

Flowers From My Garden Block #4 - Part I
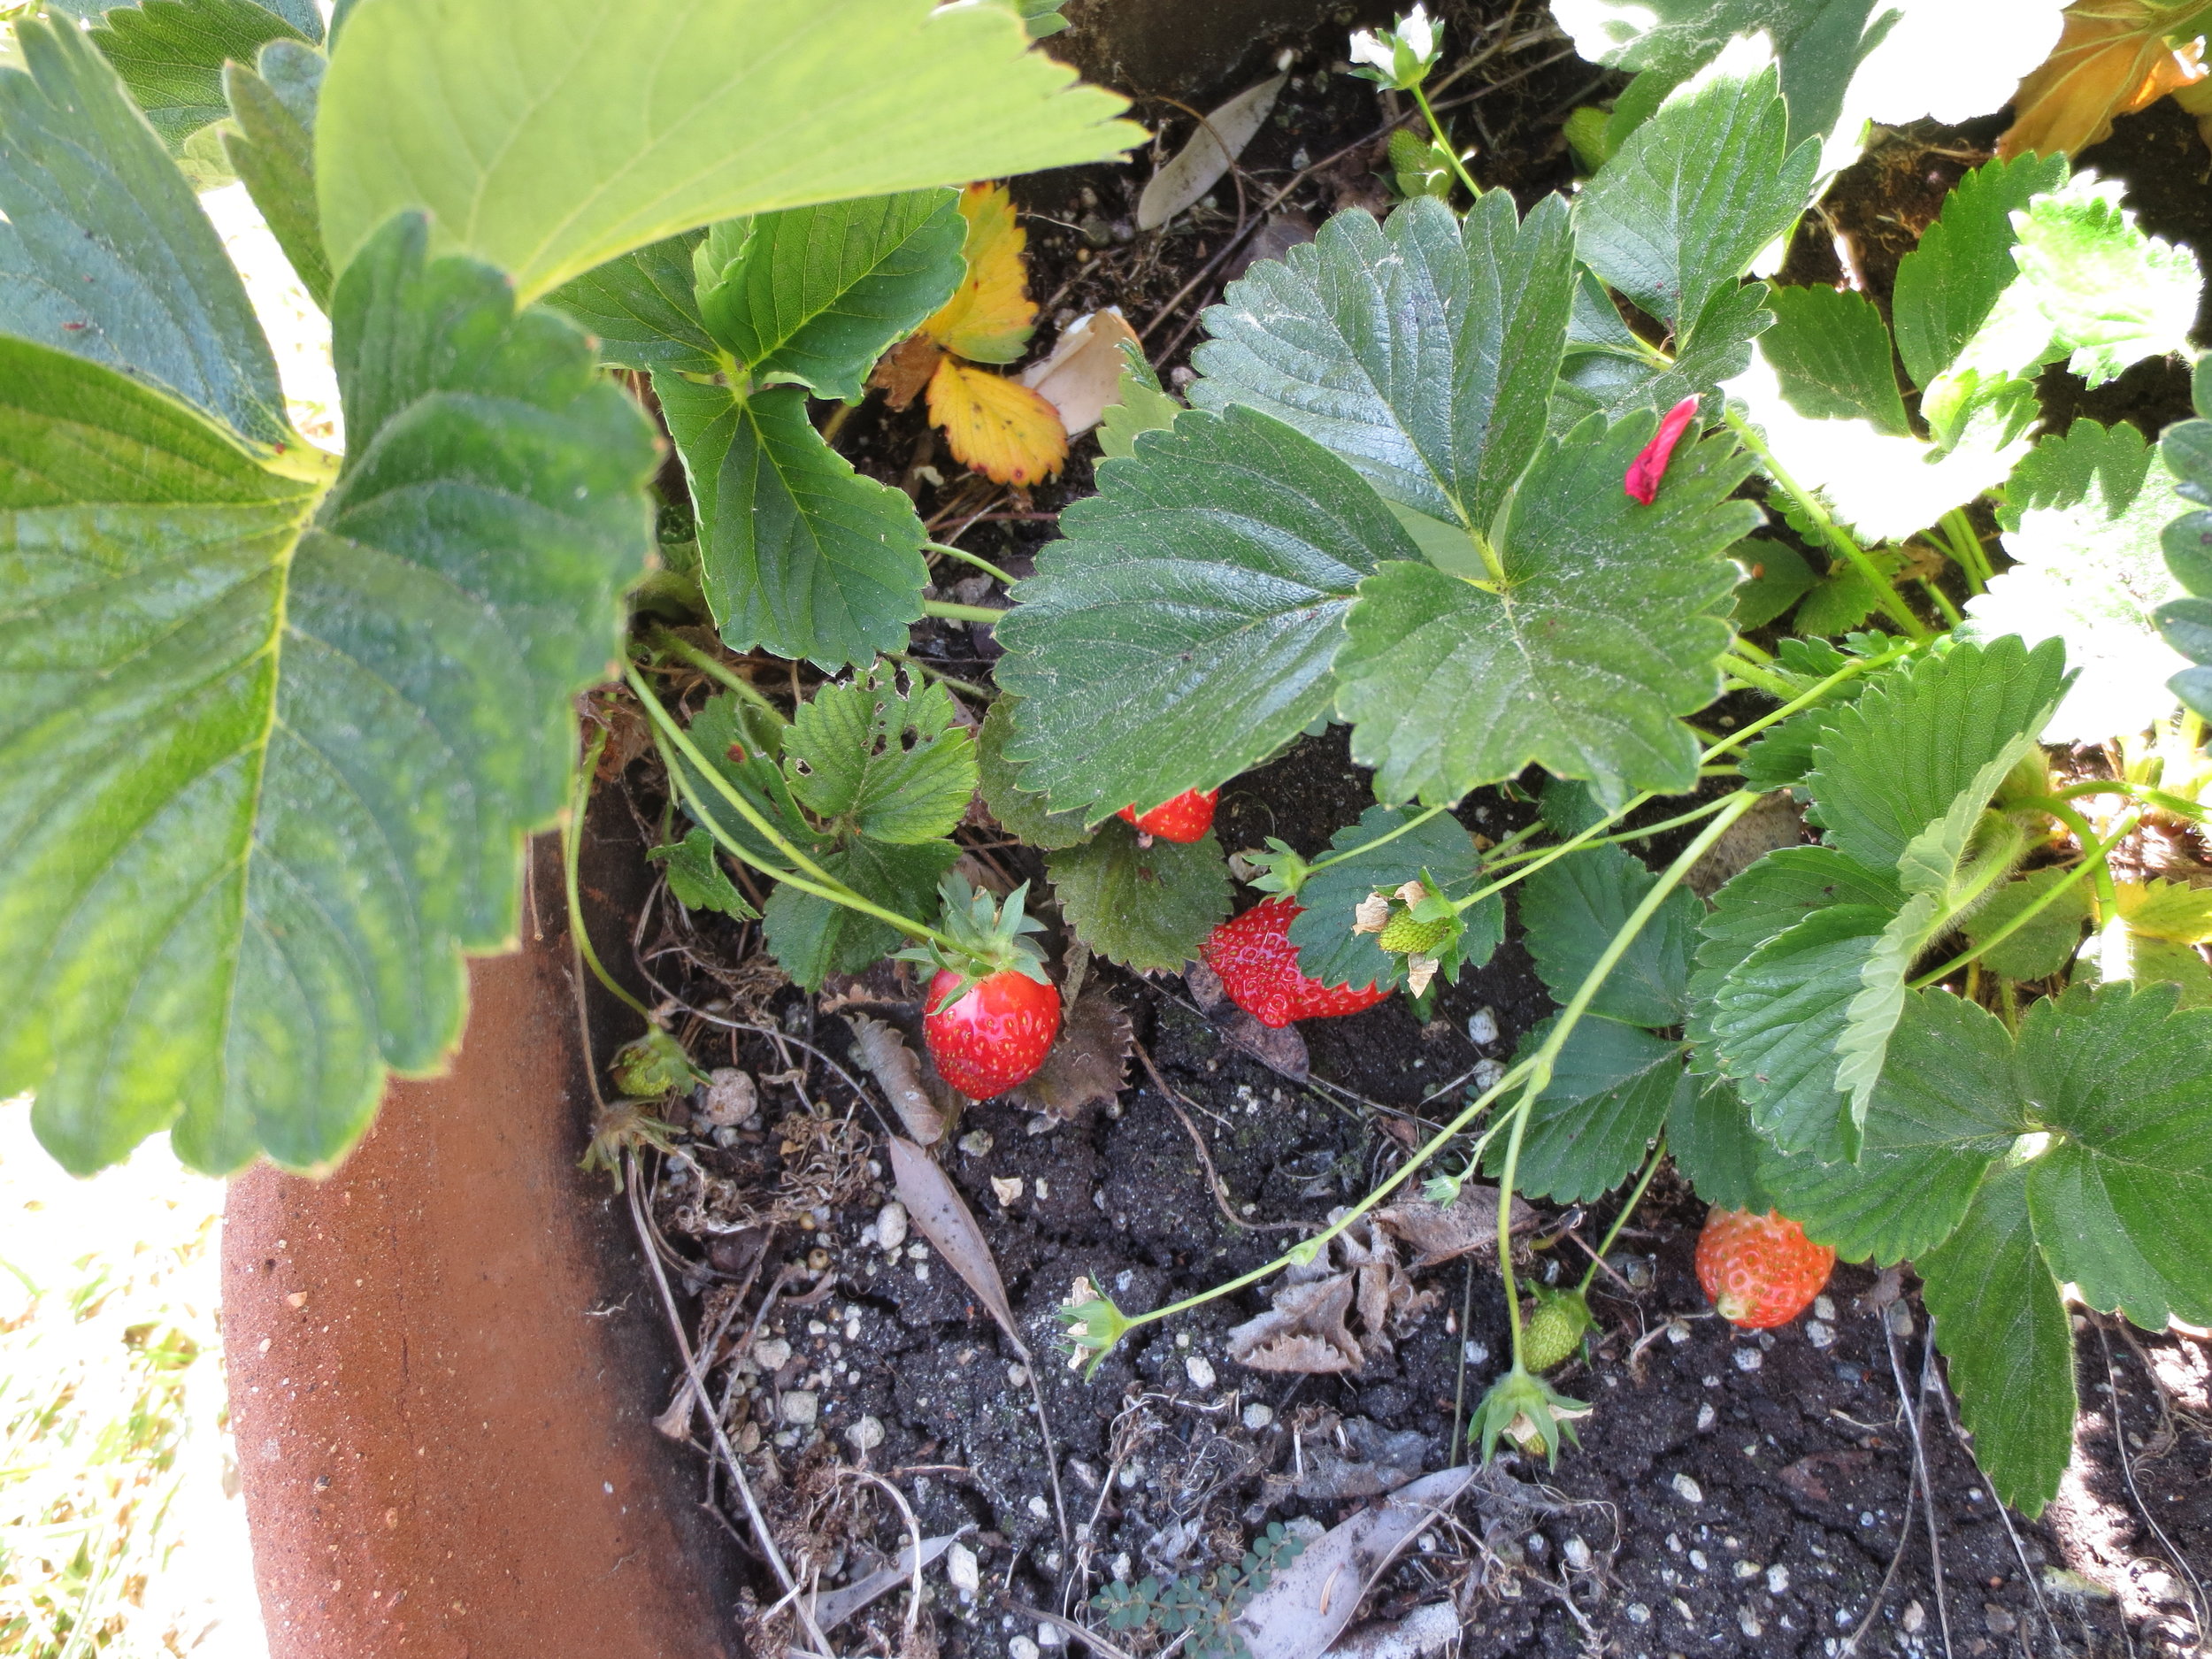
Block #4 is finally here! The roses and lilies are in full bloom in my garden and there are even a few strawberries that the critters haven't discovered yet.
You will use the same background block that you used for the previous three blocks (see post entitled Flowers From My Garden Mystery Quilt). If you are not making the quilt, you can just use a 17 1/2" square background. Most of the stitches have been used in the previous blocks, but I've added two additional stitches to keep it fresh.
You will need:
- Felted Wool
Flower #1 (lily bud) - 1" x 2 1/2" gold and yellow plaid
Flower #2 (lily), #7 & #8 (strawberry flower center) - 3" x 4 1/2" gold solid
Flower #2A & #3A (lily base) - 2" x 3" dark gold/brown plaid
Flower #3 (lily) - 2 1/2" x 3 gold check
Flower #4 & #6 (rosebud sepal), Leaf #F (strawberry) - 5" square medium green solid
Flower #4A (rosebud) - 1" x 2" purple houndstooth
Flower #6A (rosebud) - 1" x 2" medium purple solid
Flower #5 (rose) - 4" square dark purple
Flower #5A (rose middle) - 3" square light purple
Flower #5A (rose center) - 1 1/2" gold & purple plaid
Flowers #7 & #8 (strawberry) - 2" x 3" off white solid
Leaf A (lily) - 2 1/2" x 3 1/2" medium yellow-green solid
Leaf B (lily), strawberry cap C1, C2, C3 & C4 - 2 1/2" x 6" yellow-green check
Leaves C, D & E (rose), veins of leaves A & B (lilies) - 3" x 4" Dark forest green plaid
Strawberries S1 & S3 - 2 1/2" x 4" dark red plaid
Strawberries S2 & S4 - 2" x 3" red solid
- Thread - These are the colors that I used, but your thread colors may vary depending on your wool colors.
Valdani Perle cotton, size 12
O538 - strawberry flowers, buttonhole flower stitch in center of rose
M81 - lily flowers, rose center, rose running stitch
P11 - basket
O178 - basket embellishment
78 - strawberries, lily anther
O592 - rose, eskimo edging stitch
H210 - rose middle
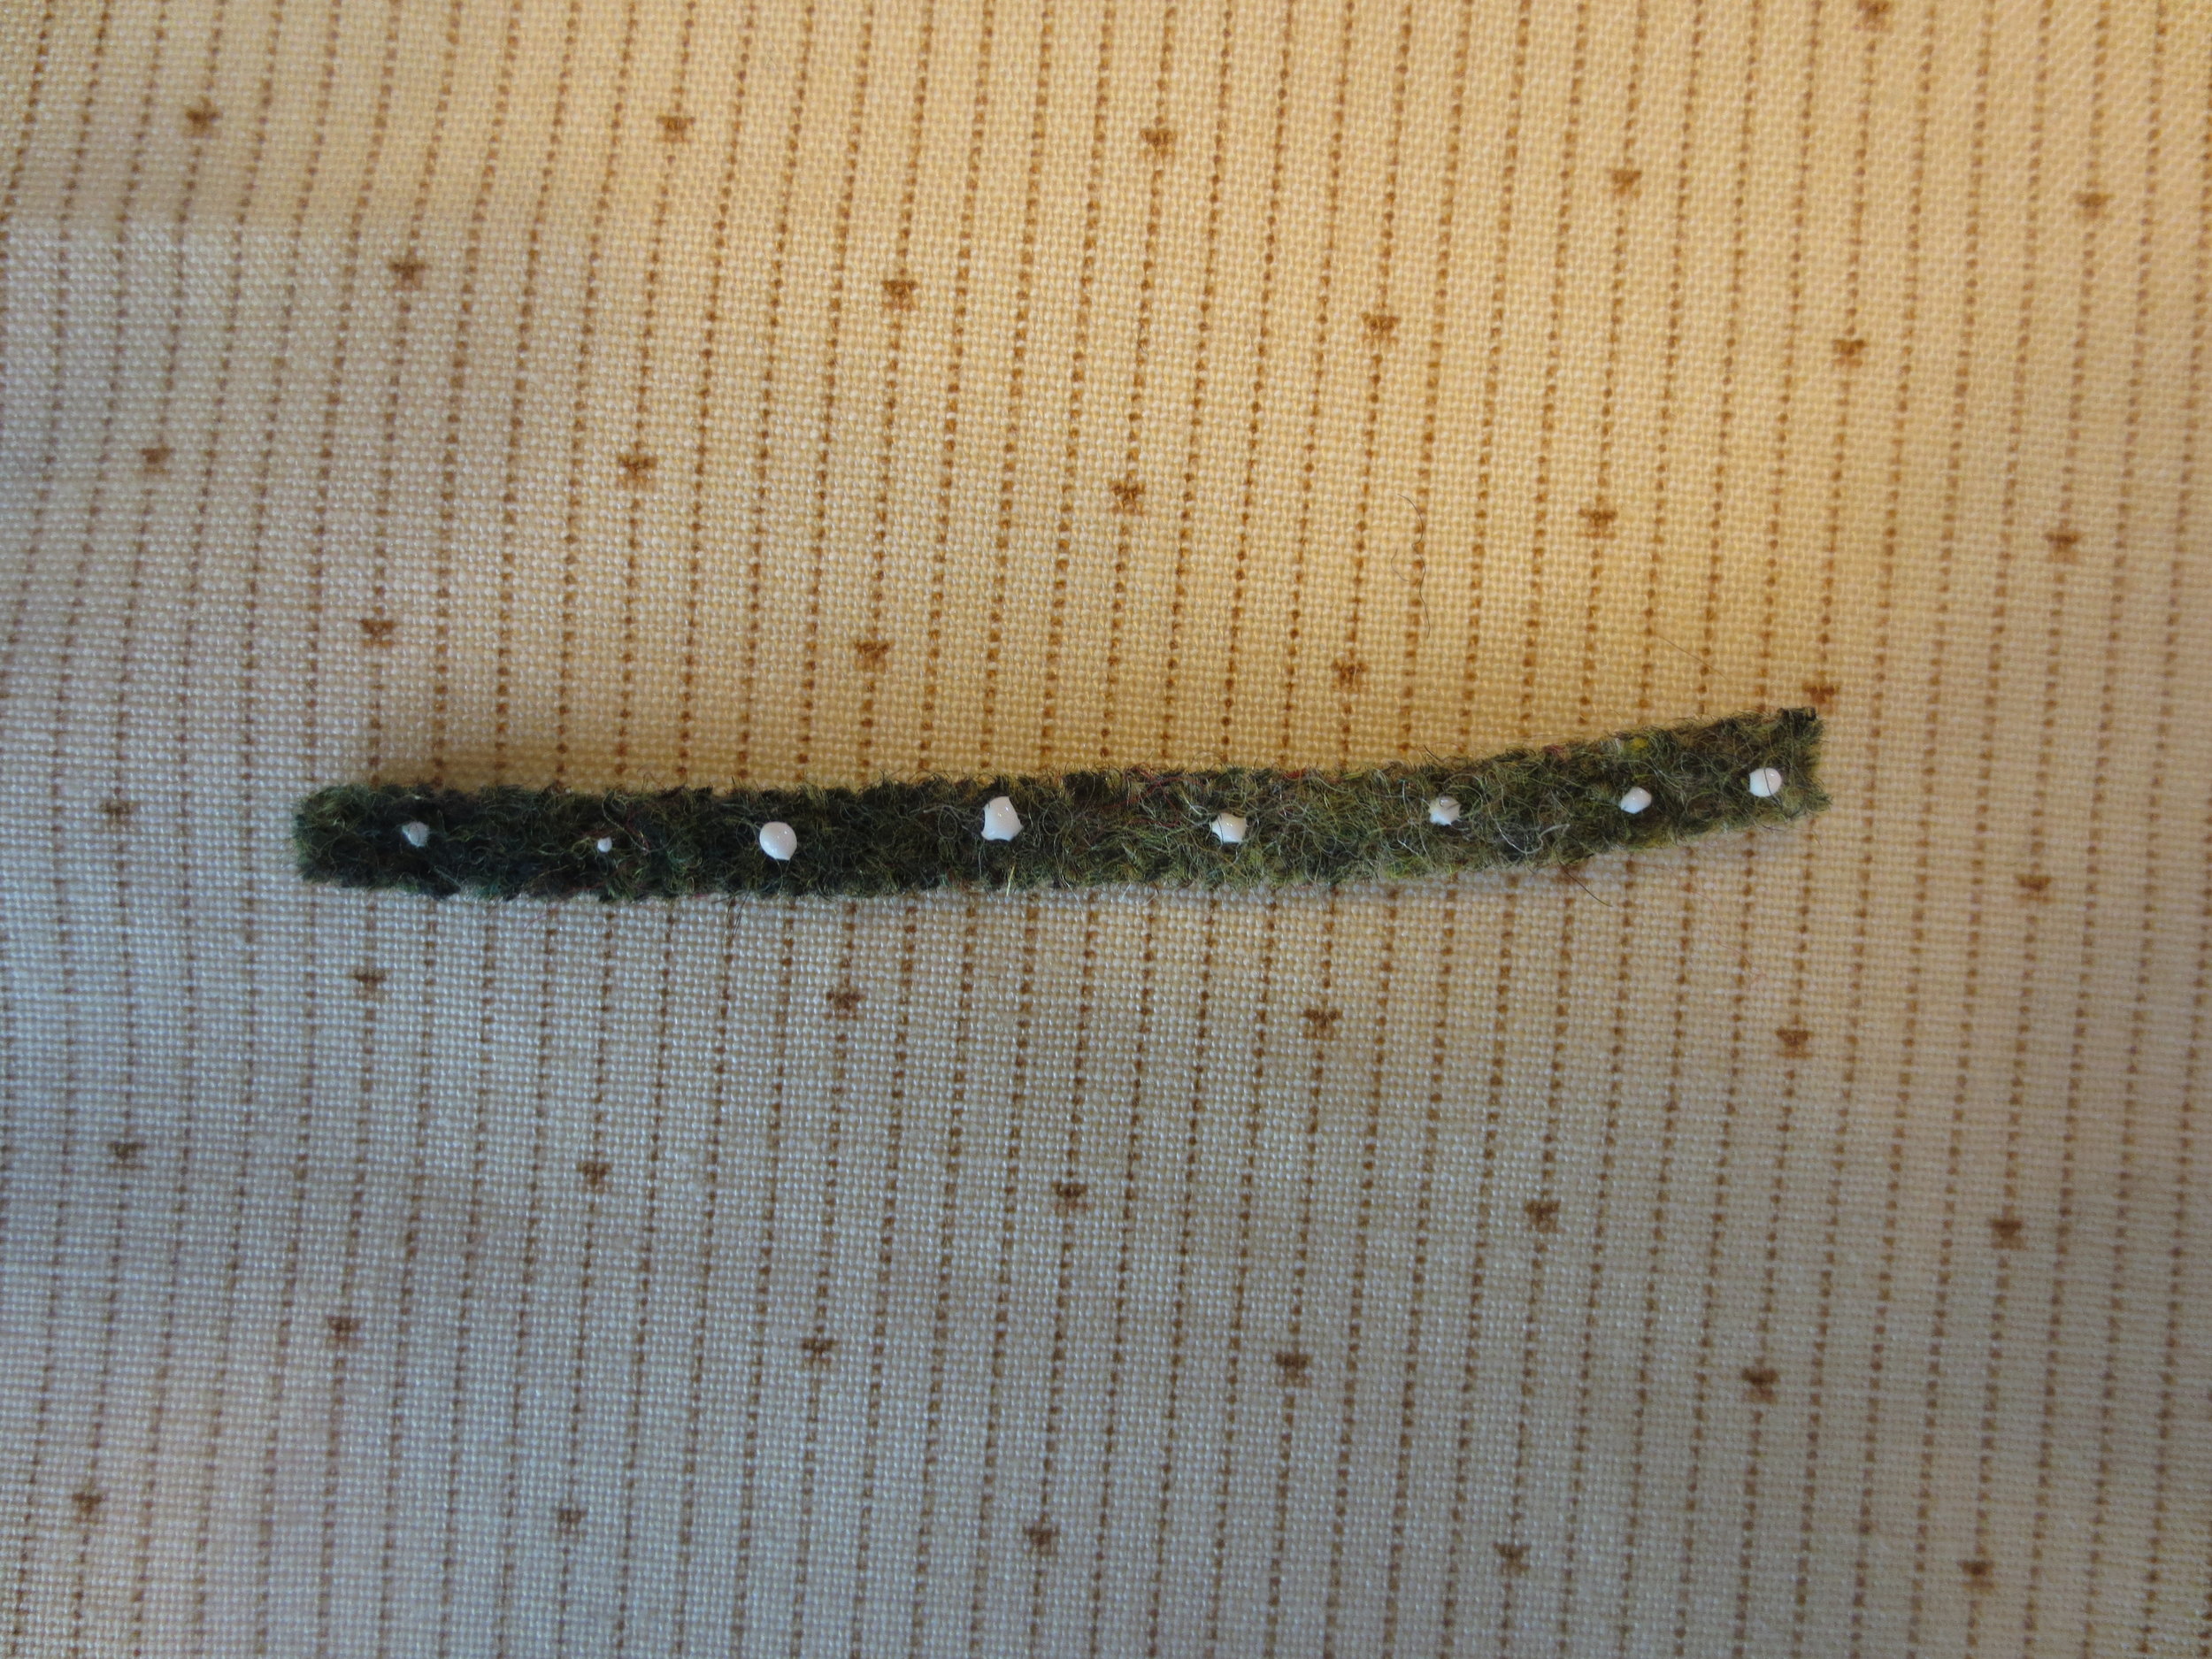
O519 - leaves; lily stems; strawberry flower centers; strawberry seeds, stems and caps; lily stamen; eskimo edging stitch on rose
O153 - strawberry stems (contrasting thread for threaded back stitch)
JP8 - rosebud leaf vein, lily leaf vein
Valdani perle cotton, size 8
O519 - rosebud stem
- Miscellaneous
1/4" wide ribbon - 15" length olive green
Featherweight fusible web
Chalk pencil - fine line
Chenille needles - size 24 & 22
Roxanne Glue Baste-It
Steam iron
Light box (optional)
Instructions - Use one strand of thread unless otherwise noted.
- Download the Layout, patterns, and stitch guide (if needed). The layout is reduced to fit on an 8 1/2" x 11" sheet of paper. Increase the image by 156% to make it full size. The pattern images are reversed for use with fusible web.
- Cut two 1/8" wide strips approximately 4" long from the wool designated for the rose leaves. These will be the veins of lily leaves. Set aside.
- Trace pattern pieces onto fusible web and cut out leaving about an 1/8" border around each image.
- Fuse onto desired wool and cut out along image outline.
- Cut ribbon stems into one 5 1/2" and one 7 1/2" lengths.
- Remove paper backing from basket handle, base and body. Layout basket onto the pieced block background. The left side of the handle is about 5 1/2" from the left edge. The right side of the handle is about 5" from the right edge. the bottom of the basket is about 3 1/4" from the bottom edge. Use the layout as a guide. Note: This is where a full size layout and light box come in handy. By layering the layout and background block on the light box you can see the image through your background and this will allow you to place the pattern pieces percisely.
- Pin stems in place, making sure to tuck the bottom ends under the basket top.
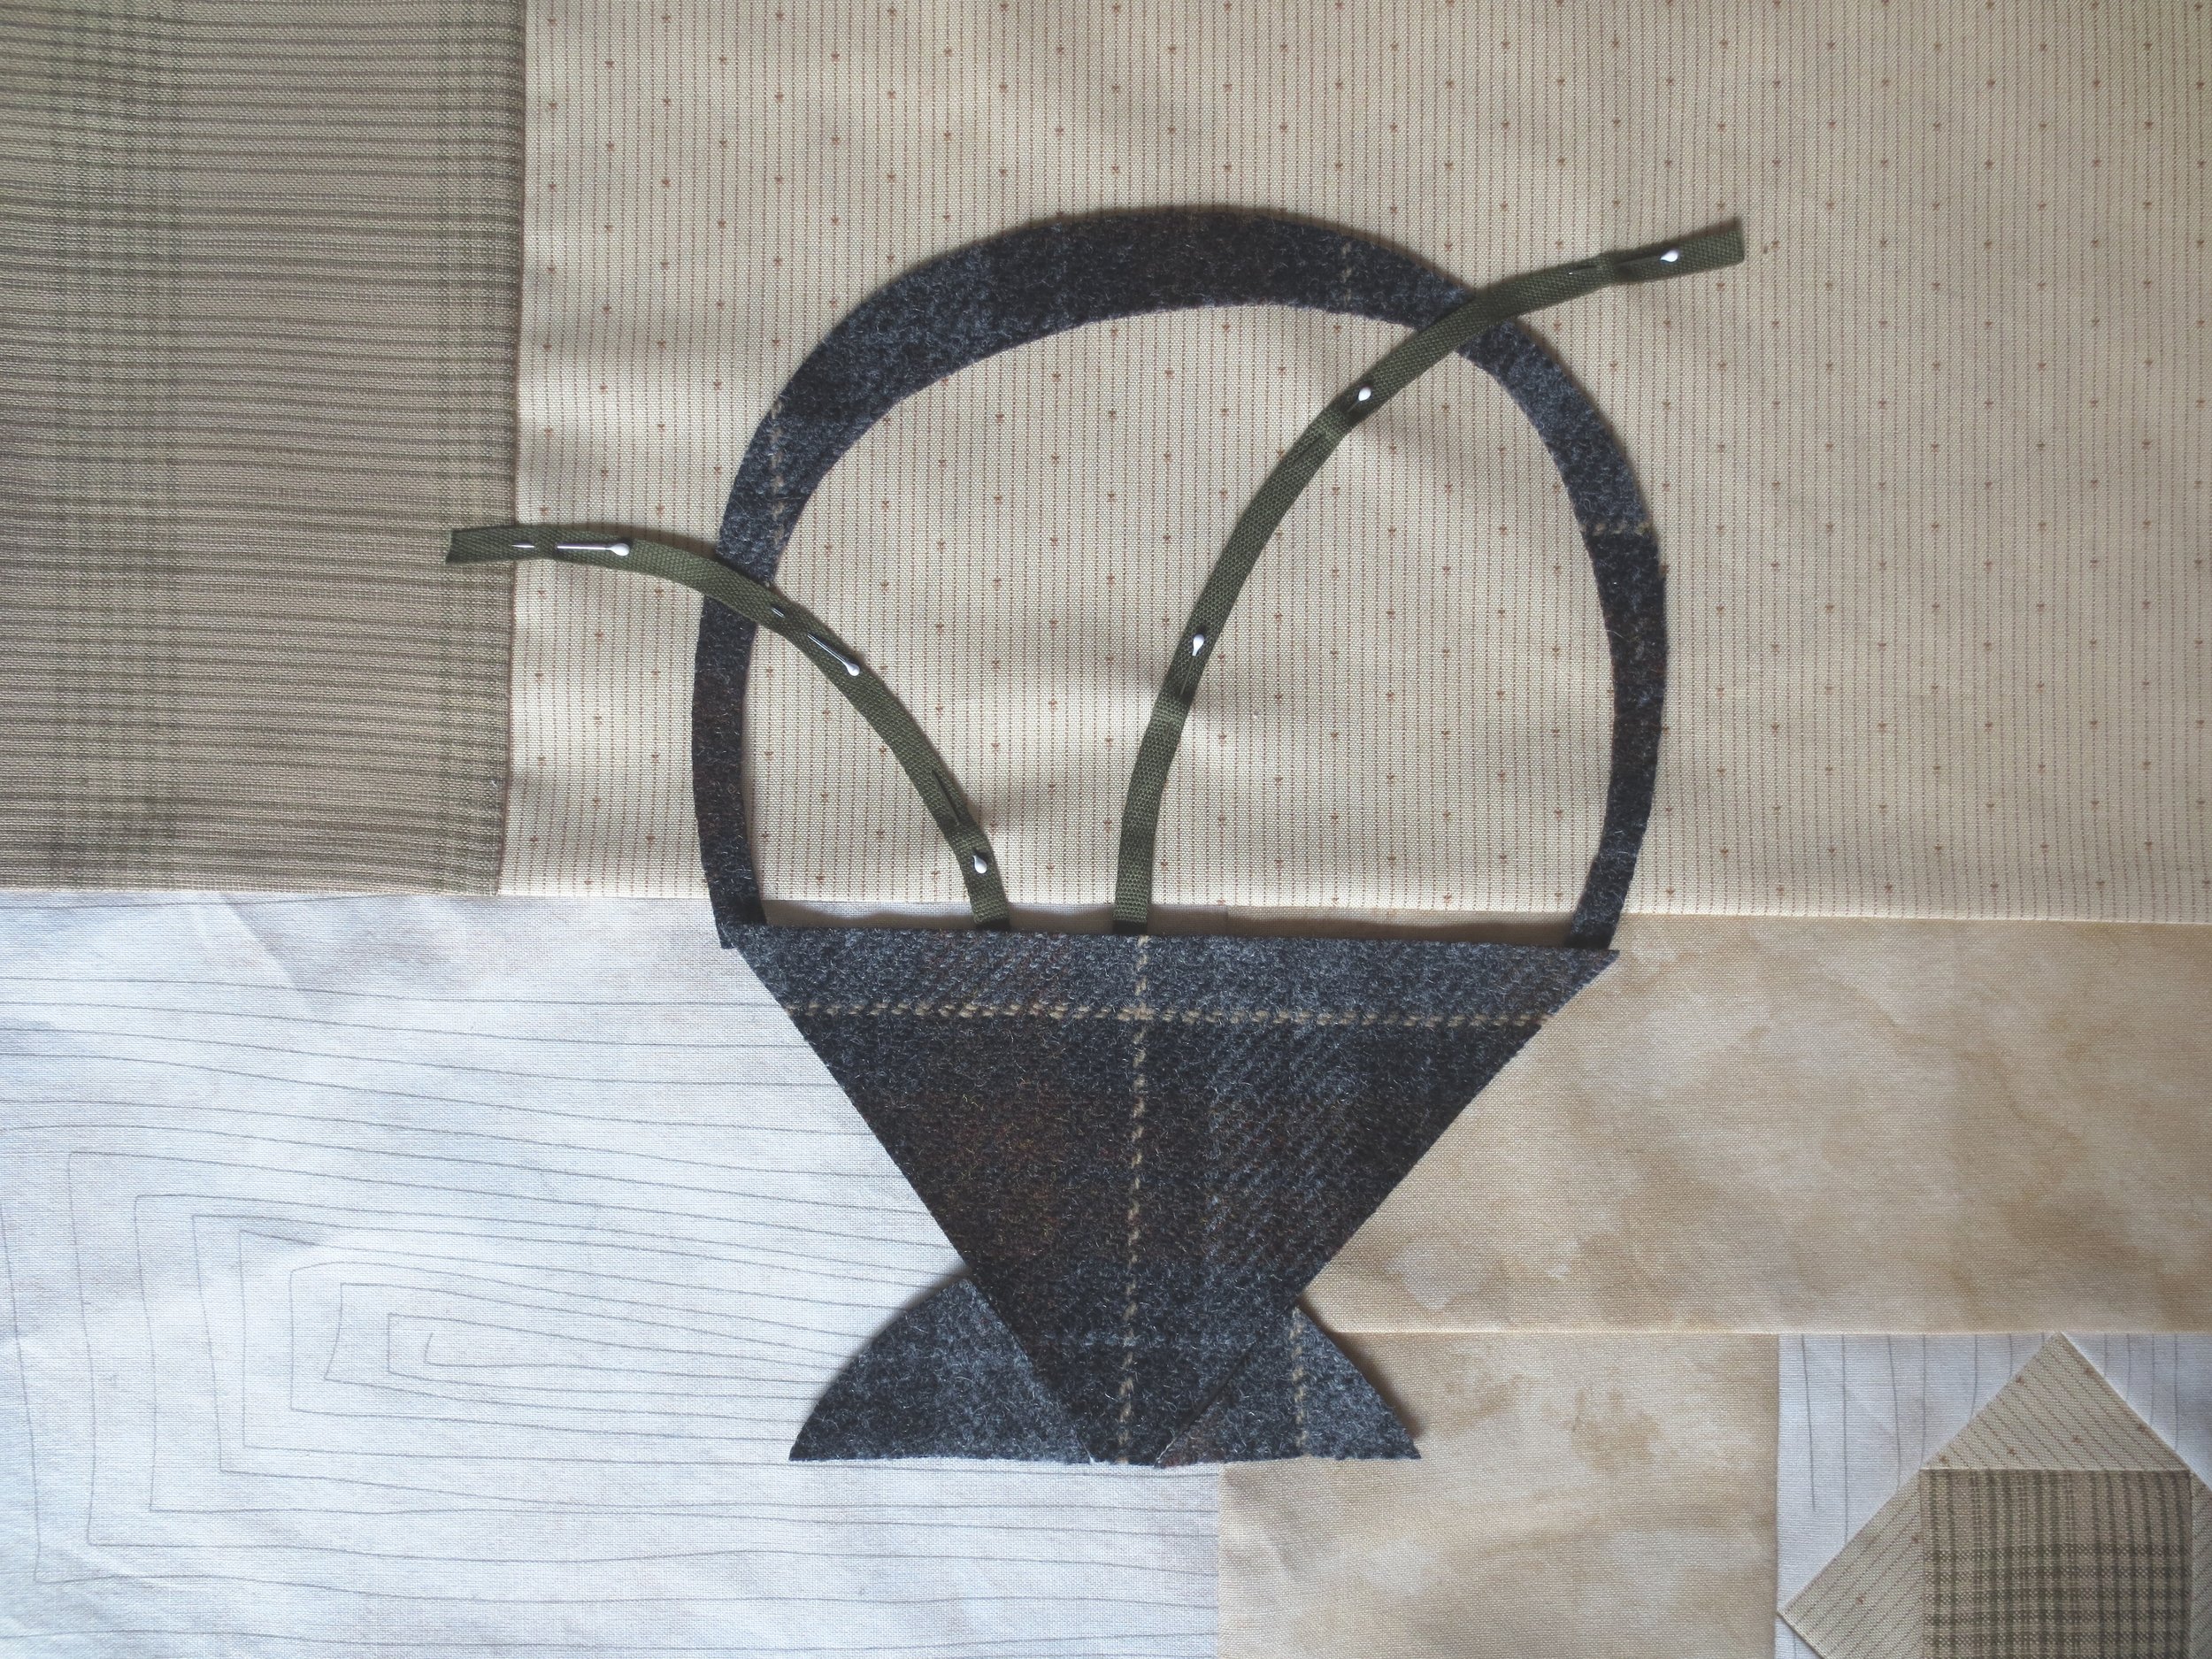
7. Fuse the wool to the background using steam.
8. Whip stitch the stems first then the outer edges of the basket.
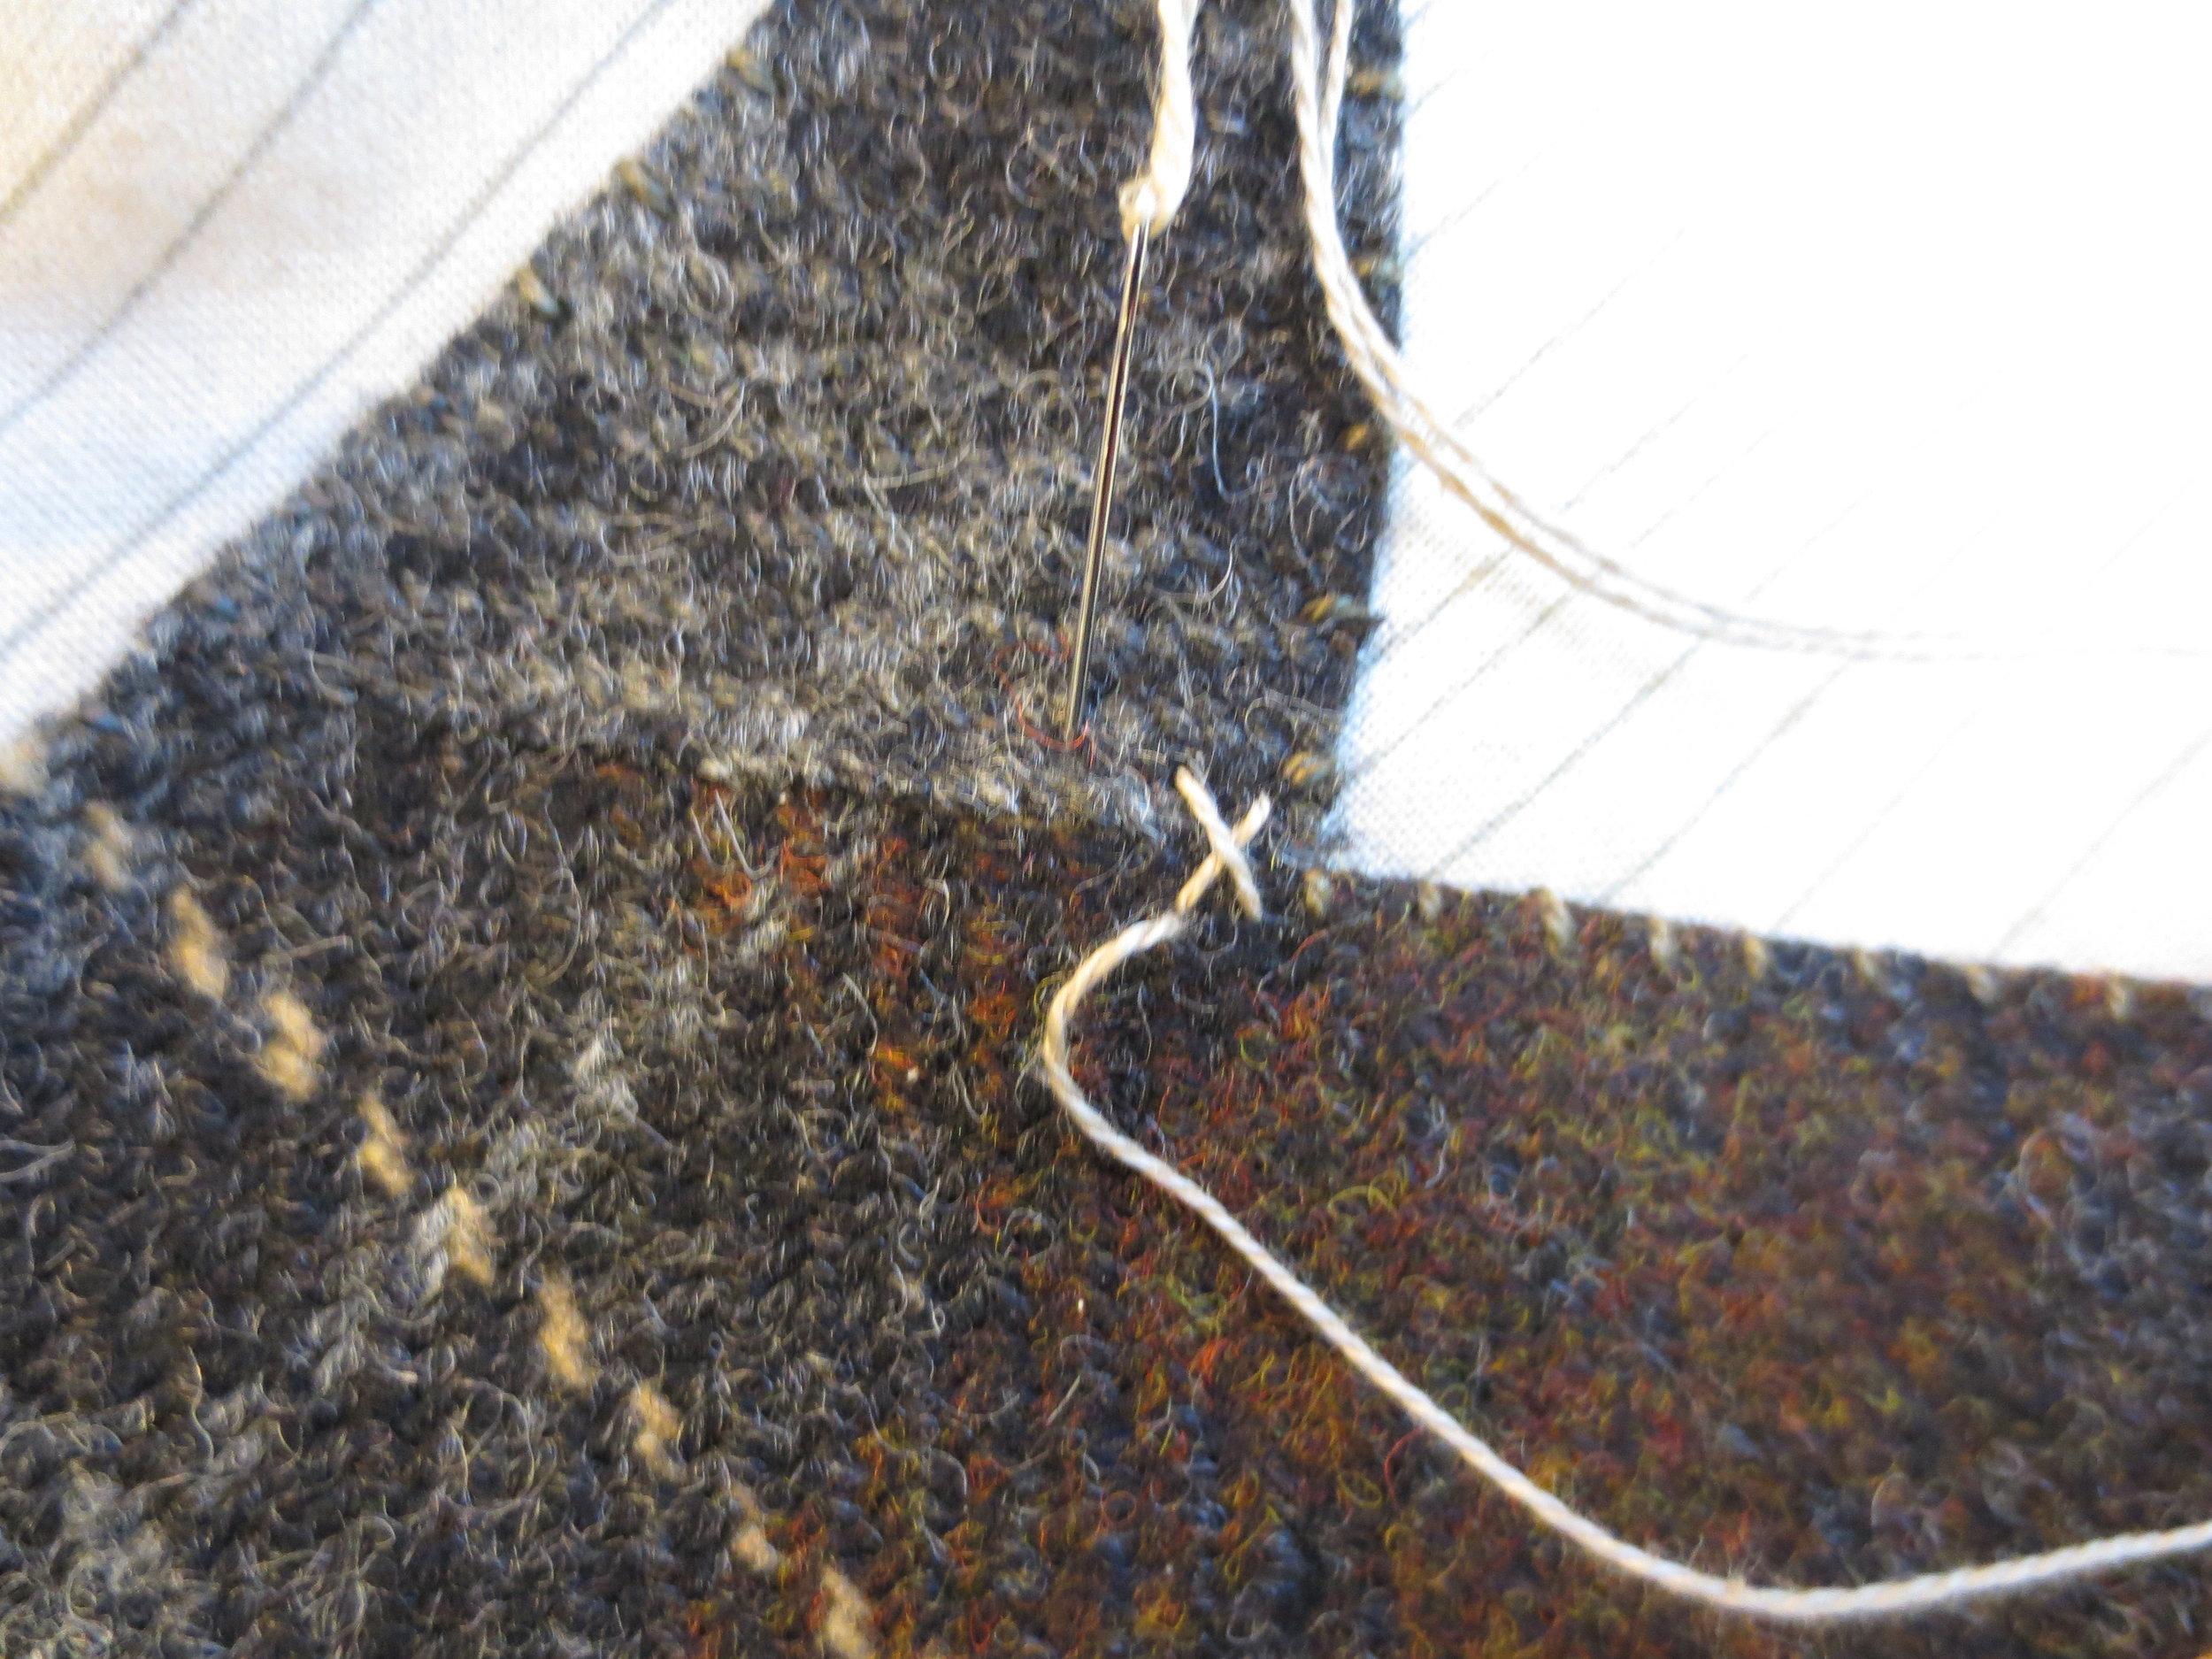
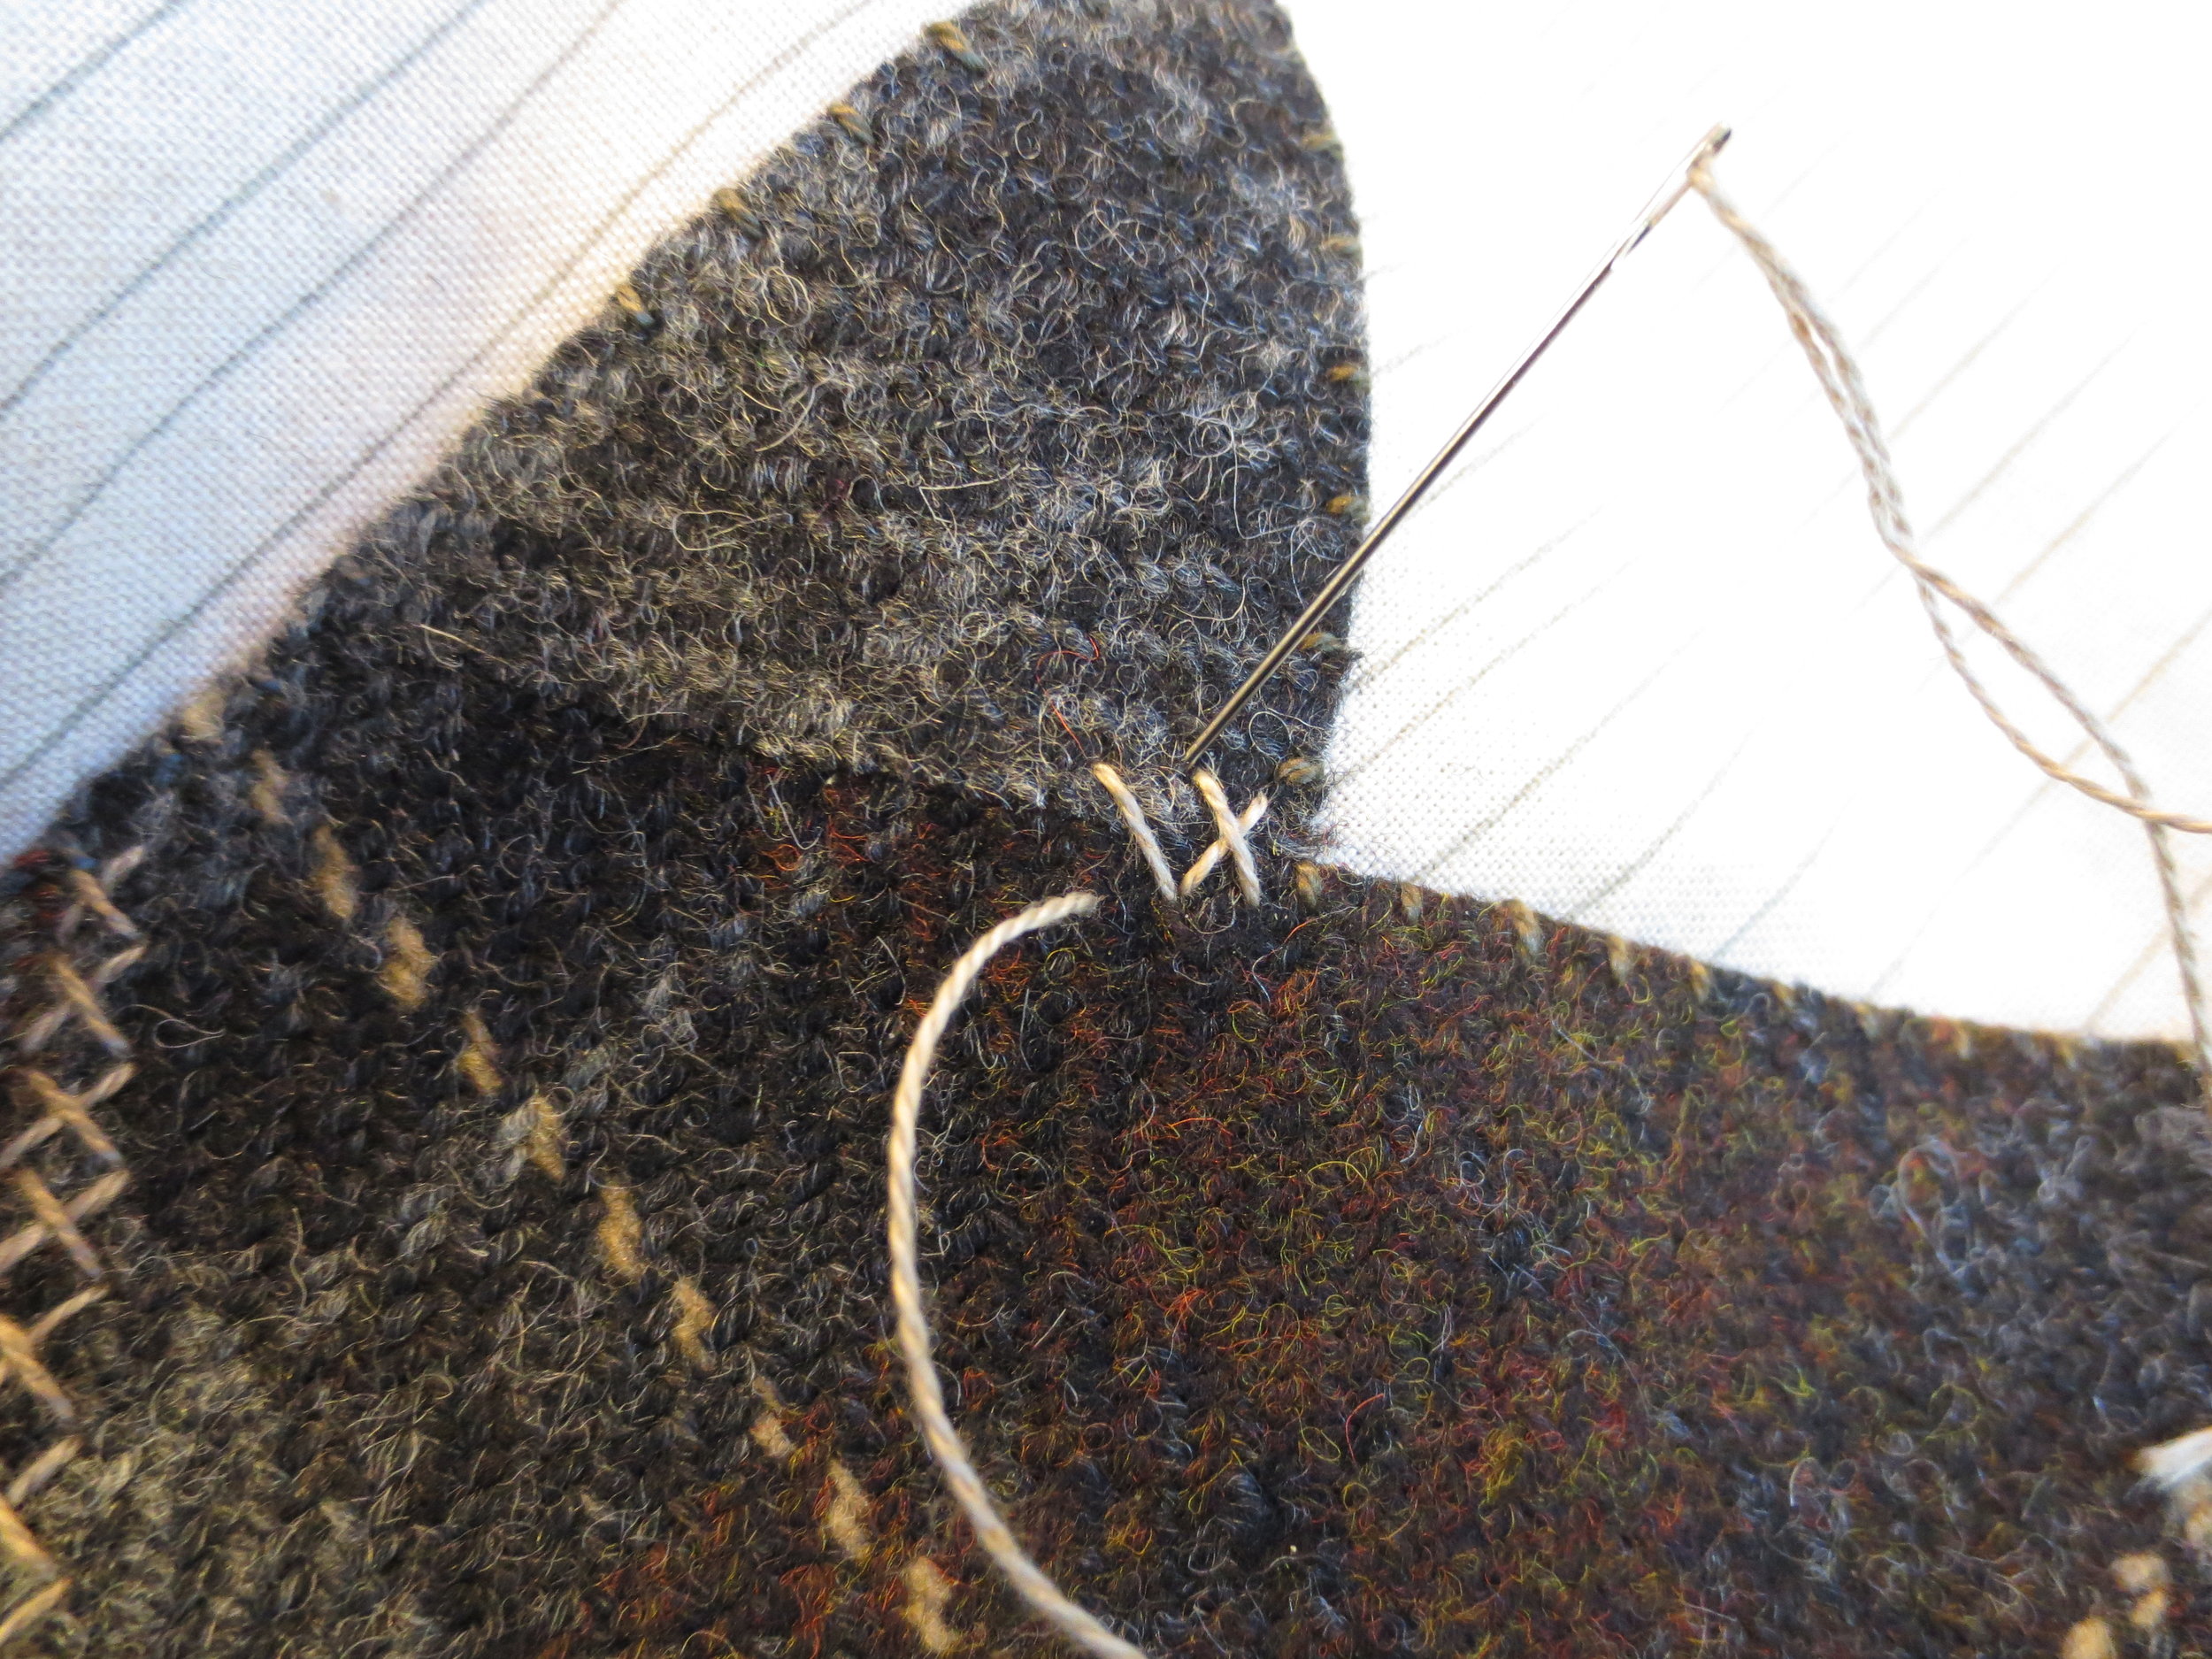
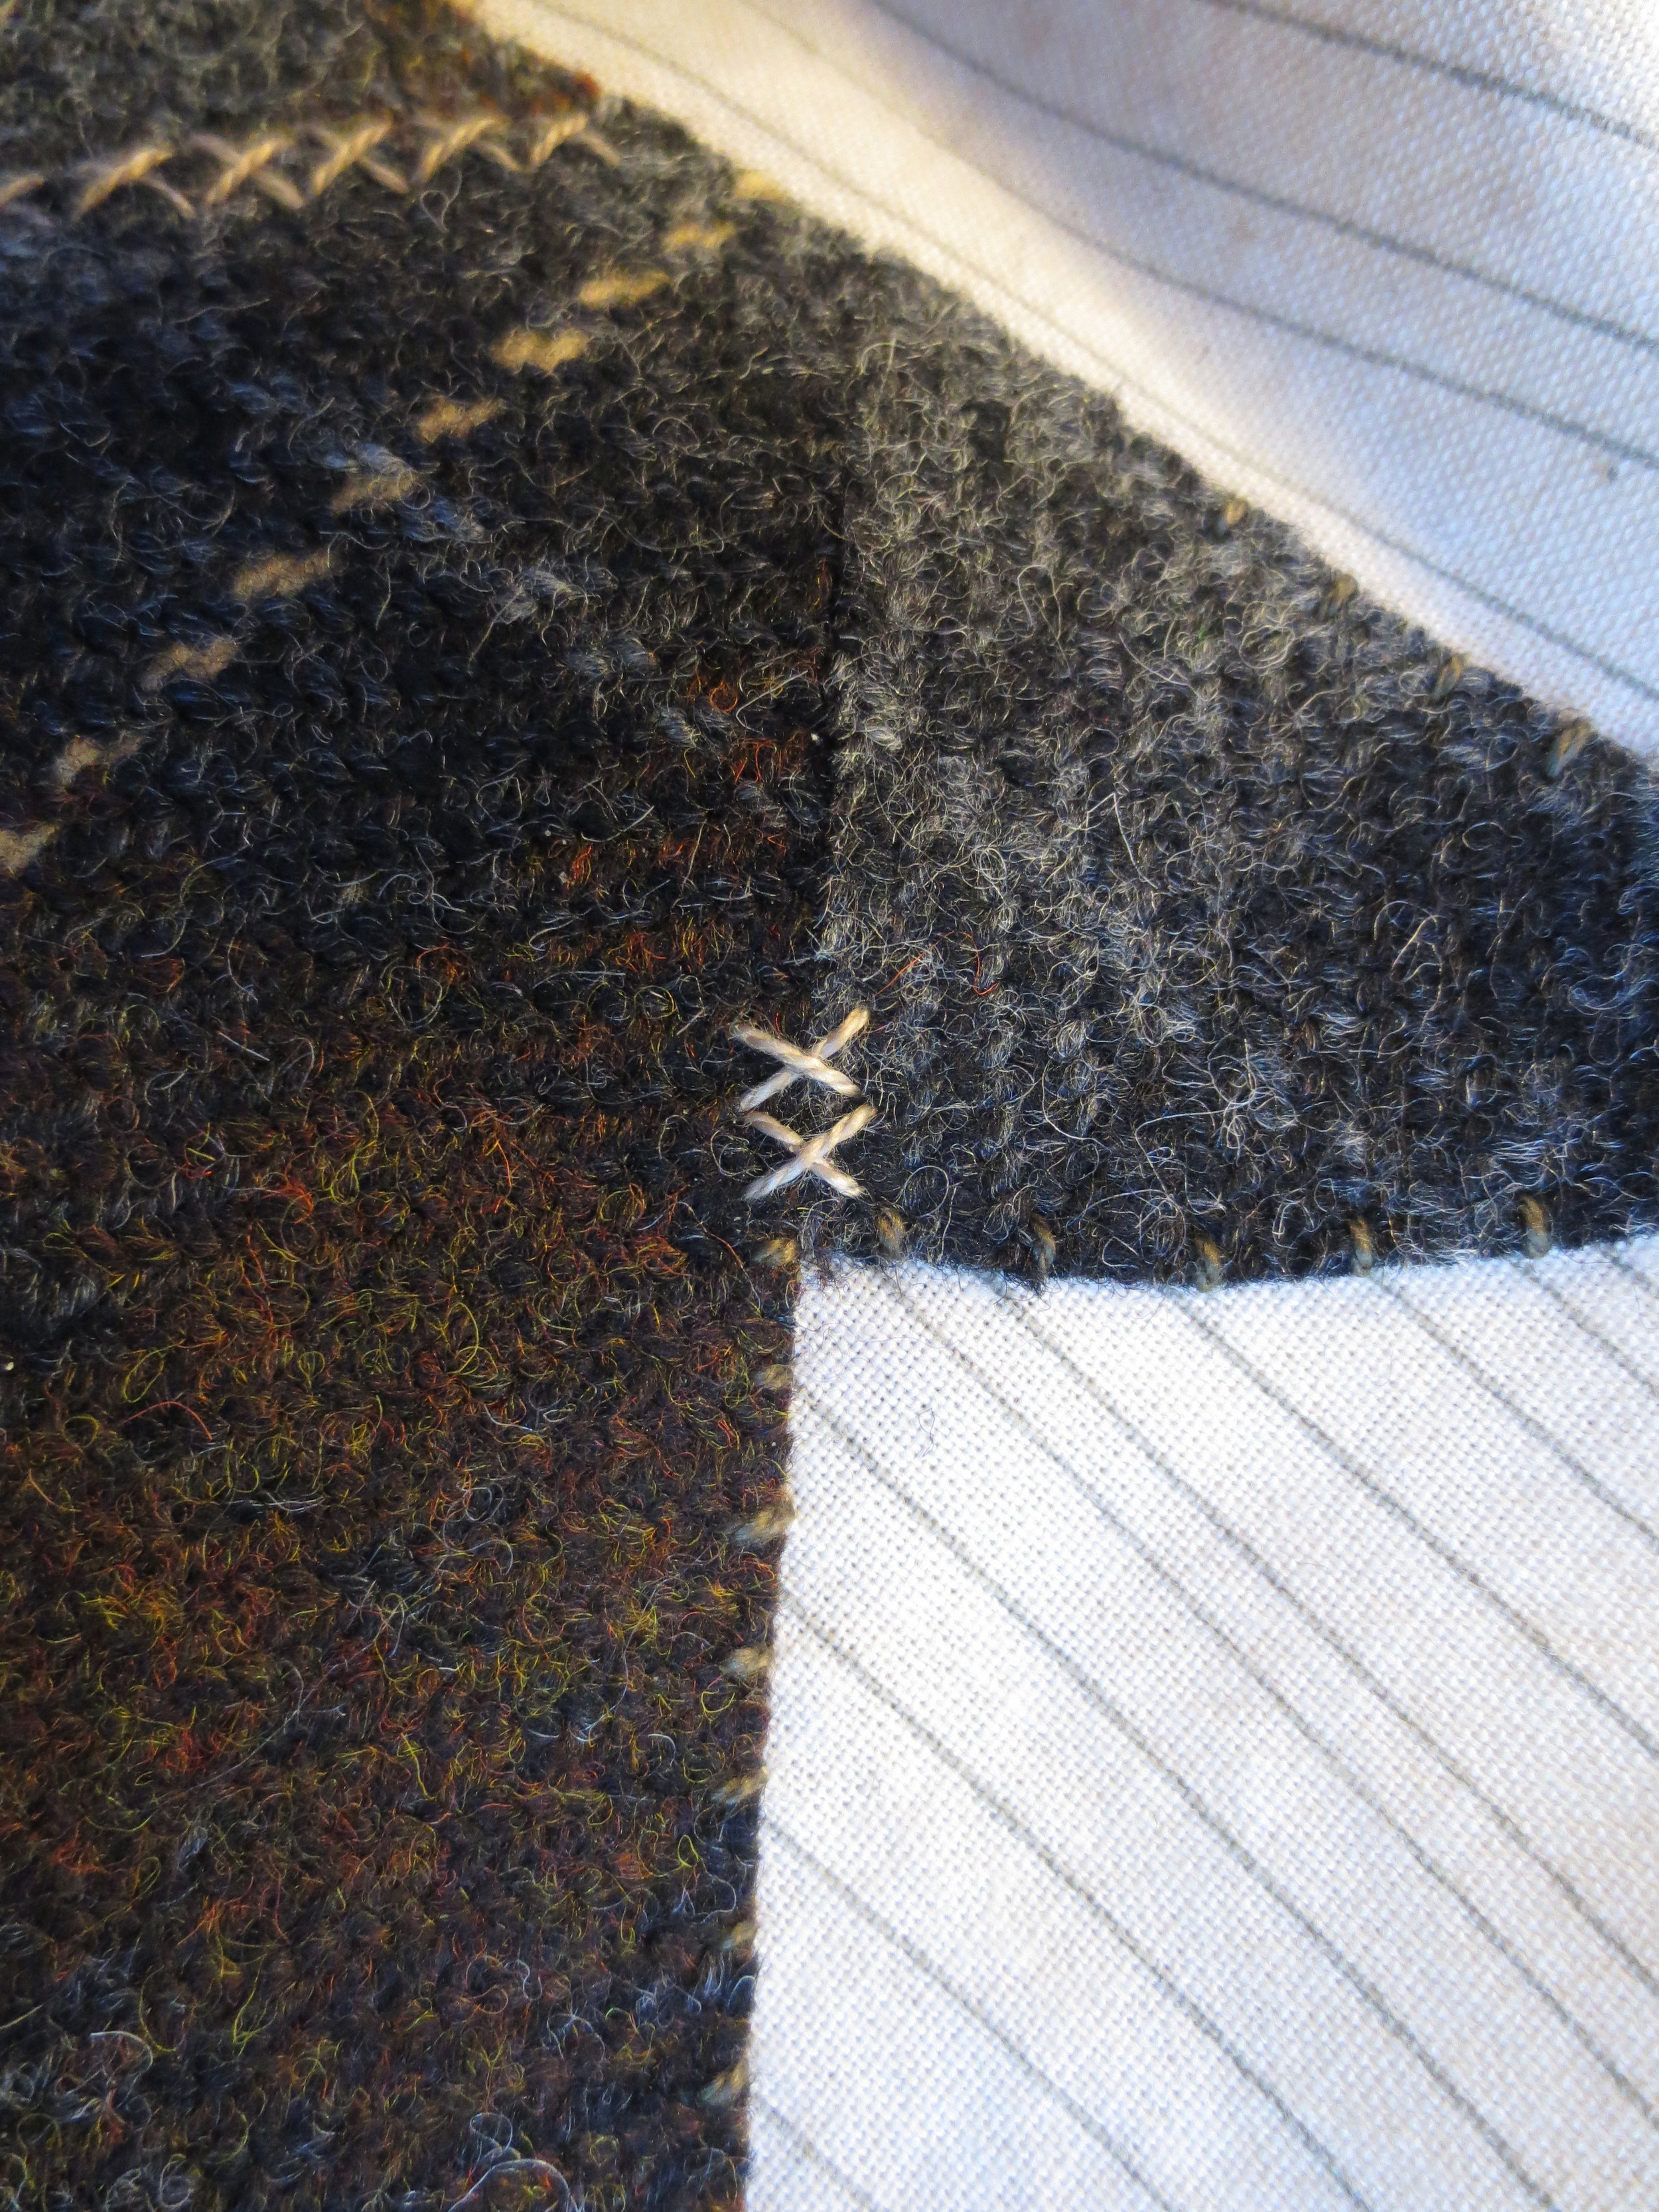
9. Use a contrasting colored thread (#O178) to make a series of cross stitches accross the seam between the basket and base pieces.

10. Position the remaining pattern pieces onto the background using the layout as a guide. Fuse in place.
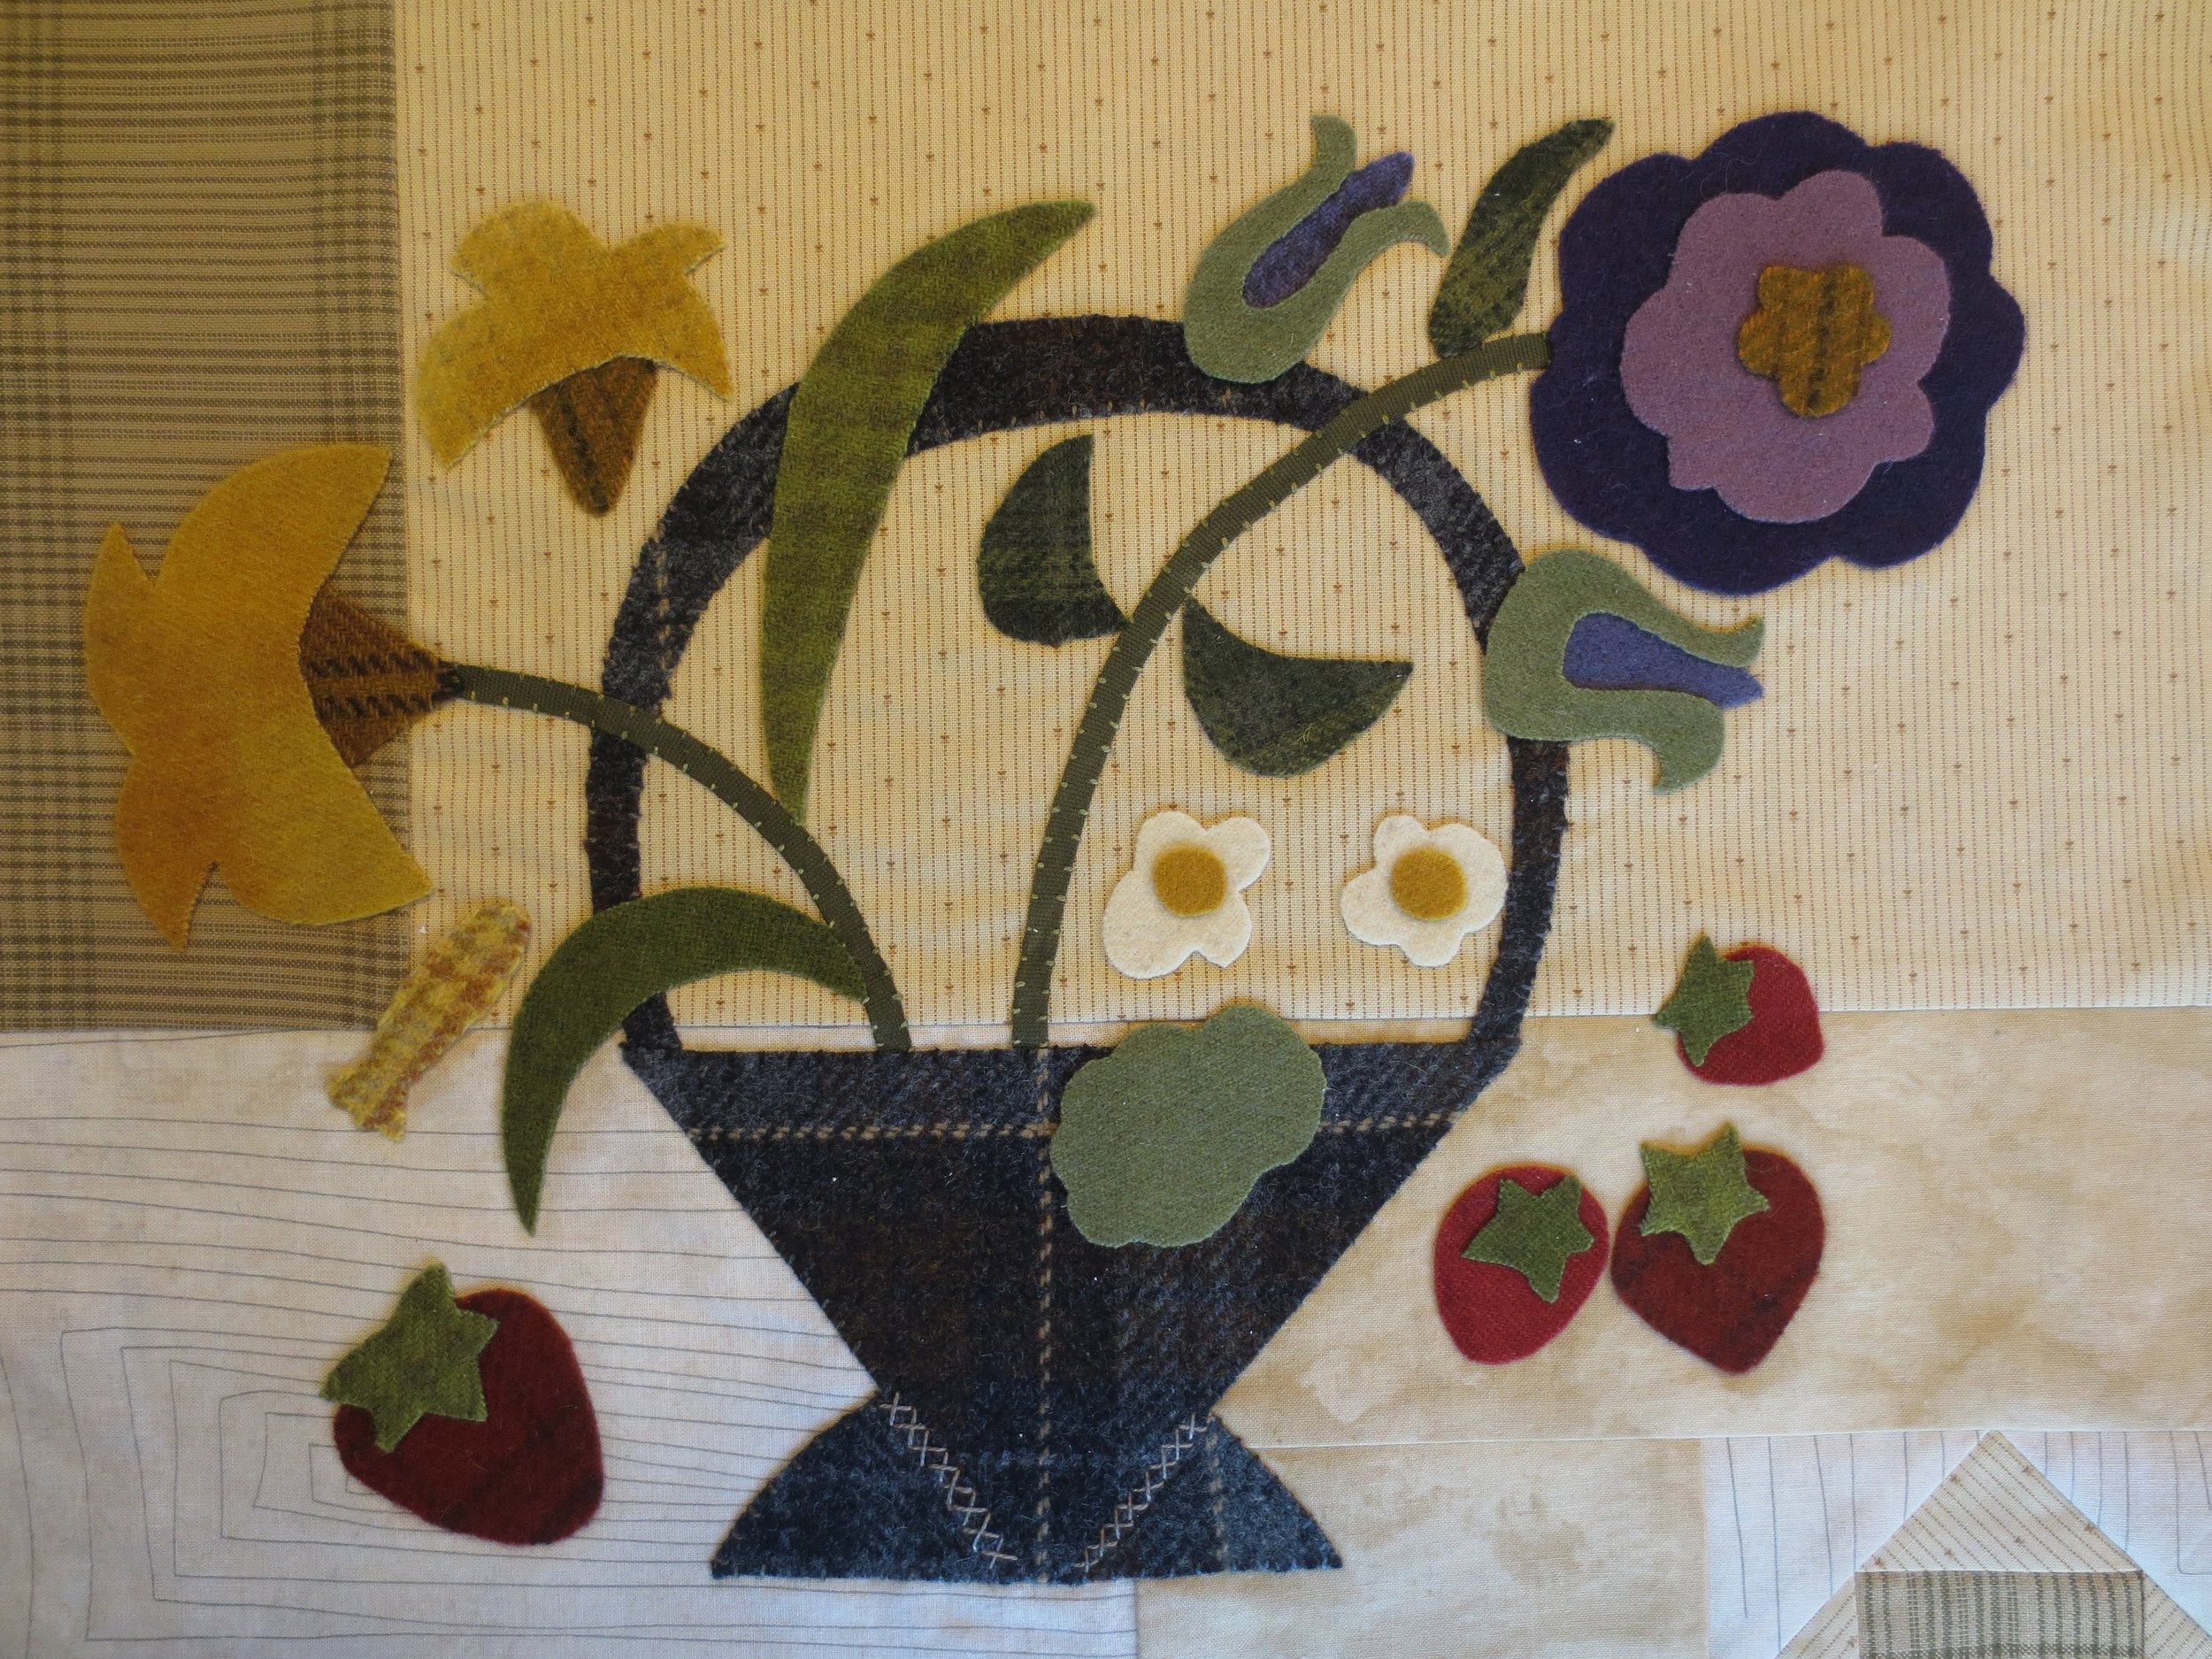
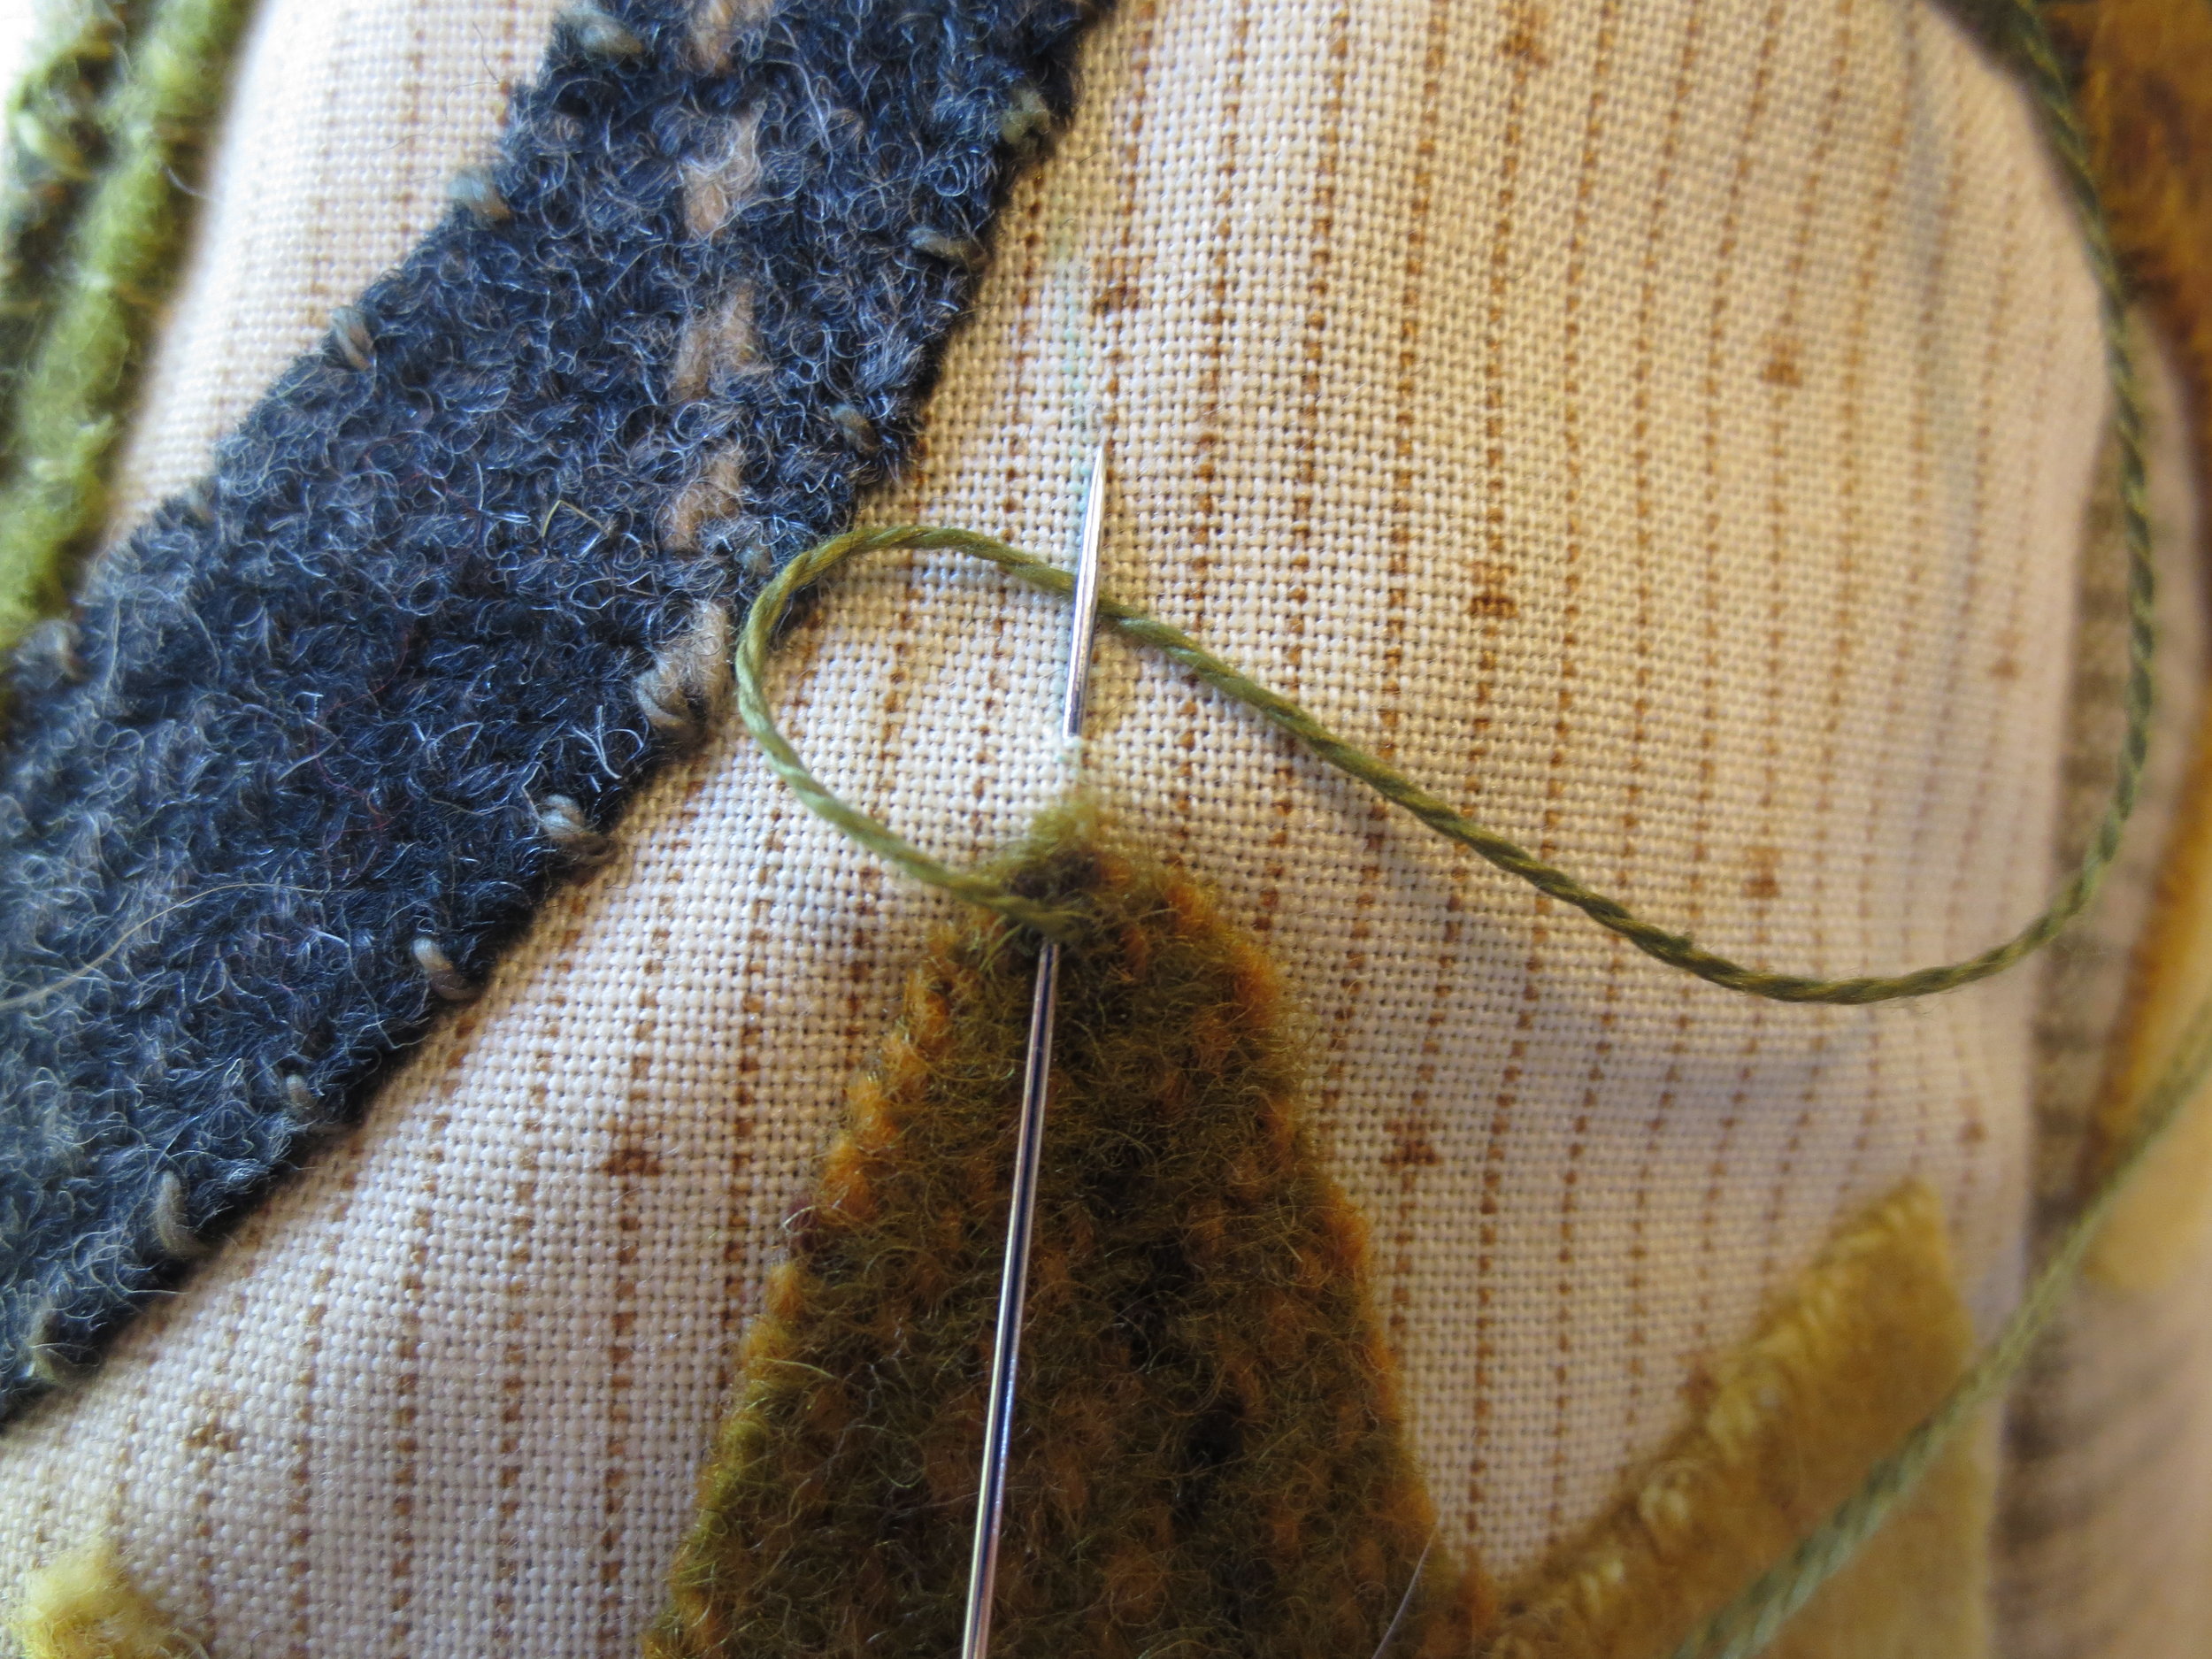
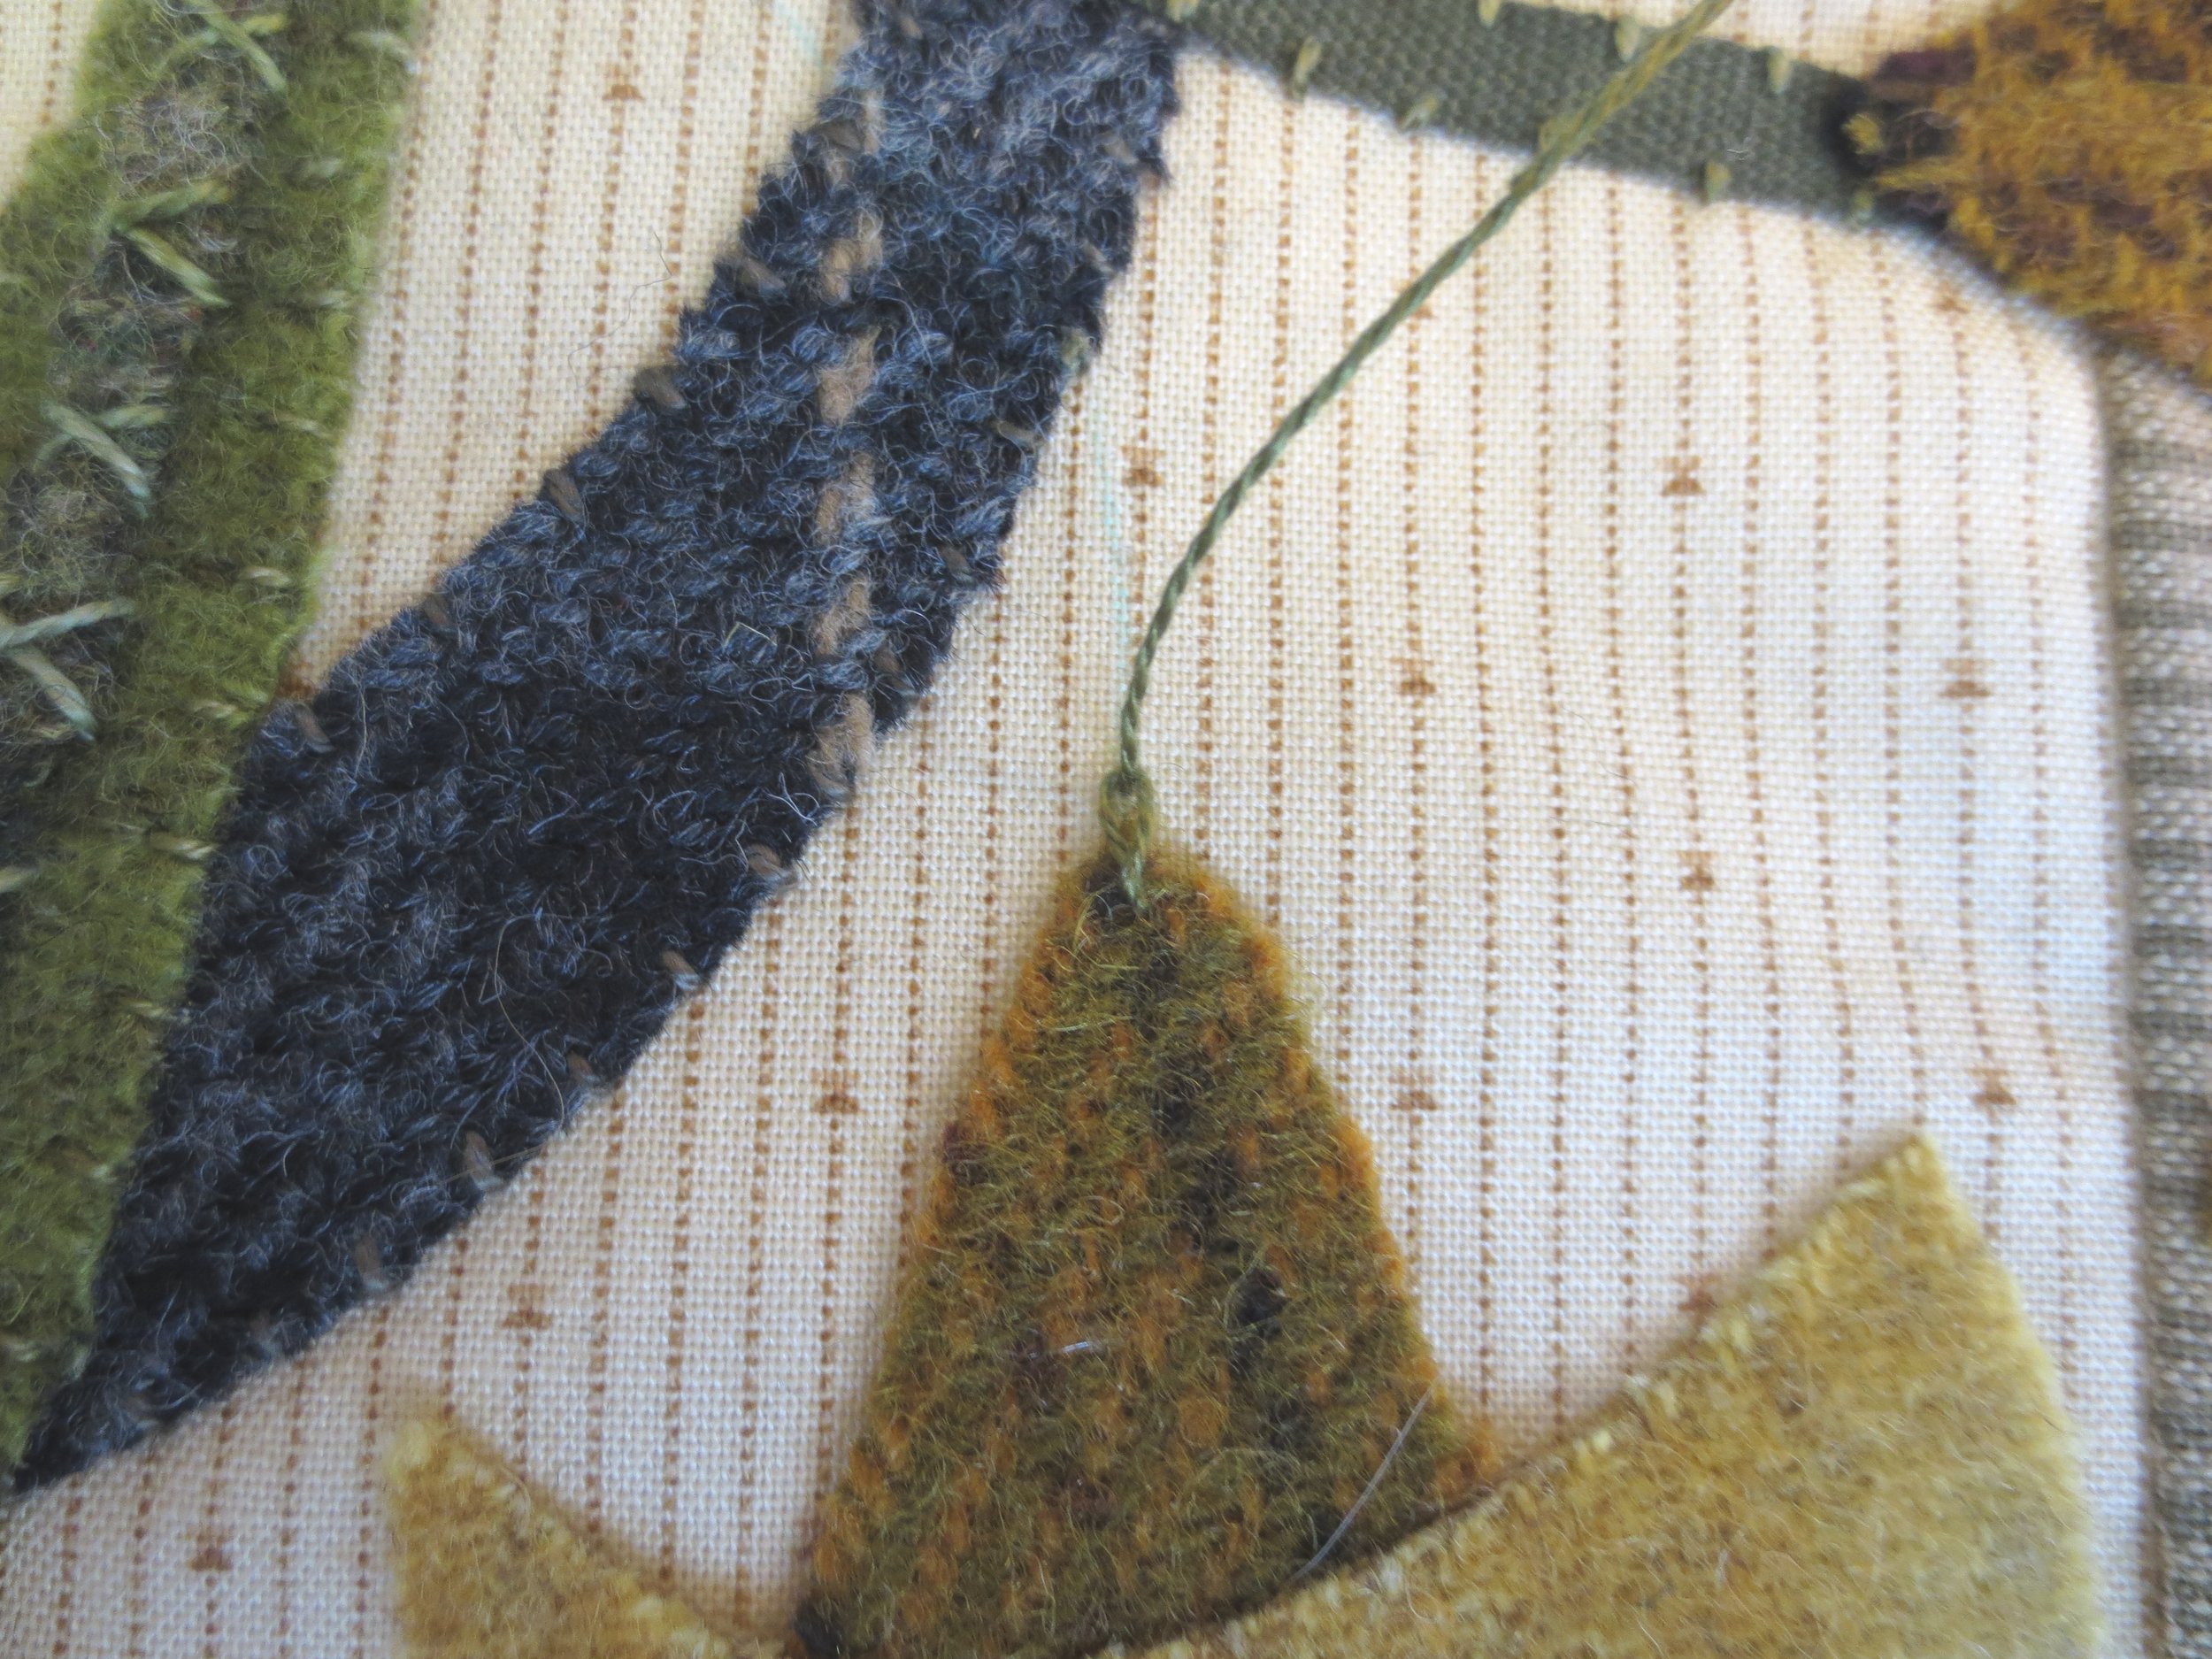
11. Draw the strawberry, lily, and rosebud stems with a chalk pencil.
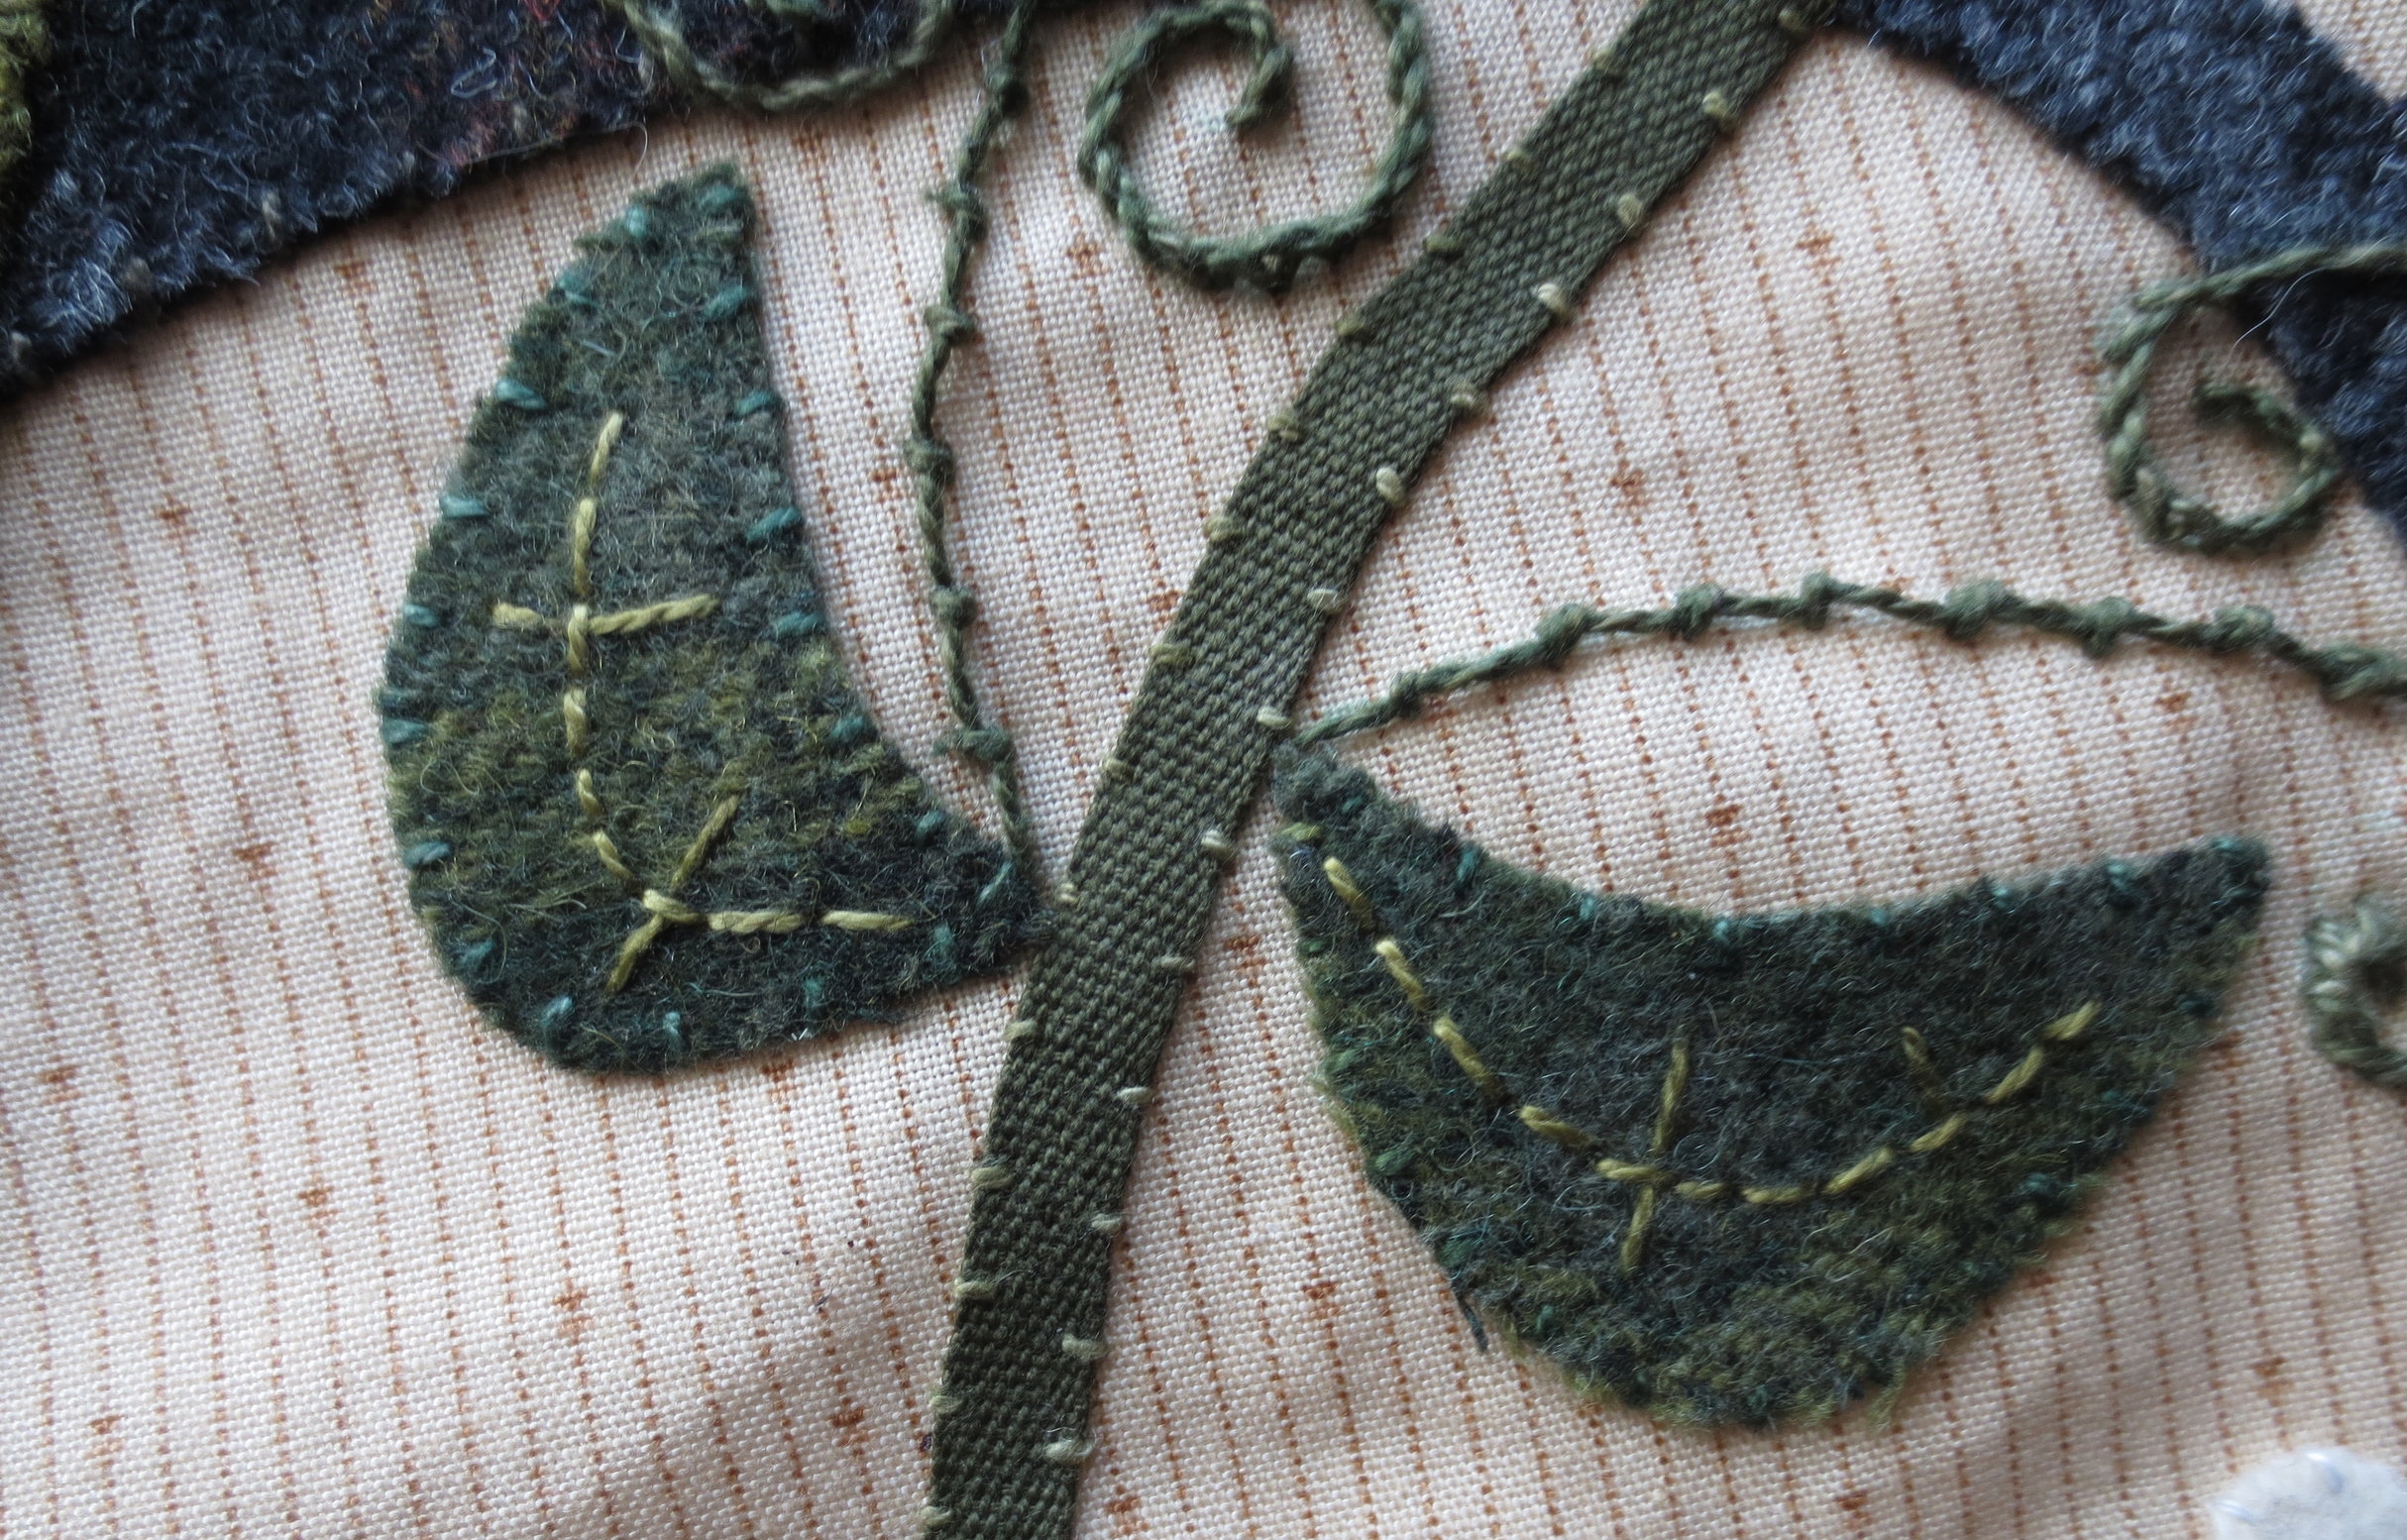
12. Whip stitch all the wool pieces with thread that matches the wool colors except for the strawberry flower centers. Use a light green for the flower centers.
13. Draw the stamens on the lilies. Use #O519 to stem stitch (see stitch guide) over the lines.
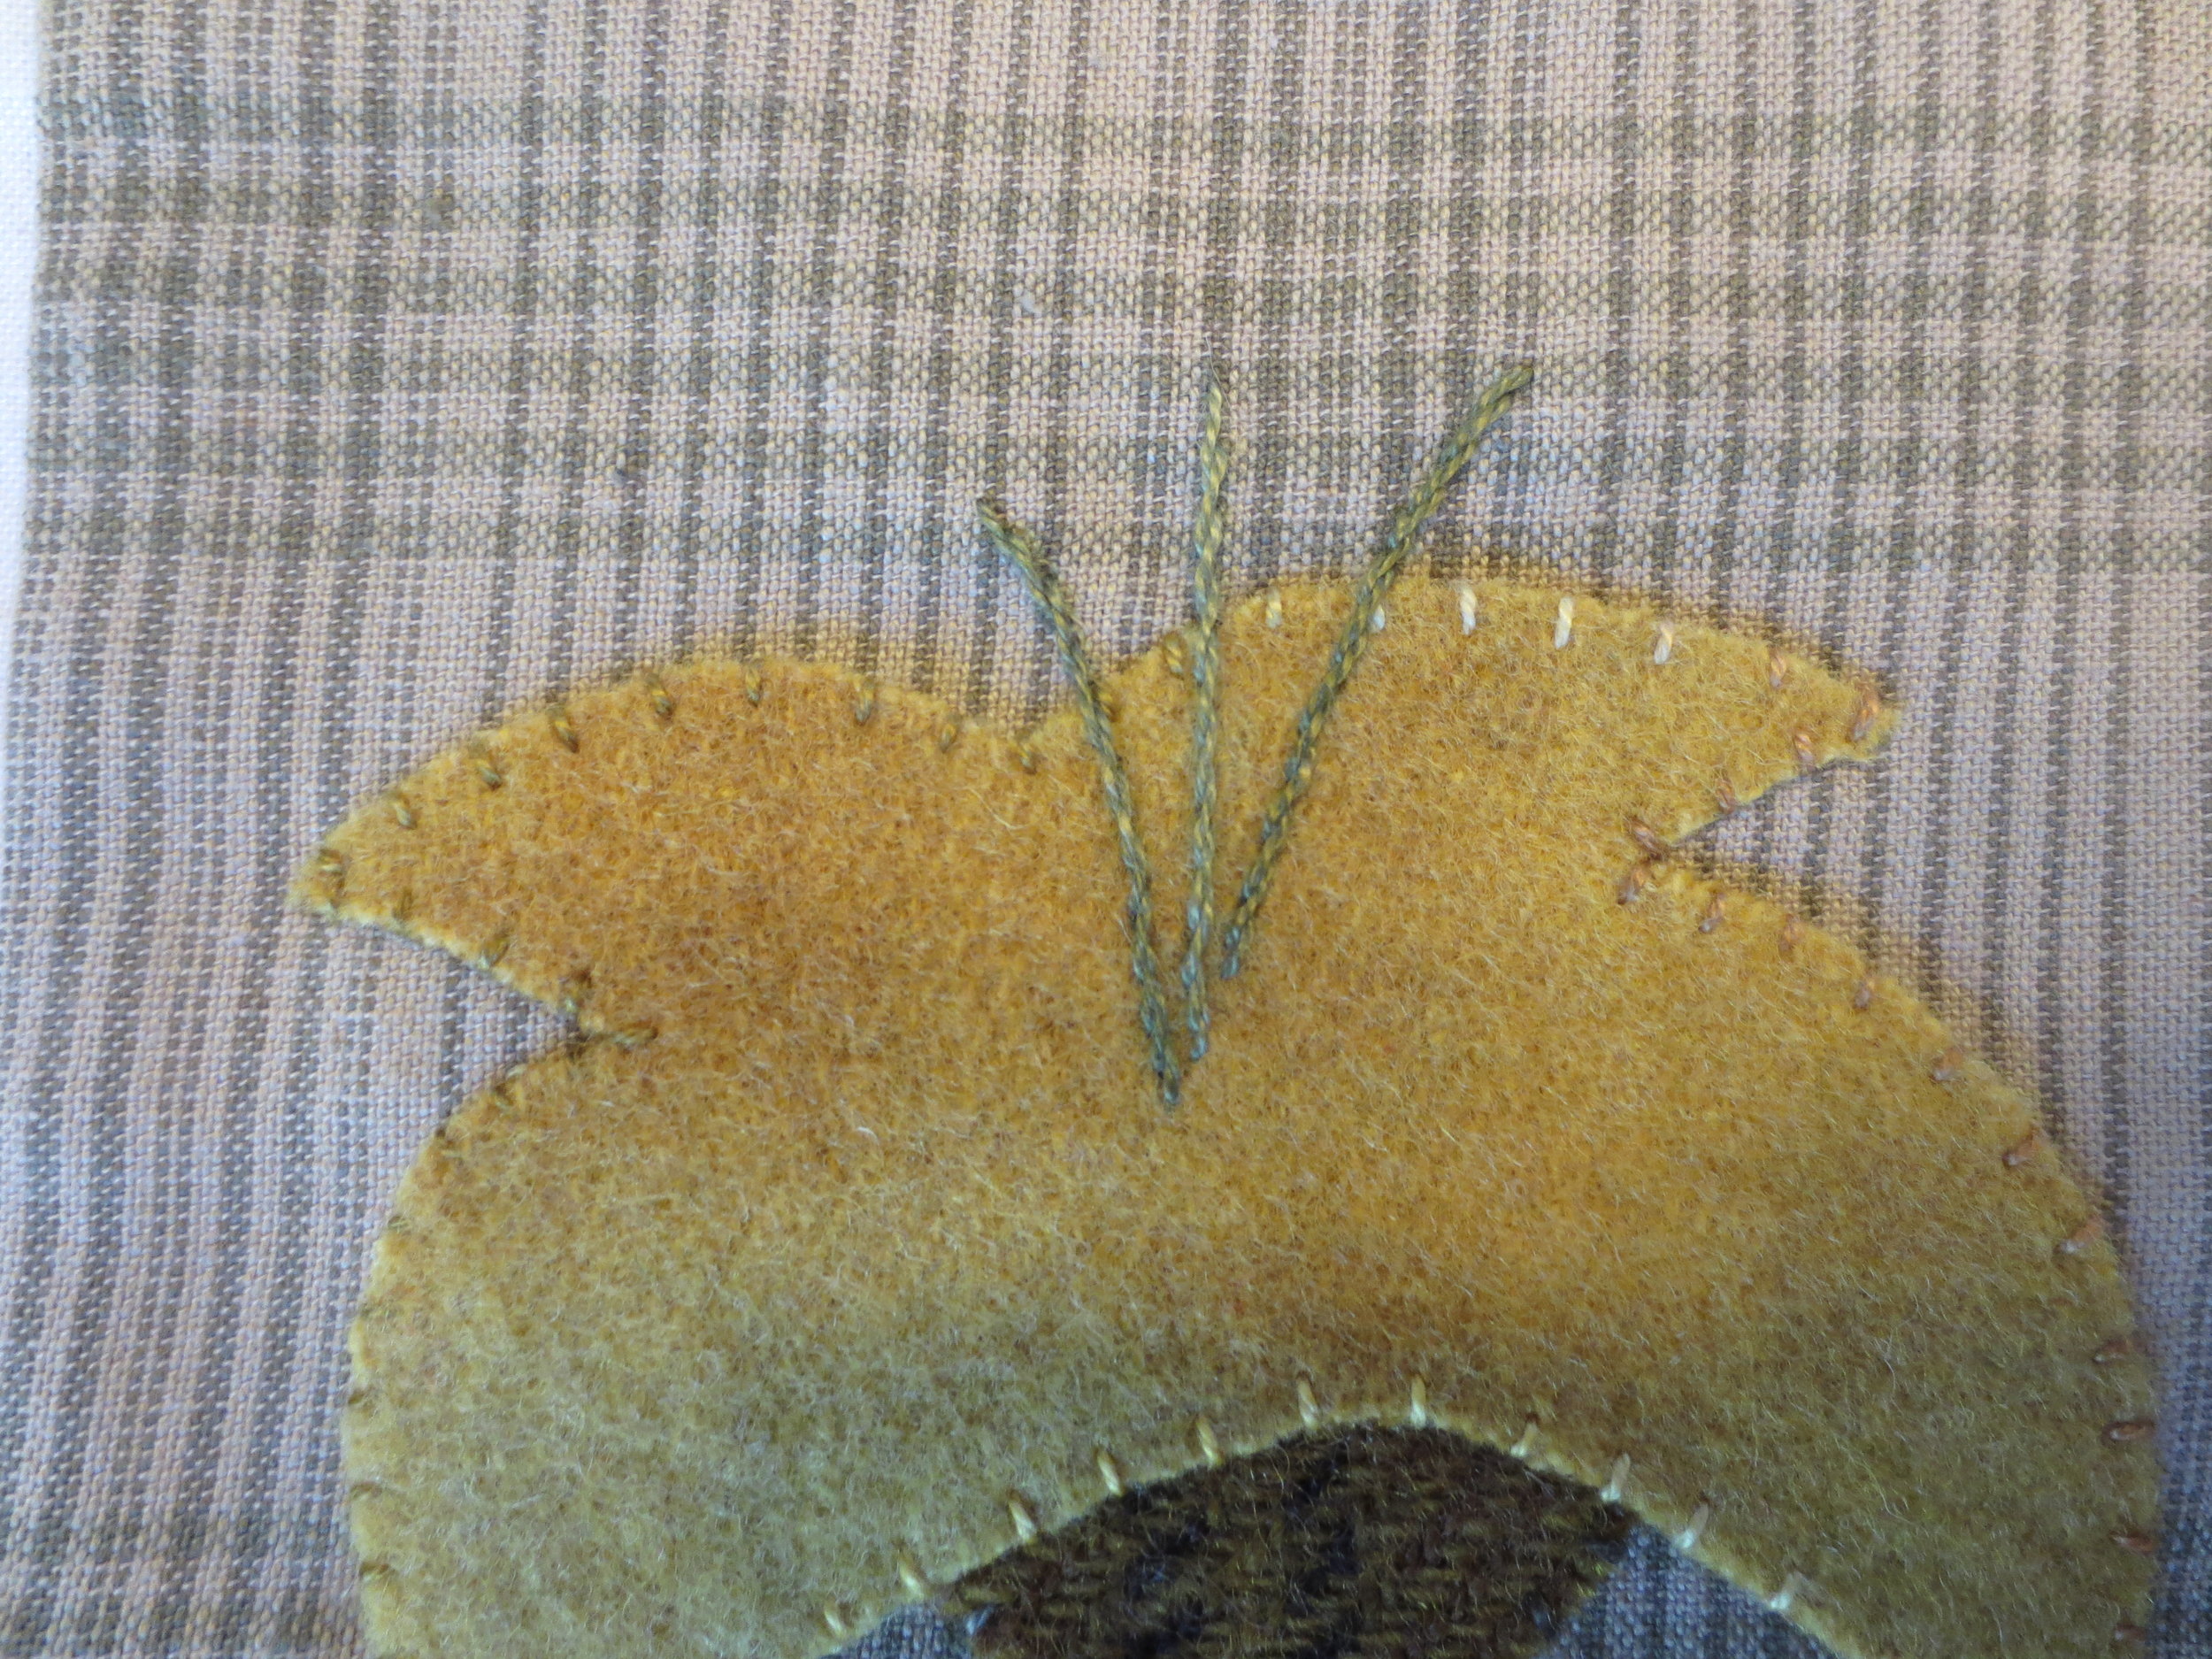
14. I used a stitch I call a blanket stitched back stitch to make the anthers on the stamens. Begin with a back stitch about 1/4" long extending from the end of the stamen, using thread color #78.
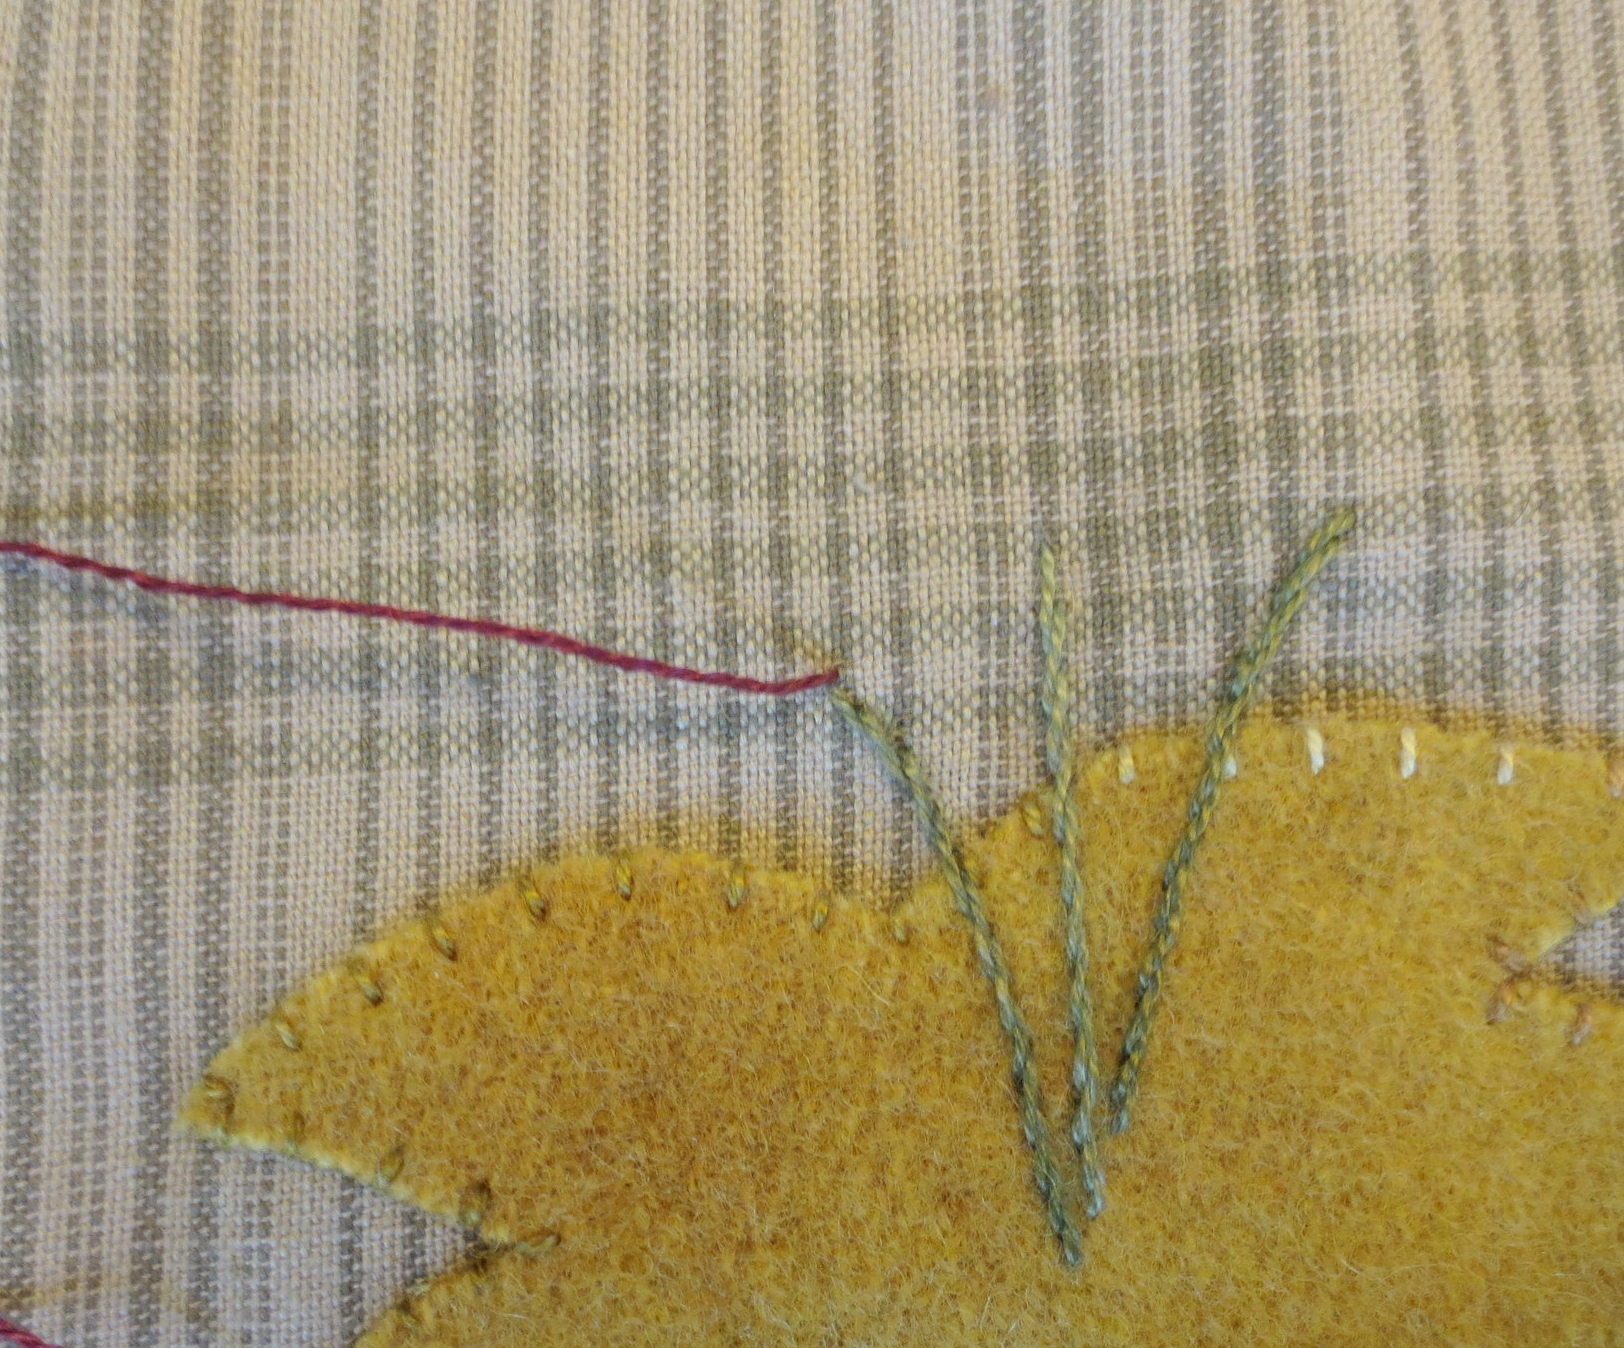
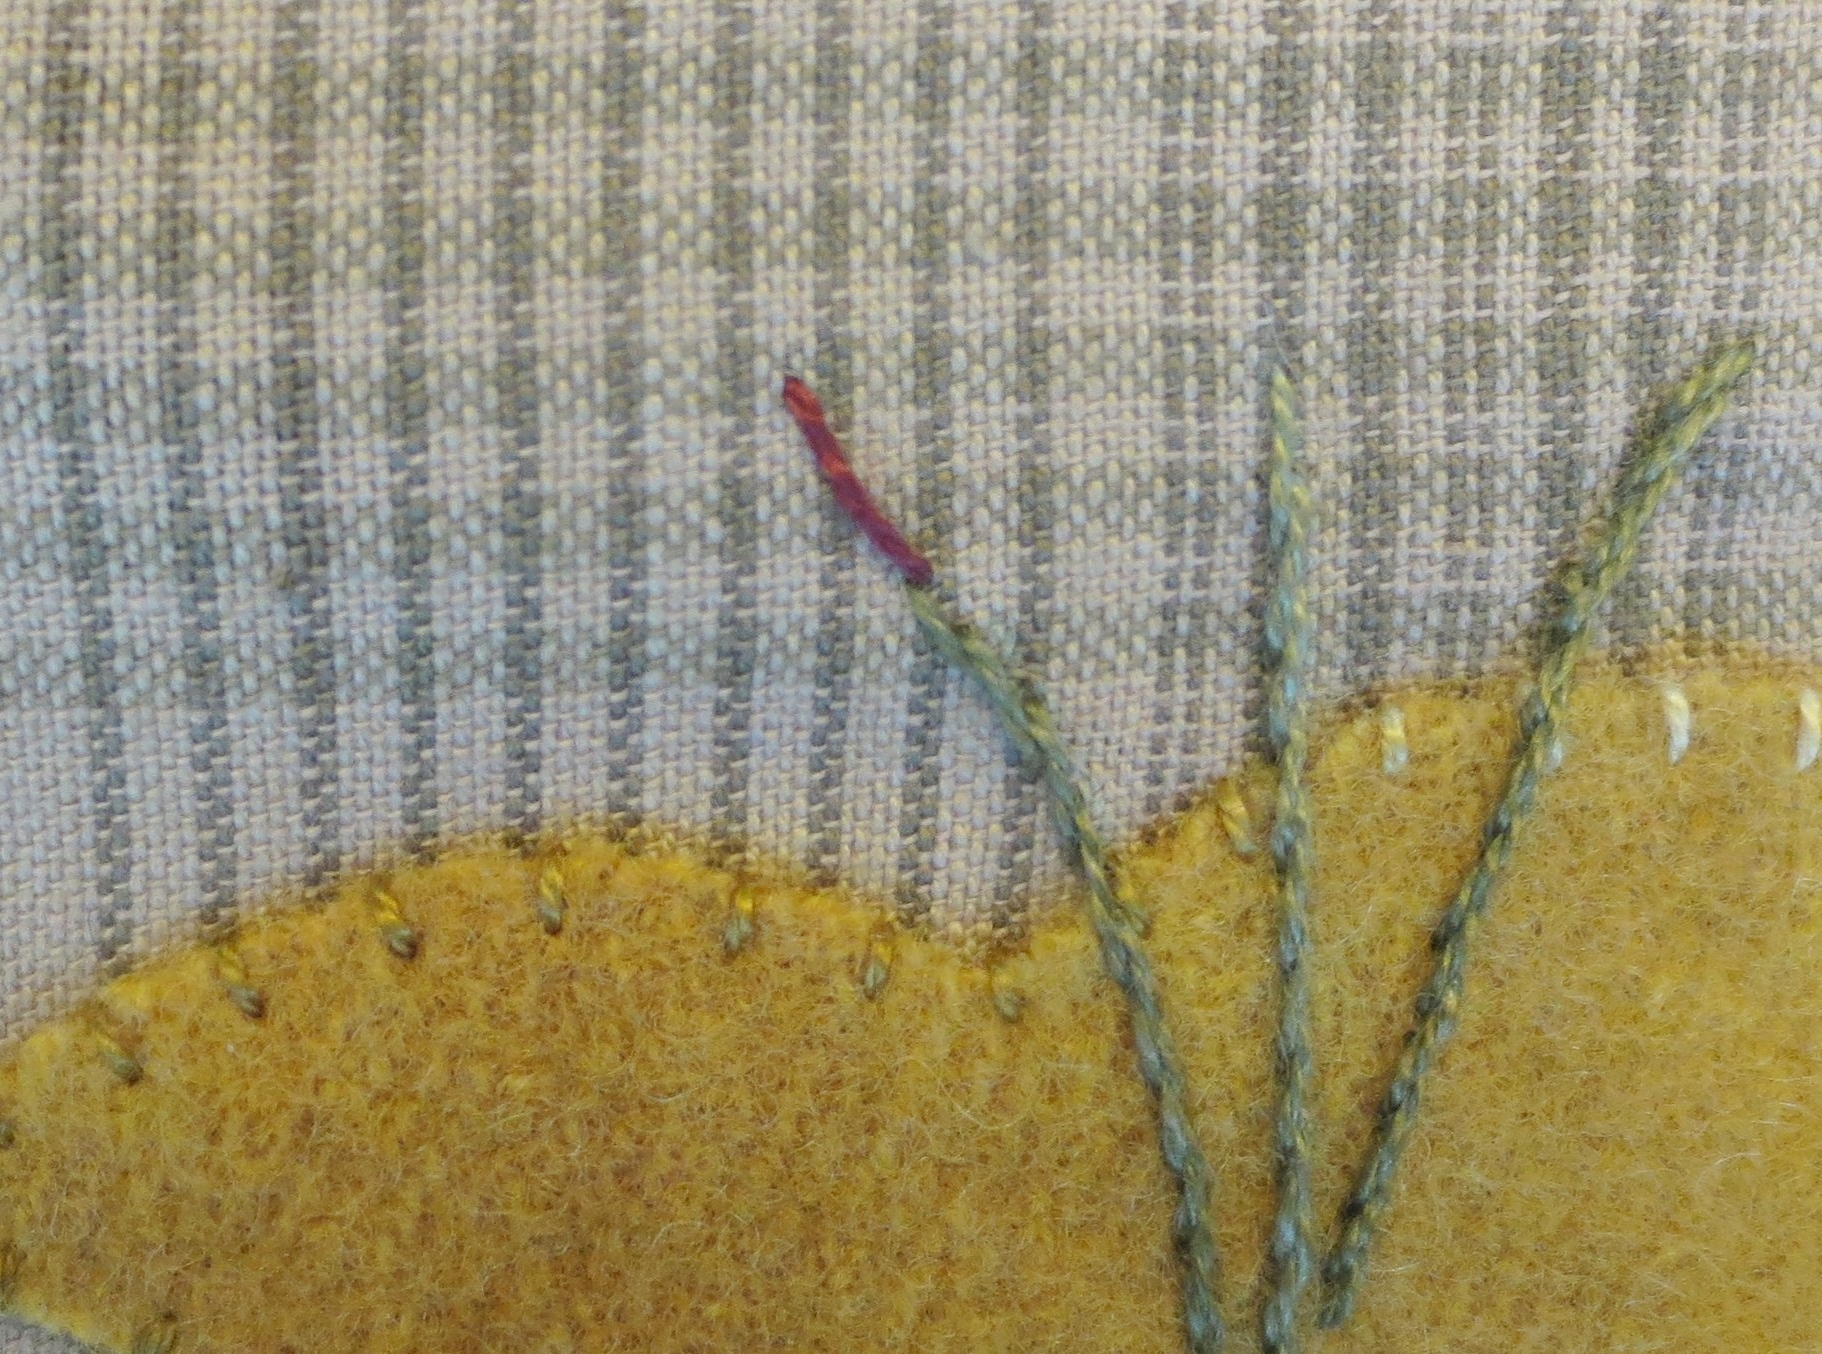
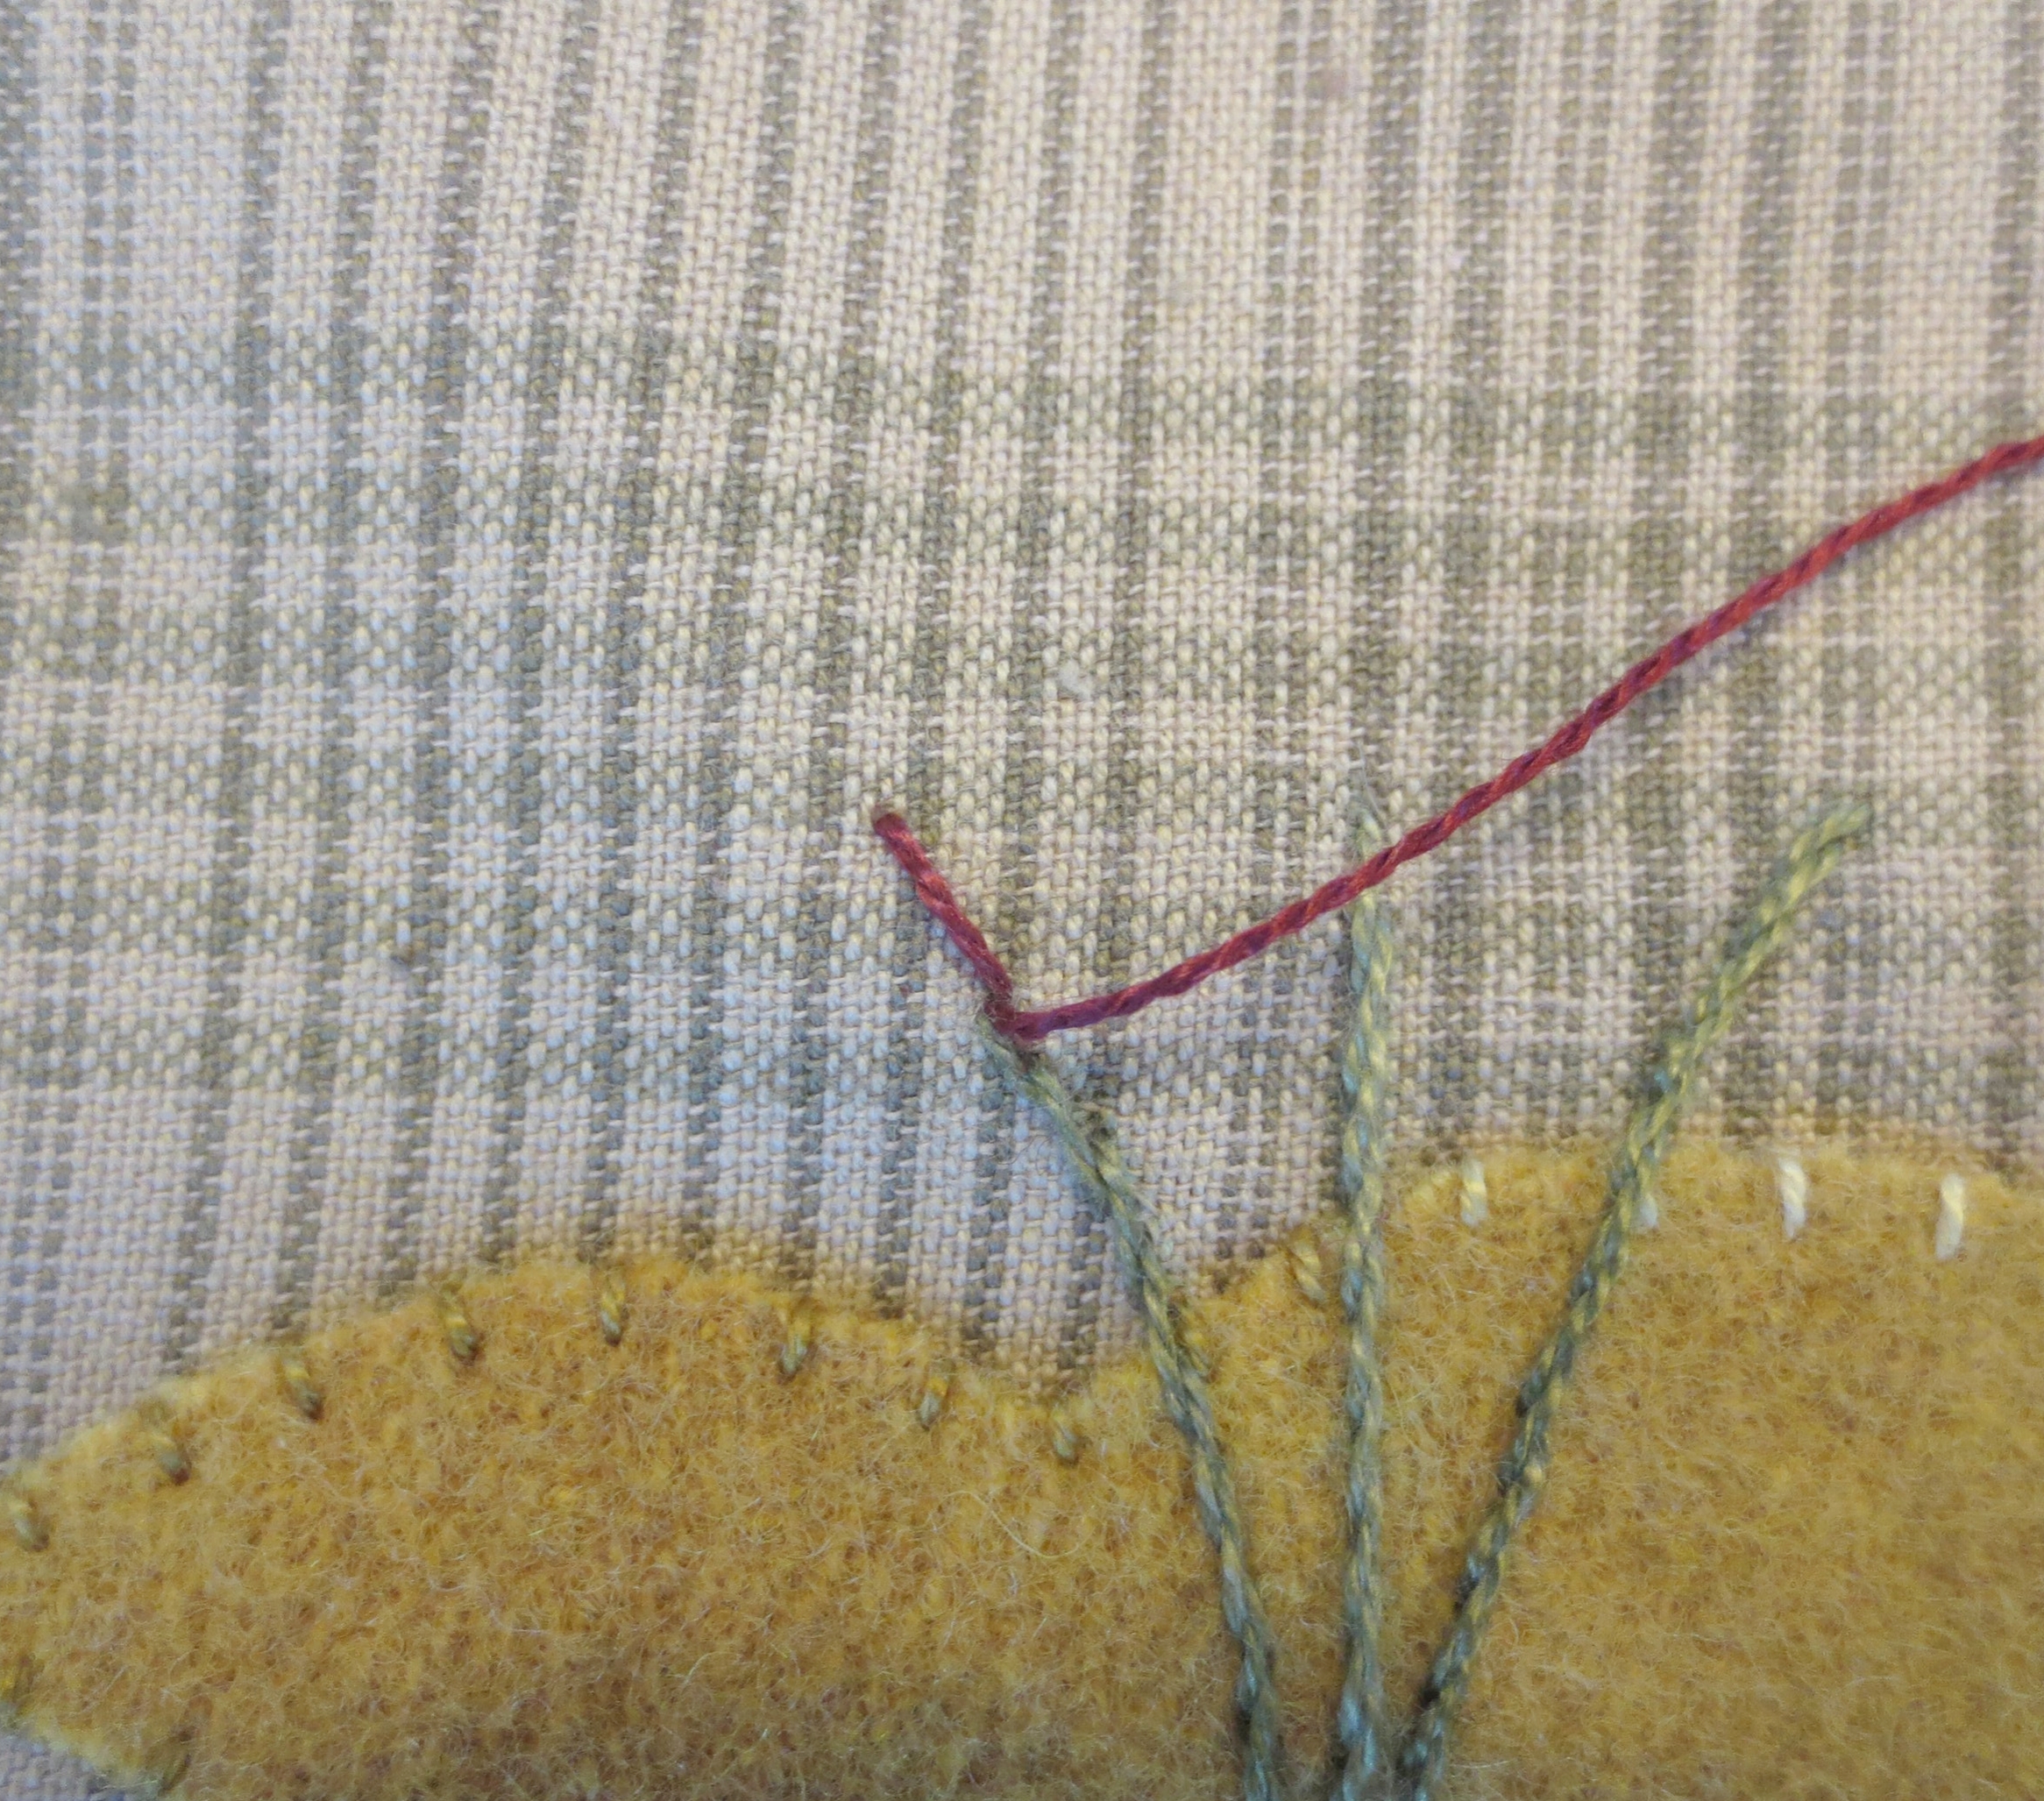
15. Turn your work so that the back stitch is horizontal. Beginning on the far left of the back stitch, make a series of blanket stitches accross the back stitch.
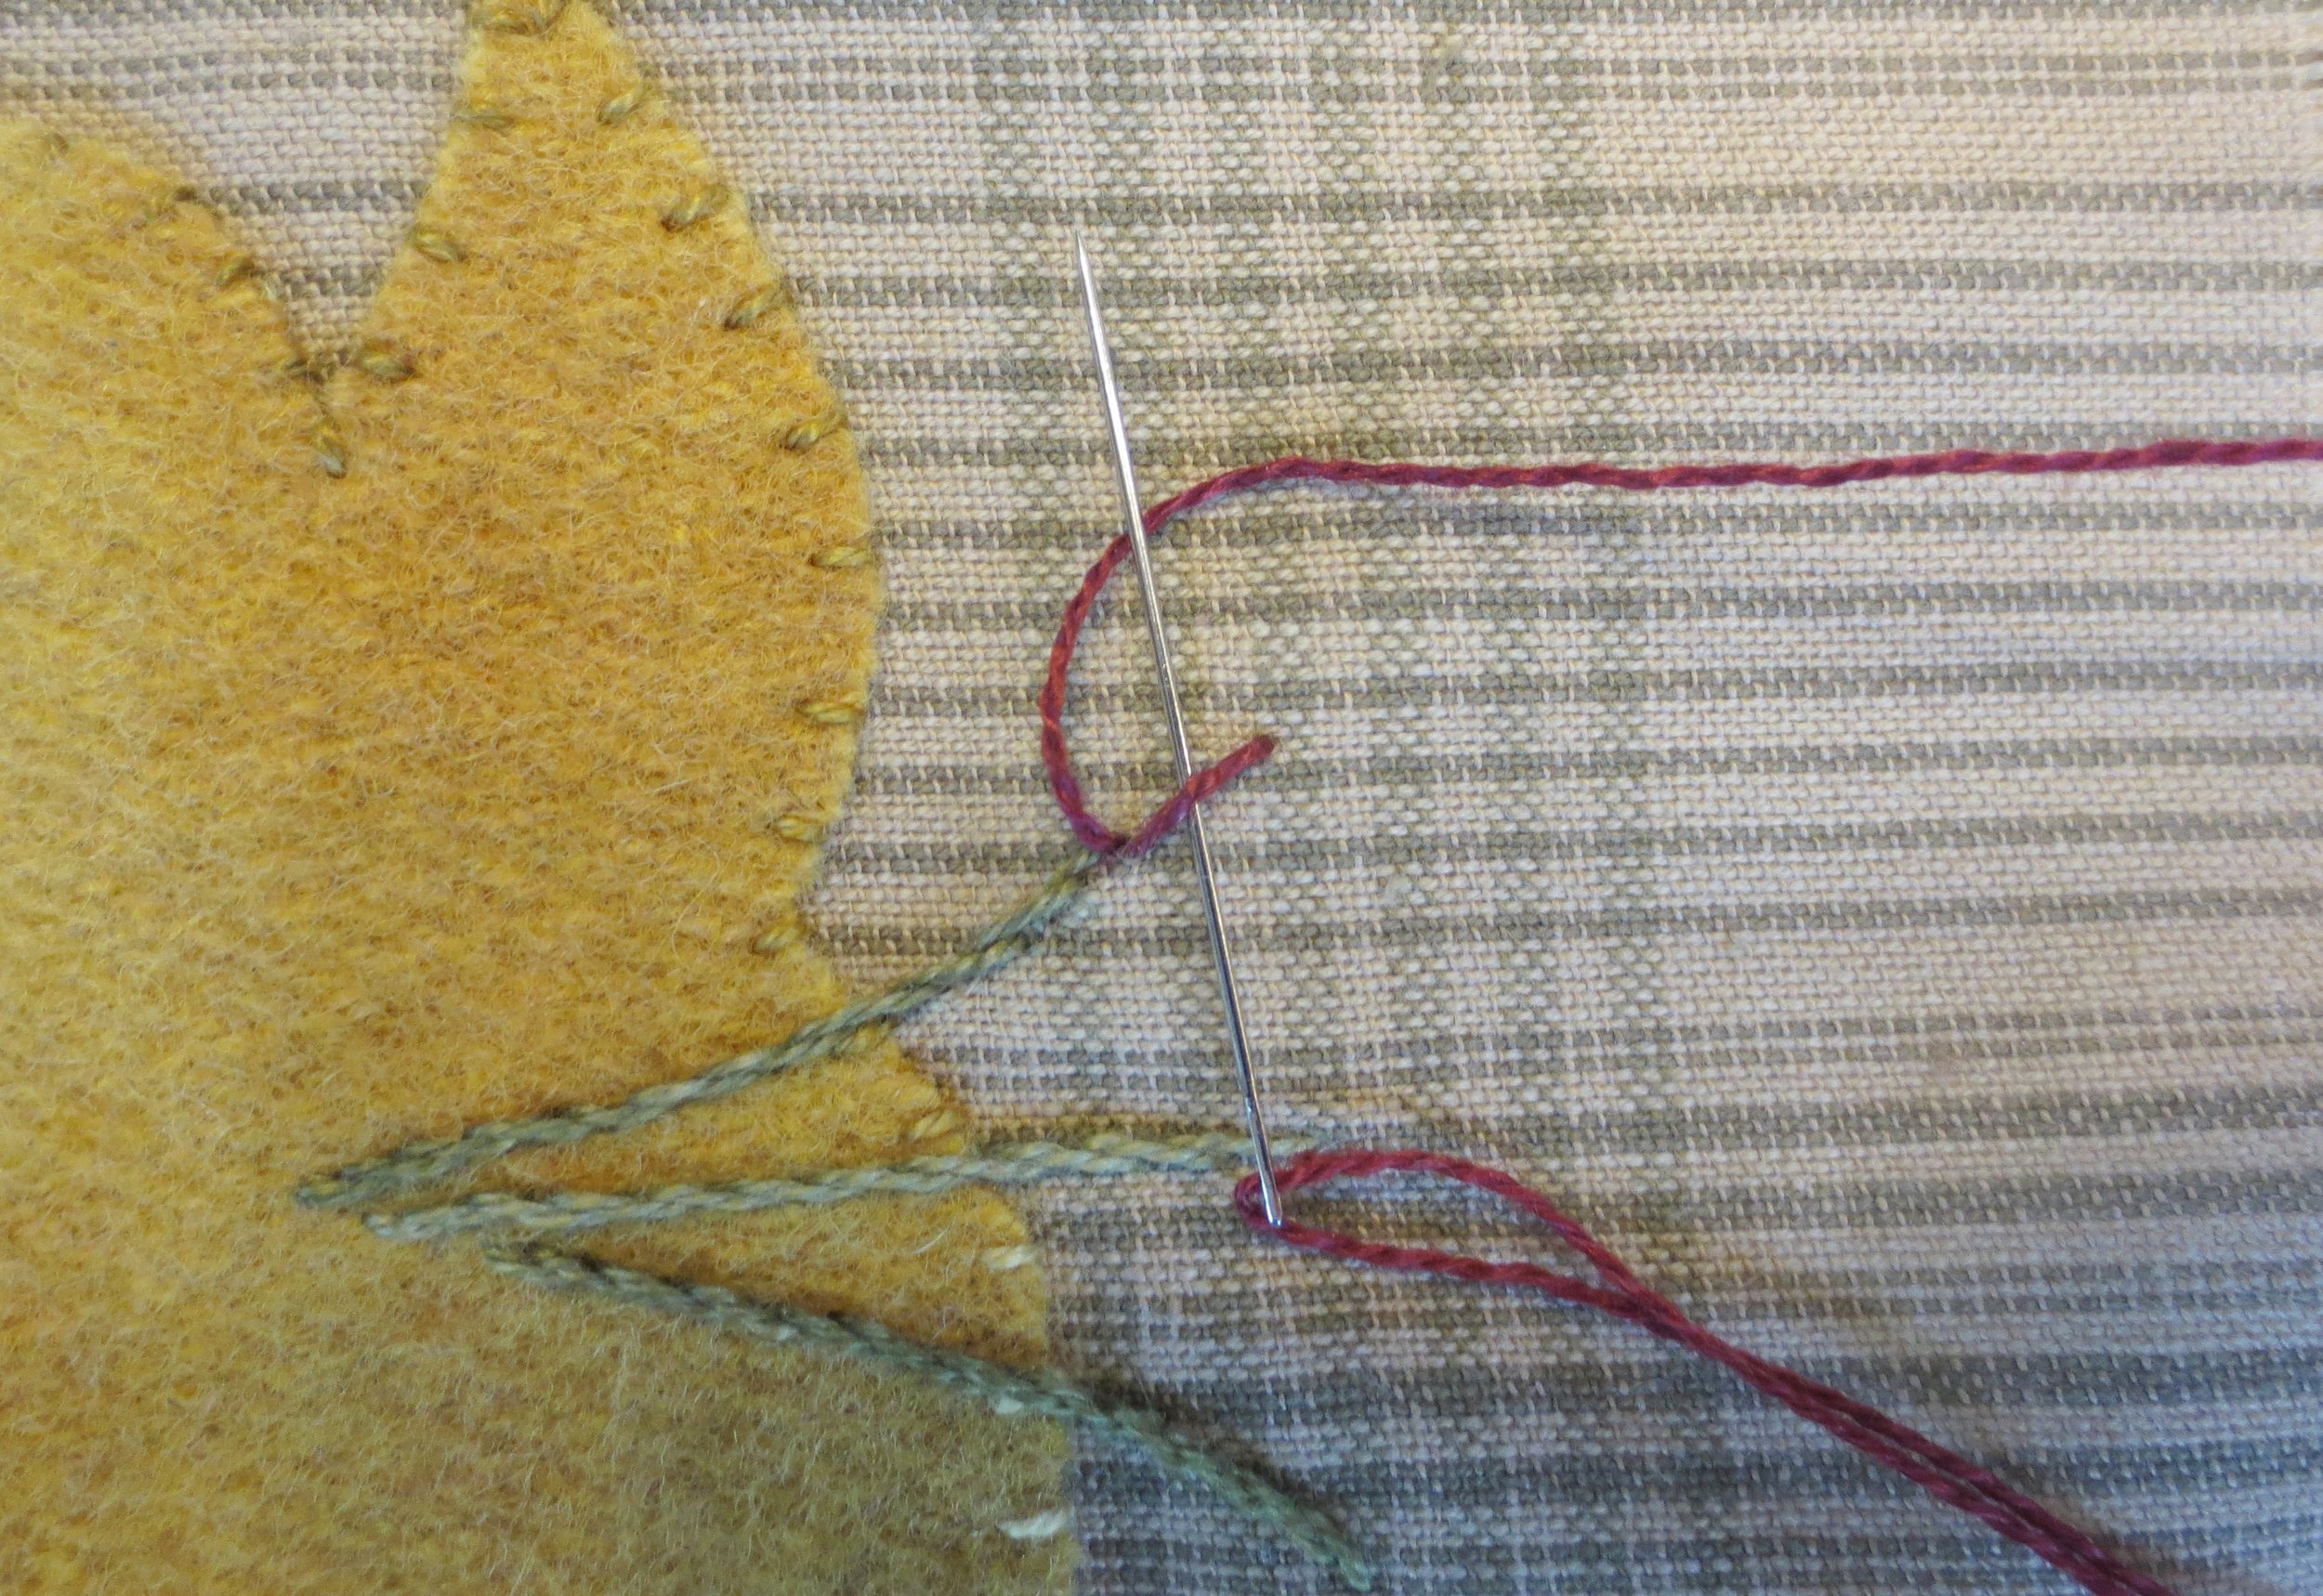
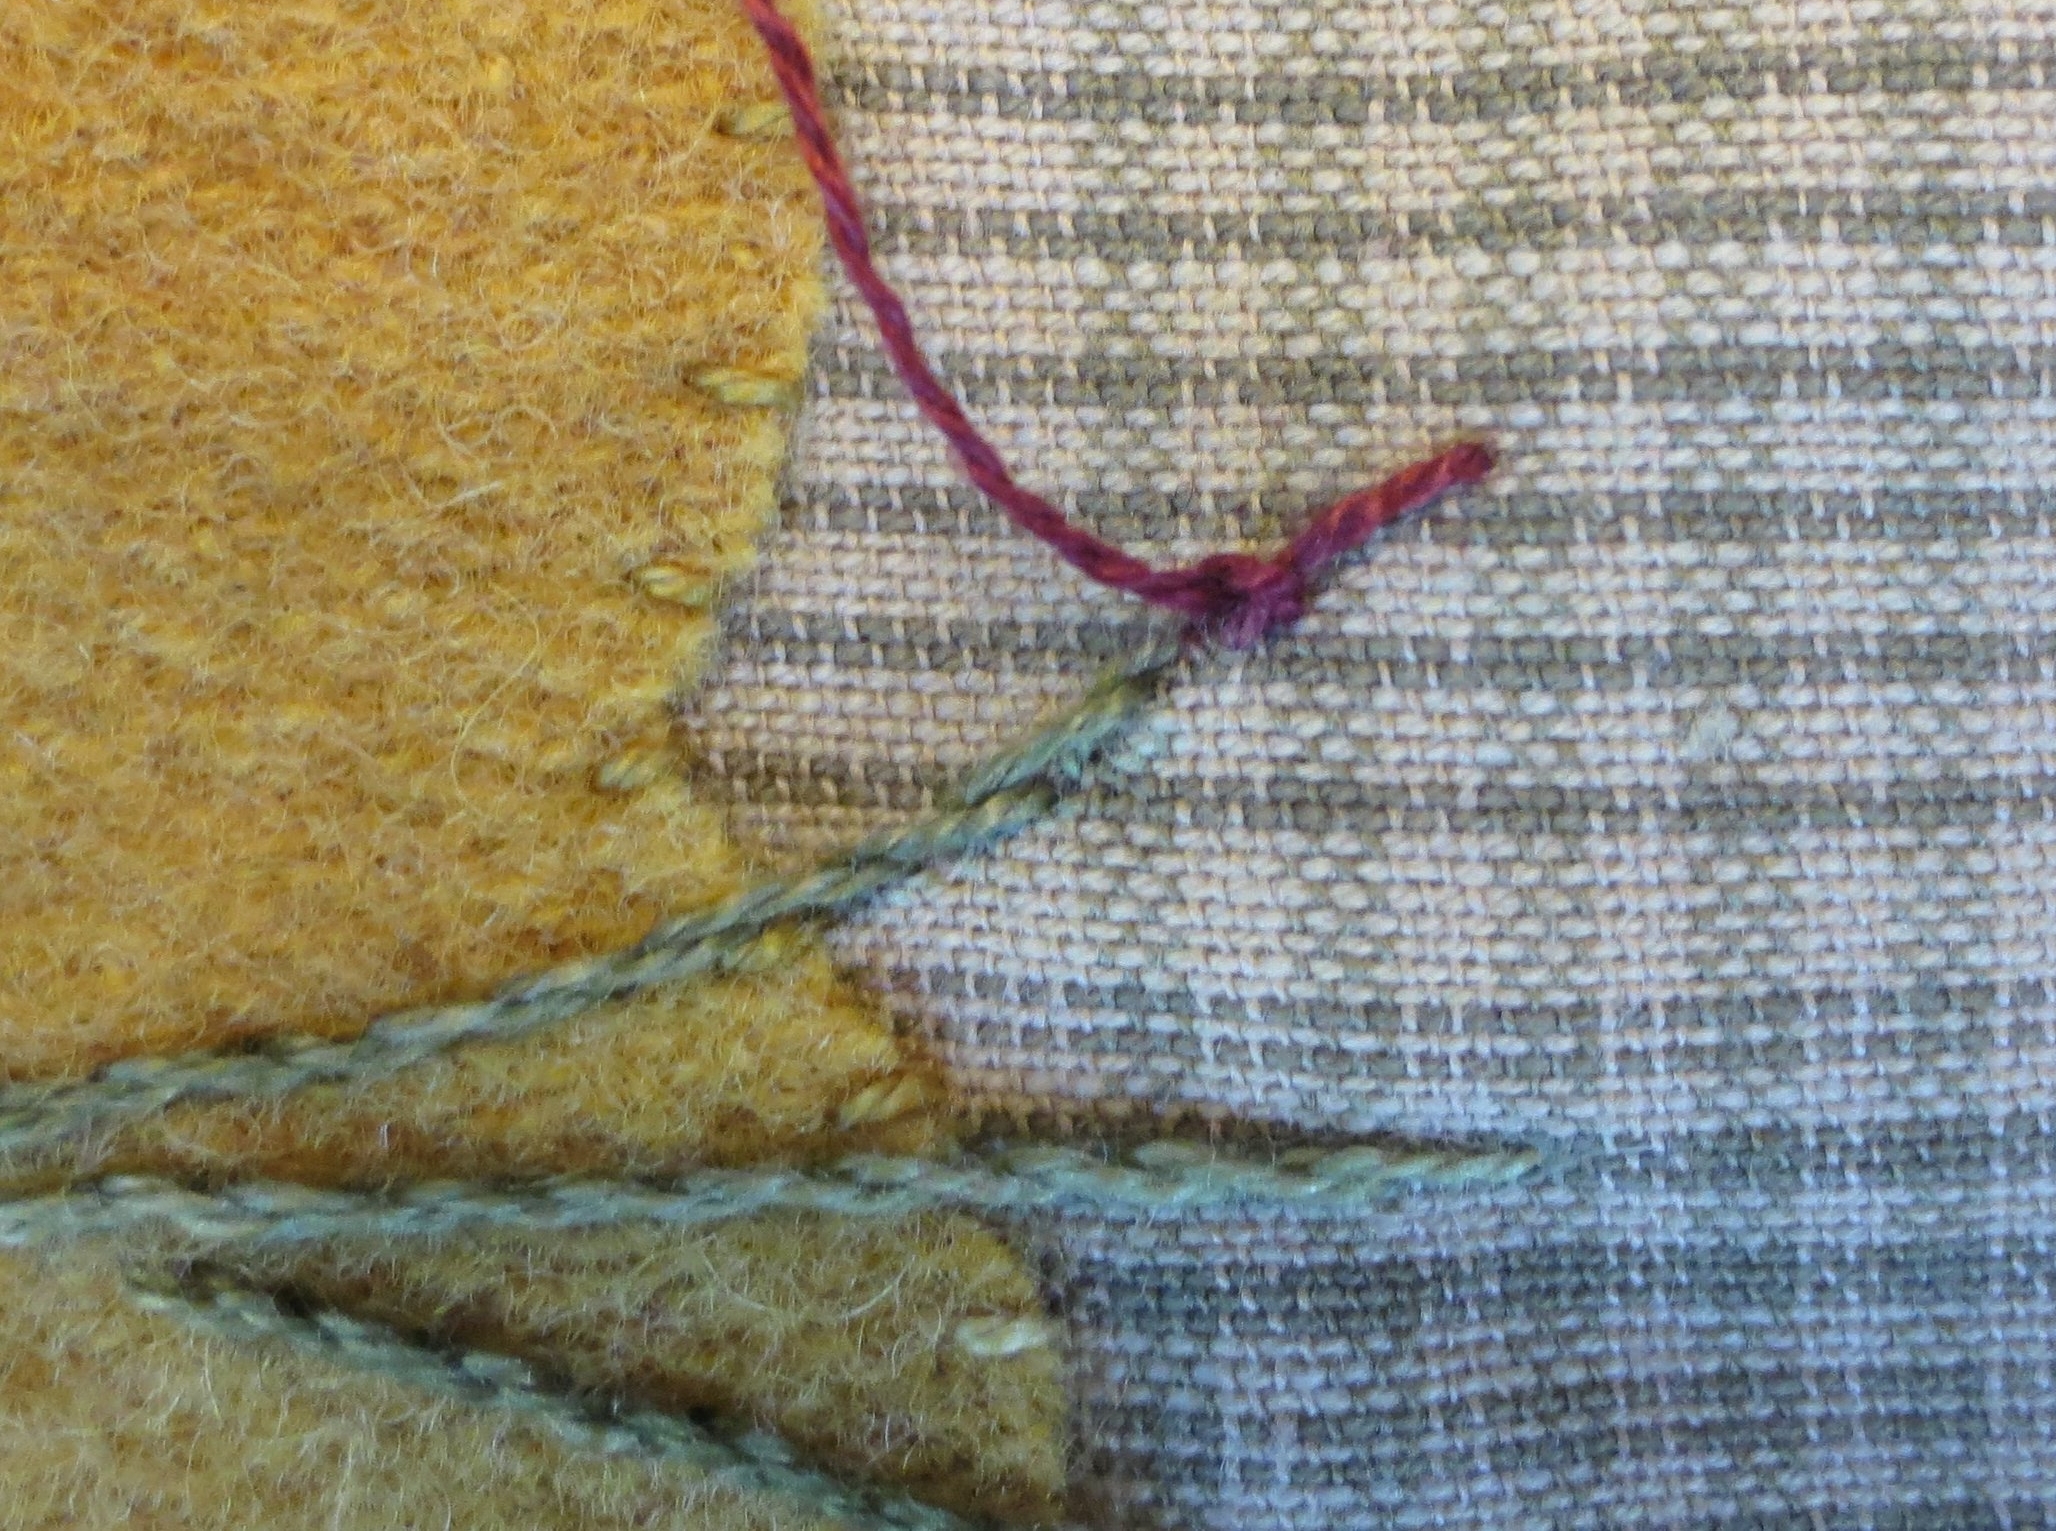
16. When you can't make anymore blanket stitches insert the needle into the end of the back stitch and pull the thread through. This will secure the anther in place. Repeat the steps above for each anther.
17. Cut the lily leaf veins into two lengths: 2 1/2" and 3 1/2".
18. Add a few drops of Roxanne Glue Baste-IT on the back of each of the lily veins.
19. Position the veins onto leaves A & B.
20. Use a thread color lighter than the vein wool color to make simple cross stitches down the length of the vein. I suppose this could be called a cross stitched couching stitch like the one we used on the snail shell on block #3.


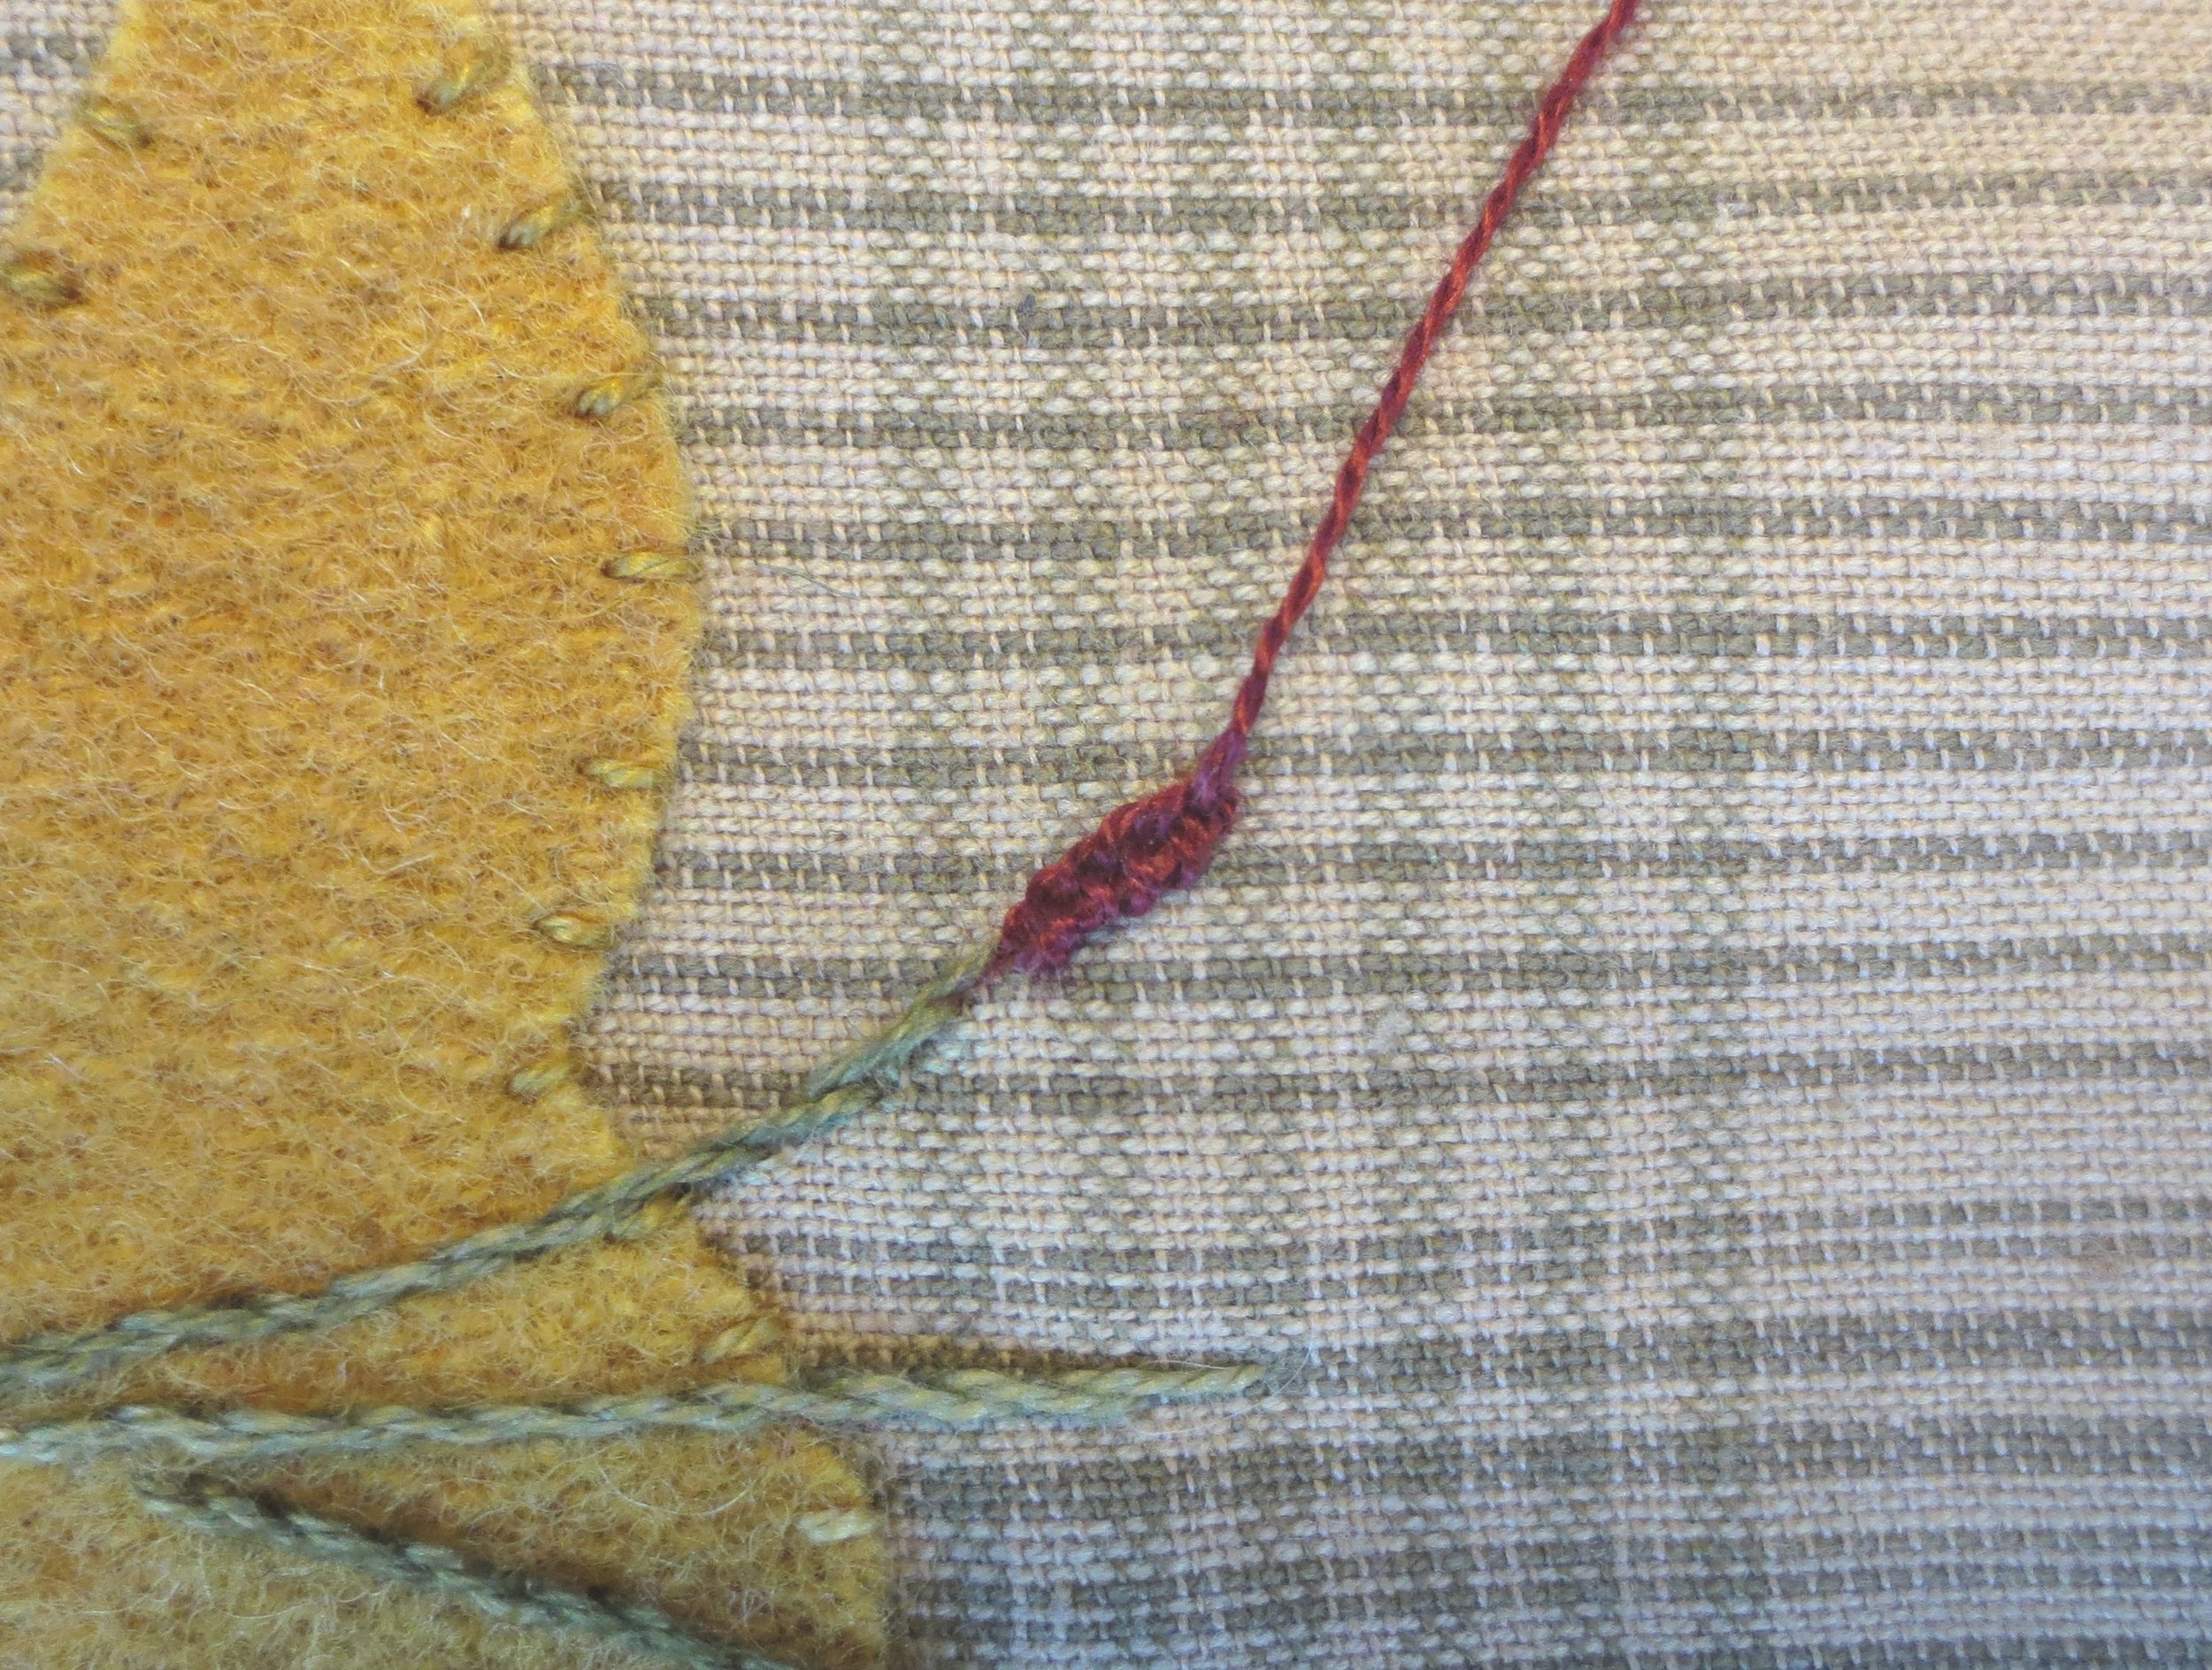
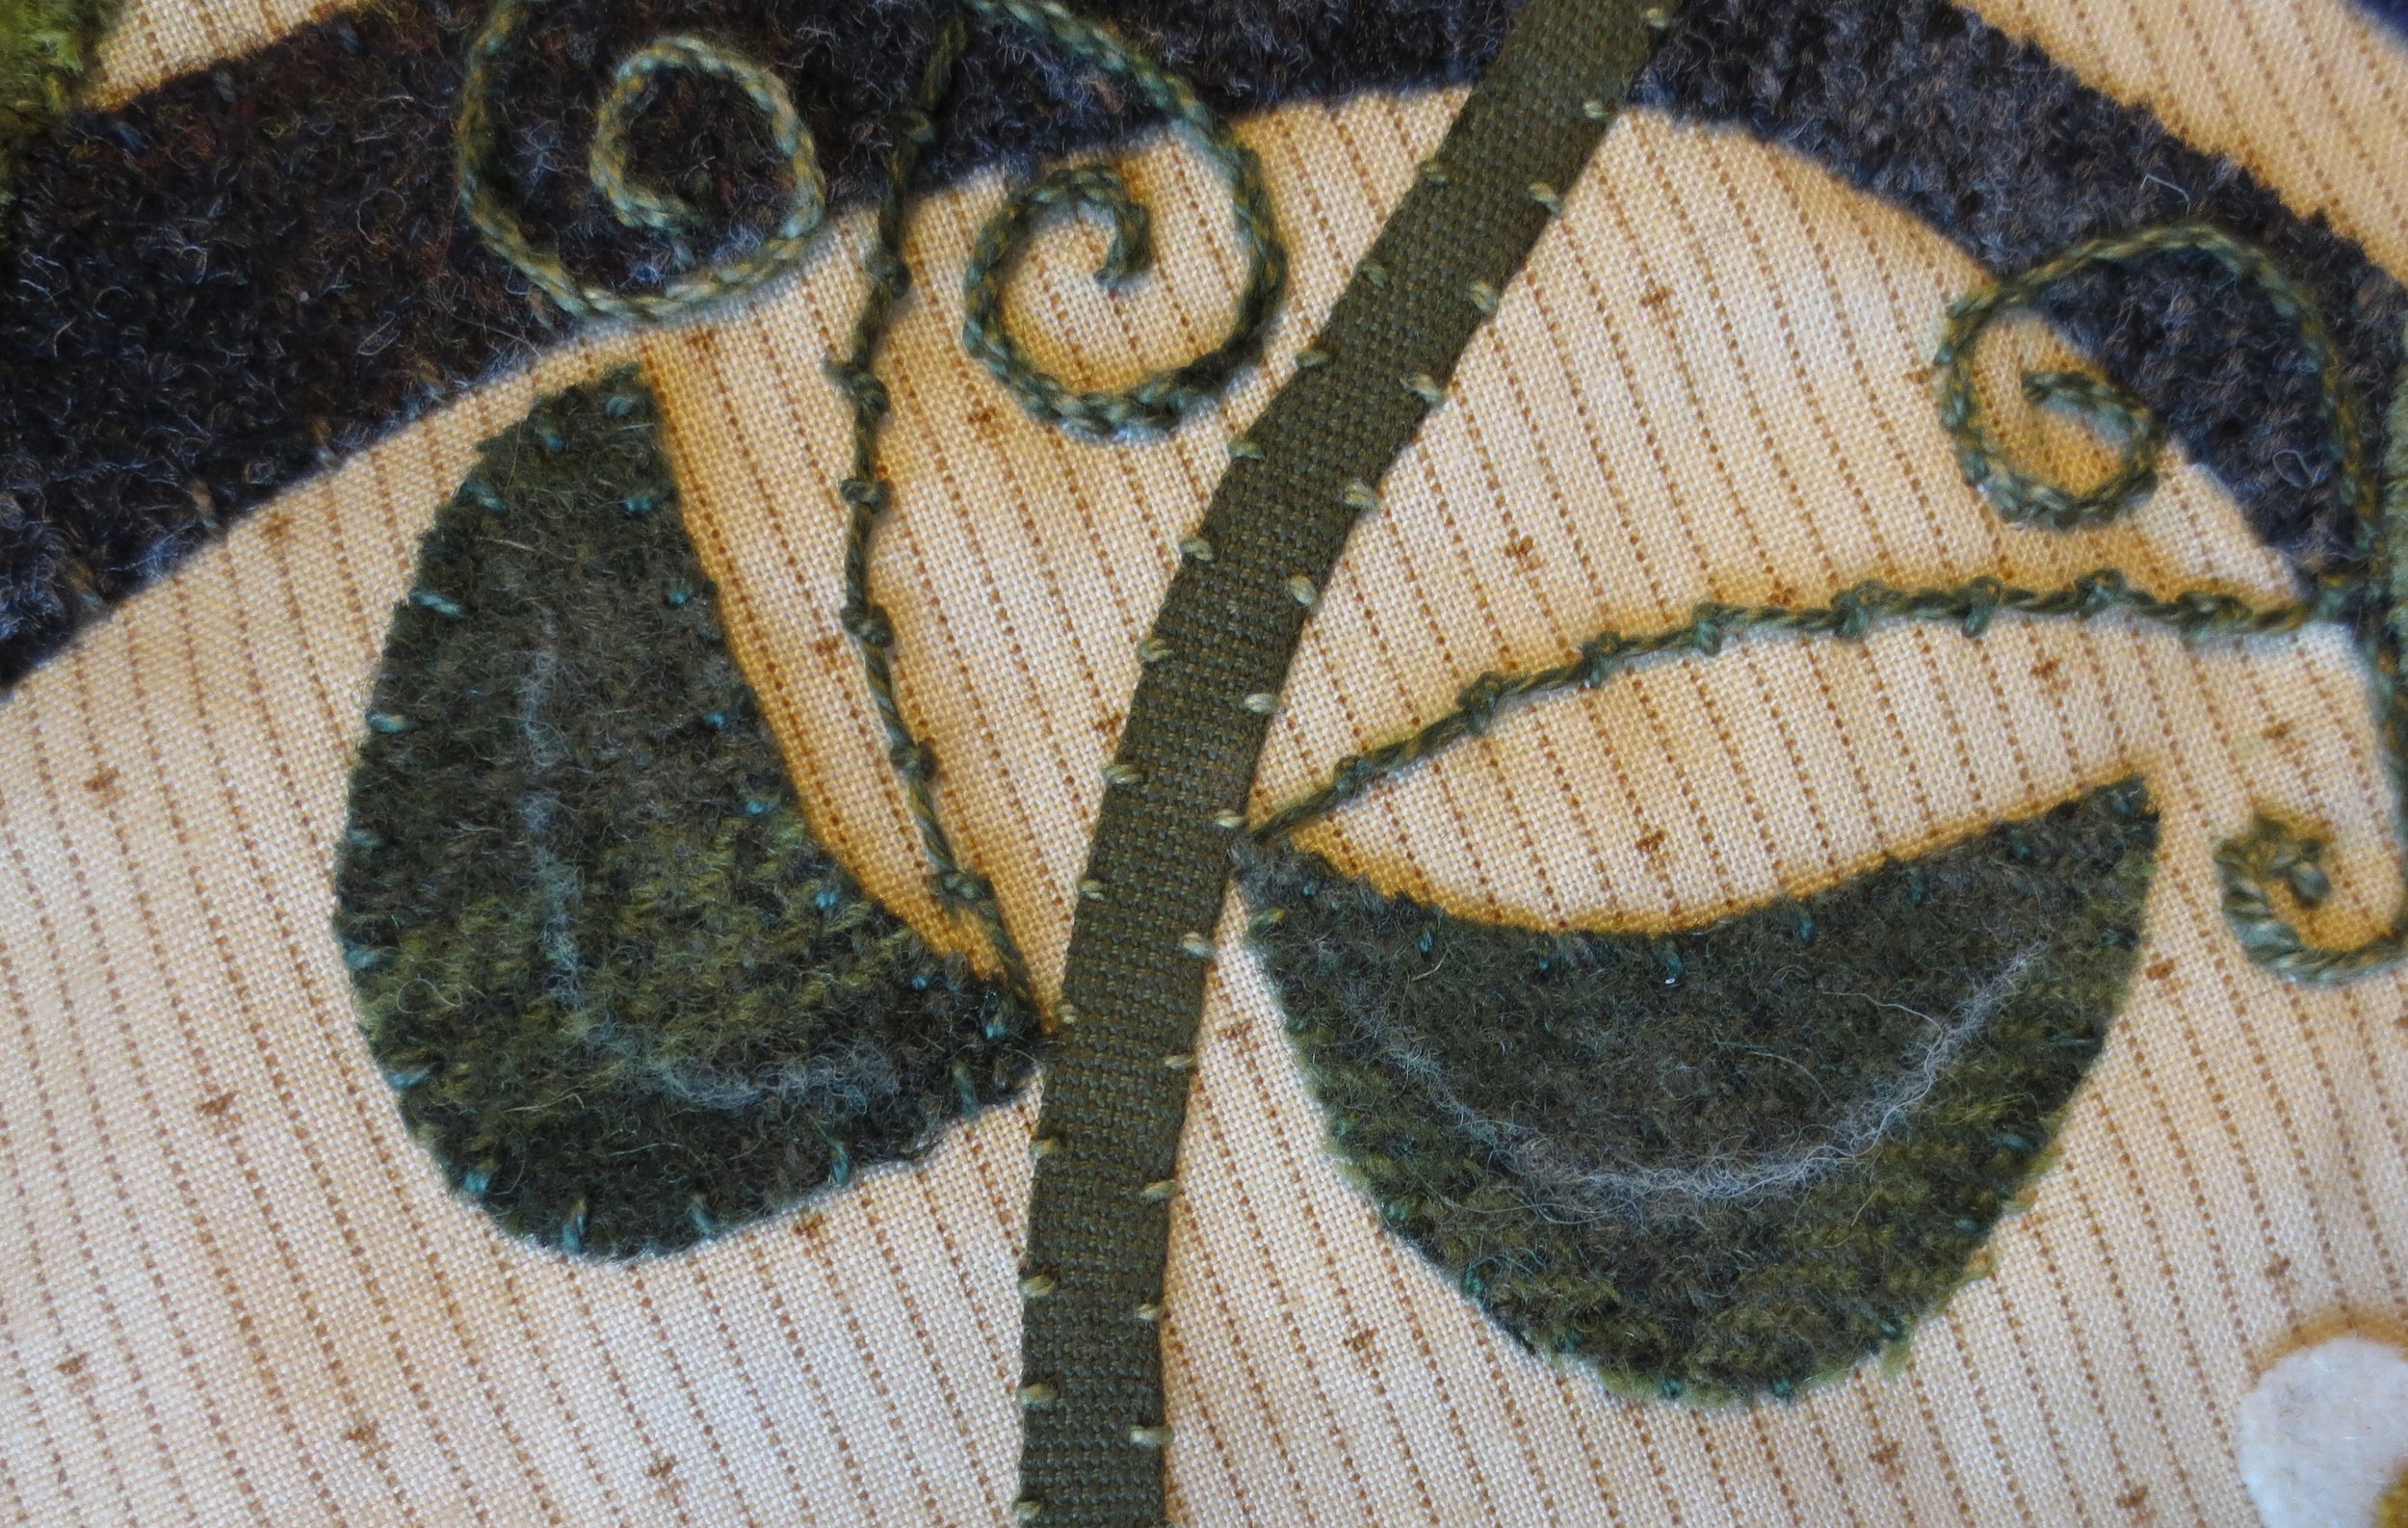
21. Use #O519 to chain stitch (see stitch guide) the stems of Flowers #1 & #3.
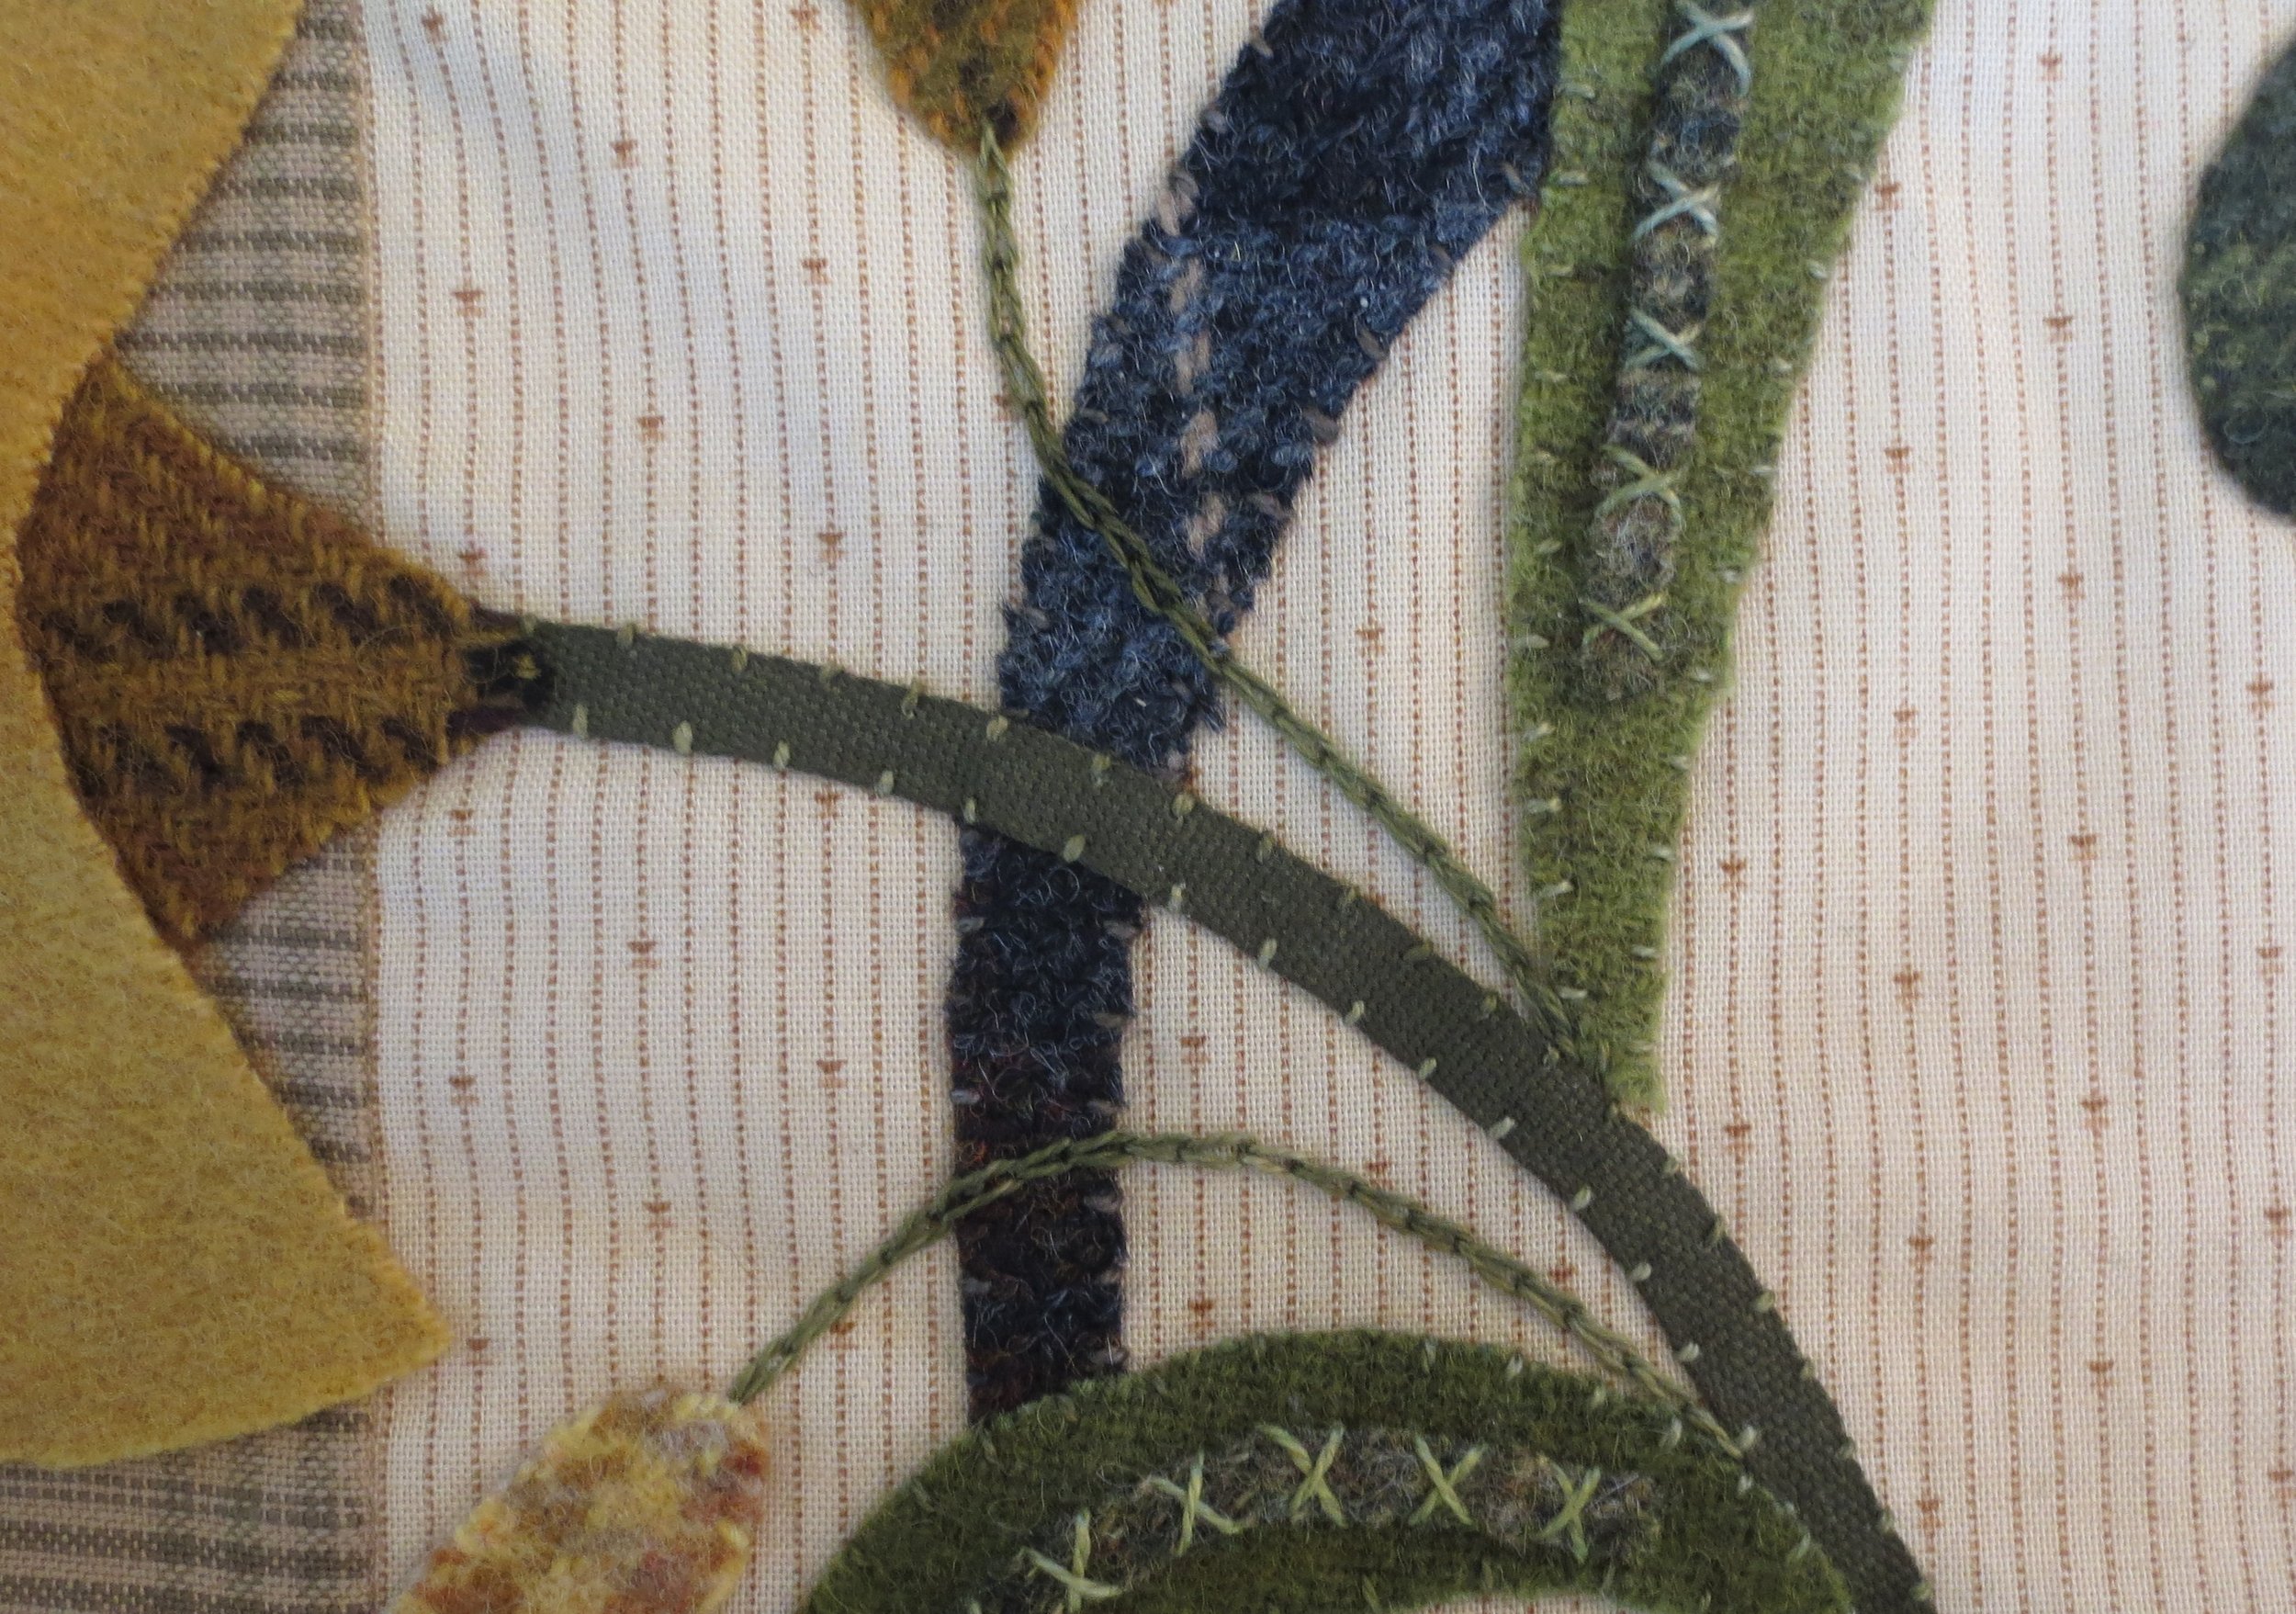
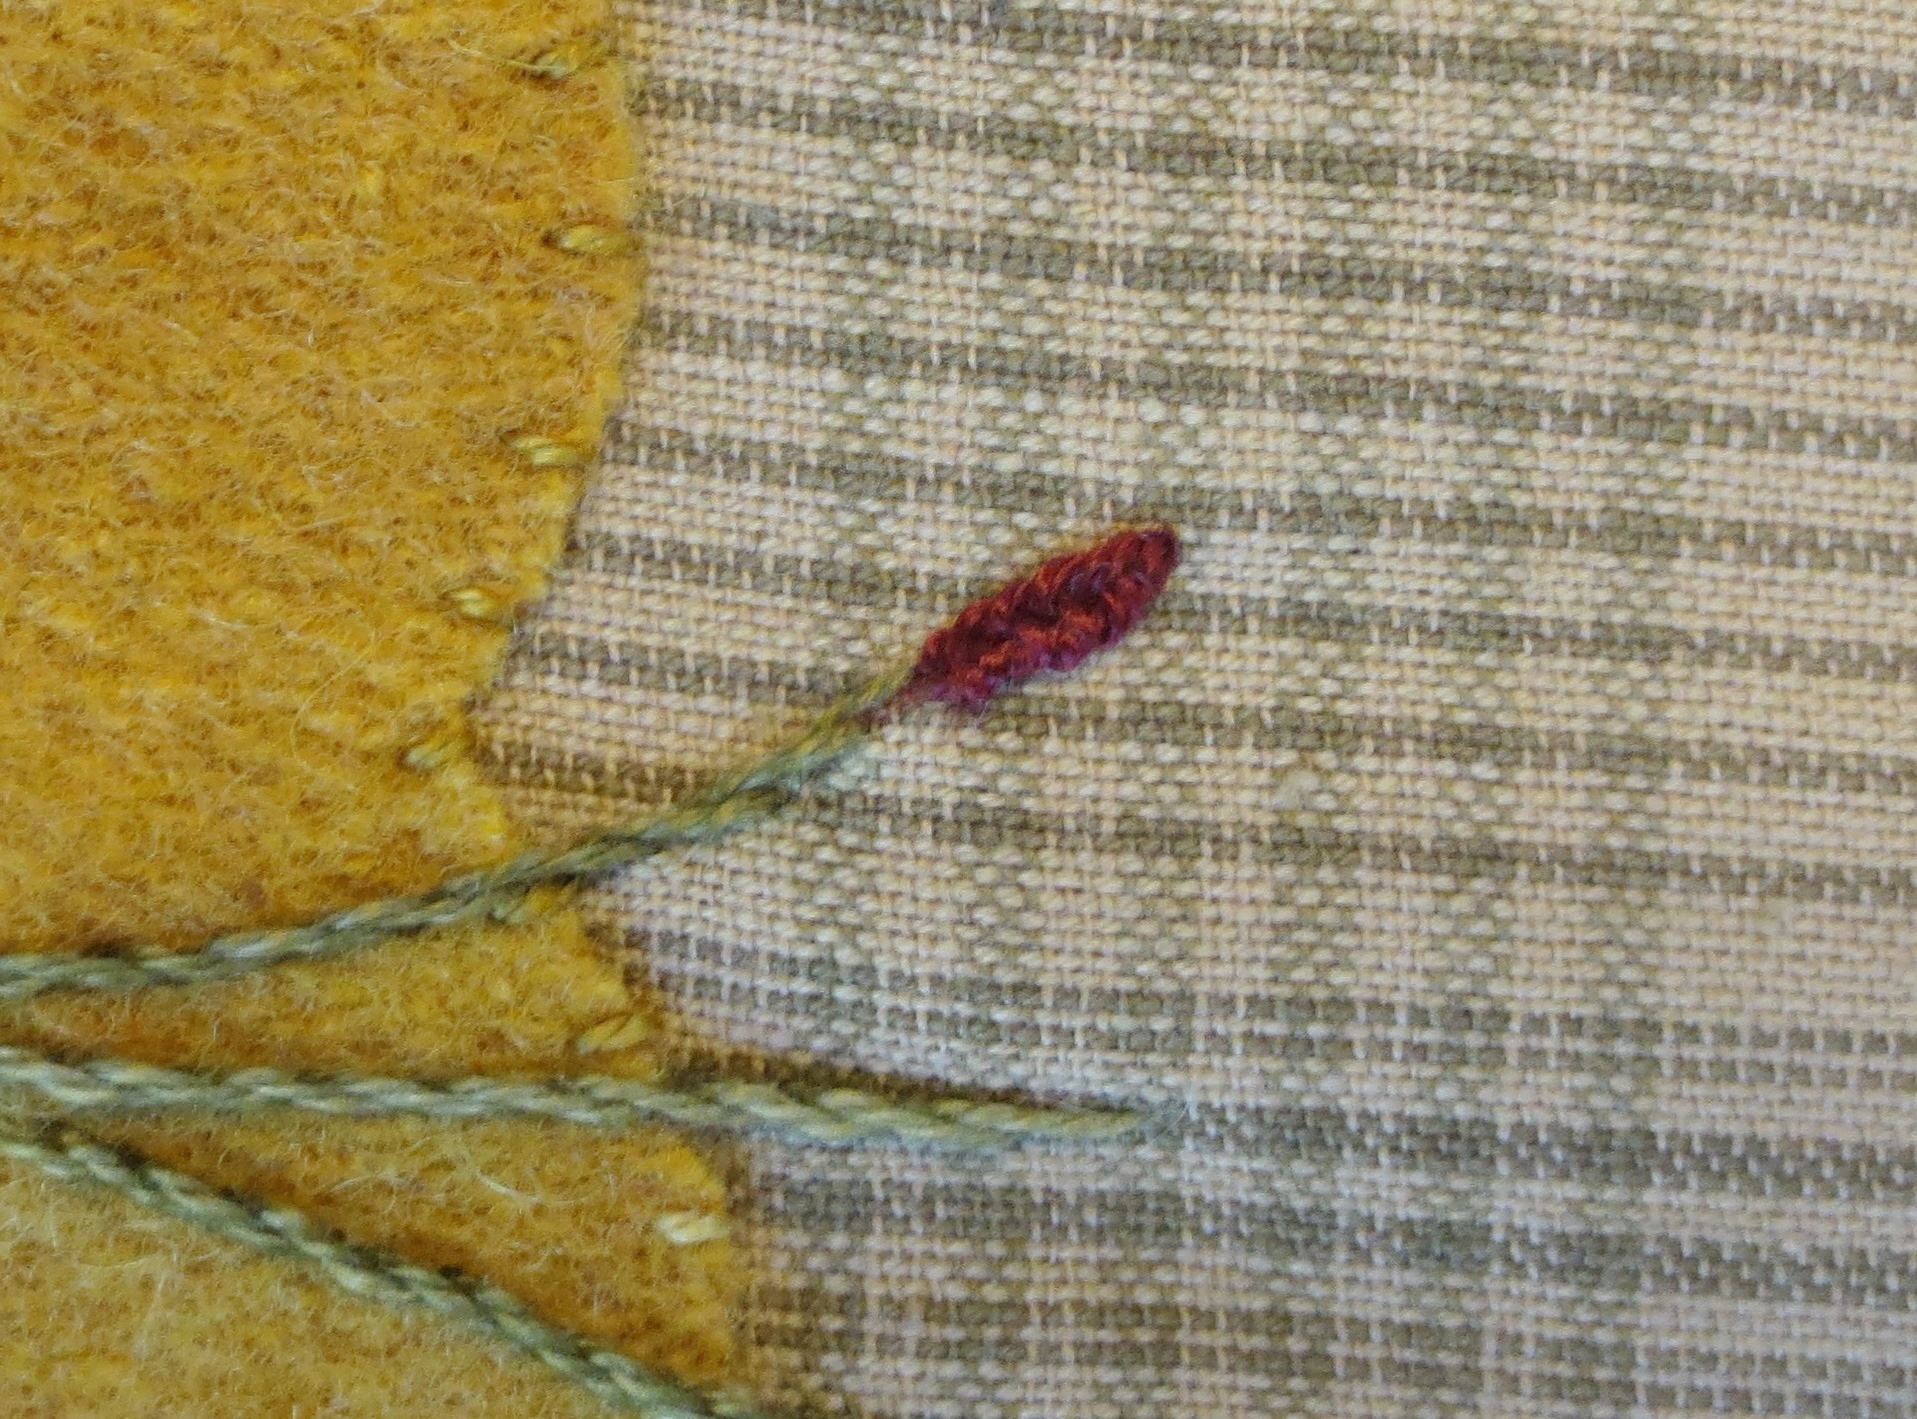
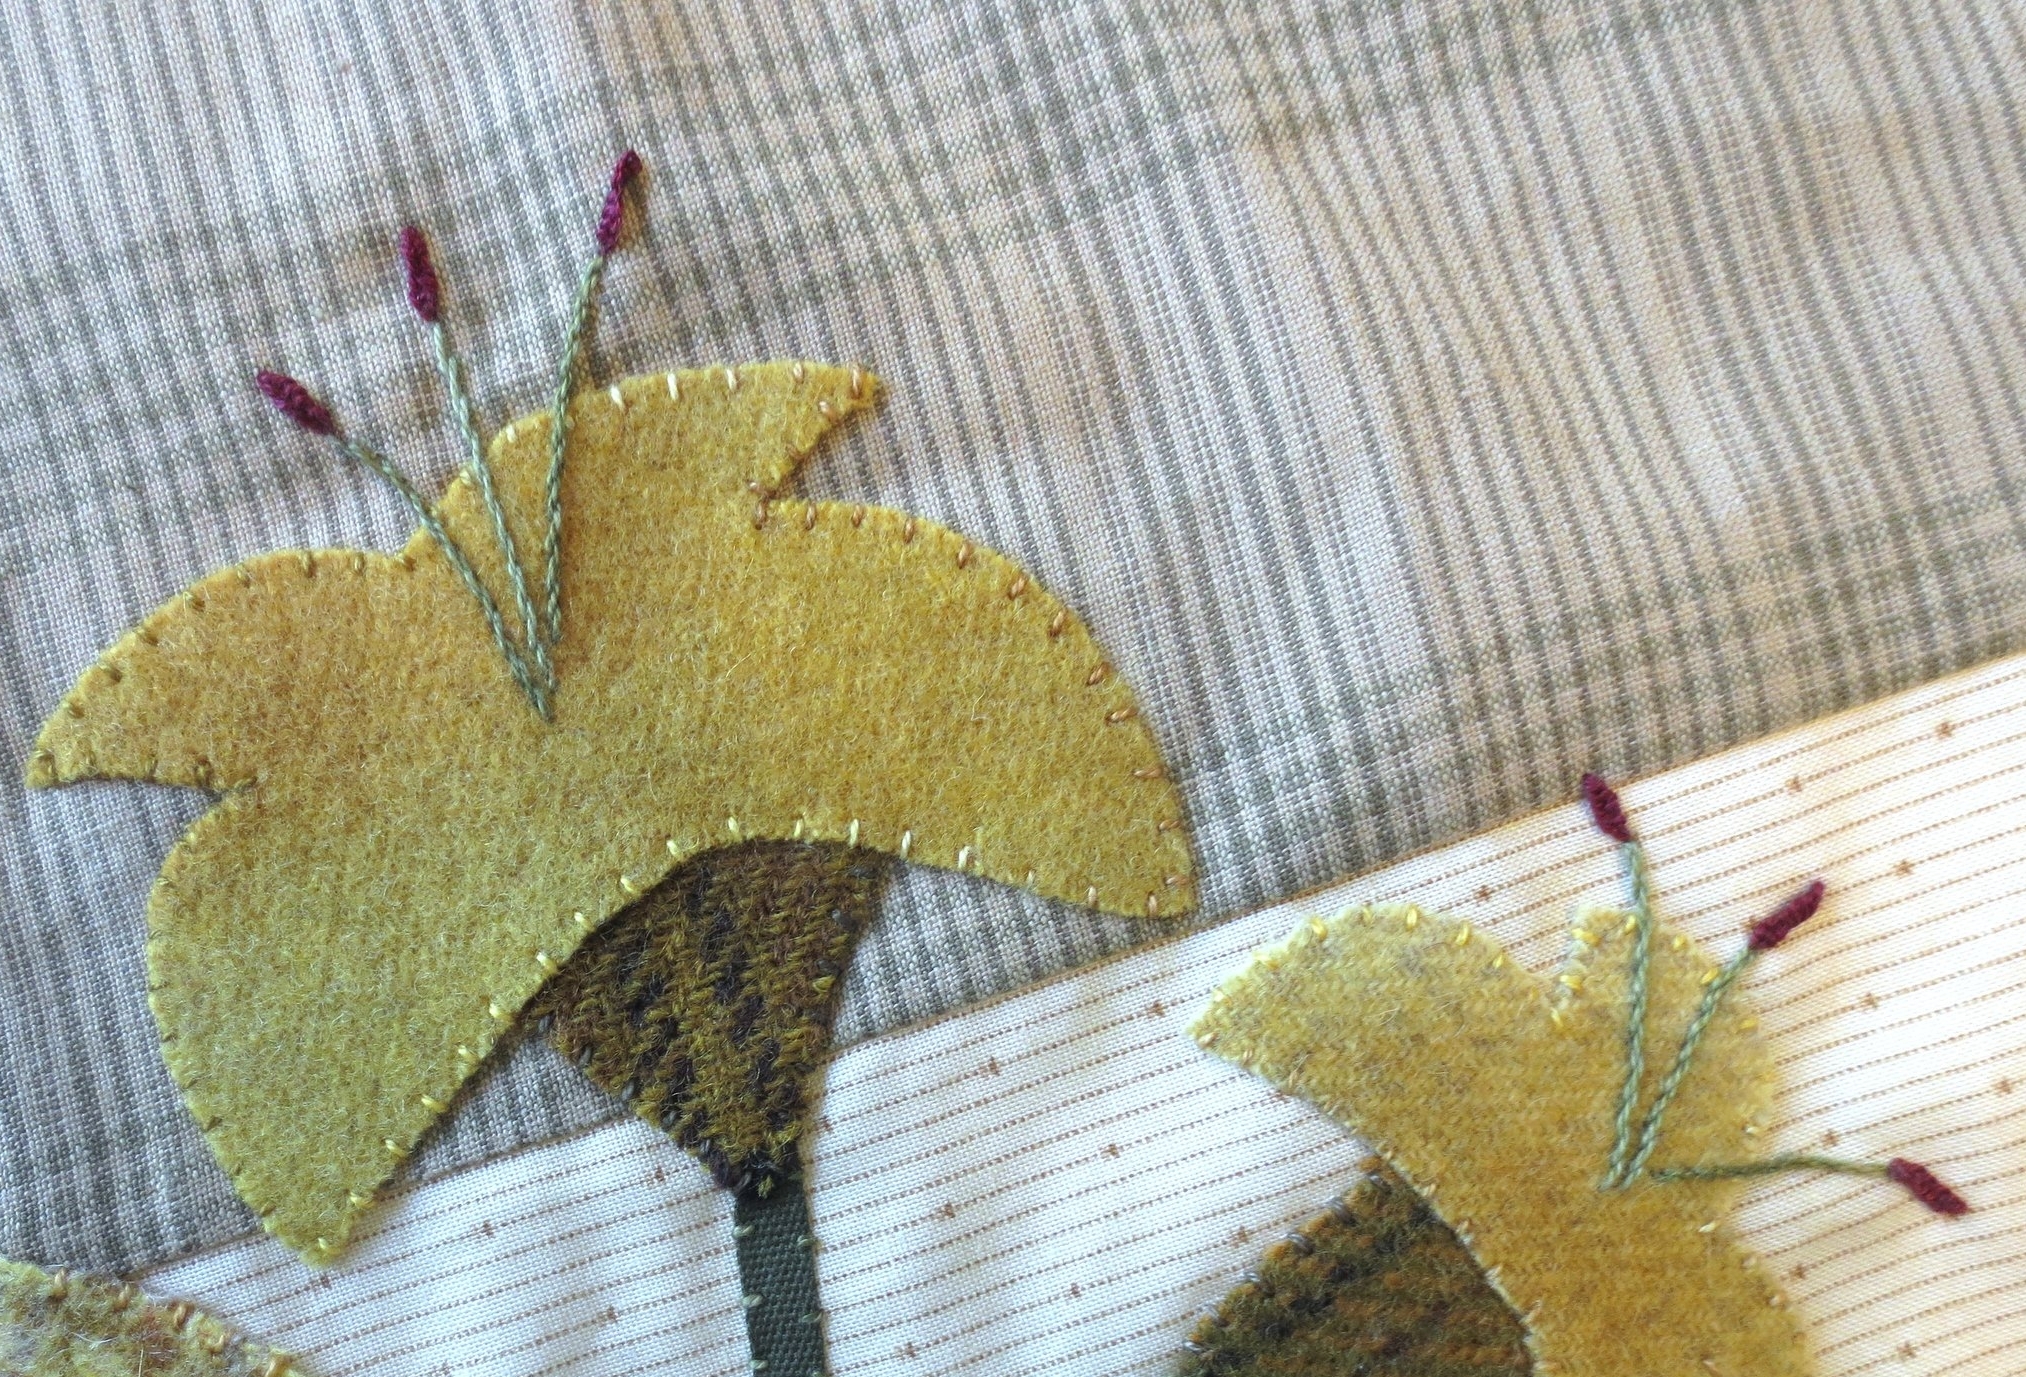
22. Use Valdani perle cotton, size 8, color #O575 to stem stitch the curliques on Flowers #4 & #6.
23. Use the same thread to make coral stitch (see stitch guide) stems on Flowers #4 & #6.
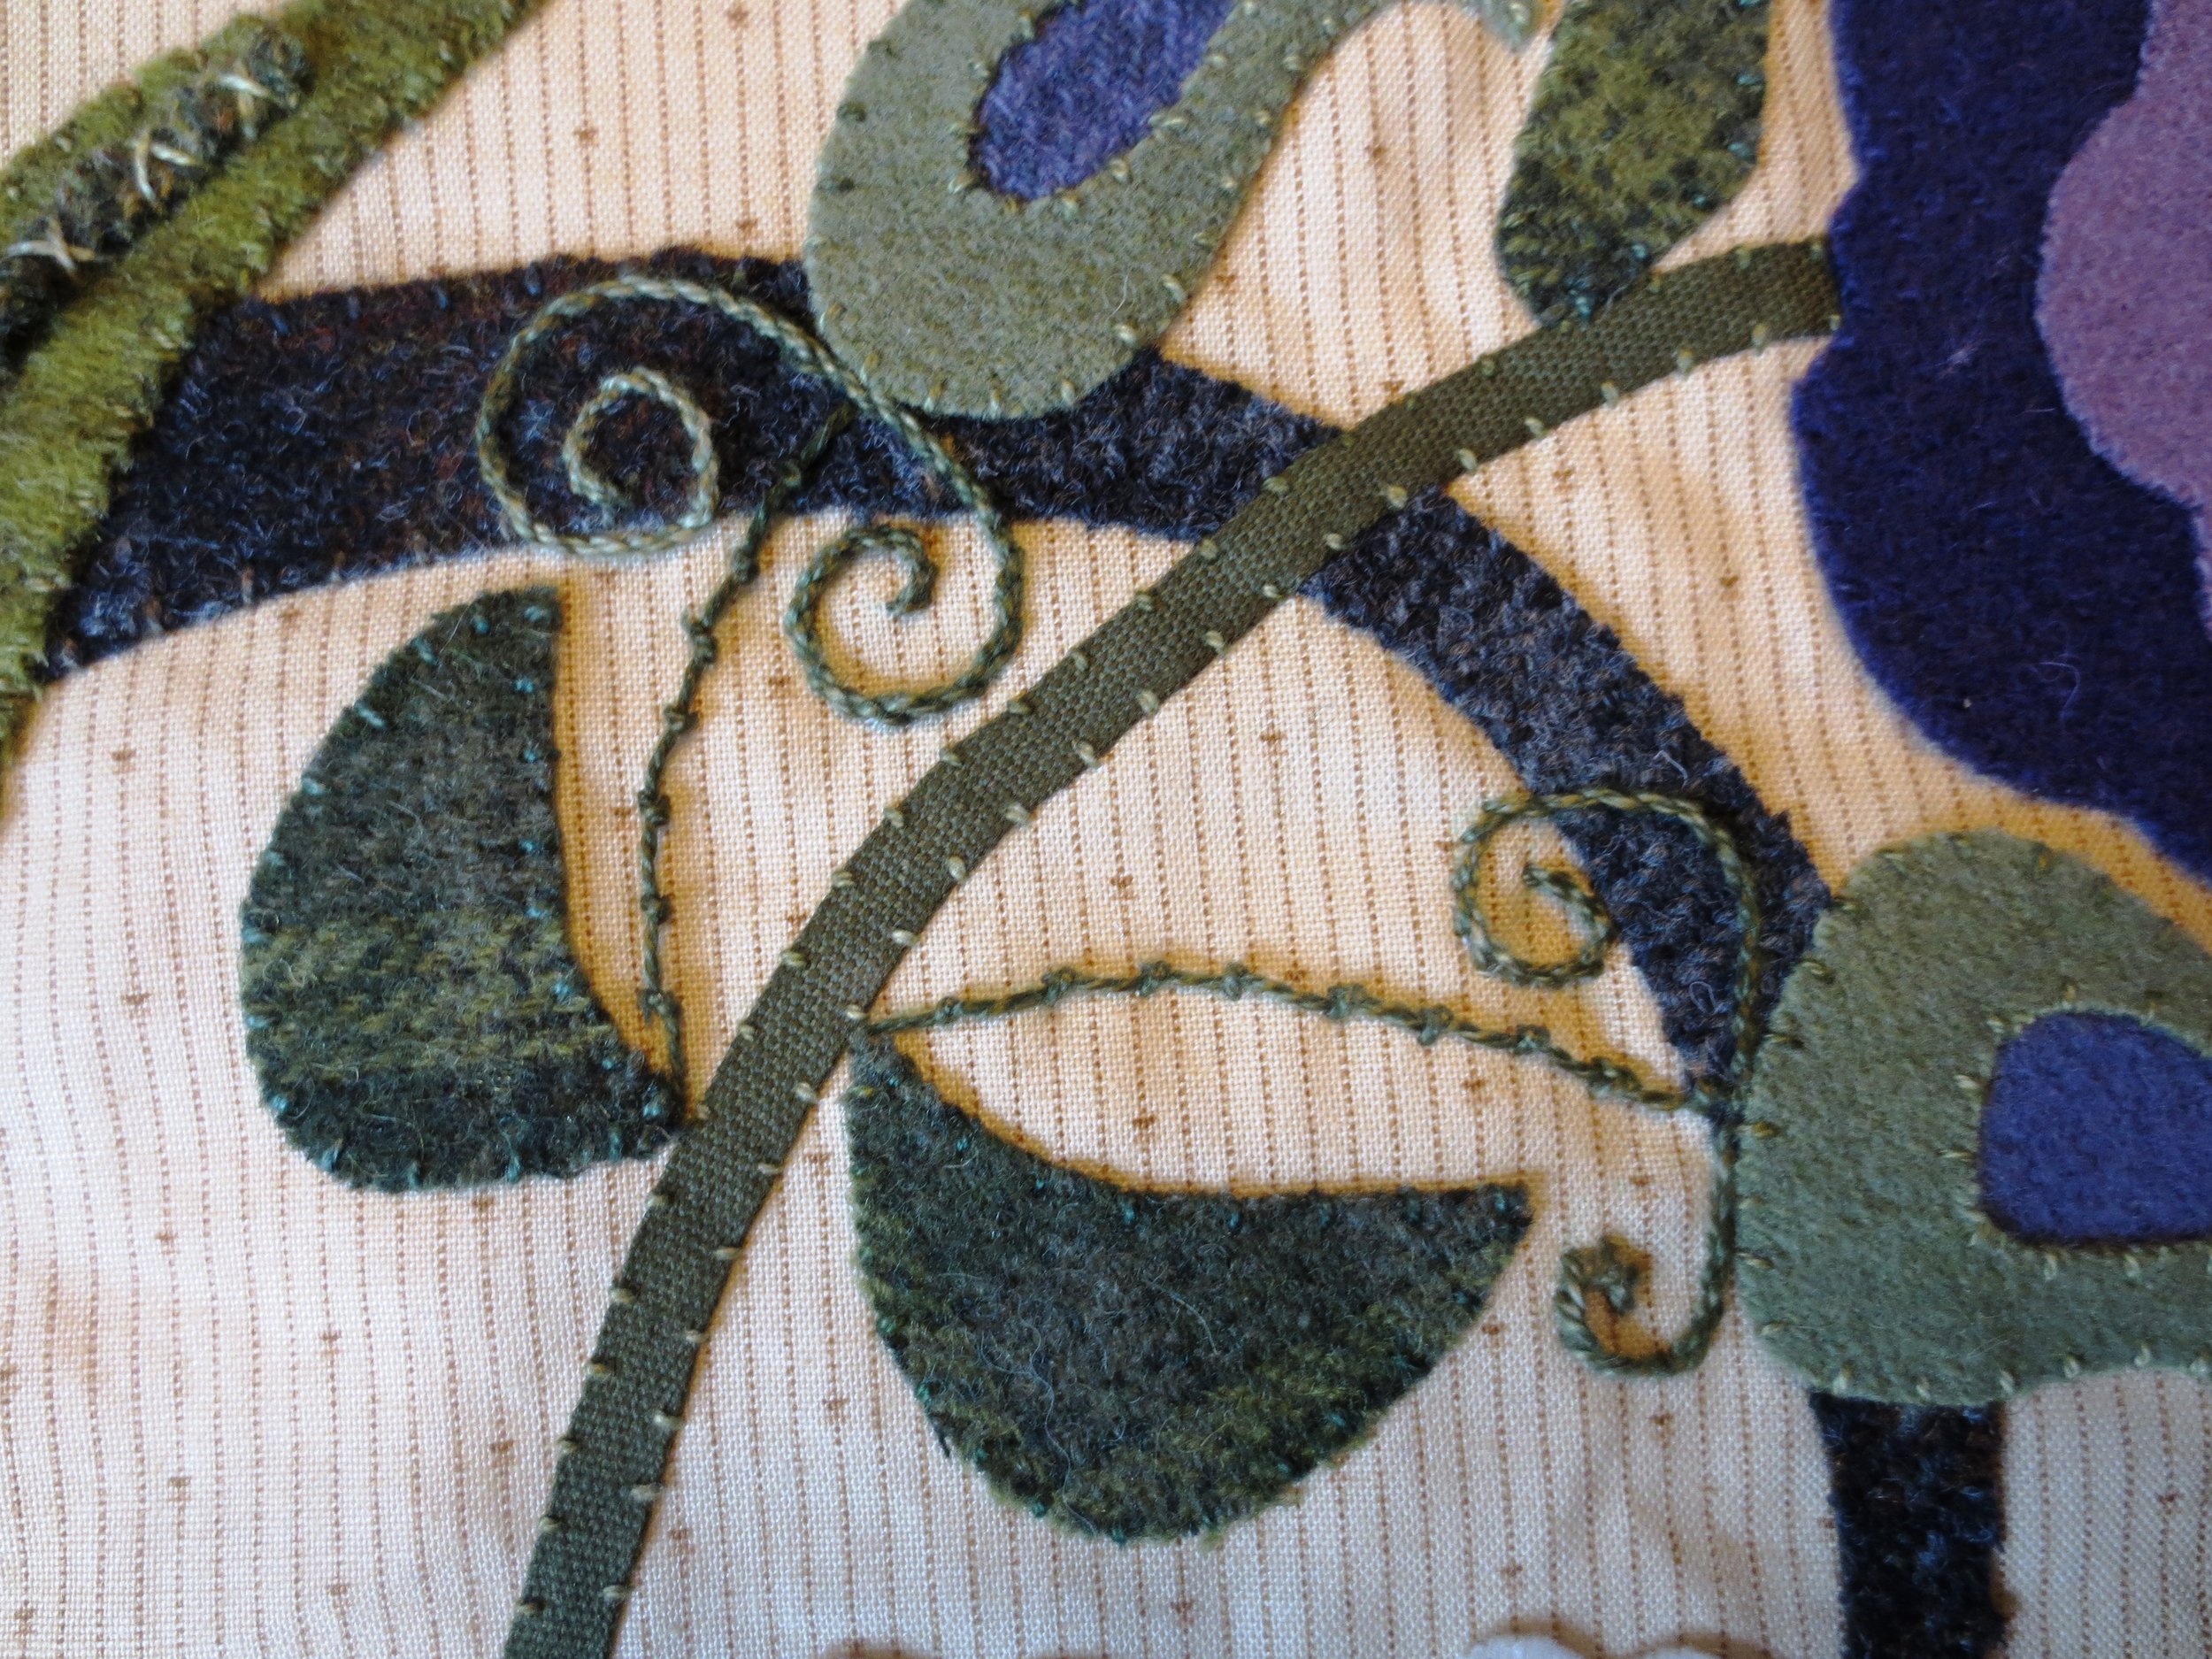
24. Draw veins of leaves C, D & E.
25. Back stitch central veins with thread color lighter than the leaves (#JP8).
26. Stitch two straight stitches that slide under the back stitches for the side veins.
We will finish the strawberries and Flower #5 in the next post.
Happy Stitching!