

Flowers From My Garden Mystery Quilt - Block #2 Part I
This is the second block in a 4 block series for the Flowers From My Garden Mystery Quilt. It is based on a 19th century sampler design by 10- year-old Elizabeth J. Demeritt of Rochester (New Hampshire or Massachusetts). See bottom left of the photograph below.
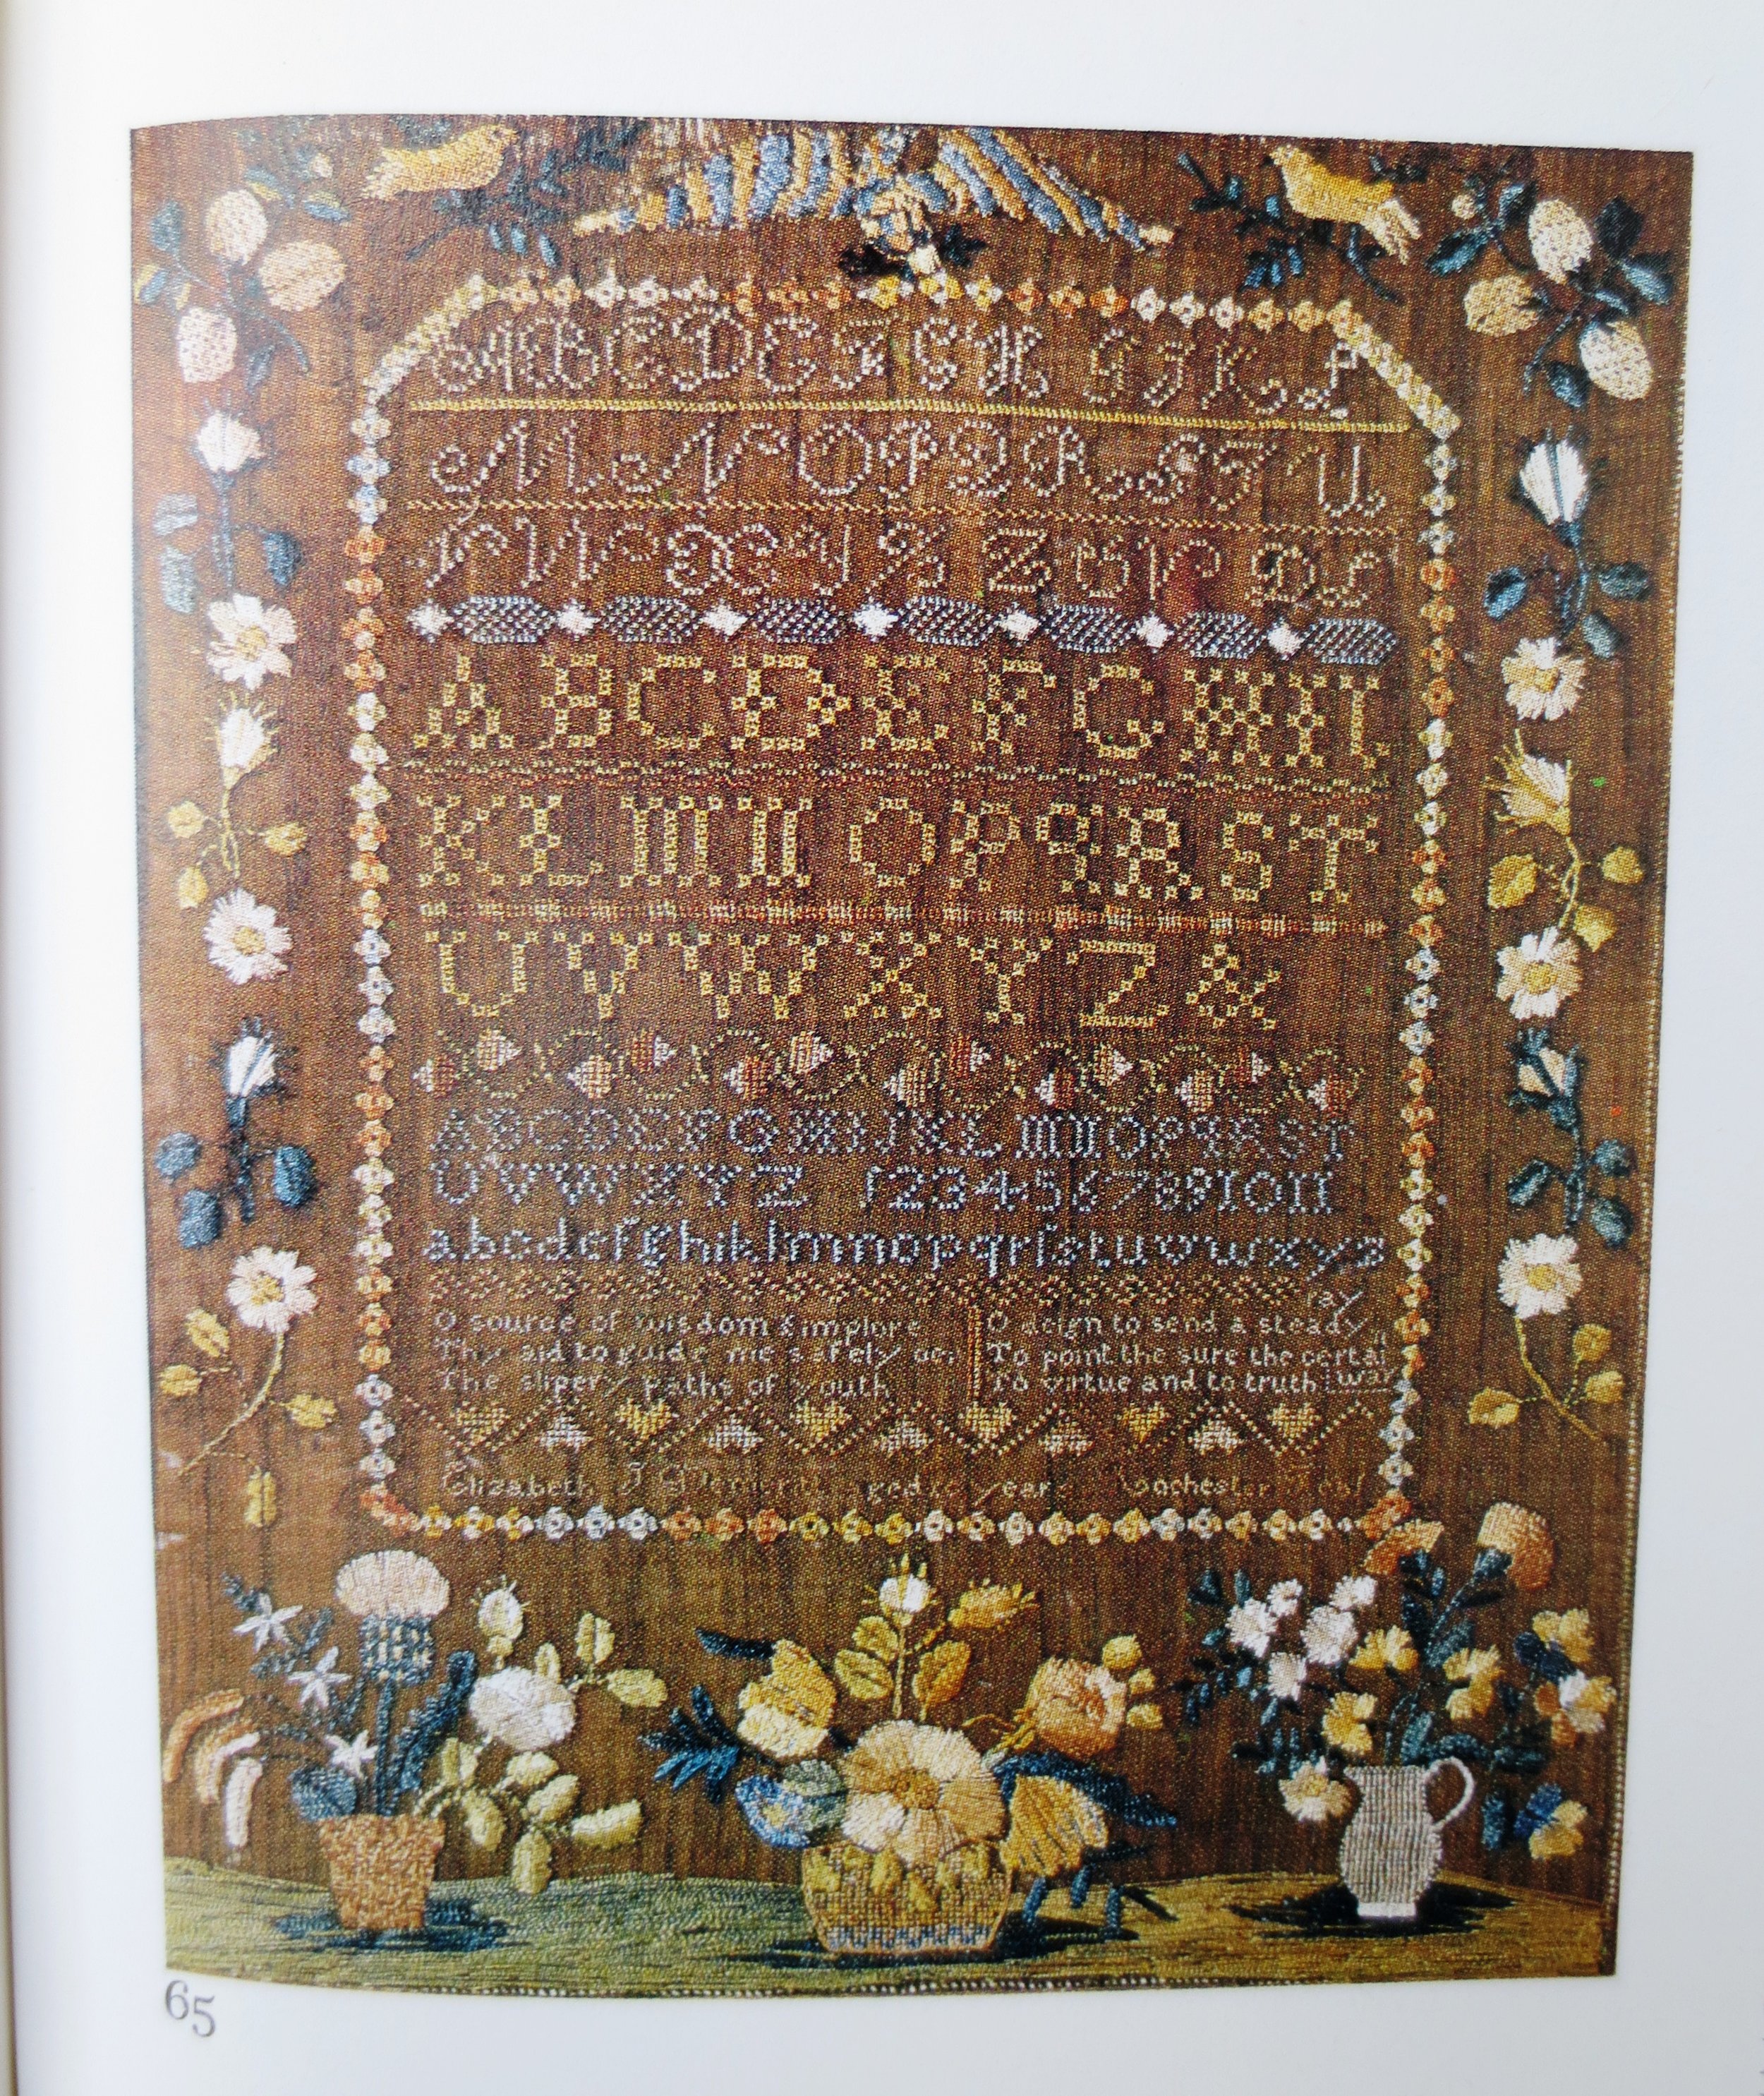
The image is from A Gallery of American Samplers: Therodore H. Kapnek Collection by Glee Krueger, ISBN: 0-517-455927.

A Gallery of American Samplers: The Theodore H. Kapnek Collection
Krueger, Glee F.
The design has less wool and more embroidery stitches than block #1. However, the background is the same as the first block (see first post), but it's rotated 180 degrees to the right so that the square within a square is on the upper left.
This block can also be used to make a pillow top for a 16" square pillow like the one below. It was stitched on black wool and fabric was added to the top and bottom with a ribbon and rick rack tongue border.

Flowers From My Garden - Block #2 Pillow
You will need:
Fabric background (see Flowers From My Garden Mystery Quilt - Block #1)
Felted wool - The colors are just recommendations. Your colors may vary.
- Flower pot bottom - 3 1/2" square black green stripe
- Flower pot top and bee body - 3" x 4" black green
- Thistle top - 2 1/2" x 3" purple tweed
- Thistle base - 2" x 2 1/2" yellow green
- Large flower base - 3" square beige/off-white check
- Large flower top - 2 1/2" x 3" colonial blue
- Large flower center - 1" square gold
- Long flowers -3 1/2" square purple check
- Star flowers - 3" x 4" gold
- Leaves 1, 8 & 9 - 3" square green plaid
- Leaves 3, 4 & 7 - 3" square green/burgundy/black plaid
- Leaves 2, 5 & 6 - 3" square yellow green solid
- Bee stripes - 1 1/2" x 2" yellow
- Bee wing #1 - 1" x 1 1/2" beige
- Bee wing #2 - 1" x 1 1/2" off-white
- Caterpillar - 1 1/2" x 3" periwinkle blue herringbone
3/8" wide ribbon, 5" length/green ( I used a dark olive green) - Thistle stem
Thread
- Perle cotton, size 12 in colors that match wool and thistle stem colors - whip stitching
- Perle cotton, size 12 in a green color that contrasts with the green of the leaves - veins of leaves
- Embroidery floss - yellow that matches bee stripes (Perle cotton, size 12 tends to overpower small wool pieces, so I use 2 strands of embroidery floss instead.)
- Perle cotton, size 8 - In two shades that compliments leaf color - leaf and flower stems. (I used Valdani #O519, and #O518)
Miscellaneous
- Featherweight fusible web
- Chenille needles, sizes 22 & 24
- Chalk pencil
- Steam iron
- Light box (optional)
Instructions - Use one strand of thread unless otherwise noted.
- Download Flowers From My Garden - Block #2 Layout, Pattern #1, Pattern #2. If you haven't downloaded the stitch guide from the first post, you can do so here: Butternut Plaid Stitch Guide. The layout has been reduced to 70% of it's actual size. If you have a printer that prints 11" x 17" paper increase the size to 130%. Alternatively, you can put it on a thumb drive and take it to your local copy store to have it printed full size.
- Trace patterns onto fusible web (images are reversed for use with fusible web).
- Cut out leaving a small border around each outline.
- Fuse to desired wool.
- Cut out along outline.
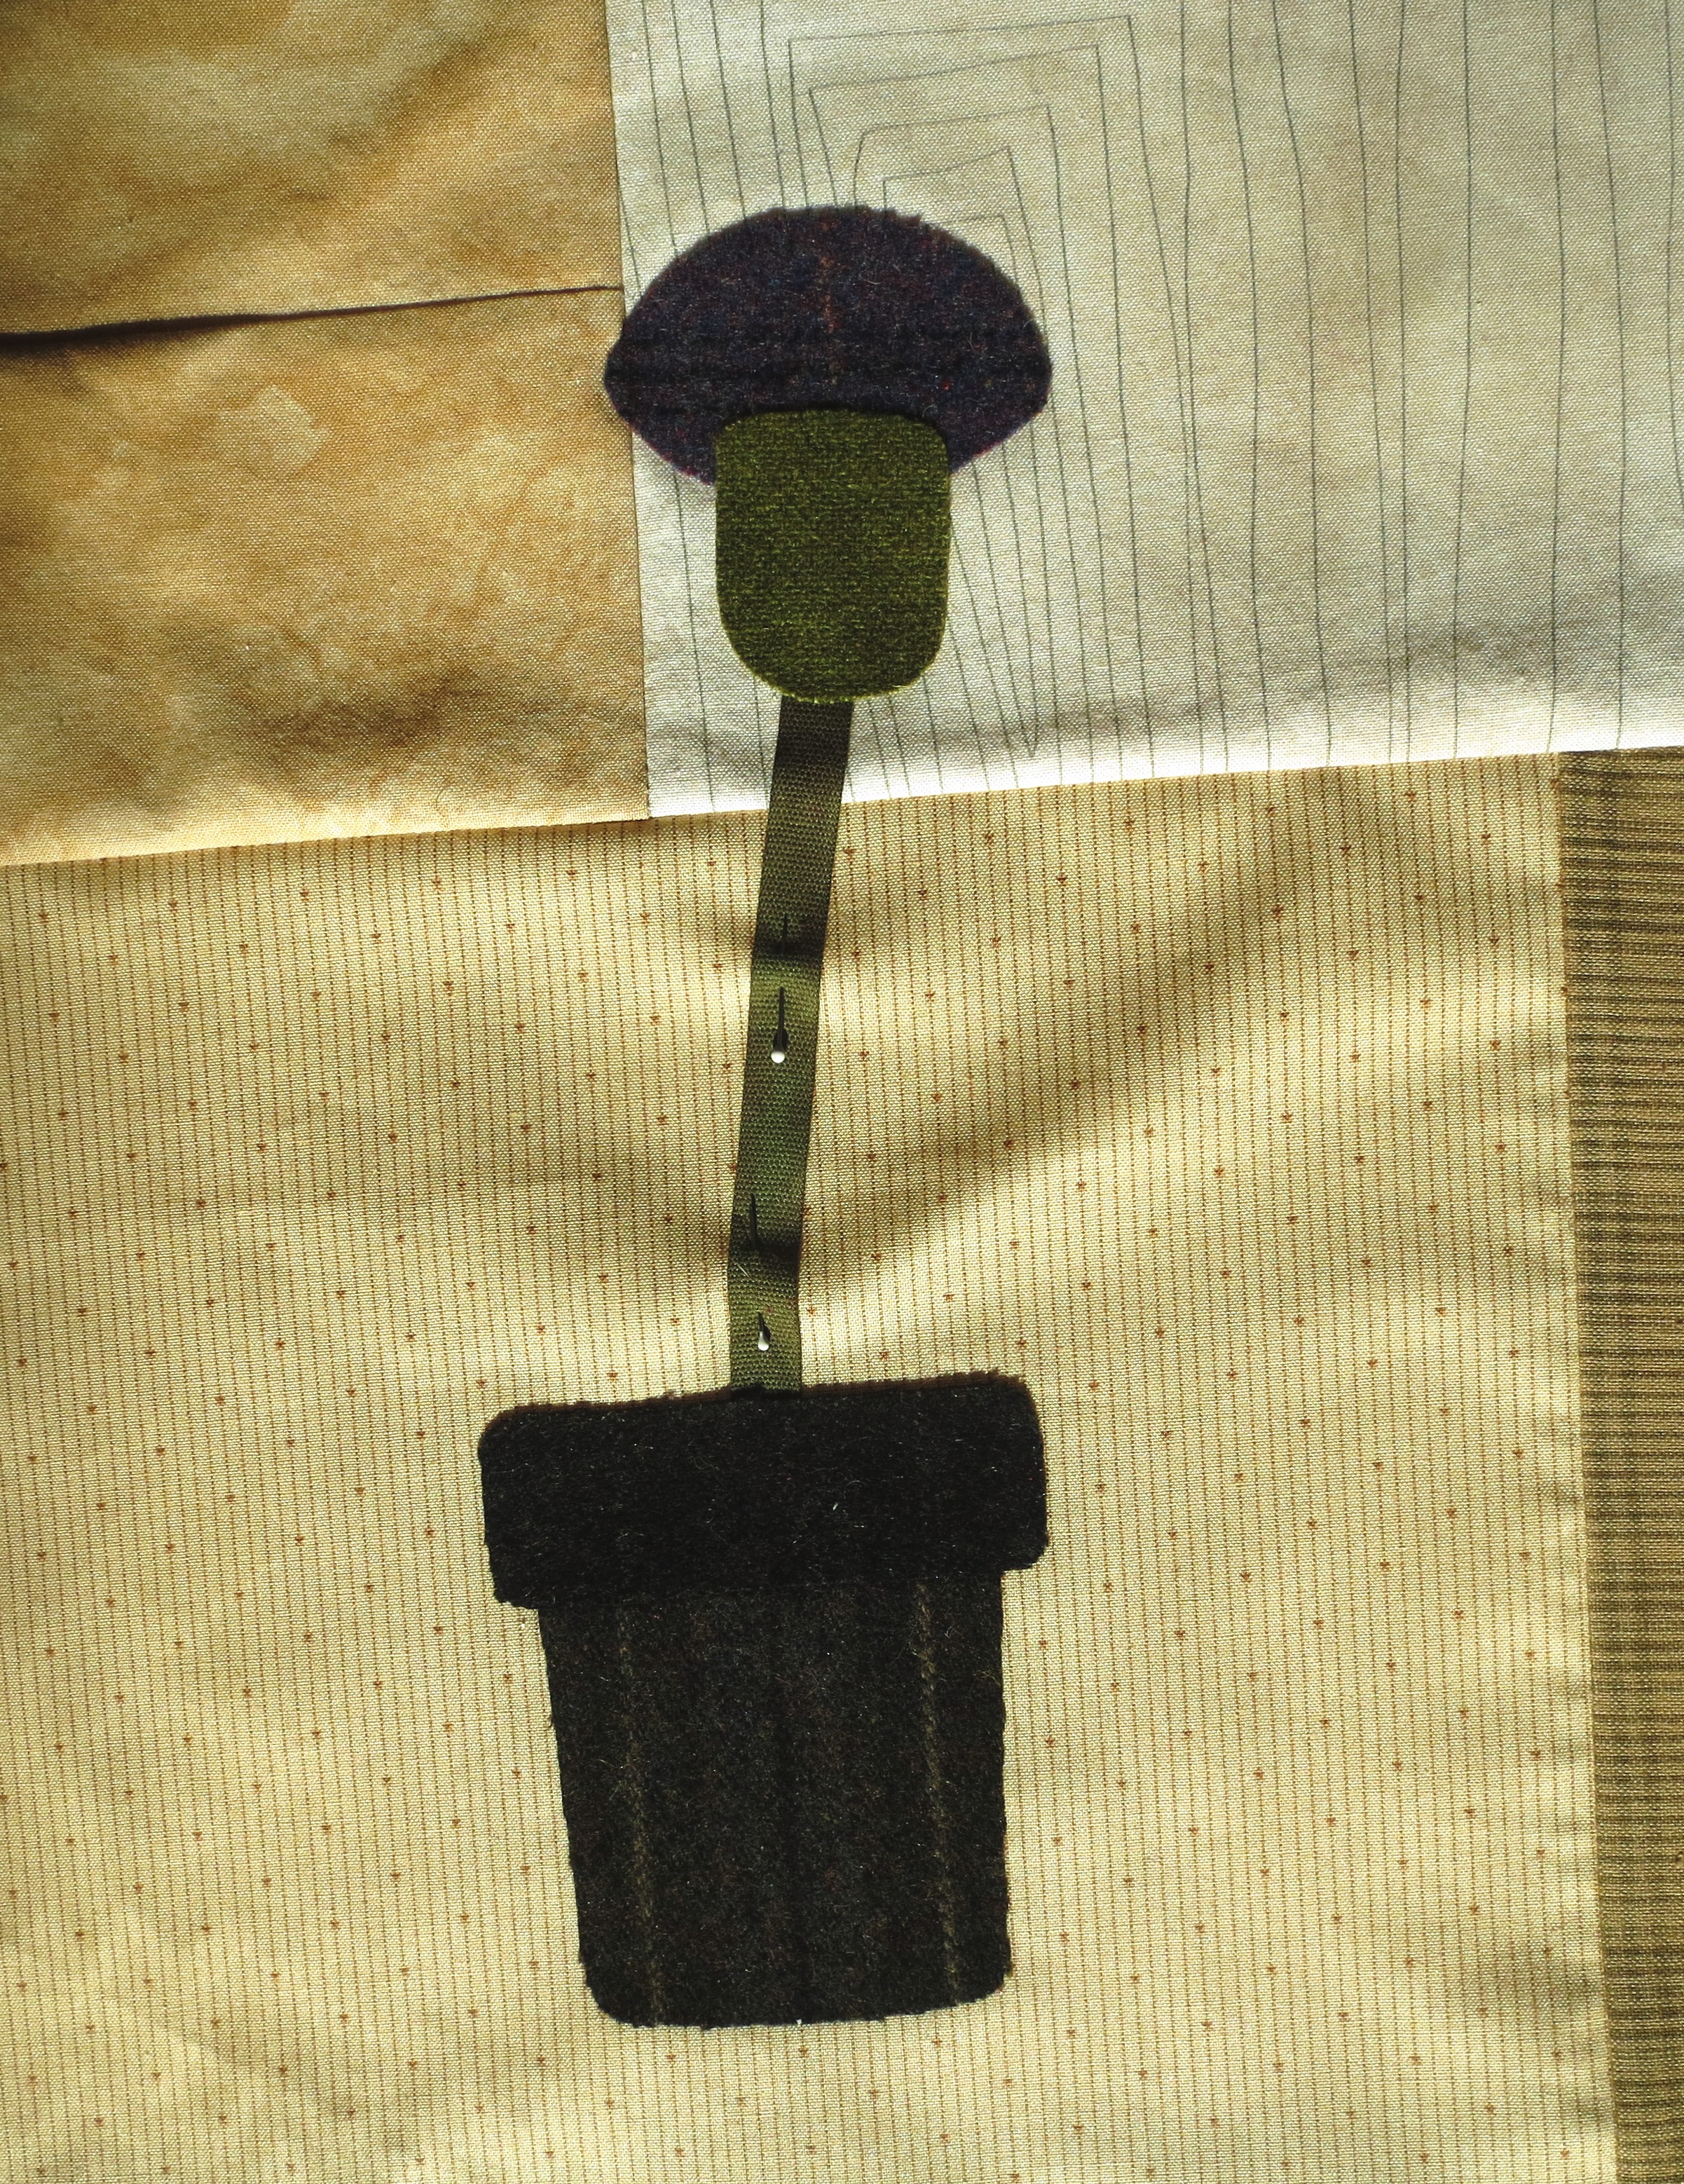
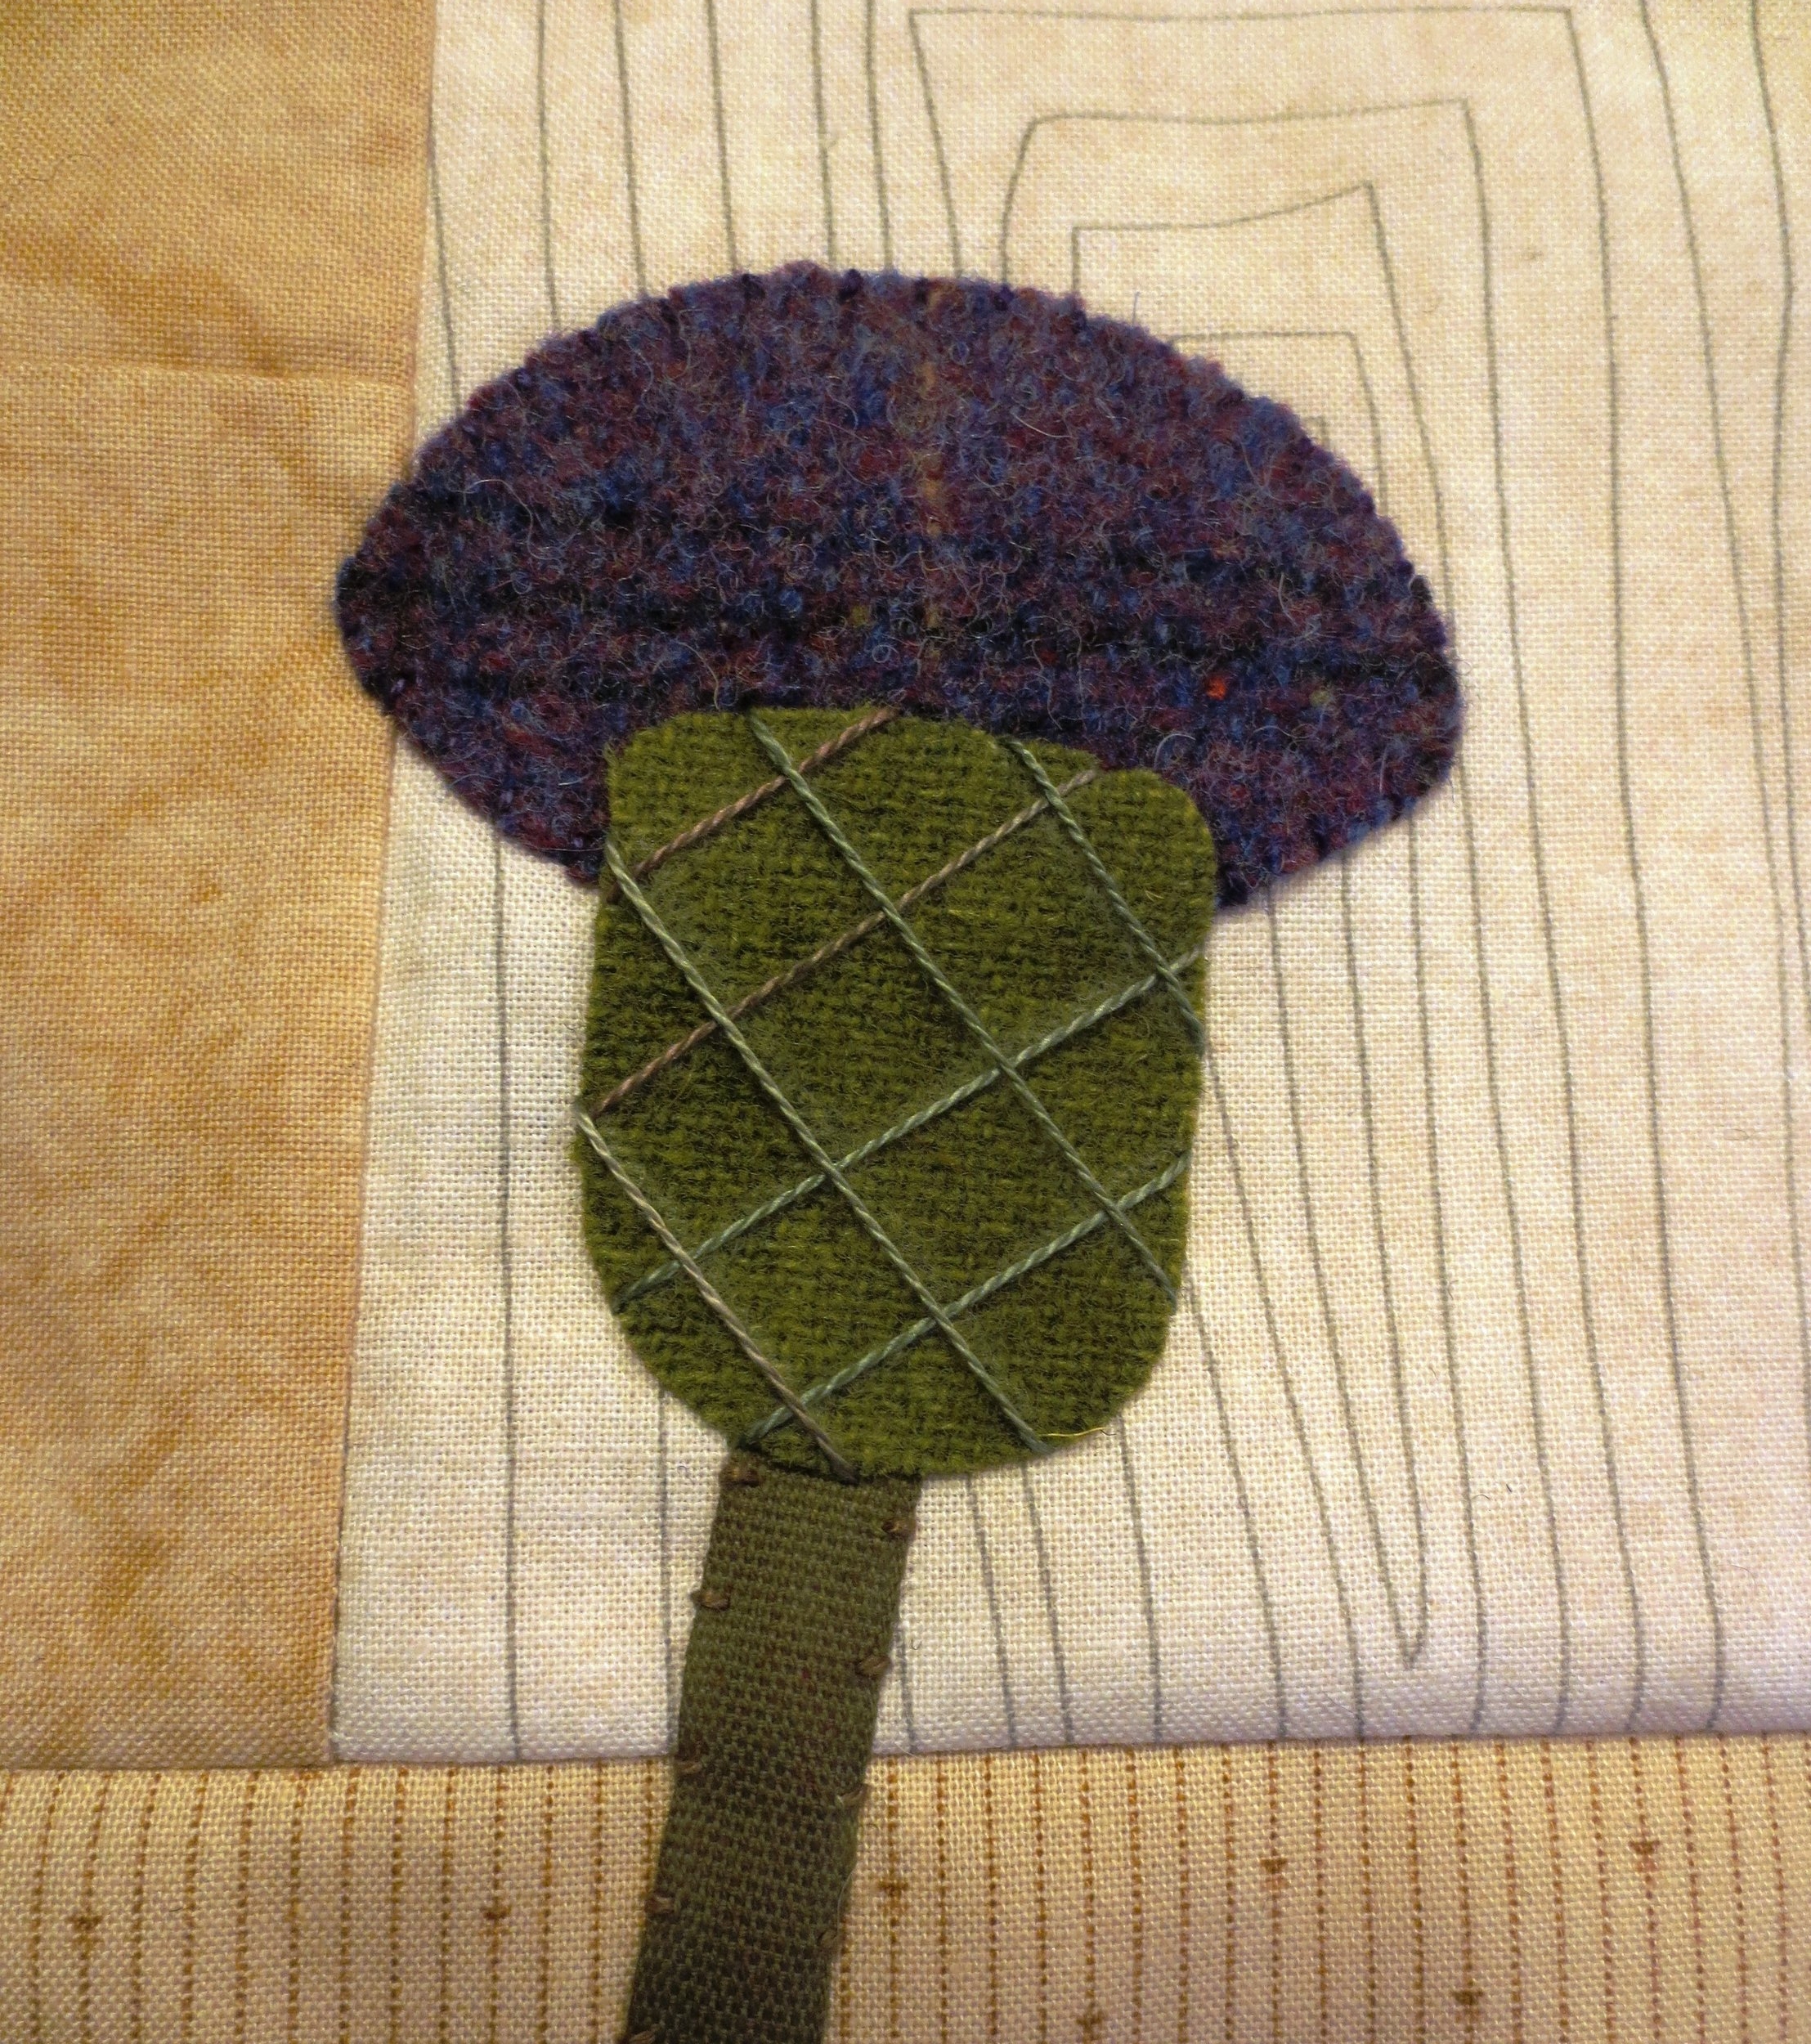
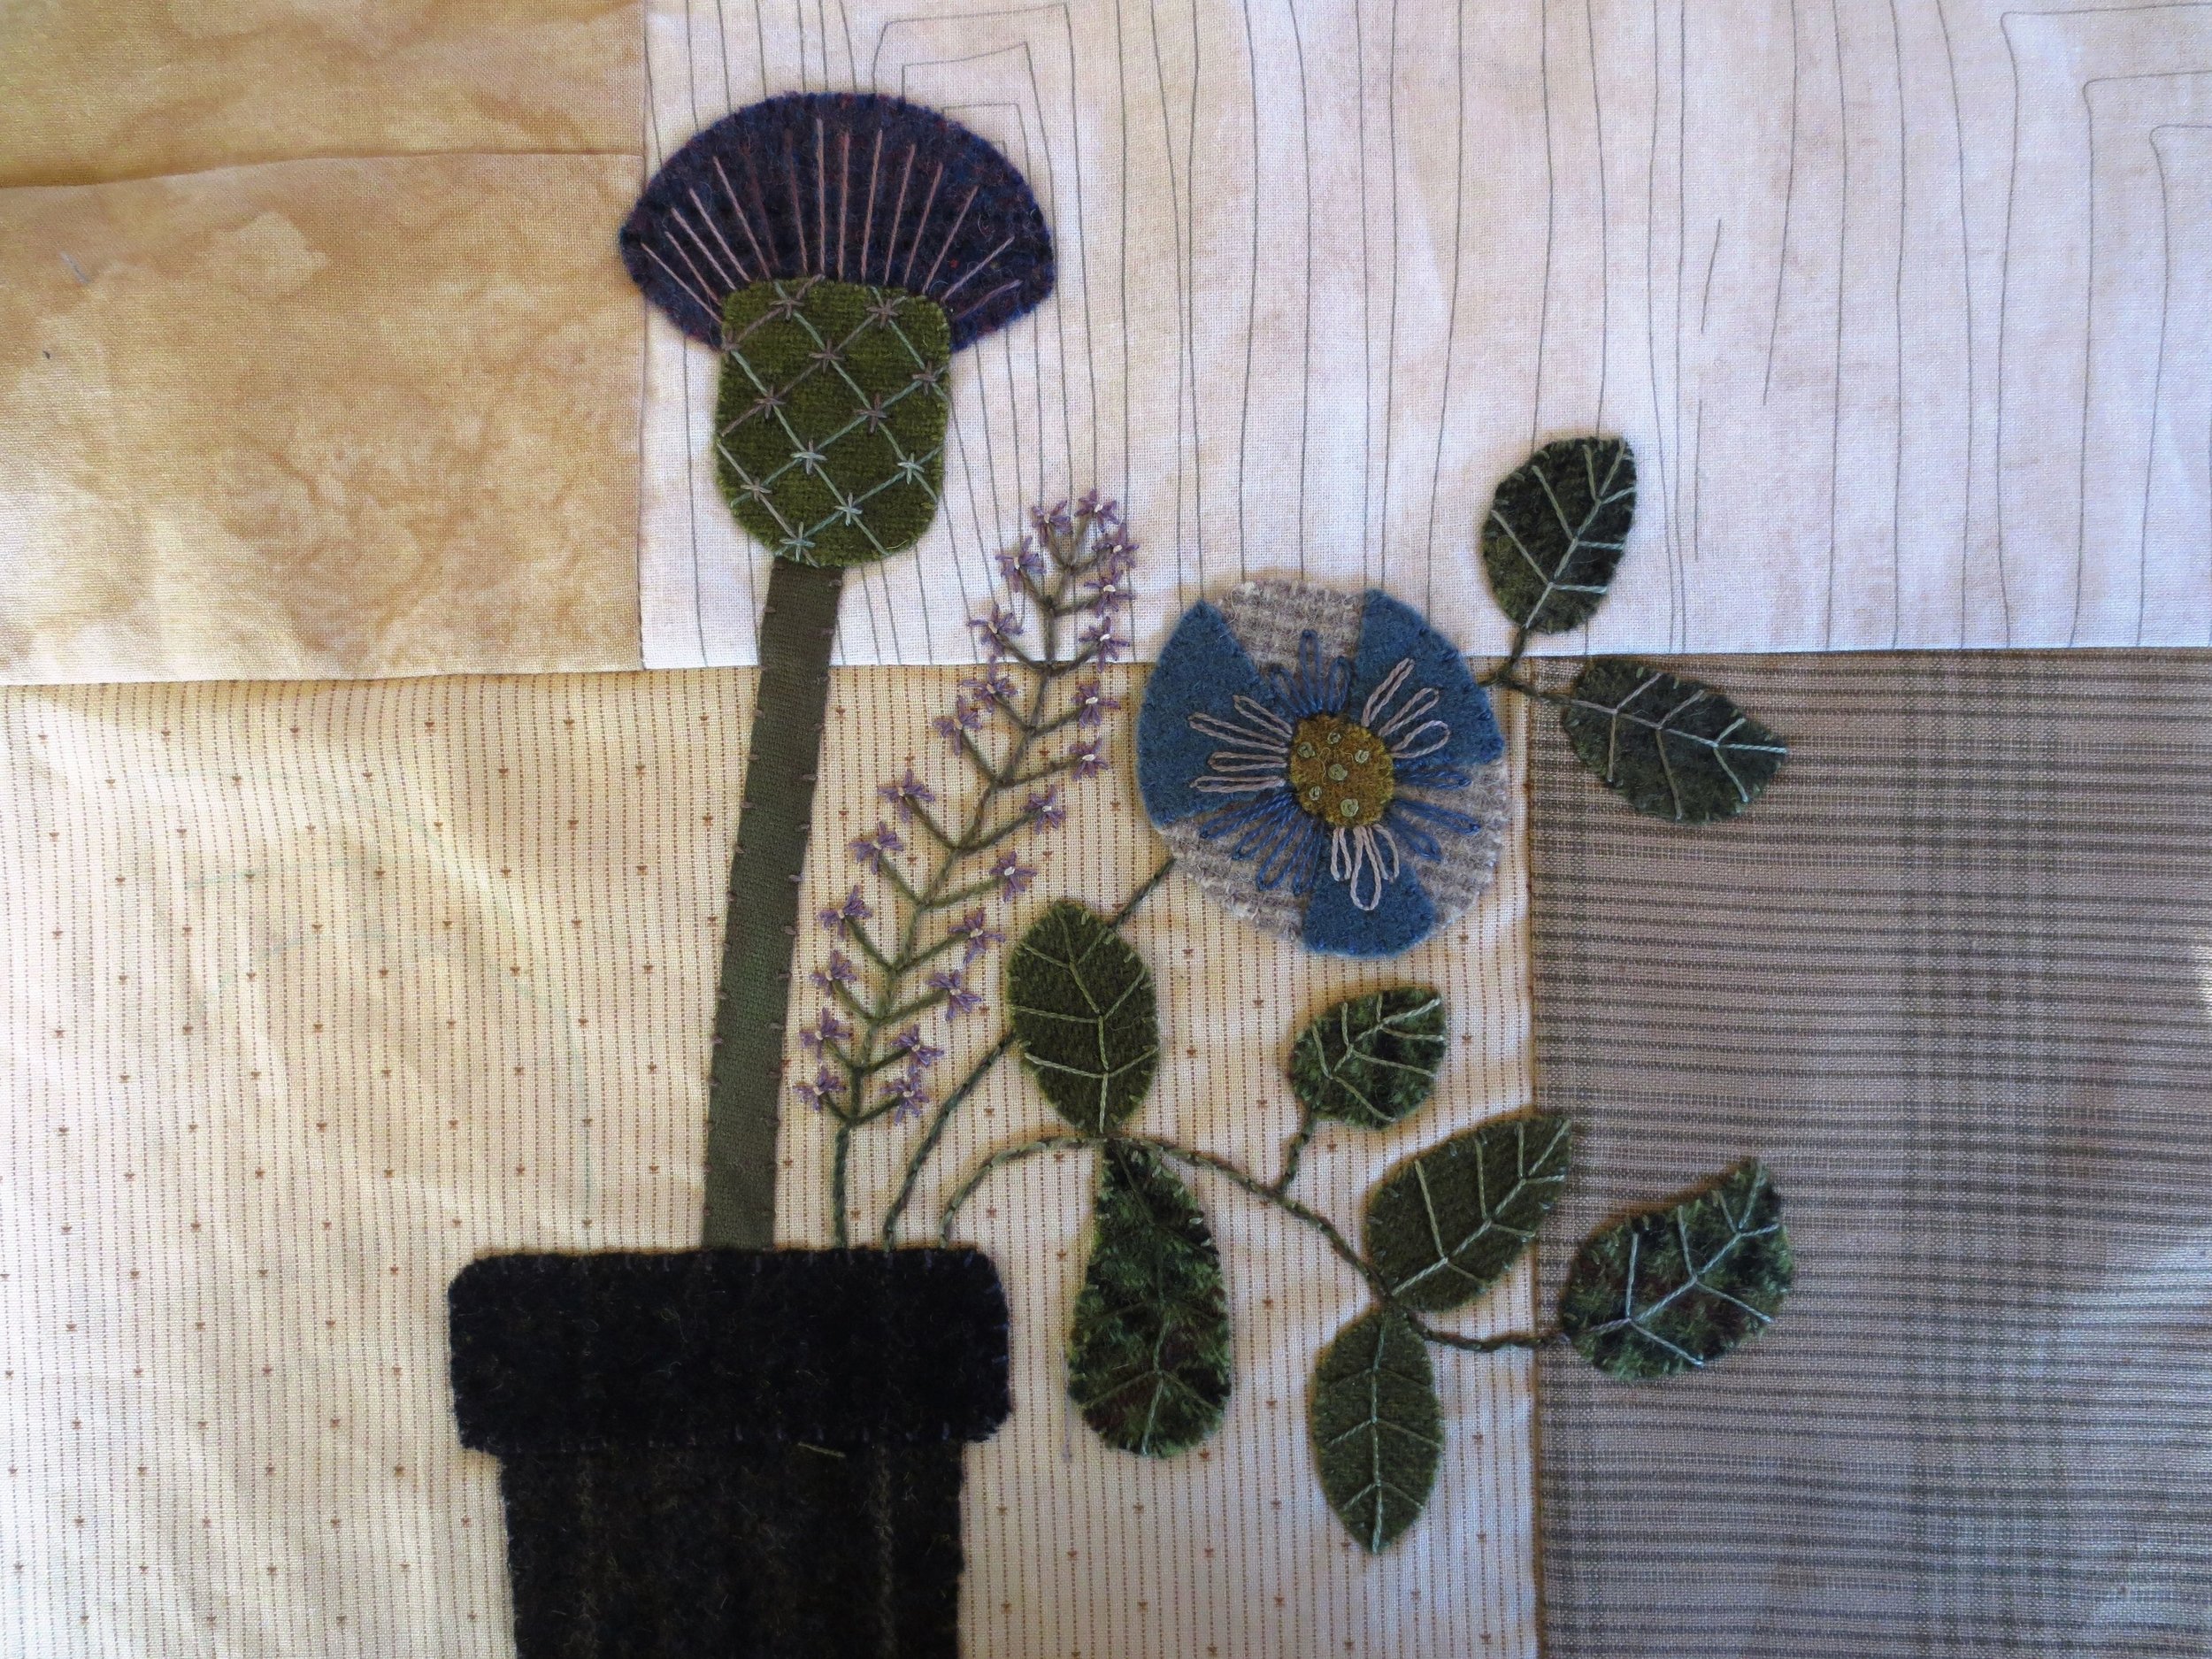
- Lay out the flower pot and thistle base, top, and stem. I made my stem a little longer than the picture (about 4 ") with approximately 1/2" of each end tucked under the flower pot top and thistle base. Lengthening the stem filled the space better. Pin the stem in place. Note: This is where a light box comes in handy. Lay your full sized layout on the light box, then center your background block on top. You should be able to see the layout through the fabric. This makes positioning of your pattern pieces a breeze.
- Fuse the thistle and flower pot in place using steam.
- Whip stitch the stem in place first, then the flower pot and thistle.
9. Using a chalk pencil, draw 4 parallel diagonal lines approximately 3/8" apart on the thistle base (see layout for placement).
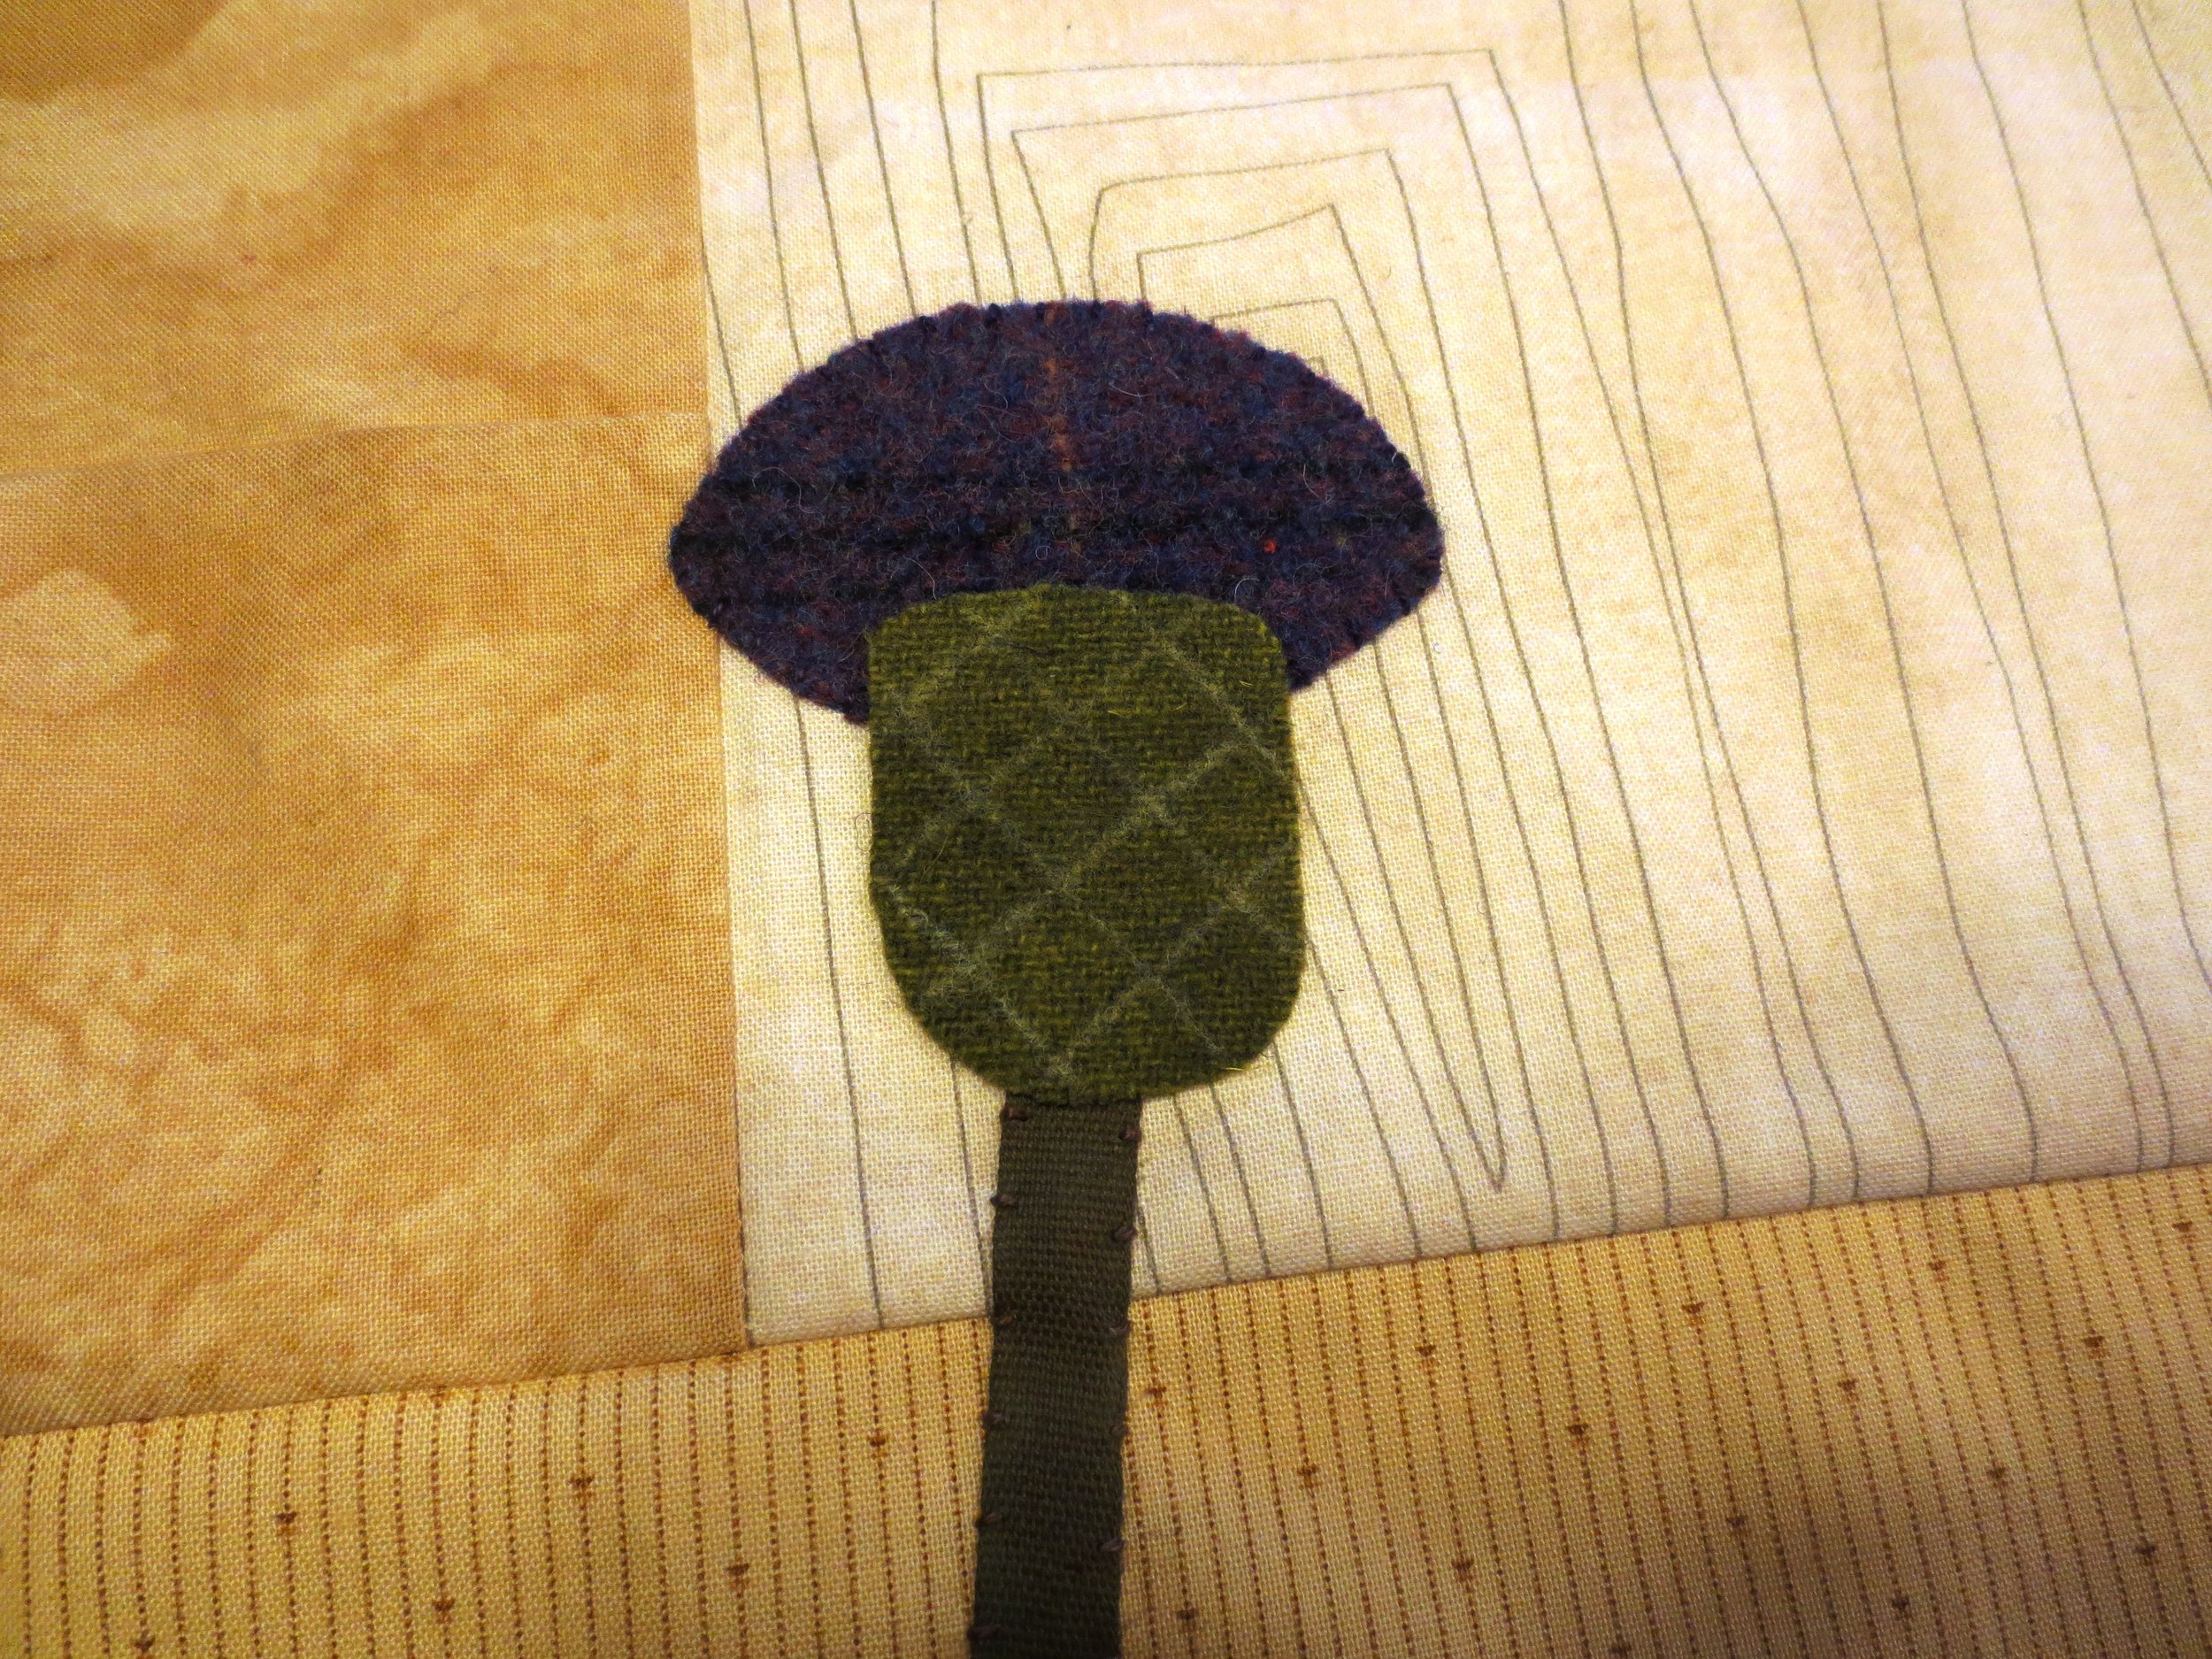
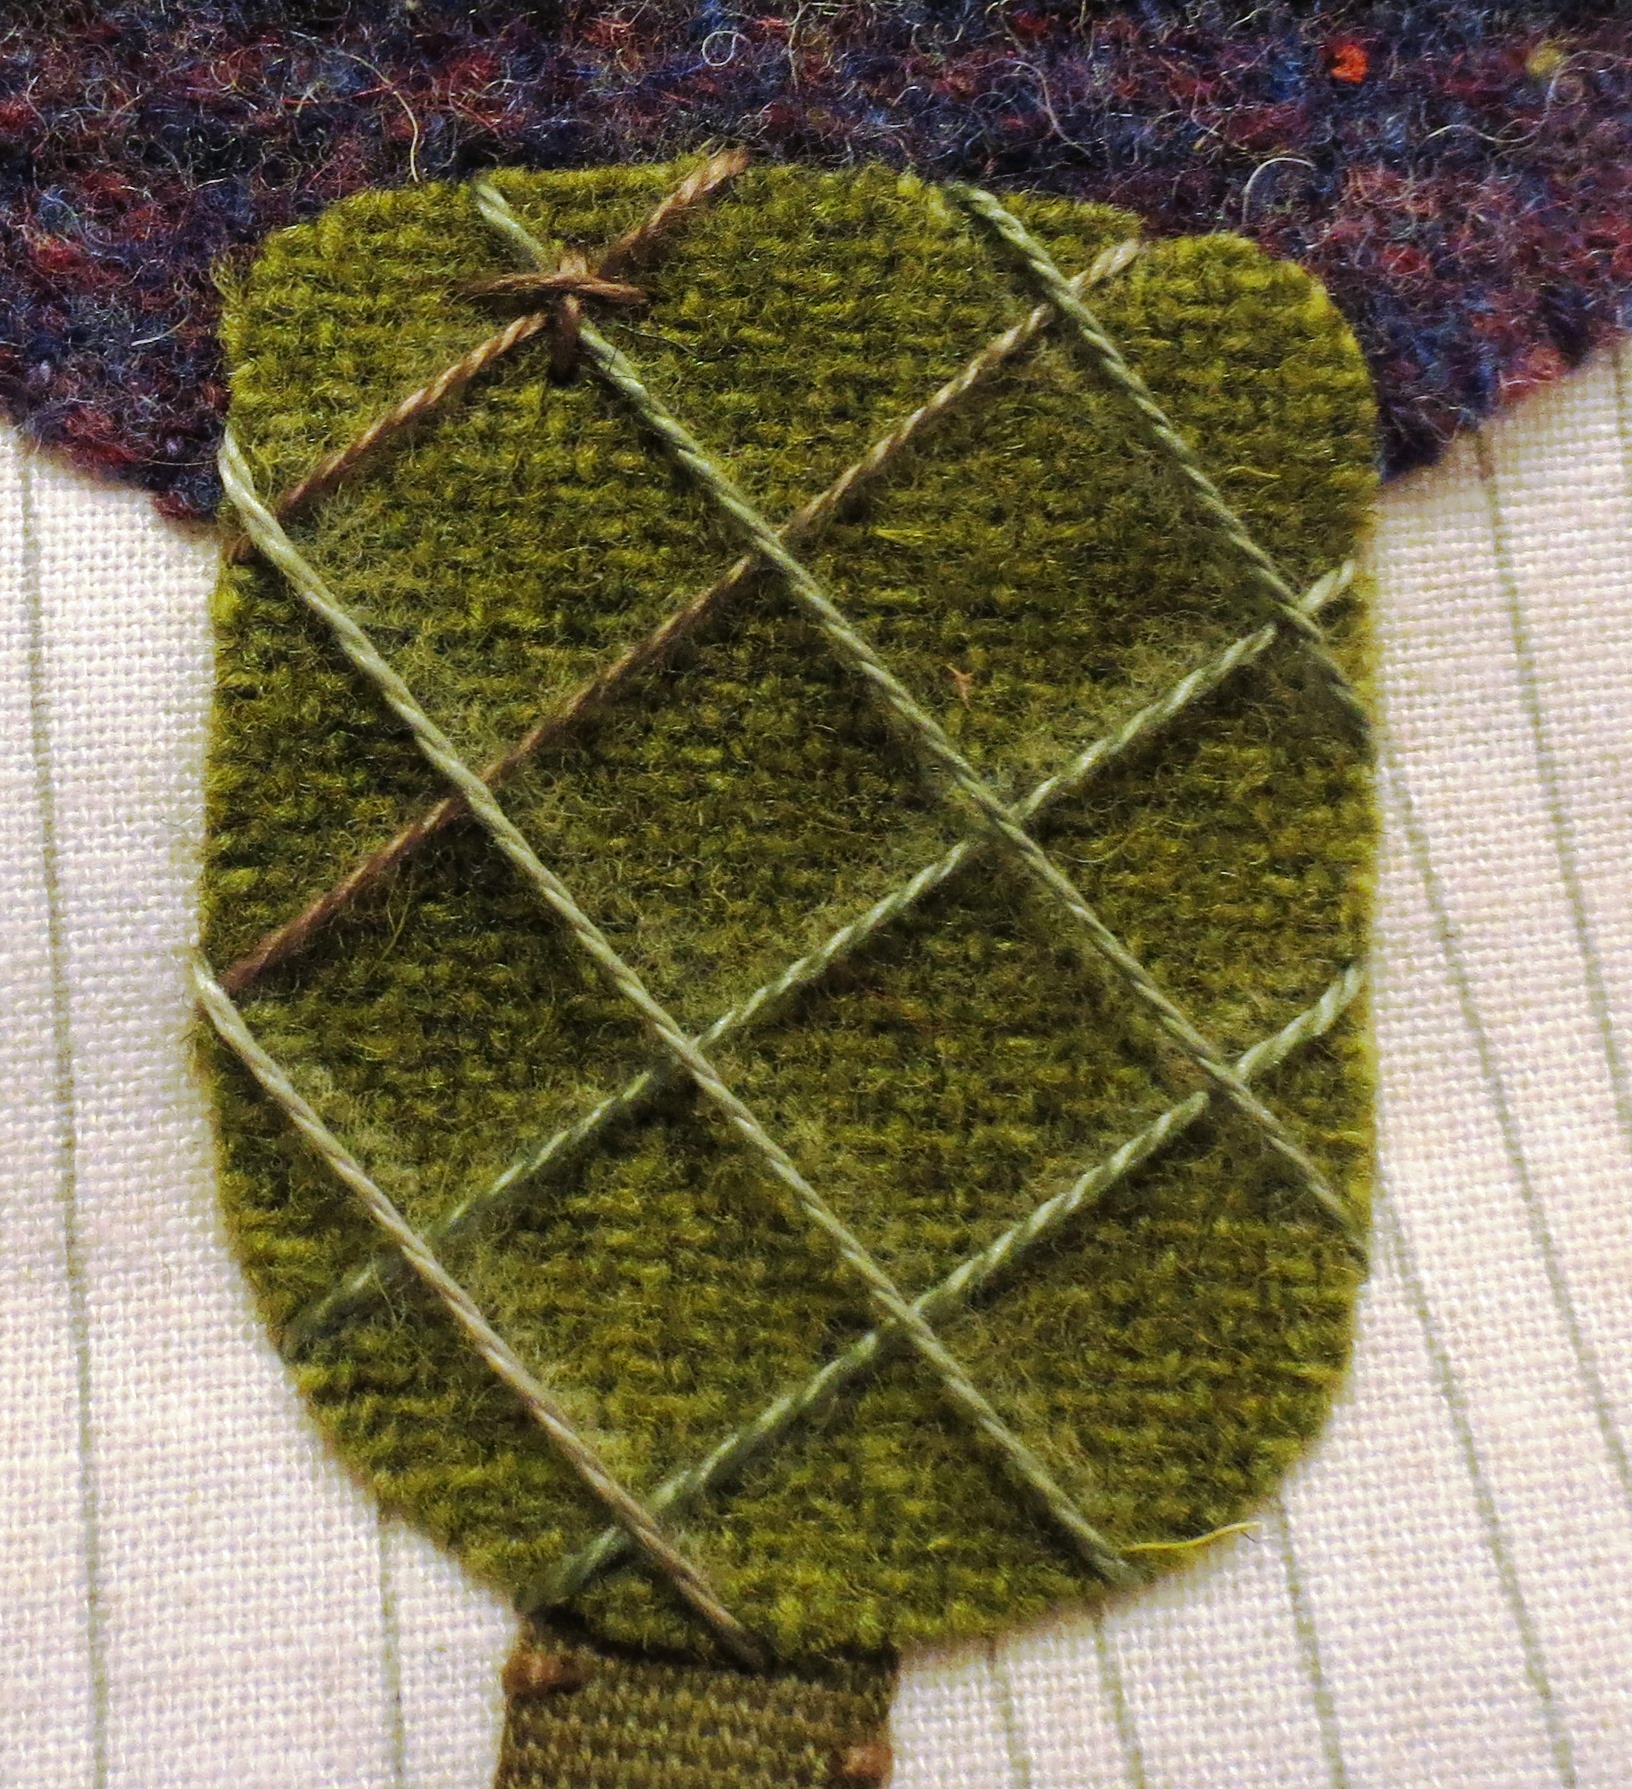
10. Use a perle cotton, size 12 in a contrasting color (I used Valdani #O565) to stitch long straight stitches over the chalk lines to create a grid pattern.
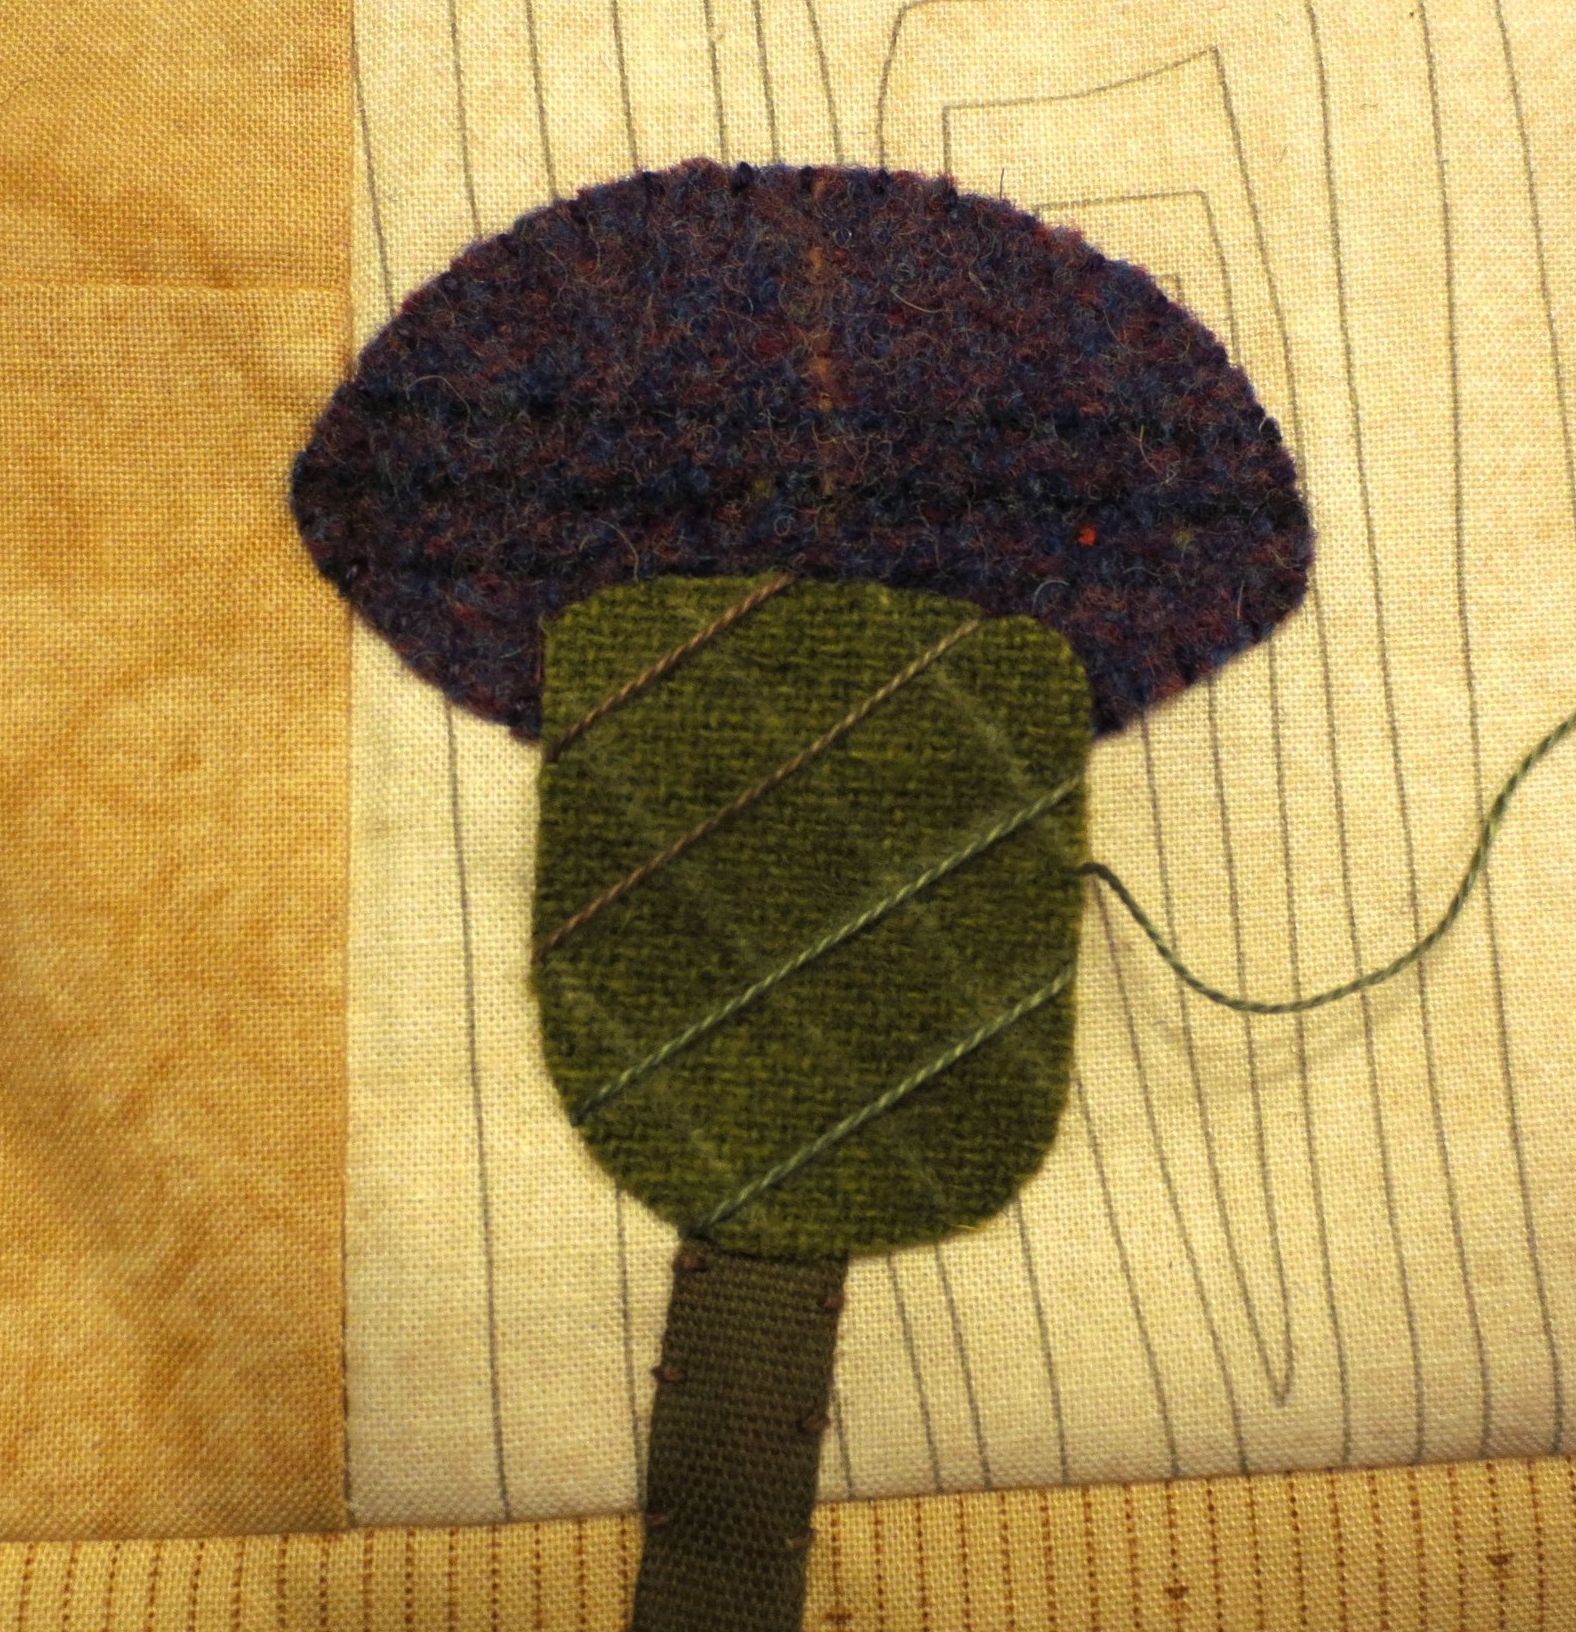
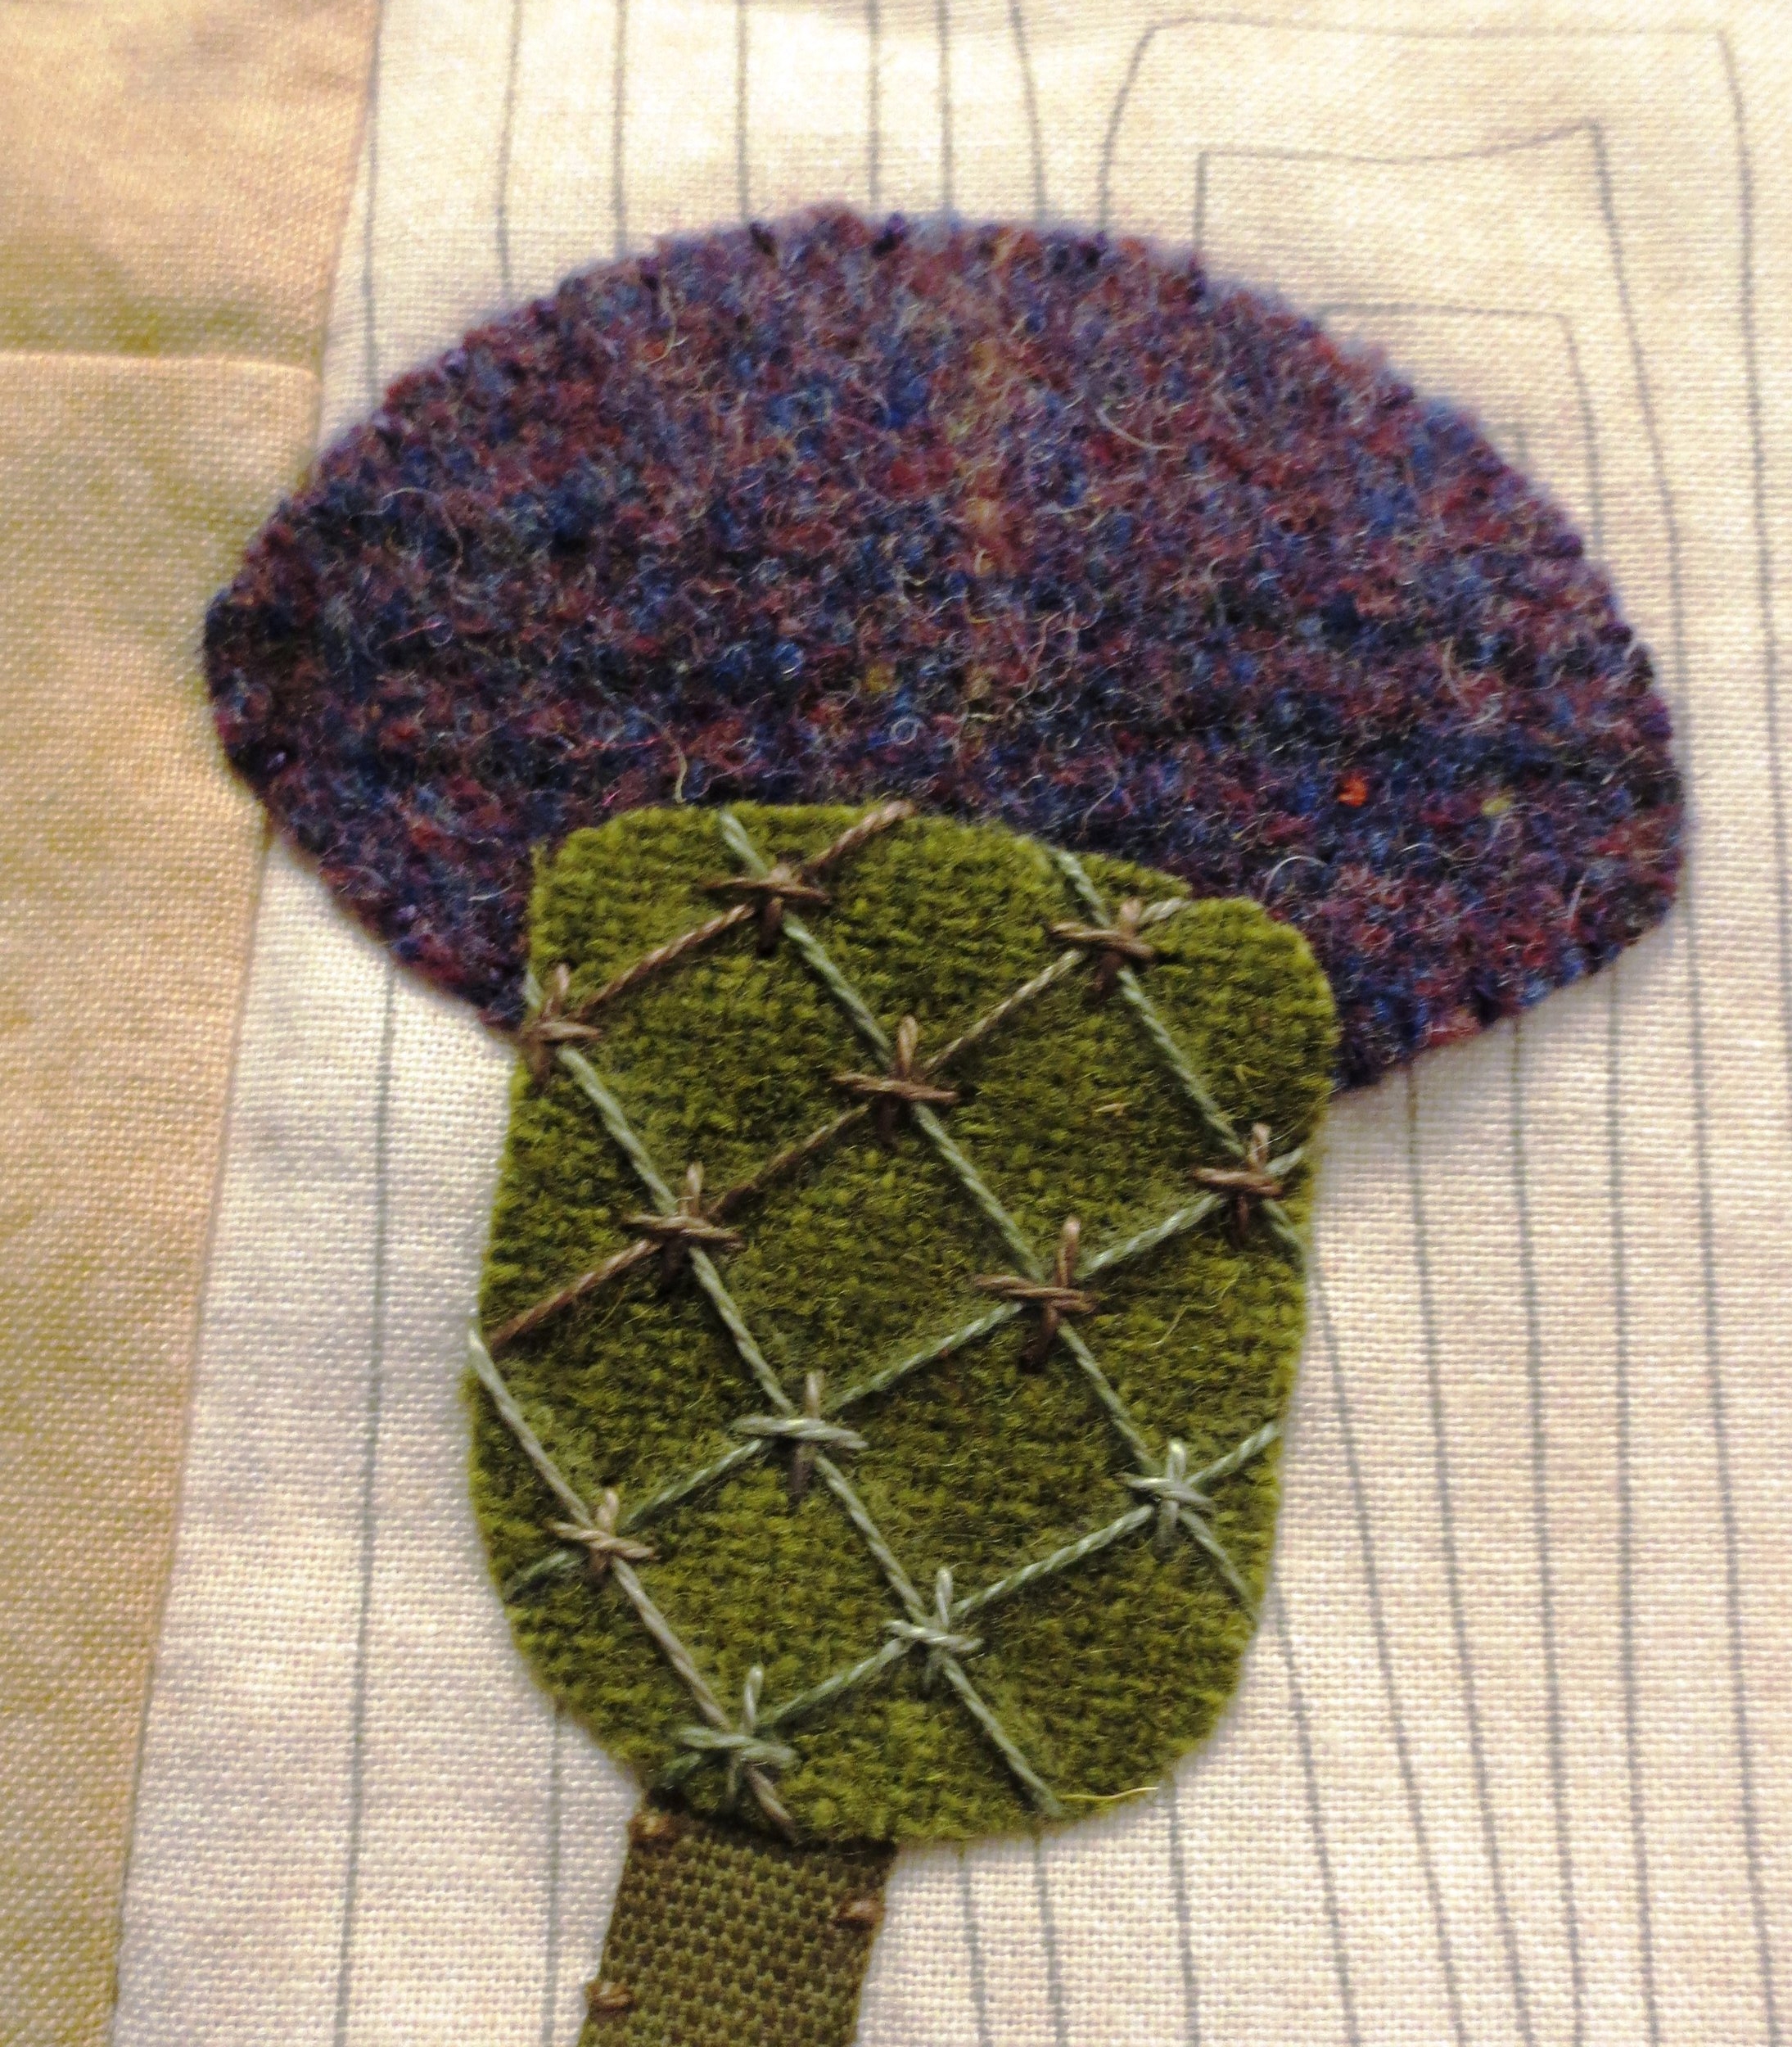
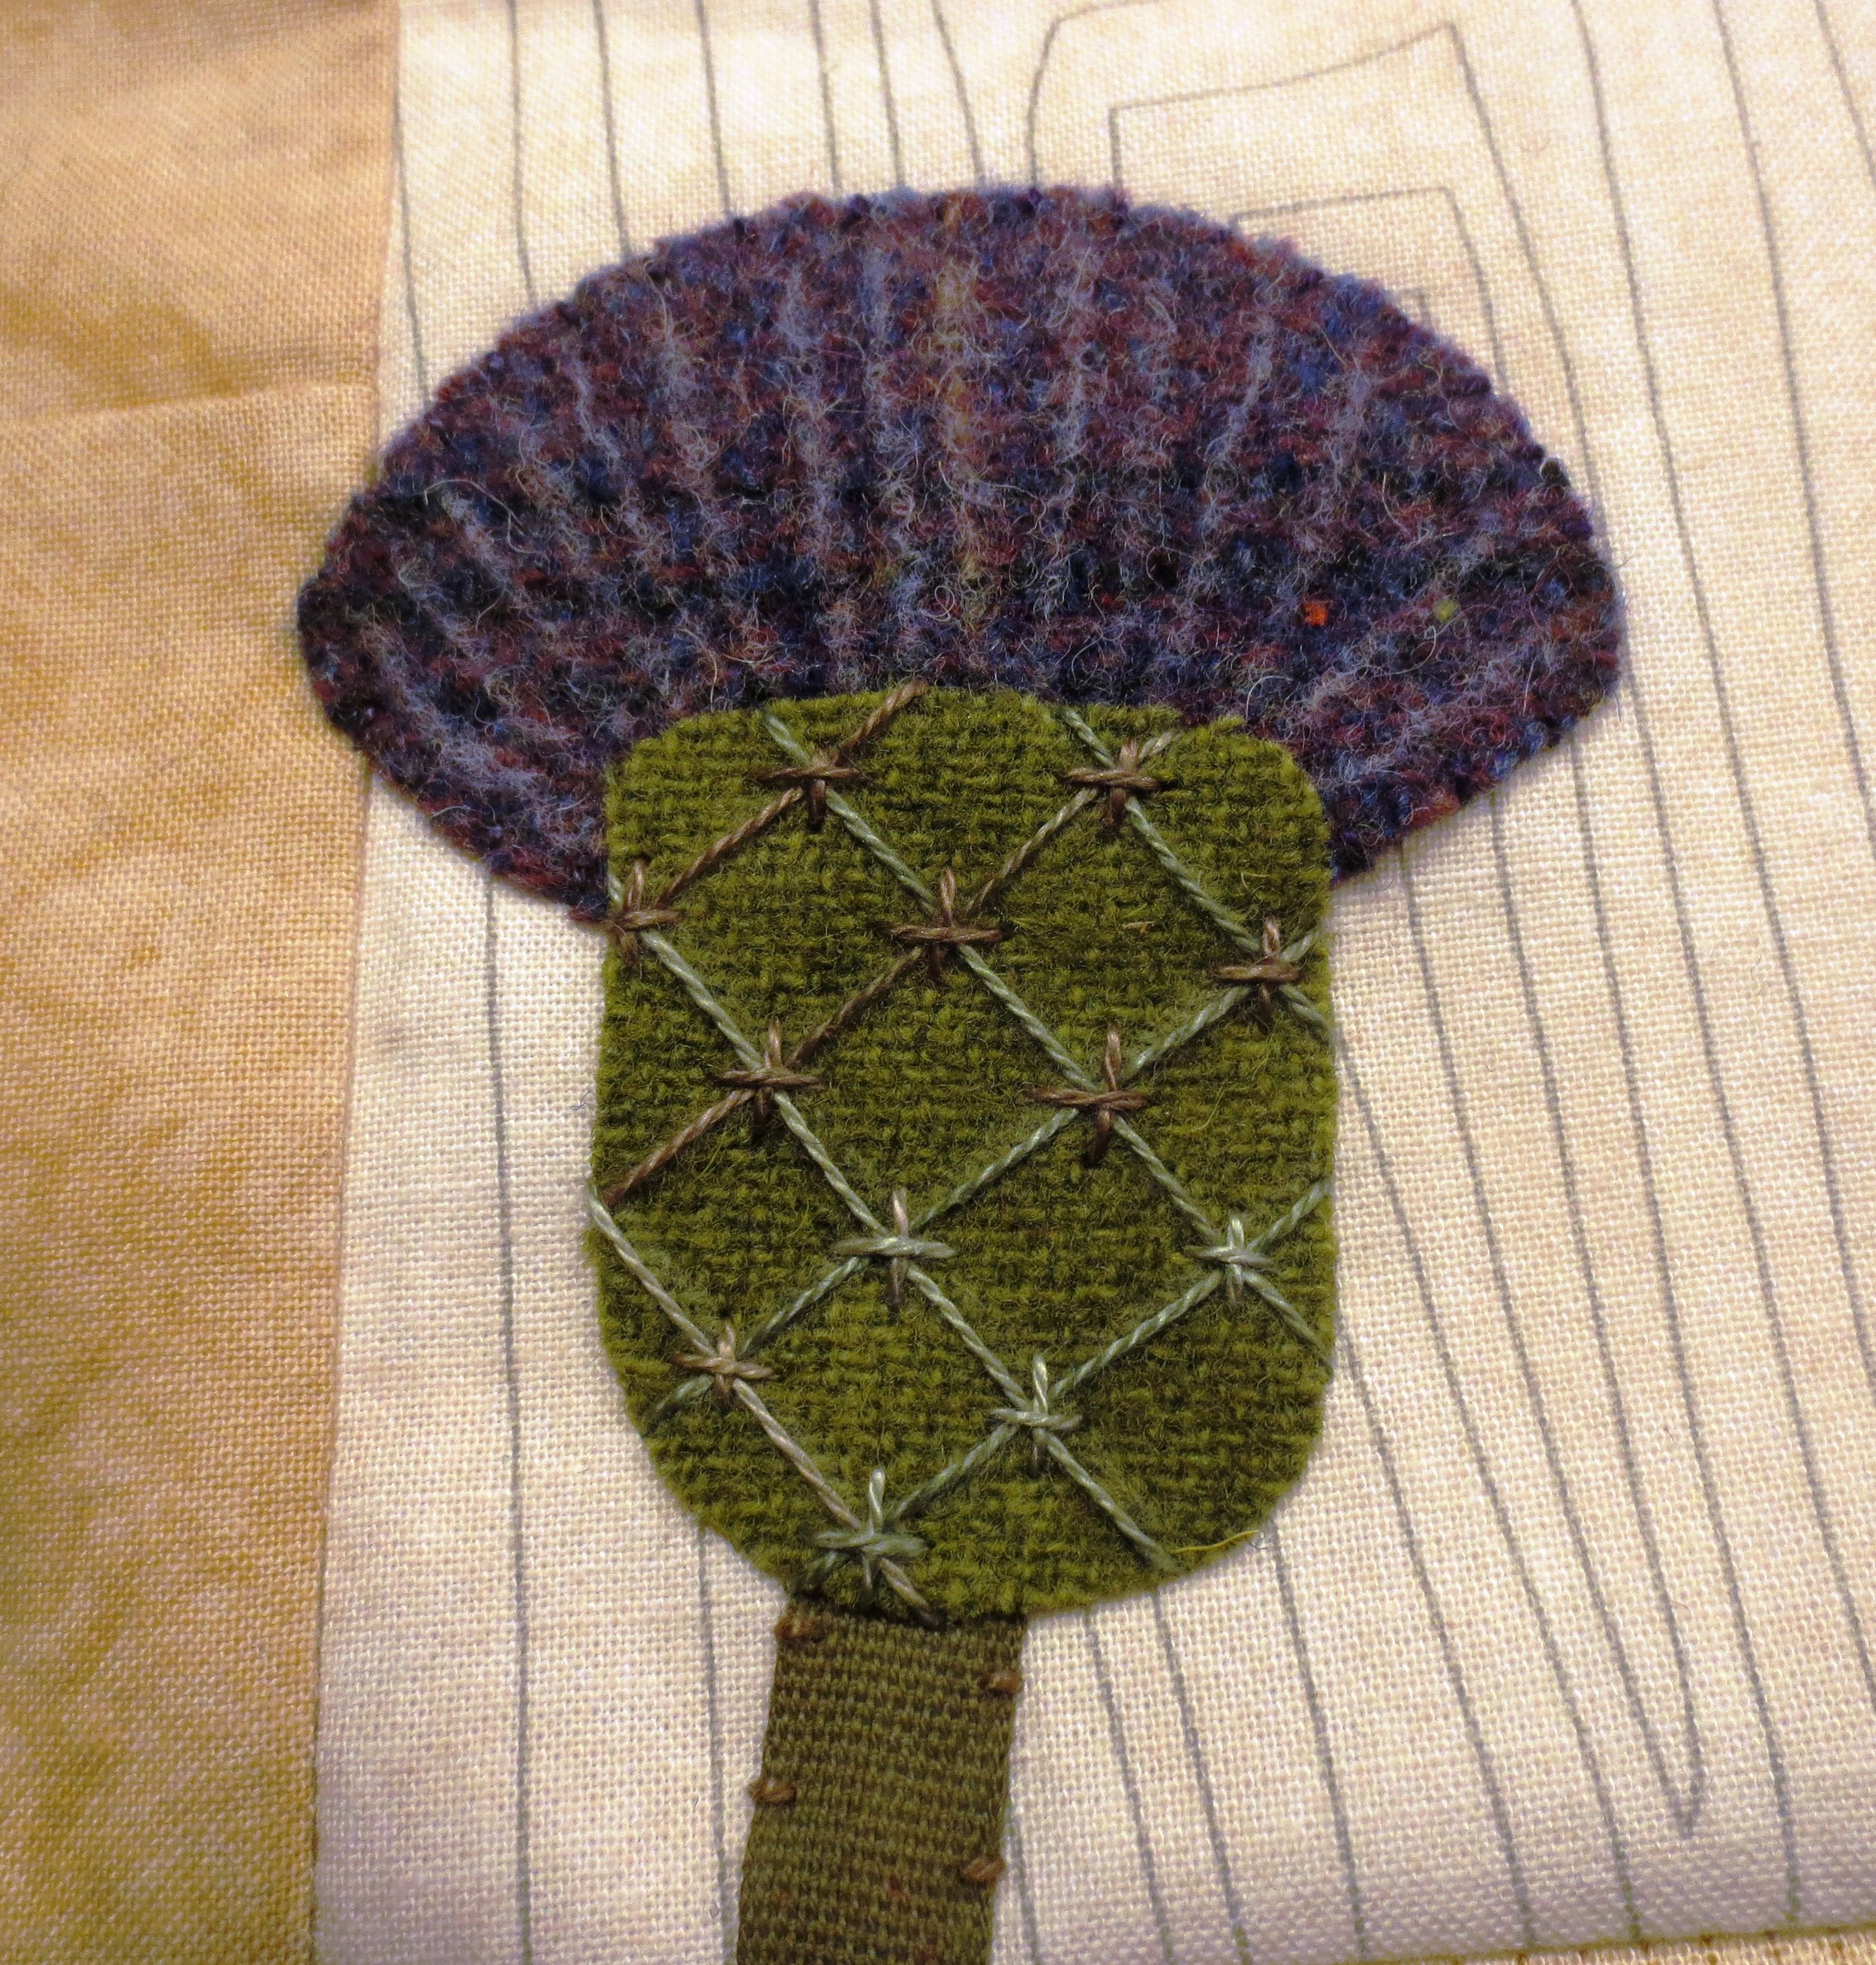
11. Using the same thread, stitch a cross over each intersection of the grid pattern. This will lock the grid in place. I love how the variegated thread looks on this!
12. Draw the design on the thistle top.
13. Use a contrasting colored thread (I used Valdani #H210) to make long straight stitches over the lines.
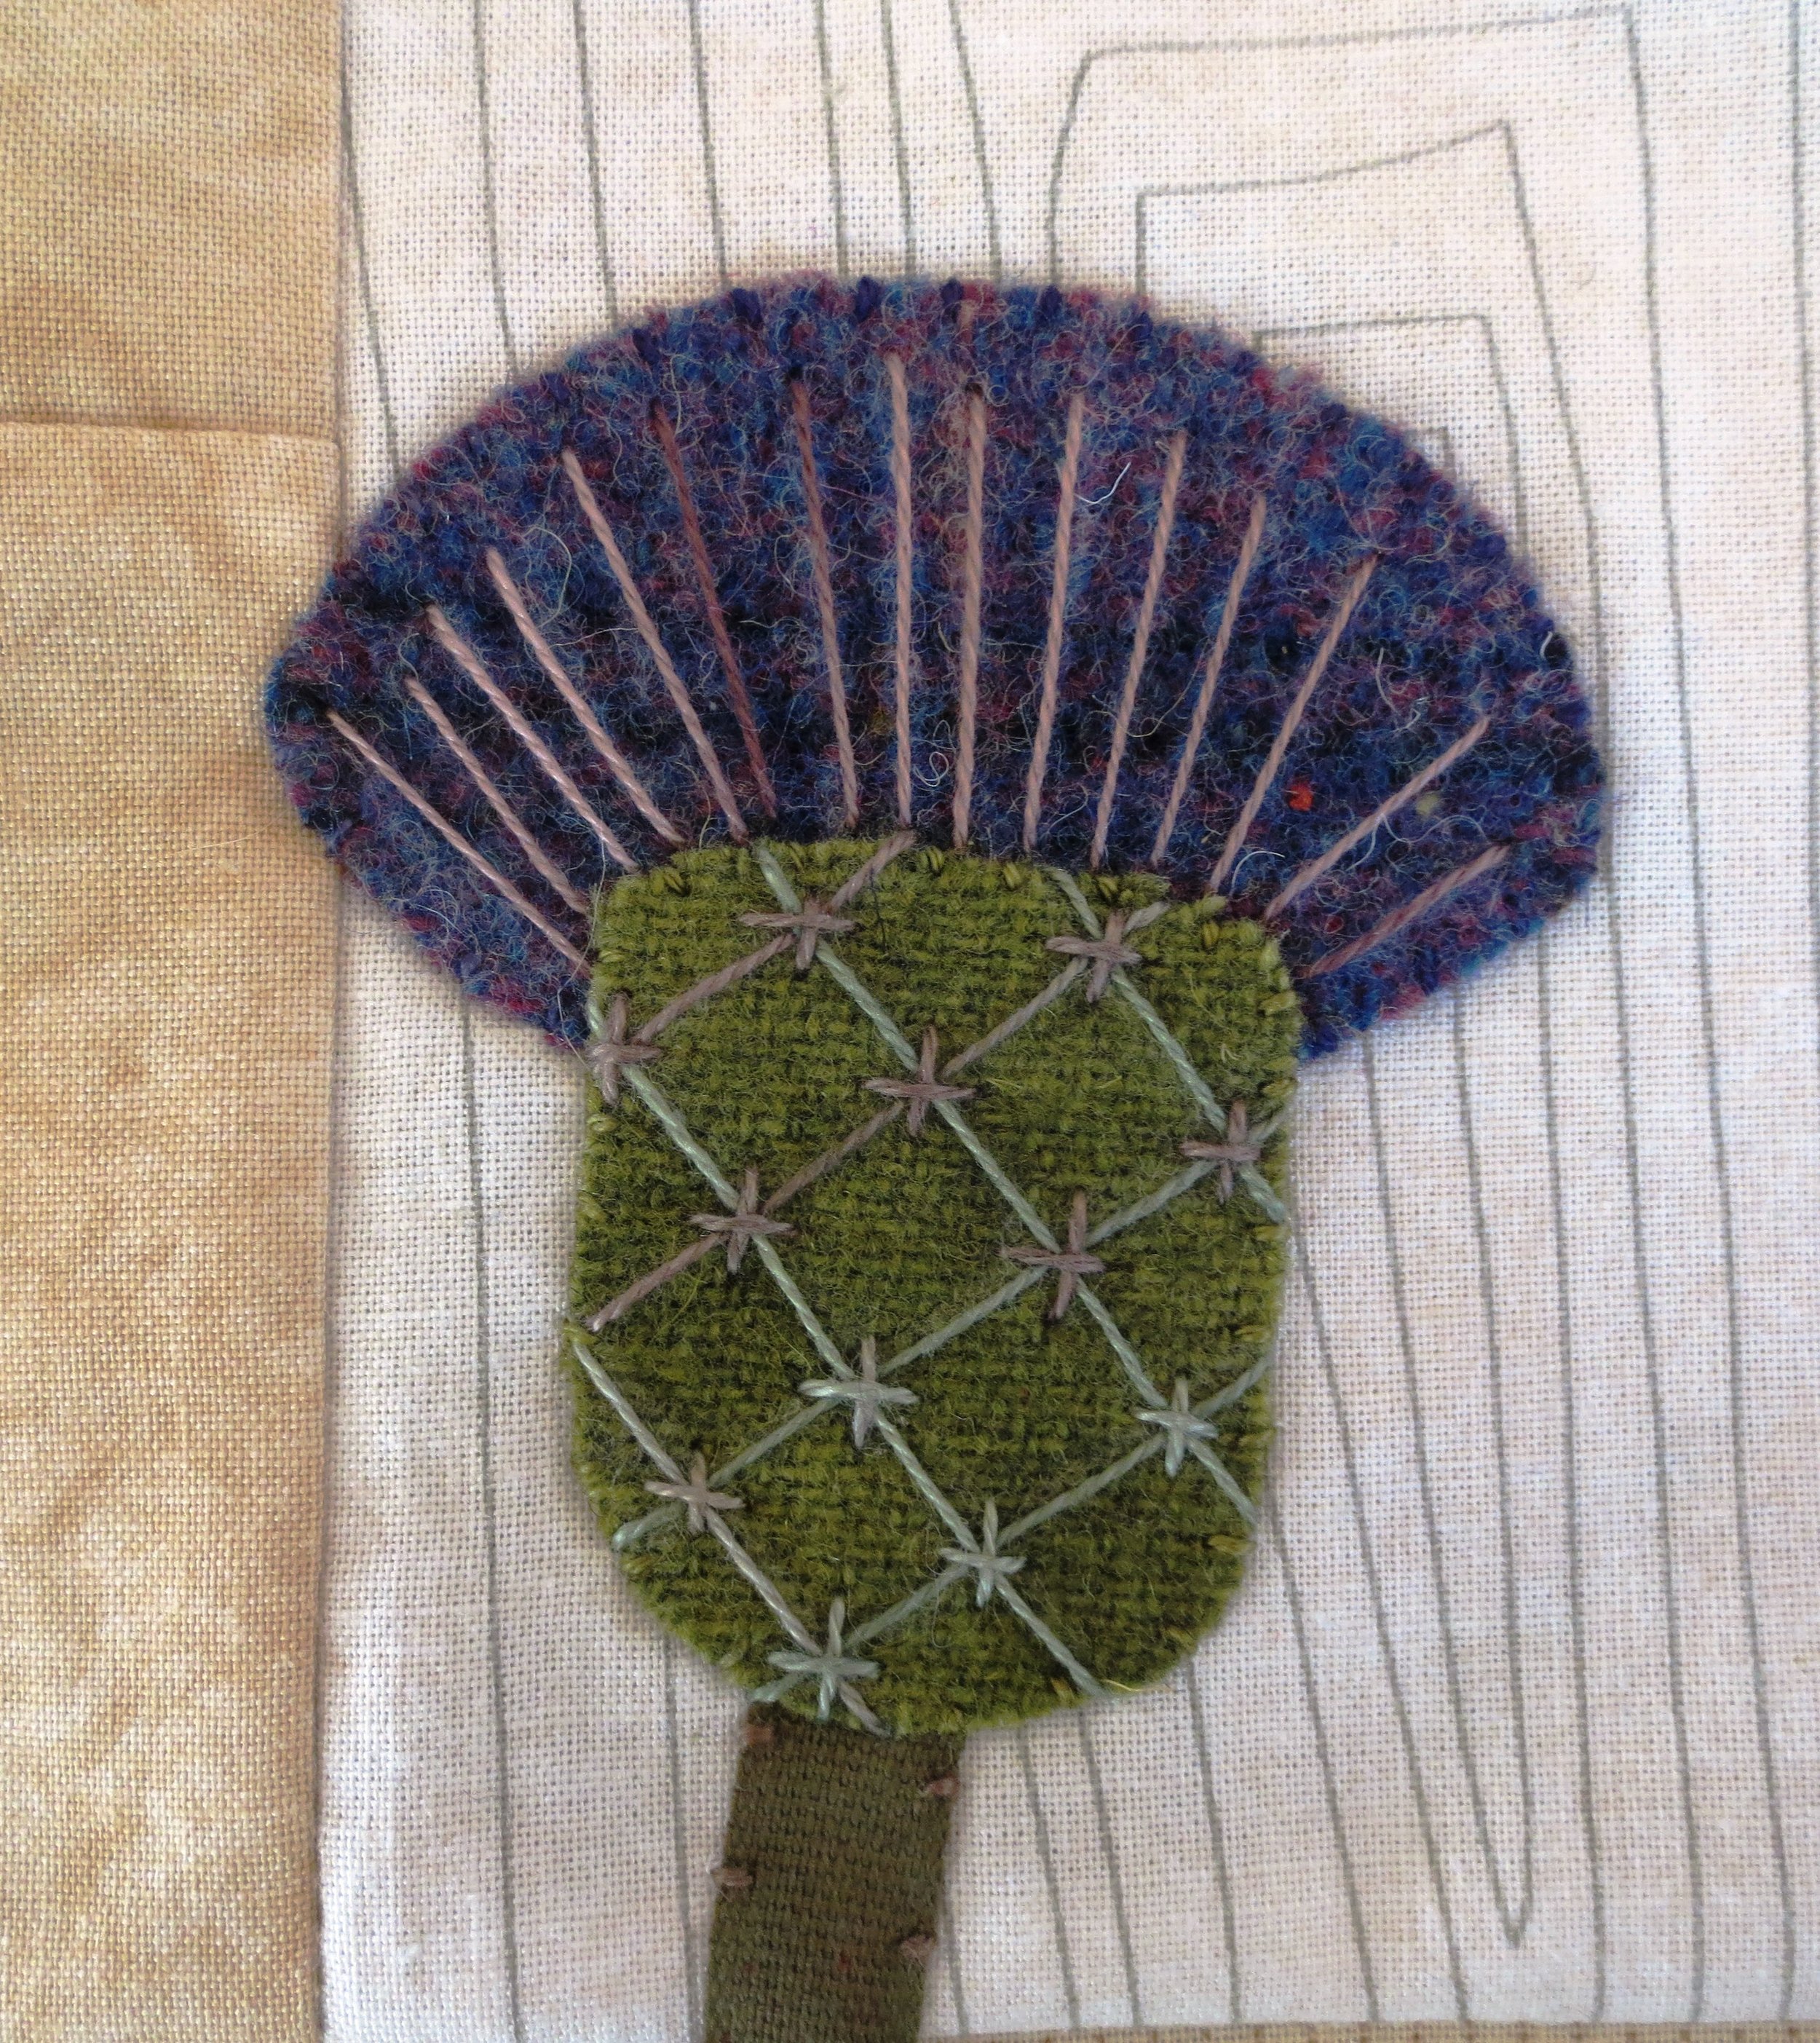
13. Place your block on the light box again and trace all the stems. If you don't have a light box you will need to lay out the leaves and flowers and then draw the stems.
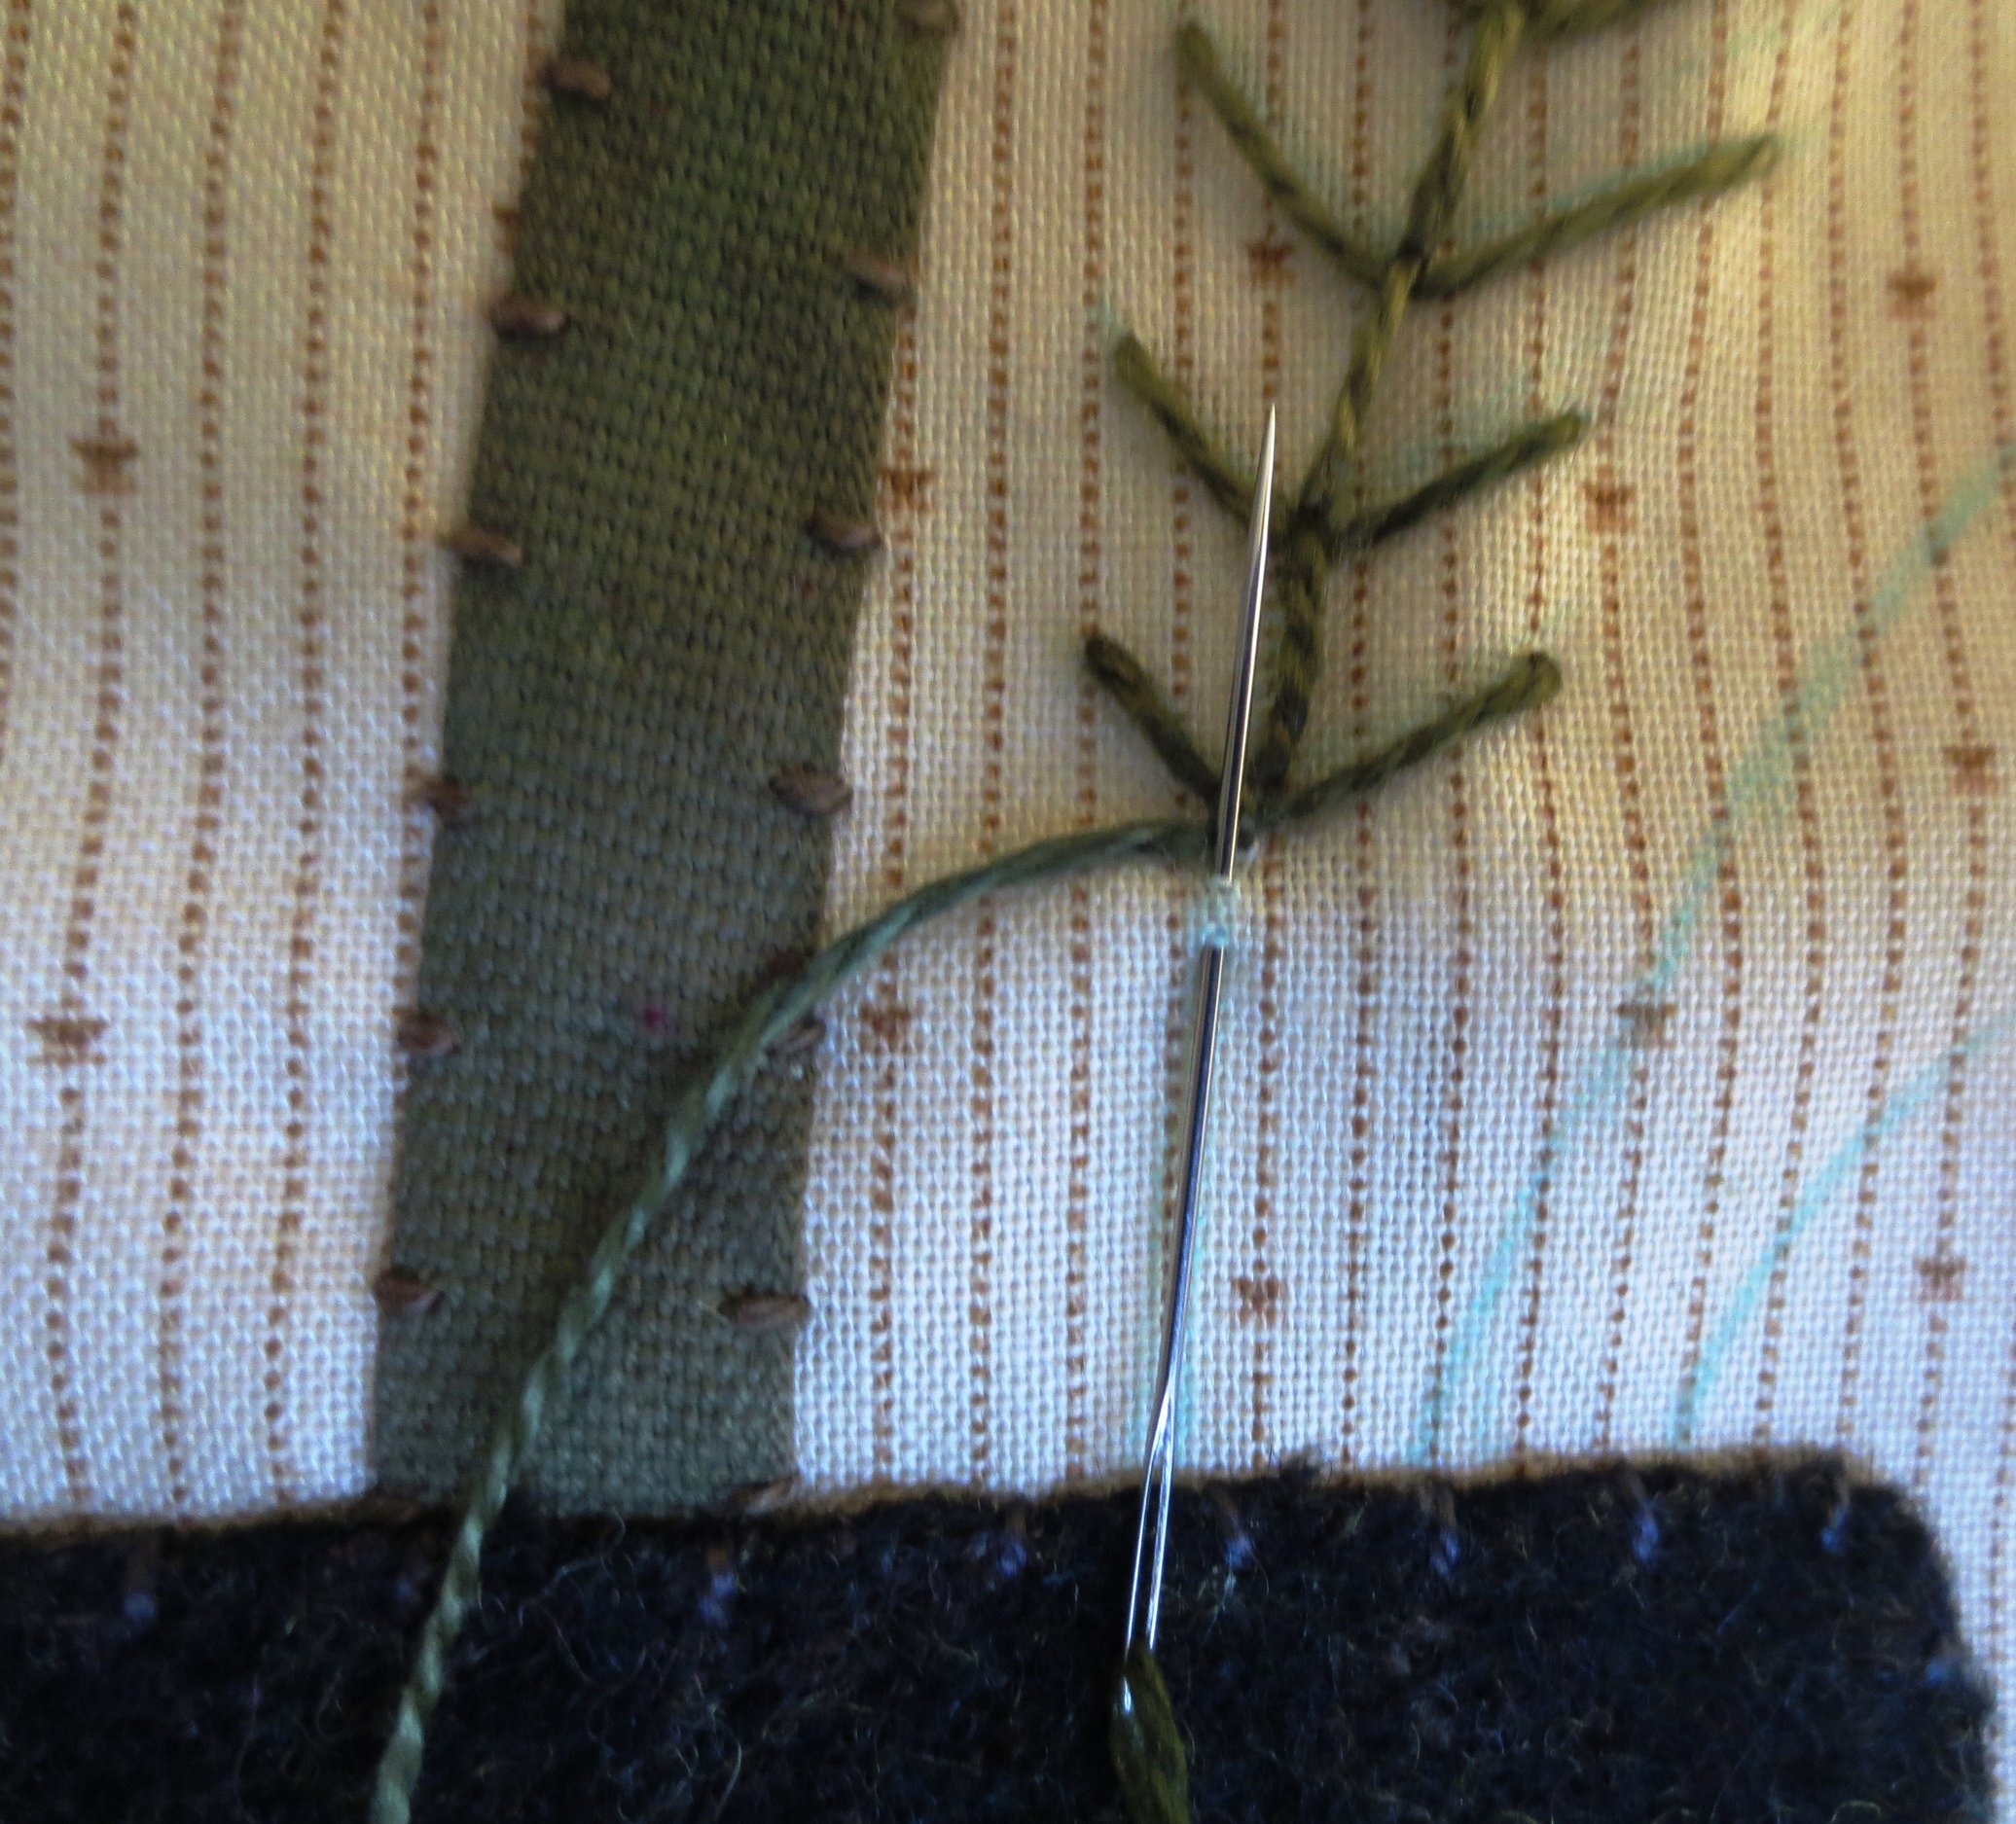
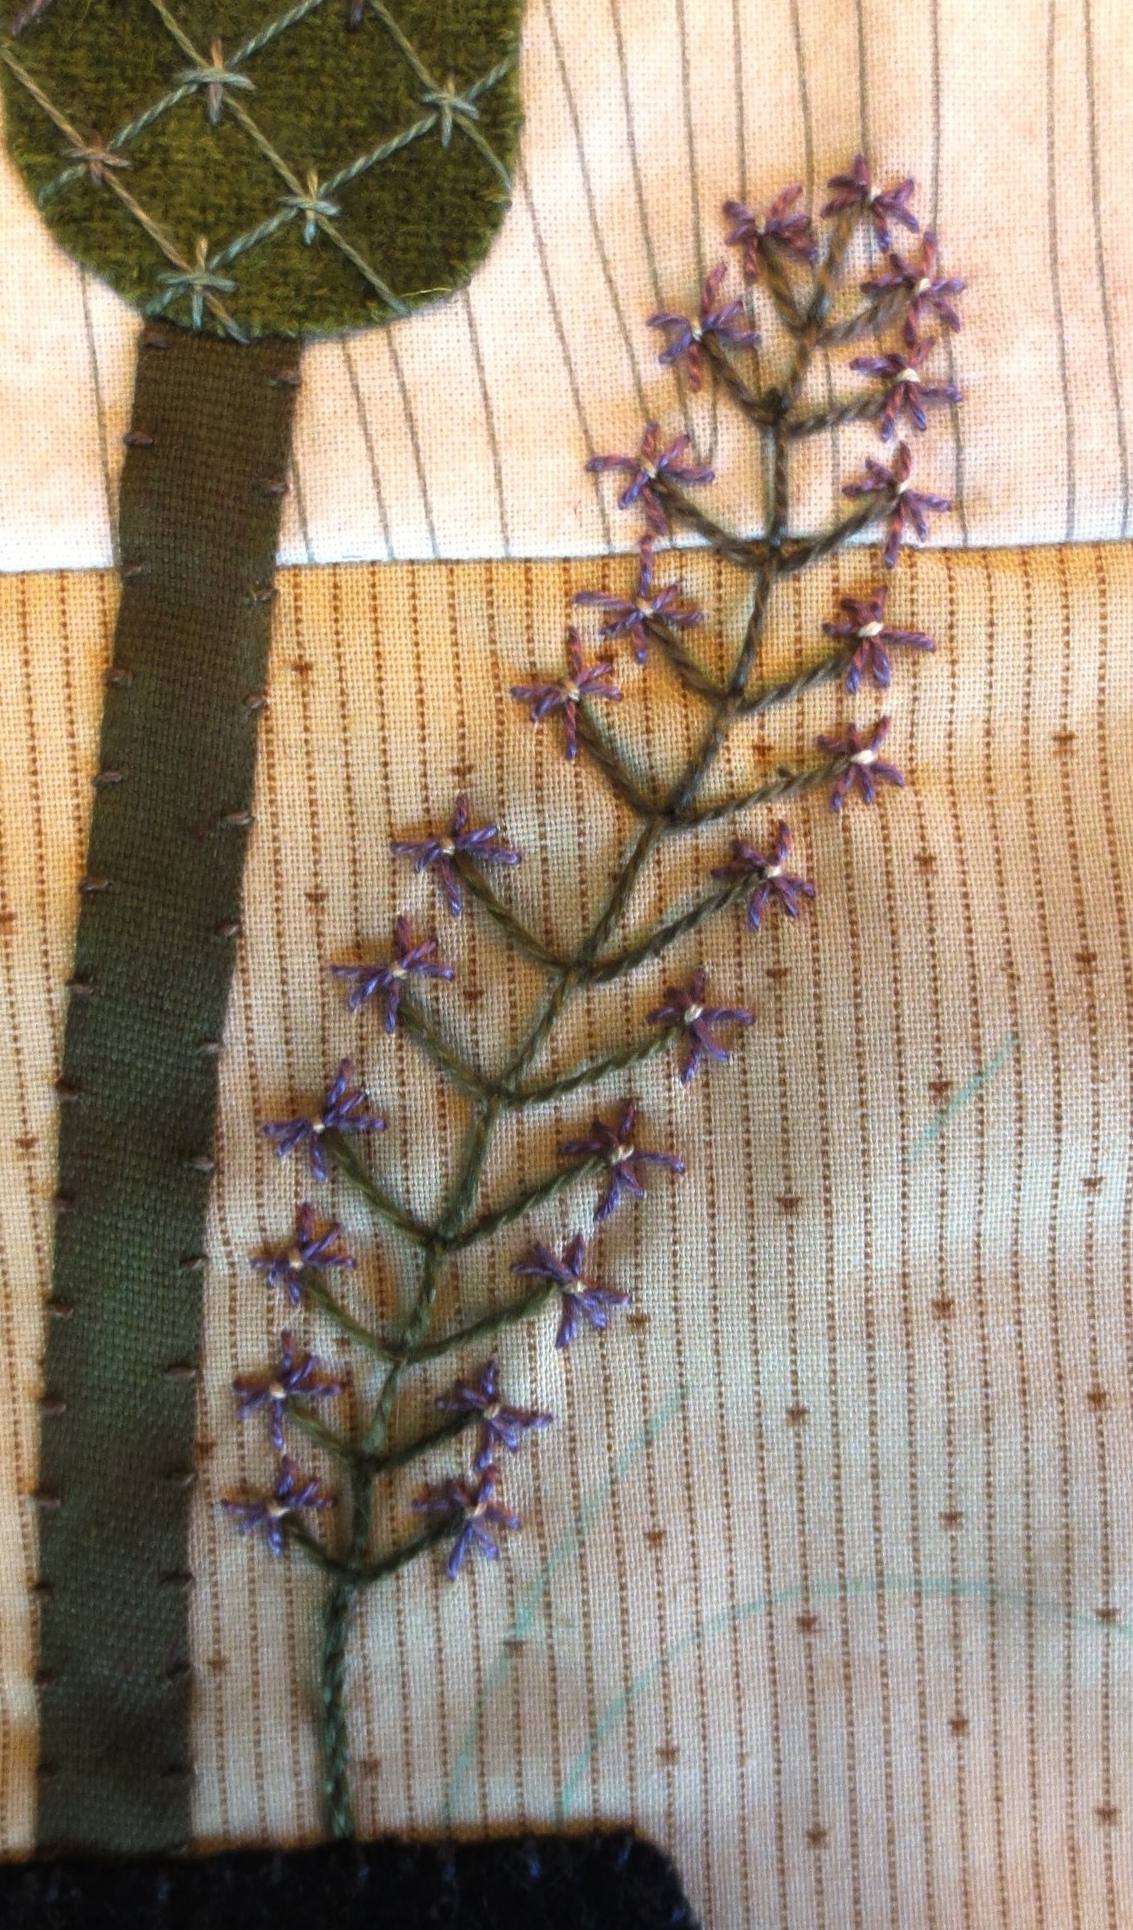
14. Let's begin with the flower directly to the right of the thistle. Use a green colored (#O565) perle cotton, size 8 (you may need to change your needle size to #22) to make a closed fly stitch over the chalk lines.
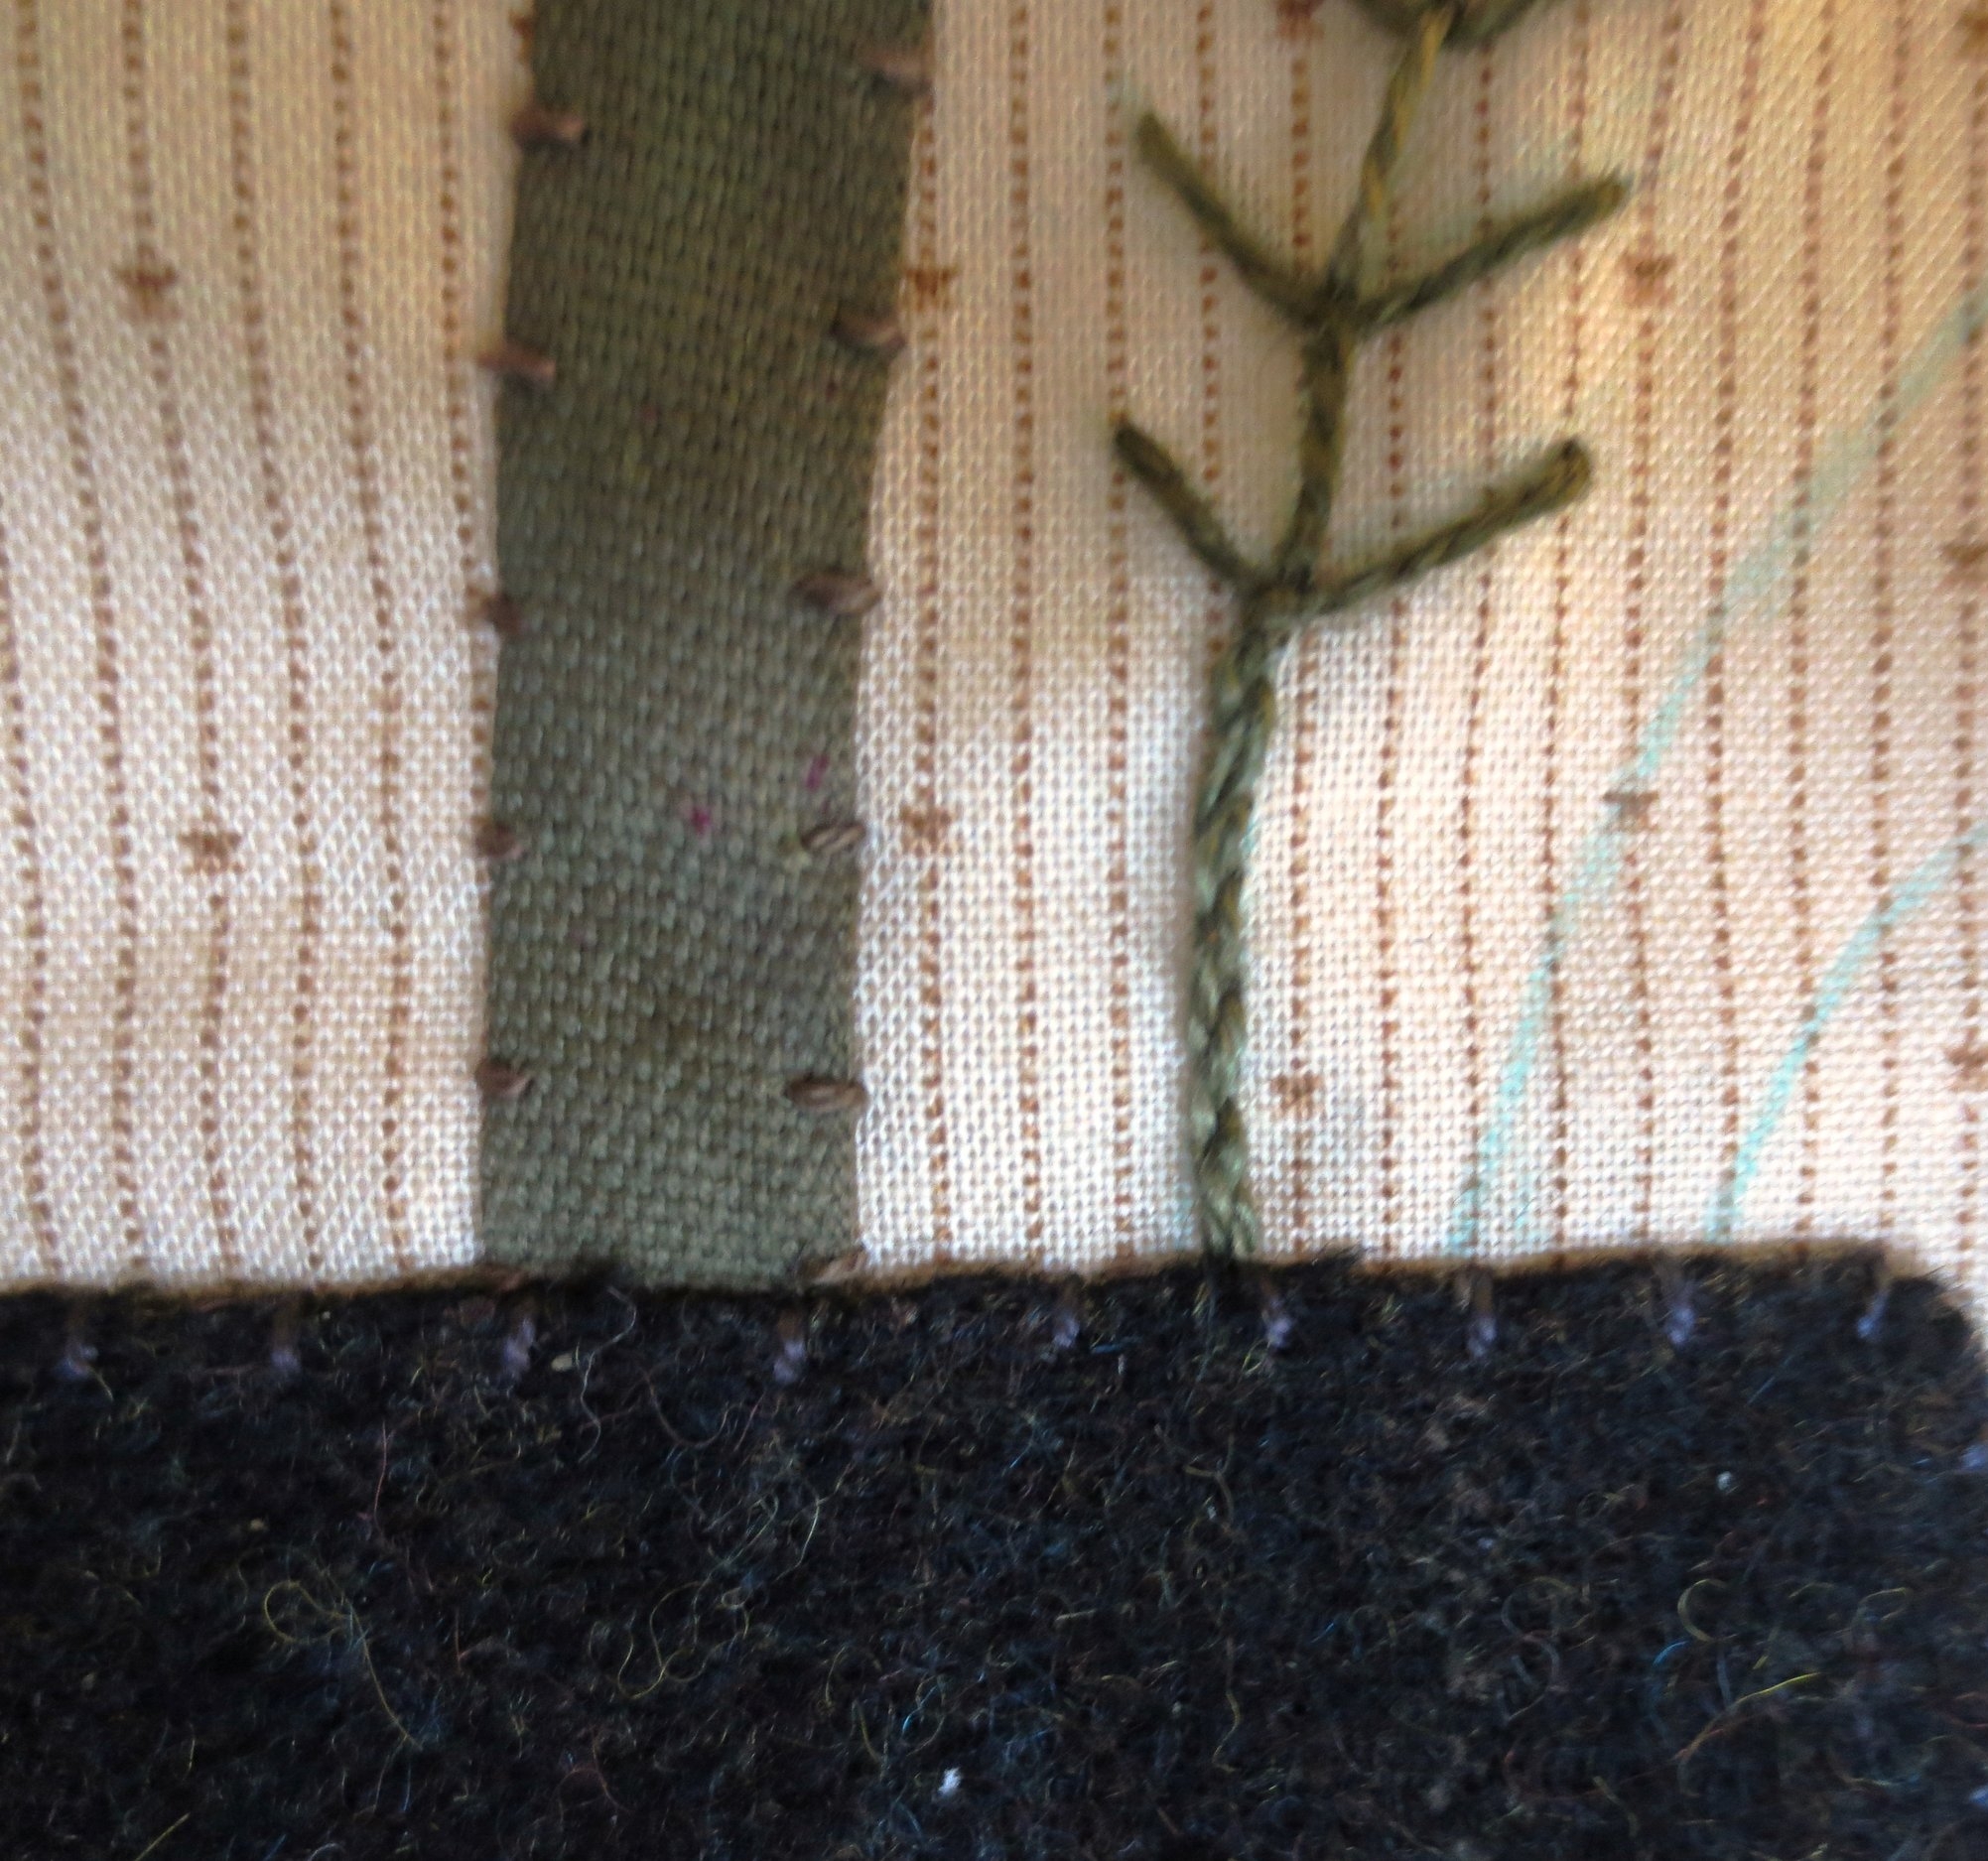
15. When you get to the end of the branches, change to a stem stitch to finish off the base of the stem.
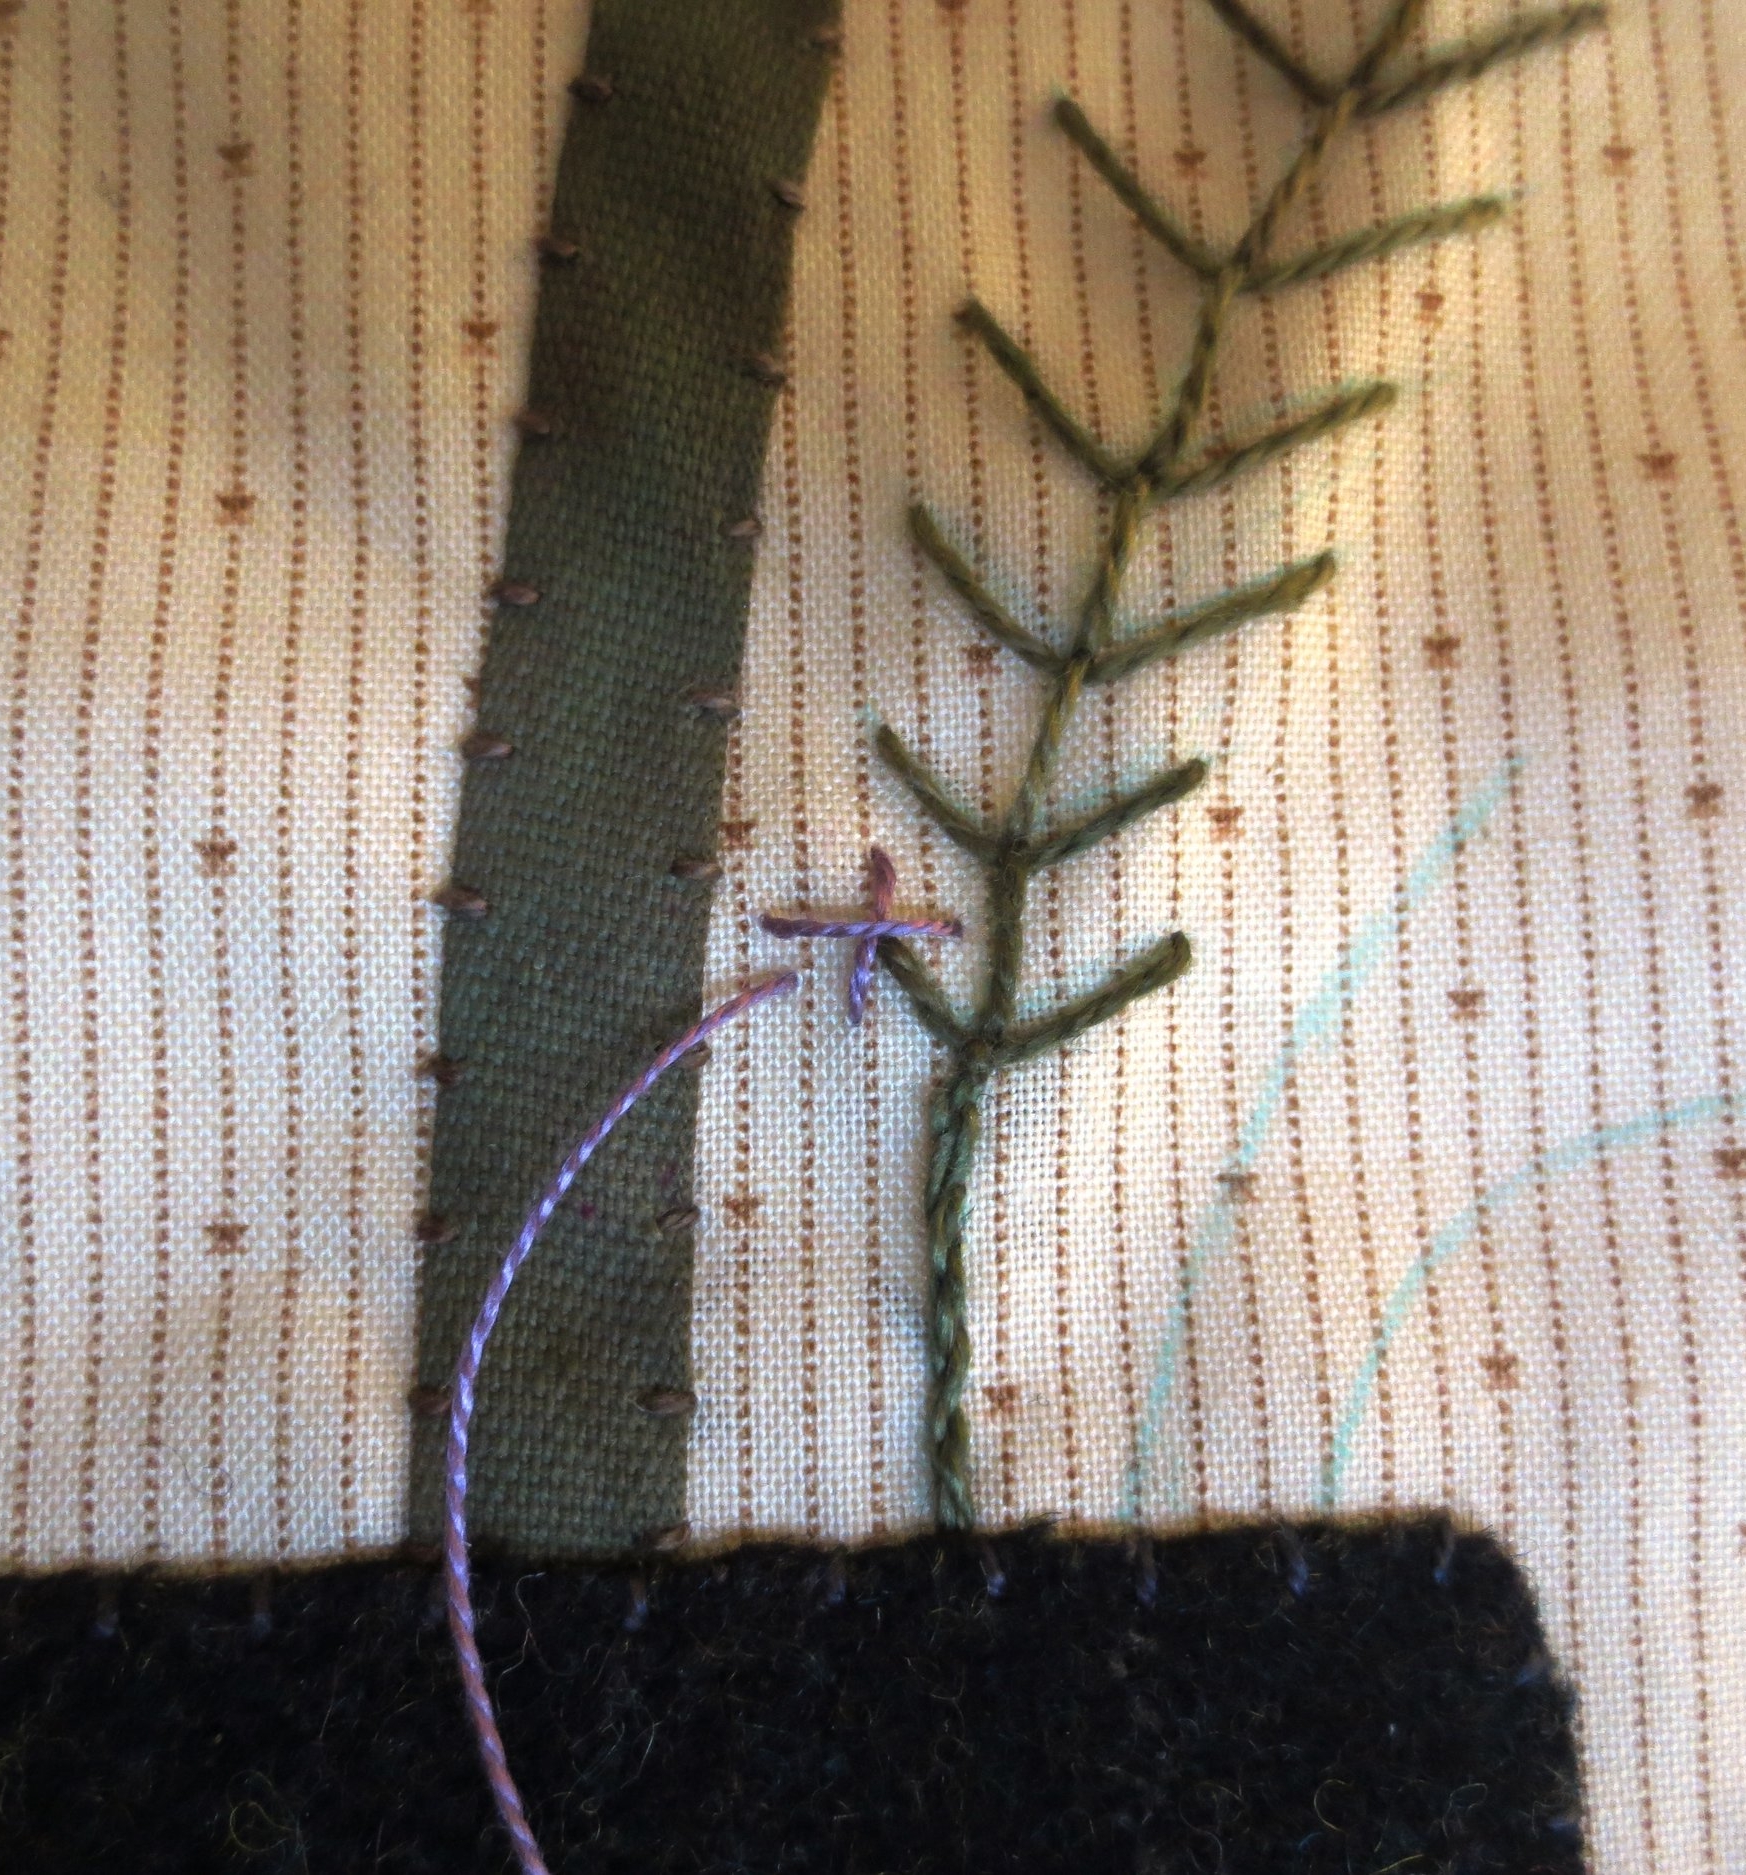
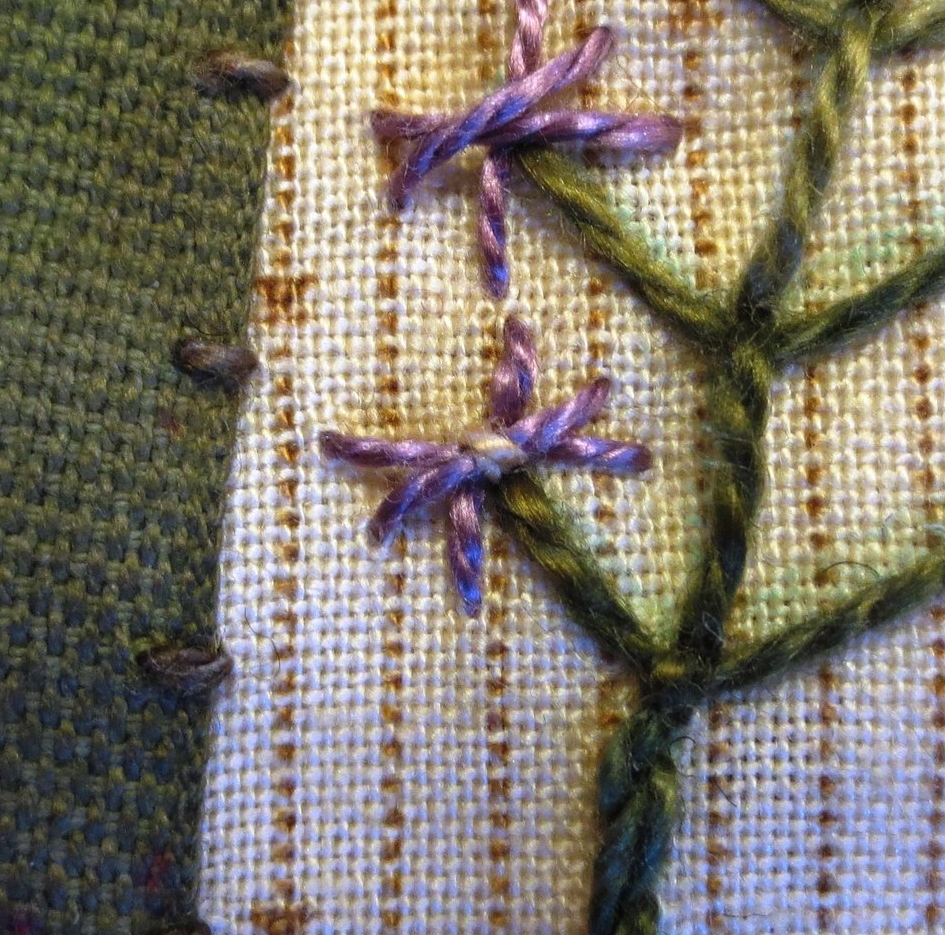
16. Use a perle cotton, size 12 in a light purple color (I used DMC #3041) to make star stitches (double cross) on the ends of each of the stems. It's not a complete star stitch, but rather a 3/4 of a star stitch. Don't worry if they don't appear to align perfectly. We will fix that in a moment.
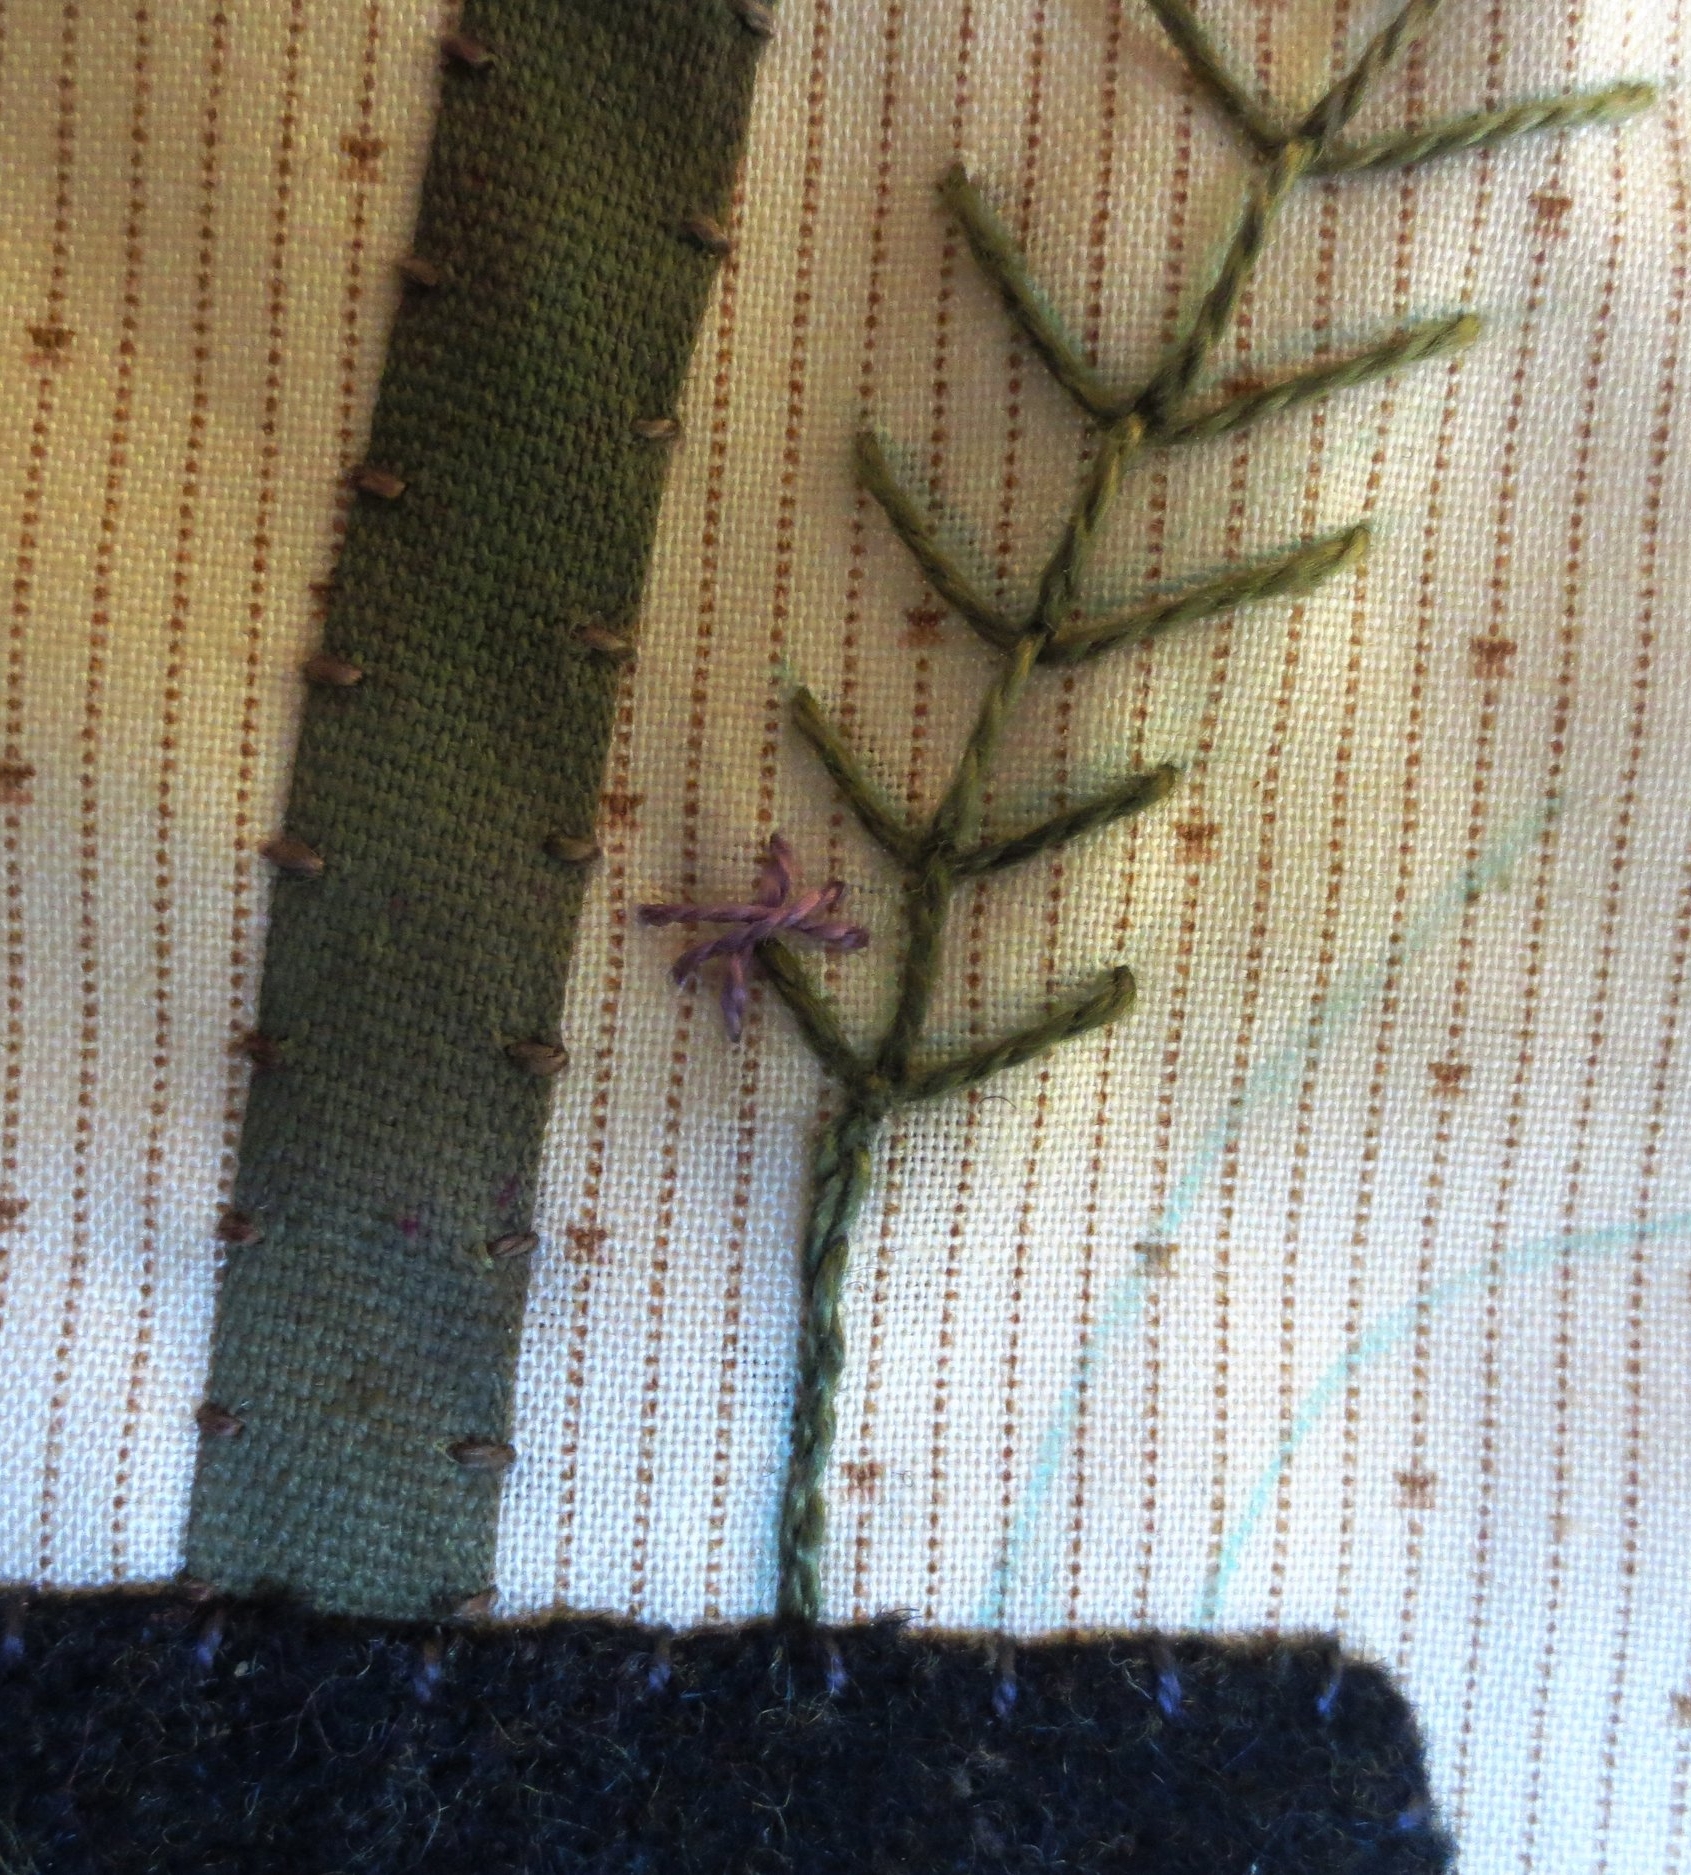
17. Stitch the flowers all the way up one side. Then use a light gold colored perle cotton, size 12 to make a little tacking stitch in the center of each flower (I used Valdani #JP2). This will make the stars appear a little neater.
18. Continue making star stitched flowers on the remaining stems and tacking them with the light gold thread.
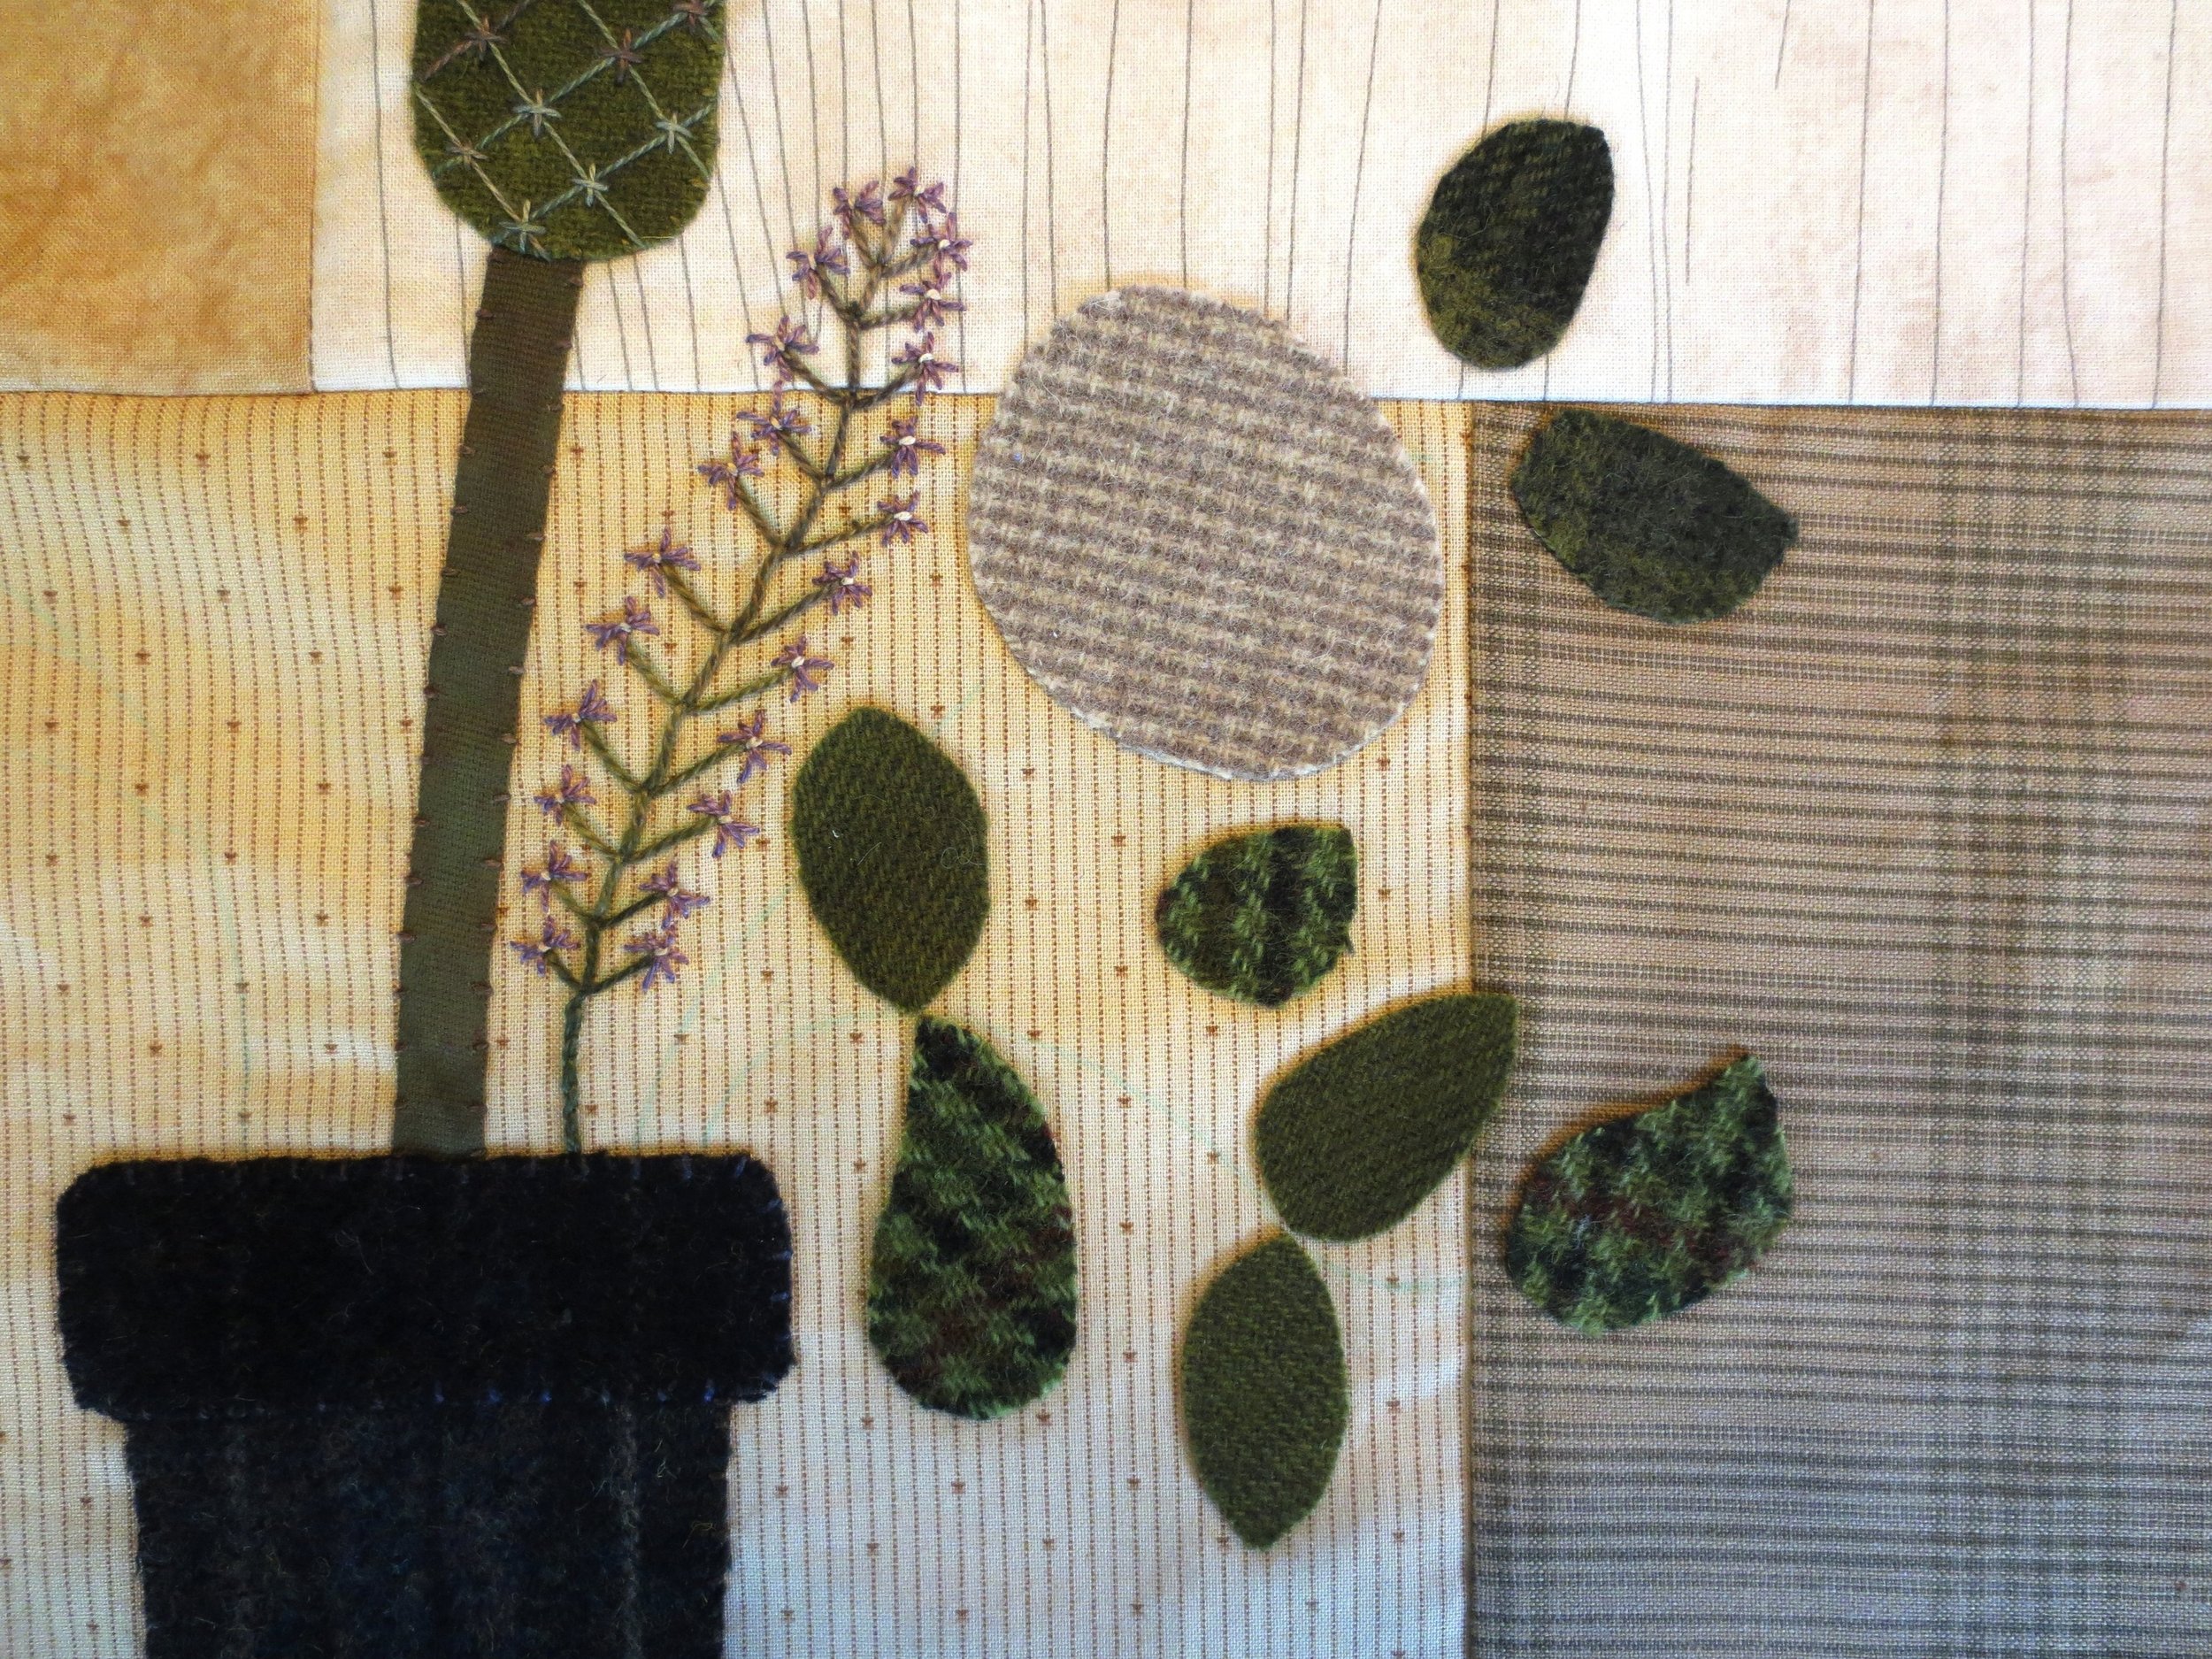
19. Position the large flower base and leaves 2-9 on the drawn stems.
20. Position the large flower's top on top of the flower's base and fuse in place using steam.
21. Position the large flower's center and fuse in place using steam.
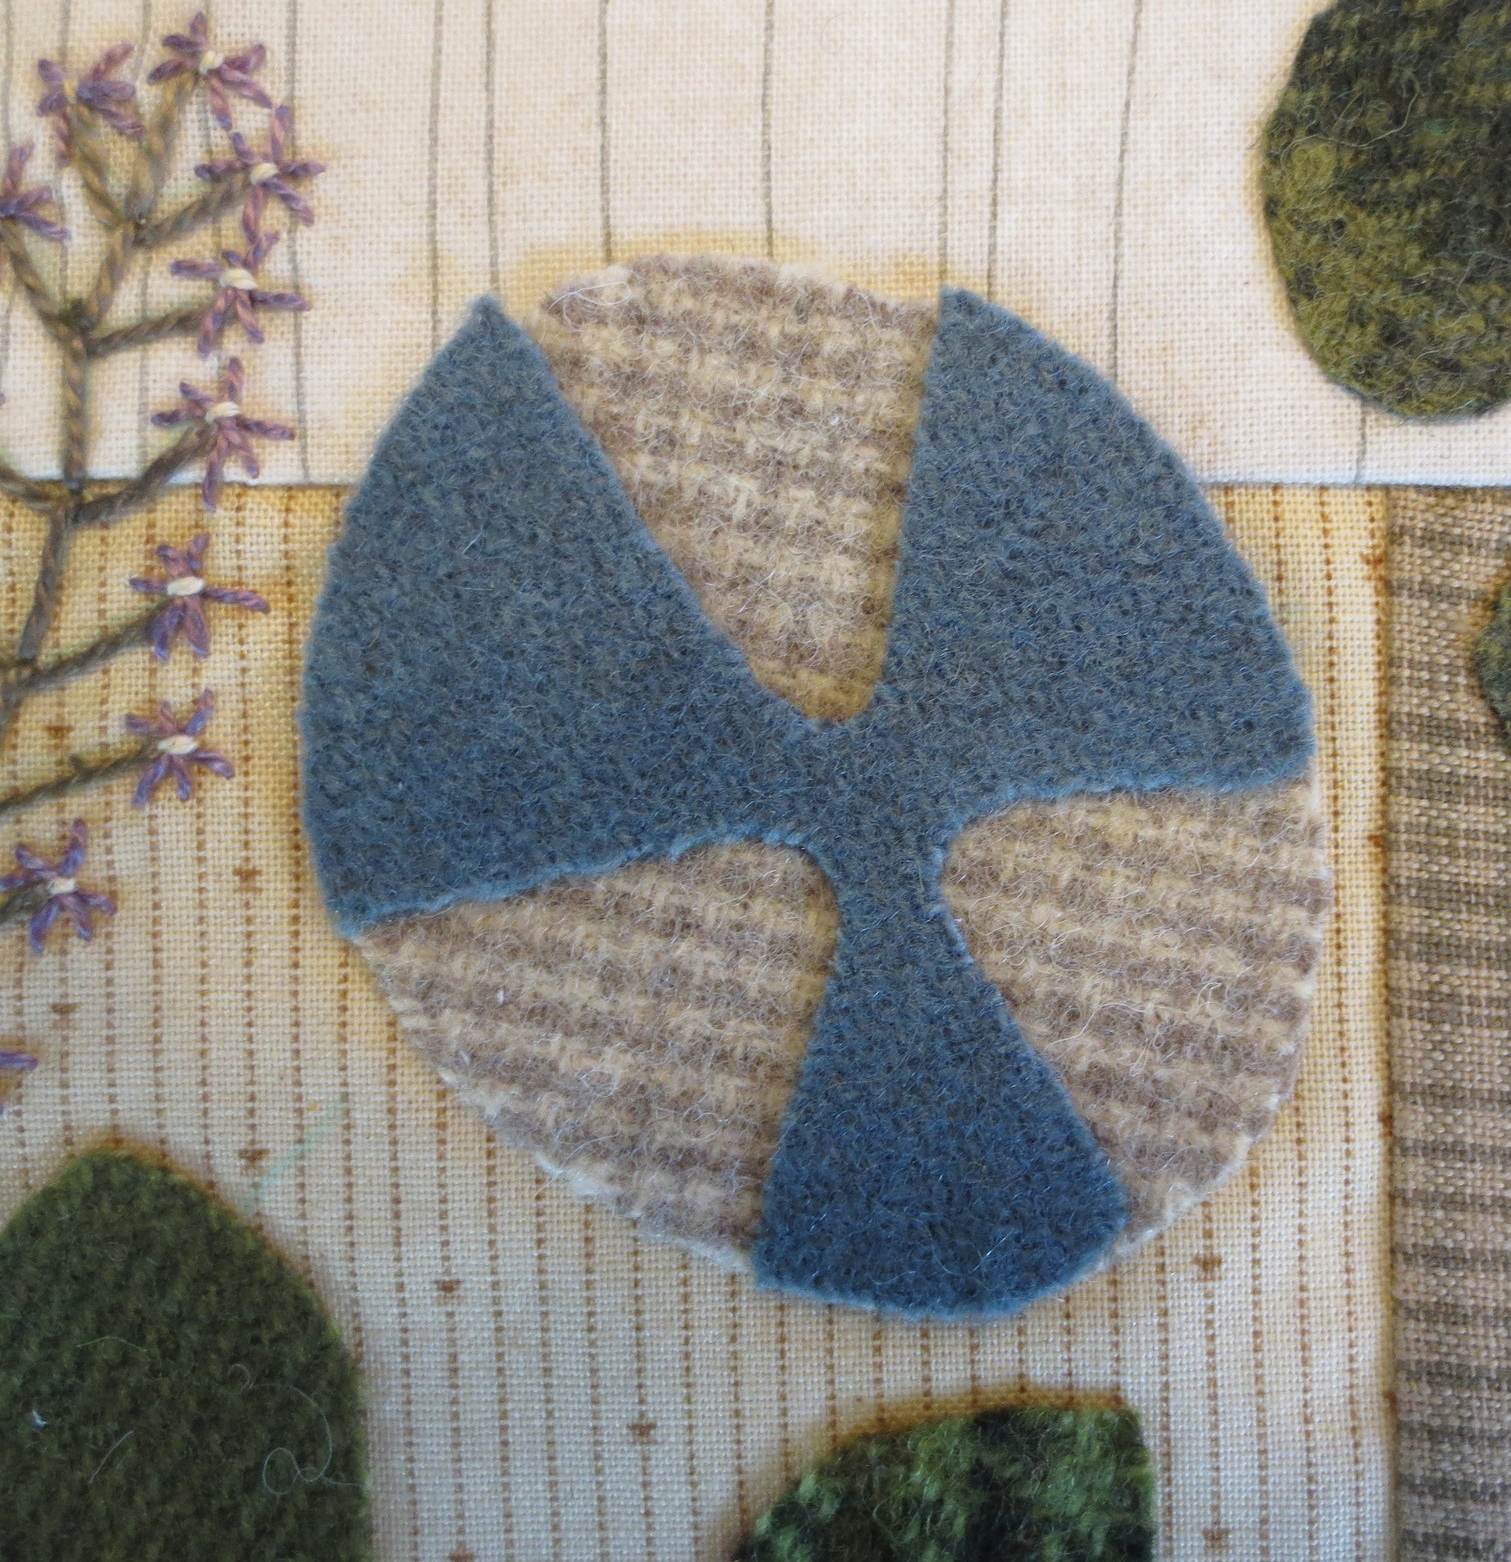
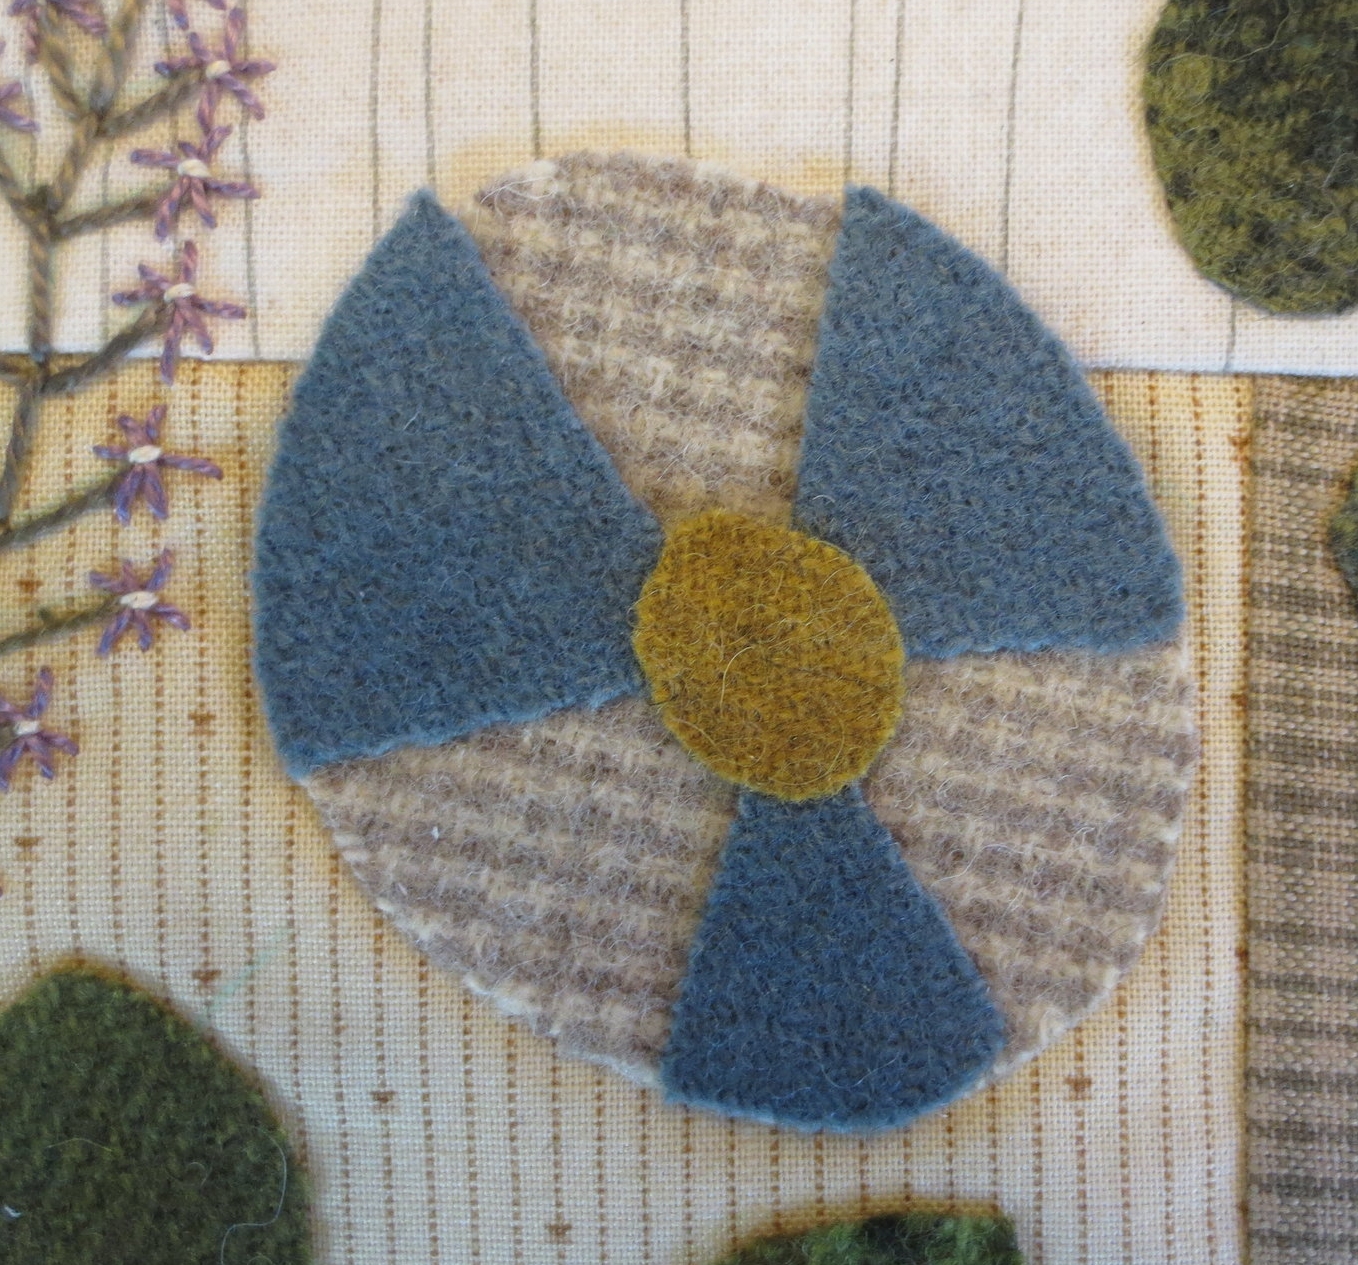
22. Use perle cotton, size 12 in colors that match your wool to whip stitch the large flower's center first, then the top and base.
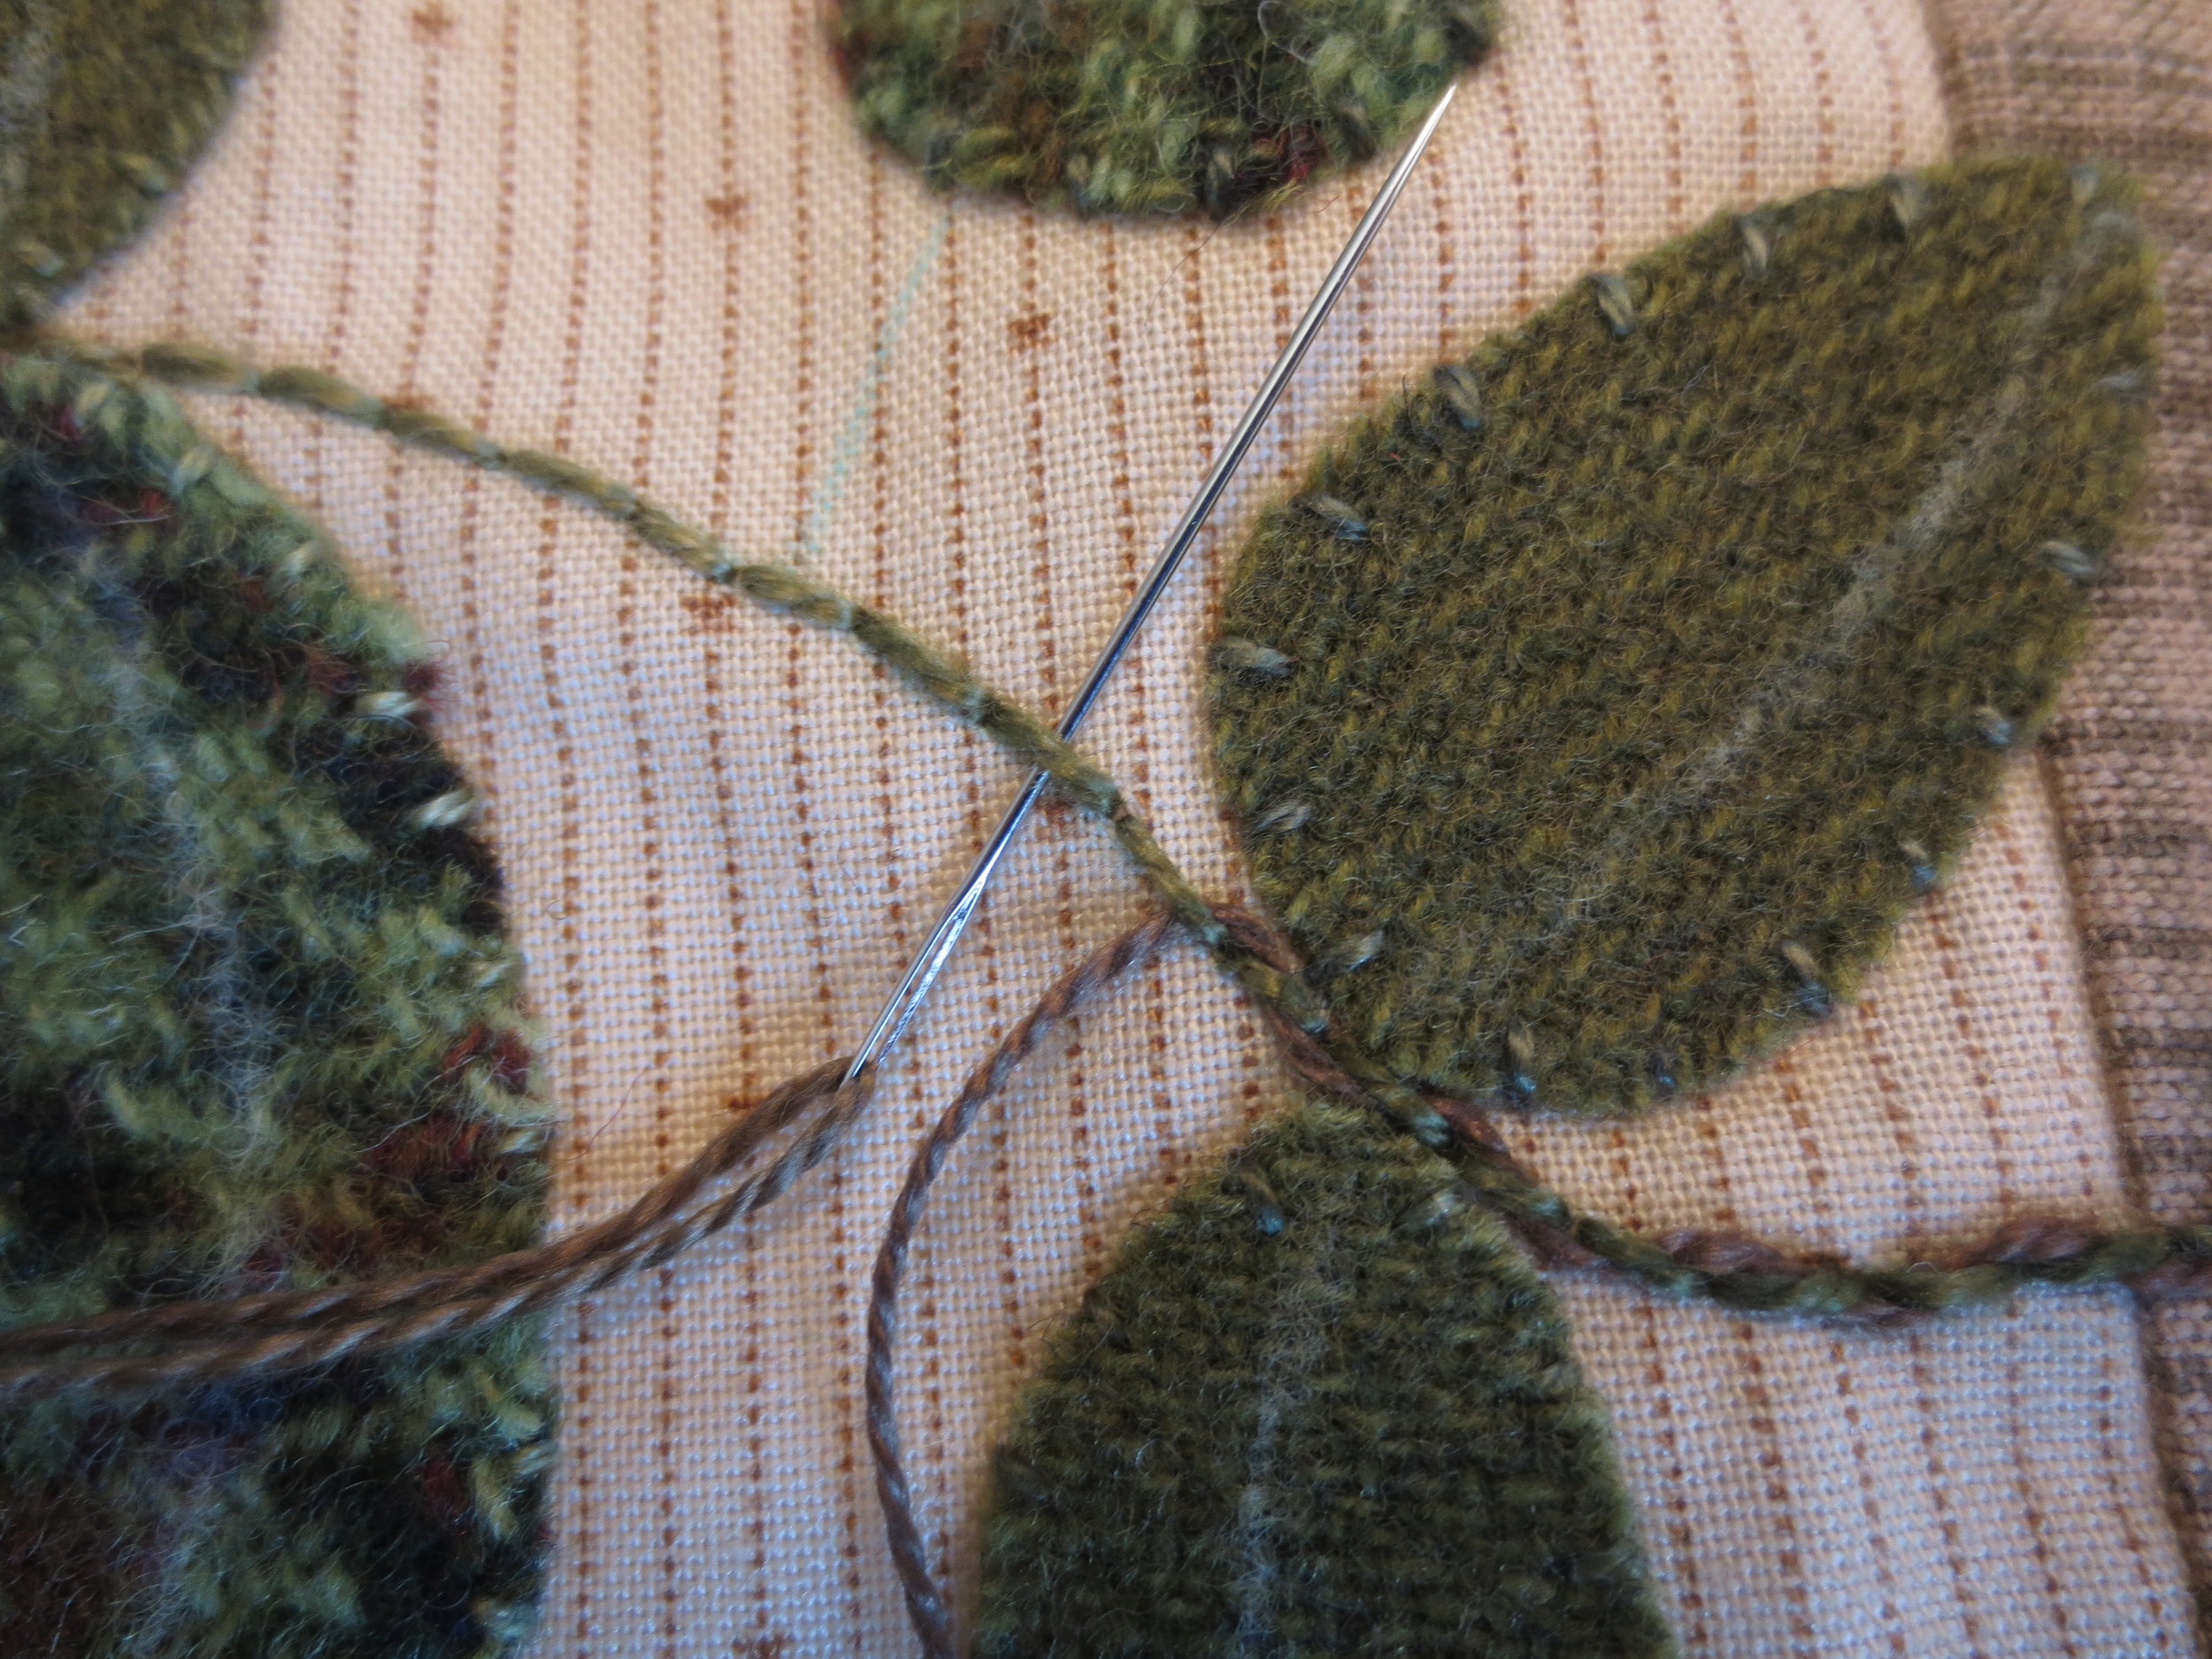
23. Use perle cotton, size 12 in a green that closely matches your leaves to whip stitch leaves.
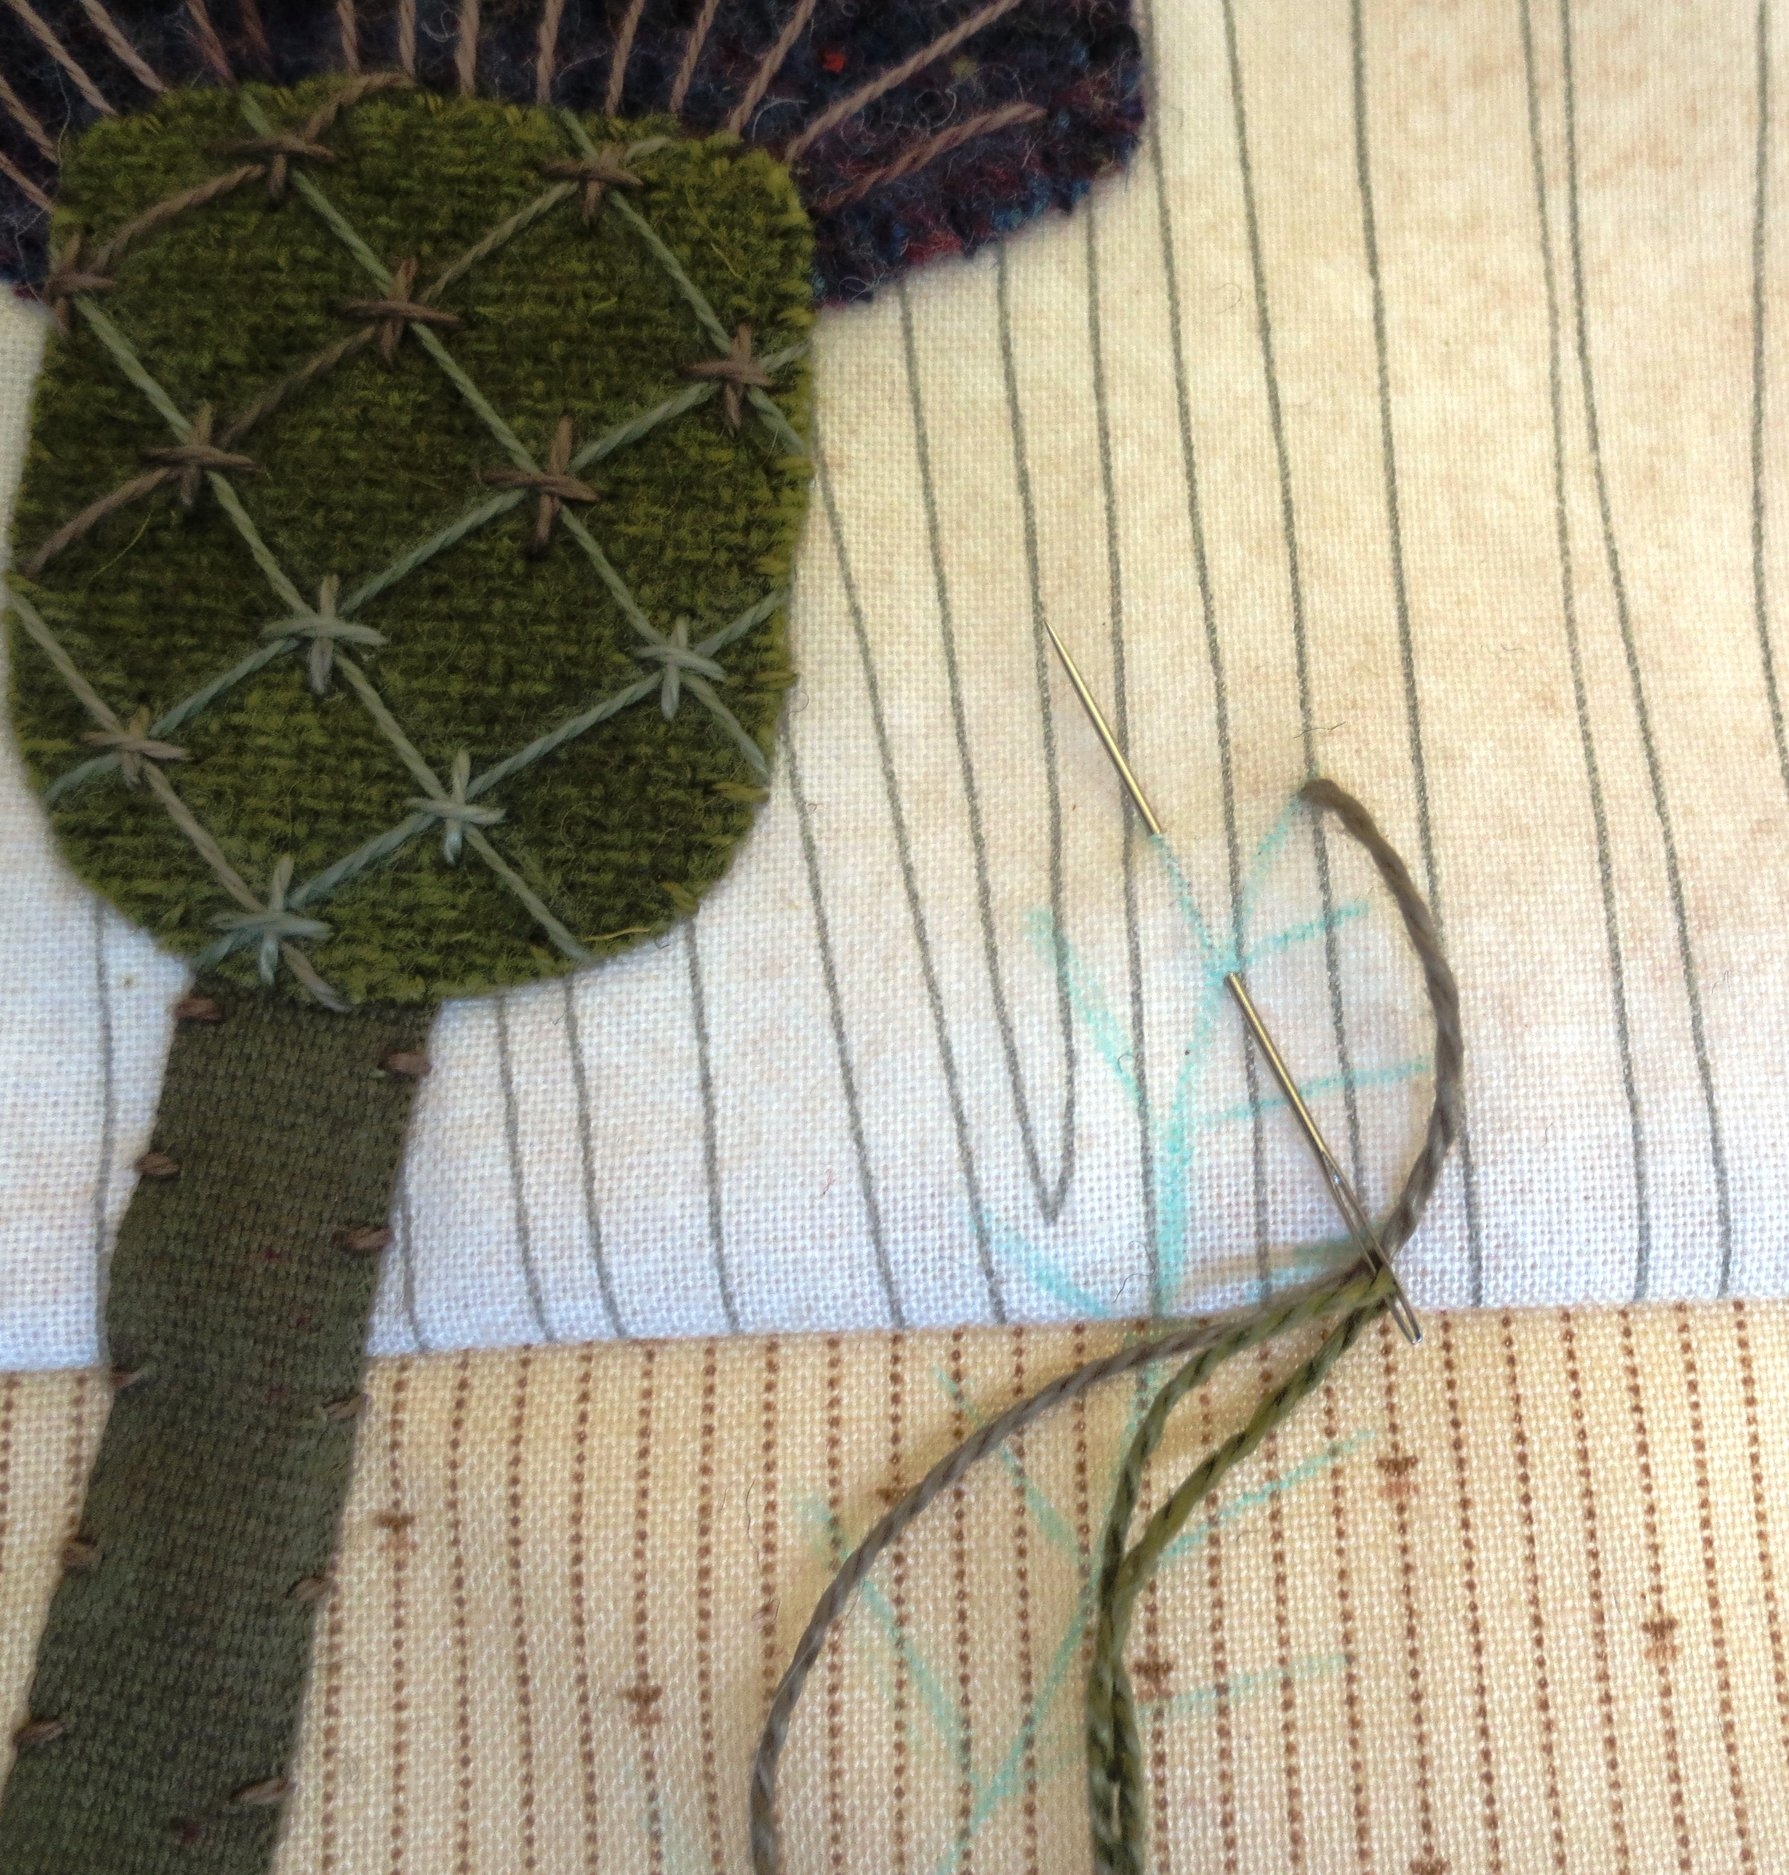
24. Flower and Leaf Stems
- Draw the veins of the leaves with a chalk pencil. You will stitch the veins in a minute, but first we'll stitch the stems and the large flower.
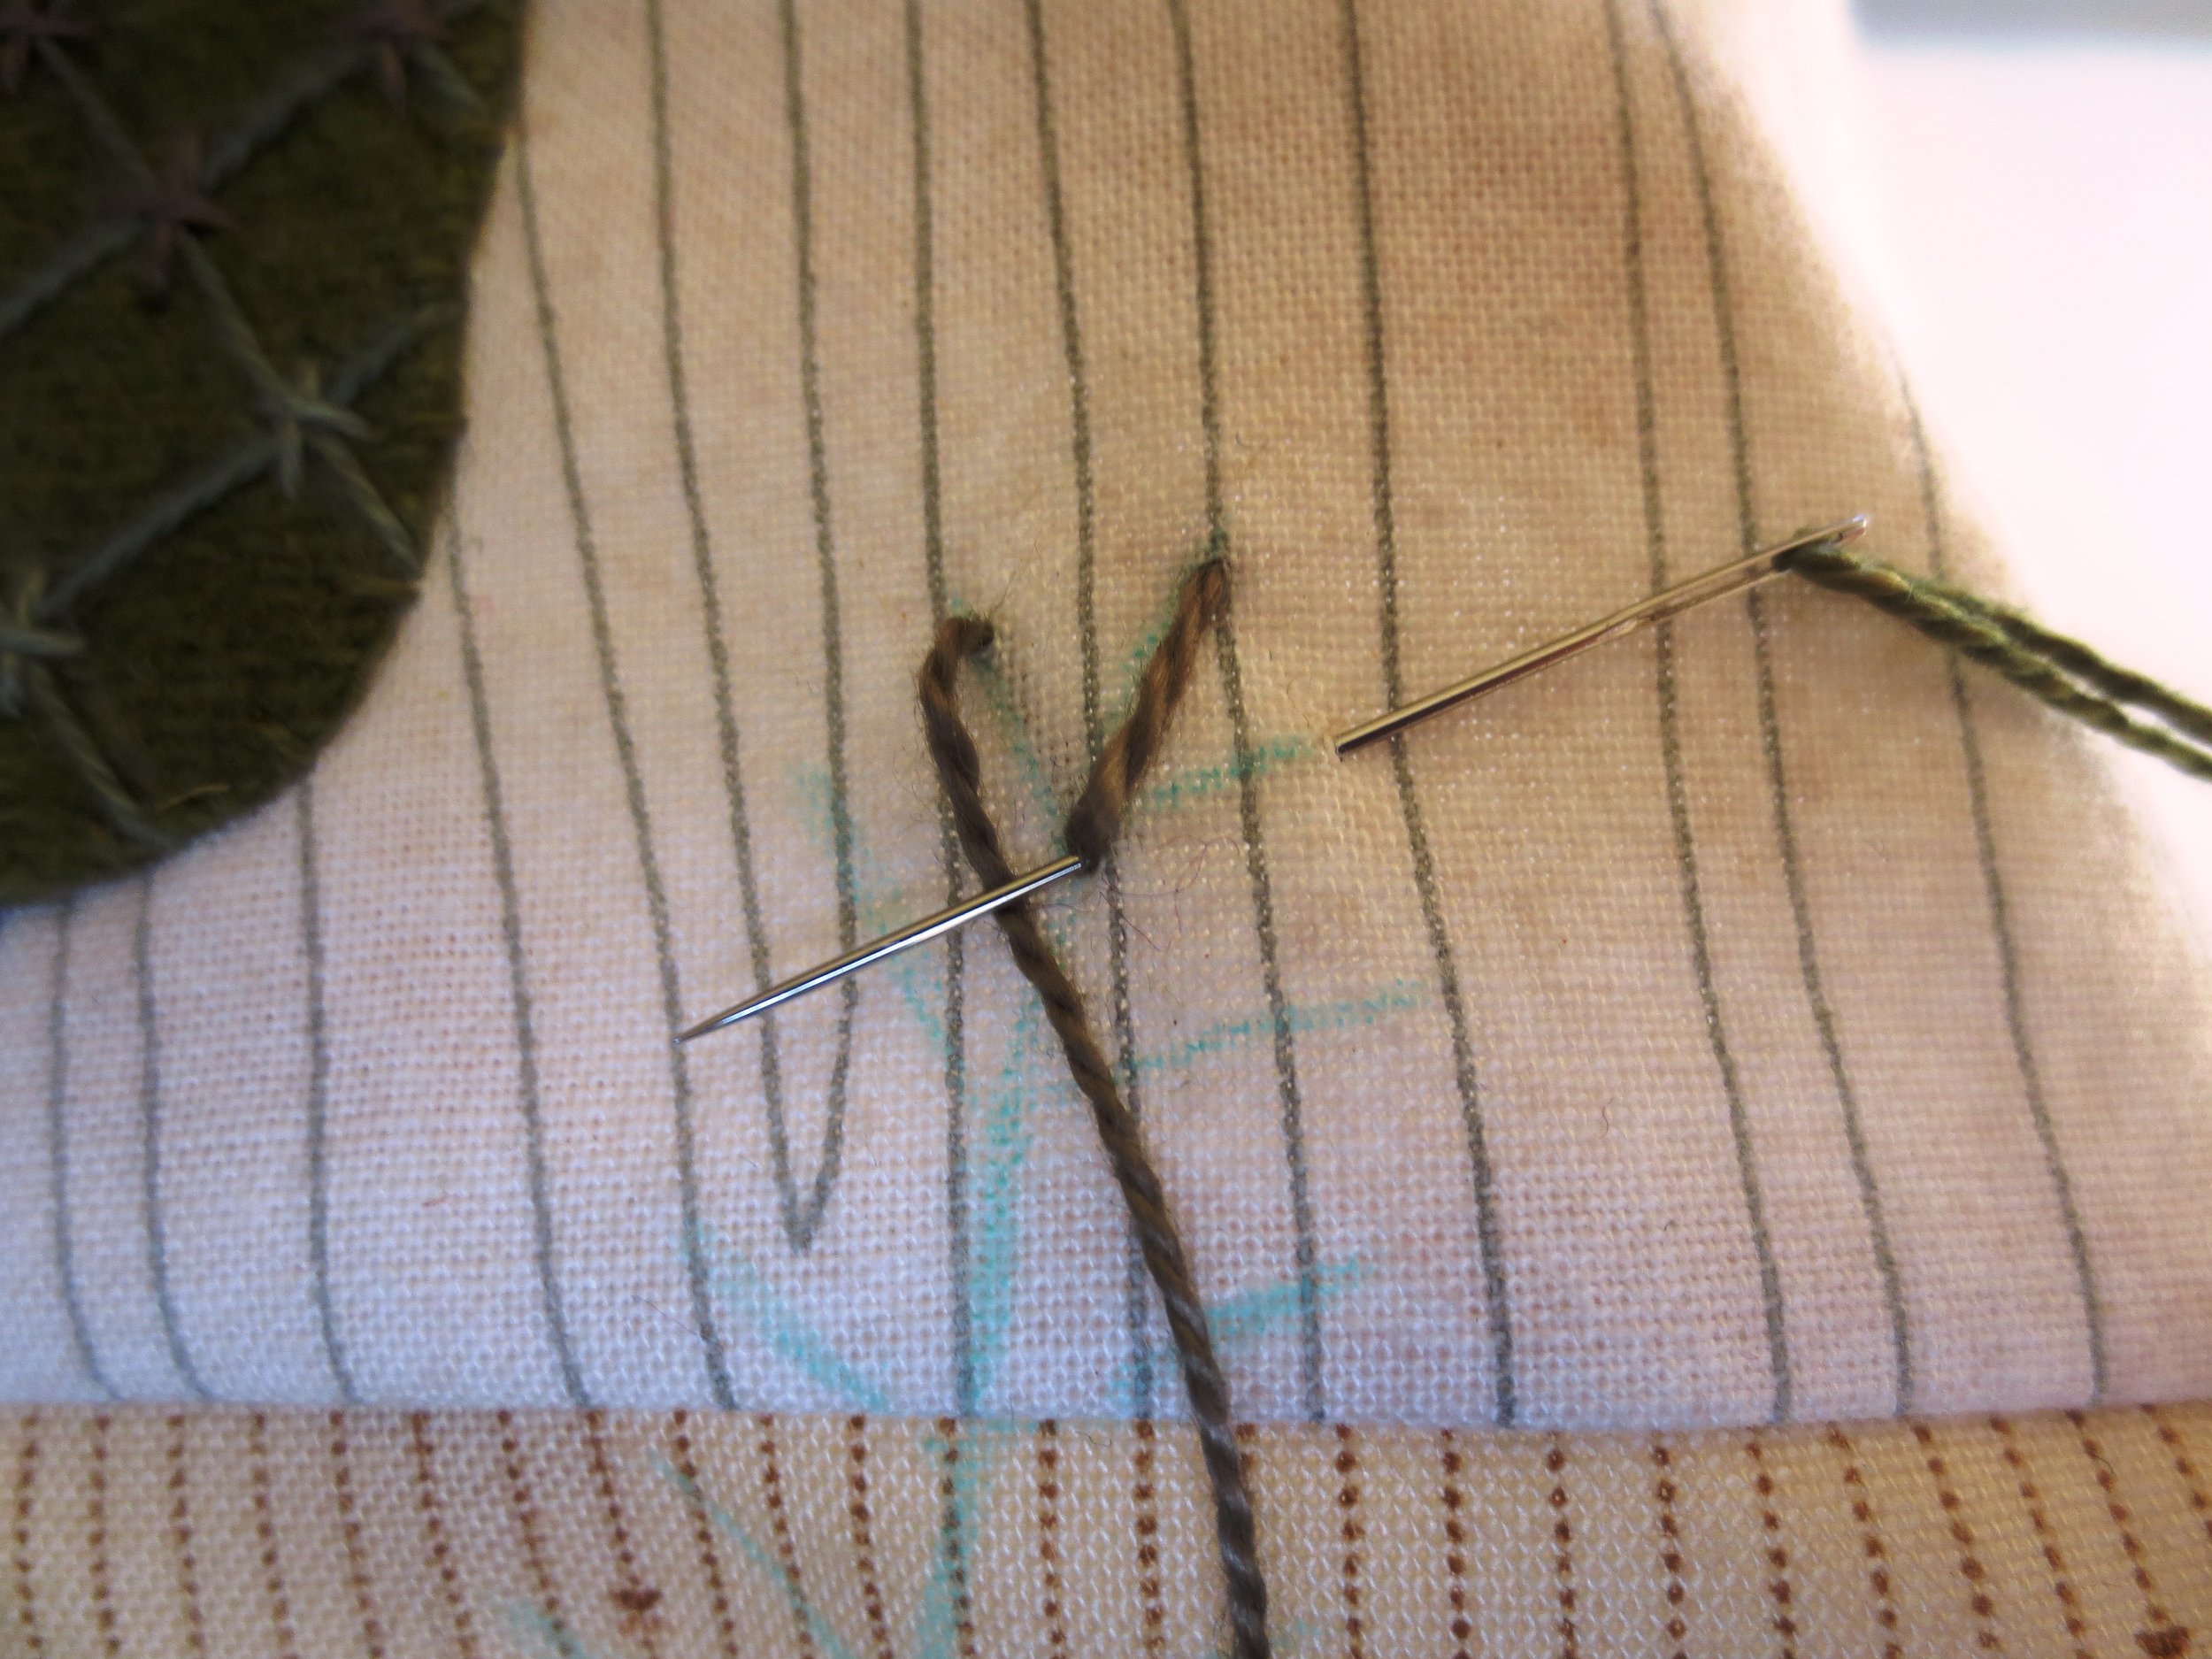
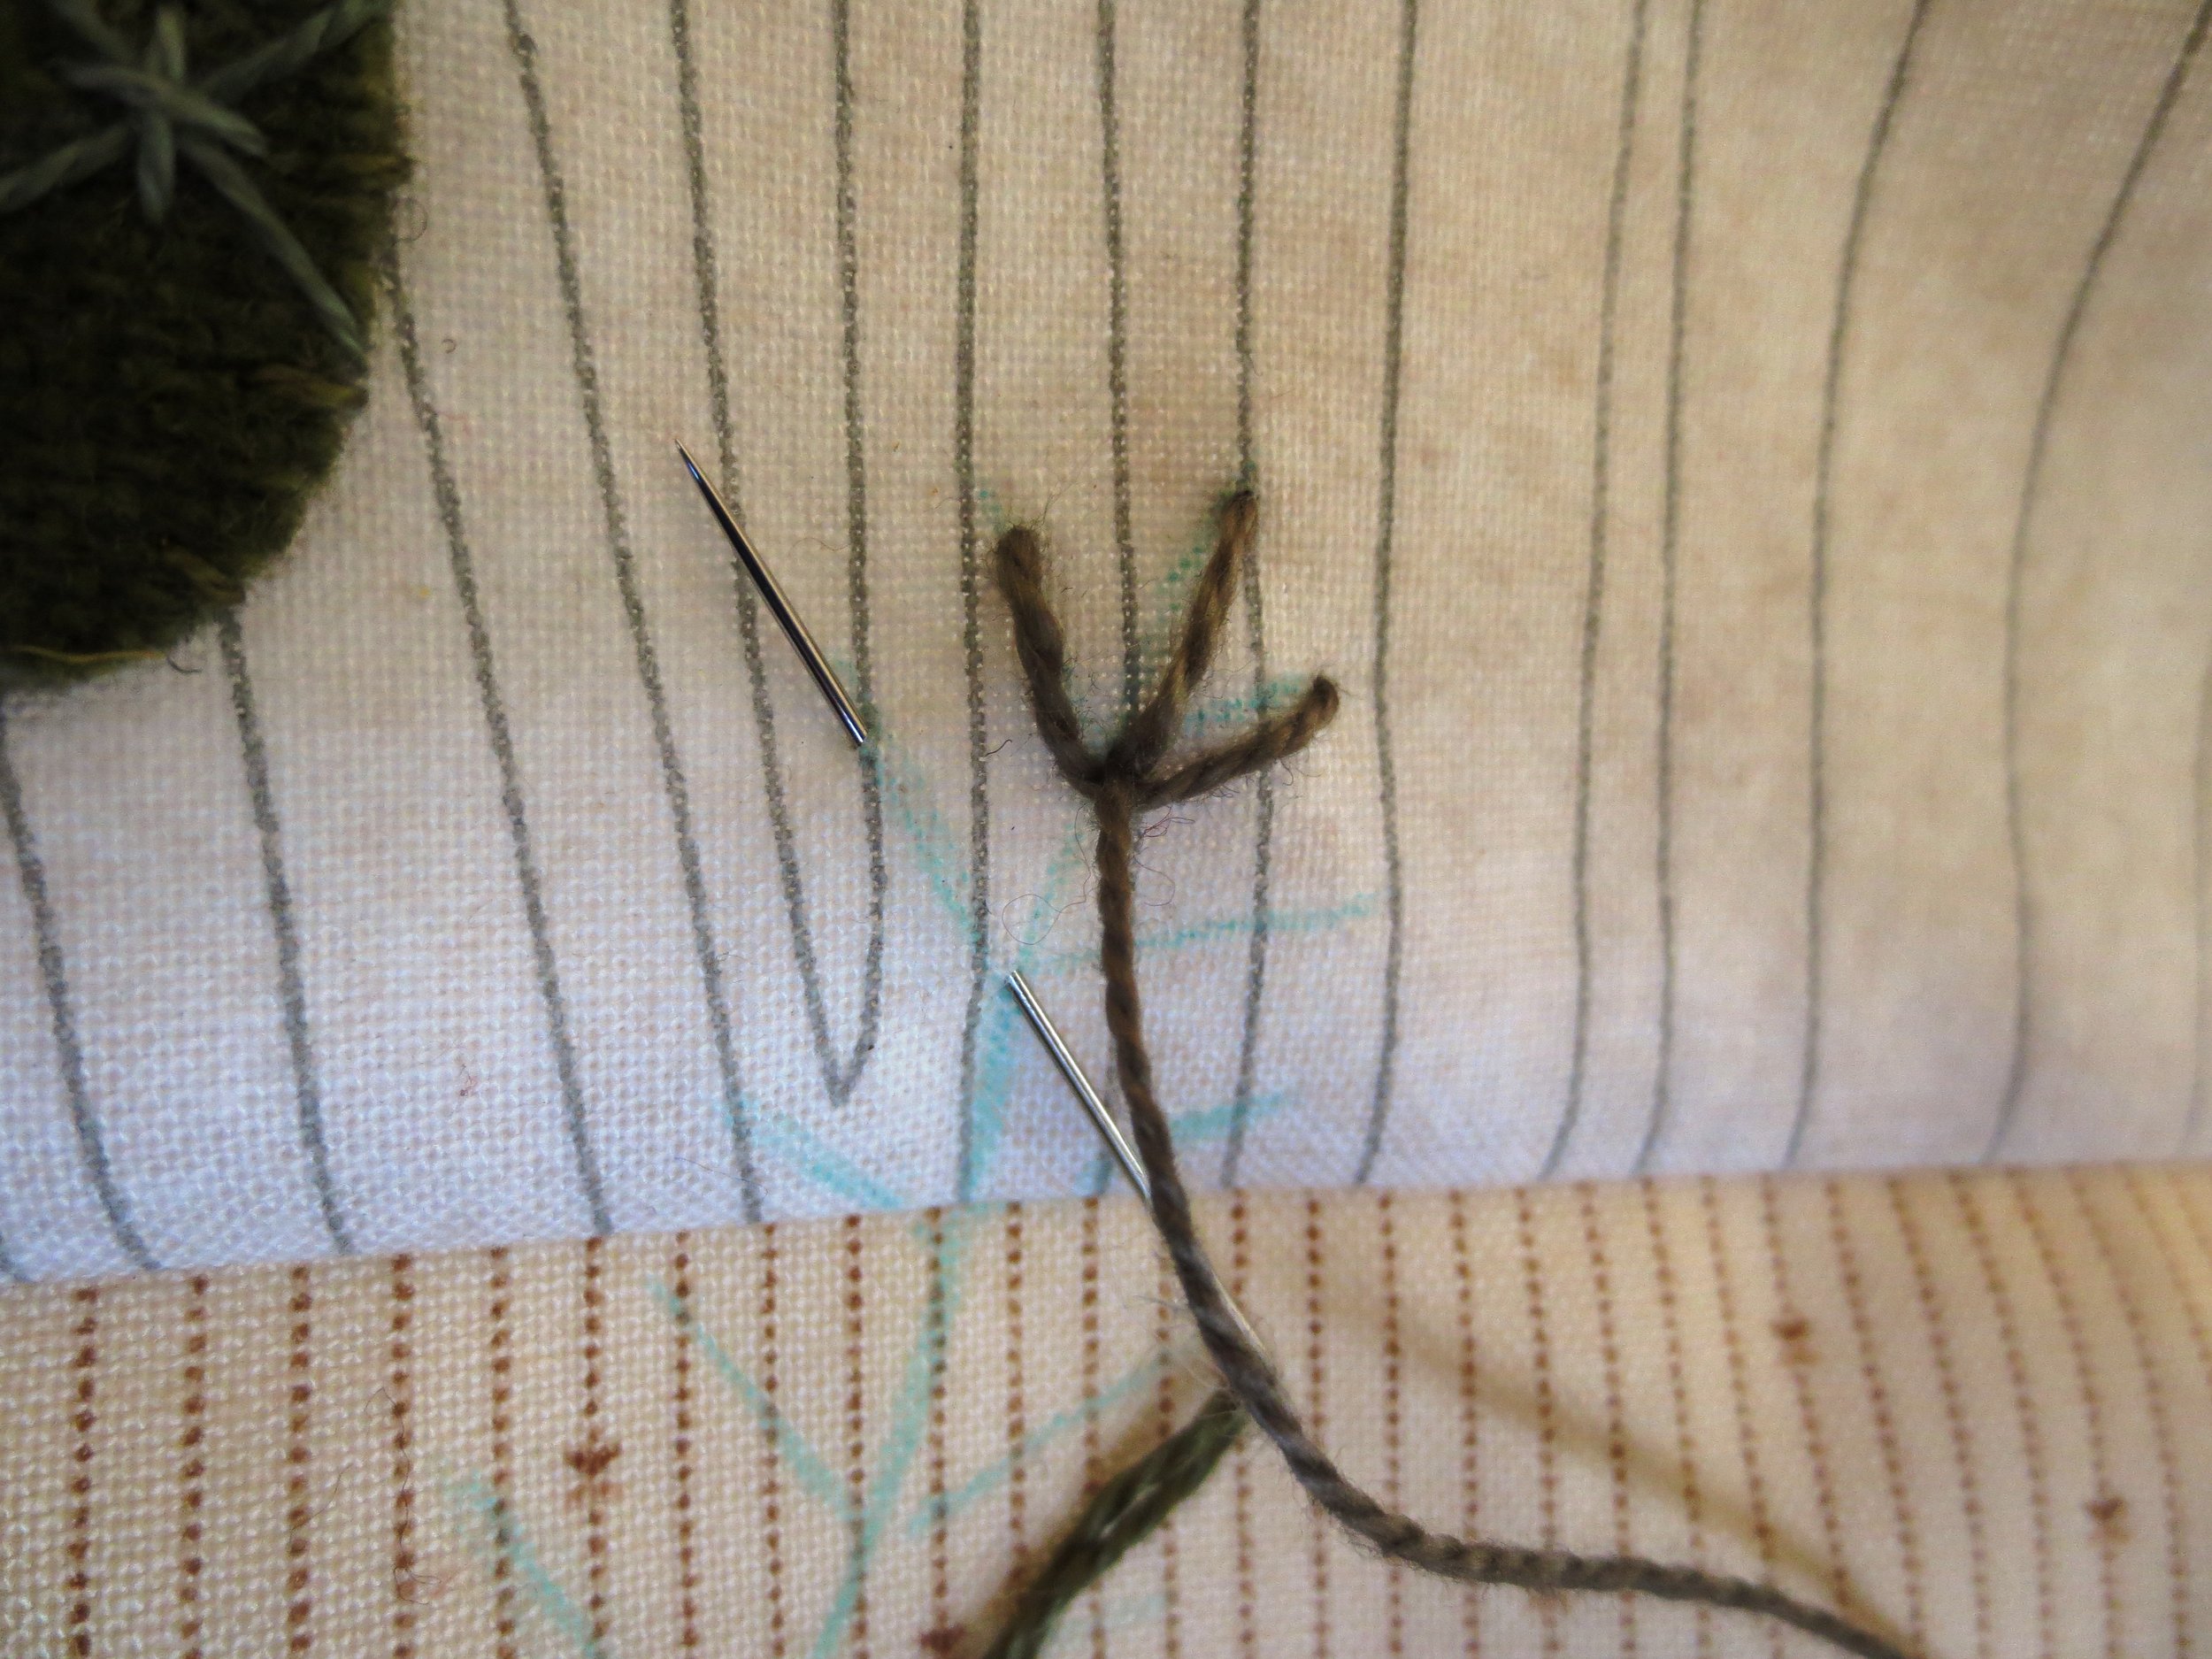
- Use two colors of perle cotton, size 8 to stitch a woven back stitch over the drawn stems. I used Valdani #O519 (variegated green) and #O518 (variegated greenish brown). Begin with a basic back stitch using the green thread.

- Then weave the second color in and out of the back stitched line.
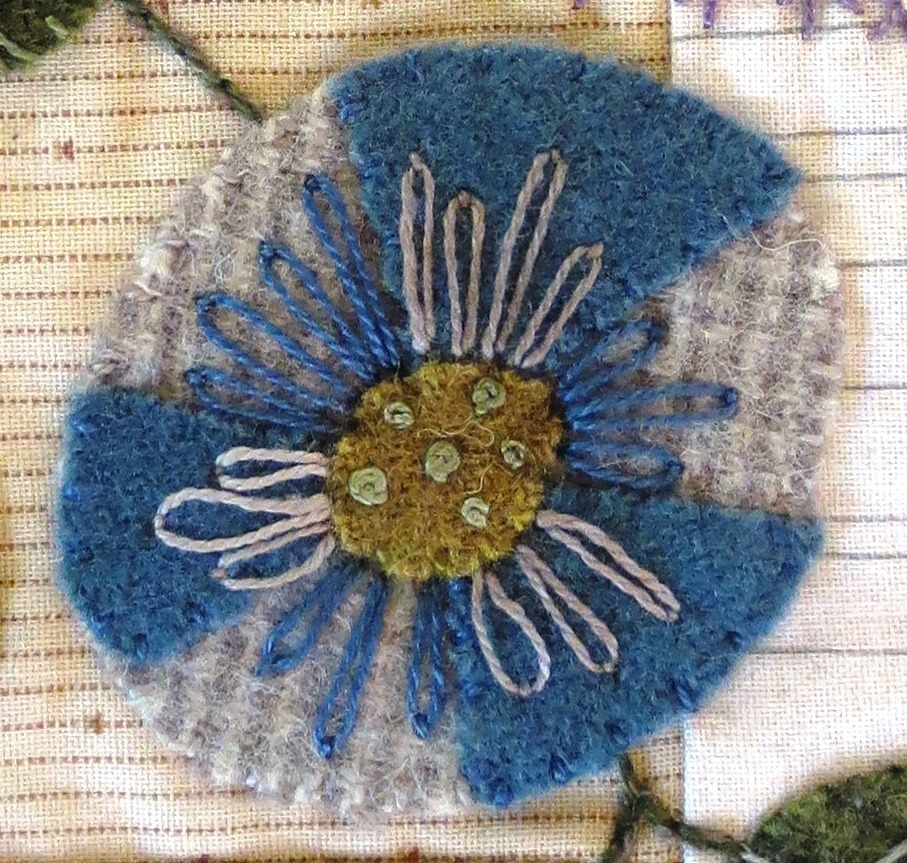
25. Large Flower Embellishment
- Use a color of perle cotton, size 12 that matches your flower's base to make lazy daisy stitches of various lengths on the flower's top (see layout for placement). I used Valdani #O178. This is the same thread I used to whip stitch the flower base.
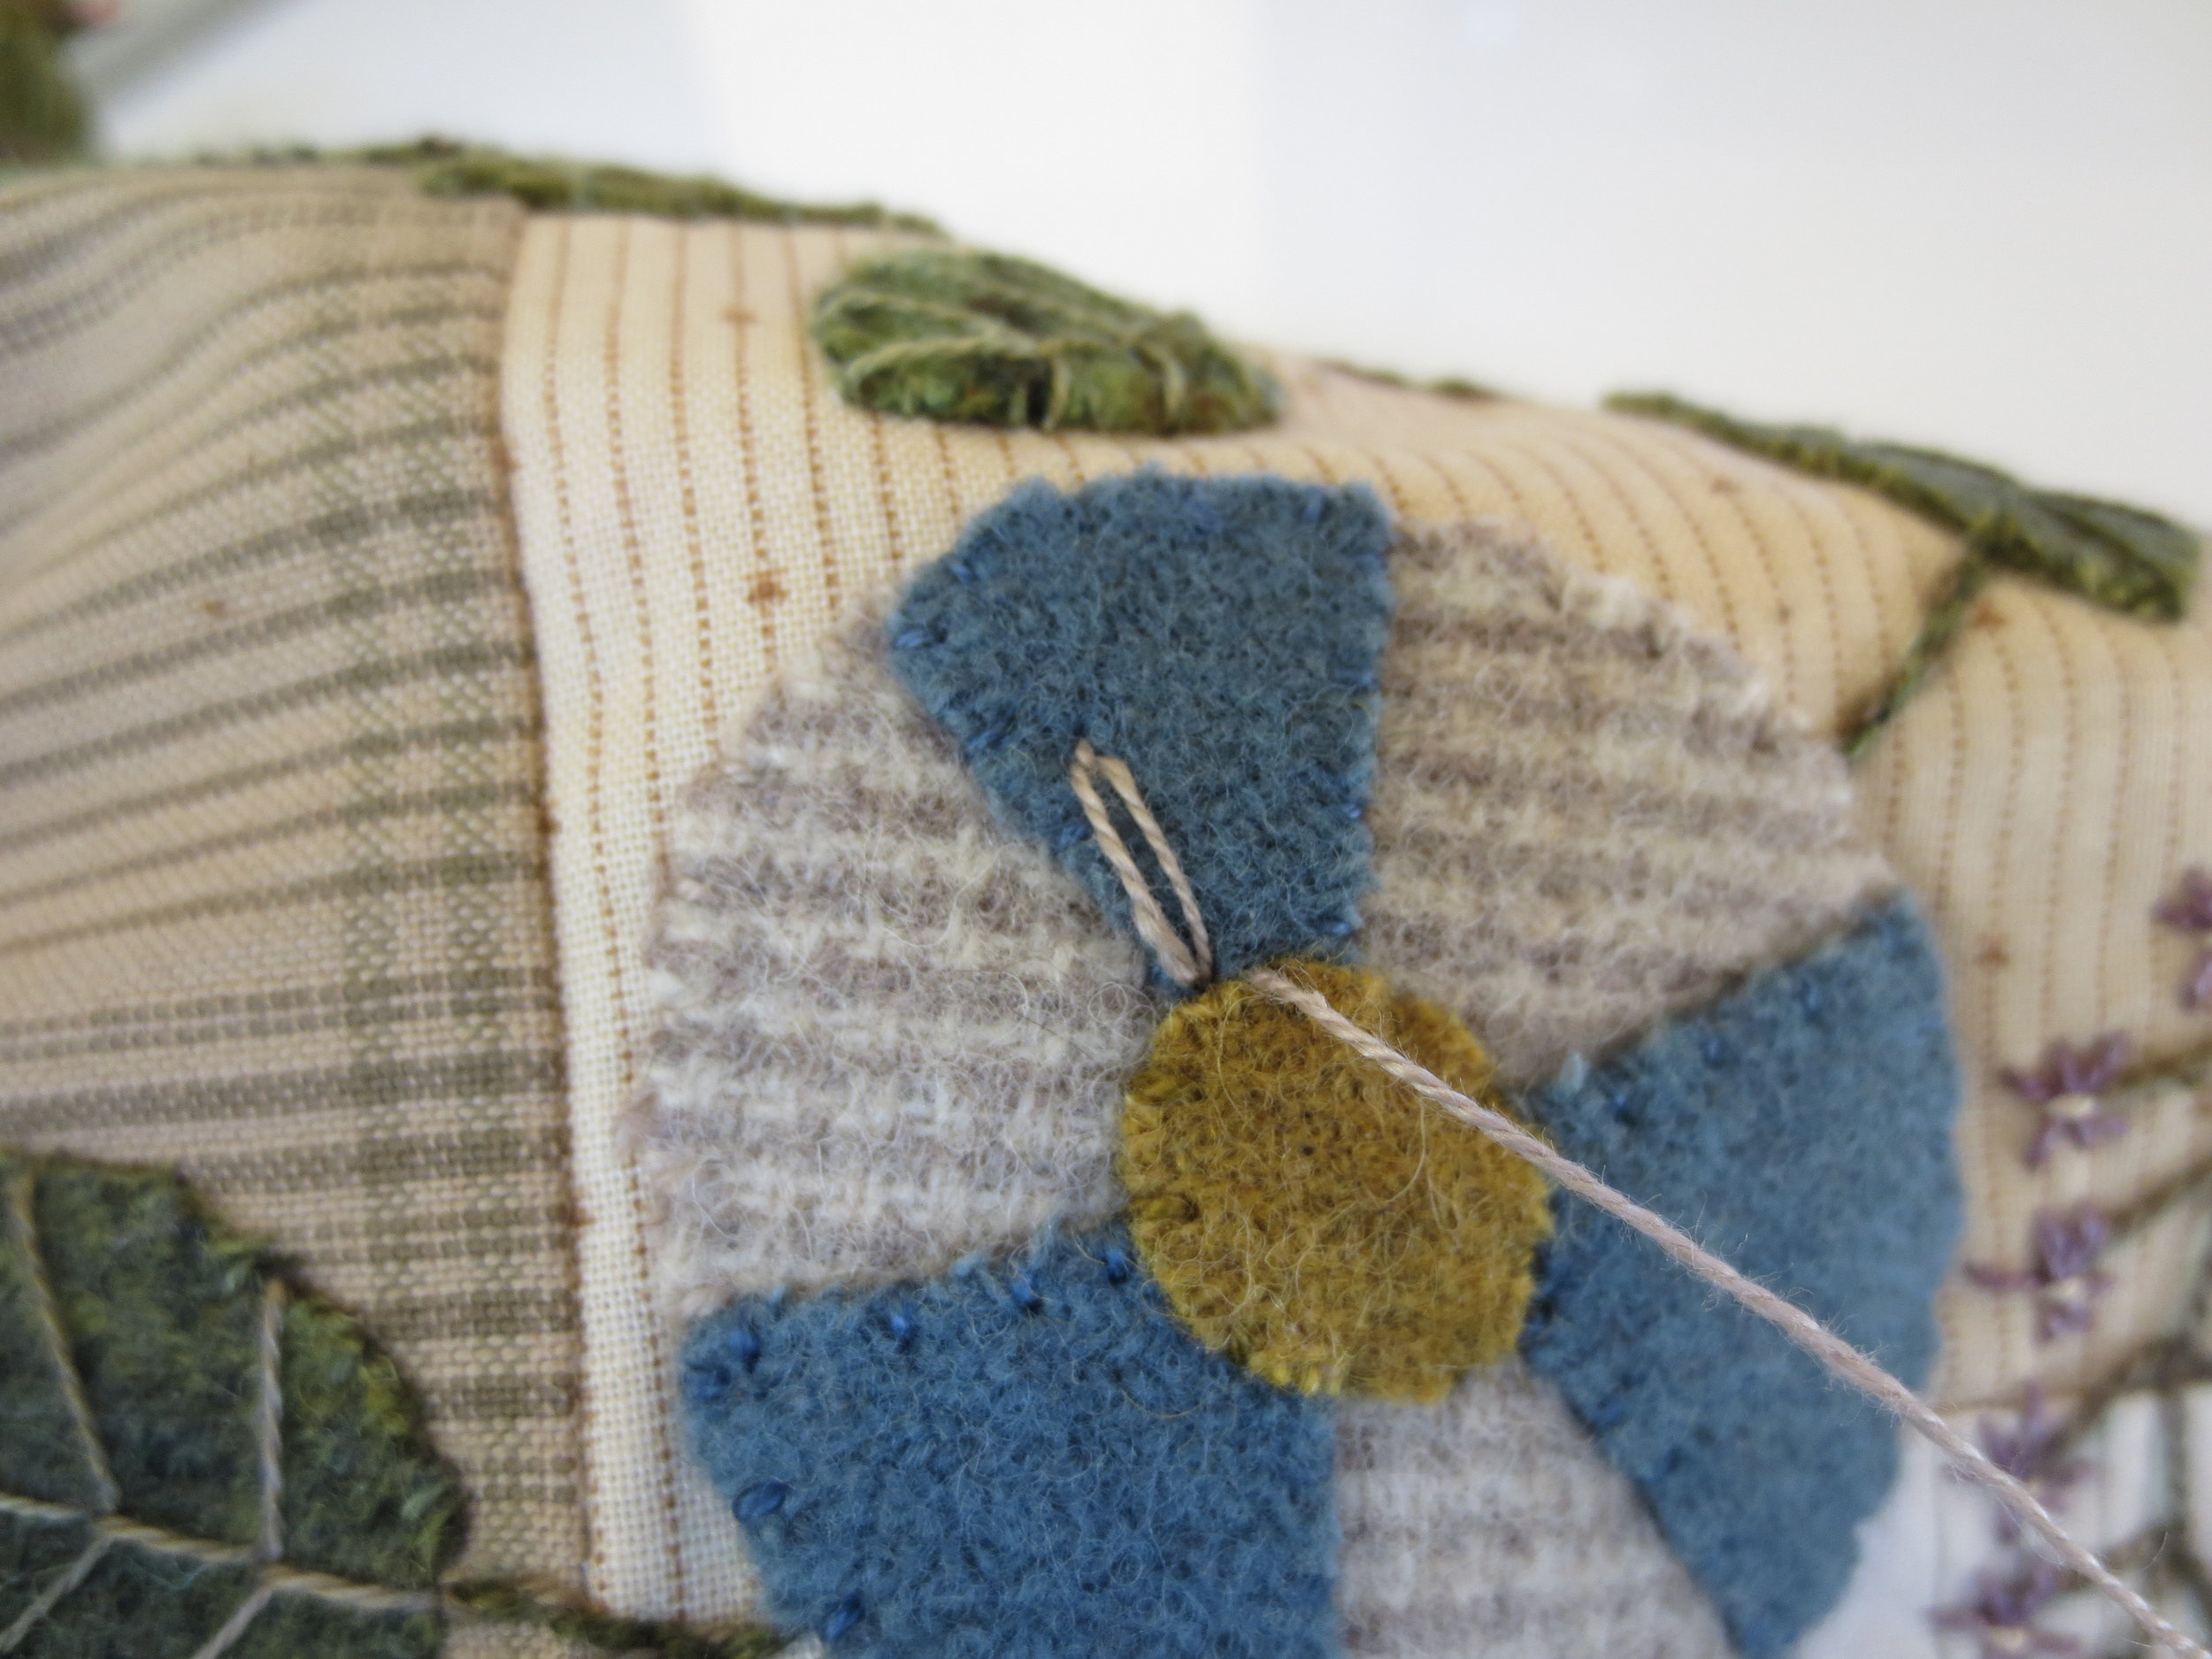
- Repeat lazy daisy stitches on the flower's base with a color that matches the flower's top (see layout for placement). I used Valdani #871 (blue). This is the same thread used to whip stitch the flower's top.
- Use the green thread used to whip stitch the leaves to stitch french knots on the flower center (see layout for placement).
26.Remember those leaf veins? Use green perle cotton, size 12 to stitch the veins of the leaves. Use a closed fly stitch beginning at the tip of each leaf, making 3 sets of branches on each leaf. I used a variegated green (Valdani #O519) that I could select light and dark portions from for contrast on dark and light leaves.
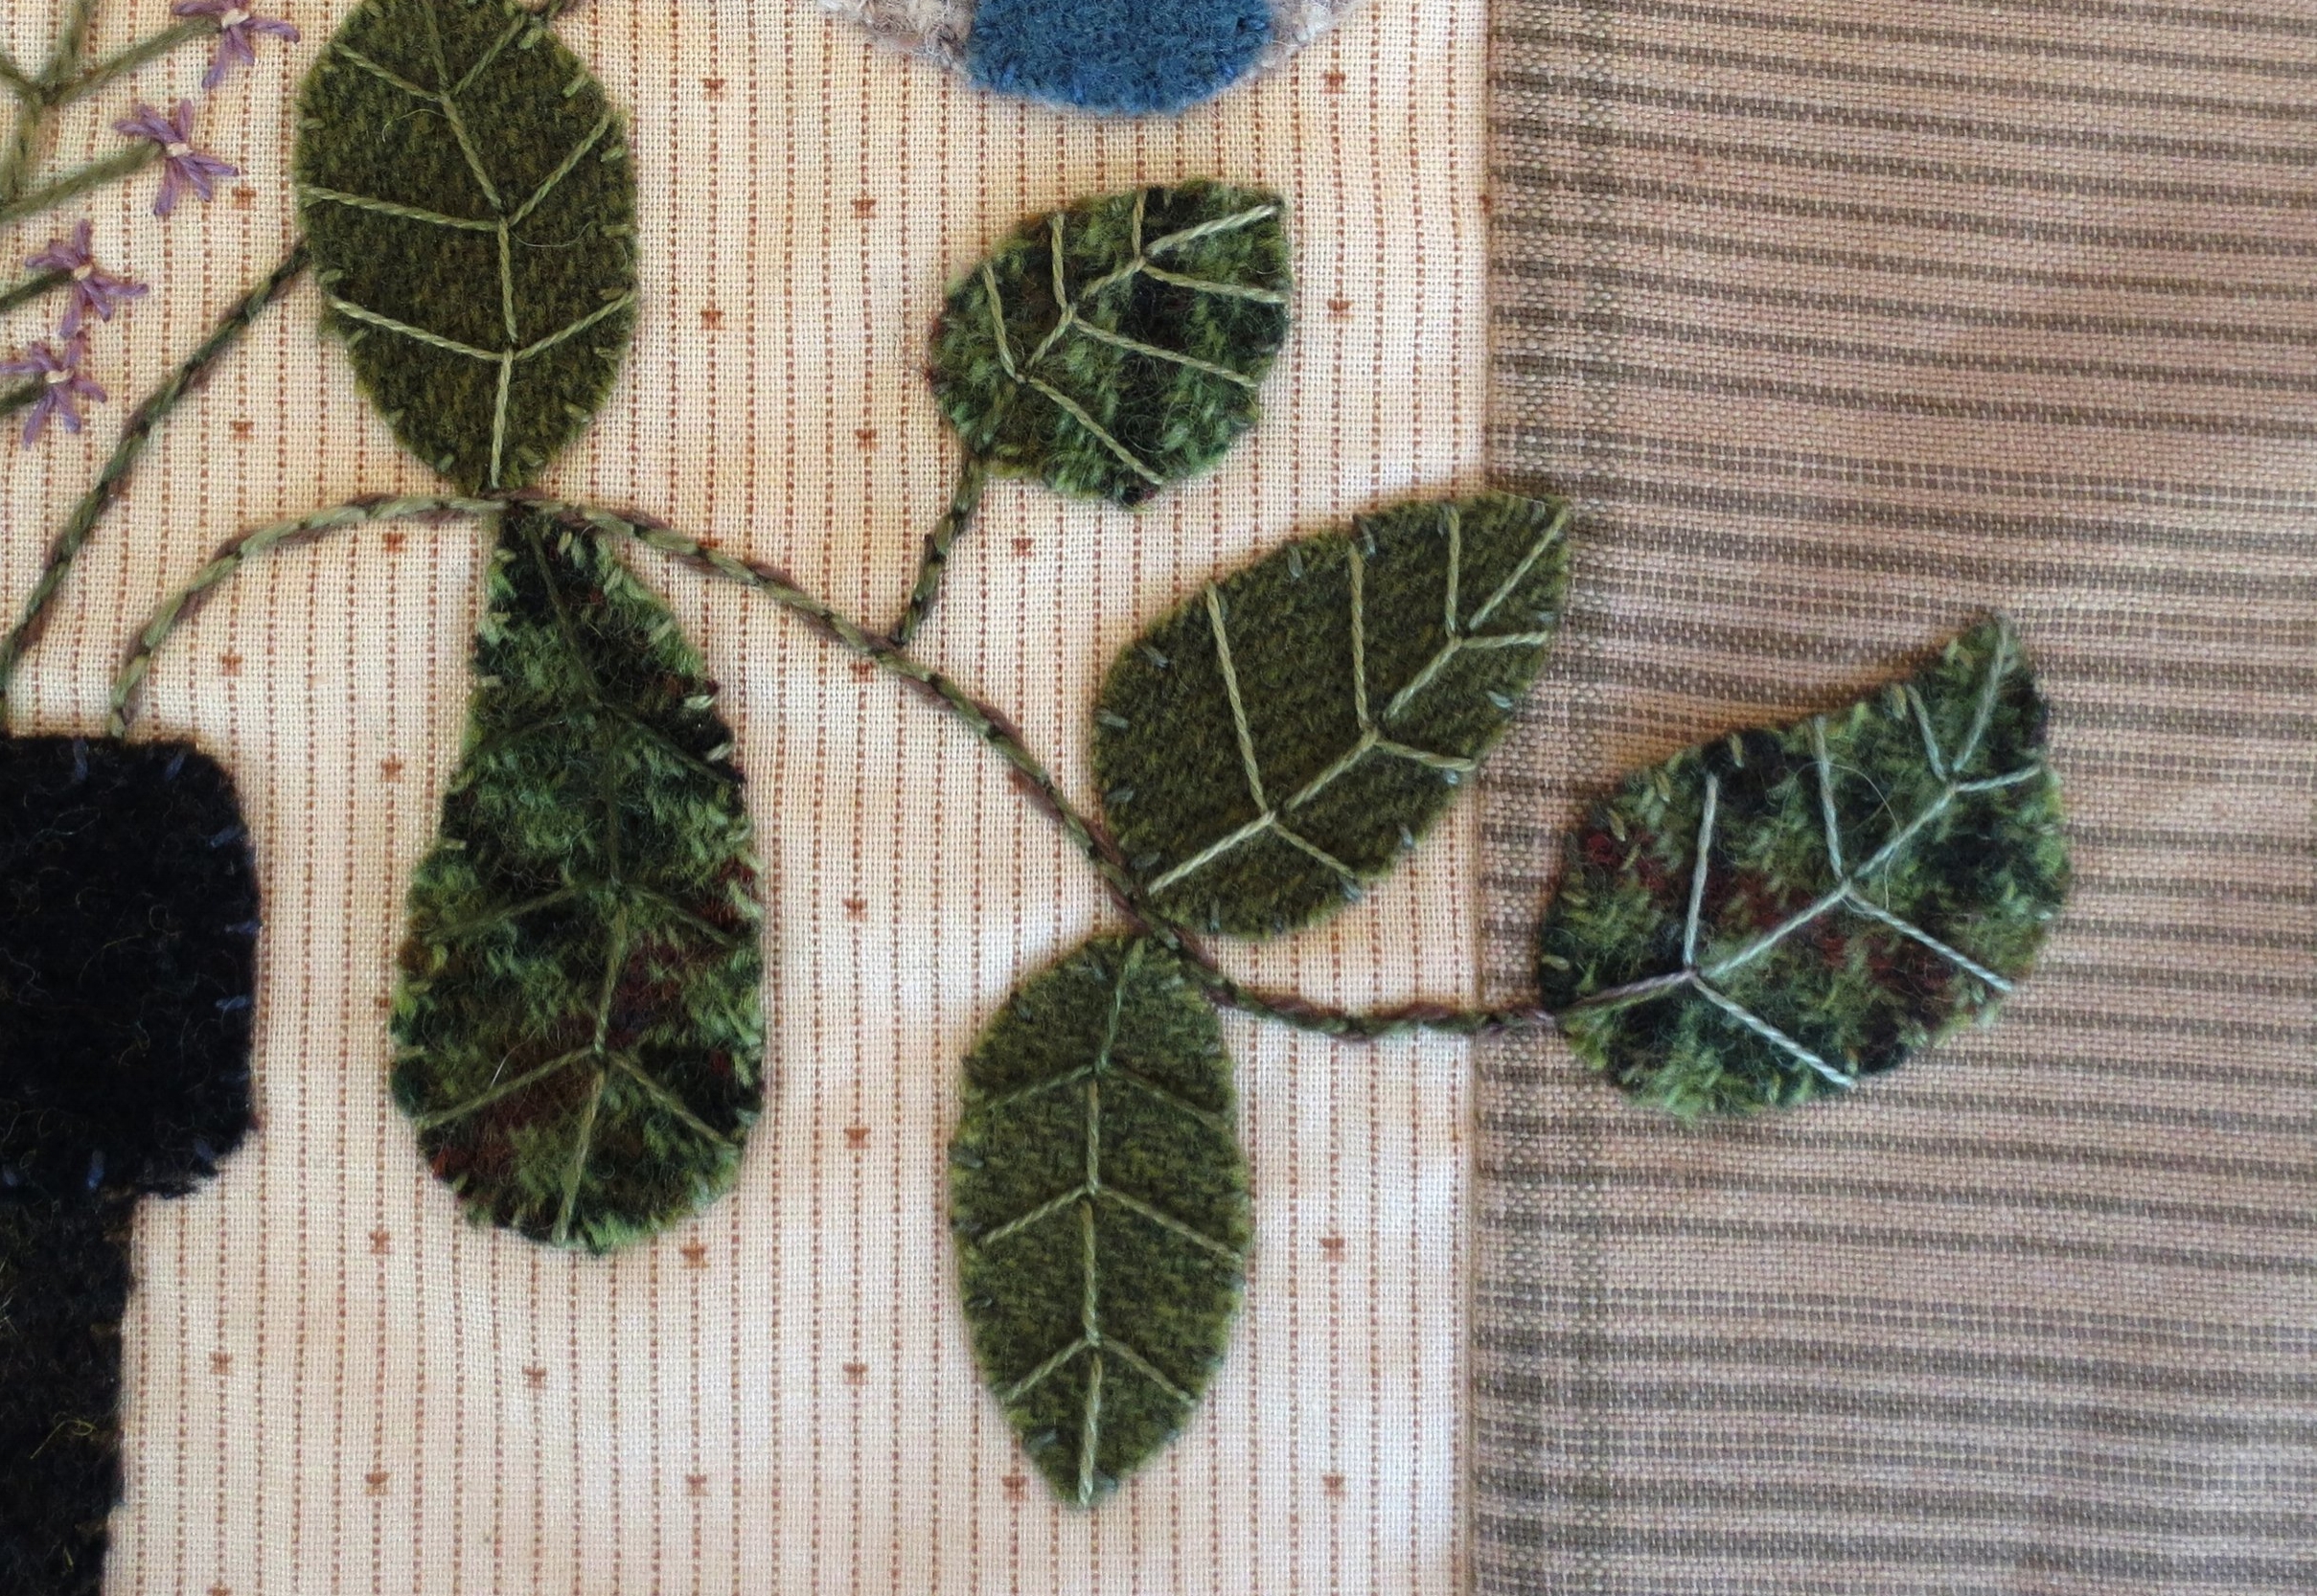
Hooray! The right side of the design (except for the worm) is complete!
The next post will cover the left side, and the final post will cover the insects. Stay tuned.
Happy Stitching!