
Marsha's Choice

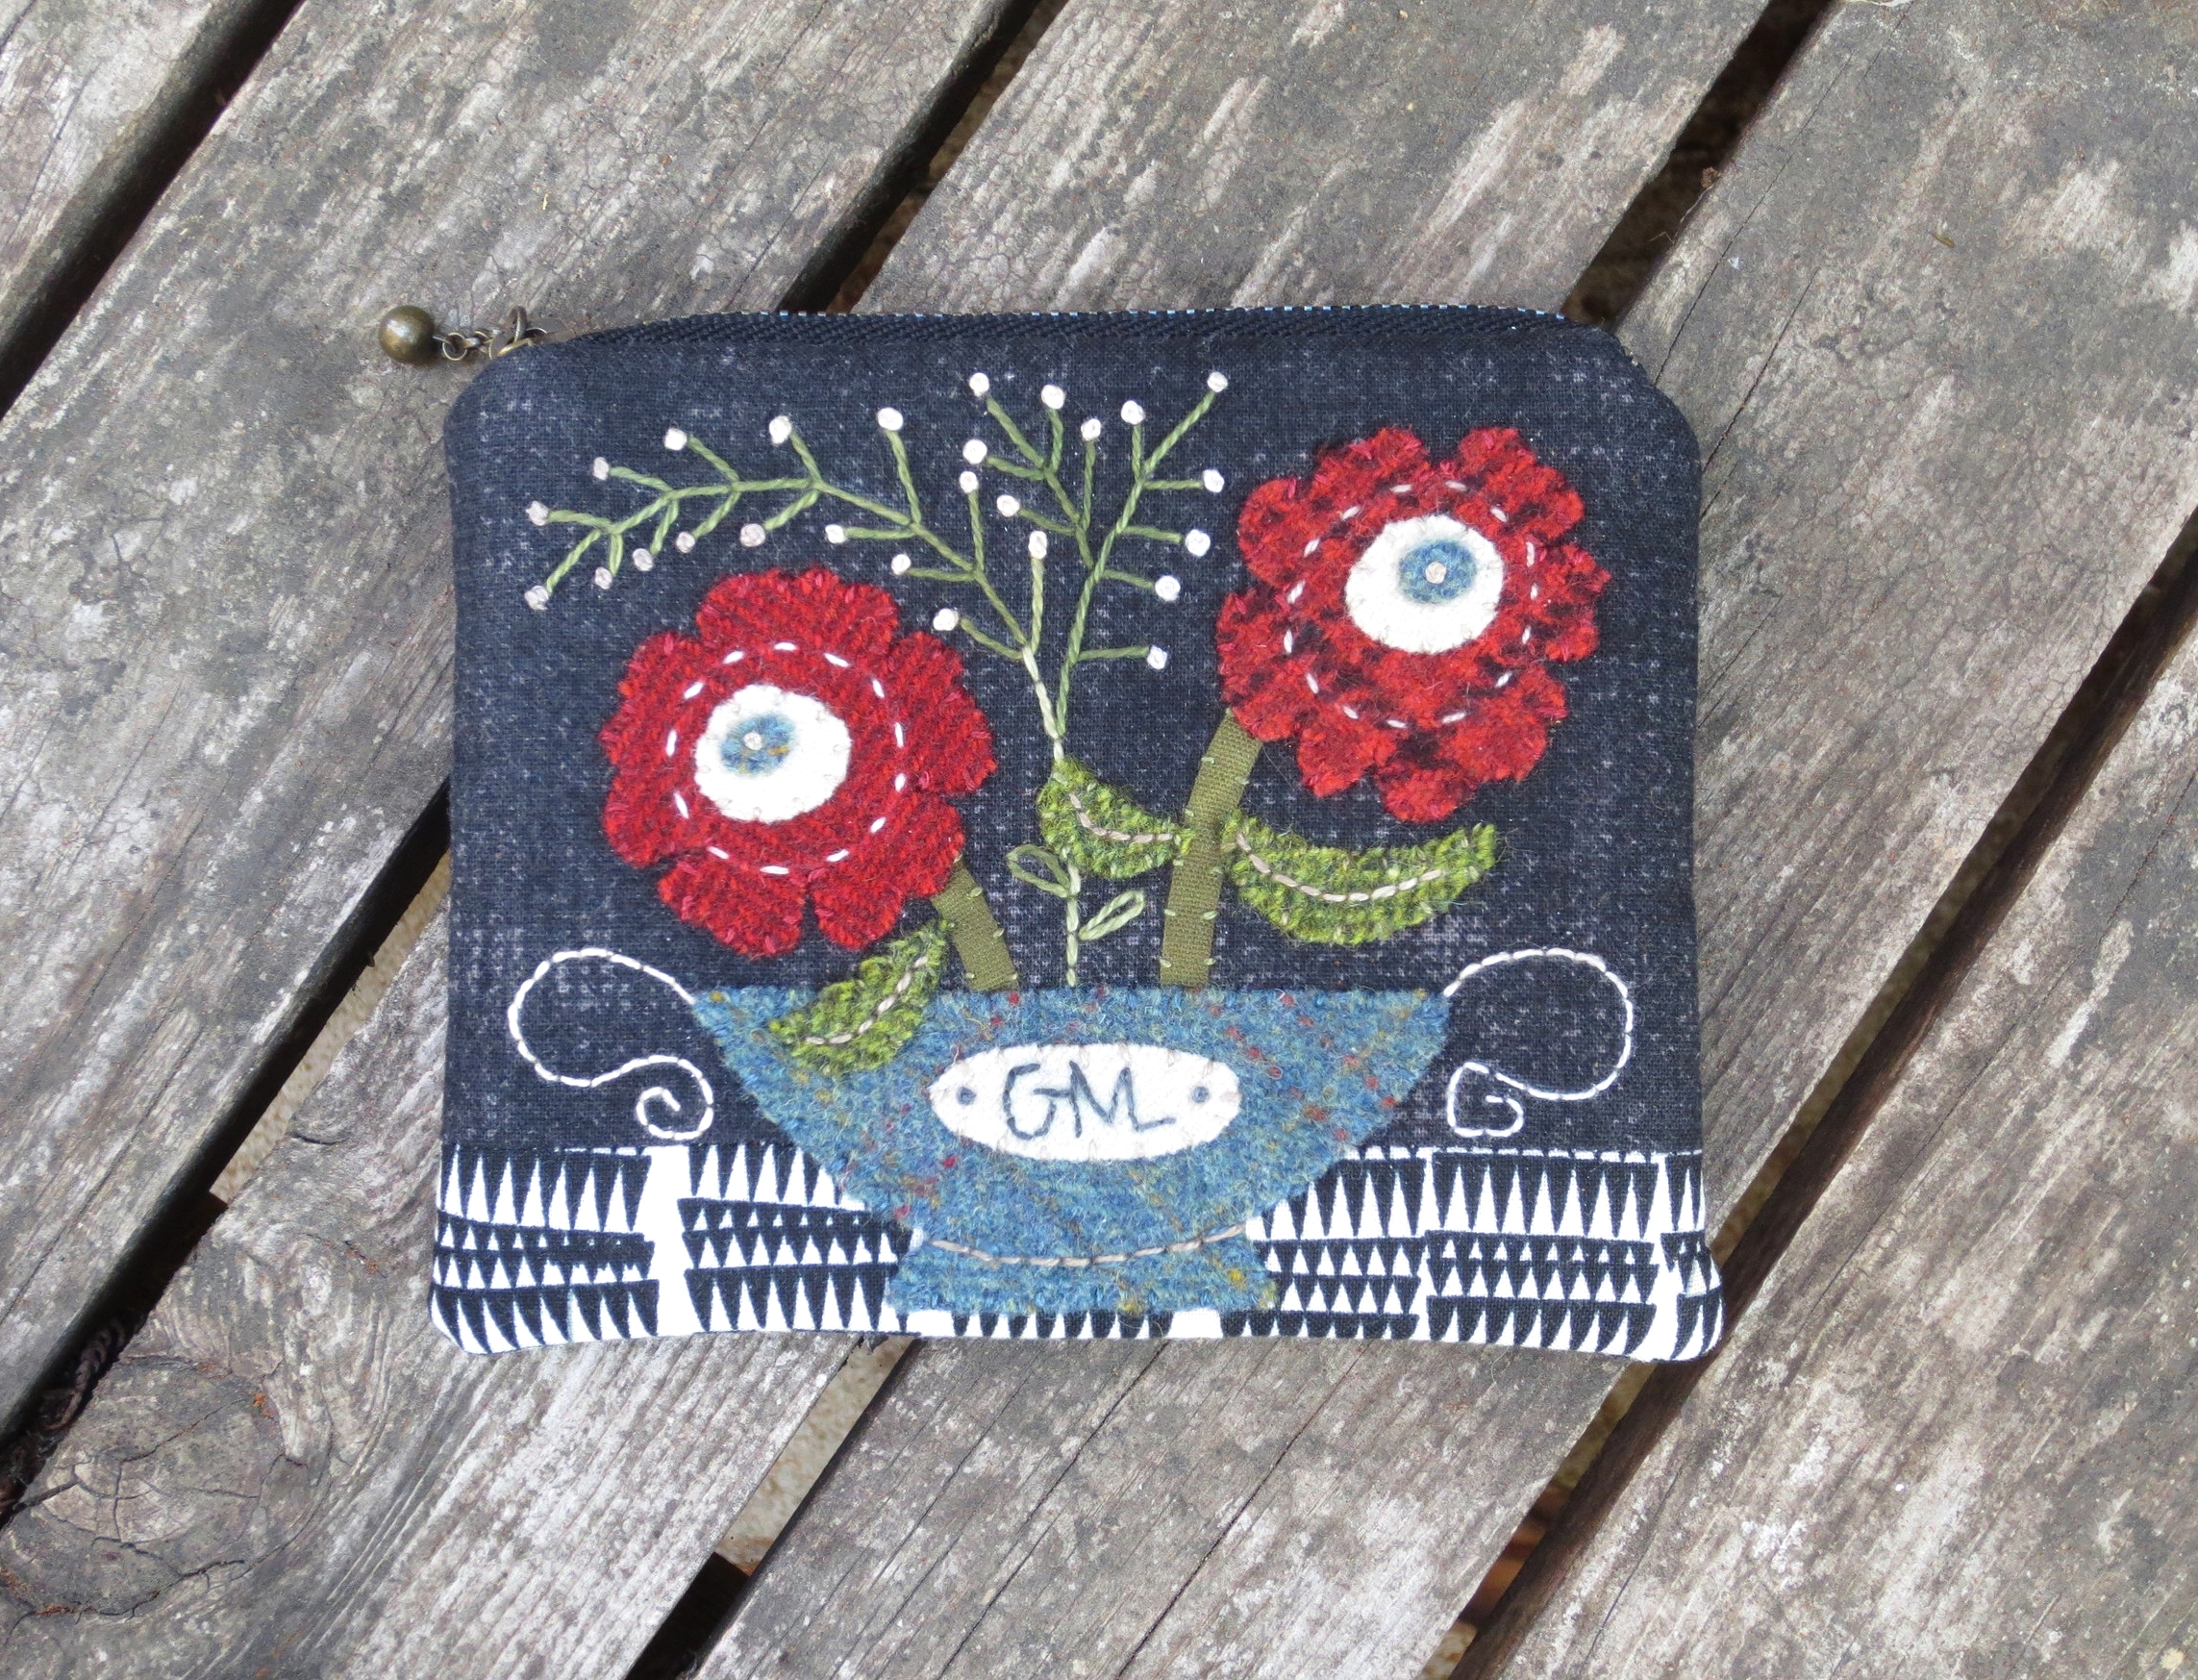
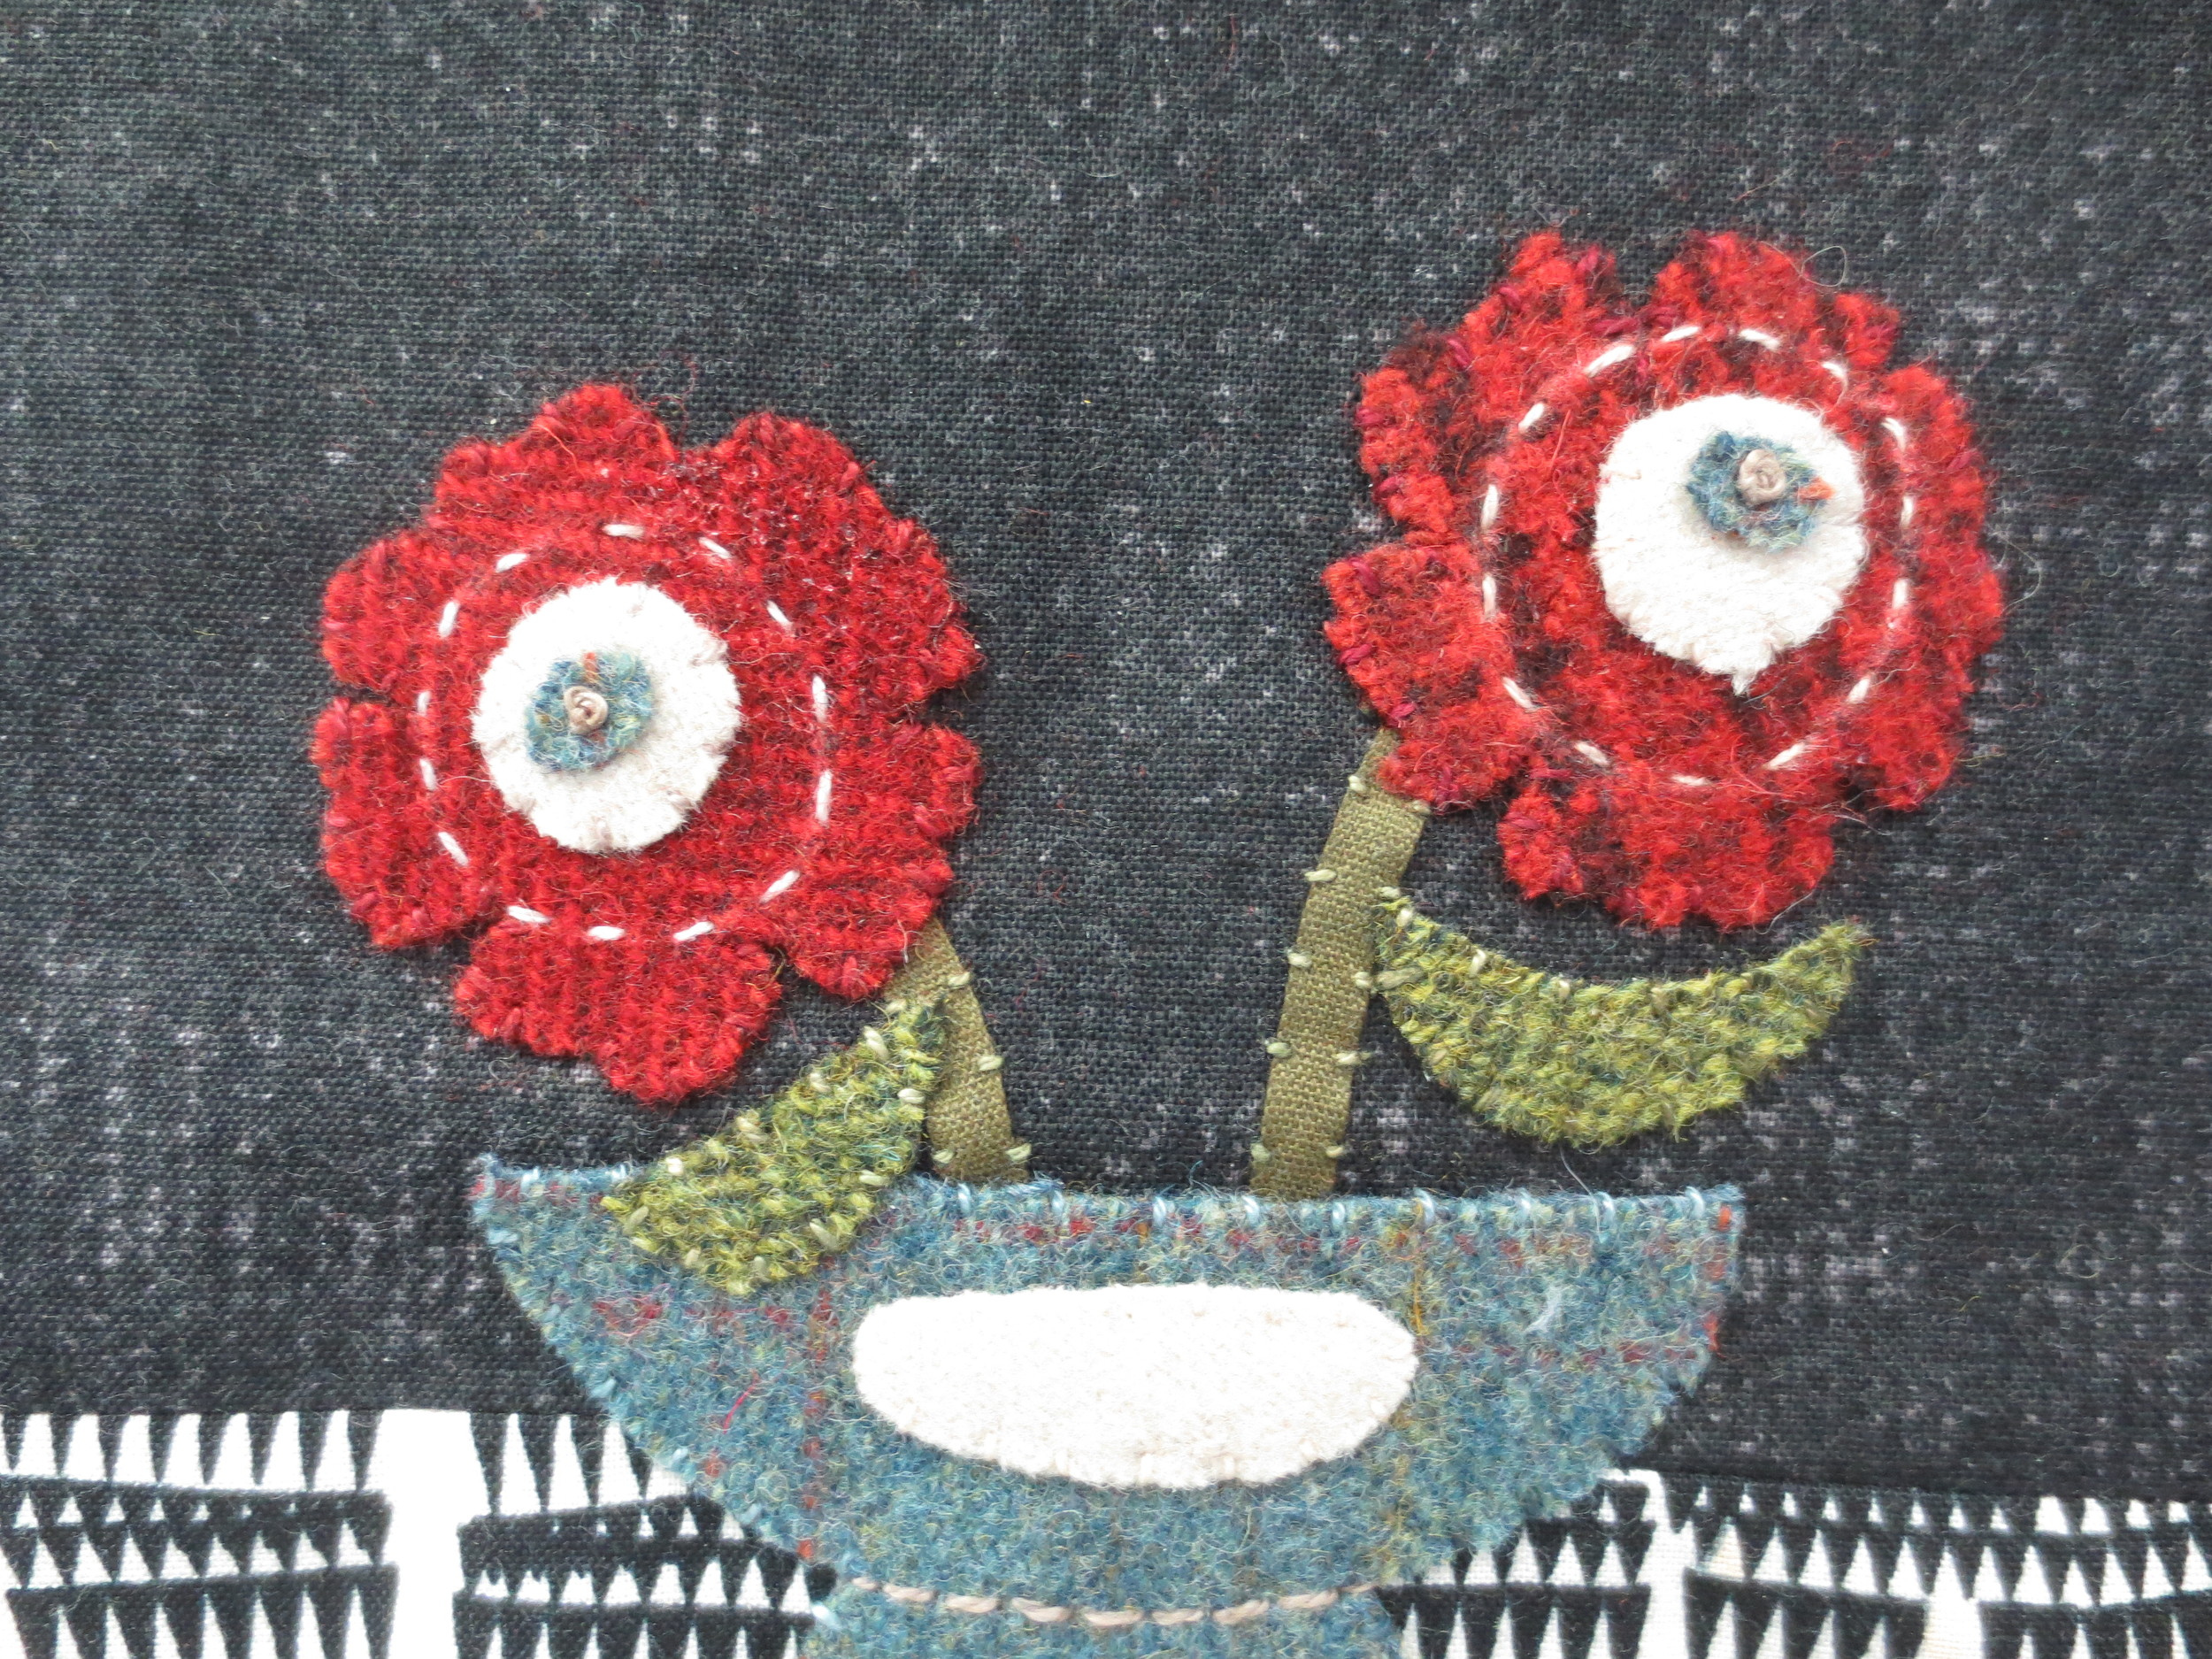
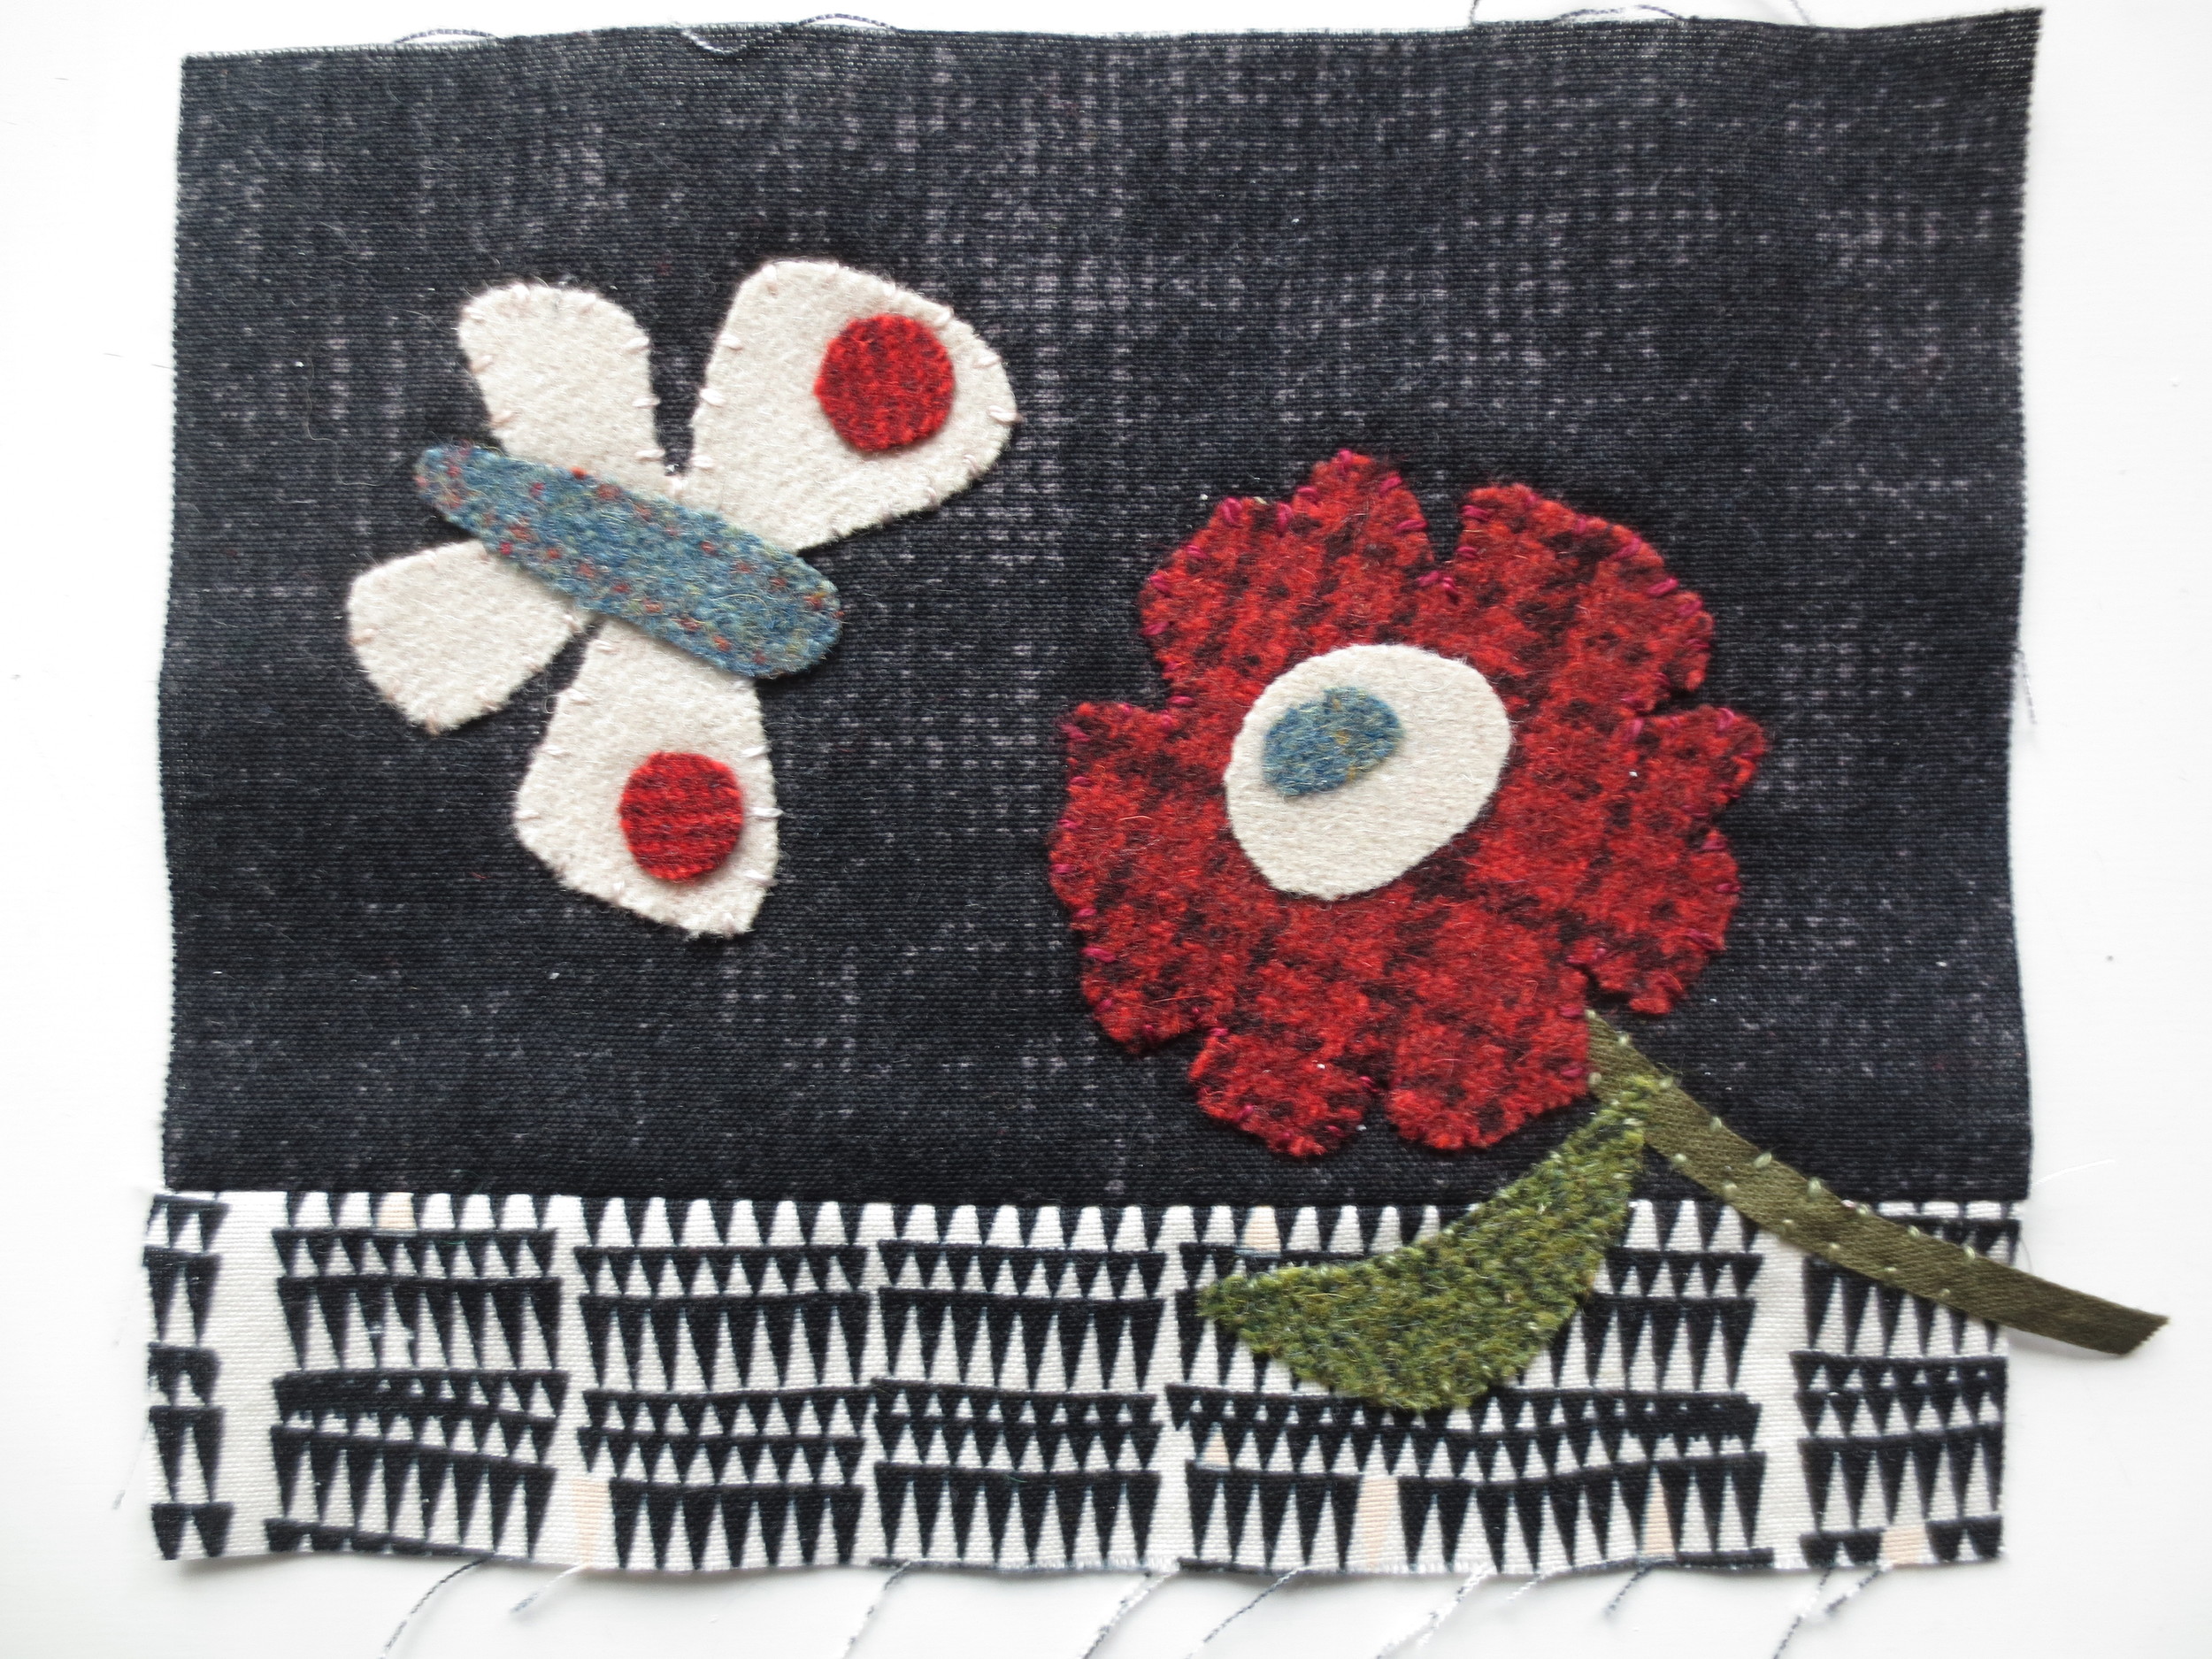
Marsha's Choice wool applique pouch - Back cover
This design is for Marsha from the Beach Cities Quilt Guild. You wanted a new design for the wool appliqued pouch, so here it is. I hope you like it.
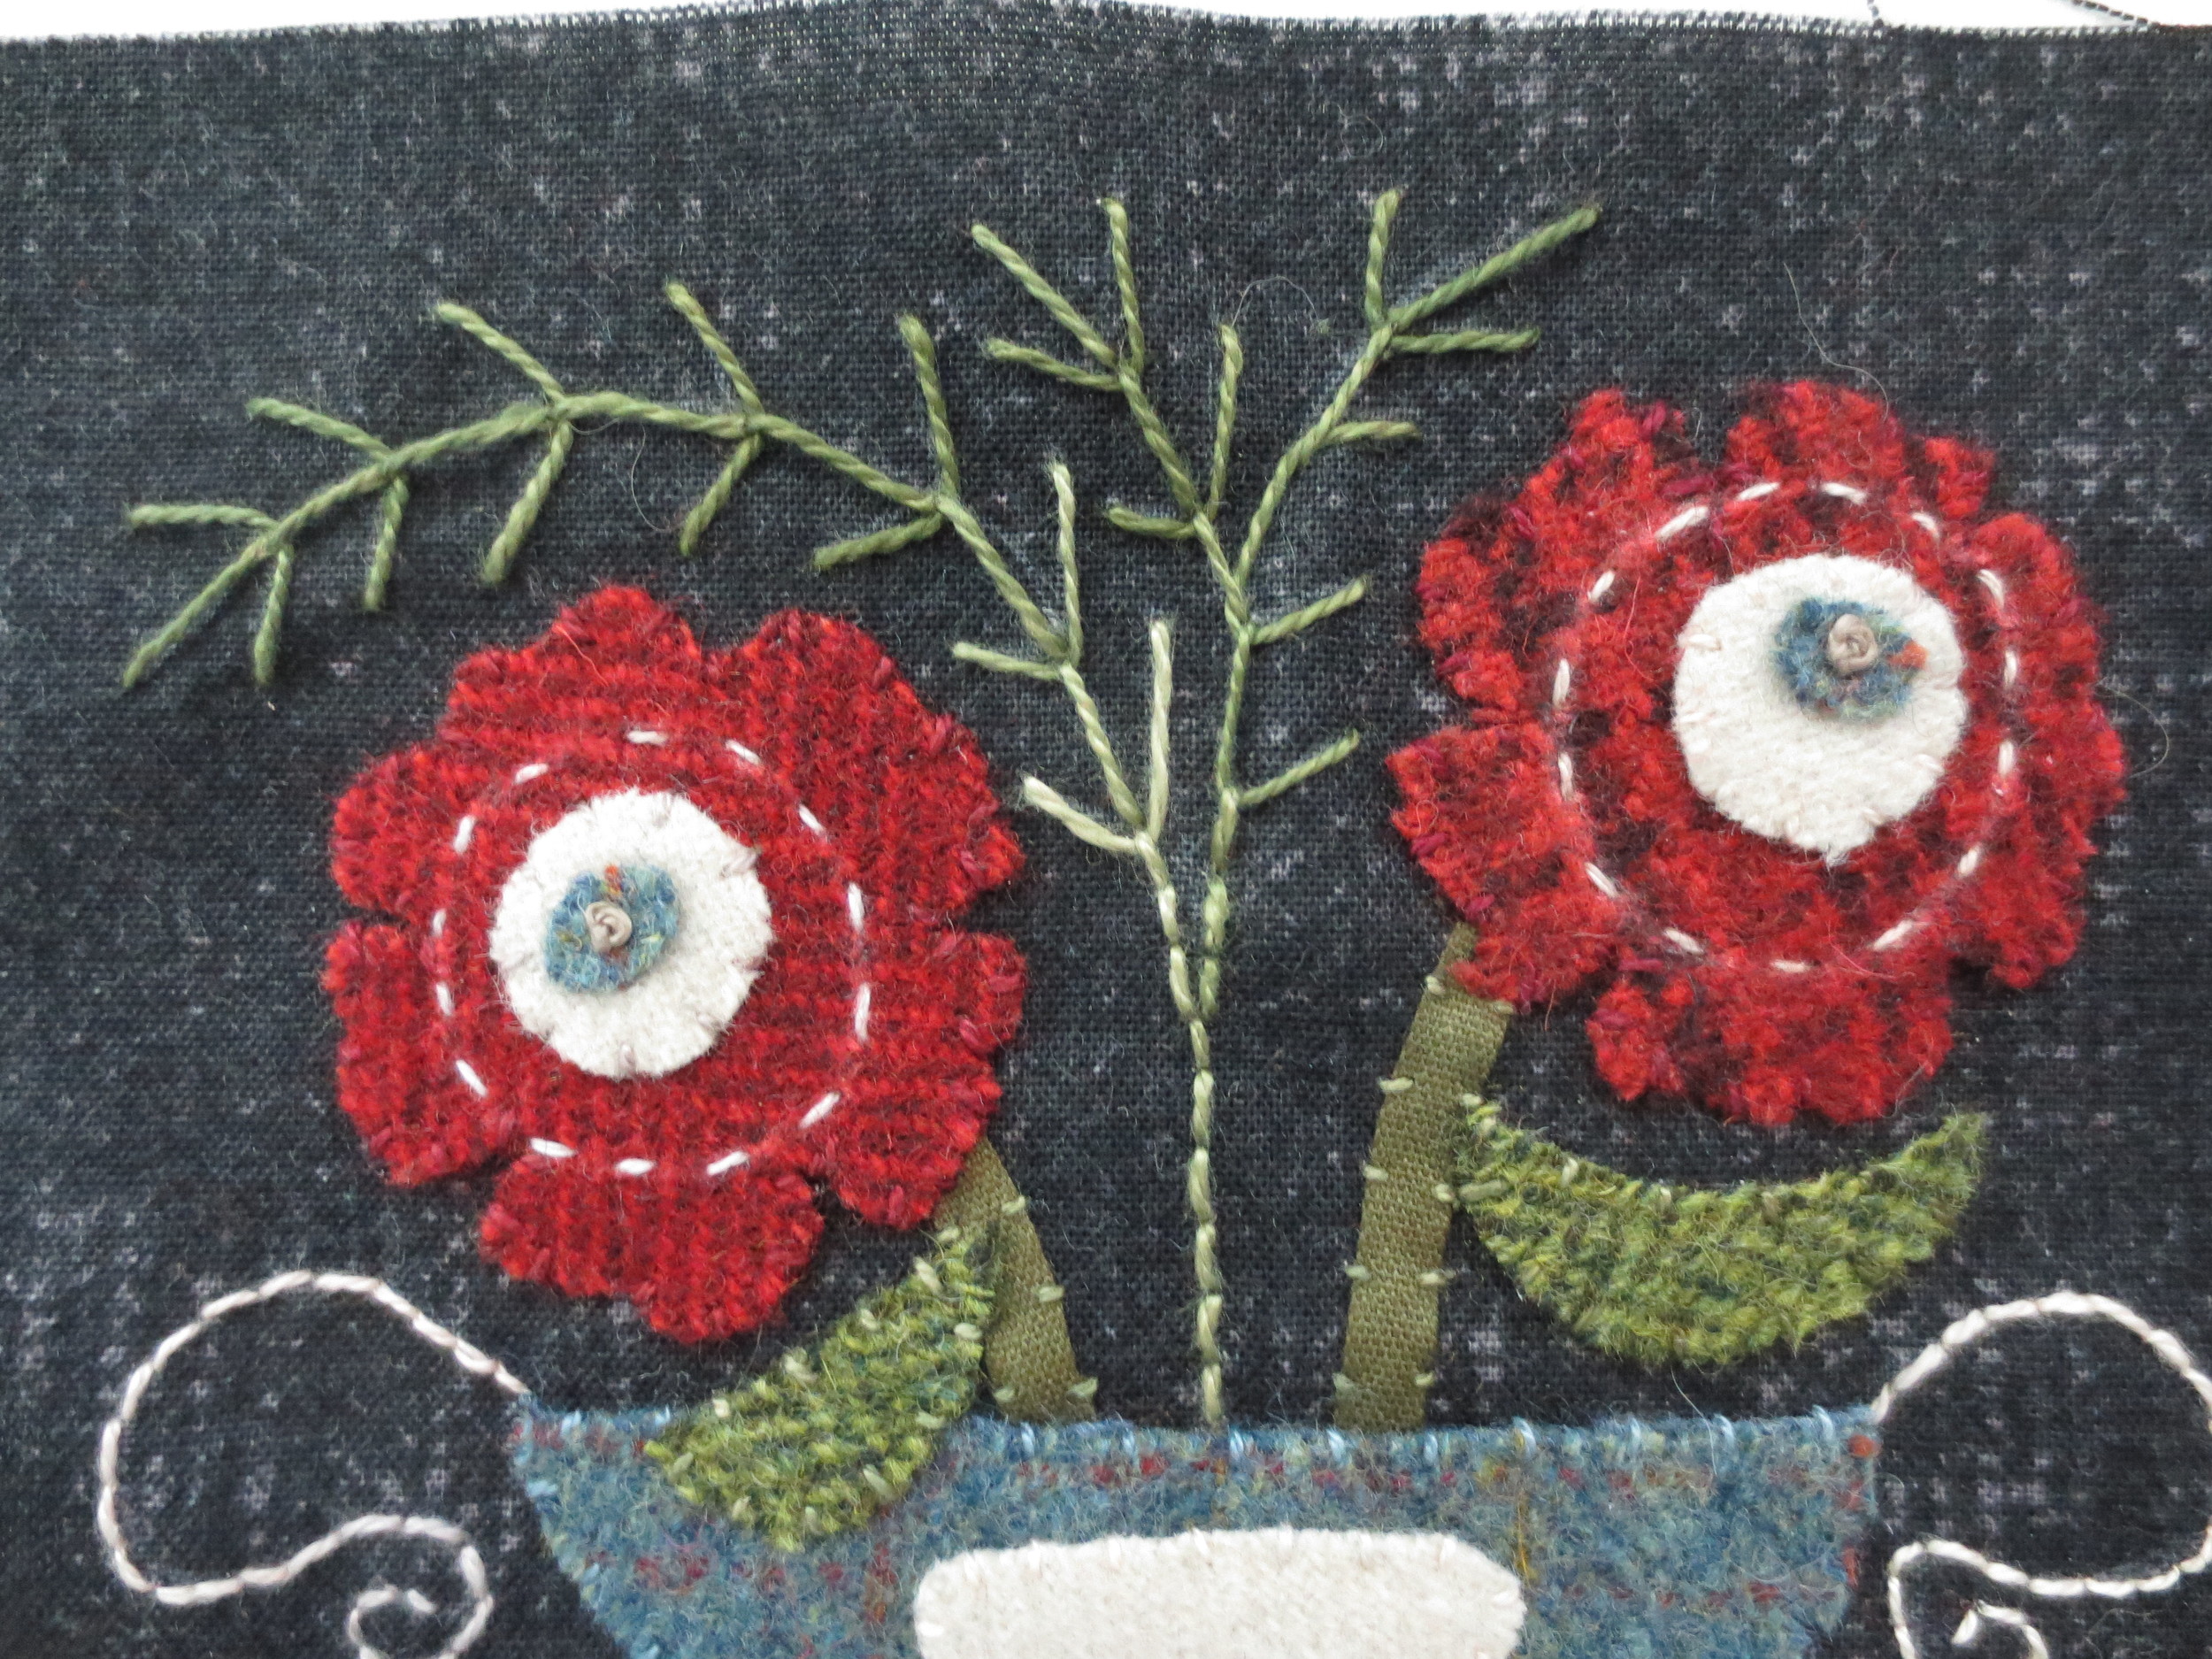
I think I like the back cover better than the front. It's simplier and visually more graphic.
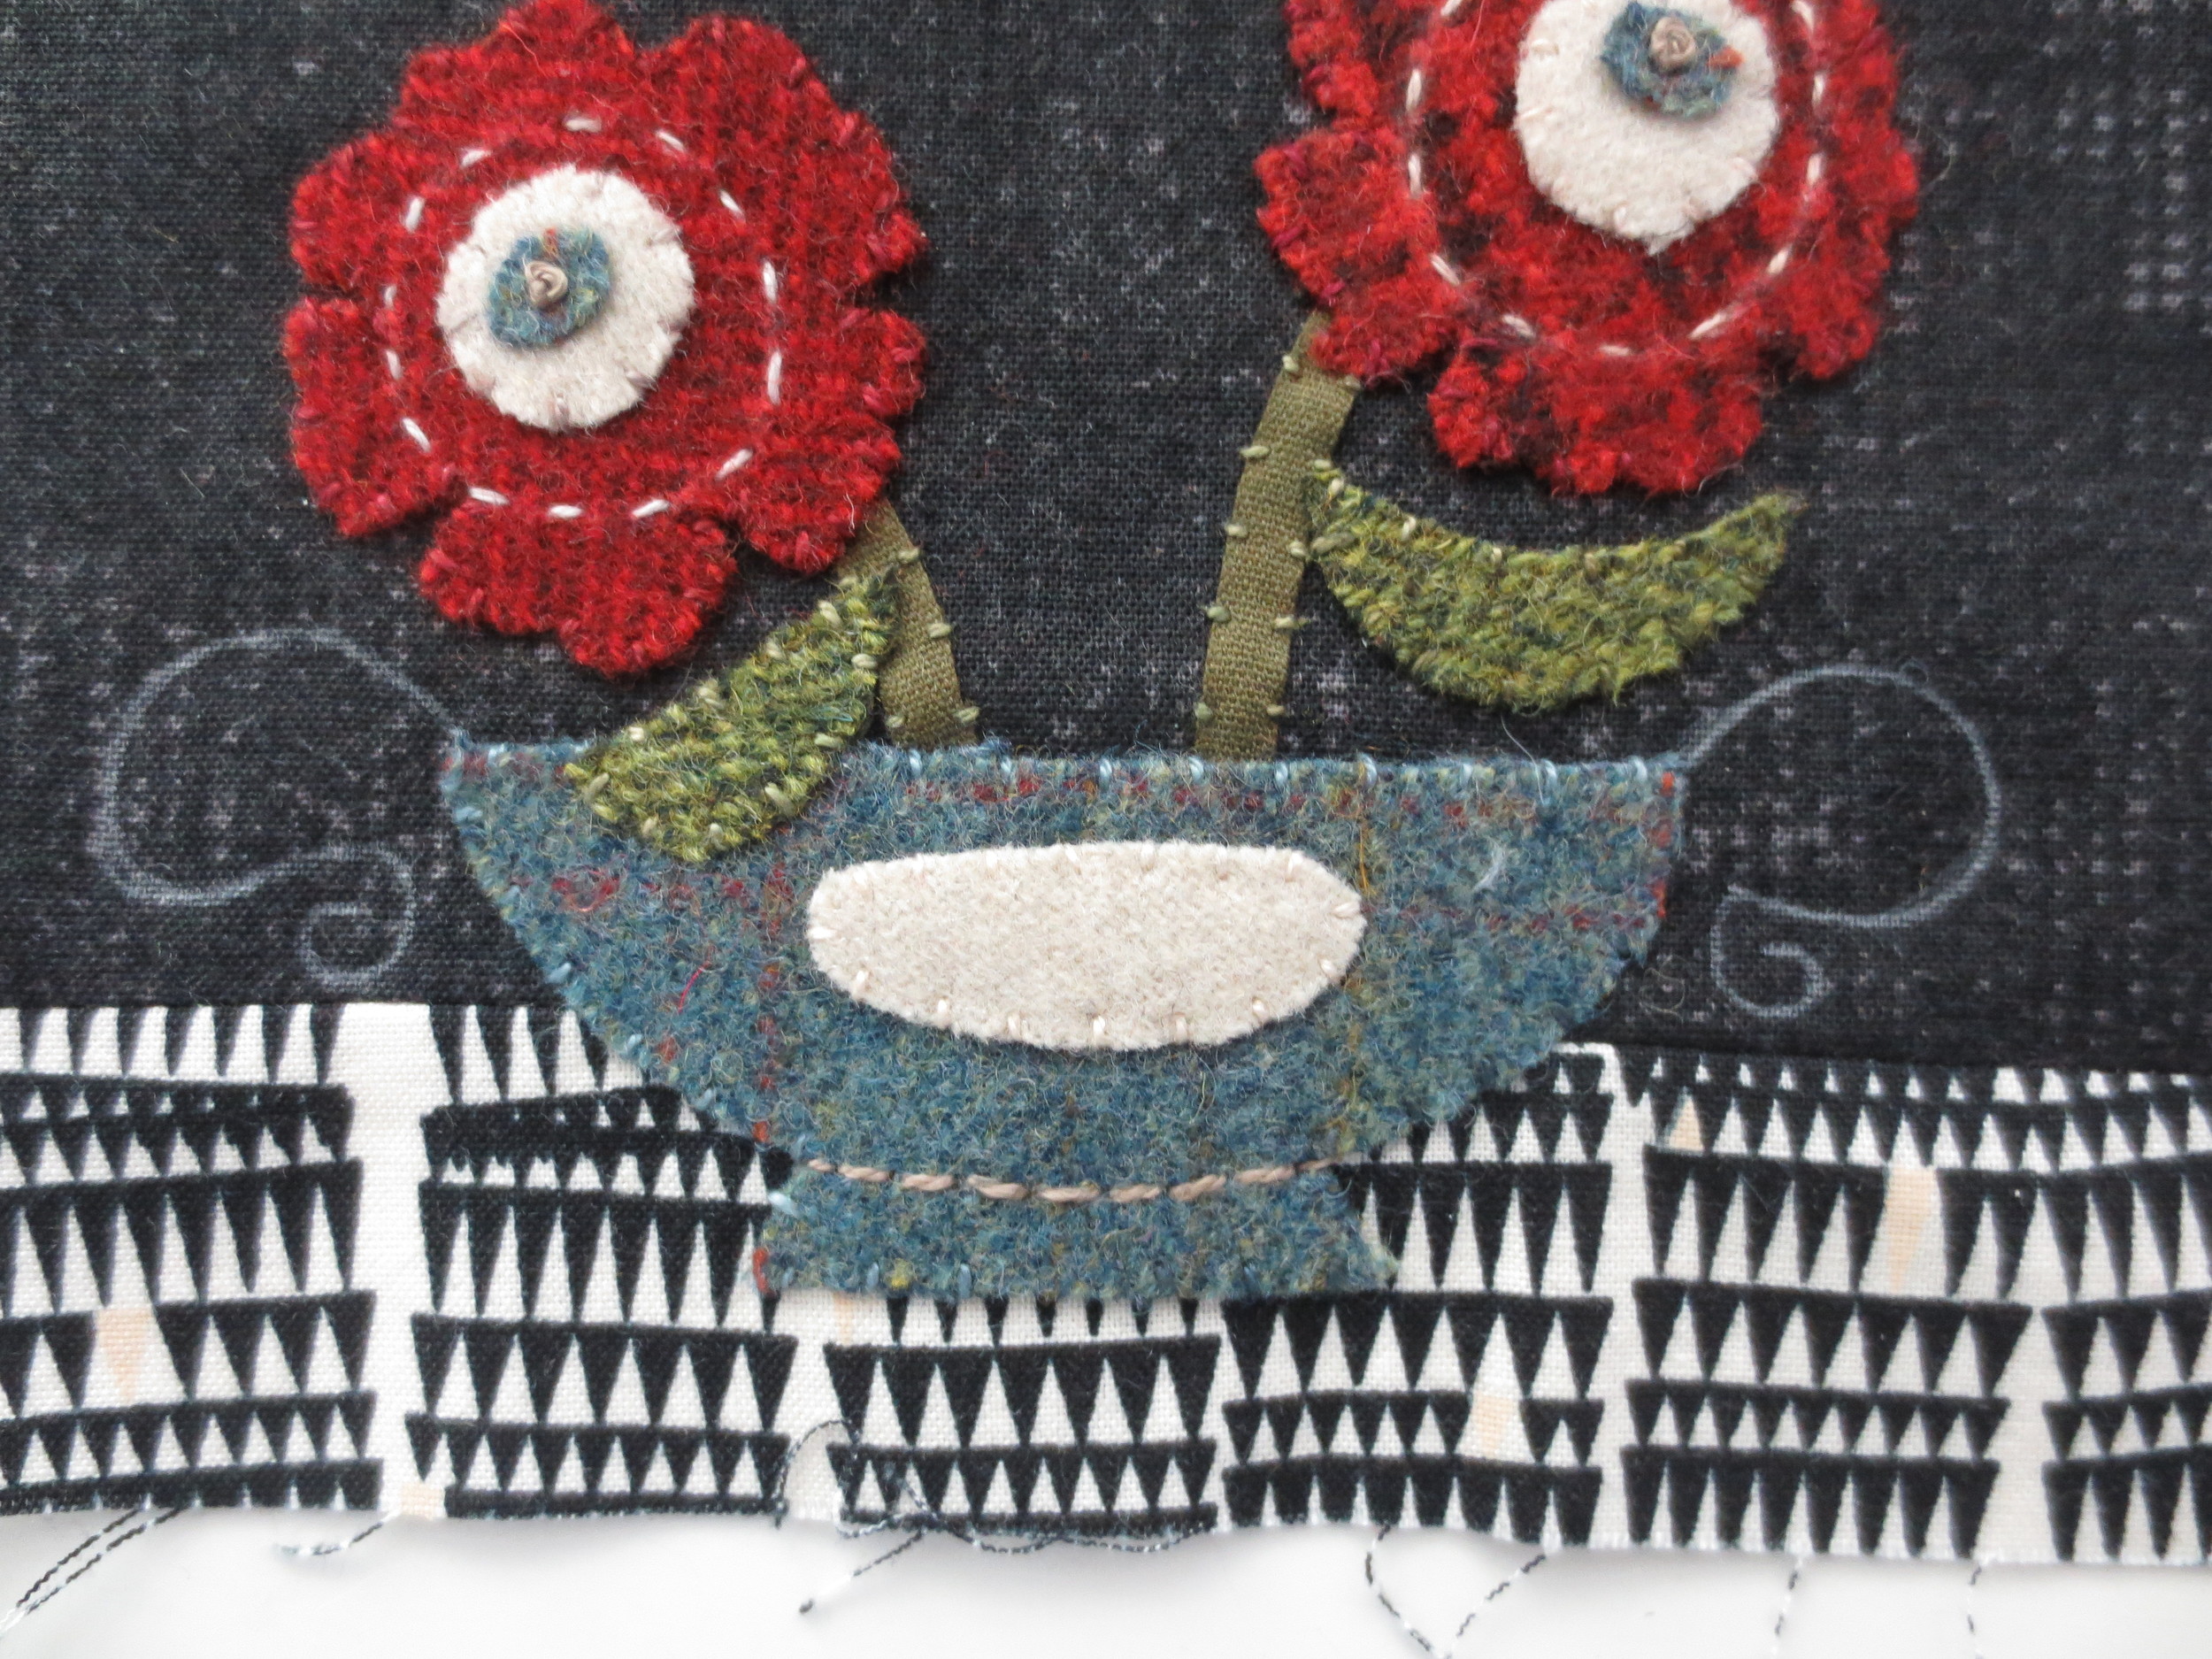
I used the black Faux Burlap again and added a bit of some bold graphic from Carolyn Friedlander. For the basket, I used some yummy blue plaid wool that I purchased from Bits and Pieces By Joan. Did I need more wool? Absolutely........not. But I couldn't resist when I saw it at the Beach Cities Quilt Guild Show (no judging please). I also used fusible fleece instead of batting for the padding.
Refer back to the Wool Appliqued Pouch (4" x 5") - Flower Variation for instructions on sewing the pouch together. This blog post covers the applique instructions only.
You will need:
Fabric (quilting cotton)
Applique background top - 5" x 14" ( Quilter's Candy Faux Burlap, color - black)
Applique background bottom - 2" x 14" ( Carolyn Friedlander for Robert Kaufman, design #15024)
Lining - 6" x 14" (Carolyn Friedlander for Robert Kaufman, design #15024)
Wool (felted)
Vase, butterfly body, and flower centers (small) - 2" x 4"
Butterfly wings, vase plate, flower centers (large) - 3 1/2" square
Flowers (Back, front right, butterfly spots - 4" square
Flower (front left) - 2" square
Leaves - 2 1/2" square
Thread - Valdani Perle Cotton
Size 12 - Use colors to match the flowers, leaves, stems, vase, and butterfly
Size 12 - Color #O178 for veins of leaves, French knots in flower centers, and vase bottom
Size 8 - Color #H202 for Baby's Breath Stem
Miscellaneous
6" x 14" Pellon Fusible Fleece or thin quilt batting - padding
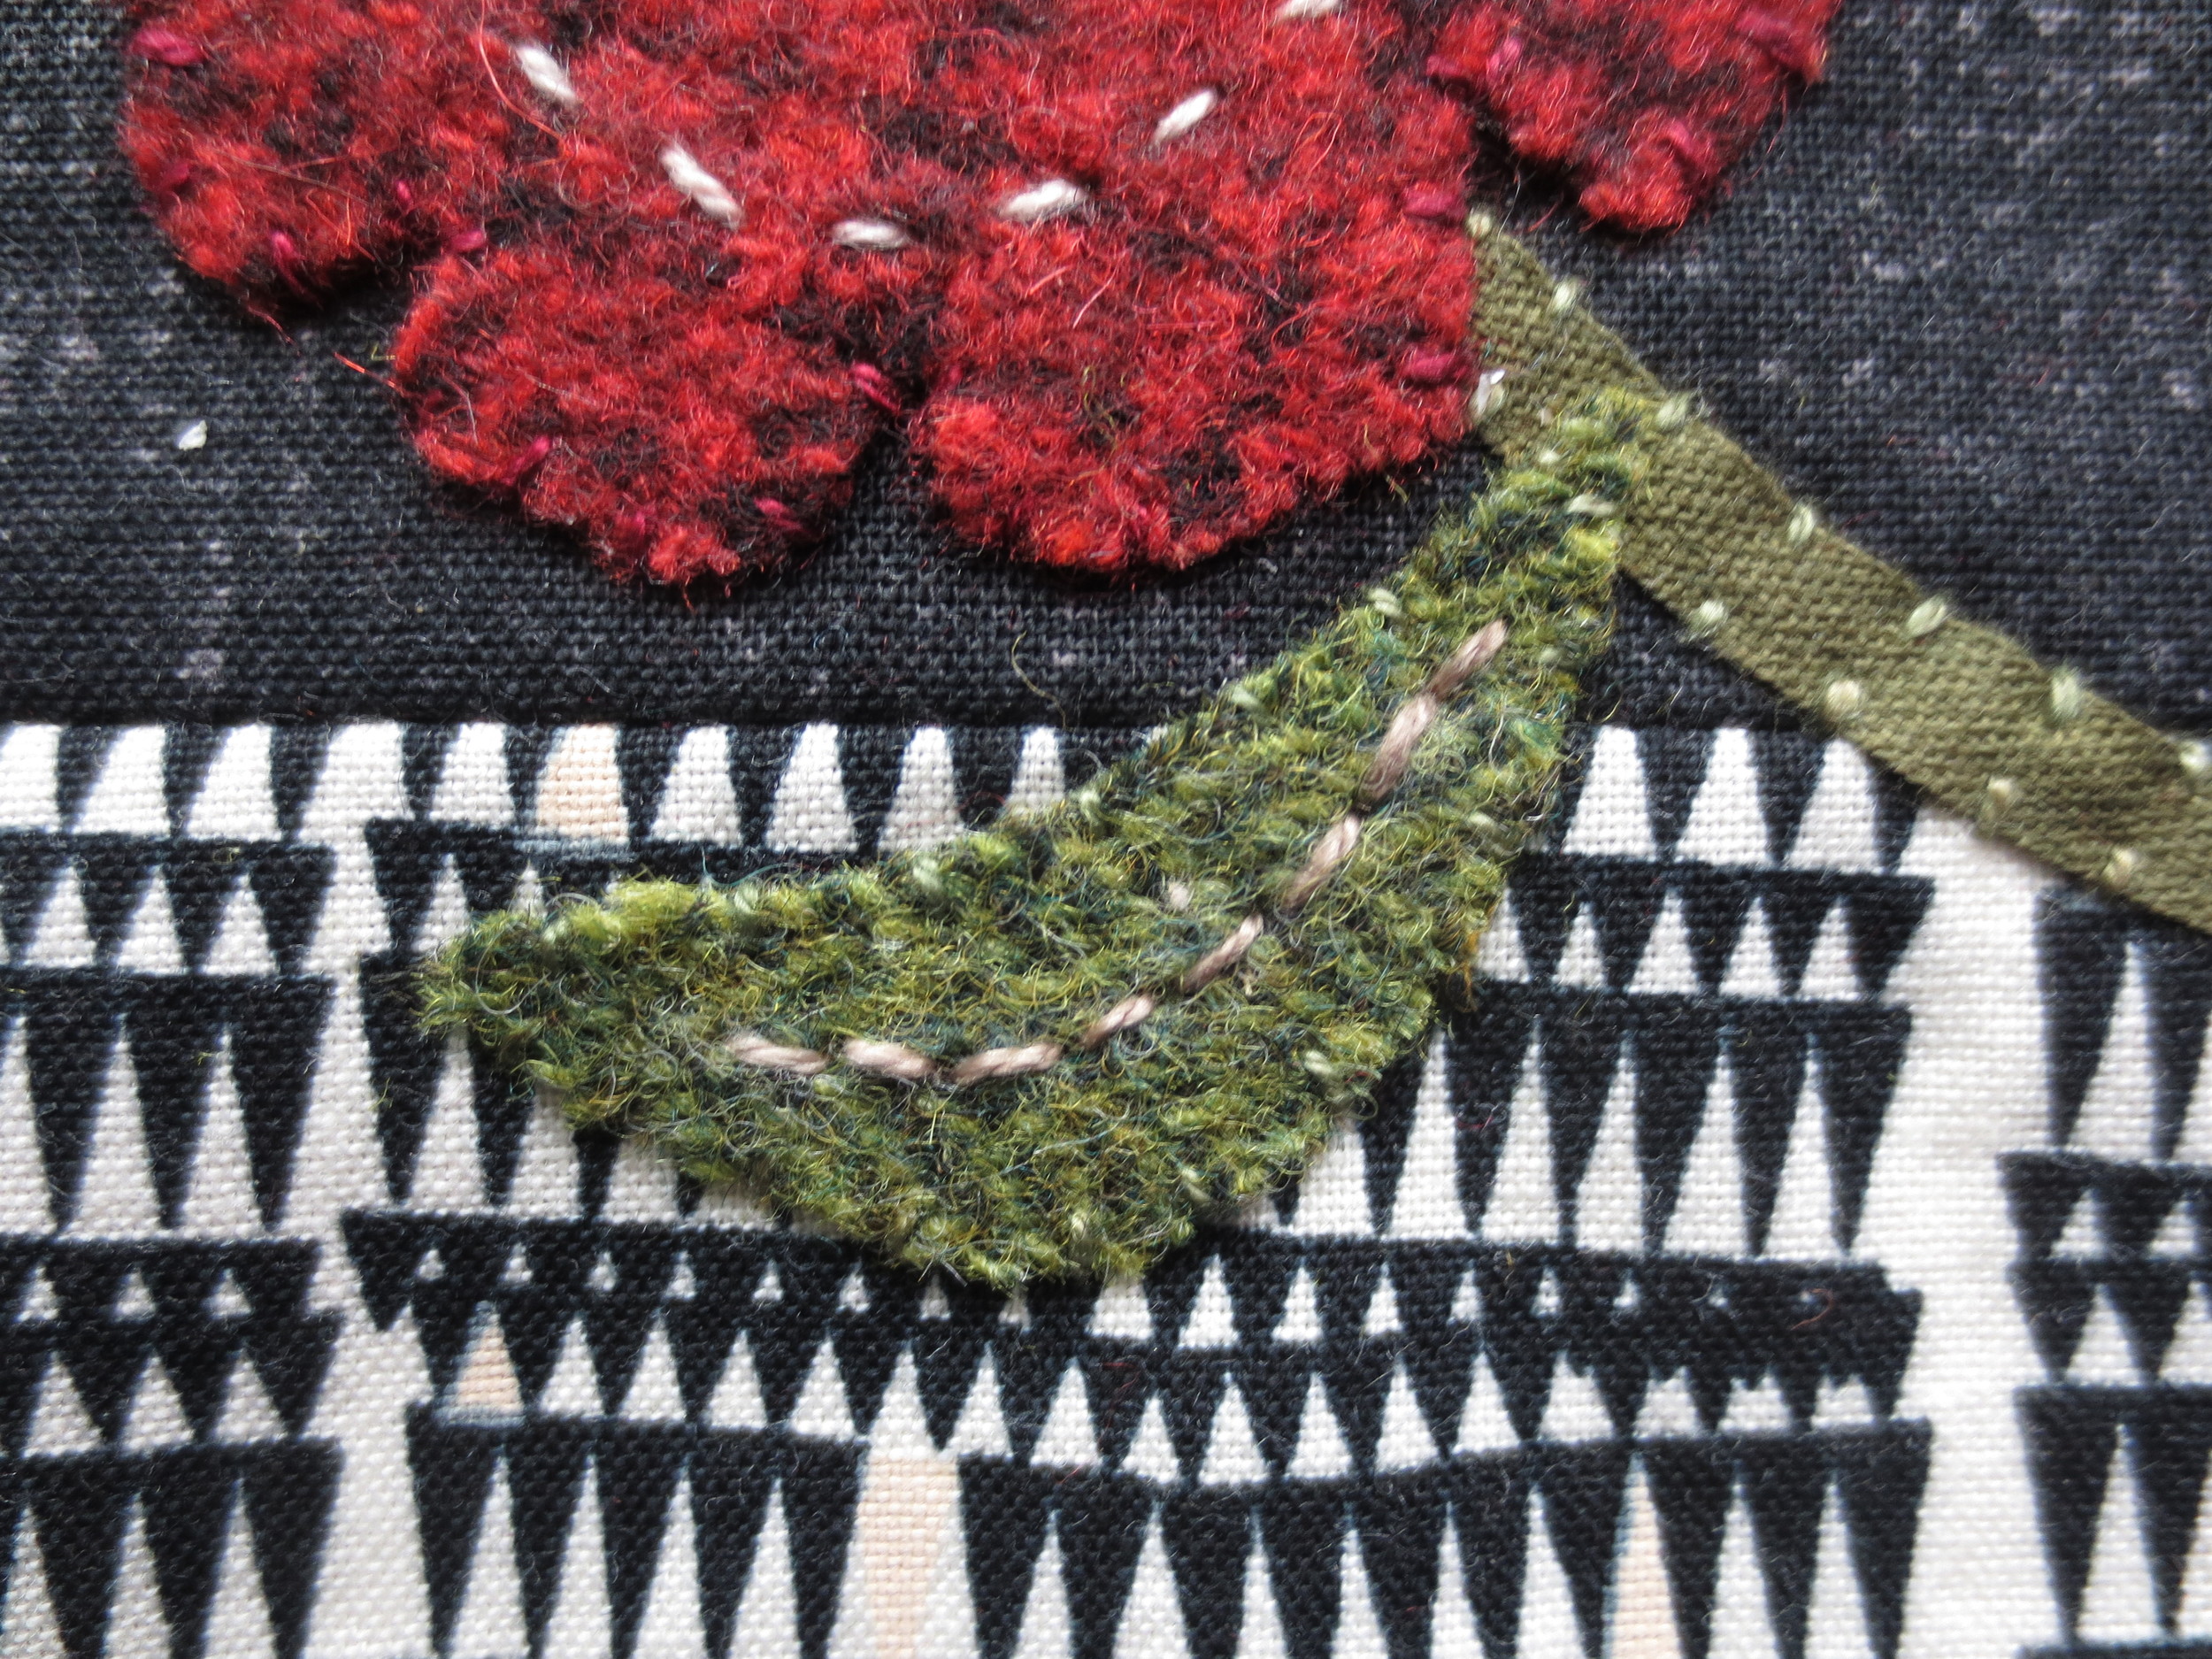
5" piece of 5mm or 1/4" wide ribbon, olive green color - flower stems
5" zipper (Pinwheels.com)
Chenille needle, size 24
Featherweight fusible web
Chalk pencil
Steam Iron
Sewing machine with a zipper foot
Instructions
Download: Marsha's Choice Layout & Pattern (Front), Marsha's Choice Layout & Pattern (Back), and Butternut Plaid Stitch Guide.
Cutting
Cut the bottom background fabric to 1 1/2" x 14".
Cut the top background fabric to 4" x 14".
Sew the bottom background fabric to the top background fabric along the 14" edges. You should have a long rectangle that measures 5" x 14".
Cut this rectangle into two 5" x 6" pieces. Set aside.
Cut two 4 3/4" x 6" pieces from the lining fabric. Set aside.
Cut two 5" x 6" pieces from the fusible fleece. Set aside.
3. Applique
Trace pattern pieces onto fusible web. The pattern pieces are printed in reverse for use with fusible web.
Cut out and fuse to desired wool.
Cut out wool pattern pieces.
Front
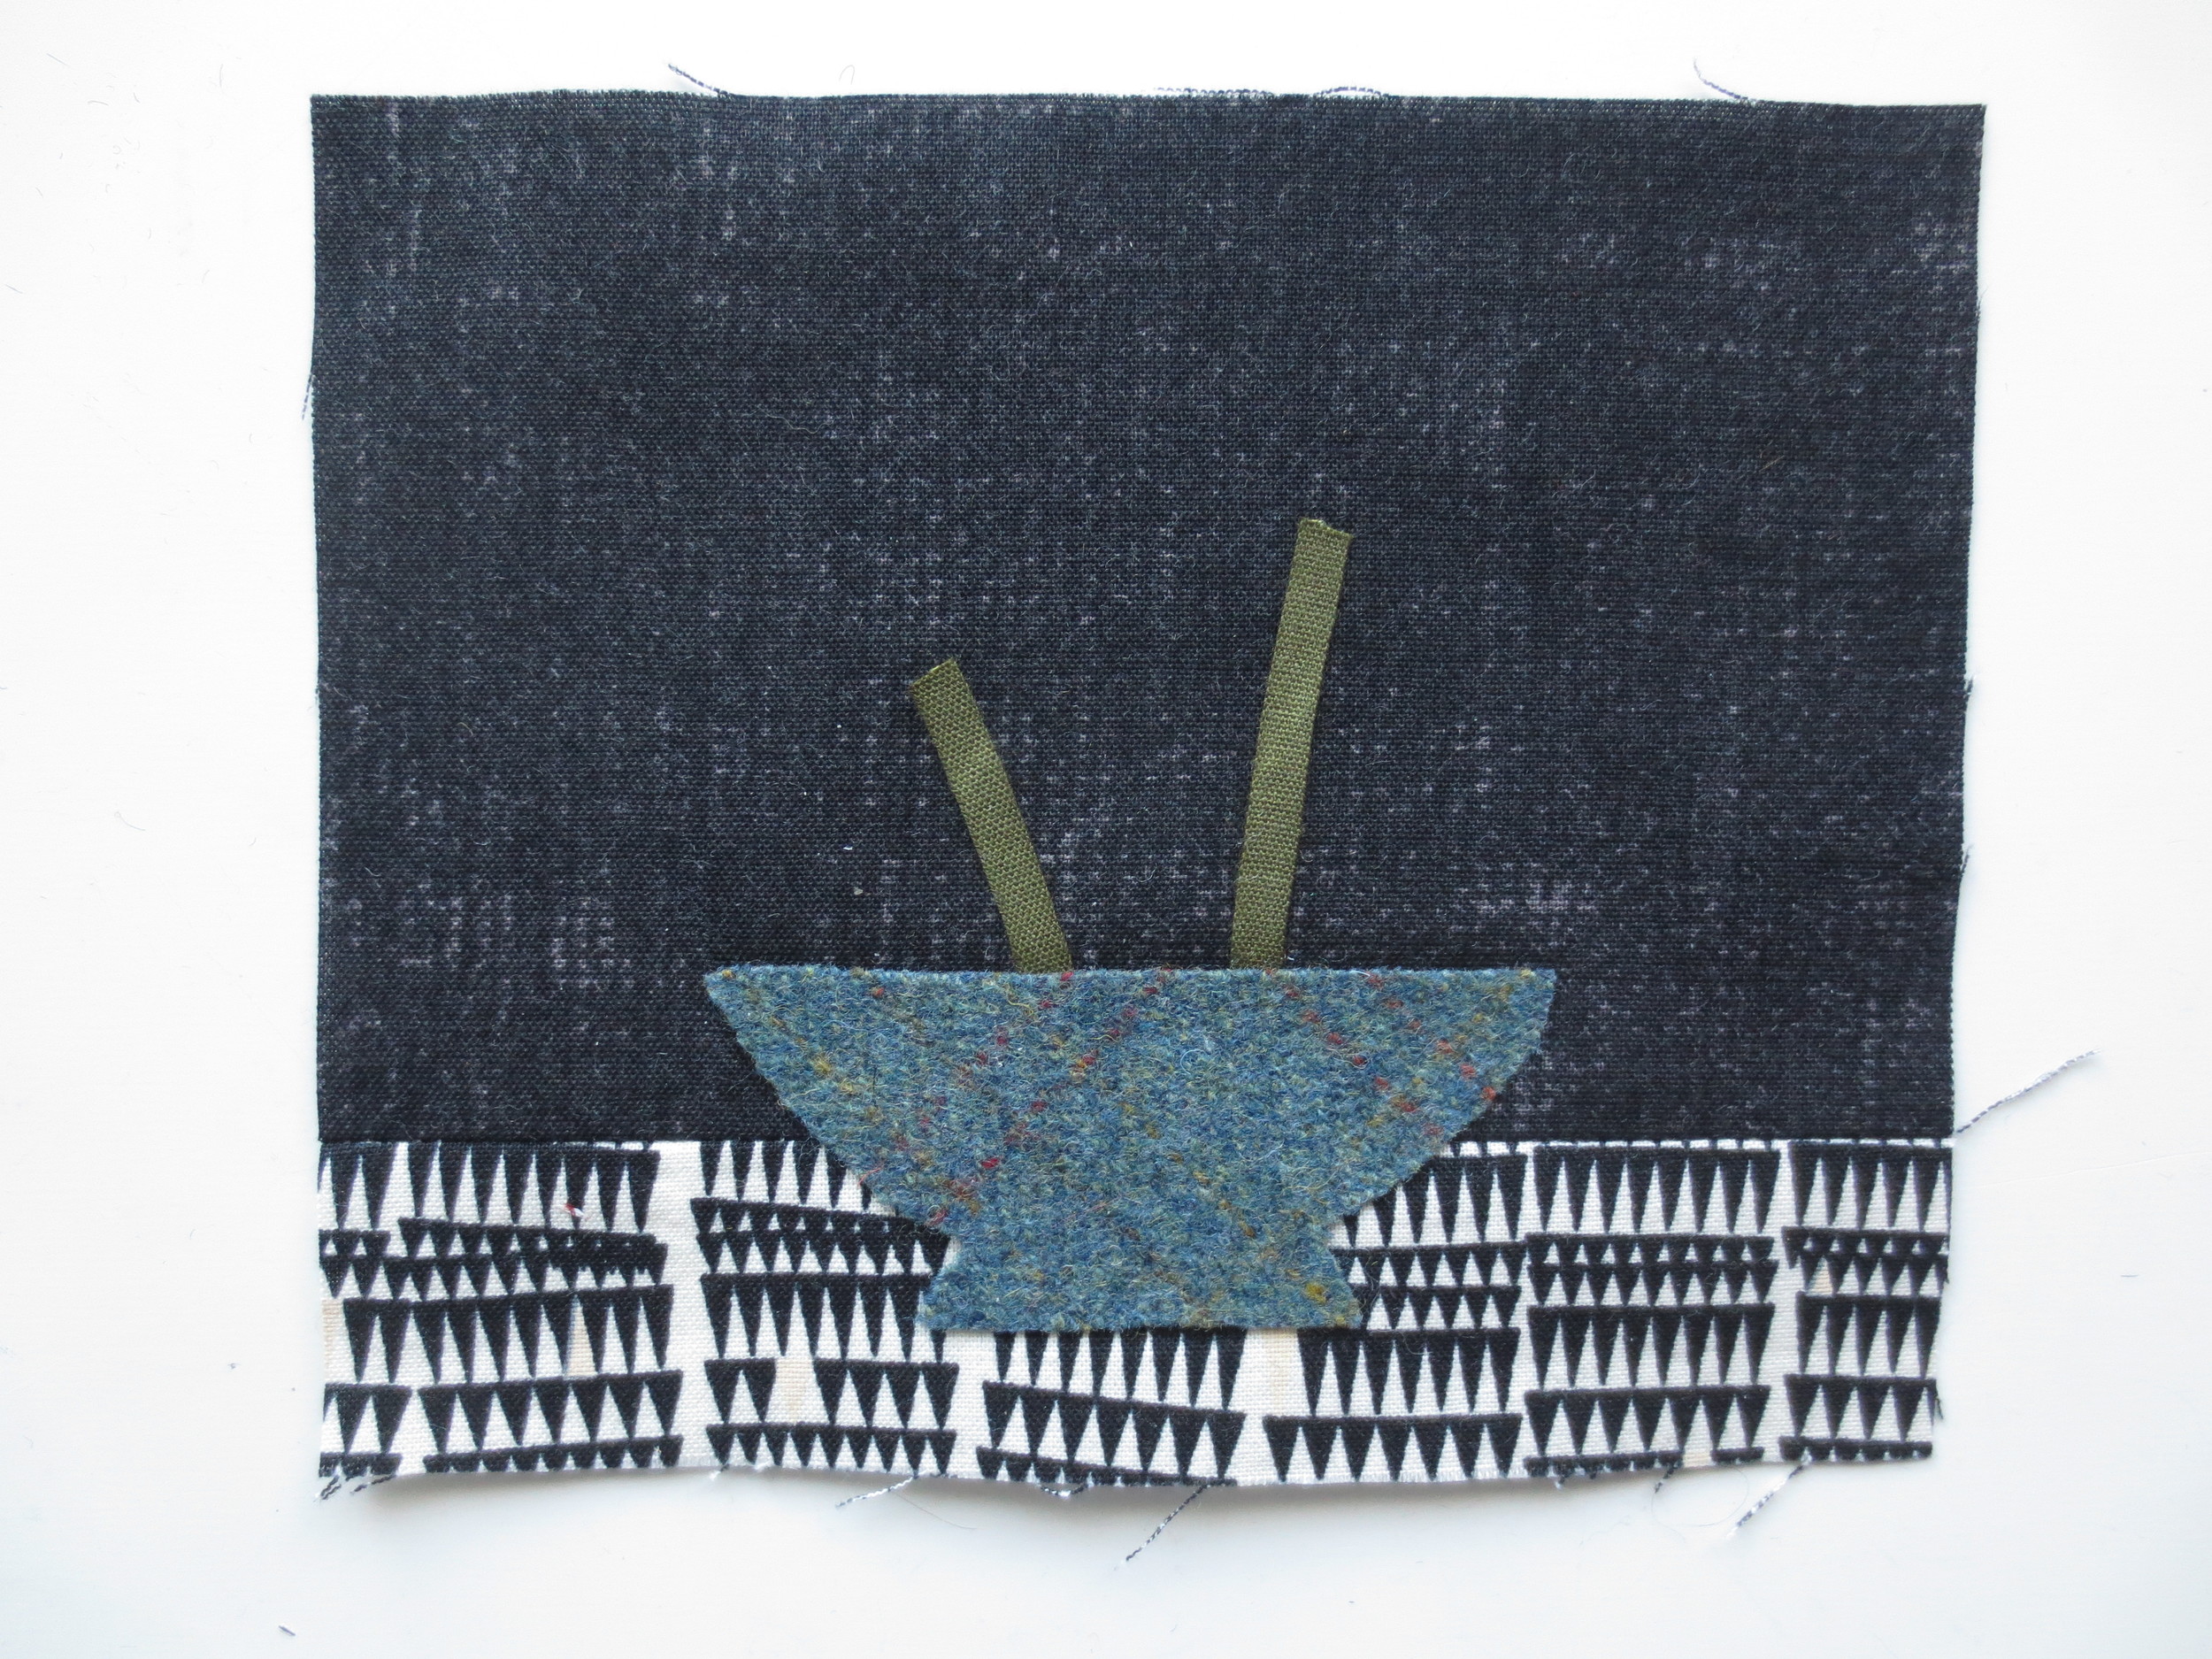
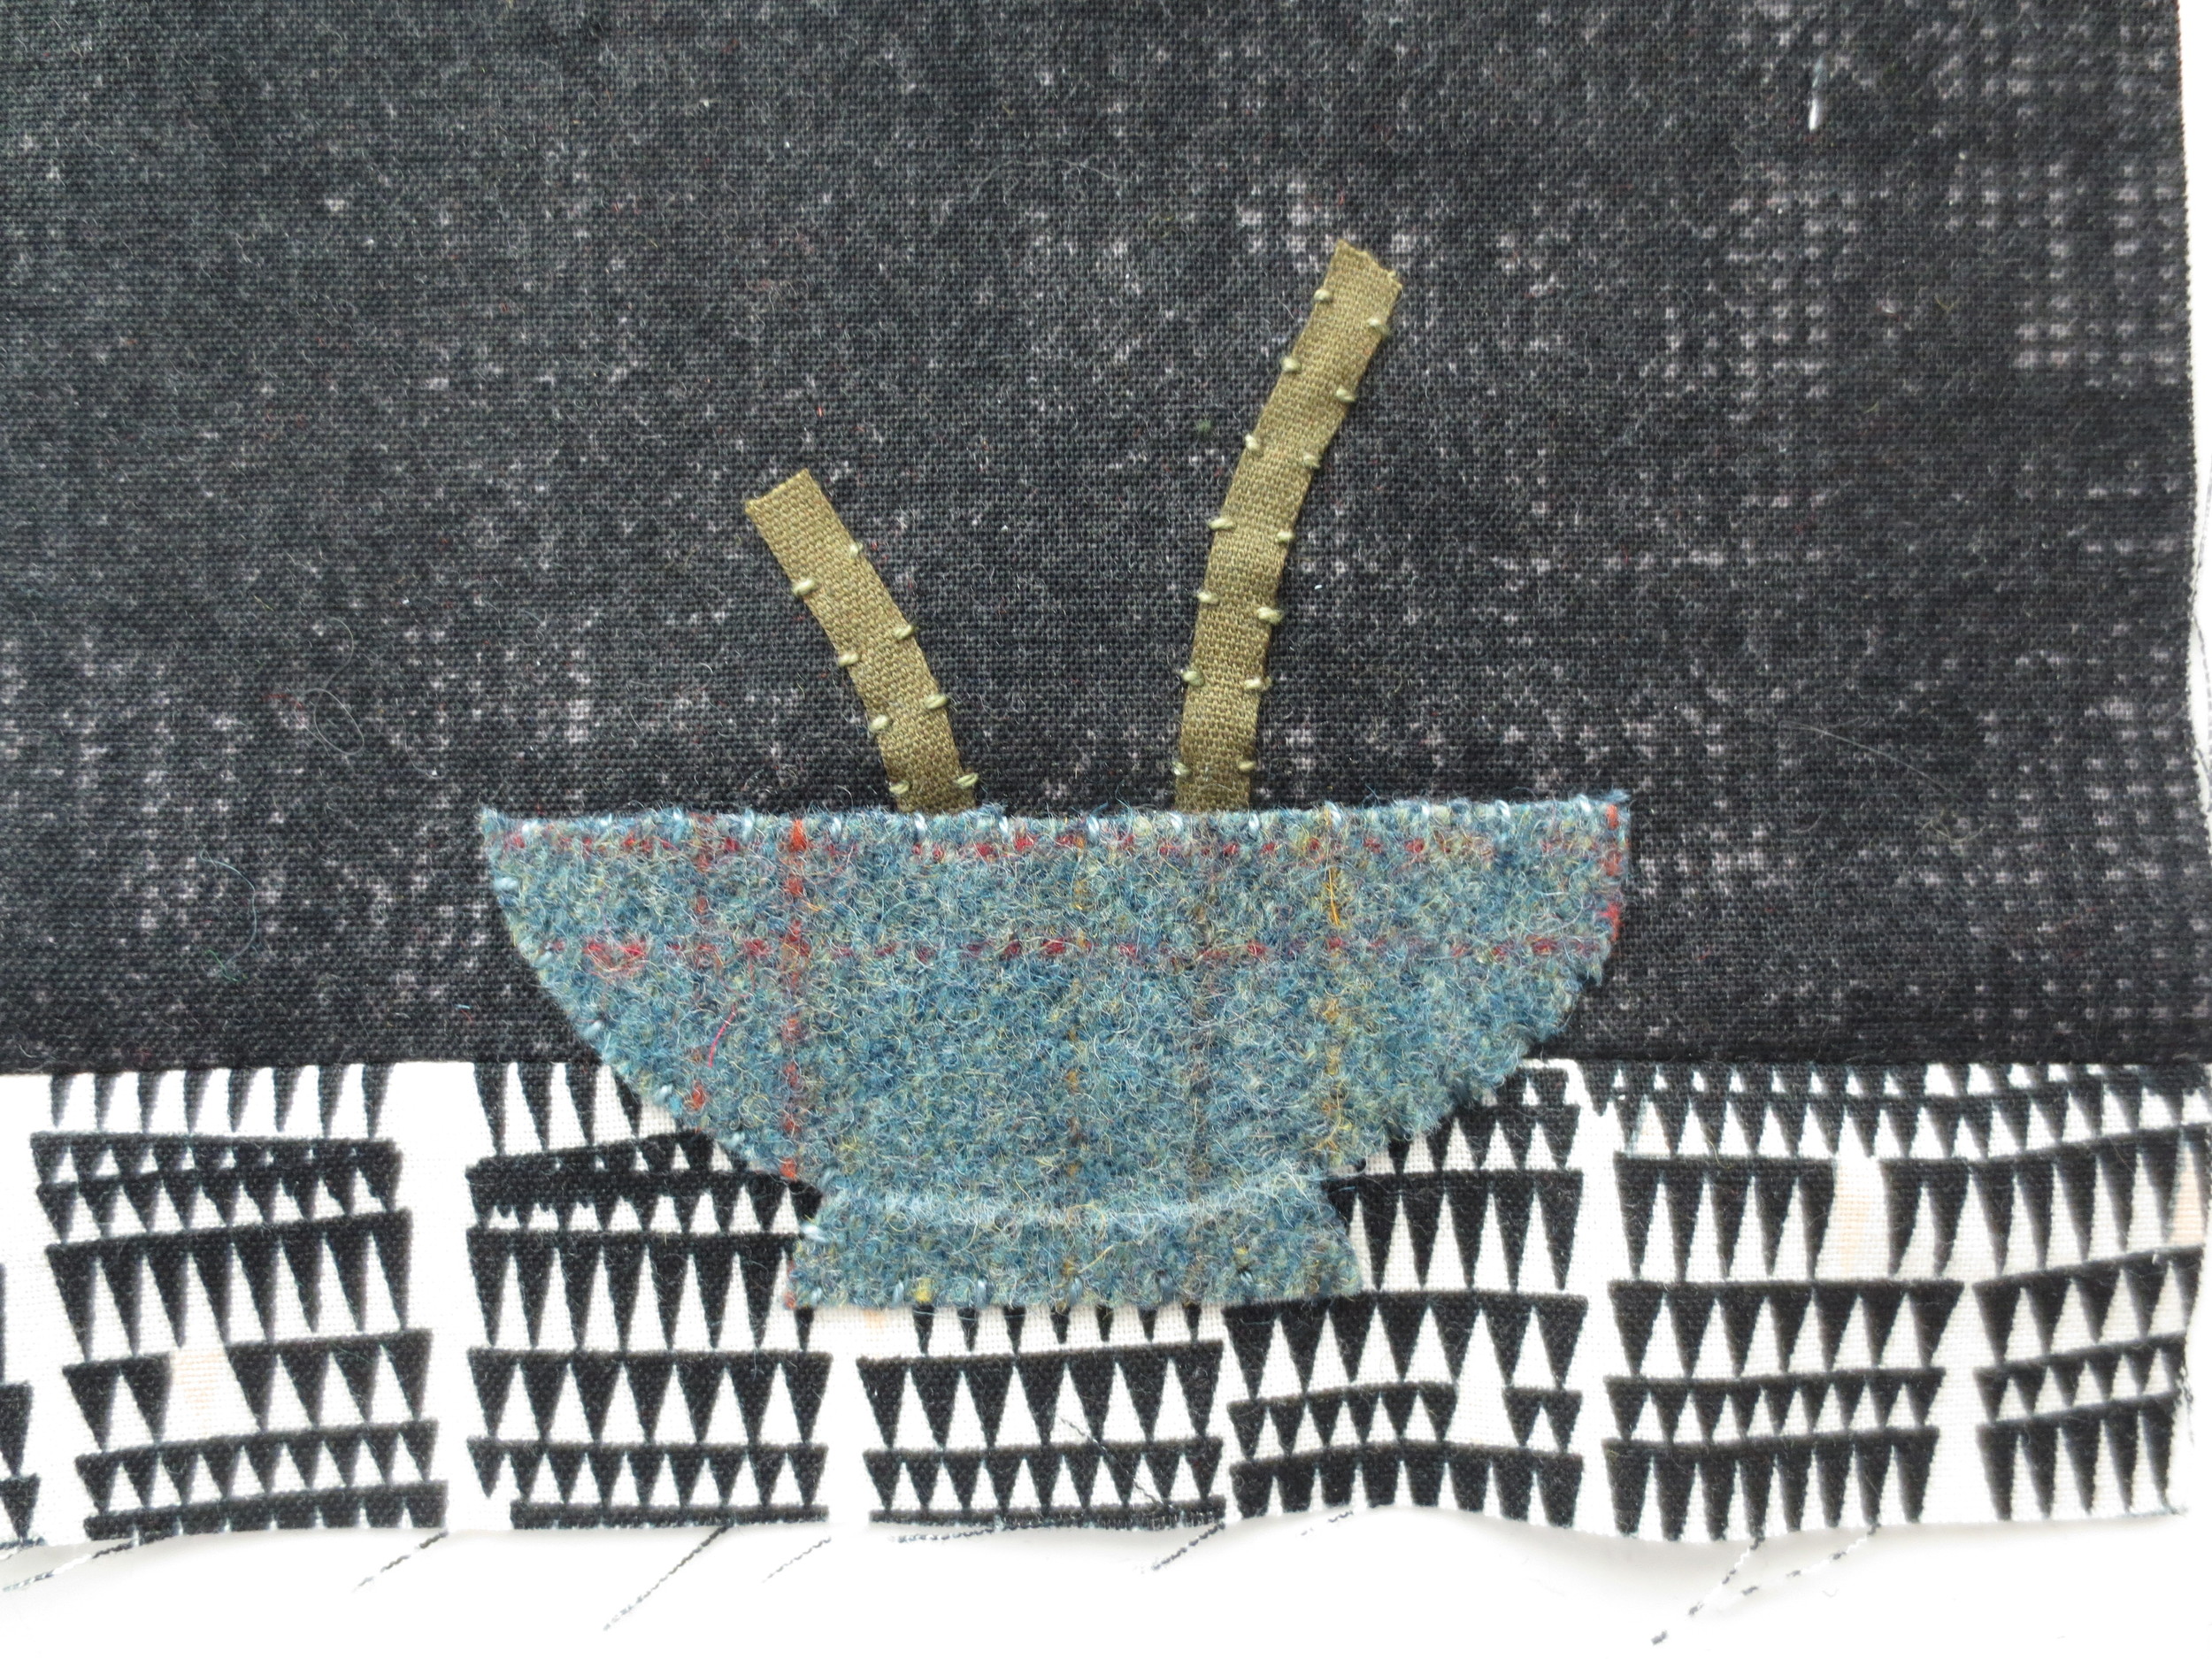
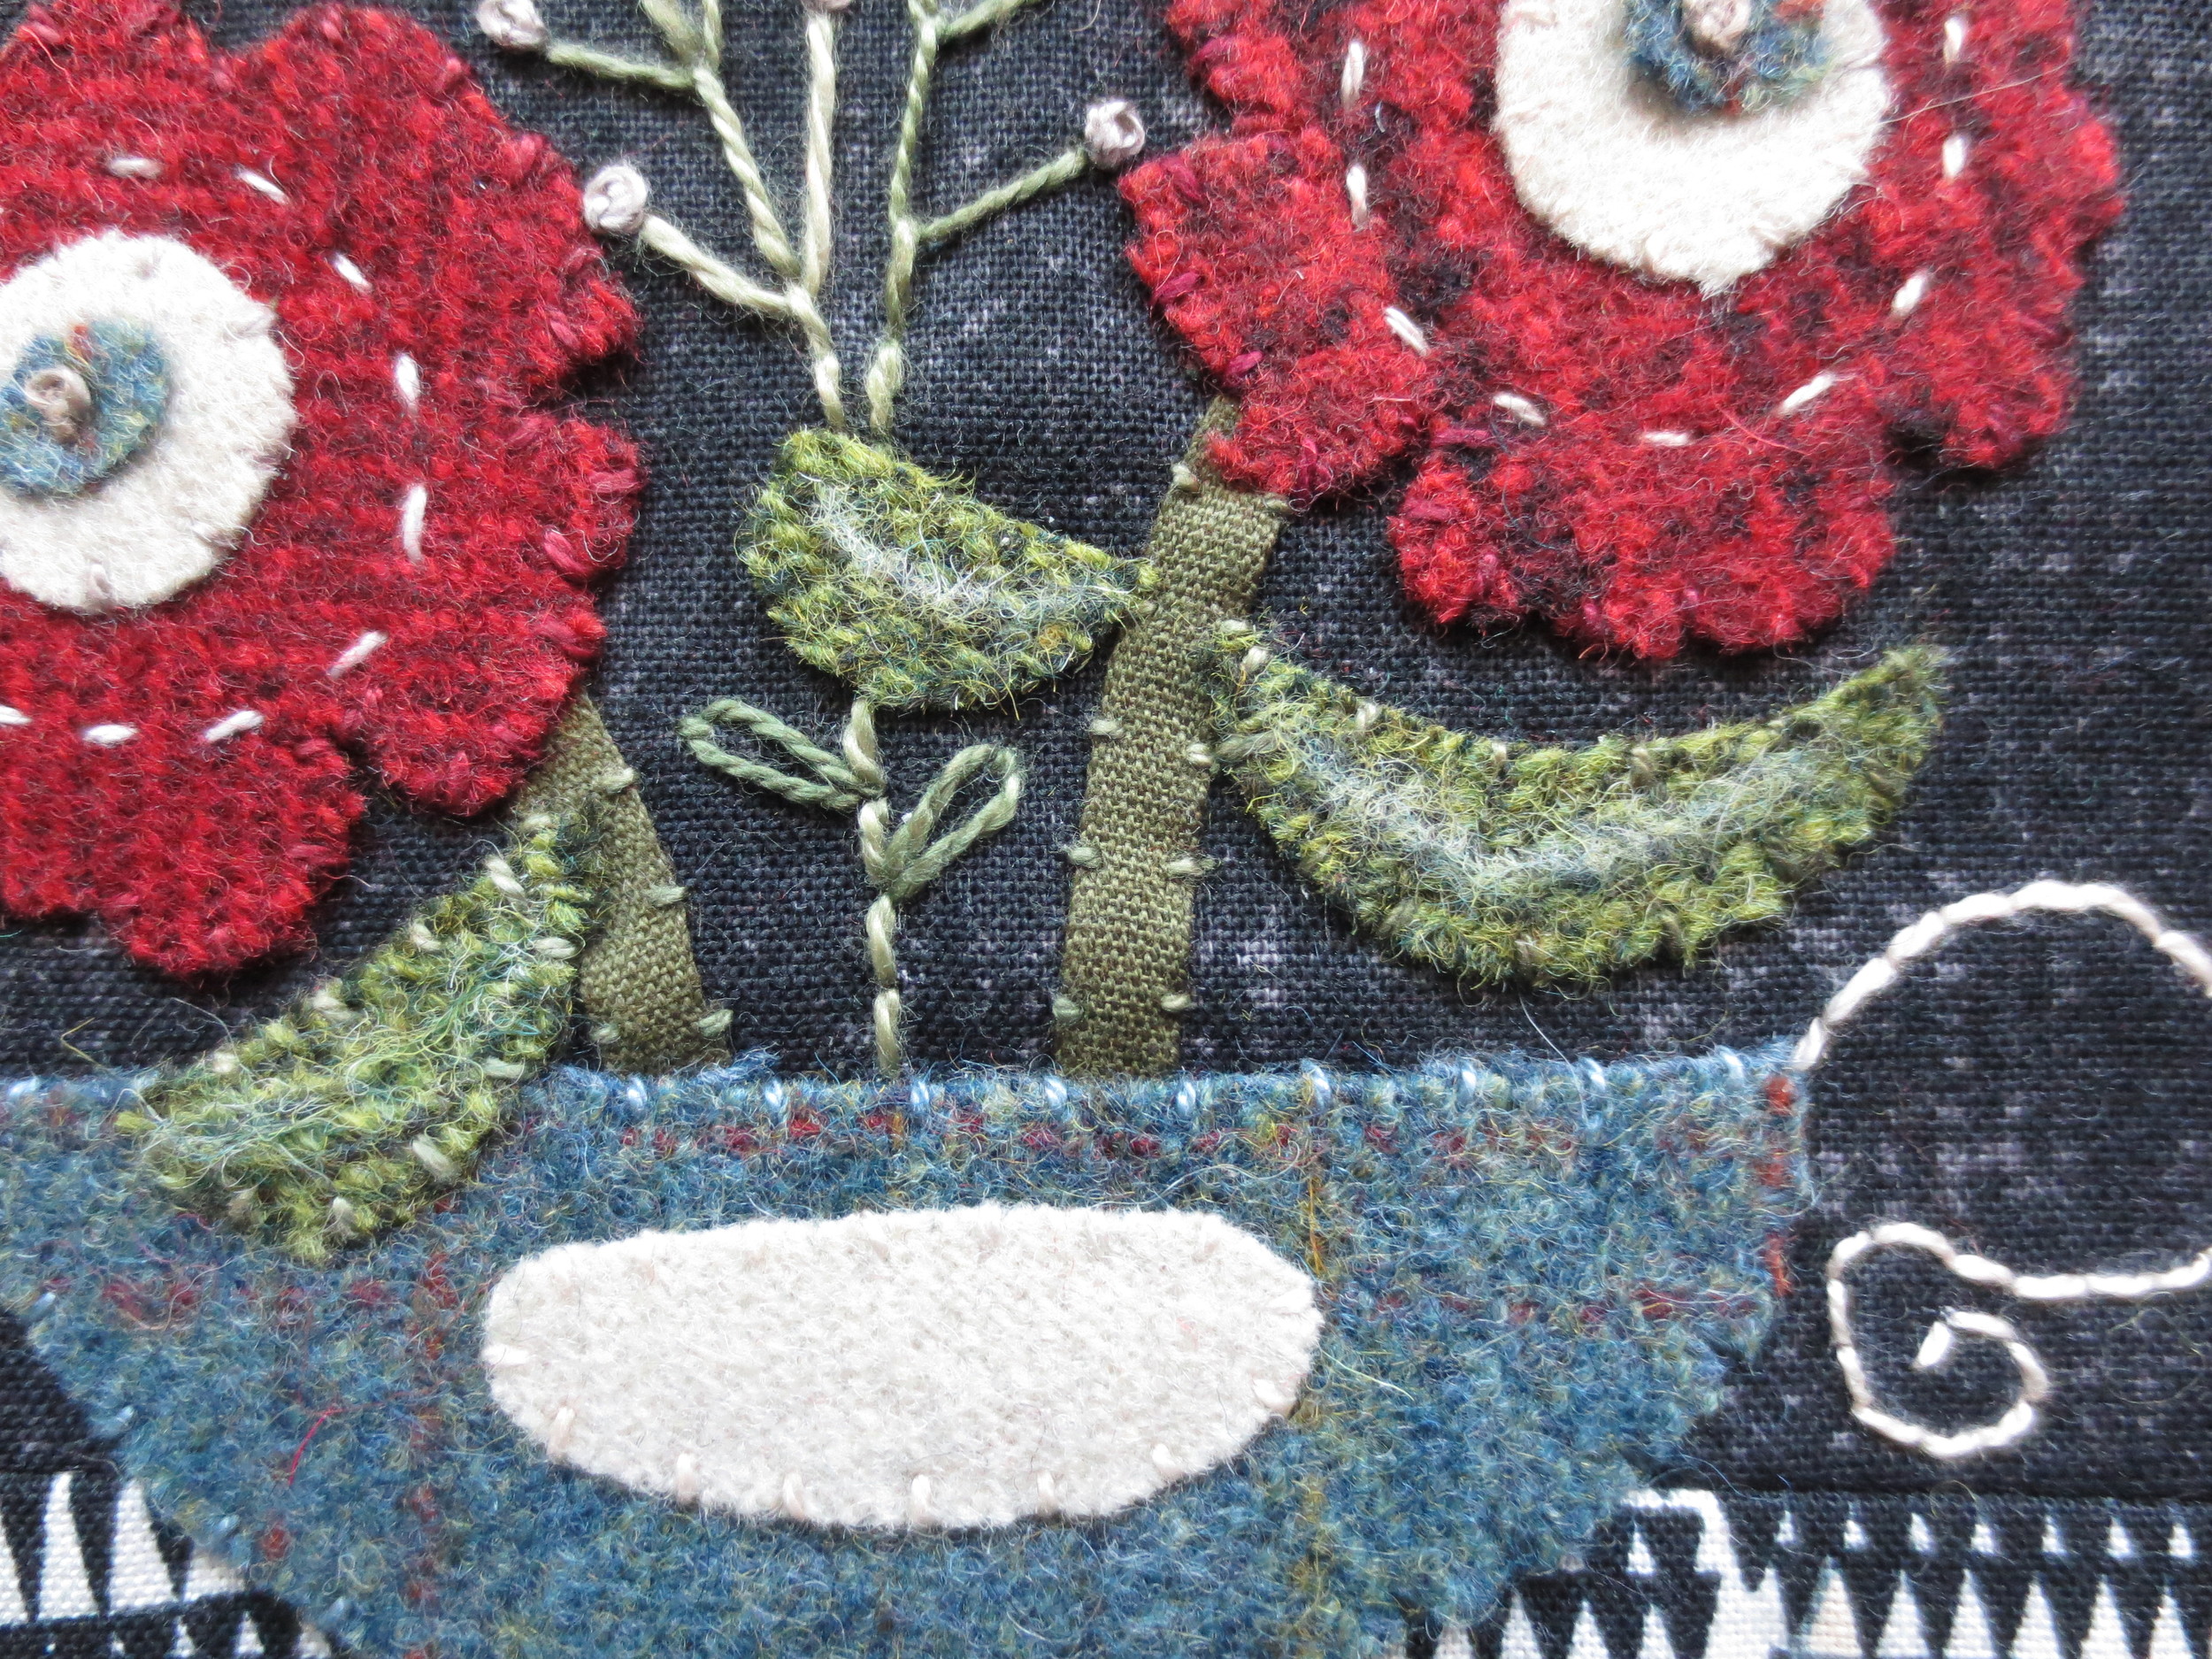
Using the layout as your guide, position the vase, flowers, leaves and ribbon stems on the front of the pouch. THIS IS JUST FOR POSITIONING OF THE STEMS. DO NOT FUSE.
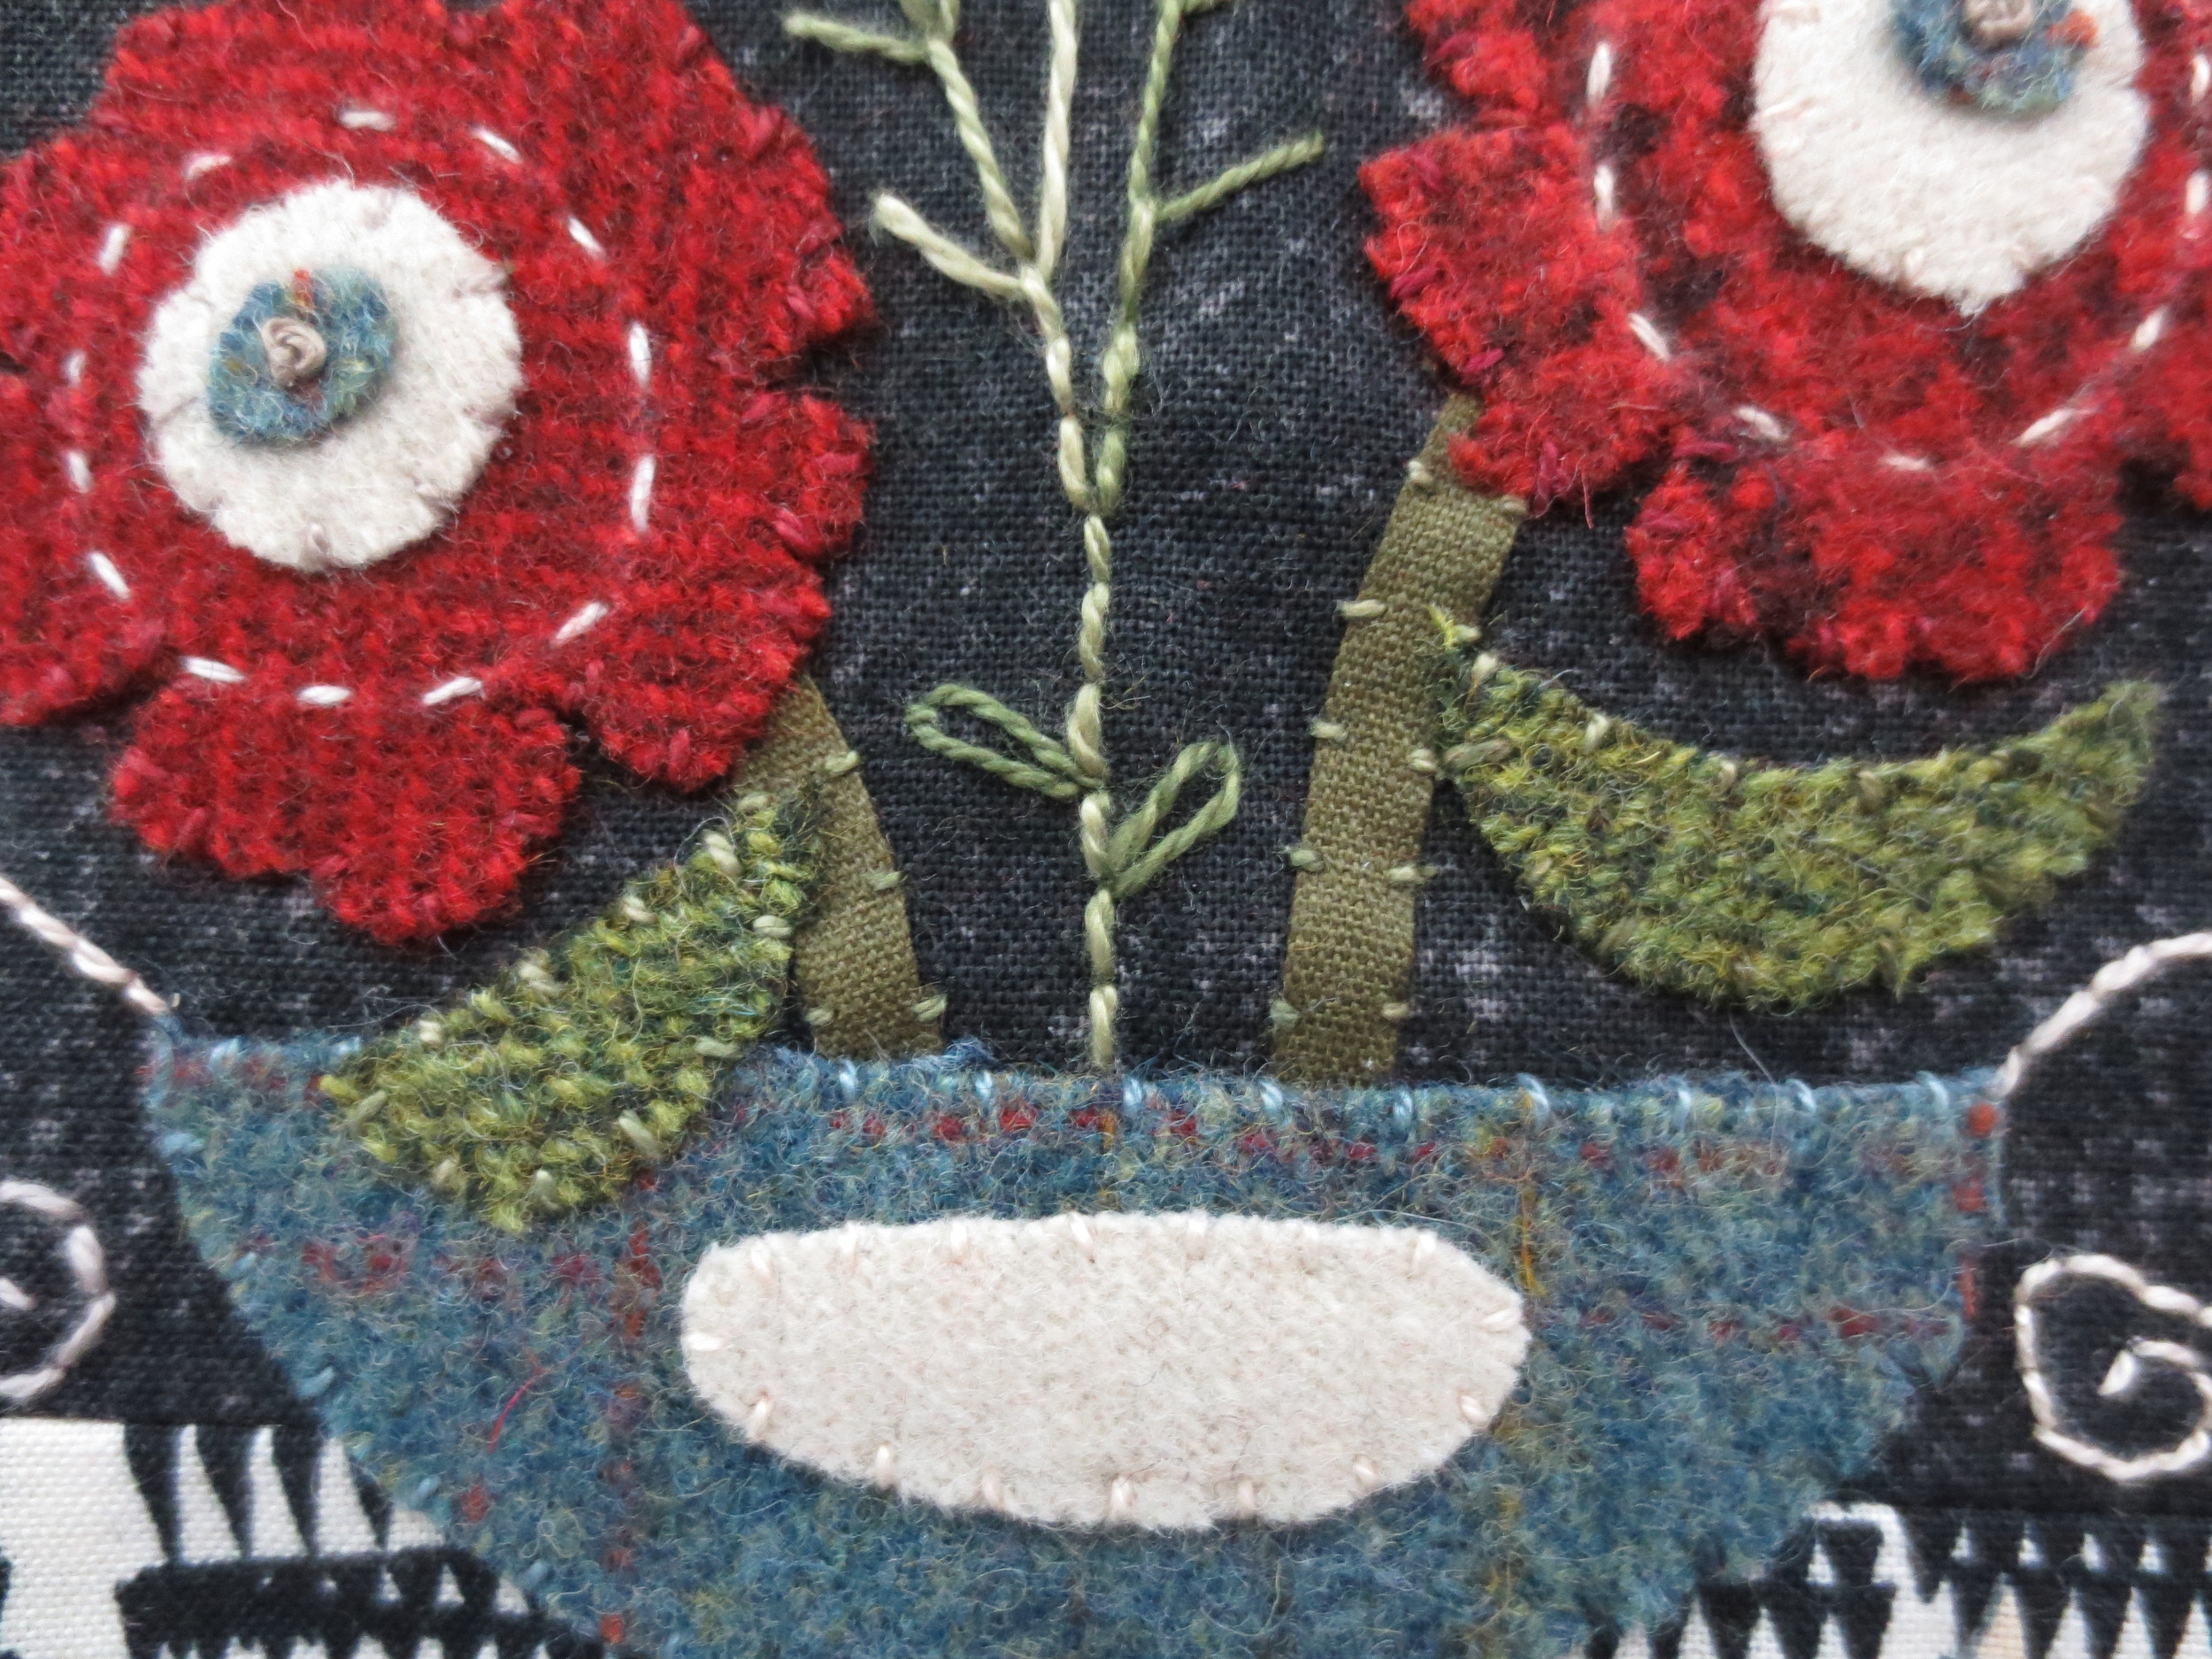
Remove everything but the vase and stems. Fuse the vase using steam. The fused vase will anchor the stems.
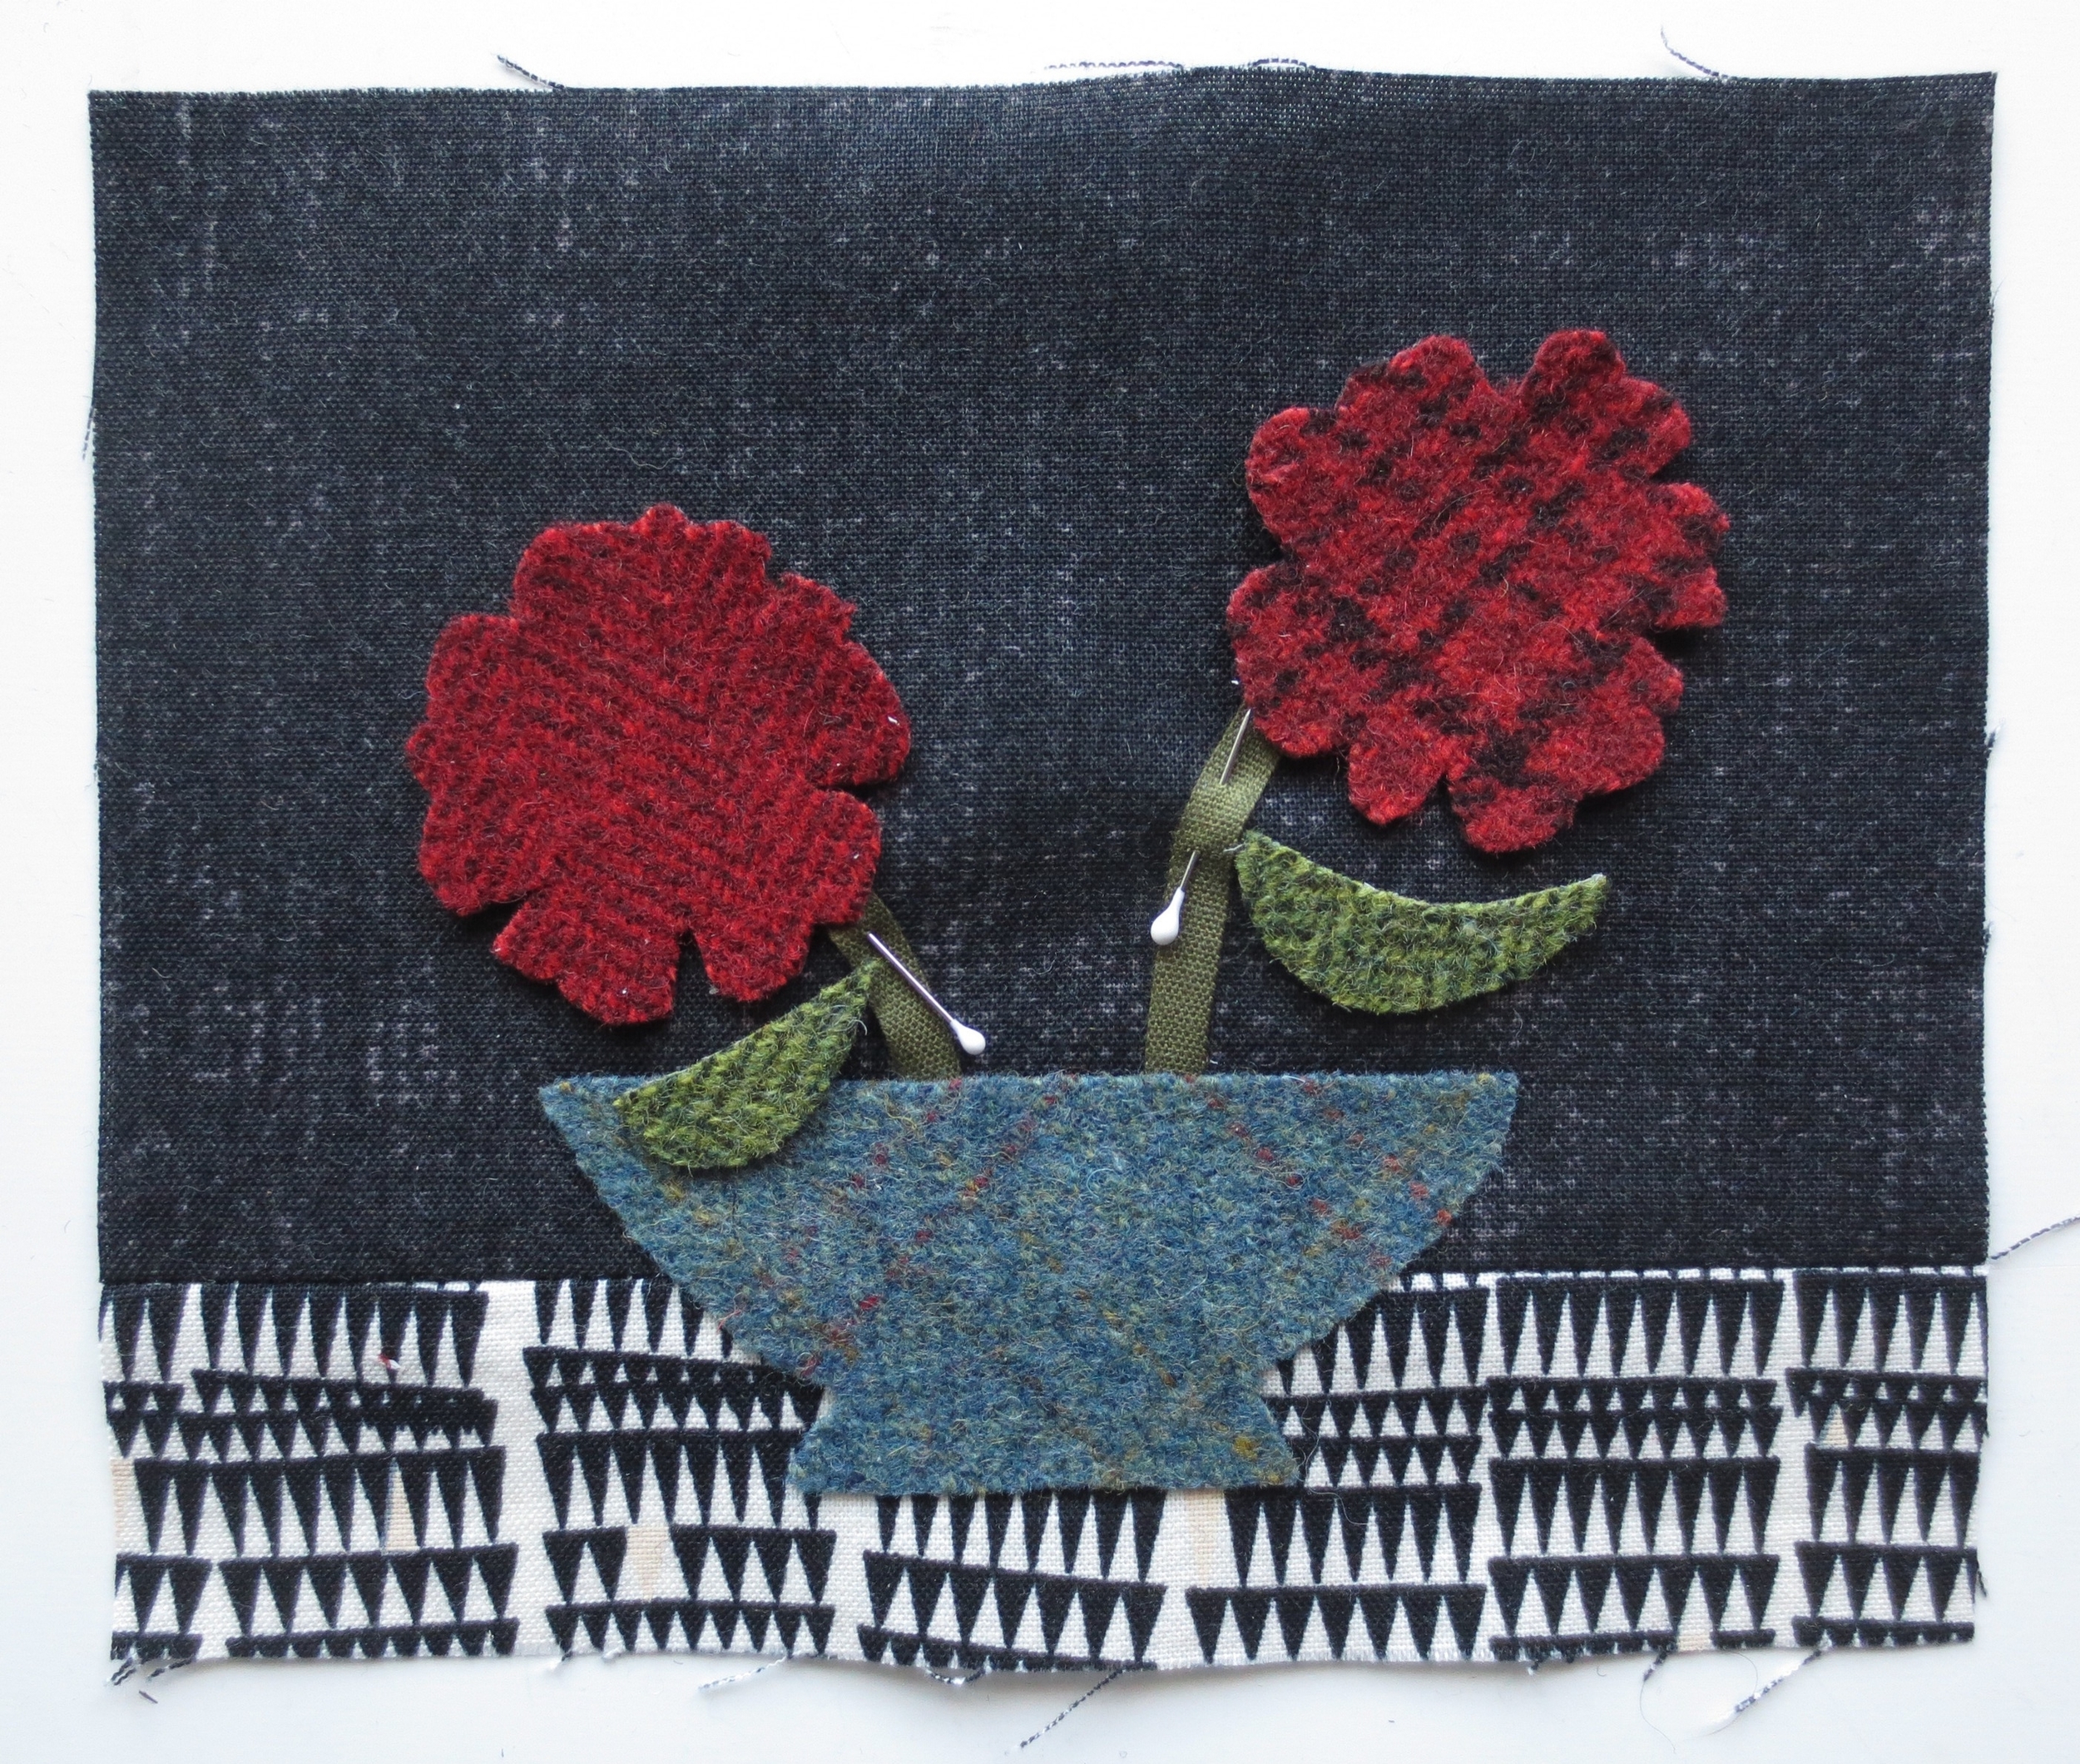
Reposition the flowers and leaves. Curve the stems to match the layout using pins to hold in place. Remove the flowers and leaves after pinning.
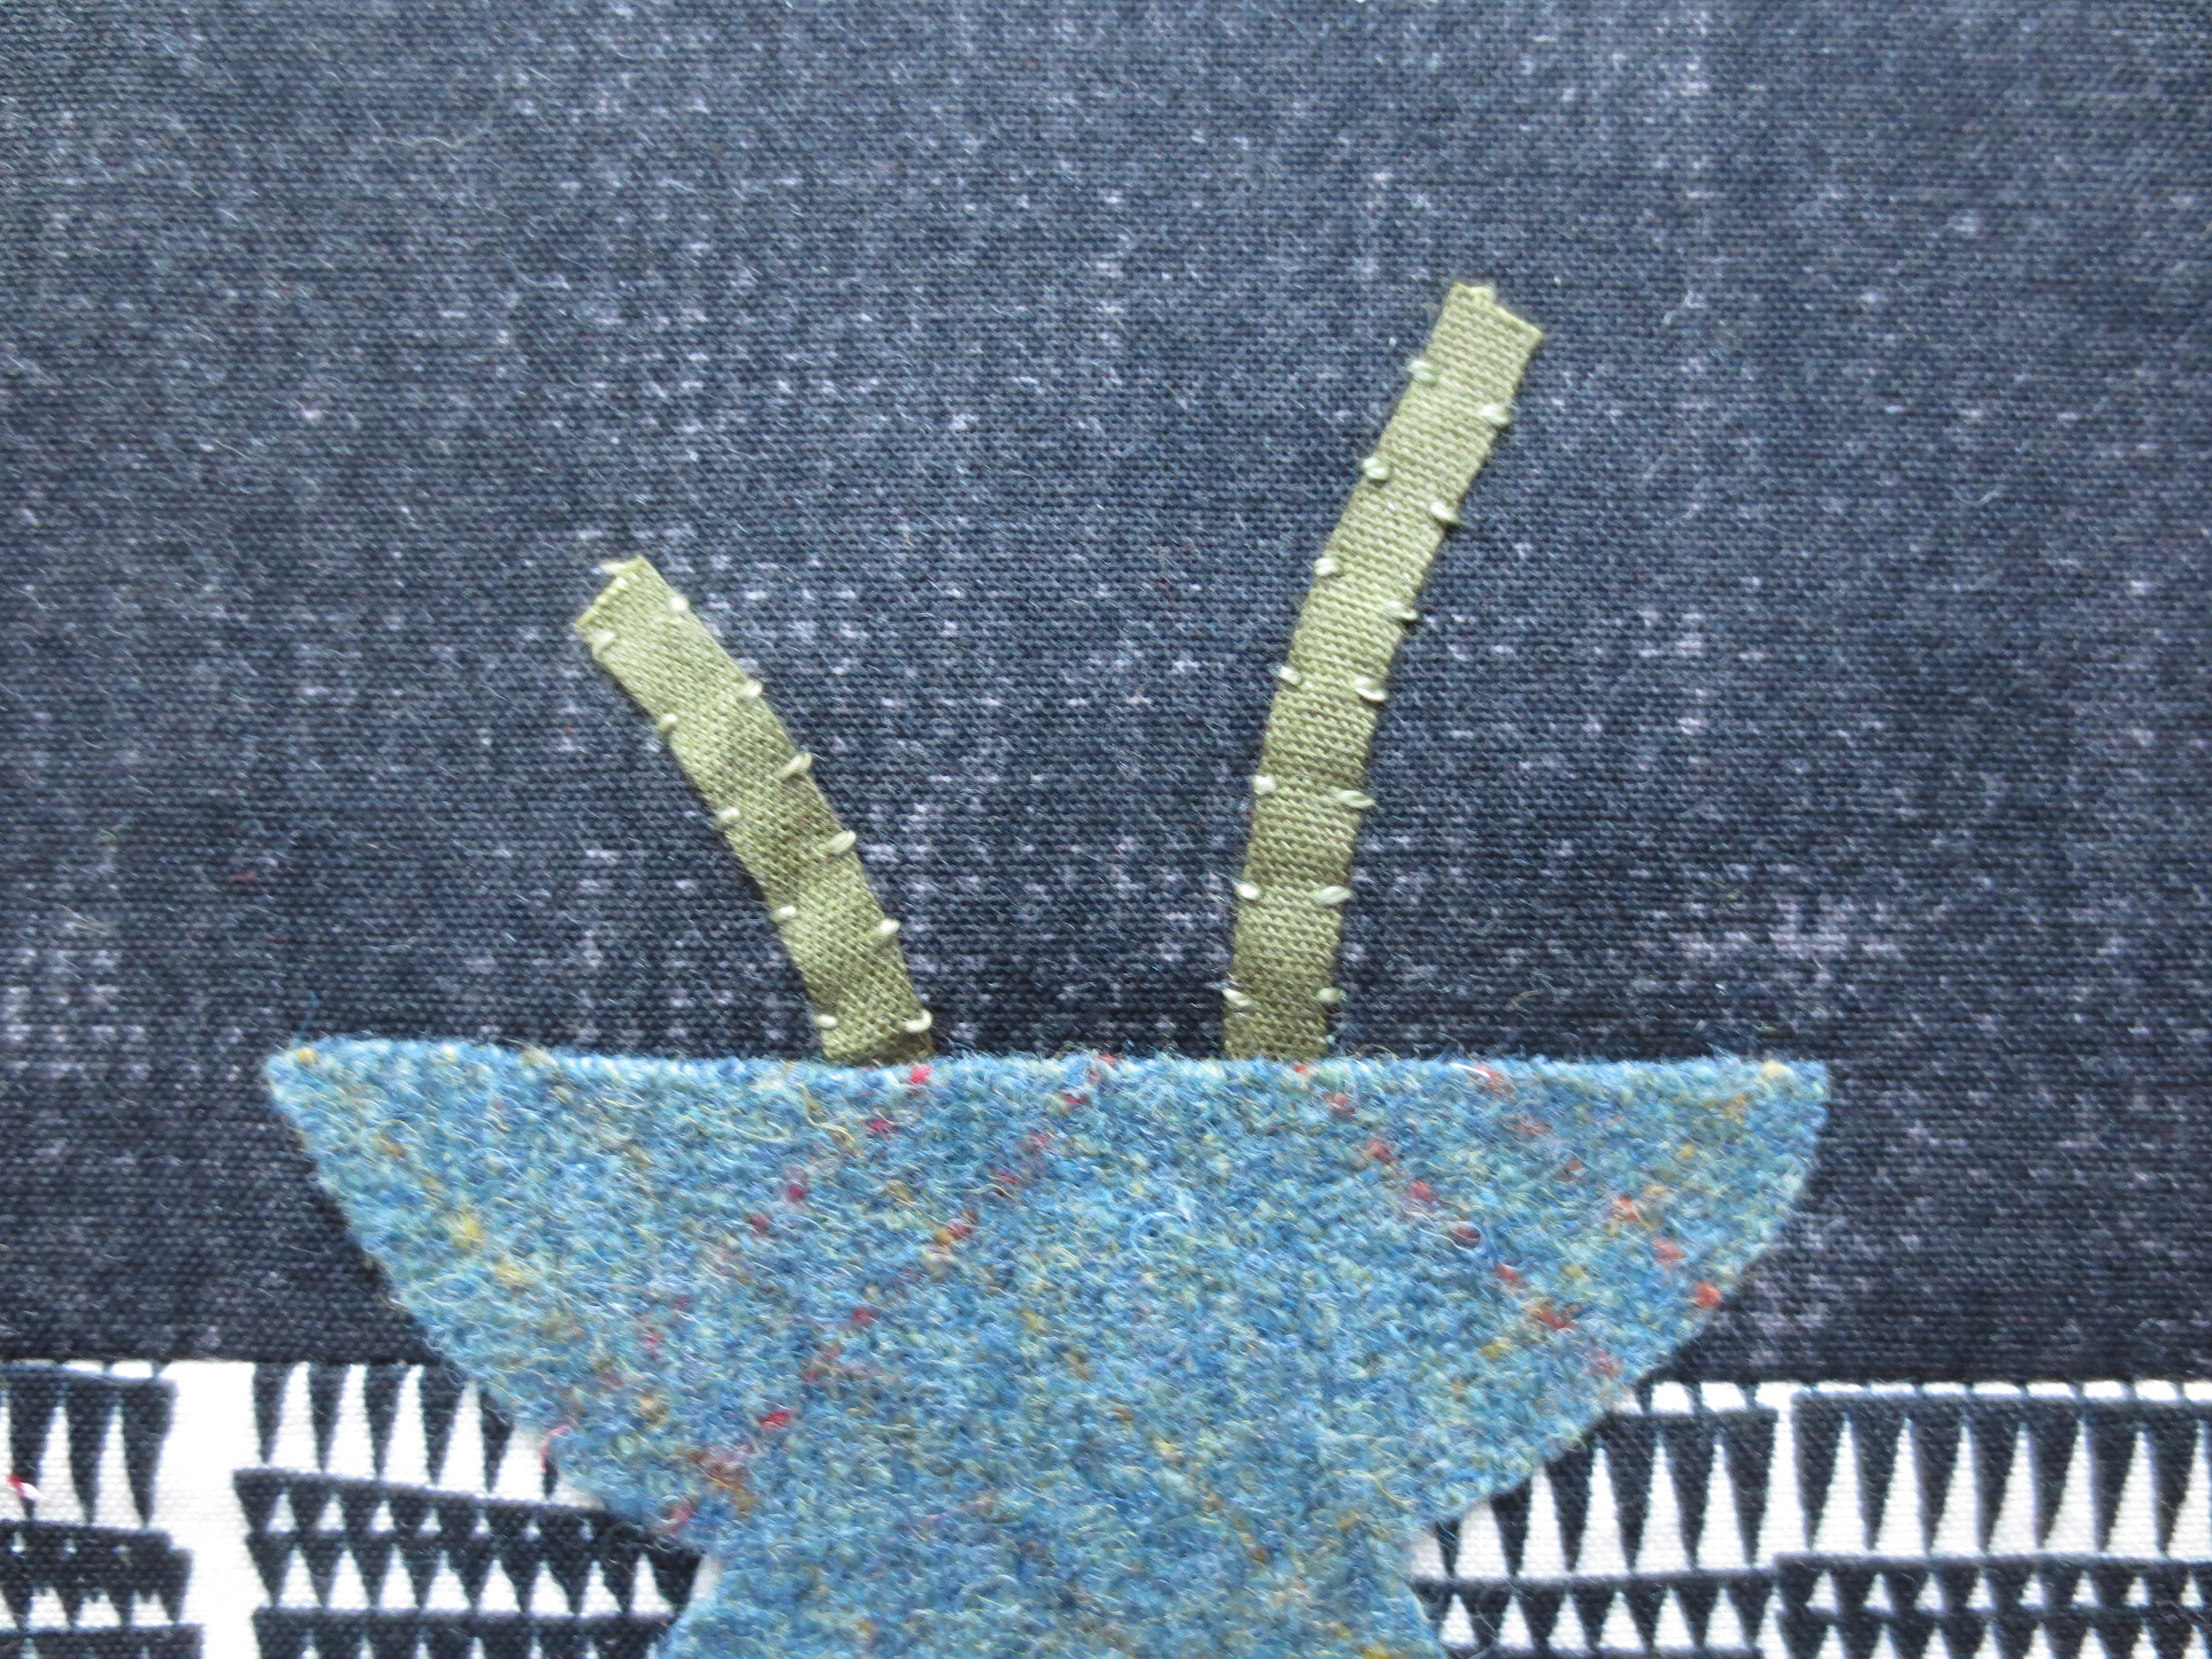
Whip stitch the stems in place.
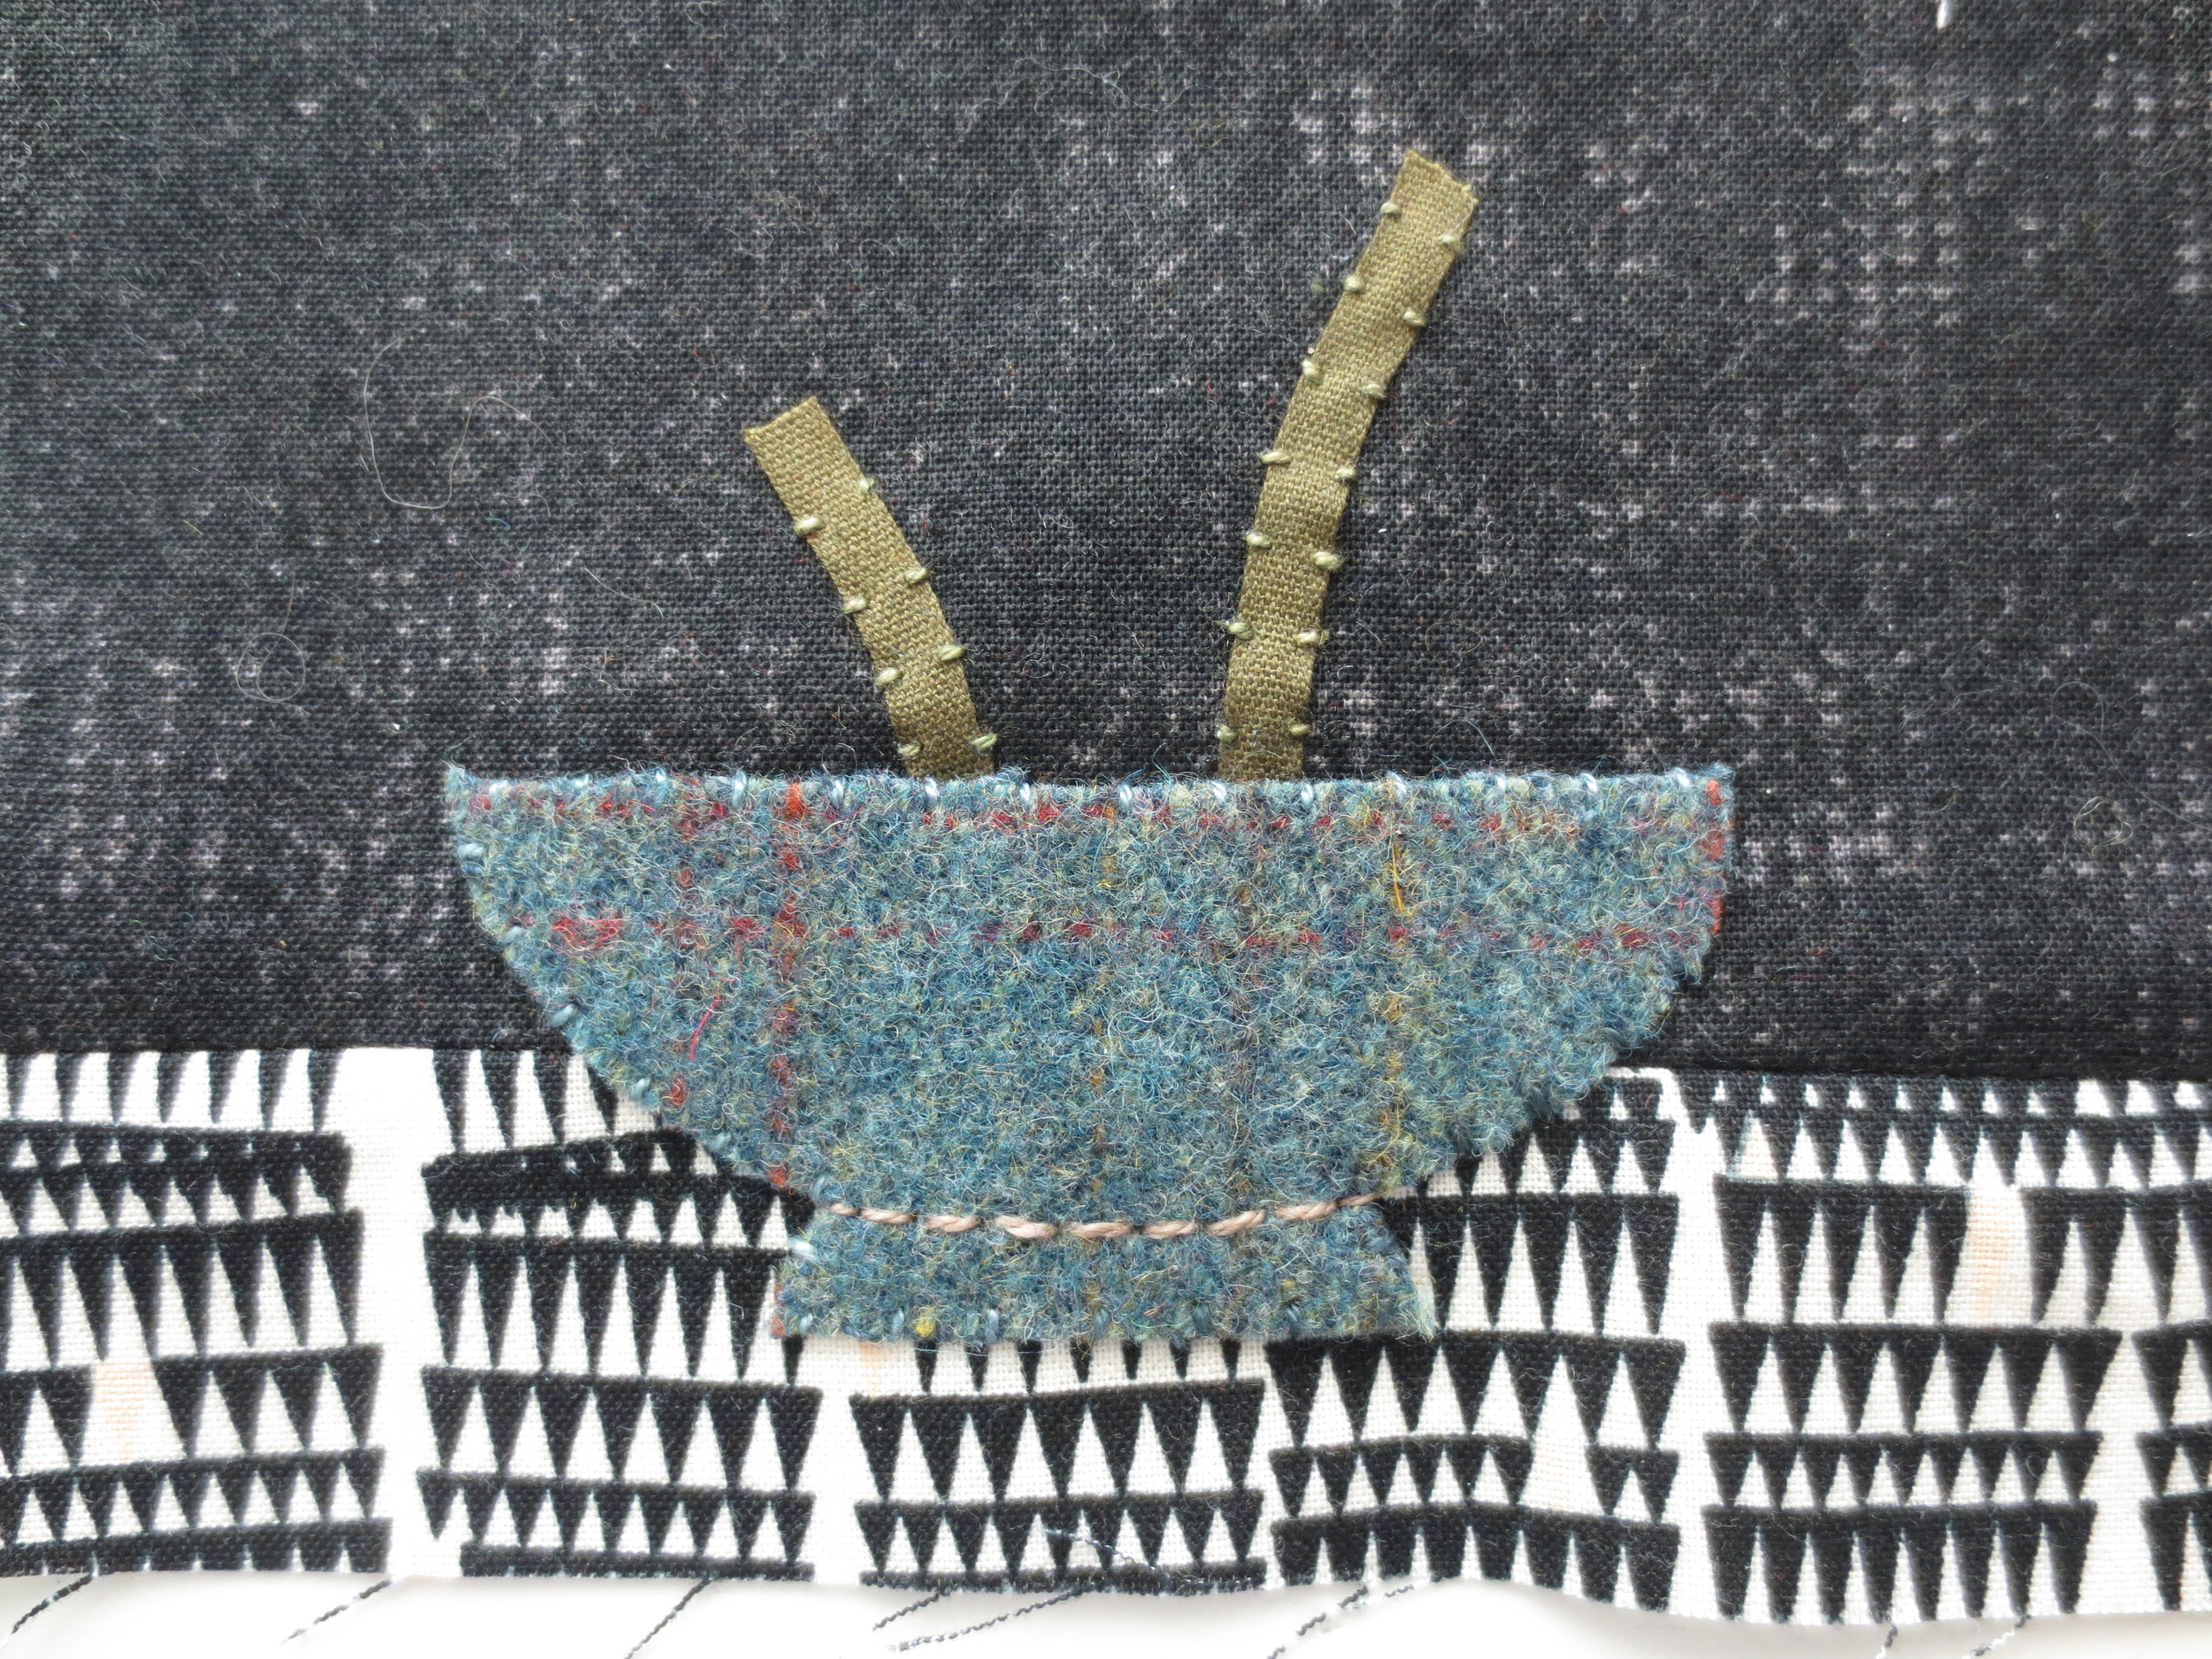
Whip stitch the vase.
Use a chalk pencil to draw the curved line on the vase bottom.
Back stitch over the chalk line with #O178.
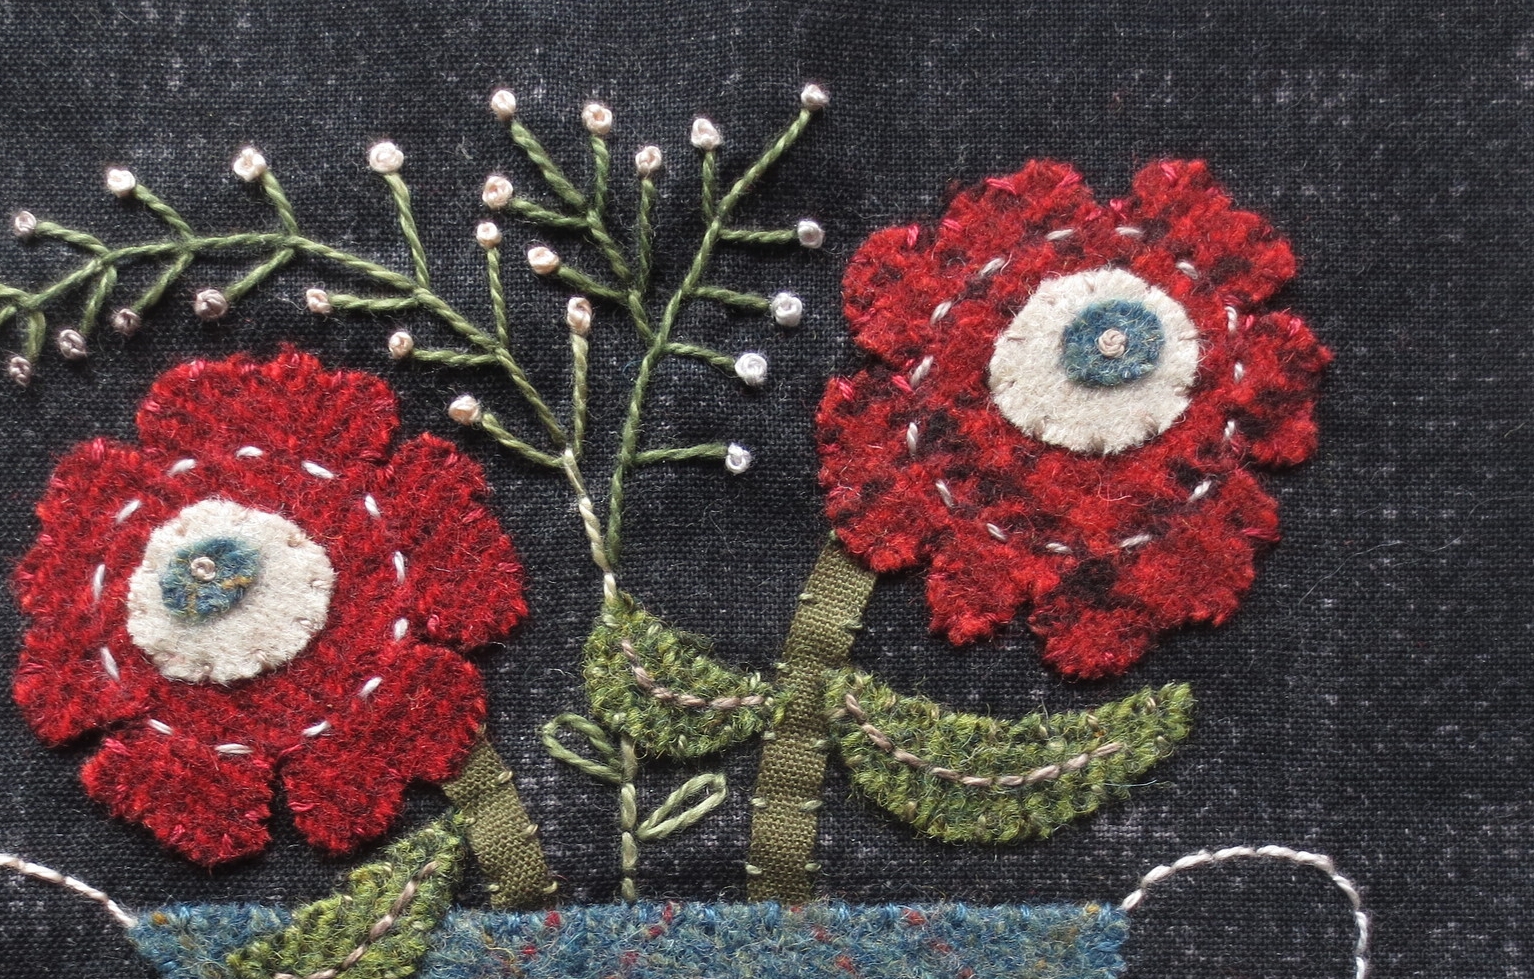
Reposition the flowers and leaves #1 & #3. Fuse in place, then whip stitch.
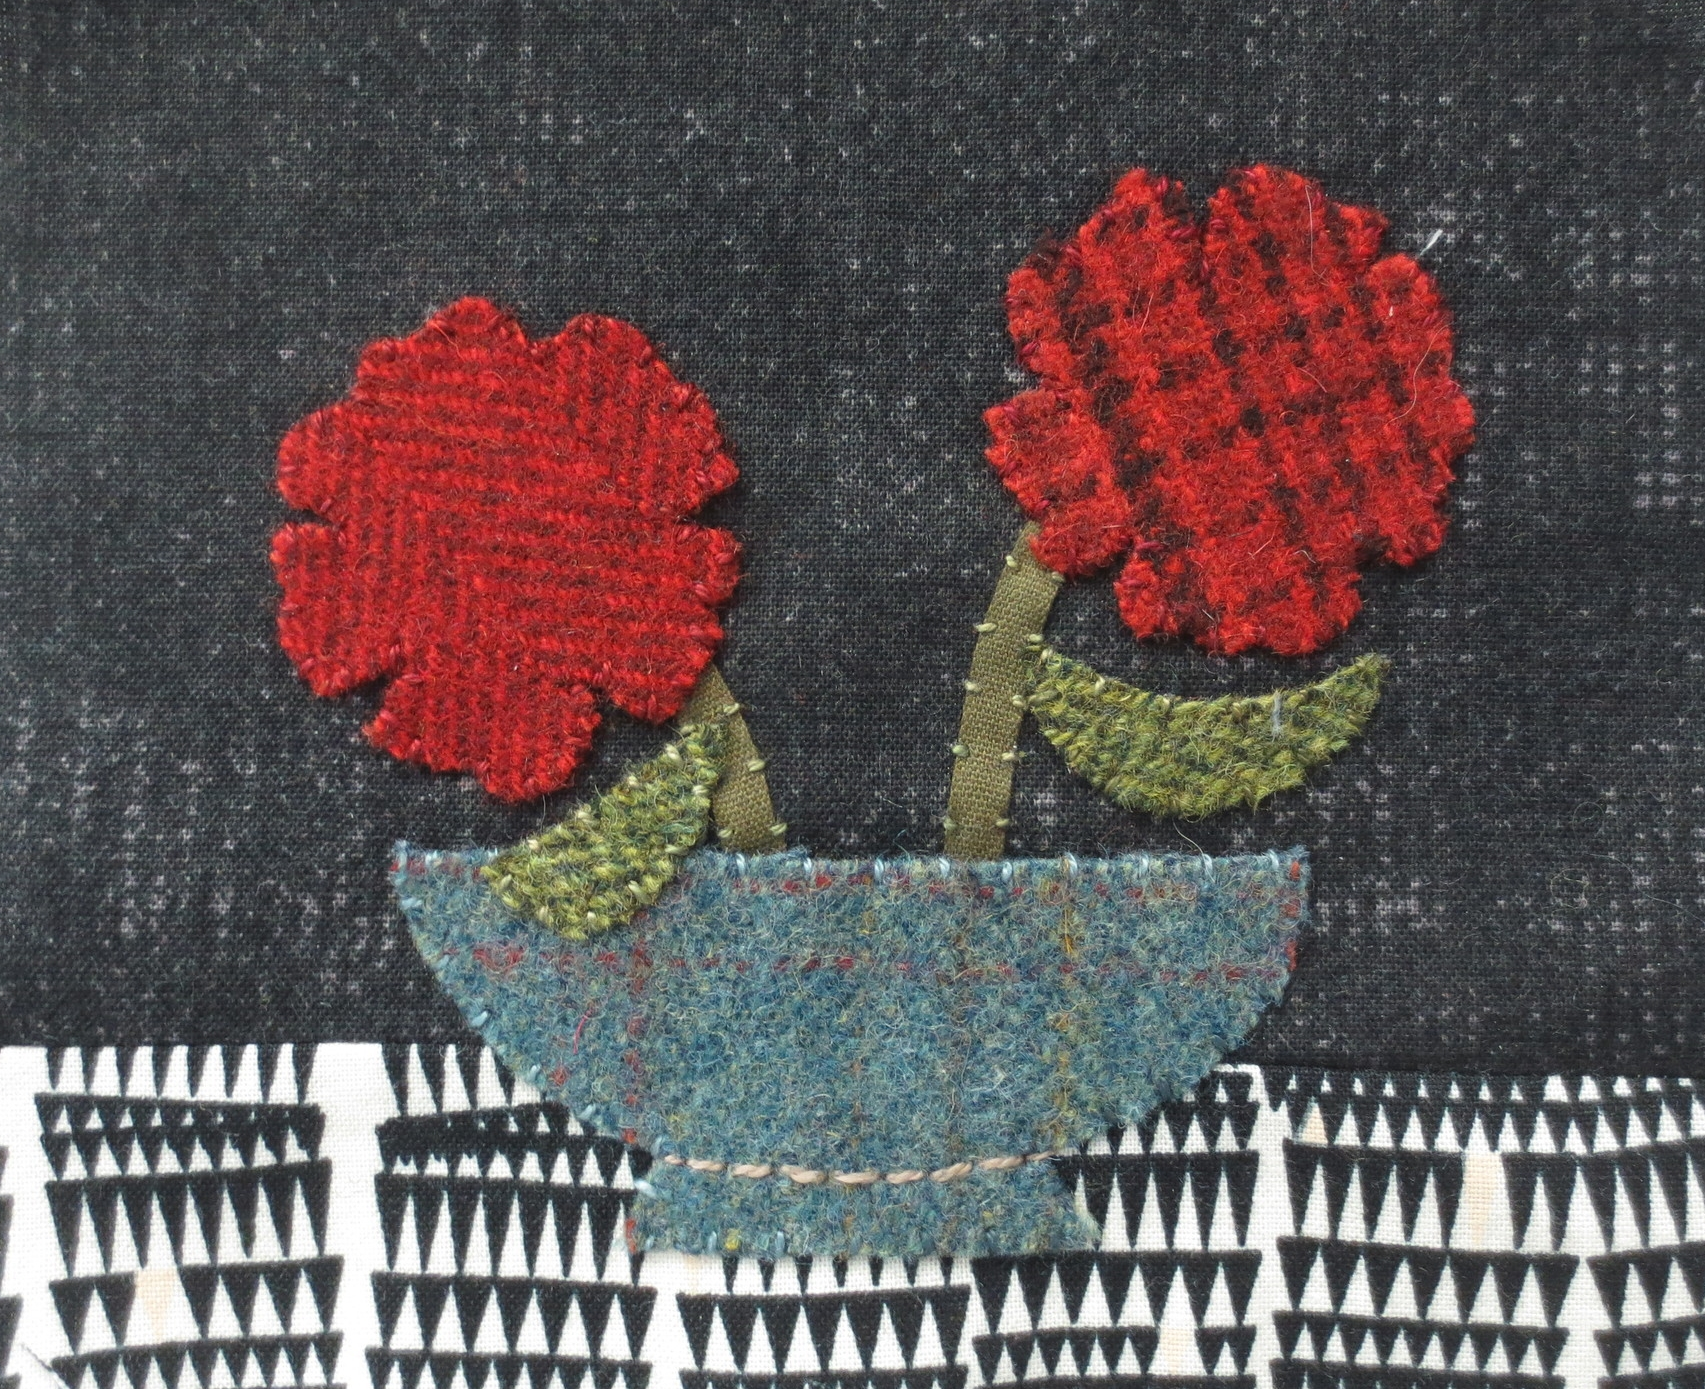
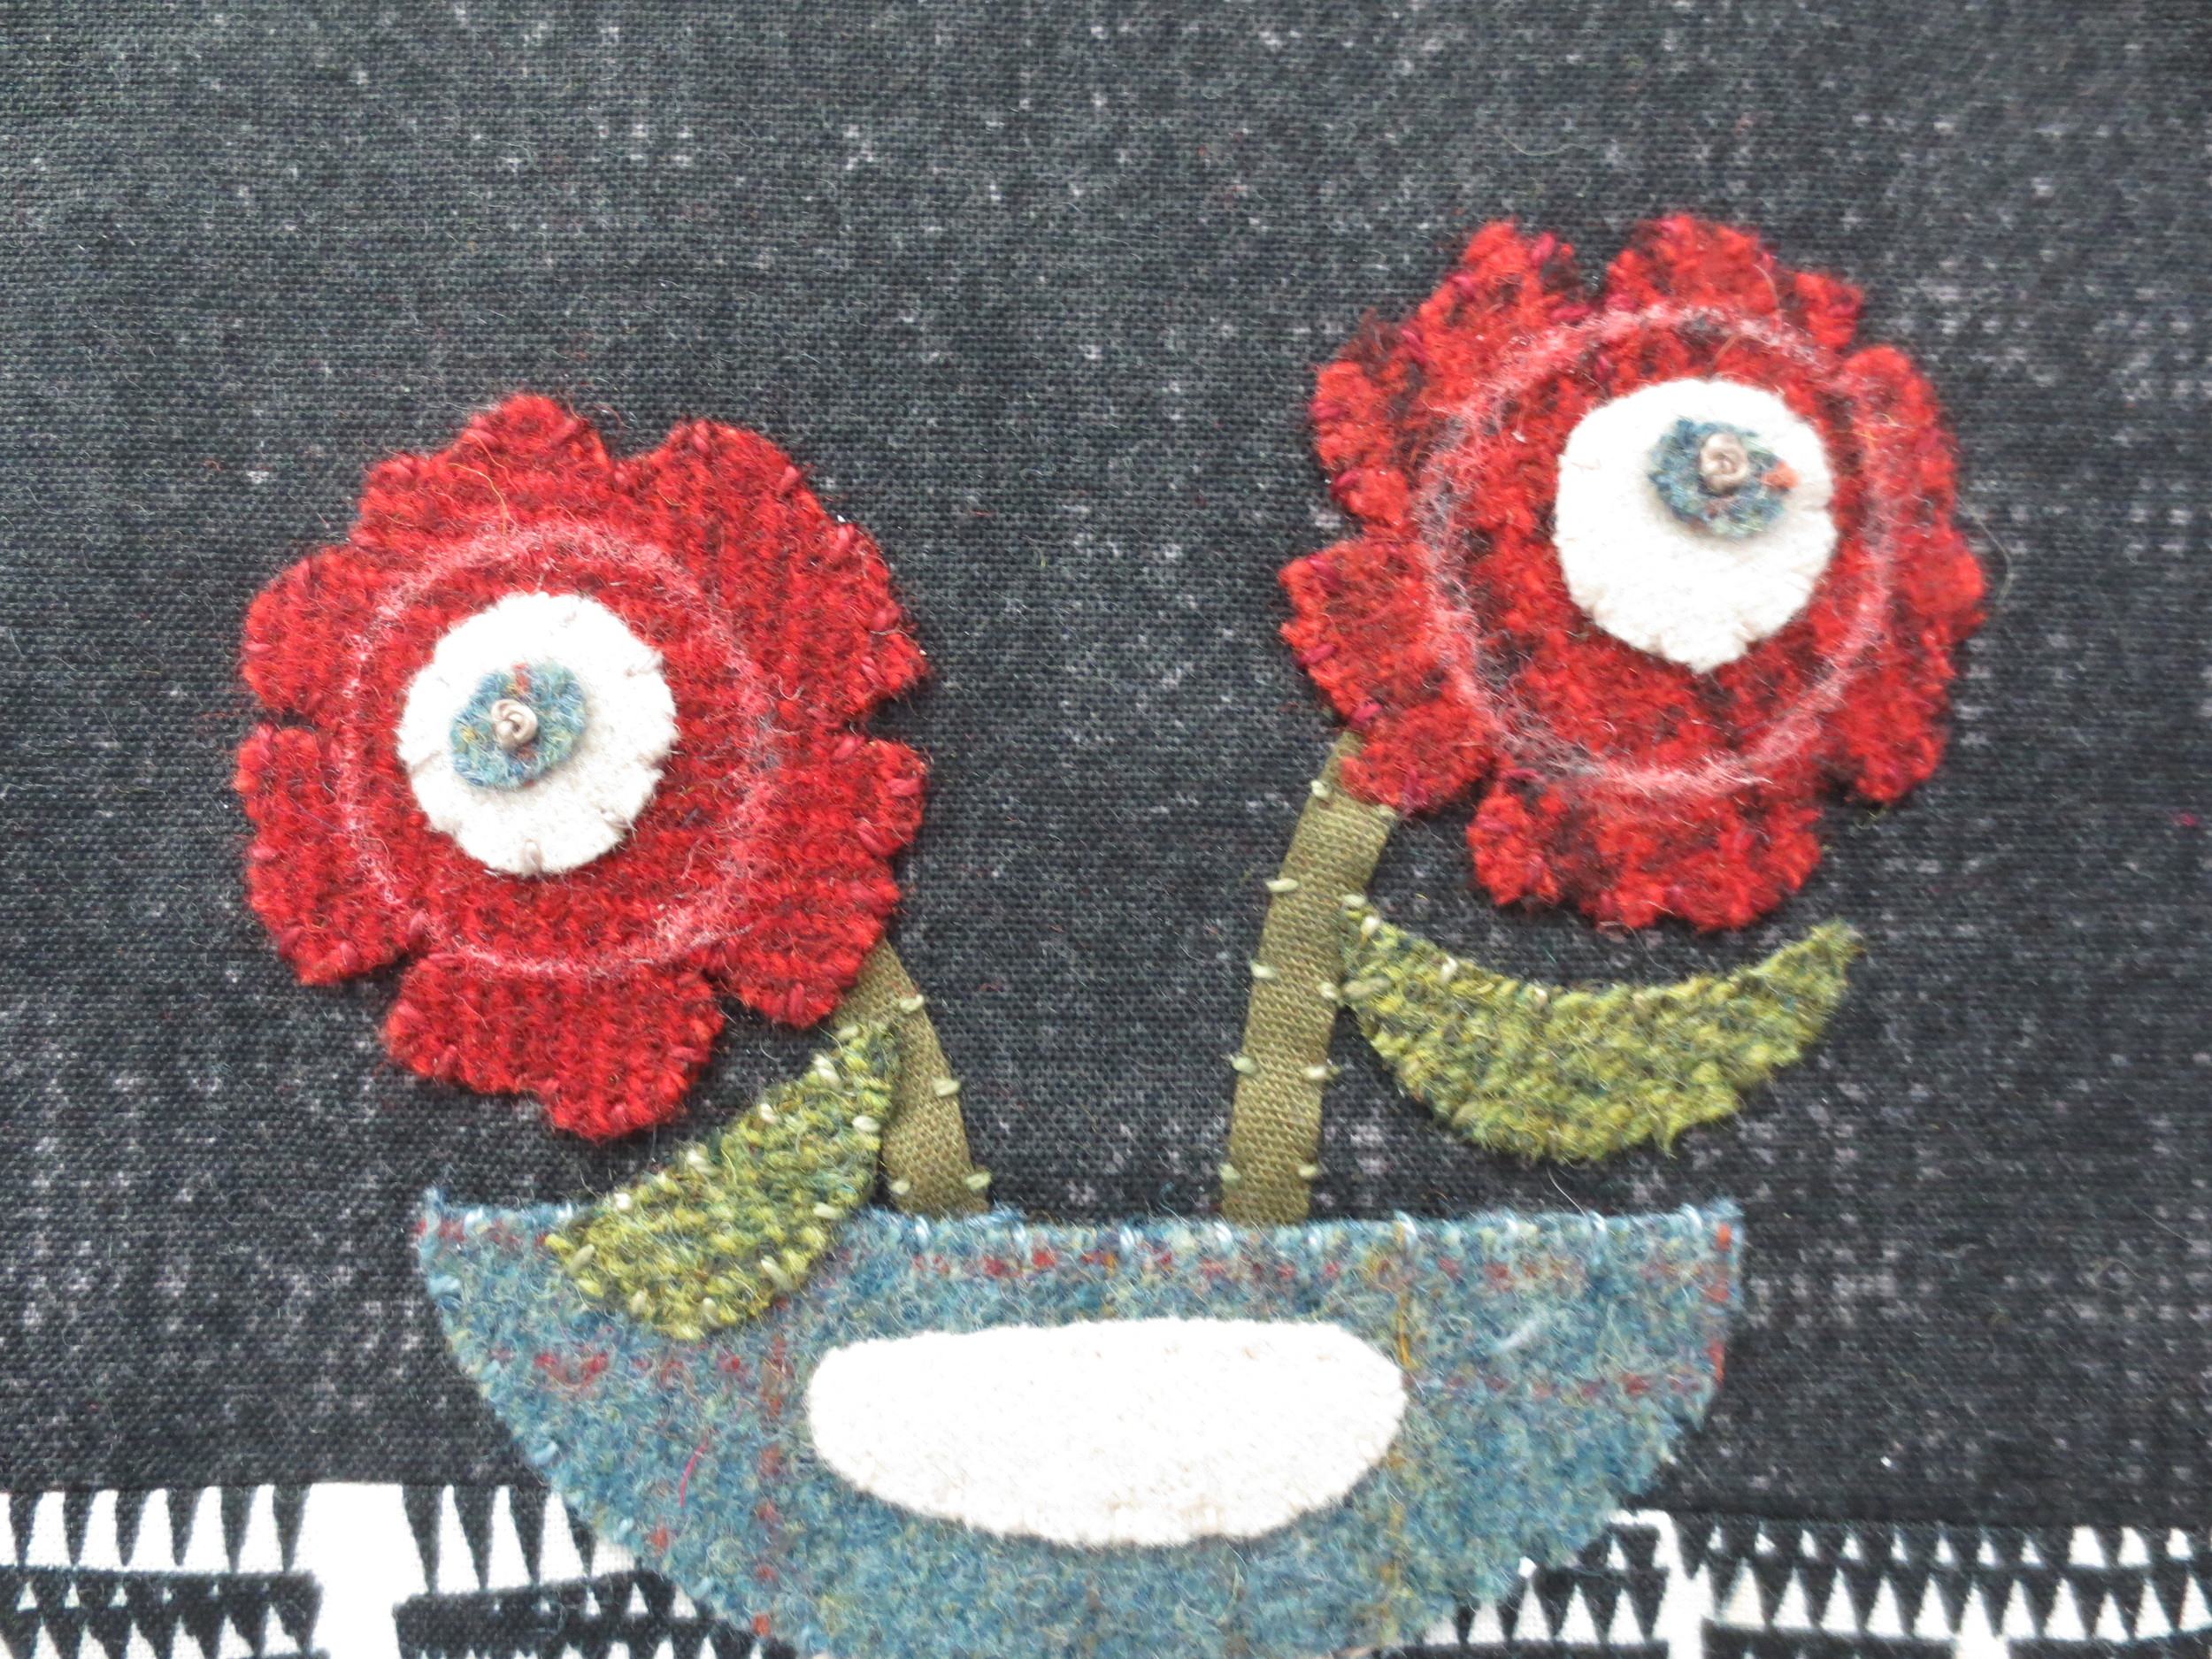
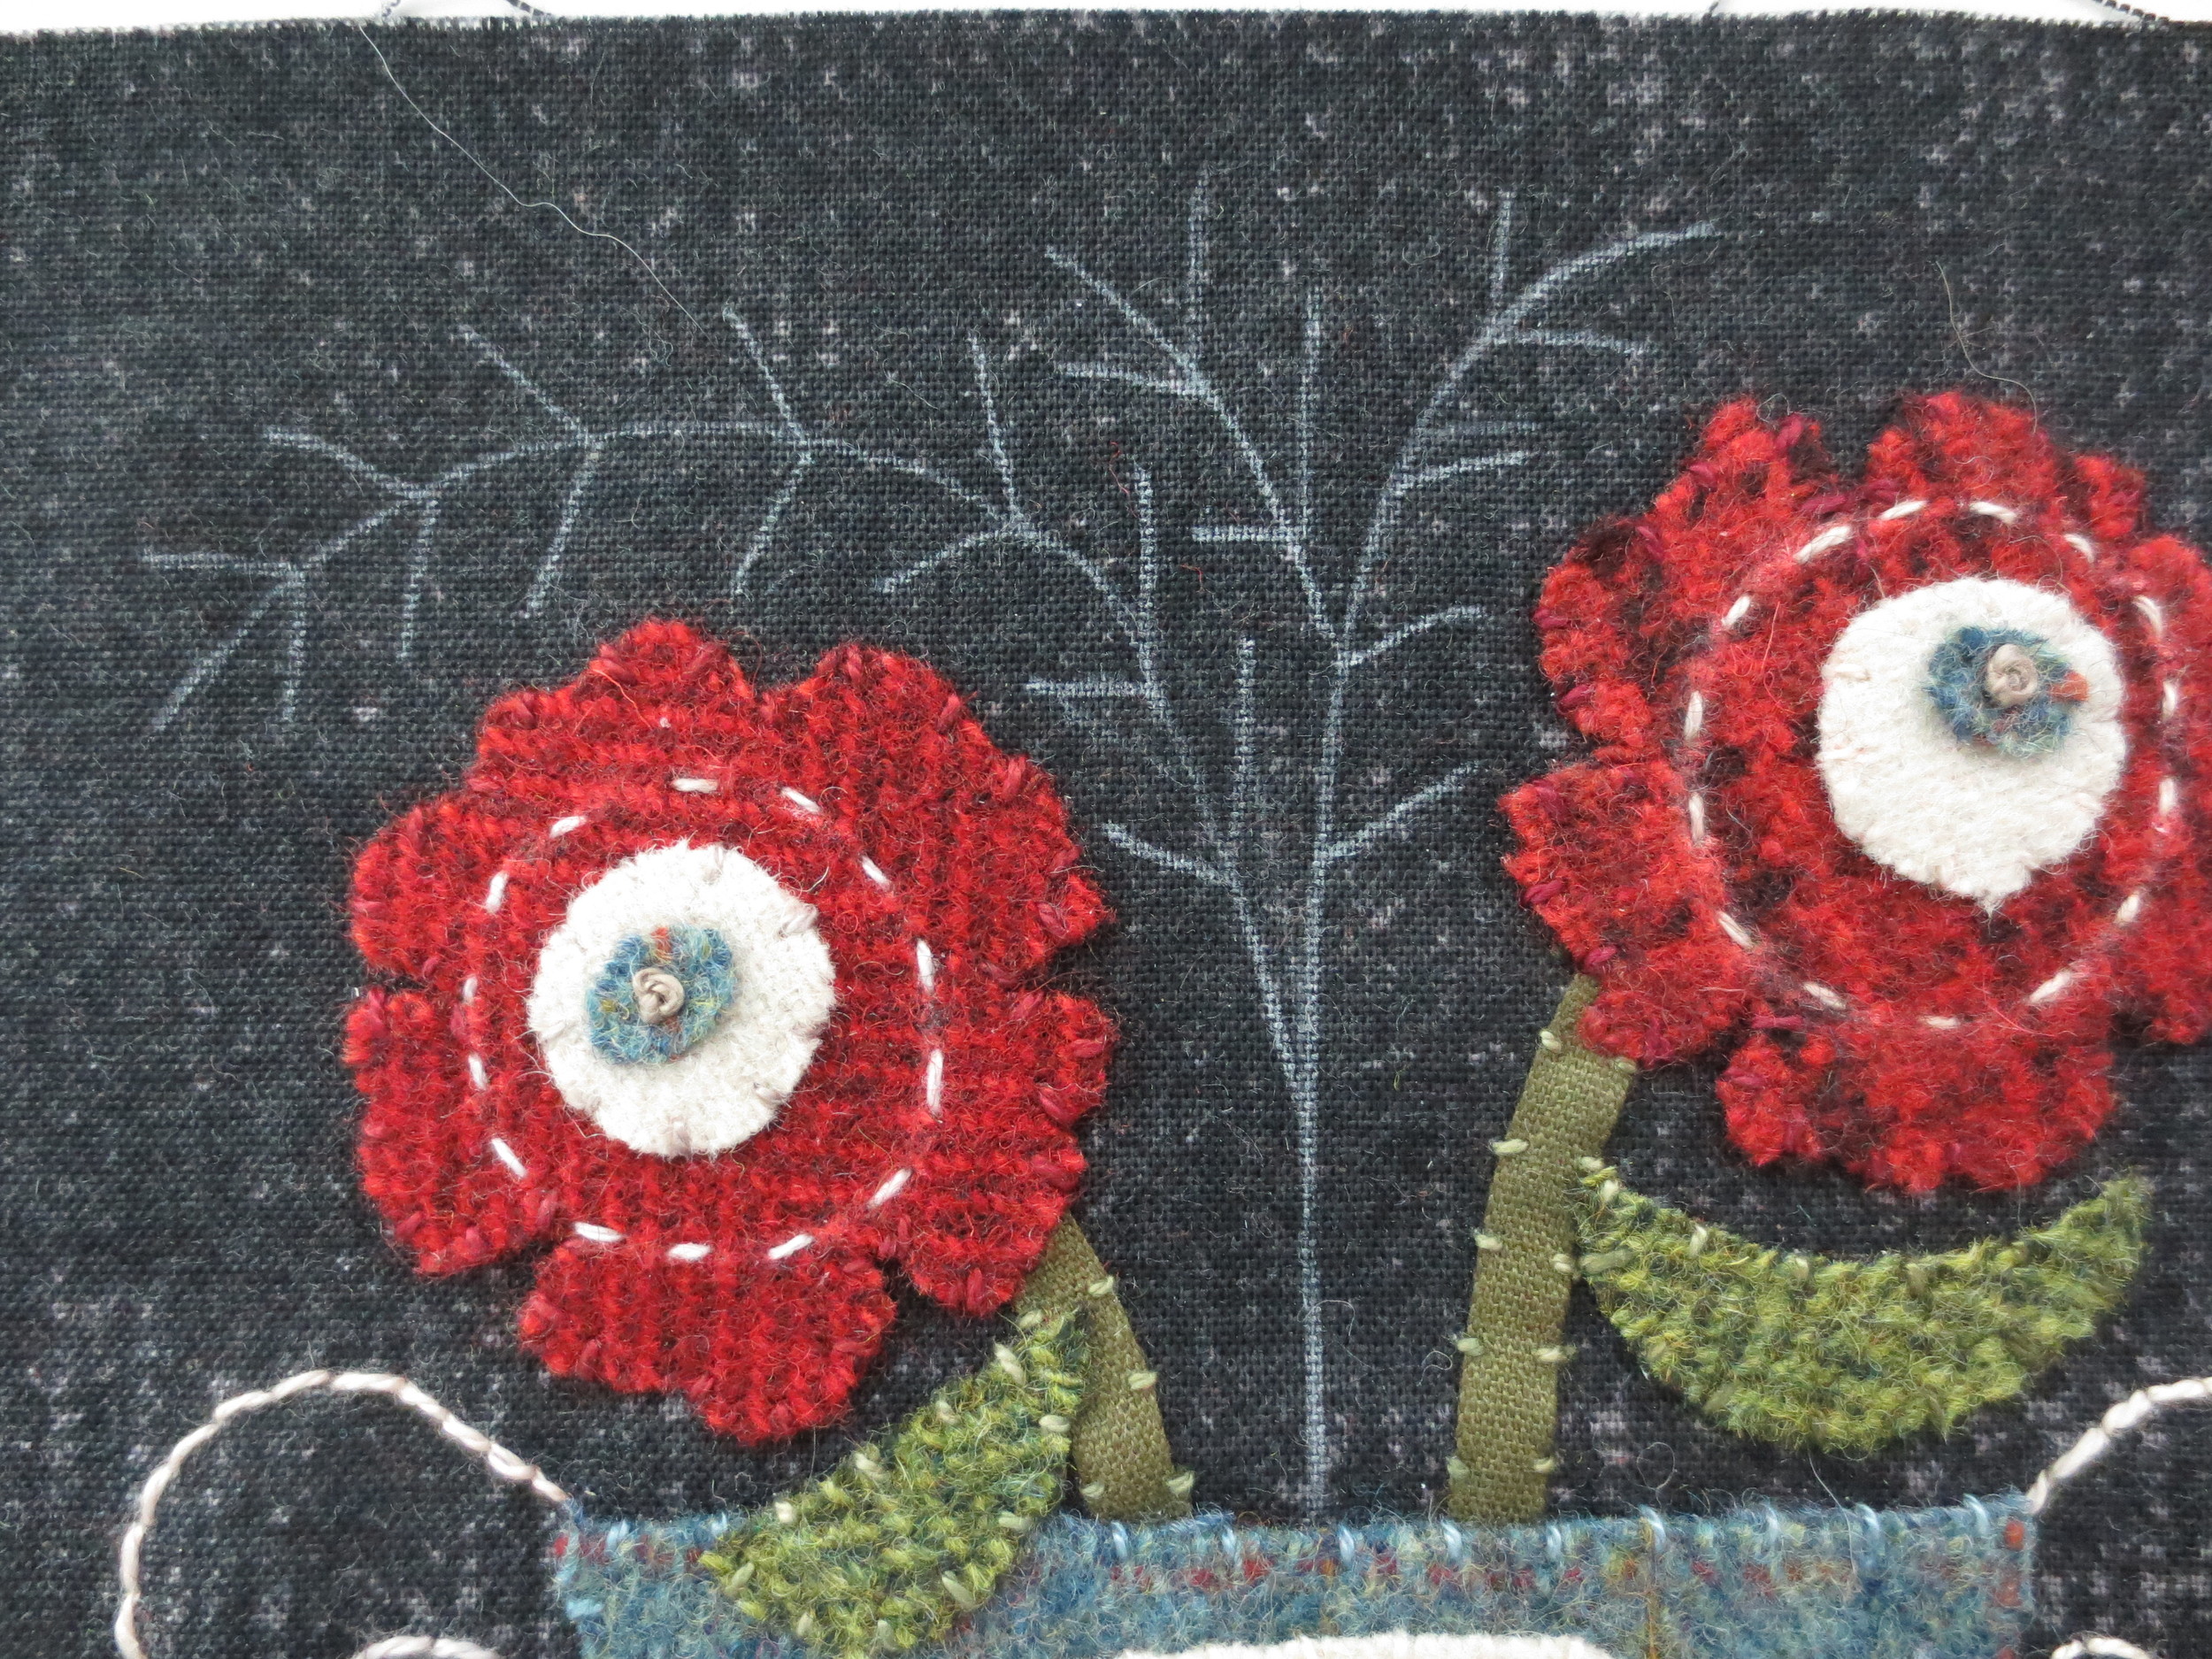
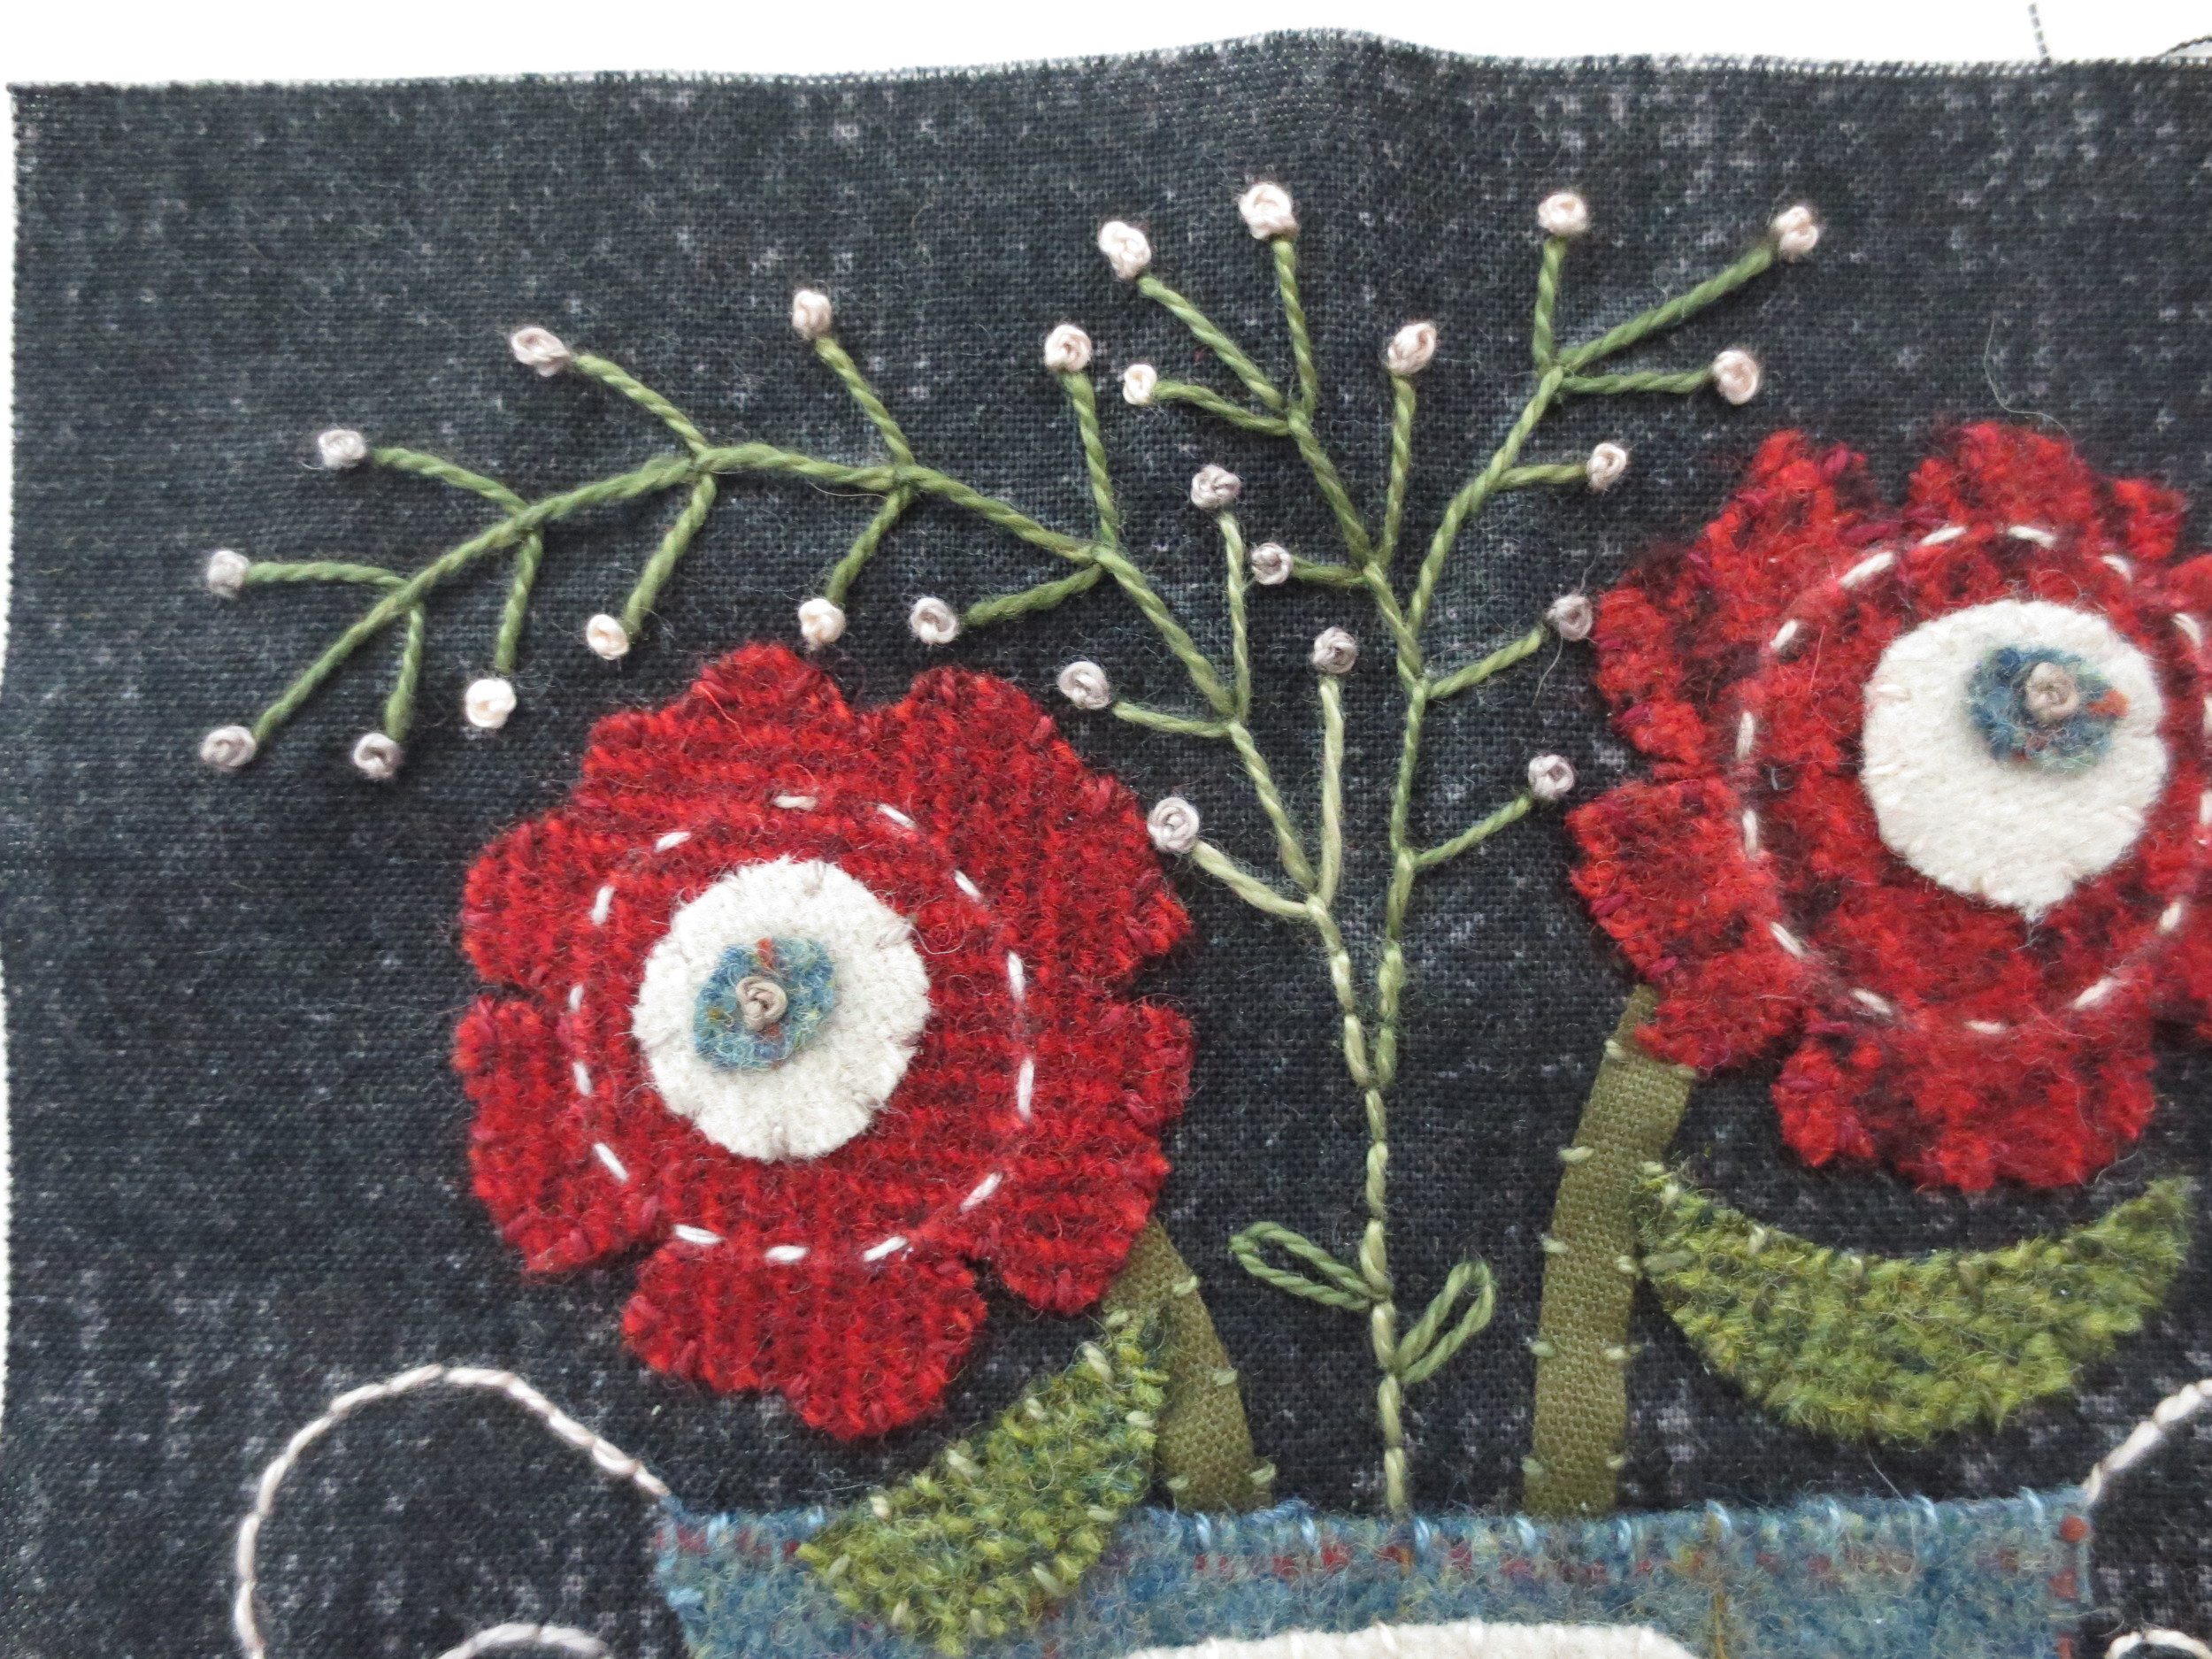
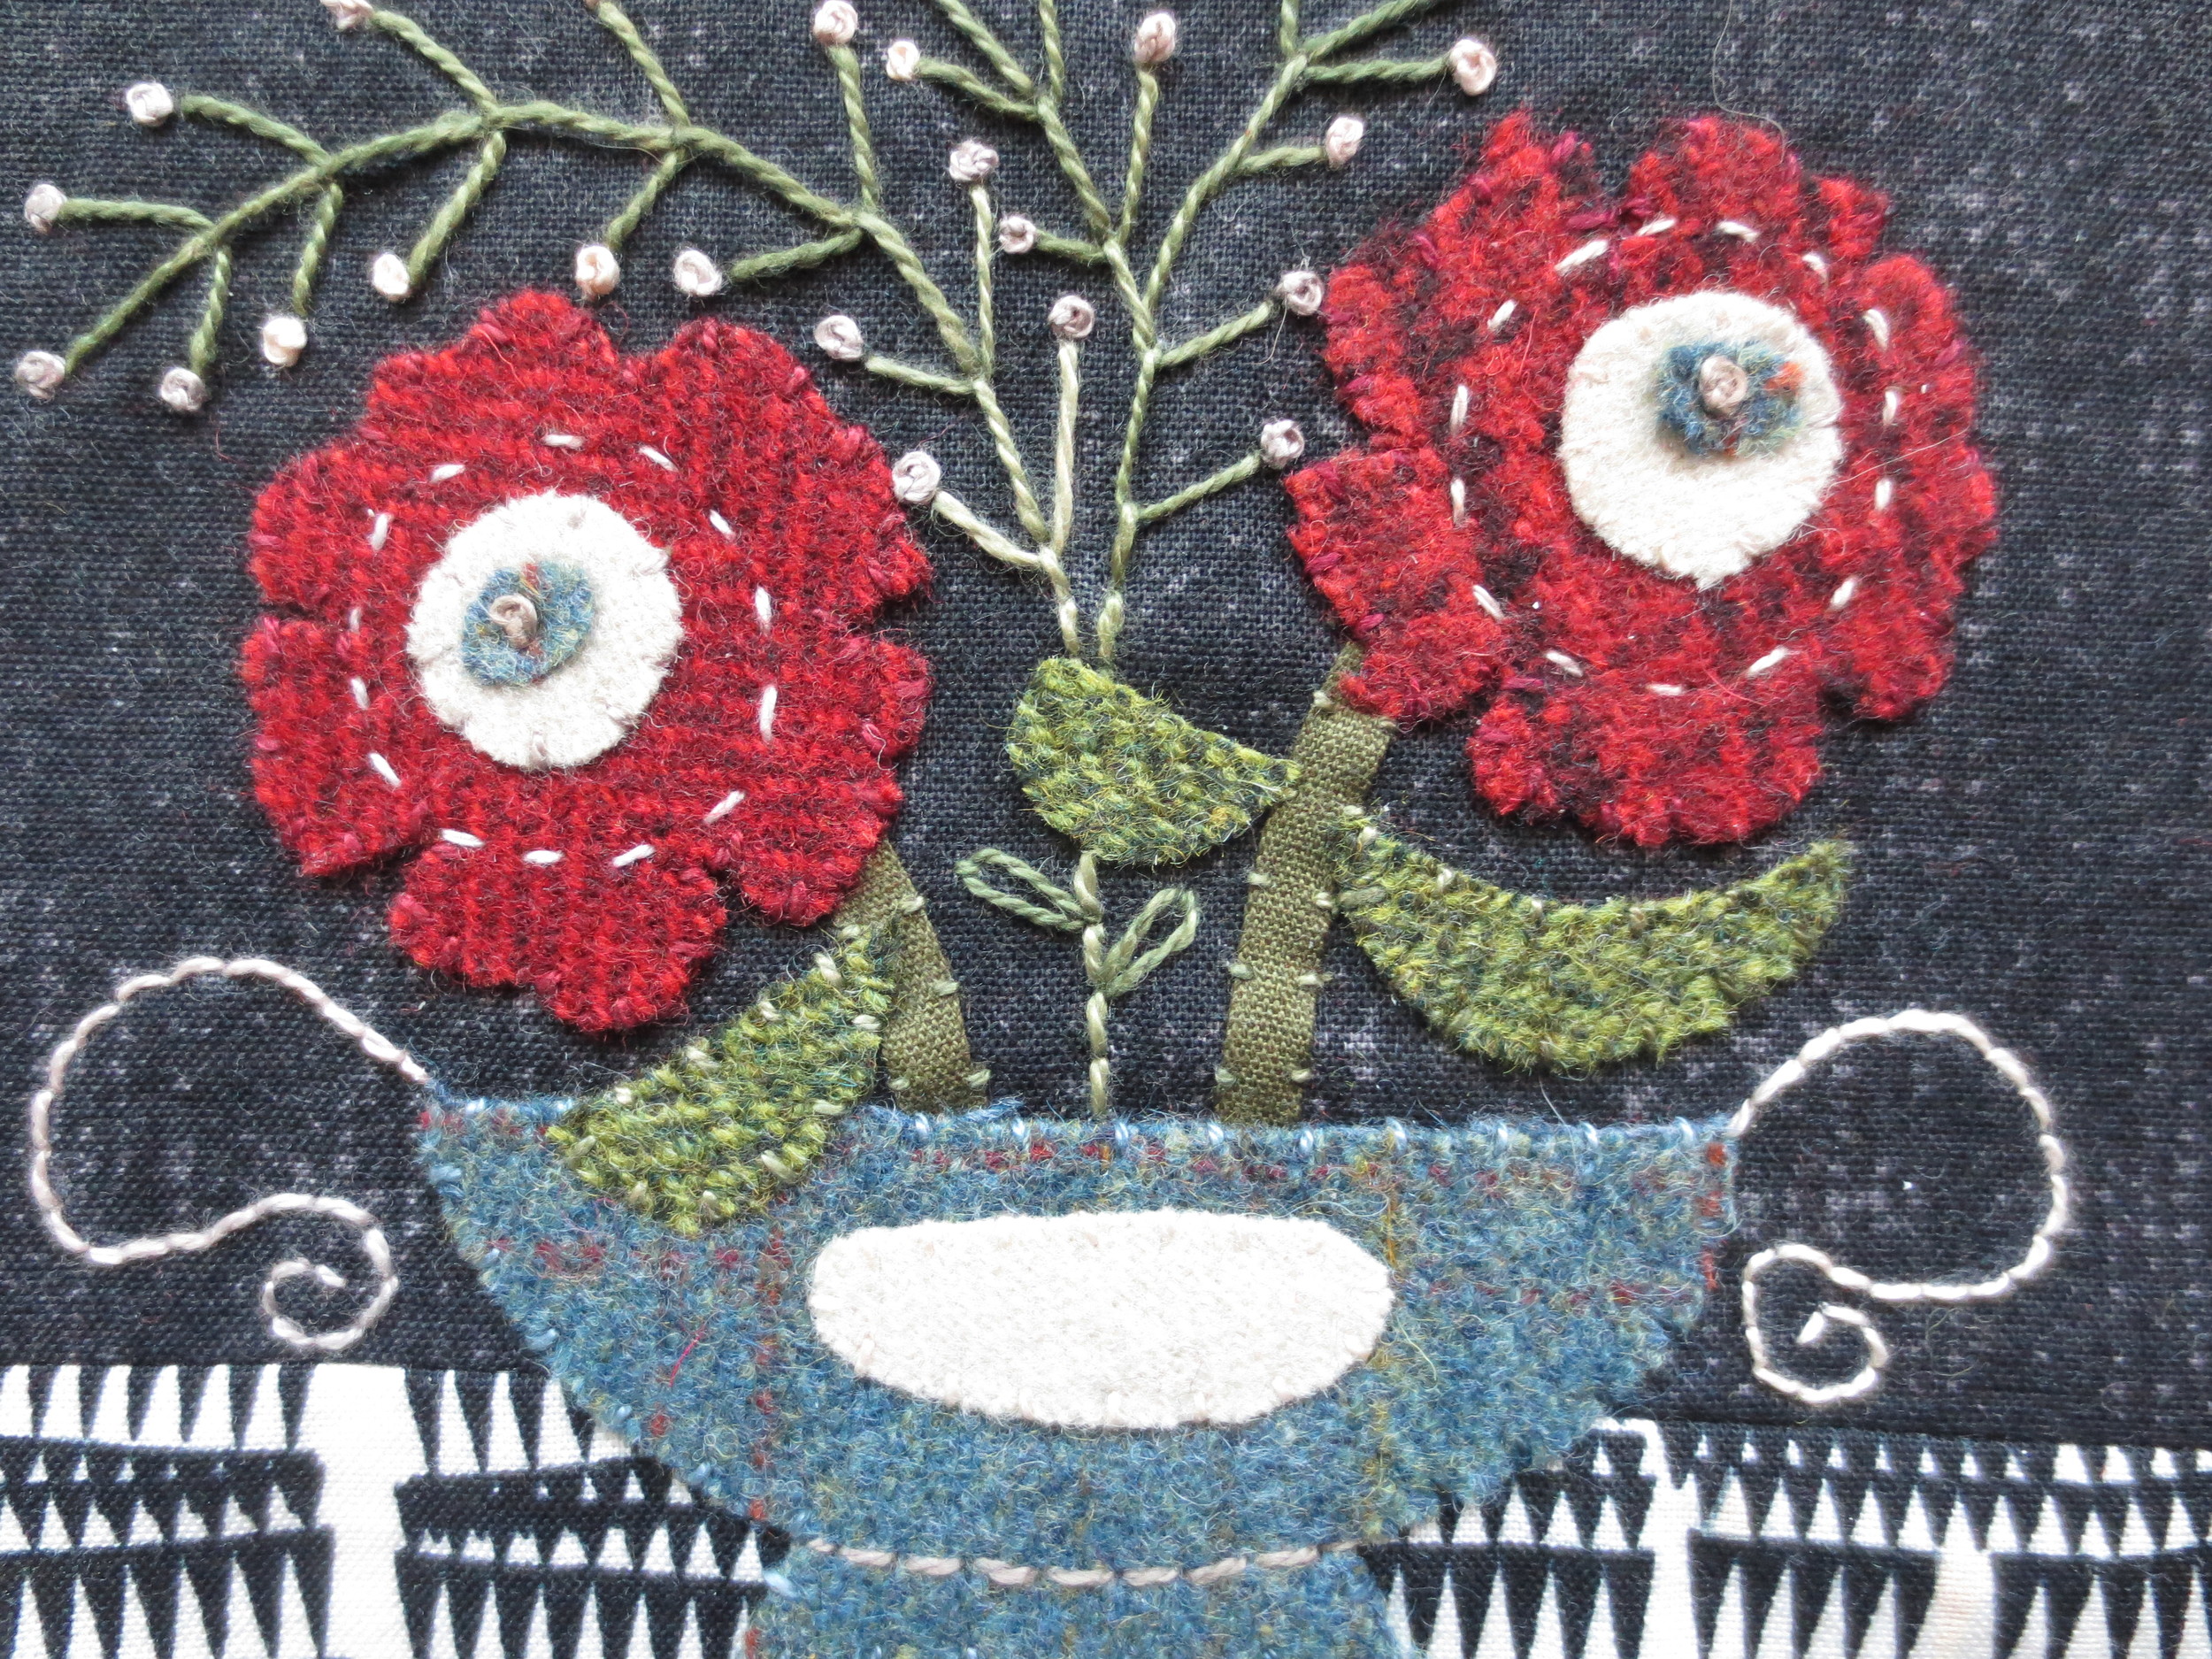
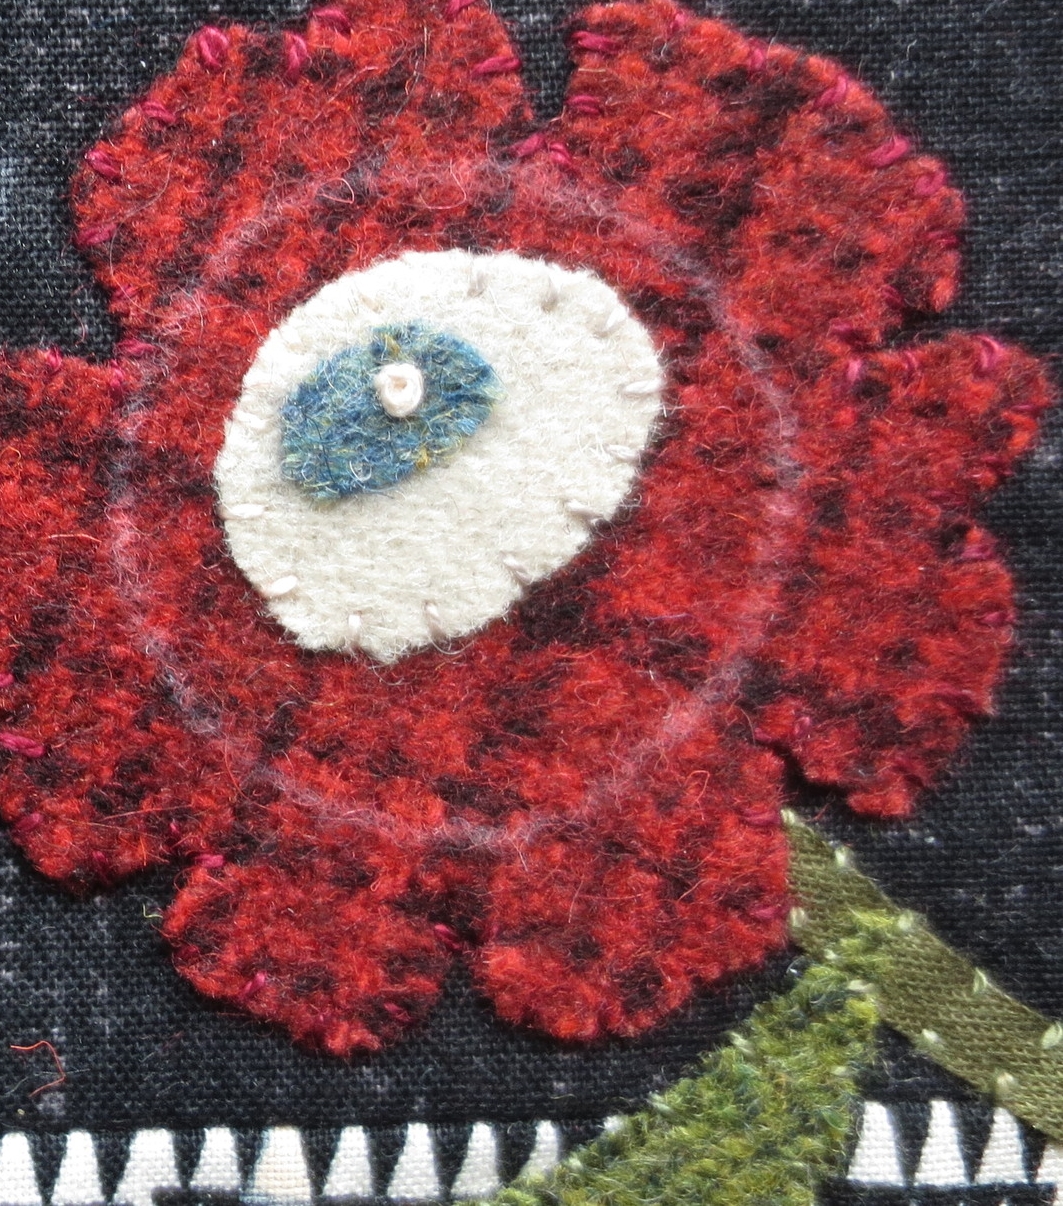
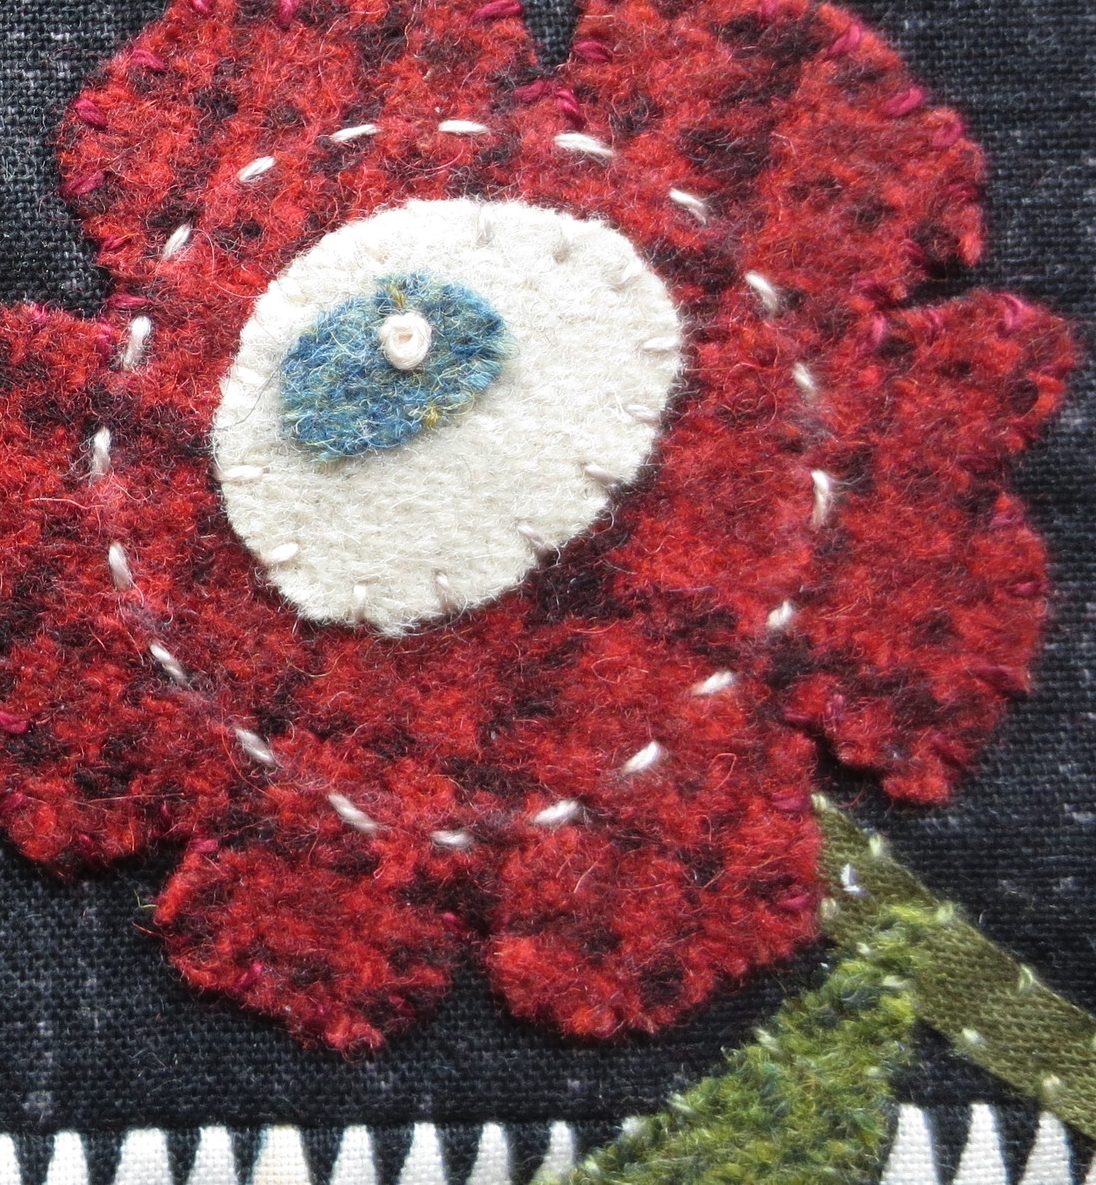
Position large and small flower centers and vase plate according to the layout. Fuse in place.
Stitch a single French knot in the center of each small flower center. This will secure the small flower center so you won't have to whip stitch it.

Whip stitch the vase plate and large flower centers.
Draw circles around the large flower centers ( they're not perfect circles).
Use the same colored thread that you used for whipstitching the large flower circles to stitch a running stitch over the chalk line.
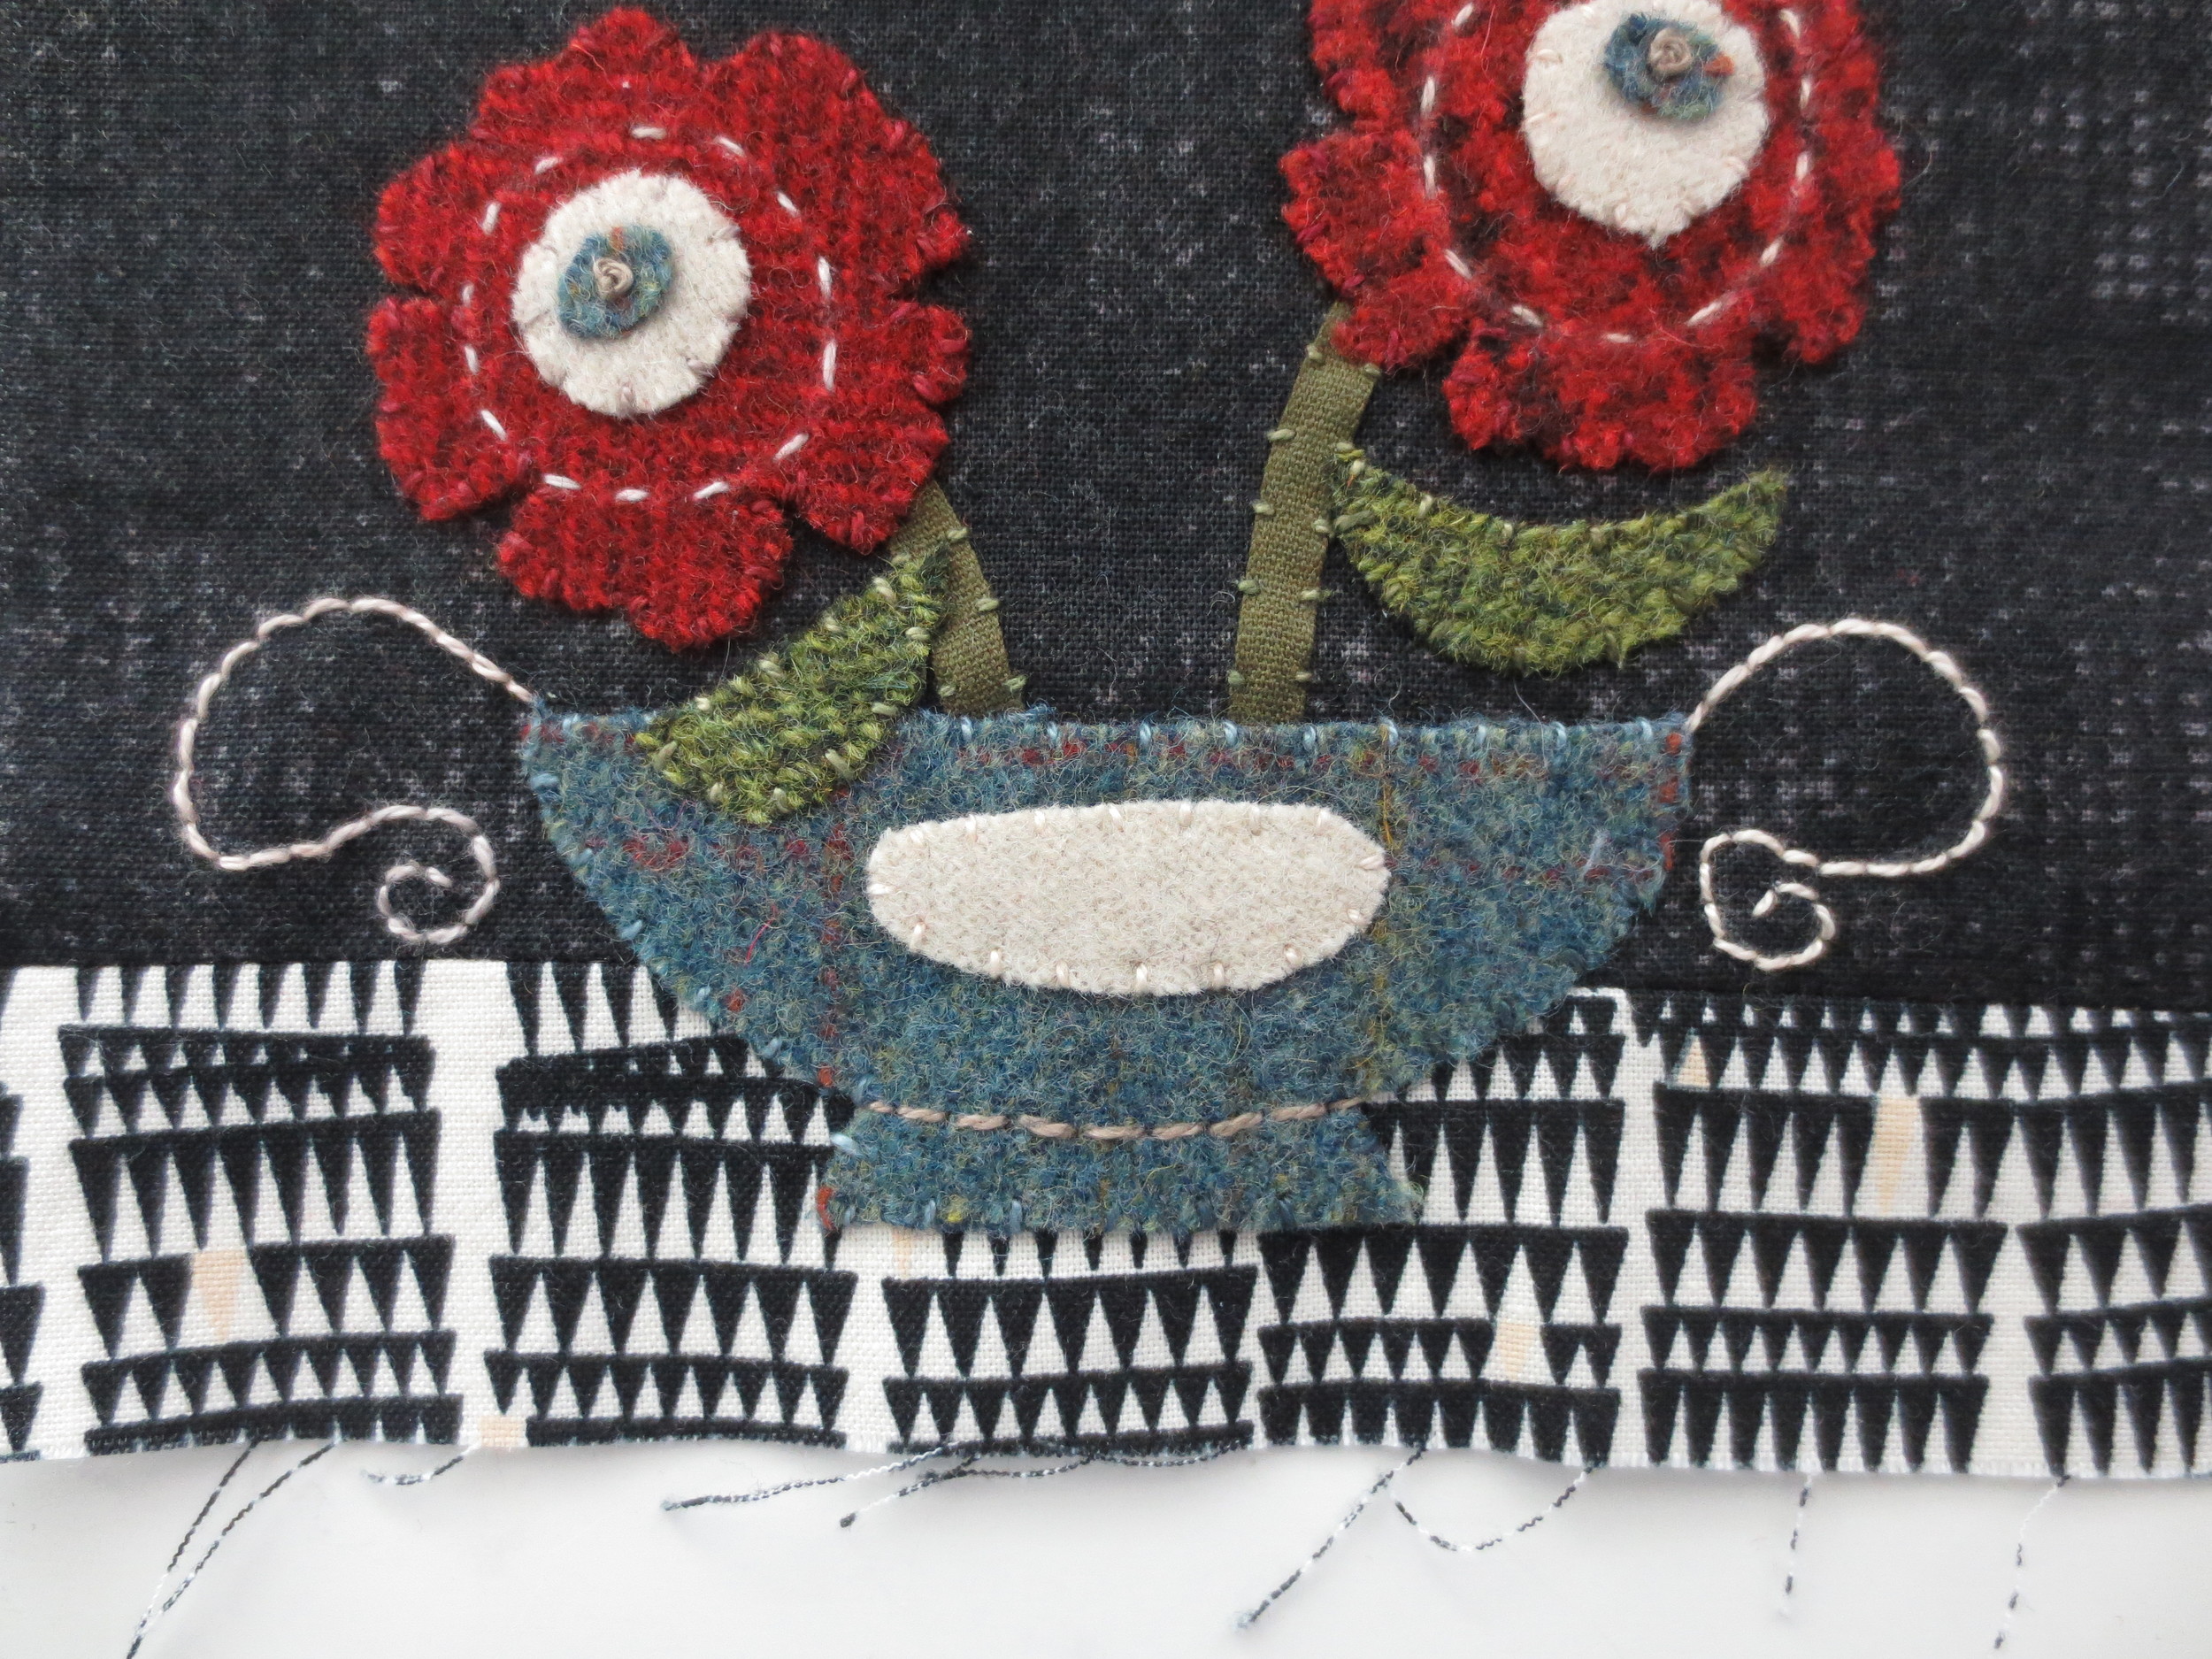
Draw the vase handles, then backstitch over the chalk lines with the same thread used above.
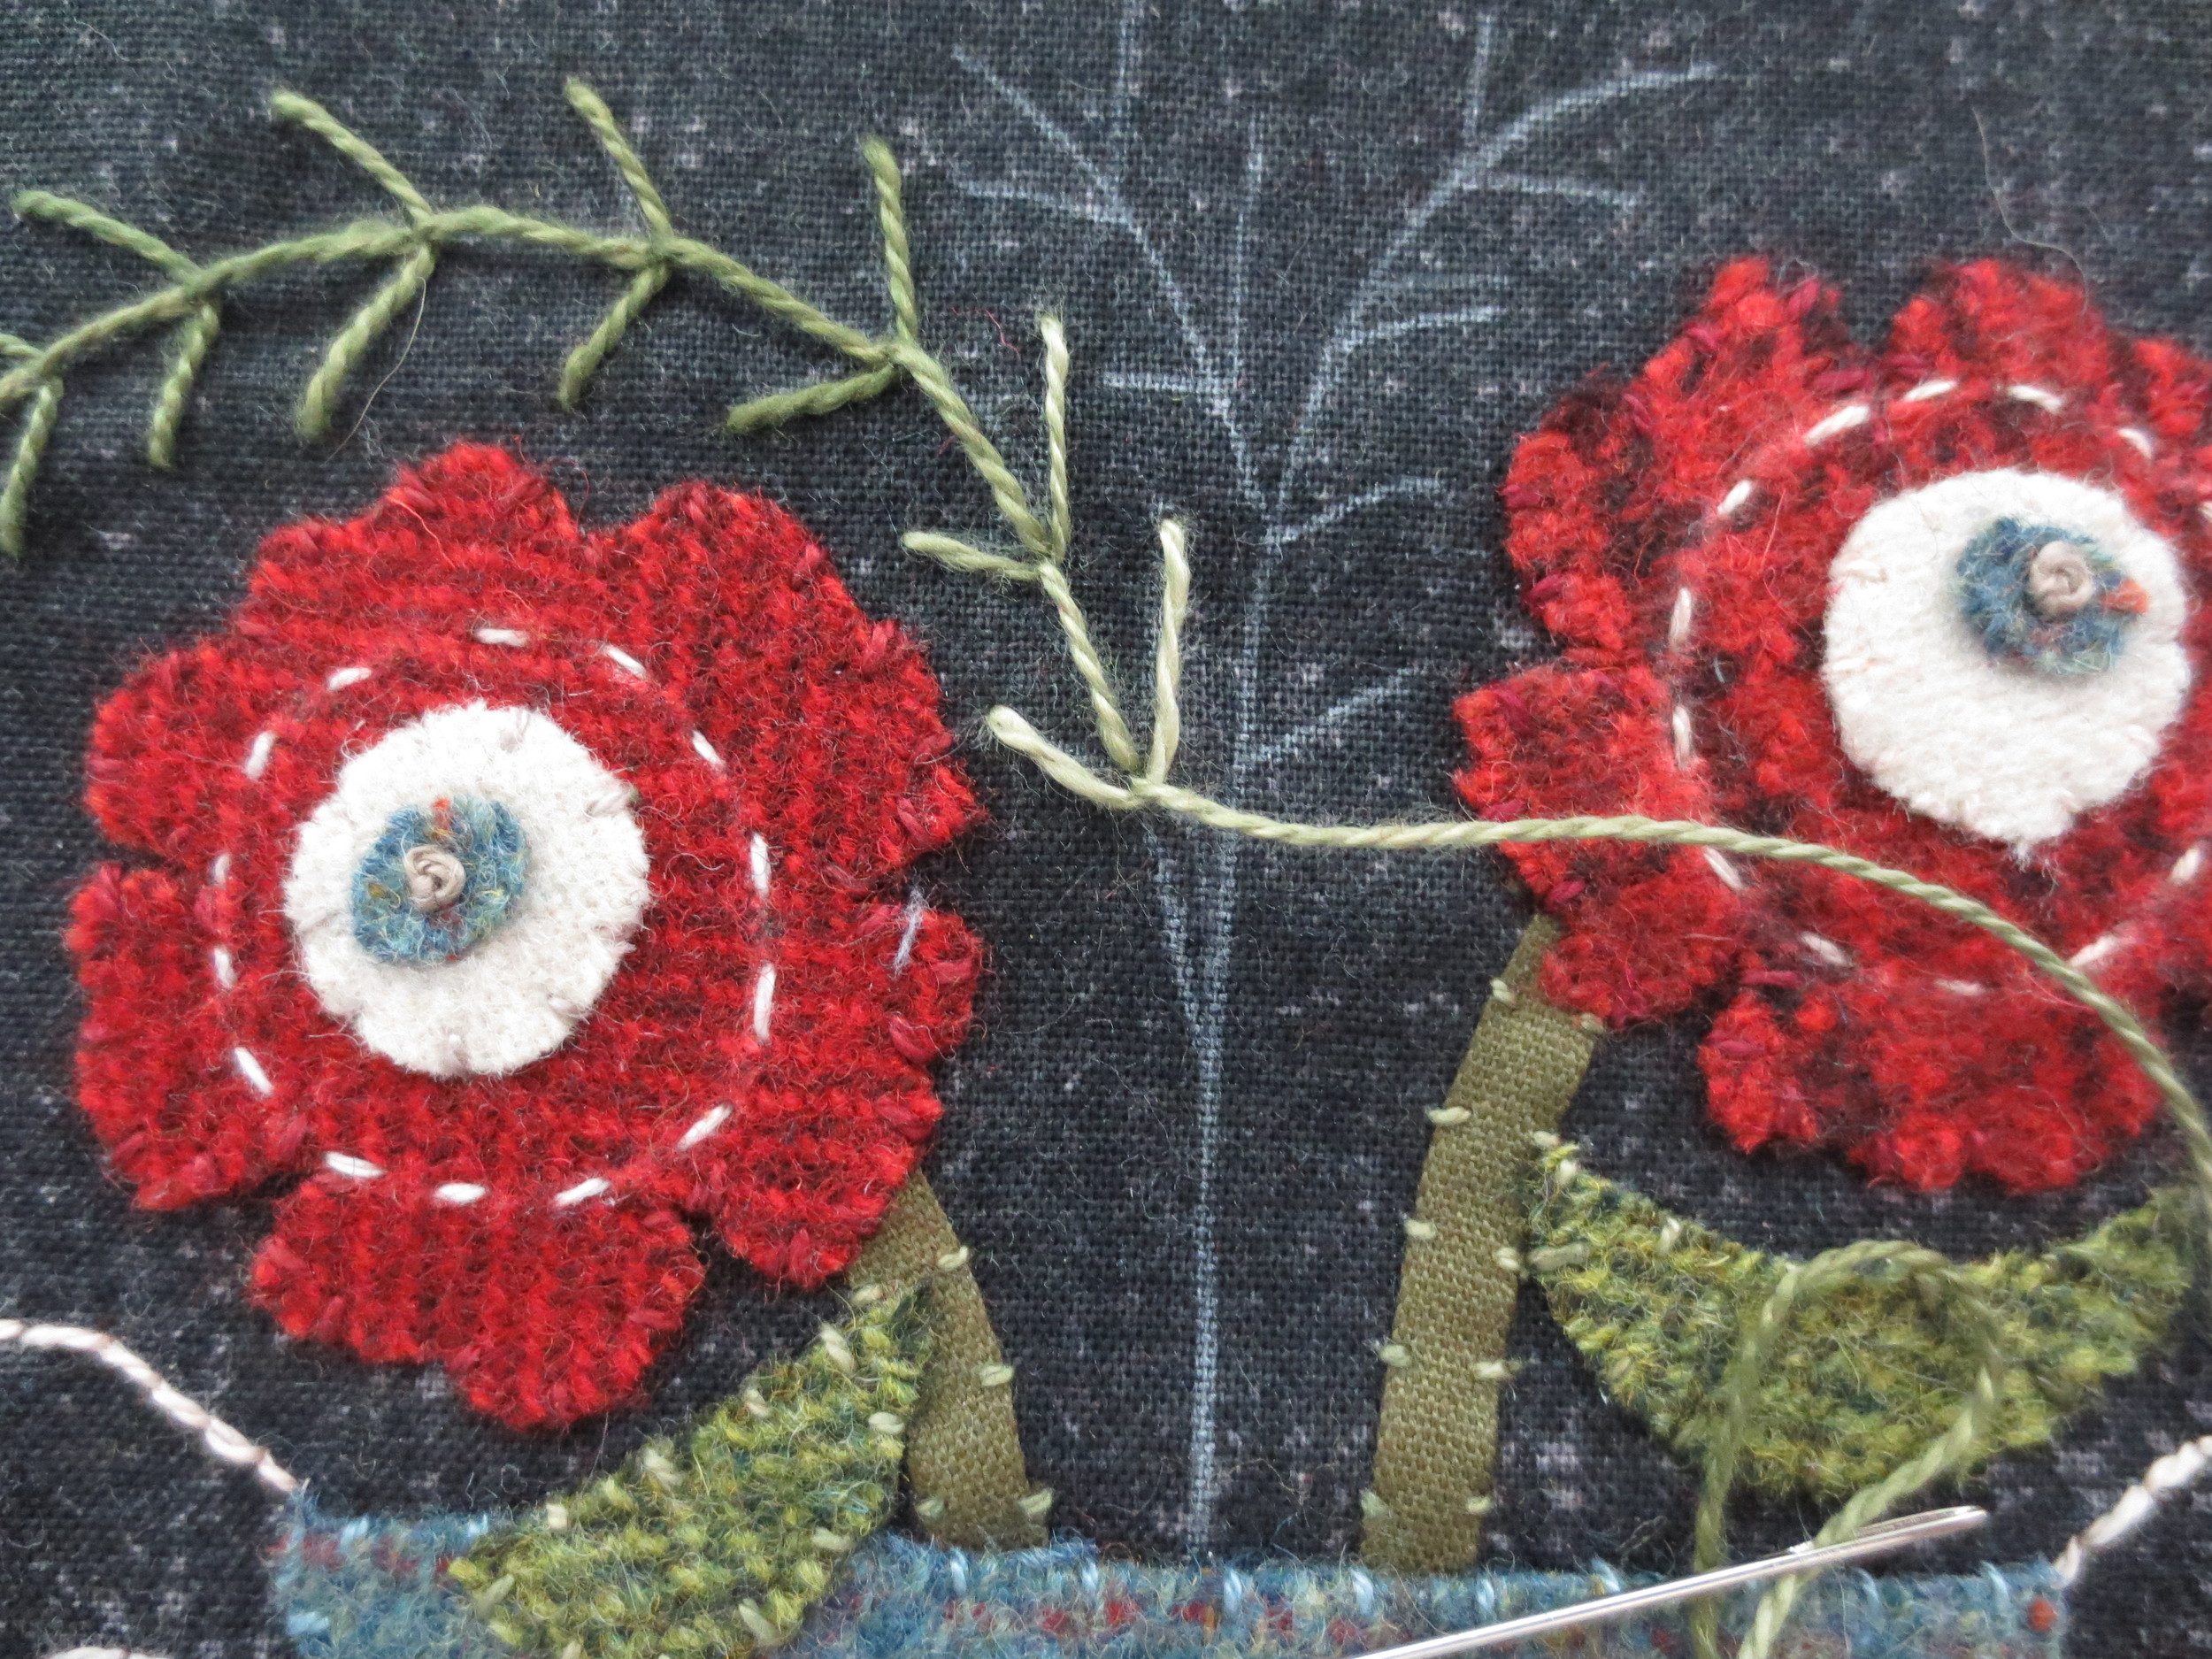
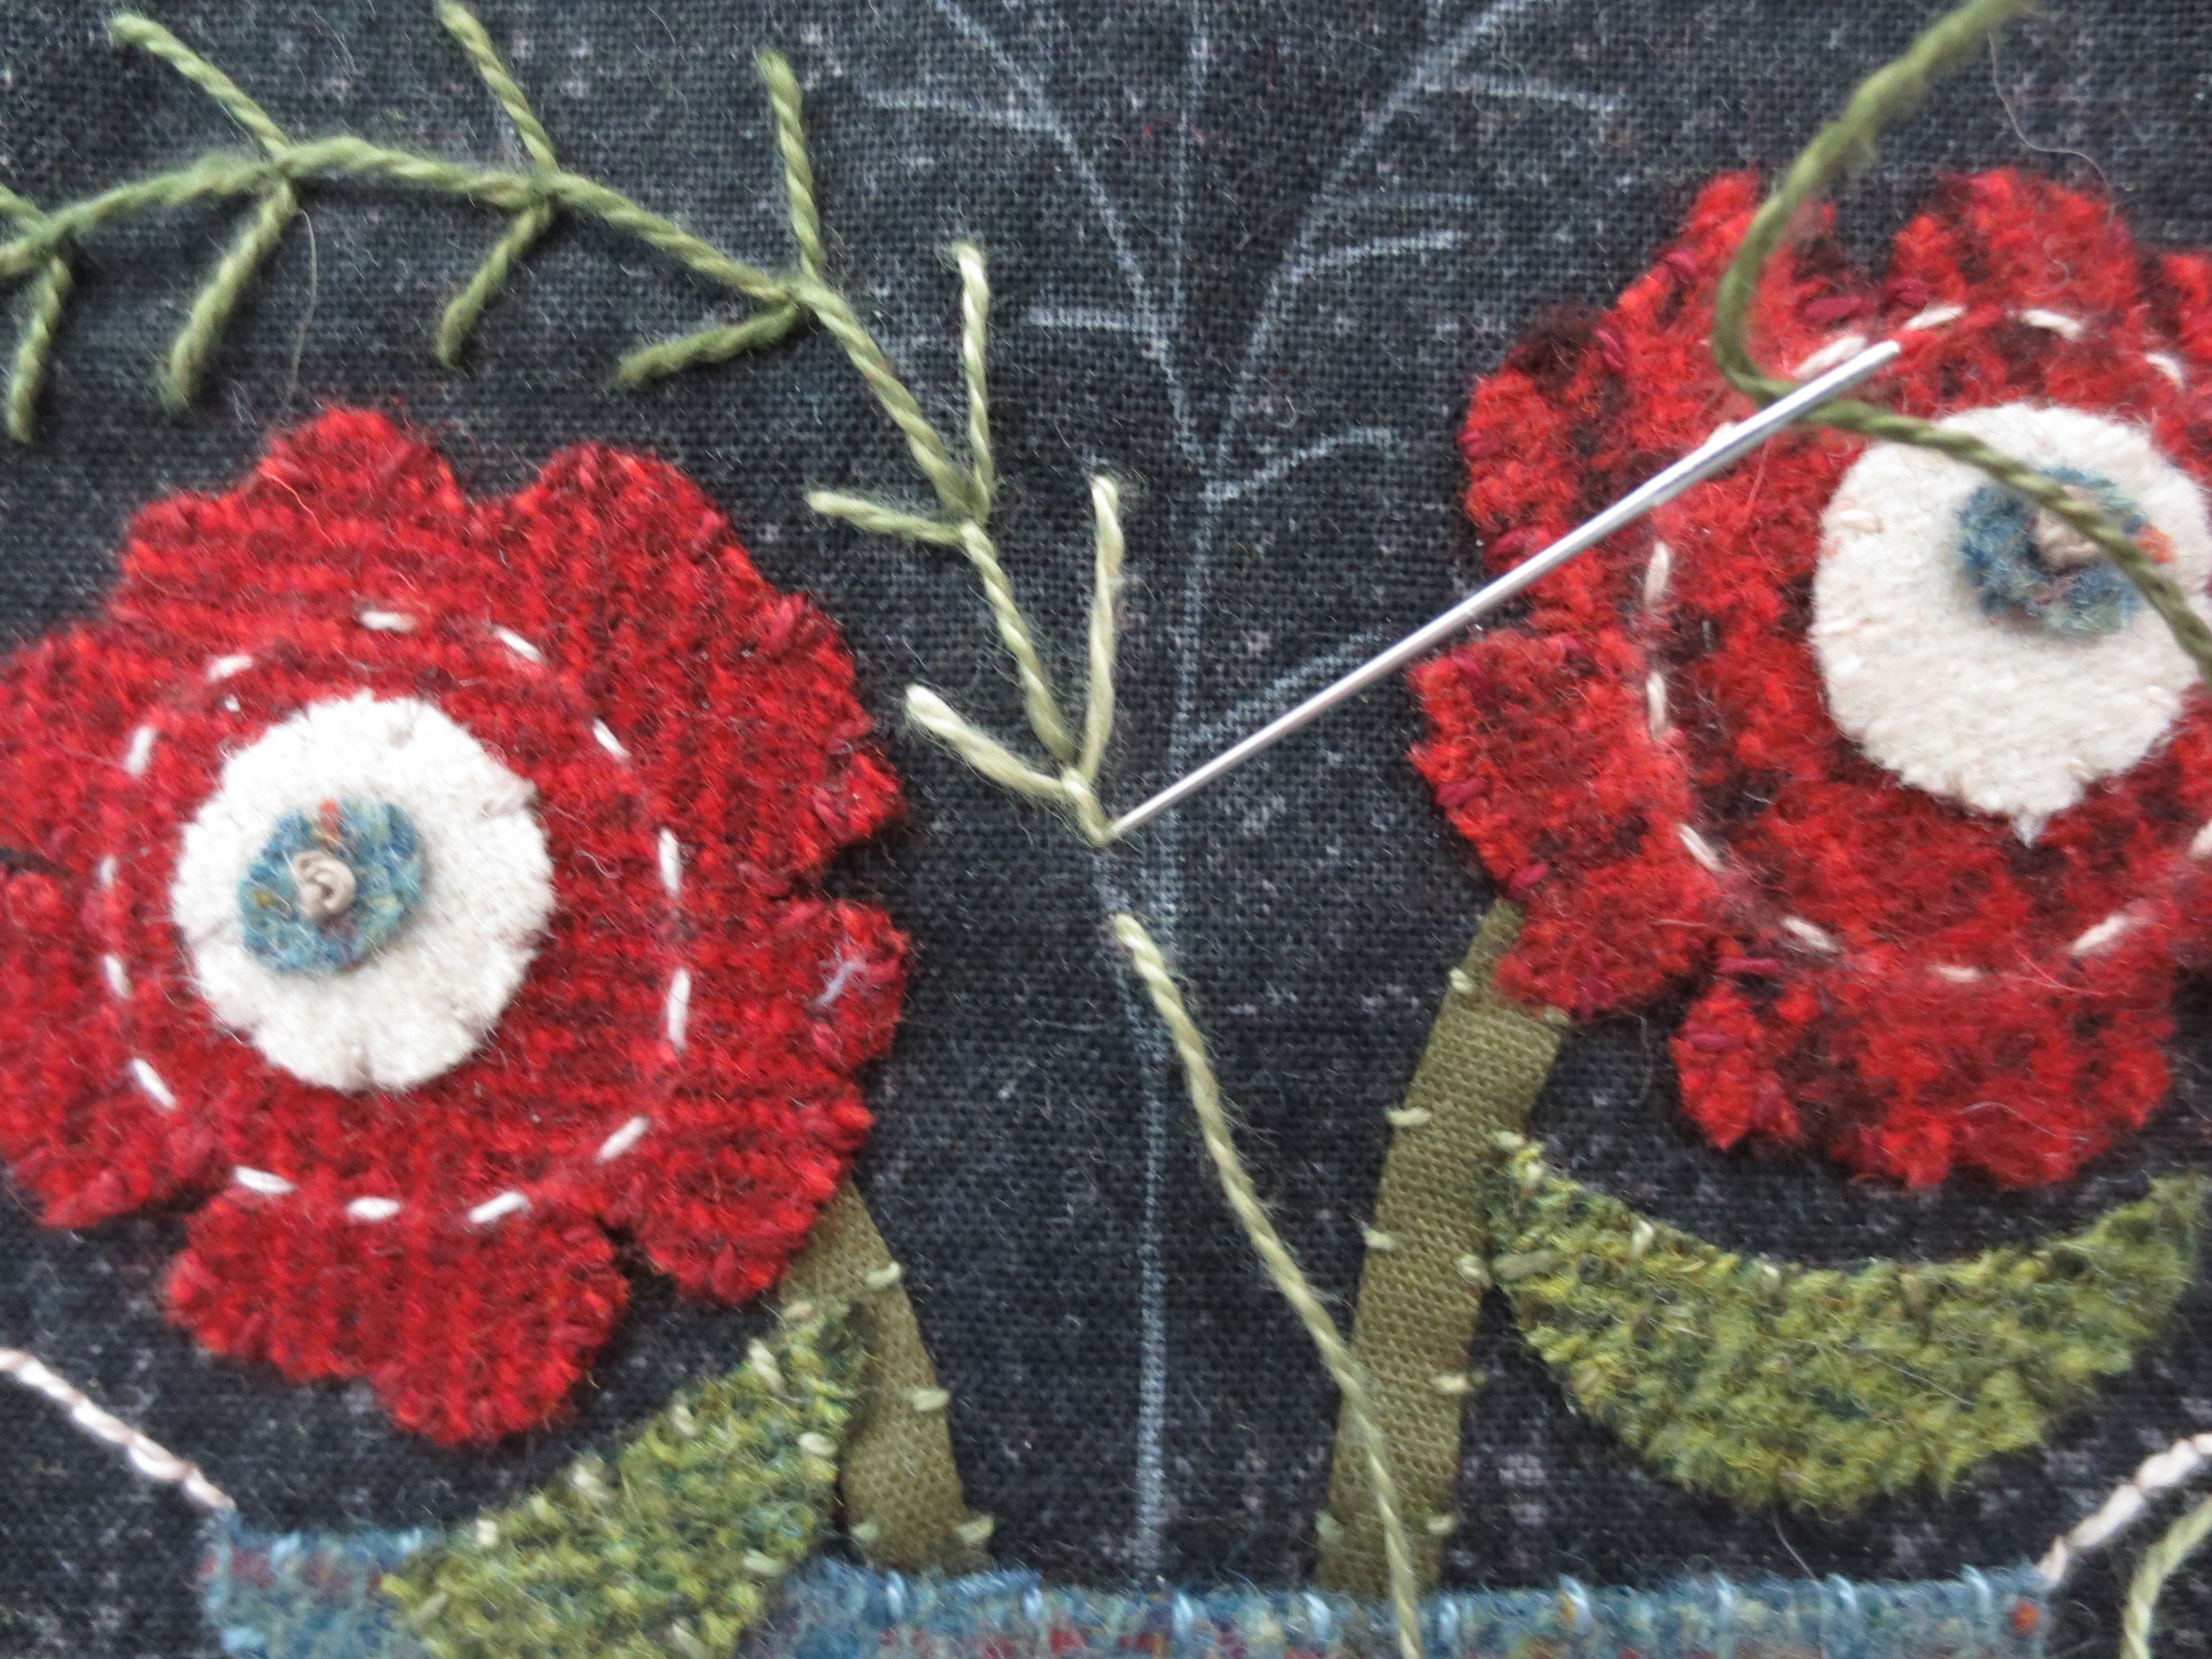
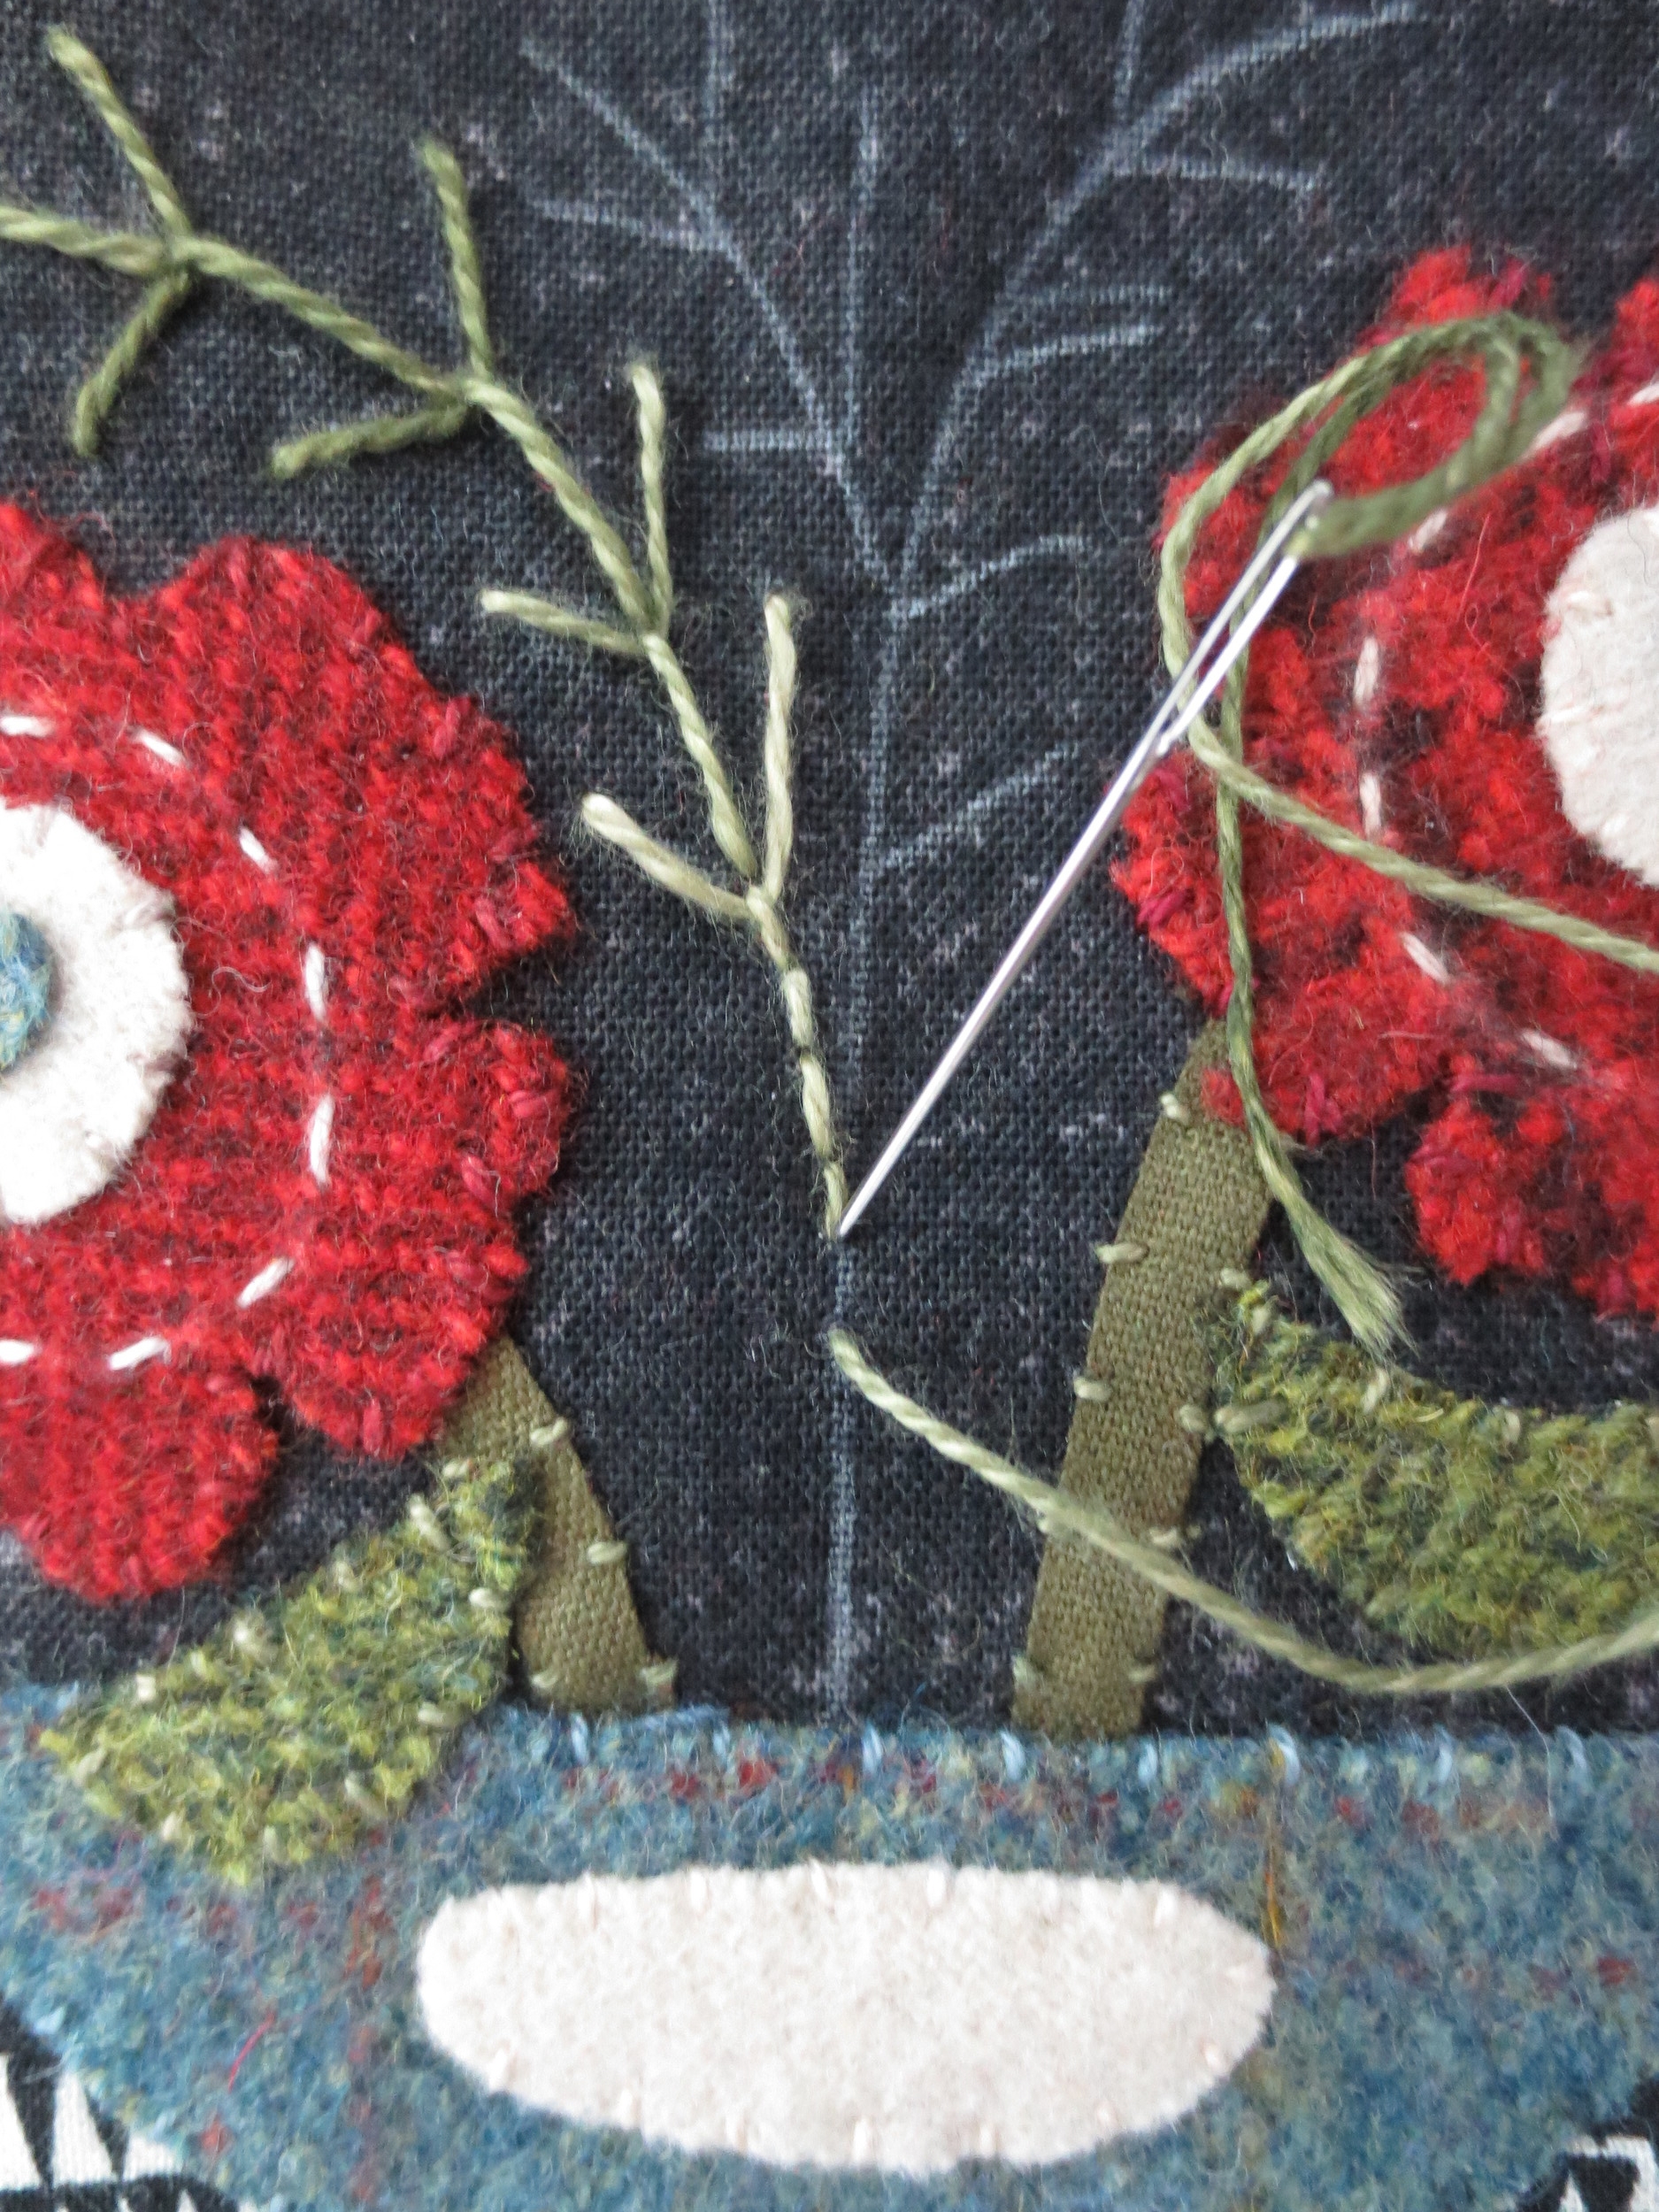
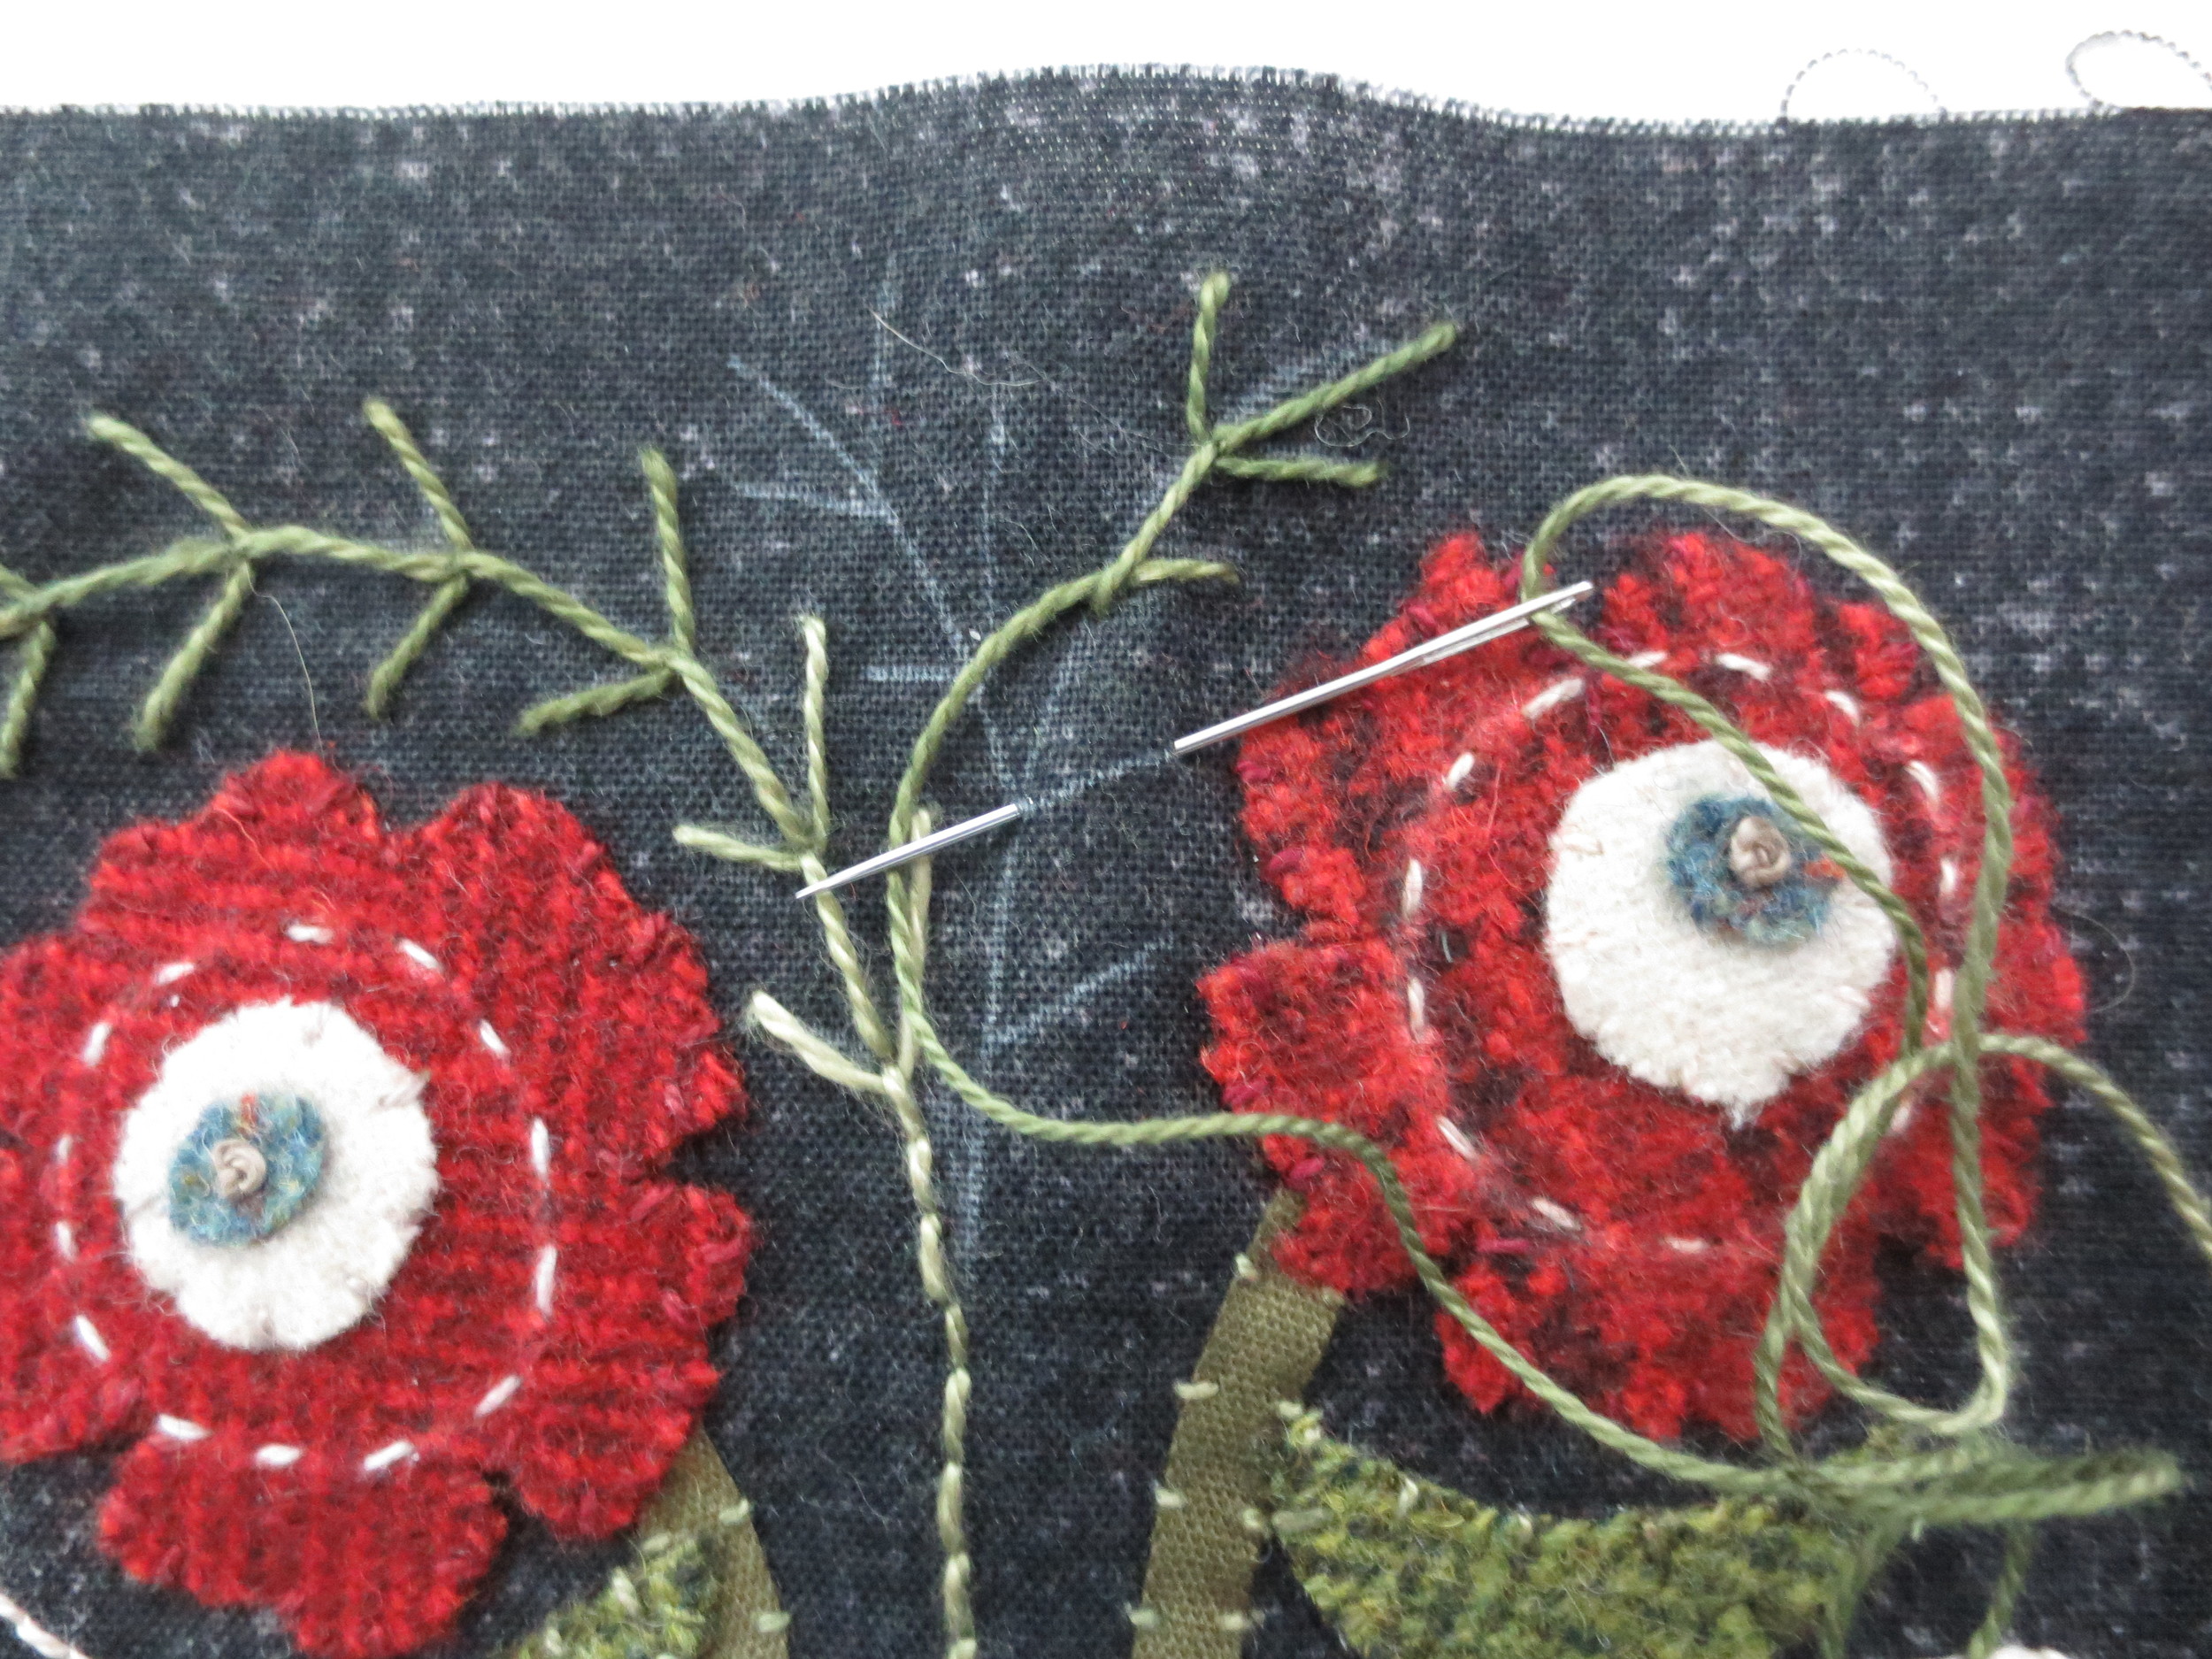
Draw the stem of the Baby's Breath. Use the perle cotton, size 8 to stitch a closed fly stitch over the chalk line up to the last branch. Complete the stem with a back stitch. The stem on the right has side branches on the right only, so you will need to adjust your stitching. Instead of coming straight down onto the main stem on the first stitch, insert your needle into the end of the side branch, then come up at the base of the side branch, wrapping the thread under the needle, and pulling your thread through (see below).
Stitch two lazy daisy leaves on the bottom of the stem.
Use the same colored thread used to whip stitch the large flower centers to stitch a French knots on the end of each branch.
Fuse leaf #2 in place. Whip stitch in place.
Draw veins of leaves. Back stitch over lines with #O178.
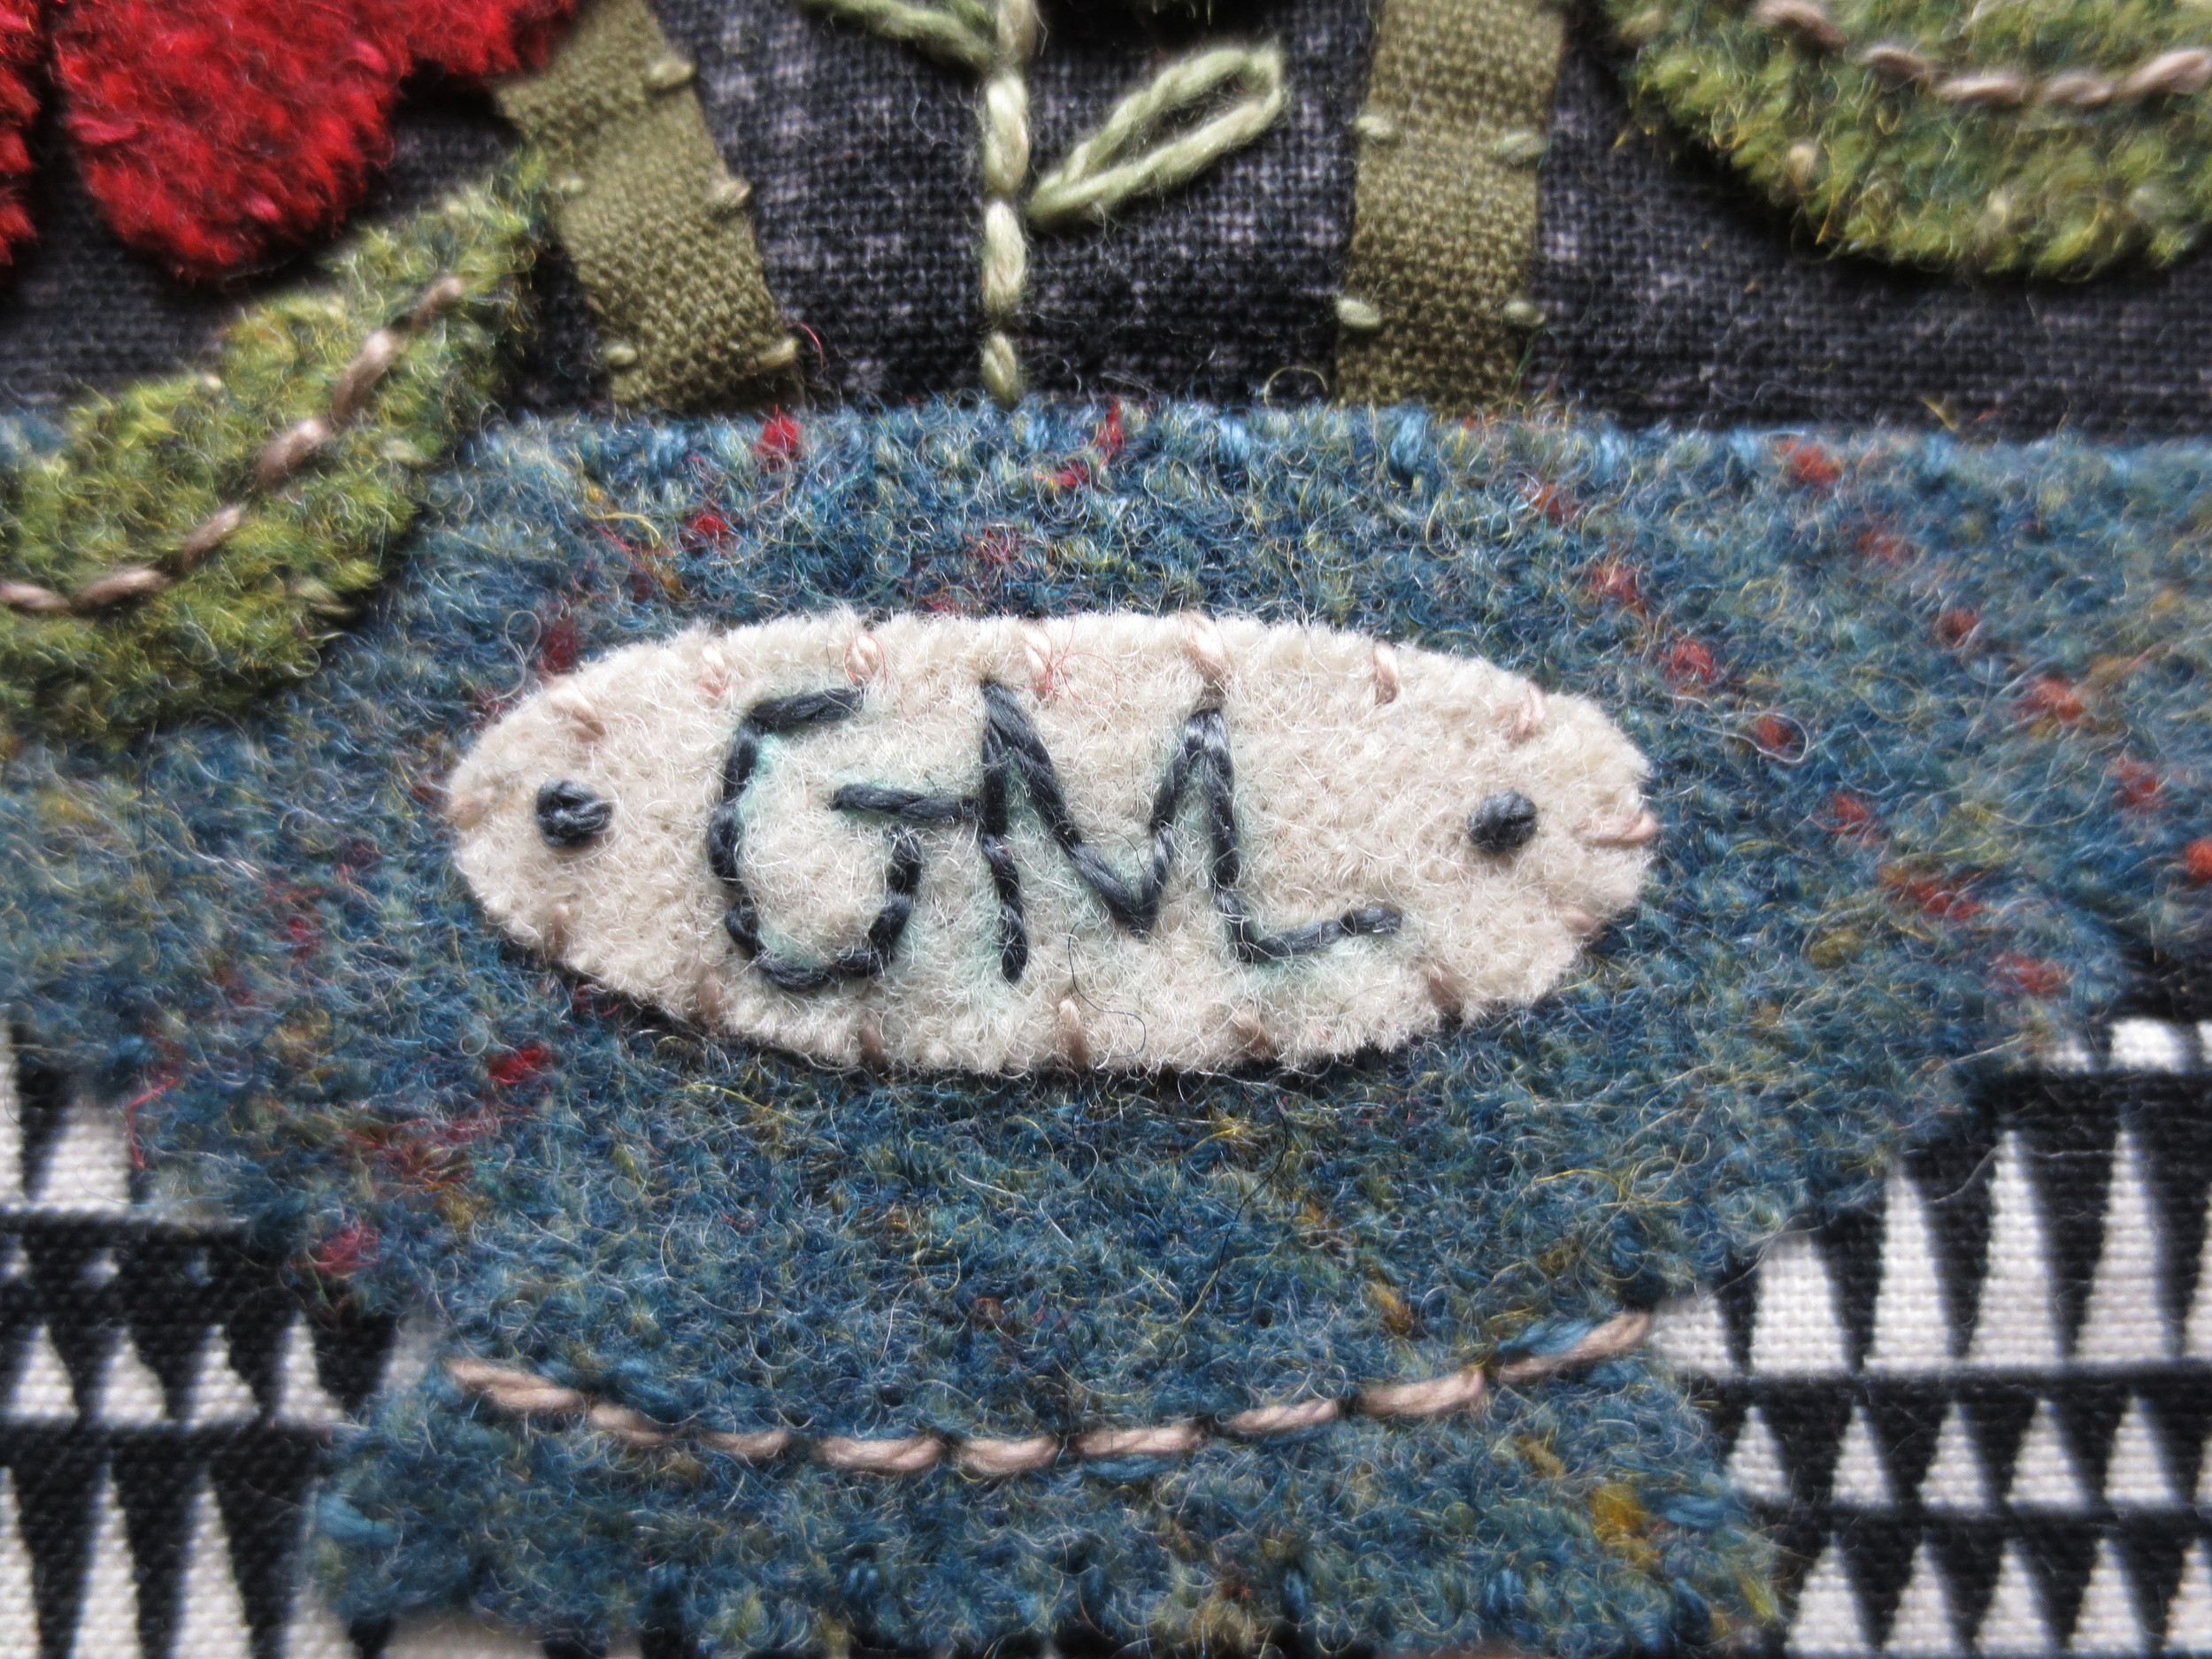
I personalize my pouch by stitching initials onto the vase plate. This is optional. I used a dark colored chalk pencil to draw the letters. Then I used the same colored thread that I used to whip stitch the vase to backstitch over the chalk line. I also added a French knot on each side of the initials.
Hooray! The front is done! Now on to the back.
Back
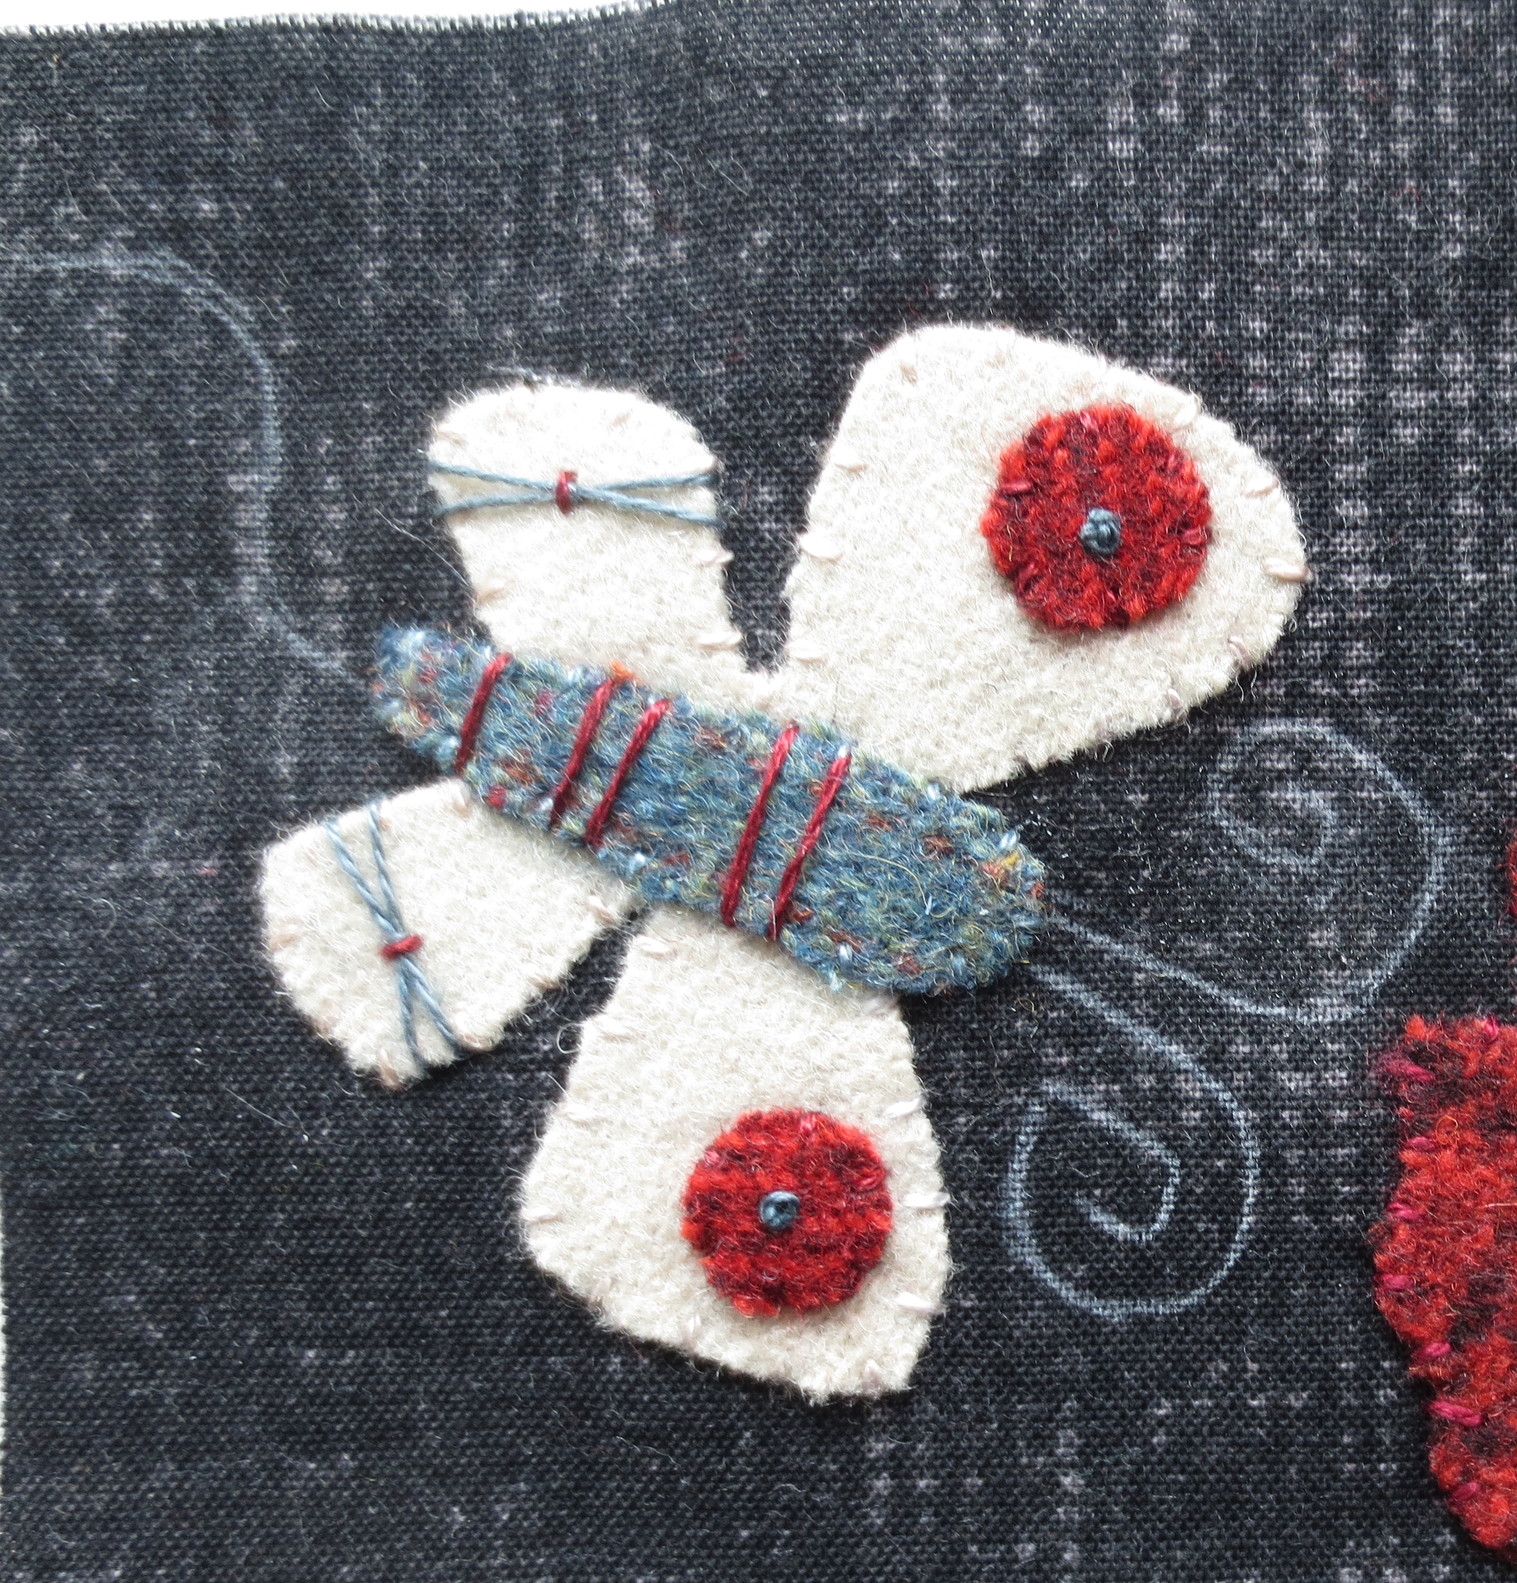
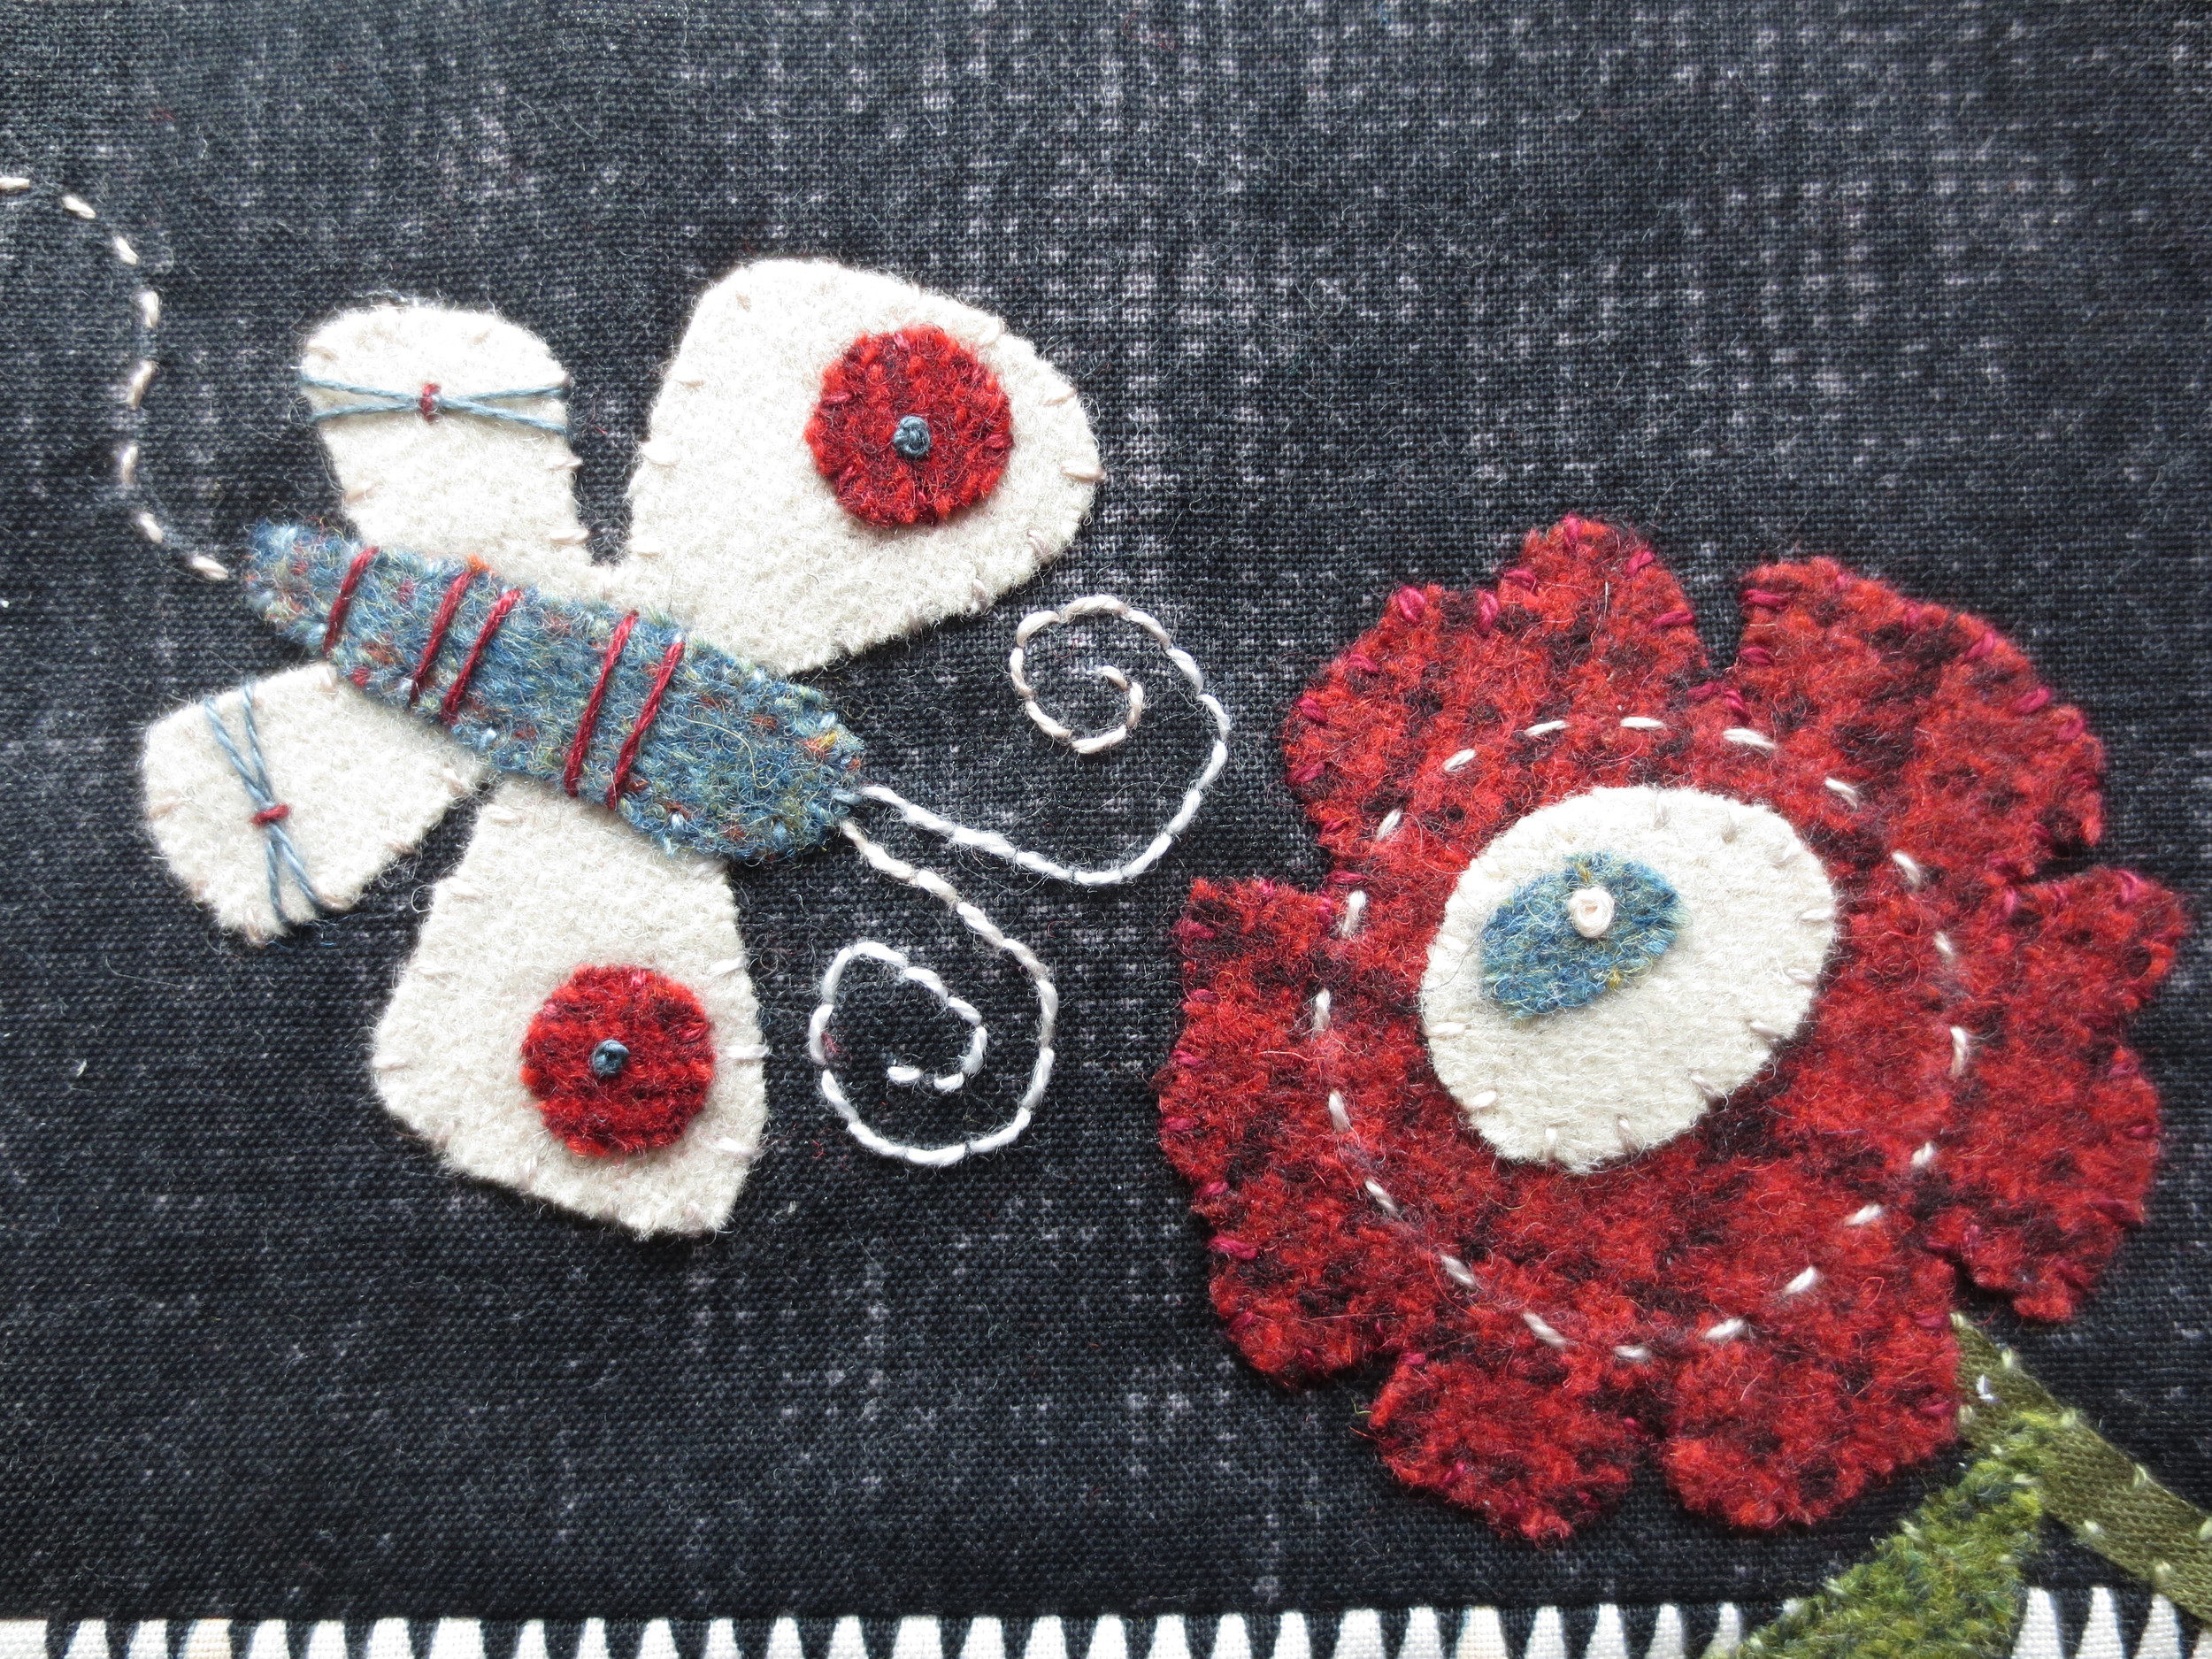
Position the flower, stem, leaf, and butterfly wings. Pin ribbon stem.
Remove everything but the flower and stem. Fuse flower. The fused flower will anchor your stem.

Whip stitch stem and flower.
Reposition the leaf and butterfly wings. Fuse in place. Whip stitch.
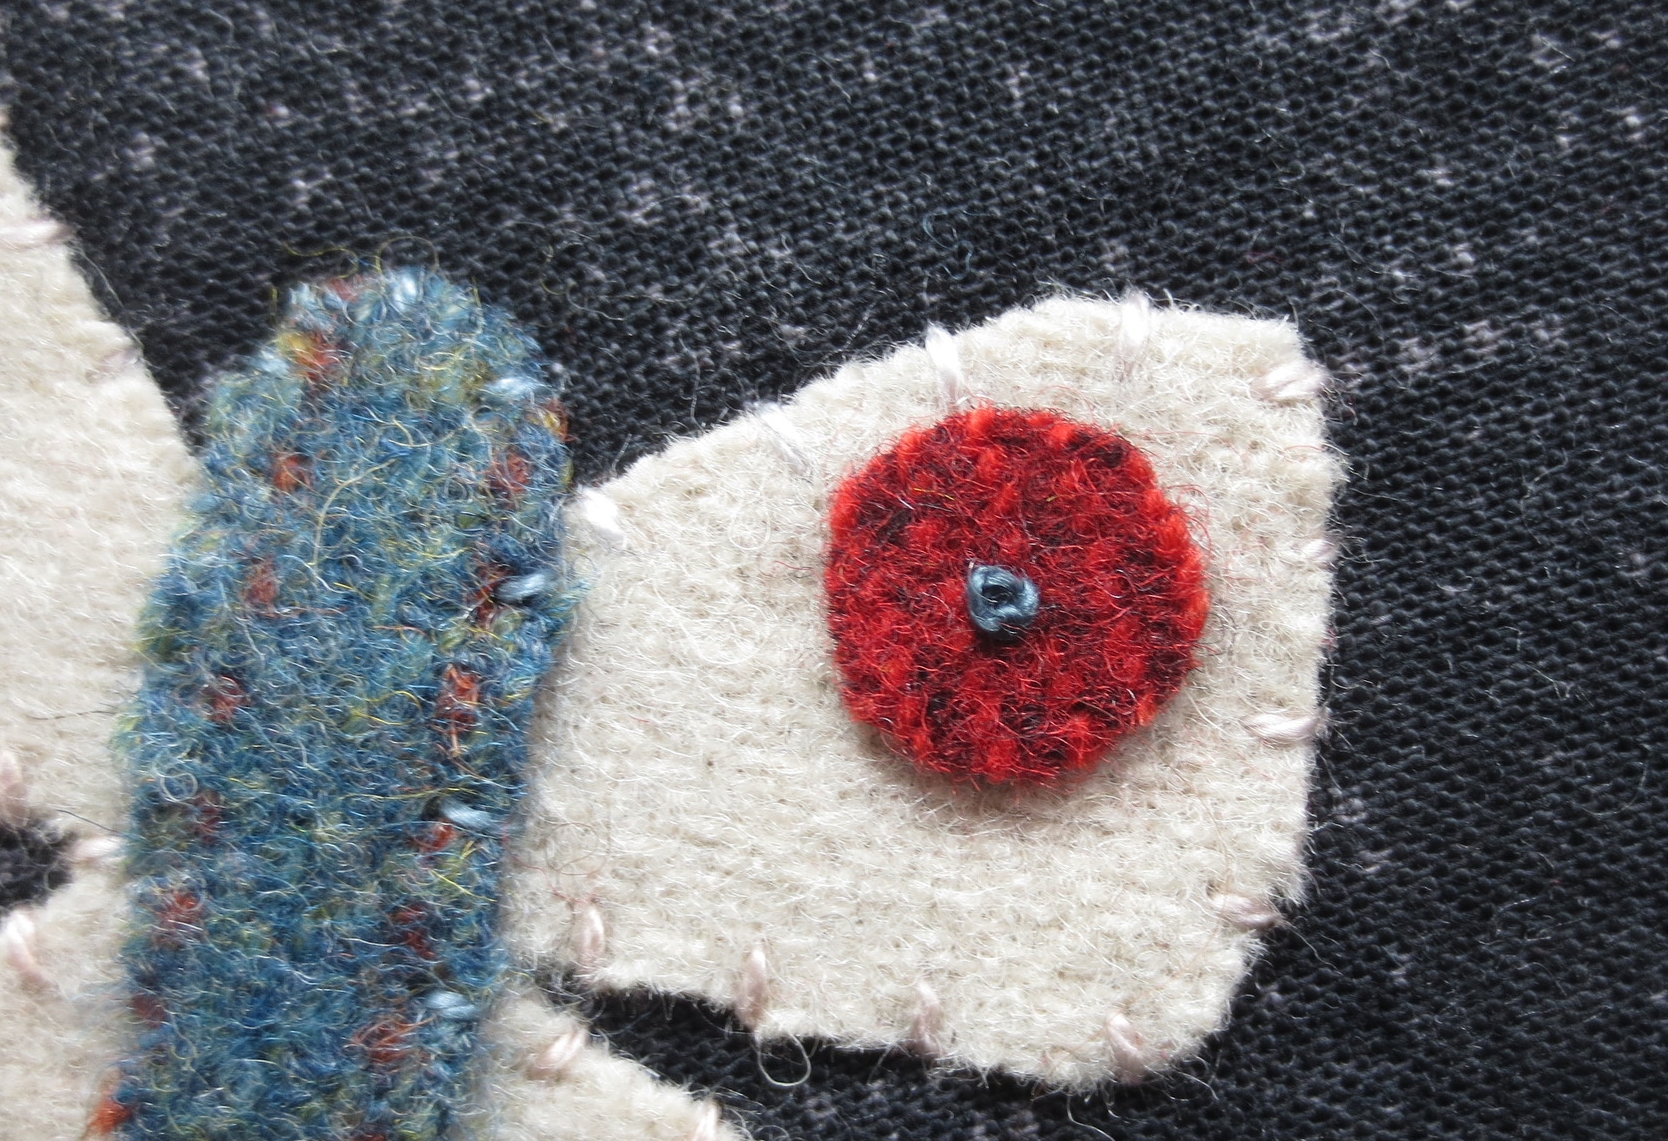
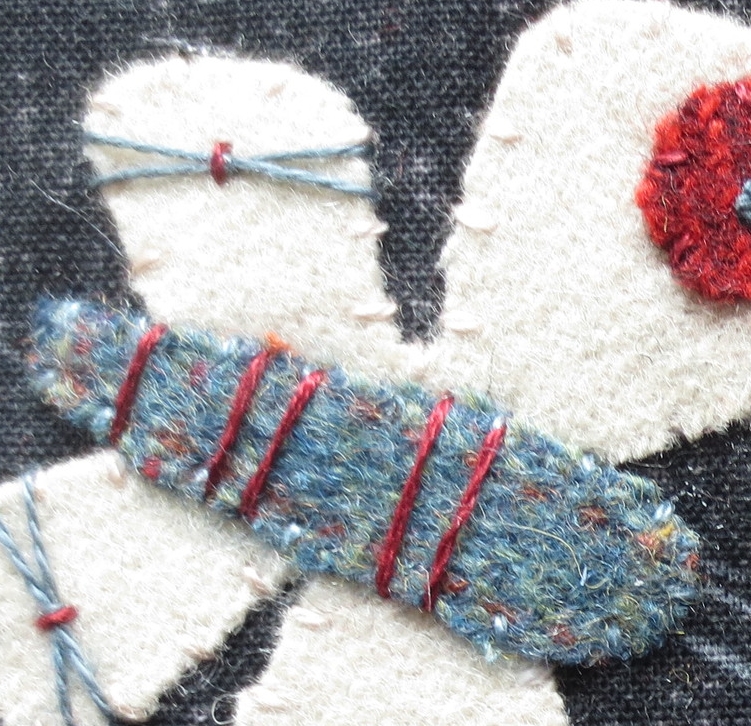
Position the flower centers, butterfly body and spots, fuse in place.
Stitch a single French knot in the center of the small flower center using the same colored thread used to whip stitch the butterfly wings. This stitch will anchor the small flower center to the flower so you will not have to whip stitch it.
Whip stitch the large flower center with matching colored thread.
Draw a circle around the large flower center using the layout as your guide. Use the same colored thread as above to stitch a running stitch over the drawn line.
Stitch a single French knot in the center of each butterfly spot using the same colored thread used to whip stitch the vase.
Use the same thread to whip stitch the butterfly's body.
Whip stitch the flower spots with matching colored thread.
Stitch a large cross stitch on each of the butterfly's bottom wings using the same colored thread used to whip stitch the body.
Stitch a single tacking stitch over the intersection of the cross stitch using the same colored thread used to whip stitch the spots.
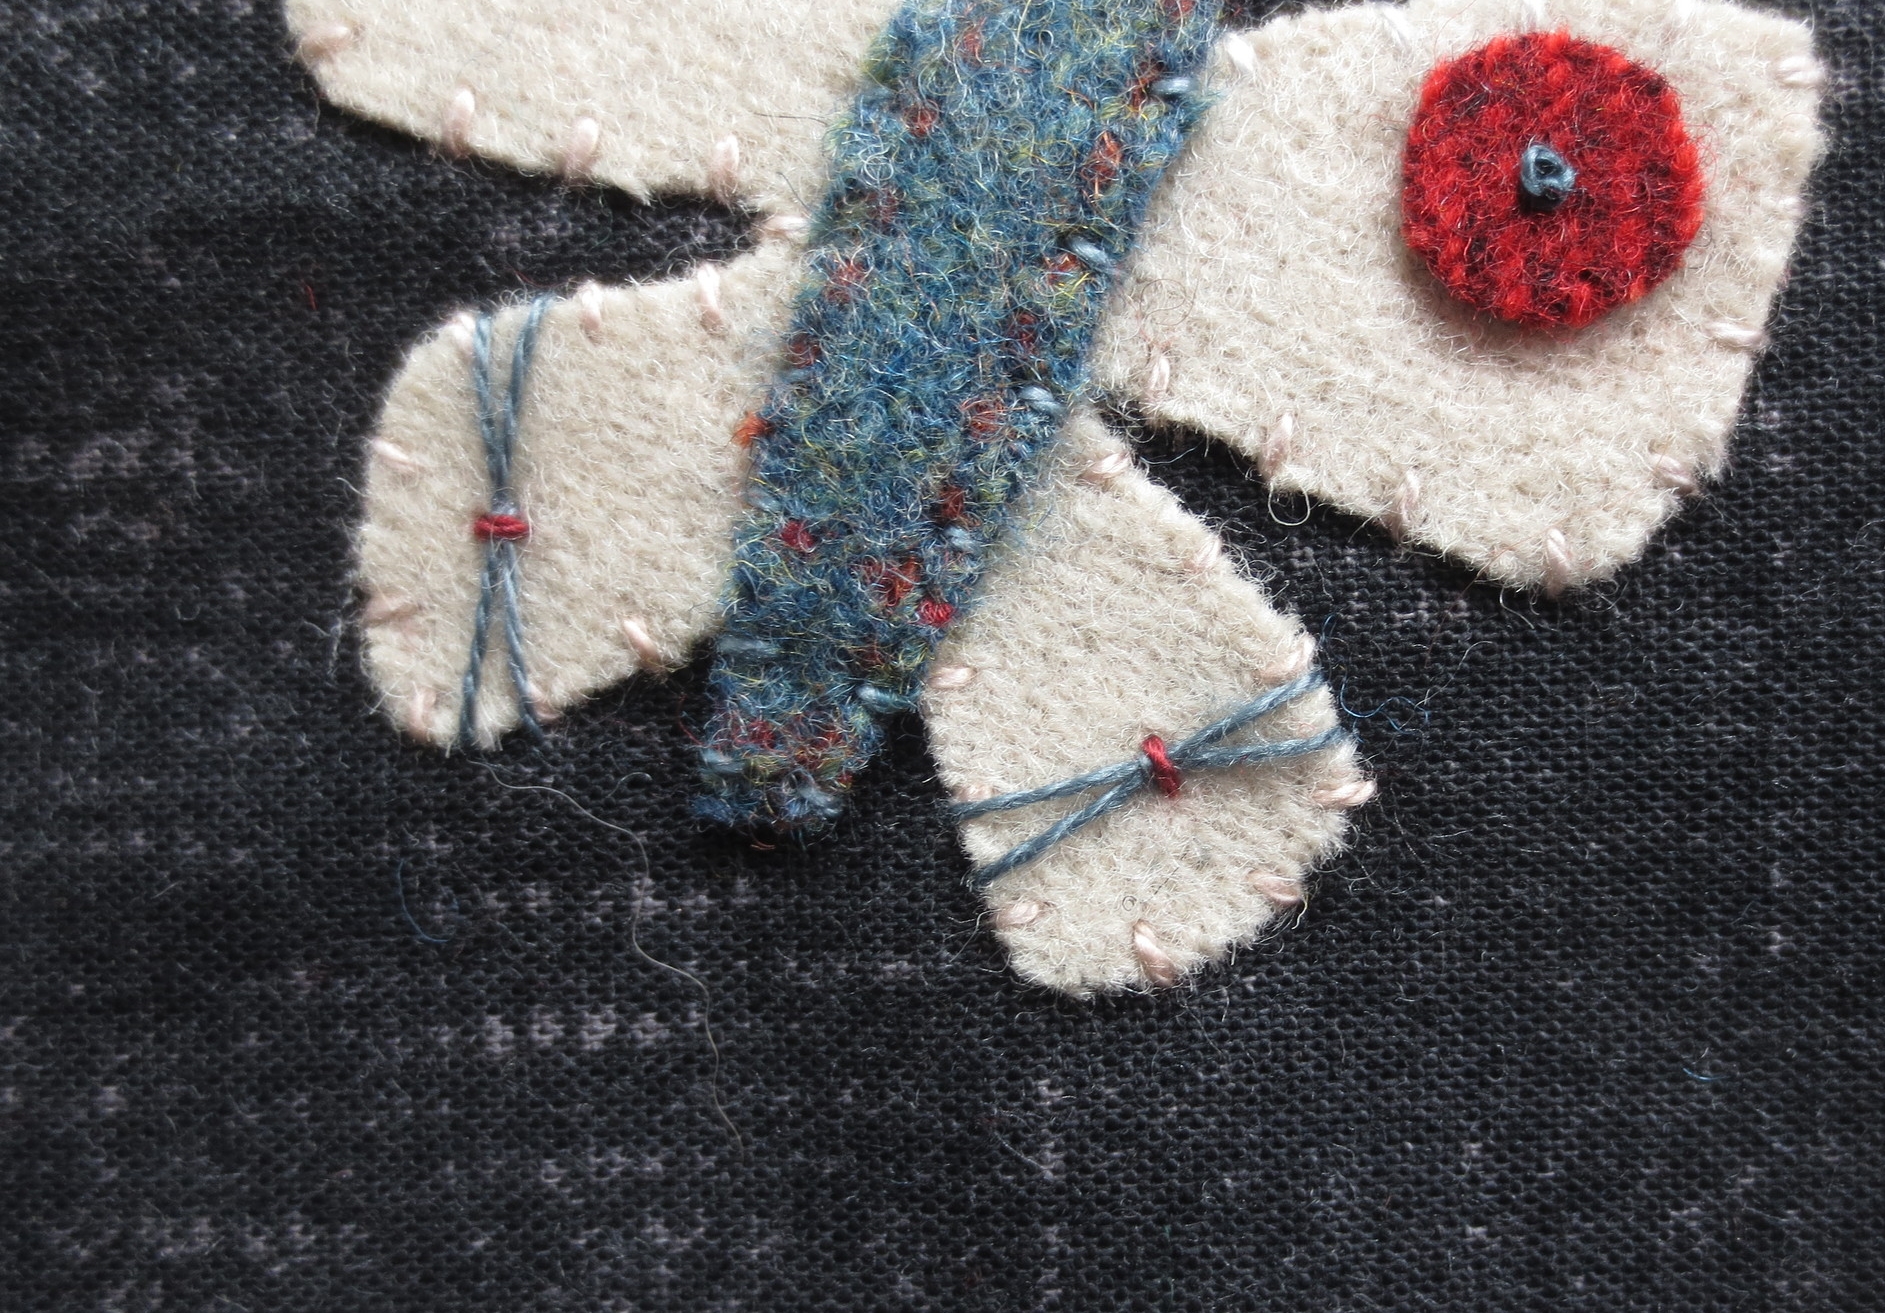
Use the same thread to stitch five (5) straight stitches across the body using the layout as your guide.
Draw the butterfly antennae, flight path, and leaf vein.
Back stitch the antennae using the same colored thread used to whip stitch the butterfly.
Use the same thread to stitch a running stitch over the flight path line.
Back stitch the leaf vein using #O178.
Voile! You are done with the applique portion of this project.

Pouch Assembly
Refer back to the Wool Appliqued Pouch (4" x 5") - Flower Variation for instructions on sewing the pouch together.