
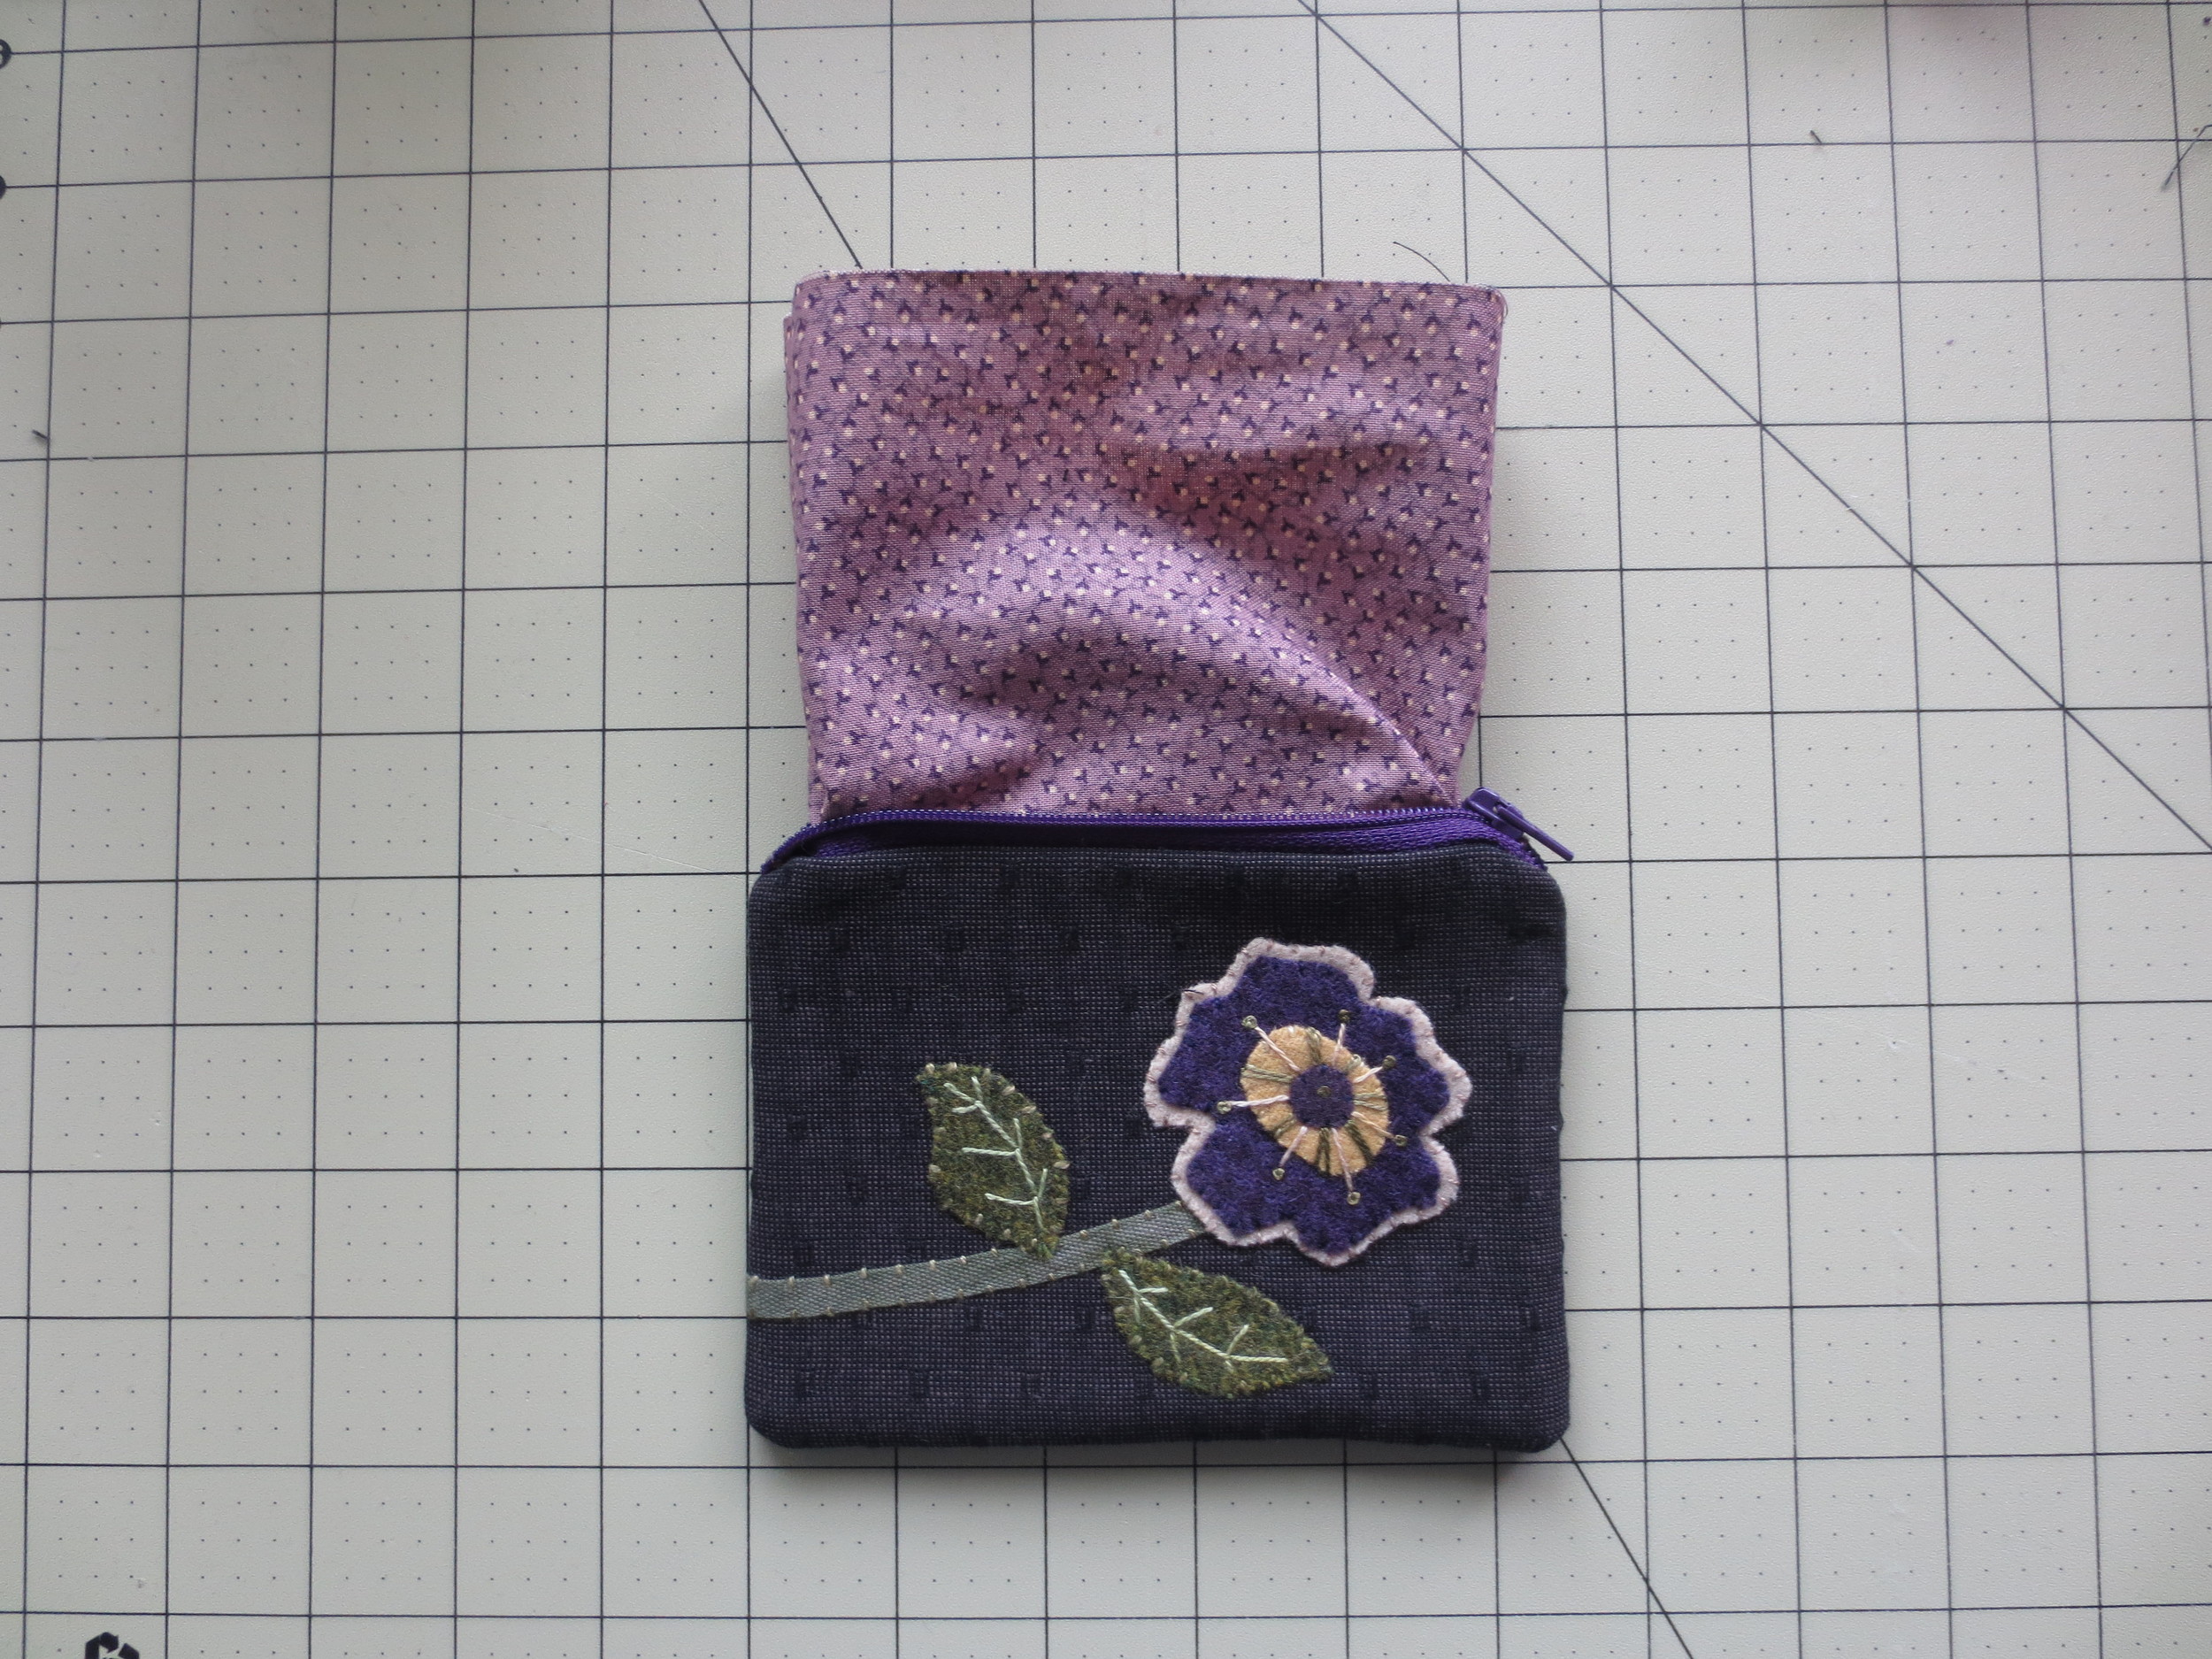
Wool Appliqued Pouch (4" x 5") - Flower Variation
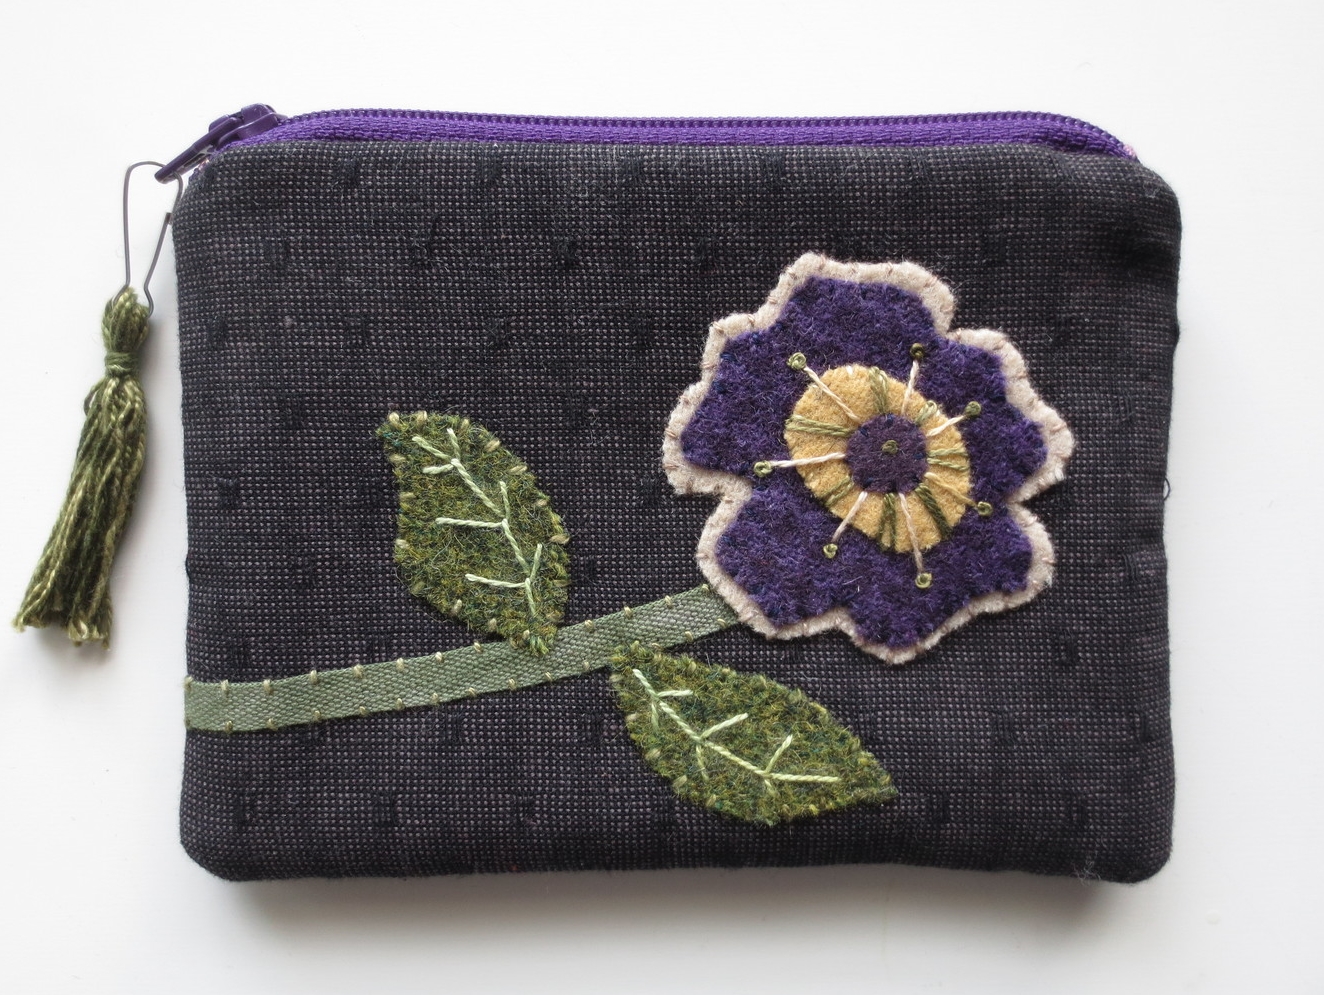
Front
I made this little pouch for my Bunco secret pal. It's a nice easy gift you can make with scraps of fabric and wool. It can be used for coins or cash and a credit card when you don't want to carry a heavier wallet. Look in the Images tab for other applique variations of the pouch. The basic construction is the same for all of the pouches, only the appliqued image varies.
You will need:
Pouch Fabric - suggested colors
- Two pieces of 5" x 6 1/2" black cotton fabric - outside
- Two pieces of 4 1/4" x 6" lavender print cotton fabric (or any color similar to flower color) - lining
- Two pieces of 5" x 6 1/2" Warm and Natural batting
- 5" zipper (A larger zipper can be cut to size)
Felted Wool for Applique - Suggested colors
- Front flower base - 3" square off-white
- Front flower - 2 1/2" square textured (herringbone, small check or plaid) purple
- Front flower center (large) and back flower center - 2" square gold
- Front flower center (small) - 1" square dark-purple
- Front flower leaves - 2" square textured green
- Back flower - 2 1/2" square textured purple that is different from front flower
4" piece of 1/4" wide green cotton ribbon - front flower stem
6" piece of white baby rick-rack - back flower ruffle
Thread - Perle cotton, size 12 or 2 strands of embroidery floss (I used both Valdani (valdani.com) perlel cotton and Wildflowers by Caron (www.caron.net.com) perle cotton.
- Green to match leaves and flower stem
- Light-green for leaf vein
- Off-white for front flower outline
- Gold to match flower centers
- Purple to match flowers
Pearl cotton, size 8 or 3 strands of embroidery floss
- Green for back flower stem, leaves and tassel
Vilene Bondaweb (available at Pinwheels.com) or any light-weight fusible web.
Chenille needle - size 24
Fine point chalk pencil (I used Bohin France)
Dritz Fray Check
Lanyard hook - 23mm (optional)
2" square piece of tagboard or cardboard (optional)
Sewing machine with zipper foot
Steam iron
Applique Instructions All threads are perle cotton, size 12 or 2 strands of floss unless otherwise noted. Use the Stitch Guide for embroidery stitch tips.
1. Download pattern layout pouch1 , pattern pouch2 , and Stitch Guide.
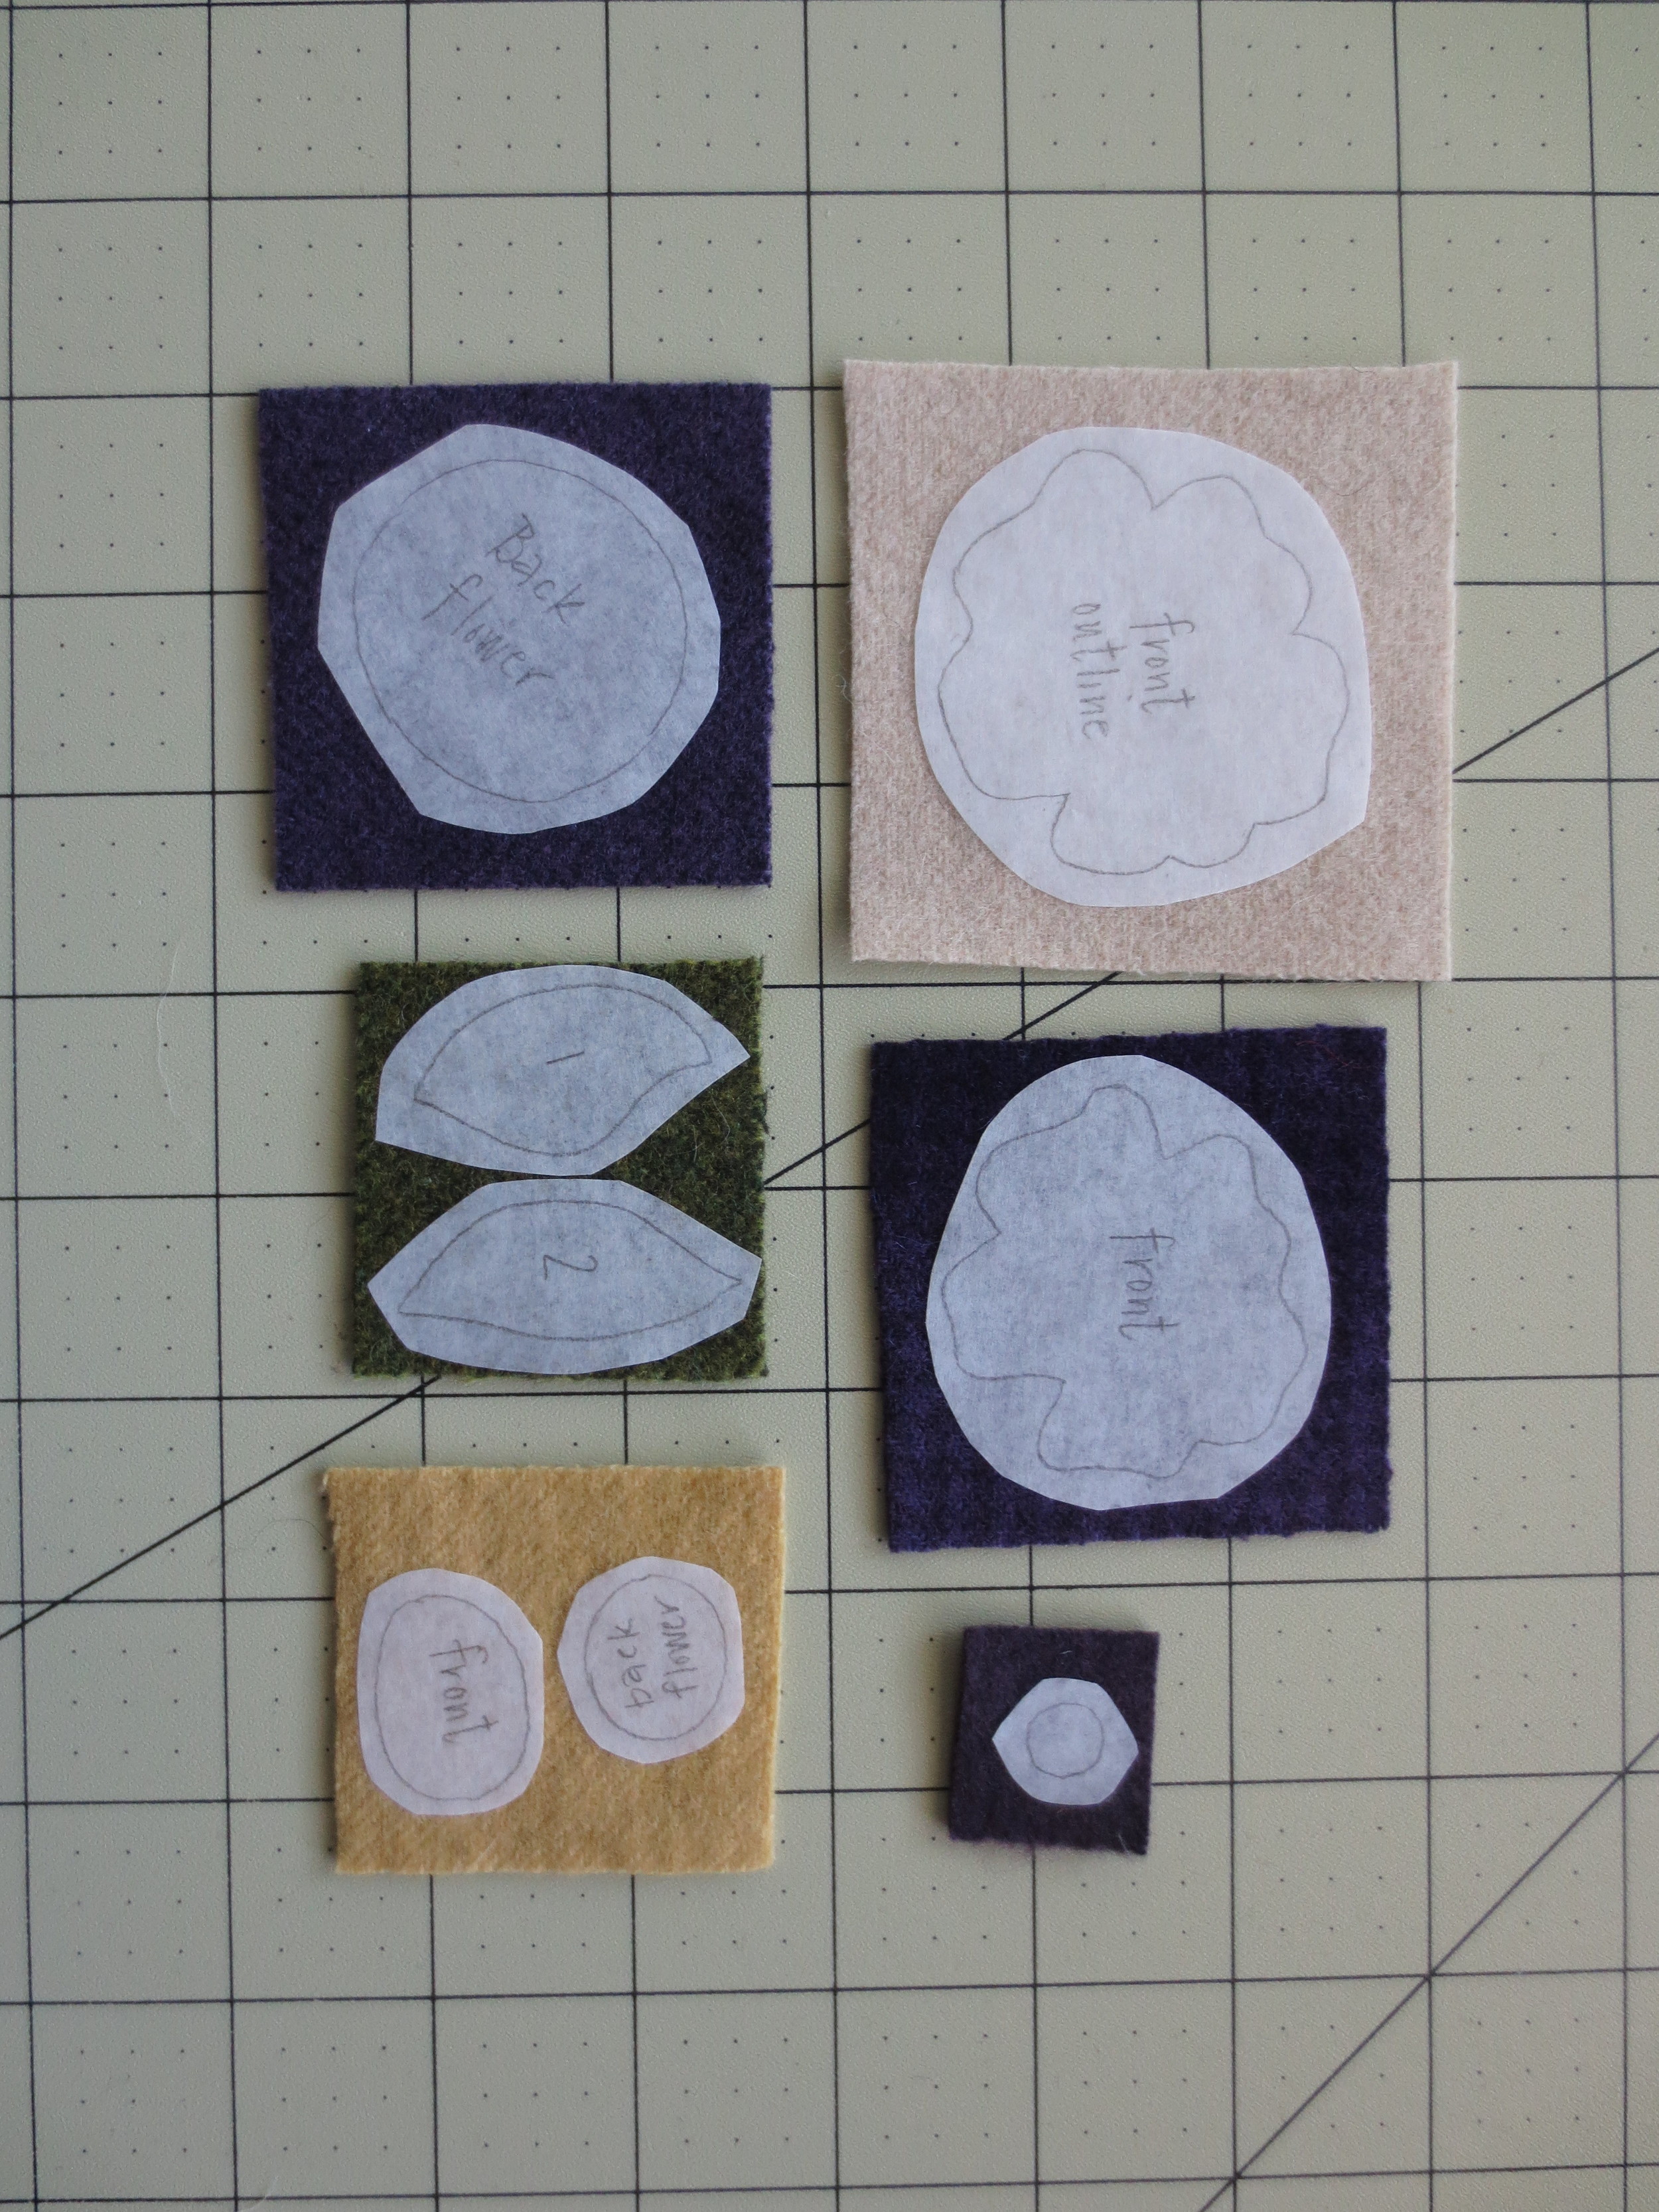
2. Reverse images of pattern pieces and trace onto fusible web. The reverse or mirror image can be made on most printers, but if you don't have that option you can tape the pattern sheet, image facing the glass, on a window (during the day) or on a light box, image facing glass, and trace the reversed image.

Fusible web and felted wool
3. Cut out pattern pieces slightly larger than their outlines.
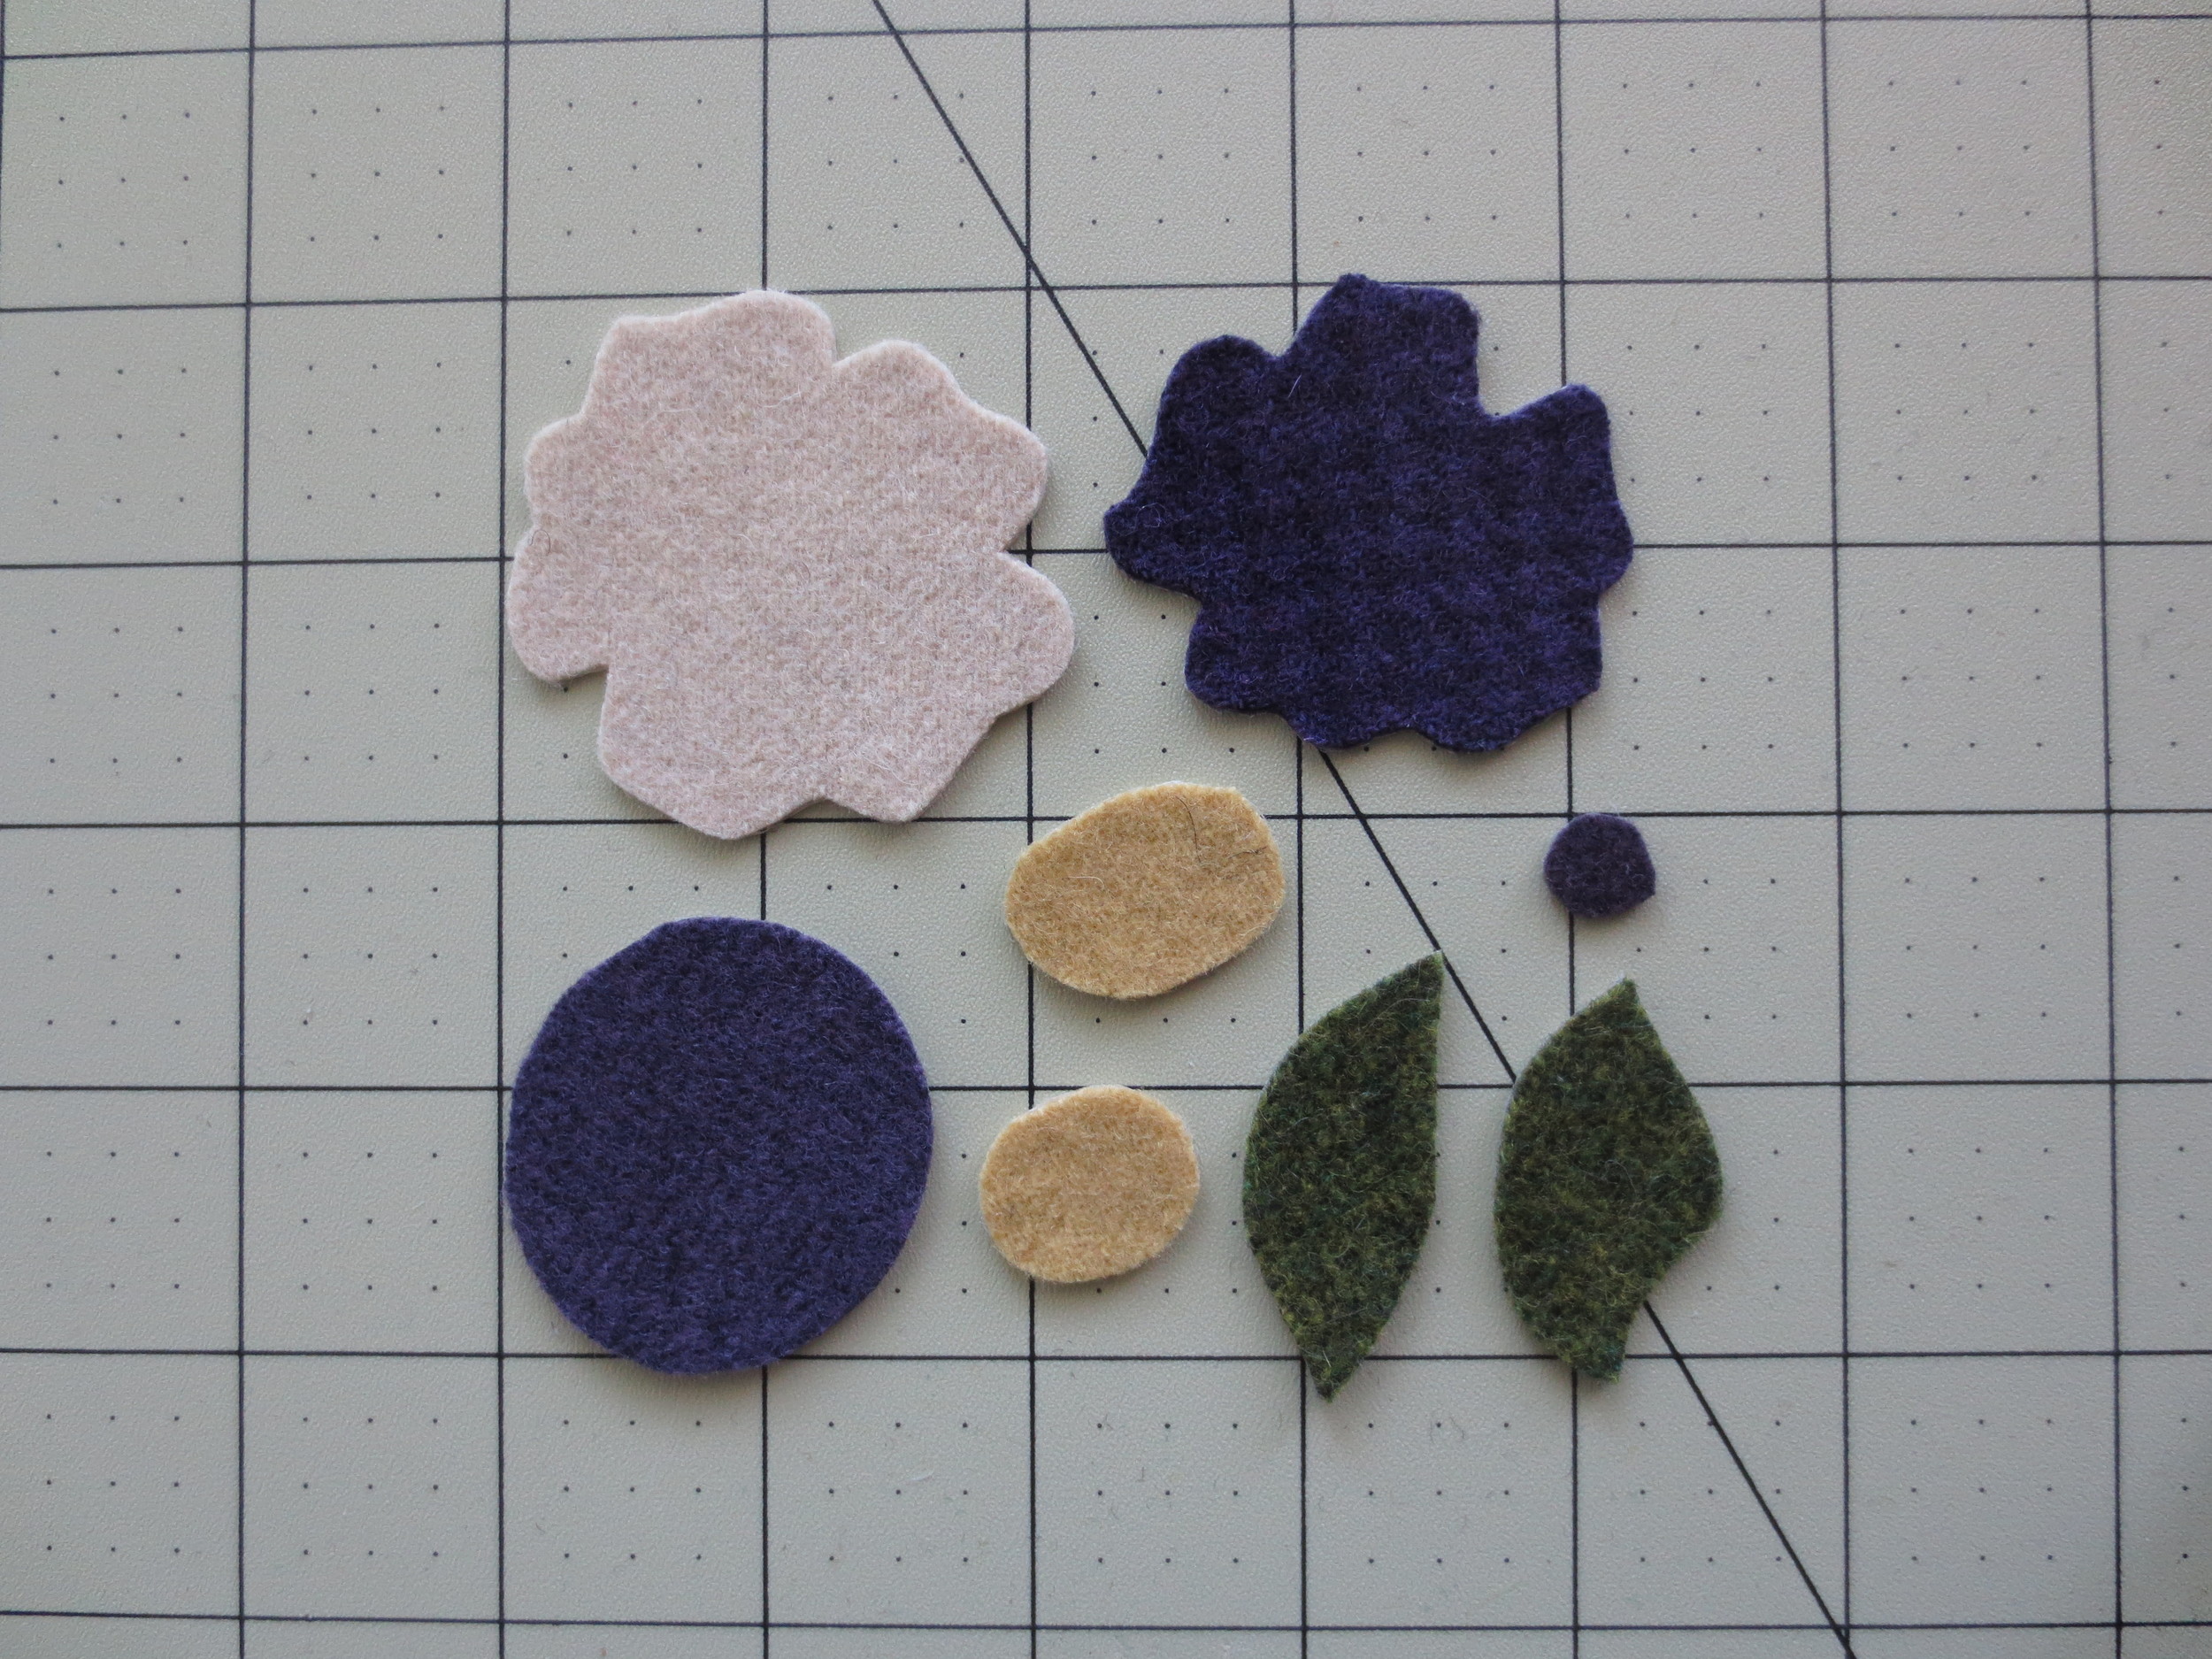
4. Fuse pattern pieces onto designated wool with iron.
5. Cut out wool along outlines, then remove paper backing.
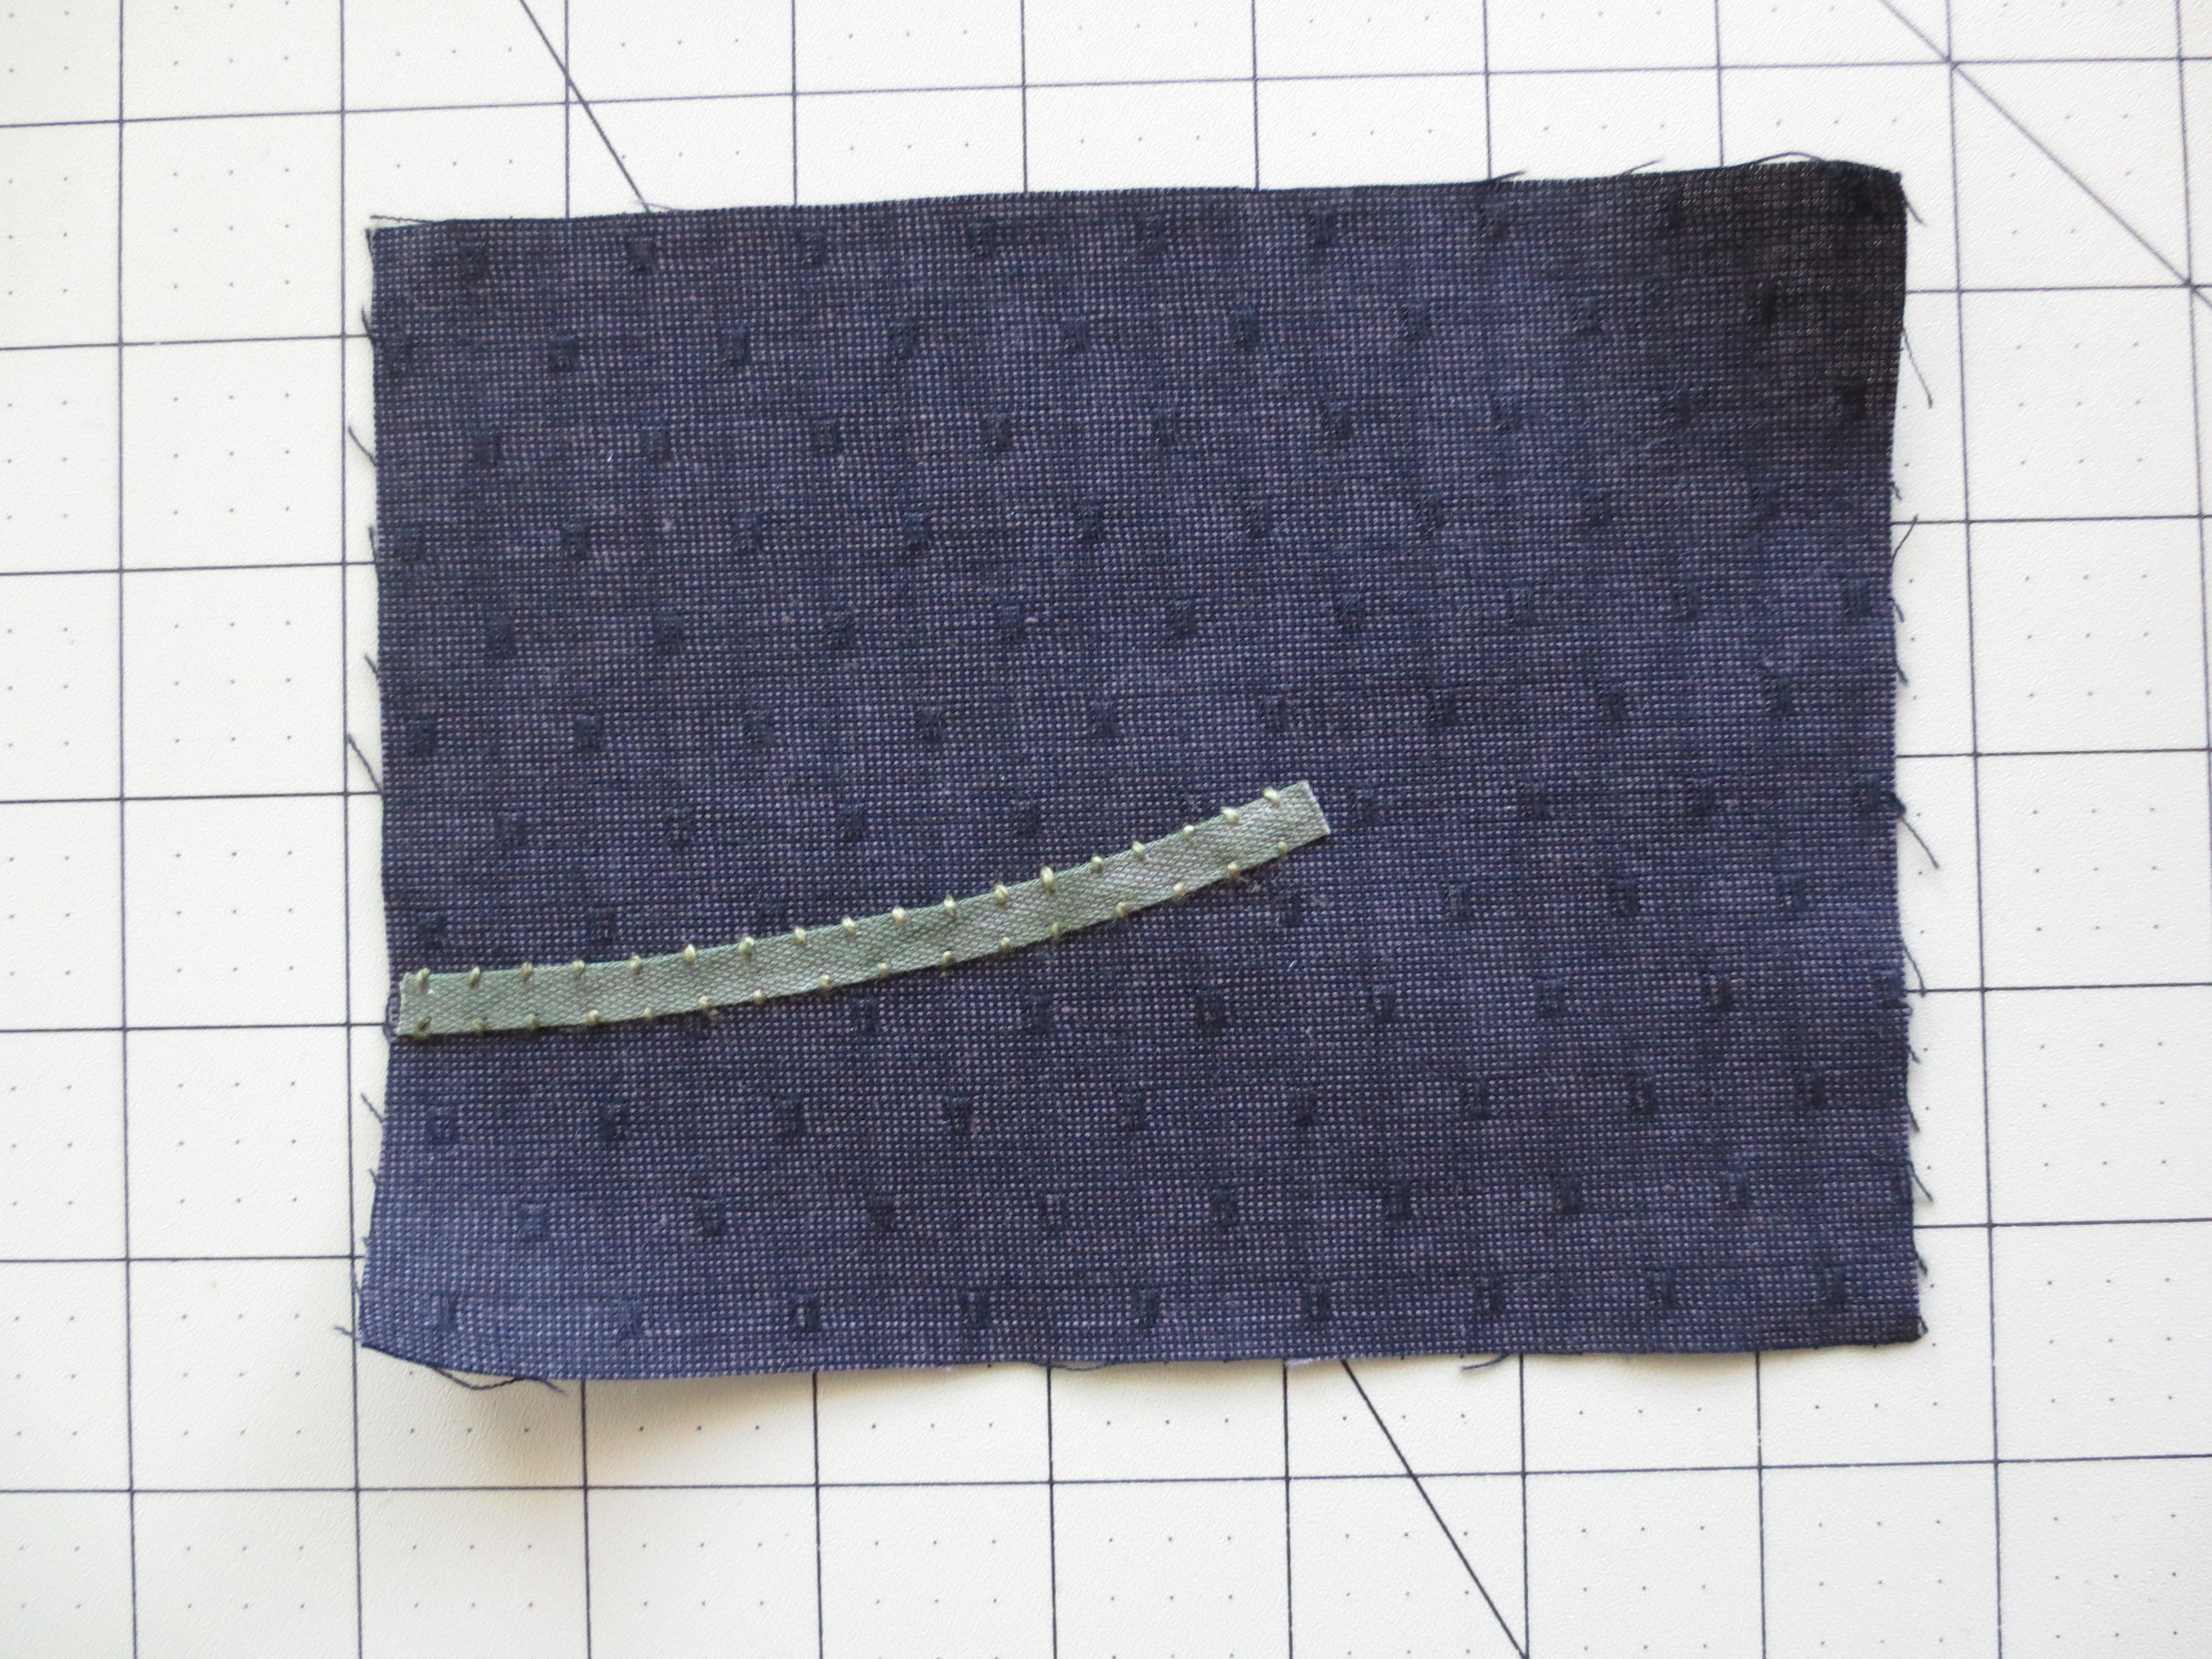
6. Layout front flower base, stem, and leaves on one of the black pouch pieces (use layout guide for positioning). Remove flower and leaves. Pin stem in place. You will trim both appliqued pieces to 4 1/2" x 6" when complete, so don't place pieces too close to the outside edges.
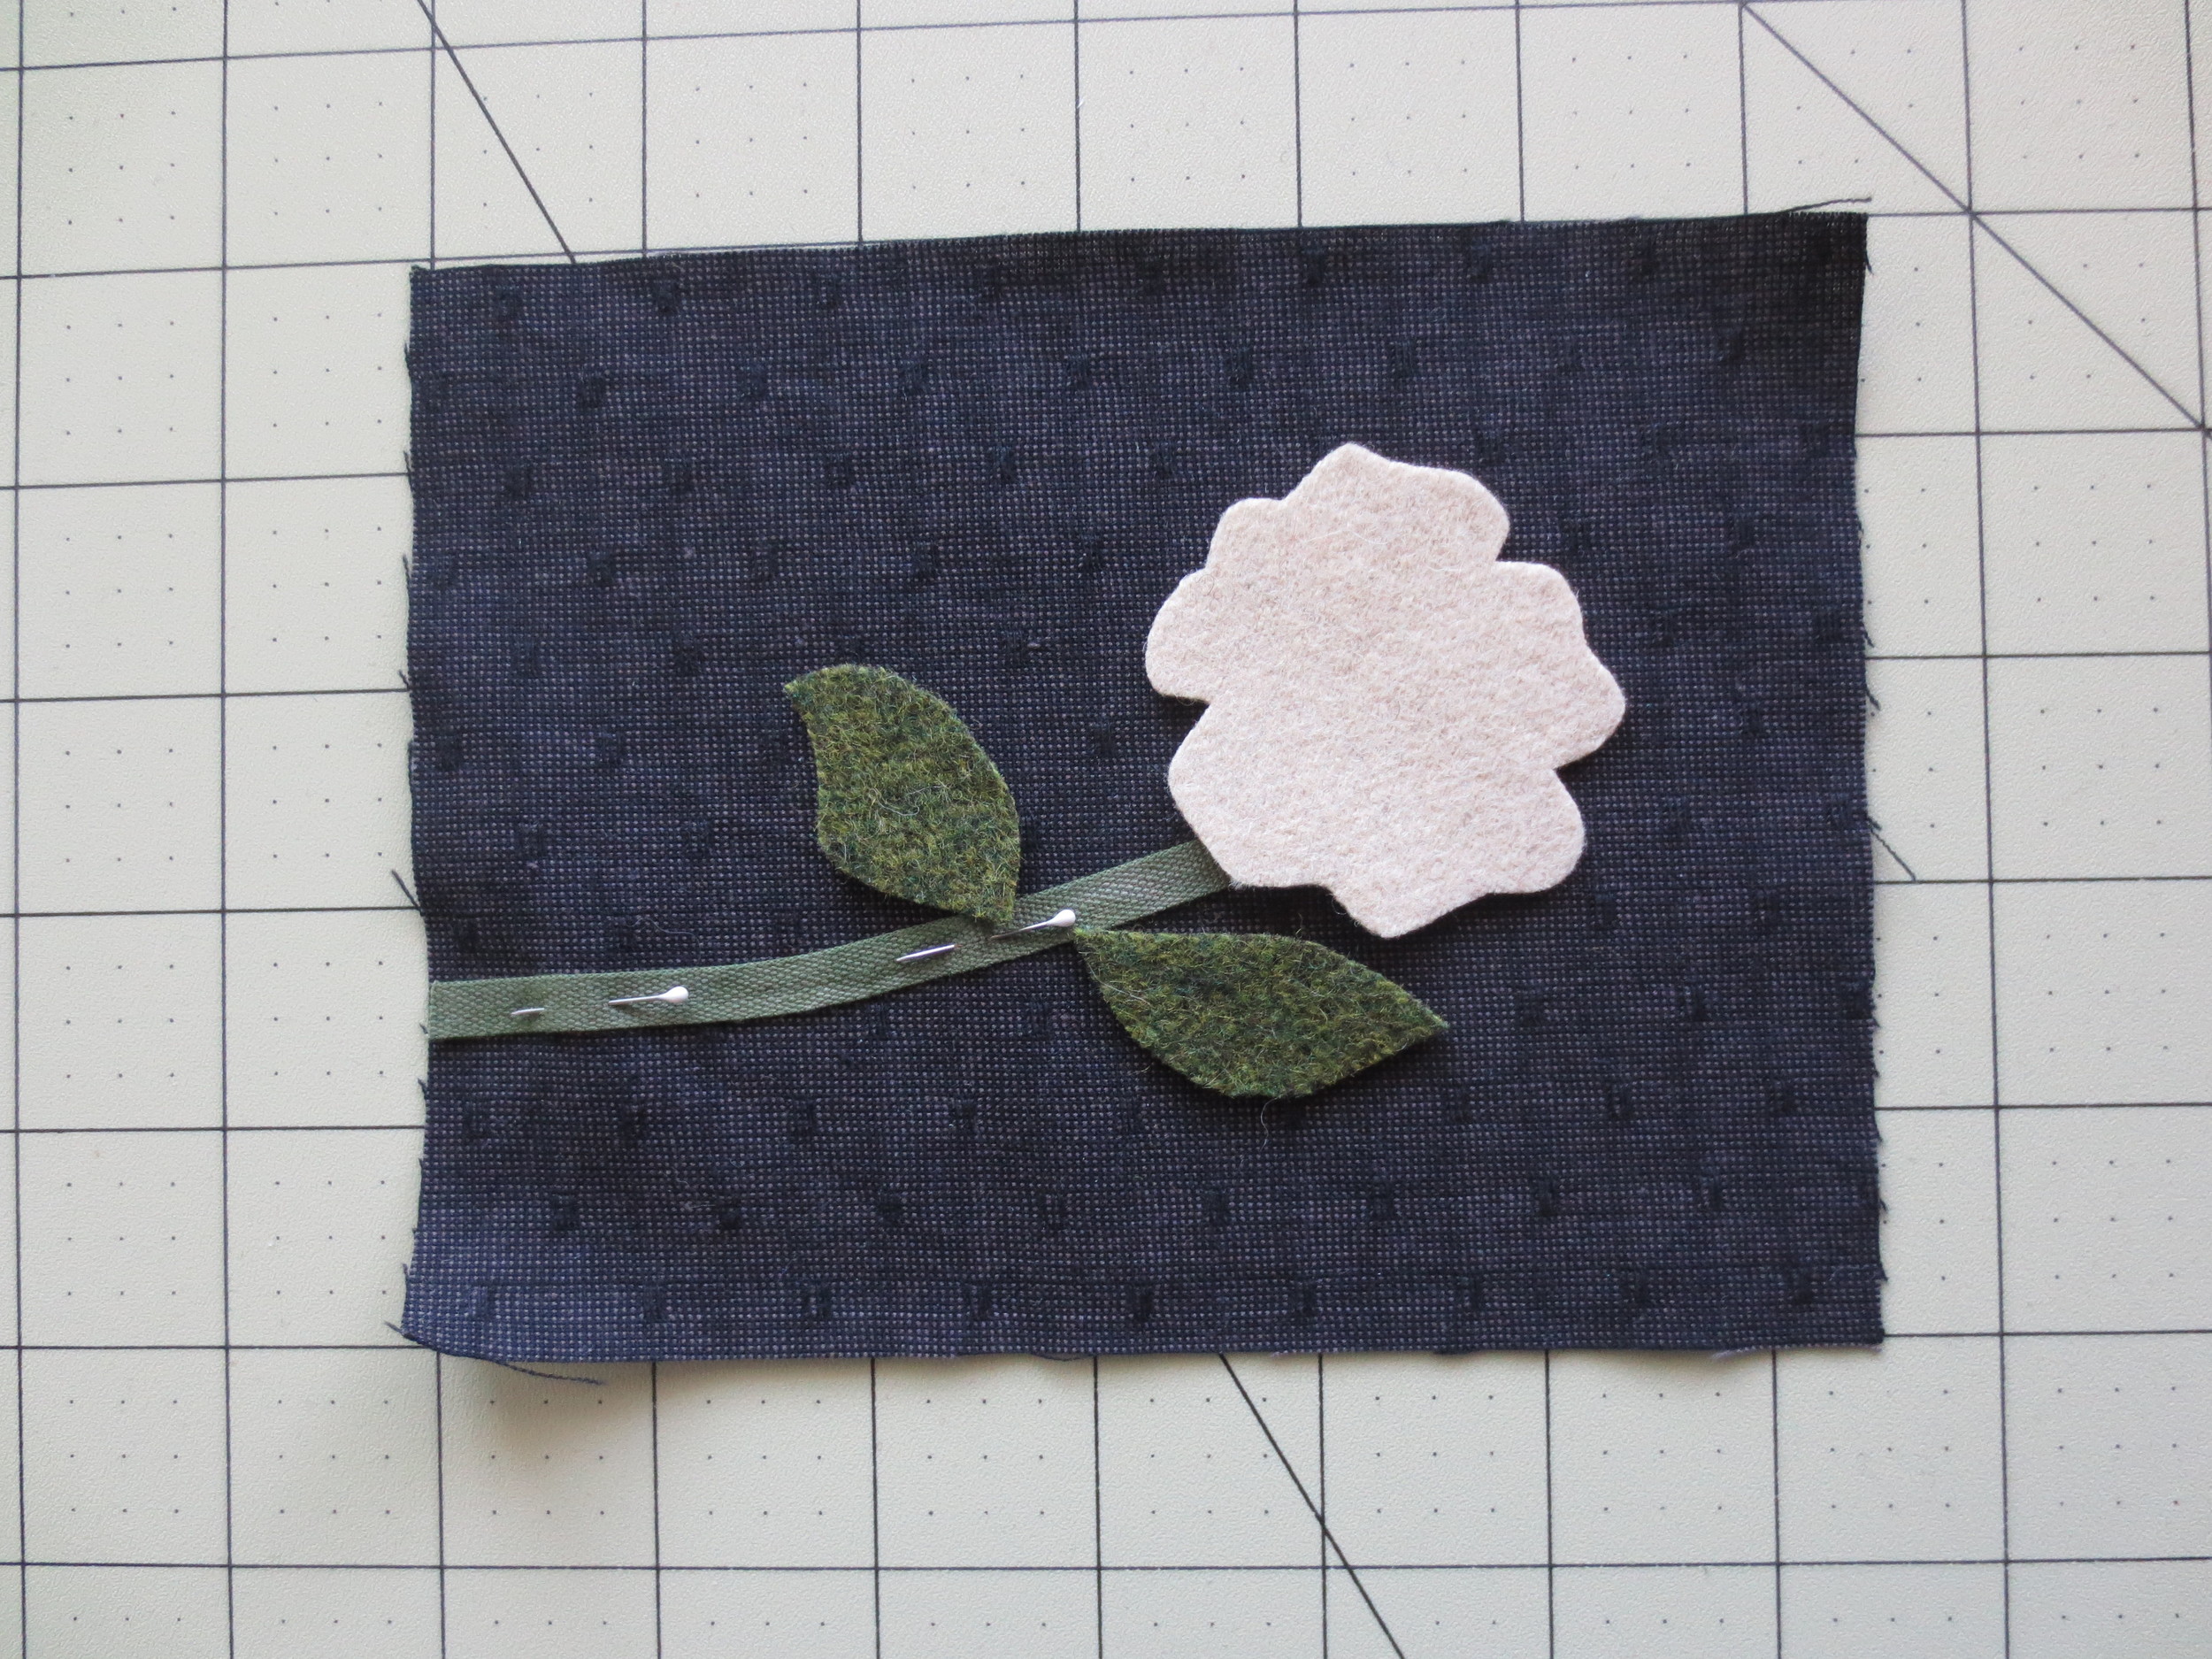
7. Whip stitch stem in place using matching colored thread.
8. Re-position flower and leaves. Fuse in place. Position small and large flower centers on flower. Fuse in place. You will need to use steam in your iron to fuse the wool pieces together.

9. Whip stitch all layers of the flower with thread that matches each layer's color.
10. Whip stitch leaves with matching thread.
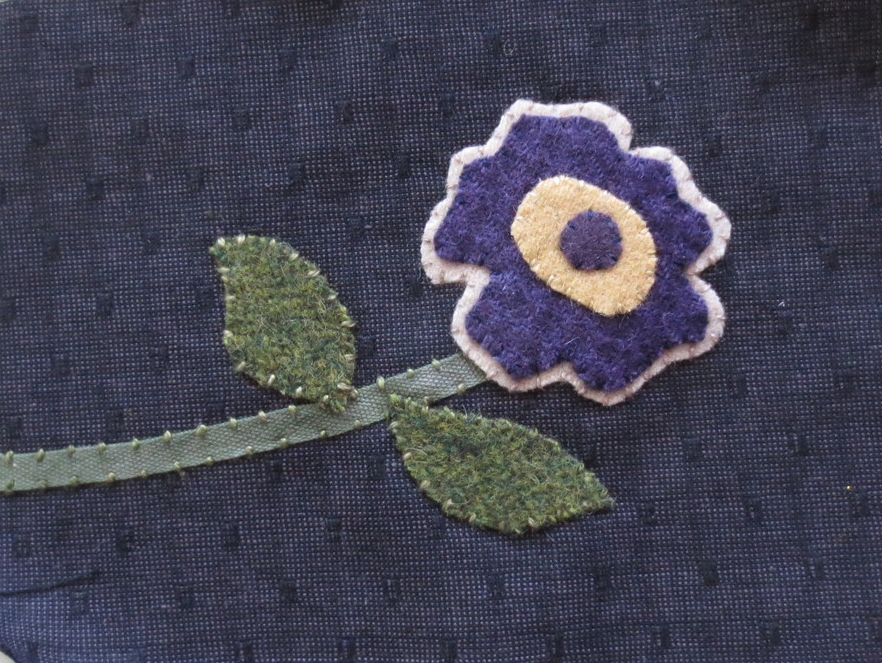
11. Draw veins of leaves with chalk pencil and use a closed fly stitch to make veins.

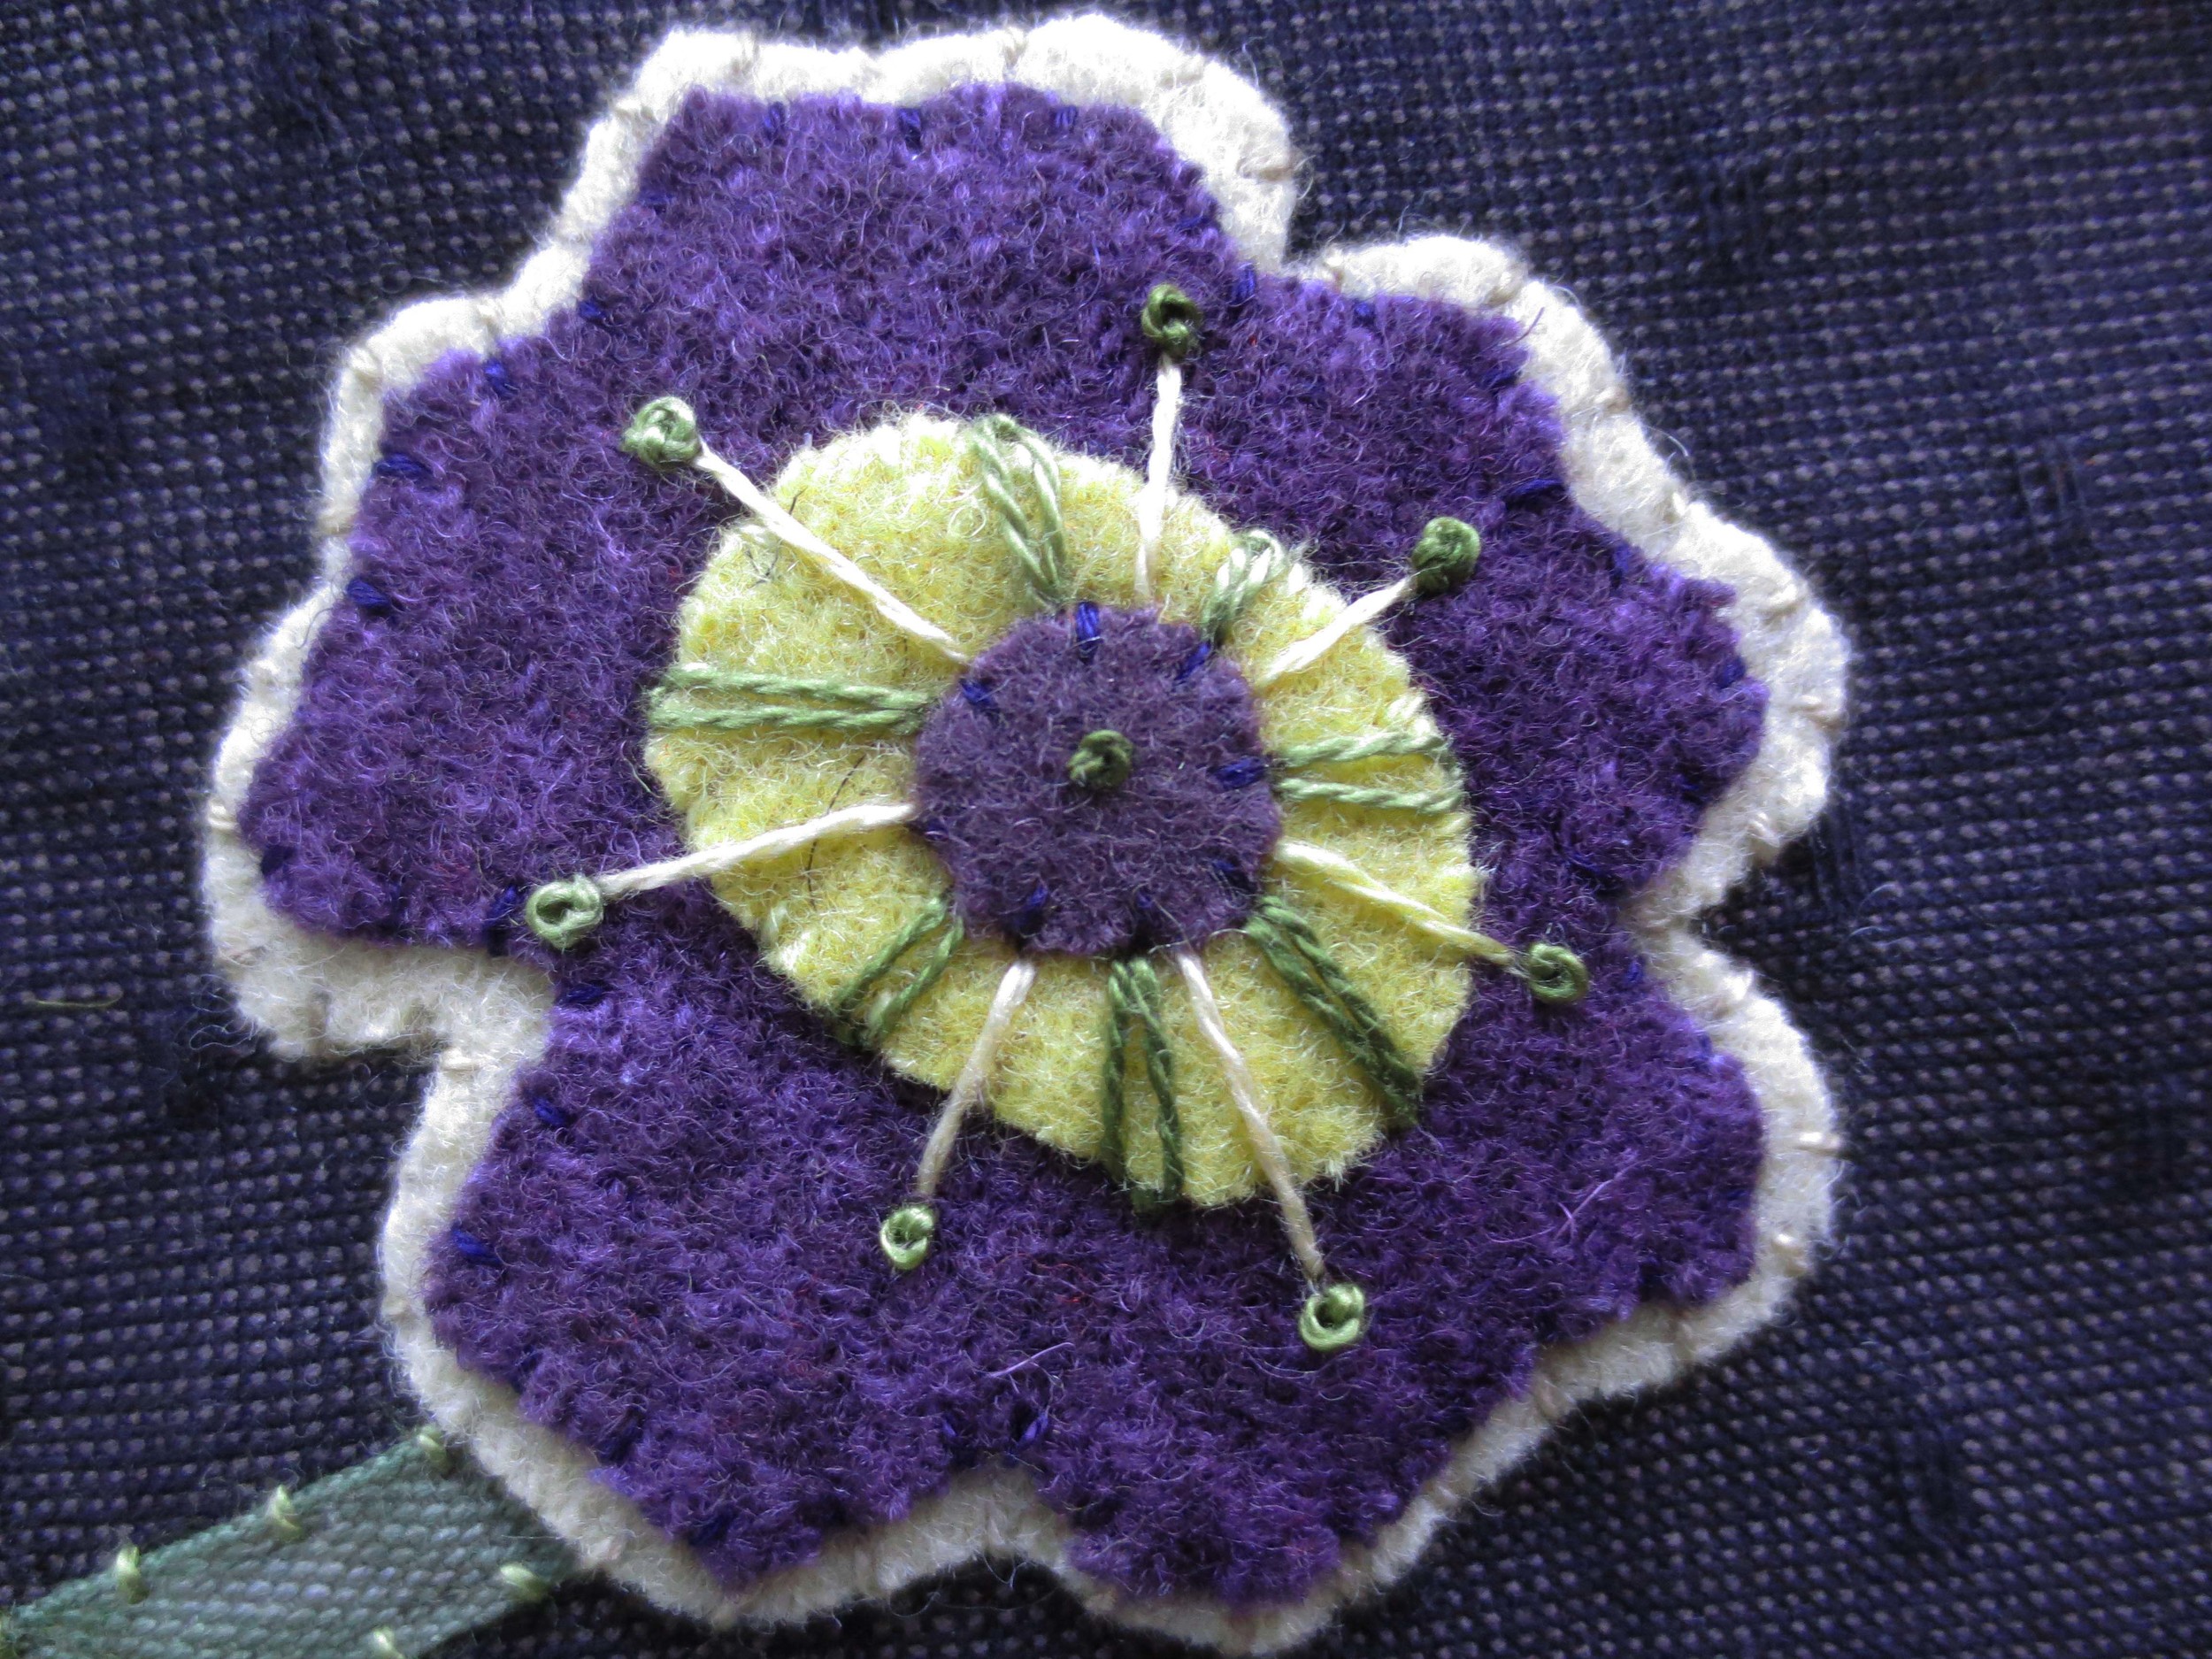
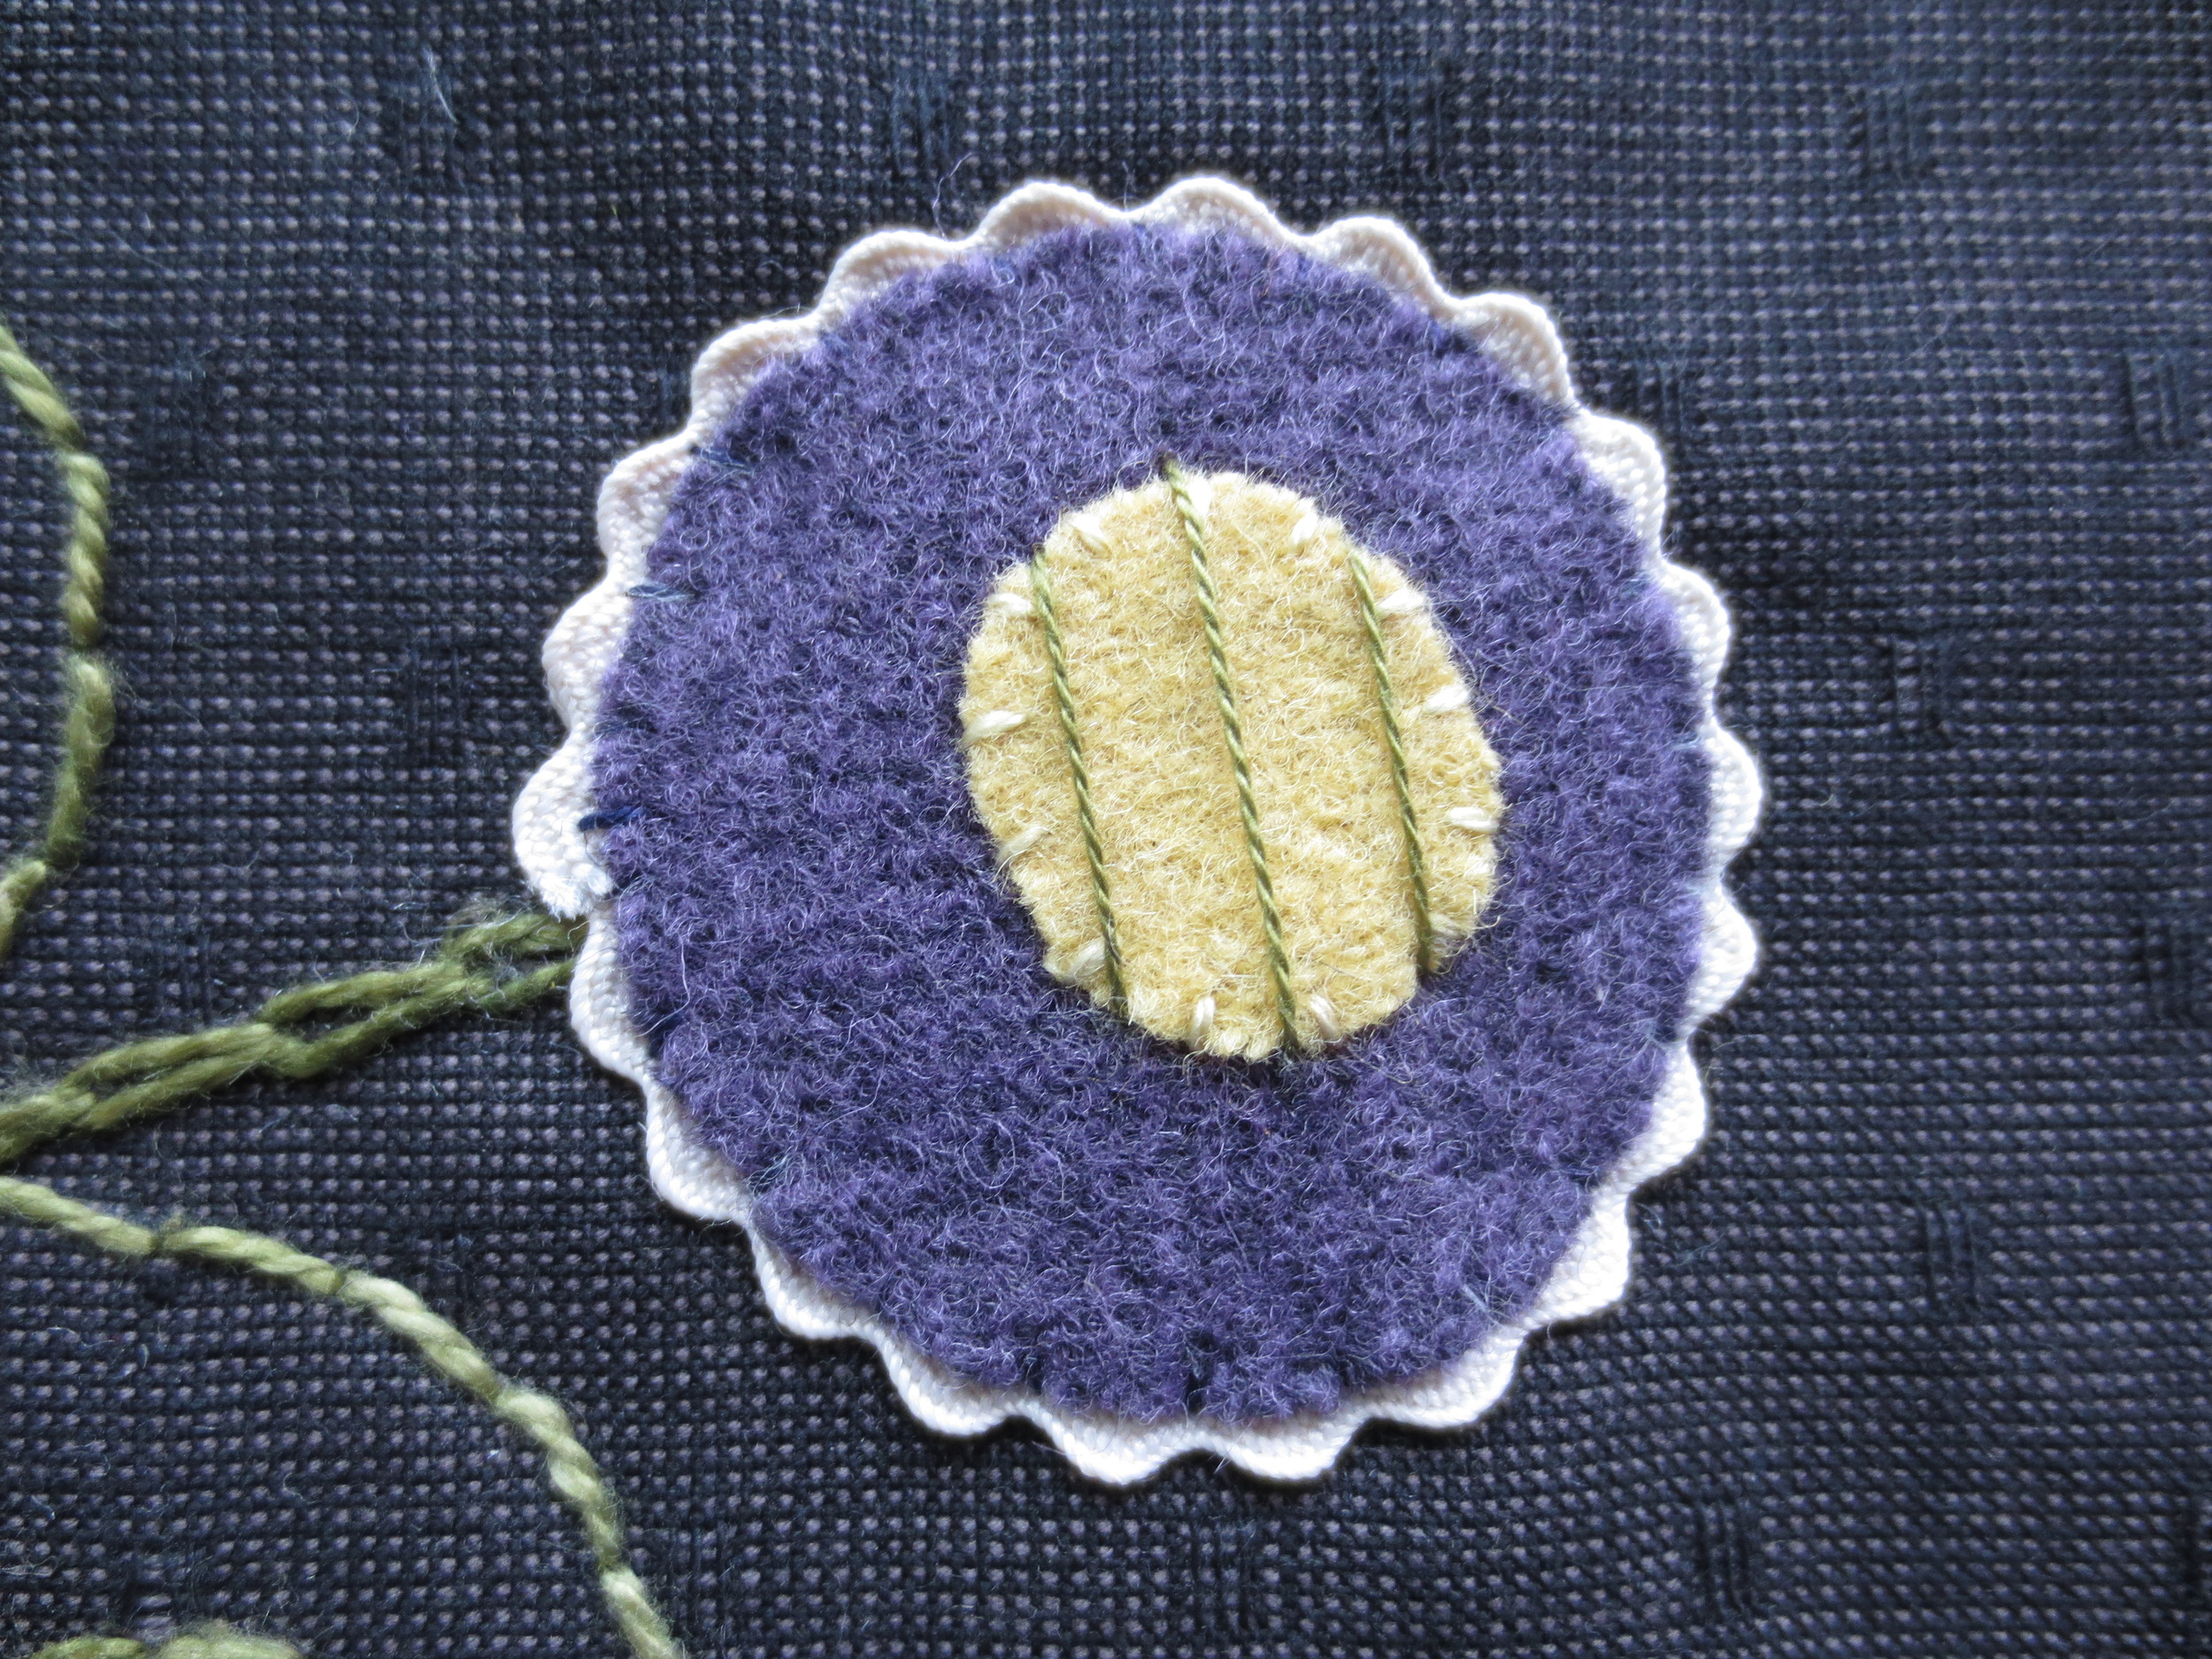
12. Use the same green thread to stitch seven (7) lazy daisy stitches that radiate out from the small flower center to the edge of the large flower center.
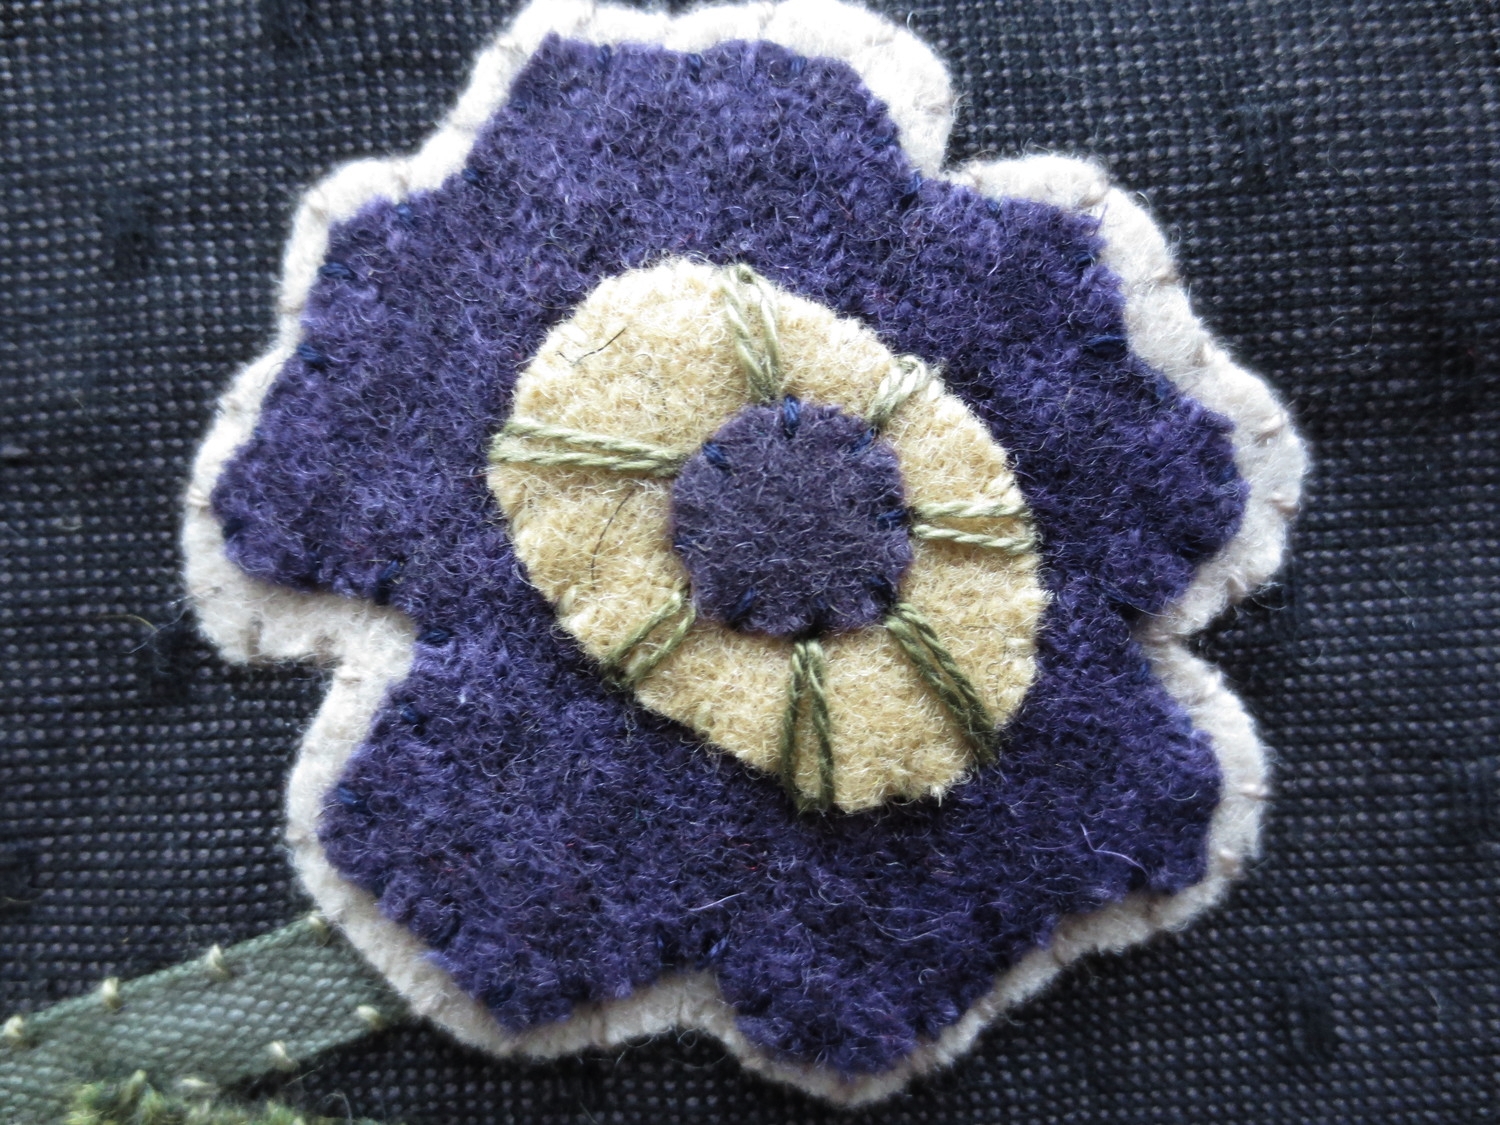
13. Use gold thread to make a straight stitch in between each of the lazy daisy stitches.

14. Use the green thread used for the lazy daisy stitches to make a French knot on the end of each straight stitch and in the middle of the small flower center. Set aside.
15. Now let's work on the back side of the pouch. Use a chalk pencil to draw the flower stem and leaves. Use size 8 perle cotton to chain stitch stem and back stitch leaves. This piece of fabric will be trimmed to 4 1/2" x 6", so begin the chain stitch about 3/8" from bottom edge. Note: I found that if I layer the fabric over the batting and stitch through both layers it gives the fabric more stability, thus making it easier to stitch . Pin layers together so they don't shift while you stitch.

16. Position the back flower and flower center on the stem. Fuse flower pieces in place.

17. Peel up outside edges of flower and tuck baby rick rack under edge, pinning rick rack in place and cutting off excess. The ends of the rick rack should overlap approximately 1/4".

18. Use thread the same color of your flower to whip stitch the flower and rick rack together. Then use off-white thread to whip stitch the "humps" of the rick rack to backing fabric. Add a drop of Dritz Fray Check on cut ends of rick rack to keep them from fraying.
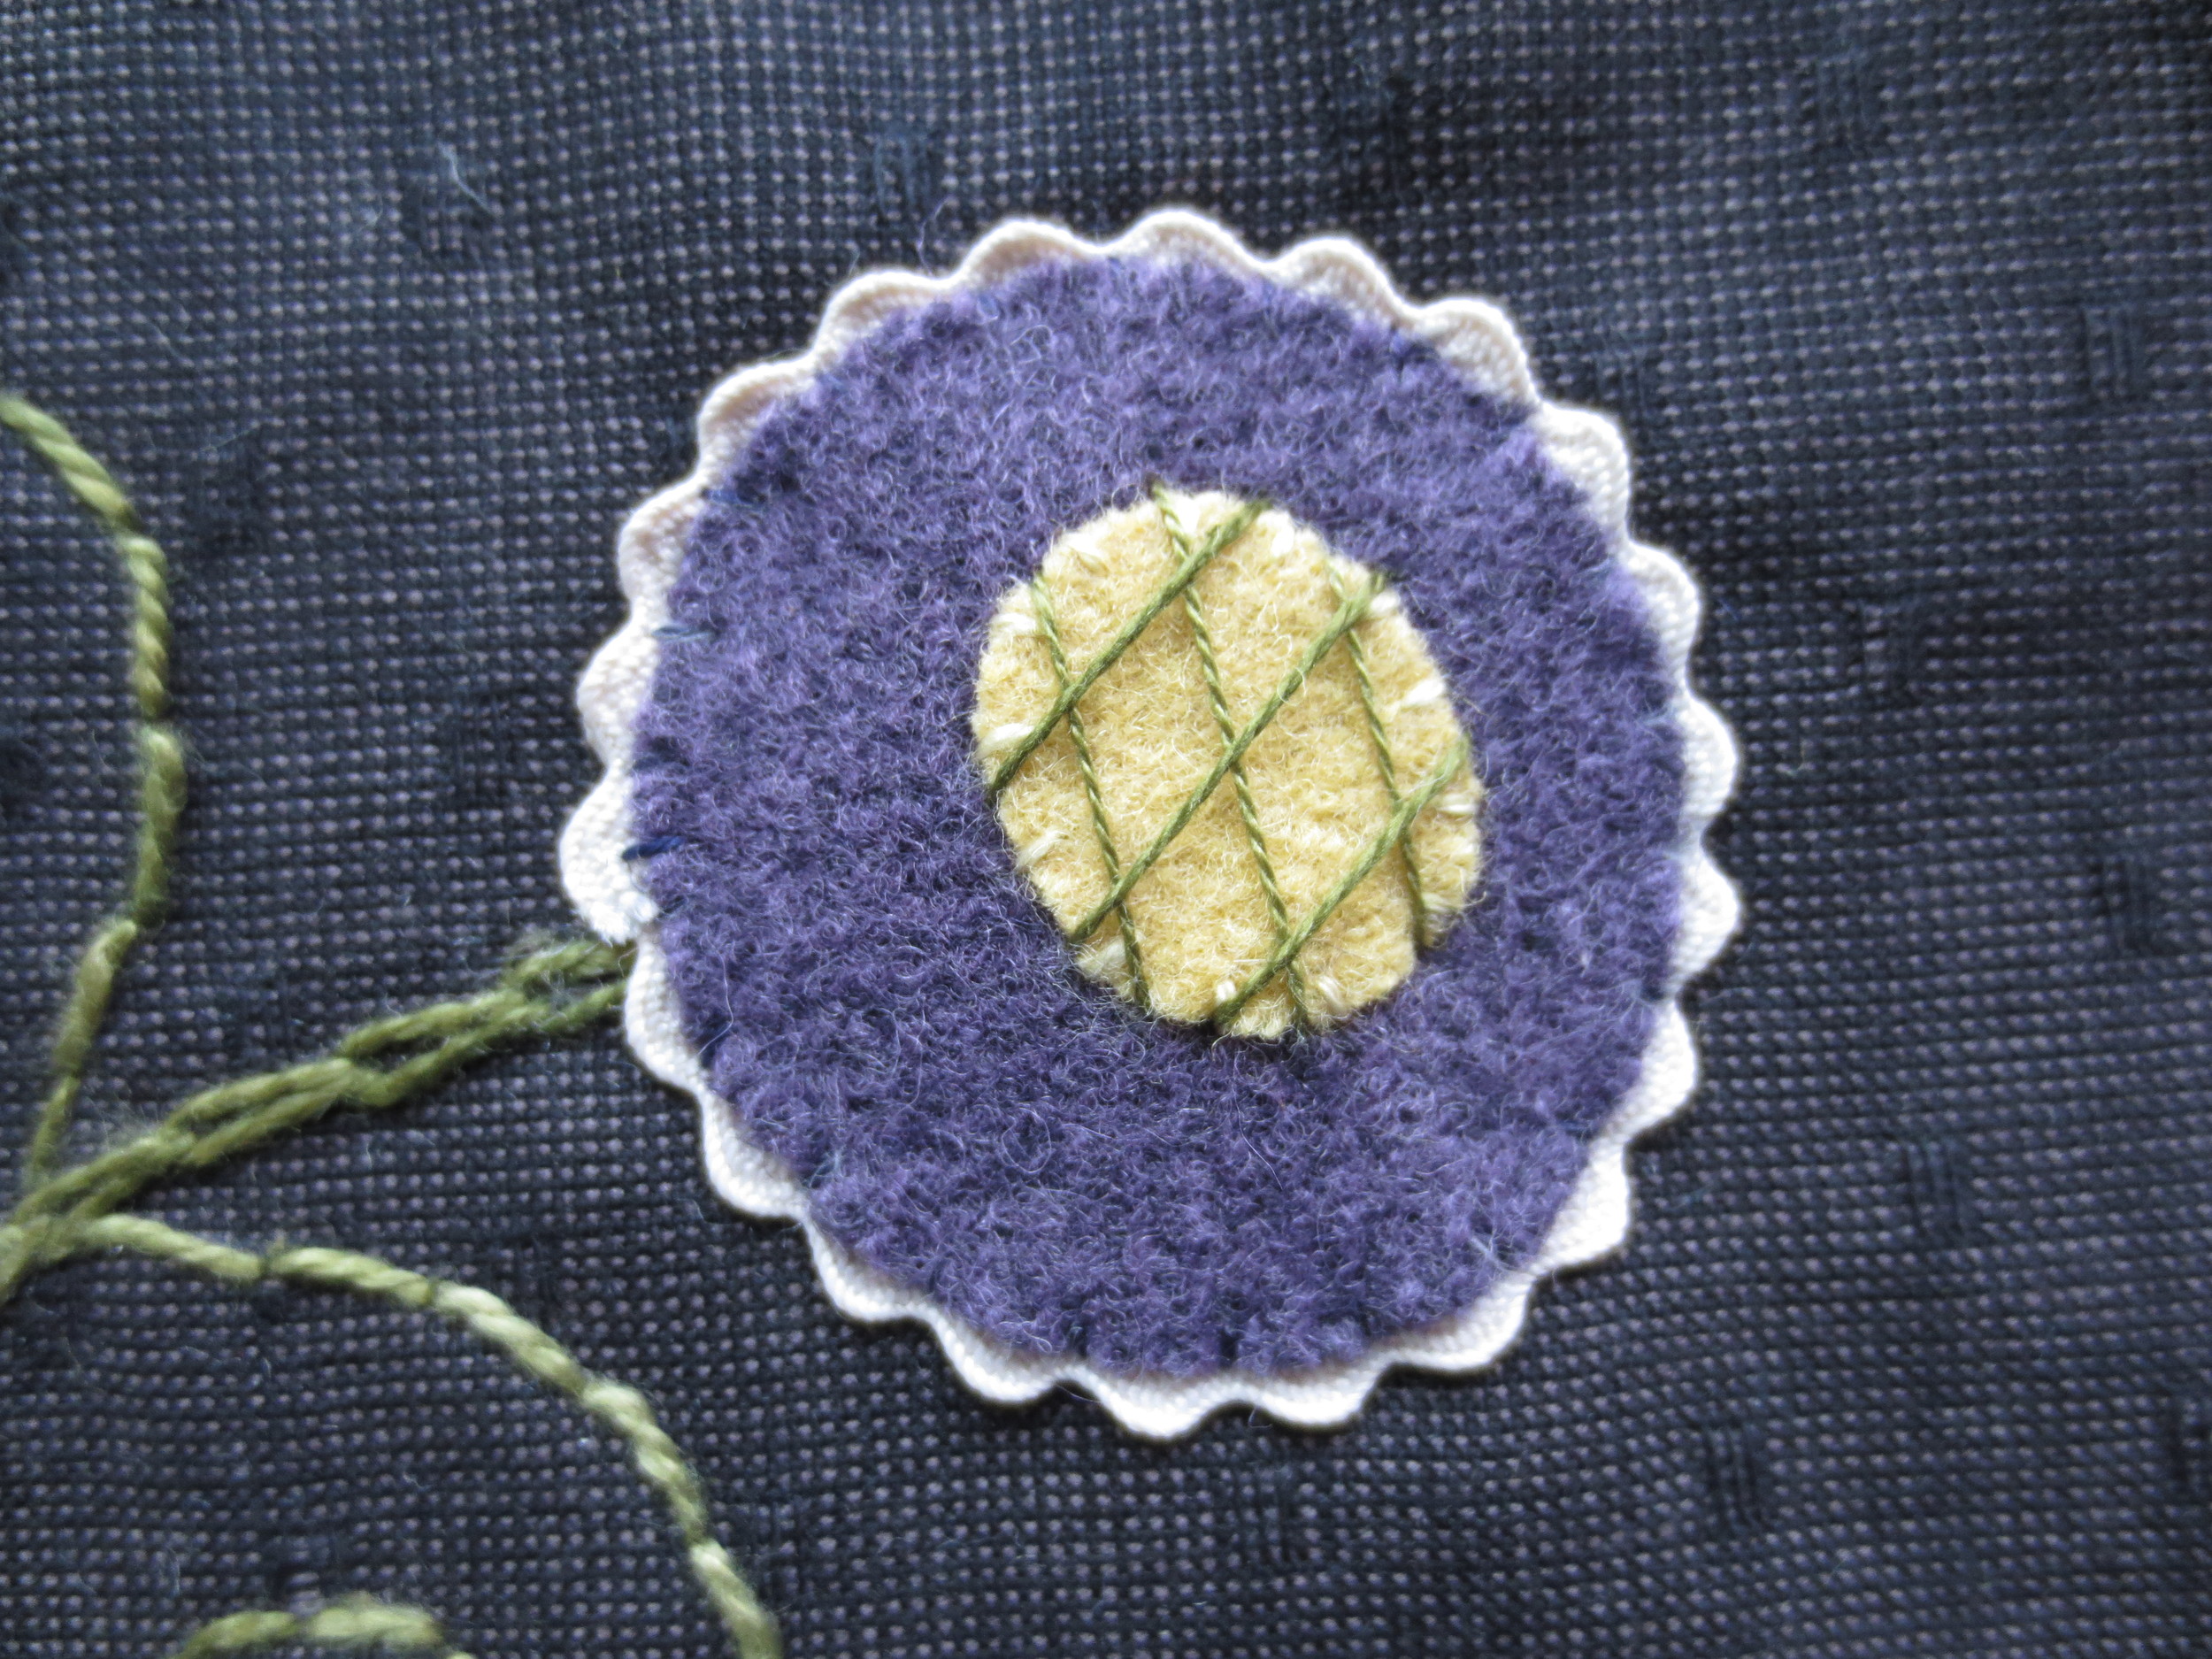
19. Whip stitch flower center using gold thread. Then use the green thread you used for your leaves and a square laid stitch to create your flower center embellishment.
1st step of square laid stitch
2nd step of square laid stitch
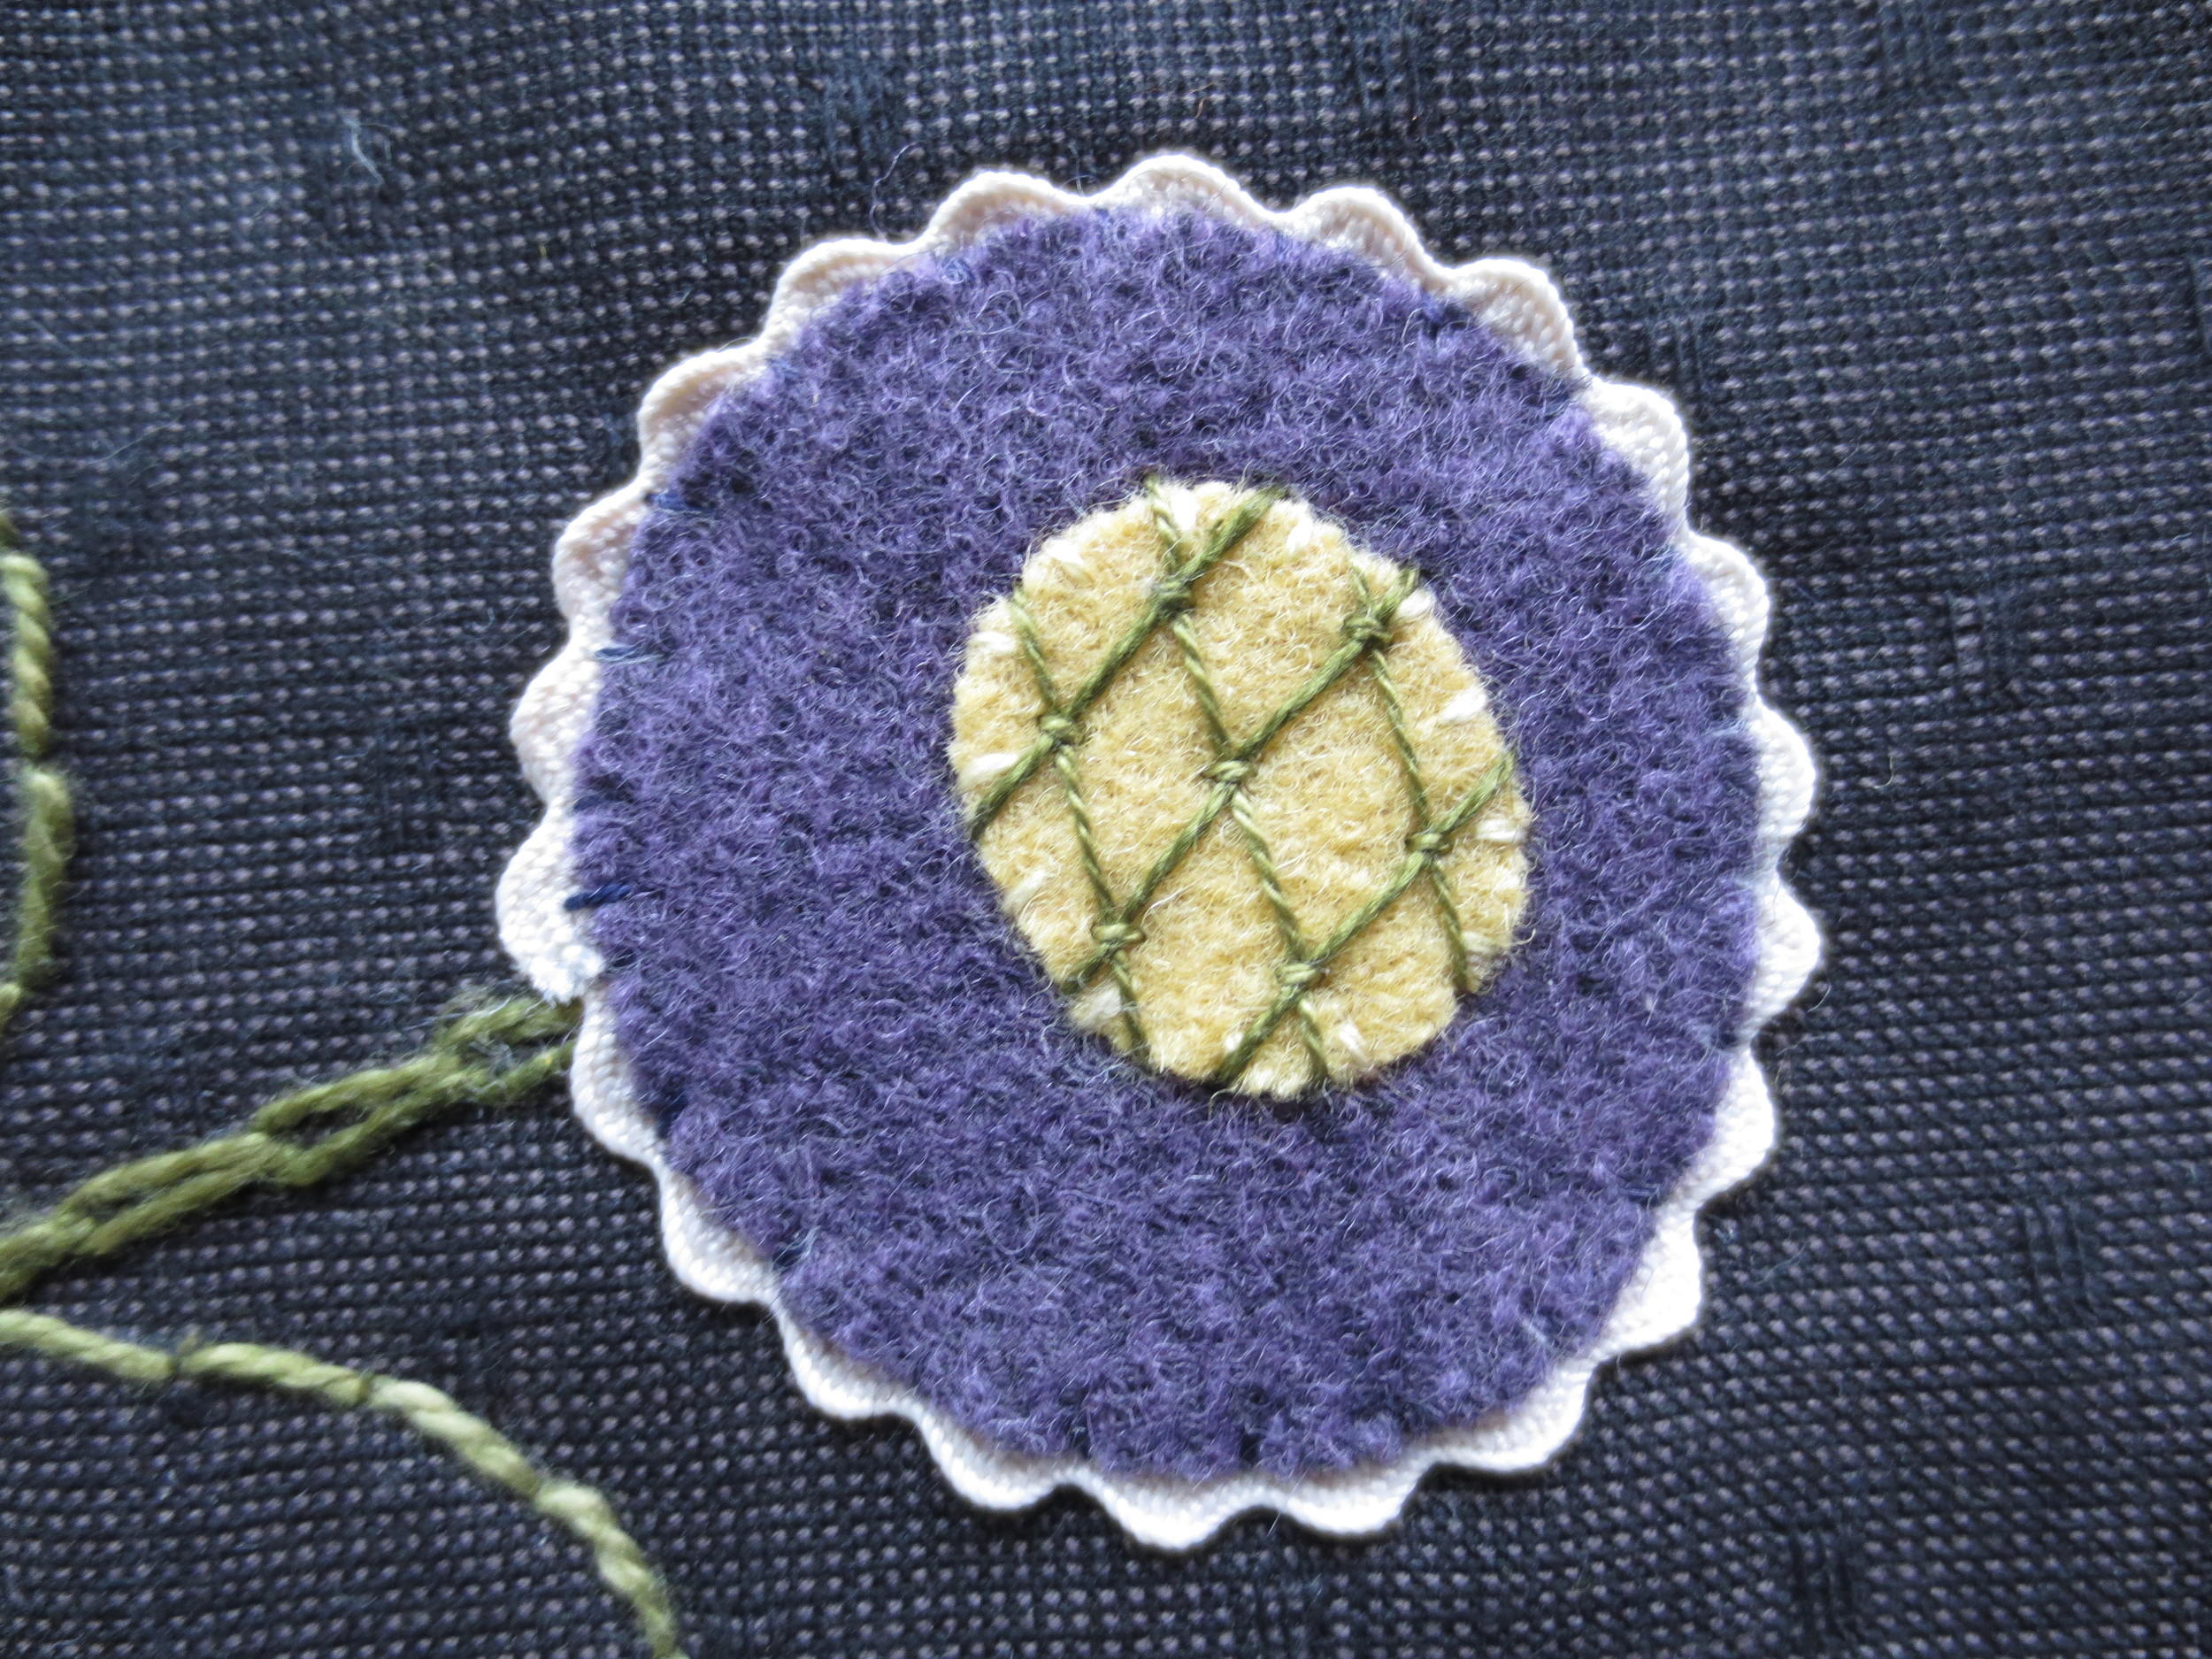
Final step of square laid stitch
20. Trim front and back appliqued pieces, and batting to 4 1/2" x 6".
Basic Pouch Construction
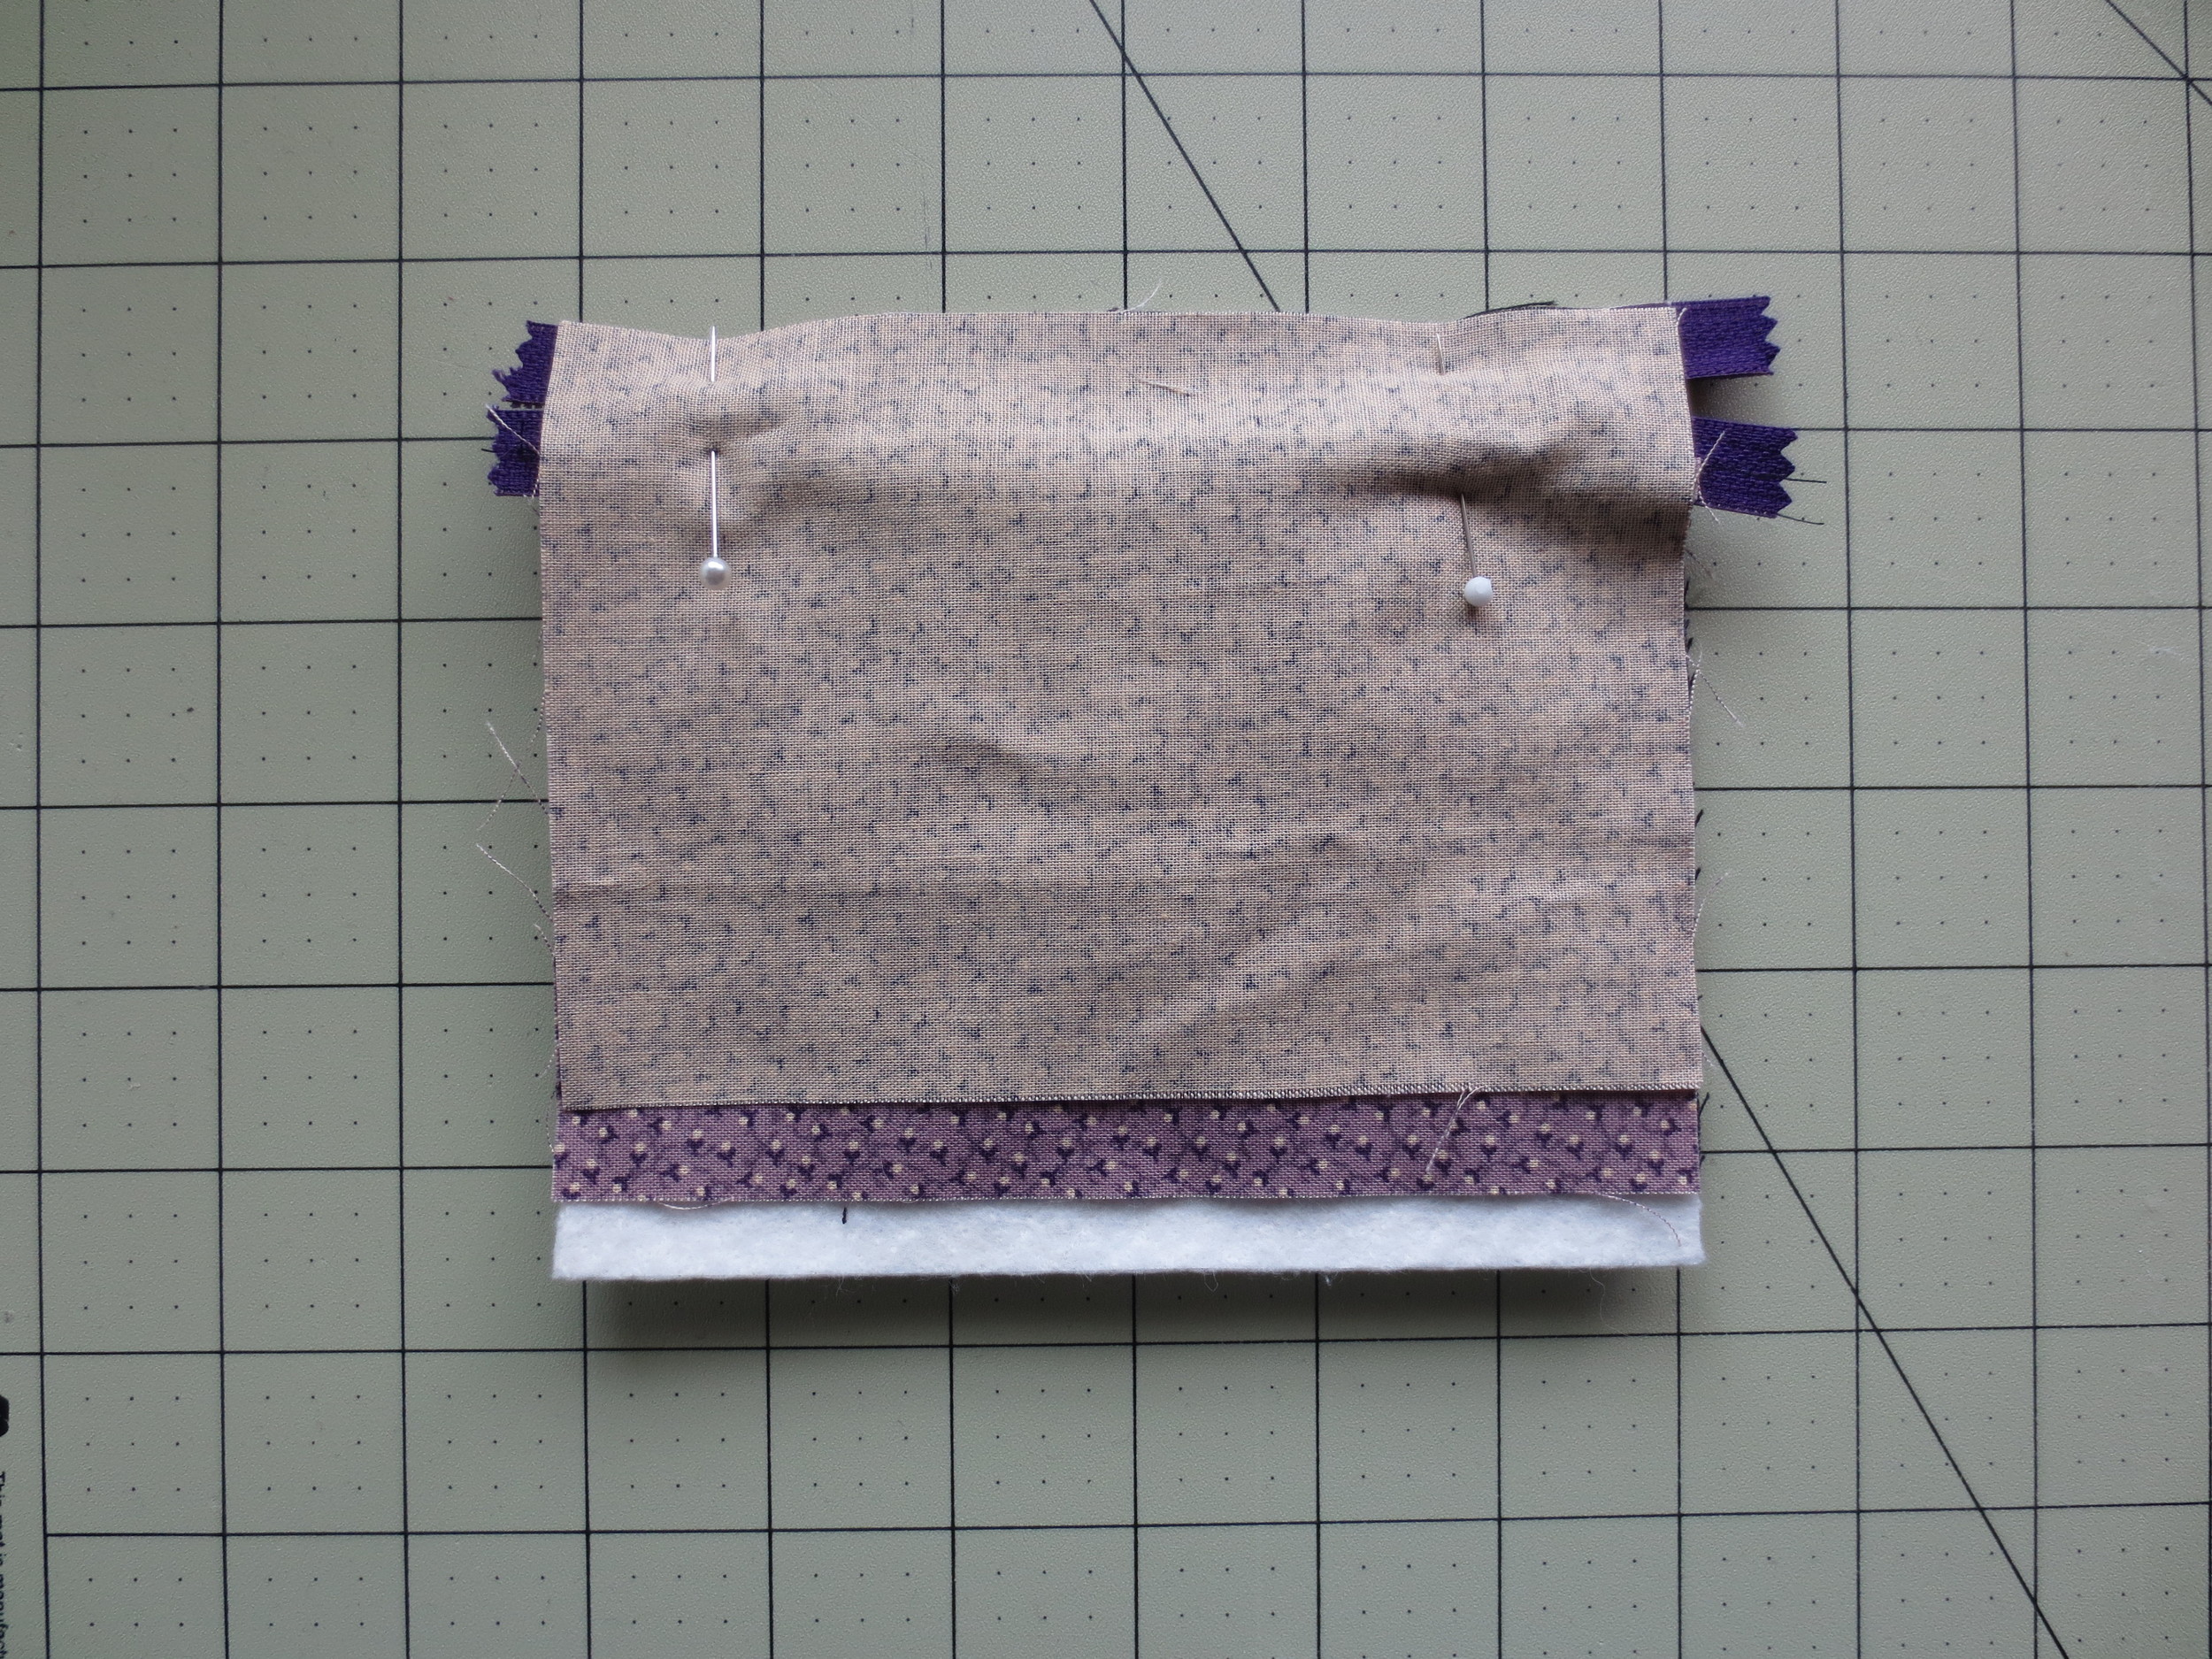
1. Layer as follows: batting, pouch front (right side up), zipper (face down/zipper pull on left), and lining (right side down). Pin in place.

2. Using a zipper foot, machine sew together with a 1/4" seam.
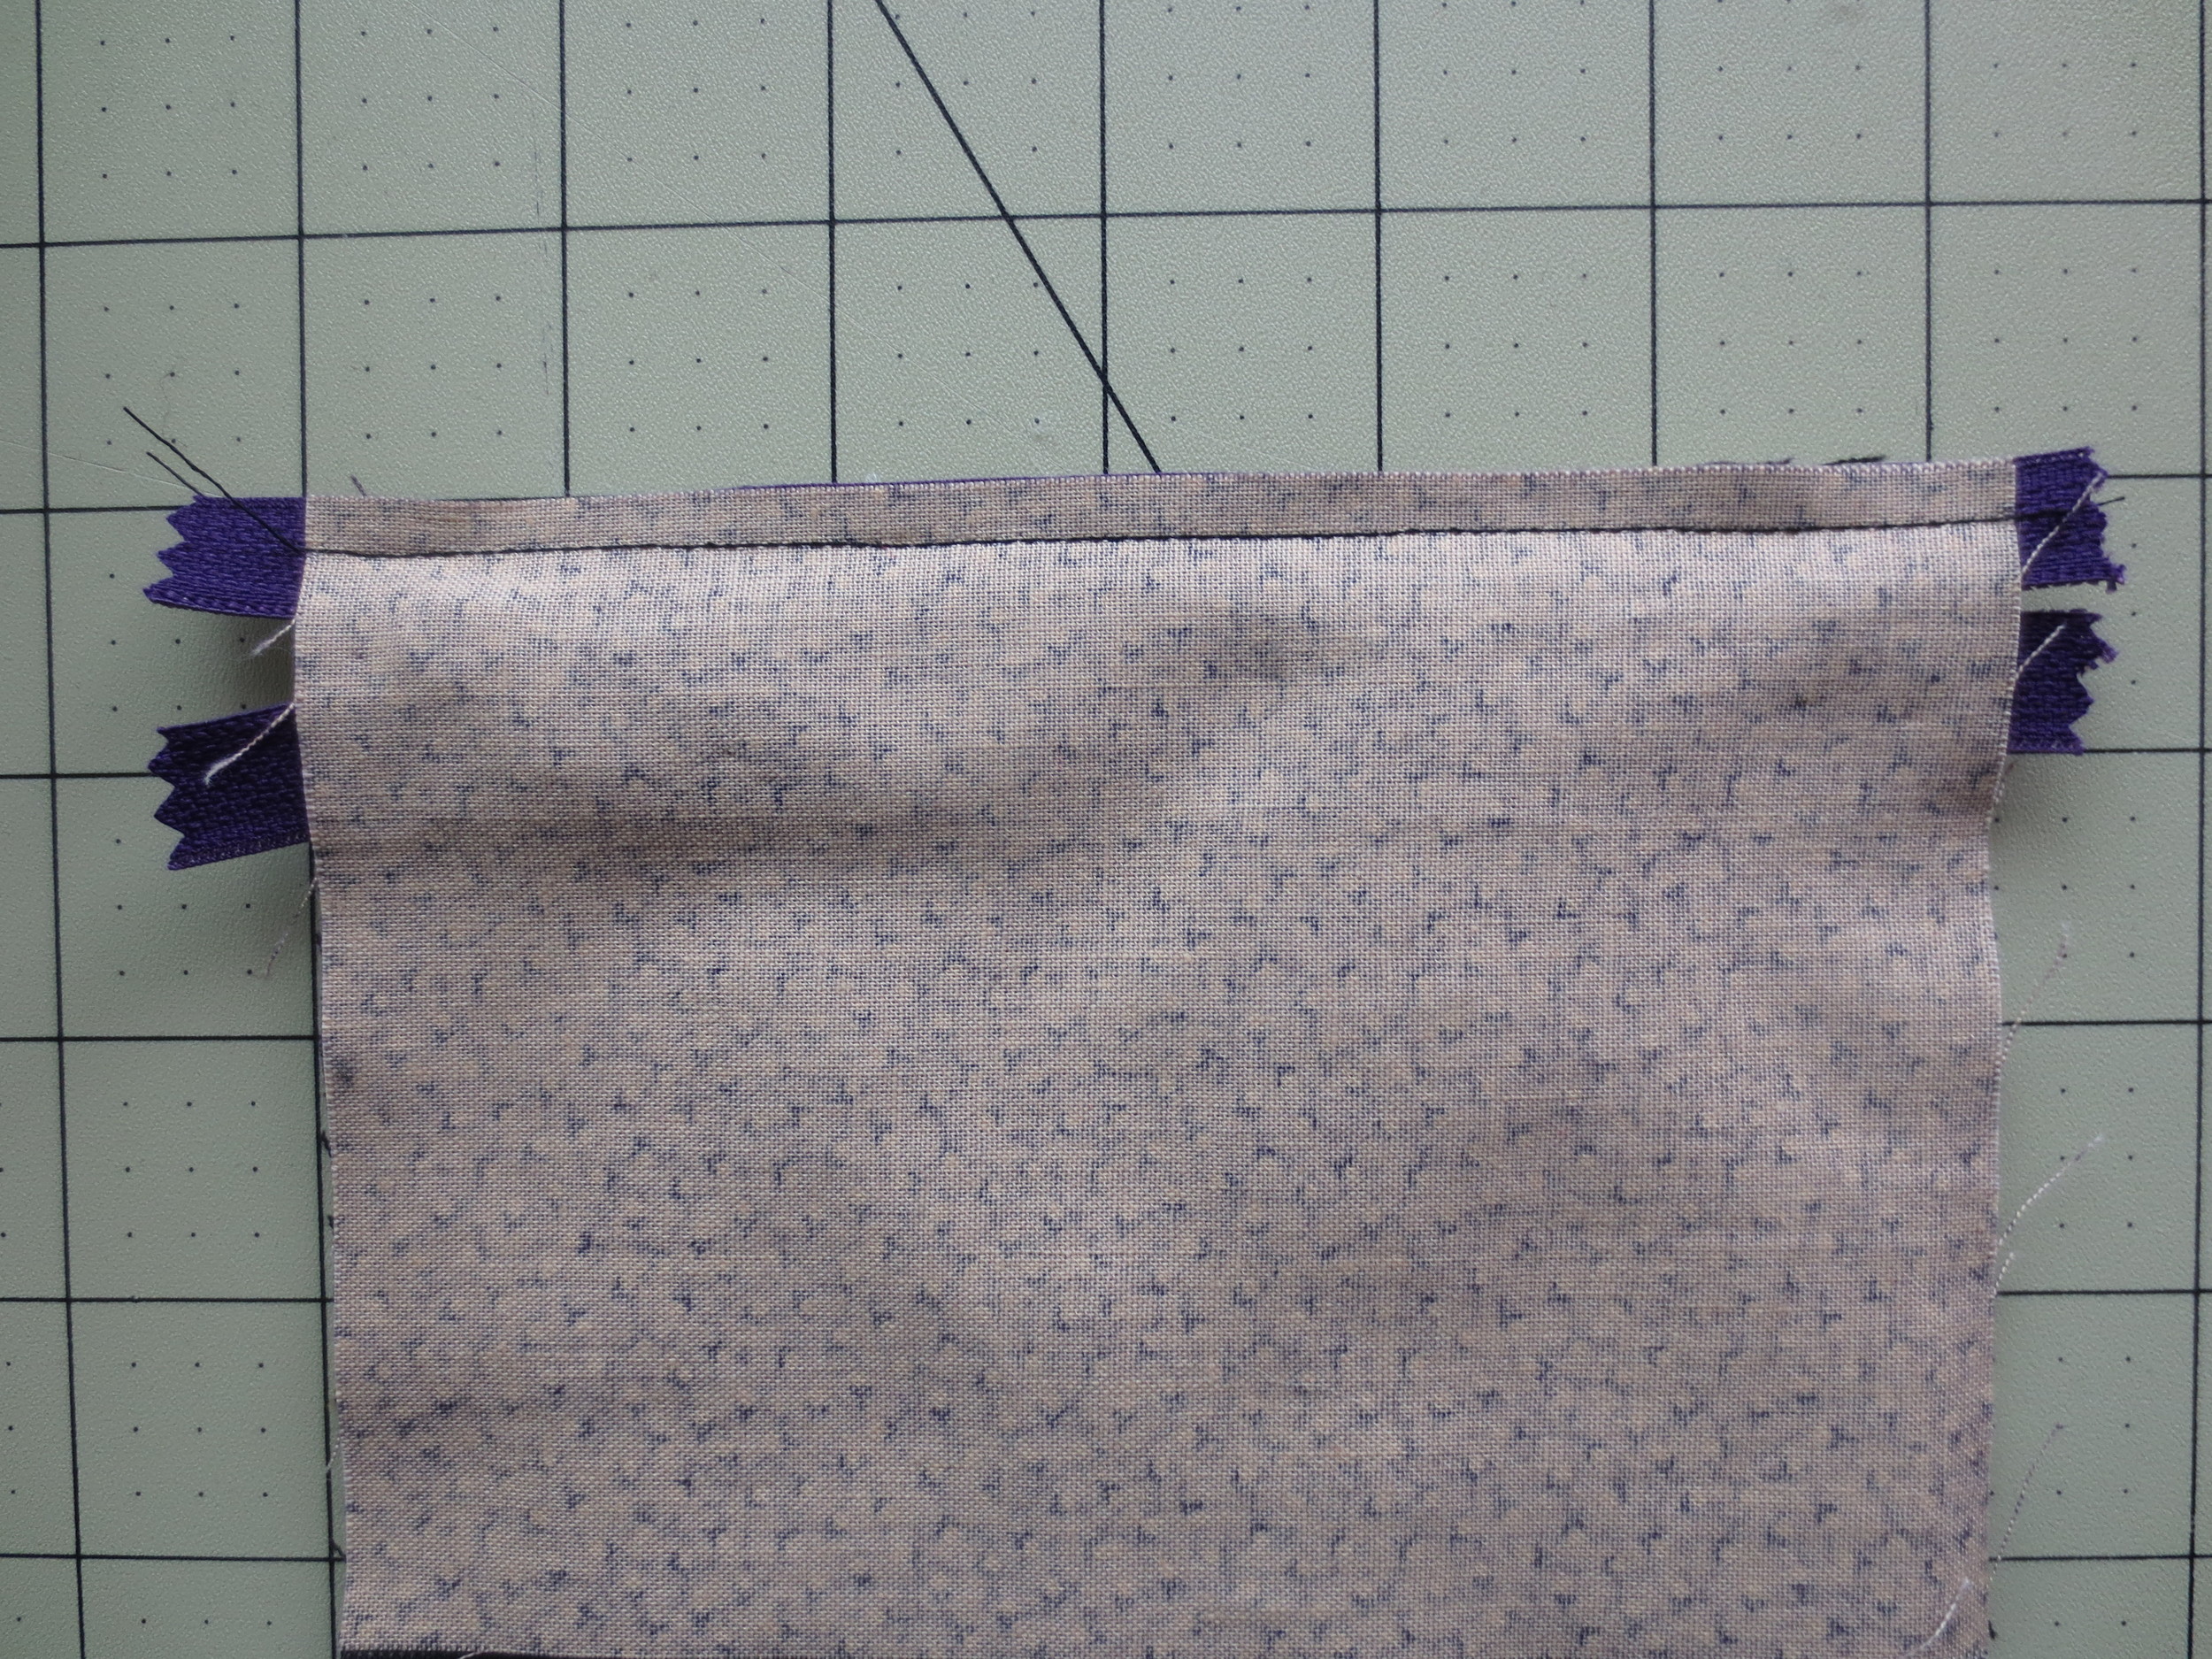
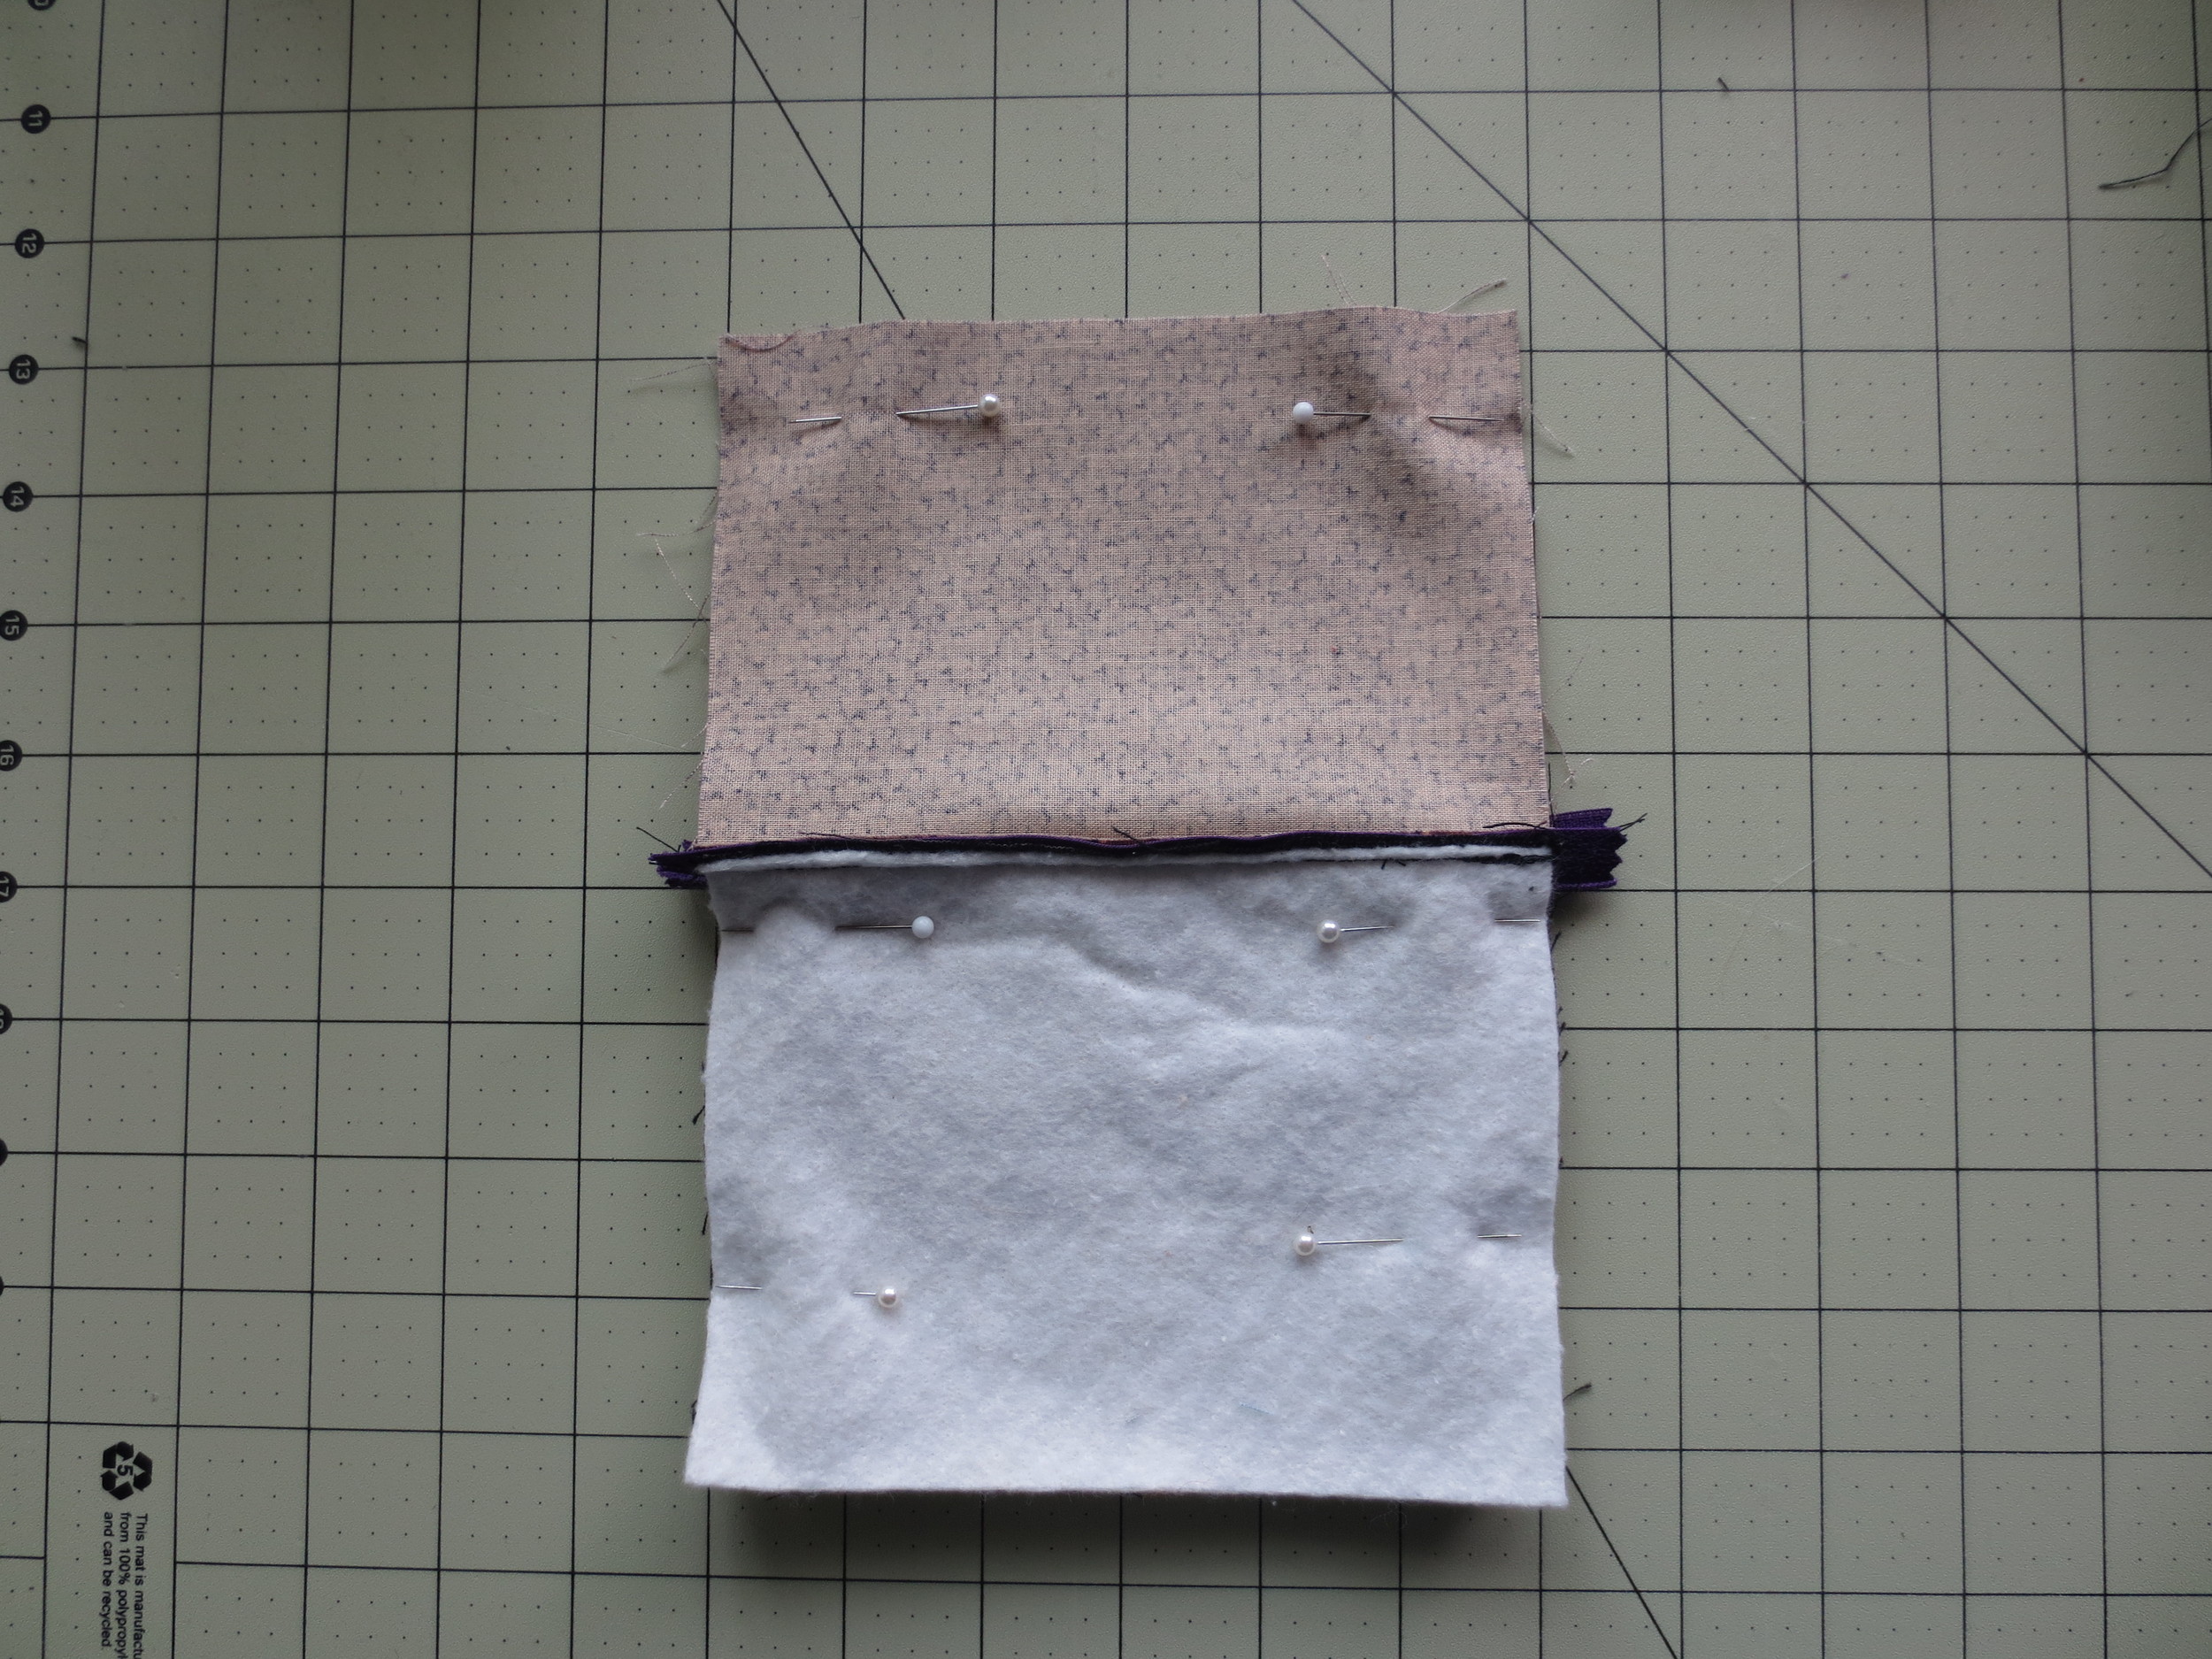
3. Fold both lining and pouch away from the zipper, so the wrong sides of lining and pouch front face each other.

4. Flip this over, so that the zipper pull is on the right and the pouch front is face down. Layer as follows: batting, pouch back (right side up), zipper (face down/pull on right), and lining (wrong side up). Line up side edges of lining, pouch front, and back. Pin in place.
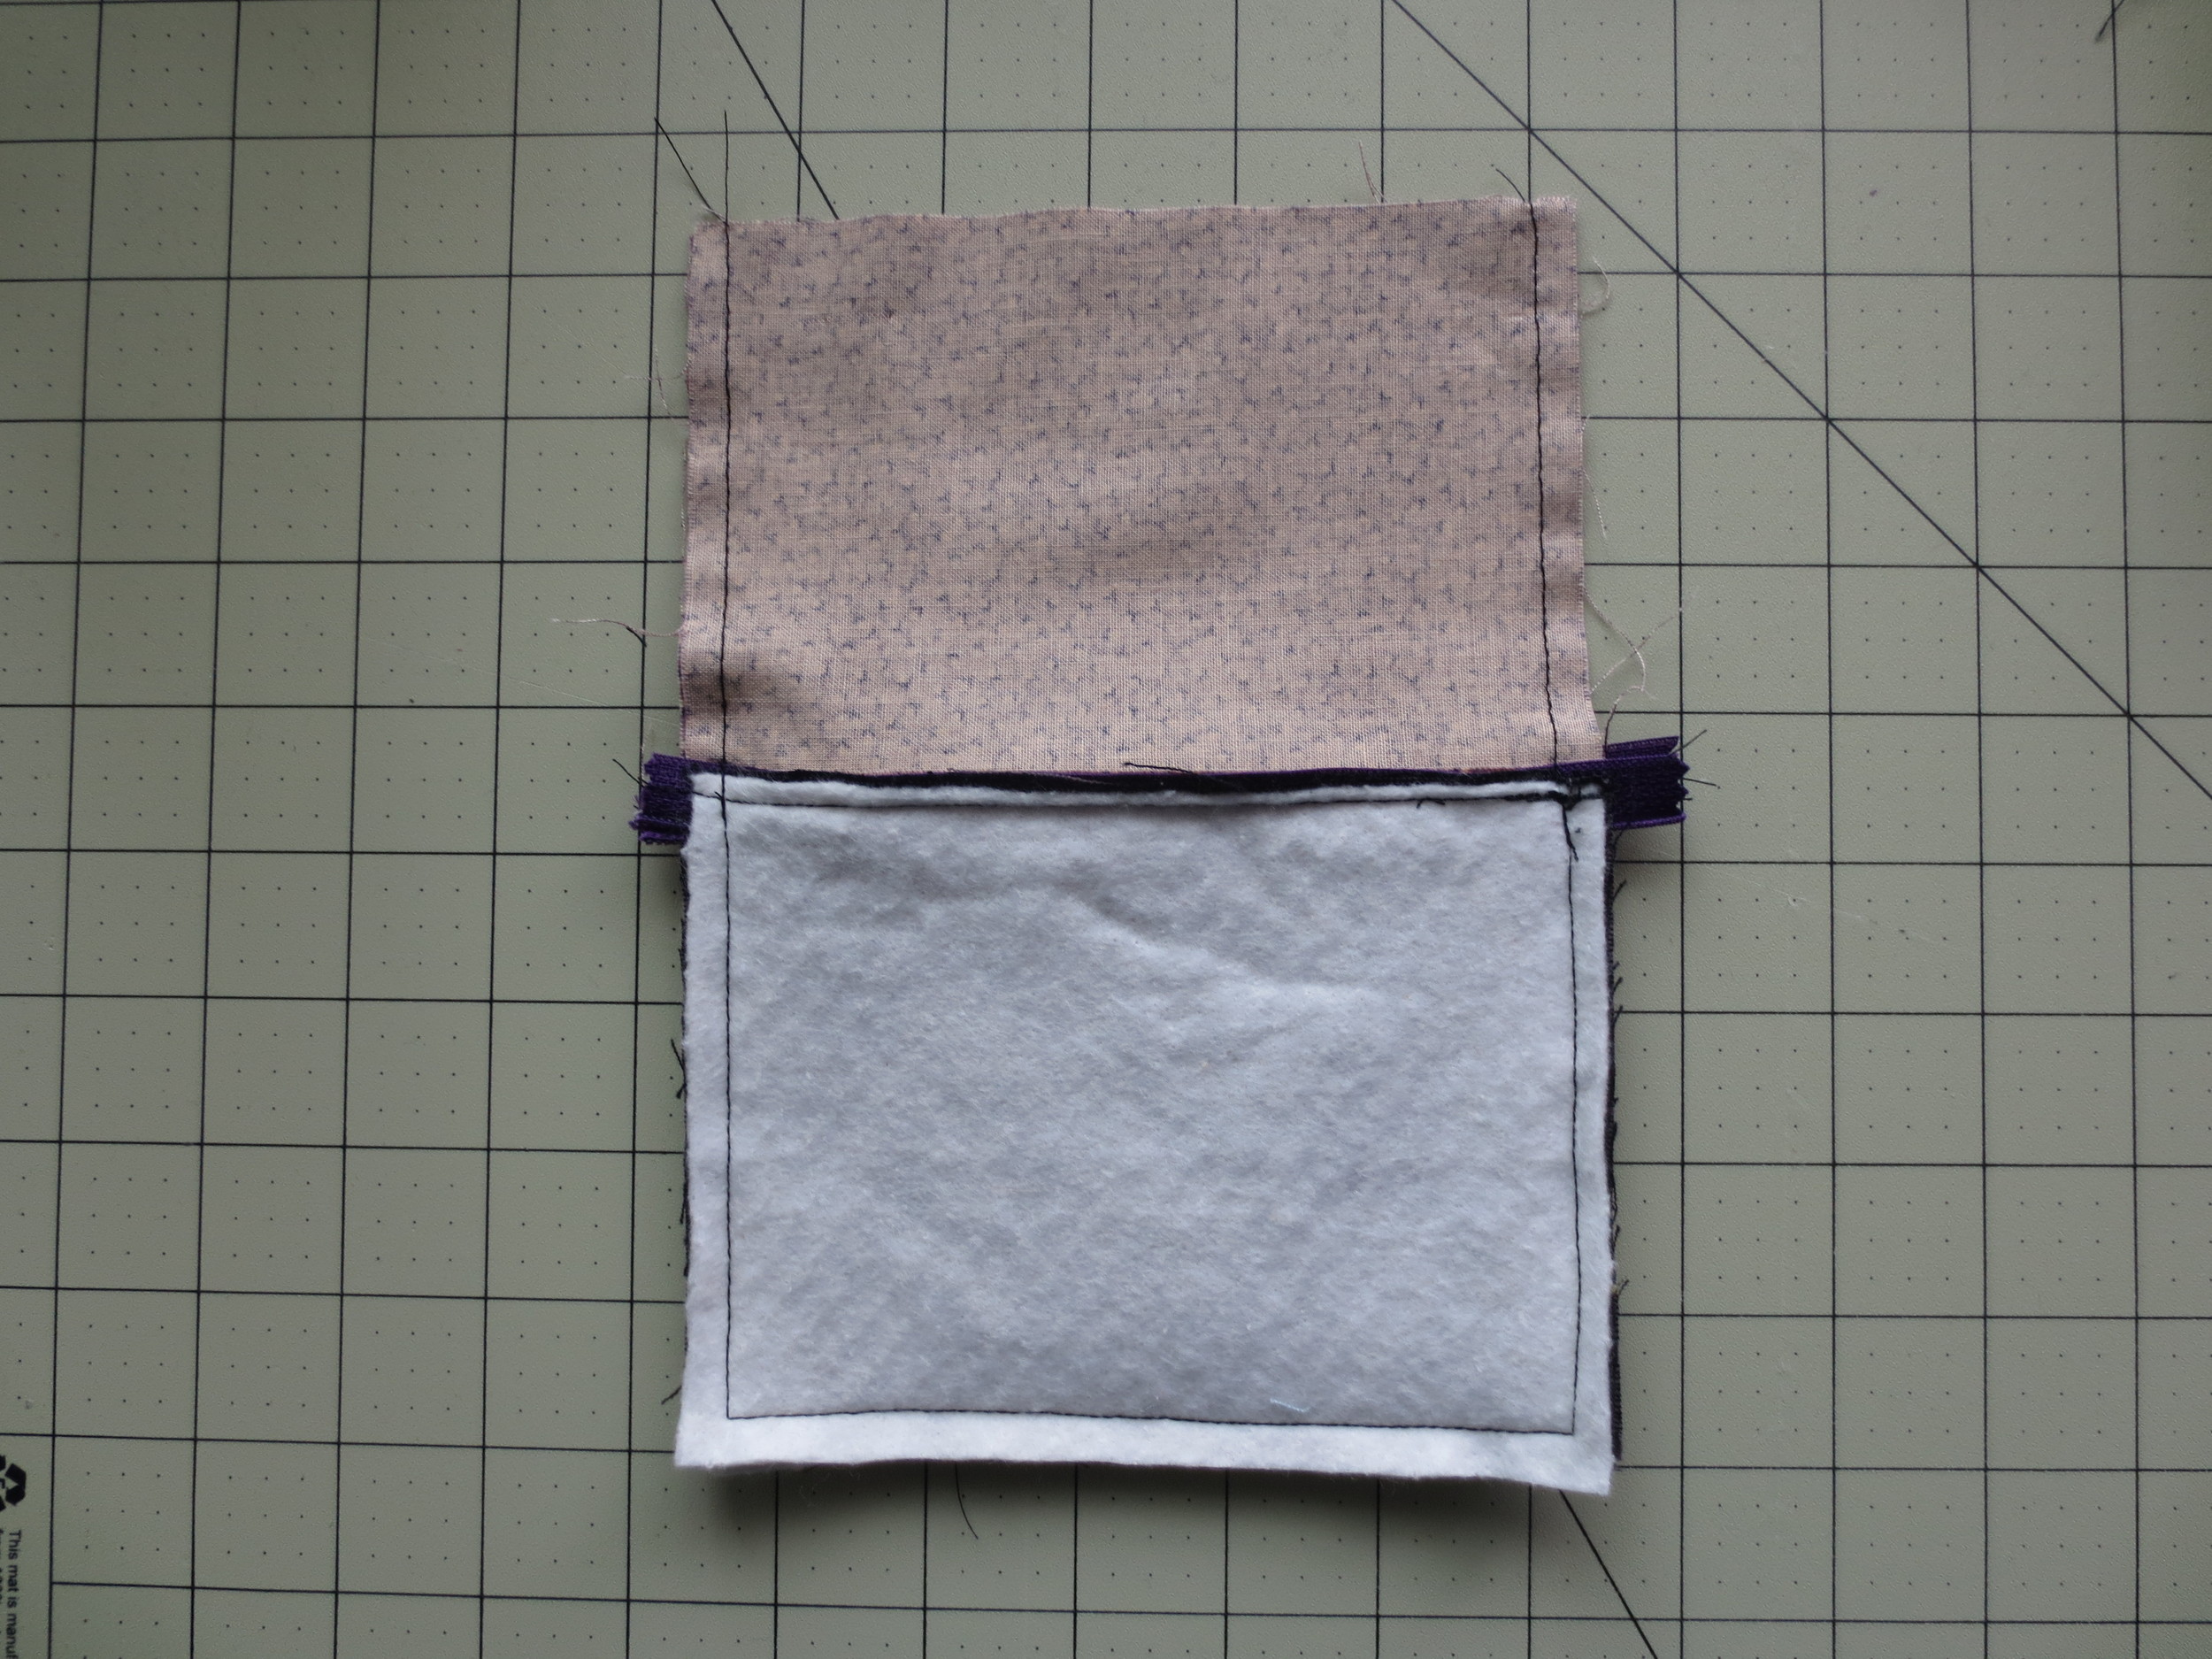
5. Sew together using a 1/4" seam.
6. Fold both lining fabrics up, right sides together, making sure all edges align. Pin to secure. Unzip the zipper. Fold pouch front and back fabrics down, right sides facing, making sure all edges align. Pin to secure.
7. Sew sides and bottom of pouch/lining combo using a 1/4" seam. Leave bottom of lining open.
8. Clip corners and trim zipper ends flush with pouch sides. Reach through lining opening to grab pouch and pull right side out.
9. Fold raw edges of lining (1/4") inward, press and whip stitch closed. Push lining into pouch.
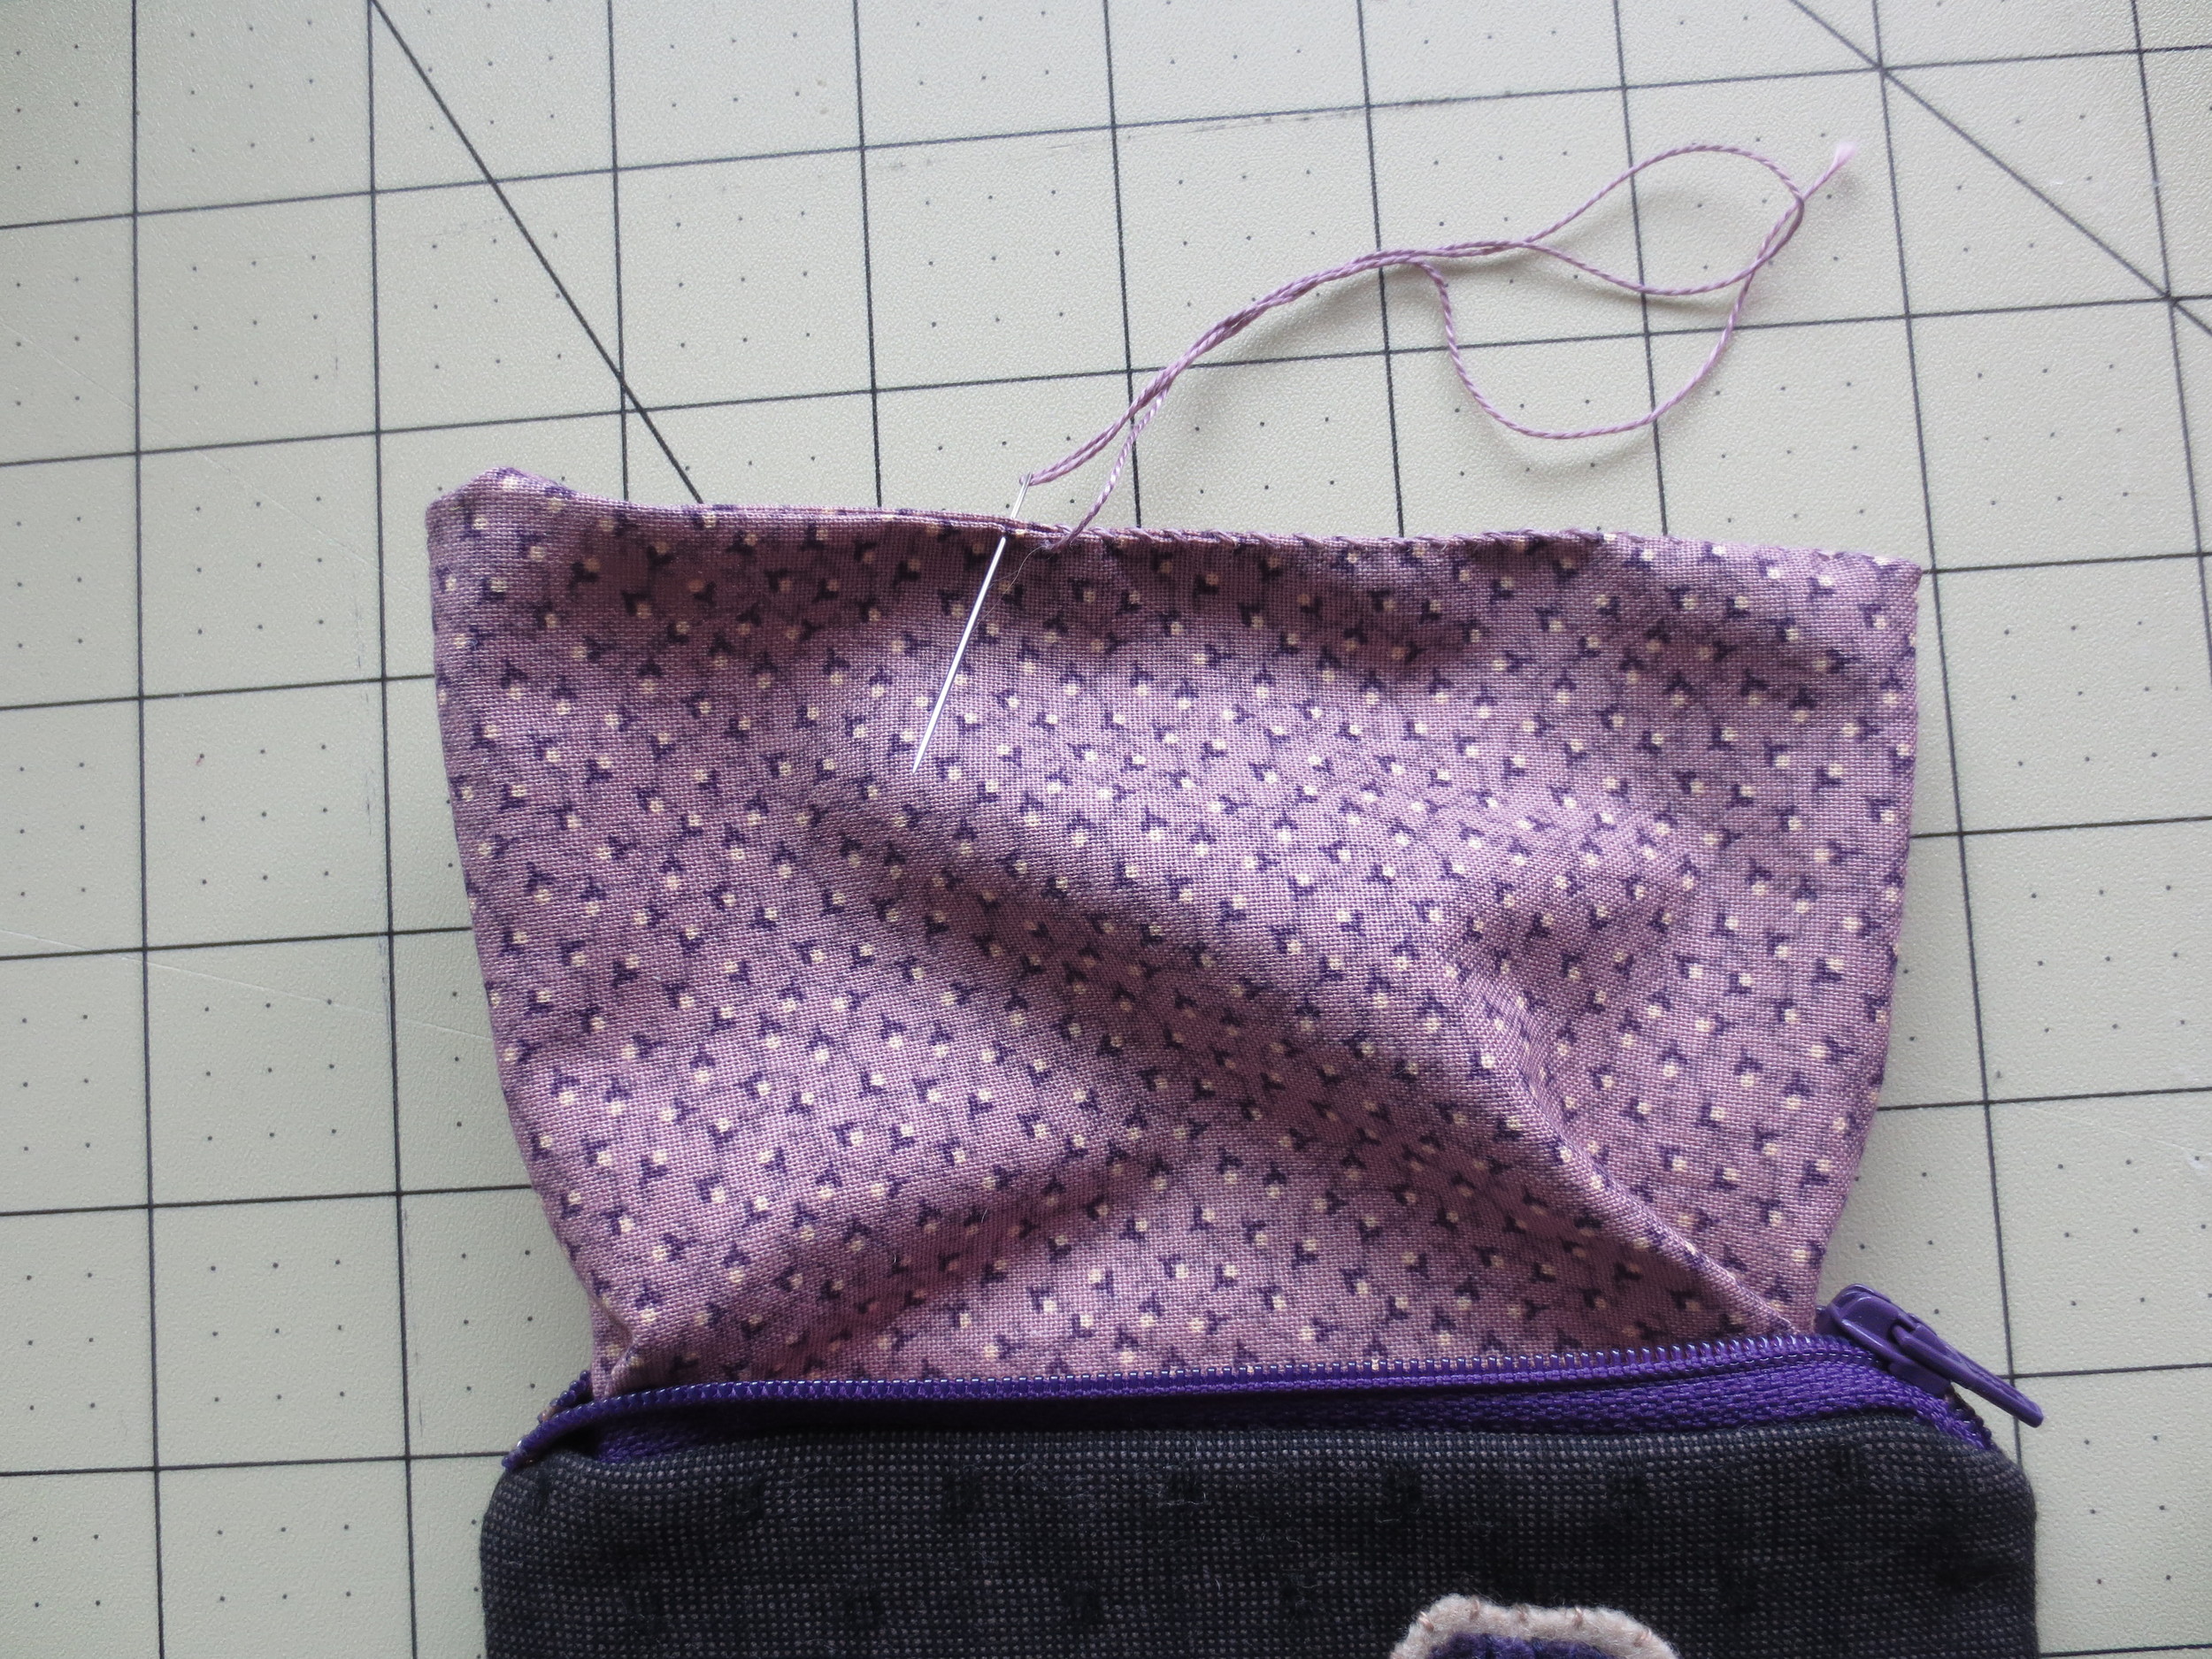
Optional Tassel Pull
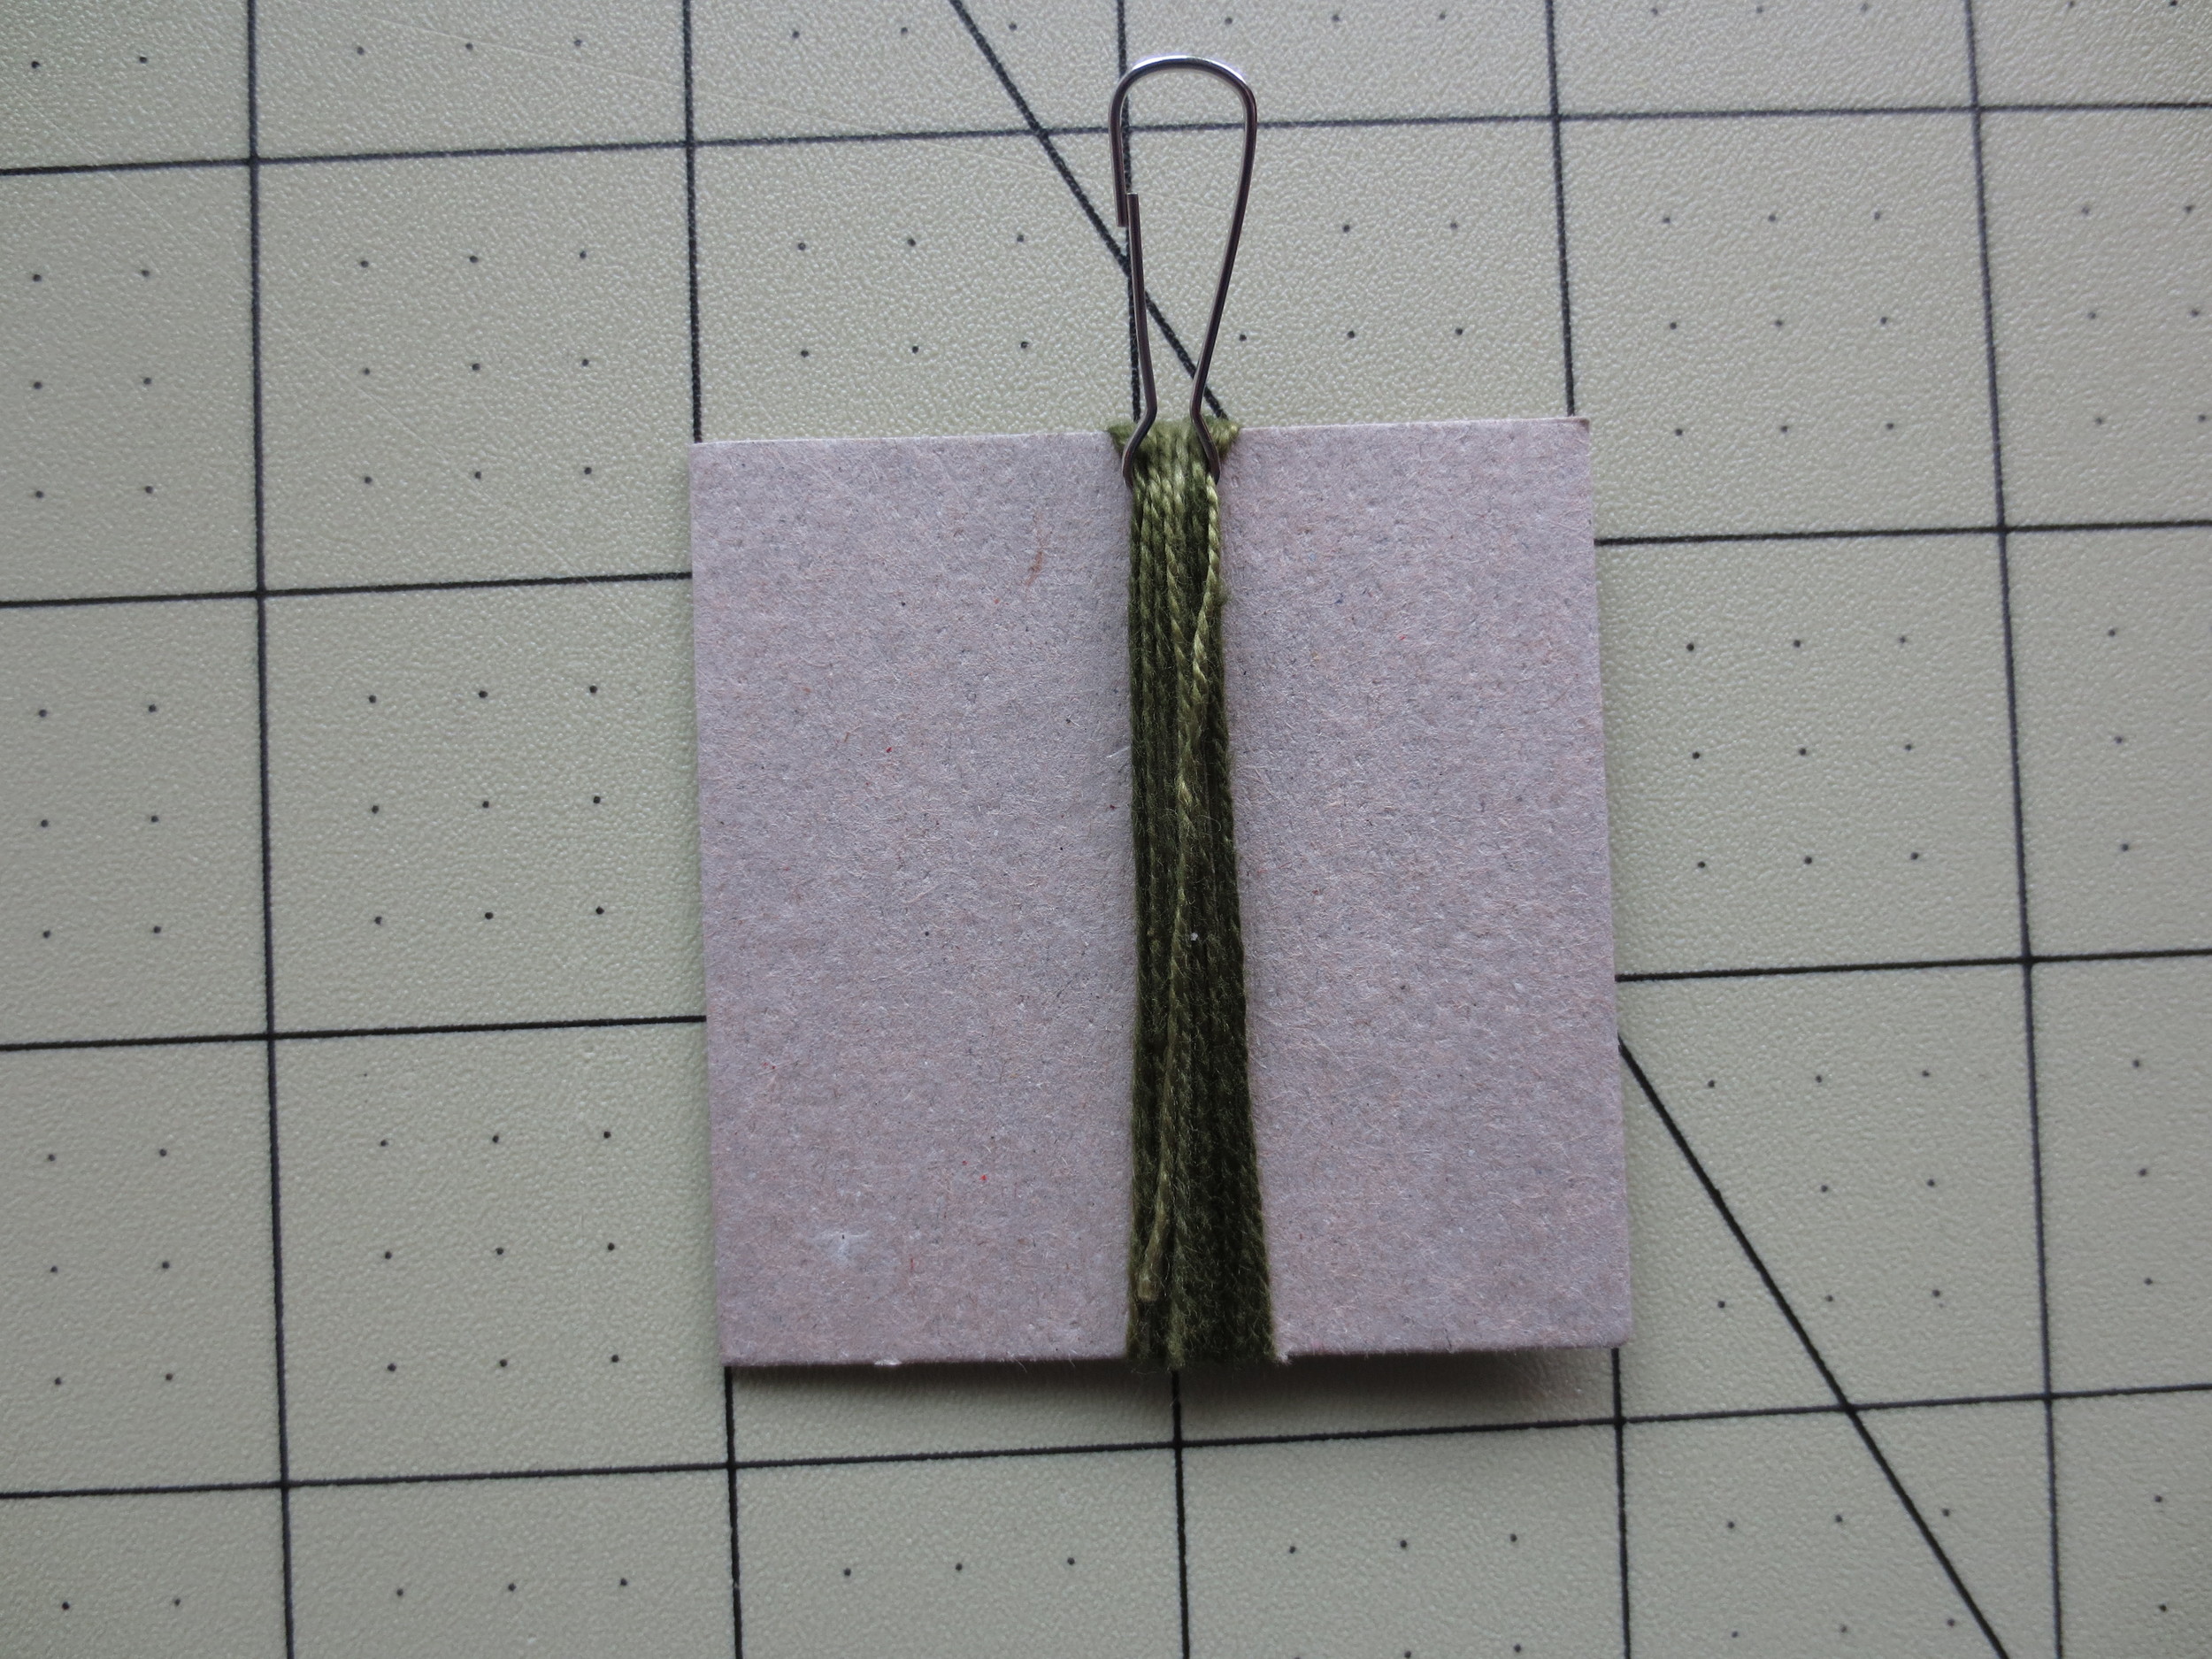
1. Wrap green perle cotton, size 8 around 2" cardboard about 12 times, beginning and ending at the same spot. Slip lanyard around thread bundle and cut bundle where beginning and ending threads are.
2. Cut another piece of thread approximately 8" long, thread it through a needle and lay it horizontal. Lay the thread bundle on top of the 8" thread about 3/8" from lanyard.
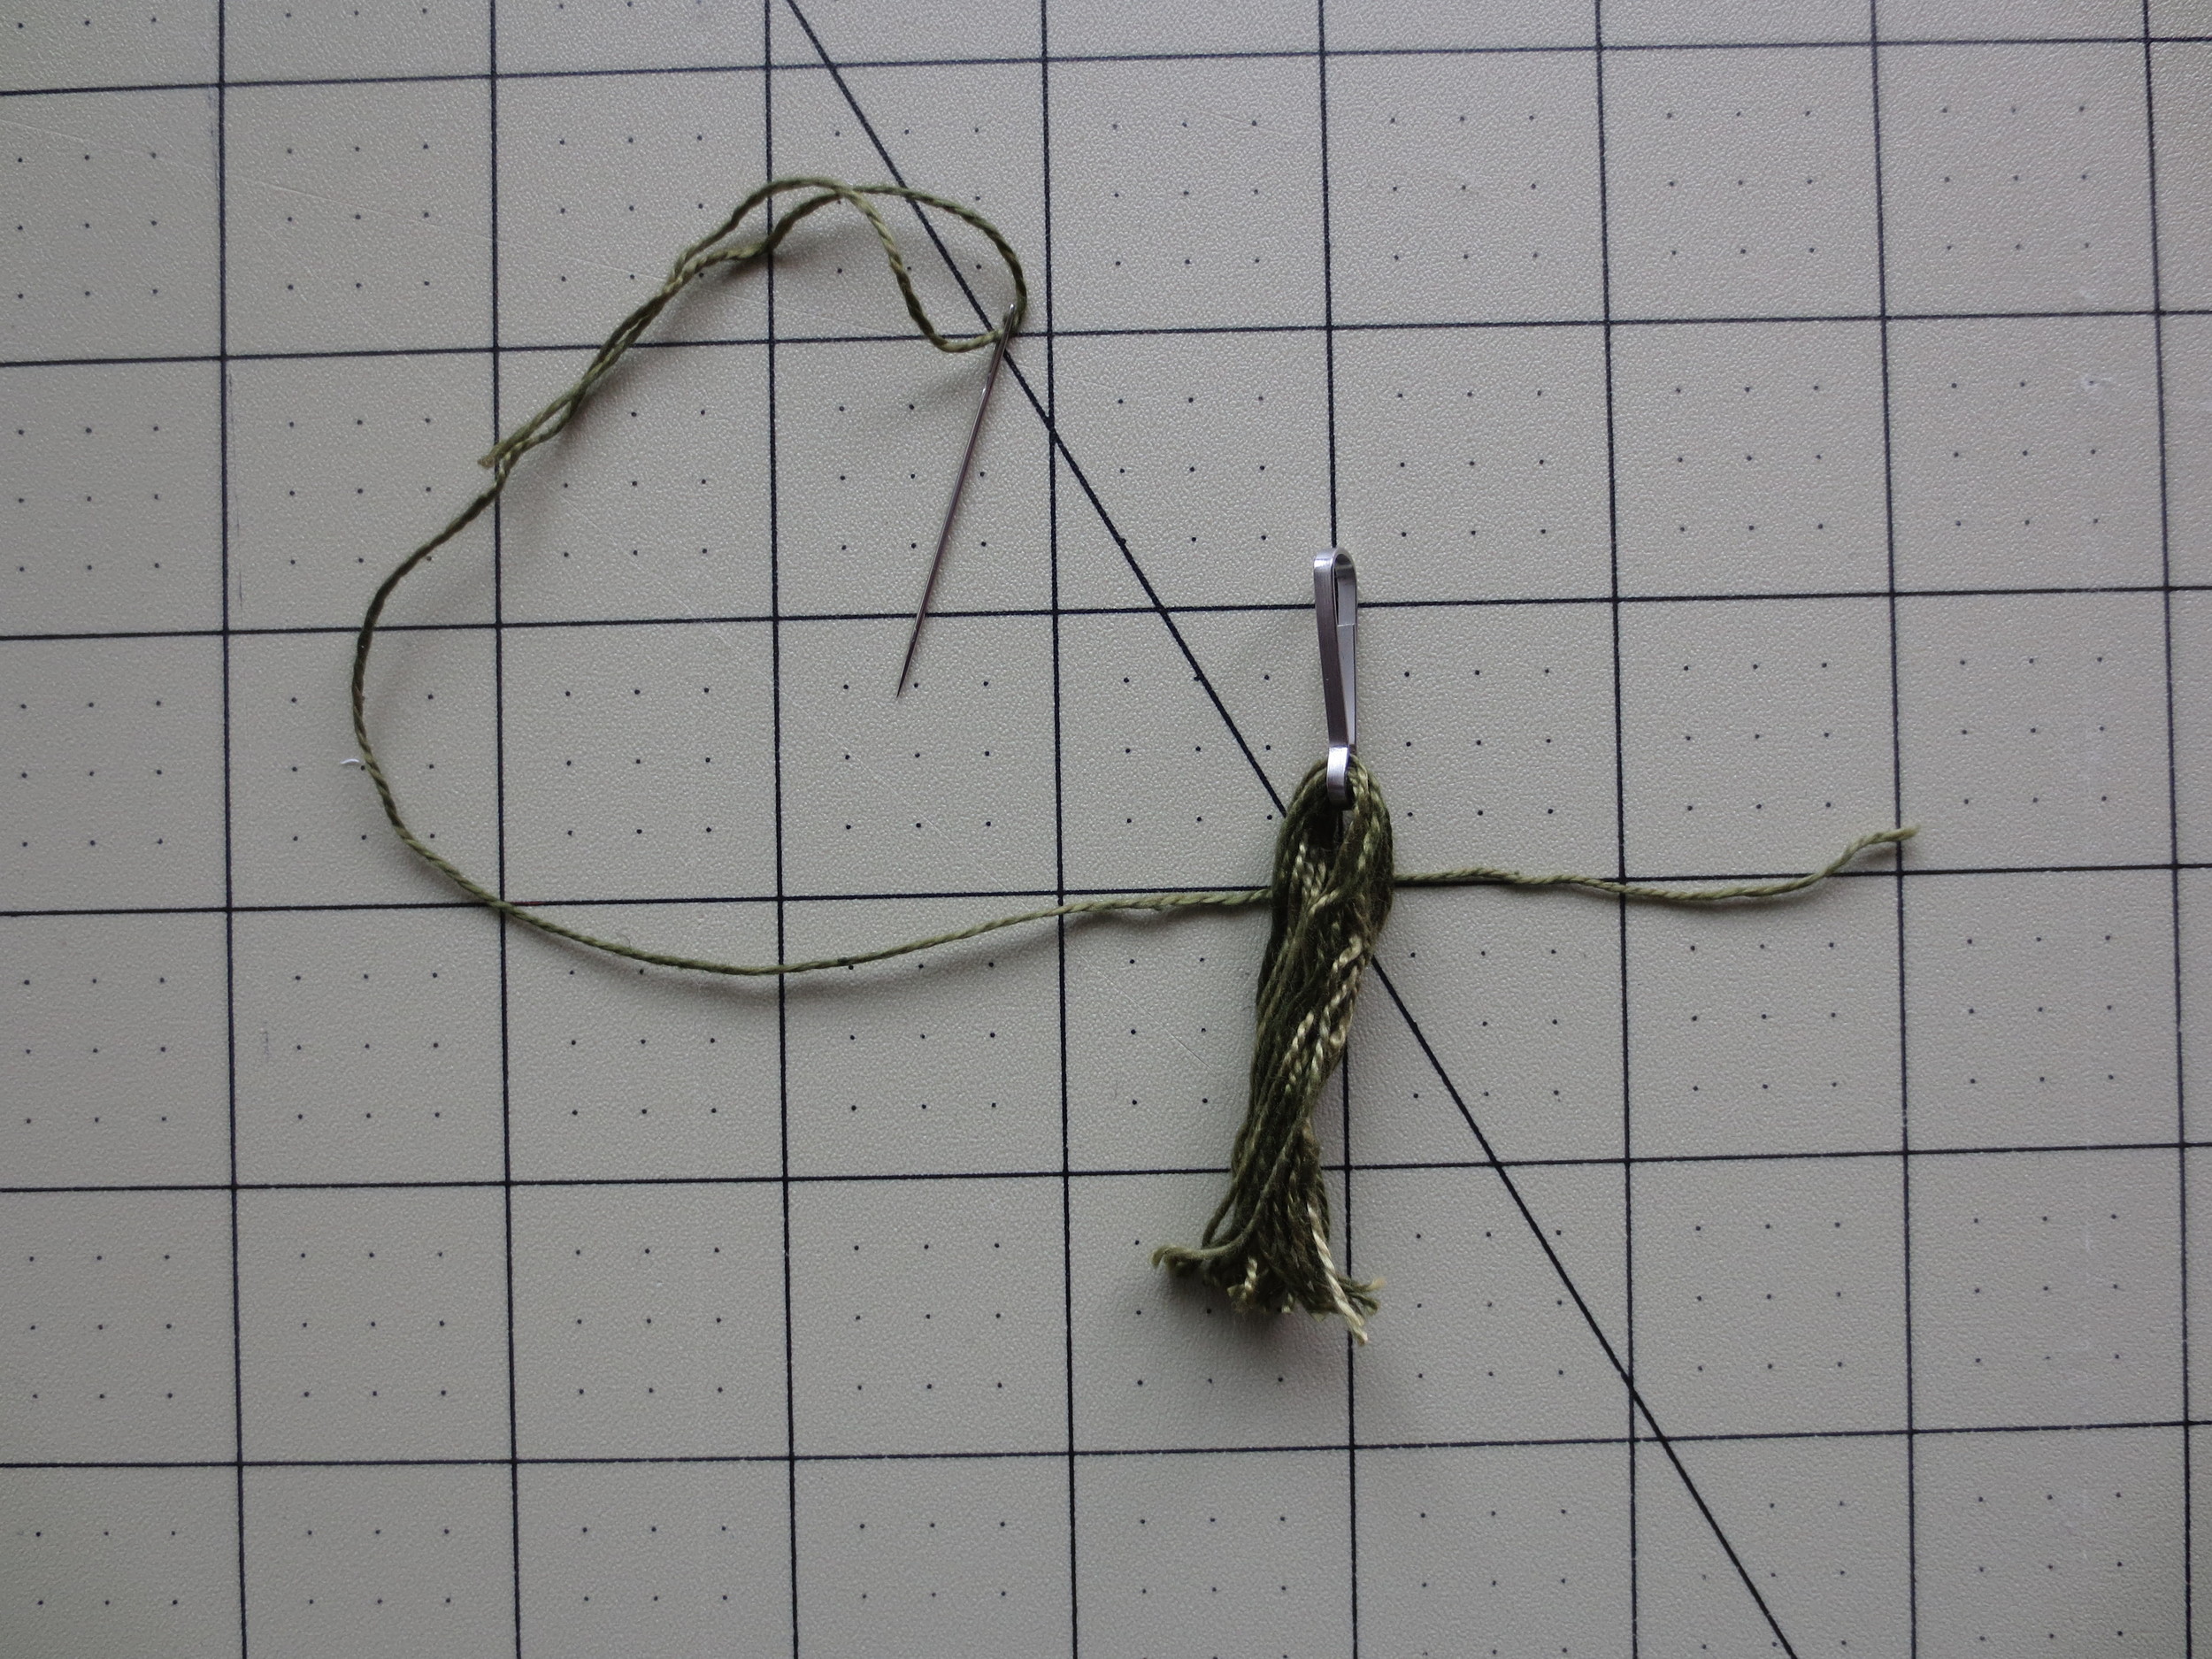
3. Tie the thread around the bundle and wrap the longer side around four times and knot it. Insert the needle inside of the wrapped section and pull it through towards the cut ends. Trim threads to uniform tassel length. Iron tassel if the threads are twisted and trim again.
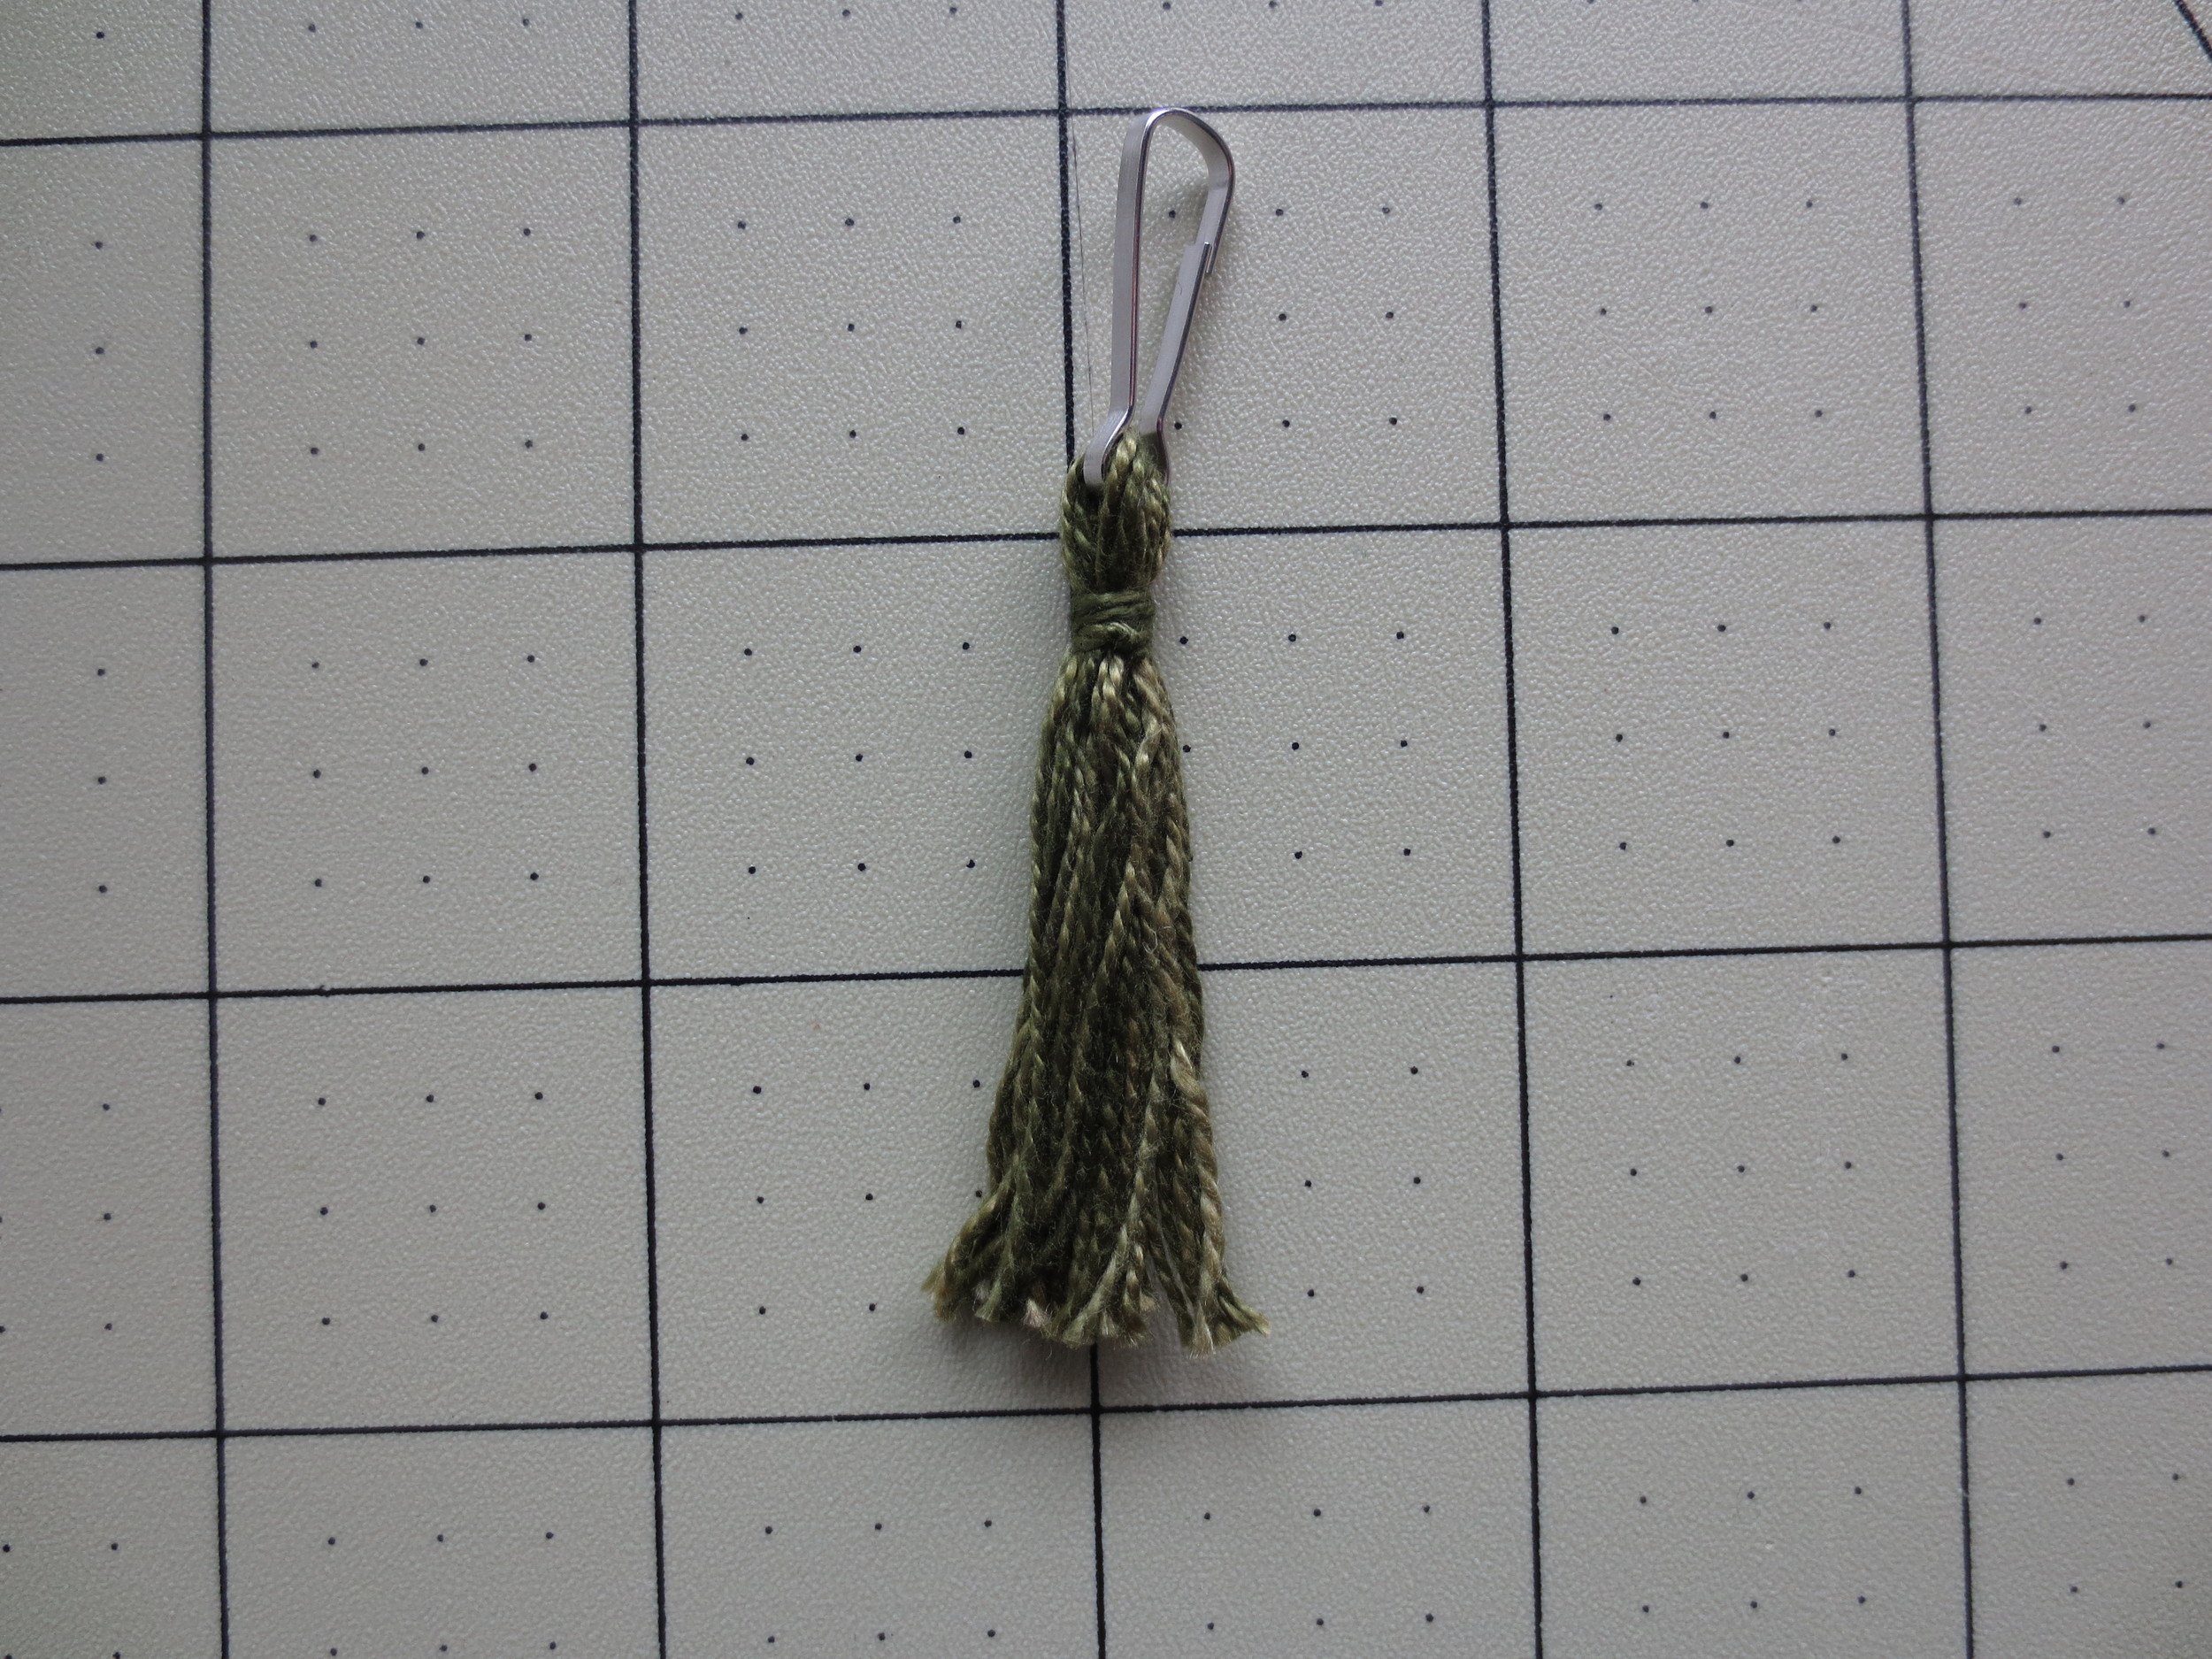
4. Clip tassel to zipper. ENJOY!

Back