

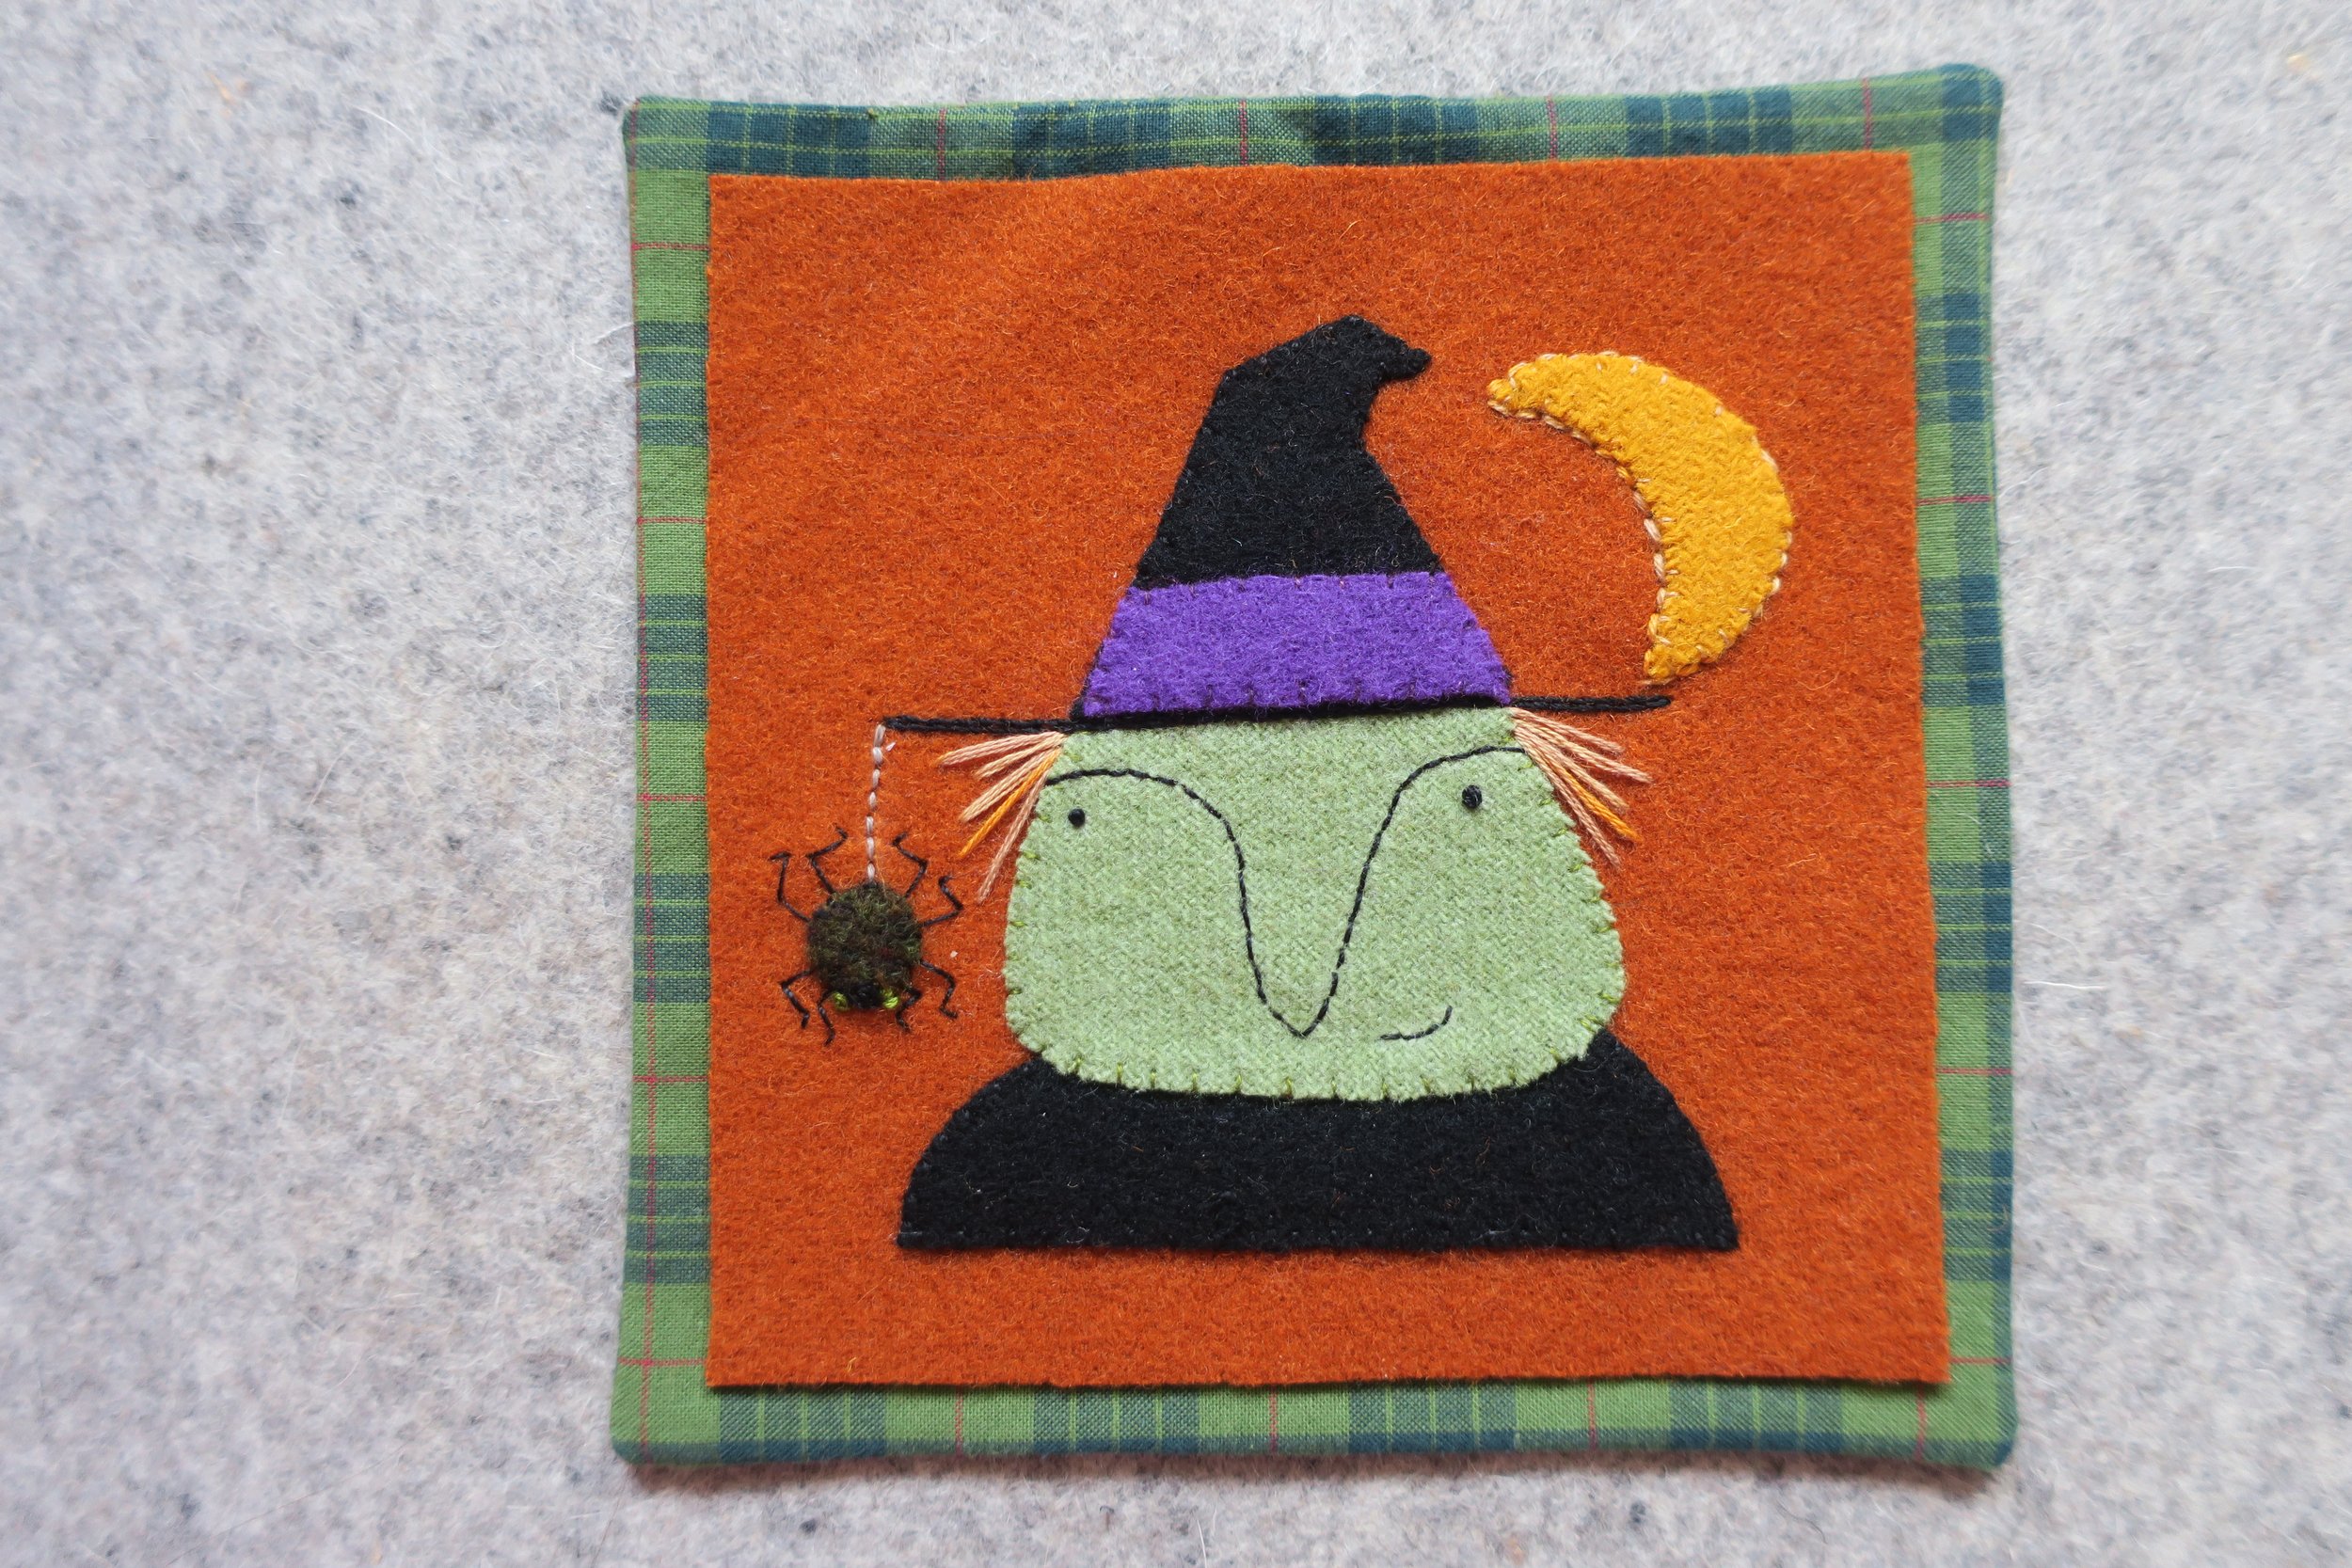
Perfectly Witchy
The year is just zooming by, and it’s almost Halloween! This is Viridescent , a friendly witch who wants to help you have a spooktacular Halloween. it’s a quick and easy project you can complete in an afternoon. This is a little 5 3/4” x 5 3/4” applique that you can hang on your door to welcome your Trick or Treaters or you can increase the size 220% to fit on a 14” pillow — the perfect companion for the Smiling Cat Pillow.
Happy Stitching!
Pattern and Layout - Download here
Stitch Guide - Download here. This is the same guide used for all the projects.
Supplies
Background fabric - one fat eighth of coordinating homespun cotton or Halloween print quilting cotton (This will be cut into two 6 1/4” squares)
Wool (felted or wool felt)
Background - 5” x 5” cinnamon
Witch hat and chest - 3 1/2”x 4” black
Hat band - 1”x 2 1/2” purple
Witch face - 2 1/2” x 3” green
Moon - 2” x 2” gold
Spider - 1” x 1” green black tweed
Thread
Embroidery floss in colors that match wool colors plus medium grey for spider web
Embroidery floss - variegated orange ( I used Olympus kogin thread 051, Pumpkin )
Perle cotton, size 12 - black
Miscellaneous
Feather weight fusible web
Chenille needle - size 24
Chalk pencil or air erasable fine line marker
Clothes iron
Sewing machine
Light box for tracing patterns - optional
Instructions
Cut background fabric into two 6 1/4” x 6 1/4” squares. Set aside.
Trace pattern pieces onto fusible web.
Cut out pattern pieces leaving a small (1/8”) border around each pieces.
Fuse pattern pieces onto designated wool.

5. Cut out along traced lines.

6. Position the spider, moon and witches chest, face and hat on the background wool using the layout as a guide.

7. Fuse in place.
8. Postition hat band on hat and then fuse in place.
9. Whip stich everything down using 1 strand of matching colored embroidery floss.
10. Use a chalk pencil or erasable fabric marker to draw the hat brim. The brim should extend 3/4” on each side of the hat.

11. Use 1 strand of black perle cotton, size 12 to stitch two rows of stem stitches over the drawn line. Begin by stitching one stem stitch line next to the hat and then stitching a second line just below the first stitched line to create a bold line.

12. Draw a line from the left edge of the hat brim to the spider.

13. Use 2 strands of grey floss to back stitch over the drawn line.

14. Use 1 strand of black perle 12 to make a three wrap French knot head for the spider.

15. Use 1 strand of black perle cotton to backstitch the legs of the spider.
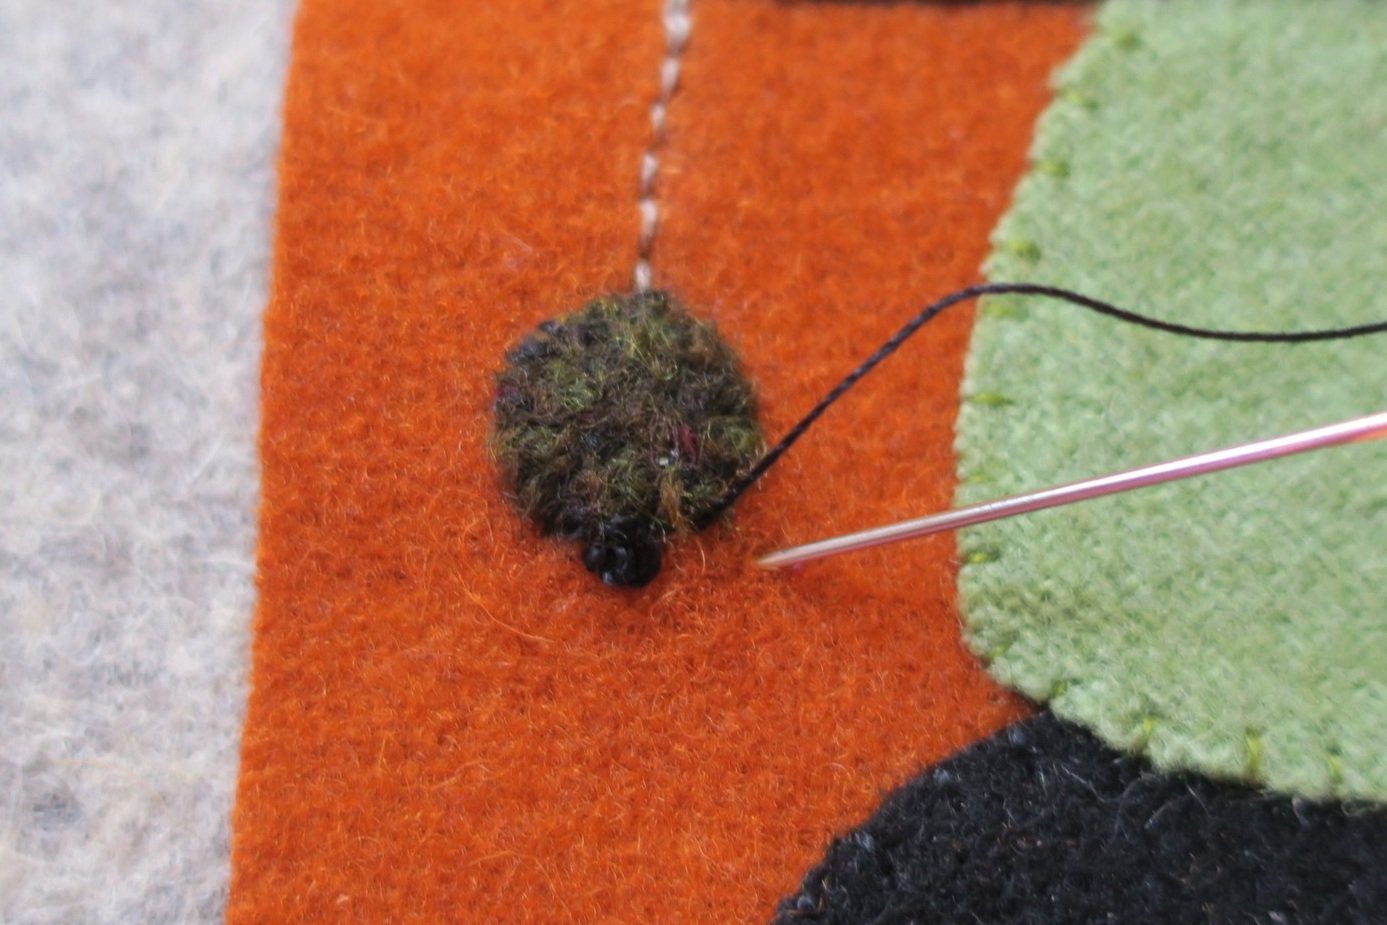


Stitch 3 more legs on the right.

Repeat on the left side of the spider.

16. Use 2 strands of green floss to stitch a French knot eye on each side of the spider’s head.

17. Use a chalk pencil to mark the starting point of the eyebrows, the tip of the nose and the position of the eyes using the layout as a guide.

18. Connect the dots to make the eyebrows and nose.

19. Back stitch the lines with 1 strand of black perle cotton, size 12.
20. Use the same thread to stitch French knot eyes ( I wrapped my needle 2x).

21. Draw the mouth using the layout as a guide.

22. Back stitch over the drawn line.

23. Use 3 strands of variegated orange floss to straight stitch (5 on each side) the witch’s hair using the layout as a guide.

24. Use 2 strands of the same thread to back stitch an outline around the moon.

25. Place the background fabric pieces right sides together and then sew them together using a scant 1/4” seam. Leave a 3 1/2” opening on one side so that it can be turned right side out.

26. Clip the corners and turn inside out. Use a chop stick or small dowel to poke the corners.


27. Press flat and then whip stitch the opening closed.
28. Position the applique onto the background and then pin to secure.
29. Use a ruler and chalk pencil to mark 1/4” ticks onto the top edge of the wool background.
Note: The chalk marks tend to disappear as you work, so it’s best if you mark one side at a time, then stitch.

30. Use one strand of black perle cotton, size 12 to stitch a German knotted blanket stitch (see below) border around the perimeter of the wool background.
Begin by bringing the thread up at the corner of the applique and then making the first blanket stitch at the first mark.

Then make a second blanket stitch about 1/16” from the first stitch. The working thread is on top of the loop.


Before continuing onto the next blanket stitch slide the needle under the two stitches and pull the thread through making a small knot and creating an inverted V.


Continue making the knotted blanket stitches around the border.

Viridescent is ready to greet your guests!