
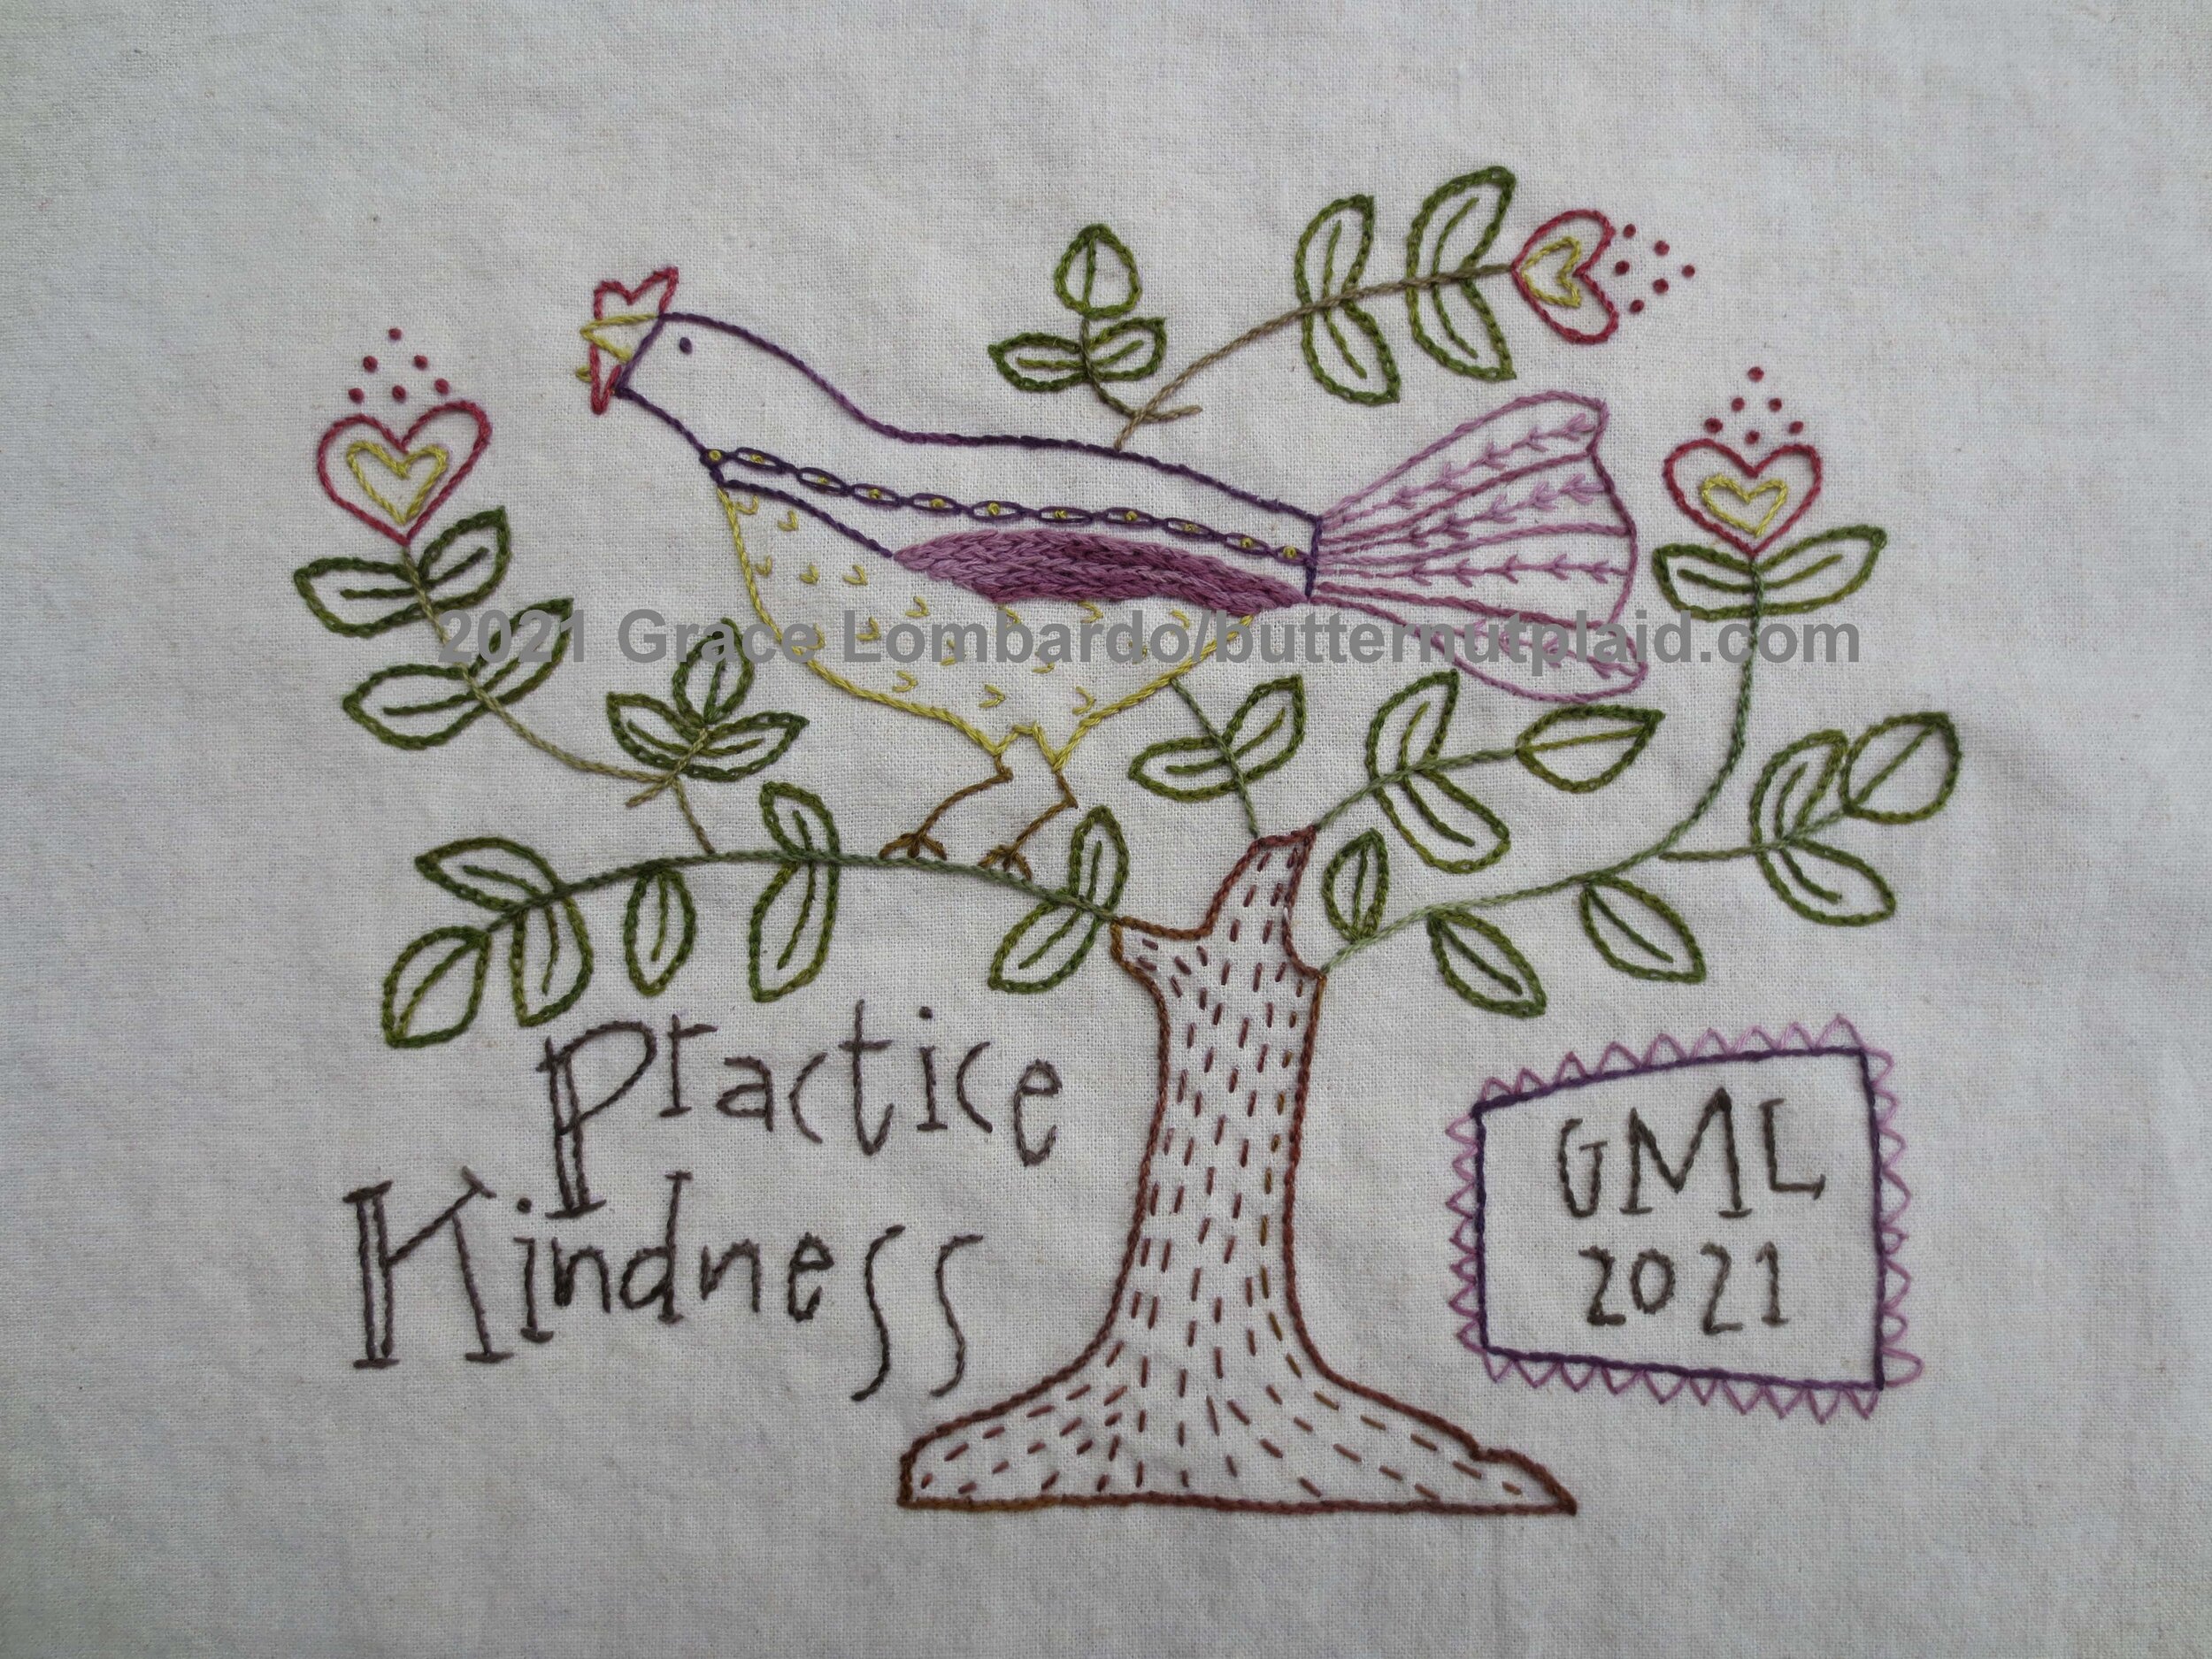
Practice Kindness


No act of kindness, no matter how small is ever wasted. – Aesop
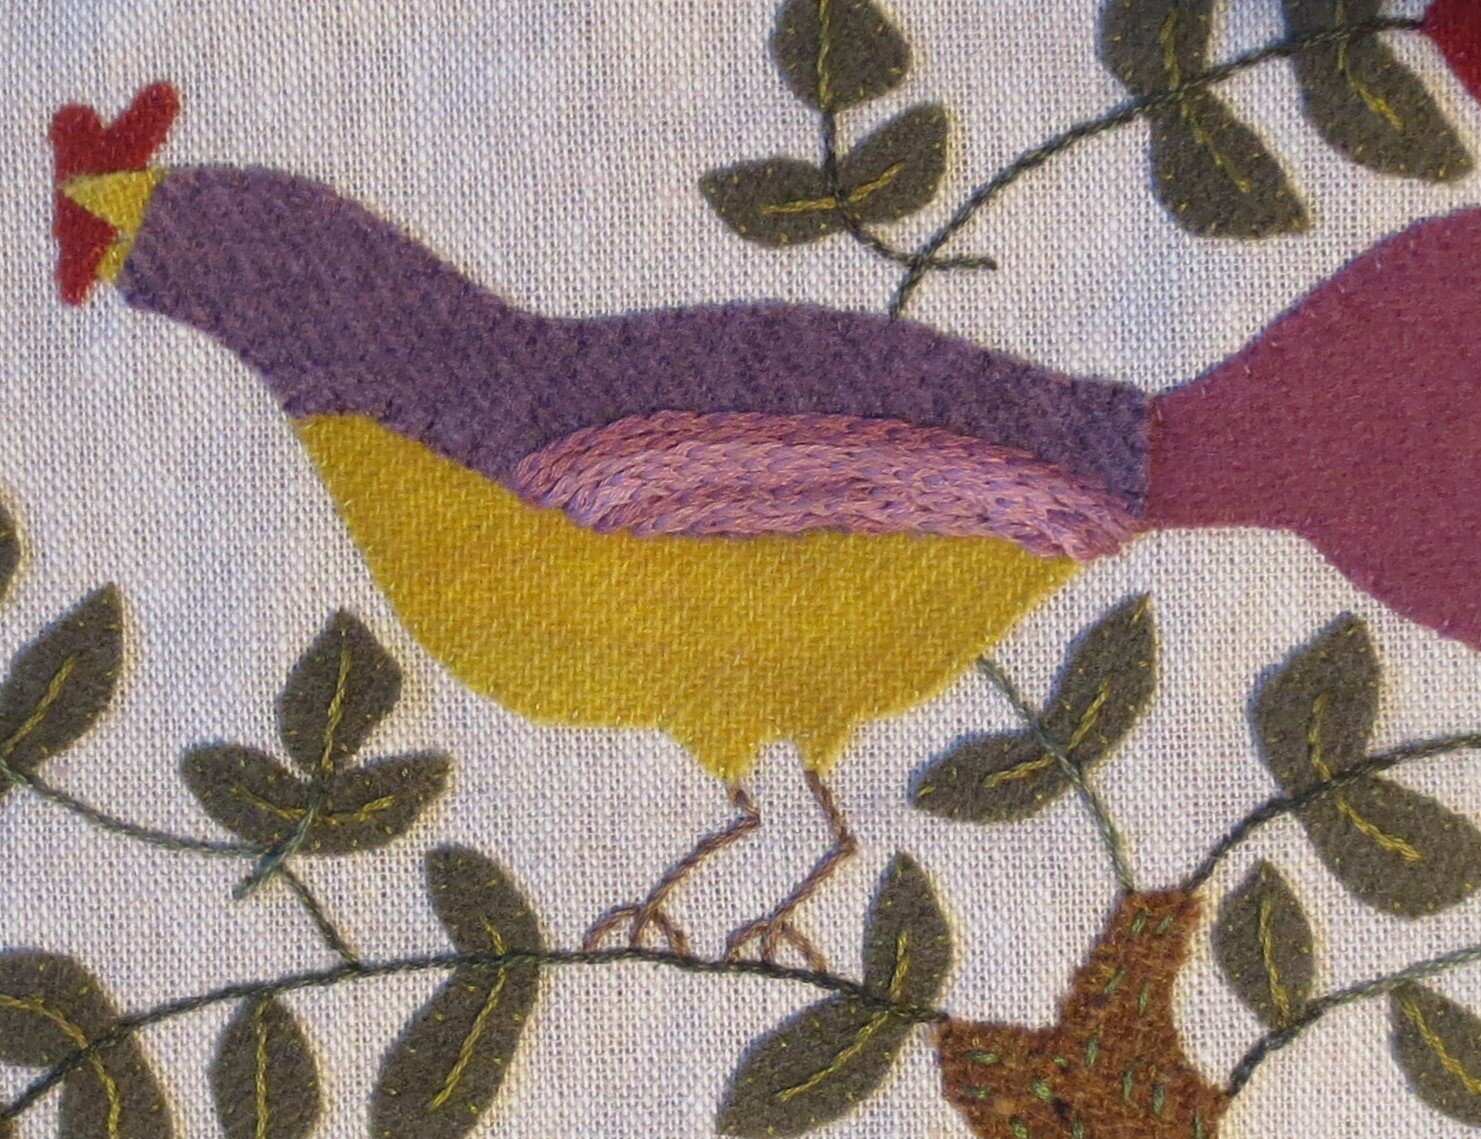
The inspiration for this design is from early American embroidered or cross stitched samplers. These samples of a young girl’s expertise in stitching usually featured images of flowers, trees, animals, and sometimes people and houses. The images were usually accompanied by a verse of some kind and the maker’s name, age, home town, and date of creation. Many of them also included decorative borders.
This design can be stitched with wool applique and embroidery, or embroidery only. The image size is 7 1/4” x 8 3/4” (18.42 cm x 22.23 cm). The final product can be made into a small pillow, inset into a small quilt, or mounted into a 10” x 12” frame. I didn’t include any finishing instructions in this tutorial.
Most of the embroidery stitches we have done before on earlier projects, but there is a new stitch called a “cable chain” stitch that I’ve introduced in this pattern. If you need a little refreshment on your stitches refer to the Butternut Plaid Stitch Guide (link below). A great resource for stitch instruction is Mary Corbet Embroidery www.needlenthread.com . She has numerous videos in the “how to” section of her website. Please consider donating to her patreon page. For as little as $12/year you can receive free patterns and previews of new products. This is also a great way of supporting such a generous and talented artist.
Practice some kindness today
Happy Stitching.
Fabric Requirements
Background fabric – 12” x 15” linen cotton canvas (Robert Kaufman Essex canvas 7.85 oz./square yard) or comparable medium weight fabric*. I used Robert Kaufman Essex canvas in Flax.
*Lighter weight fabrics can be used when fused with Pellon Shape Flex. Shape Flex is a woven fusible interfacing that adds stability to light weight fabrics.
Felted Wool Requirements – Suggested colors
Note: Because there is a lot of layering and small pieces in this project, I suggest using thinner, tightly woven and felted wools especially for the beak, leaves and hearts. Andover Fabrics offers 5” charm packs of this type of wool. They are called Woolwerks. Wool felt can also be used.
Tree – 4” x 4” golden brown
Bird’s back – 2” x 4 ½” dark violet
Bird’s breast – 2” x 4” antique gold
Tail – 2” x 2 ½” purple
Leaves – 4 ½” x 4 ½” dark olive green
Hearts – 3” x 3” dark red
Thread Requirements – Suggested colors
Embroidery floss that matches wool colors - This can be a 3-strand or 6-strand.
o Dark violet – I used Cosmo Seasons #5026
o Antique gold – I used Cosmo #822
o Golden brown – I used DMC #610
o Very Dark Olive green – I used DMC #730
o Dark Mauve – I used Cosmo #655
Embroidery floss – medium olive (I used DMC #733) for veins of leaves
6-strand variegated pinkish purple embroidery floss for wing embellishment – I used Valani H208
Embroidery floss - dark brown for lettering (I used hickory sticks #166 from Classic Color Works)
Perle cotton, size 12 – variegated green for branches– I used Valdani #O575
Embroidery floss medium light brown – I used DMC #433 for the embroidery version of tree trunk
Miscellaneous
Fusible web (wool version)– feather weight like Heat’N’Bond featherlite or Vilene melt fuse (Bondaweb)
Steam iron
Pellon Shape Flex – optional (Use this if using a light weight fabric background)
Chenille needles, size 24 and 22 – Use size 24 for perle cotton. Use size 22 for 6 strands of floss.
Embroidery needle, size 9 (I used Clover Fold Eye Embroidery Needles) – use for 1 strand of floss. Why do you need this small needle? You don’t want to make large holes in your small applique pieces. It could cause them to fray and come apart. This needle and the one strand of thread will minimize that.
Fine tip Fabric marker (I used Clover air erasable extra fine tip for light fabrics)
Fine tip chalk pencil (I used a Bohin fine tip chalk pencil) for dark colors
Mechanical pencil (.07mm) for tracing patterns
8” embroidery hoop – recommended if choosing the embroidery version
Sublime Stitching fine tip black transfer pen – This can be used for both the wool and embroidery version.
Light box
tape
Practice Kindness Layout and Pattern
Butternut Plaid Alphabet – use this to make your initials
Instructions
Wool Applique
1. Trace the pattern images onto fusible web, and then cut out each image leaving a small 1/8” border around each. Note: The images are already reversed for use with fusible web. Remember to label all your leaves and hearts.
2. Fuse all pattern pieces to designated wools, and then cut out along traced lines.
3. Using a lightbox, trace your initials and the date into the signature box of the layout using the alphabet sheet. I suggest that your use a pencil first and then go over the final letter design with a dark pen. I used the bottom uppercase letters. You can do the same or combine uppercase and lowercase letters. The alphabet at the top can be used for another project.

4. Transferring the design to the background fabric
Flip the layout over, image side down, onto your lightbox. Lay a blank 8 ½” x 11” piece of copy paper over the top of the layout, lining up all four sides.
Using a transfer pen, trace the branches, words, bird’s legs, and signature square onto the 8 ½” x 11” piece of copy paper. This will be your transfer paper.

Iron your background fabric with a dry iron on cotton setting, and then while the fabric is still warm, carefully center the transfer paper, image side down, onto the background. Use a dry iron to press the entire paper being careful not to move the paper. Just press up and down, not side to side. The image will slowly become visible through the paper. This is an indicator that the transfer is successful. You can check the image by gently pulling up one corner of the paper. Continue if the transfer is not dark enough. The transfer is good for a couple of more times, so don’t throw it away. The background is ready to add the wool applique pieces.

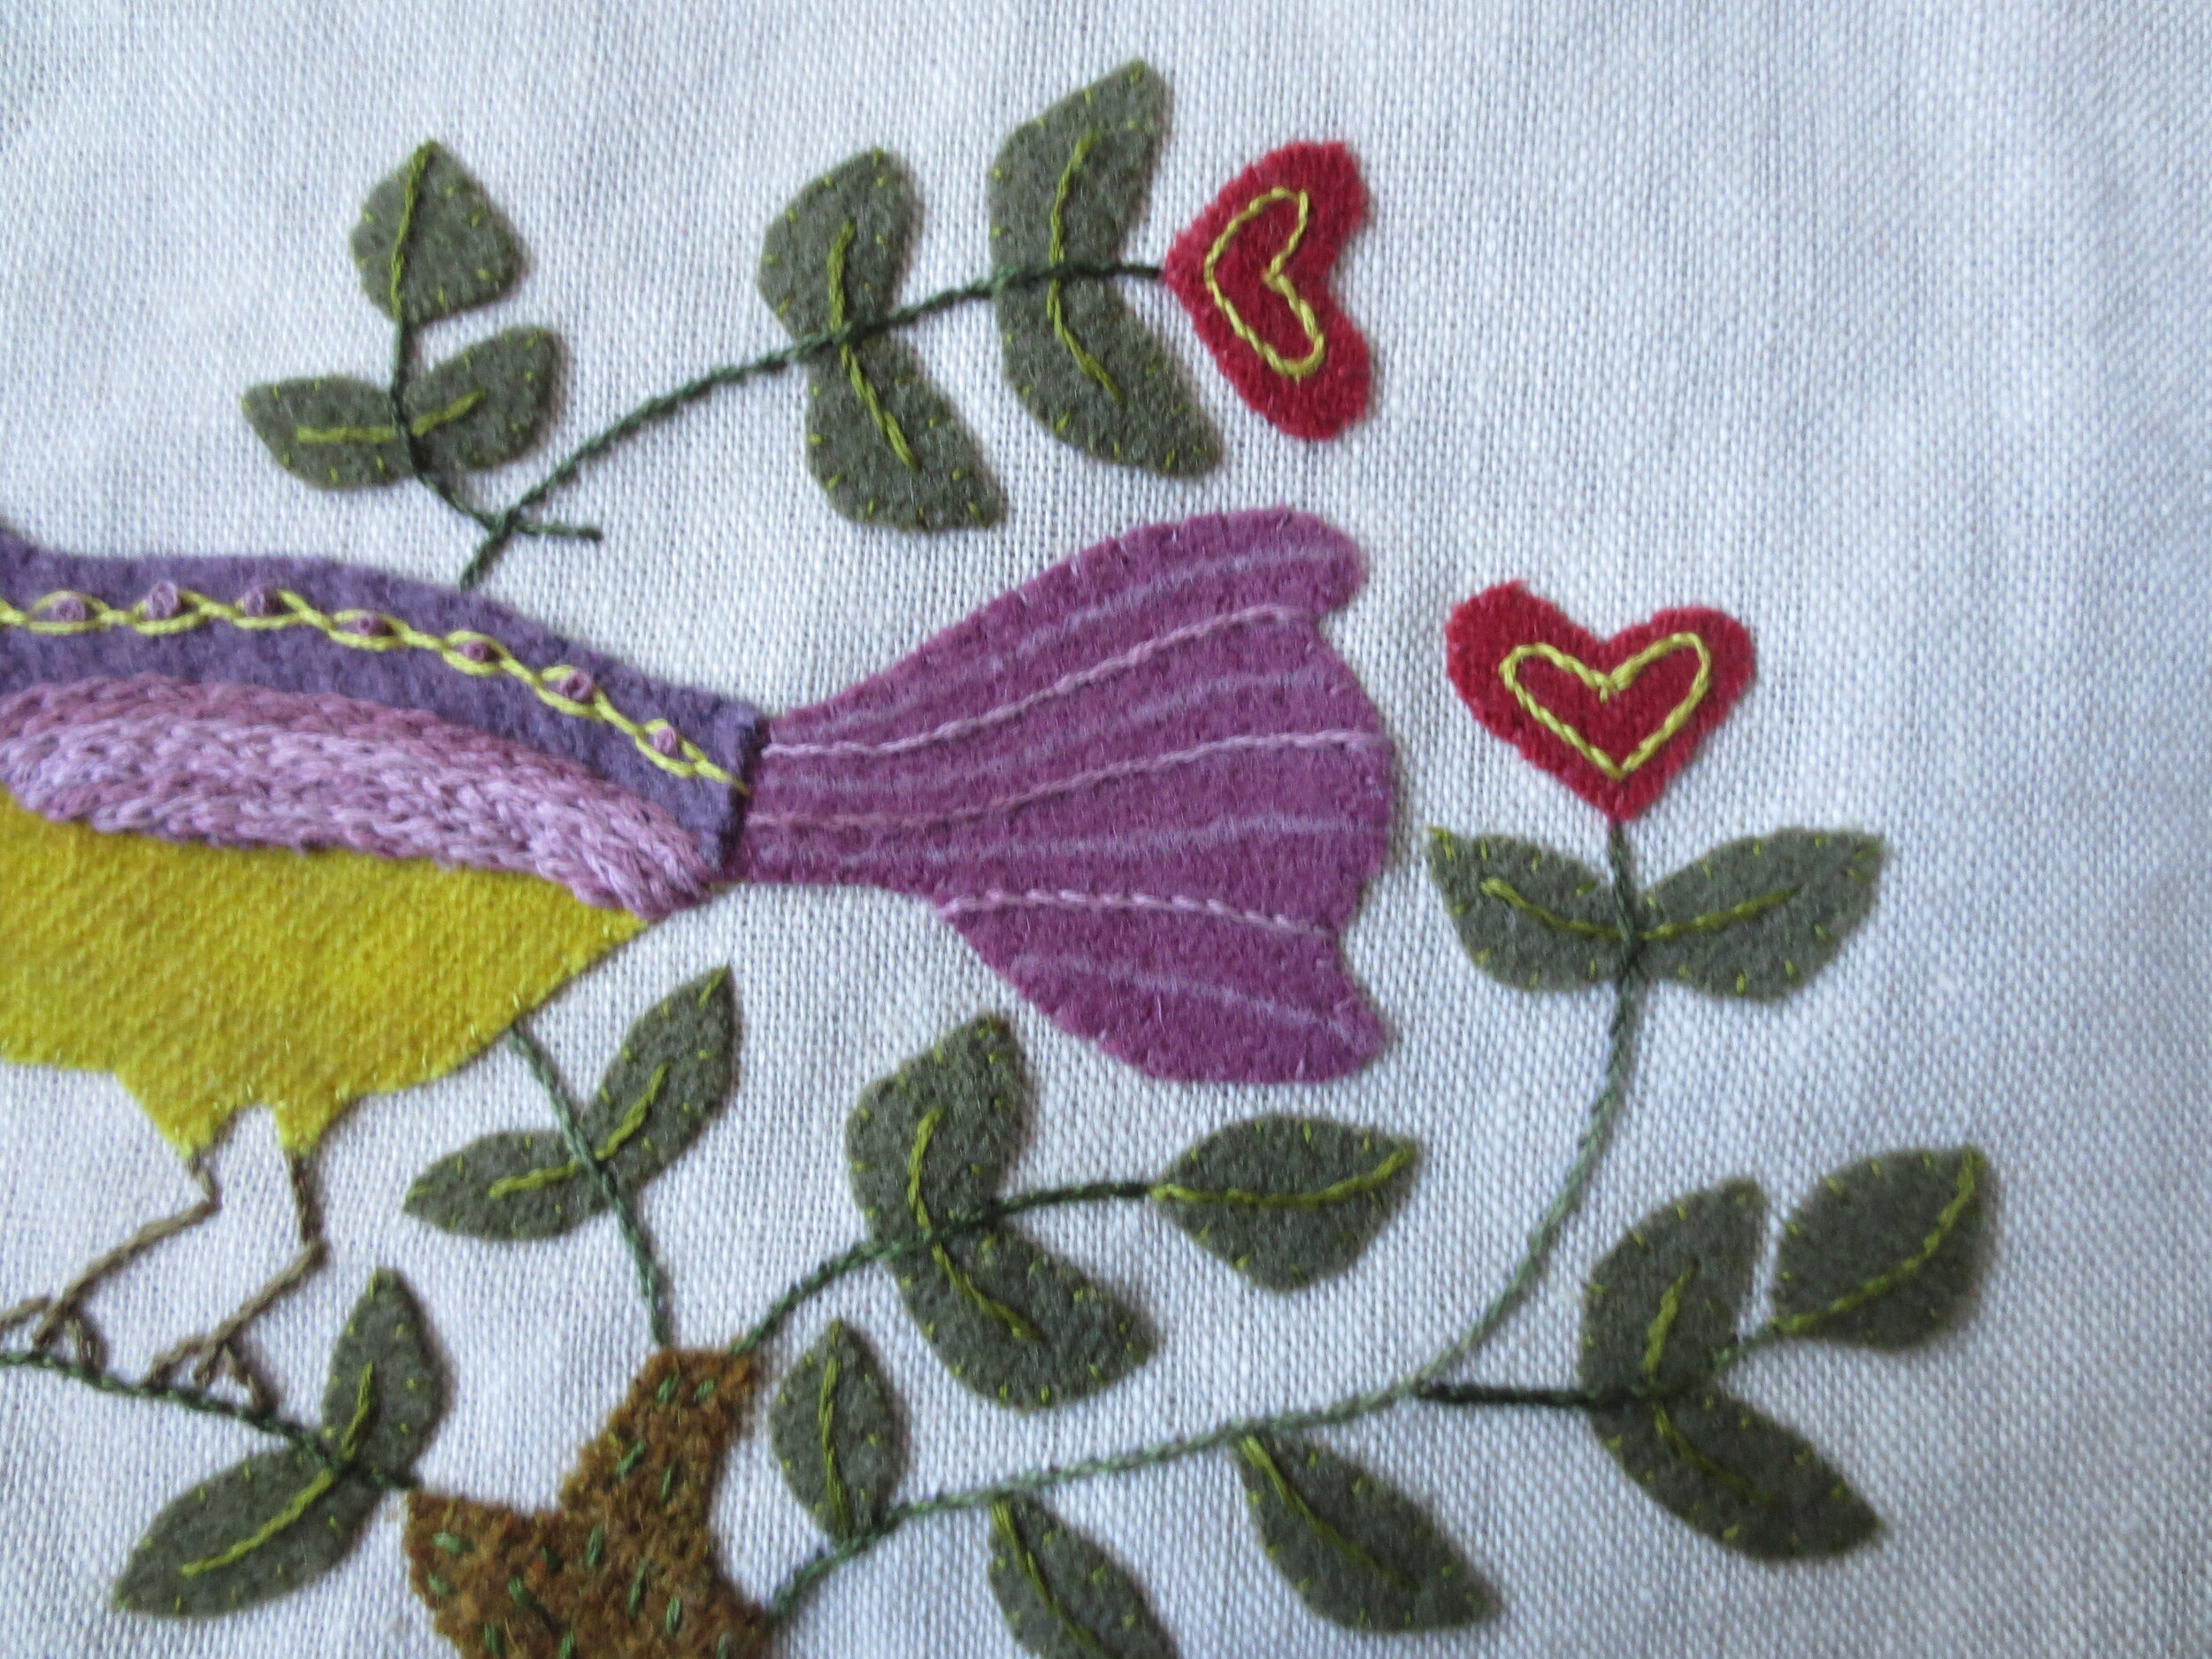
5. Using the layout as a guide, position the bird’s breast, beak with small heart, tail, and back onto the background.
Suggestions:
o Position the small heart into the beak prior to placing it on the background. A pair of tweezers is helpful here.
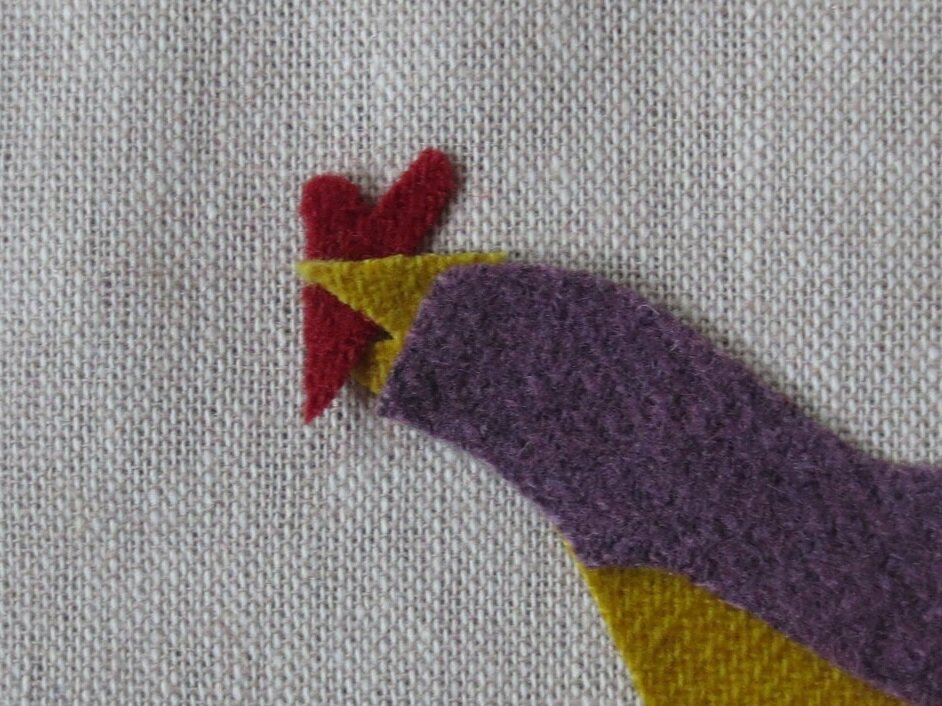
o The bird’s back and head overlap the beak, breast, and tail.
o Position leaf #13 in place prior to positioning the tail. This will help in proper placement of the tail.

6. Fuse in place using steam. Flip the fabric over and iron from the back also. This will insure adhesion.
7. Position the remaining hearts, tree trunk and leaves onto the background, and then fuse in place using steam.

Applique and Embroidery
8. Beginning with the small heart, whip stitch all the applique pieces in place using 1 strand of matching colored embroidery floss.
9. Use a chalk pencil to draw guide lines for the veins of the leaves.

10. Use 2 strands of medium olive green (DMC 733) to stem stitch over the lines.

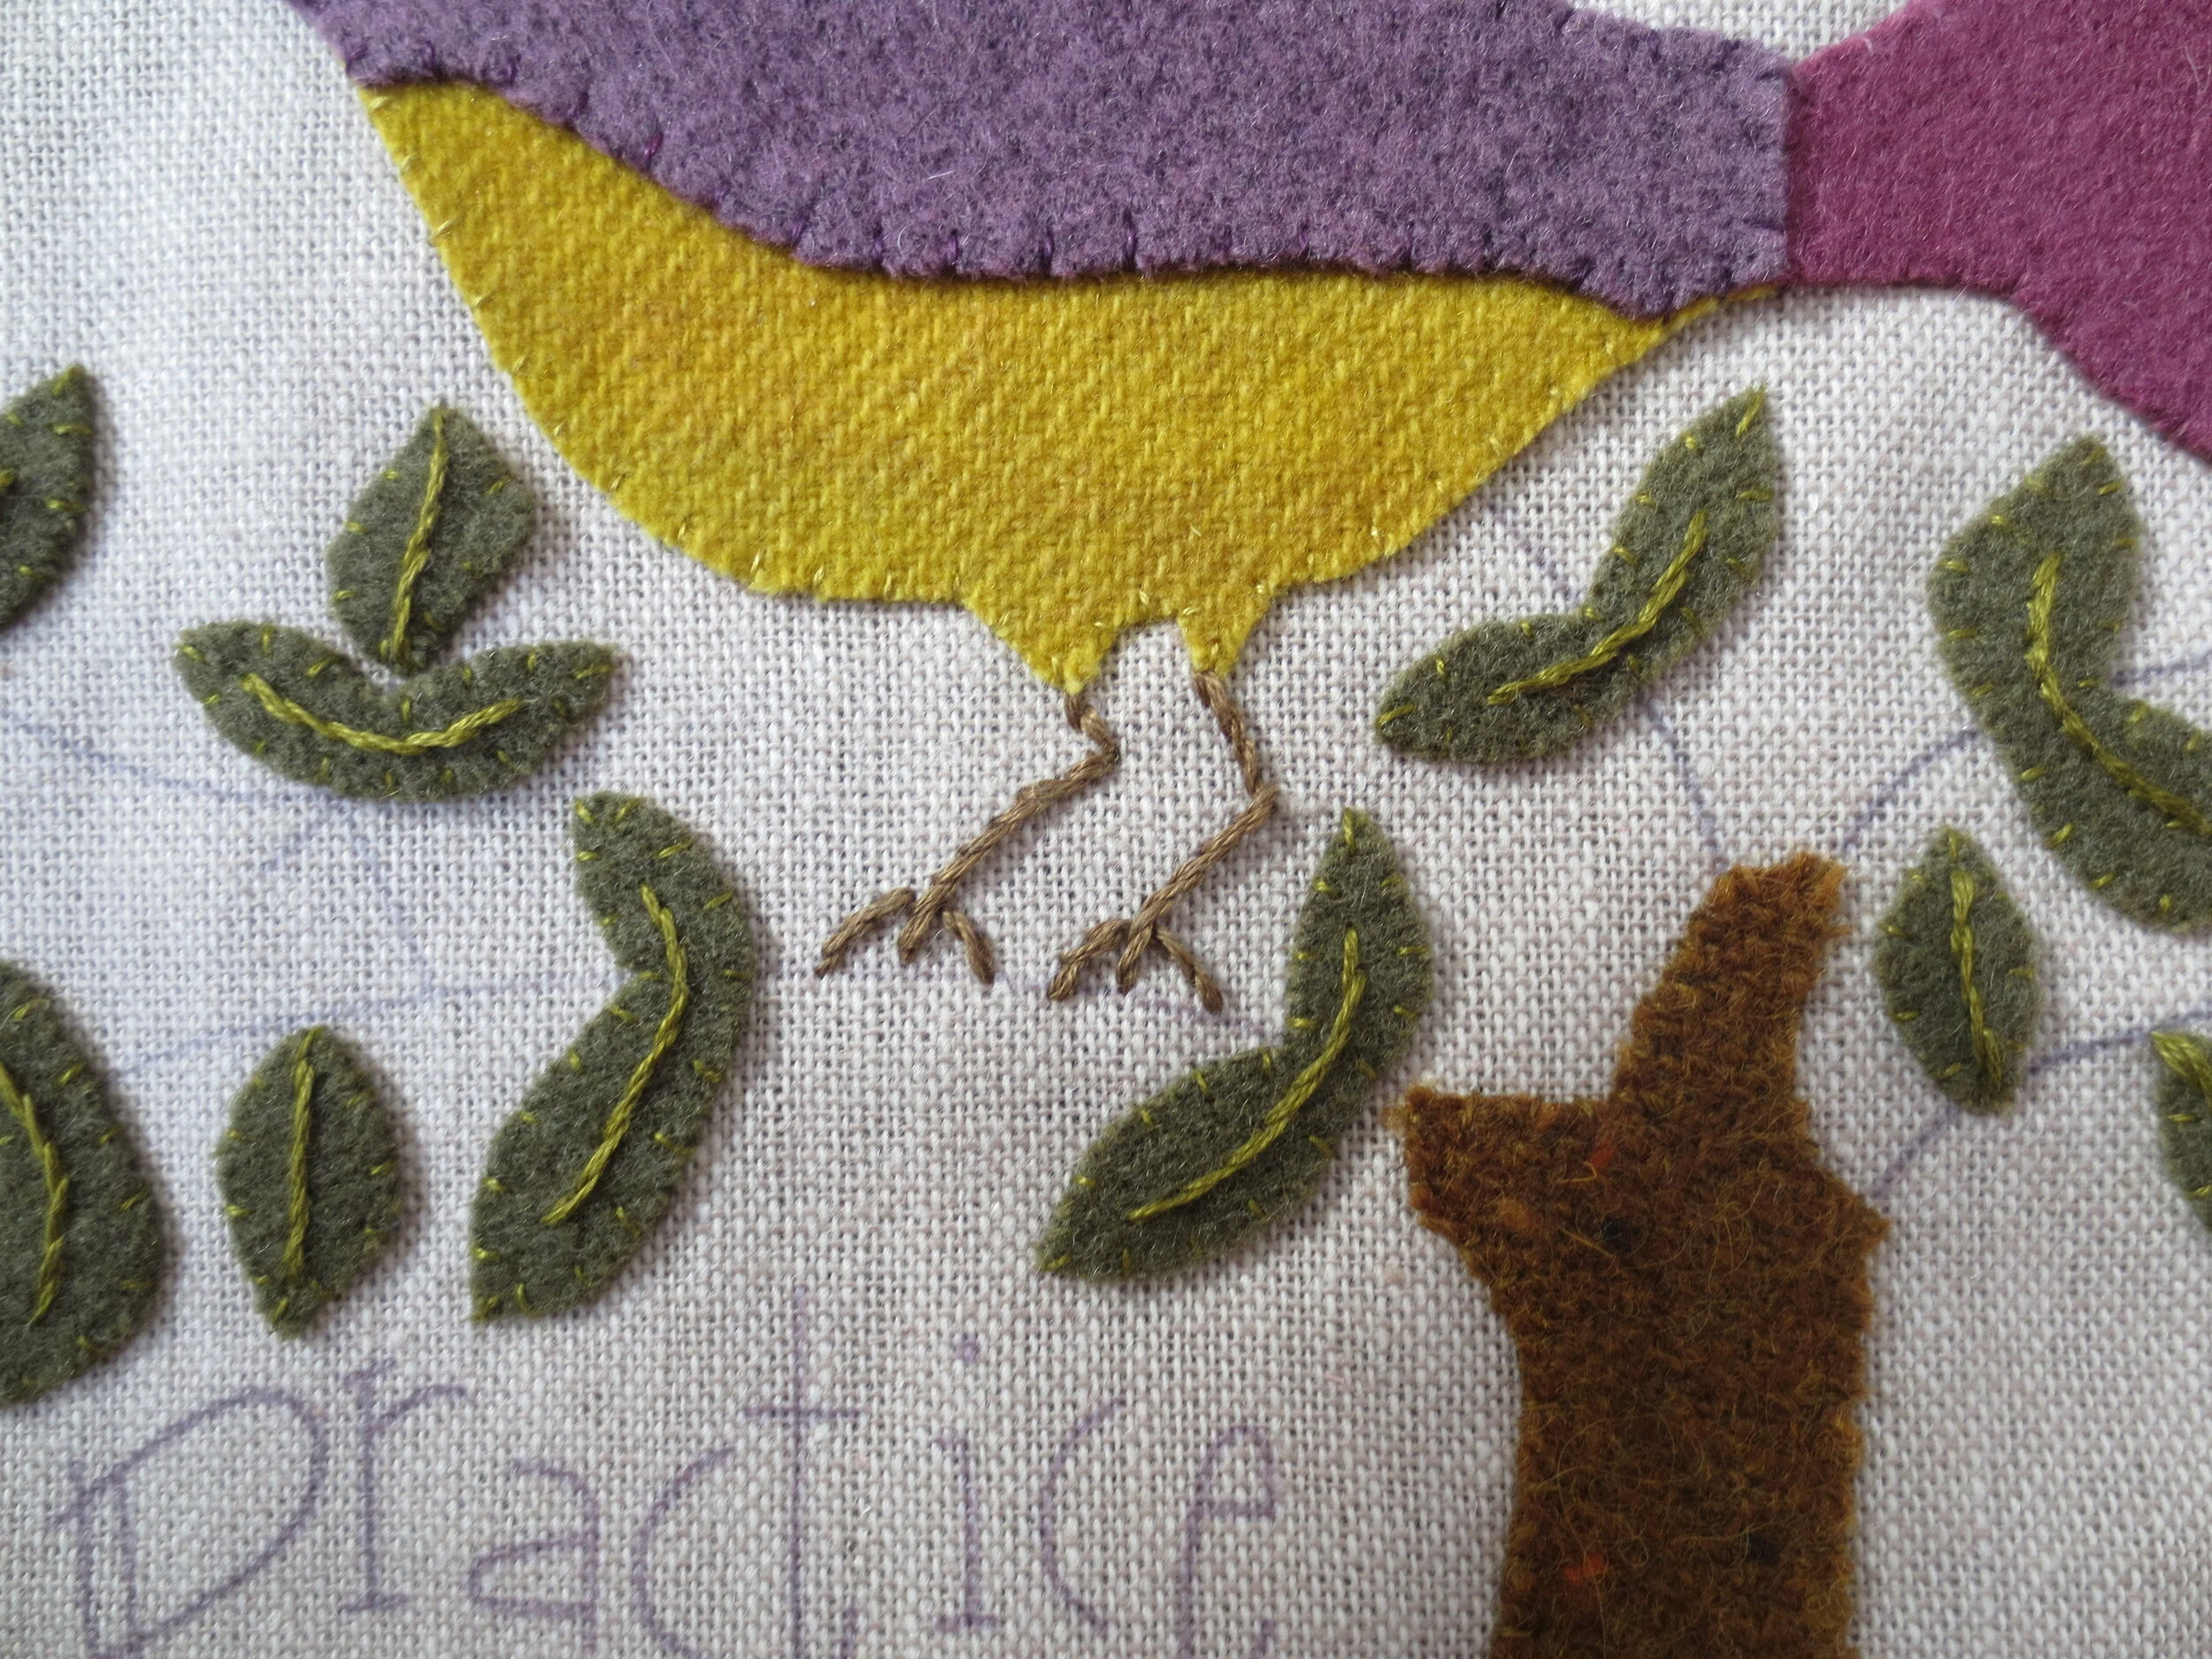
11. Use 3 strands of golden-brown floss (DMC 610) to stem stitch the bird’s legs and toes.
12. Use 1 strand of variegated green perle cotton (Valdani #O575), size 12 to stem stitch the tree branches.

13. Use a chalk pencil to draw guide lines on the tree trunk. Use the layout as your guide.

14. Use 1 strand of variegated green perle cotton (Vadani #O575) to make running stitches over the guide lines.

15. Use a chalk pencil to draw the border of the wing. Use the layout as a placement guide.
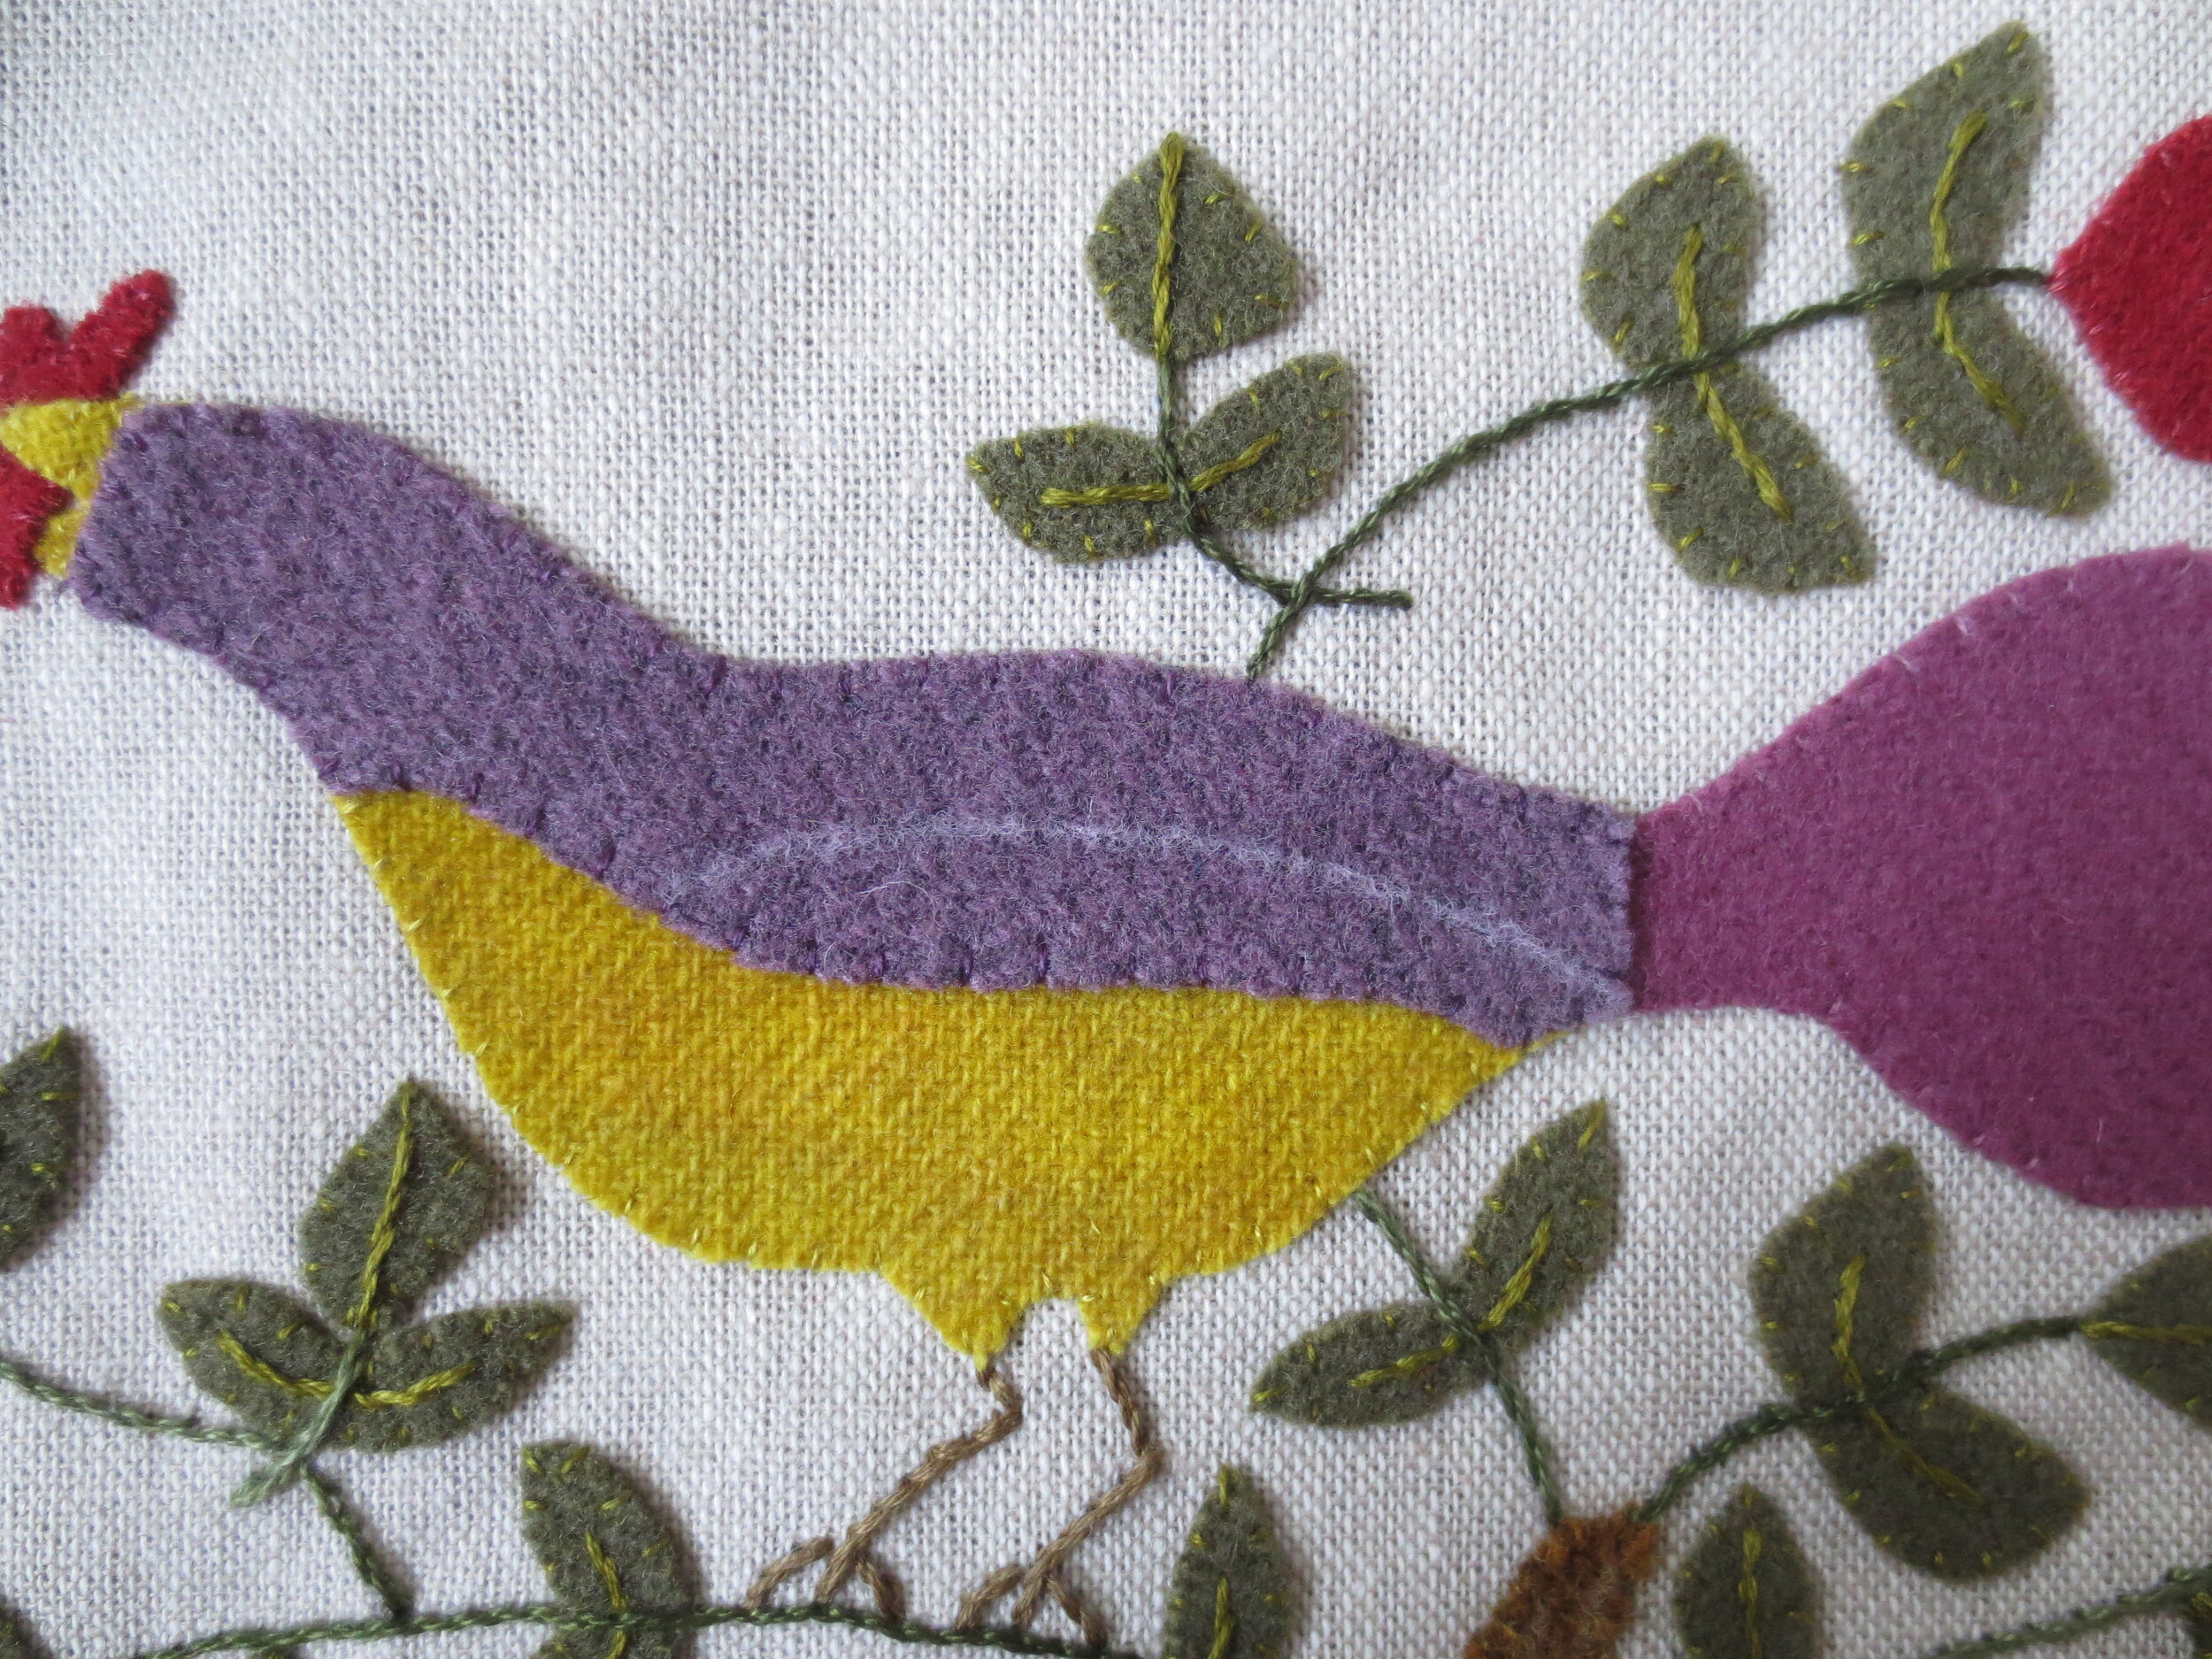
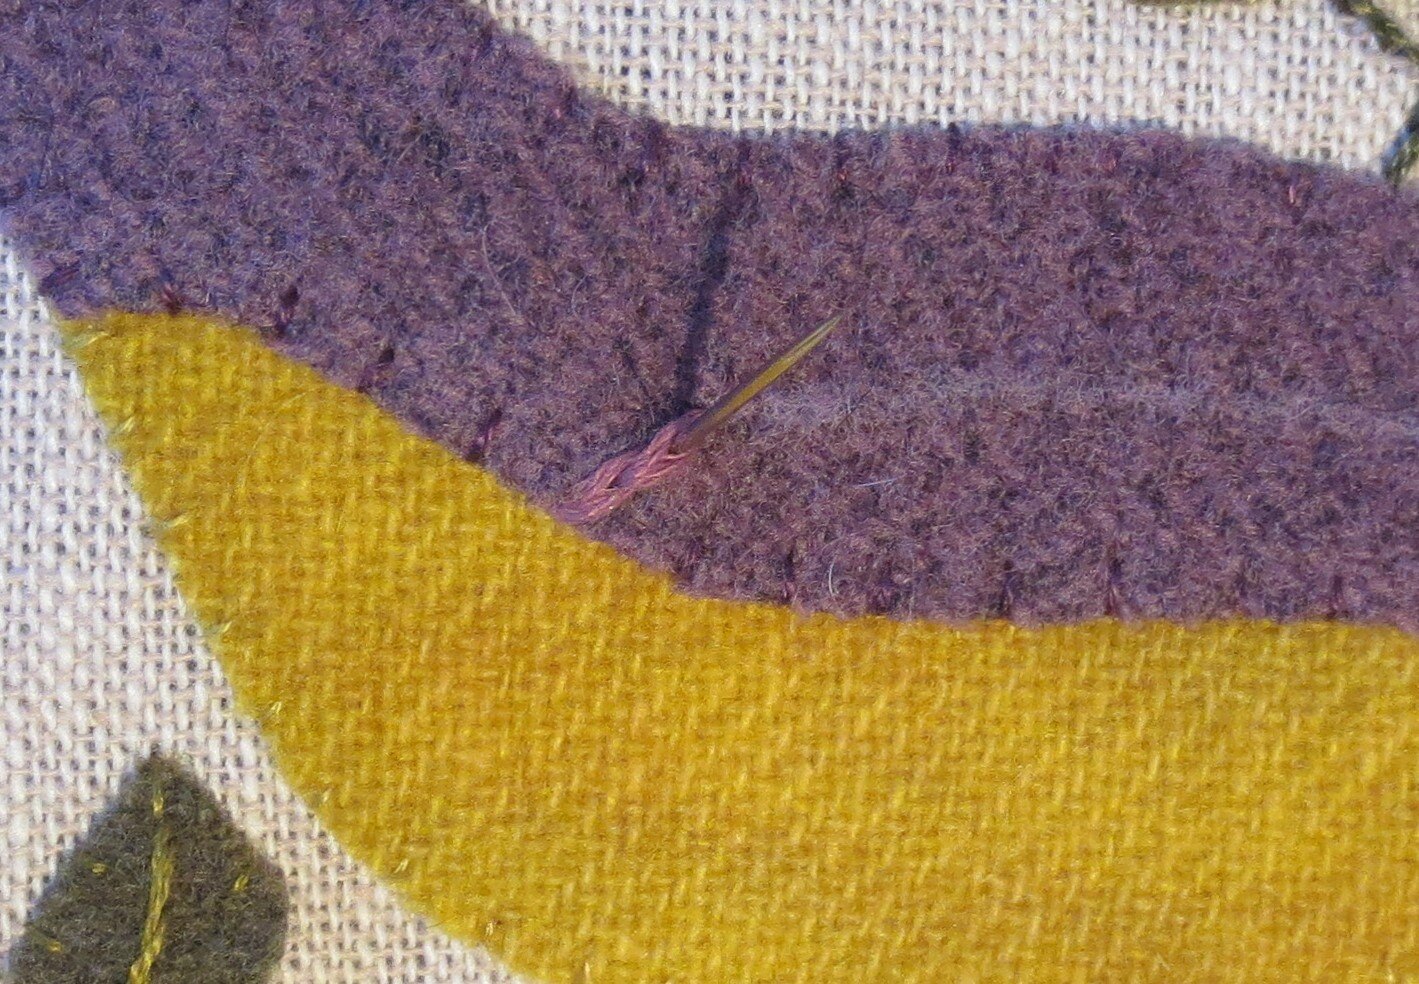
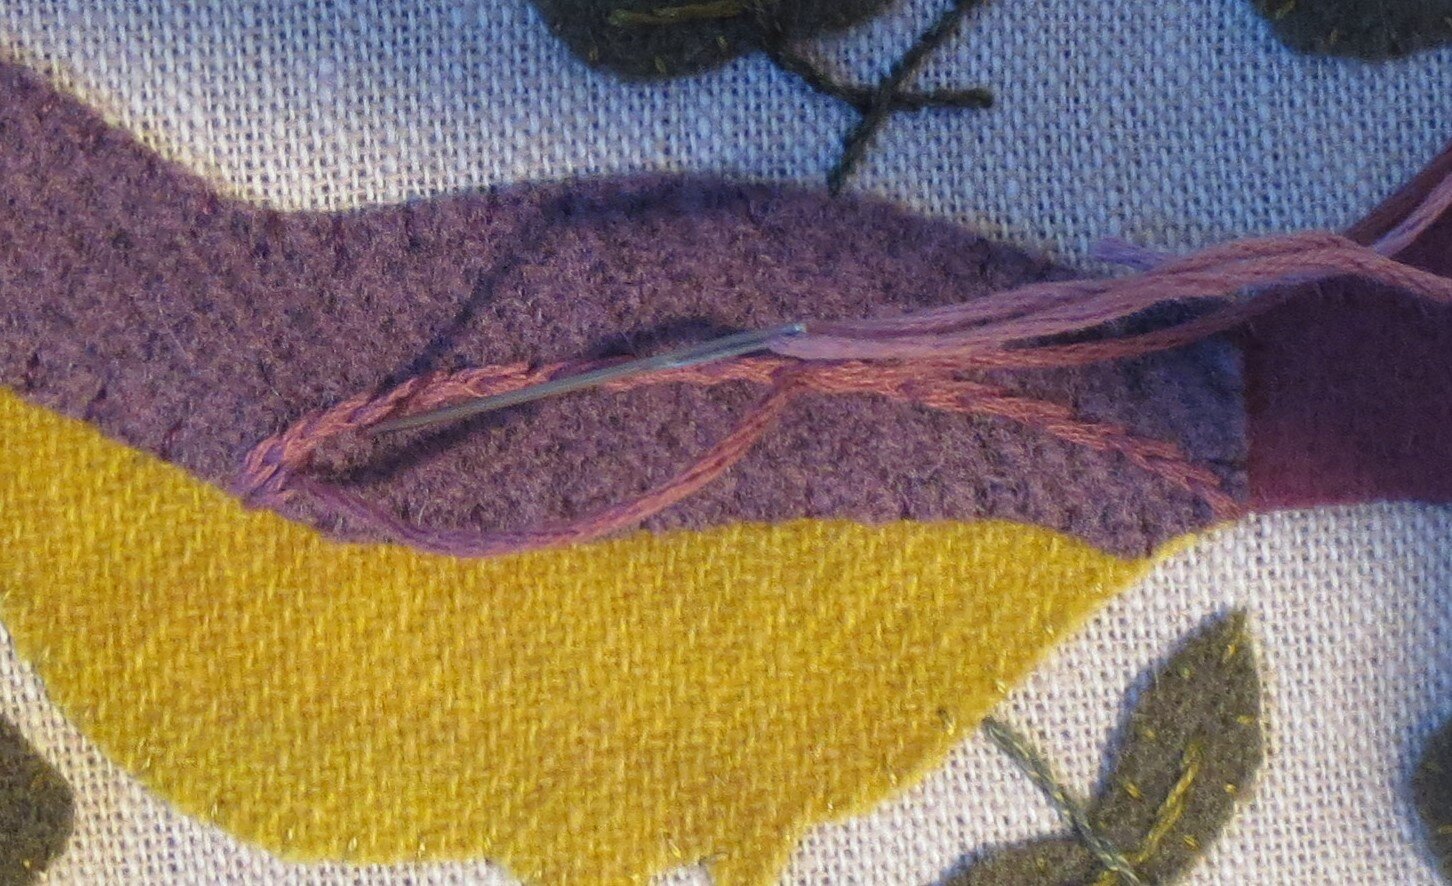
16. Use 6 strands of variegated purple floss (Valdani H208) to split stitch the wing. Begin at the top left moving to the base of the tail. Begin each row of split stitches on the left just under the preceding row, always stitching in the same direction. You should get at least 4 rows that reach the base of the tail. Continue in the same direction with each line of split stitches getting shorter and shorter until the area is filled in.


17. Use a chalk pencil to draw the small hearts inside hearts A, B & C.

18. Use 2 strands of antique gold (Cosmo #822) to stem stitch the small hearts.

19. Use the same thread to stitch a colonial or French knot eye on the bird.

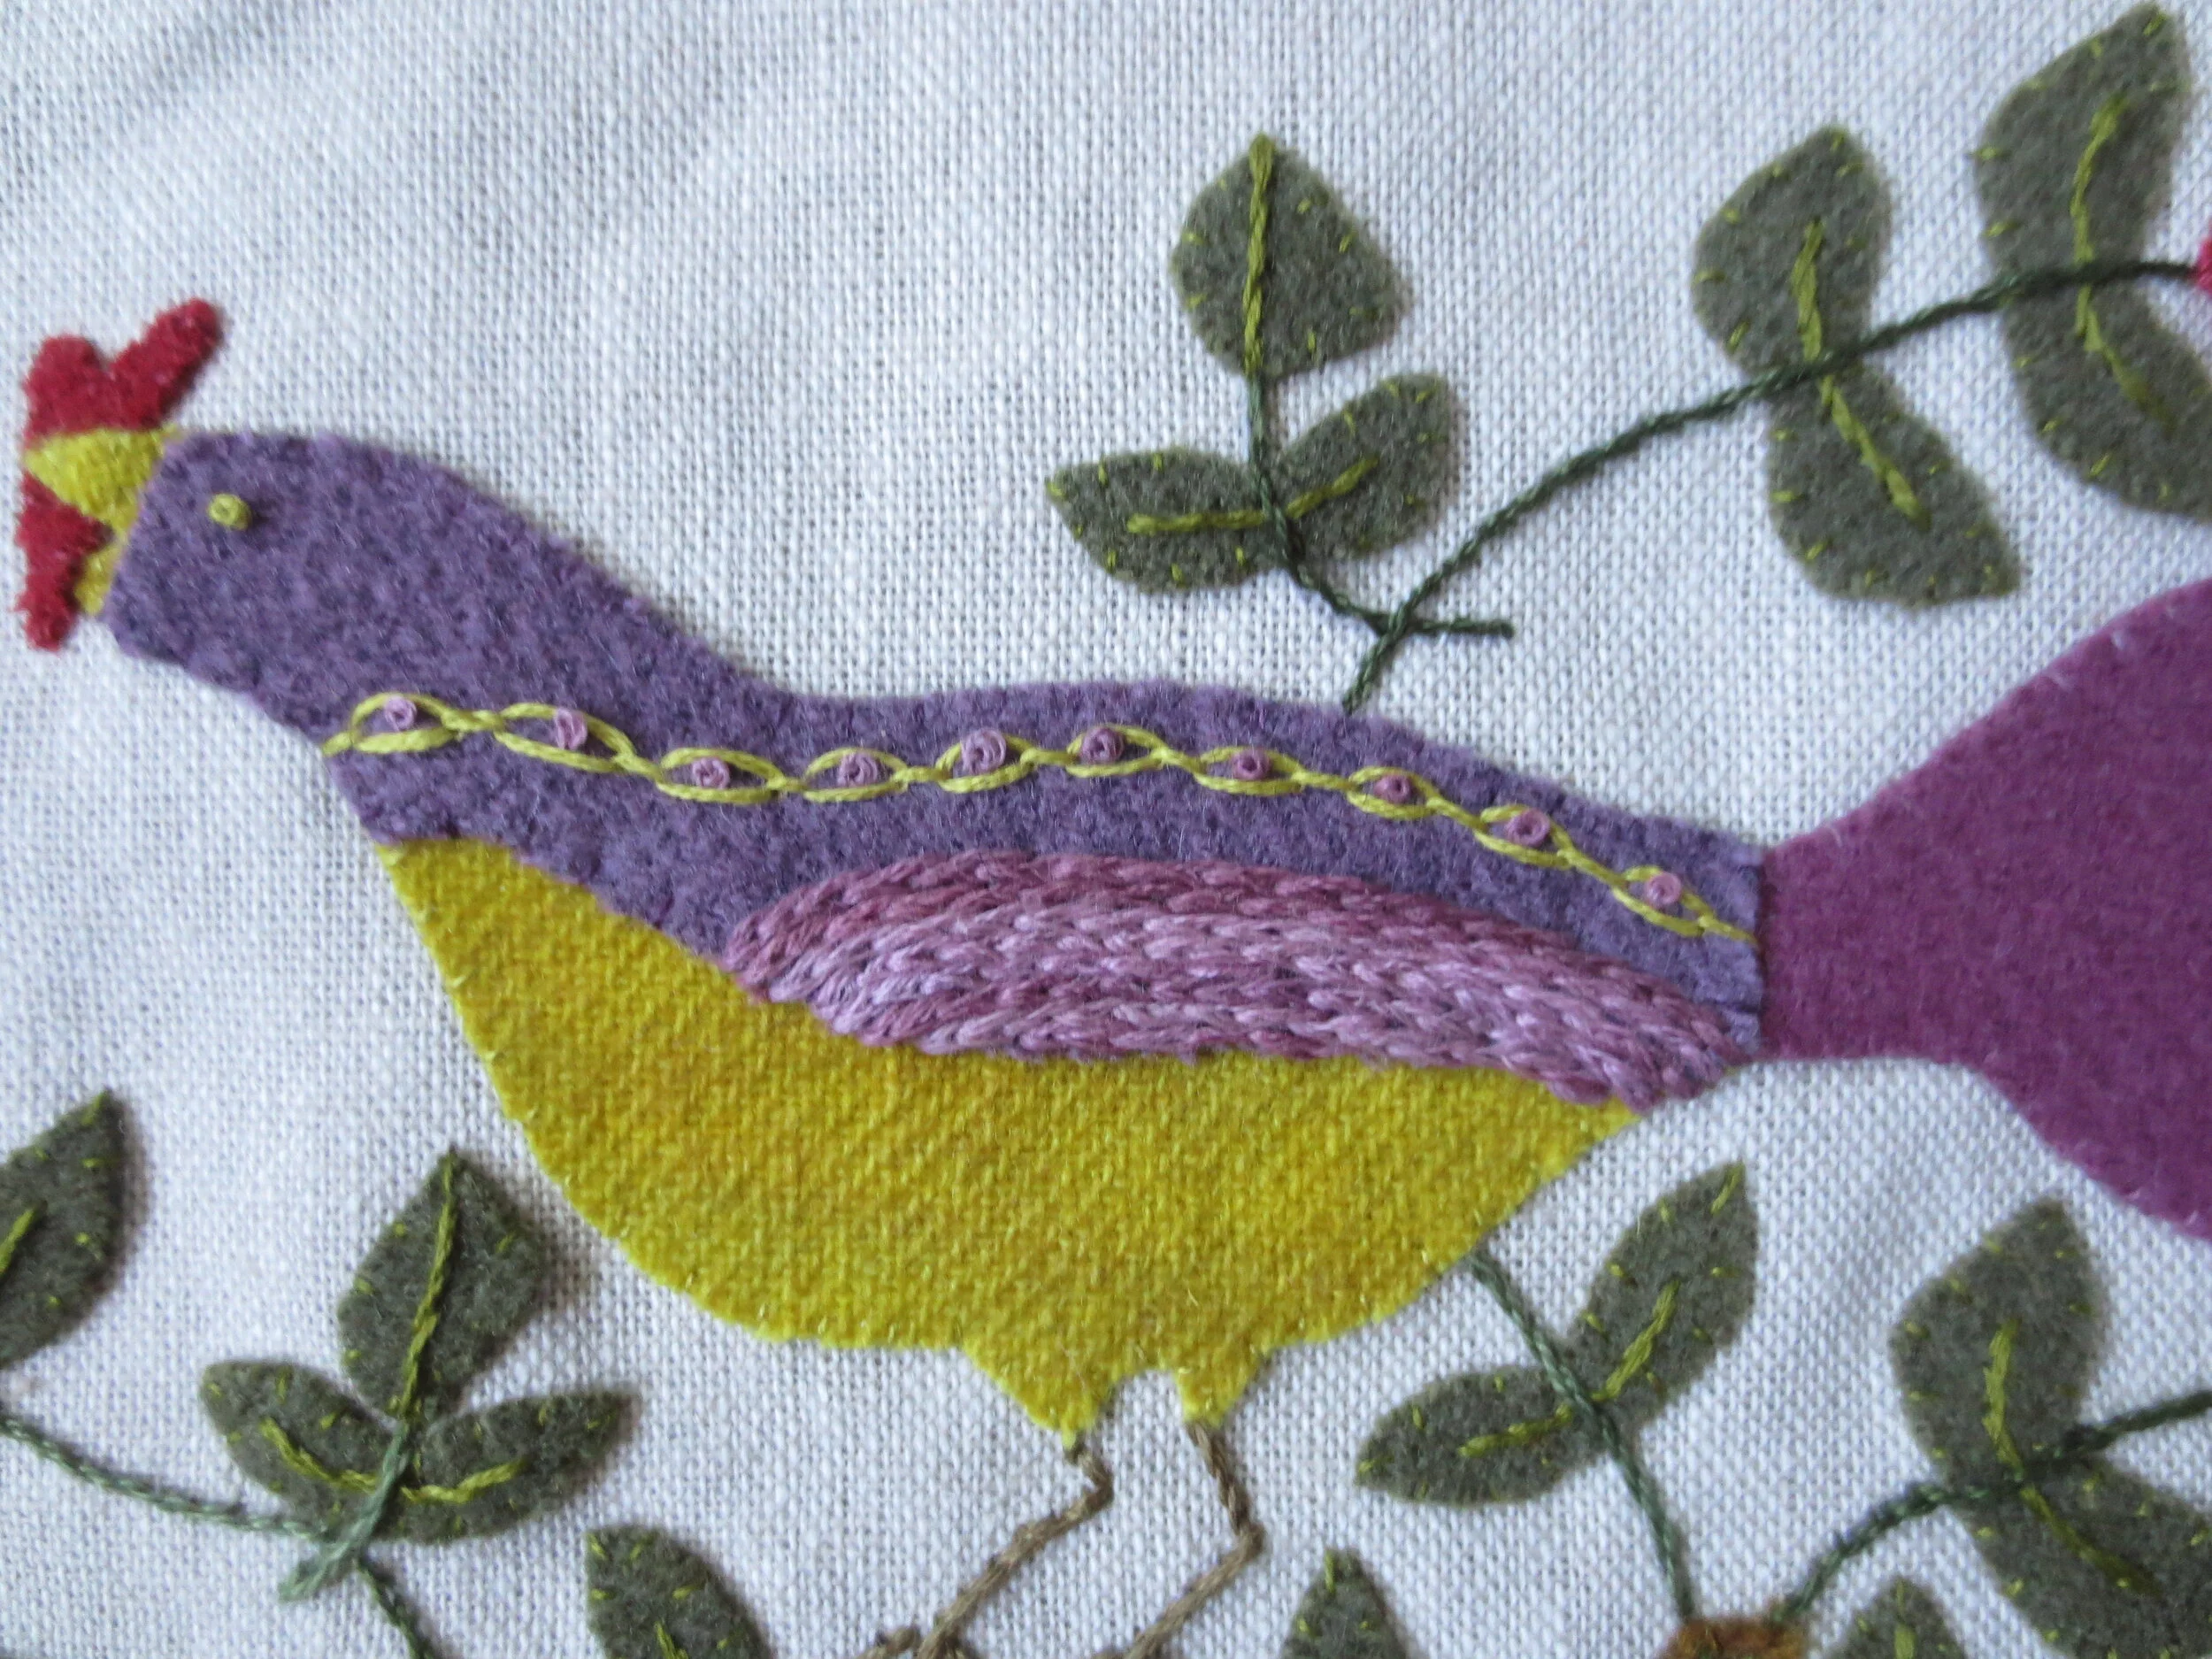
20. Use a chalk pencil to draw a guide line for the cable chain stitch along the bird’s back.

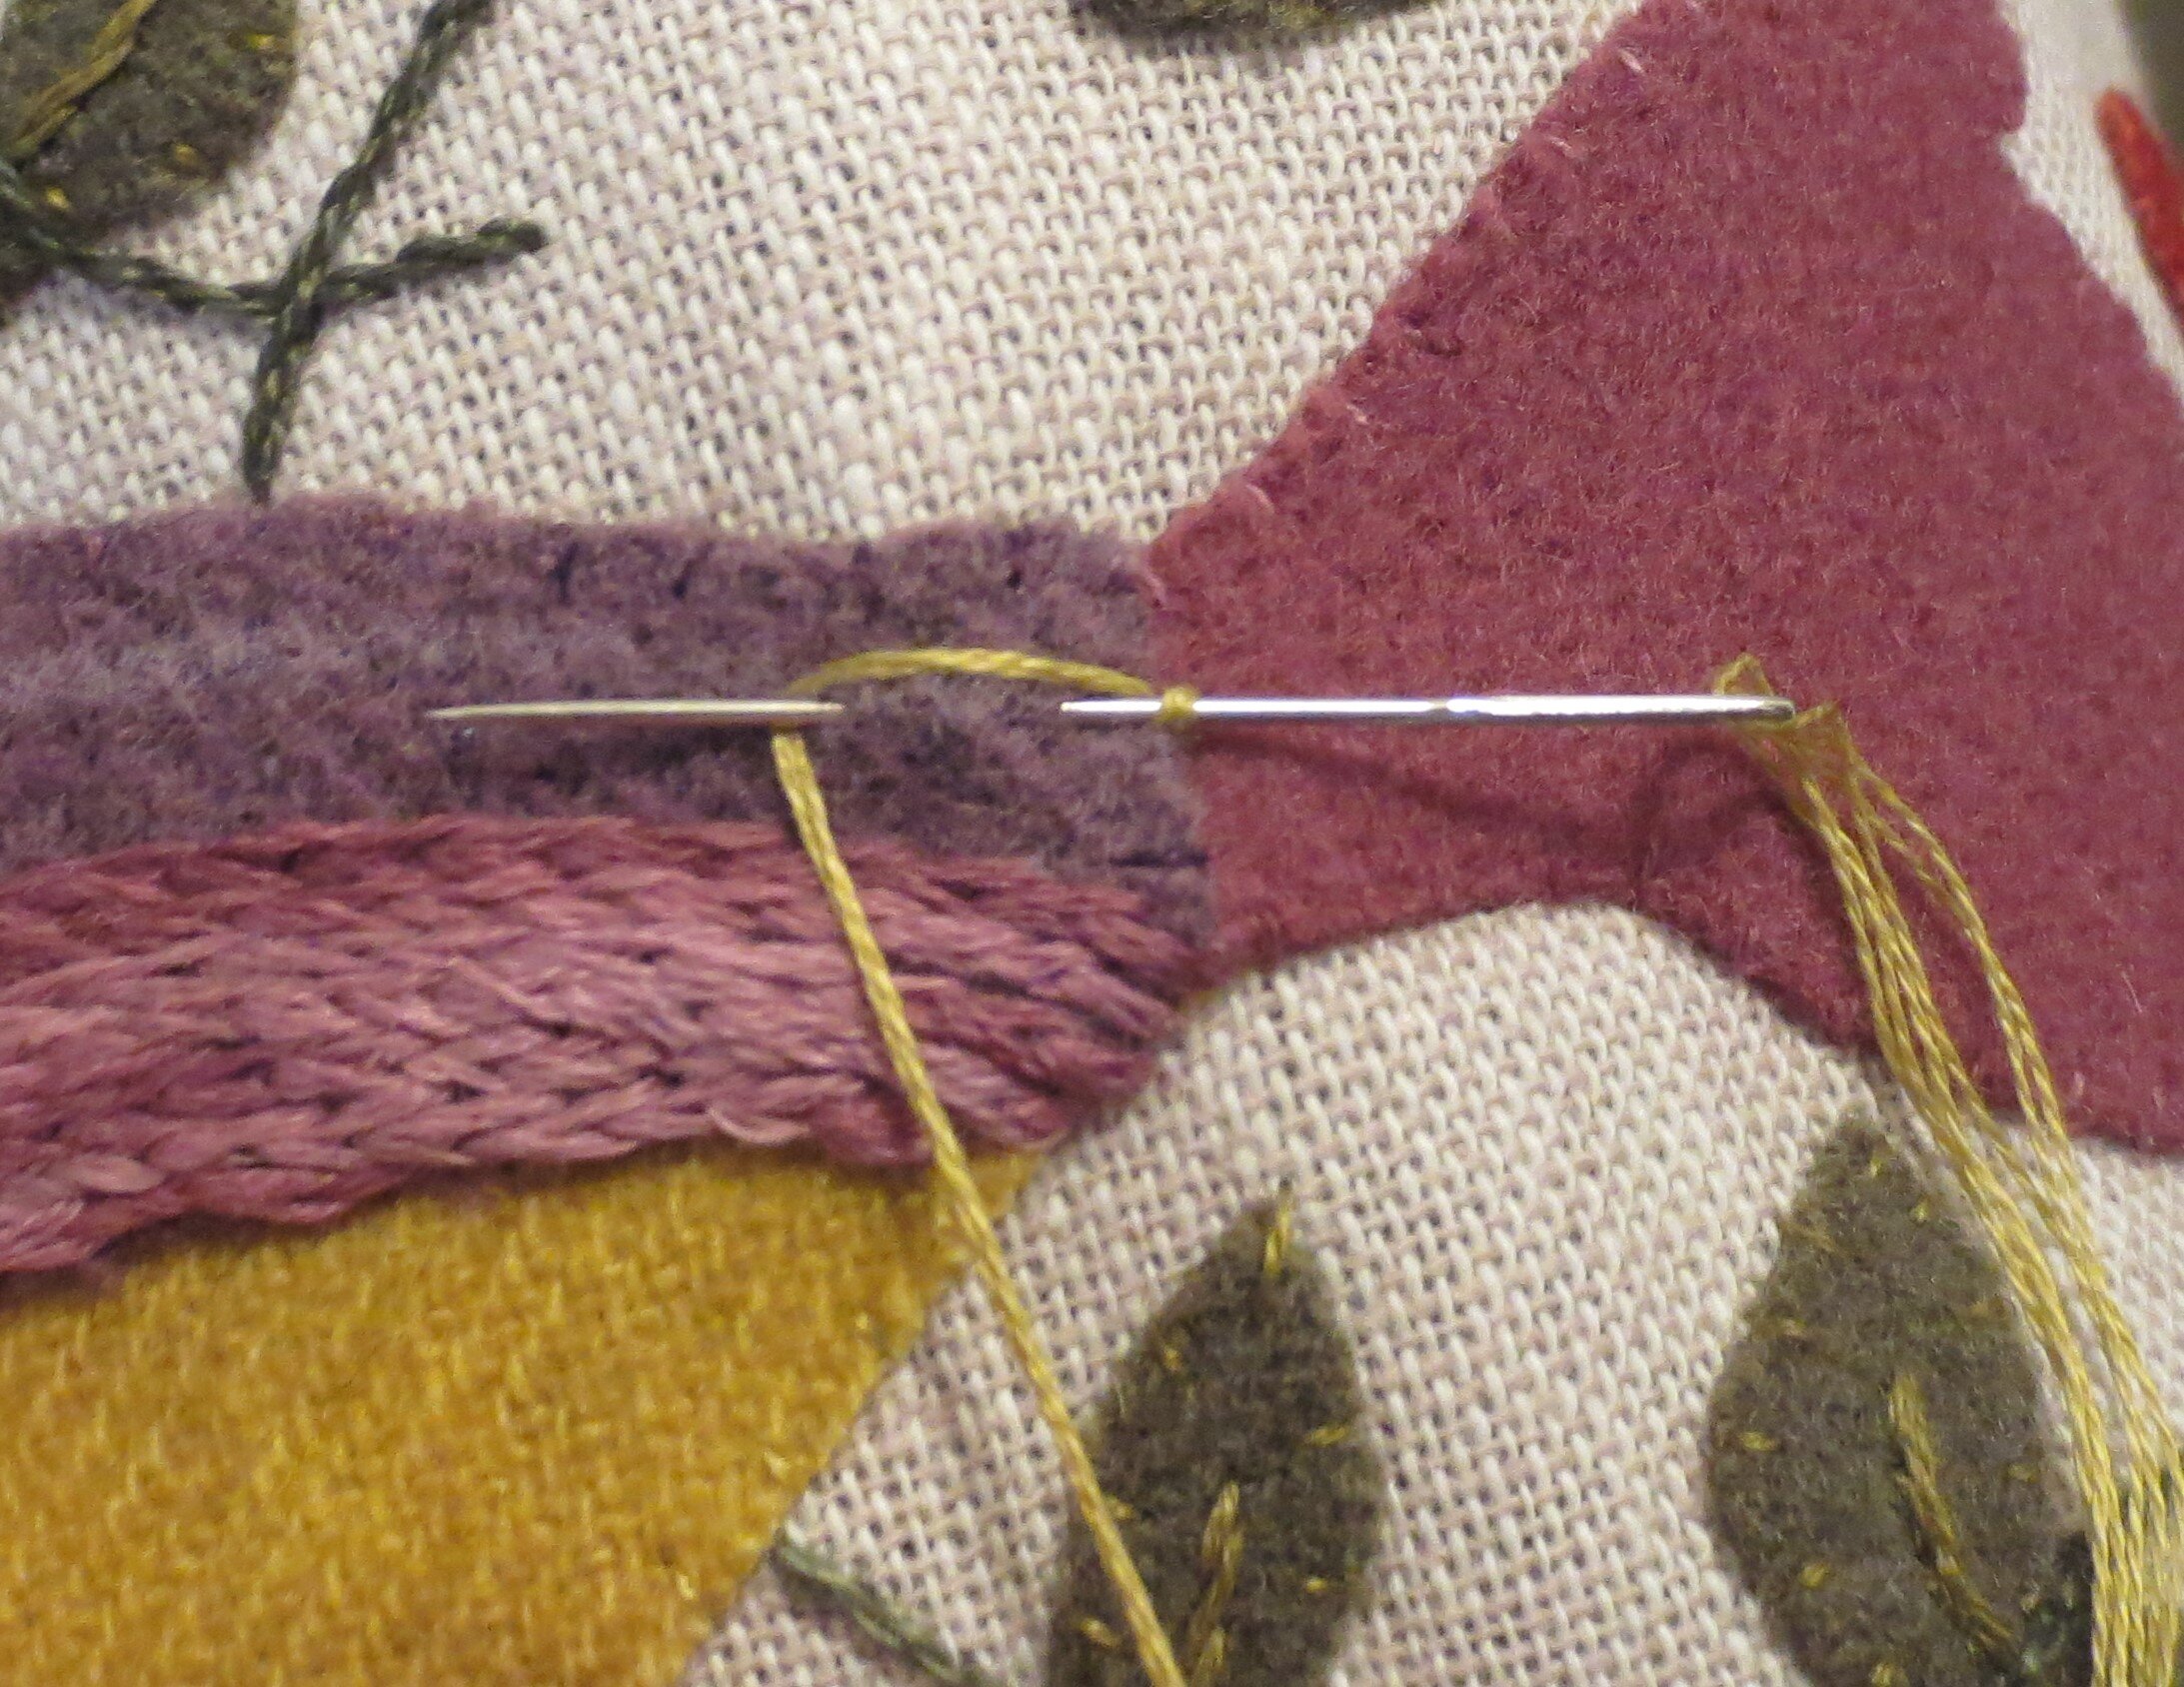
21. Use 3 strands of antique gold floss (Cosmo #822) to stitch a cabled chain over the line.
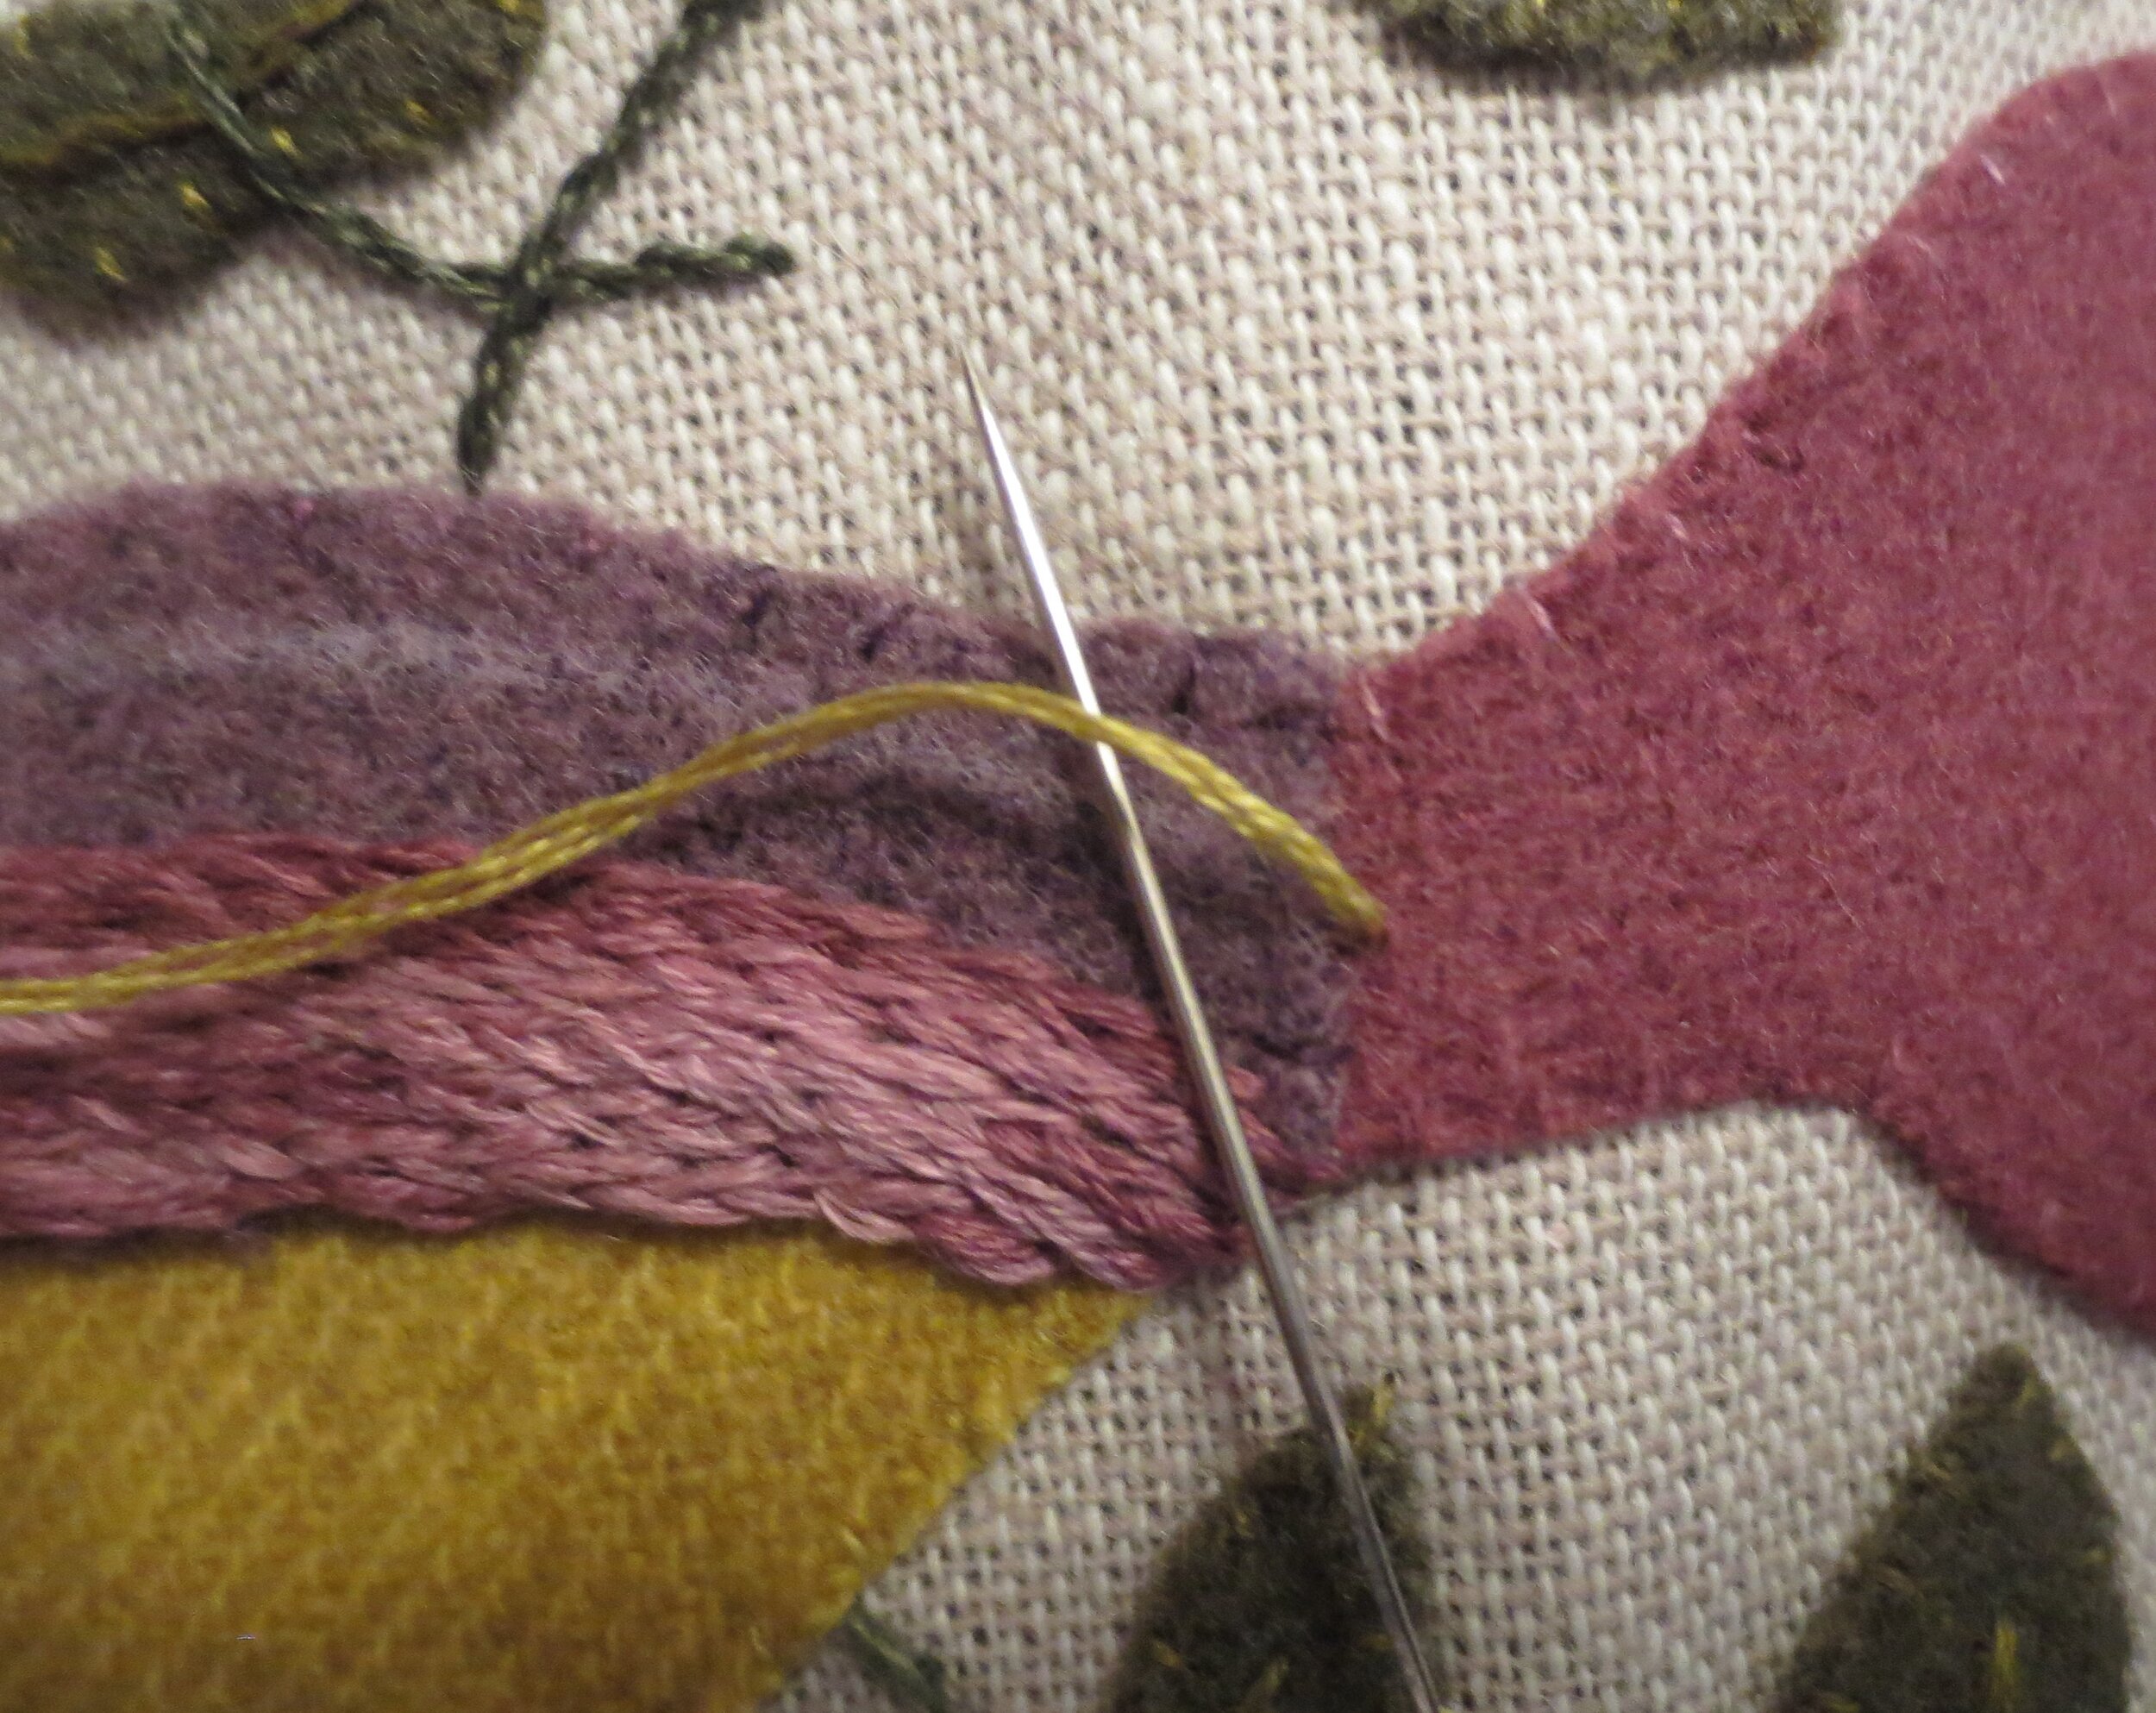
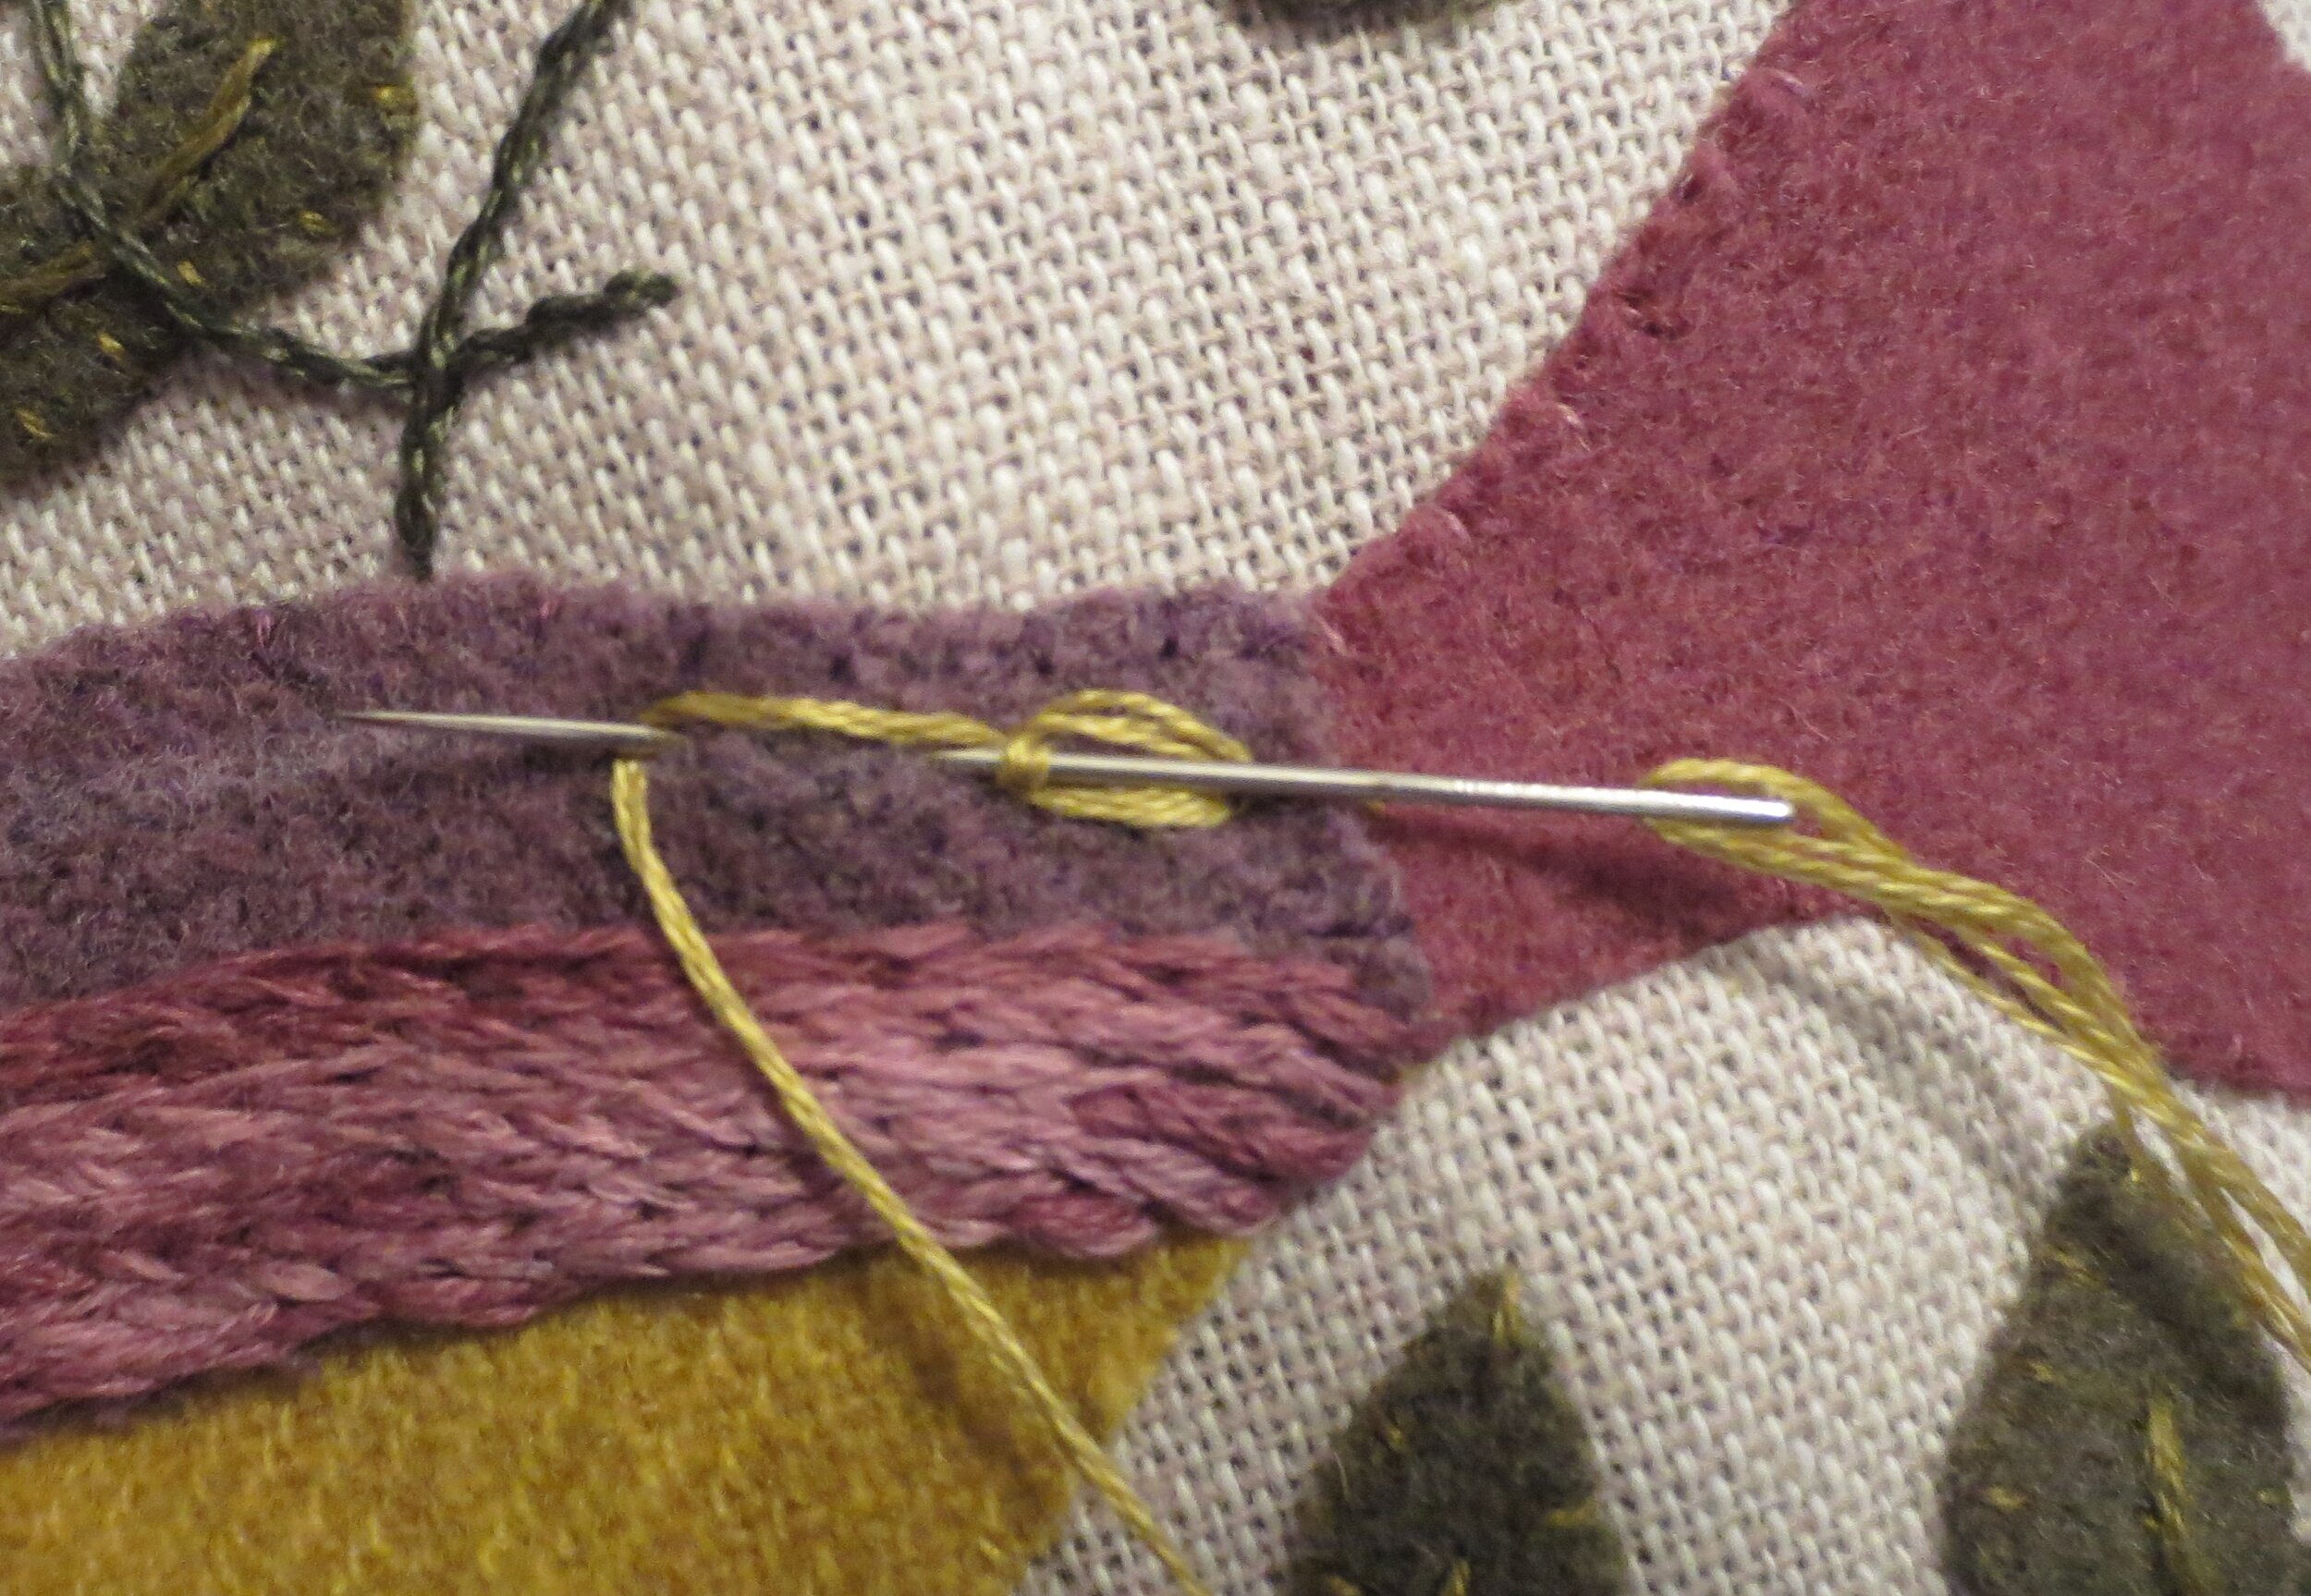
Wrap the thread around once and then insert the needle in about 1/8” from where you began.
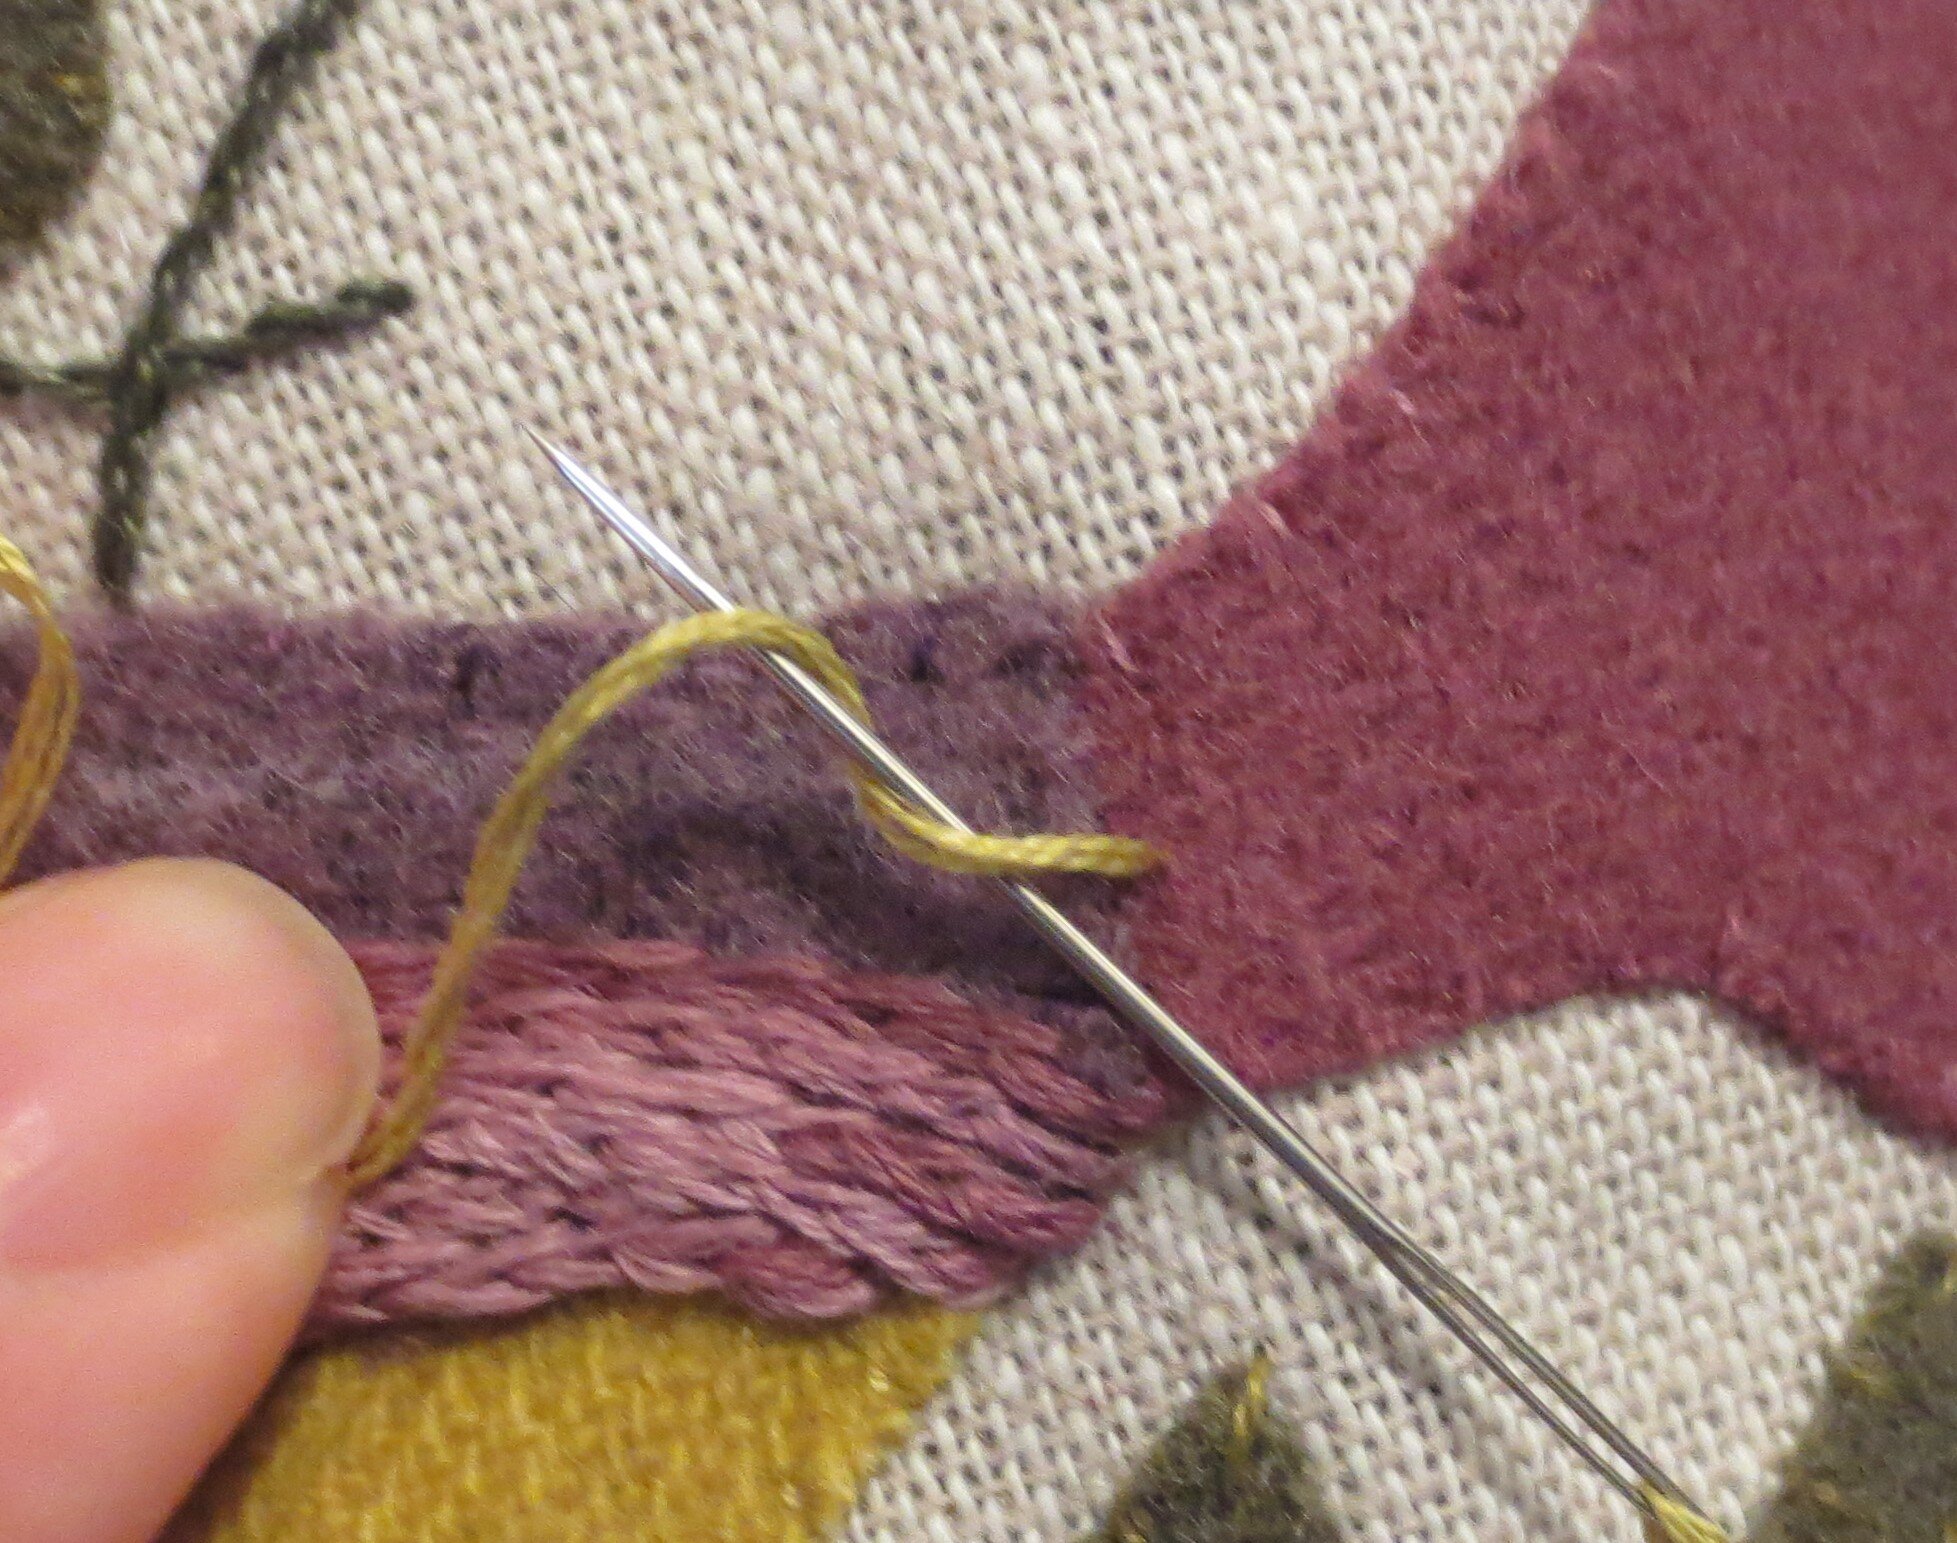
Bring the needle up along the drawn line about 3/8” from the insertion point. Wrap the thread around the end of the needle and then pull the thread through to the left. This is a bit like a lazy daisy stitch.
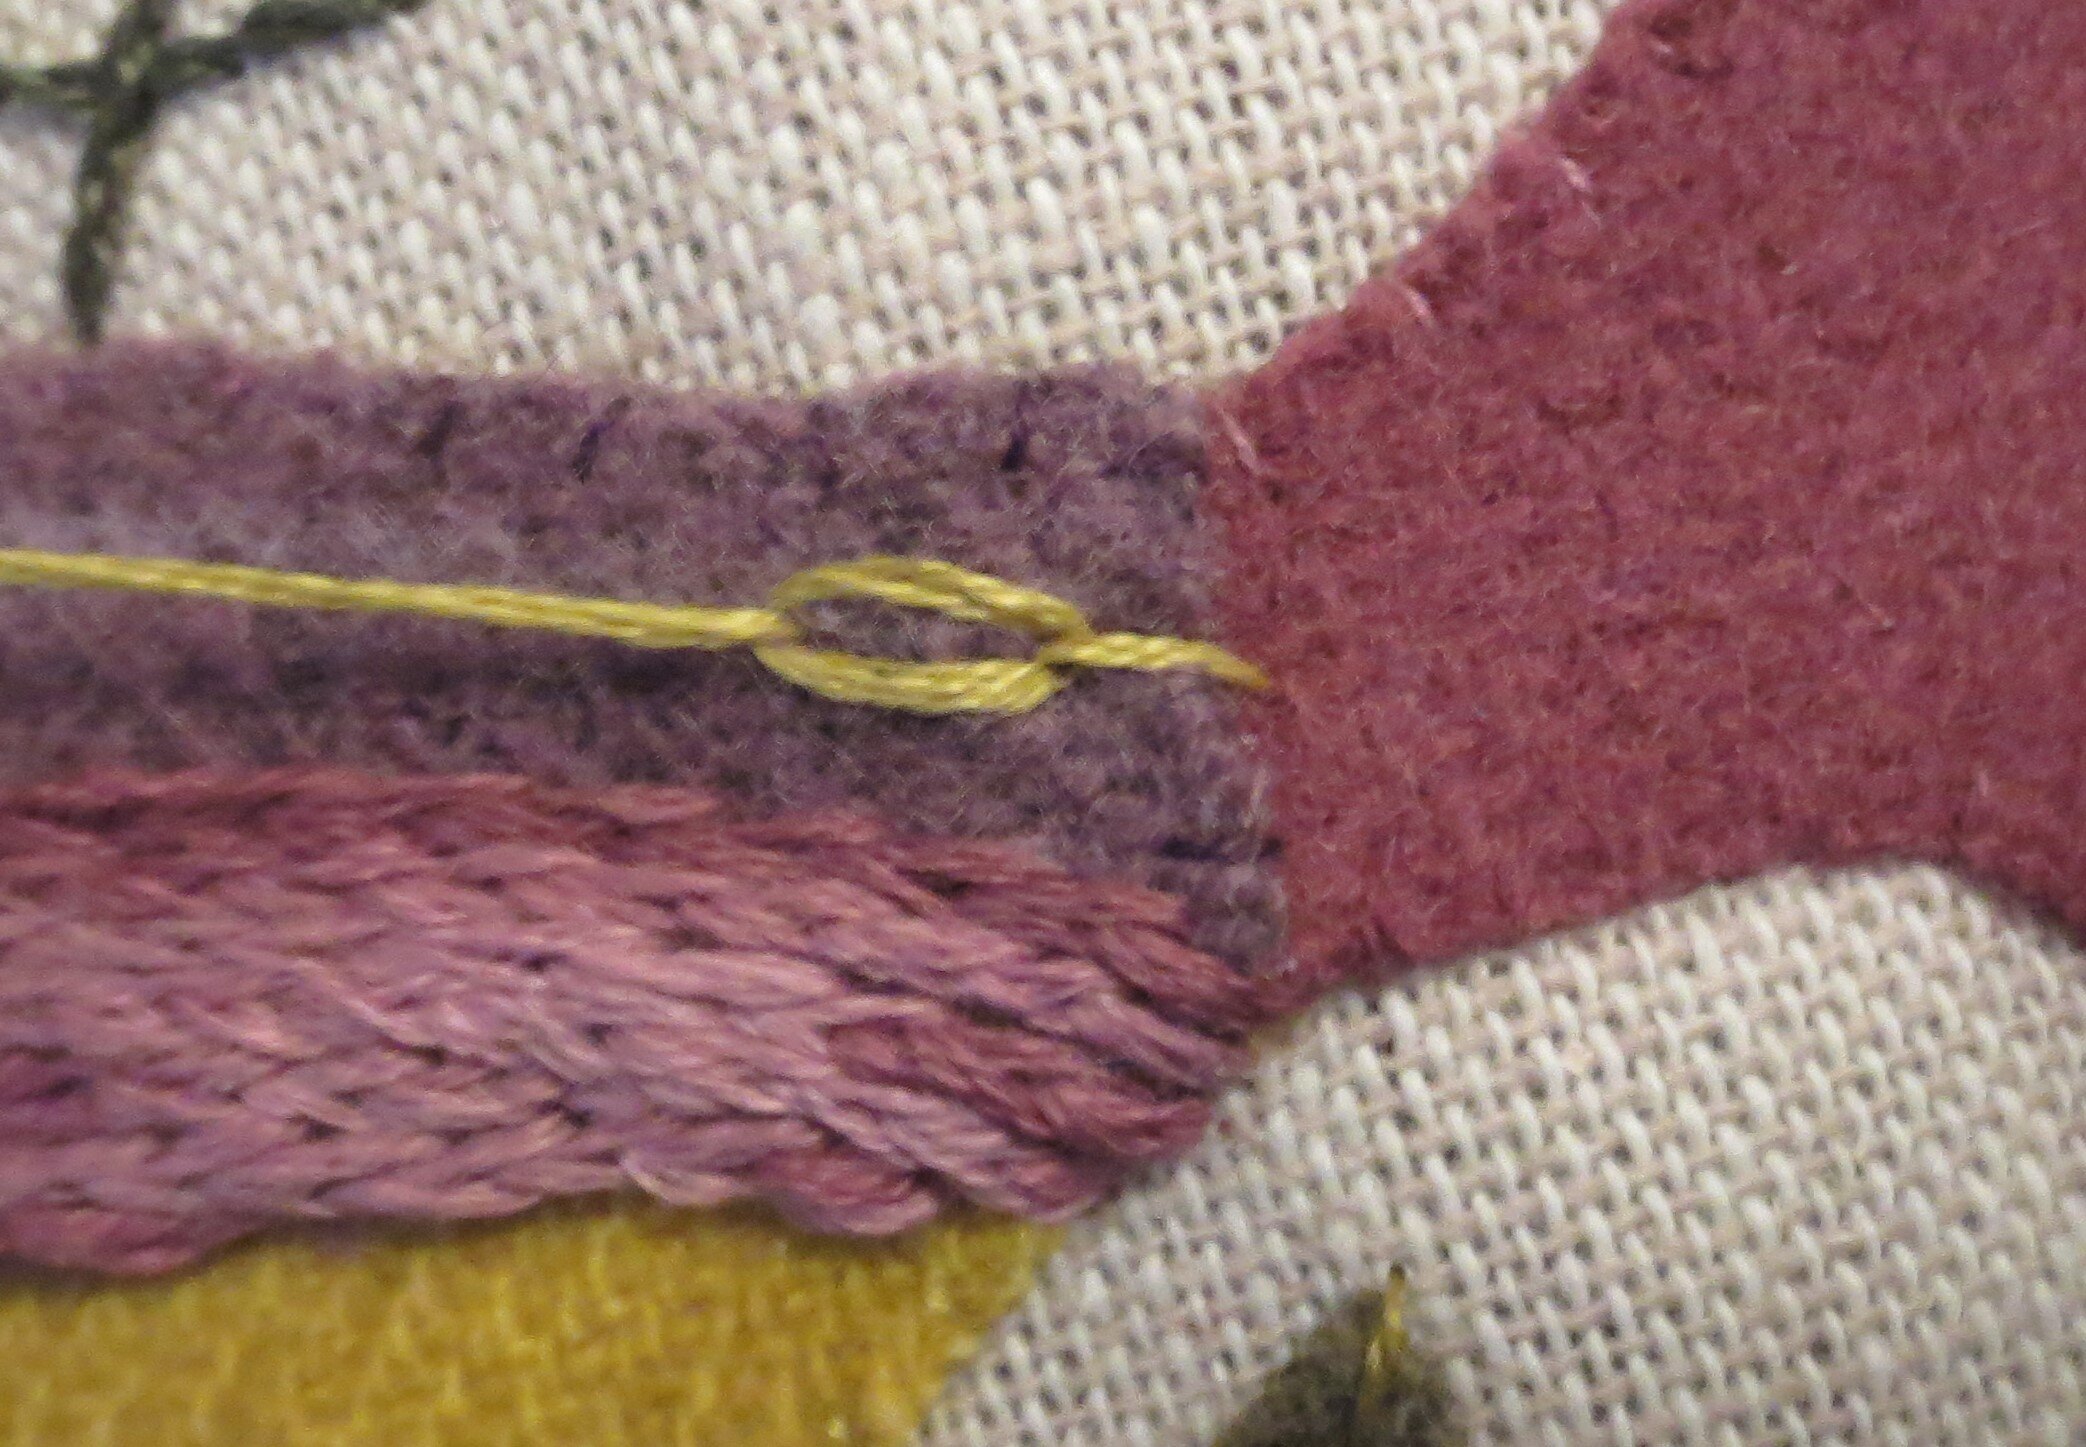
Repeat the same stitch until the whole line is covered.


22. Use 2 strands of the variegated purple floss (Valdani H208) to make a colonial or French knot in the center of each link of the chain.
23. Use a chalk pencil to draw the tail feathers on the bird’s tail. Use the layout as a guide.

24. Use 2 strands of the variegated purple floss (Valdani H208) to stem stitch over the lines. If you want a more distinct line use the dark violet (Cosmo Seasons #5026).

25. Draw the guide lines for the tail feather embellishments.
26. Use the same floss to stitch closed fly stitches over the guide lines. Stitch 2 back stitches between each fly stitch. Refer to the layout for the number of fly stitches for each feather. Finish each set of fly stitches with back stitches extending to the base of the tail.


27. Use the same thread to stitch fly stitches around the initial/date box.

28. Use 2 strands of dark brown floss (Hickory Sticks) to stem stitch the words, initials and date.

29. Use 2 strands of dark violet floss (Cosmo Seasons #5026) to stem stitch the outline of the initial box.

30. Use a fabric marker to draw random V’s on the bird’s breast.

31. Use 2 strands of dark violet (Cosmo Seasons #5026) to stitch fly stitches over the V’s.

32. Use a fabric marker to mark the position of the French knots above each heart.

33. Use 3 strands of dark mauve (Cosmo #655) floss to make a colonial or French knot over each dot.

You are finished!
Now for those of you who wish to make an all embroidered version.
Embroidery Only Instructions – Use 2 strands of floss for all stitches unless otherwise noted.
Transfer the design to your fabric background using the same method as the wool applique method, but trace the entire design to the copy paper using the transfer pen – bird, hearts, leaves, branches, tree trunk, words and initial box. Be sure to trace all the embellishments also.
Use dark violet (Cosmo Seasons #5026) to stem stitch the bird’s back and initial/date box outline.
Use the same thread to stitch a Colonial/French knot eye.
Use antique gold (Cosmo #822) to stem stitch the bird’s belly and beak.
Use the same thread to make a series of fly stitches over the bird’s breast.
Use the same thread to stem stitch the small hearts inside hearts A, B & C.
Use 3 strands of golden brown (DMC #610) to stem stitch the bird’s legs.
Use 6 strands of variegated purple floss (Valdani H208) to split stitch the bird’s wing.
Use the same floss (2 strands) to stem stitch the outline of the tail feathers.
Use the same thread to stitch closed fly stitches in each of the 4 tail feathers.
Use the same thread to stitch fly stitches around the initial/date box.
Use dark violet floss (Cosmo Seasons #5026) to stitch a cable chain along the bird’s back. See step #21 in the Applique and Embroidery section above.
Use antique gold (Cosmo #822) to stitch colonial or French knots inside each of the links of the chain.
Use 3 strands of medium brown (DMC #433) floss to stem stitch the tree trunk.
Use the same thread to stitch running stitches inside the tree trunk.
Use very dark olive green (DMC #730) to chain stitch the outline of the leaves.
Use the same thread to stem stitch the veins of the leaves.
Use dark mauve (Cosmo #655) to stem stitch each of the hearts.
Use the same thread to stitch colonial or French knots over hearts A, B & C.
Use a variegated green perle cotton (Valdani #O575), size 12 to stem stitch the tree branches.
Use dark brown (Hickory Sticks) to stem stitch the words, initials and date.