

Year of the Pig
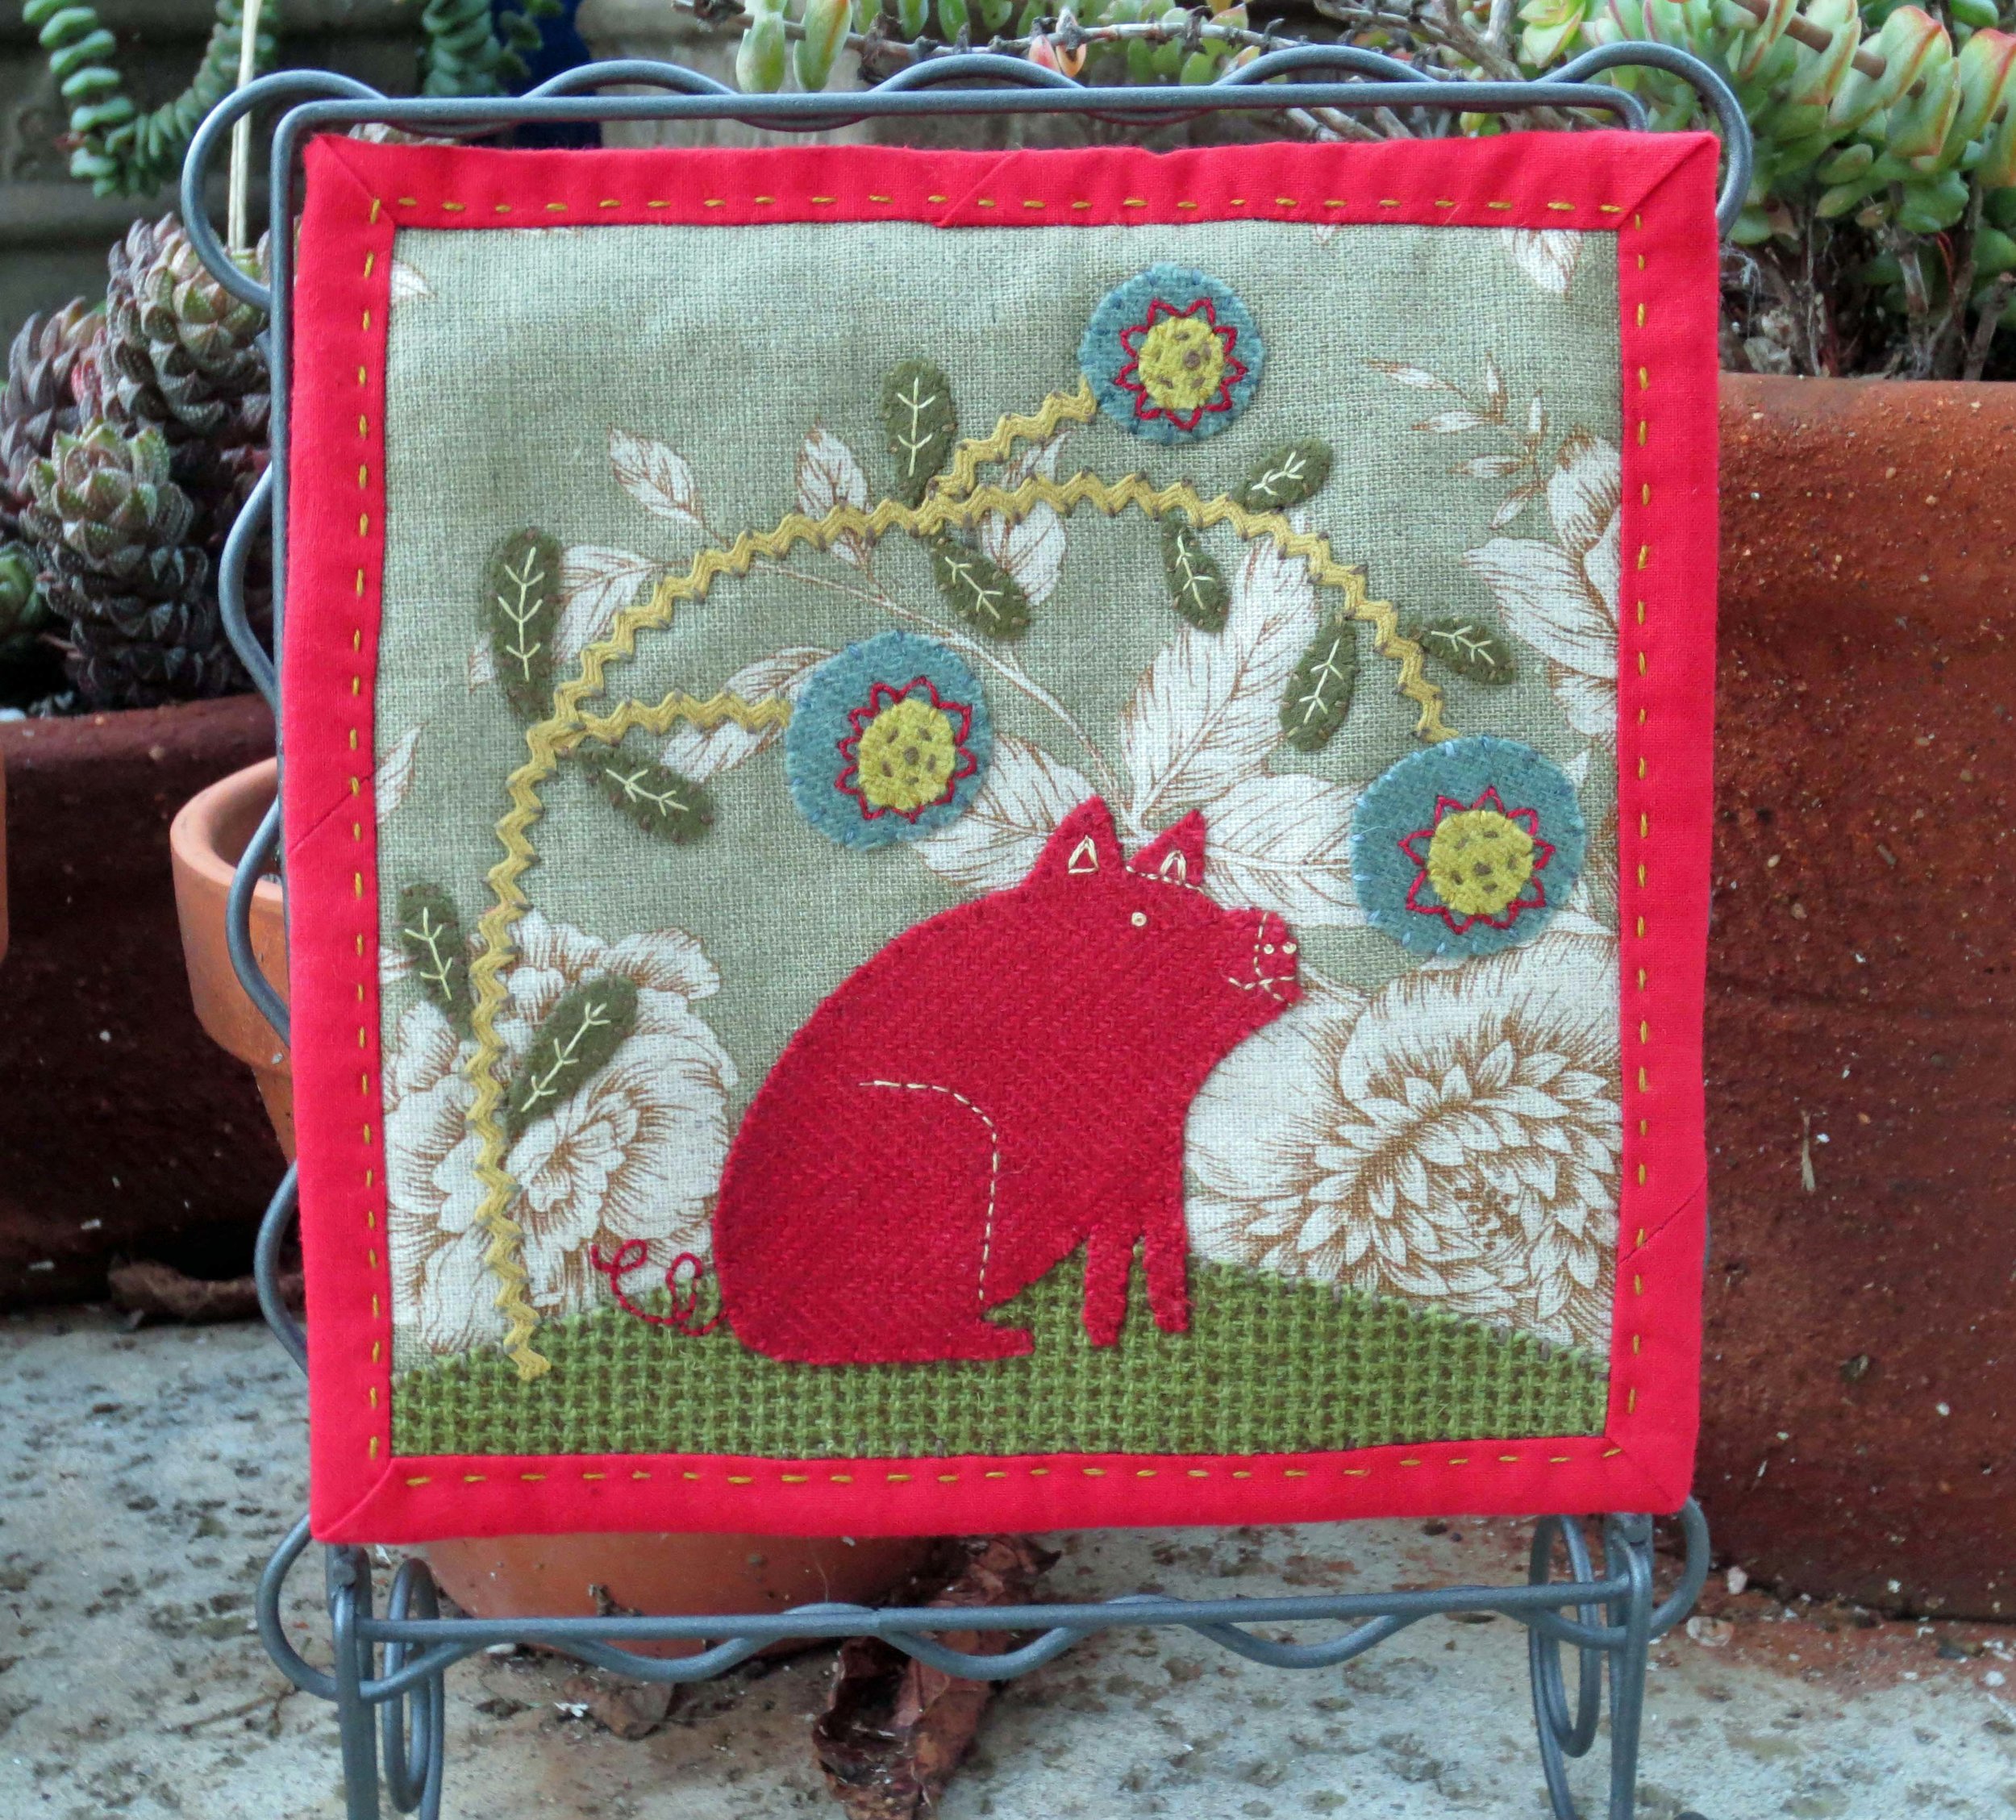
2019 is the year of the pig! If you were born in the years 1935, 1947, 1959, 1971, 1983, 1995, 2007, 2019 this is your year of good fortune and luck.
The color red symbolizes happiness and luck in China, so naturally I made it in red. The background is a bit of Japanese fabric I purchased from Pinwheels.com last year at Road To California. To make this you will need a few wool scraps and a little bit of rick rack for a whimsical flower stem. You will also need to have knowledge of quilt binding to make the border (I’ve added a few links to tutorials for those of you who have never bound a quilt). The final product will be a 6 1/2” square, so it’s the perfect size for the table top mini quilt stand from Connecting Threads.
You will need:
Fabric
Background - 6 1/2 inch square piece of quilting cotton, linen, or wool
Backing - 7 1/2 inch square piece of quilting cotton, or linen
Binding - 1 1/2 inch x 30 inch piece of red cotton fabric
Batting - 7 1/2 inch square thin cotton batting like Warm and Natural
Wool - Felted wool or wool felt
Pig - 3 1/2 inch square red
Flowers - 2 1/2 inch square blue
Flower centers - 2 inch square gold
Leaves - 2 inch x 3 inch olive green
Ground - 2 inch x 7 inch green and brown ticking
Rickrack - 11 1/2 inch piece of 1/4" inch wide gold ( I purchased mine from elegantstitches.com/RickRack.htm )
Thread
Embroidery floss - gold DMC #3046 (match color of flower centers)
DMC #610 olive green (leaves)
Valdani perle cotton, size 12 - #O518 Dusty leaves (ground & stem), #O775 Turkey red (pig), #871 Dusty blue (flowers)
Miscellaneous
Chenille needle - size 24
Feather weight fusible webbing
Steam iron
Instructions
Download the Pattern, Layout, and Stitch Guide.
Trace the patterns onto fusible web. The pattern images are reversed for use with fusible web, so there is no need to reverse the images. Label each piece.
Cut out the patterns leaving a small border around each image.
Fuse patterns onto designated wool fabrics, and cut out along drawn lines

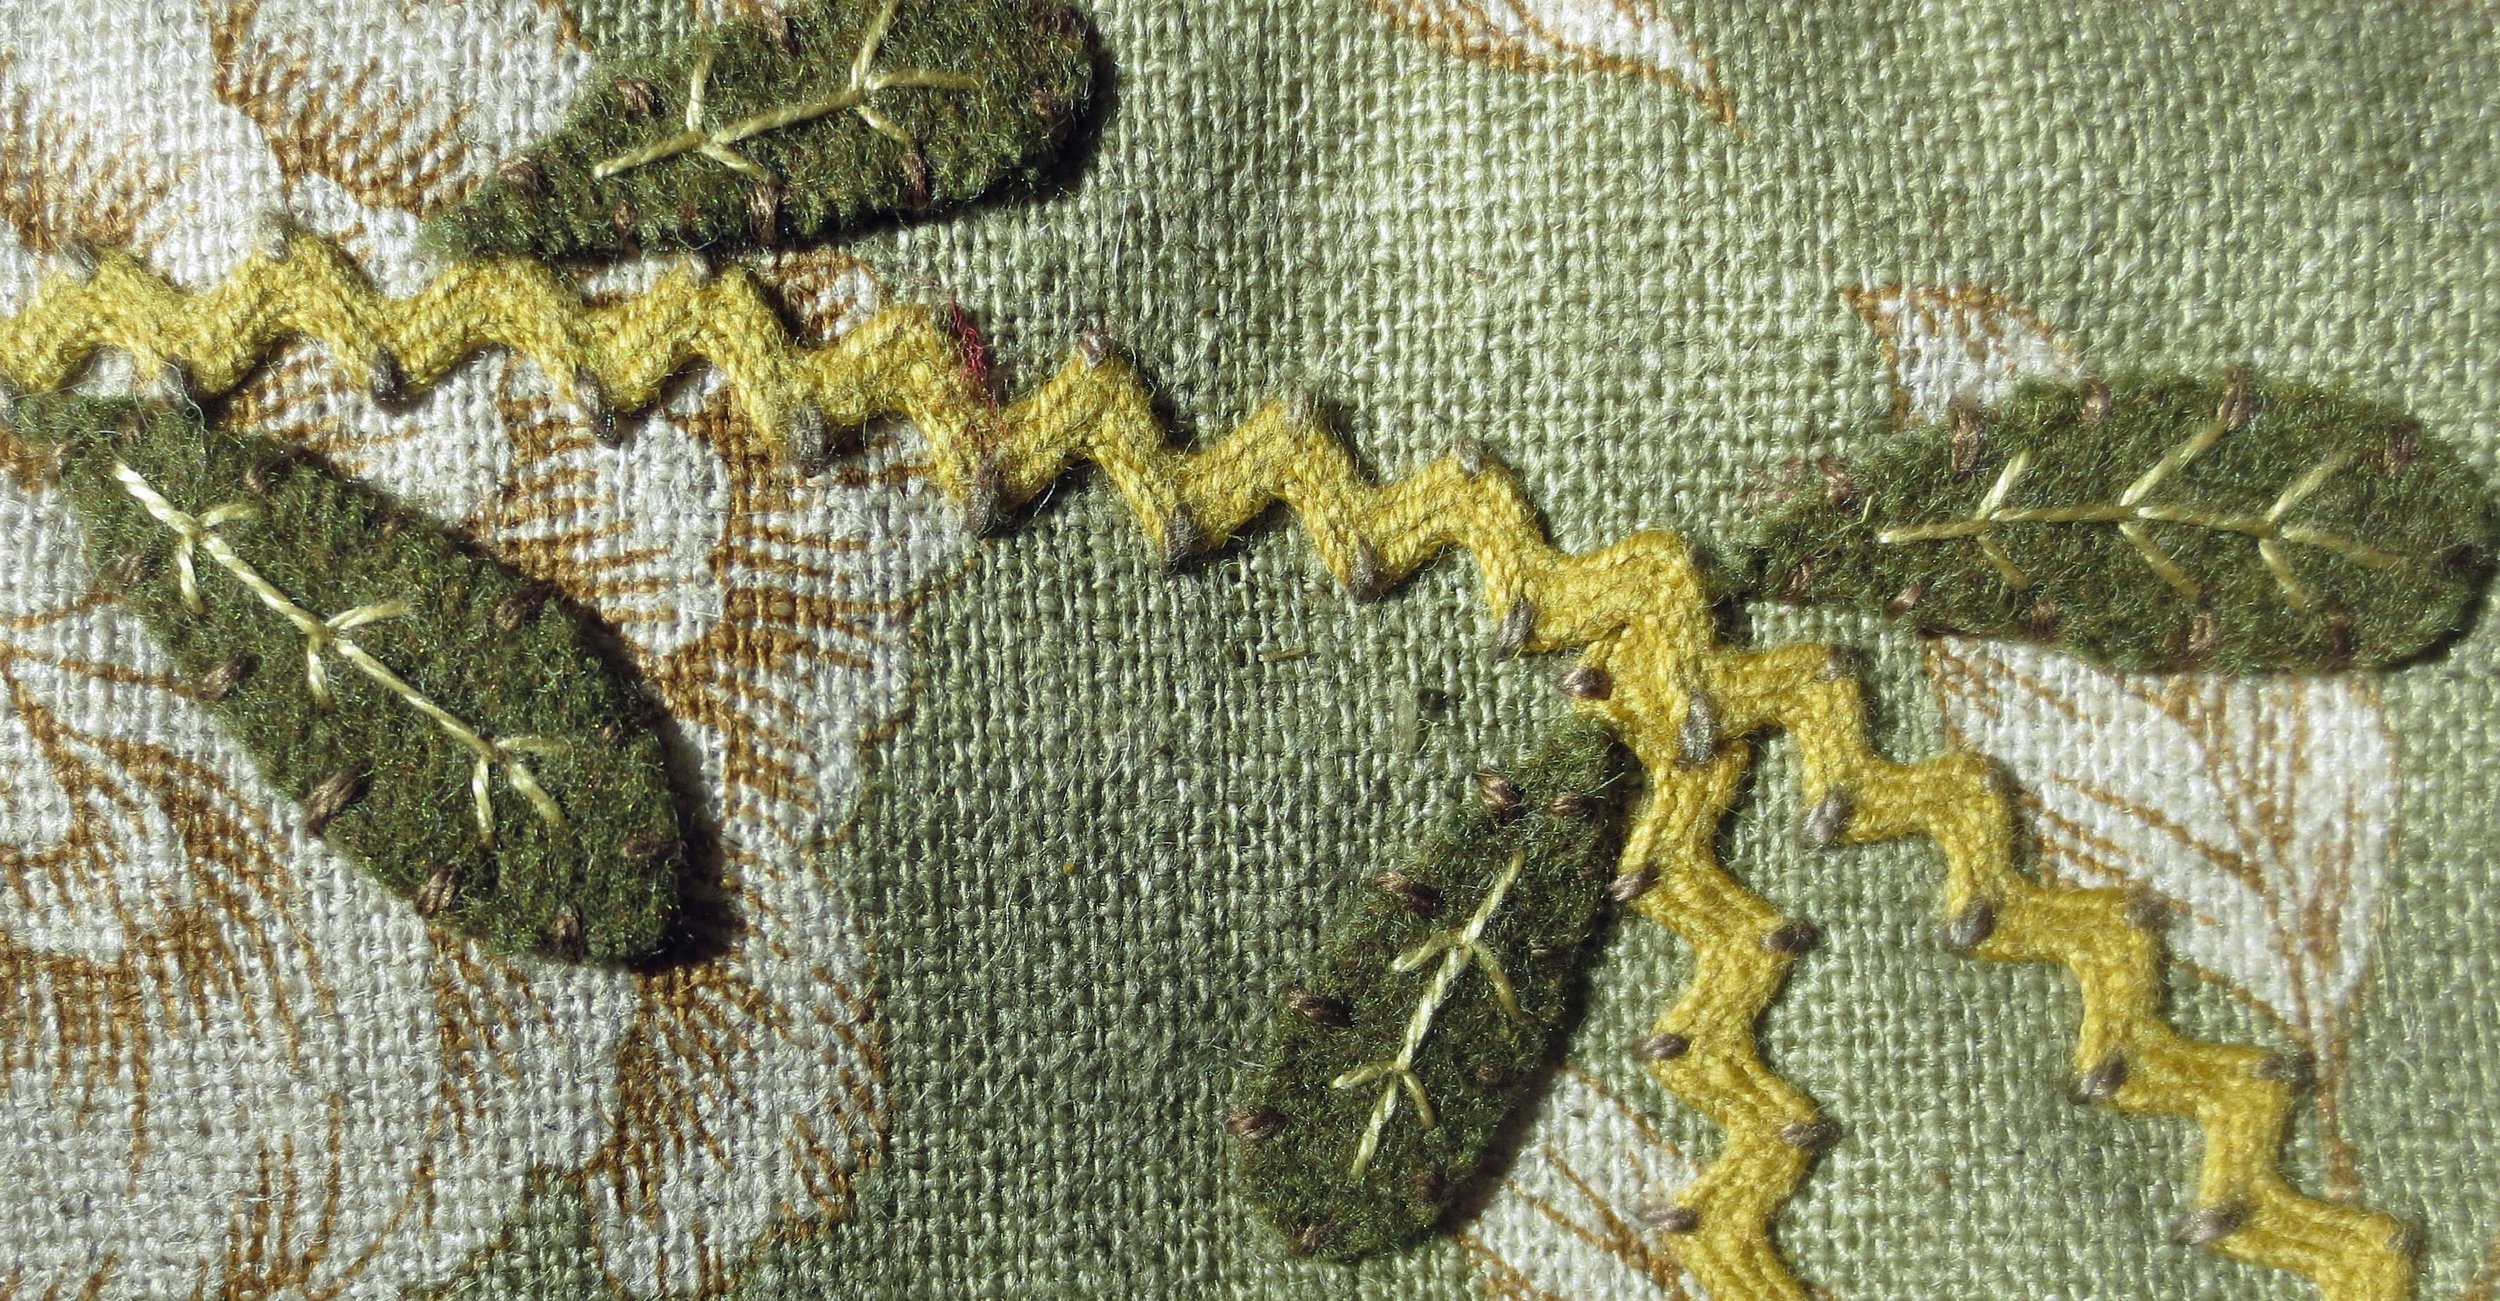
5. Cut the rickrack into three pieces.
Two 1 1/2 inch pieces
One 8 1/2 inch piece
6. Position the pig, flowers, leaves, and rickrack flower stem on the background fabric using the layout as a guide. Leave a 1/4 inch border for seam allowance.
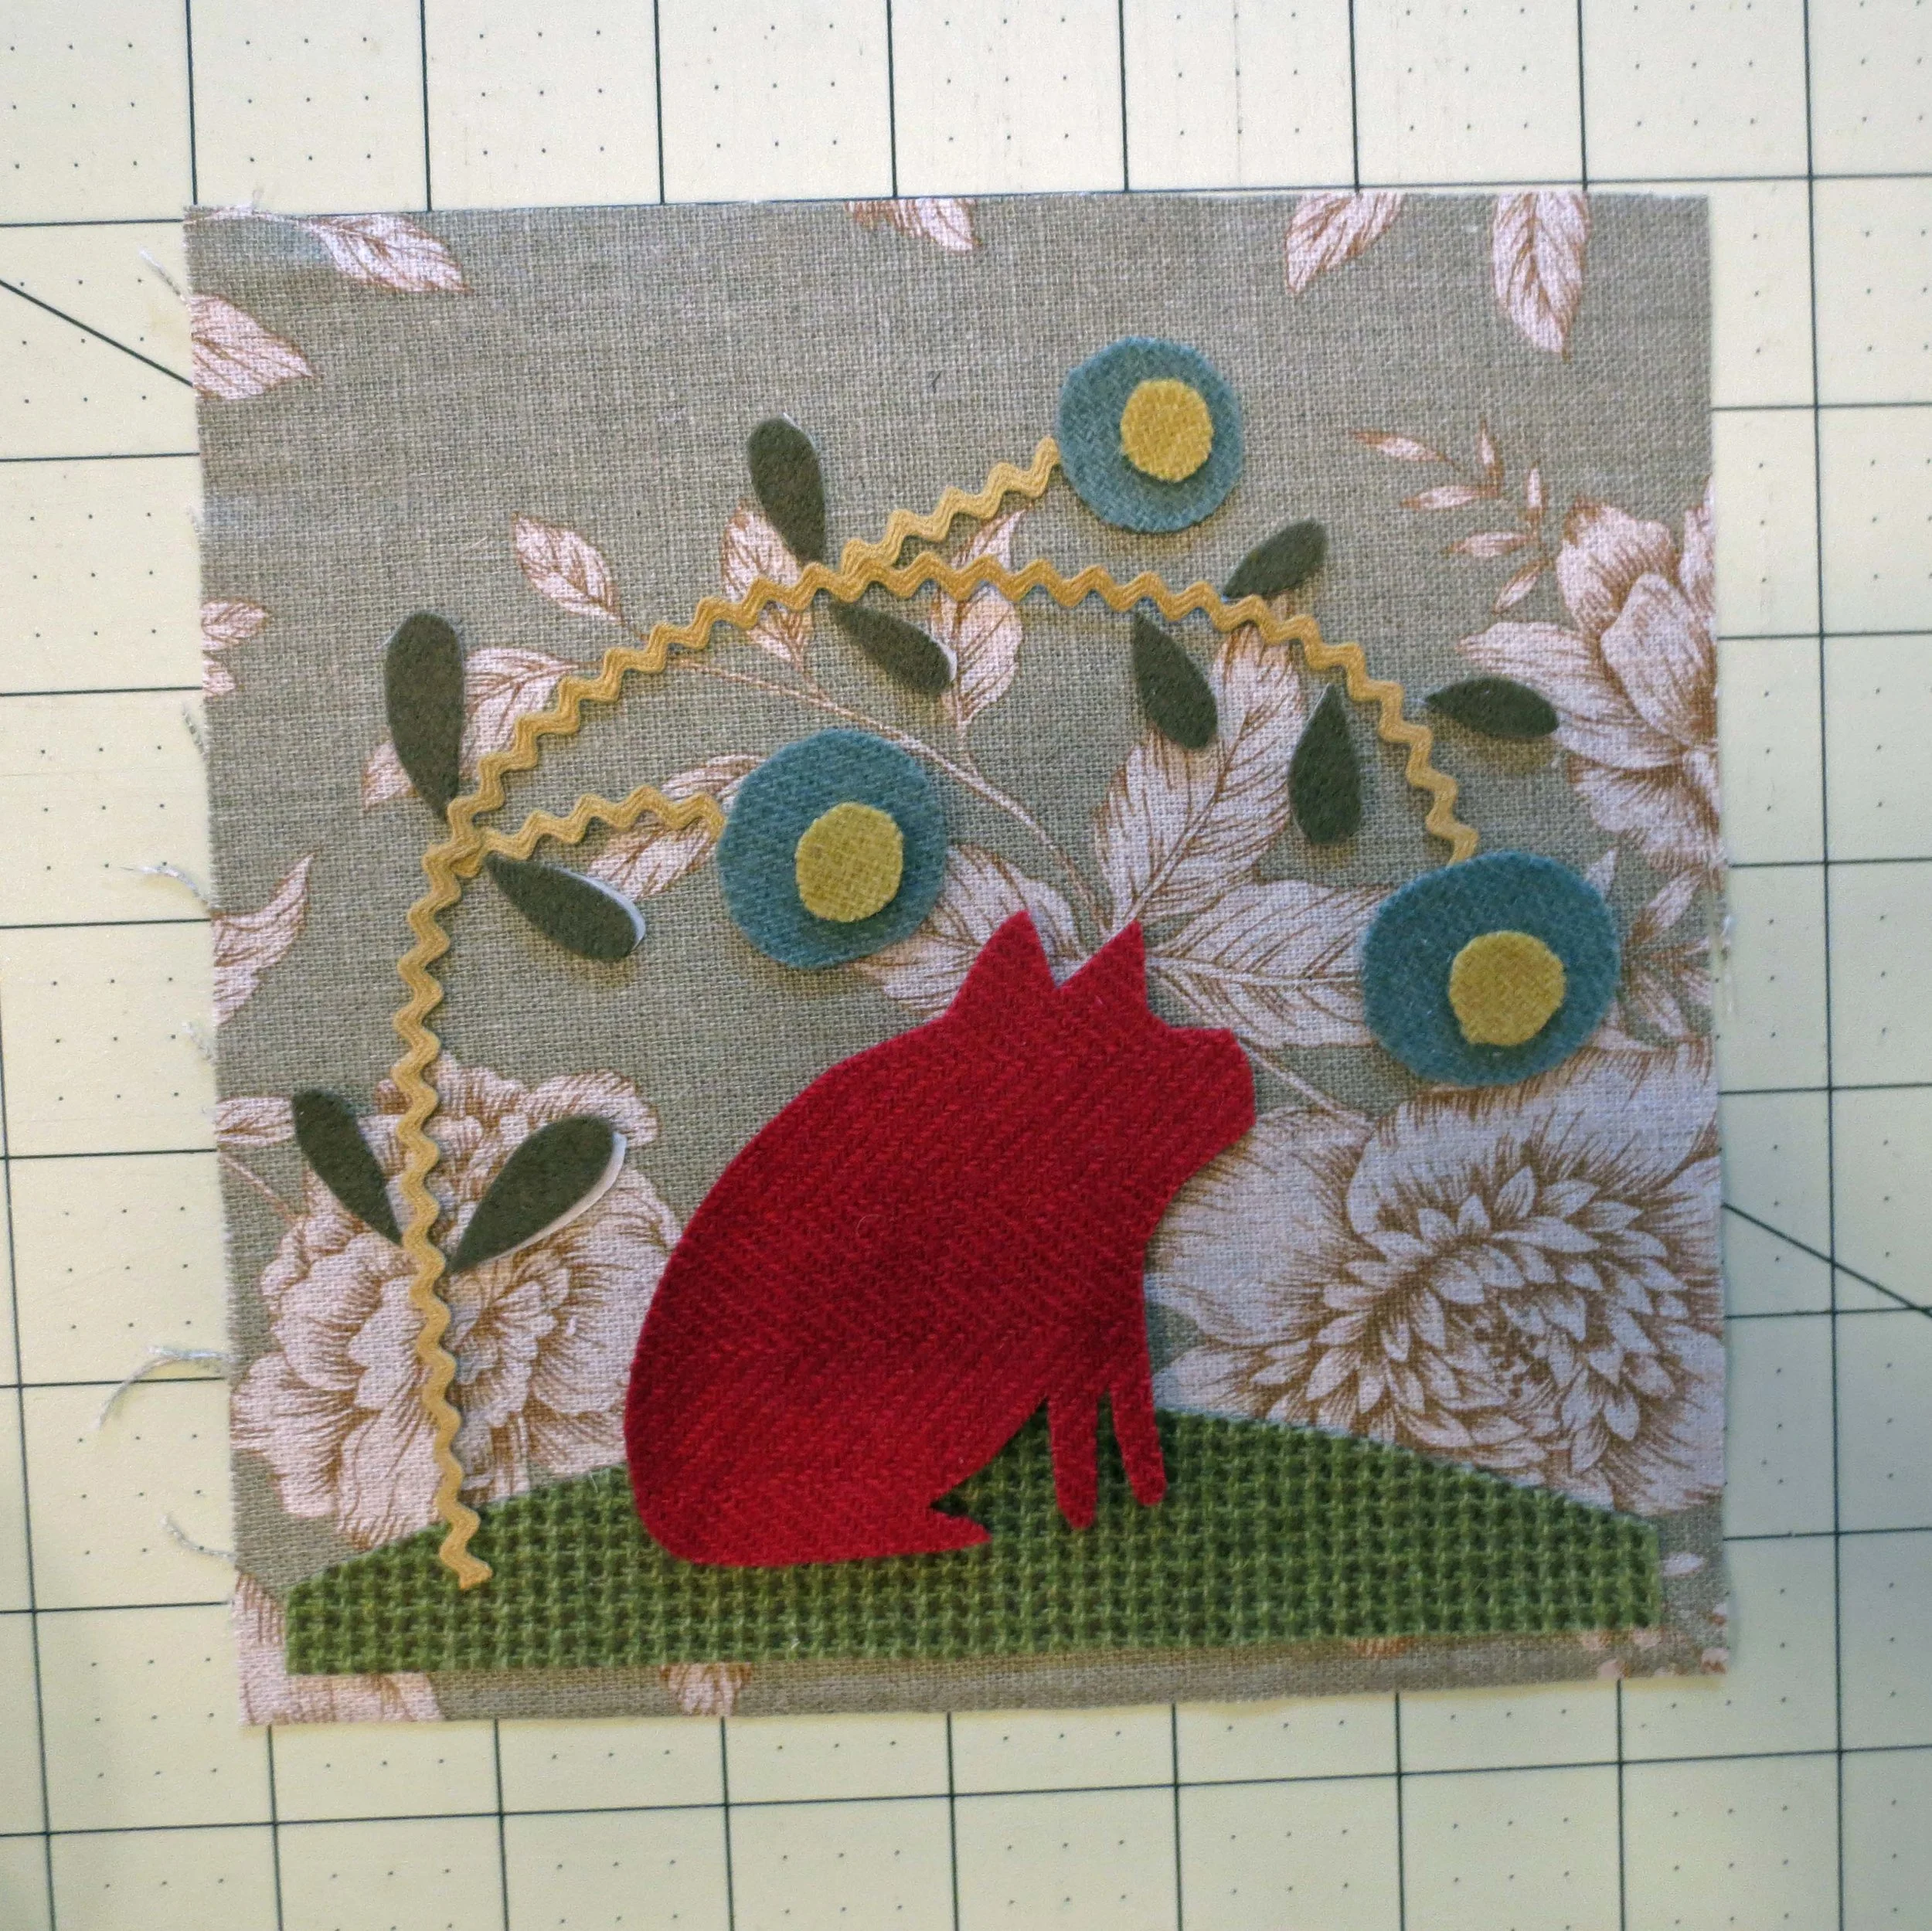
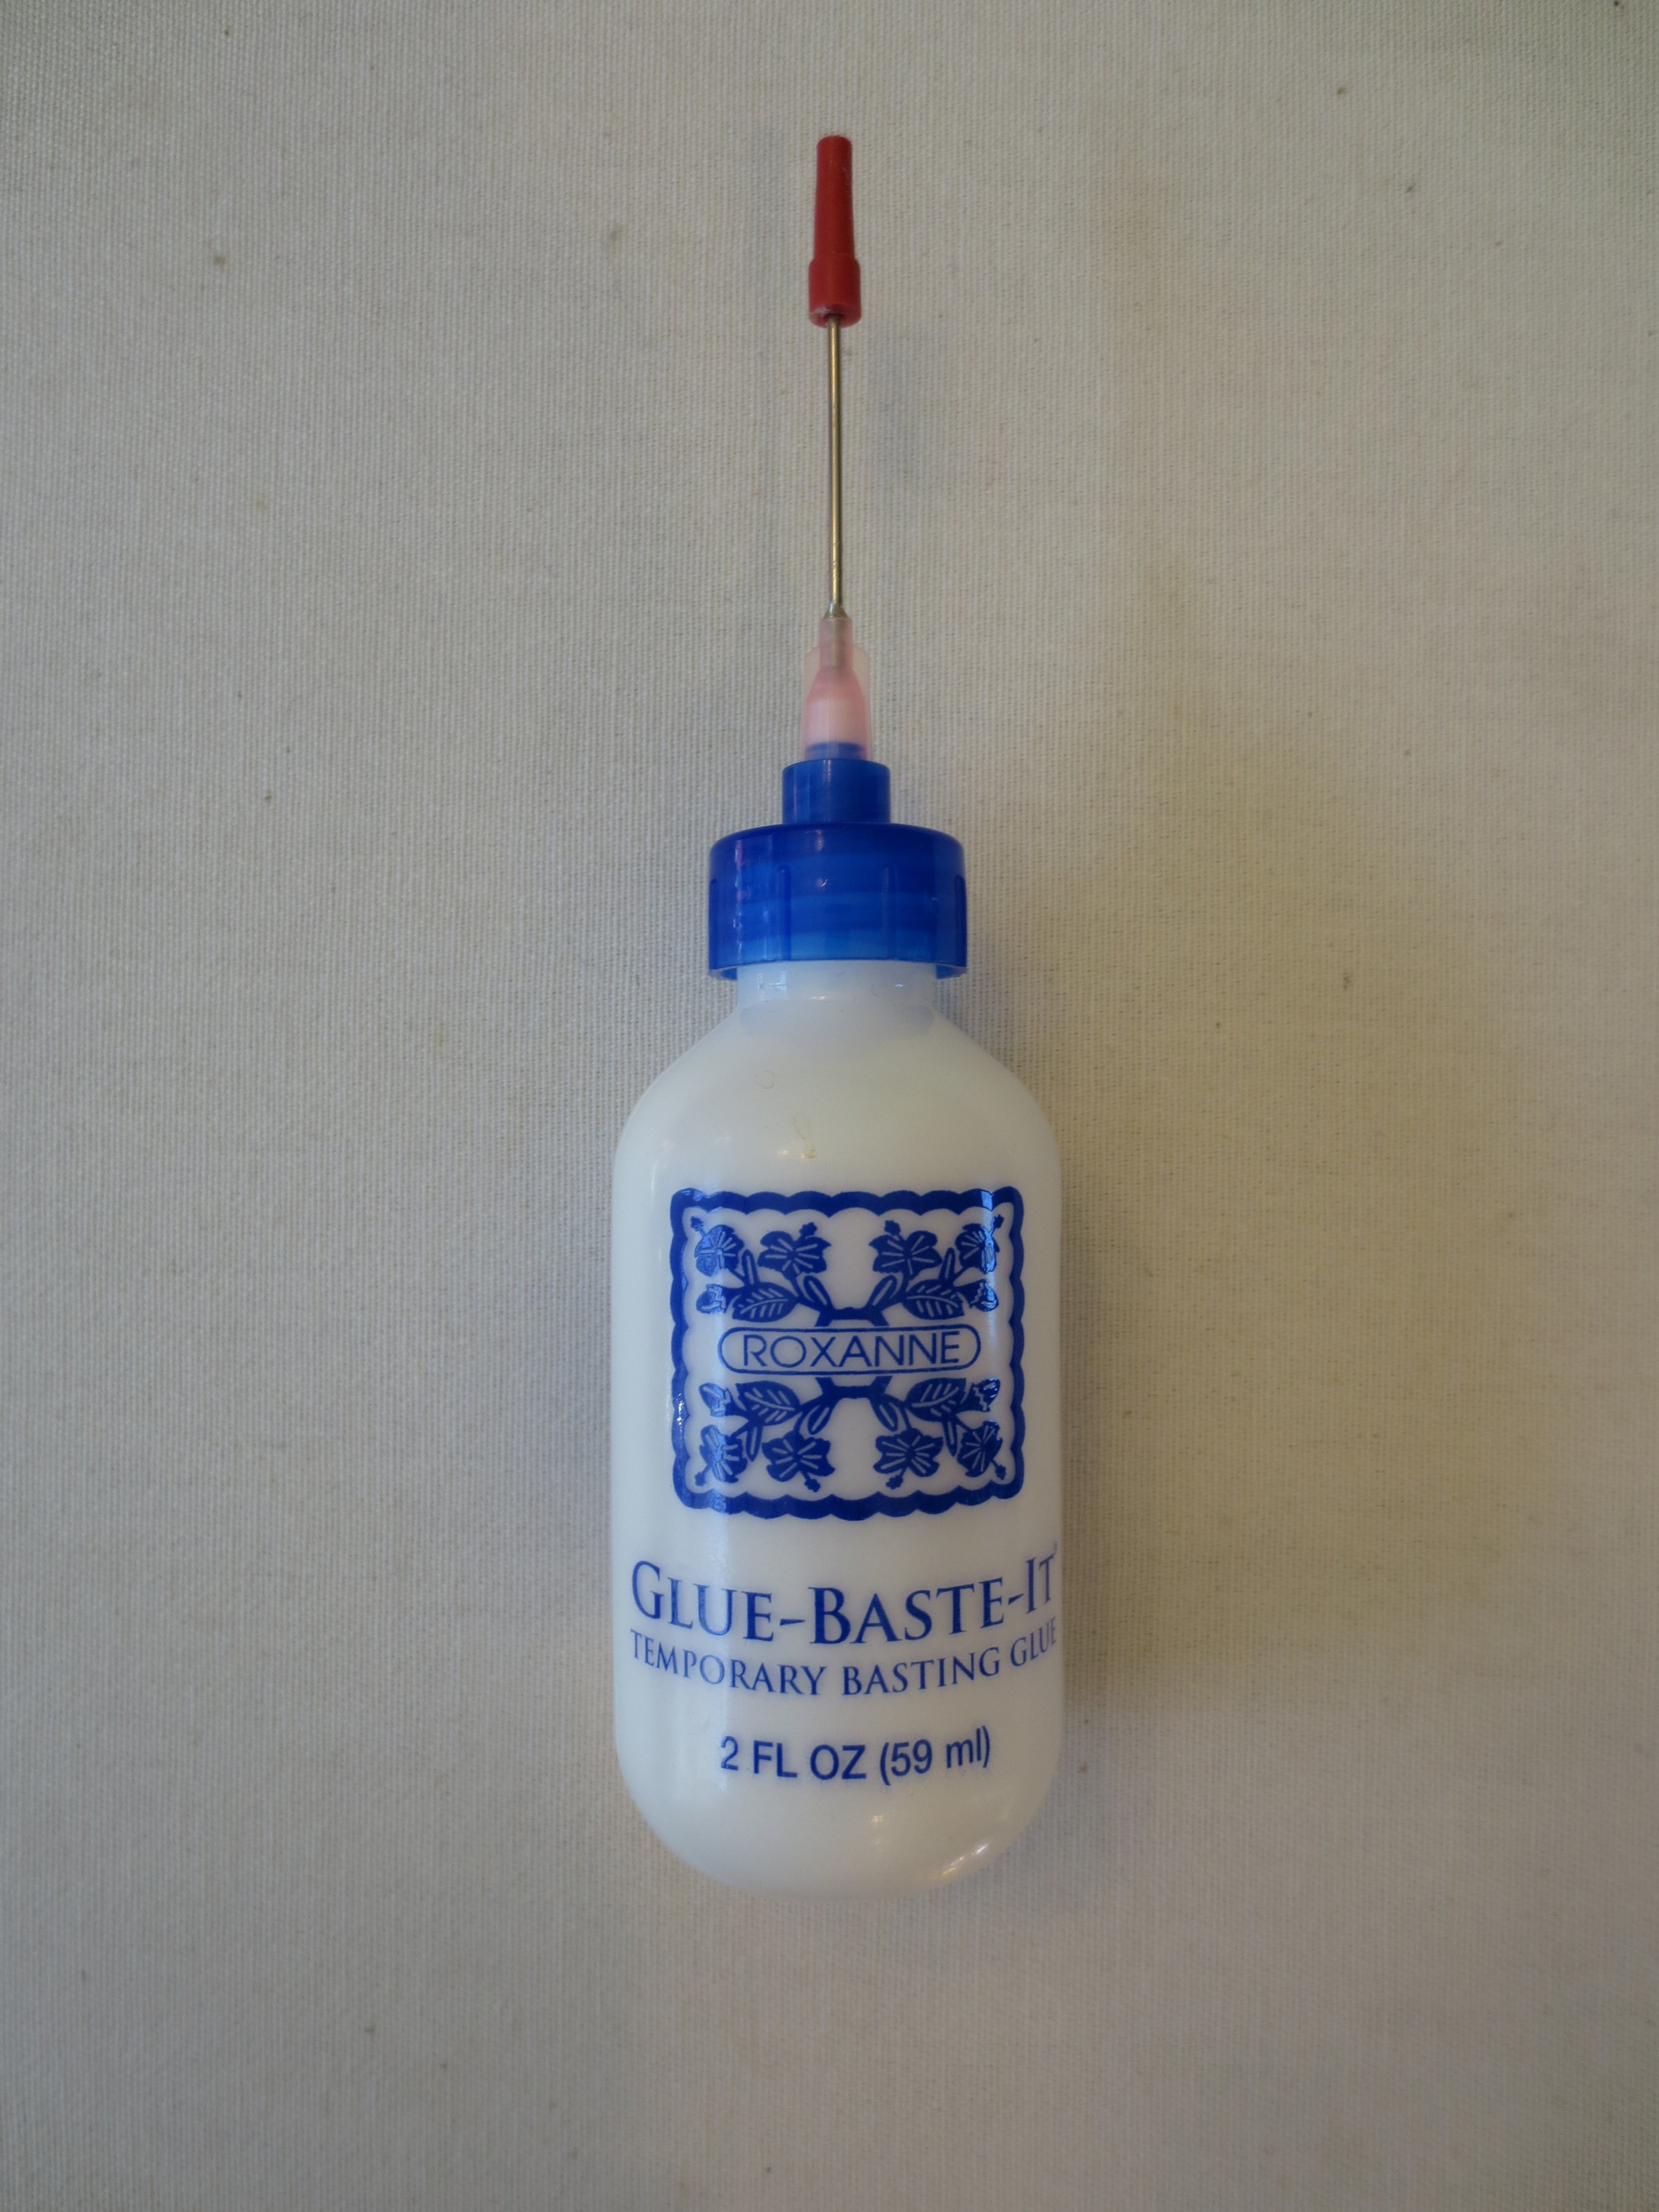
7. Carefully apply a drop of Roxanne Glue-Baste-It (see below) underneath the rickrack stem about ever inch or so. I use the glue instead of pinning the rickrack because the rickrack is so narrow that the pins distort the position of the stem. This glue seems to hold well after ironing, and can be applied to small surfaces without getting glue all over your project and yourself.
8. Remove the leaves and the flower centers.
9. Carefully transfer your project to your ironing board and press in place using steam. The glue underneath the rickrack will set with the heat.
10. Replace the flower centers on the flowers, and then fuse in place using steam.
11. Whip stitch the rickrack first using a single strand of Valdani perle cotton, size 12, color #O518. I placed my stitches at each lobe of the rick rack.

12. Whip stitch the flowers using one strand of perle cotton, size 12 (#871).
13. Whip stitch the flower centers with two strands of embroidery floss.
14. Whip stitch the pig with one strand of perle cotton, size 12 (#775).
15. Whip stitch the ground with one strand of perle cotton, #O518.
16. Use the same thread used for the pig to stitch a series of fly stitches around each flower center.
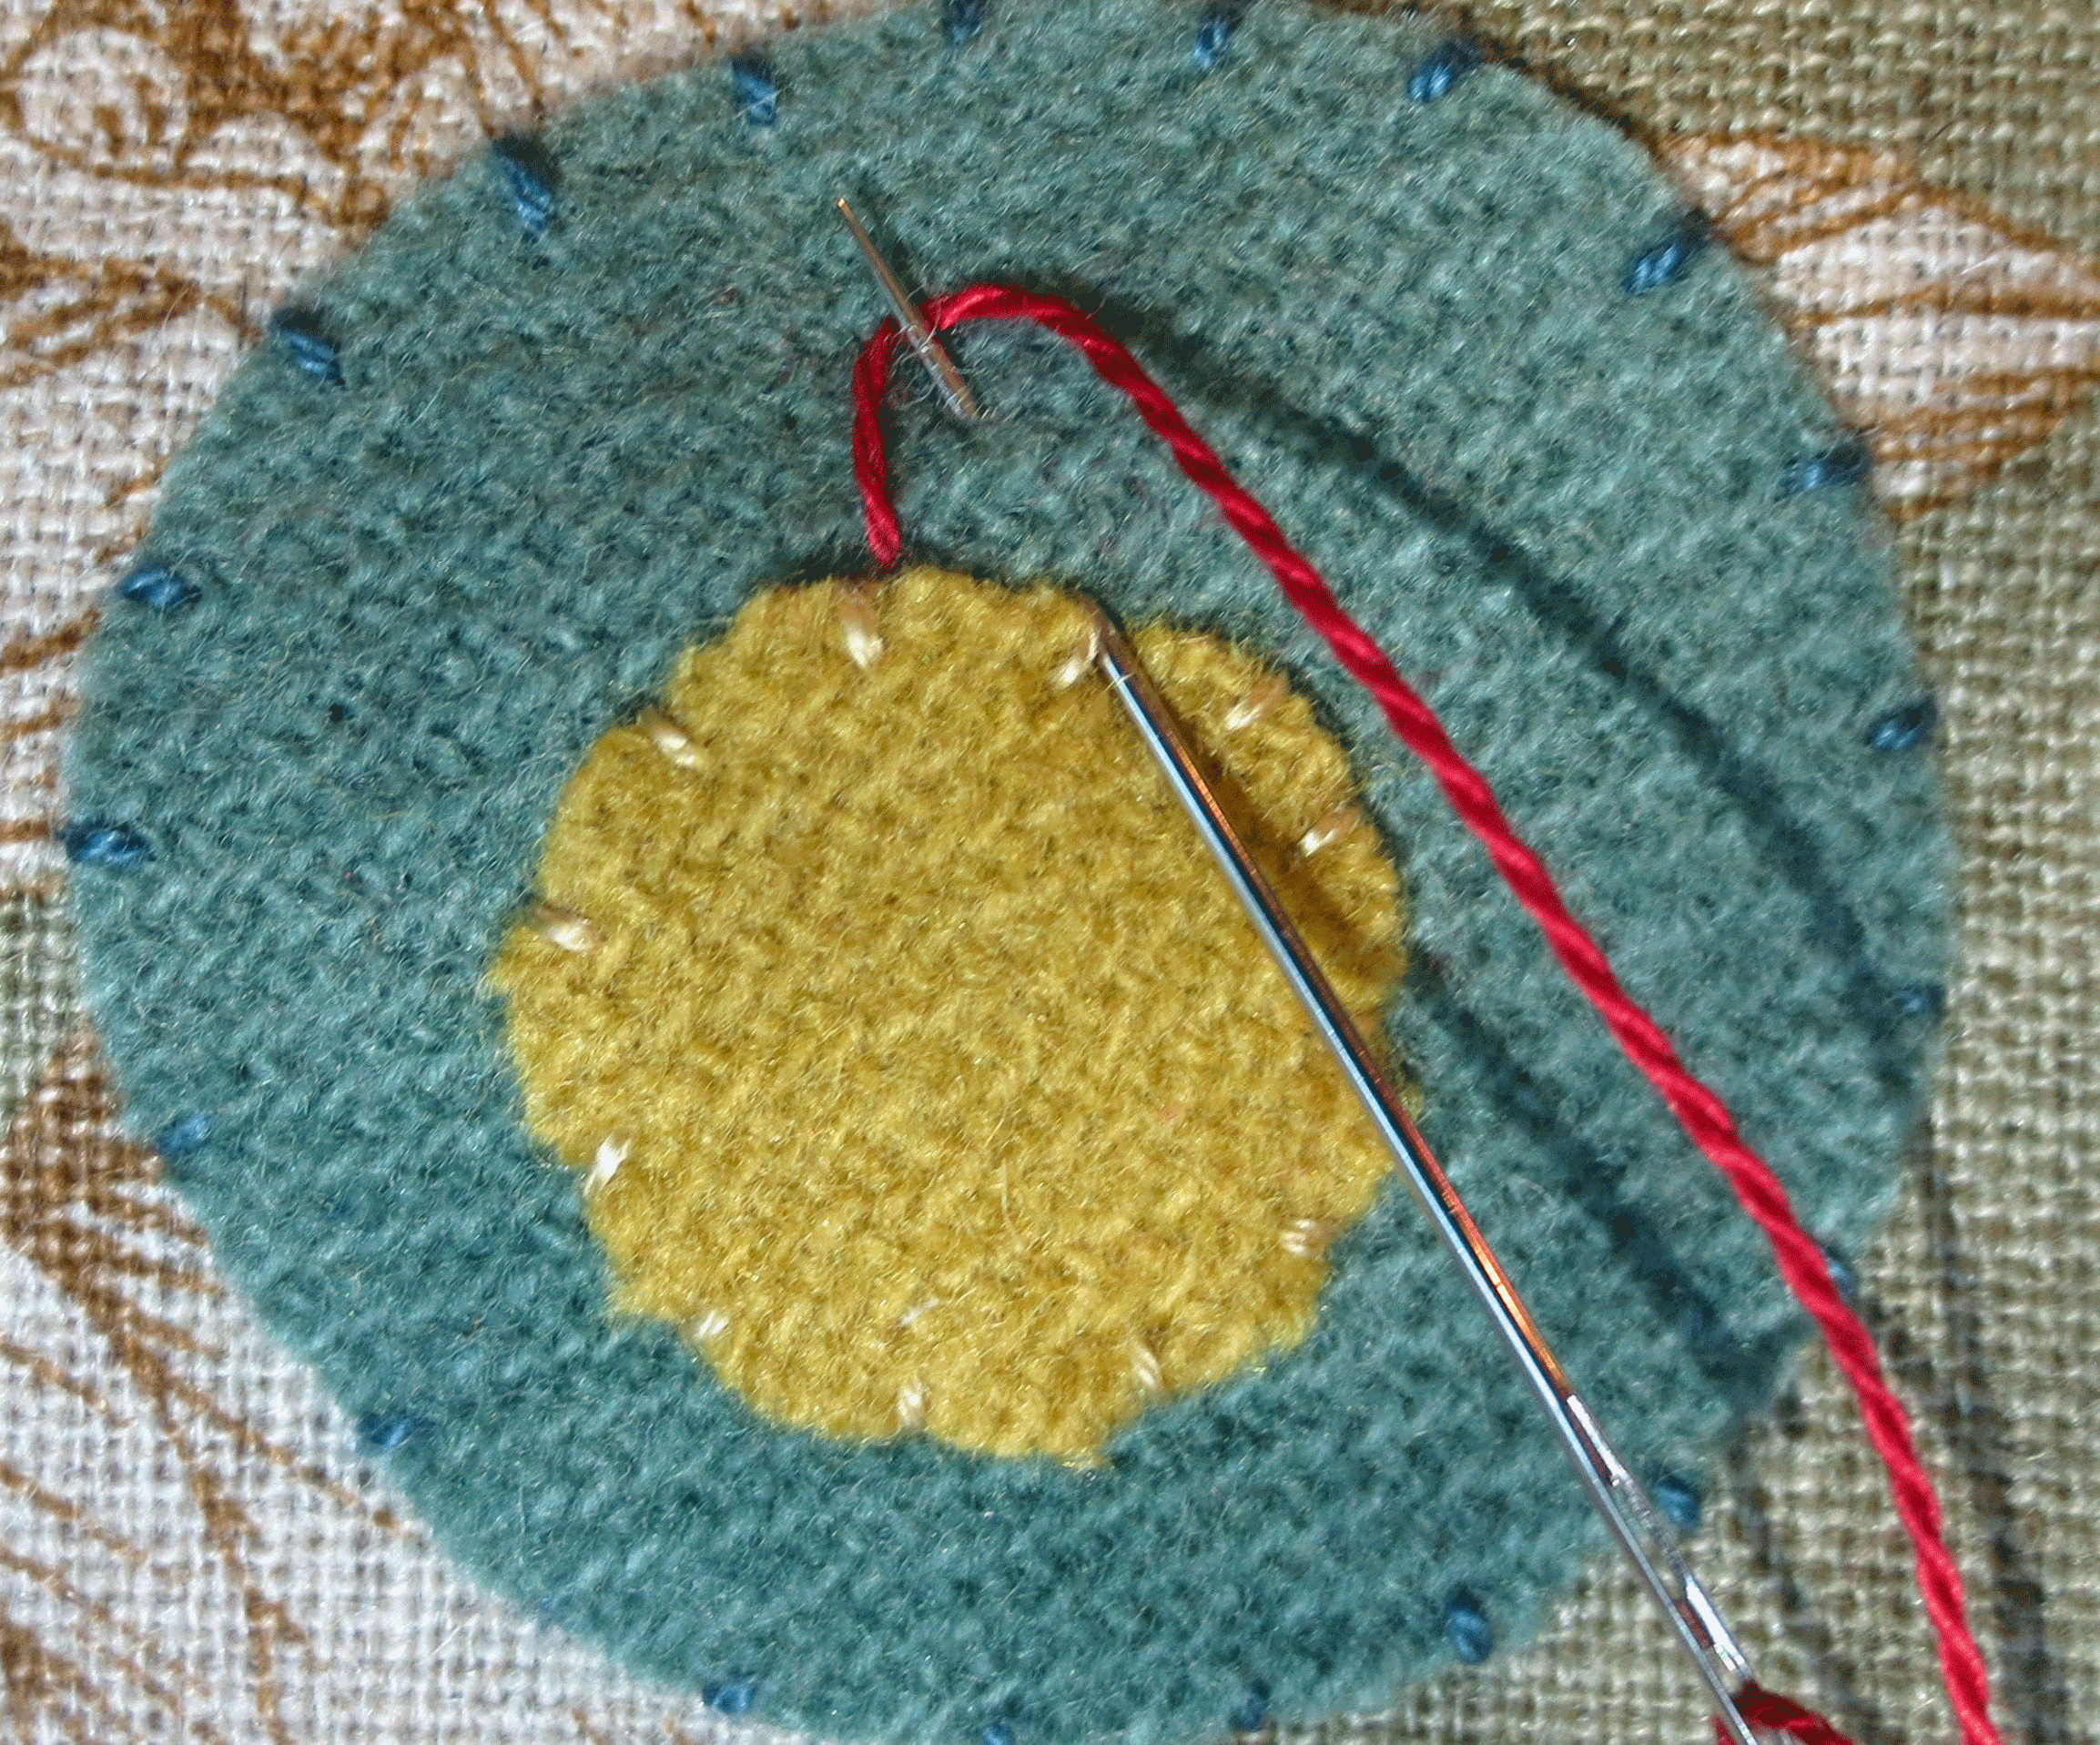
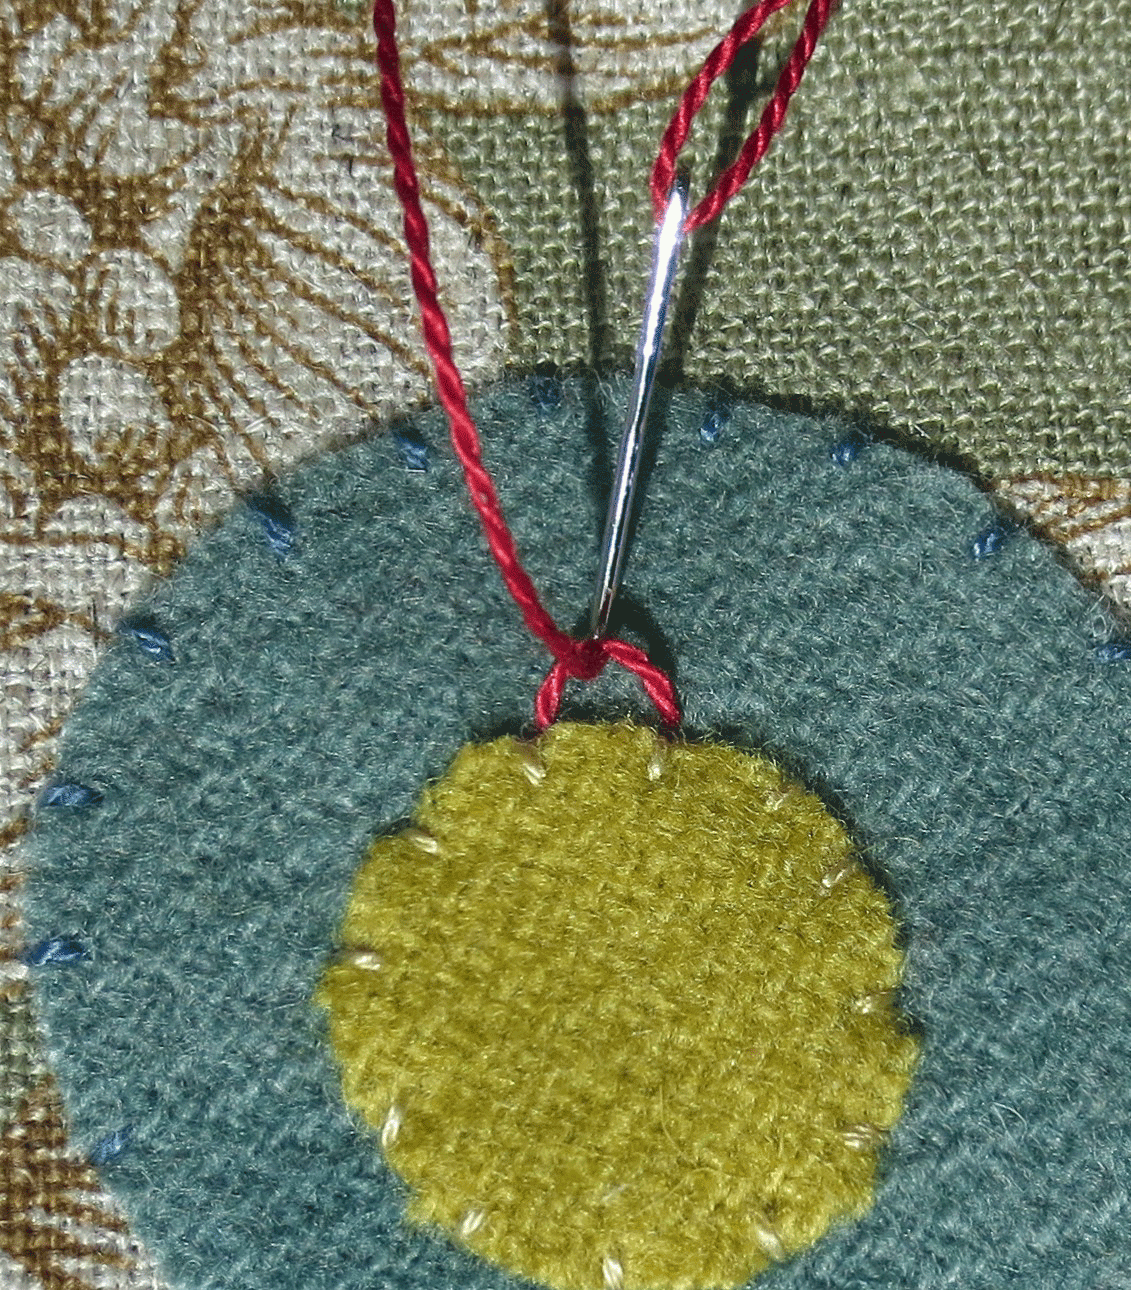

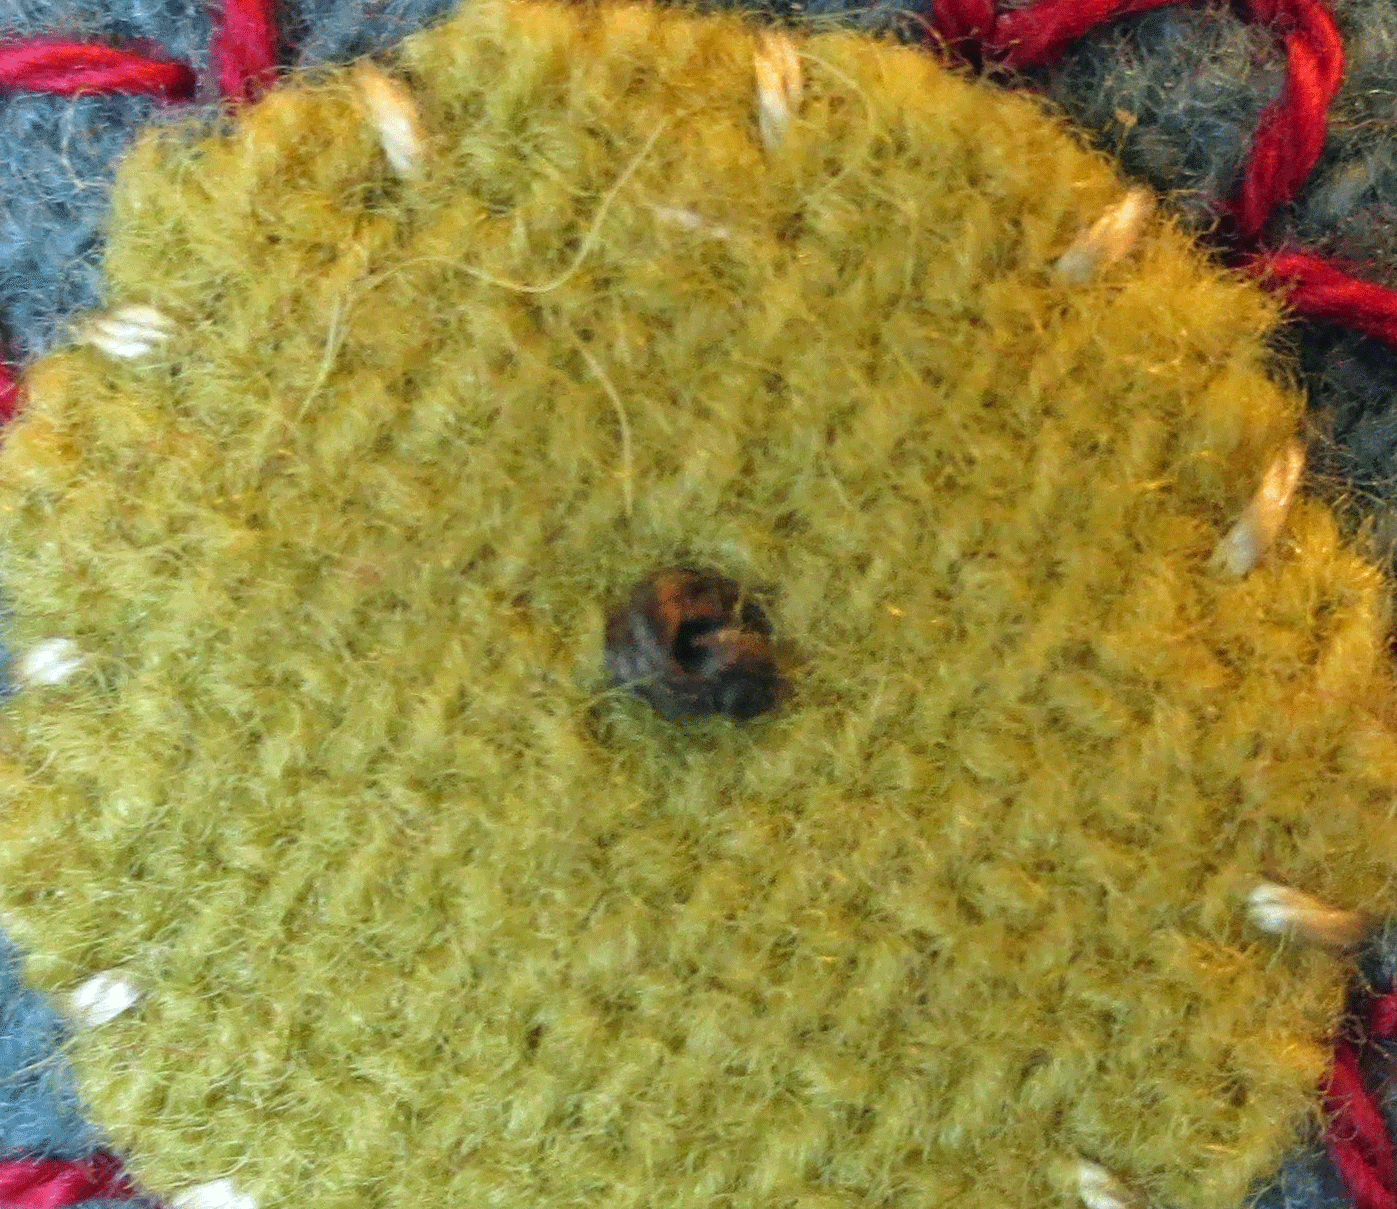
17. Use one strand of #O518 to make a single french knot/colonial knot in the center of each flower center.
The pictures below show how to make a colonial knot. After bringing the thread up through your flower center, slide your needle under and to the right of the thread. While holding the thread down with your left thumb, turn your needle to the left, so it’s perpendicular to the thread you are holding with your left thumb. Wrap the thread around the needle twice and pull taut.
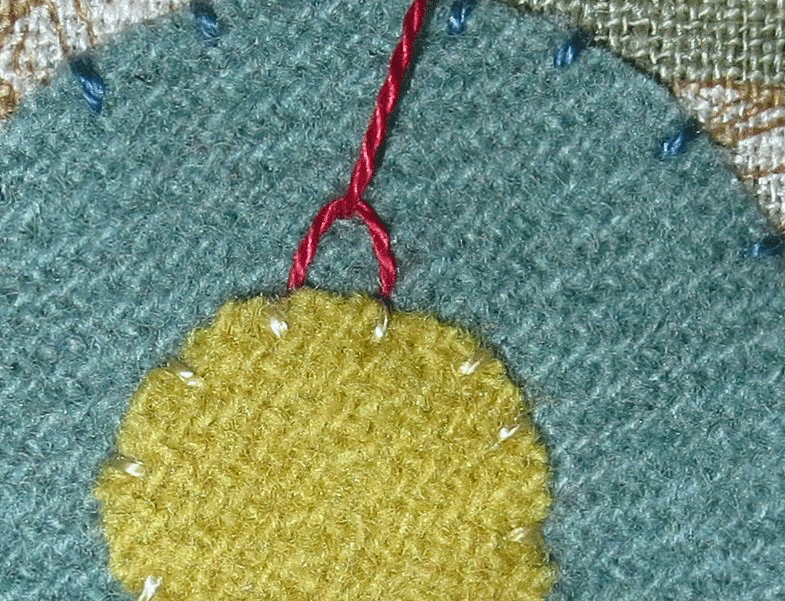
Now, carefully insert the needle right next to the point where the thread came up from. Keep holding the thread taut with your left thumb until the needle is pulled through the back of your work.
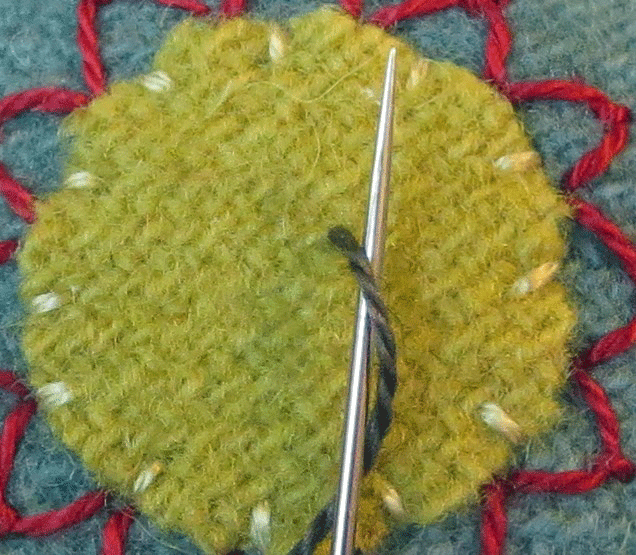
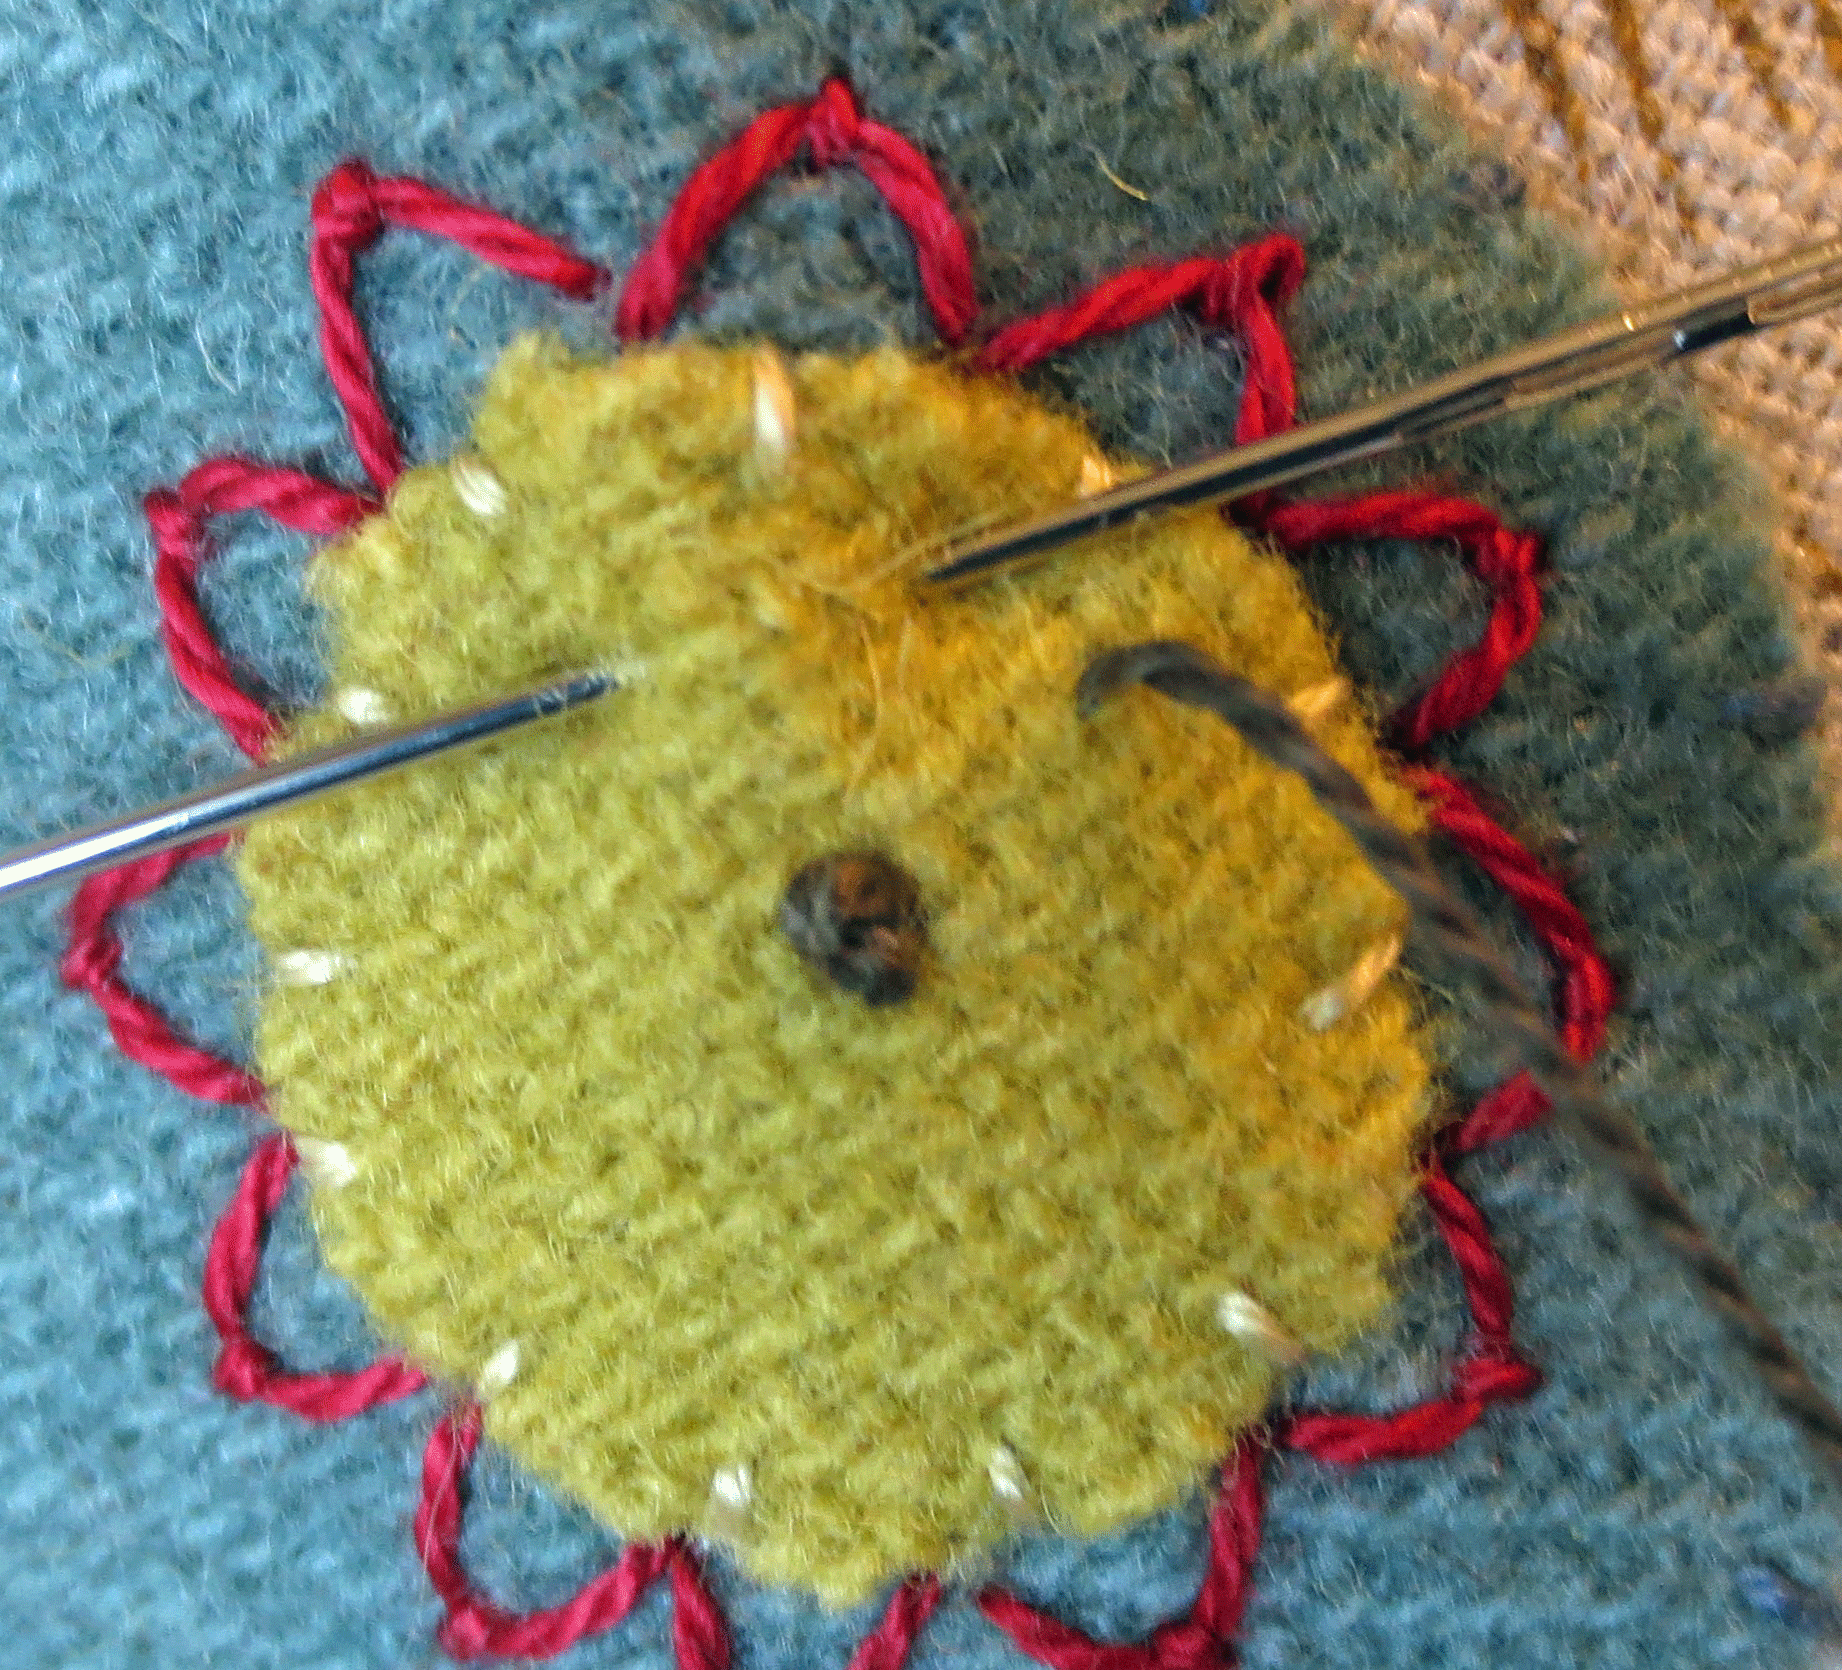
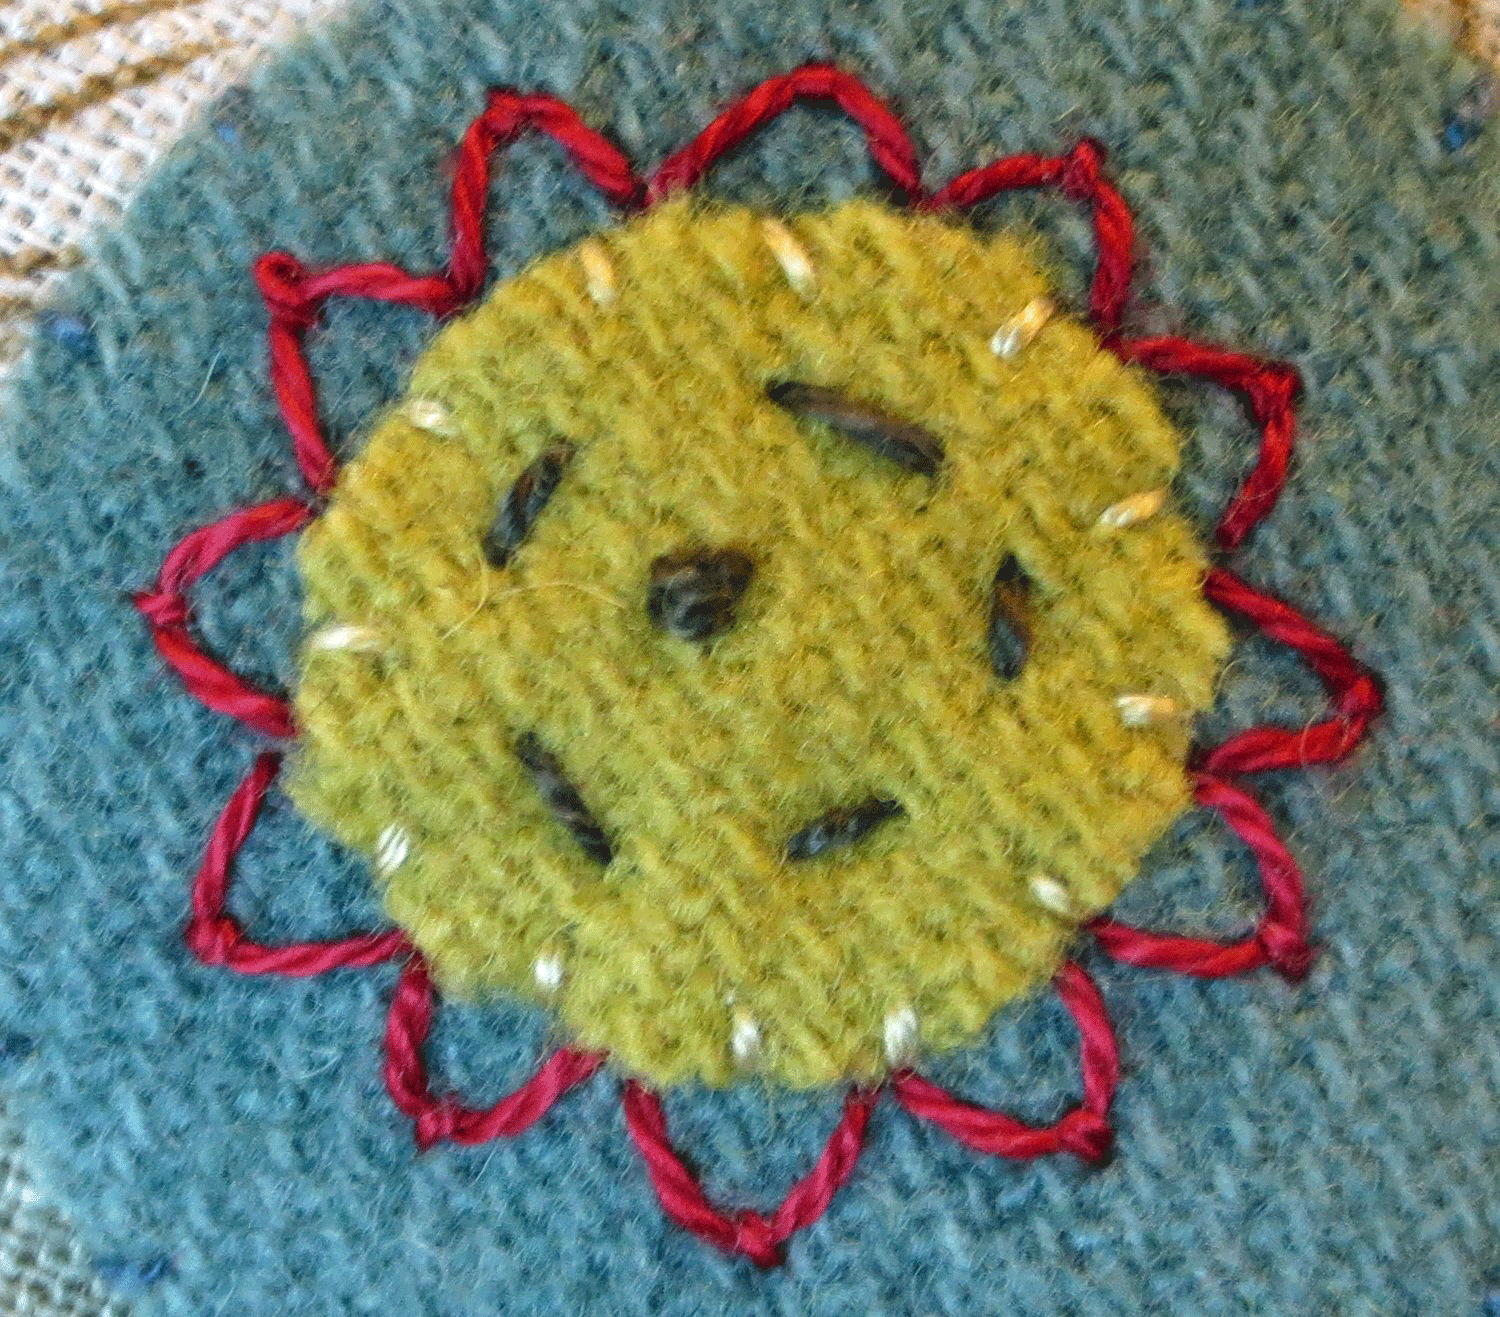
18. Bring the same thread to the front and make a series of running stitches around the center knot.
19. Cut a piece of Press ‘n Seal large enough to fit over the pig.
20. Place the Press ‘n Seal on top of the pig image in the Layout. Trace the back leg line, tail, nose, eye, and ears.
21. Remove the Press ‘n Seal from the Layout and press onto your project.
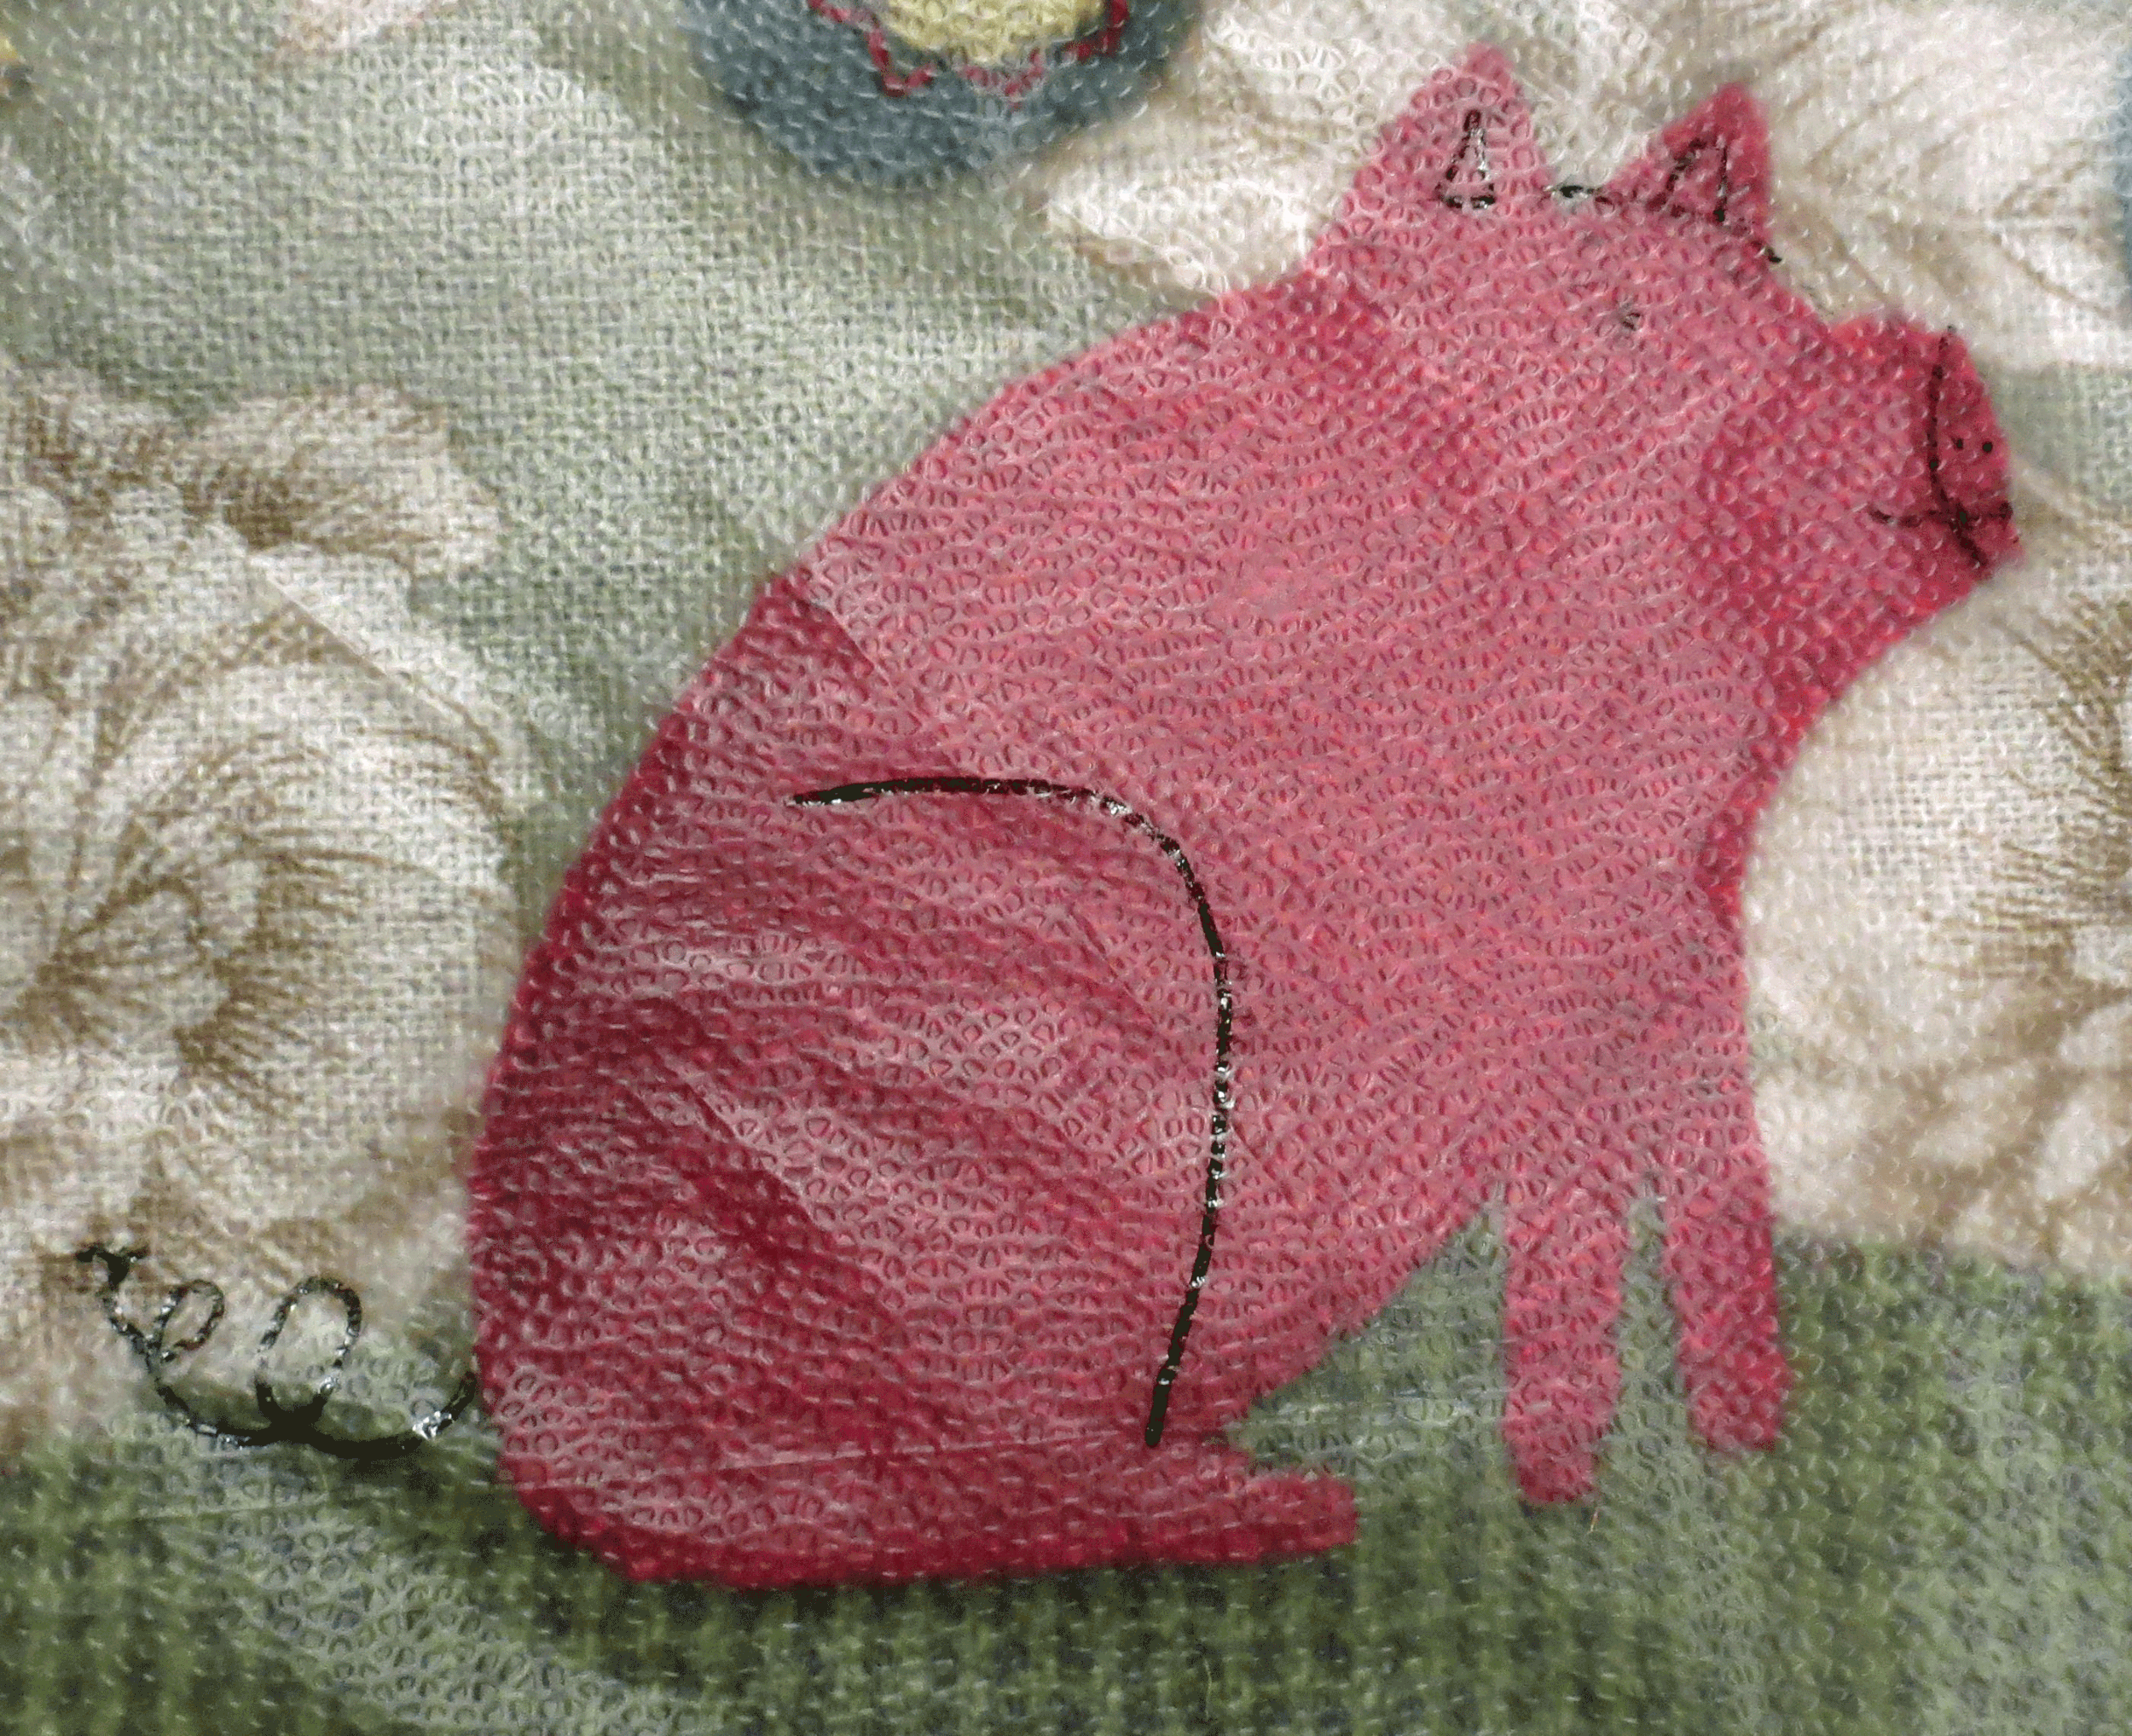
22. Use one strand of embroidery floss (DMC #3046) to backstitch over the lines that create the leg, snout, mouth, and head.
23. Use the same thread to make two fly stitches over each of the ears (the fly stitches are made one inside the other). Make a single straight stitch under each ear.
24. Make two french knot for the nose with the same thread.
25. Make a single colonial knot for the eye with the same thread.
26. Use a single strand of perle cotton, size 12, #O775 to back stitch the tail.

27. Gently pull the Press ‘n Seal away from the stitches. You may need to use tweezers to pull small pieces from under the stitches.
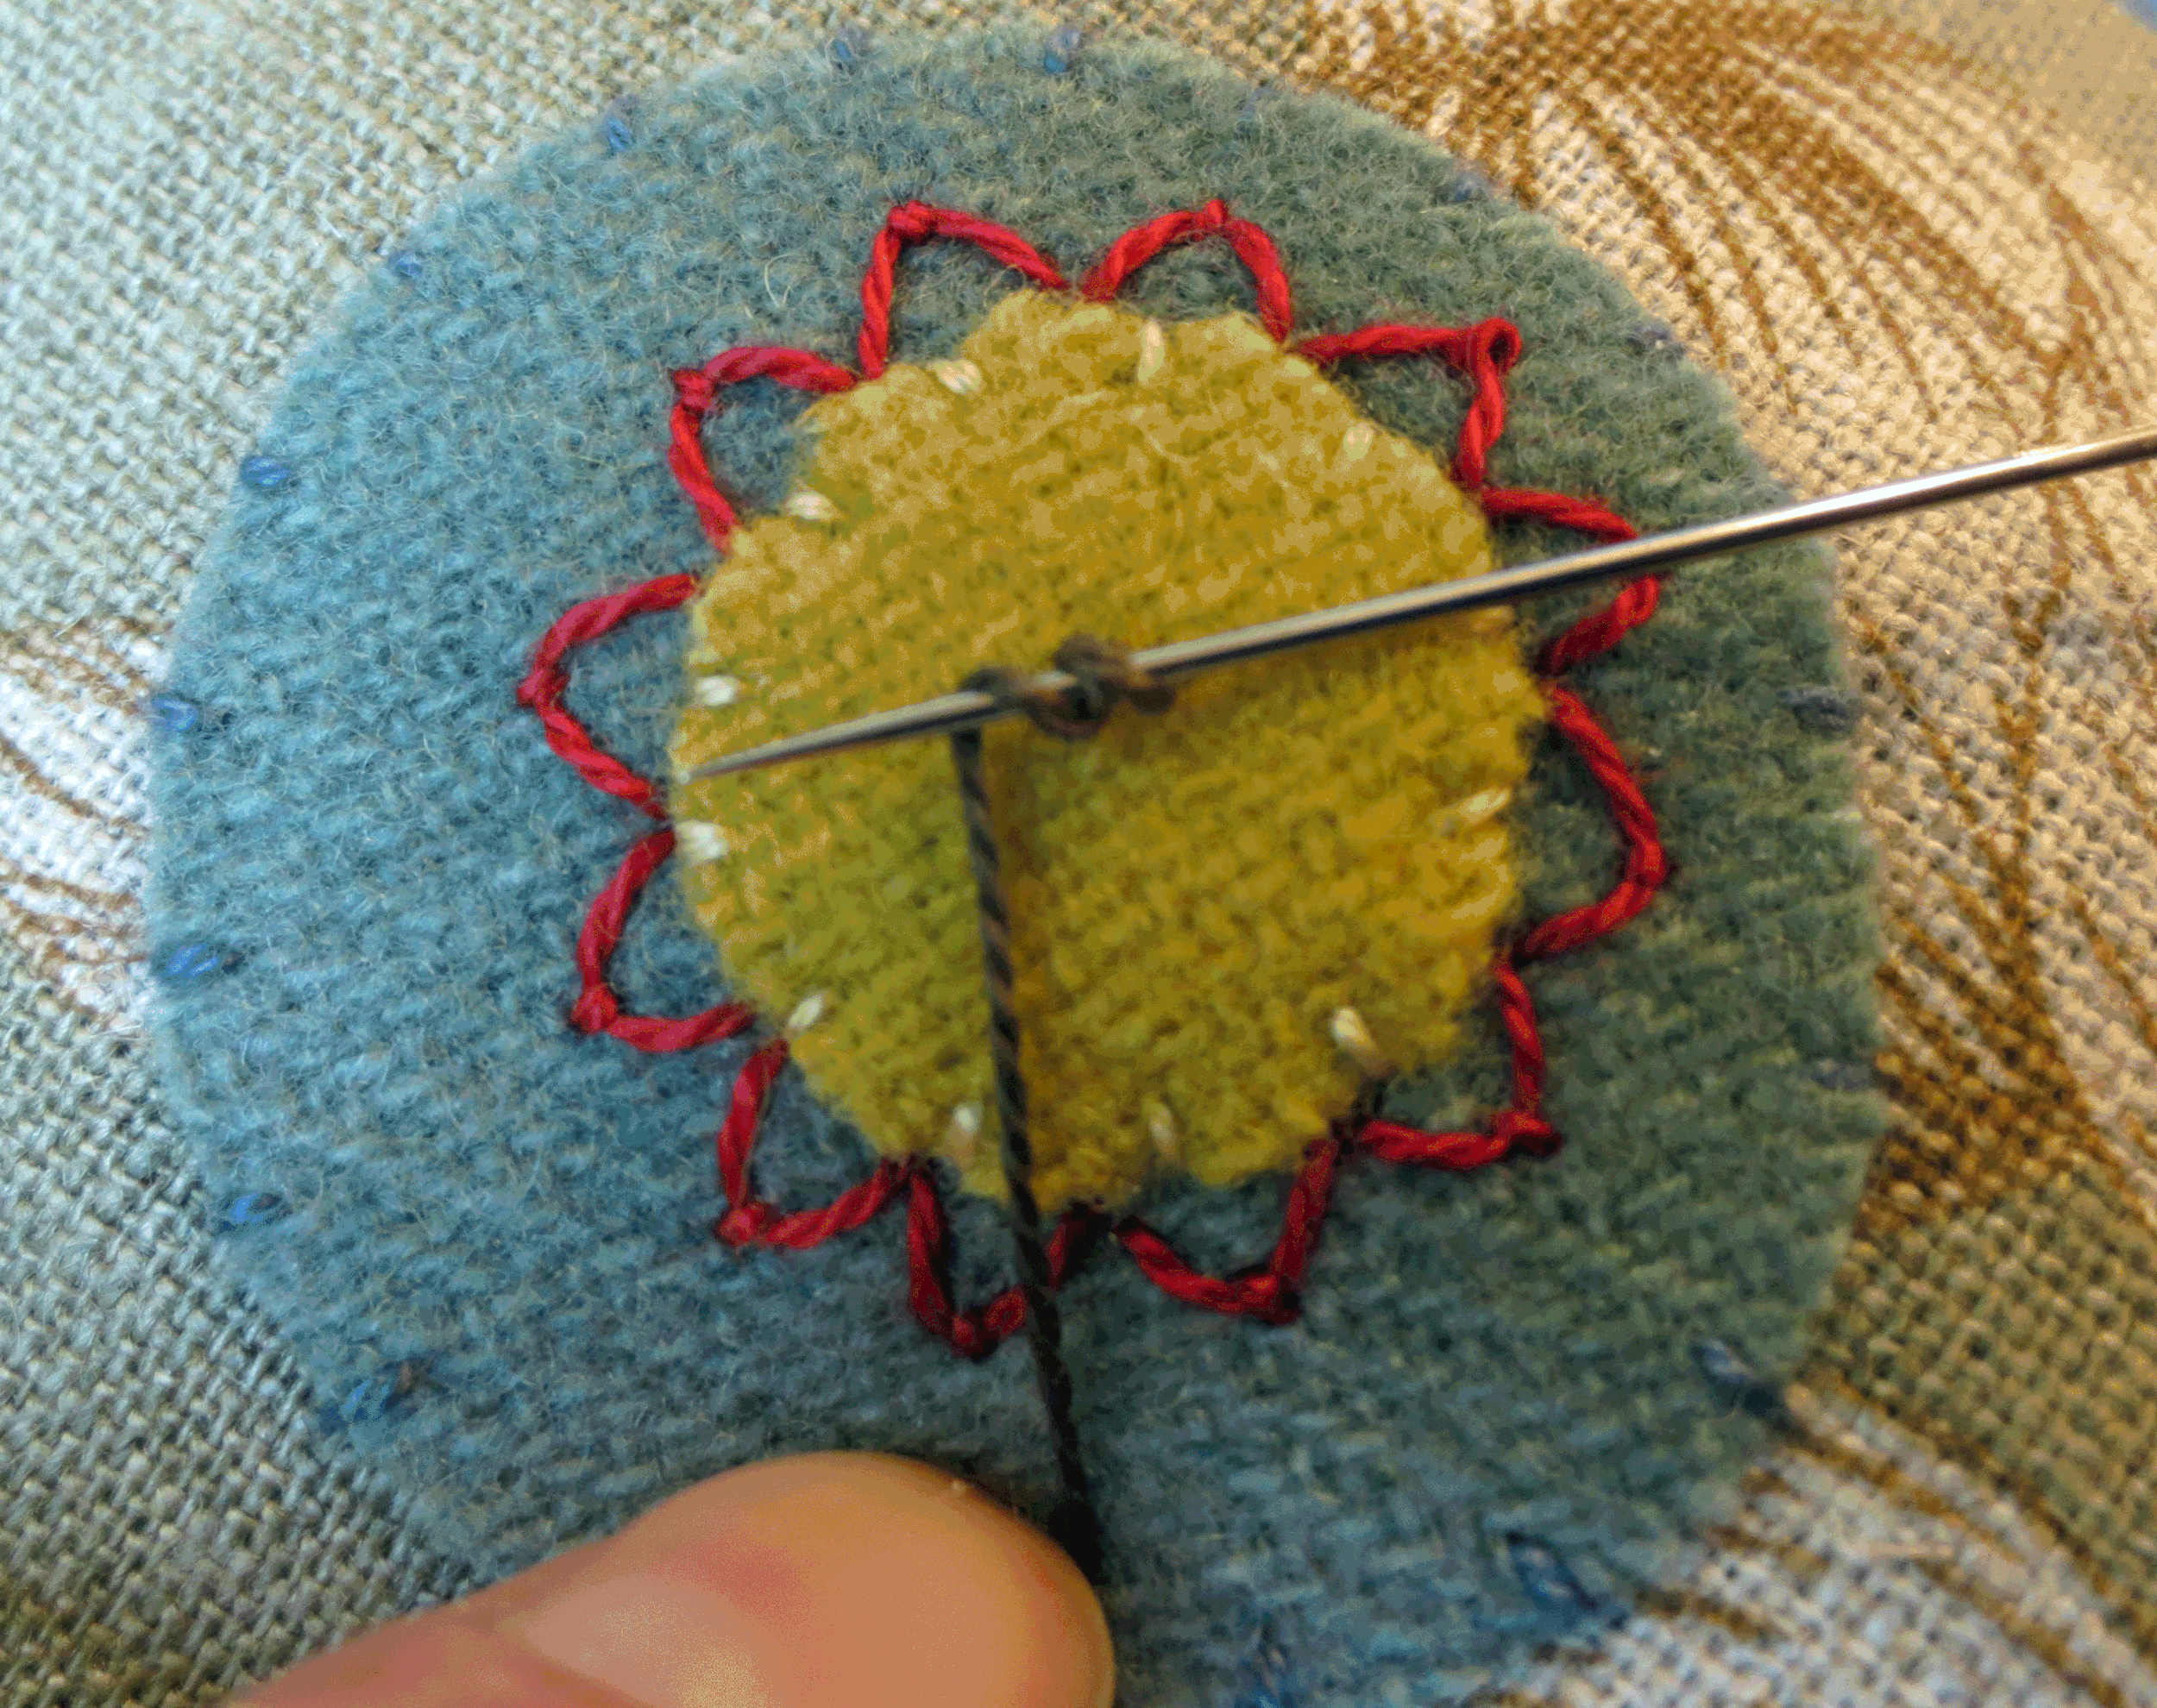
28. Position the leaves along the stem and fuse in place using steam.
29. Whip stitch the leaves with 2 strands of DMC #610.
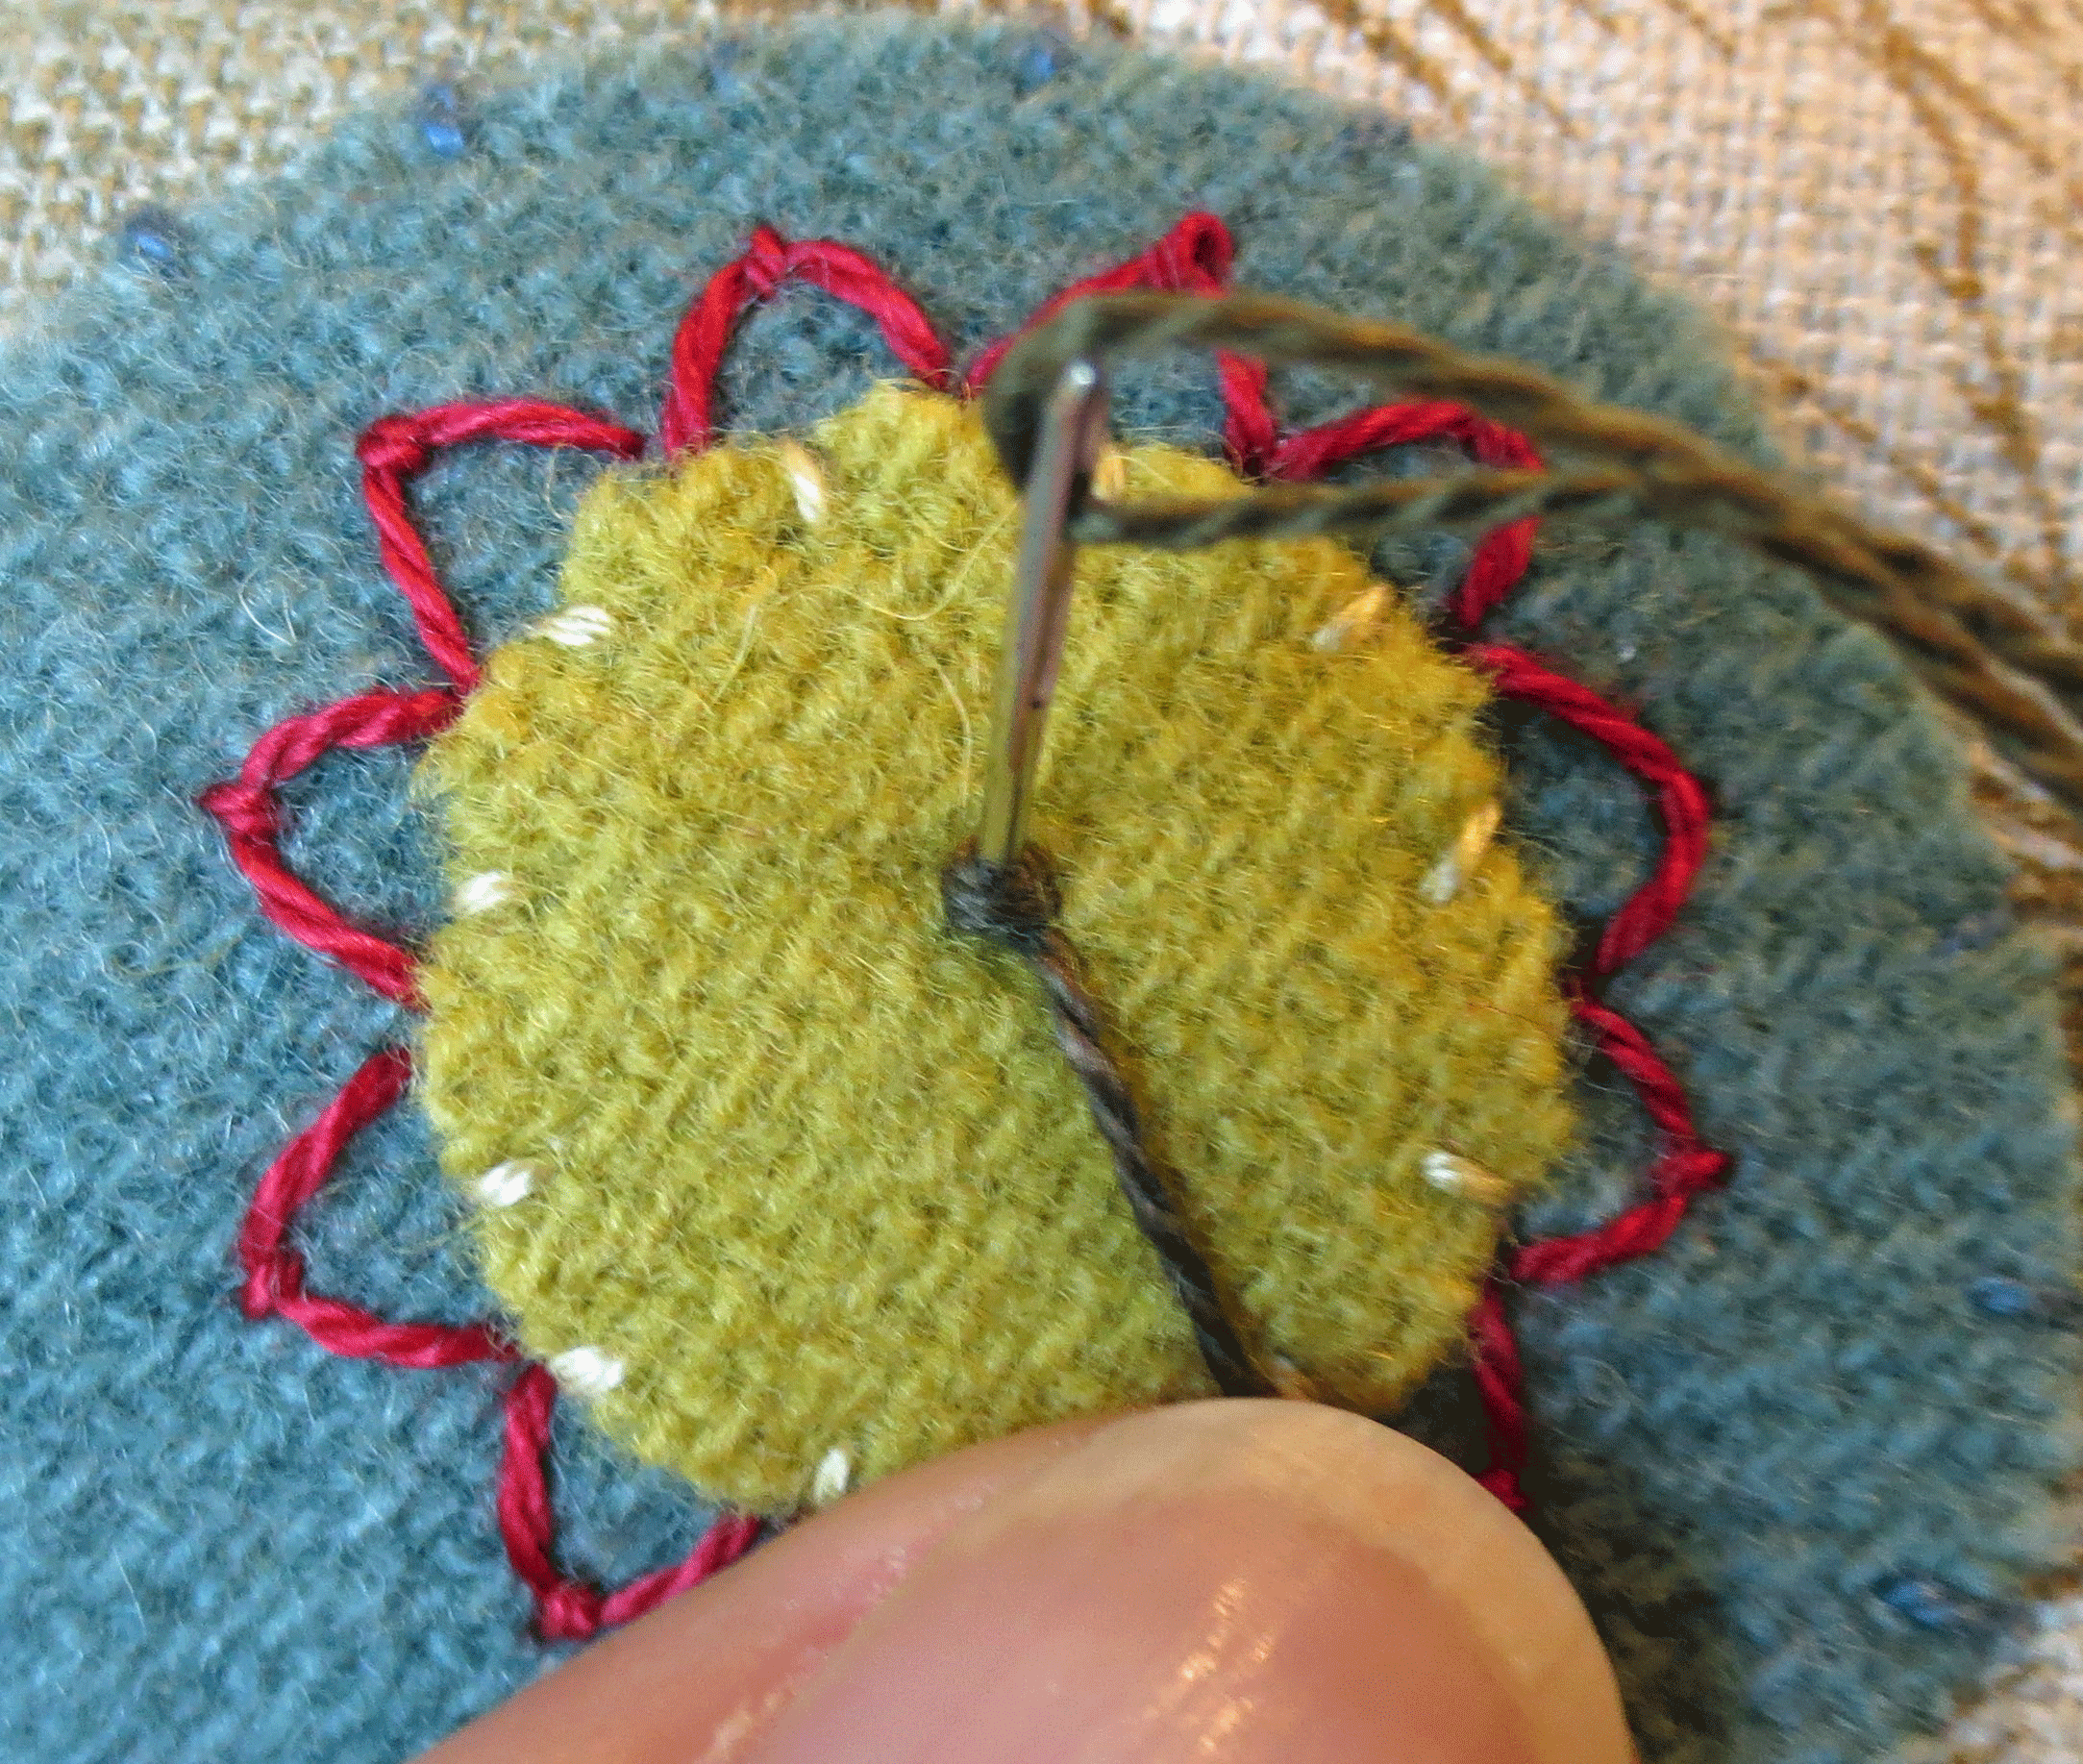
30. Use one strand of DMC #3046 to make the veins of the leaves with closed fly stitches.
The applique is complete!
31. Mini quilt assembly
Make a quilt sandwich of the appliqued top, batting, and backing fabric. Pin to secure. I didn’t add any quilt stitches to my project, but if you wish to add quilting stitches do it prior to adding the binding.
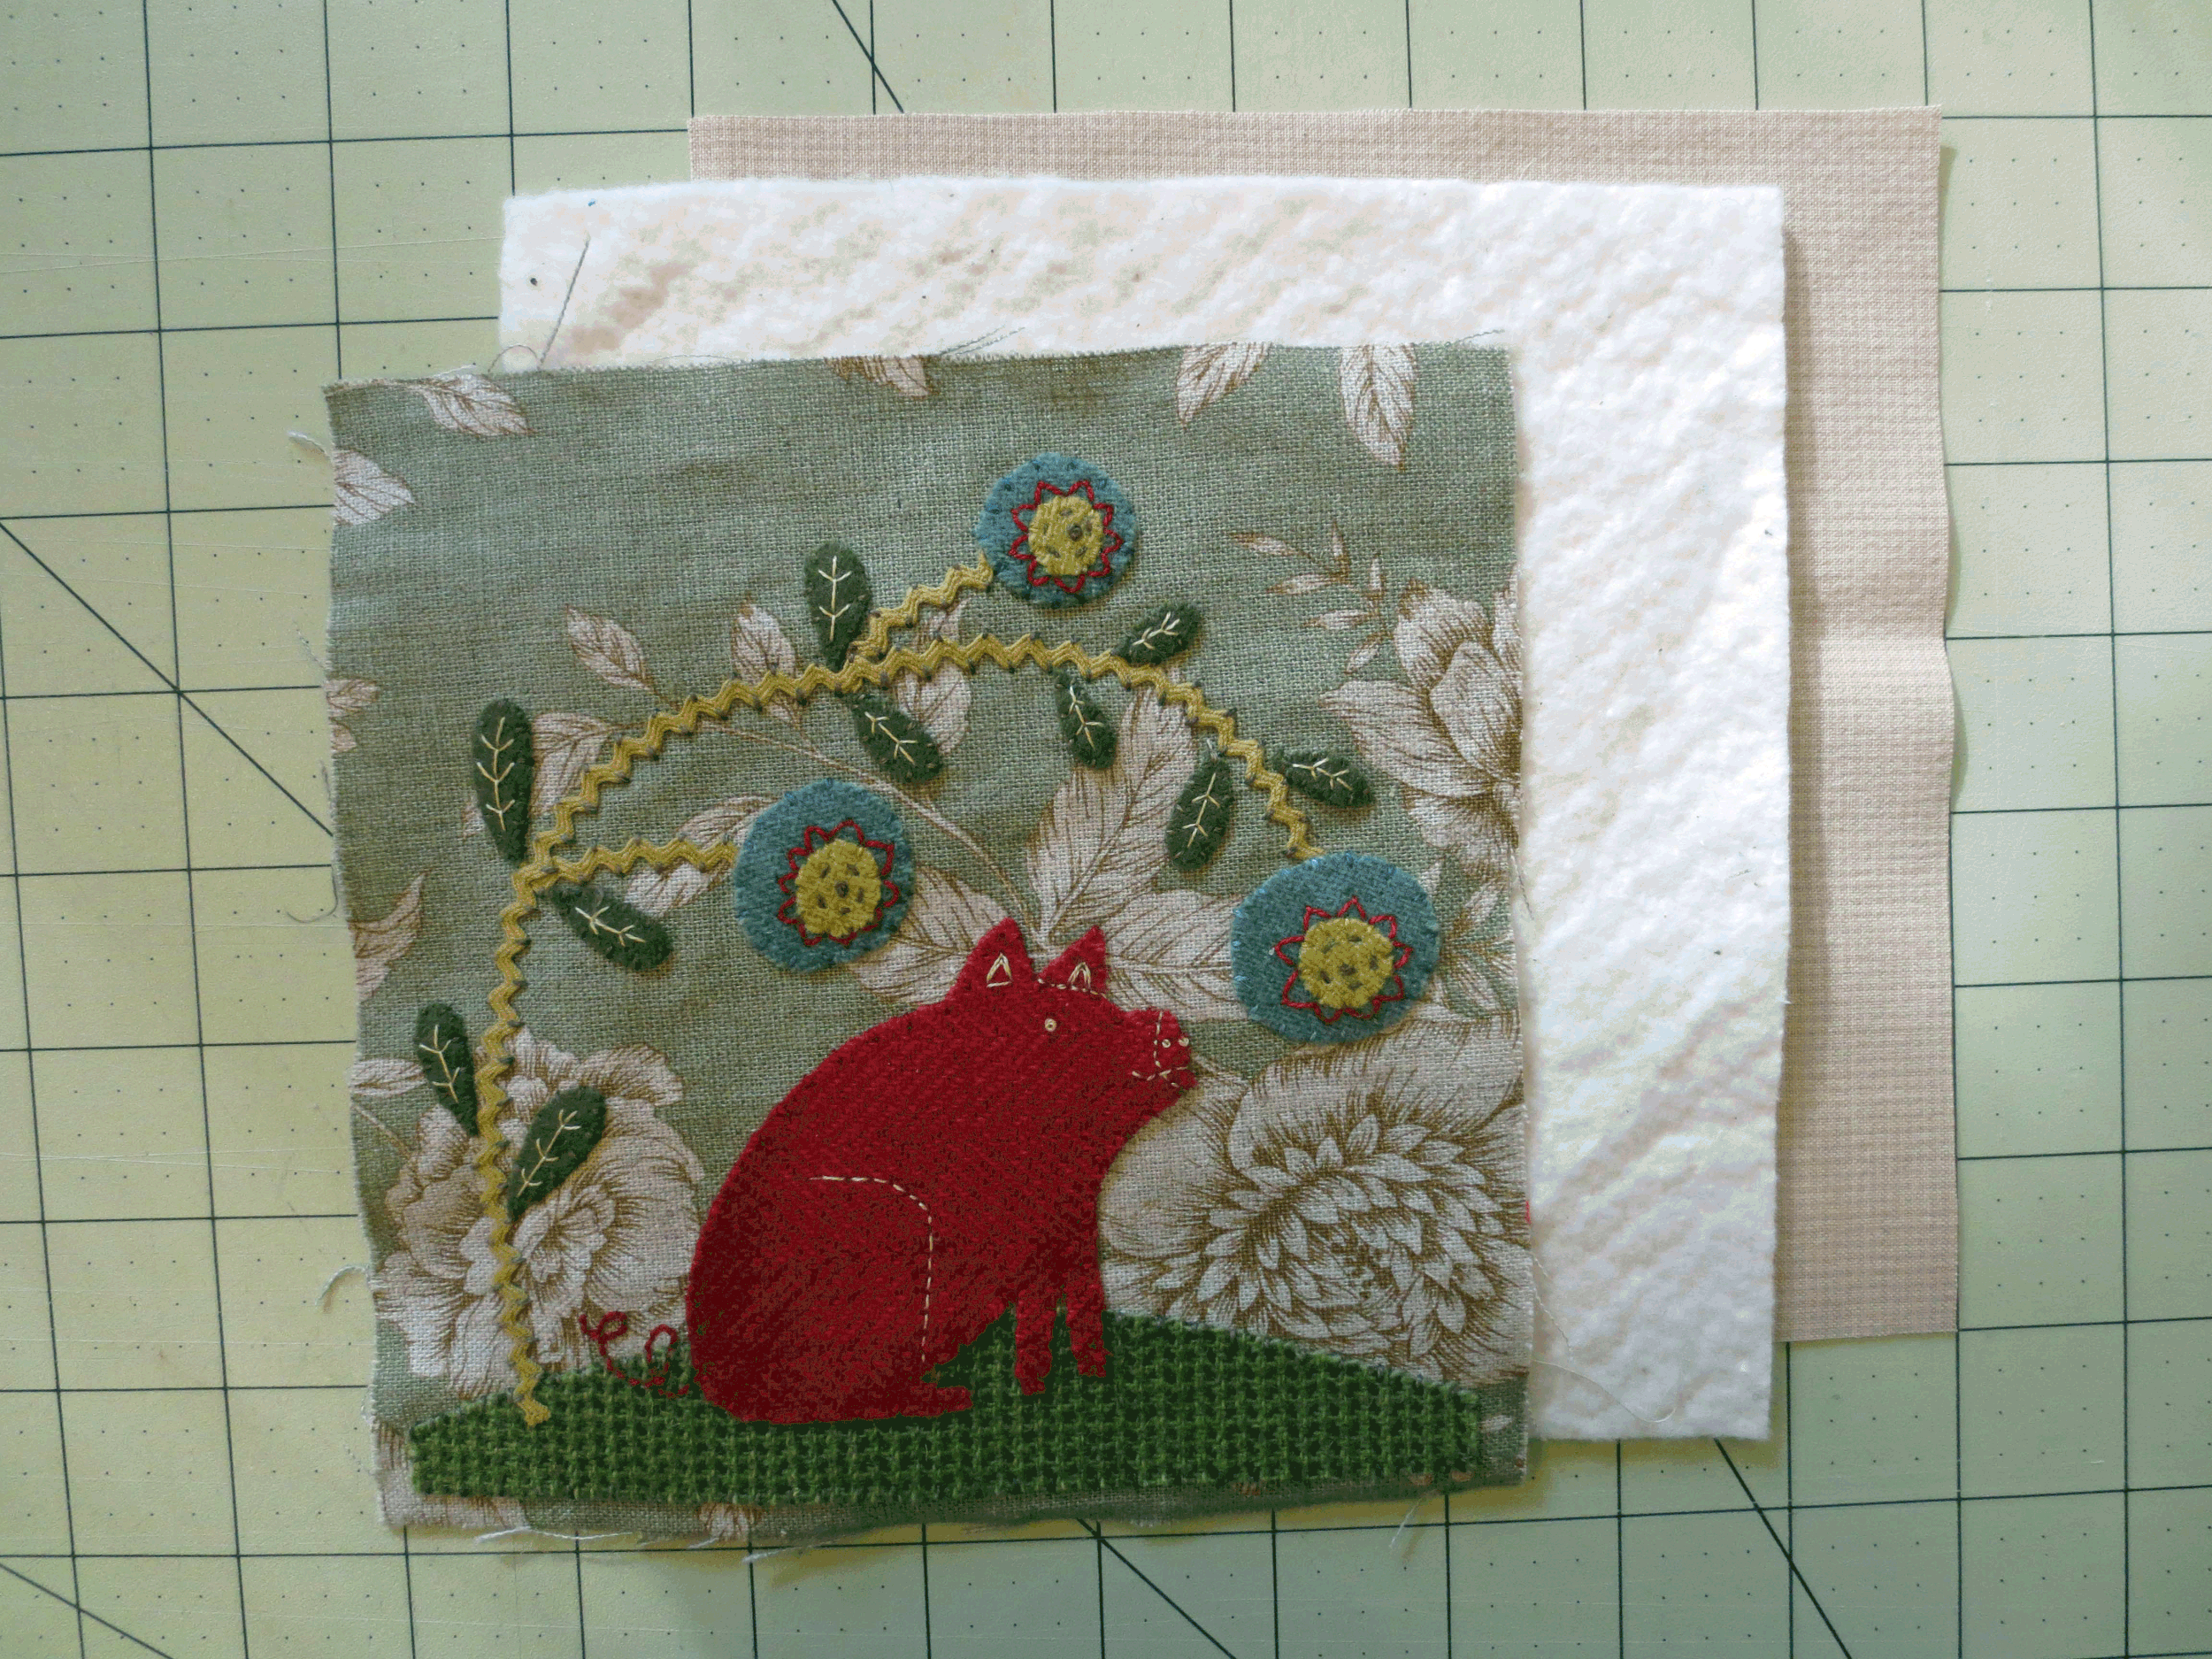
Trim the sandwich to a 6 1/2 square.
Sew a single fold binding around the quilt sandwich.
Here are a few quilt binding tutorials:
https://www.youtube.com/watch?v=T74vLvkD_lo
https://www.sewcanshe.com/blog/2015/6/15/quilting-unplugged-tips-and-tricks-for-mini-quilt-binding
https://www.youtube.com/watch?v=YC3OrmzZc08
I added a simple running stitch using two strands of DMC #3046 on top of the binding for a little bit of extra embellishment.
ENJOY!