
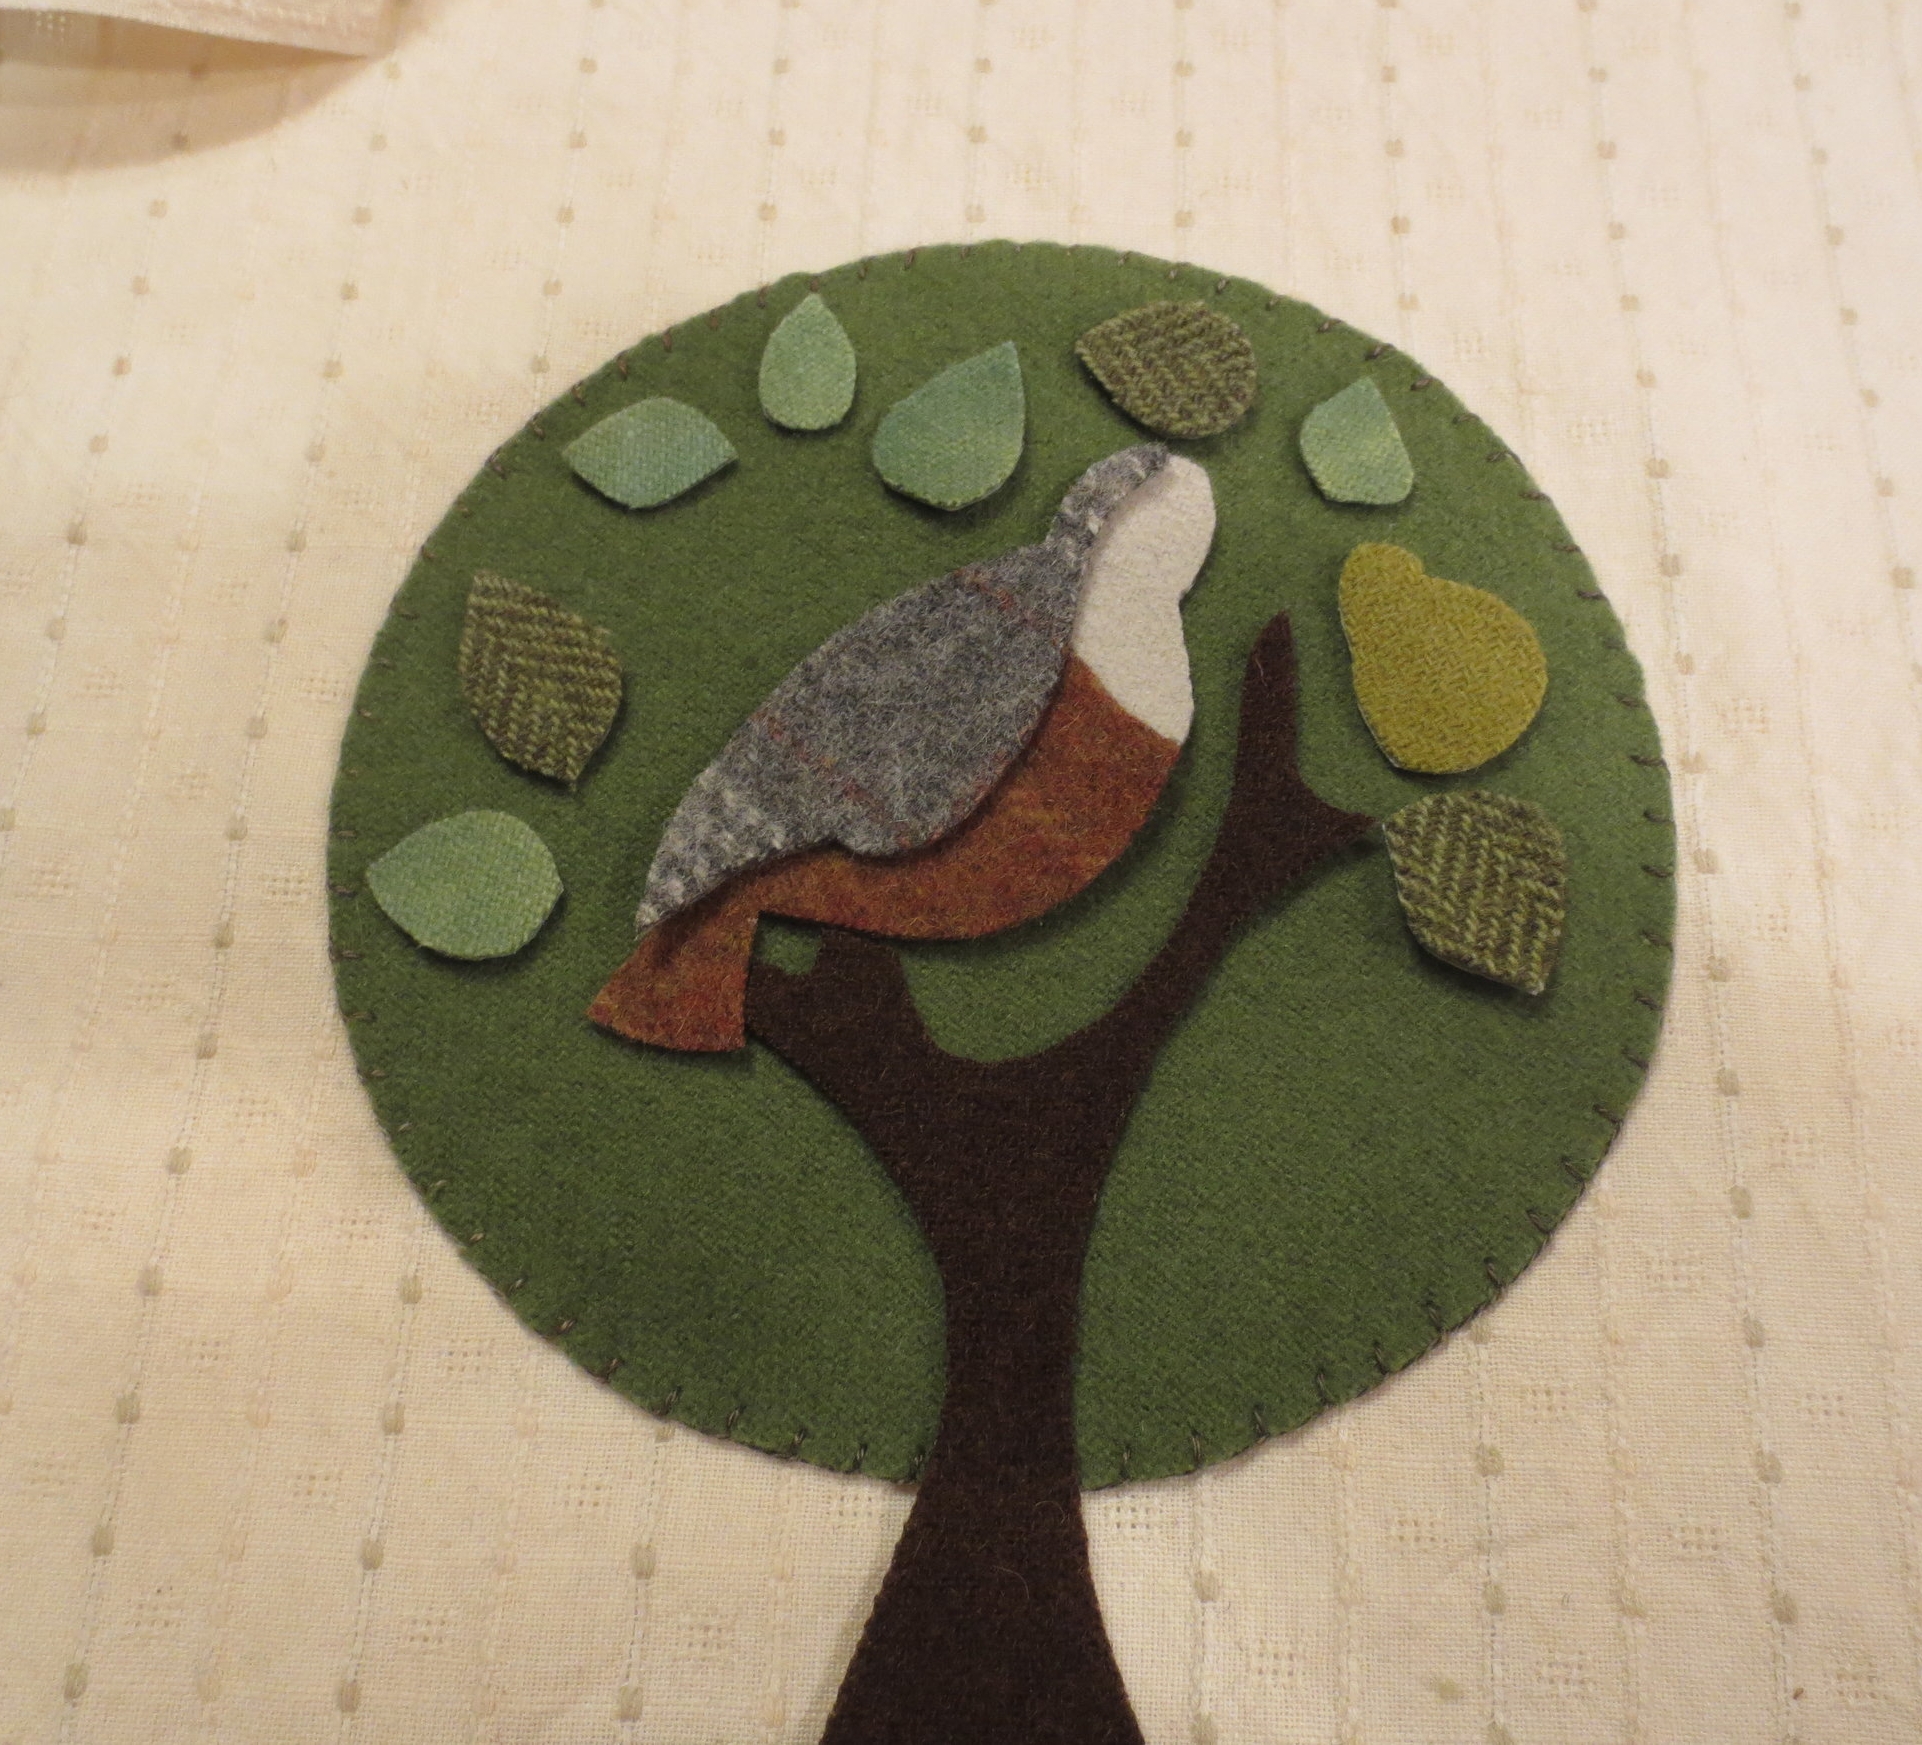
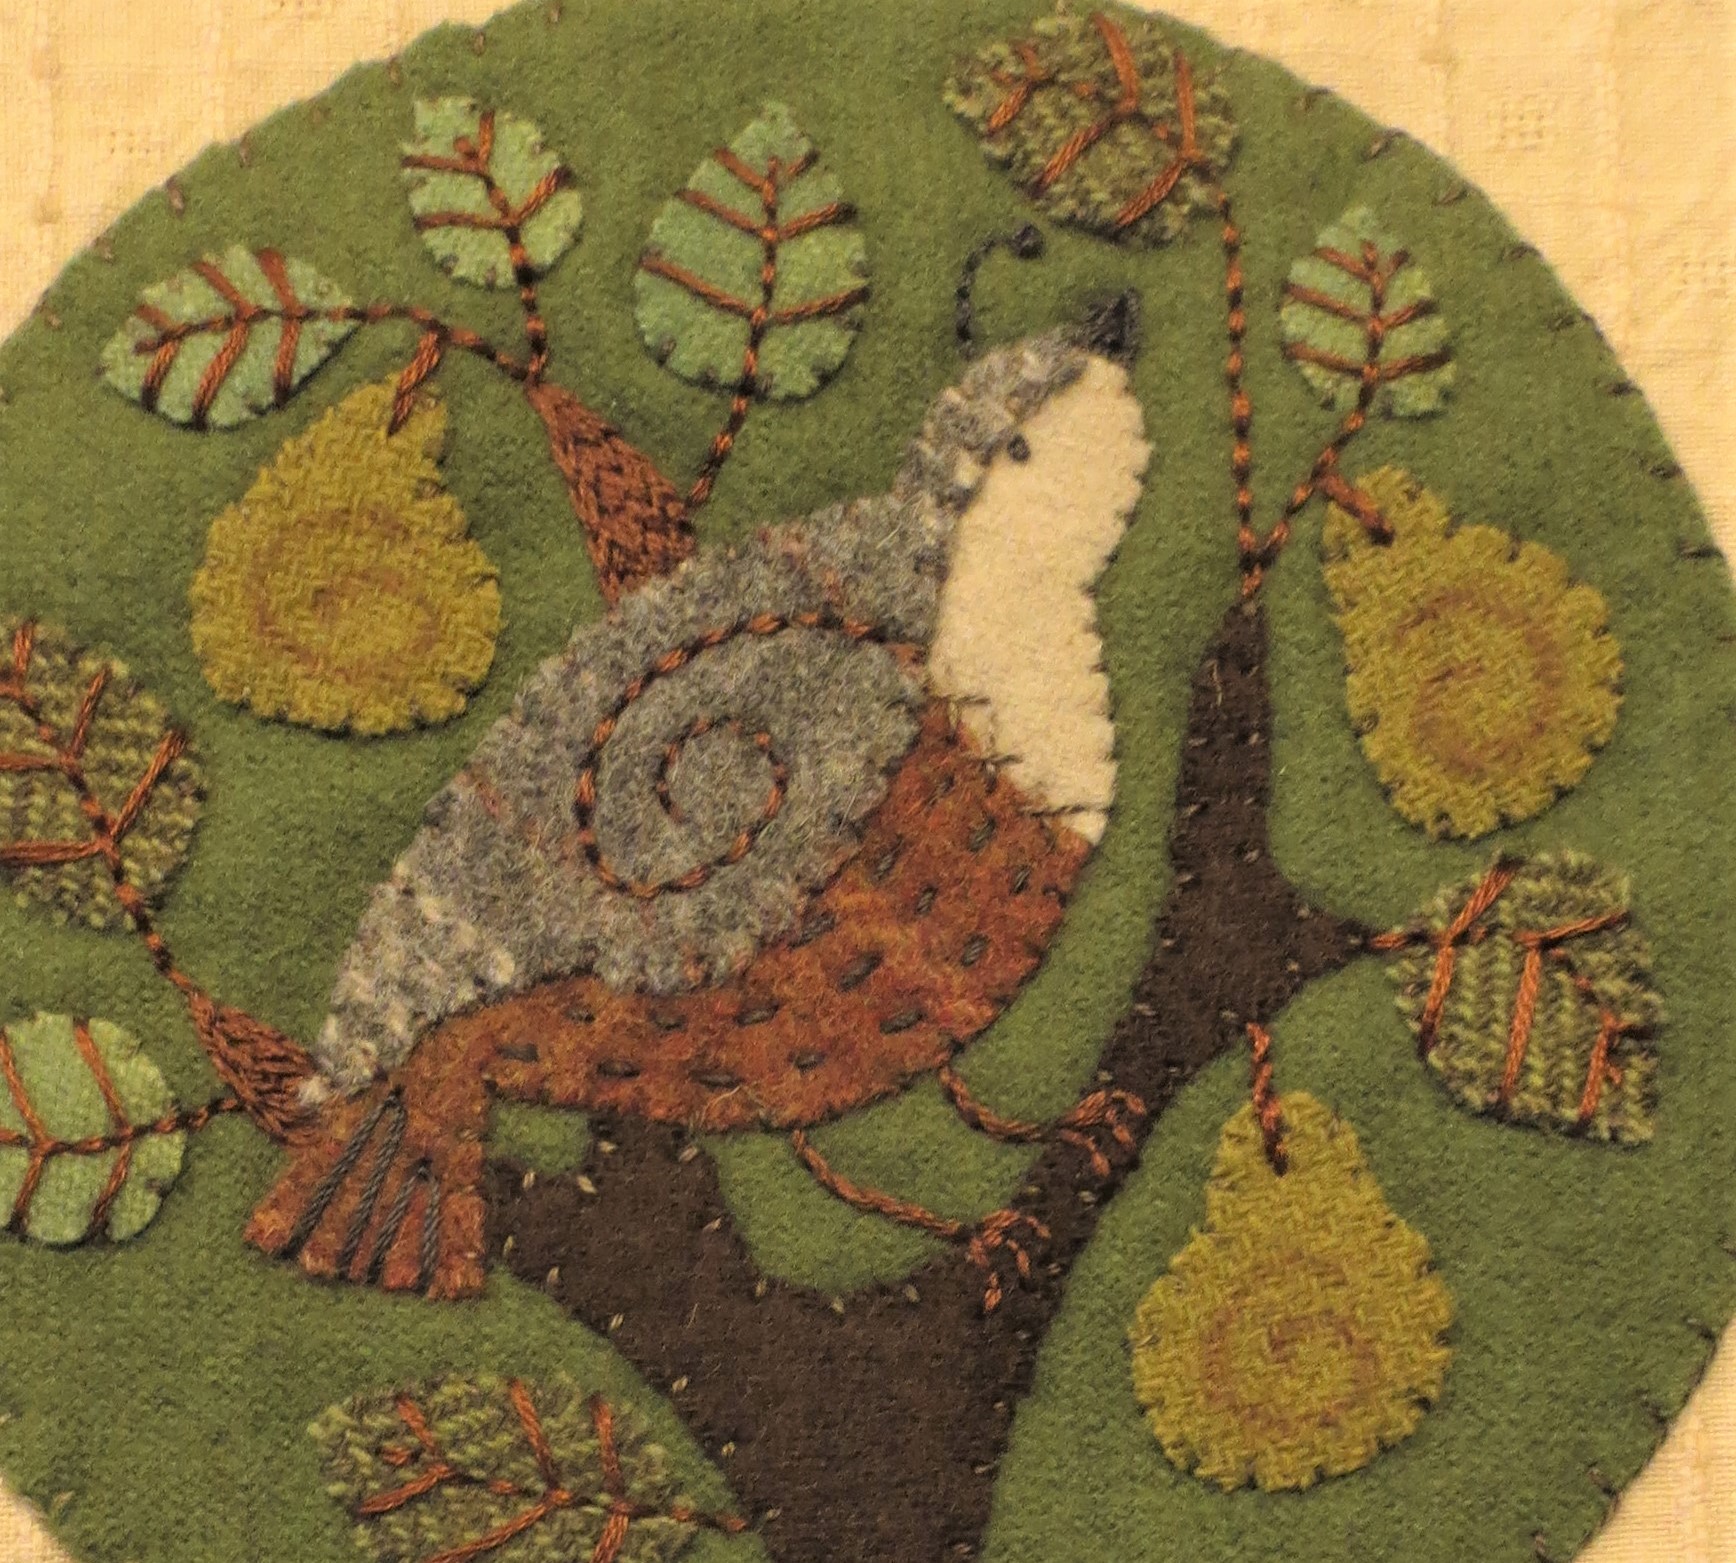
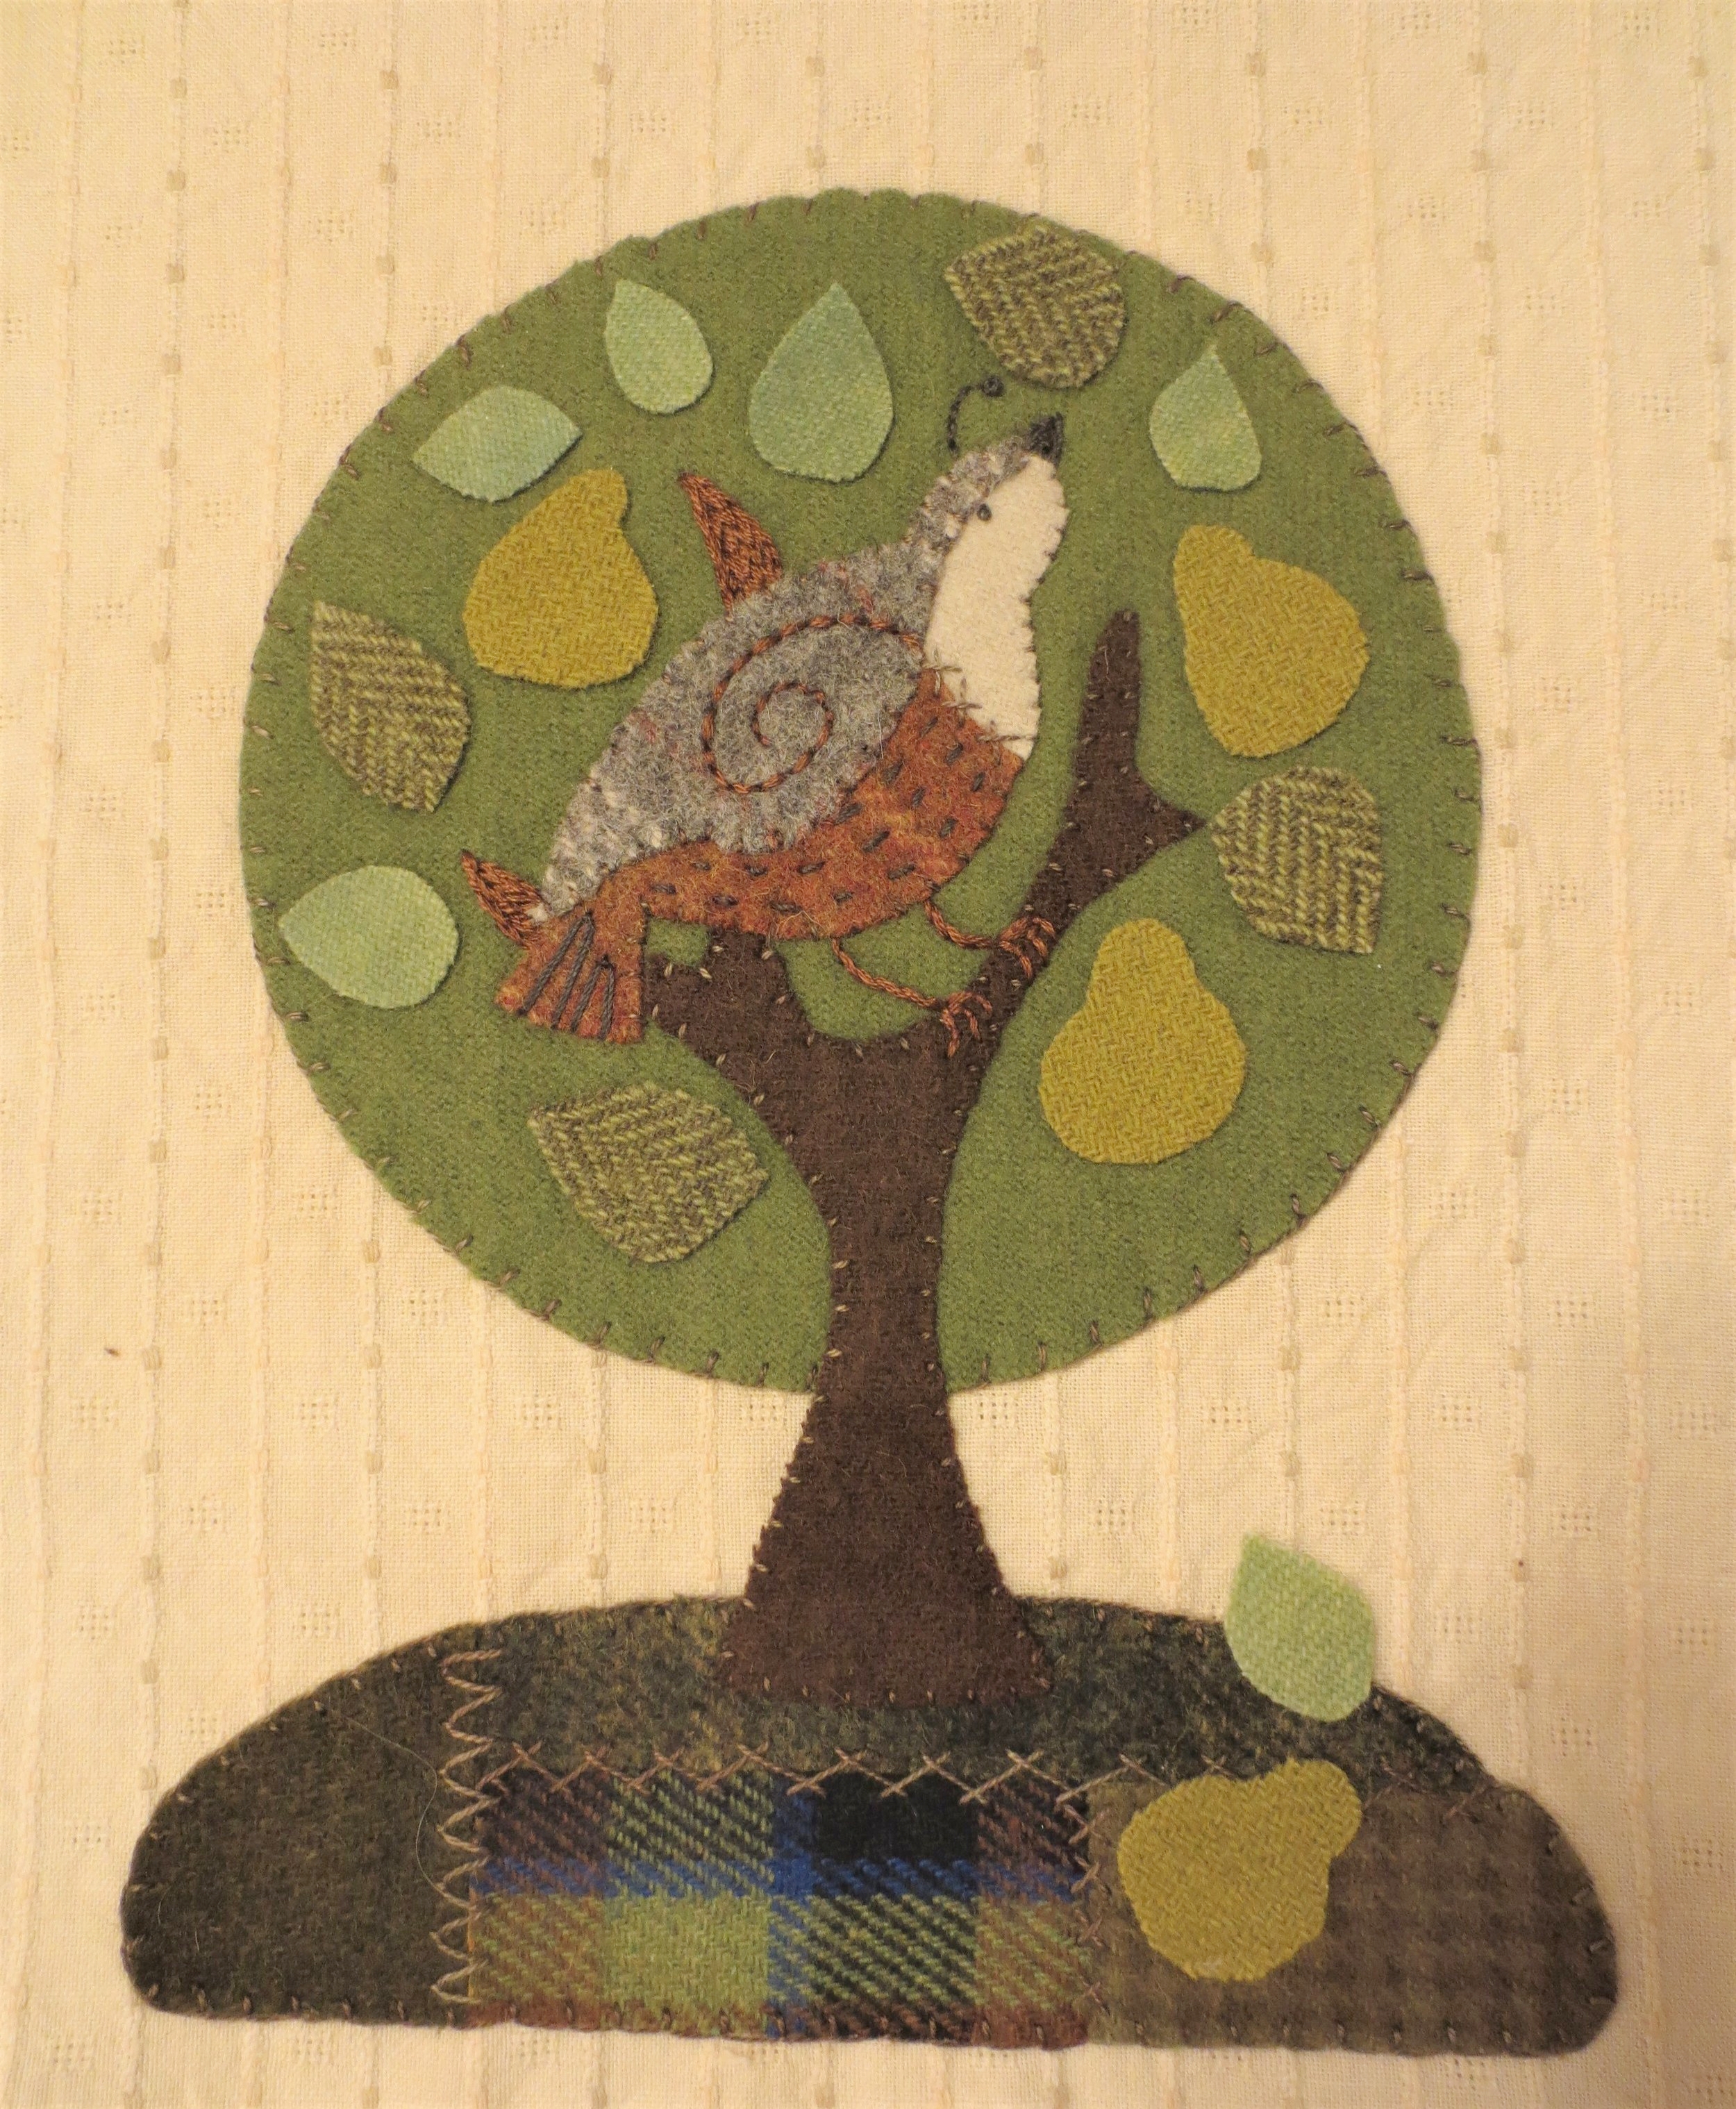
A Partridge in a Pear Tree

Partridge in a Pear Tree wool applique
Christmas is almost here! Are you getting all your handmade gifts completed? Have you started yet? Well, here’s a project that you can easily finish before the 25th.
This is a design I originally made as an ornament, minus the tree trunk and ground. Except for the tree top, the project can be made with wool scraps. I used a textured woven cotton for the background, which gives it a slightly Victorian look, but it’s not ideal for embroidery (too light-weight). I think a linen-cotton blend (Robert Kaufman Essex) would have been a better choice. I also added a little bling with some metallic gold floss from Sublime Stitching, and then finished it up with a gilded frame.
Happy Stitching!
You will need:
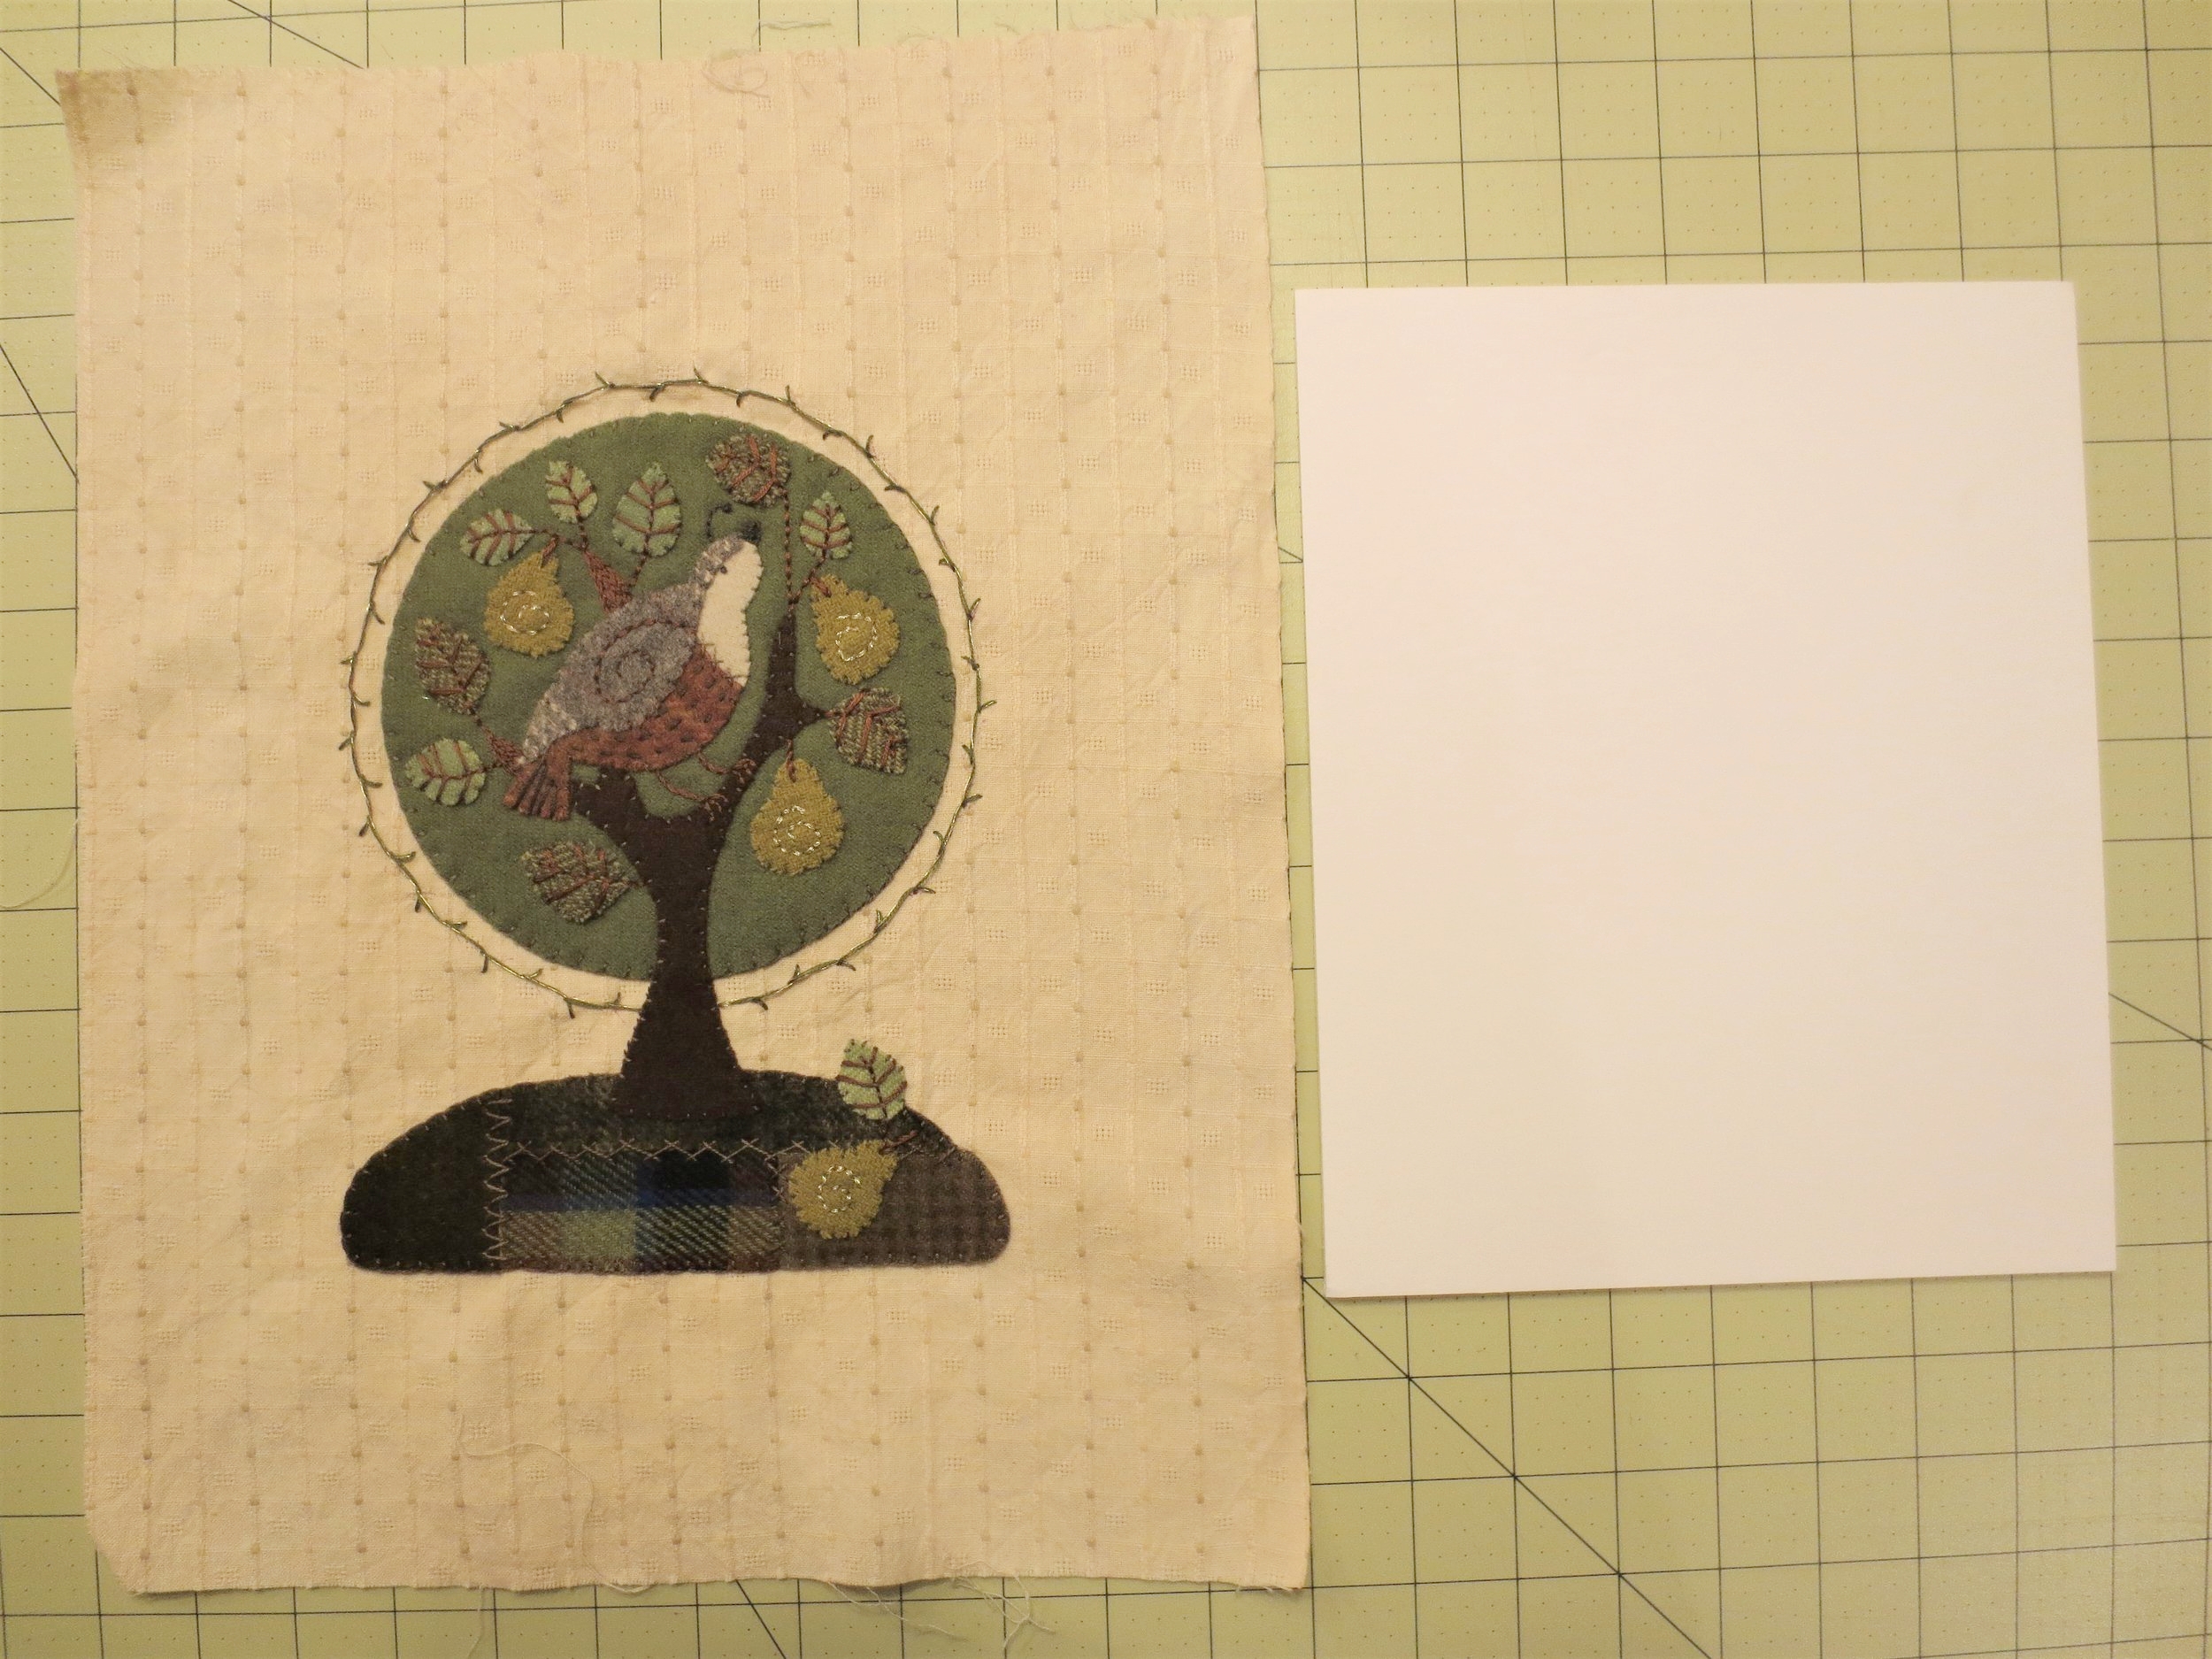
Pattern and Layout – The layout is actual size. Use this in combination with a light box to position the ground, tree trunk, and tree top. The pattern images are reversed for use with fusible web.
Stitch Guide - This is the guide I used for all my previous tutorials. I’ve included links to stitches not included in the guide.
Fabric background
12 x 14 inch piece of medium weight cotton, cotton/linen, or linen - I used Diamond Textile PRF-595.
Wool applique – Felted wool or wool felt is recommended. Loosely woven wools will work for larger pieces if they are stabilized with a fusible. The leaves and pears will require a tighter weave of wool, or felt.
Tree top 7 x 7-inch piece of solid medium-dark green
Tree trunk 3 x 6-inch piece of solid brown
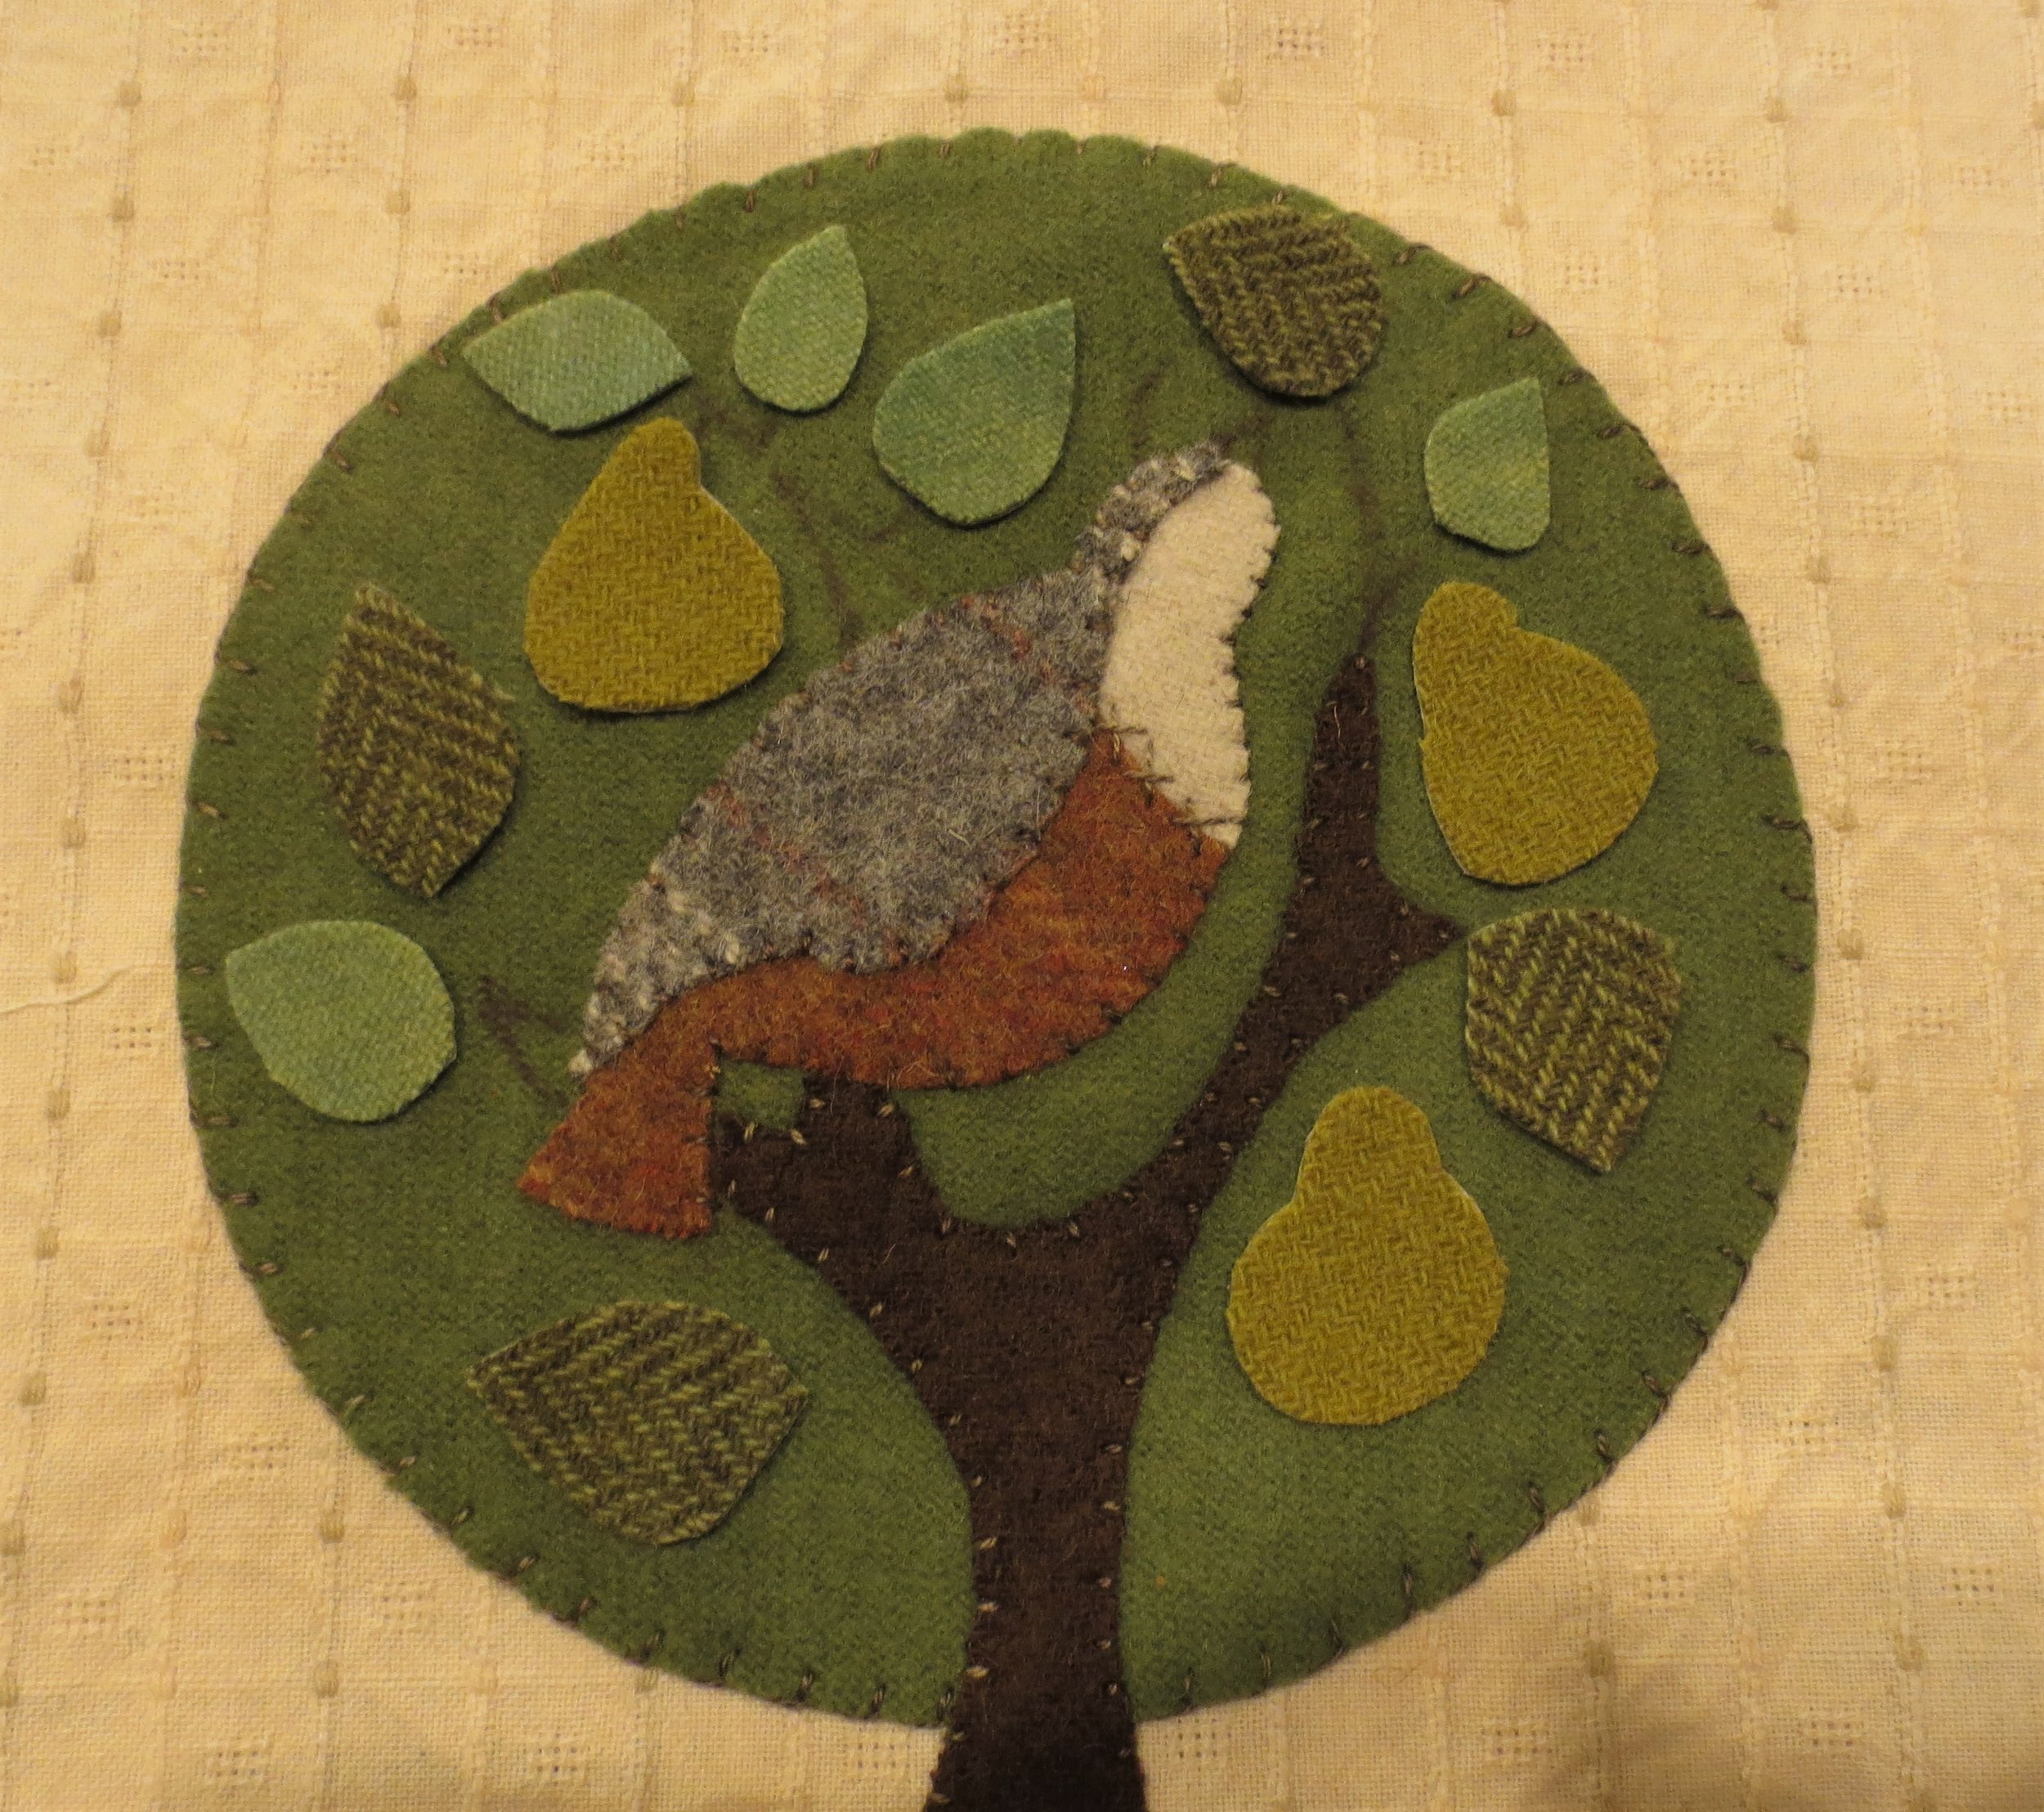
Leaves
One 3 x 3-inch square of light green
One 3 x 3-inch square of medium green
Pears – 3 x 3-inch square of light olive green
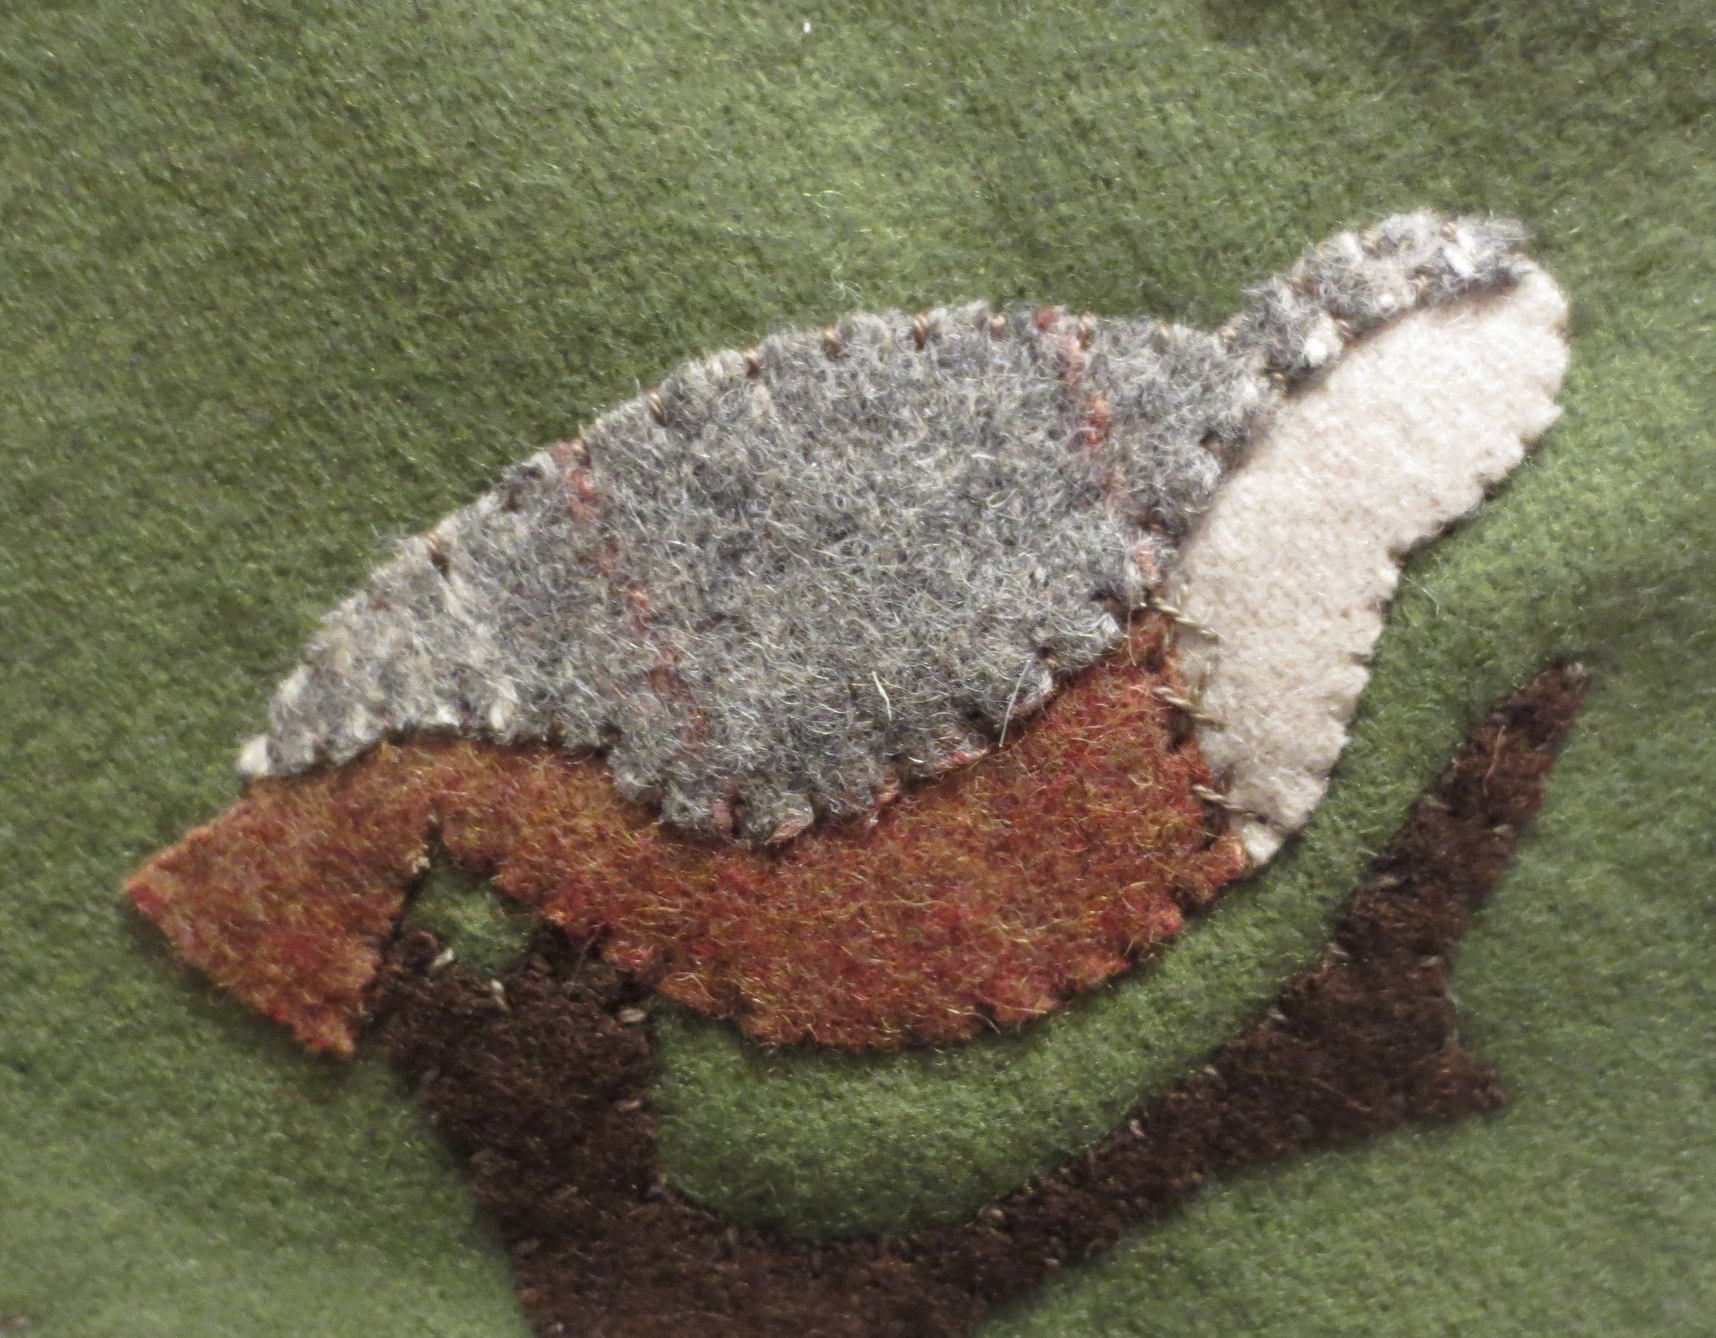
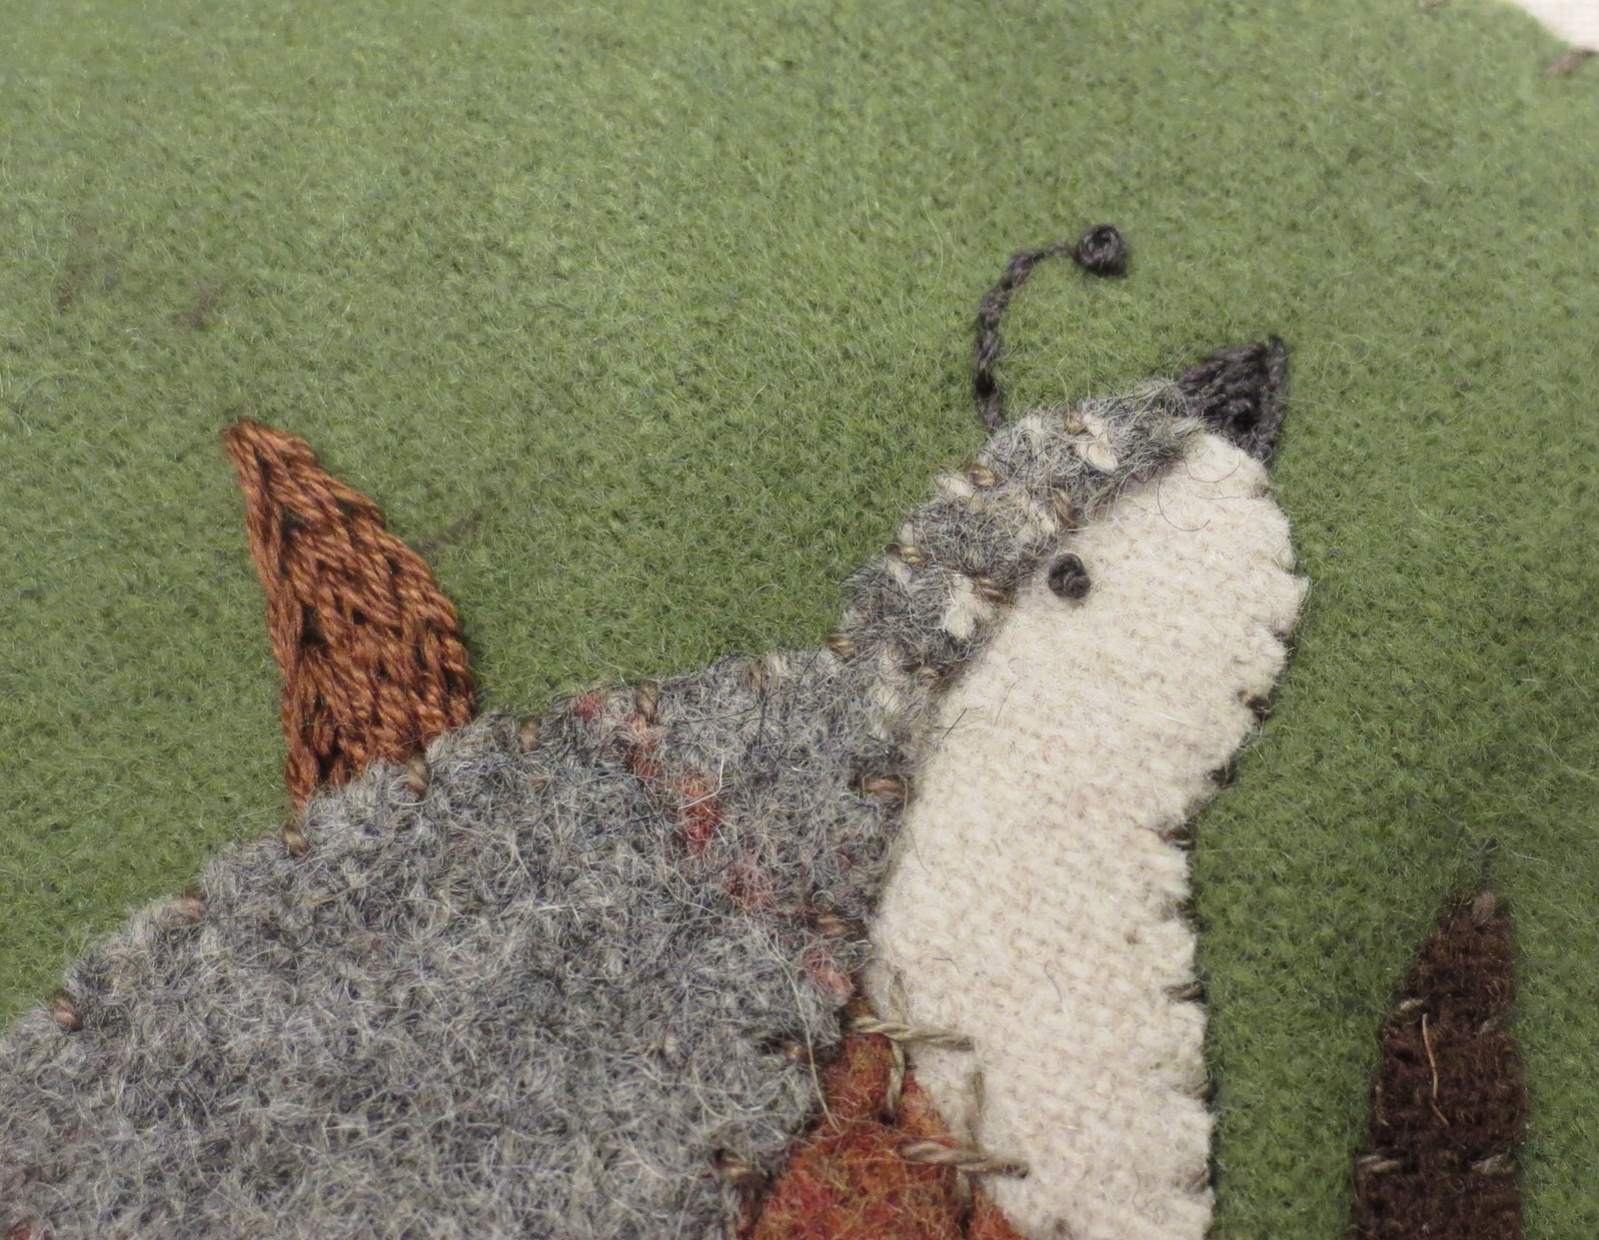
Partridge
Chest – 2 x 3-inch piece of rust-brown
Head – 2 x 2-inch piece of off-white
Back – 2 x 4-inch piece of grey-white plaid
Ground– Use four different olive-browns or brown-green textured wools.
Piece A – 2 x 2-inch piece of olive-brown houndstooth
Piece B – 1 ½ x 5-inch piece of dark-green plaid
Piece C – 2 x 3 ½ -inch piece of green/blue/brown plaid
Piece D – 2 x 3-inch olive green herringbone
Thread – Choose colors that compliment your wool colors. The following are the colors I used. Yours may vary.
DMC 6-strand embroidery floss 801 - Use this for the following: partridge legs, extension of branches, stems of pears and leaves, veins of leaves, and wing embellishment.
Sublime stitching floss 925 gold metallic - Use this for the pear embellishment and feather stitch around the tree.
DMC 6-strand embroidery floss 469 - Use this to combine with the gold metallic to make the feather stitch around the tree.
Sulky 12Wt. cotton thread 712-1234 – Use this to make the partridge’s plume, beak, and chest embellishment.
Valdani perle 12, O518 Dusty leaves – Use this for all other stitches. This is a great all-around color to use with browns and greens.
Miscellaneous
Freezer paper
Heat-n-Bond Feather Lite fusible web or Vilene Meltfuse
Chenille needle, size 24
Clover air erasable marker
Mechanical pencil
Steam iron
Pressing cloth
Thick towel
8 x 10-inch gold frame - If you want to have your project under glass you will need to get a frame that has a larger profile, with a mat board that you can remove. You will need to account for the thickness of the board that you mount your project on, and the thickness of the wool and fabric.
8 x 10-inch White acid free mat board or foam core board
Light box – optional
Instructions
1. Trace all pattern images onto fusible web, and then cut out leaving a 1/8-inch border around each pattern. Remember to label your leaves and pears.
2. Trace tree top pattern onto freezer paper, and then cut out, leaving a 1/8-inch border.

3. Fuse patterns onto designated wools, and then cut out along tracing line.

4. Position the ground pieces and tree top on your background fabric using the layout as a guide. Pin the tree top in place
Note: Placement of the pattern pieces is easier if you put the layout on your light box and center your background fabric on top of it.

5. After laying out the pattern pieces gently slide a stiff piece of cardboard, or a cookie sheet under your background fabric, and then transfer it to your ironing board.
6. Fuse the ground pieces to the background fabric using steam. Remember to remove the backing paper from your pattern pieces before you position them.
7. Use one strand of Valdani O518 to blanket stitch around the tree top.
8. Use the same thread to whip stitch around the perimeter of the ground.

9. Use the same thread to make four cross stitches over the line between ground pieces C and D.

Cross stitches
10. Using the same thread, make a row of herringbone stitches over the line between ground piece B and pieces C & D.

Herringbone stitch
11. Using the same thread, make a row of fly stitches over the line between piece A and pieces B & C.

Fly stitches
12. Position the tree trunk using the layout as a guide, and then fuse in place using steam. You may want to lay out the partridge, leaves, and some pears to insure that you will have enough room for them after the tree trunk is secured. Remove them before fusing the tree trunk.
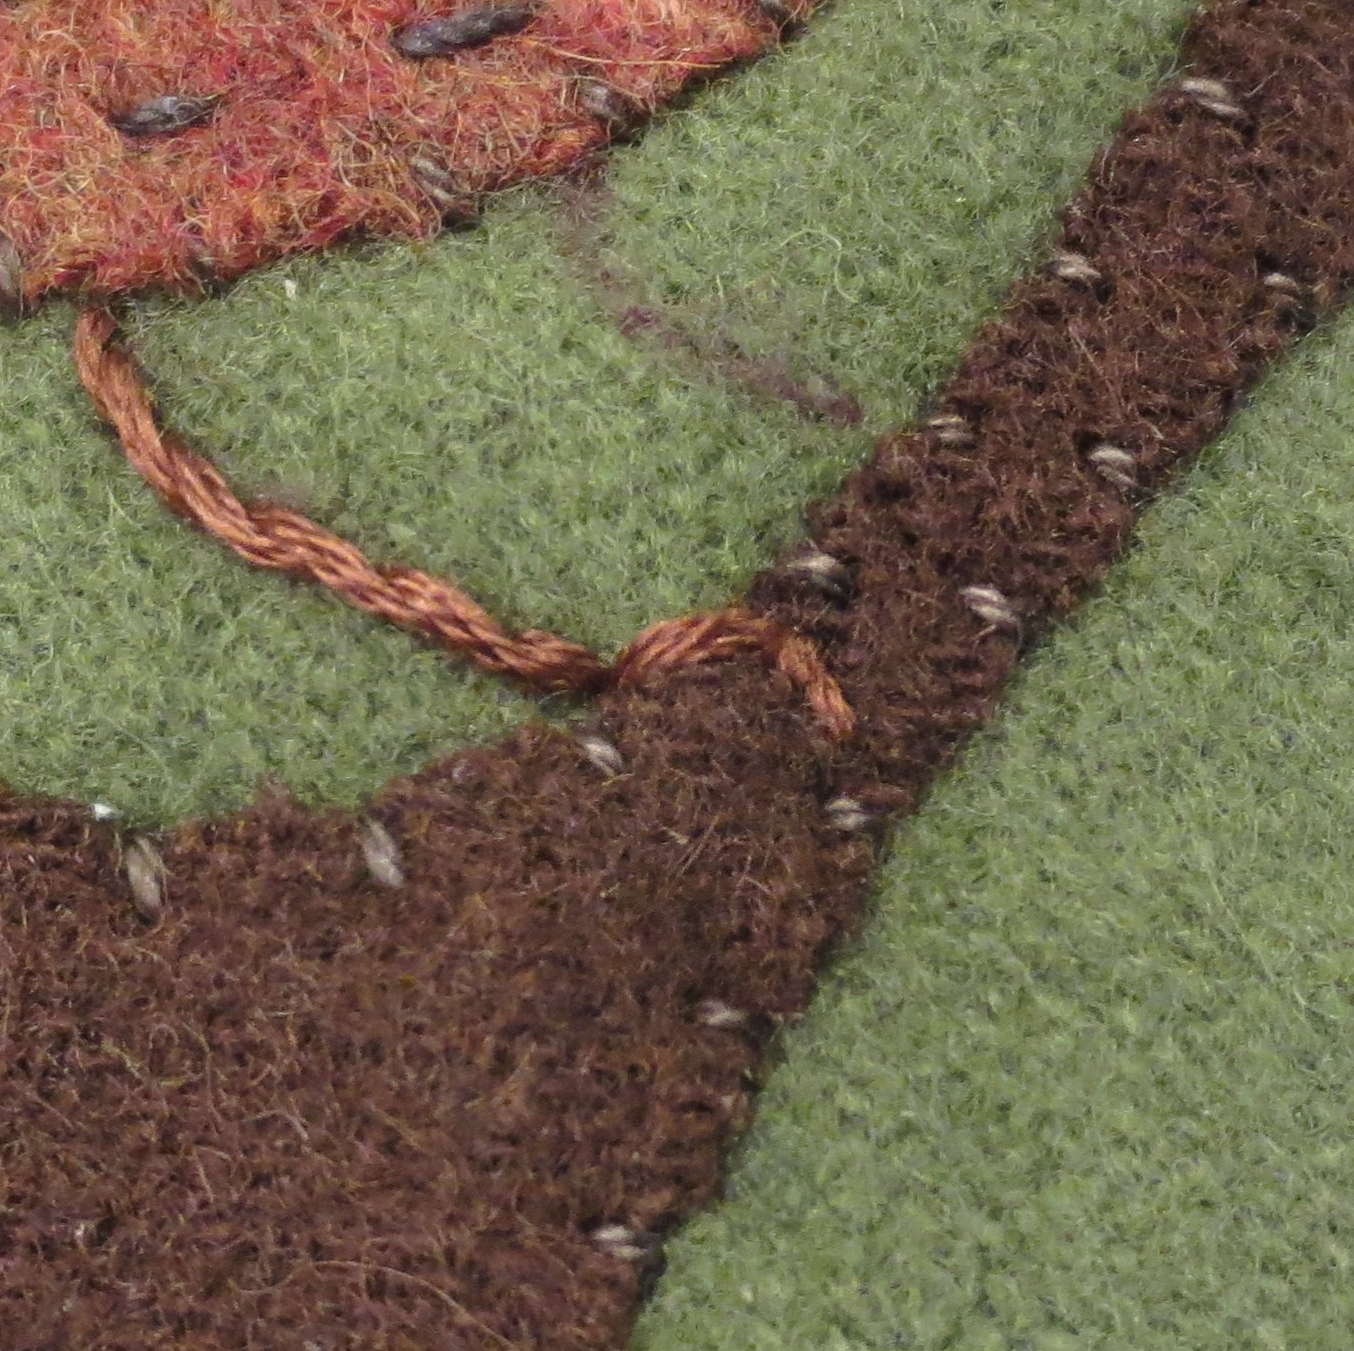
13. Whip stitch the trunk with a single strand of Valdani O518.

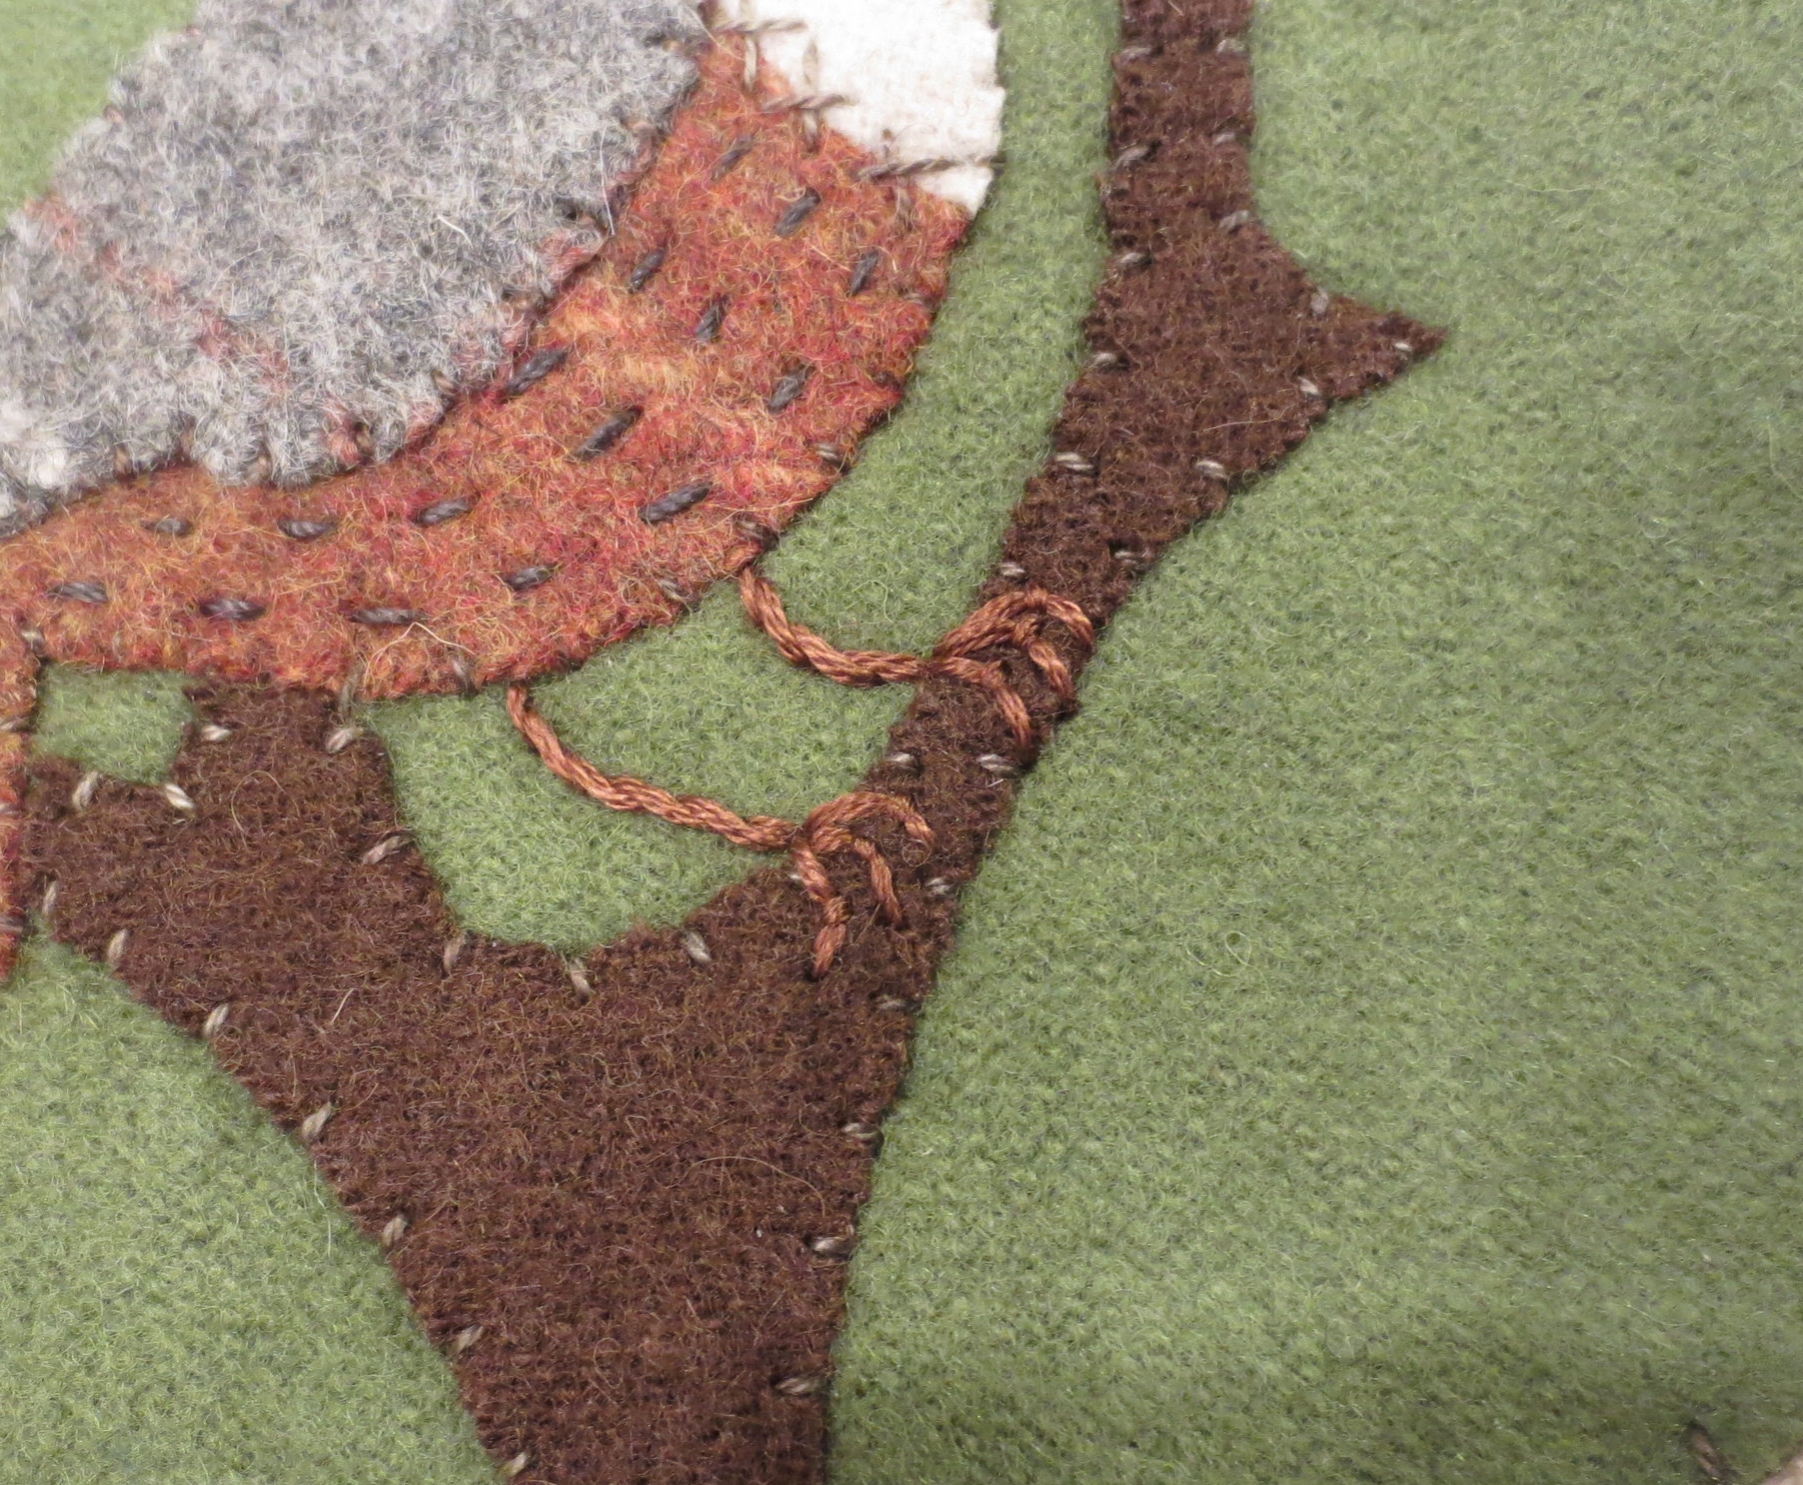
14. Position the partridge head, chest & tail, and back on the tree trunk using the layout as your guide. You may want to lay out all the leaves and pears also, so you can make sure you will have enough room for them and the extensions of the tree branches. If you are satisfied with your layout, remove the leaves and pears, and then fuse the partridge in place using steam.

15. Make three cross stitches over the line between the head and chest using one strand of Valdani O518.
16. Whip stitch the remaining edges of the partridge back and body using the same thread.
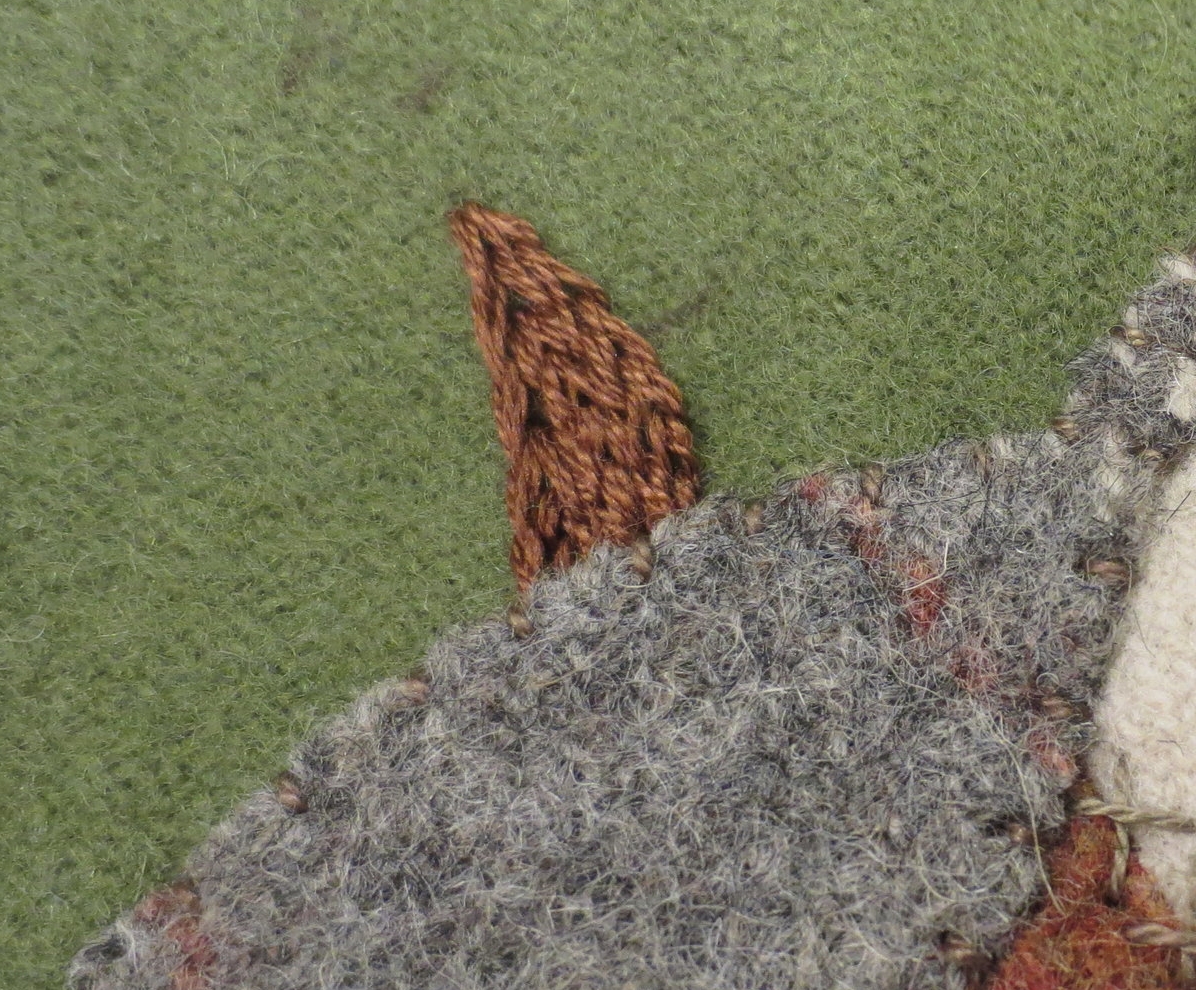
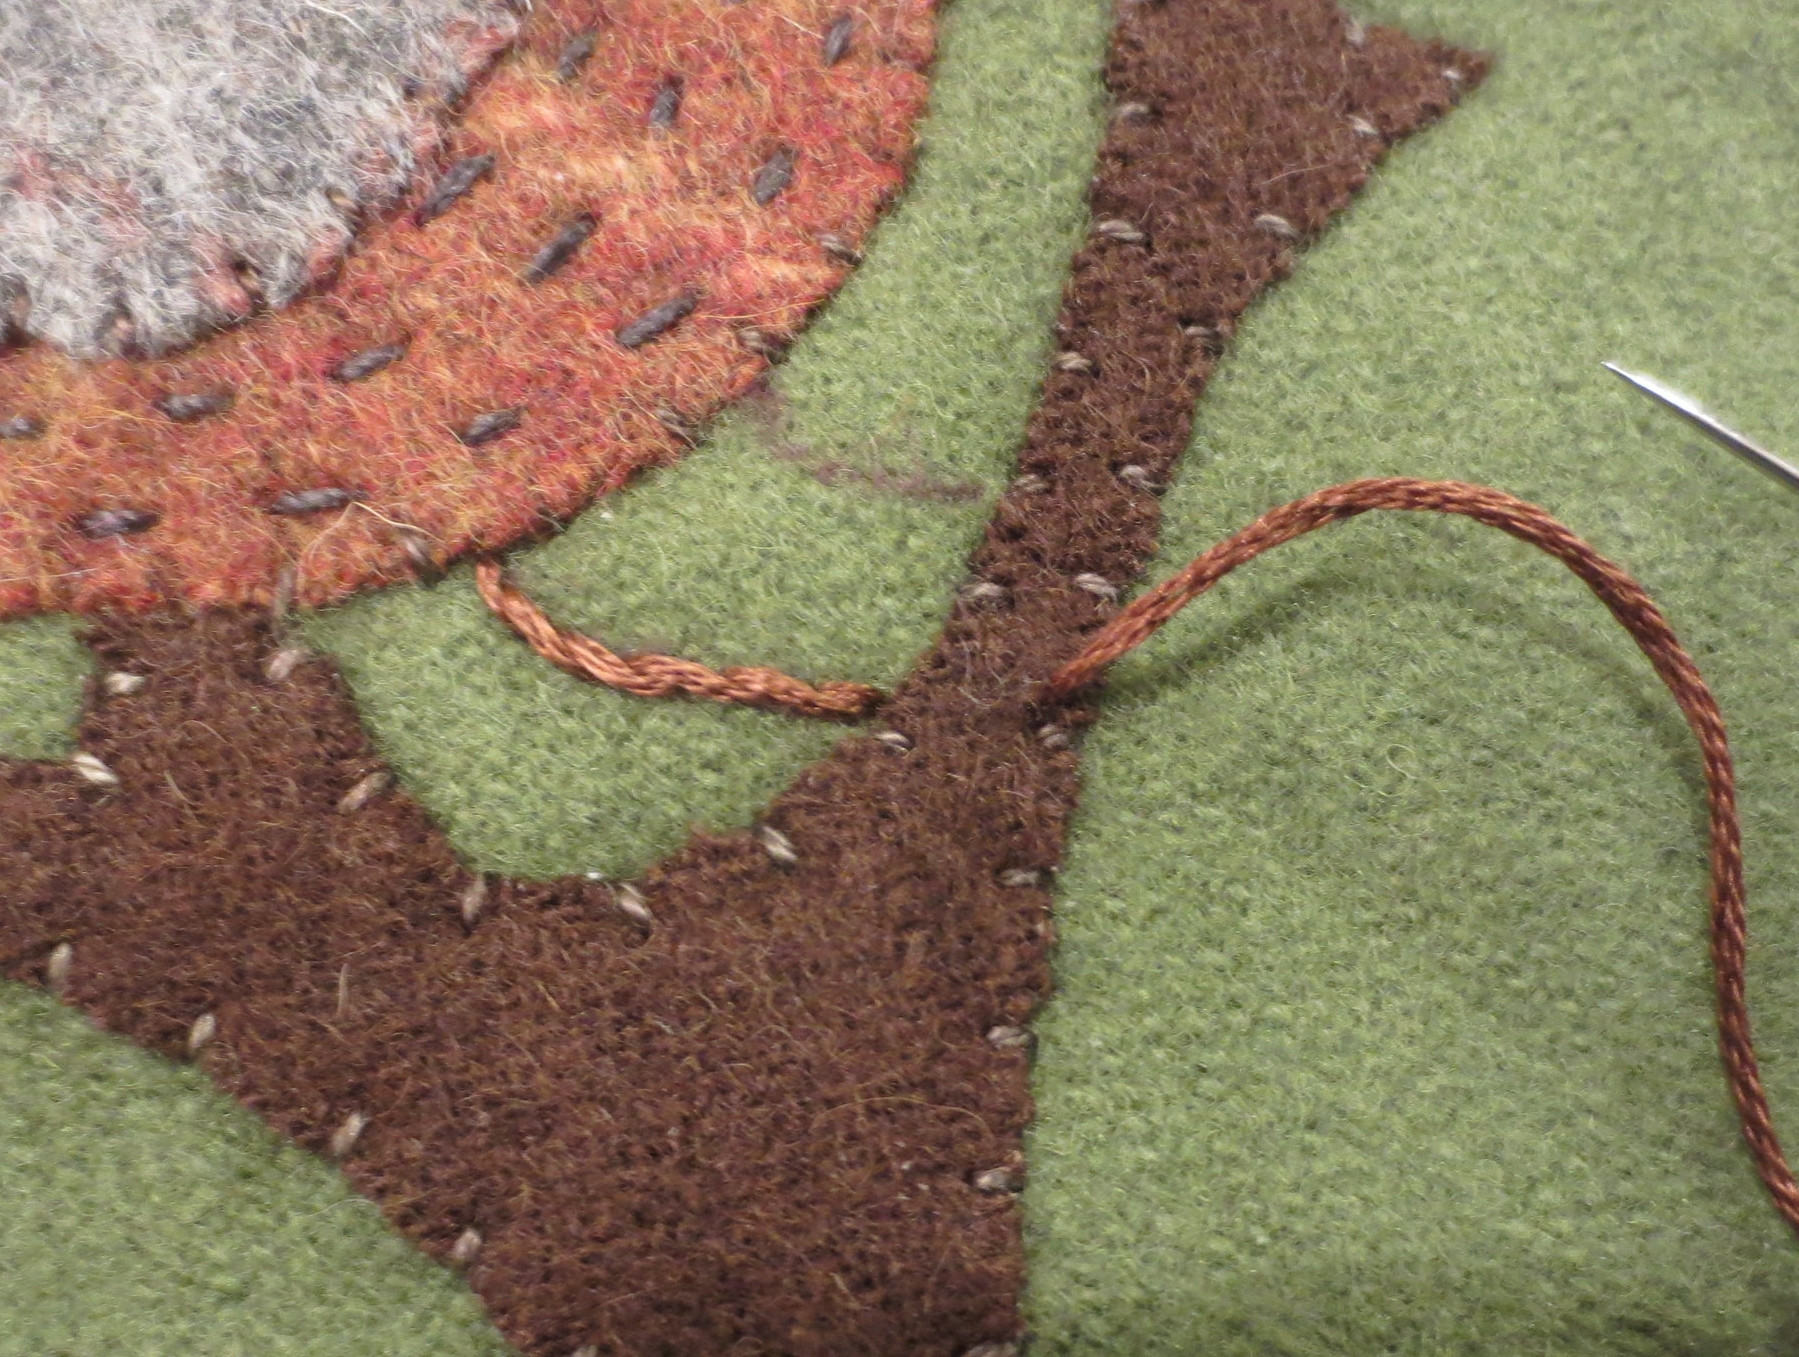
17. Place the leaves and pears back on the tree top and use a Clover air erasable marker to draw the branch extensions, beak and plume. Remove the leaves and pears.
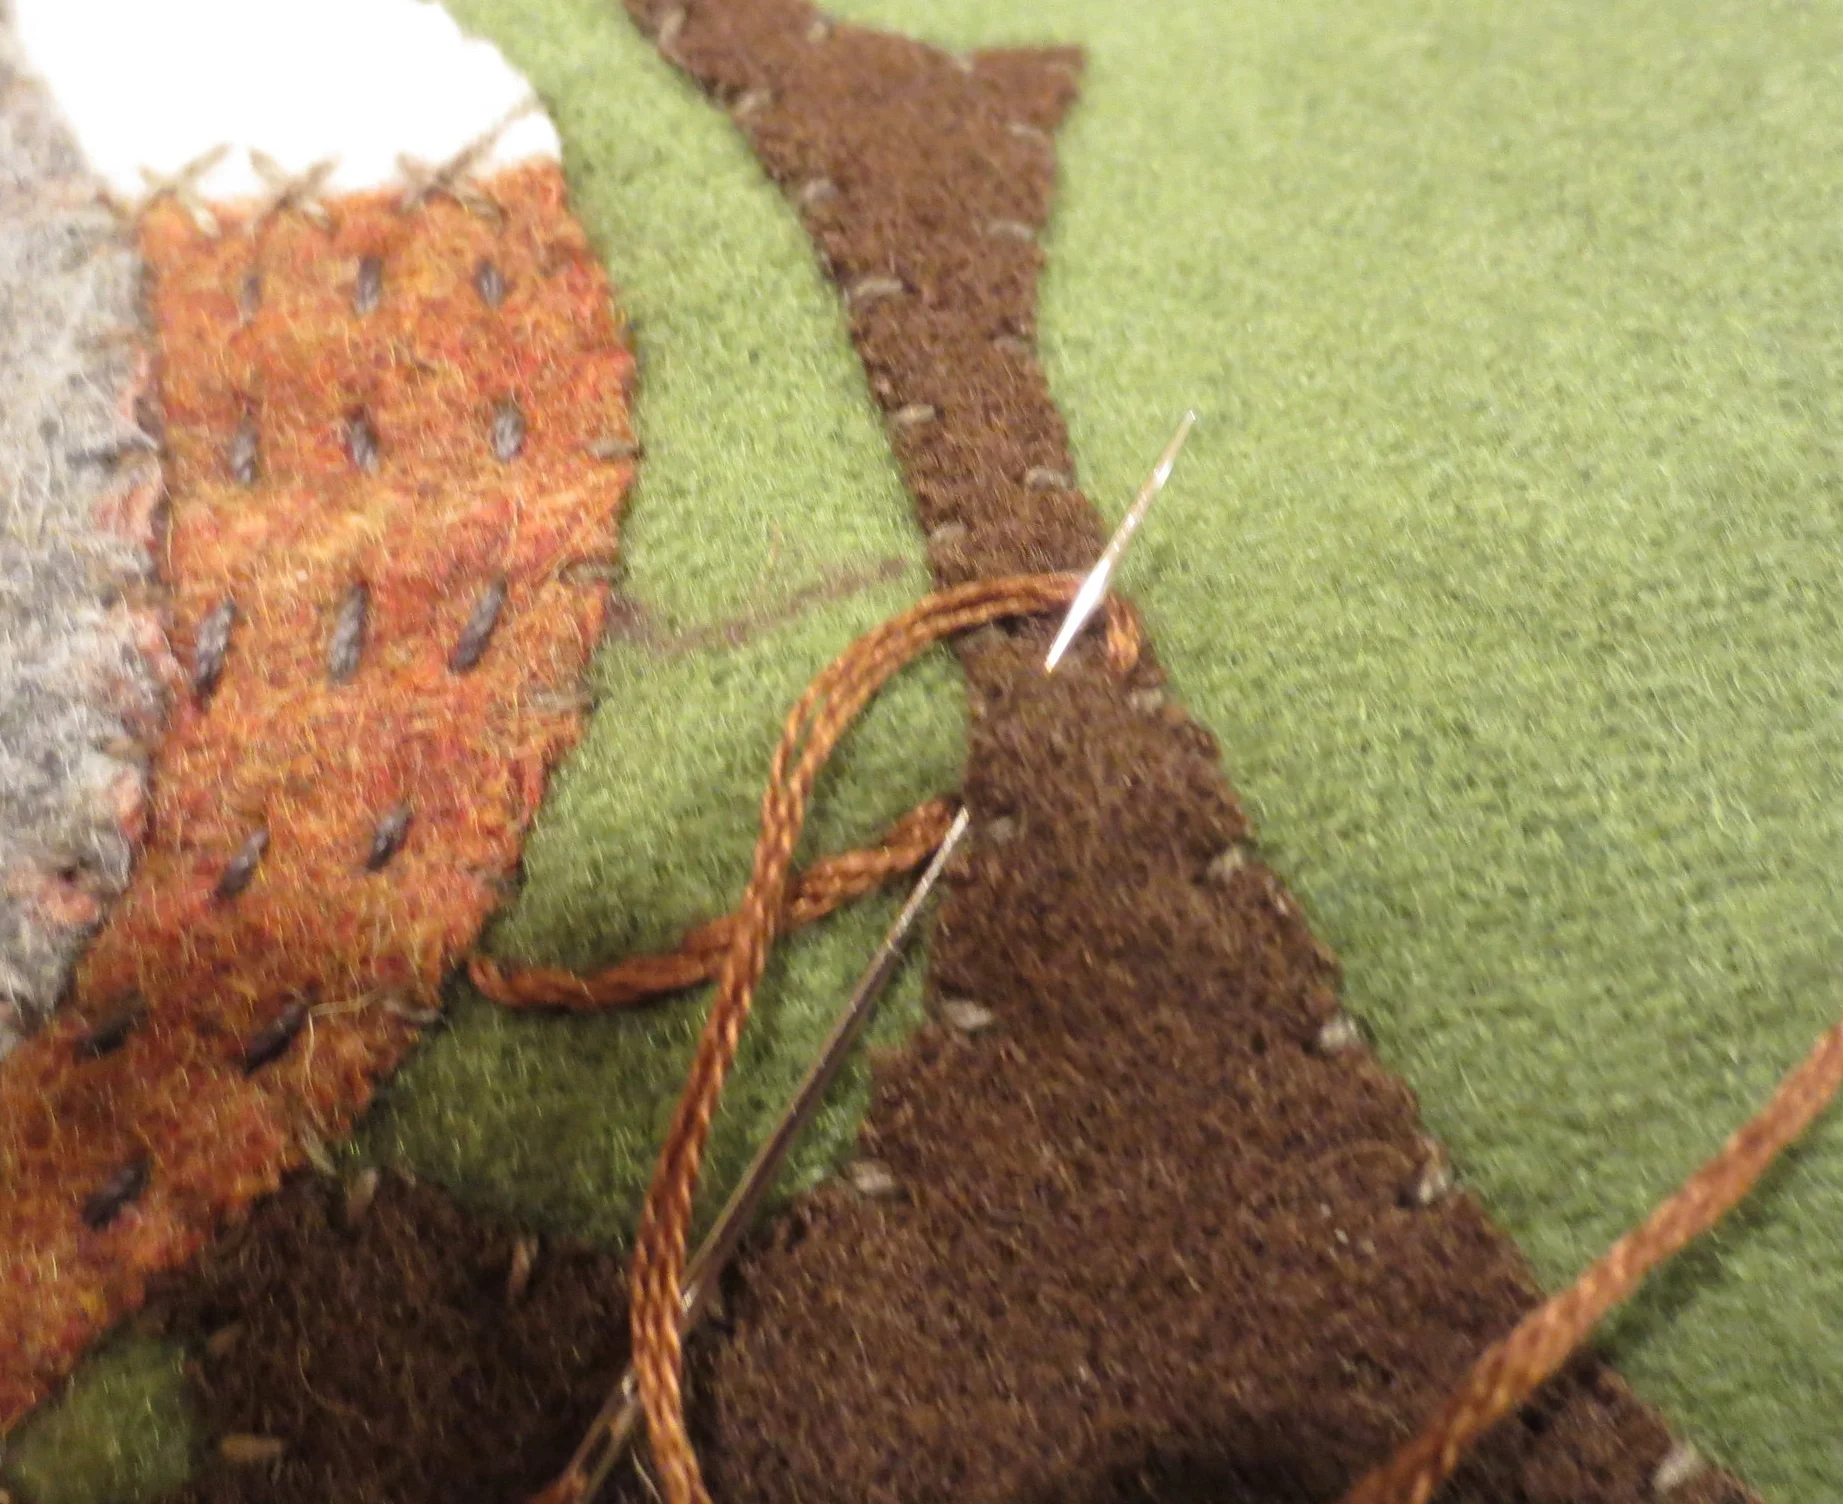
18. Use a split stitch with four strands of DMC 801 to fill the larger sections of the branches.
19. Fill in the beak with a split stitch using two strands of Sulky 12wt. cotton thread 712-1234.
20. Use the same thread to back stitch the plume, and then stitch a french knot on the end.
21. Use a single strand of the same thread to make a french knot eye.
22. Draw dashed lines on the belly of the partridge using the layout as a guide.
23. Use one strand of Sulky 712-1234 to make running stitches over the lines.
24. Use two strands of the same thread to make two fly stitches on the tail.
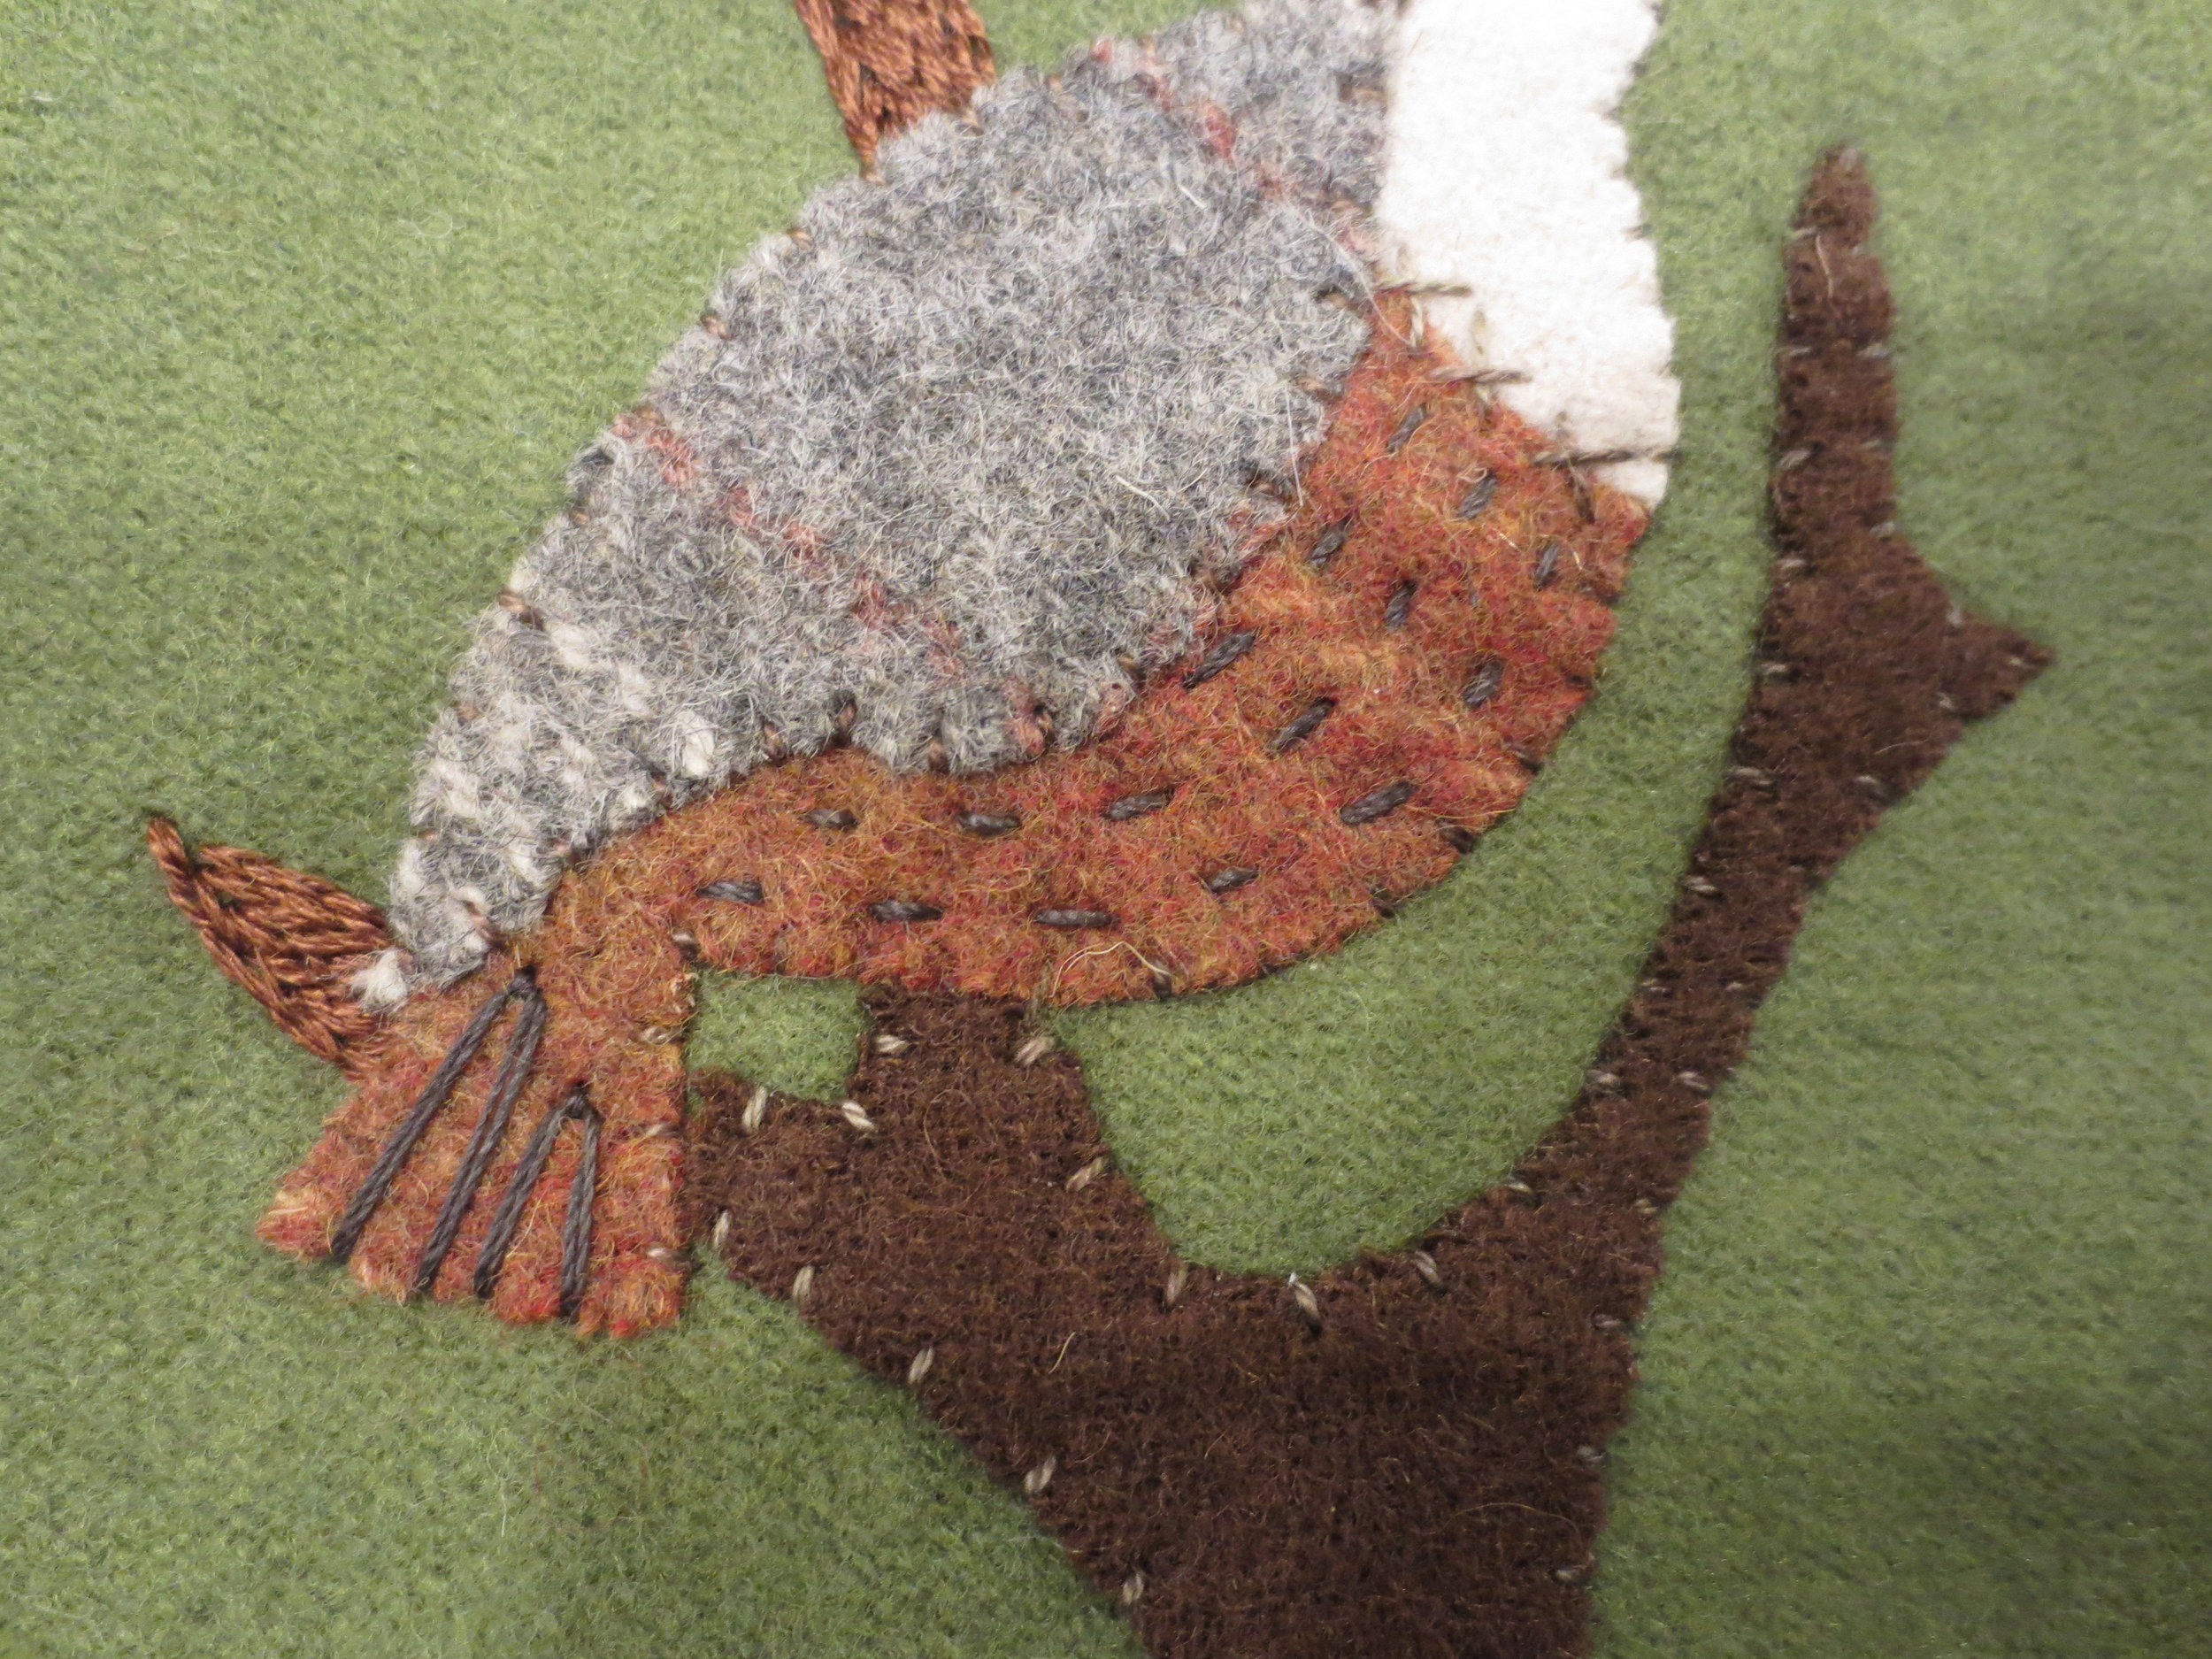
25. Draw the legs.
26. Use three strands of DMC floss 801 to stem stitch over the legs.
27. Use the same thread to make three modified fly stitches for the toes of each leg.
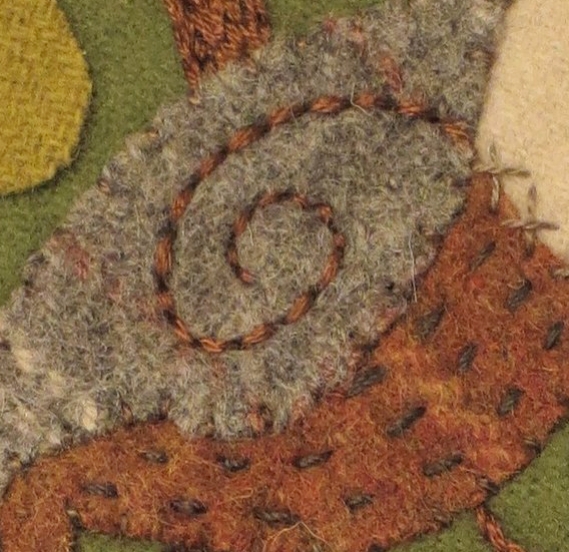
28. Draw a spiral on the back of the partridge near the wing area using the layout as your guide.
29. Use four strands of DMC 801 to back stitch over the drawn line.

30. Replace the leaves and pears using the layout as a guide.
31. Fuse the leaves and pears in place using steam.
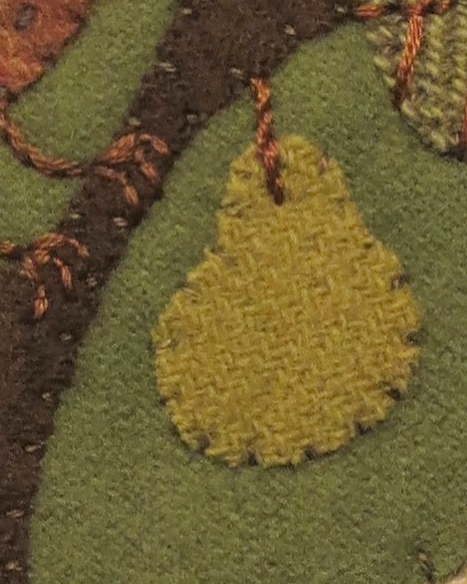
32. Whip stitch the leaves and pears with one strand of Valdani O518.
33. Draw the stems of the leaves and pears. Also draw the central veins of each leaf. I didn’t think about drawing them until I started to stitch the stems and noticed that they are an extension of the stems.


34. Stem stitch the stems of the pears using four strands of DMC 801.
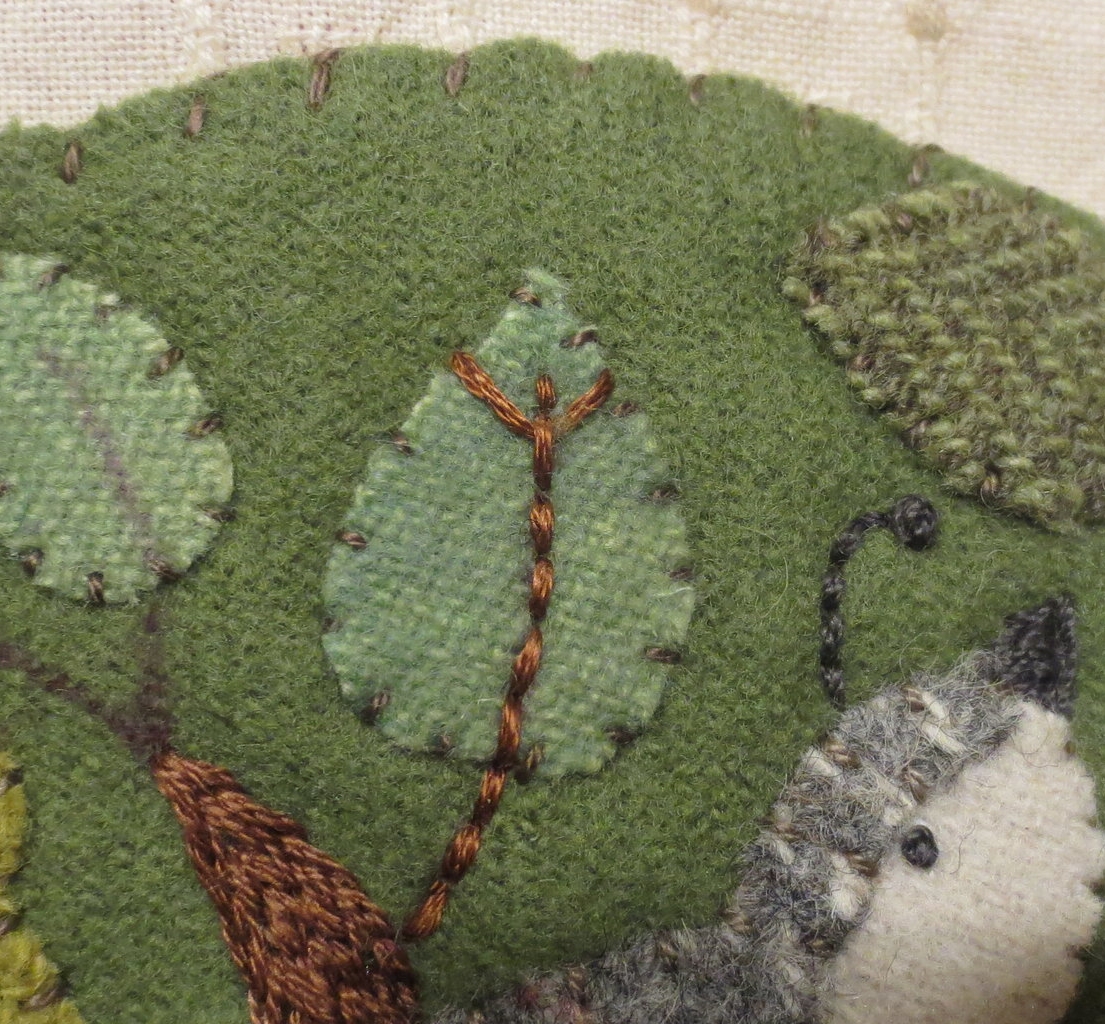
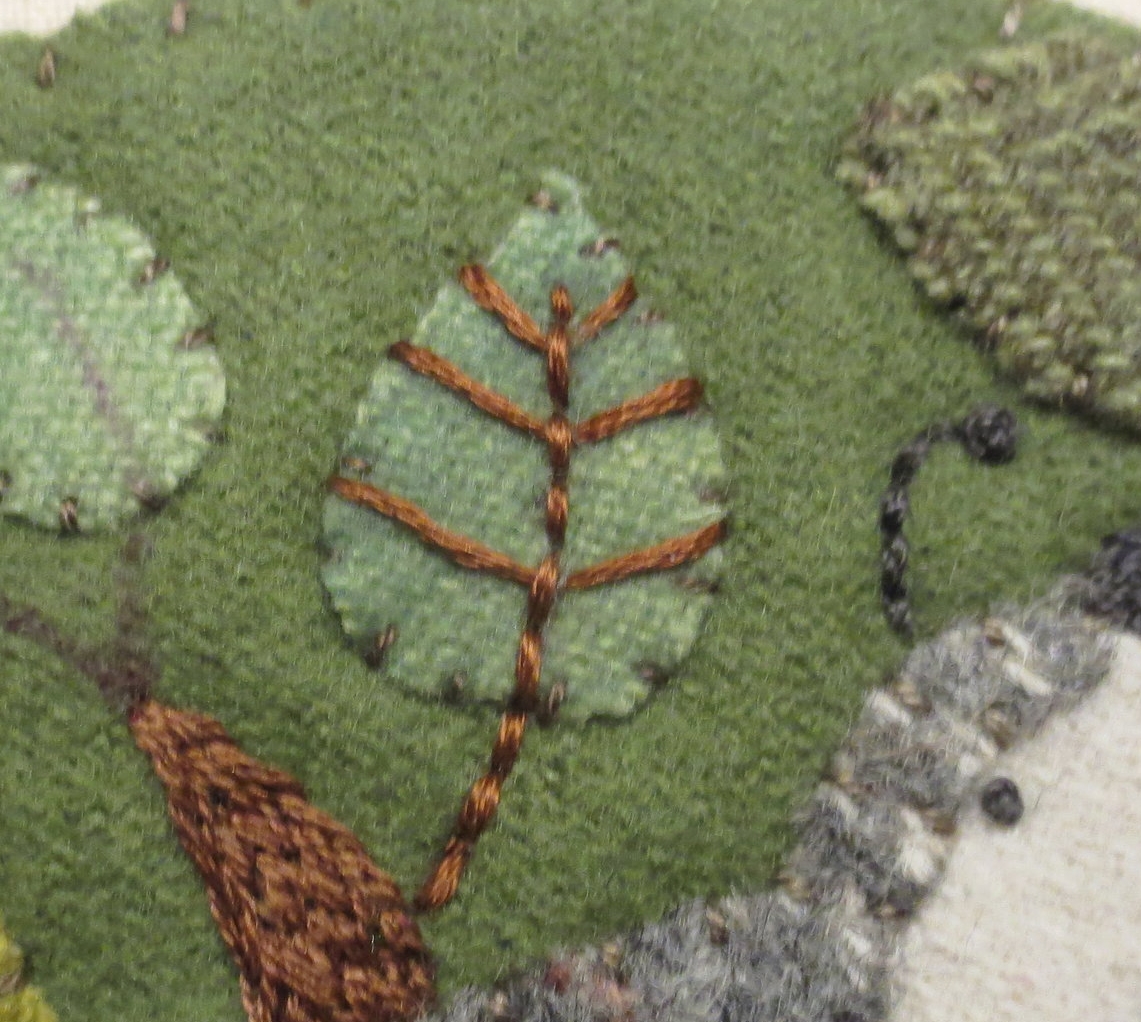
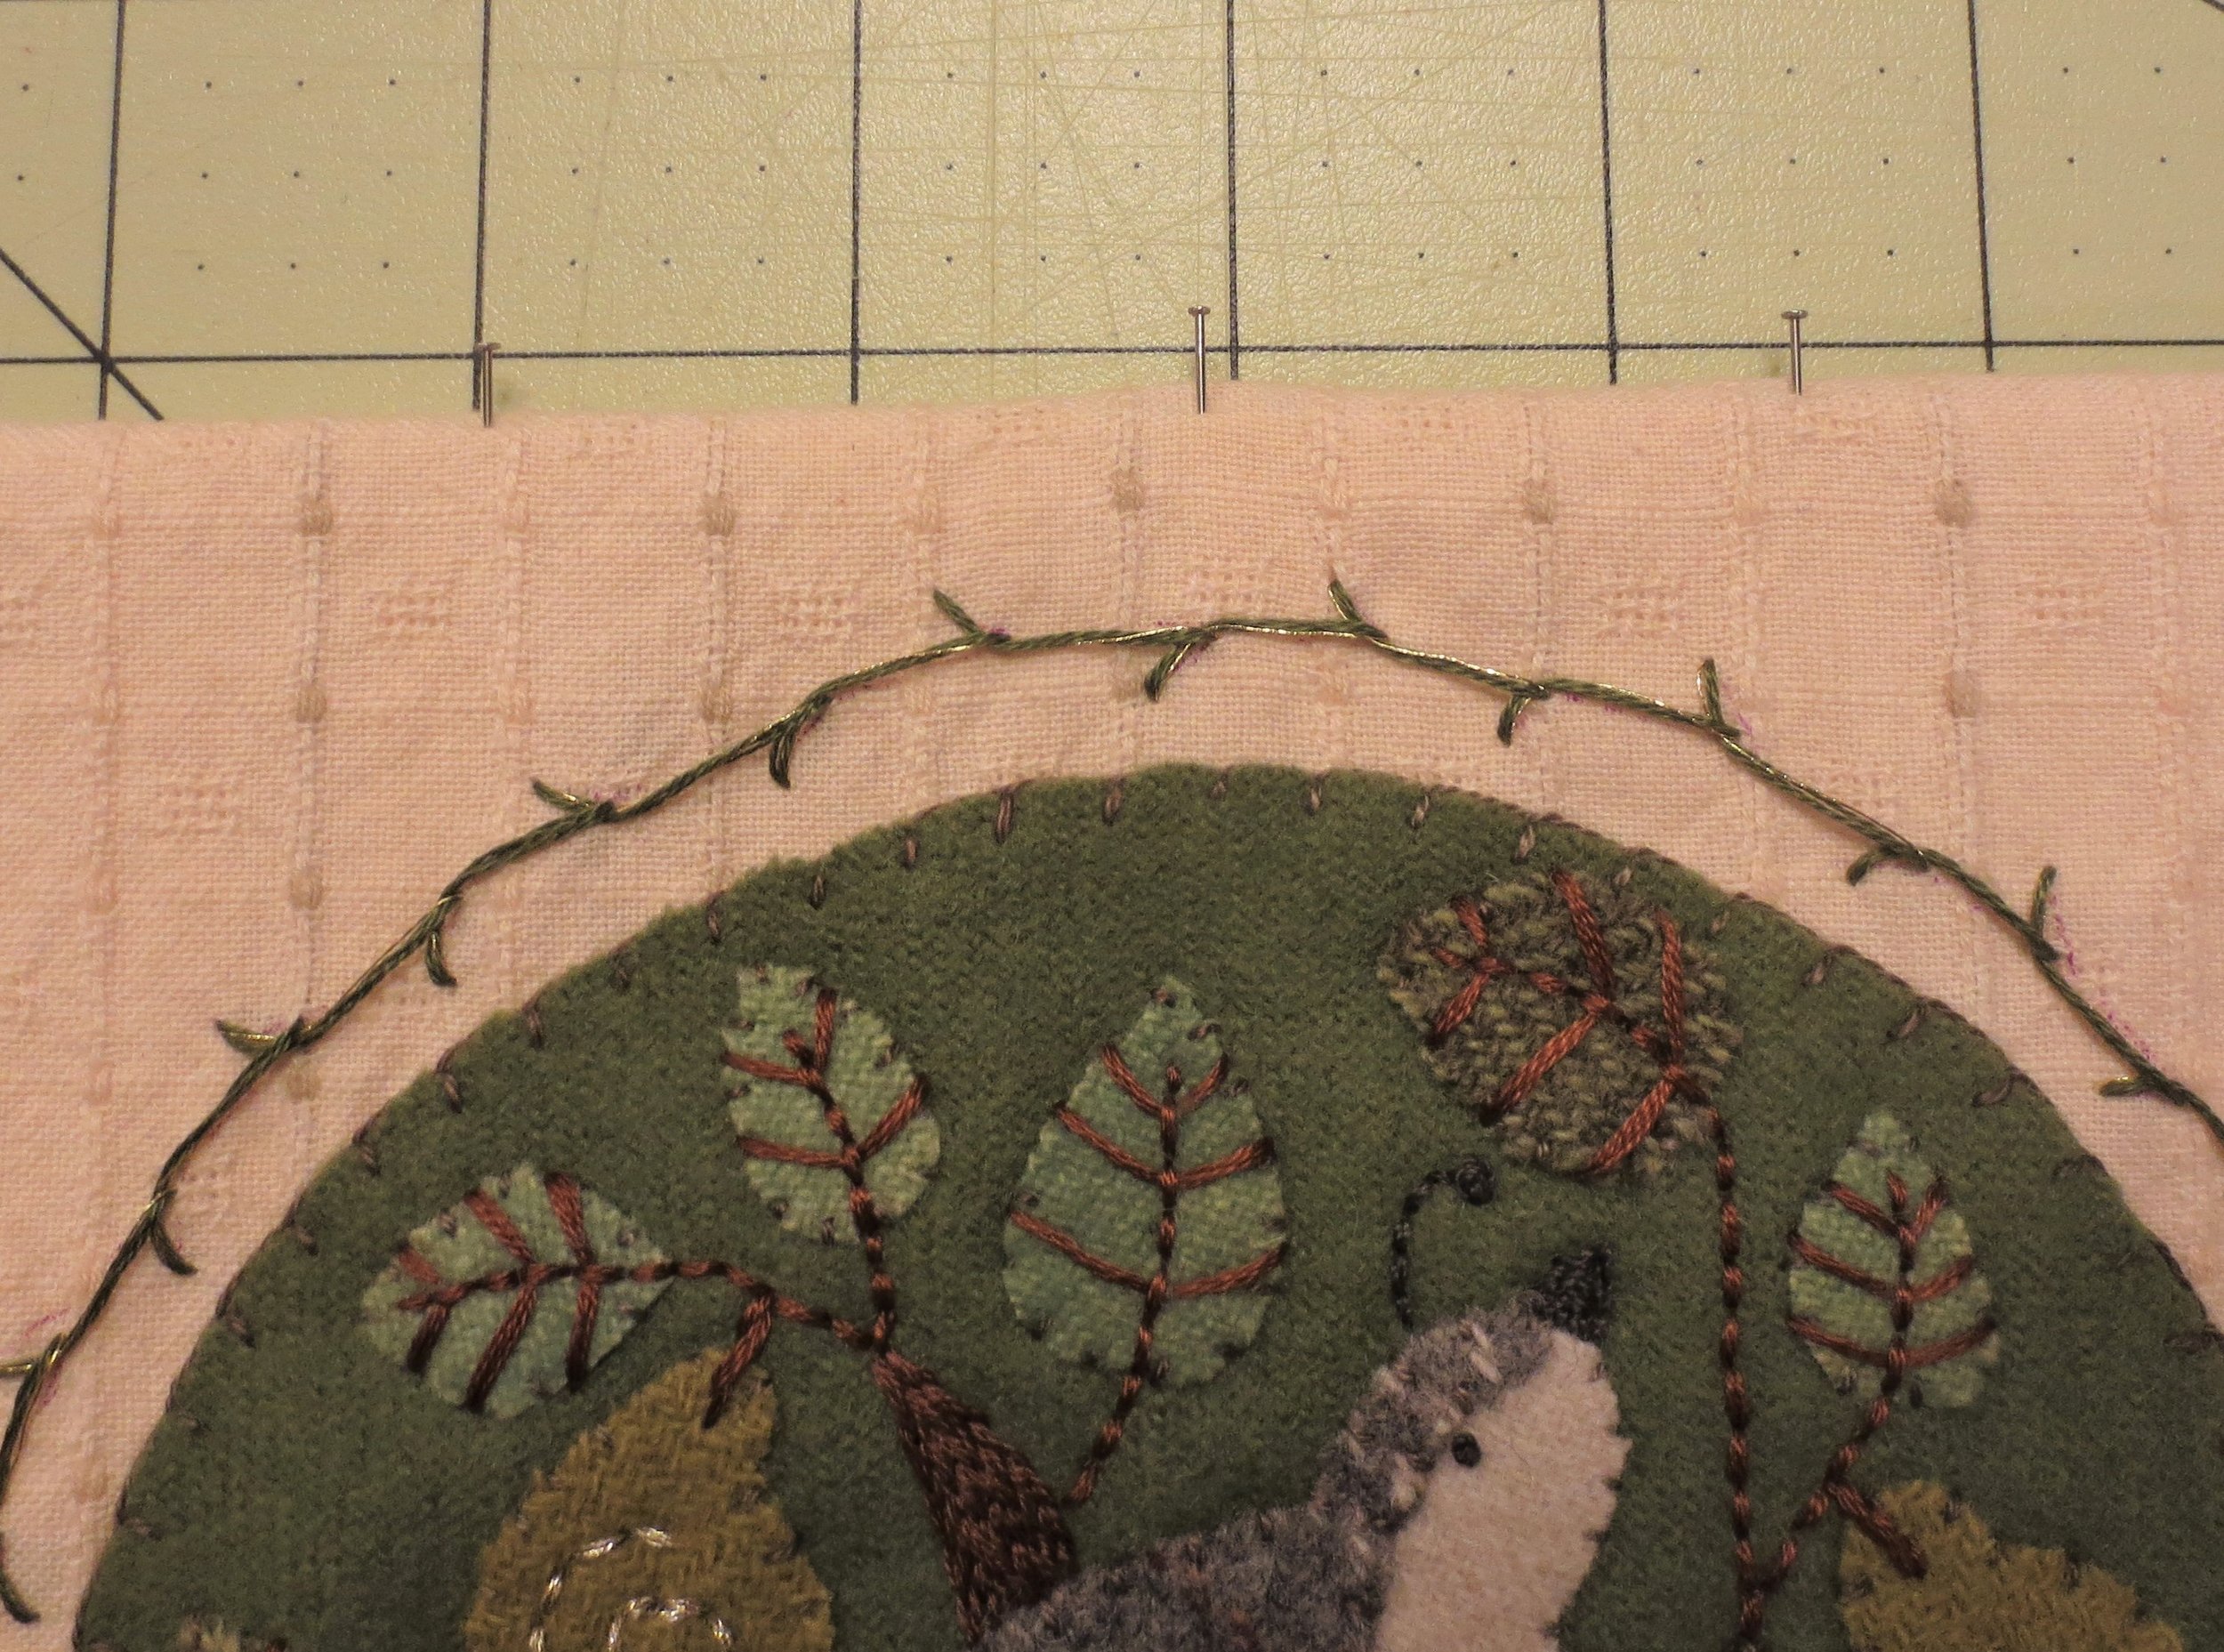
35. Back stitch the stems and central veins of the leaves using four strands of DMC 801.
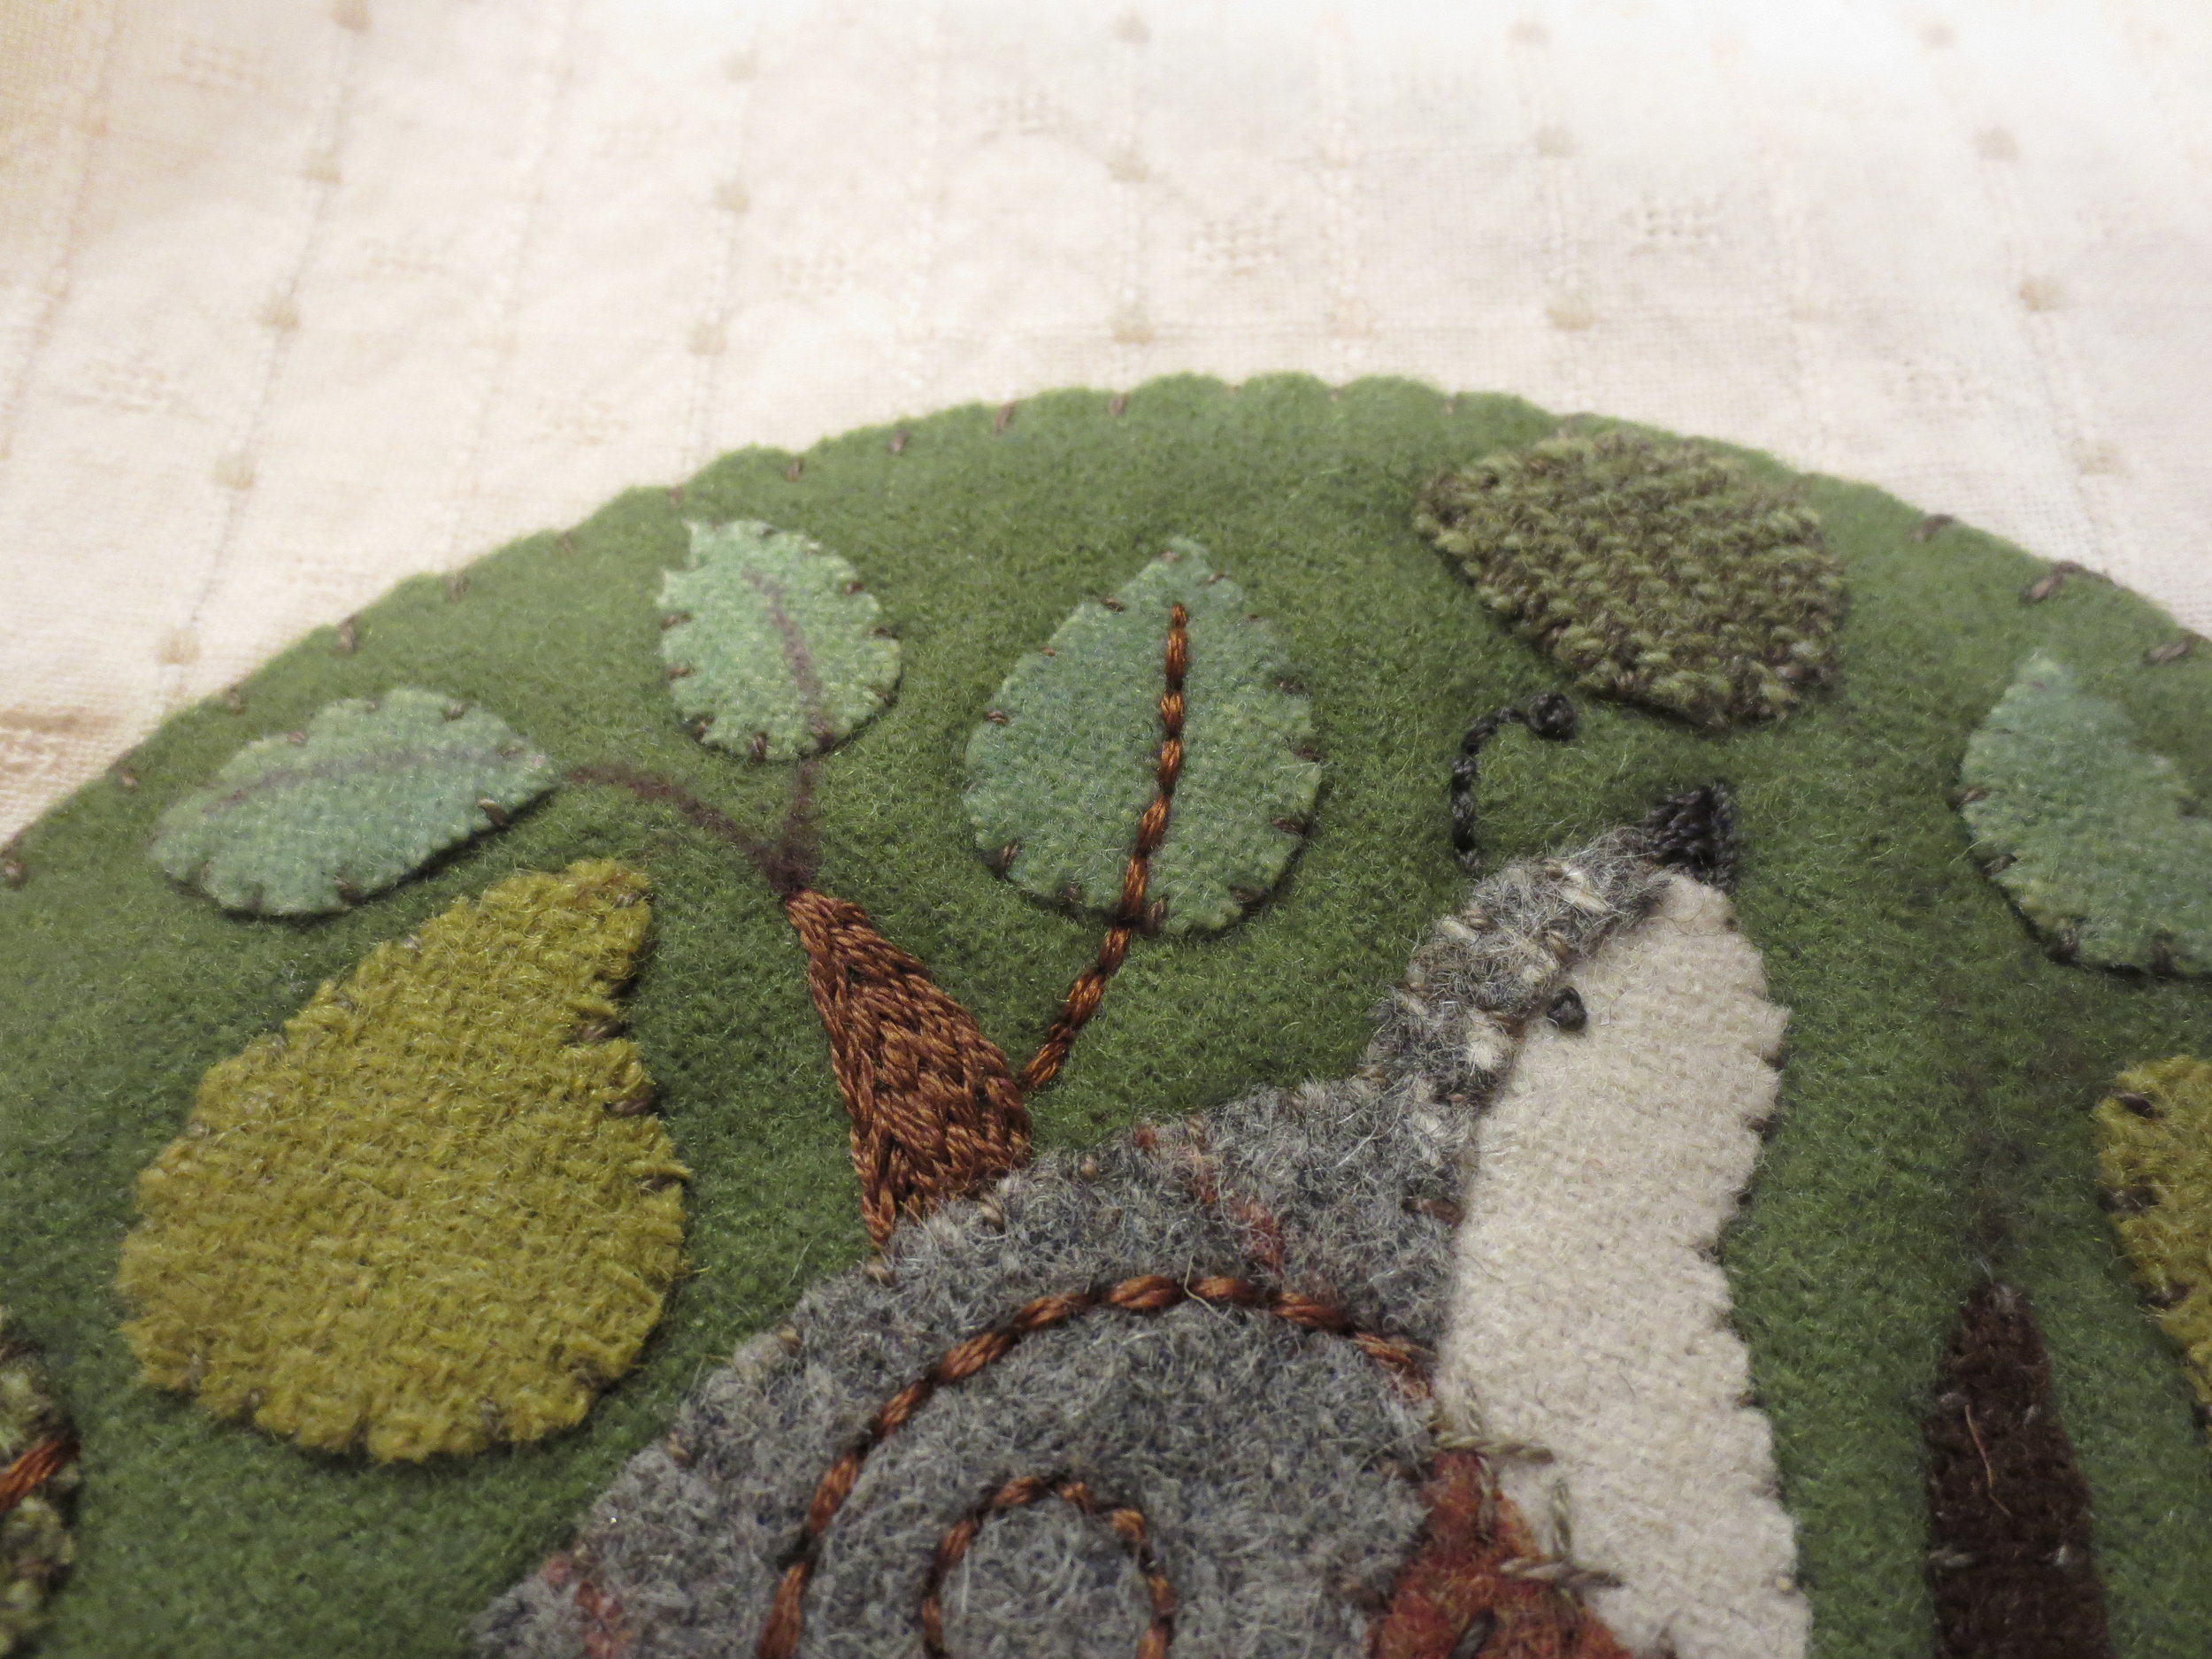
36. Use the same four strand thread to make the peripheral veins of the leaves.


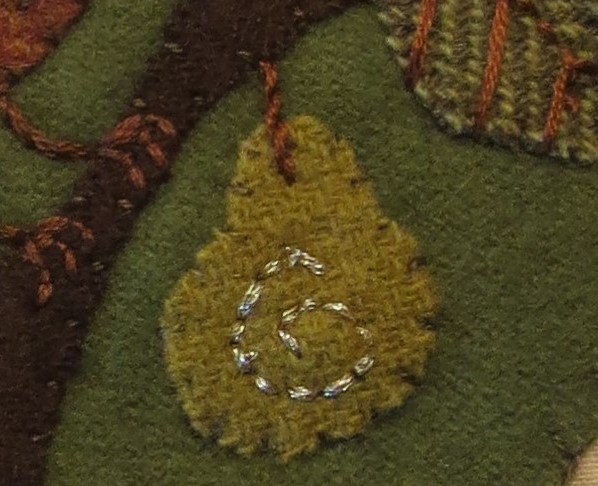
37. Draw spirals on each pear.
38. Use four strands of Sublime Stitching 925, metallic gold to back stitch over the spiral lines.
39. Draw a line parallel to the perimeter of the tree top. You can use your light box to do this, or use a compass to make a circle that is ½ inch wider that the tree top. The line should be ¼ inch from the edge of the perimeter.

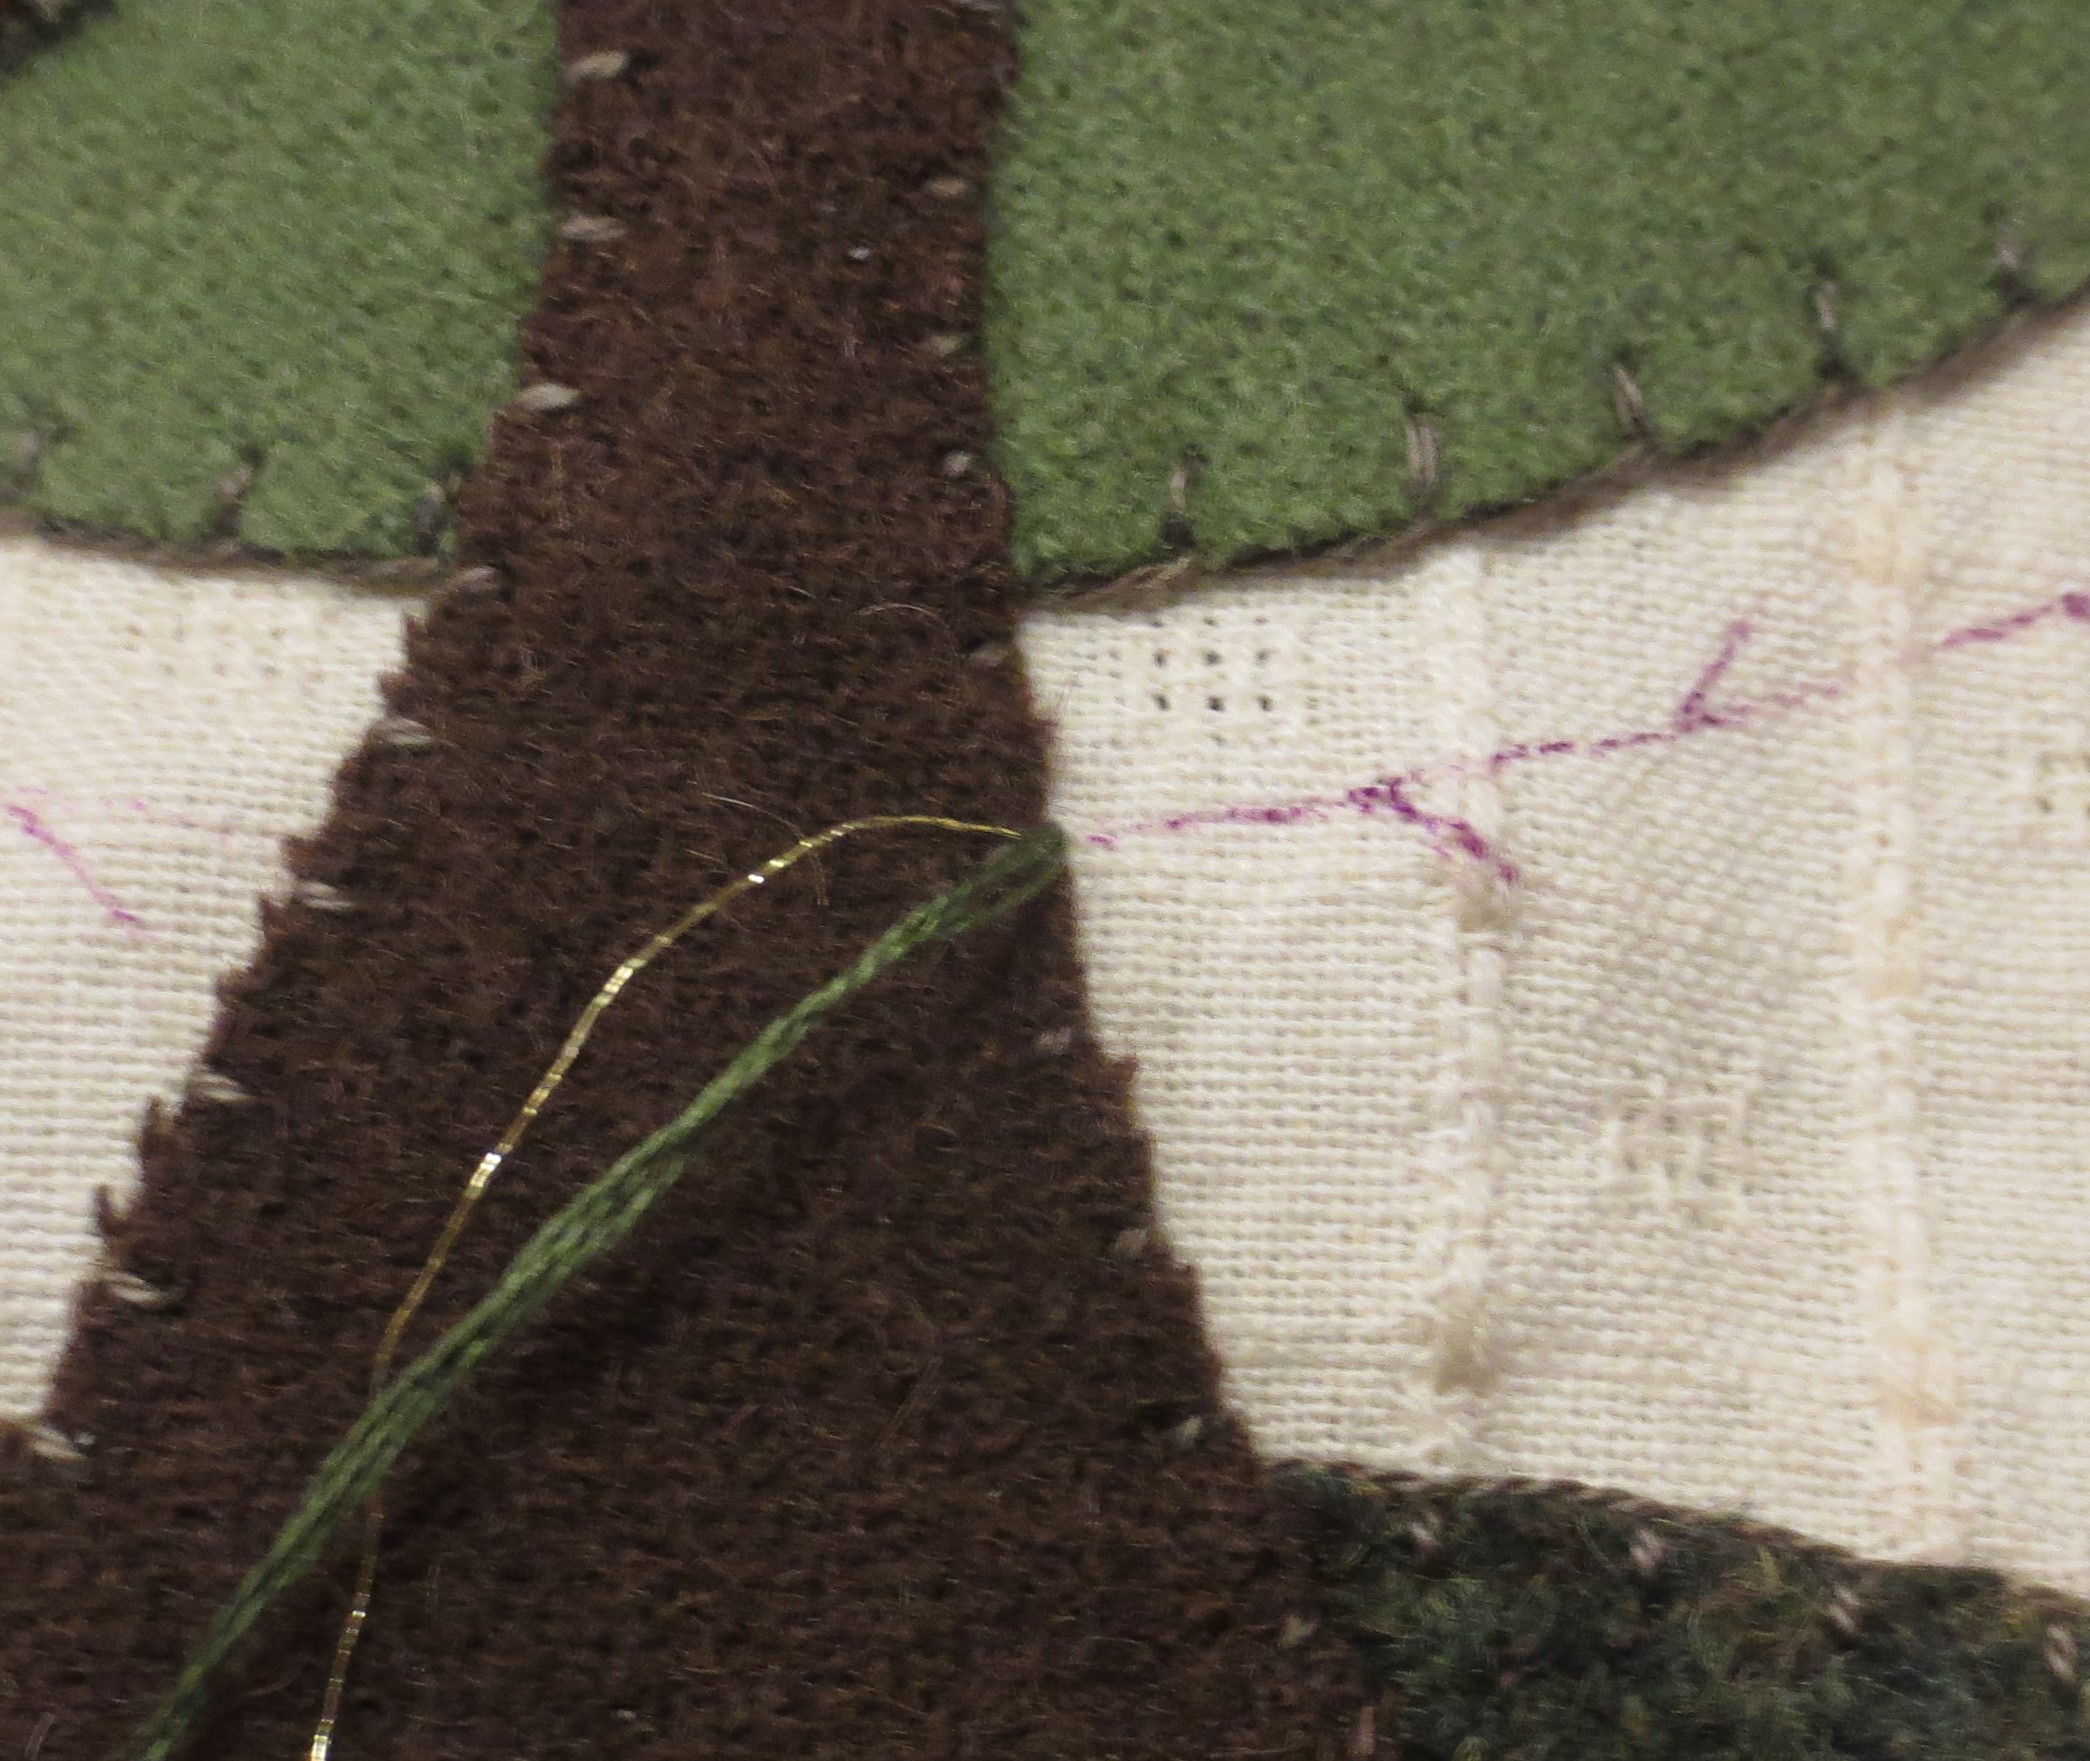
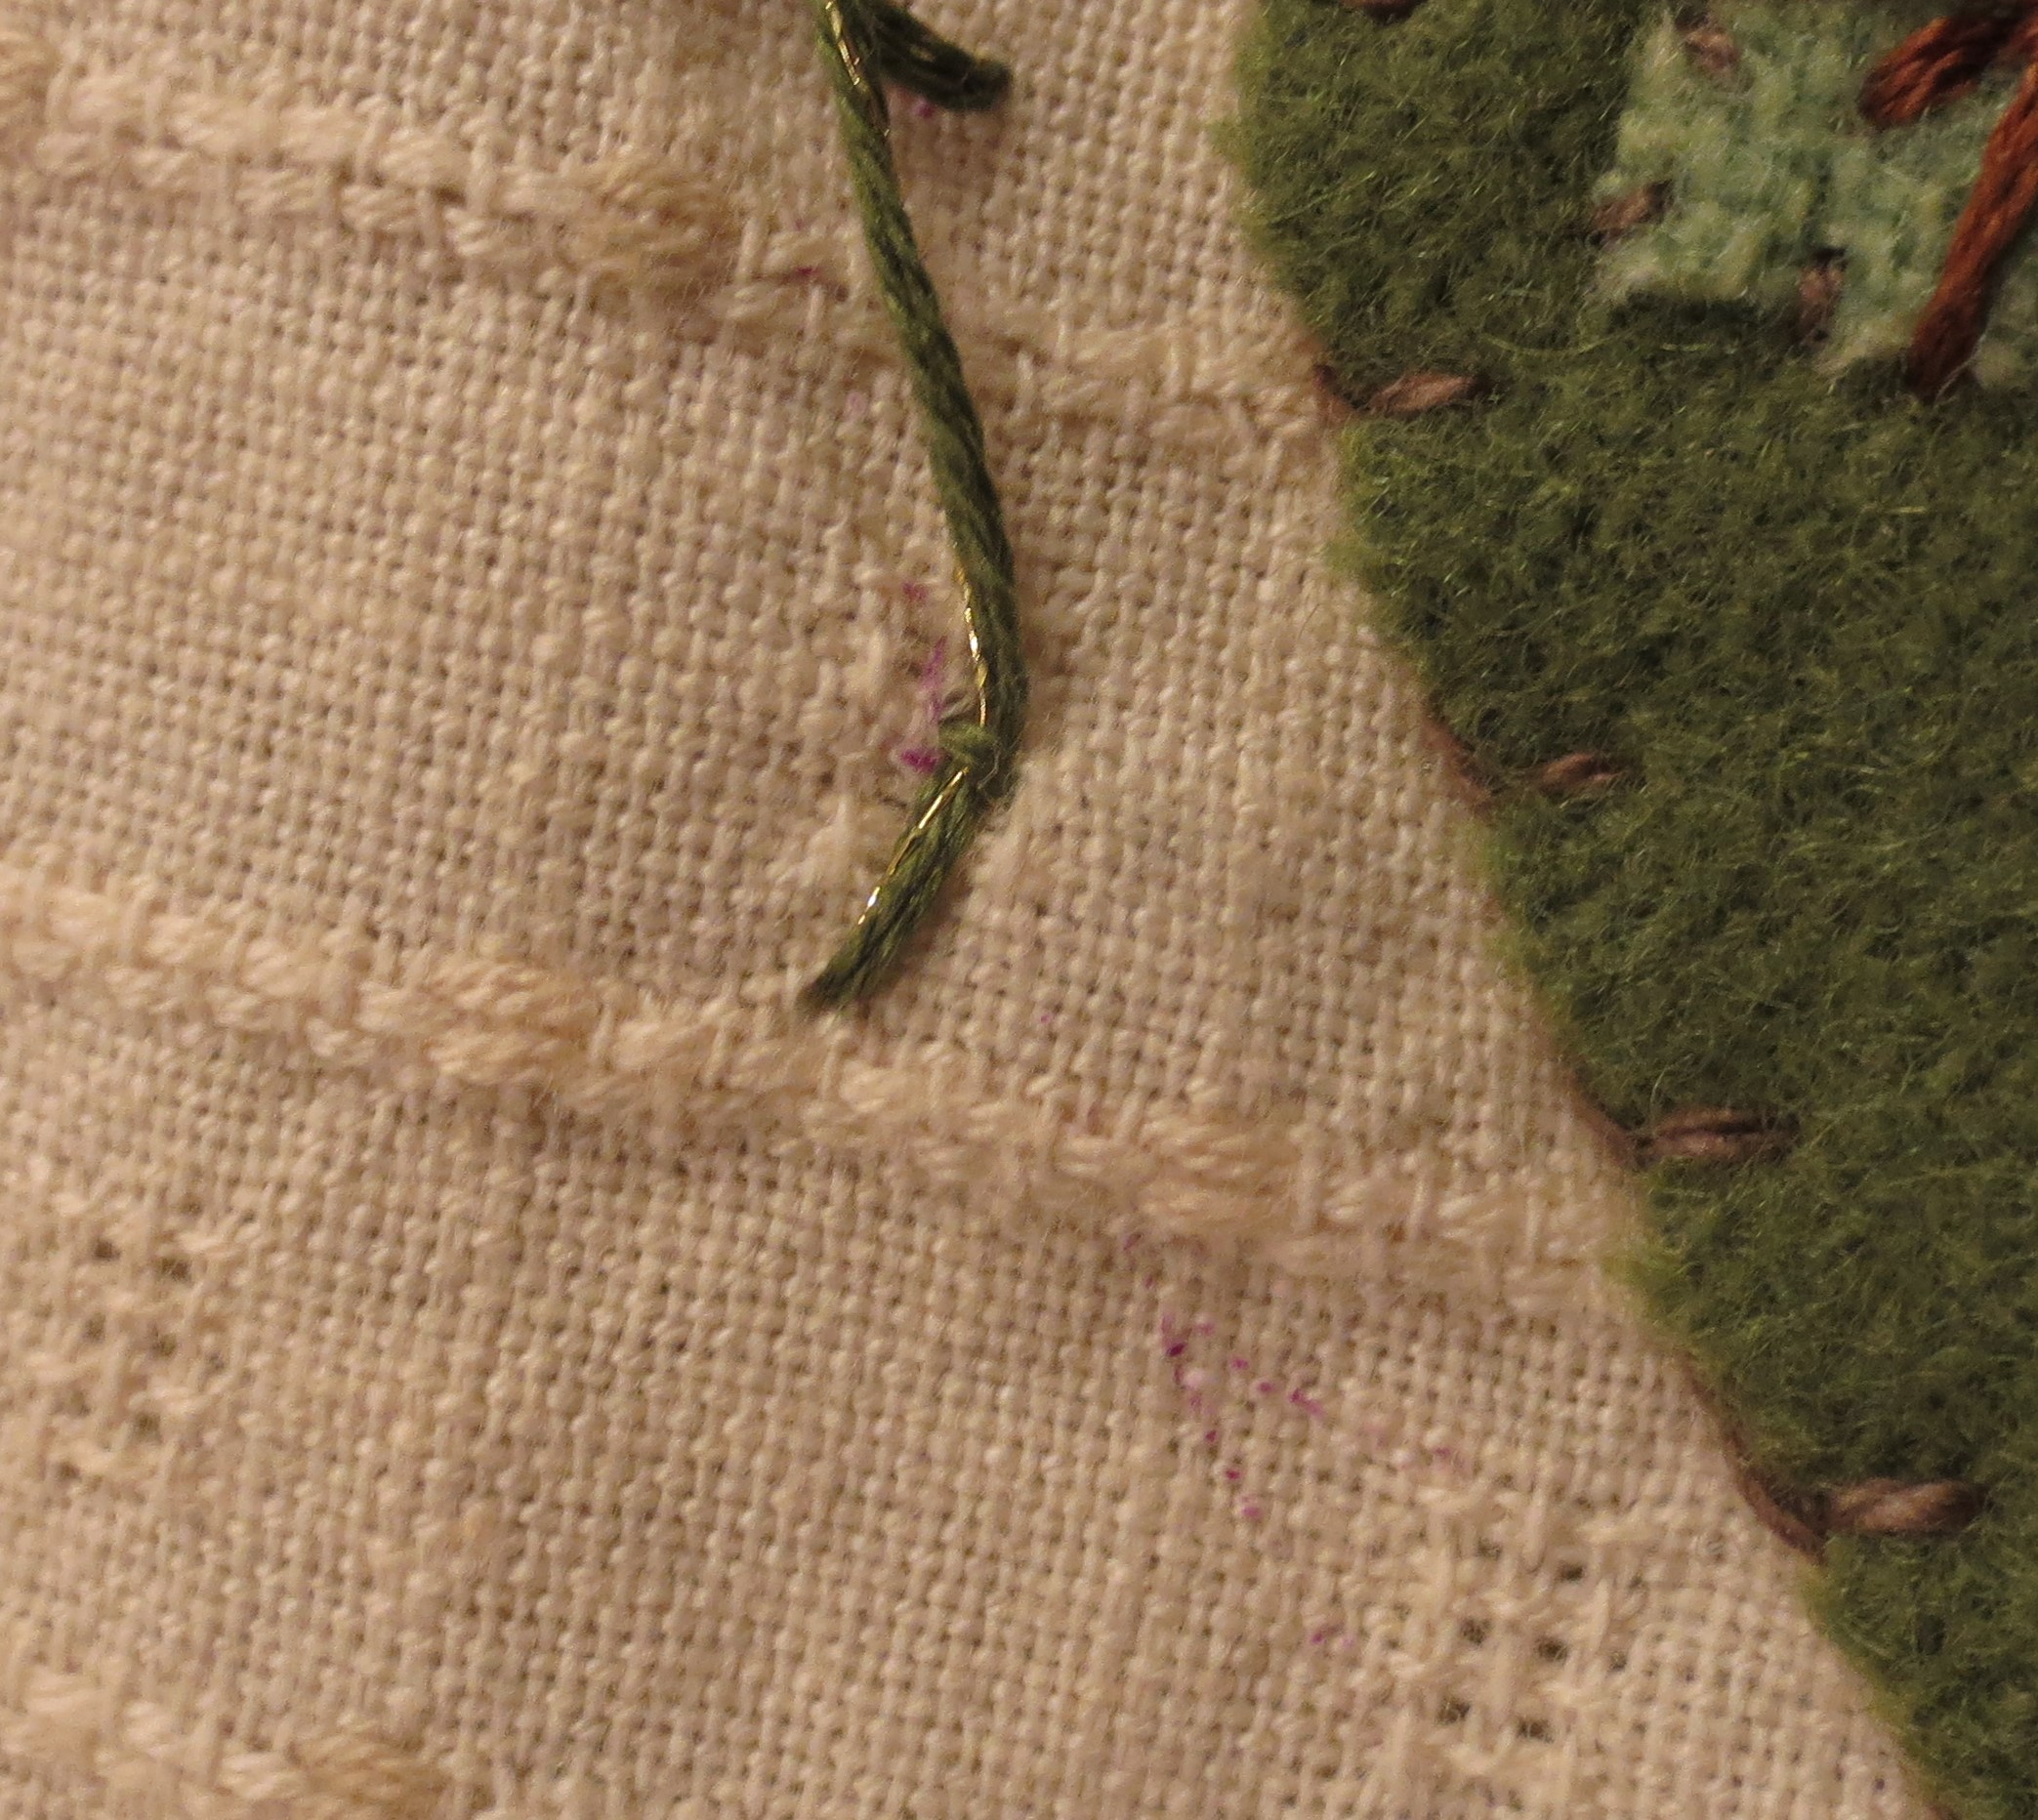
40. Use three strands of DMC 469 and one strand of Sublime Stitching 925 to make an alternating feather stitch over the line.
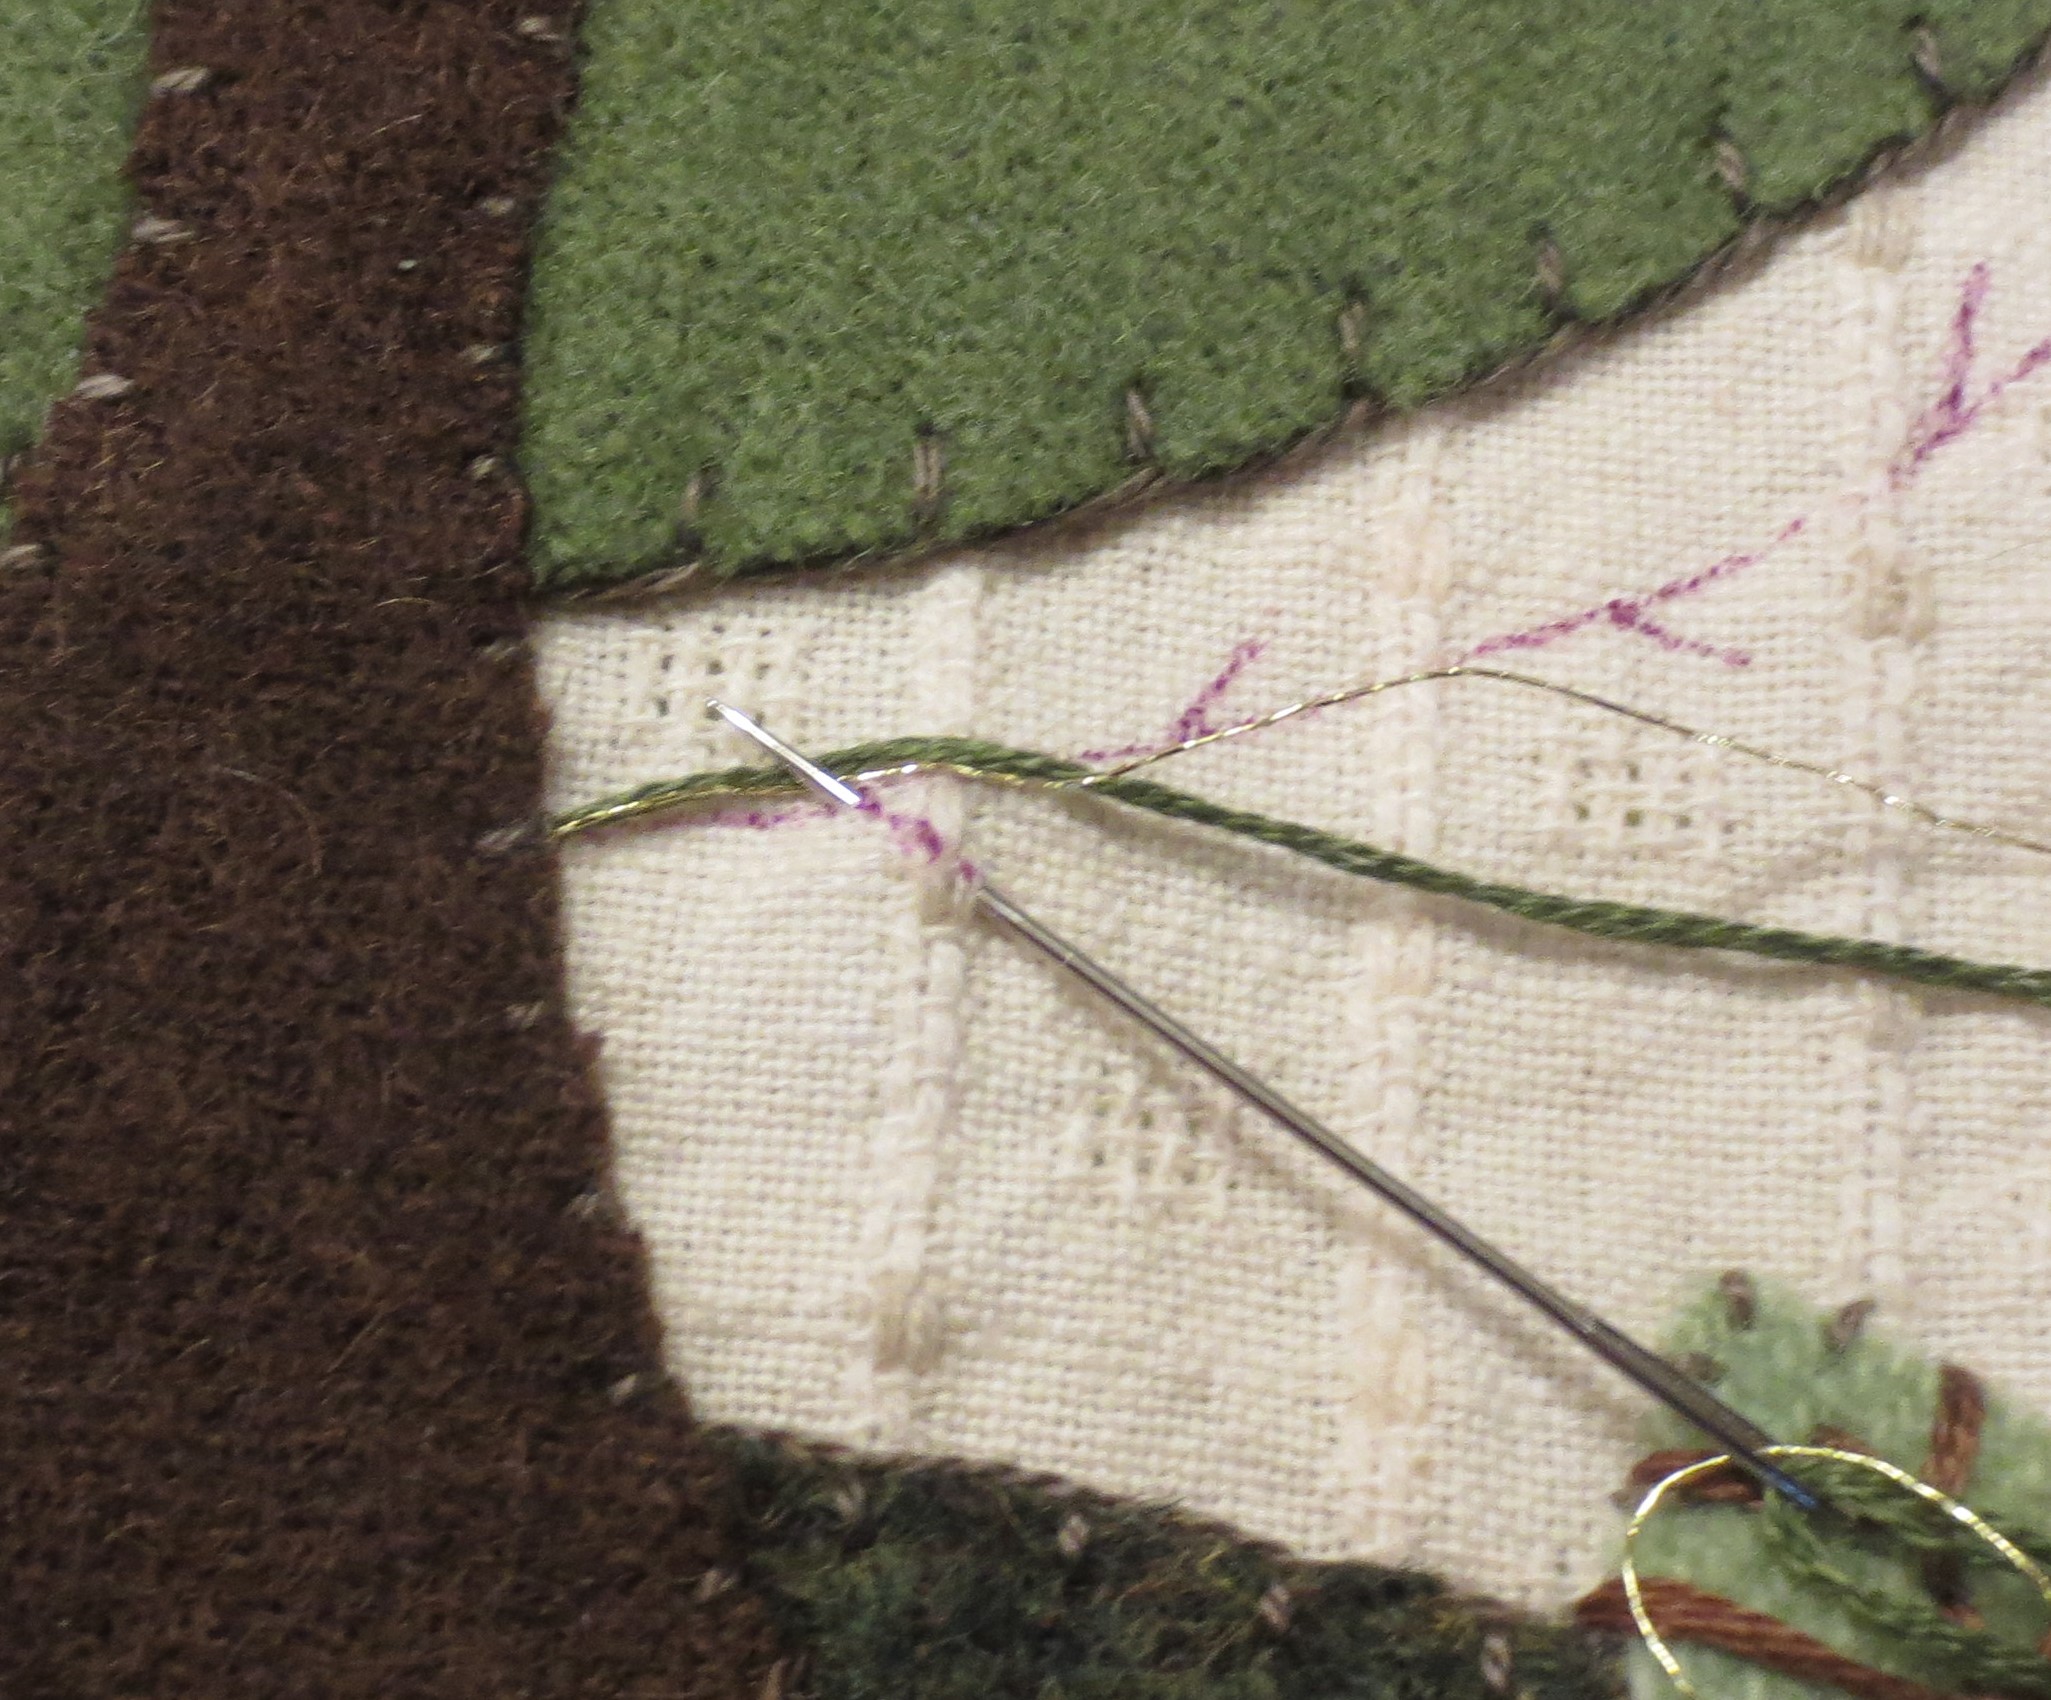
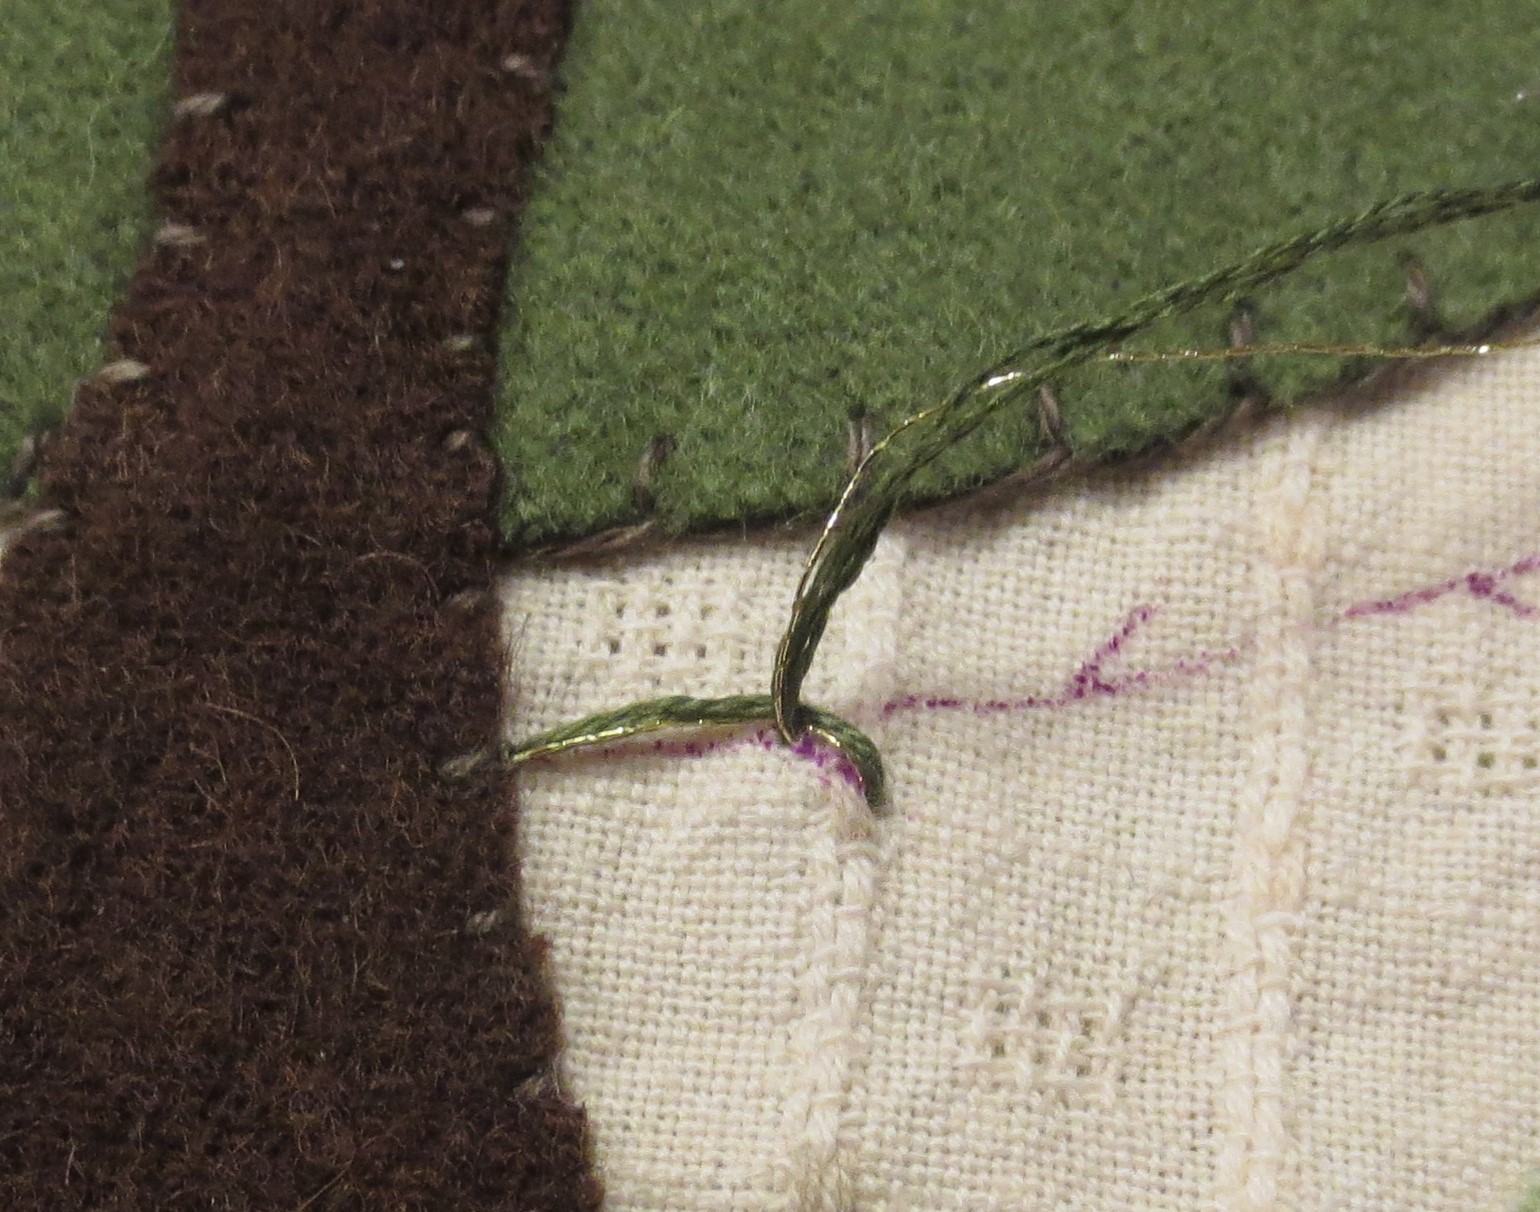
Hint: When you reach the end of your thread finish the last stitch by tacking it down. Begin your next stitch at the same point.

The applique is complete! Pat yourself on the back. Well Done!
41. How to press your project
Lay a thick towel on your ironing board, and then place your project right side down on top of it, followed by a pressing cloth. The towel will prevent your stitches from being crushed, and the pressing cloth will prevent the metallic threads from melting (most metallic threads are polyester or nylon). DO NOT USE STEAM!
42. How to prepare your project for framing
Note: I used a frame that had a mat and liner that I removed. The thickness of the mat and liner was roughly equivalent to my mounted project. This enabled me to frame my project with glass.
Cut your mounting board using the glass, or insert from your frame as a template. Make it 1/8 inch narrower and shorter than your template.
Test the fit of your mounting board. You should have a little wiggle room to allow for the additional thickness of your fabric. Adjust the size if necessary.
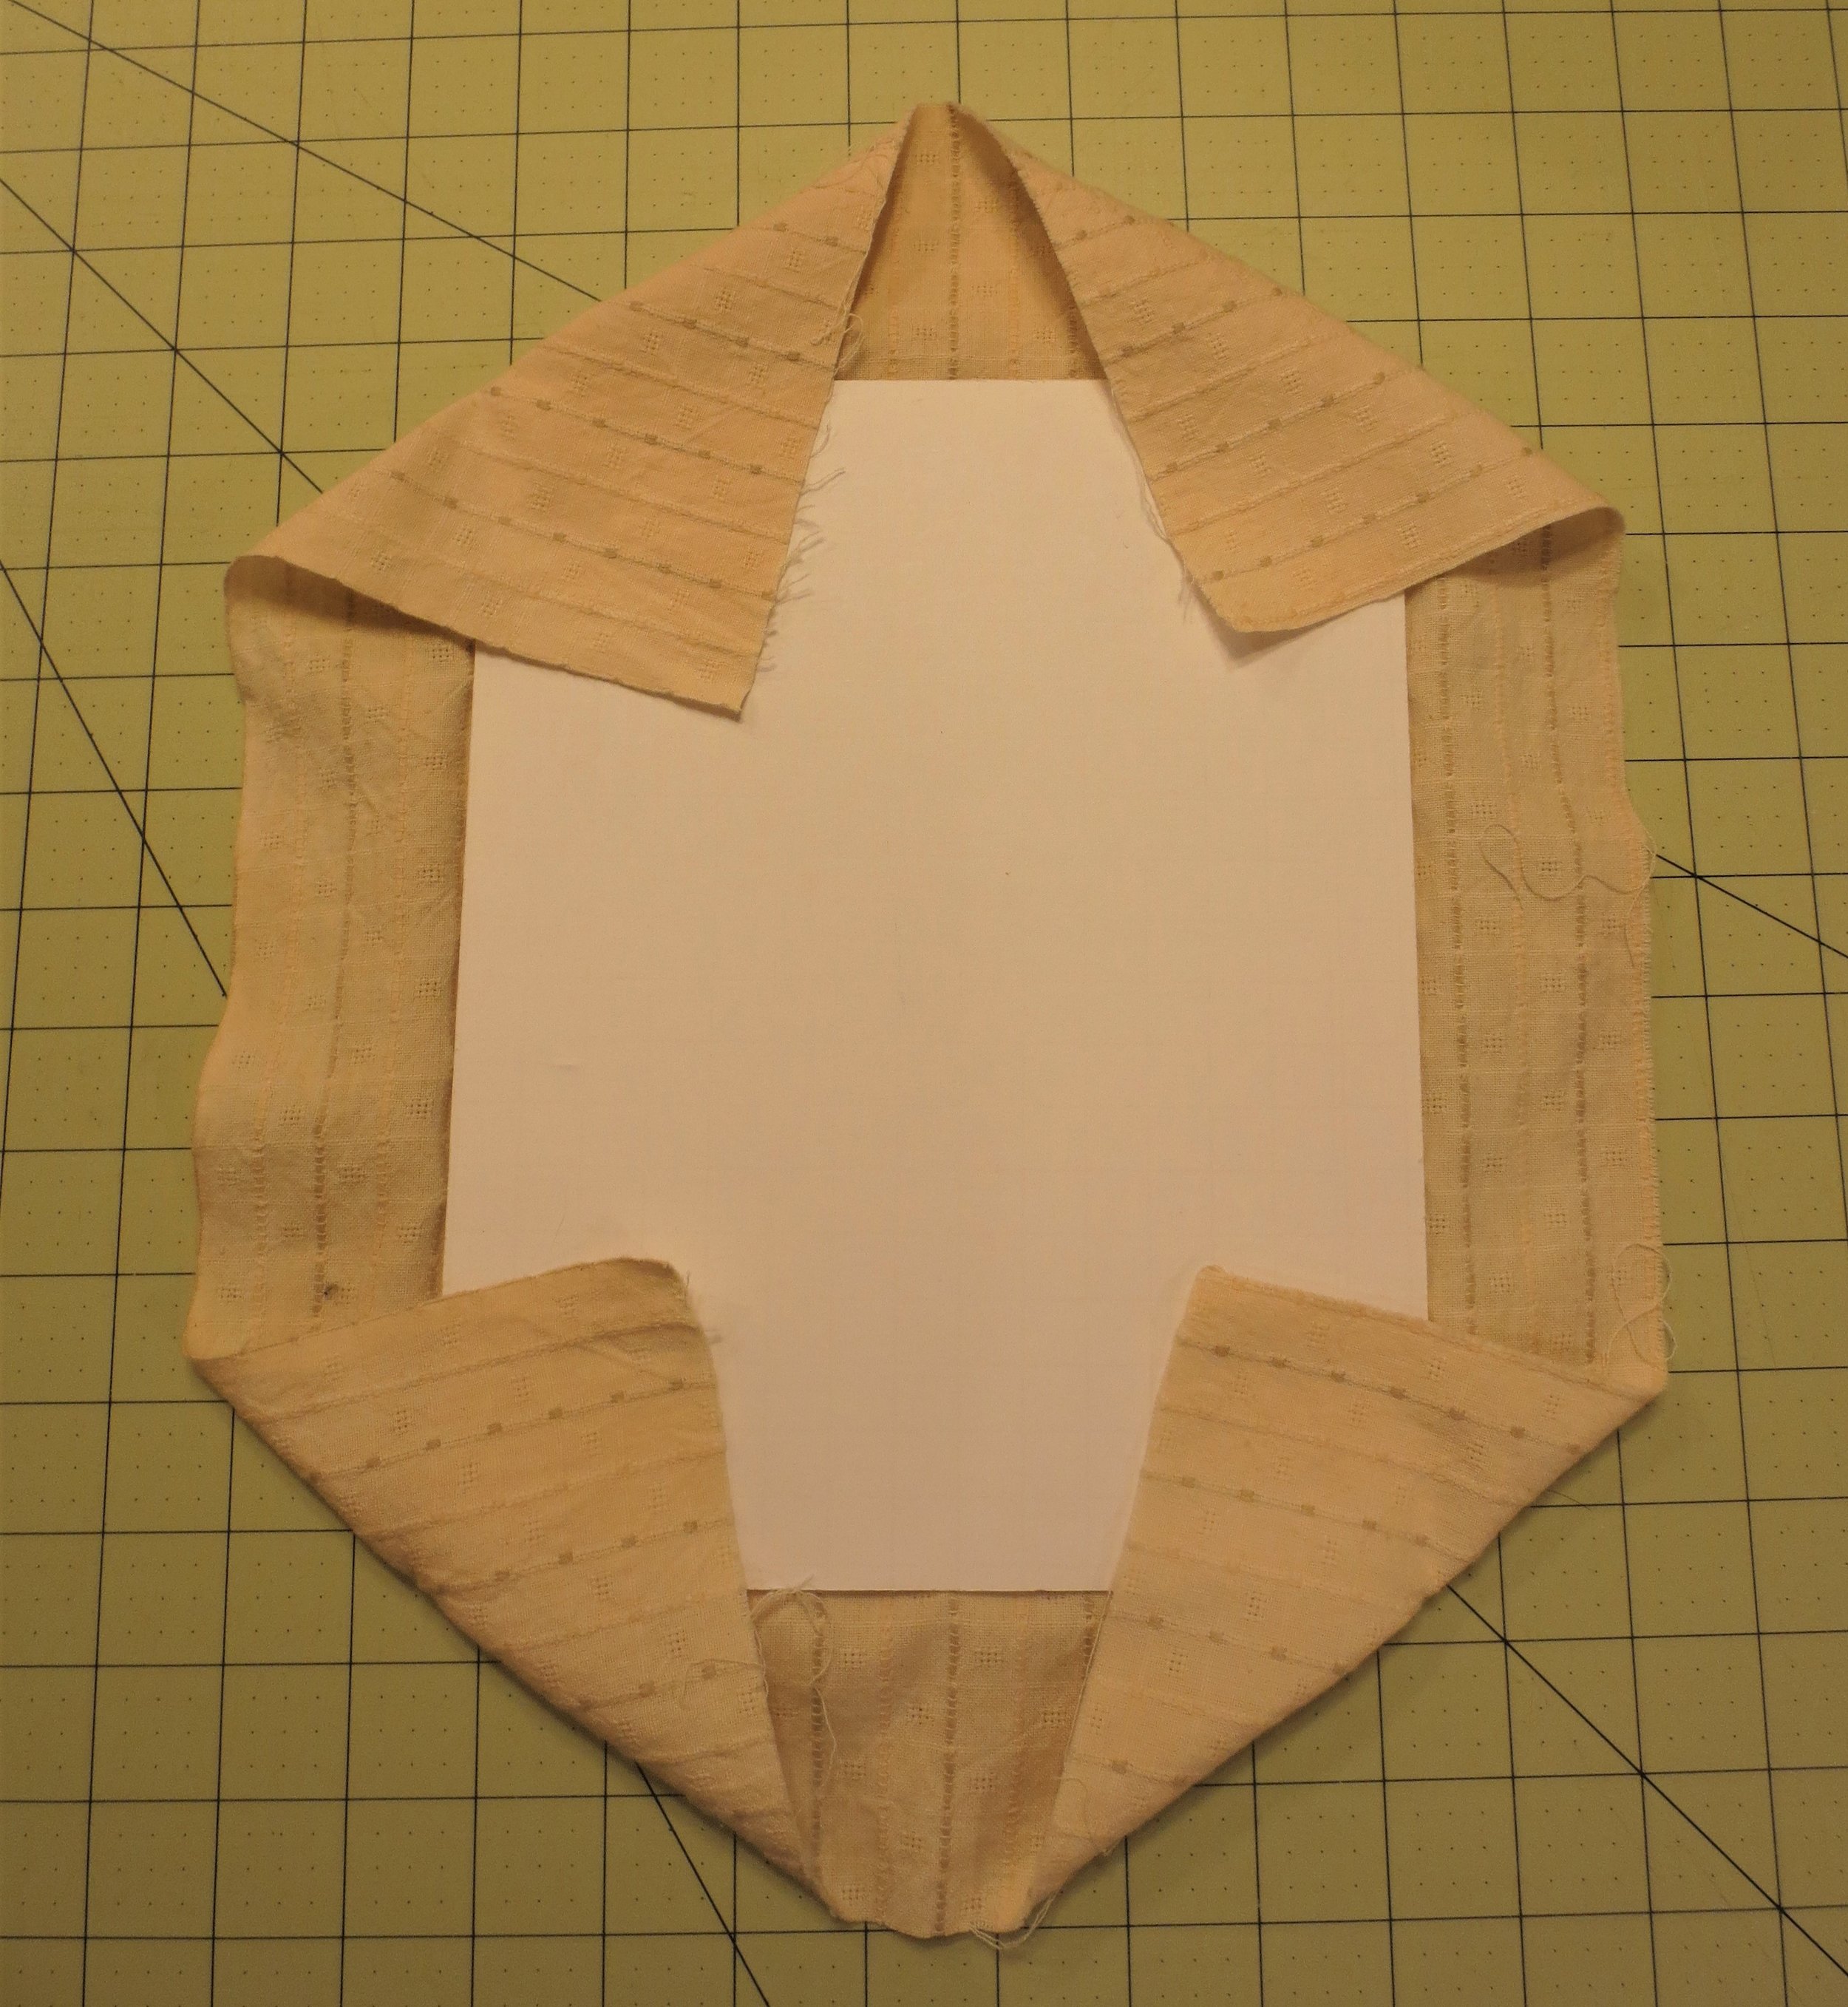
Place your applique face down, and then center the mounting board on top.
Fold the top and sides inward, and then temporarily secure with tape.
Flip it over, and check to make sure it’s centered. Adjust if necessary.
Skip the next three steps if you are using mat board.
Pin straight pins, approximately one inch apart, through the top of the applique and foam core.
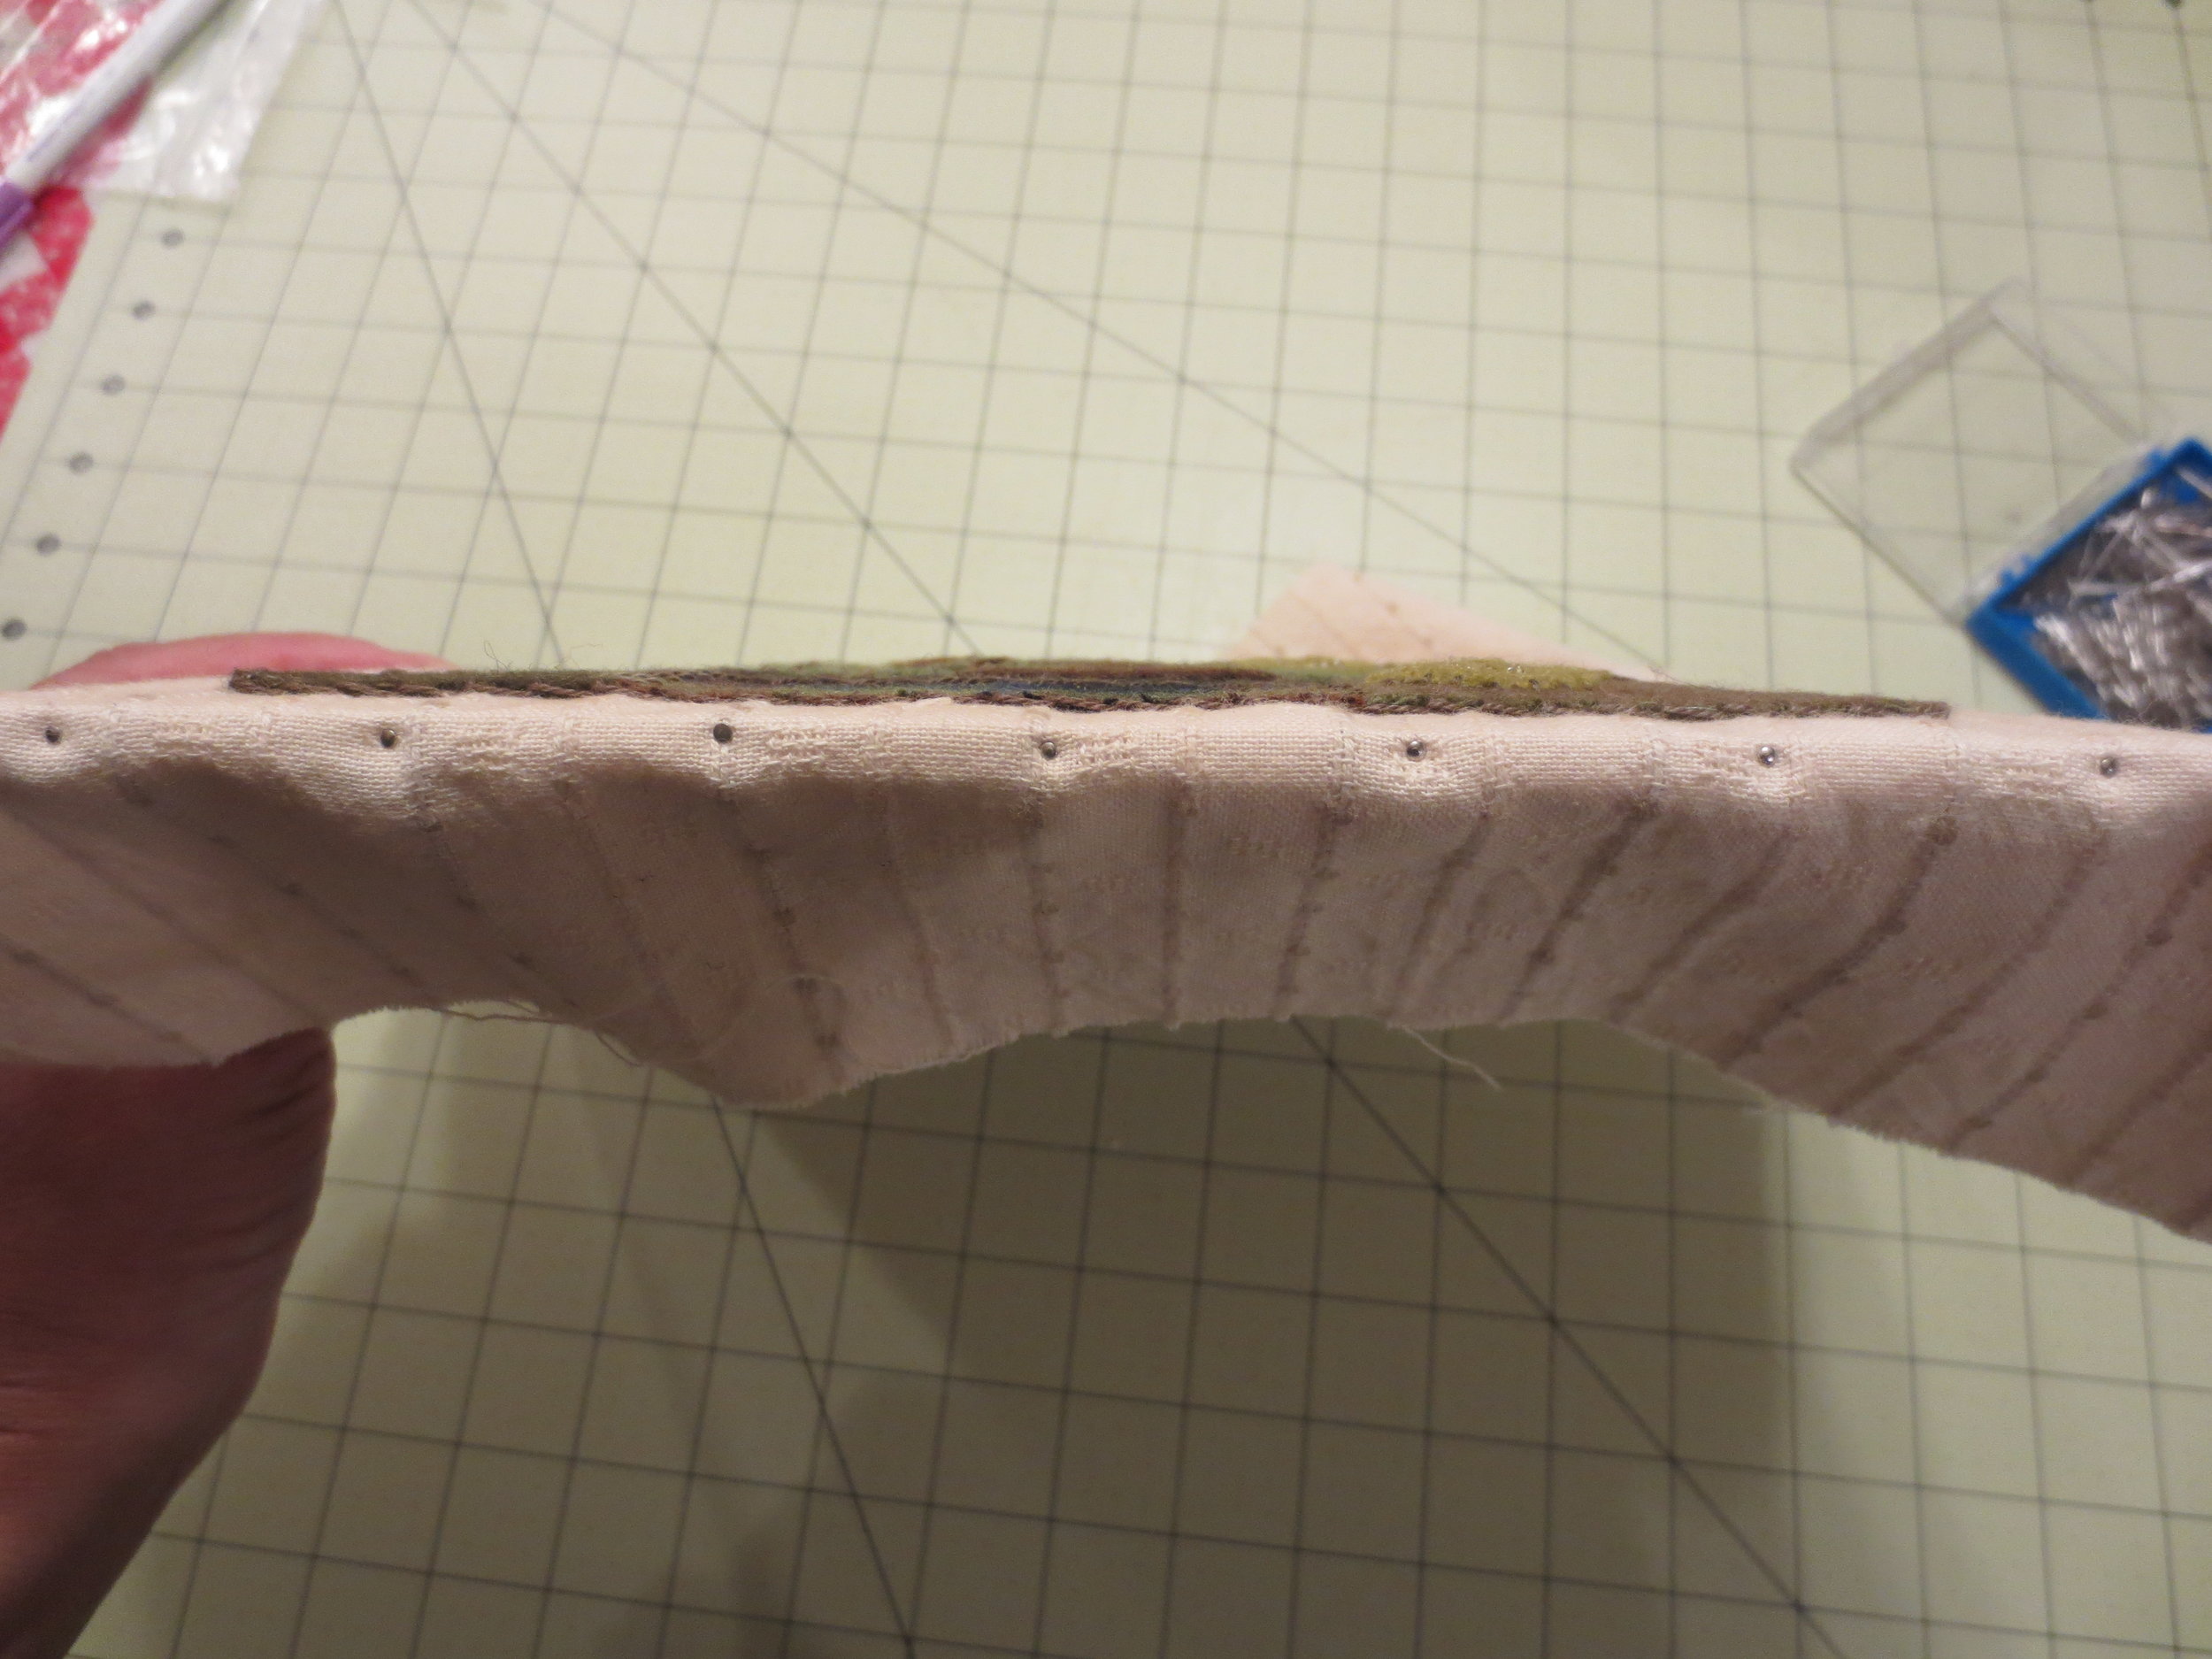

Remove the tape, and then pin the opposite side, gently pulling the fabric taut.
Repeat for the right and left sides.
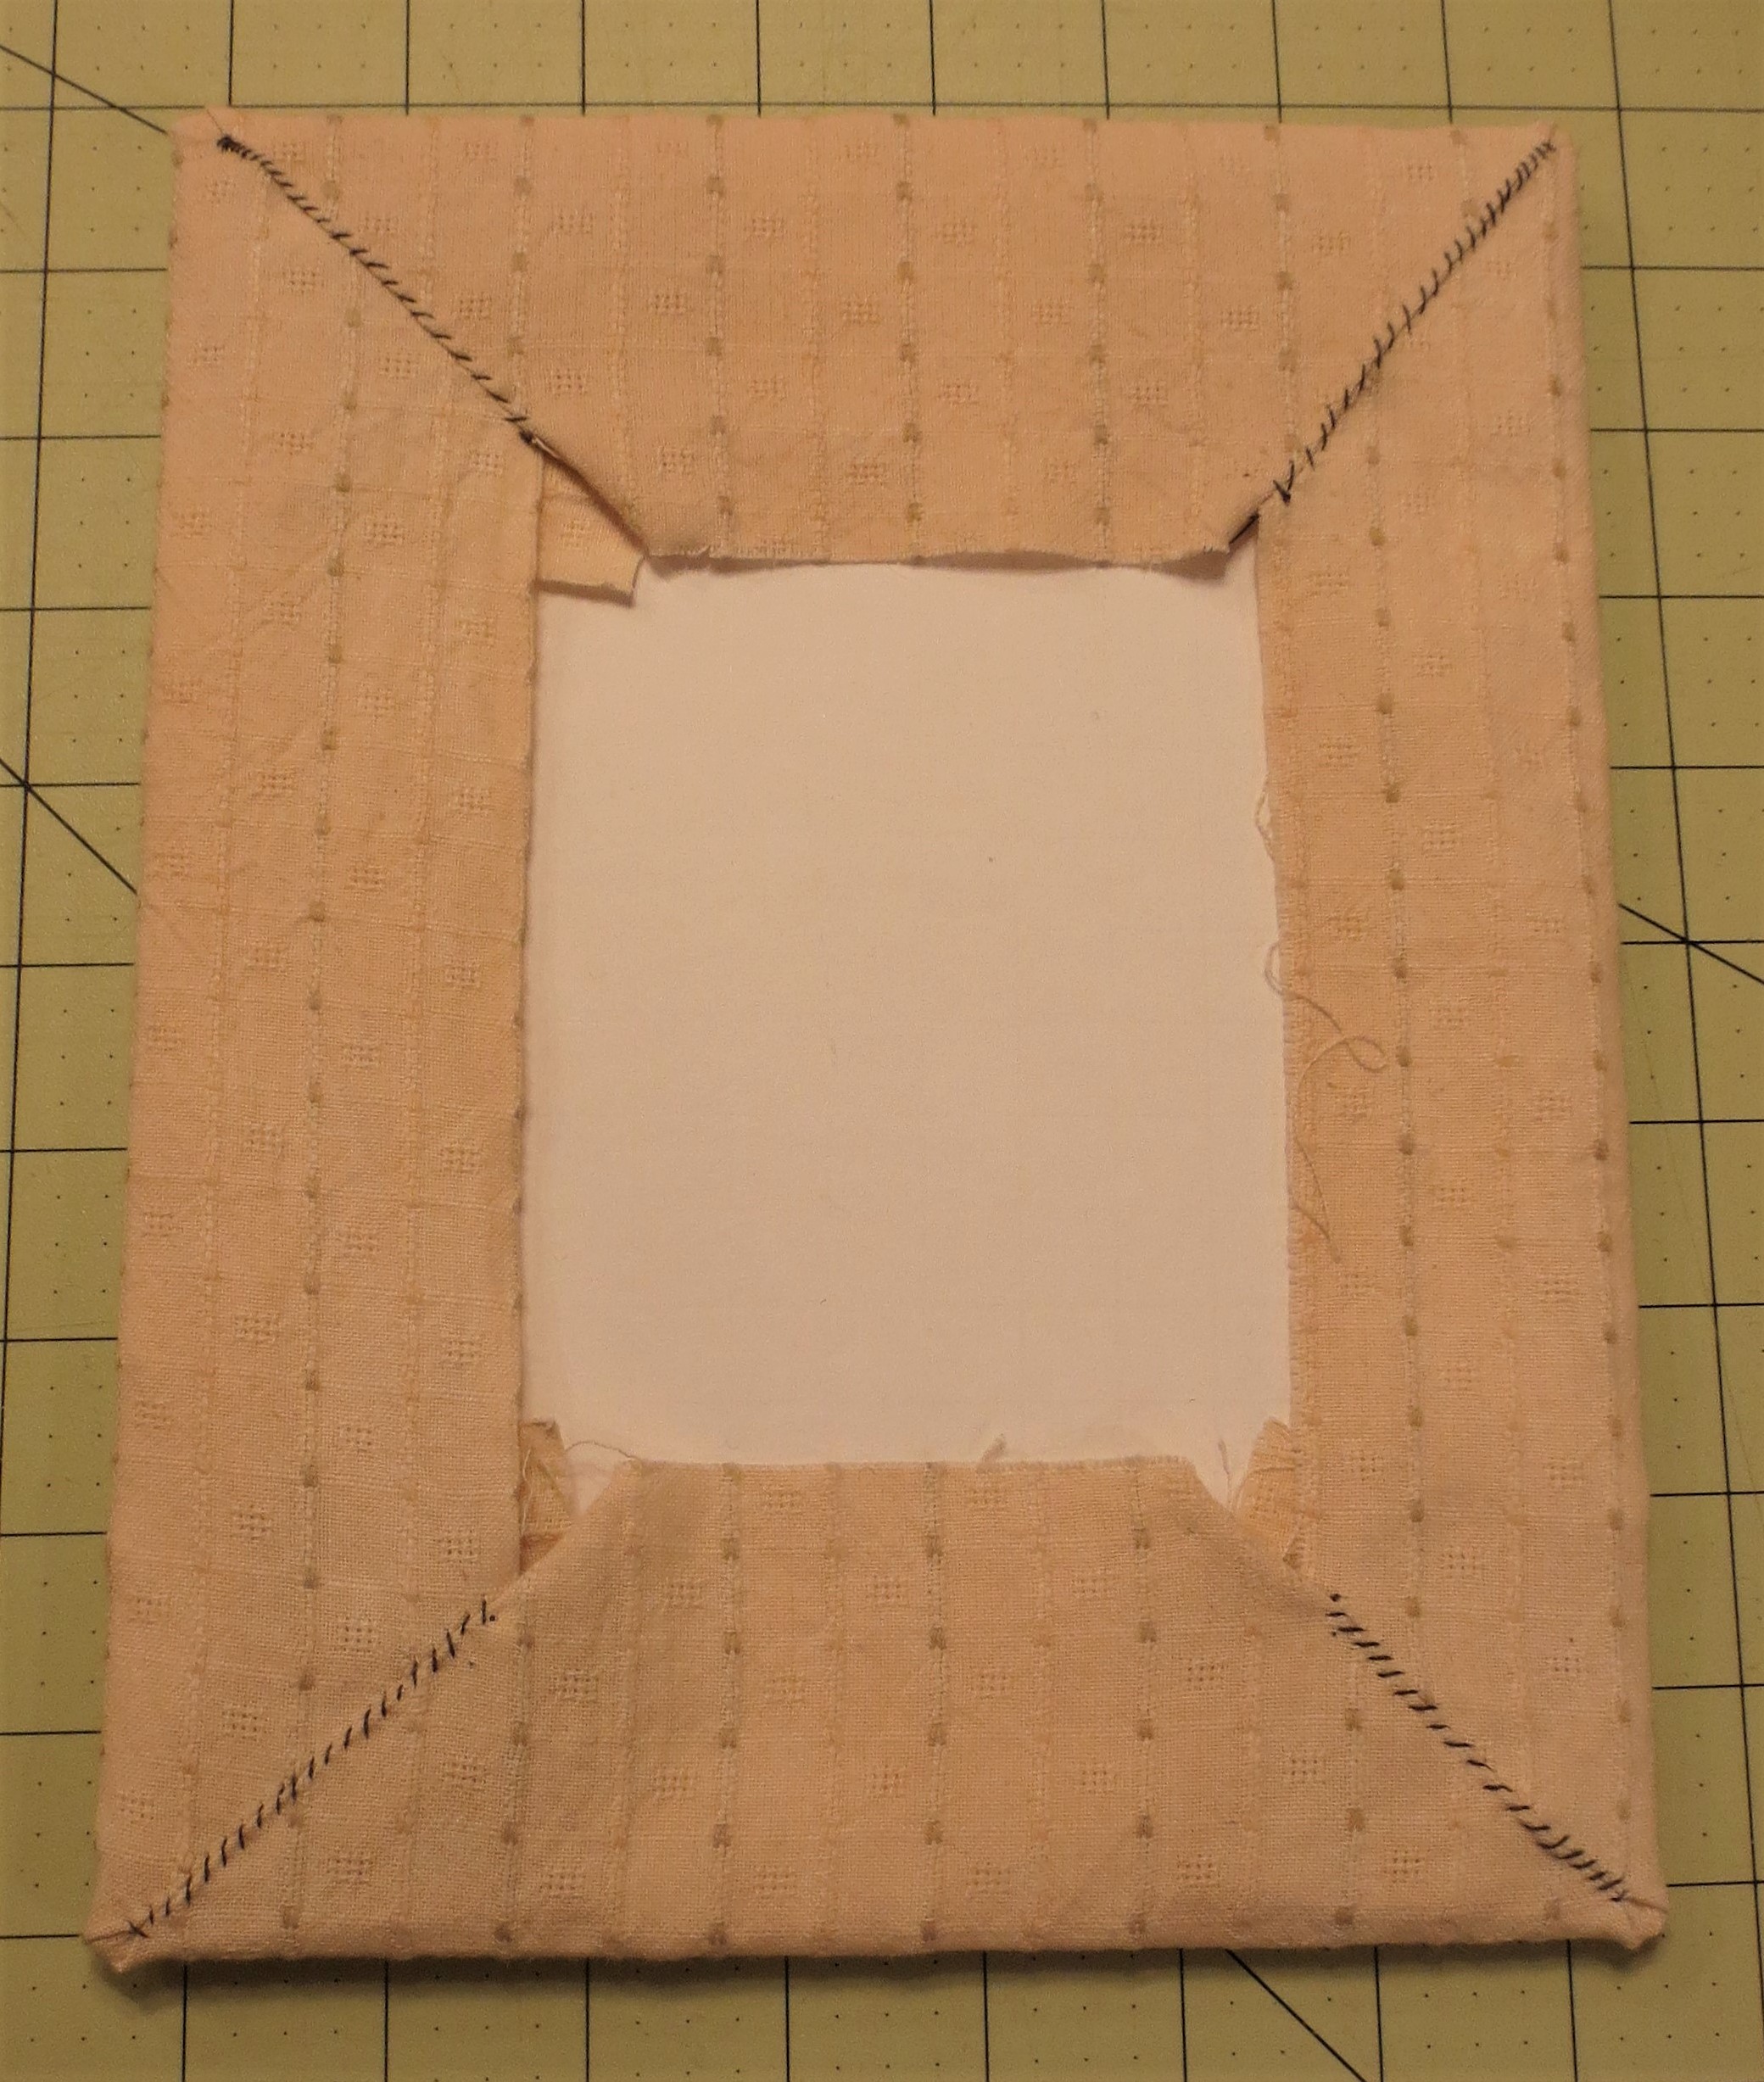
Fold each of the corners inward.
Fold the top, bottom, and sides inward making “Hospital” corners. Pin to secure. This will be easier with foam core. Pinning through mat board requires a little more muscle.

Use the Sulky 12wt. 712-1234 to whip stitch the mitered corners. Begin at the corner and work inward. This will be hidden in the frame, so don’t worry about color and neatness.
Place your mounted piece inside your frame and secure with the backing board that came with your frame.
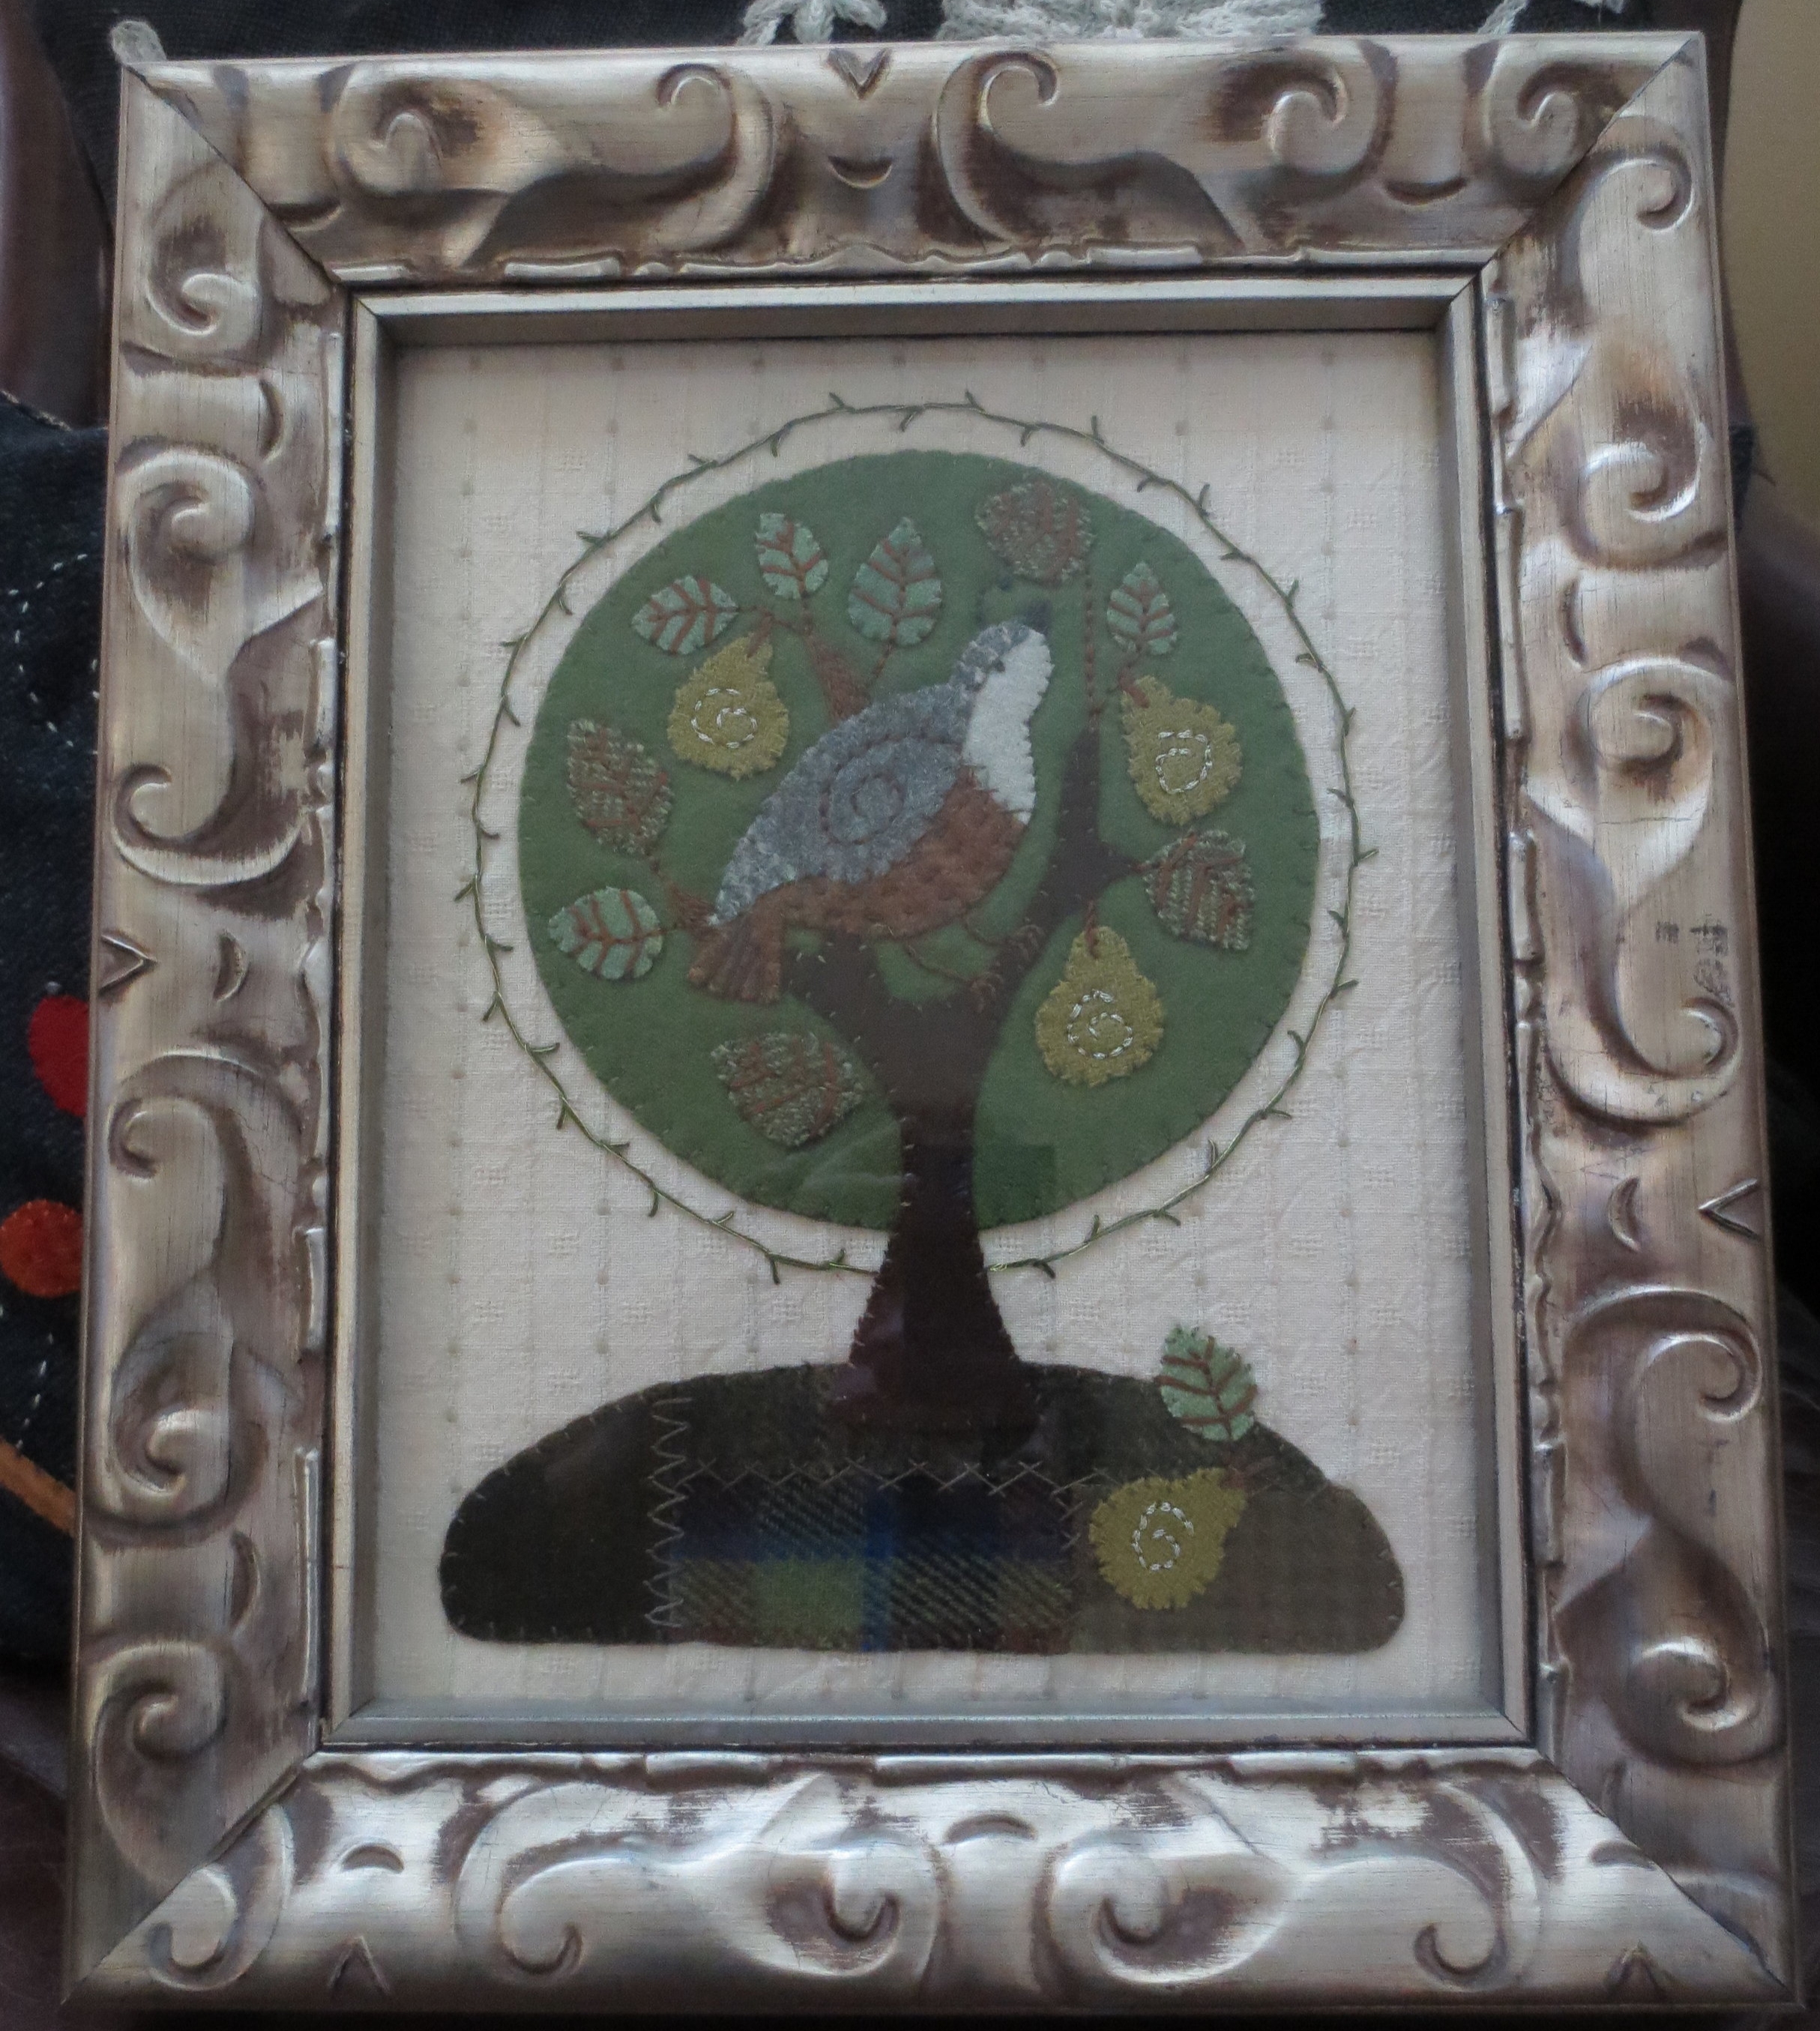
This is my project framed with glass. The frame appears silver in this photograph, but it really has a gold tint to it. The glass will protect it from dust and moths, but the texture of the cloth is somewhat subdued. Maybe the next one will be framed without glass.
Happy Stitching!