

Wool Appliqued Pouch - House Variation
Saltbox houses and weeping willows are common images found in Early American art. This design combines a saltbox, willow tree, and a sunflower (pouch back). This is a variation of the flower pouch that I posted earlier. The basic pouch instructions are in Wool Appliqued Pouch (4" x 5") - Flower Variation. This tutorial contains only the applique instructions for this project.
You will need:
Cotton Fabric - suggested colors
5" x 15" textured black (I used Faux Burlap from Connectingthreads.com) - sky
2" x 15" green ( I don't know the name of this, but it's Jenny Beyer for R.J.R. Fabrics) - grass
10" square cream print or any fabric that compliments house color - lining fabric
8" x 13" Warm and Natural cotton batting
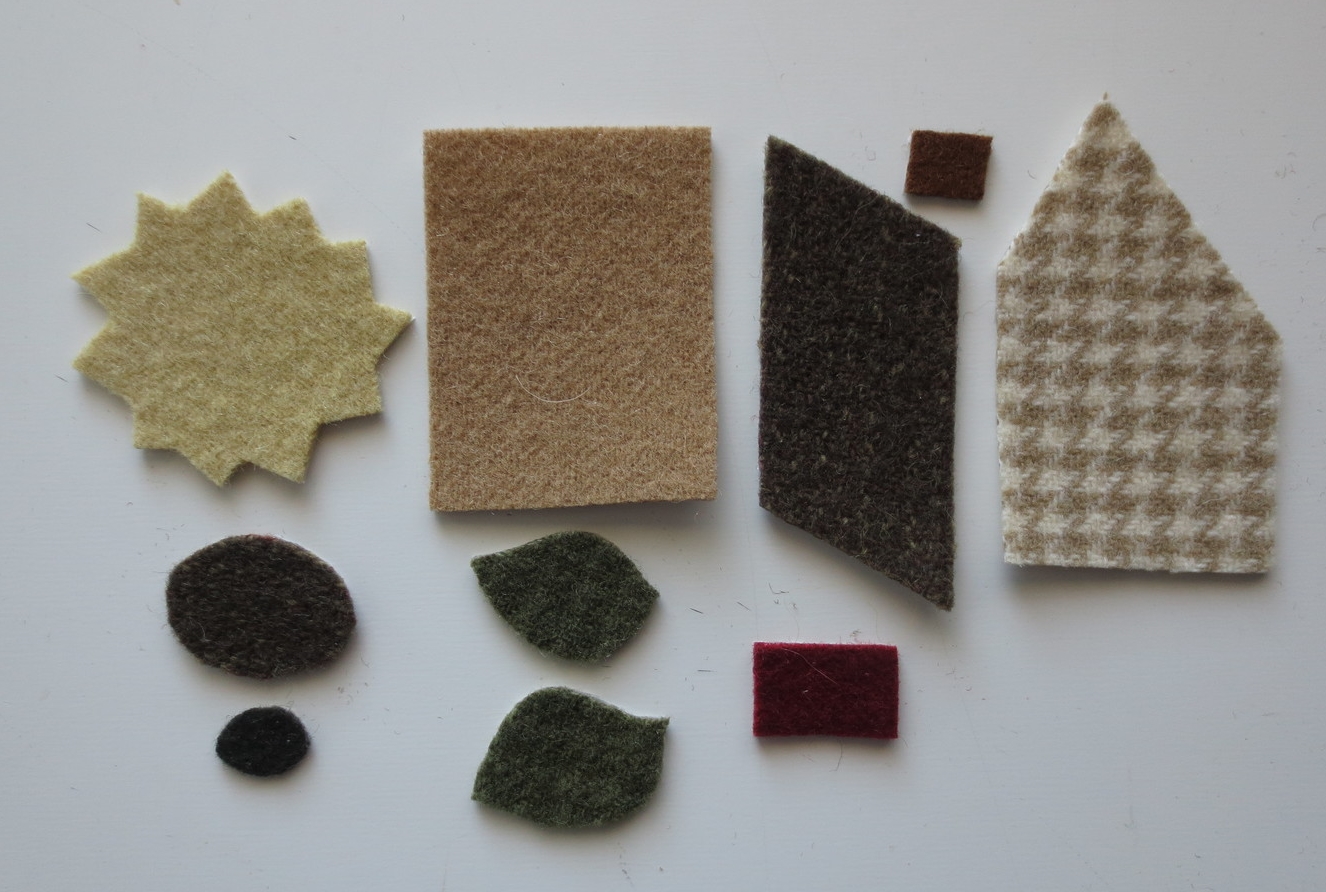
Felted Wool - suggested colors
2" x 2 1/2" camel - house front
2" x 3 1/2" cream and camel houndstooth - house side
2 1/2" x 3" brown - roof and flower center (large)
1" square red - door
2 1/2" square black - windows and flower center (small)
1" square reddish brown - chimney
2" square yellow - flower petals
2" square green plaid - leaves
Thread - Perle cotton, size 12 or 2 strands of embroidery floss (I used Valdani perle cotton Valdani.com)
beige - house front and sides, window panes, and chimney smoke
yellow - flower petals
burgundy - door
brown - roof, chimney, tree trunk, and flower center (large)
Green to match flower leaves and stem, flower center embellishment
Light green - veins of leaves, and tree branches
Miscellaneous
3" length of 1/4" wide brown ribbon ( I used italian cotton ribbon from angelaliguori.com)
4" length of 1/4" wide green ribbon (angelaliguori.com)
5" black zipper (This is an antique brass ball and chain zipper from pinwheels.com)
Vilene Bondaweb (pinwheels.com) or any light-weight fusible web
Chenille needle - size 24
Fine point chalk pencil
Sewing machine
Steam iron
Instructions
Cutting pouch fabric
Cut one 1 1/2" x 13" grass fabric.
Cut one 4" x 13" sky fabric.
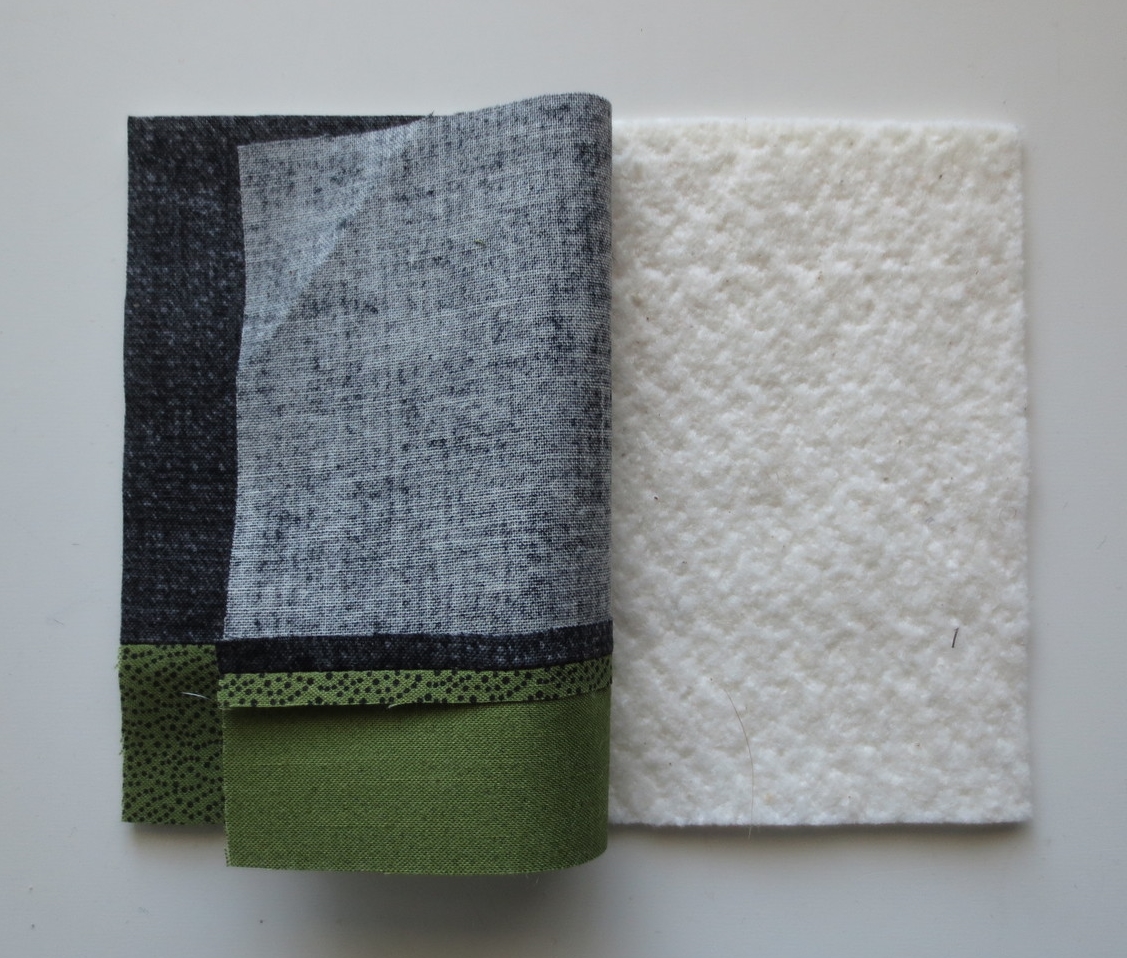
Pin grass fabric to bottom of sky fabric. Sew together using a 1/4" seam. Press seam open.
Cut into two 5" x 6 1/2" pieces.
Use pieces as templates to cut out batting. Lay pieces on batting, pin in place, and cut out batting the same size (see below).
6. Cut two 4 1/4" x 6" pieces of lining fabric.
Applique - Use one strand of perle 12 for all stitches.
1. Download Small House Pouch - Front Layout and Pattern, Small House Pouch - Back Layout and Pattern, and Stitch Guide (if needed).
2. Trace reversed image of pattern onto fusible web. The reverse or mirror image can be made on most printers, but if you don't have that option you can tape the pattern sheet, image facing the glass, on a window (during the day) or on a light box, image facing glass, and trace the reversed image.
3. Cut out pattern pieces slightly larger than outline and fuse onto designated wool pieces.

4. Cut out wool pieces along outline.
5. Begin with the pouch front.
Cut brown ribbon (tree trunk) to 2 1/2". Position the house and tree trunk on pouch front (use layout as a guide). Fold under cut ends of ribbon 1/4" and pin in place. Remove house and whip stitch tree trunk in place using brown thread. Note: You will be trimming this piece to 4 1/2" x 6" after it's appliqued, then sewing it it together using 1/4" seams, so try not to put pieces too close to the edges.
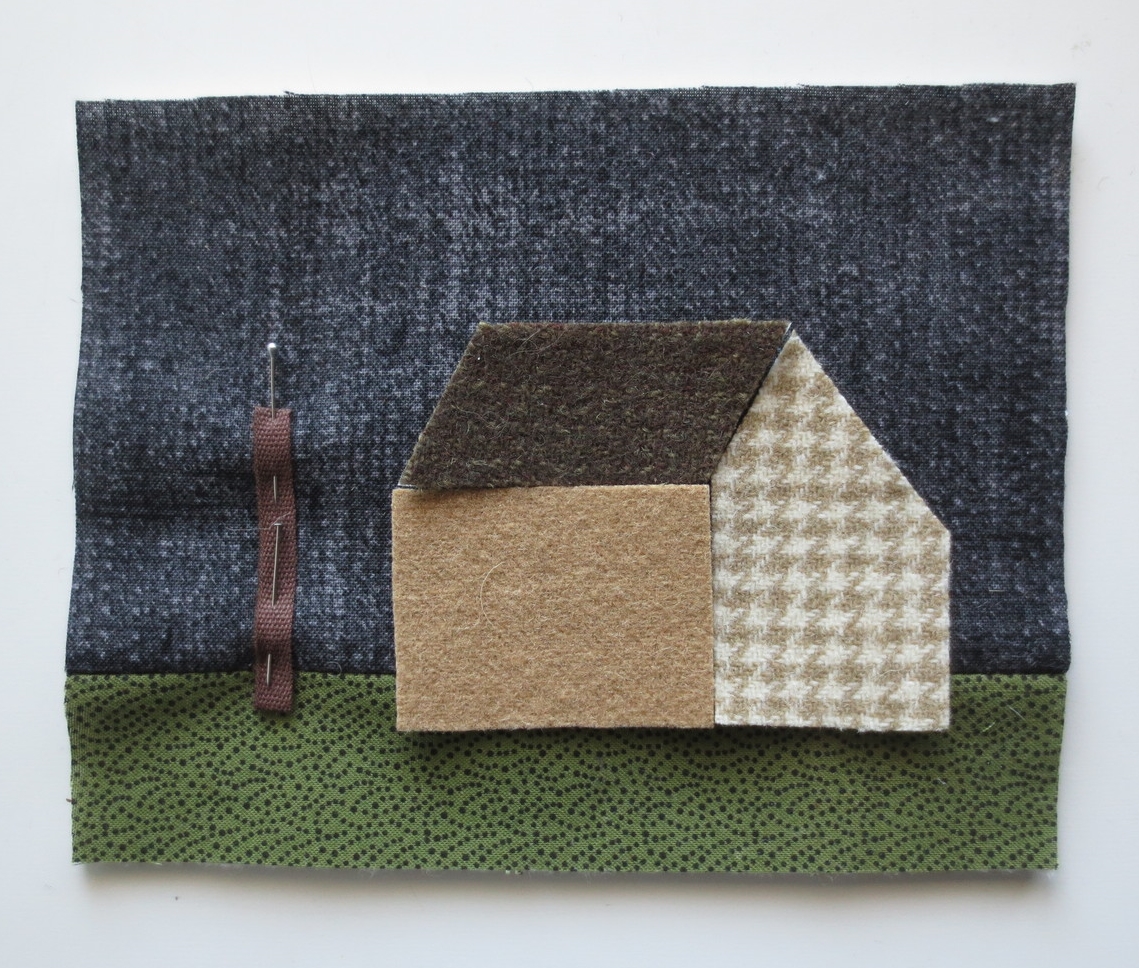
Reposition house side, front, roof, and chimney. Fuse with steam iron.
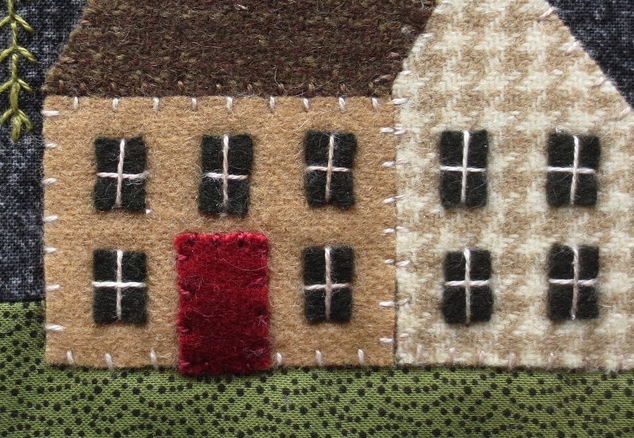
Whip stitch front and side with beige thread.
Whip stitch roof and chimney with brown thread.

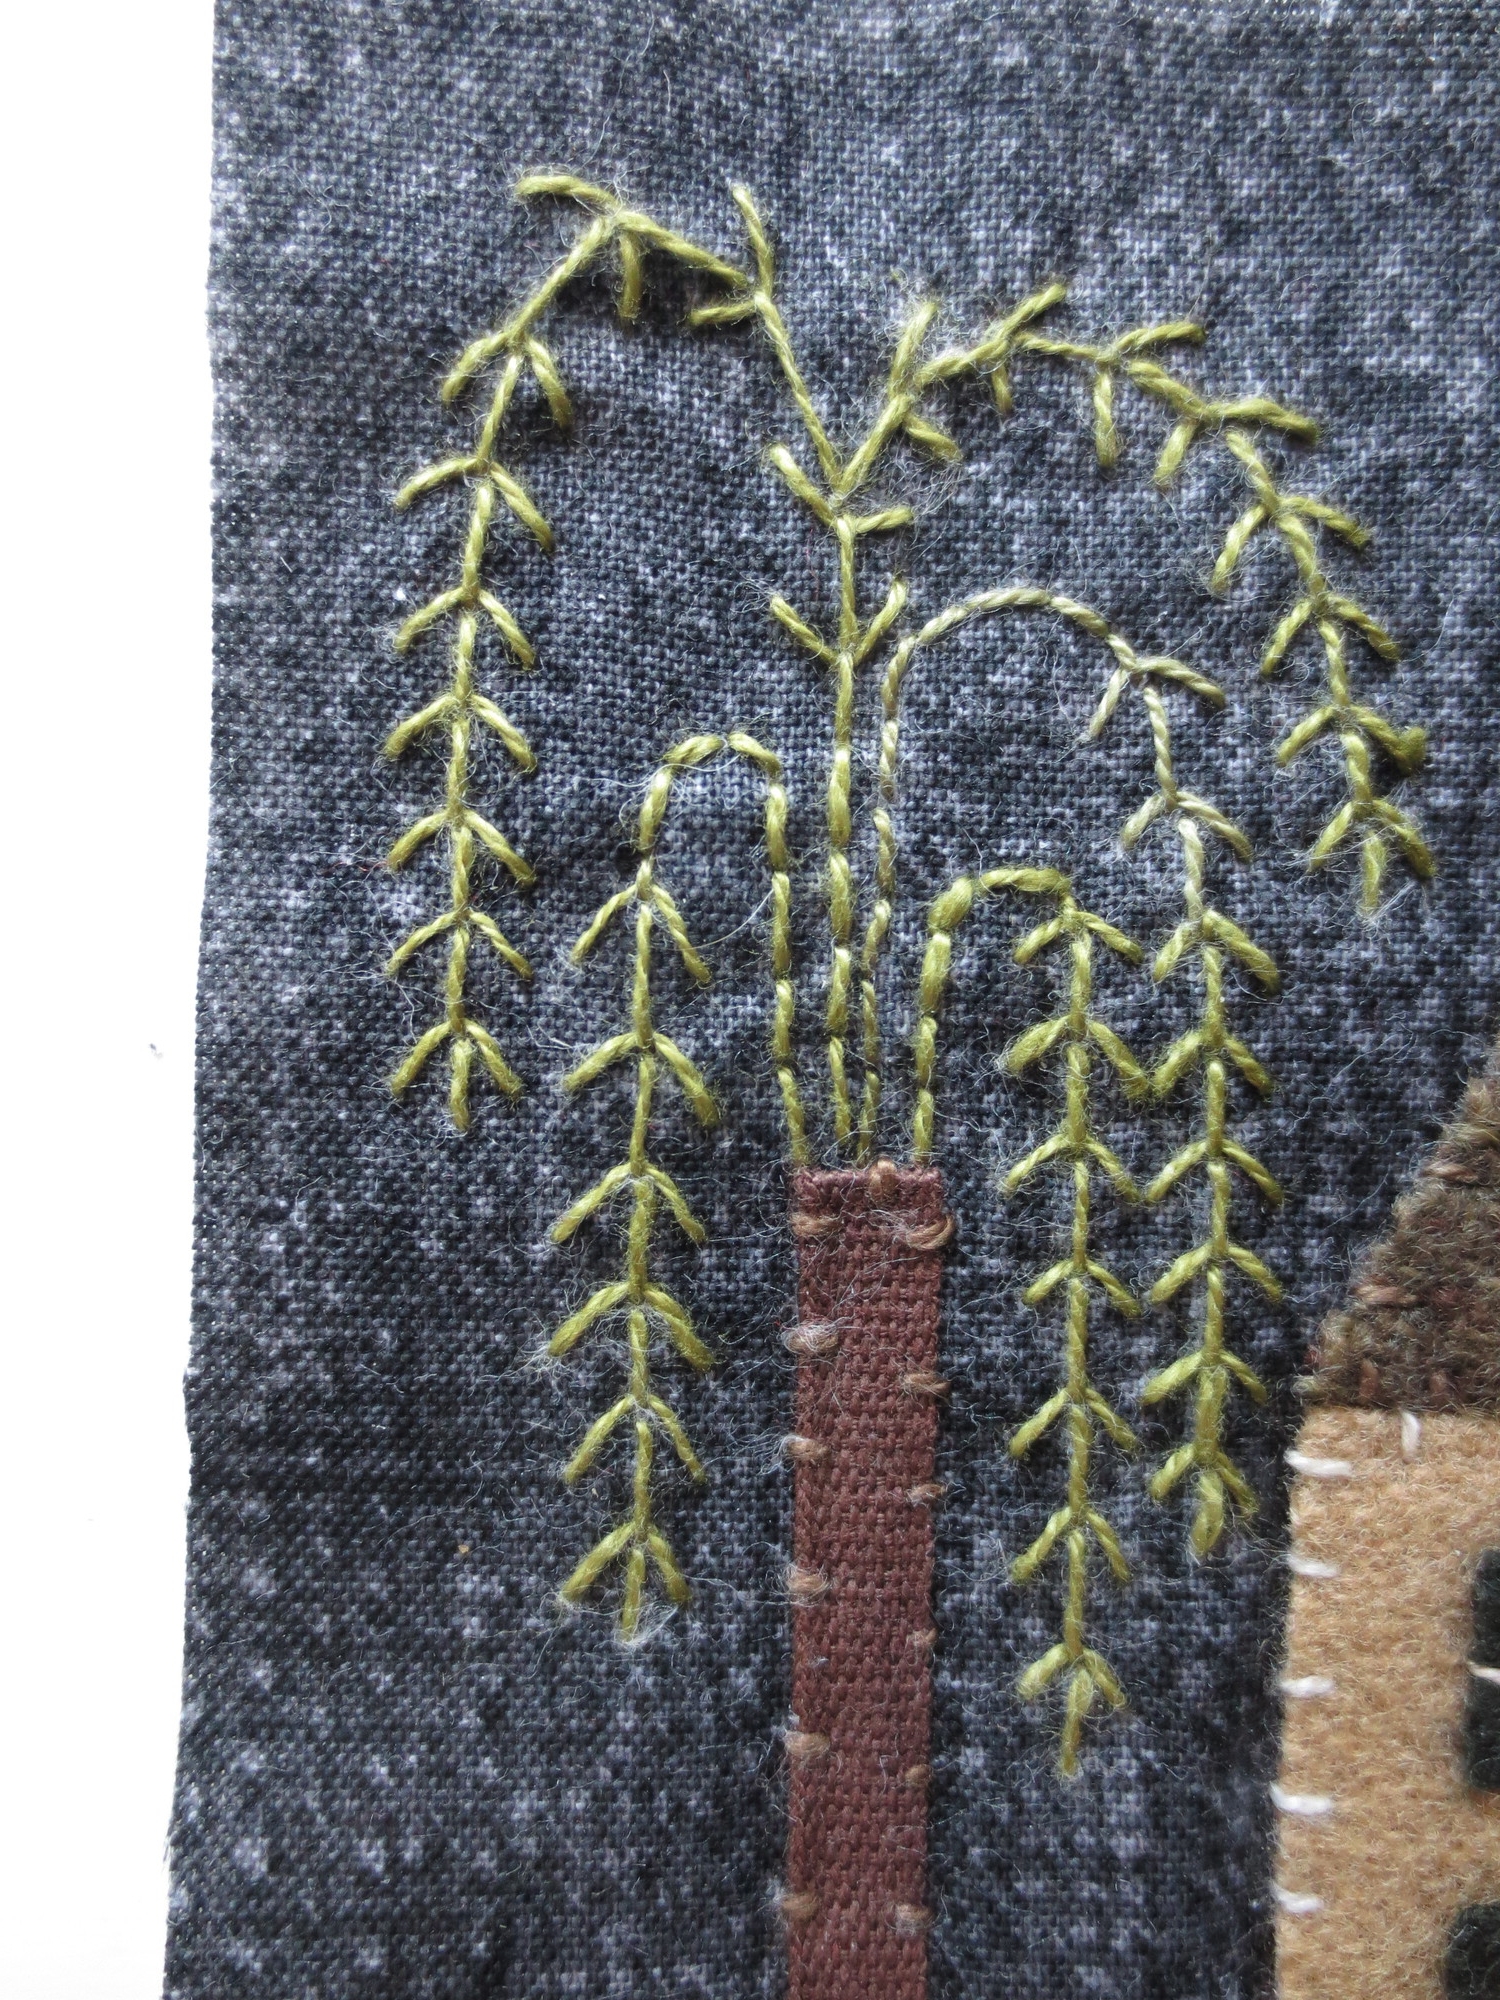
Use chalk pencil to draw tree branches. Using light green thread, stitch branches with a closed fly stitch. Use a back stitch to make the part of the branches that have no leaves (see below).
Position door and windows on house. Fuse with steam iron.
Whip stitch door with burgundy thread.
Using beige thread, stitch one vertical straight stitch and one horizontal straight stitch on each window to create panes.
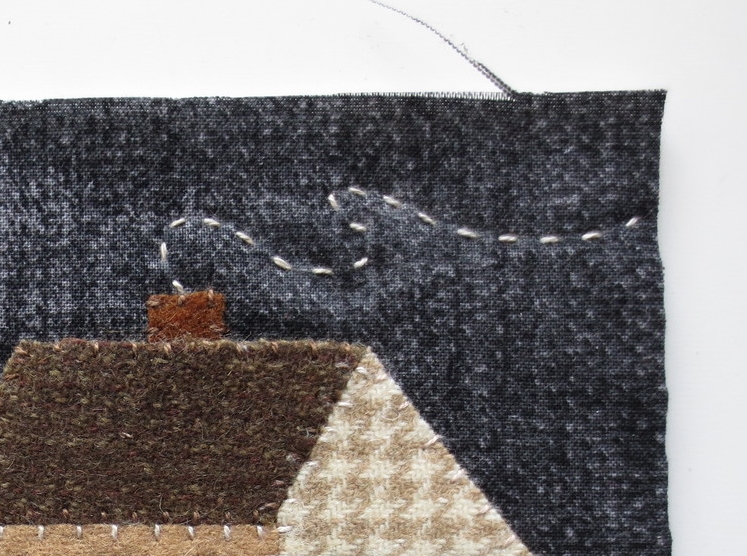
Use chalk pencil to draw chimney smoke. Stitch a running stitch with beige thread over pencil line.
Trim pouch front to 4 1/2" x 6".
6. Pouch Back
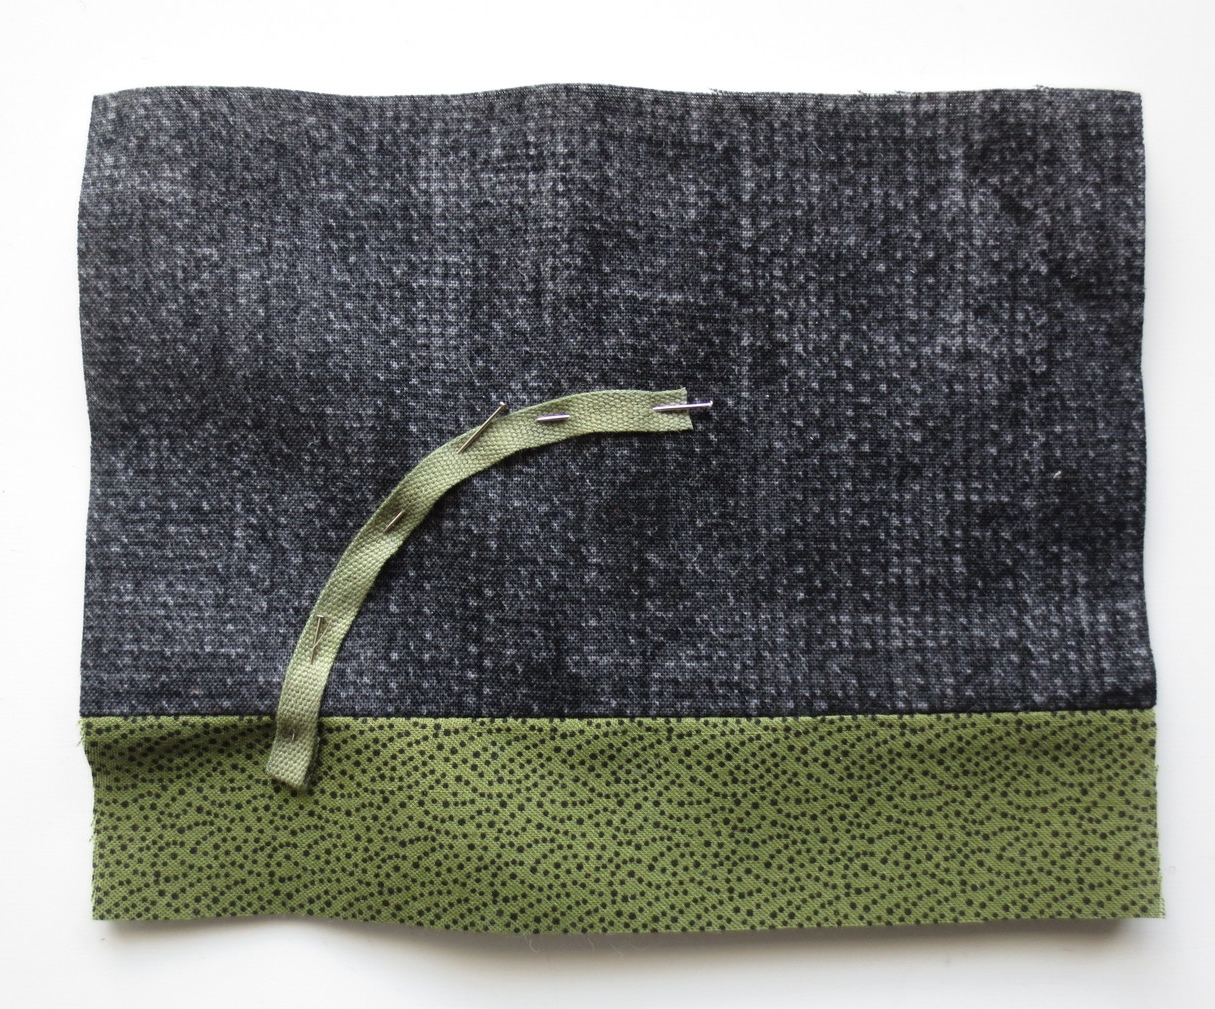
Position green ribbon (flower stem) and flower on pouch back (use layout as guide). Fold under bottom edge of ribbon 1/4" and pin in place. Remove flower and whip stitch flower stem with green thread.
Reposition flower and fuse in place. Whip stitch flower petals with yellow thread.
Position large and small flower centers on flower petals and fuse in place.
Whip stitch large flower center with brown thread.
Use green thread to make a square laid stitch on small flower center.
Use the same green thread to make nine lazy daisy stitches radiating out from small flower center to outer edge of large center (see below).

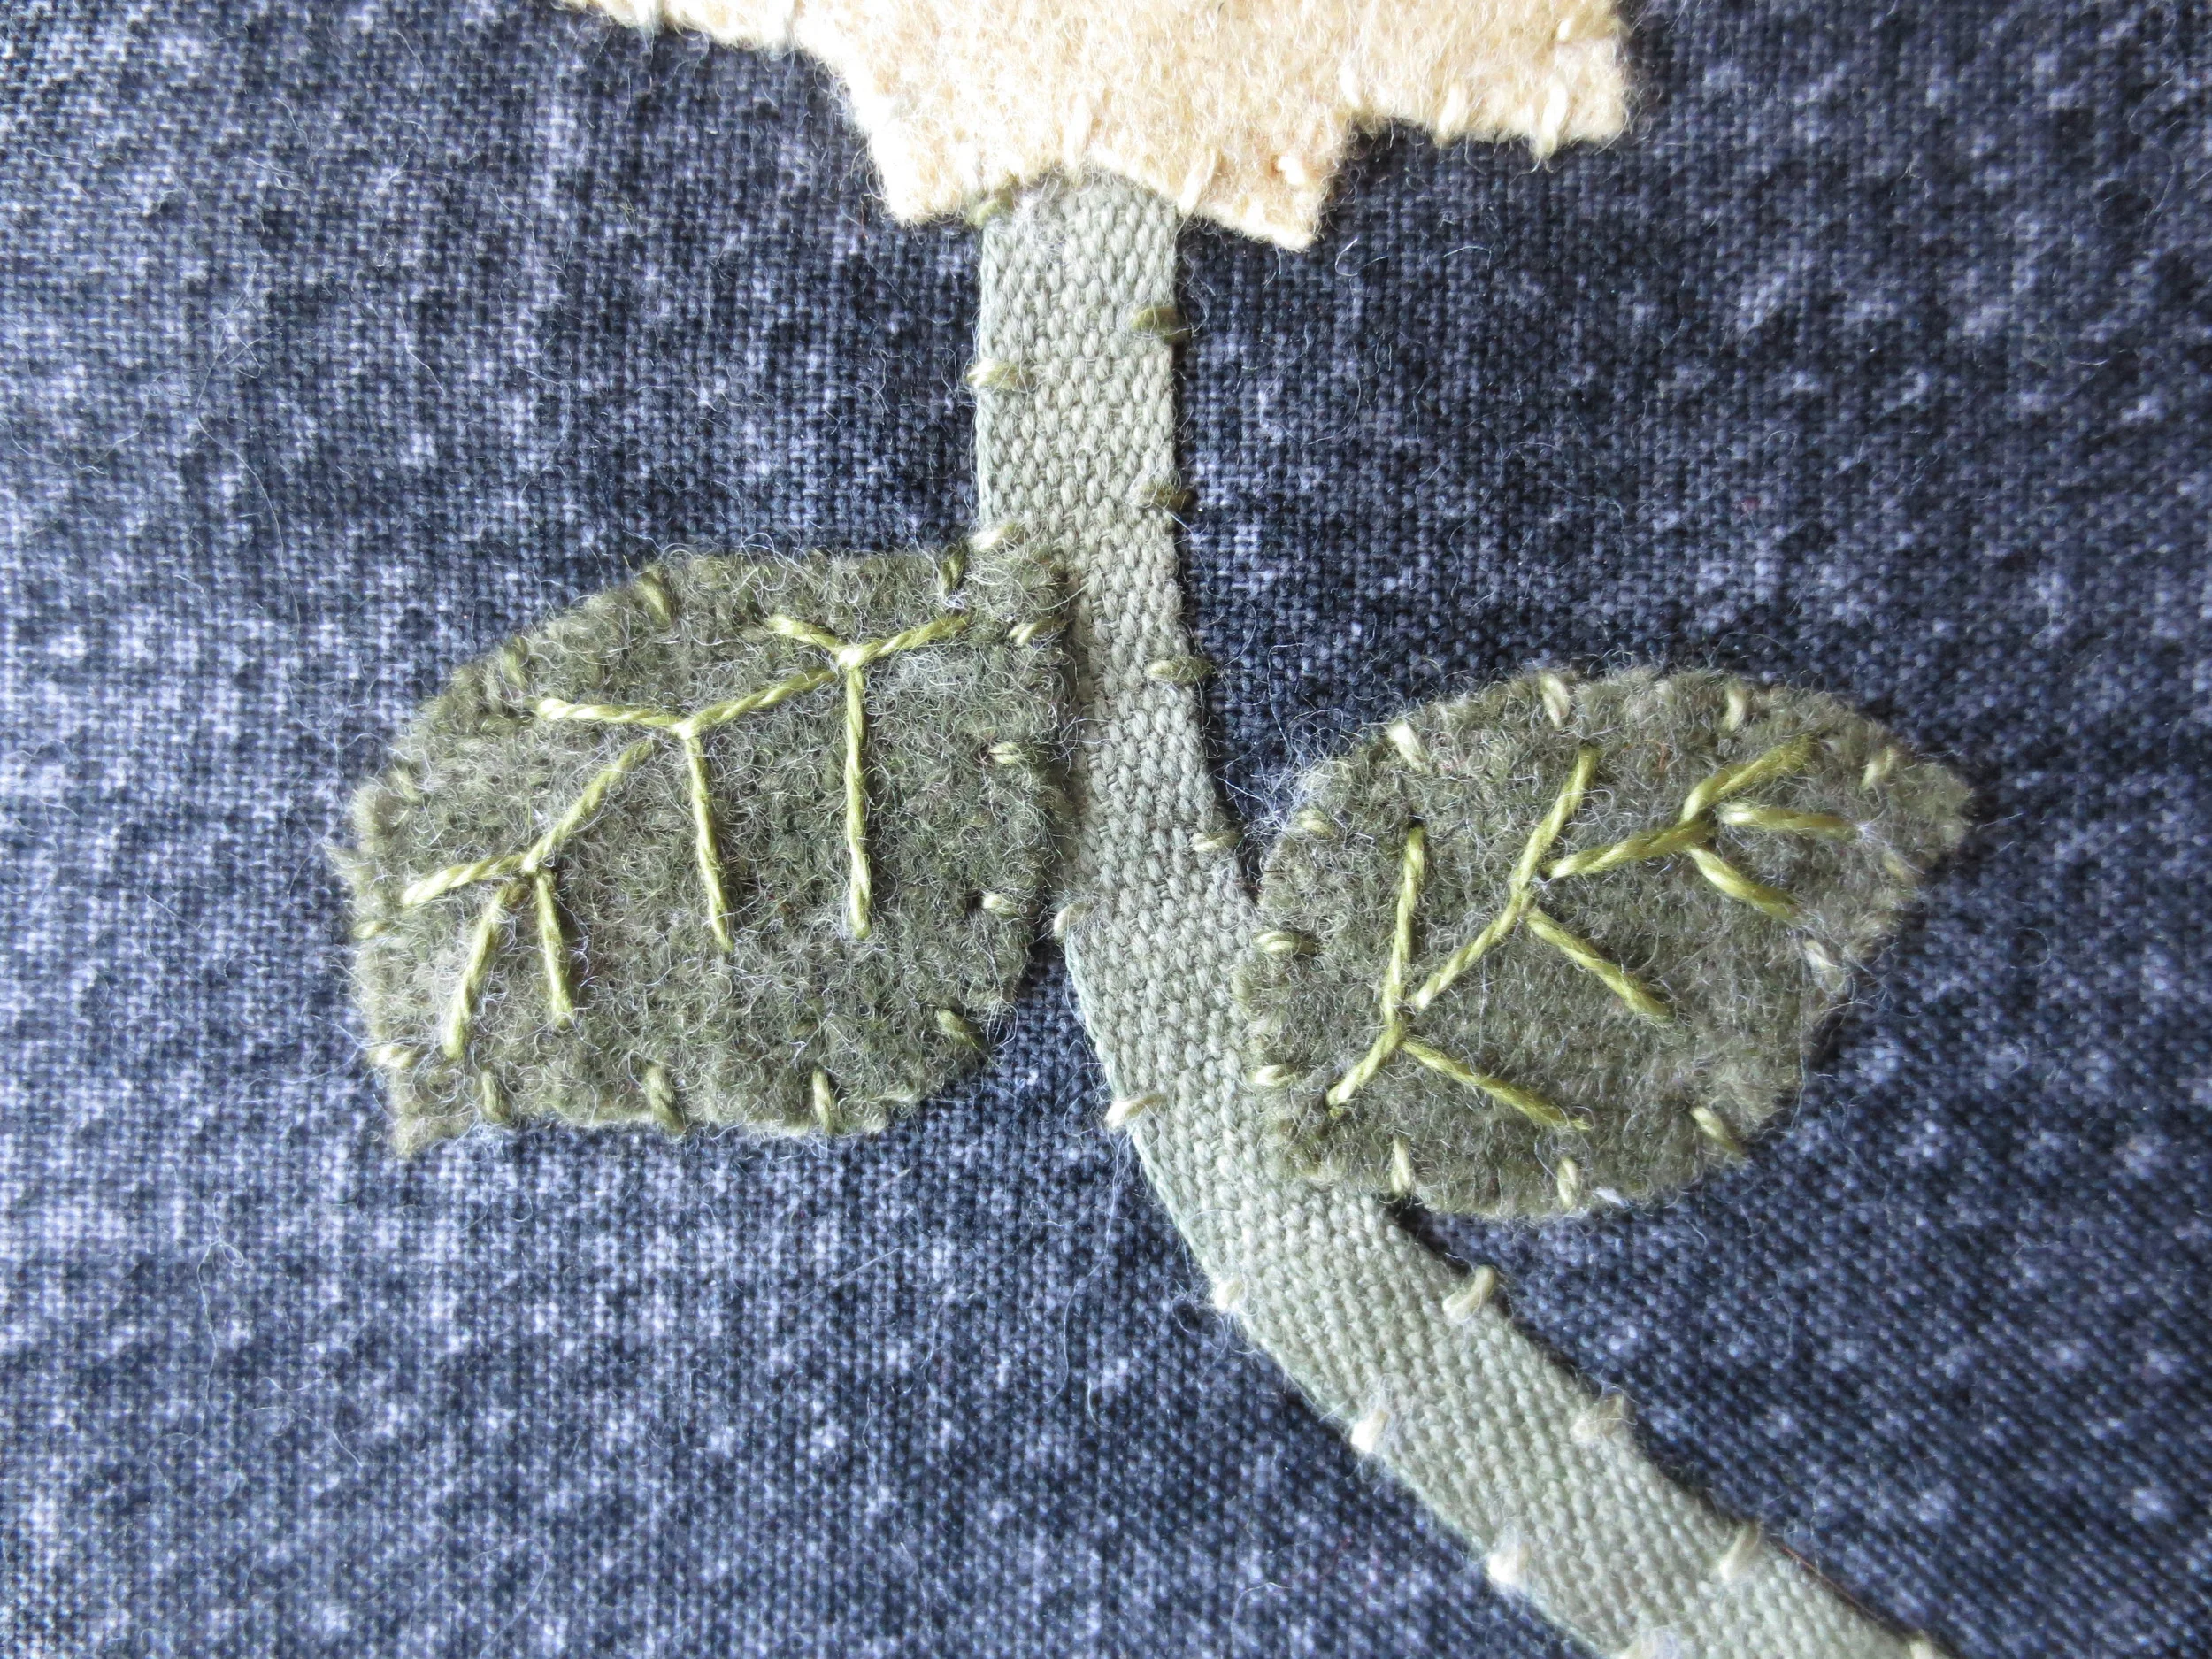
Position leaves on stem
Whip stitch leaves with the same green thread used for flower center embellishment.
Draw veins of leaves with chalk pencil. Use light-green thread to stitch a closed fly stitch over line.
Trim pouch back to 4 1/2" x 6". Make sure grass measurements match pouch front. If they are not equal your seams will not match up when the pouch is sewn together.
7. Use basic pouch assembly instructions found in Wool Appliqued Pouch (4" x 5") - Flower Variation.
8. Enjoy!