
Frienemies
This year has flown by and the holiday season is fast approaching. That means it’s time for my annual ornament tutorial.
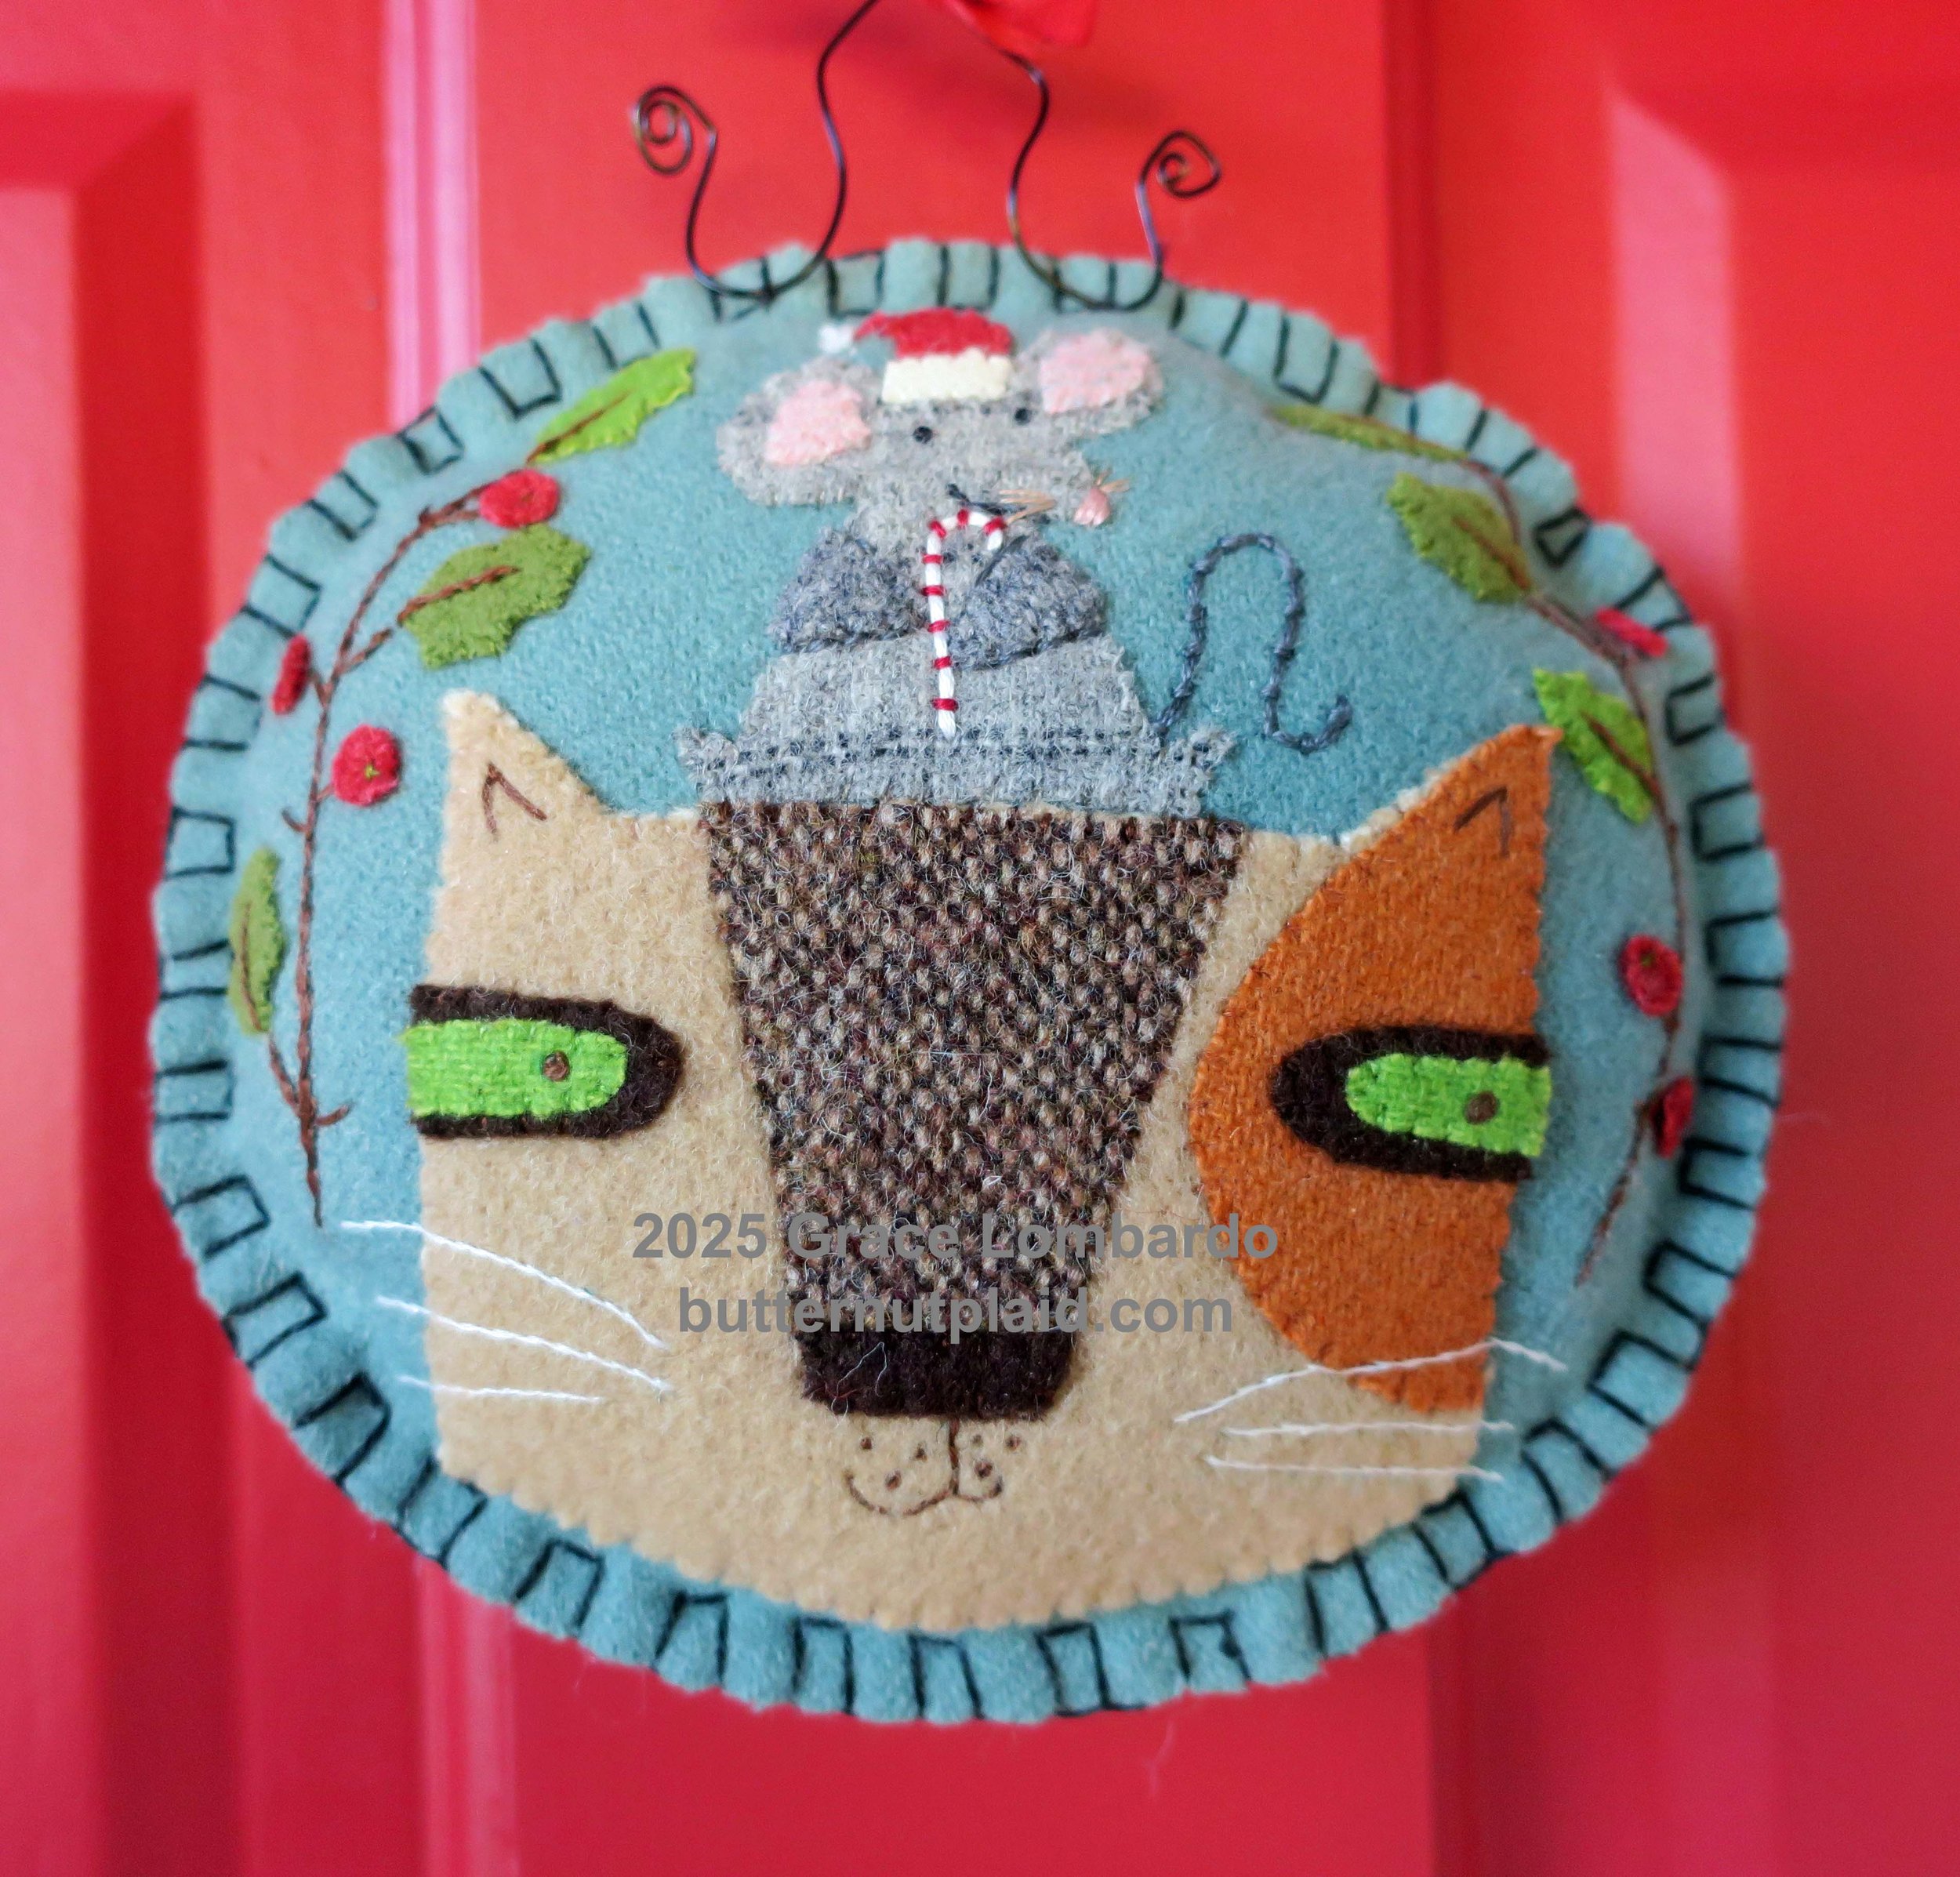
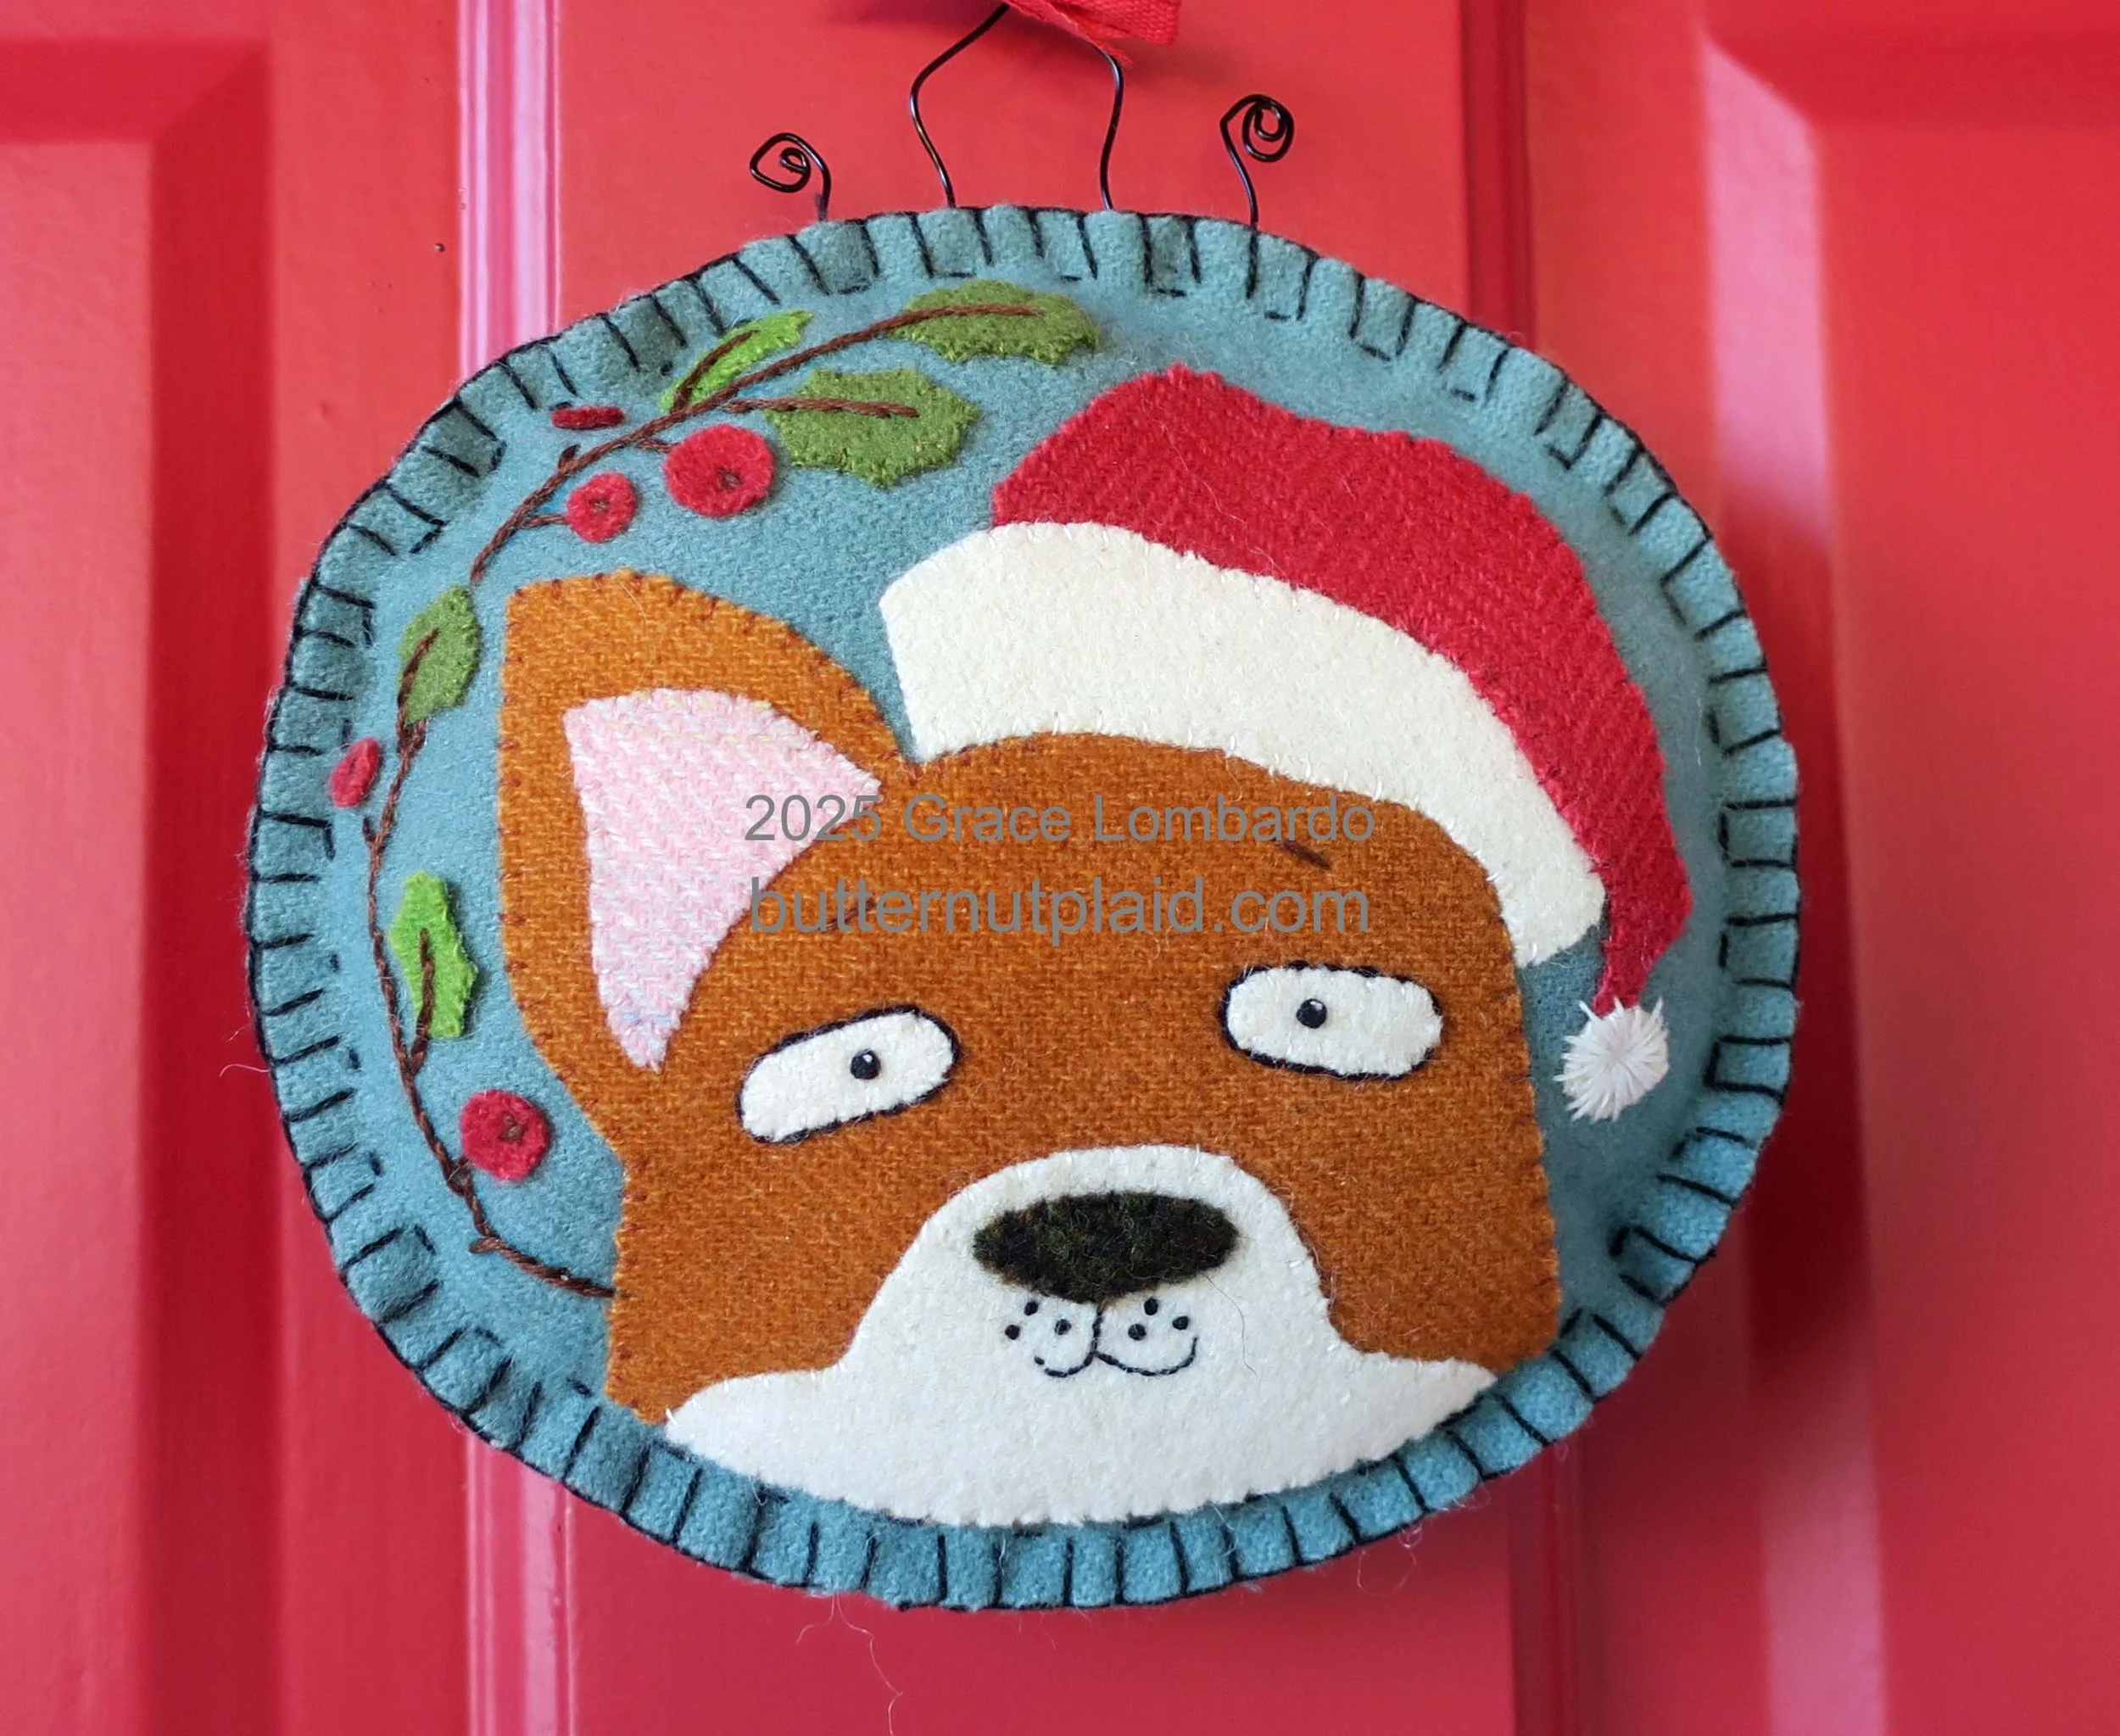
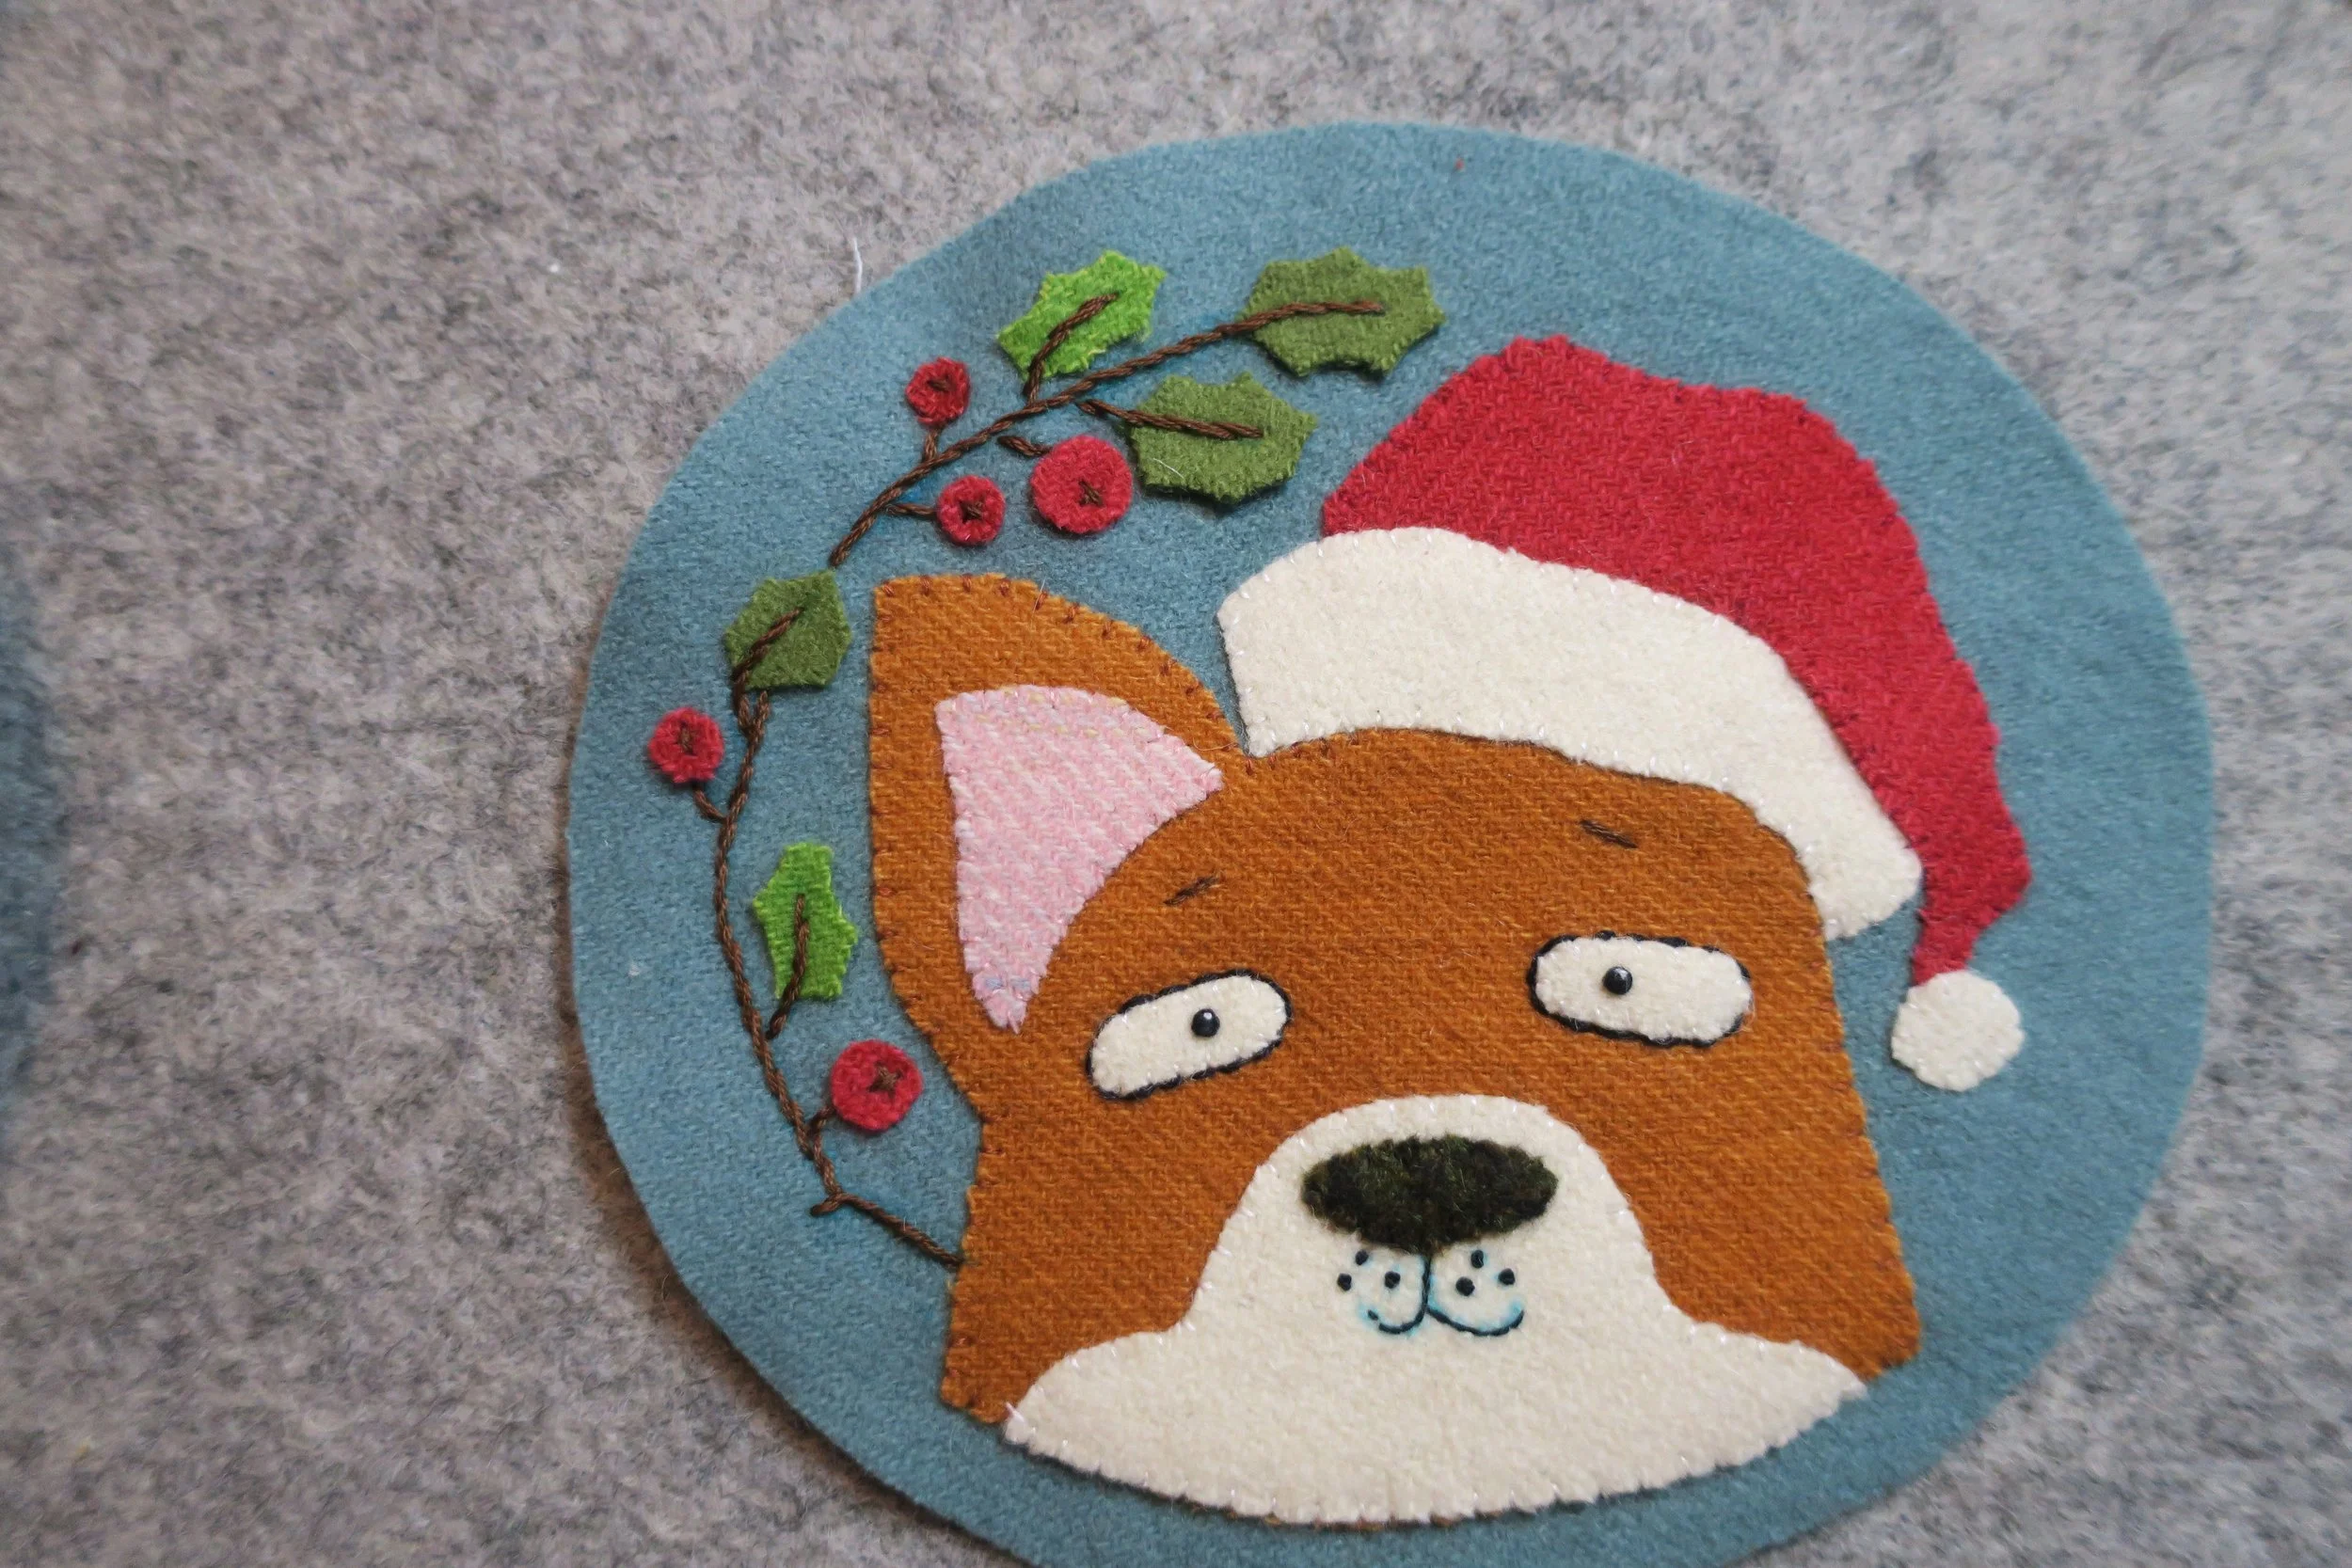
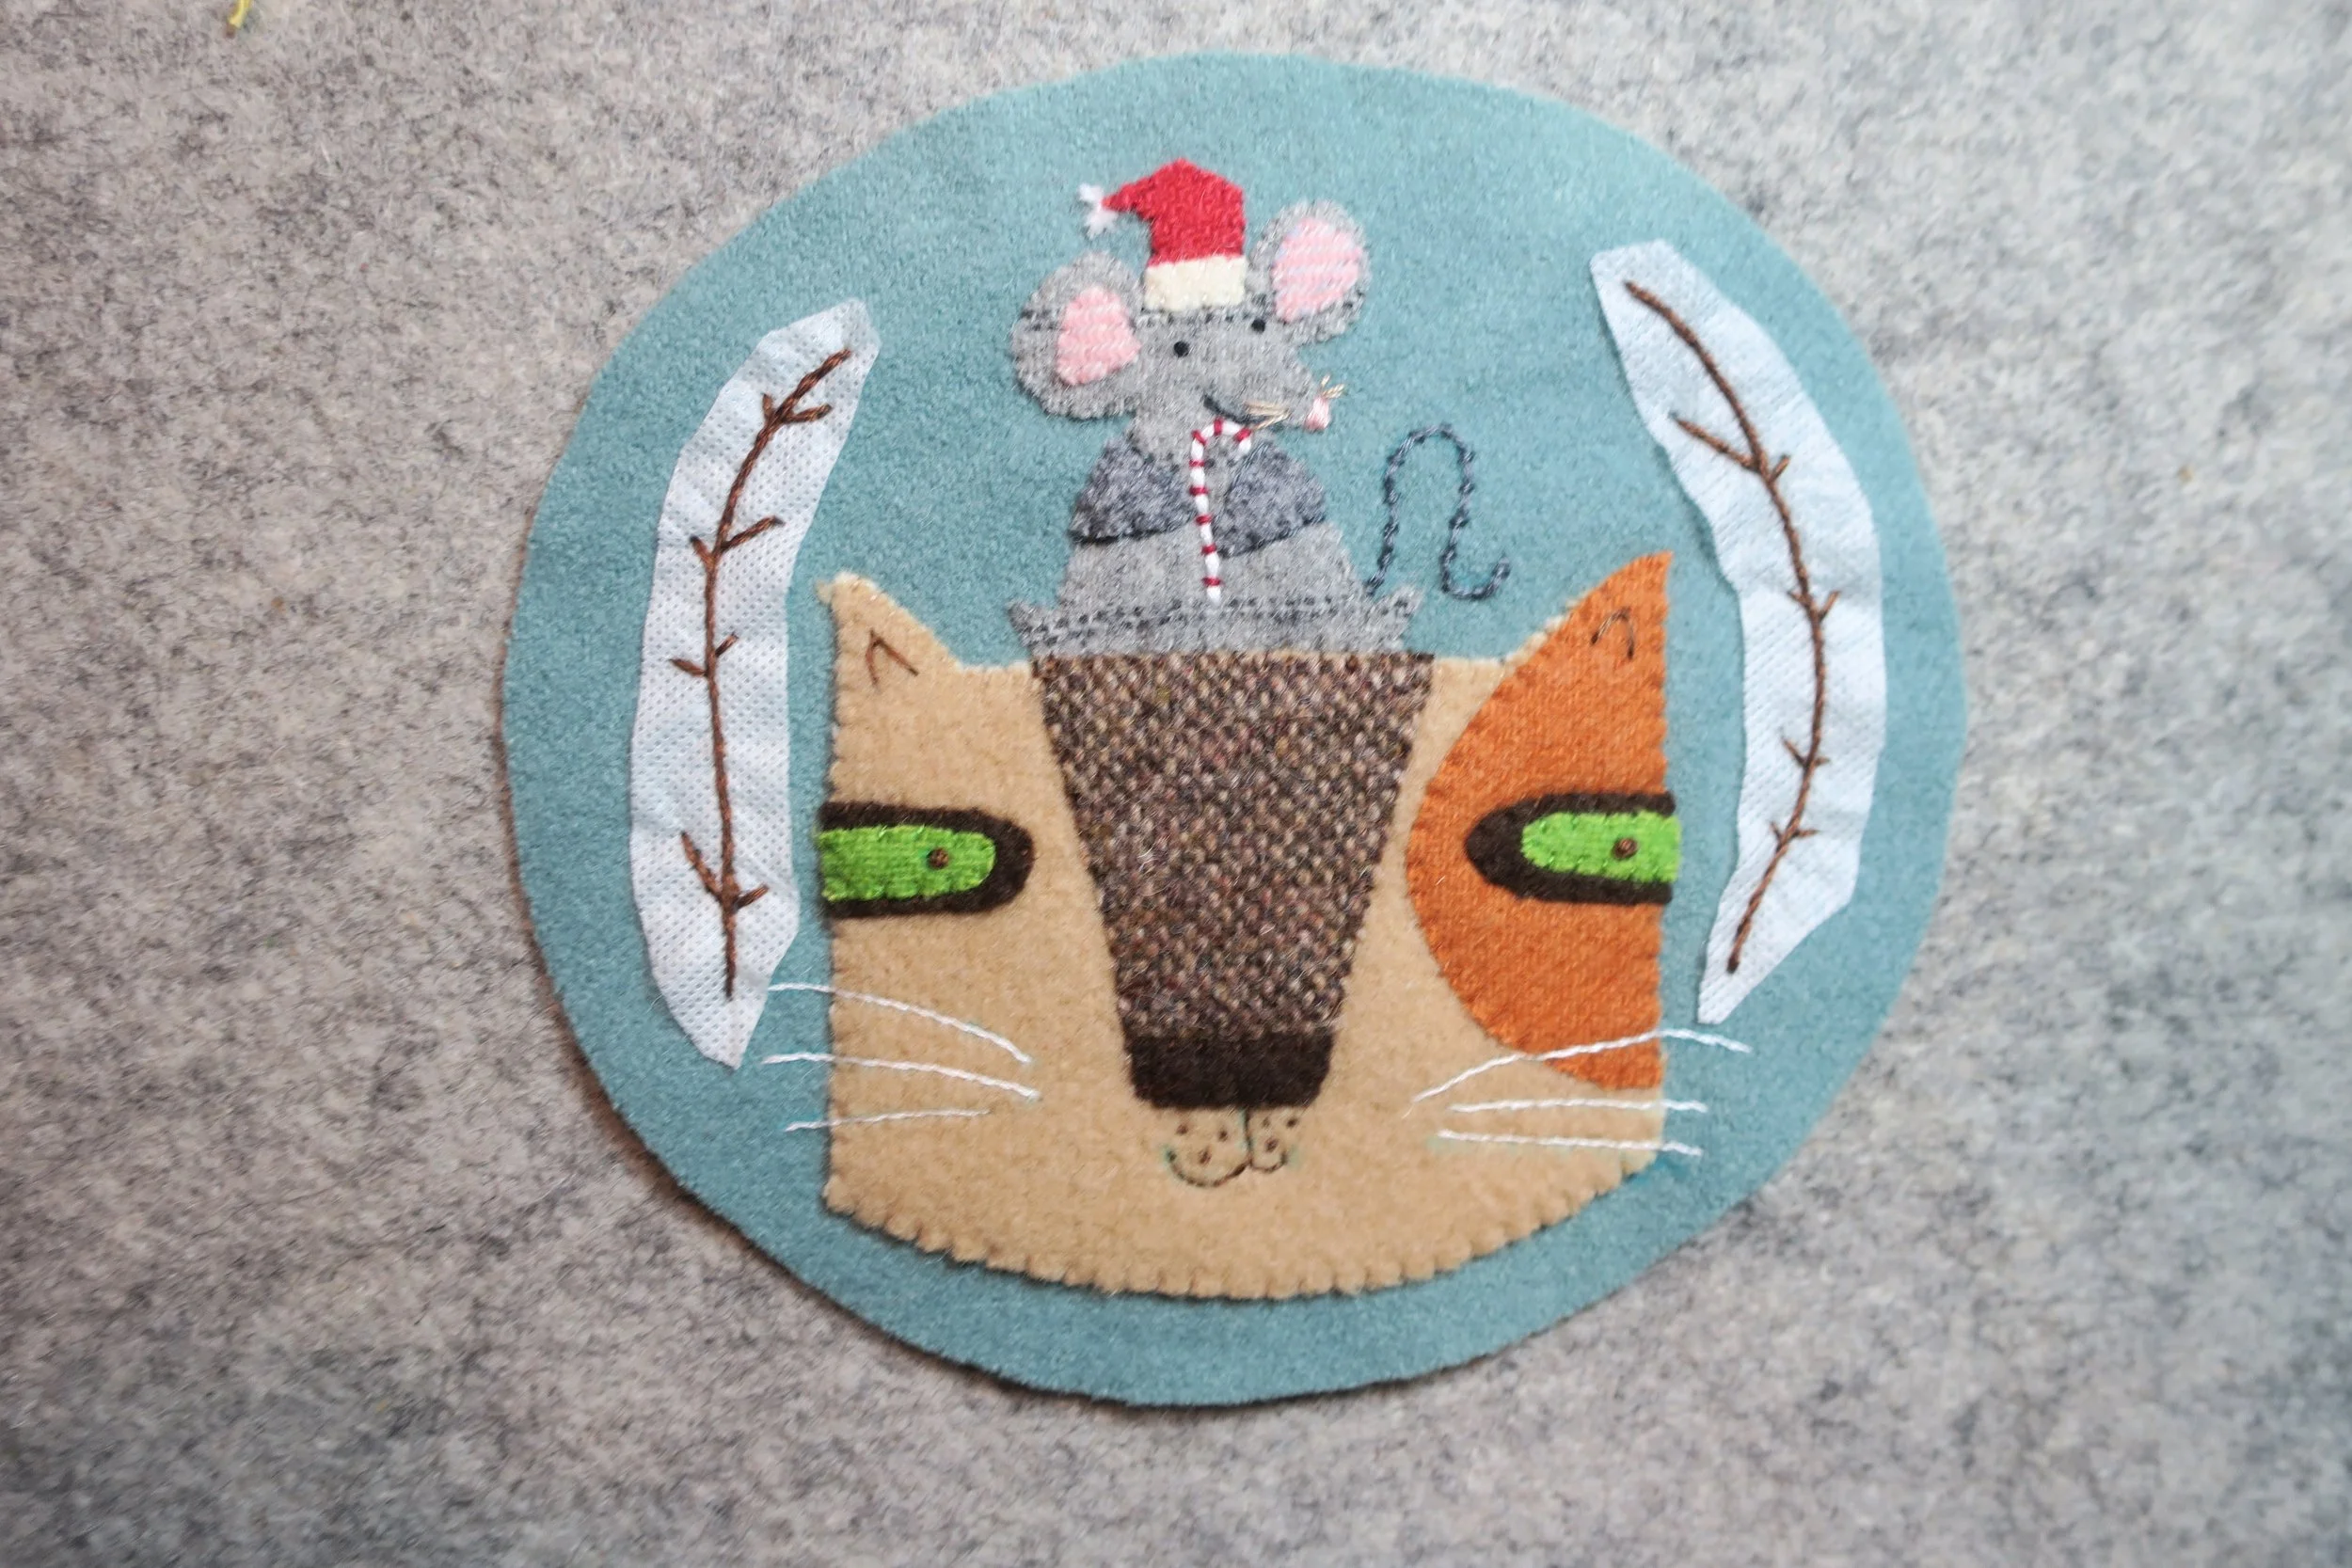
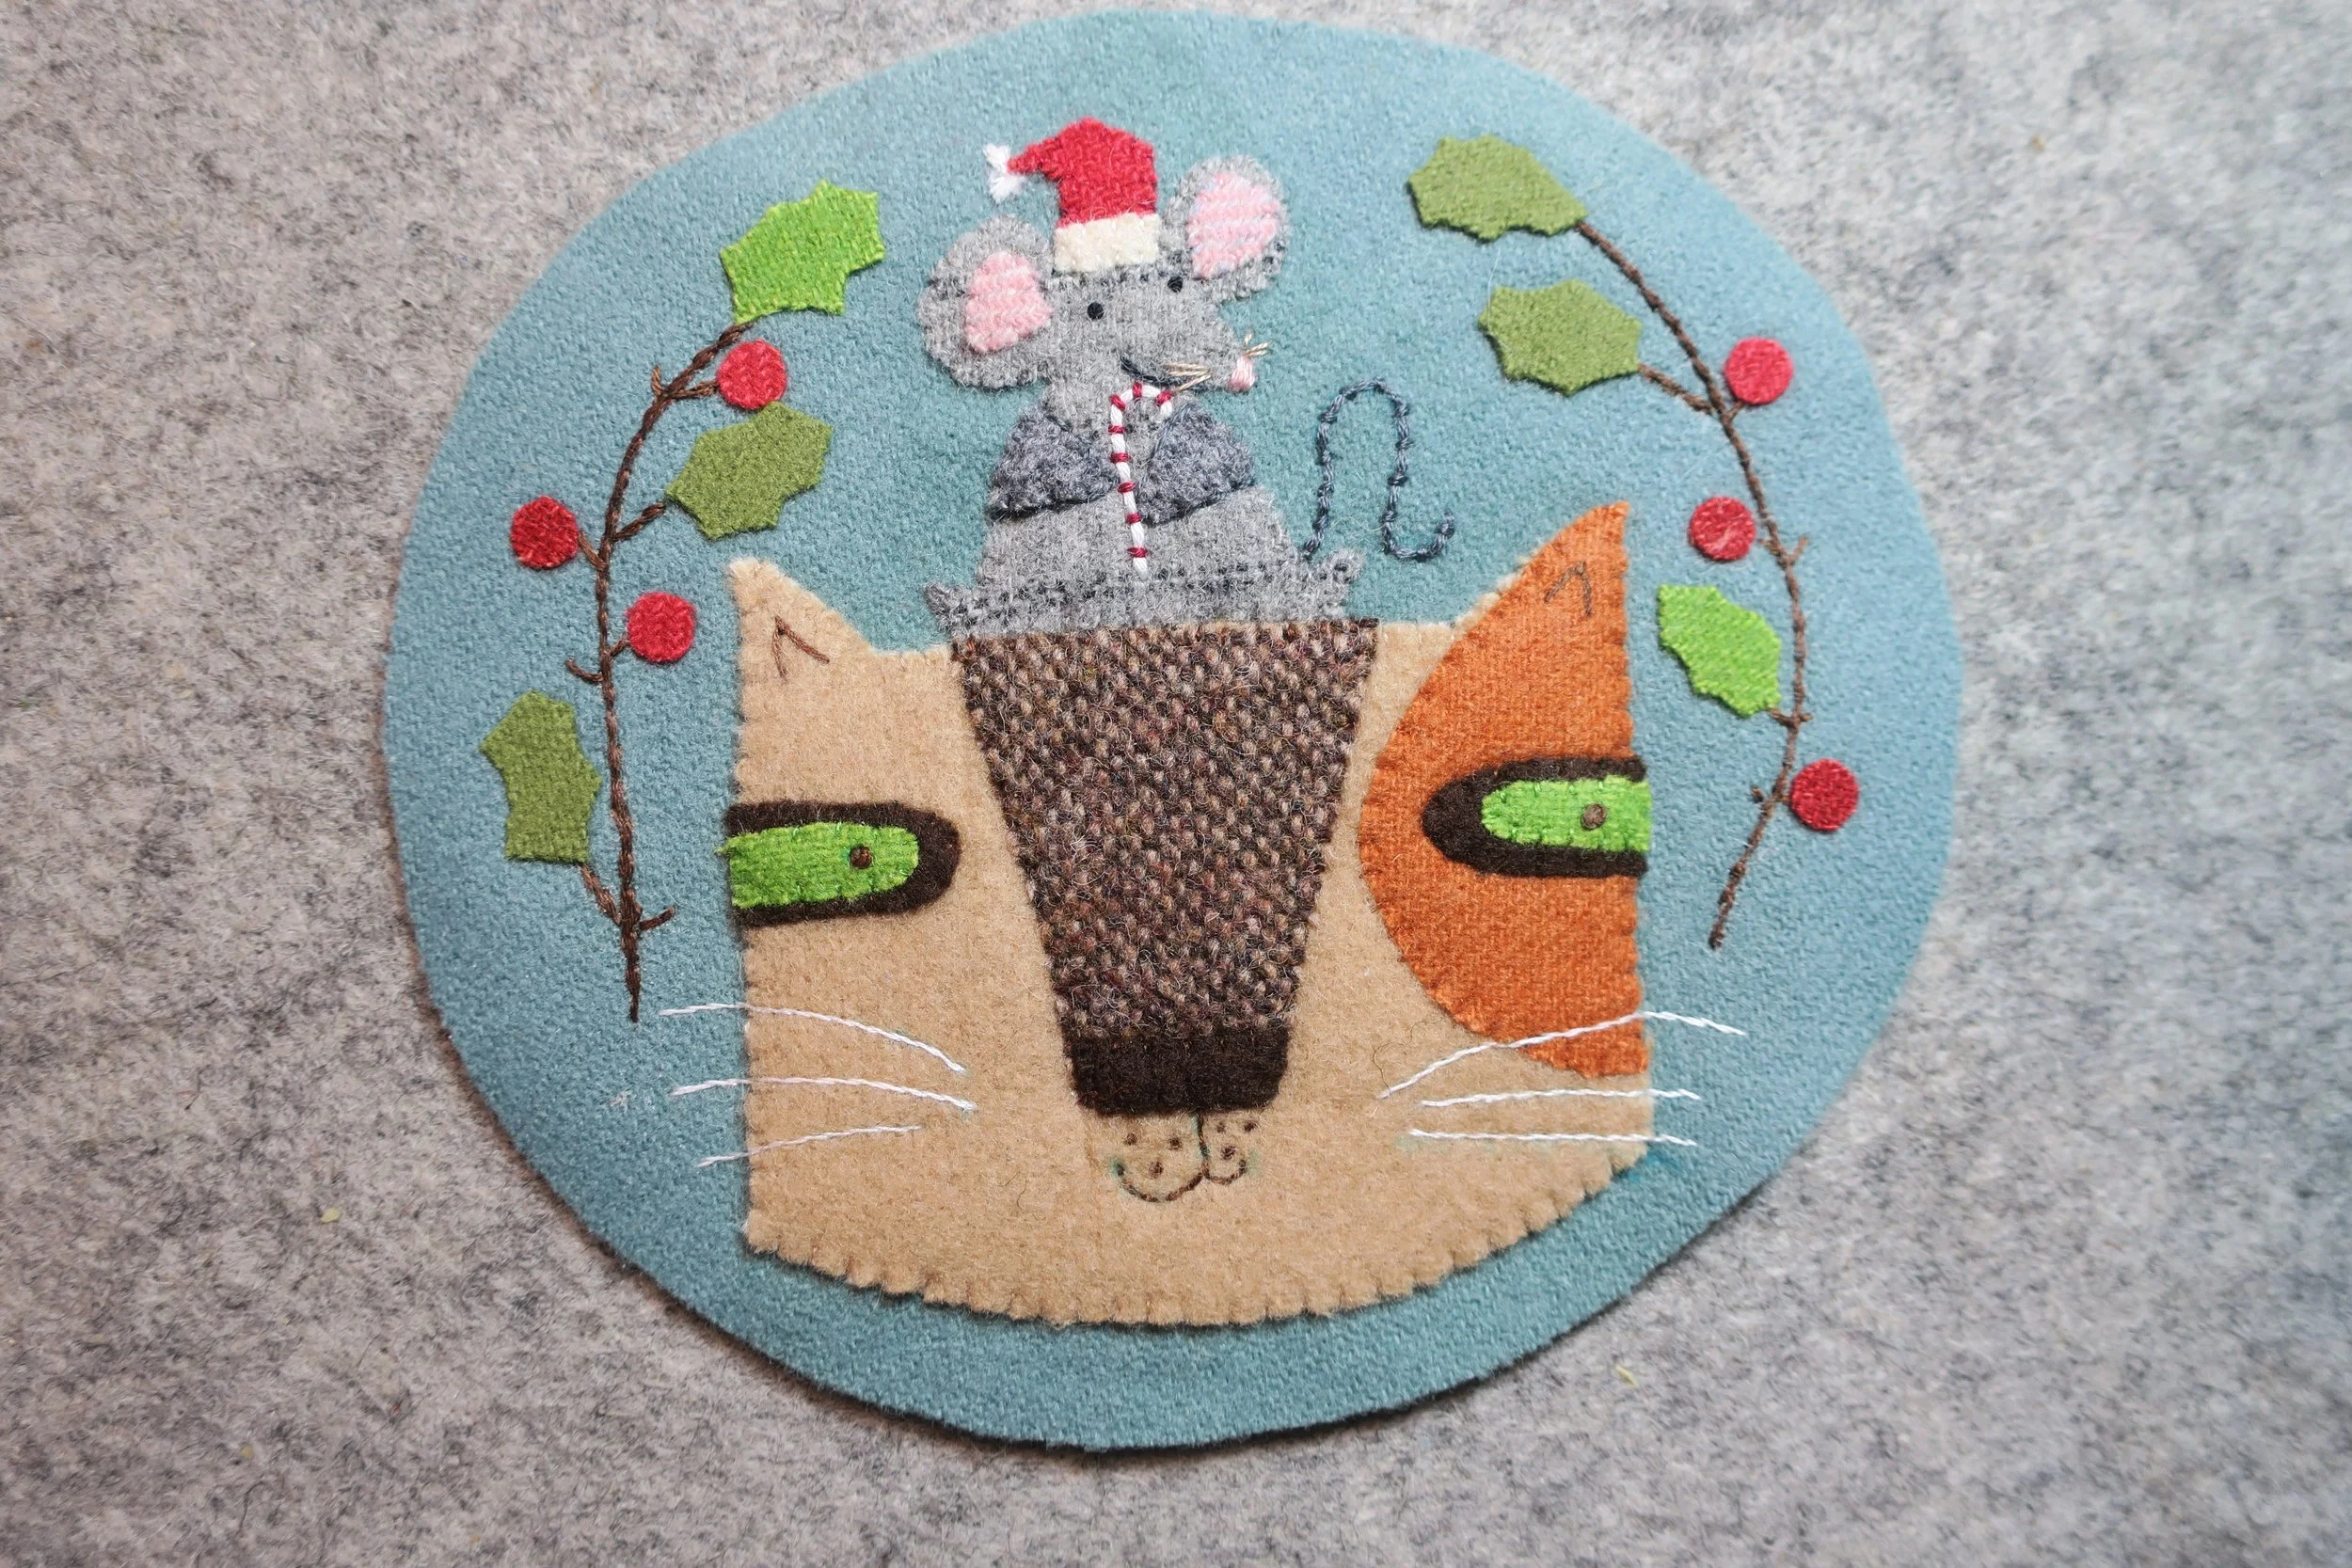
This year’s design features my beloved Corgi, Winston and his frienemy, Snickers the cat. I made it a double sided ornament, but you may want to make each one separately with a different design on the back. Check out some of the previous ornament tutorials for ideas.
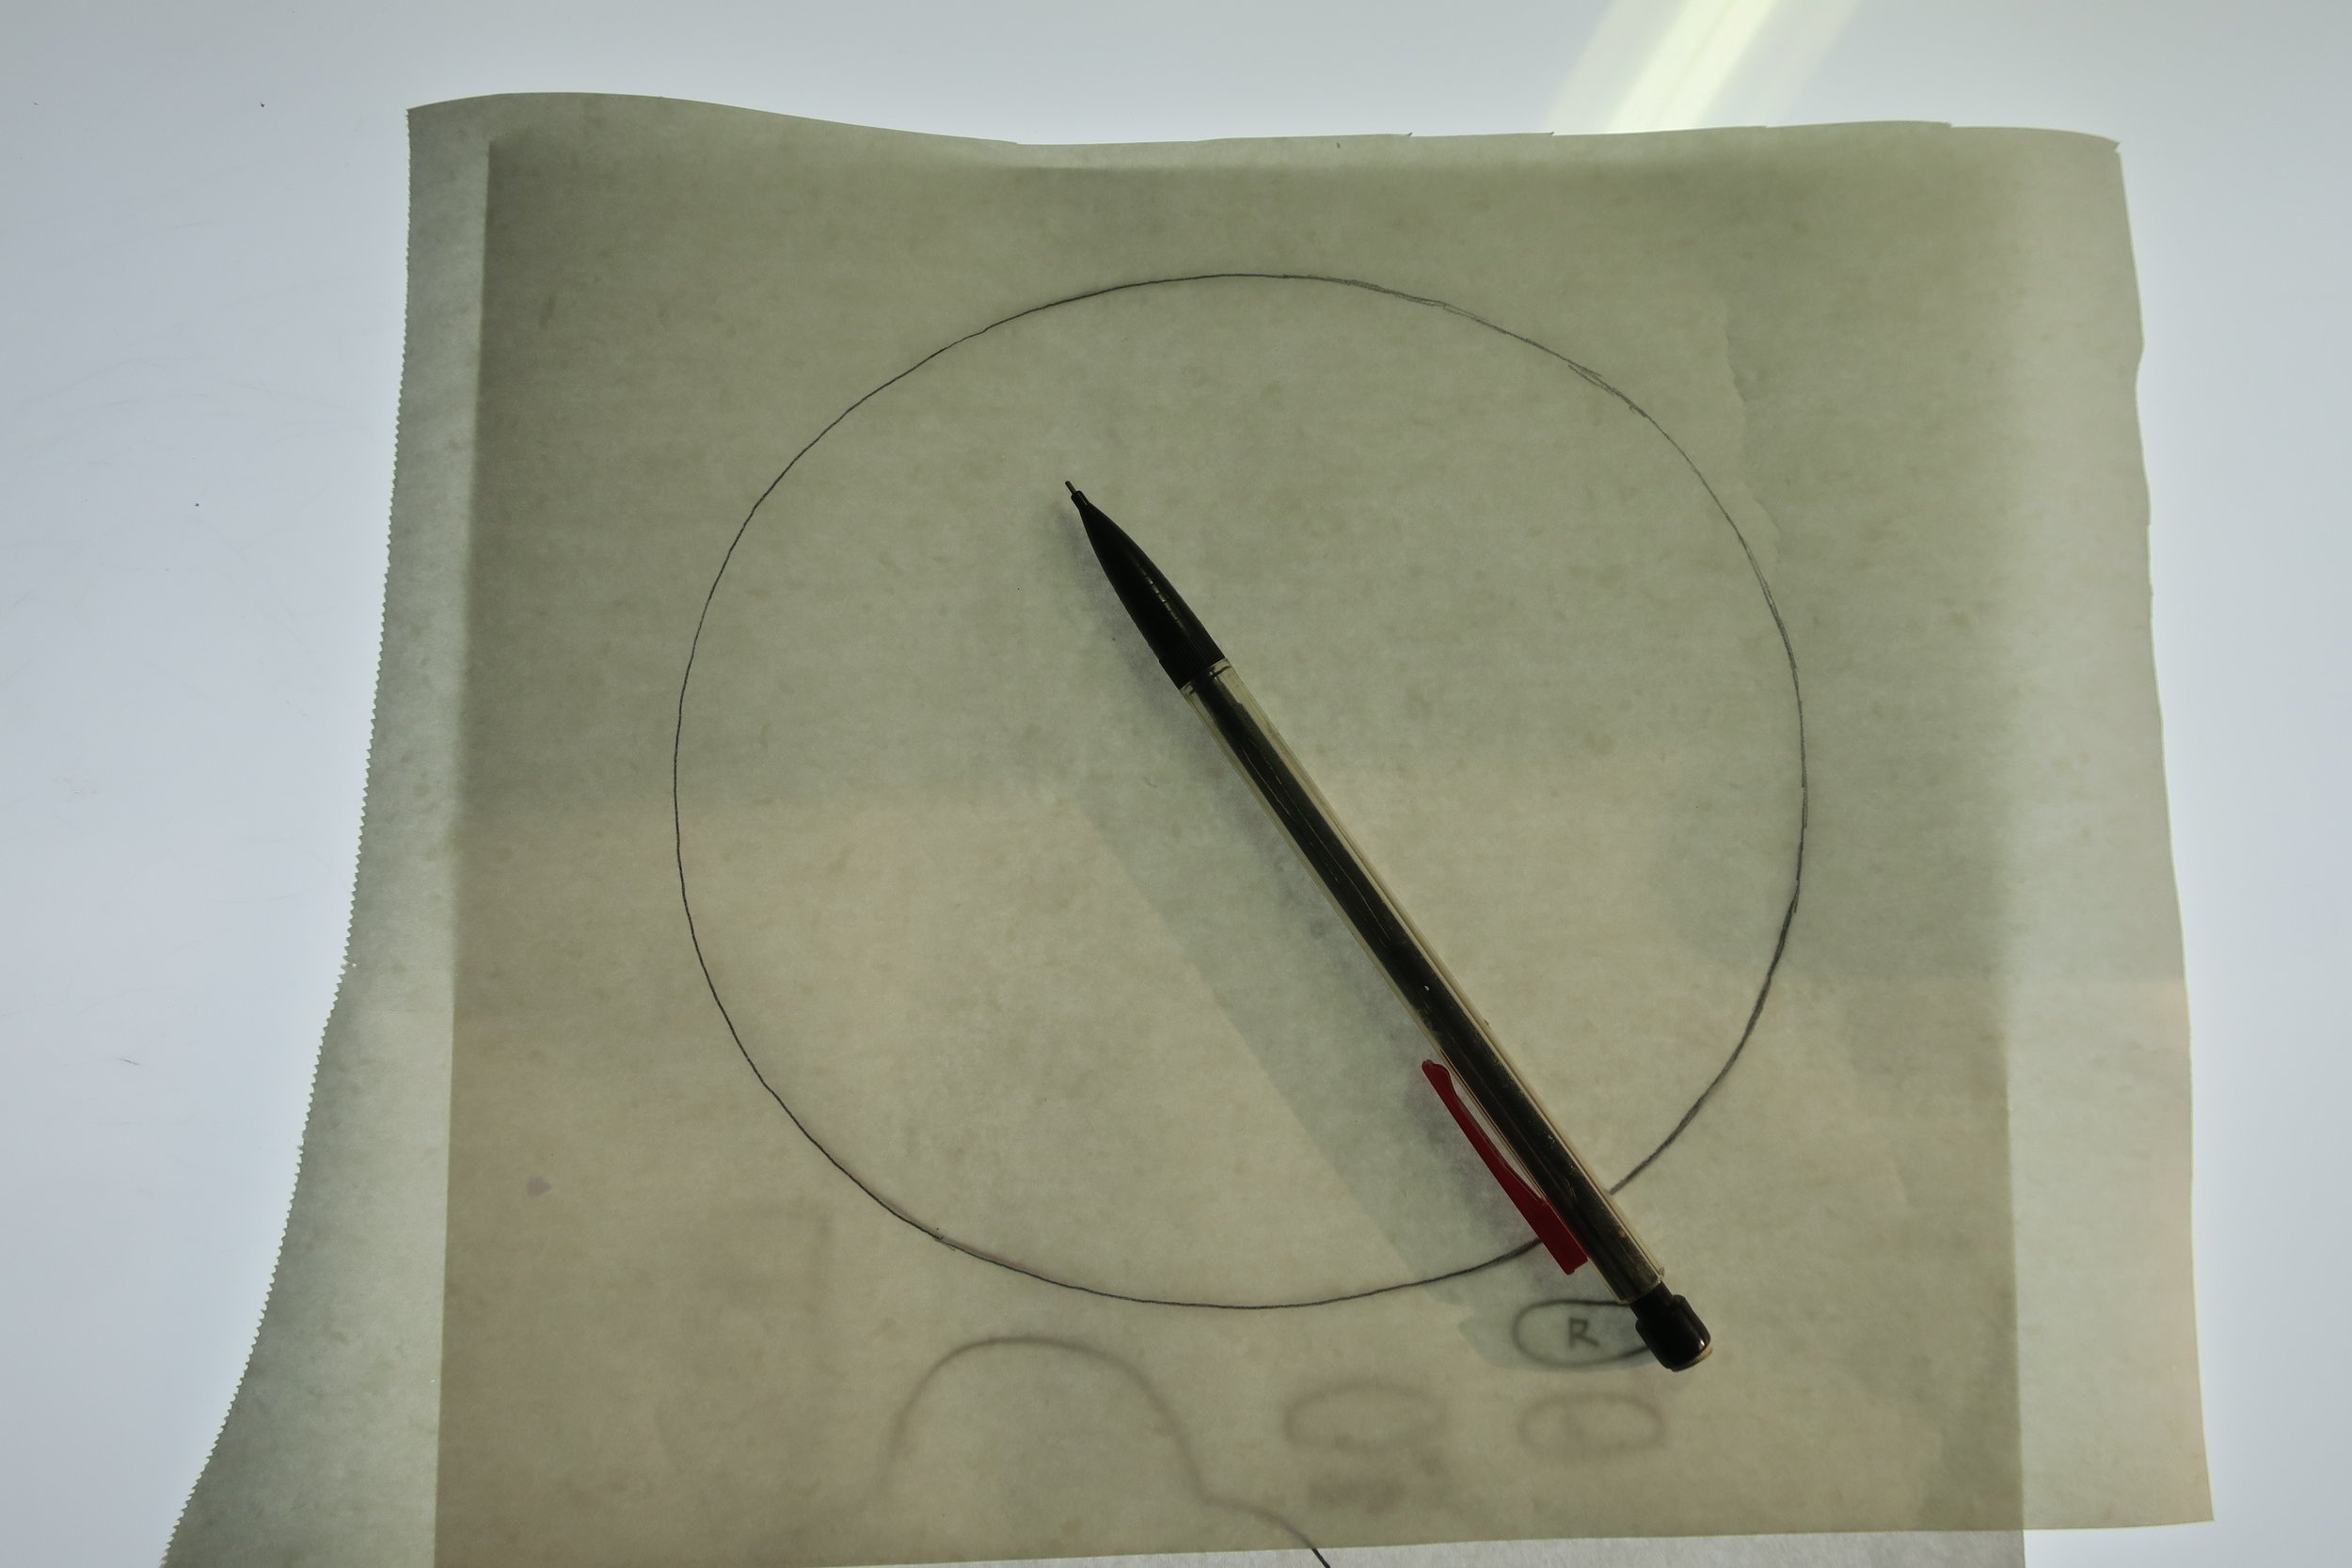
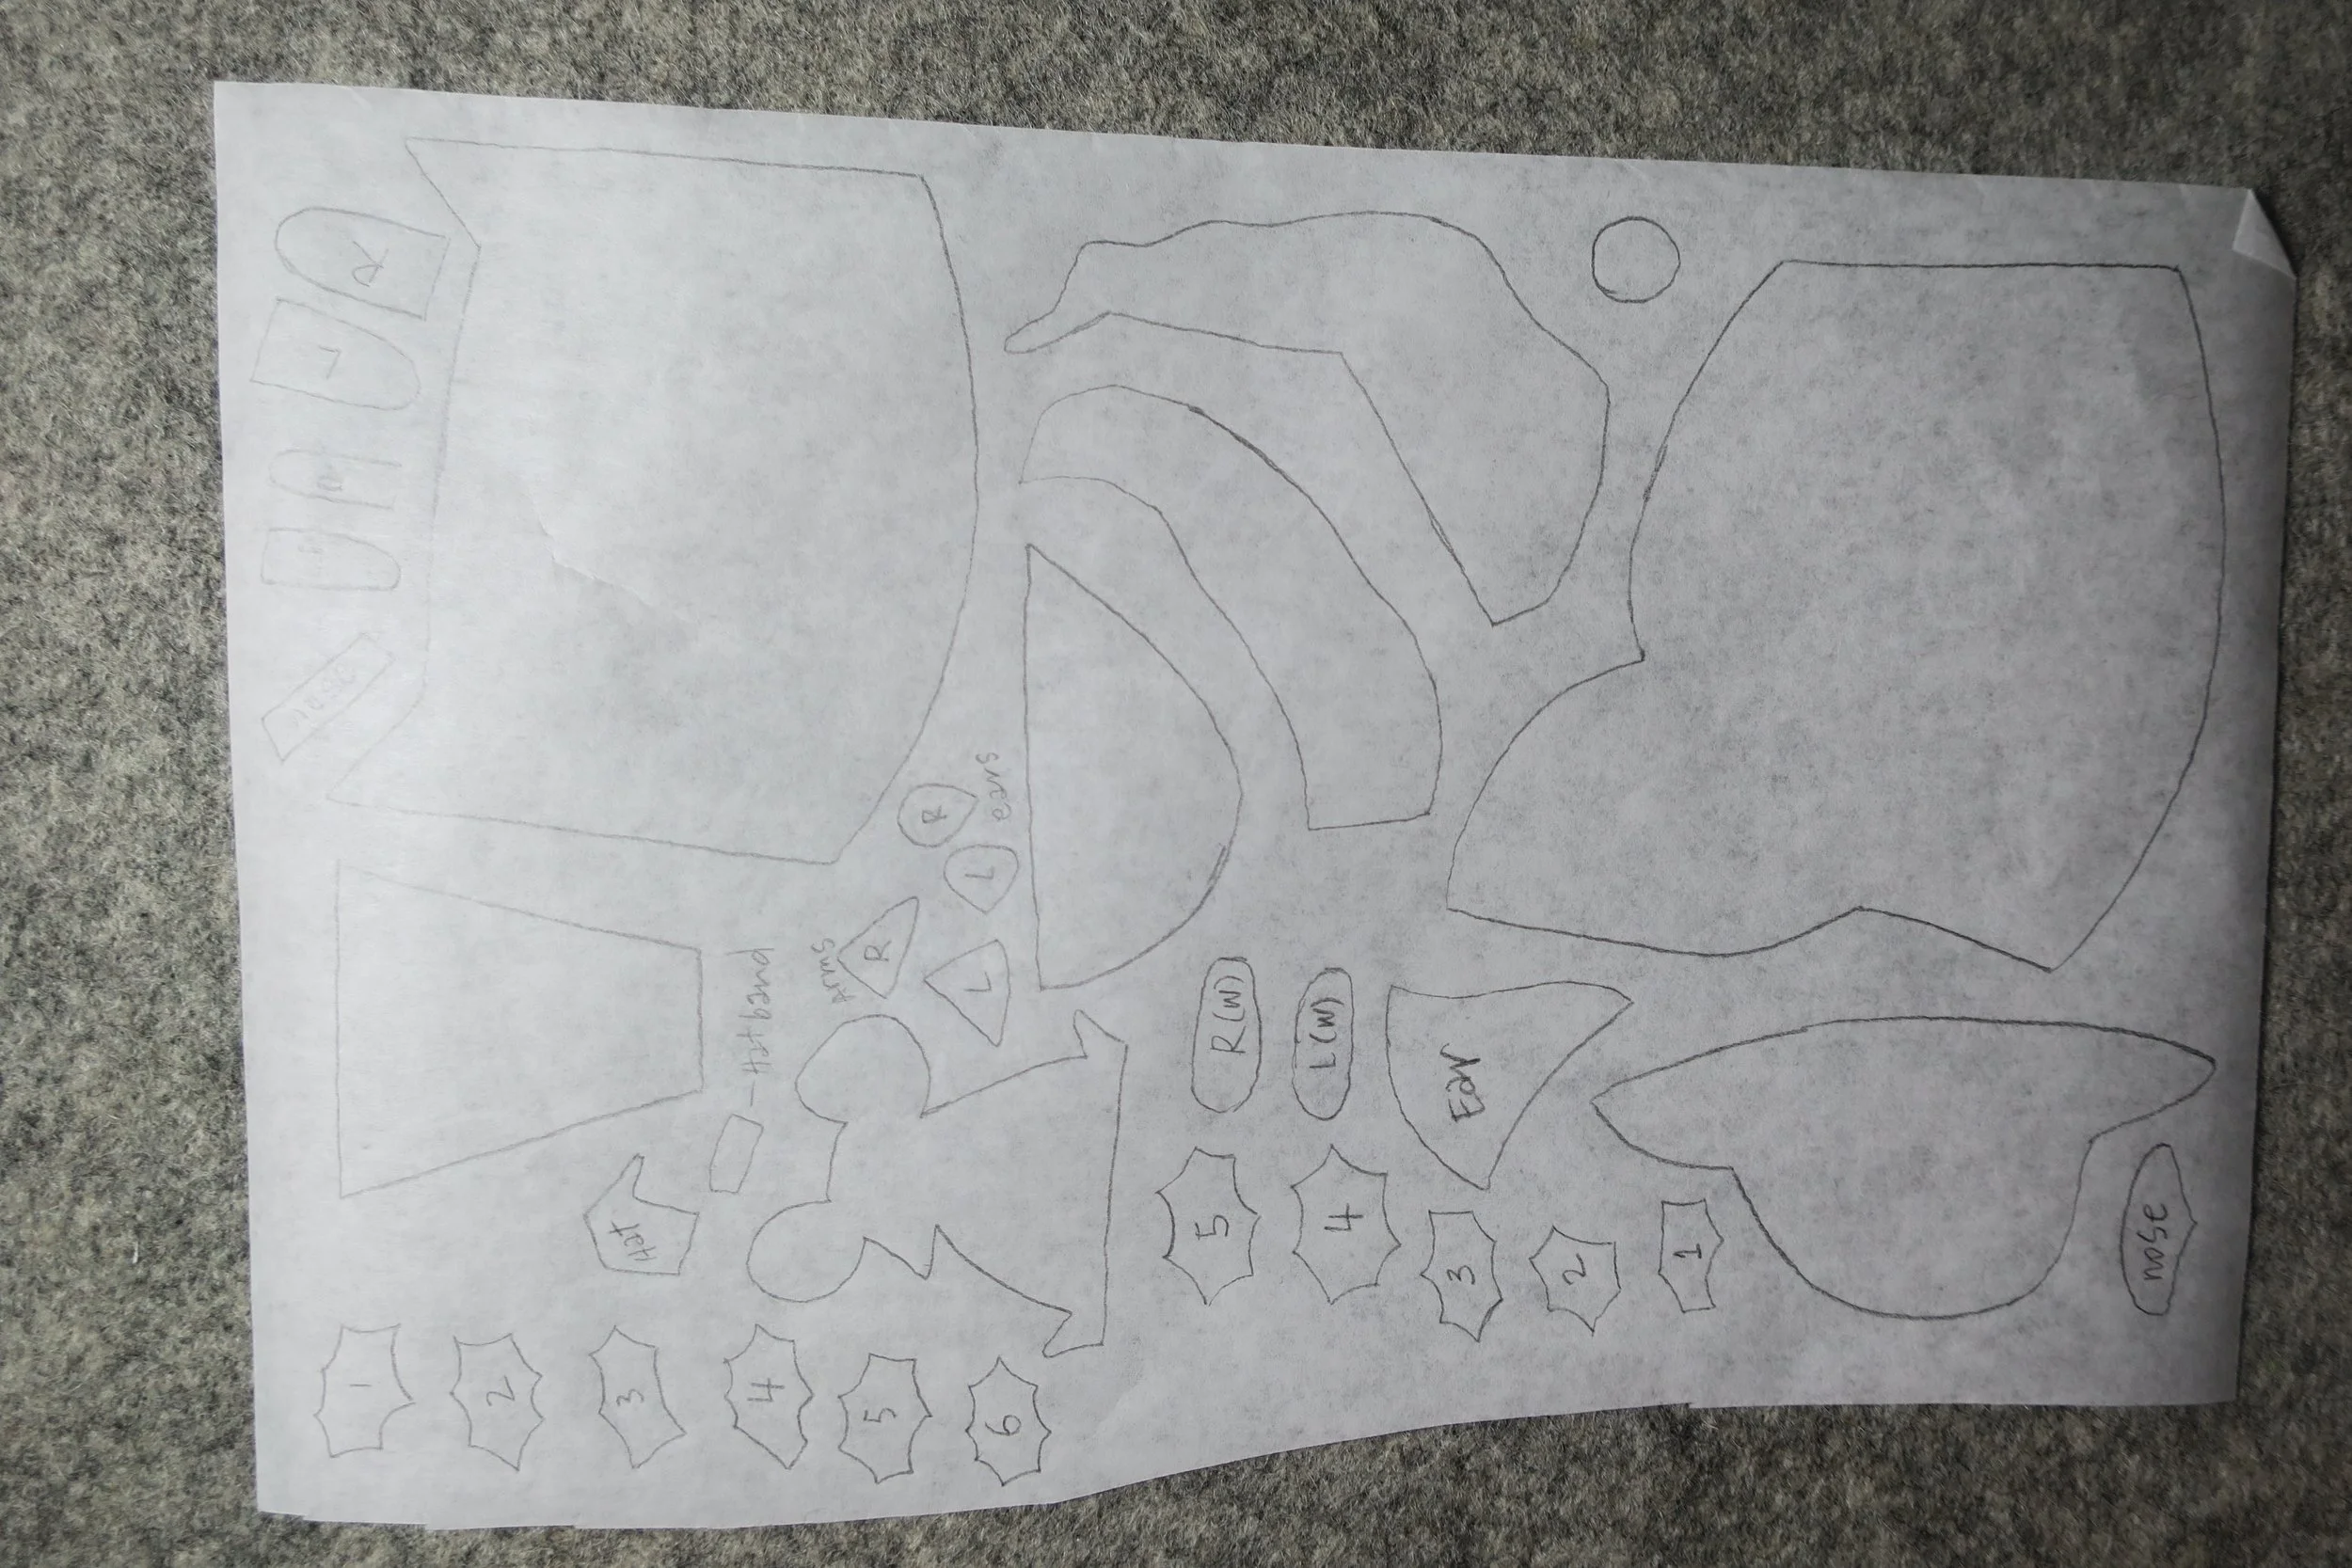
The size and shape is the same as most of the earlier ornaments, a large oval (about 5in x 6in).
All of the stitches used are in located in the stitch guide.
Download pattern and layout here.
Happy Stitching!
Supplies
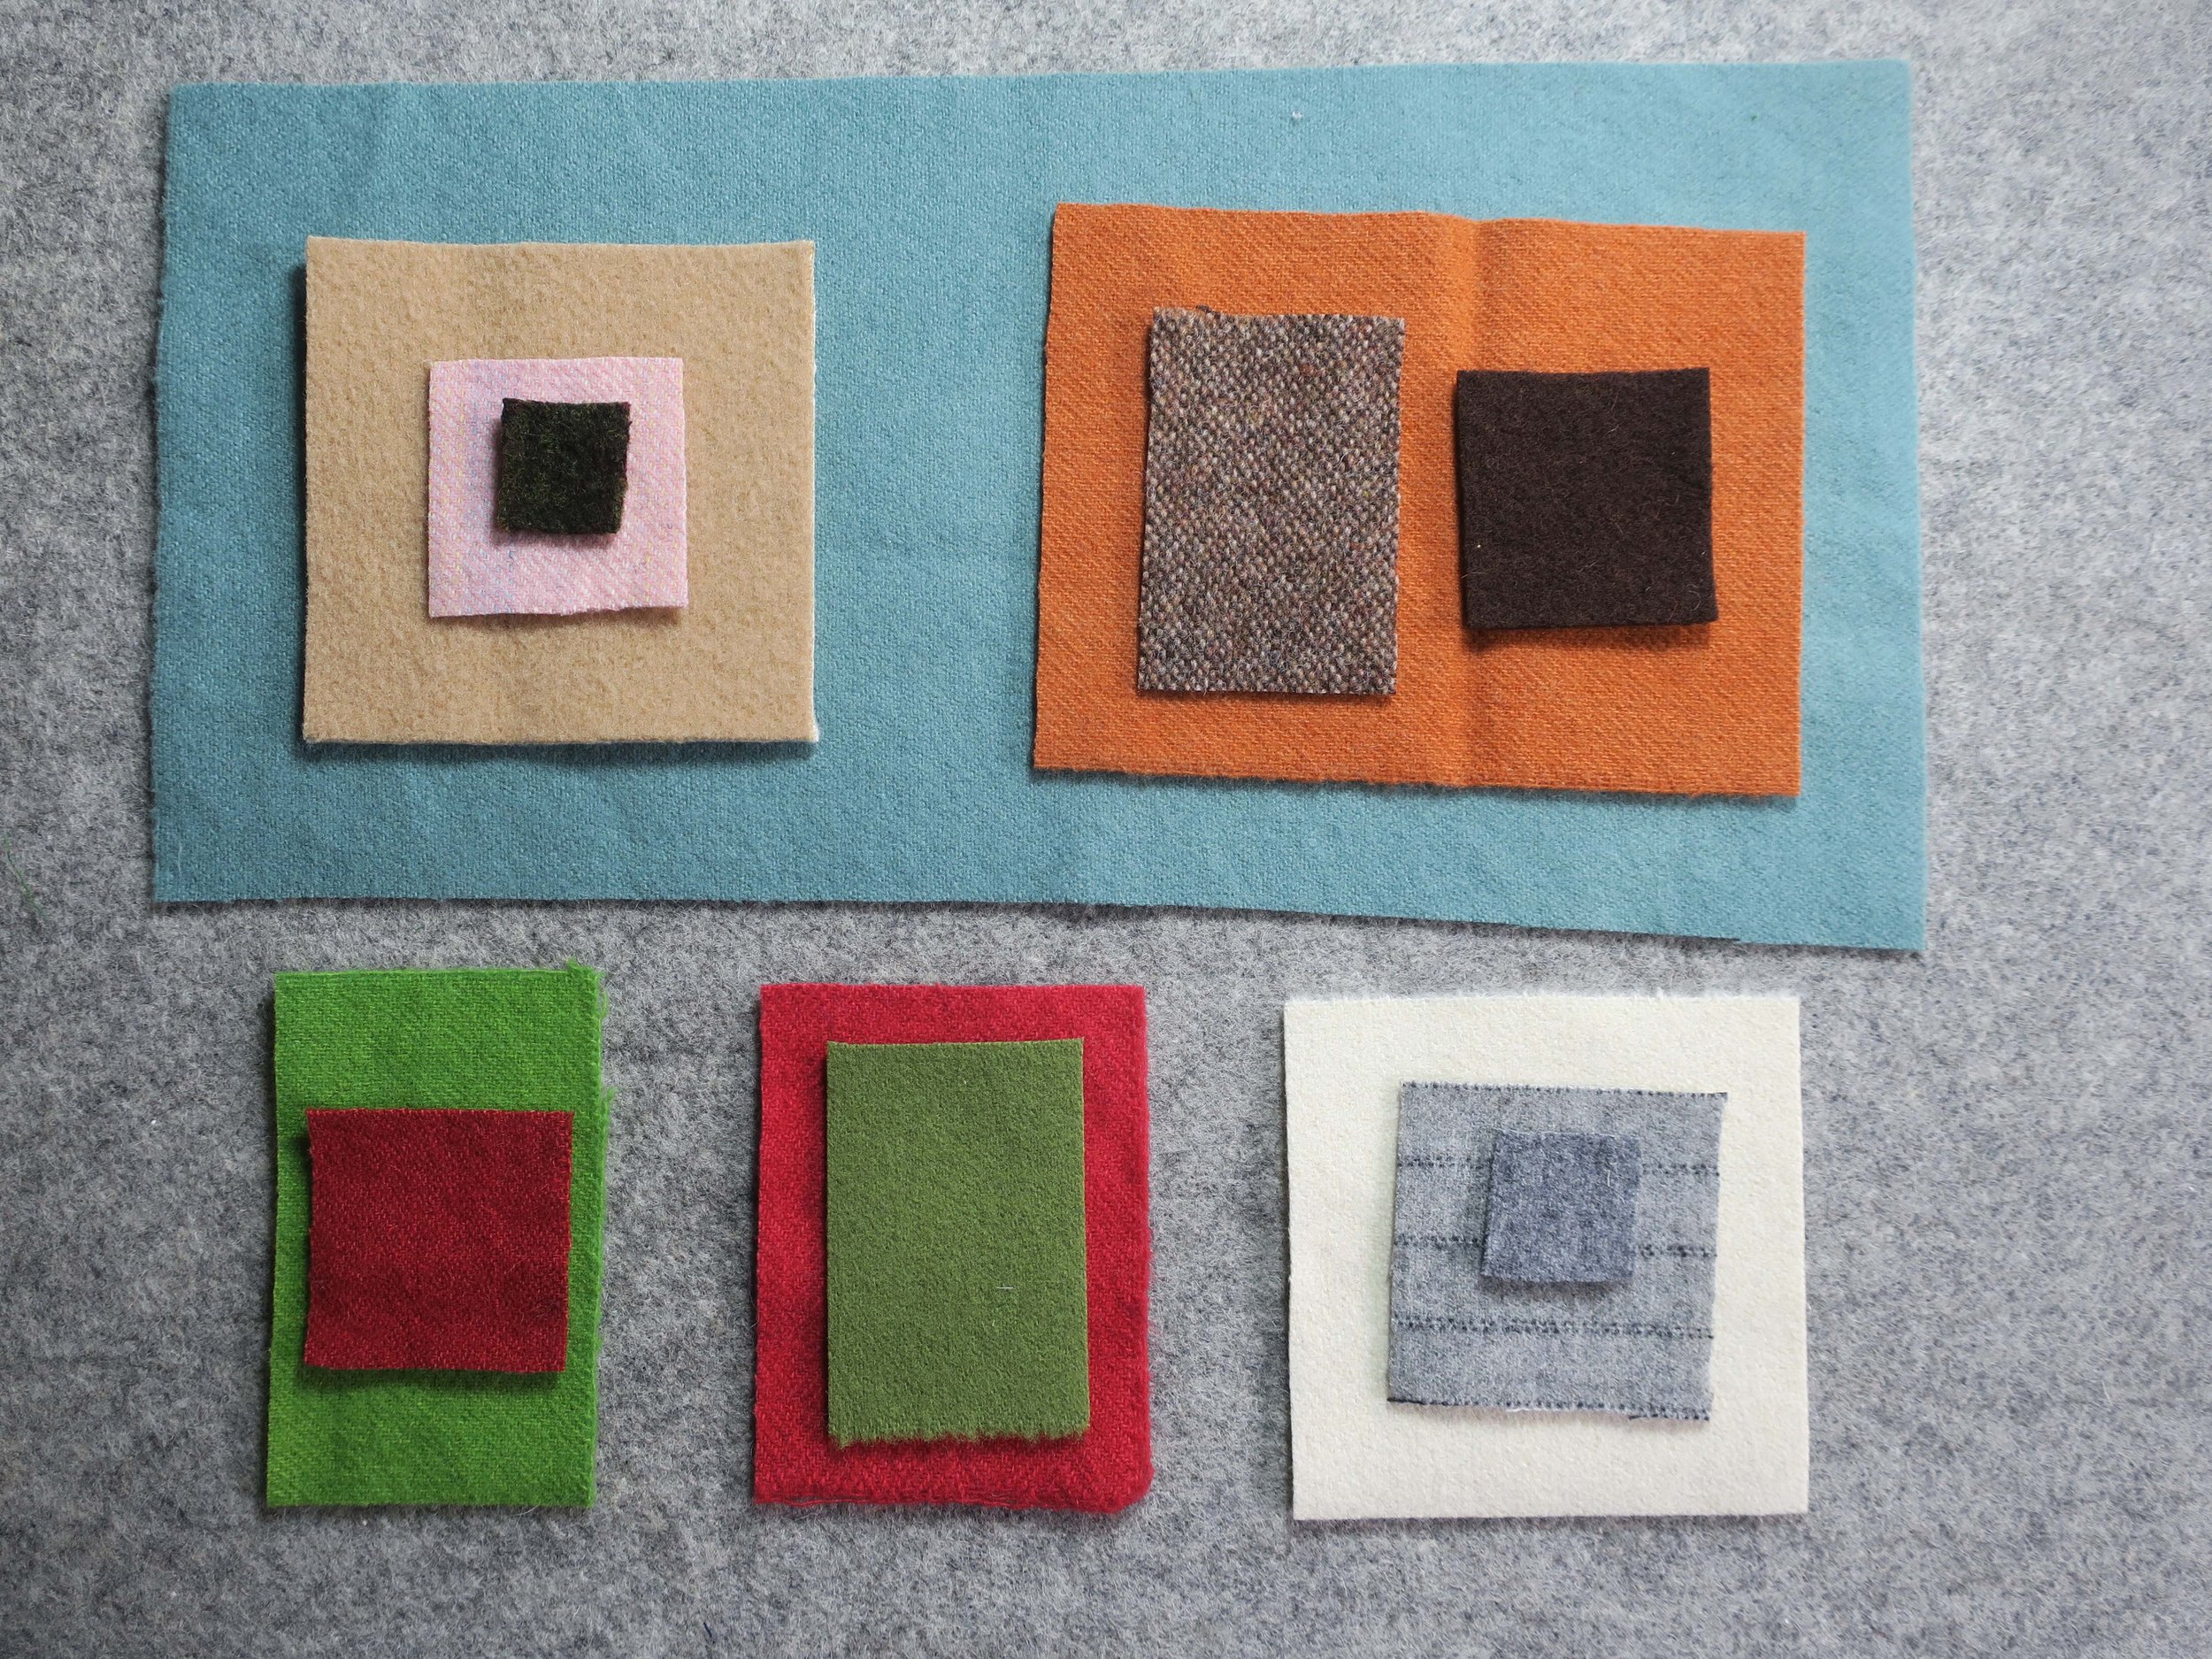
Felted wool or wool felt - Suggested colors (Many of the wools I used are from old moth eaten coats, sweaters, skirts and suits that I washed and overdyed, then tumbled dried to felt them.)
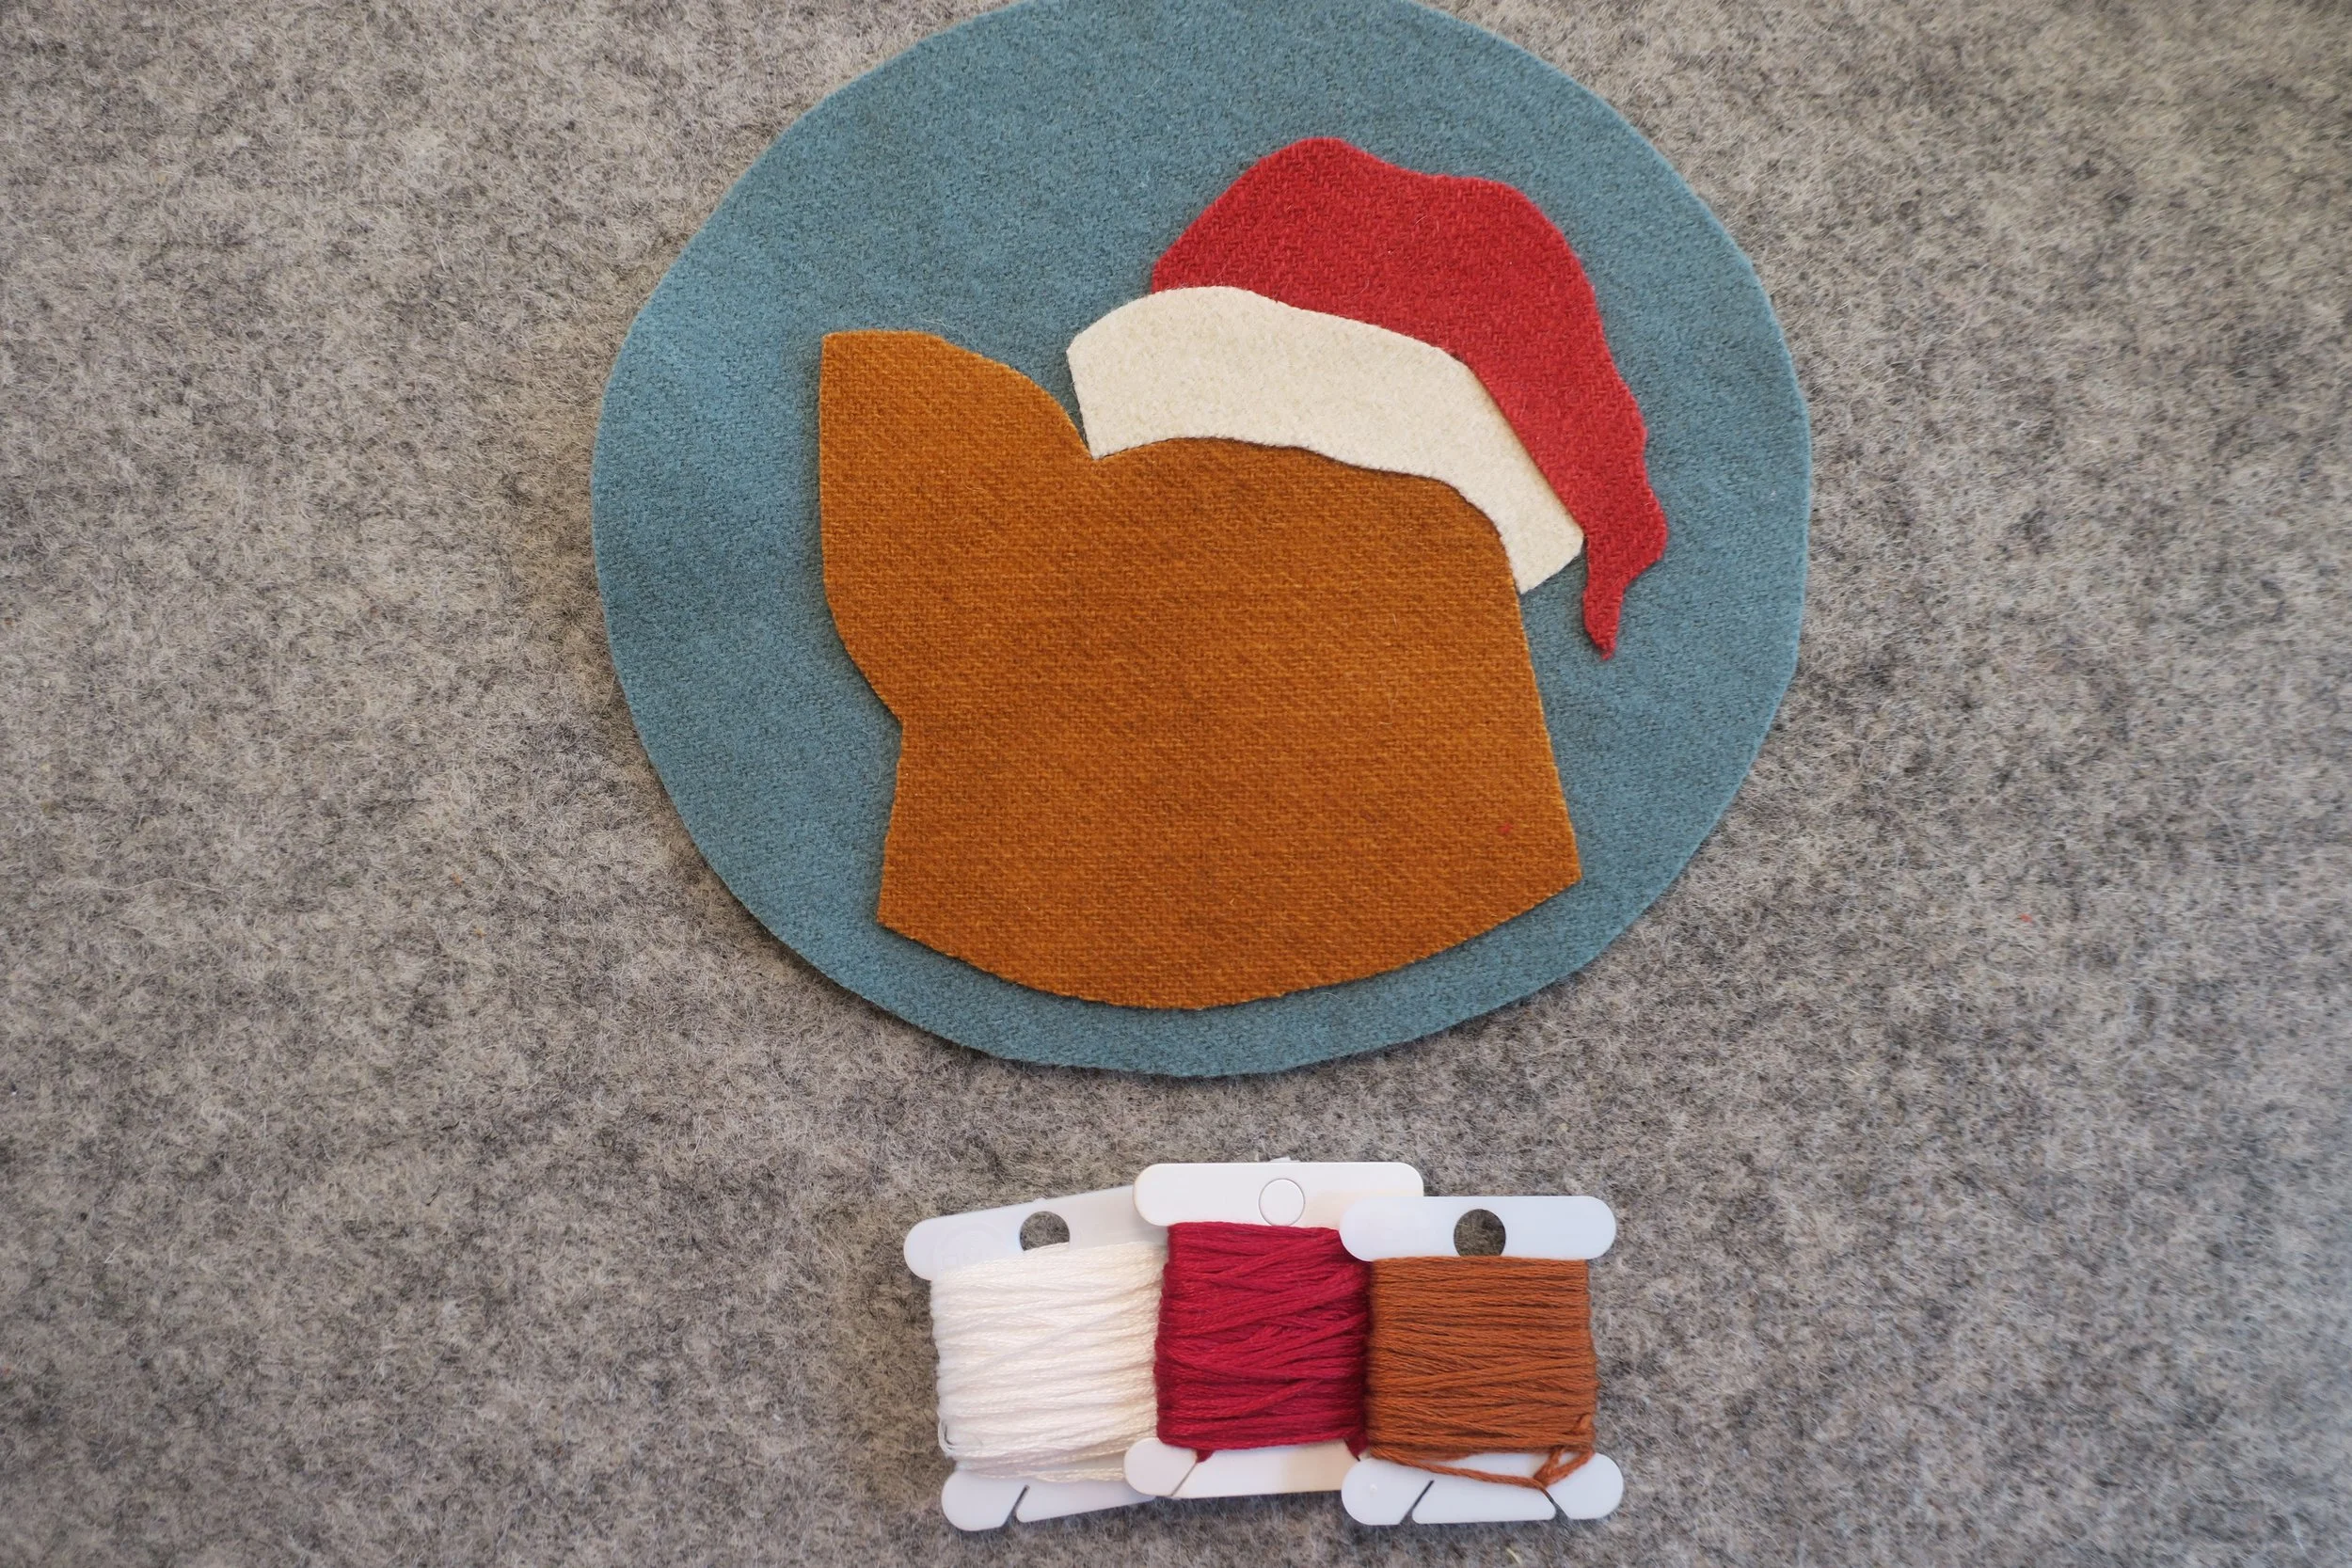
Background - 6.5 in x 14 in medium dusty blue
Winston’s head, Snicker’s spot - 4.5in x 6.0in dark burnt orange
Winston’s face and eyes , hat fur and pom pom, mouse’s hat fur - 4in x 4in off-white
Winston’s and mouse’s ear - 2in x 2in pink
Winston’s hat, mouse’s hat, 5 berries - 3in x 4in red
Remaining berries - 2in x 3in burgundy
Winston’s nose 1.5in x 1.5in black/brown tweed
Holly leaves (C1,C6,1,3), Snicker’s eyes - 2in x 3in kelly green
Holly leaves (C2,C3,C4,C5,2,4,5) - 2in x 4in olive green
Snicker’s head - 4in x 4in tan
Snicker’s nose bridge - 2in x 4in brown/tan tweed
Snicker’s nose and eye outline - 2in x 2in dark brown
Mouse body - 2.5in x 2.5in light grey
Mouse’s arms - 1.5in x 1.5in medium grey
Felted wool
Thread
I used 6-strand embroidery floss for most of the stitching. The only exception is the blanket stitch border where I used black perle cotton, size 8. The floss threads match my wool colors.
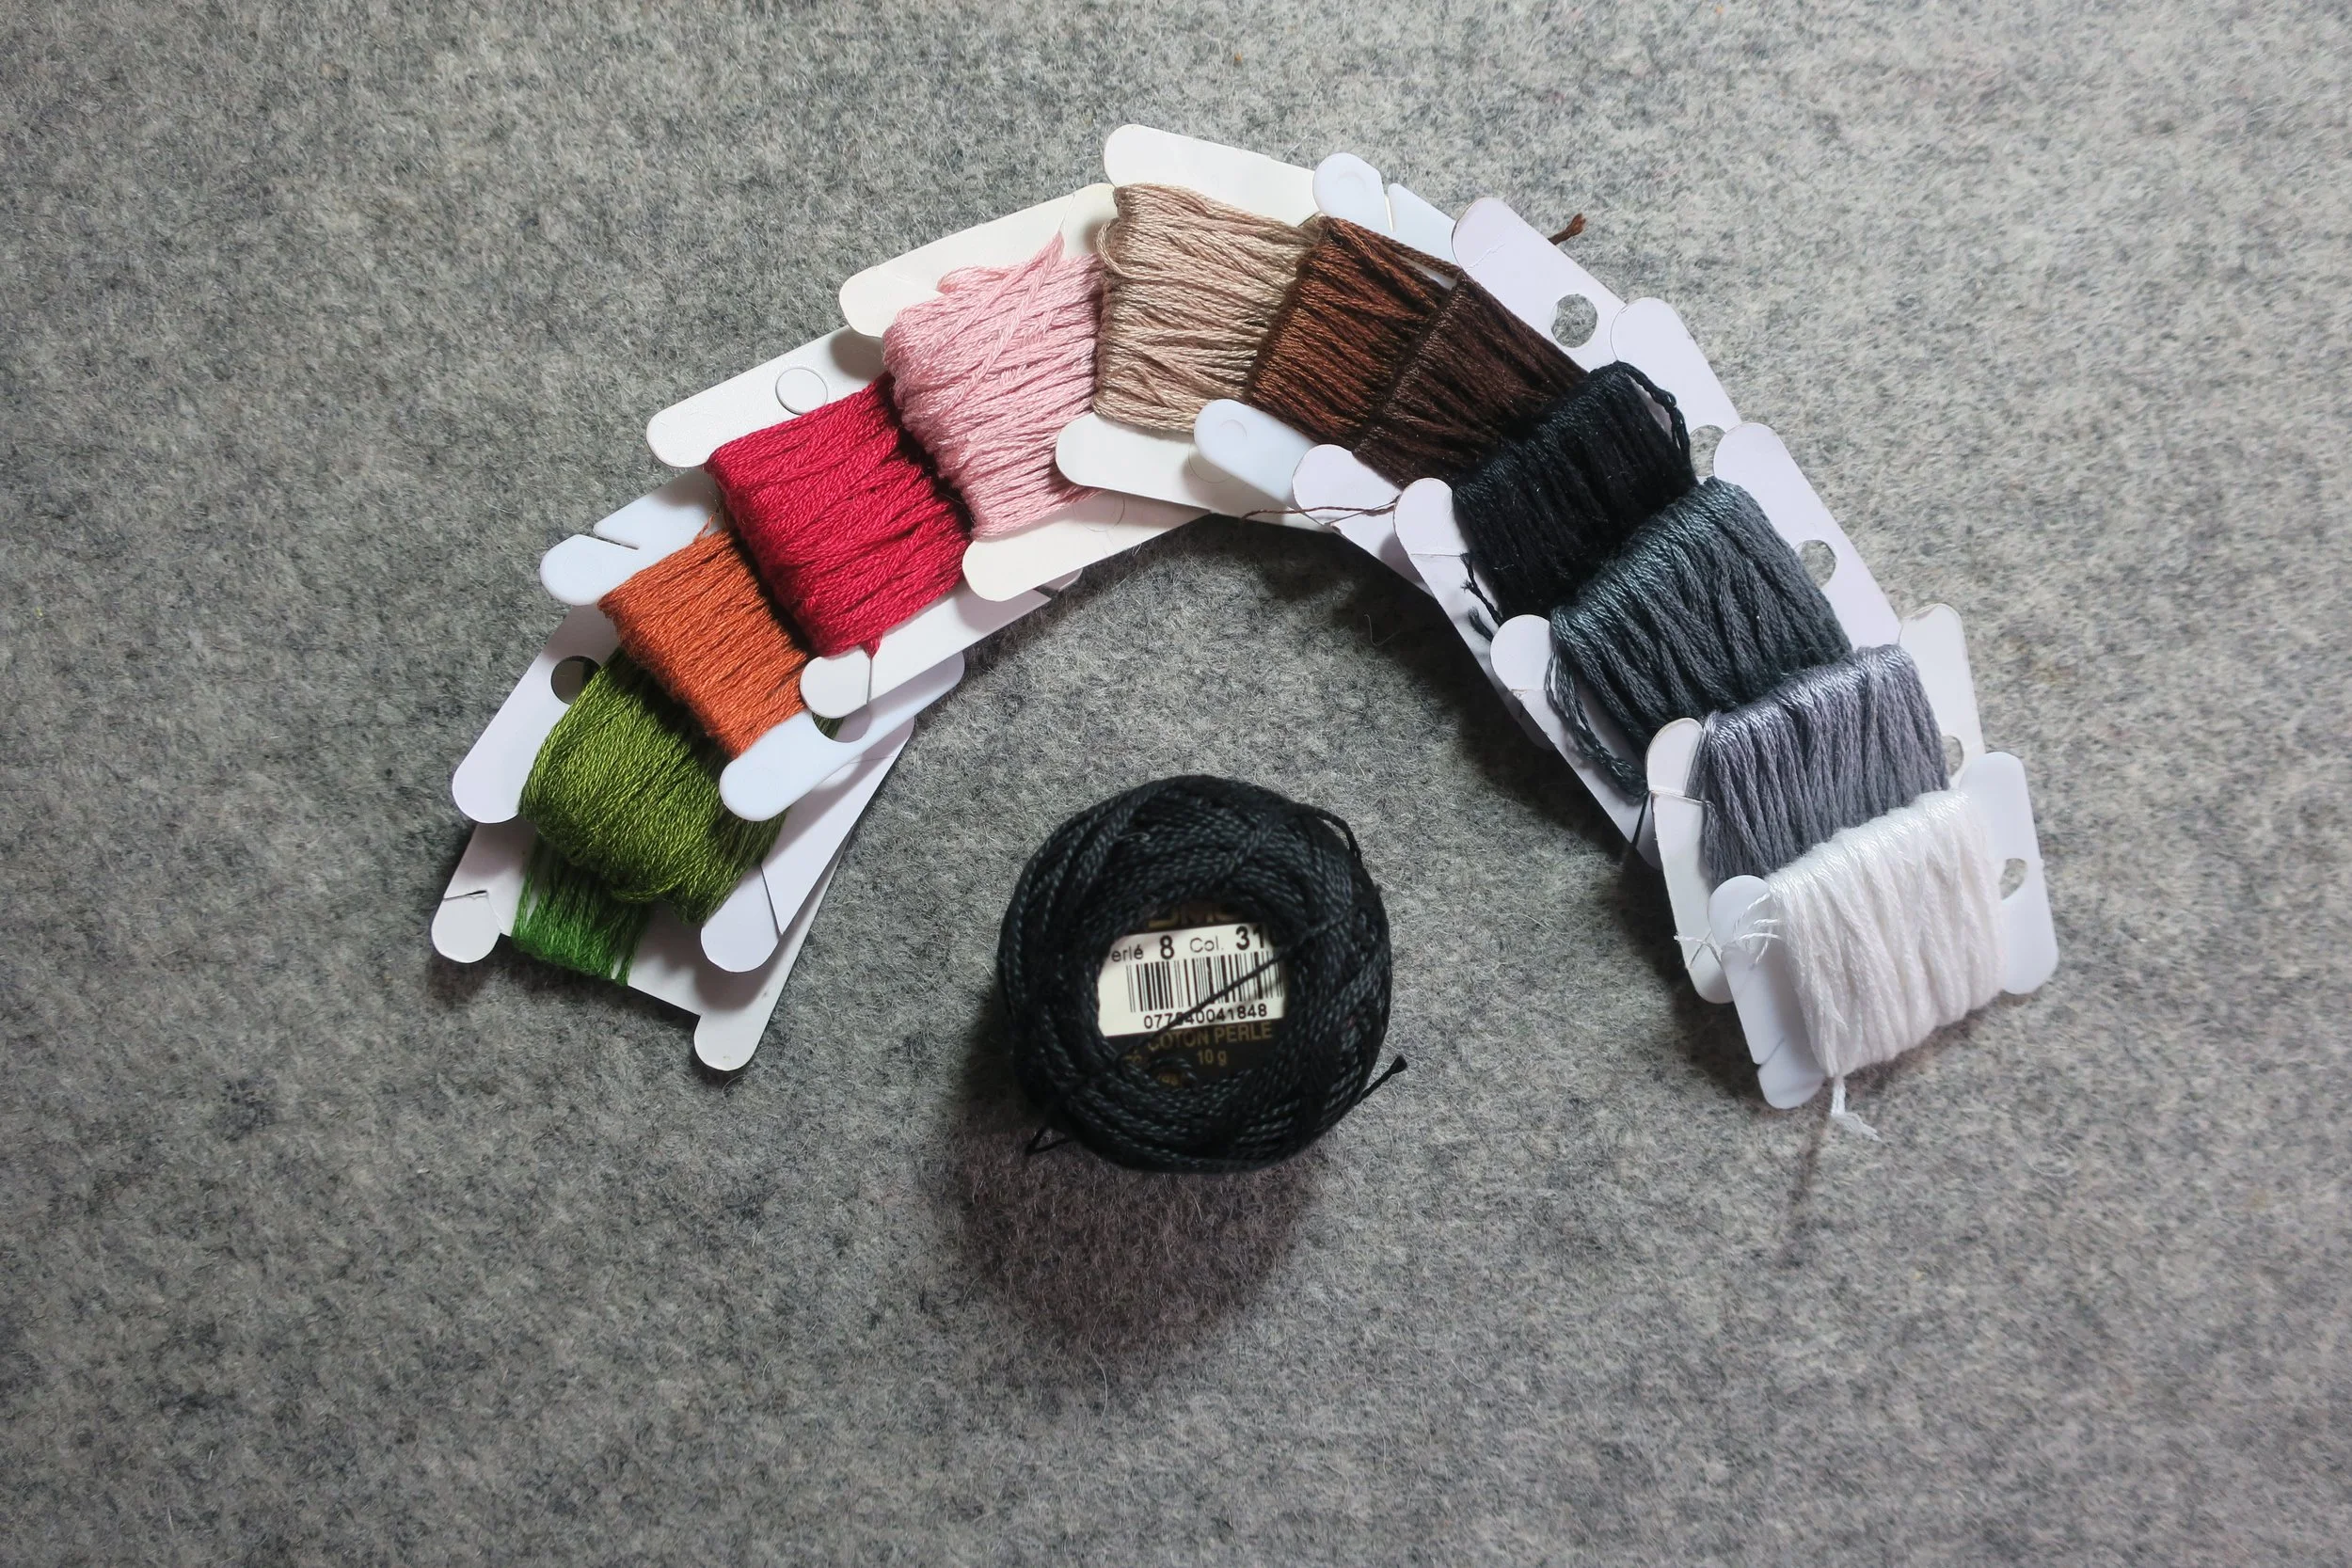
6-strand embroidery floss and perle cotton, size 8
Miscellaneous
Scissors - fabric and paper
pencil
lightbox (optional) - a brightly lit window works in a pinch
featherweight fusible web - my favorite is Vilene Meltfuse, but Heat n Bond featherlite will also work. I prefer a ultralite fusible because it doesn’t stiffen the wool.
Freezer paper
Steam iron
Ironing board or wool ironing mat
Washaway embroidery stabilizer - optional
Washaway fabric marker
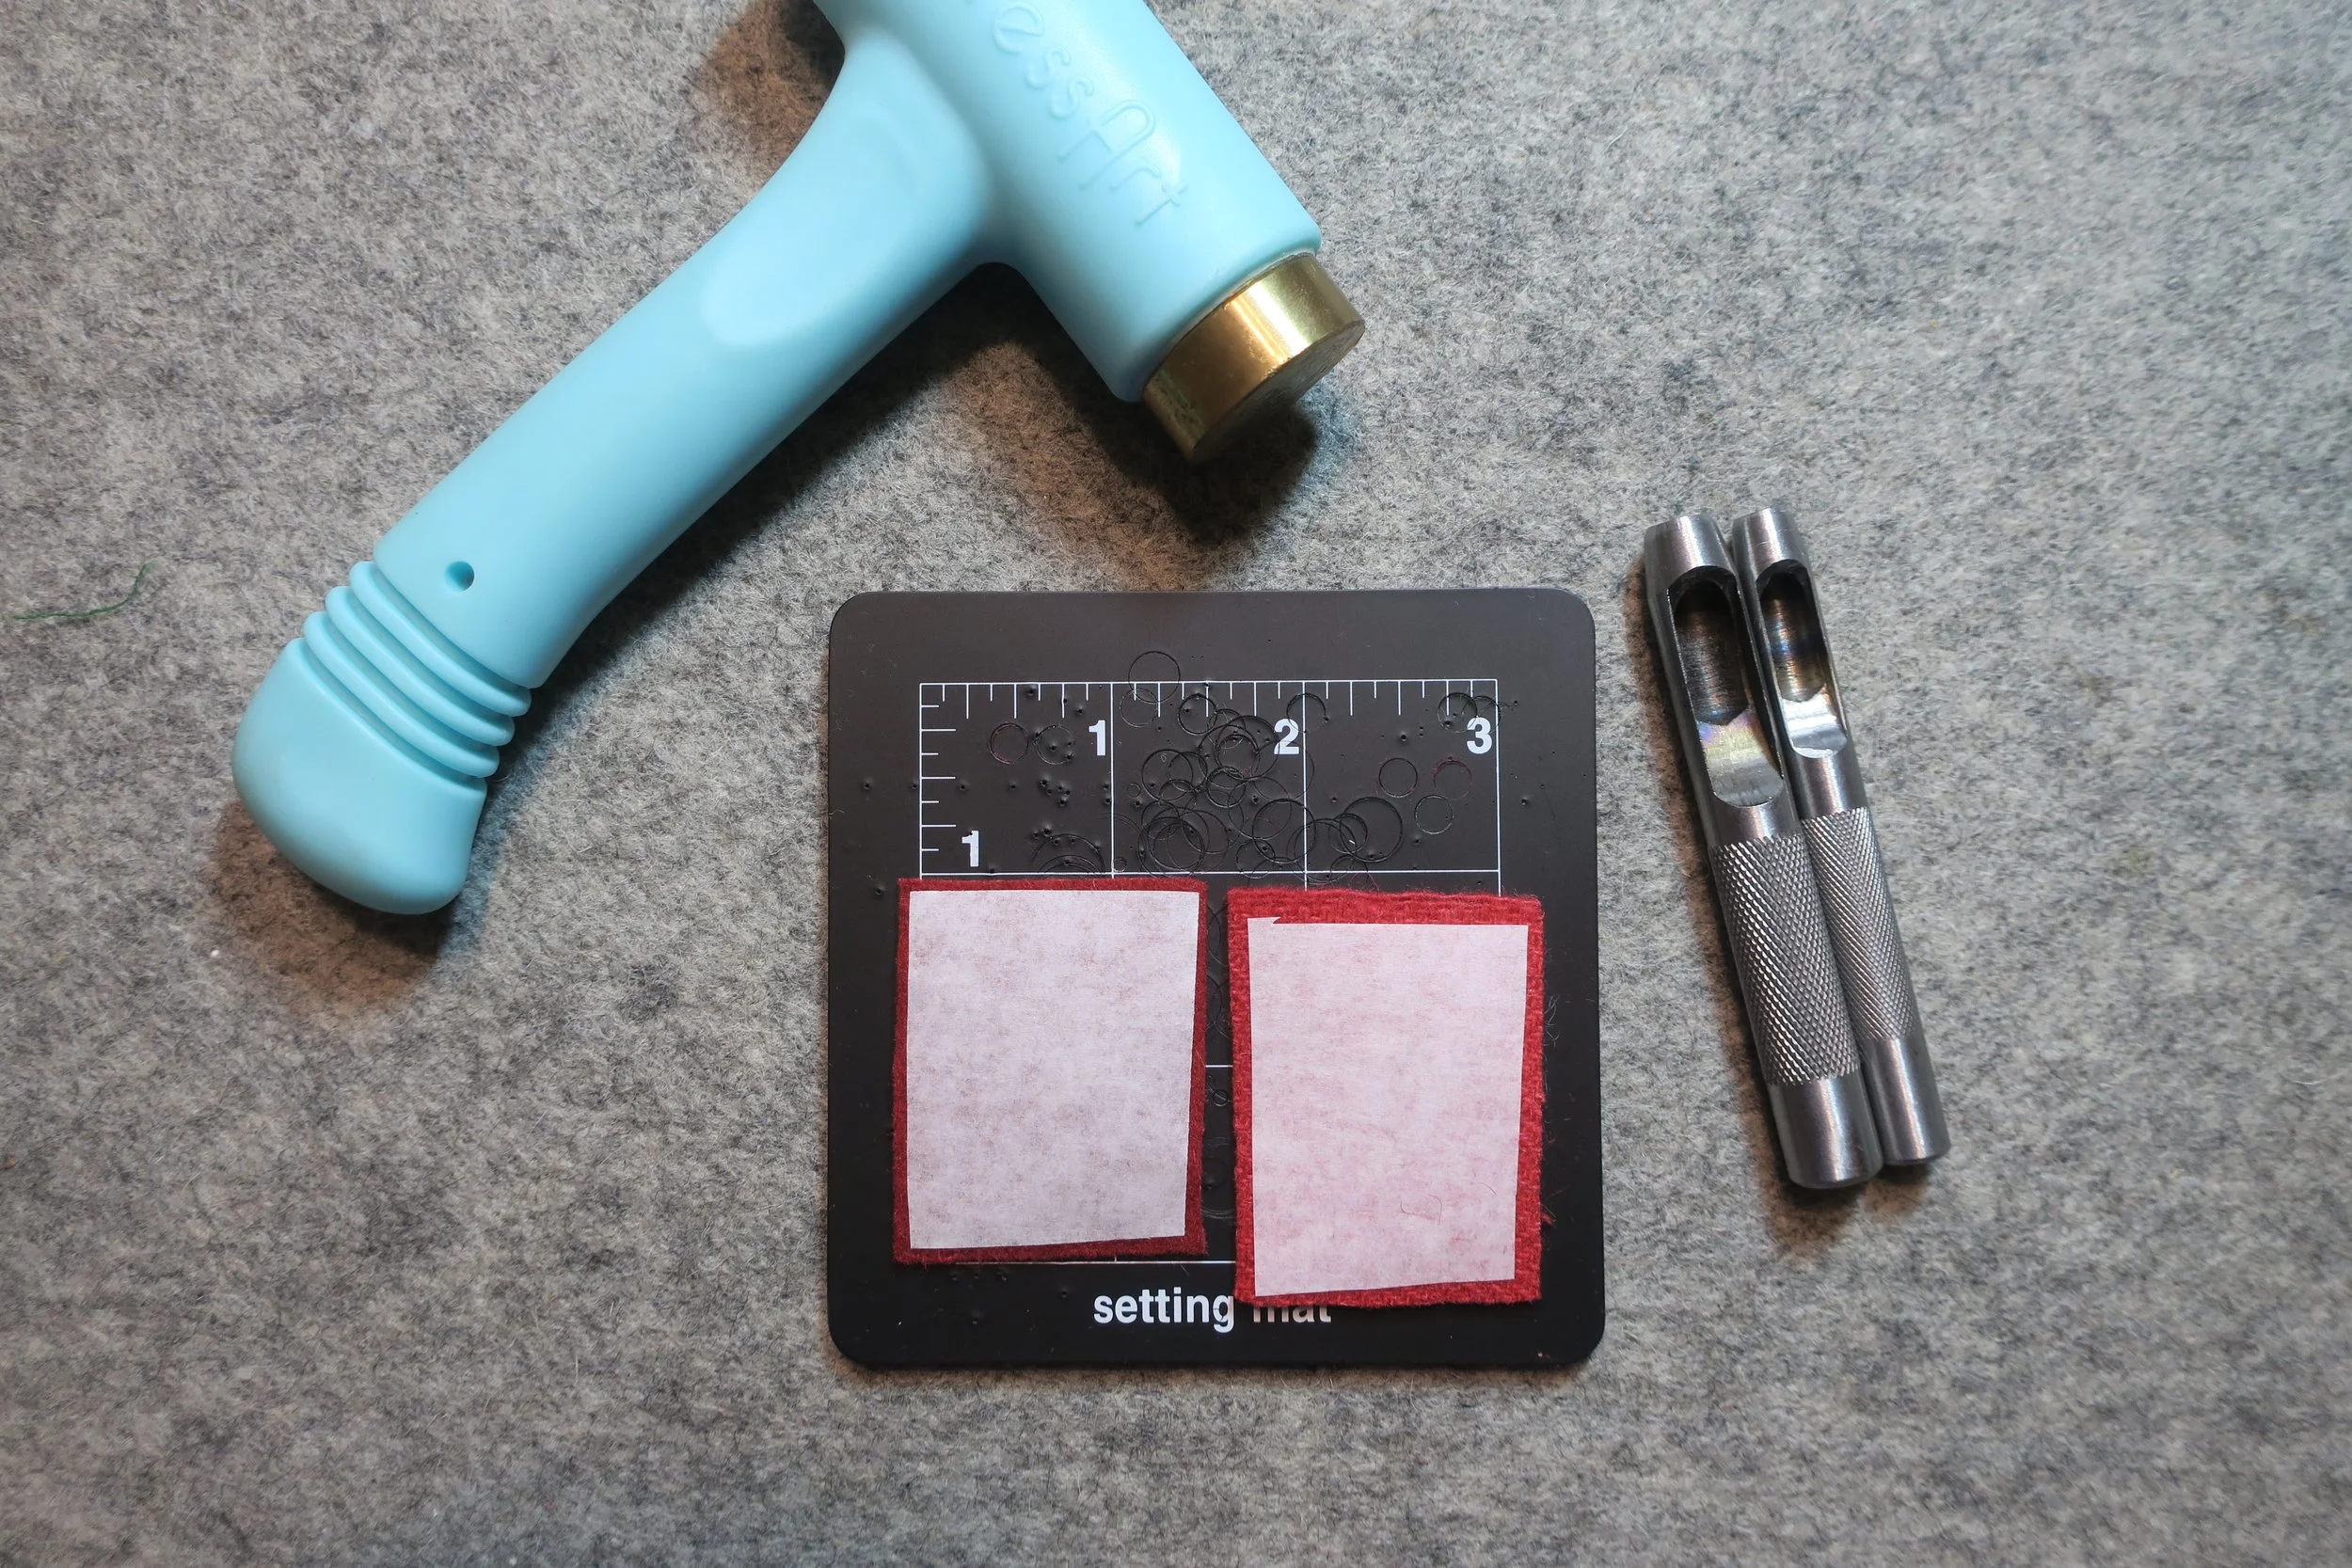
1/4” or 5/16” leather punch - optional ( I use this when I have to cut out several small circles of wool.) Owden Leather Punch Set
Instructions
Trace background oval onto freezer paper. You will only need to make one pattern because it can be reused several times.
2. Cut out the background pattern leaving a small border (approximately 1/8in), and then iron it onto the wool.
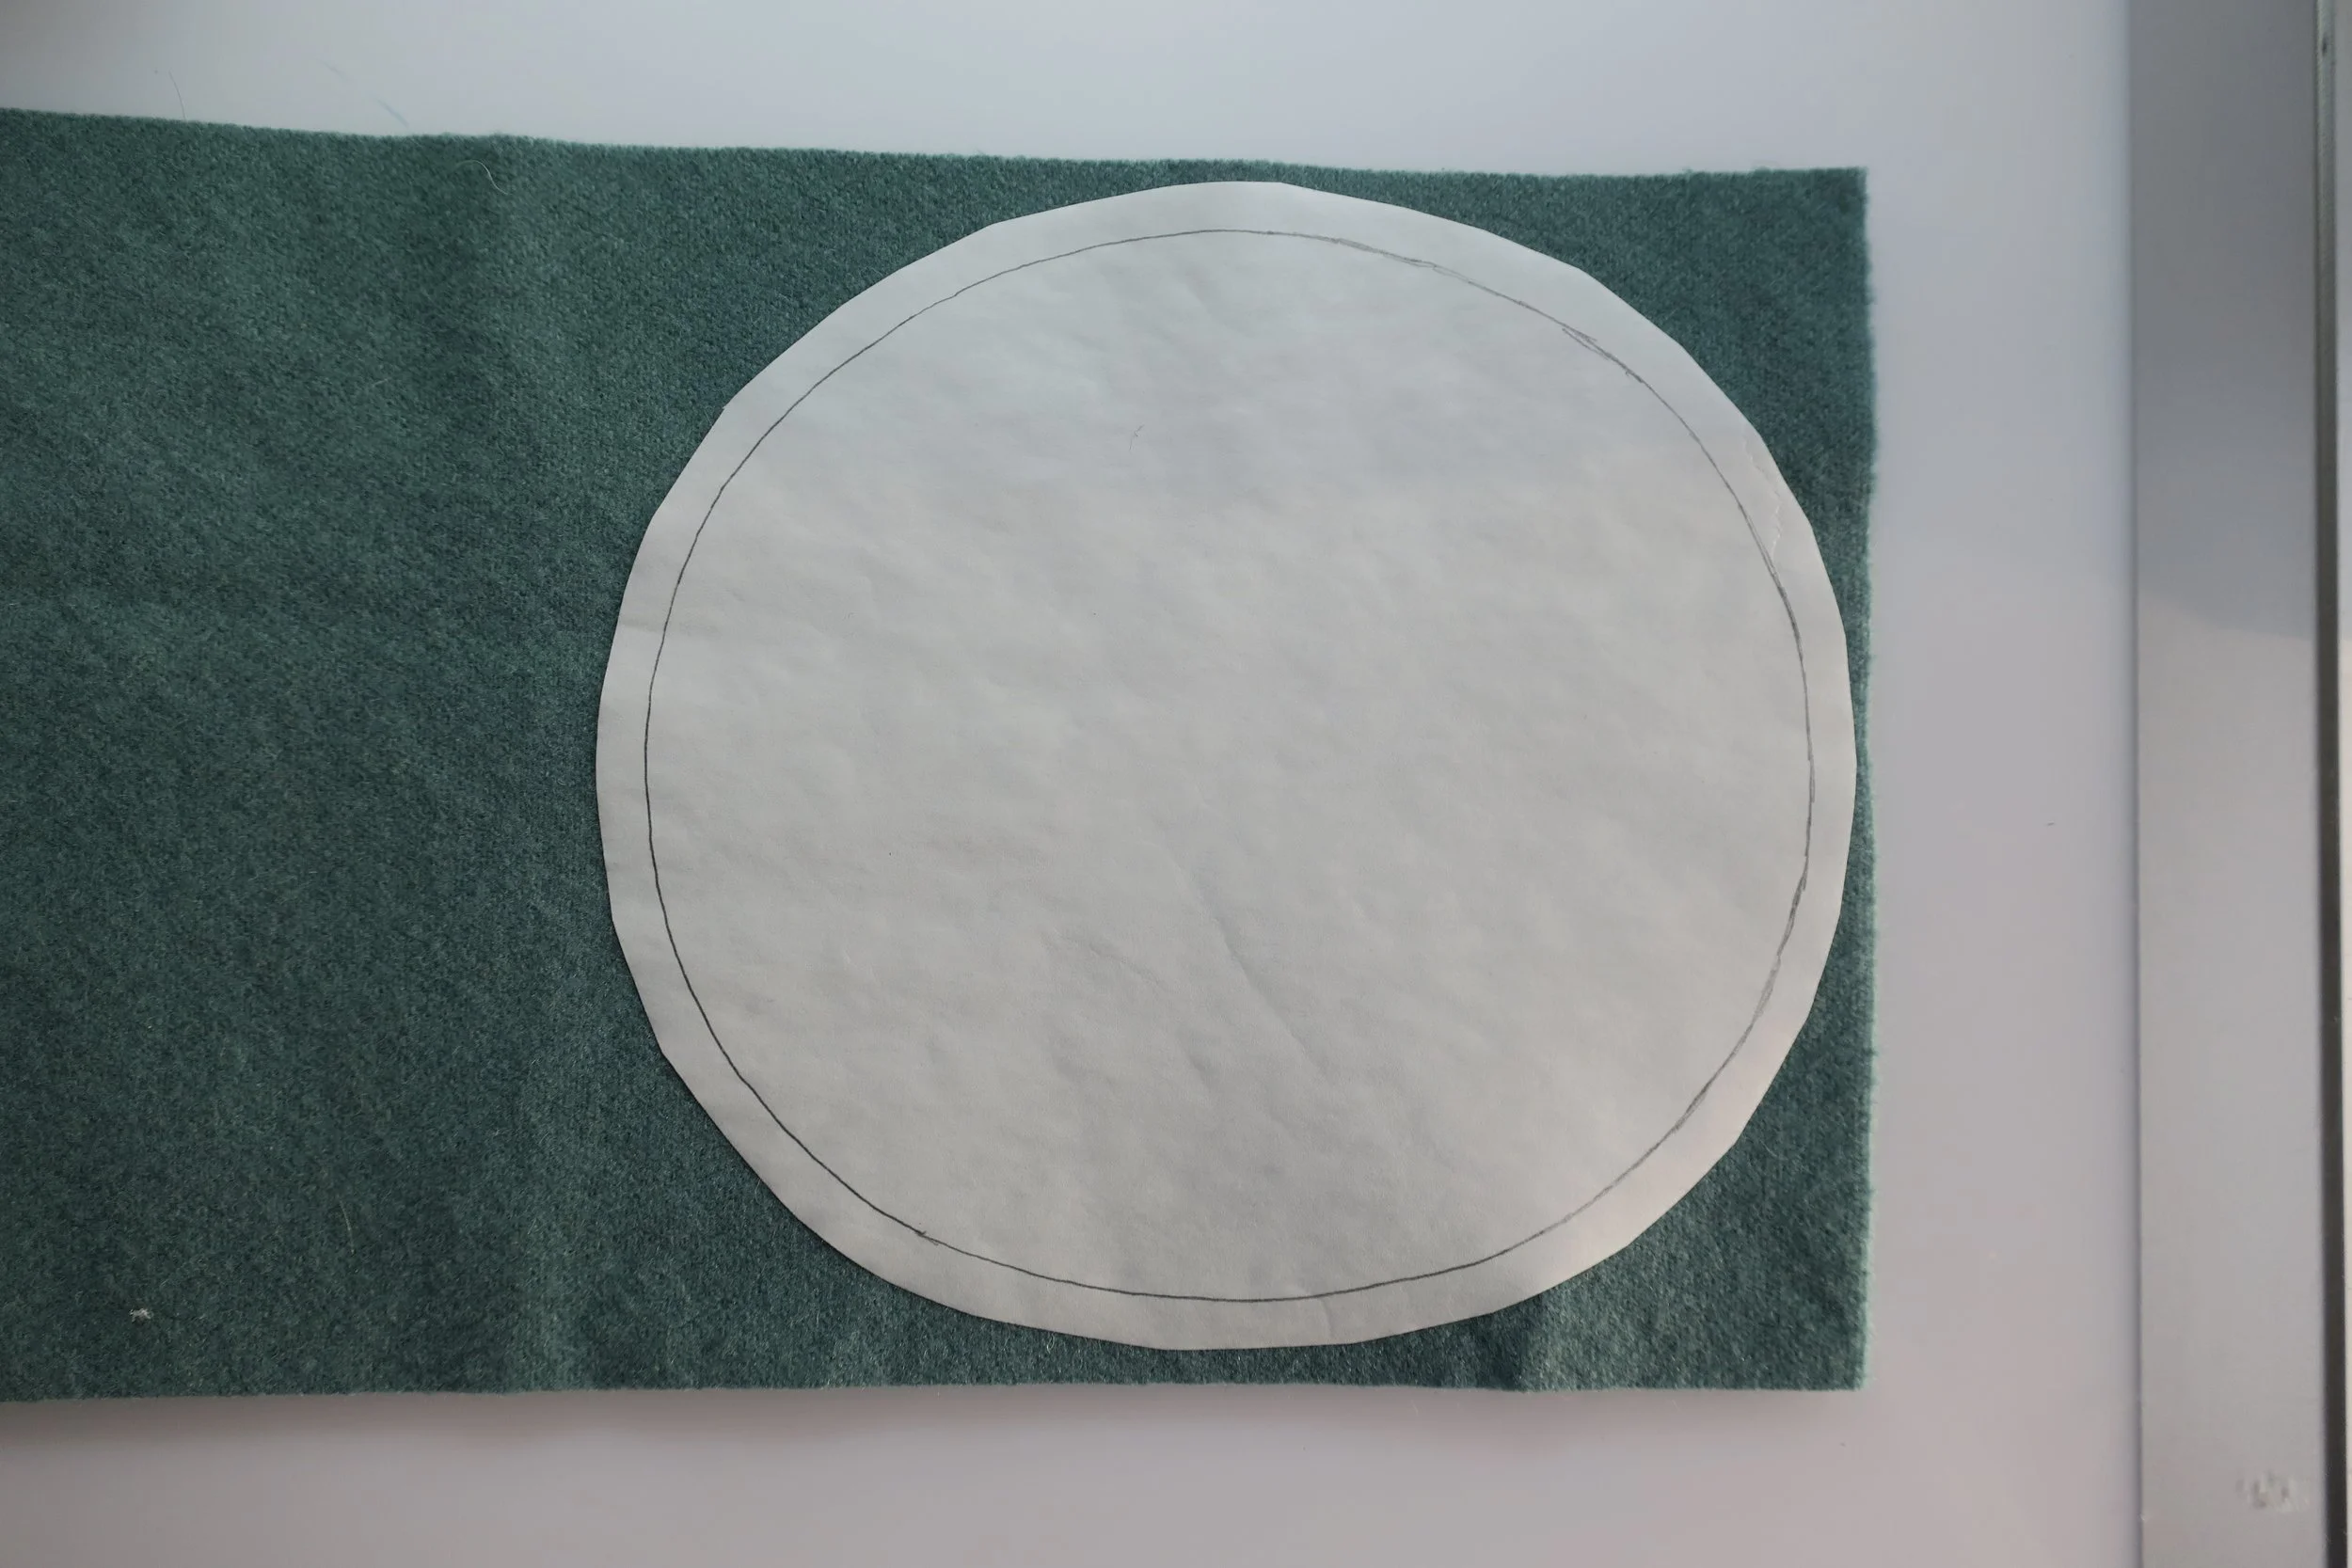
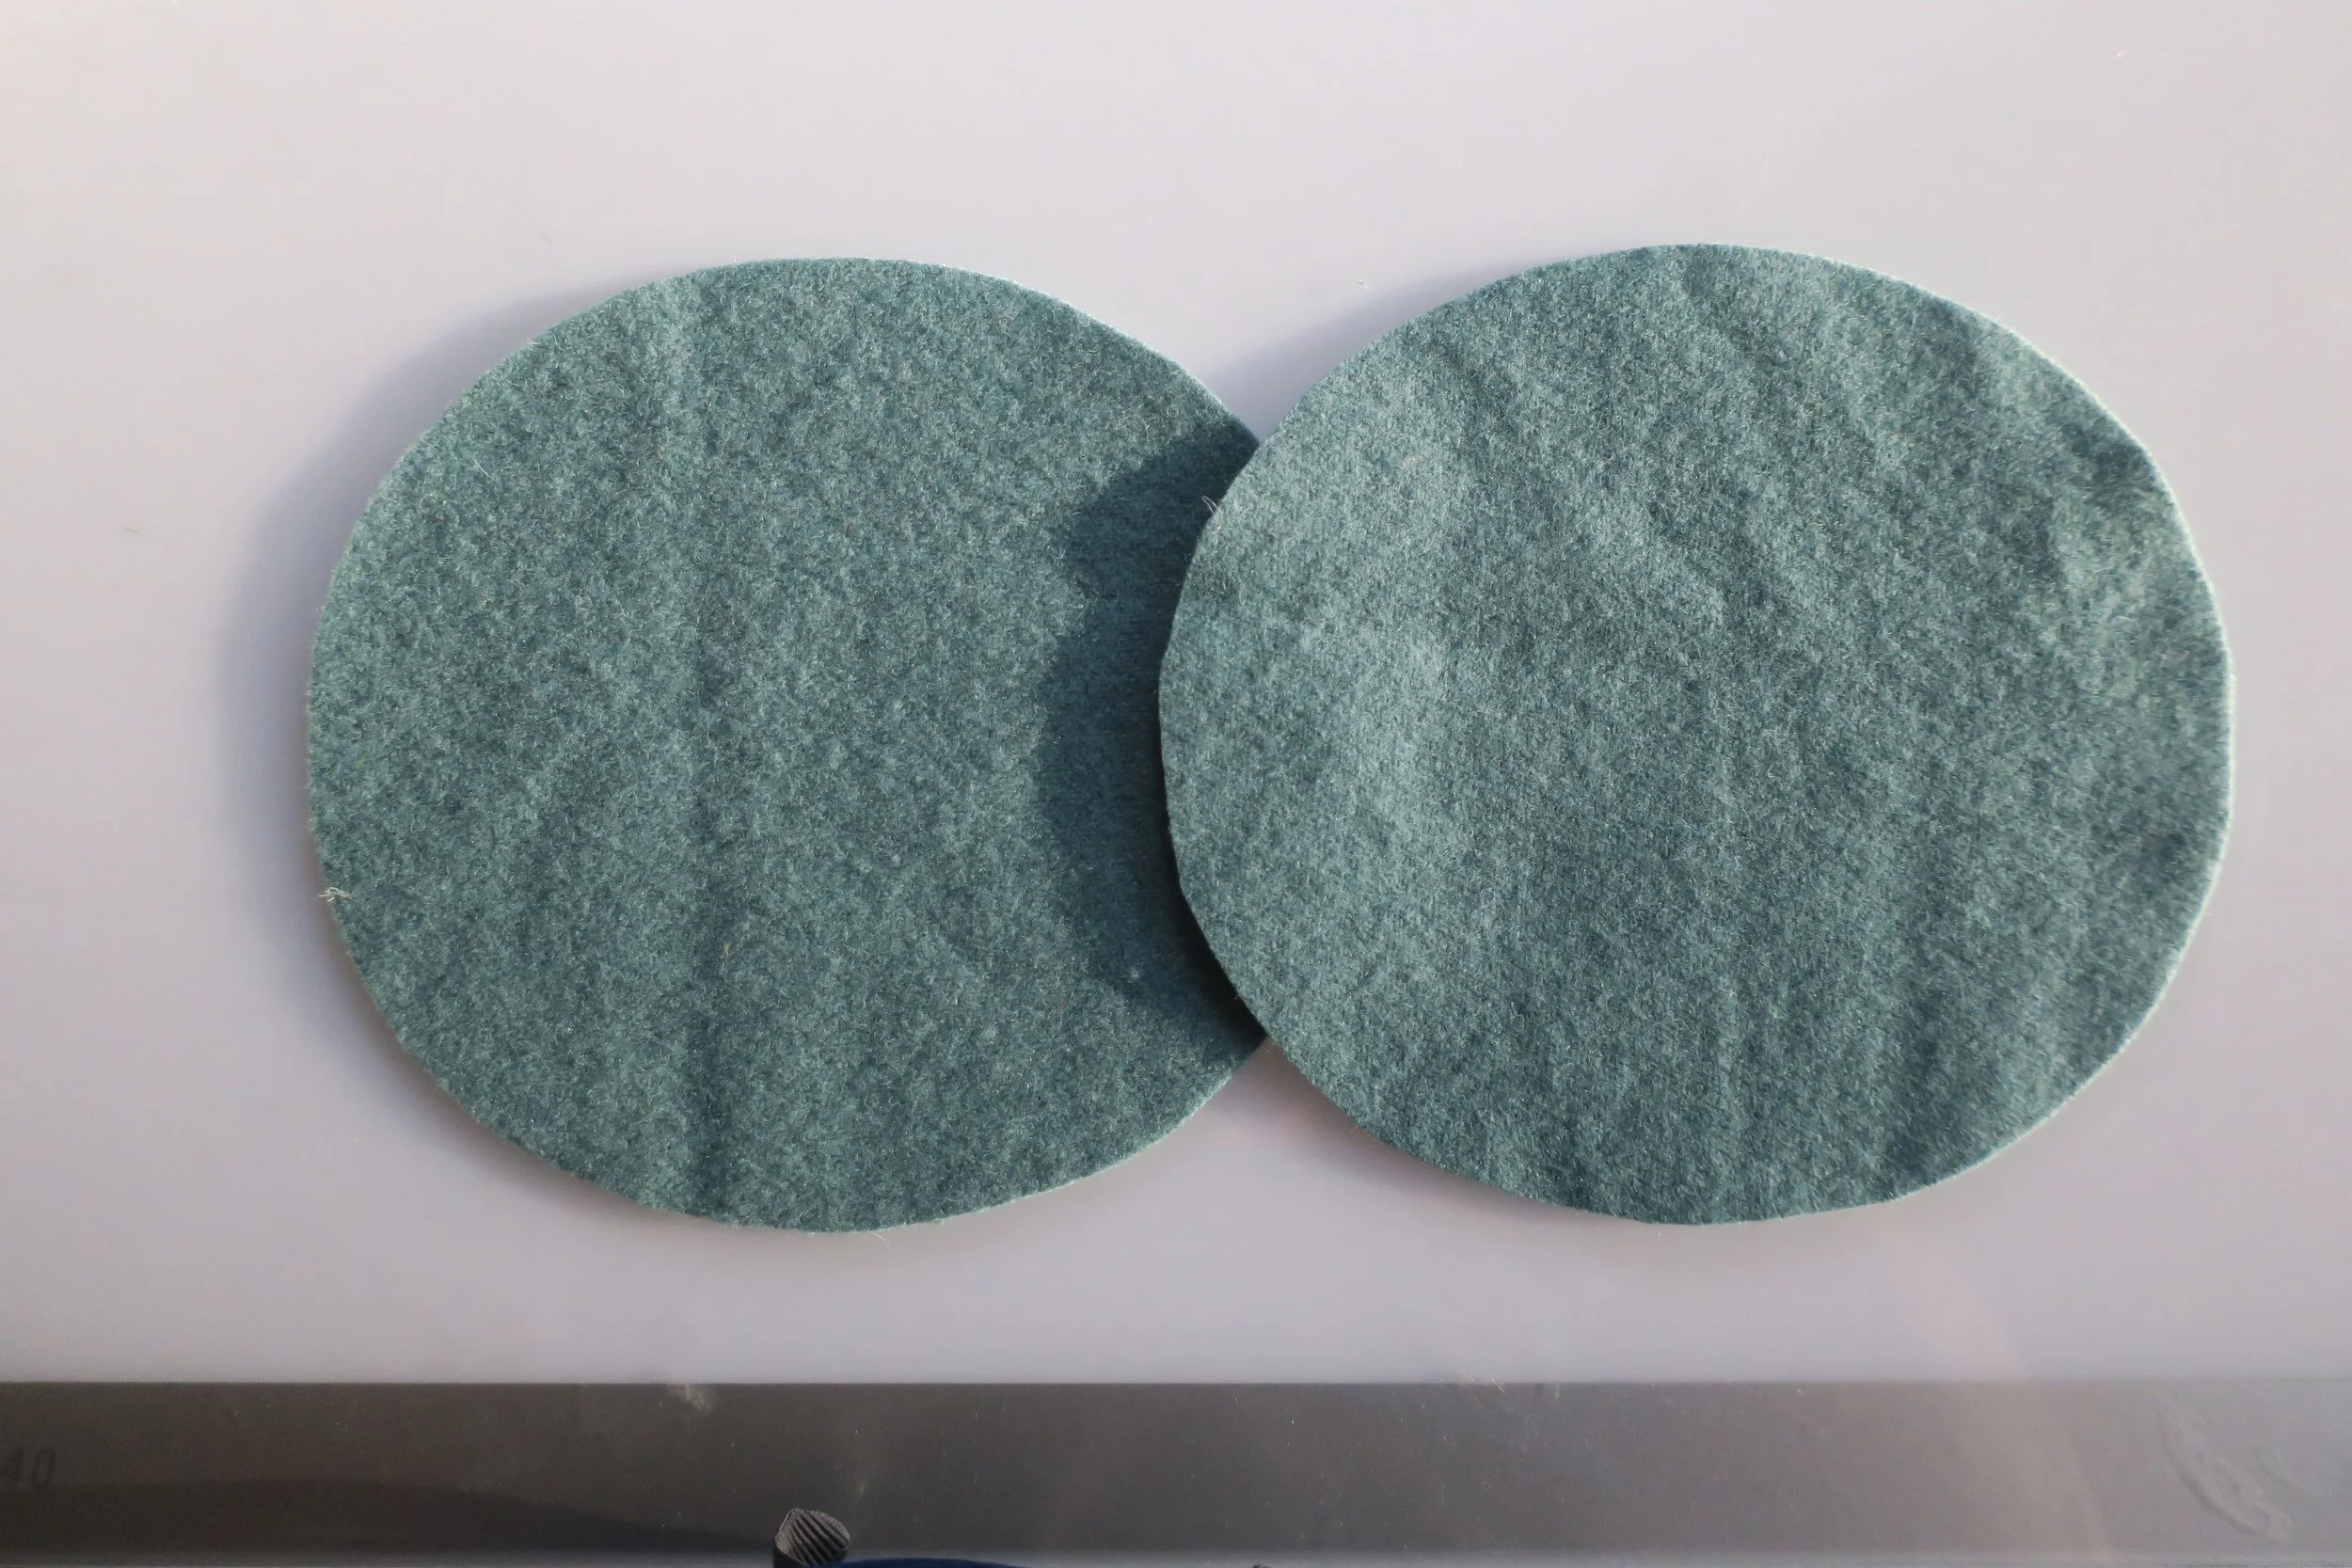
3. Cut out the wool background oval along the drawn line. Remove the freezer paper.
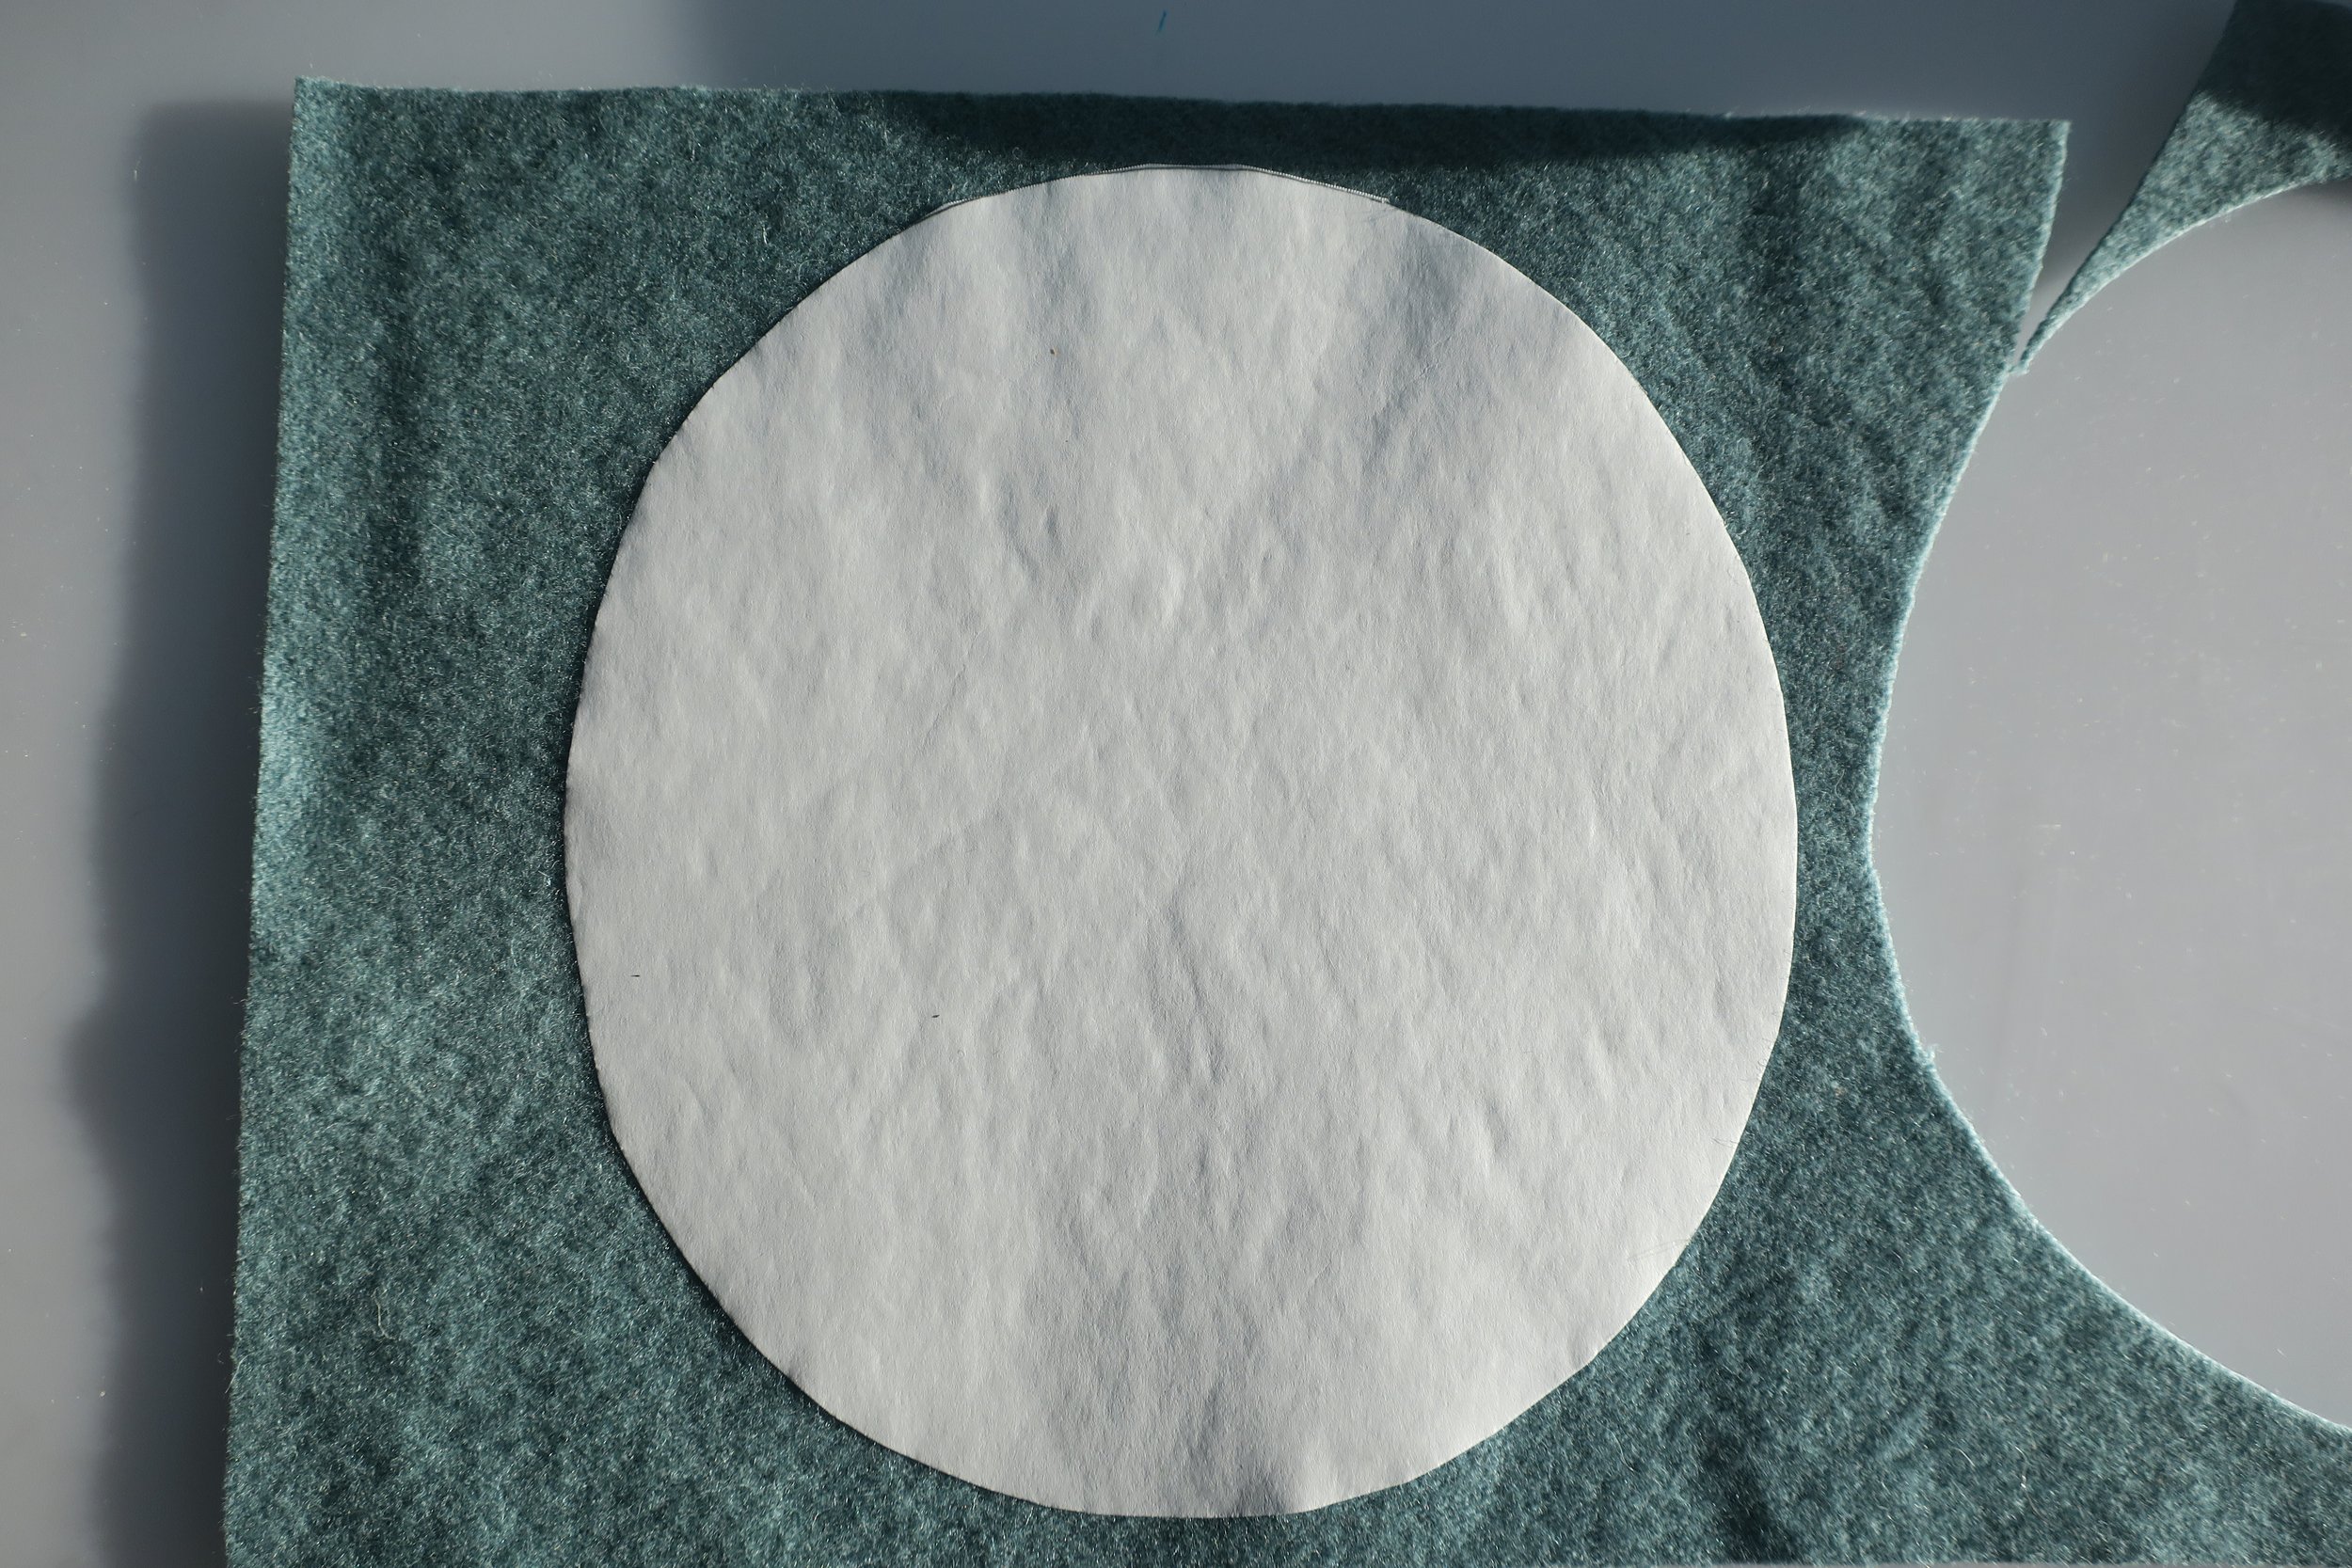
4. Iron the freezer paper pattern onto the remaining section of background wool, and then cut out.
5. Trace the applique patterns onto fusible web. The images are reversed for use with fusible web, so there is no need to reverse them. Be sure to mark your pattern pieces (leaves) so that you don’t mix them up. I didn’t mark my Snicker’s the cat leaves with a “C”, so I had a tough time determining which leaves go where.
I noticed that I had traced Winston’s head applique backwards. Oops! Apparently I failed to draw the pattern in reverse on the pattern page. It’s correct on your pattern, so all is good! This is why I make several samples using my instructions, so I can work out all the errors.
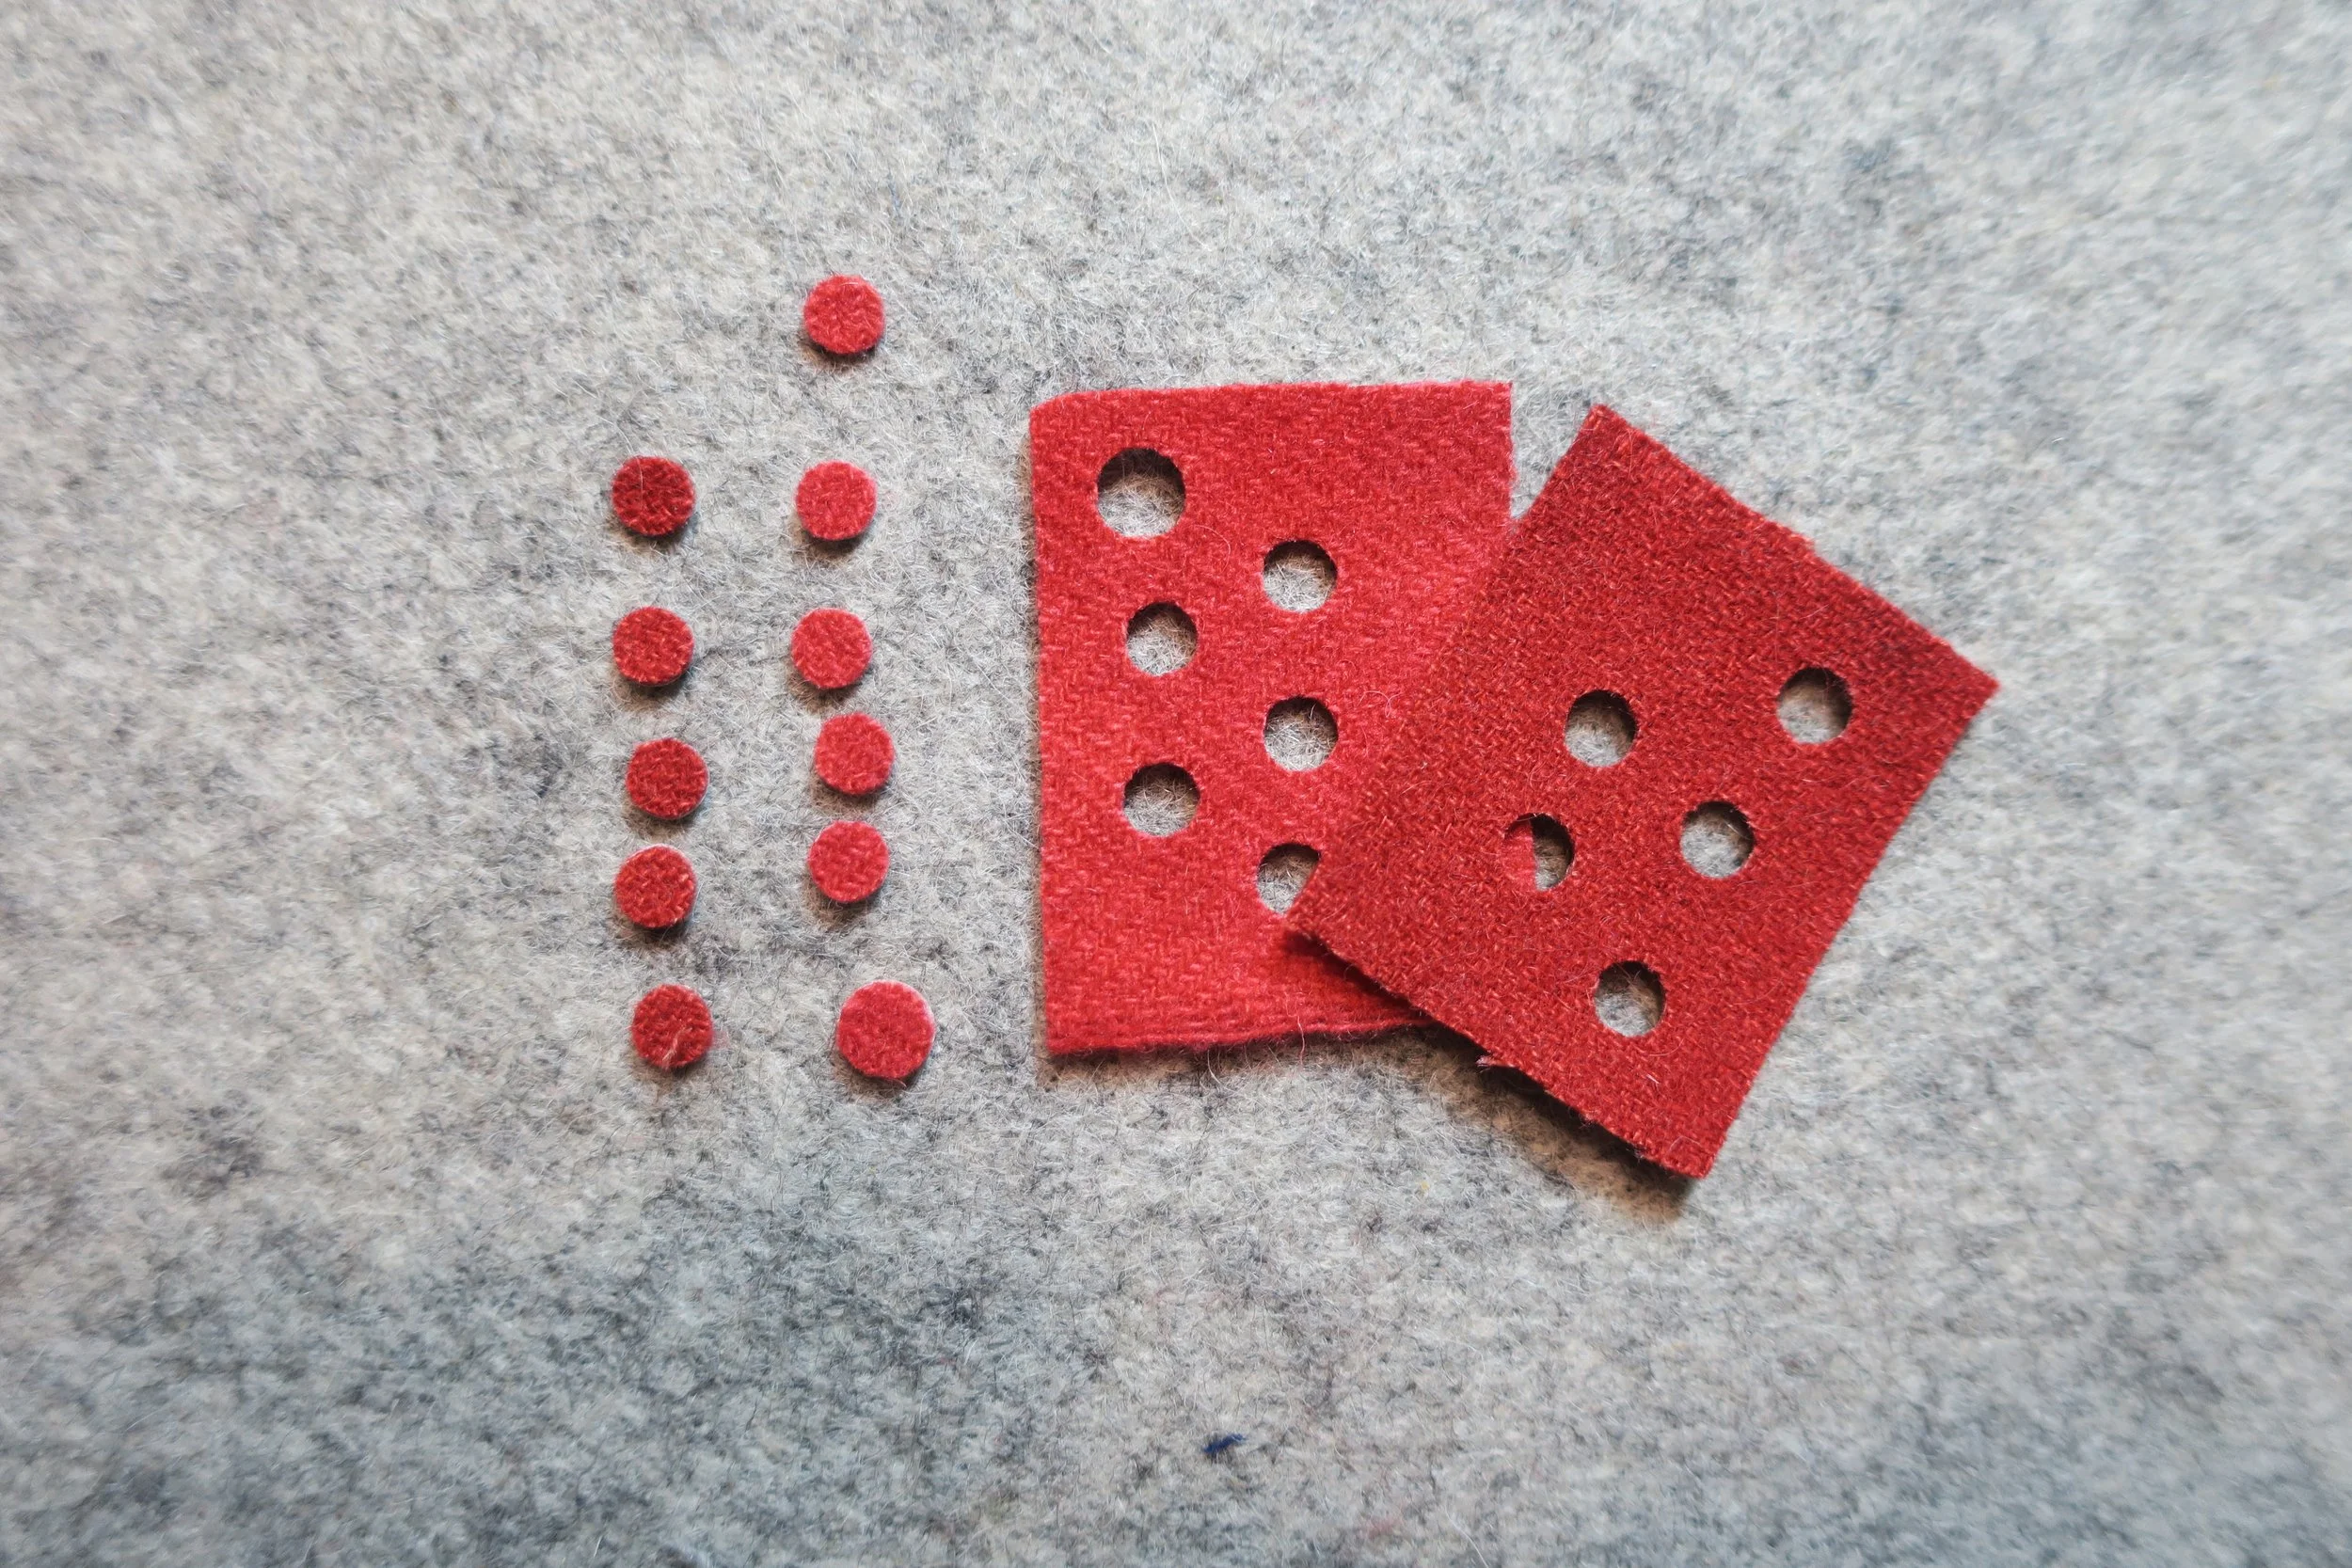
6. Cut out the fusible patterns leaving a small border around each, and then iron them onto designated wools. If you are using a punch to cut out your berries, just iron a piece of fusible onto each of the berry wools. If you are cutting out your berries with scissors, cut them inside the drawn lines. When you iron them onto your background they will flatten, making them slightly larger. Why is this important? Well, the berries need to fit into a narrow space along the holly stem and between the larger image and the outer border. If your berries are too large, they will crowd the space.

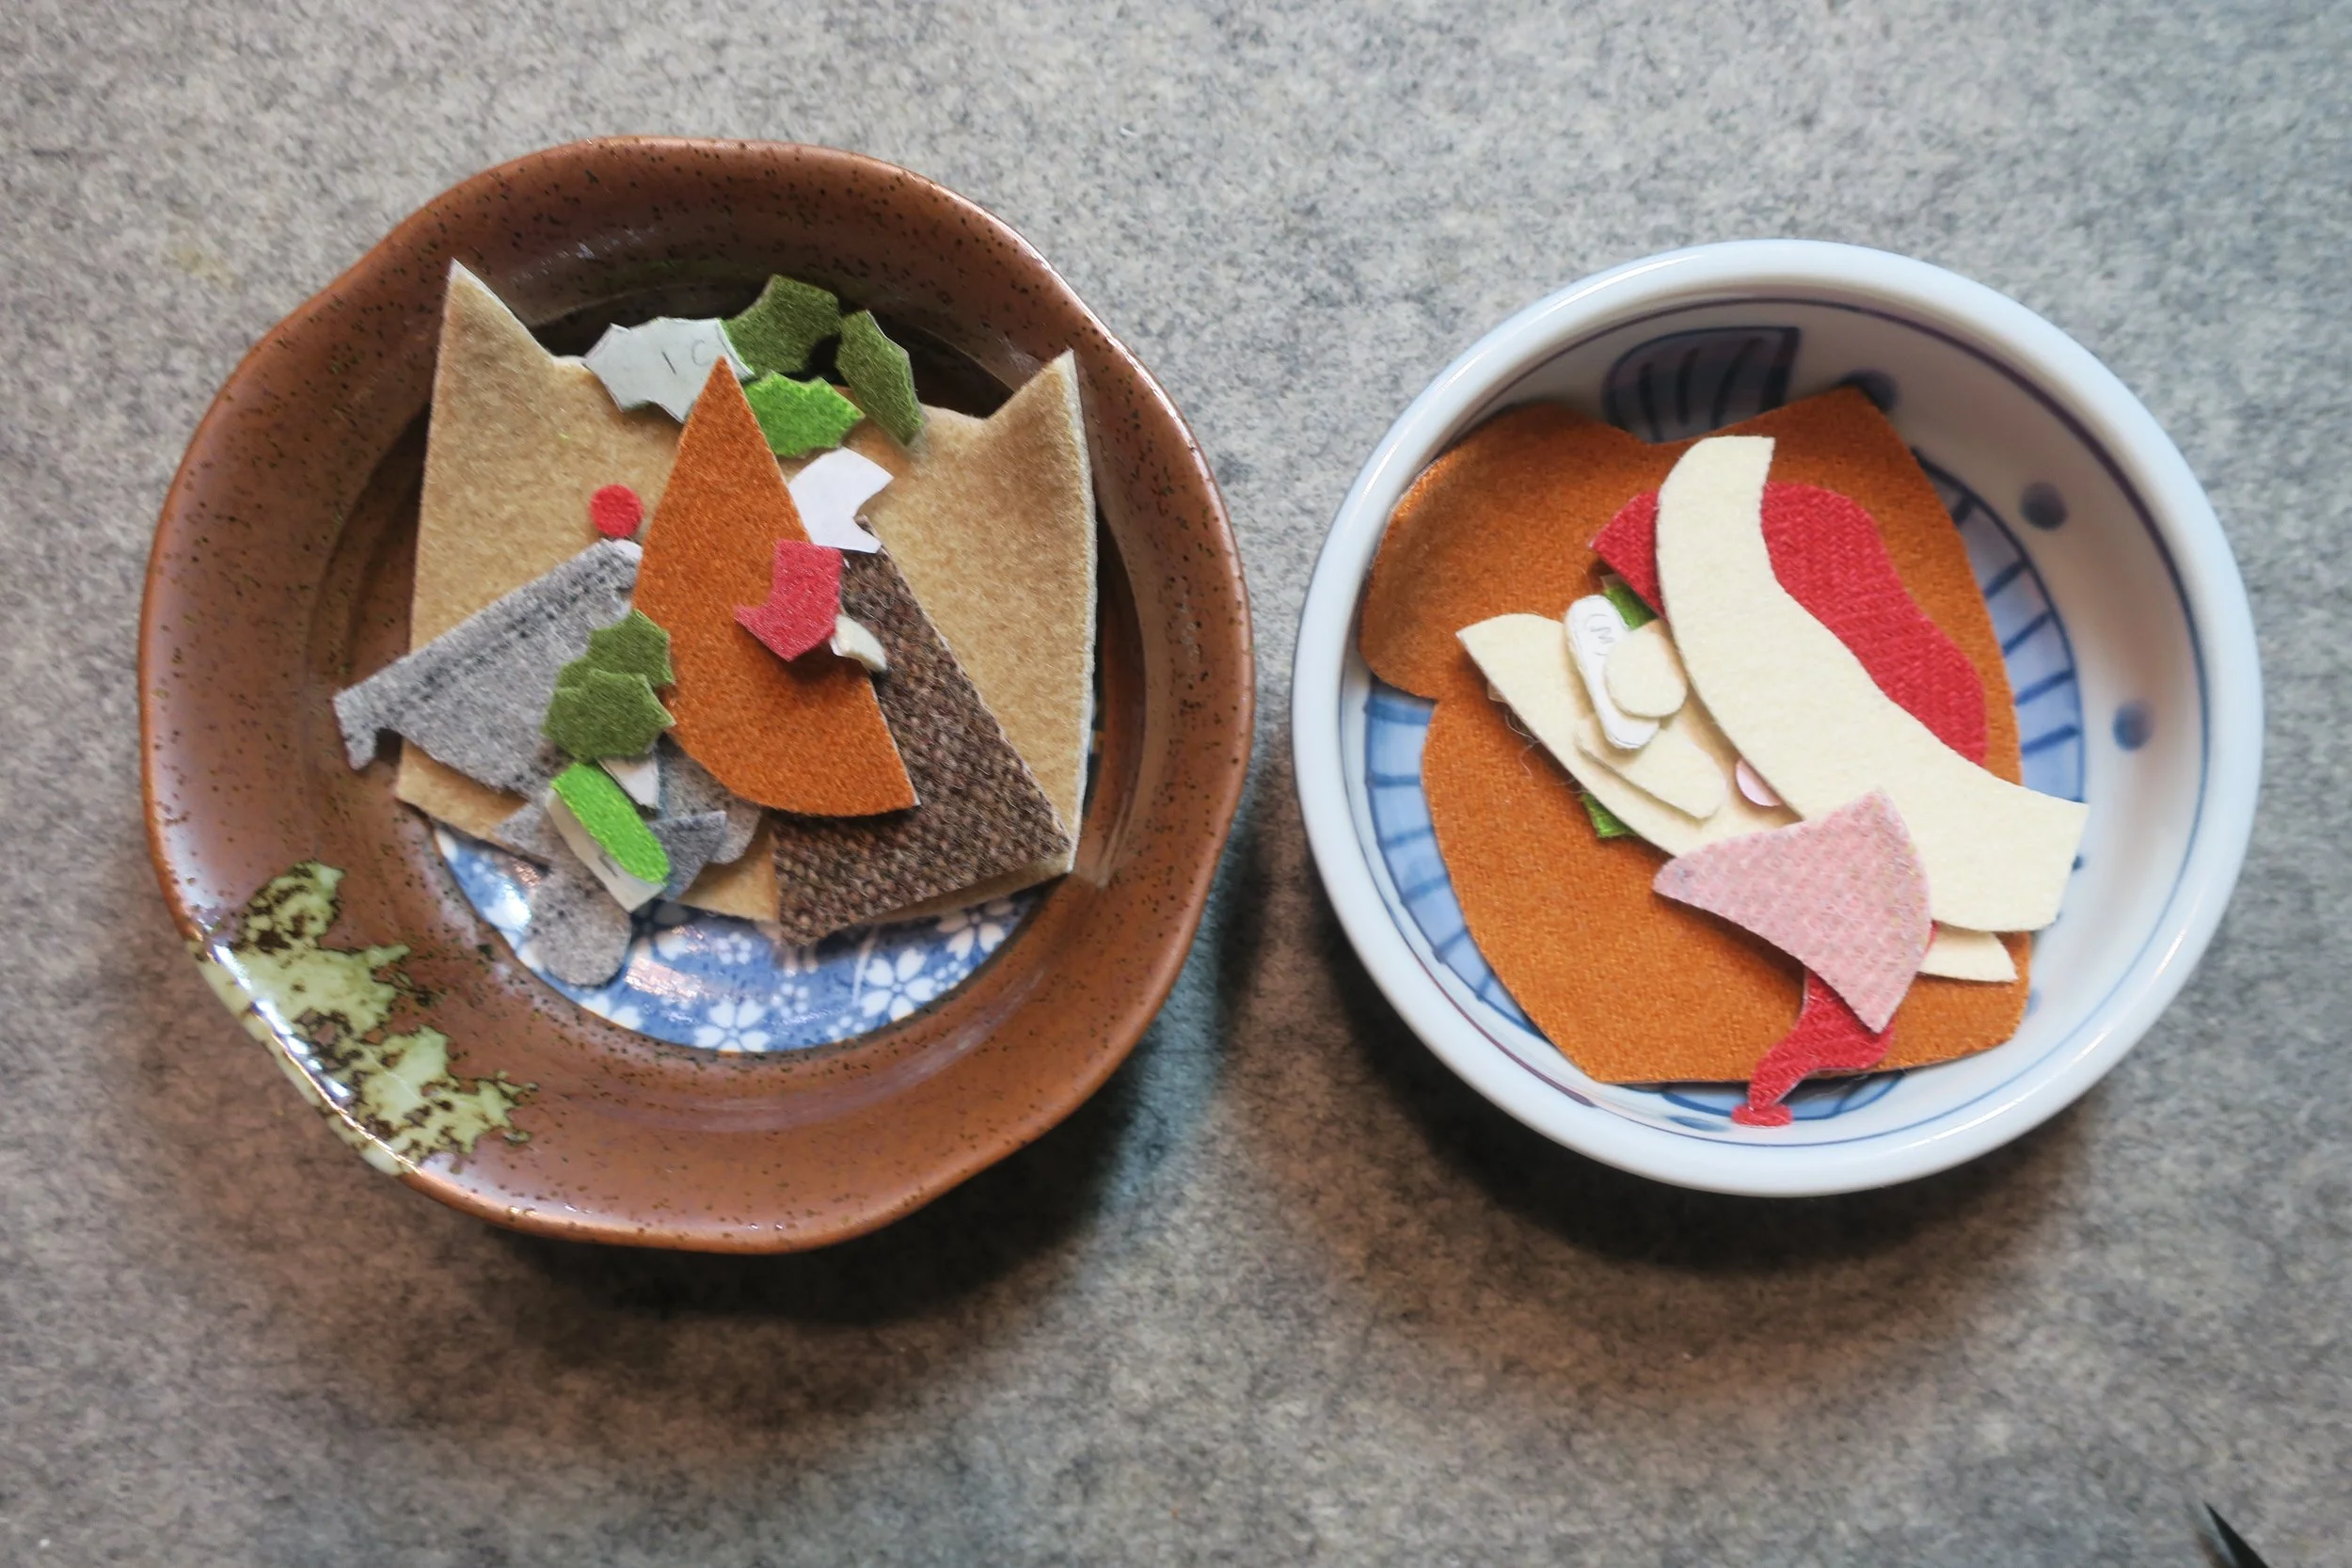
7. Cut out wool applique pieces along the drawn lines. There are a lot of small pieces, so I put them in a small bowl, one for Snickers and one for Winston.
8. This is my punch set up. I cut a piece of fusible slightly smaller than the wool.
I punch the circles wool side up.
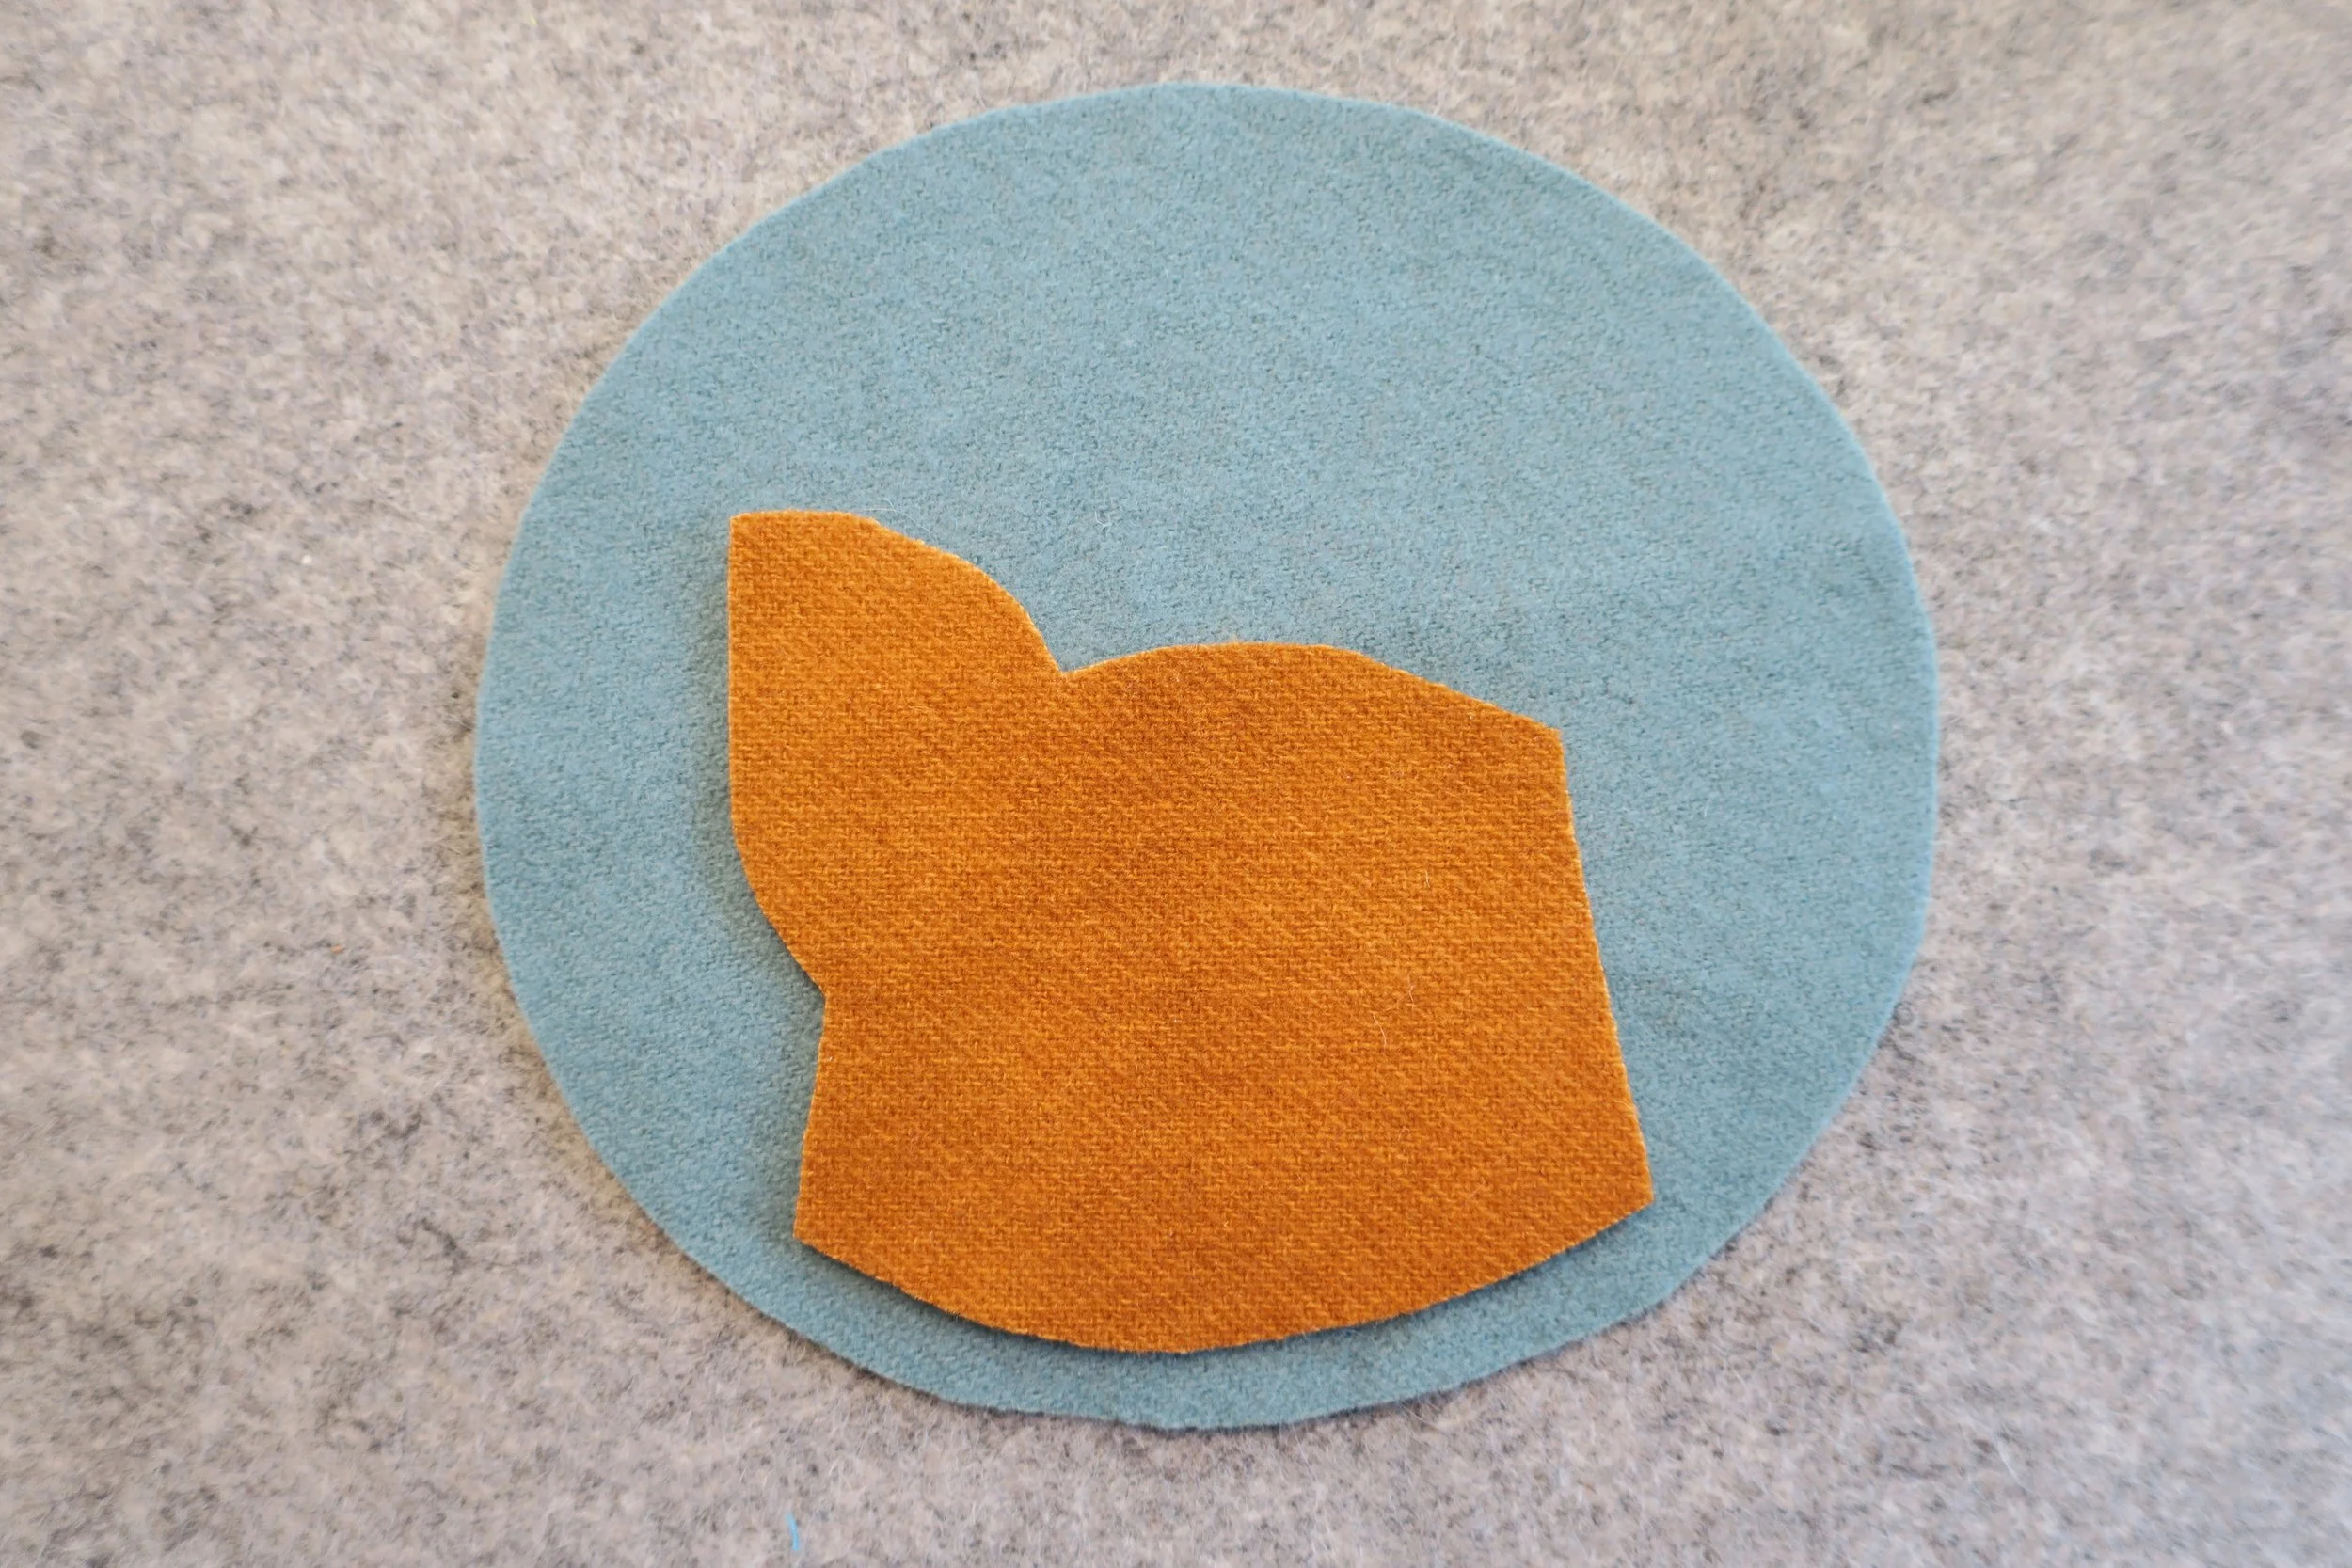
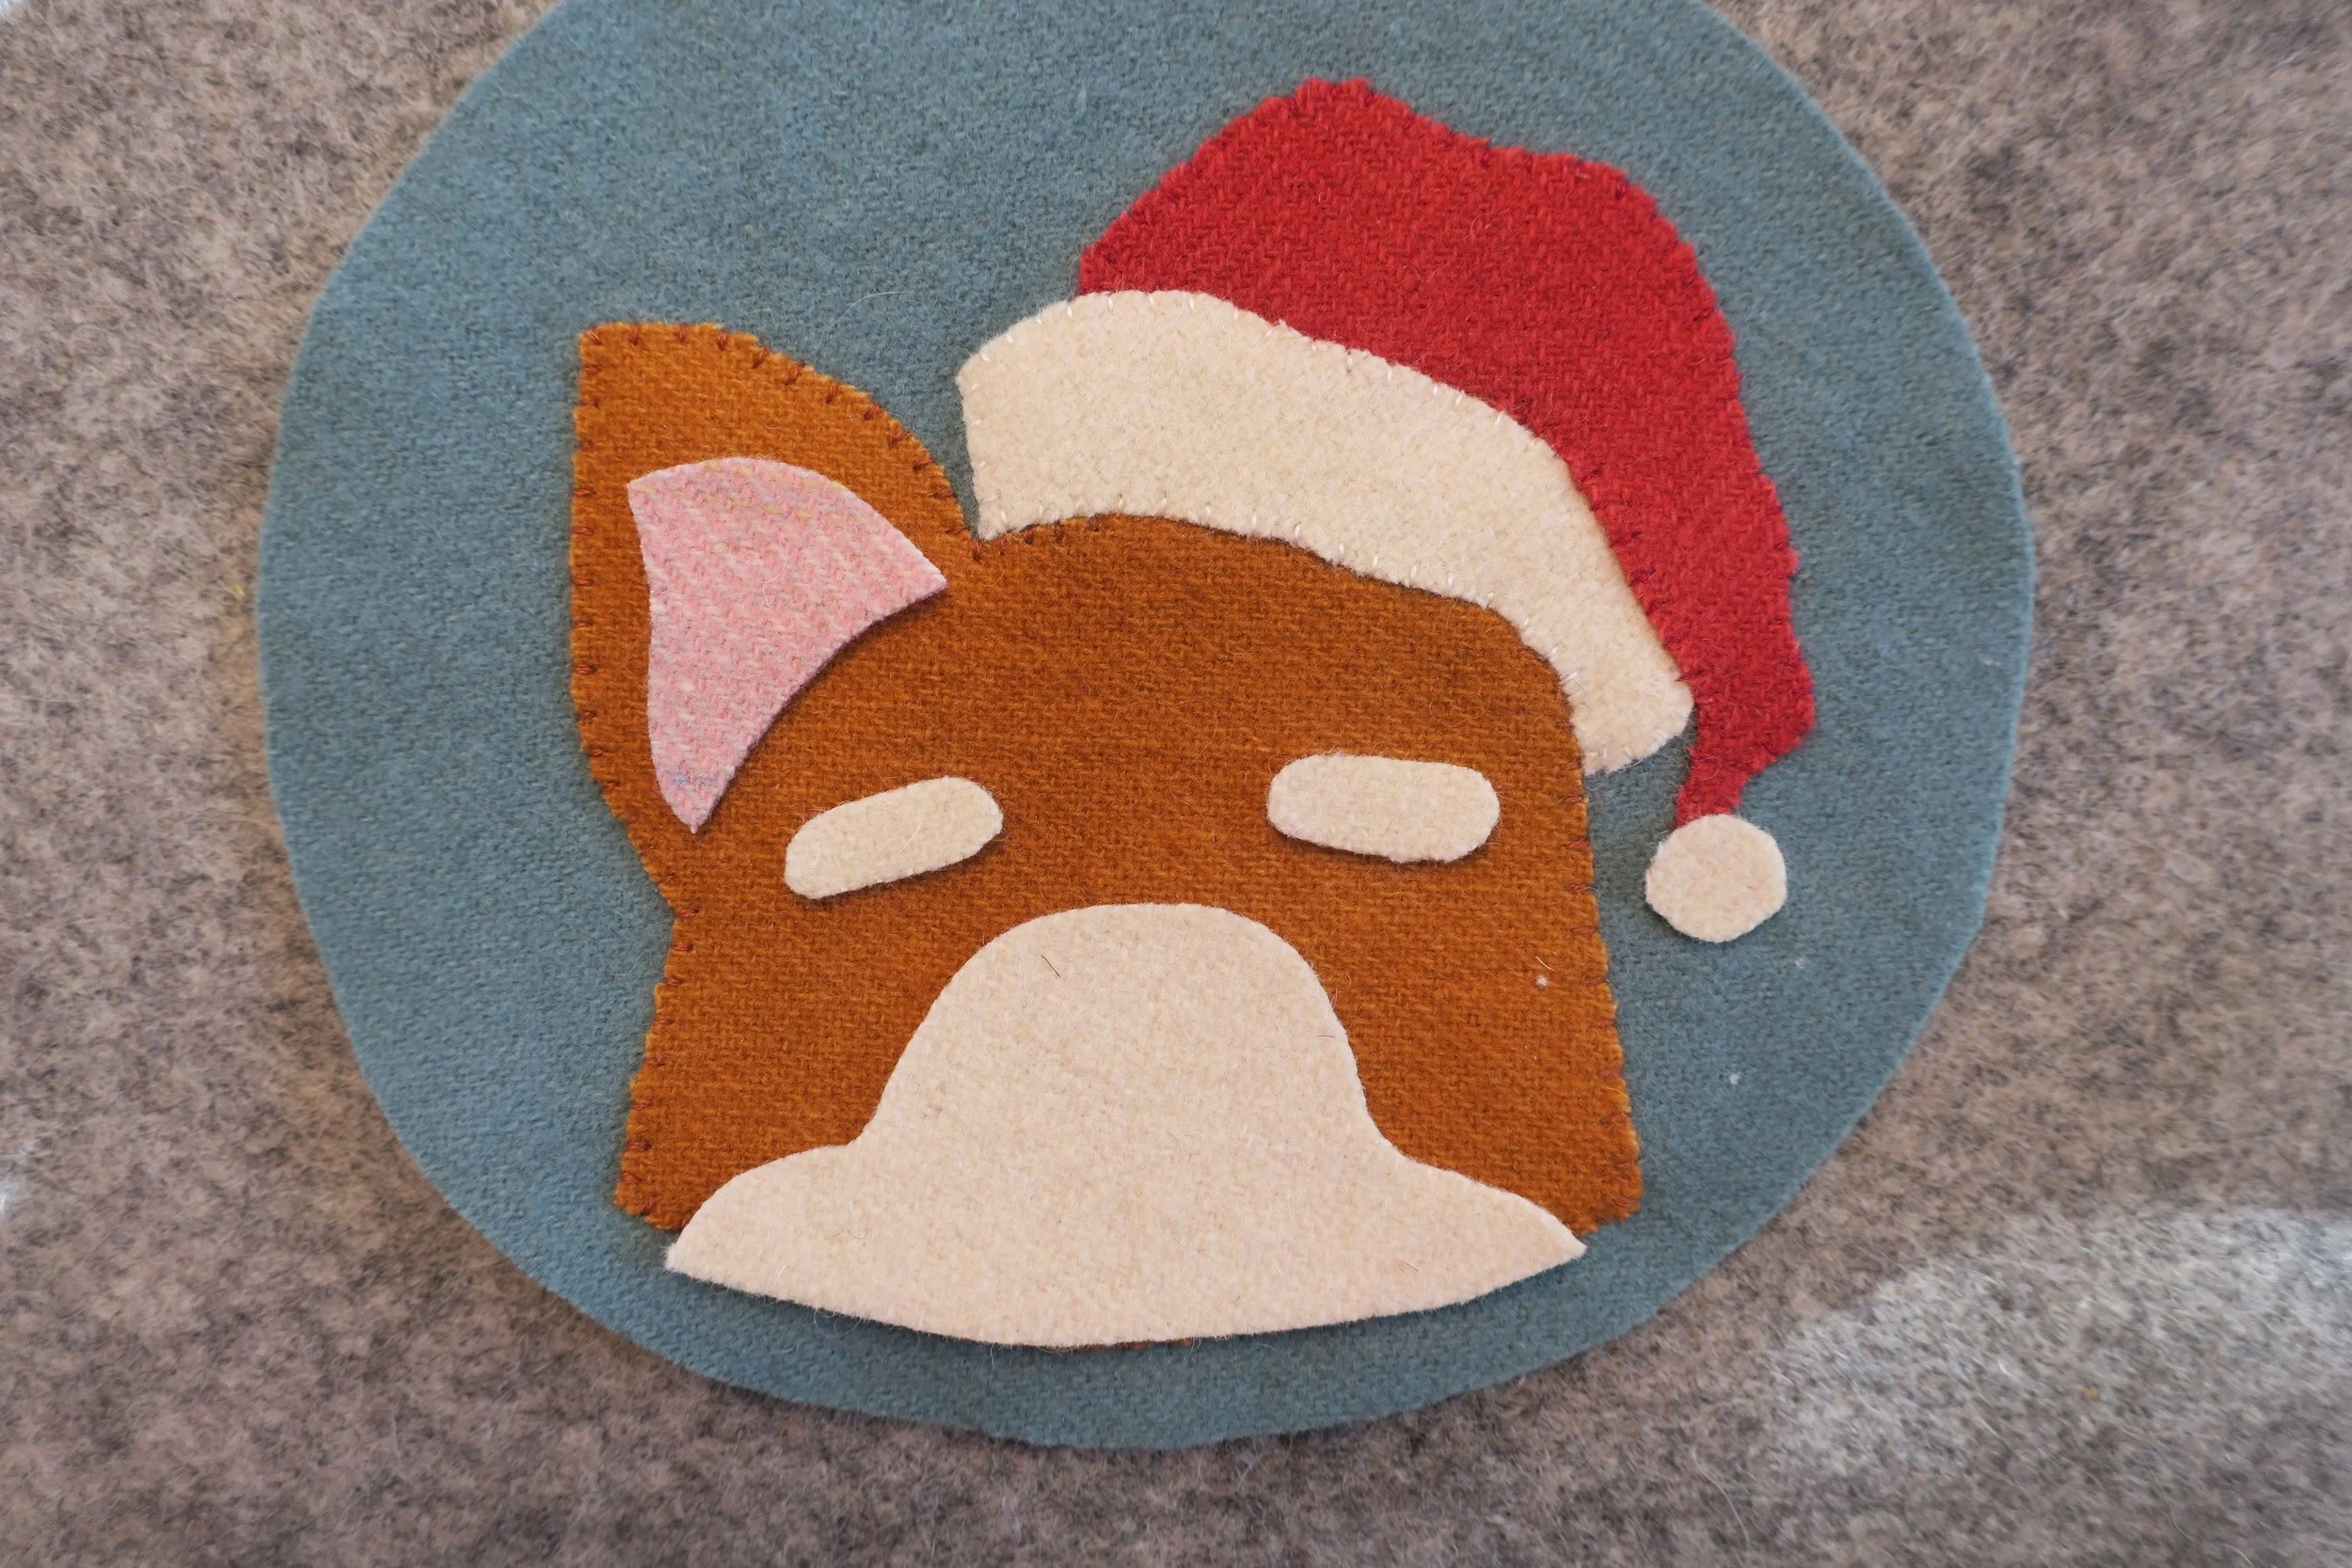
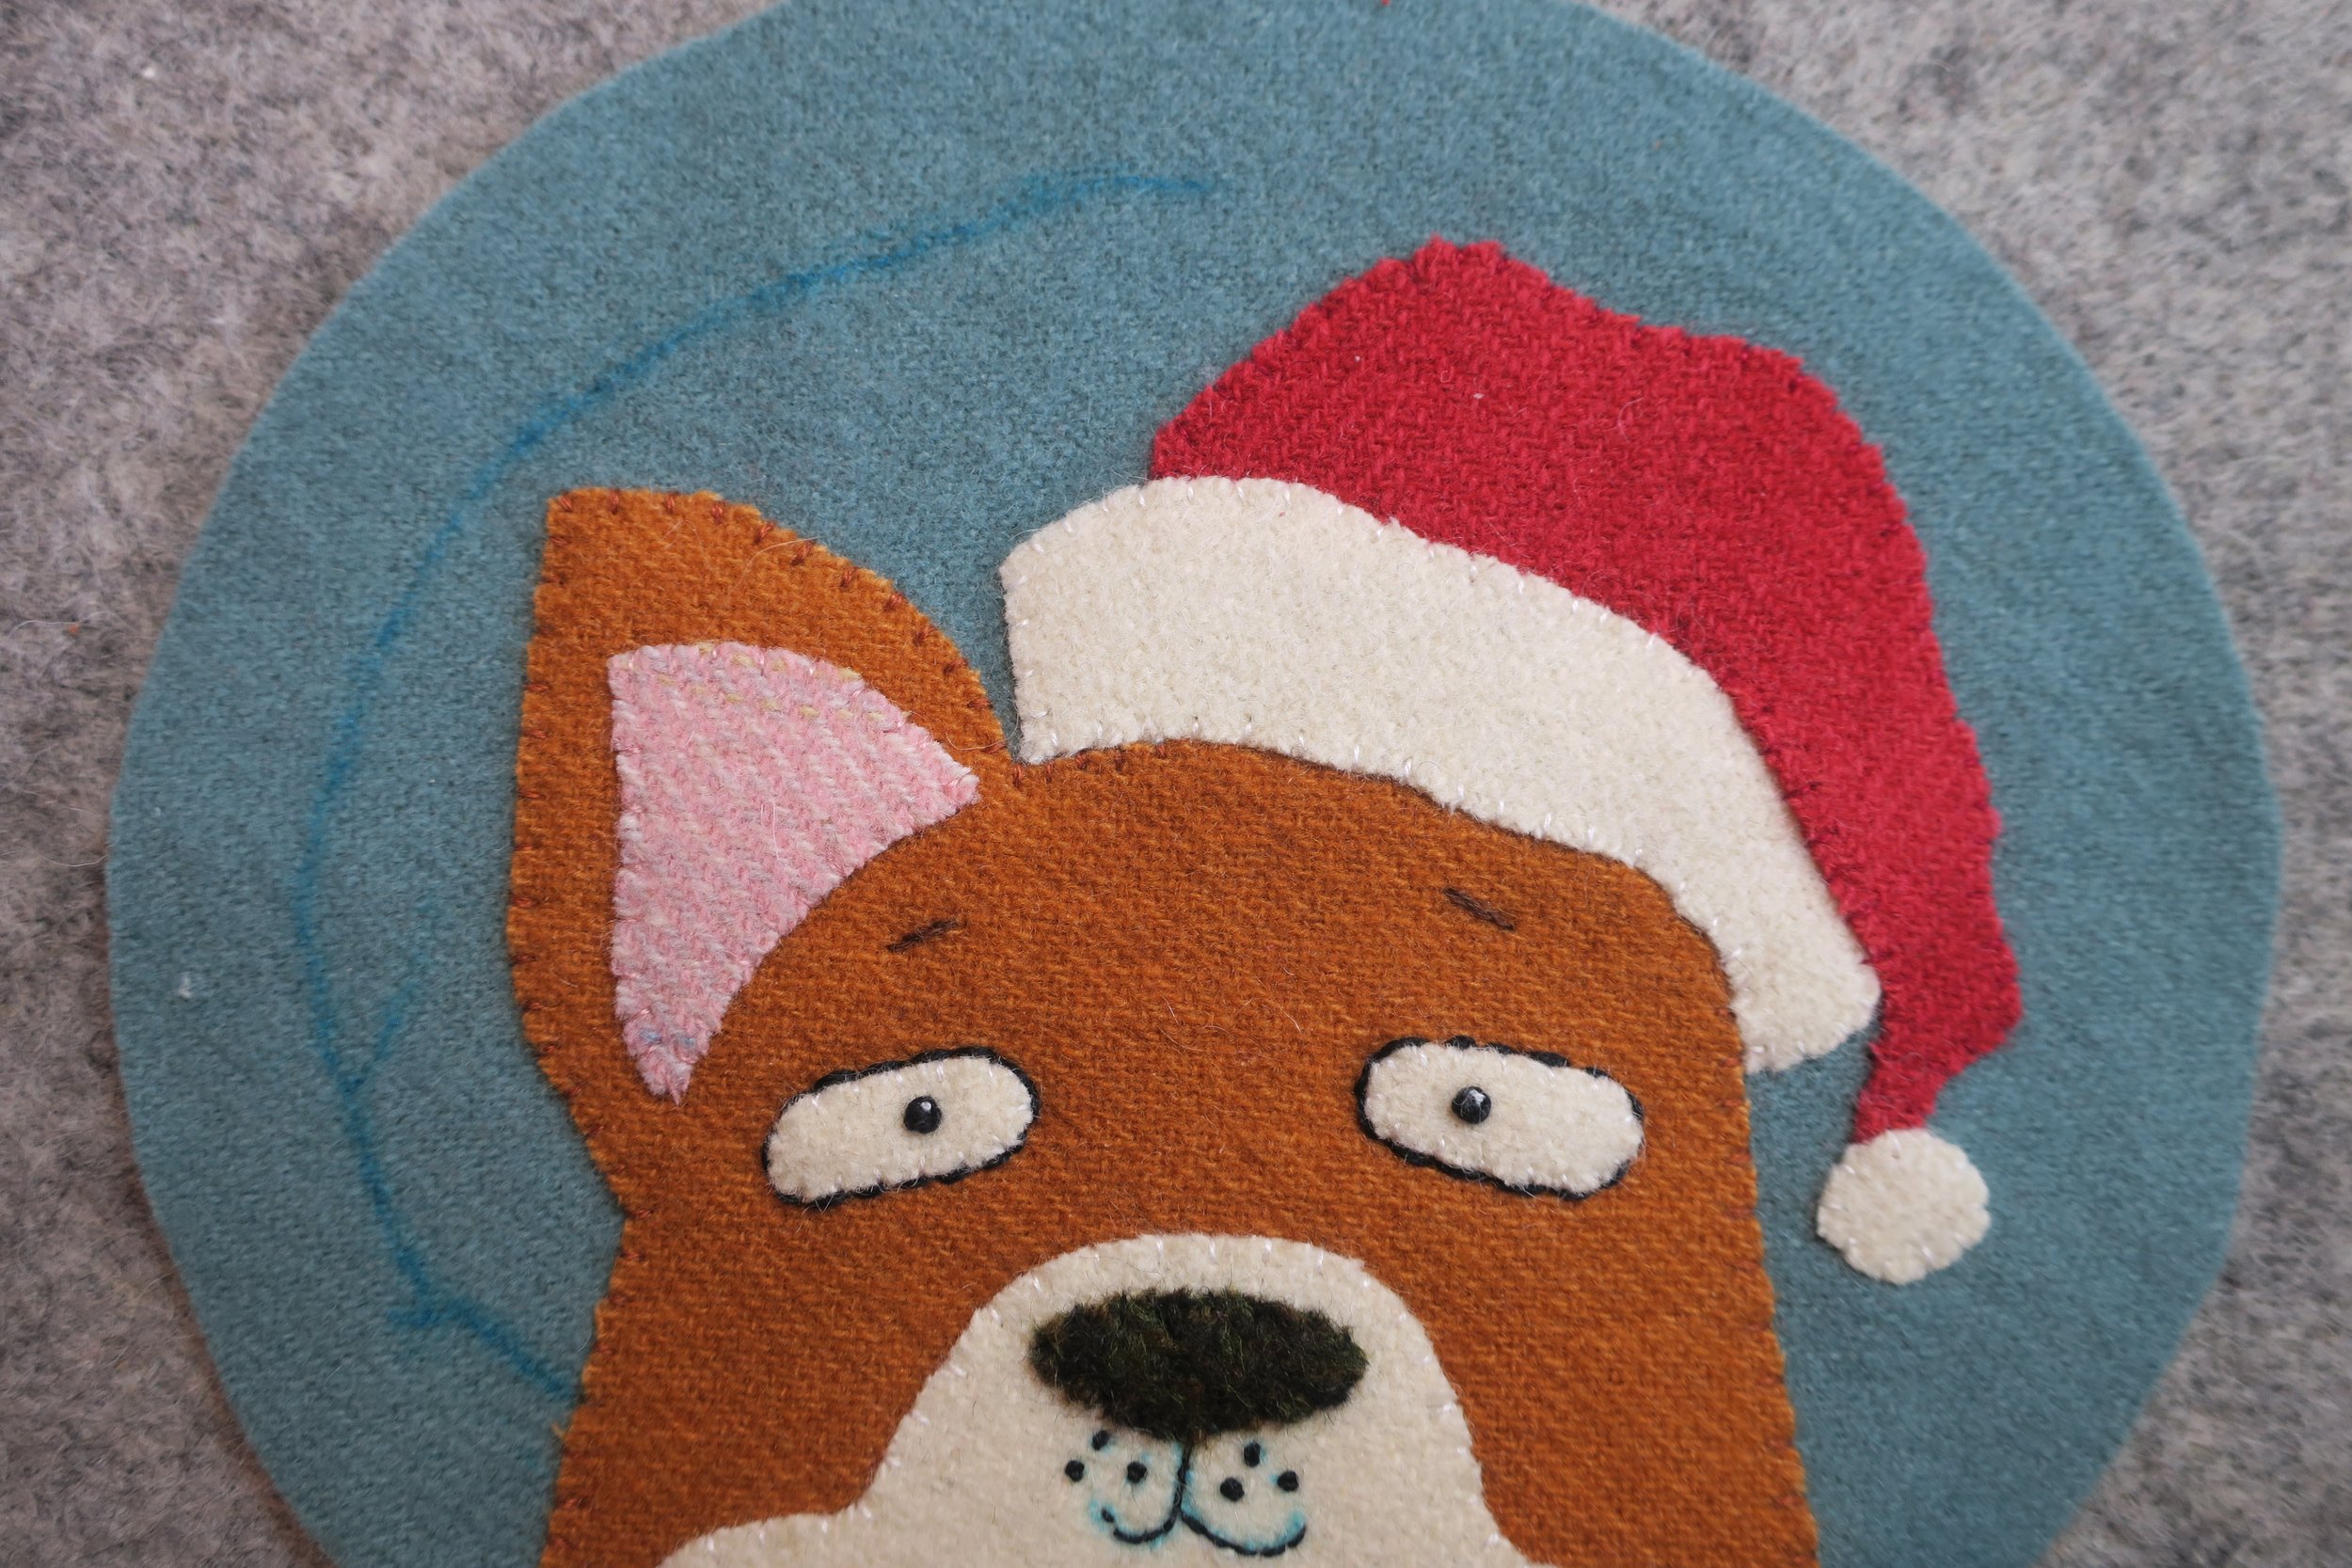
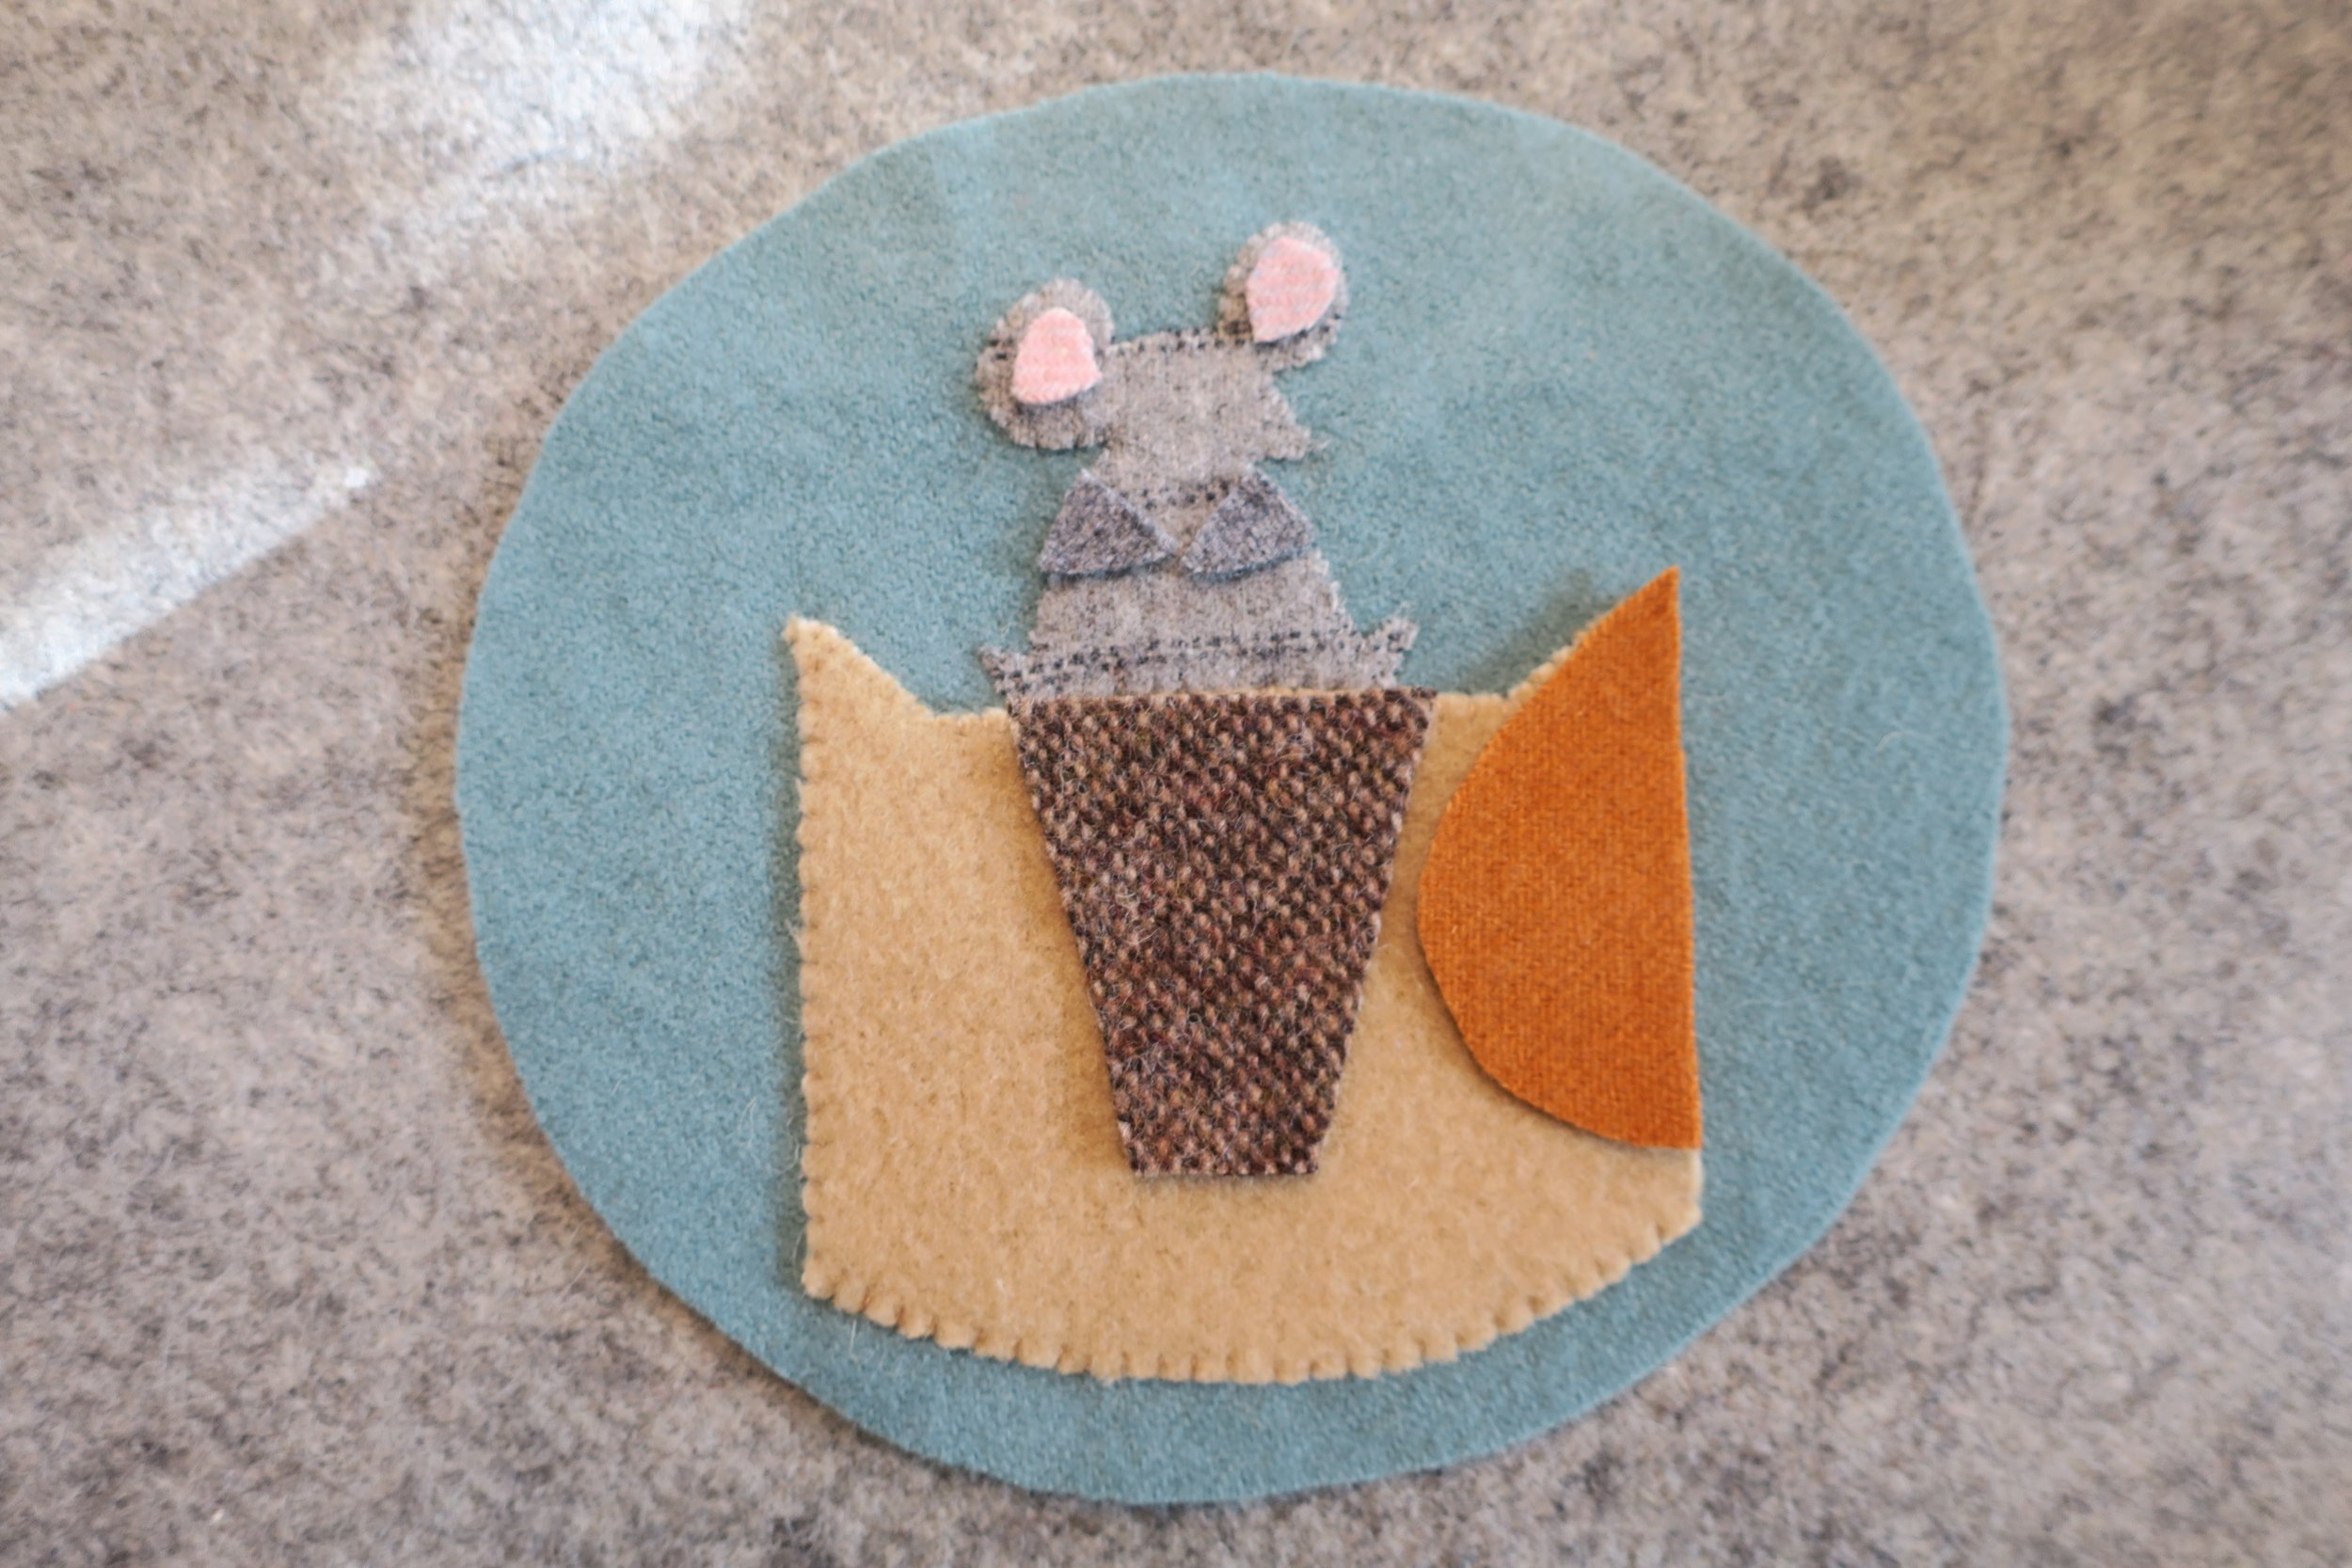
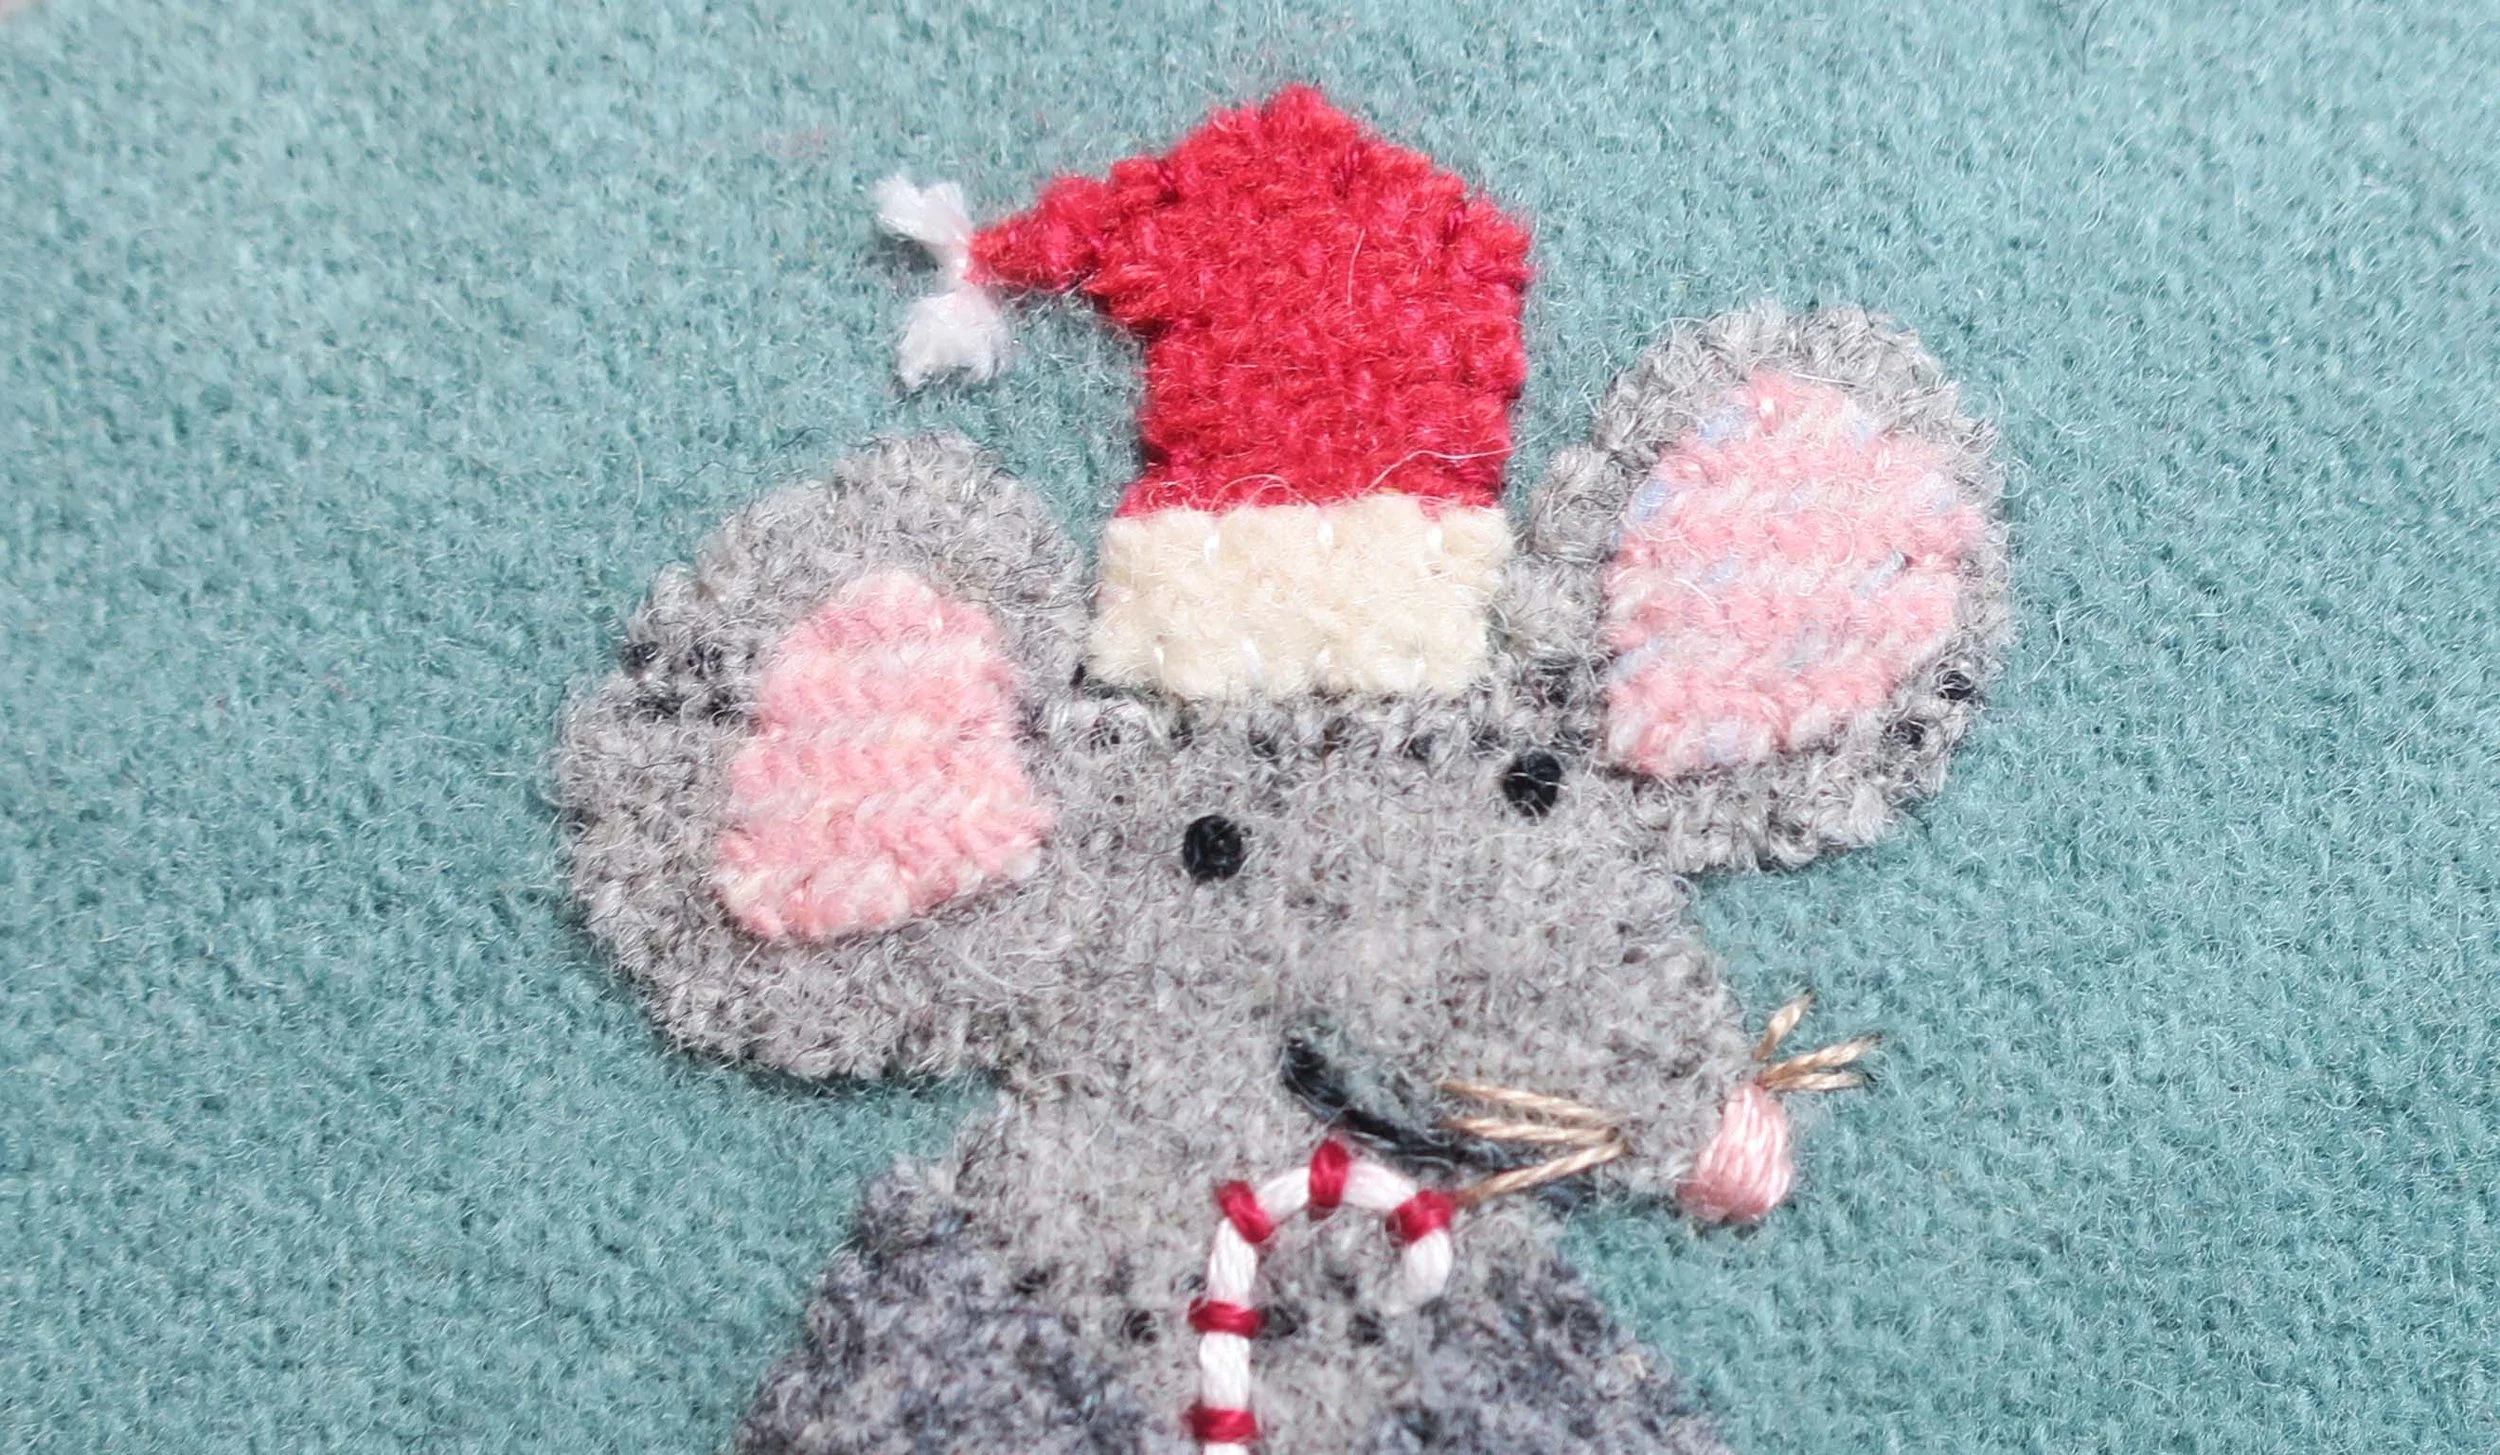
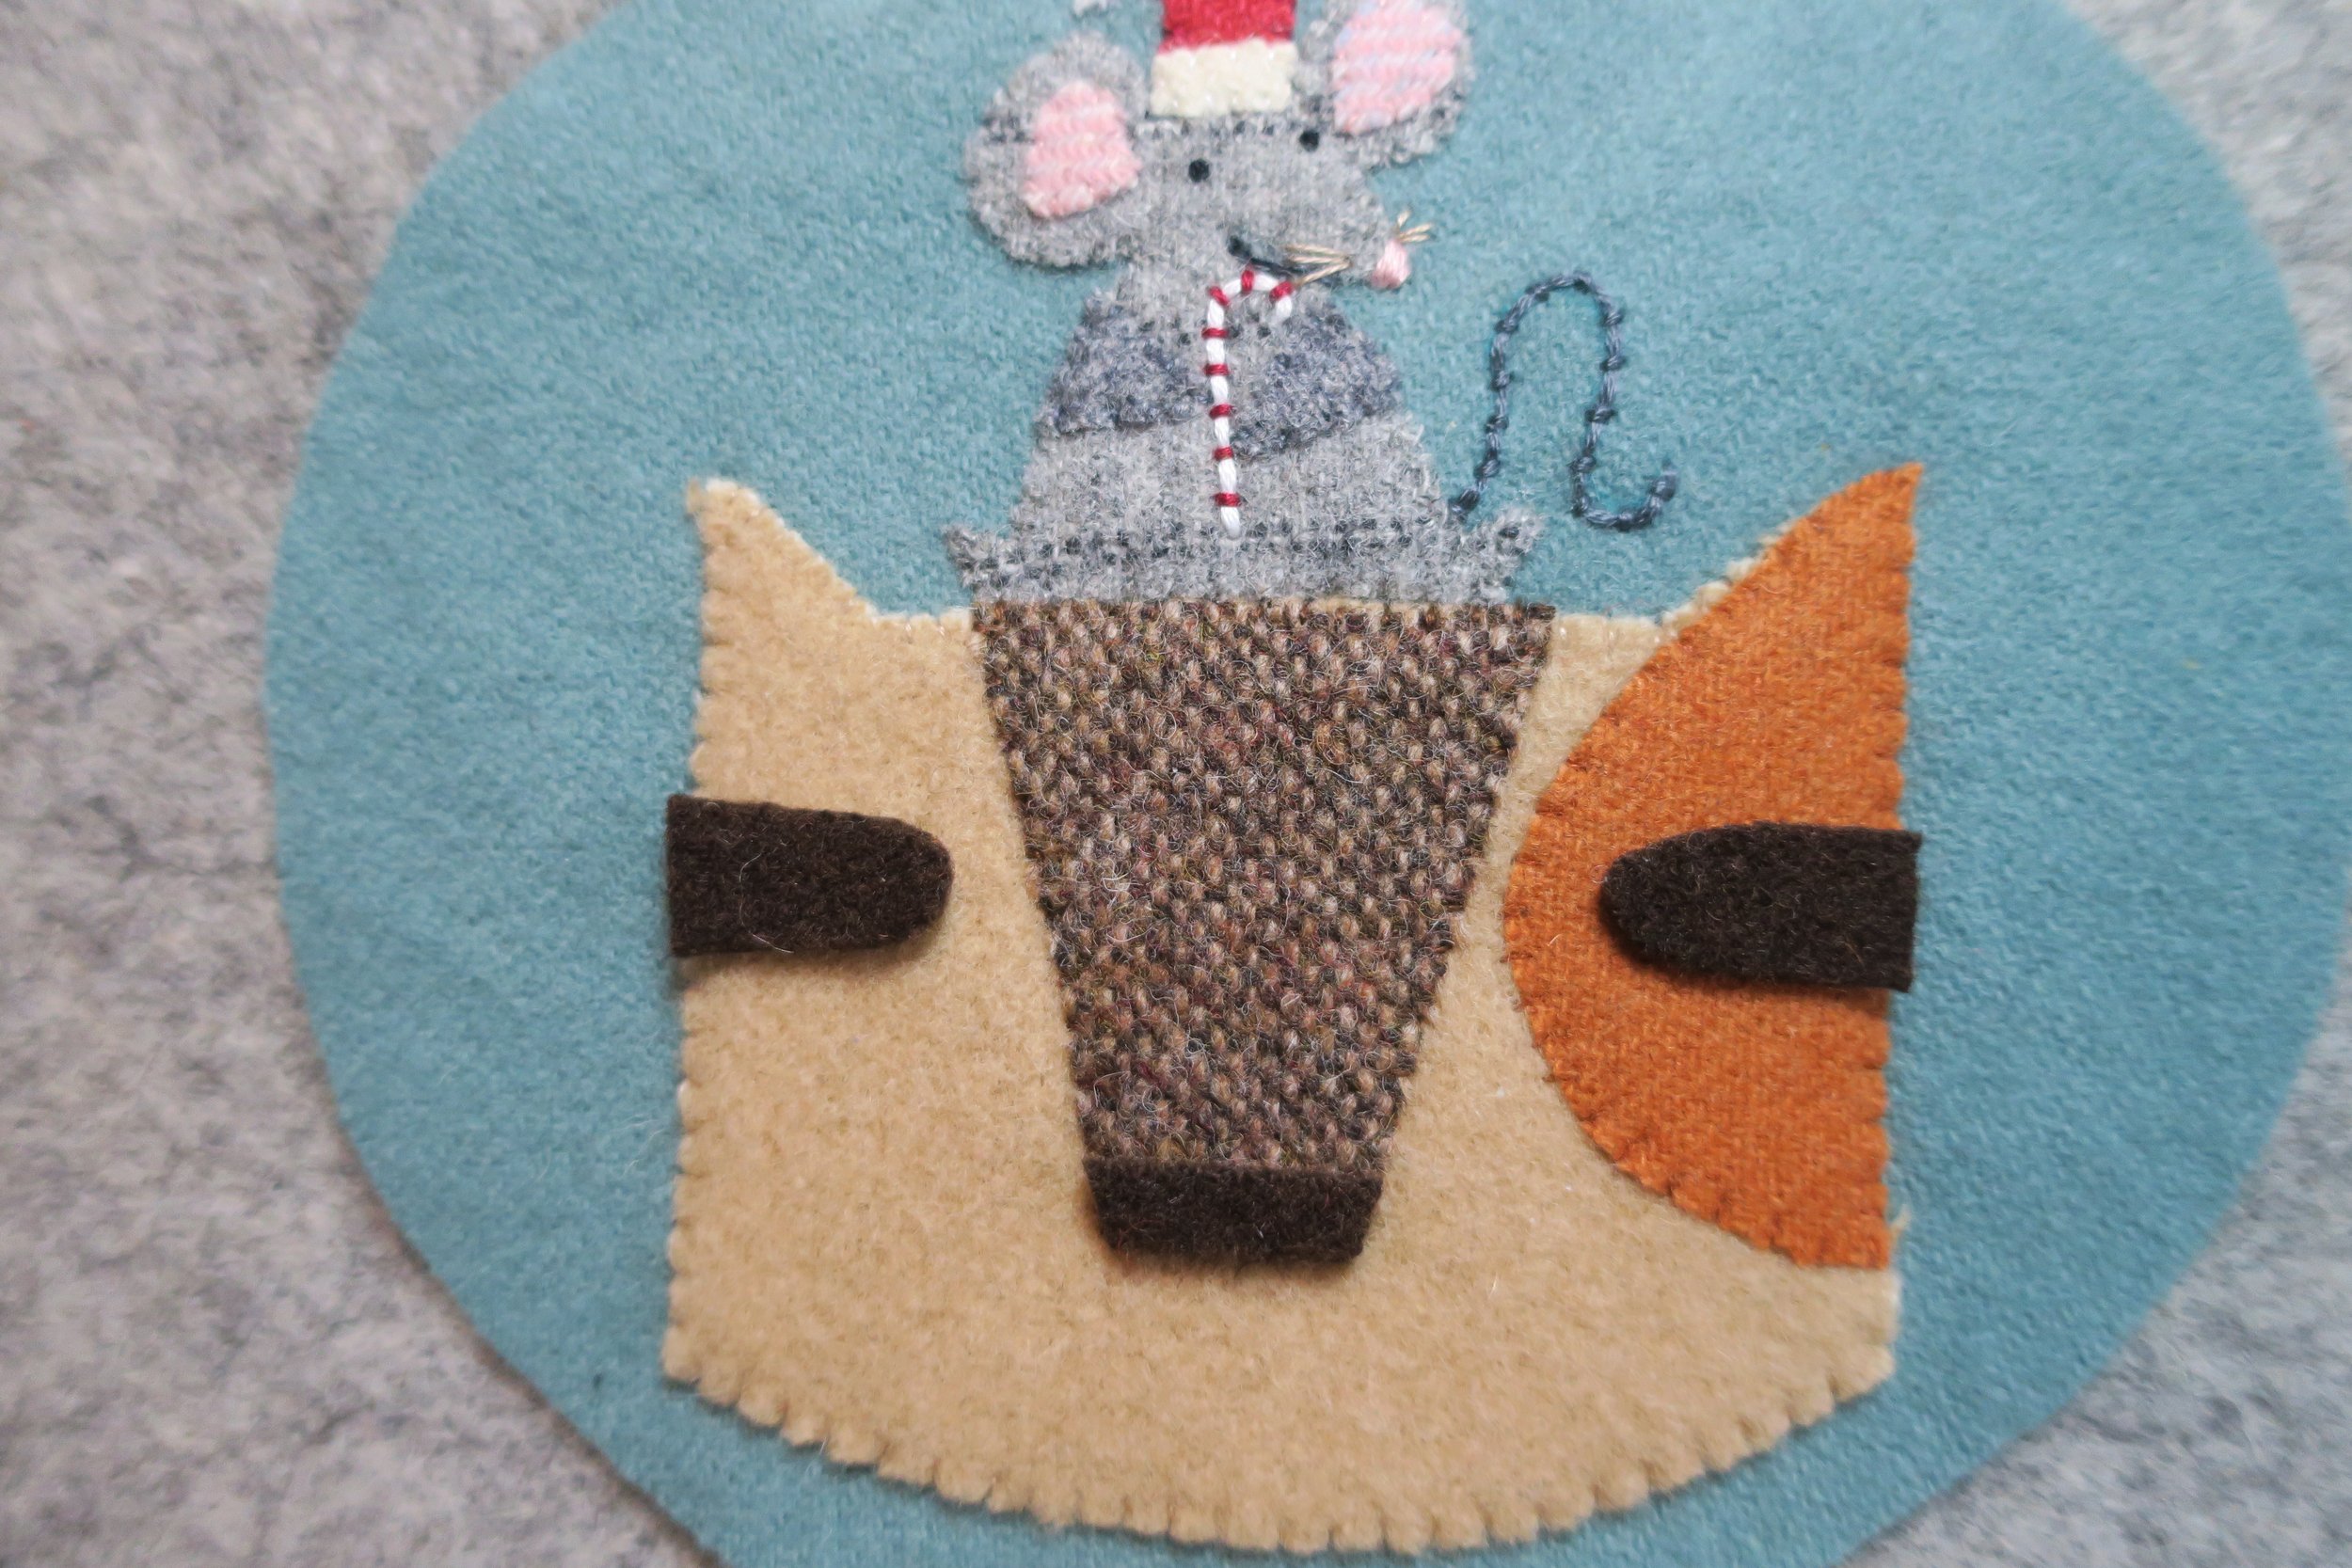
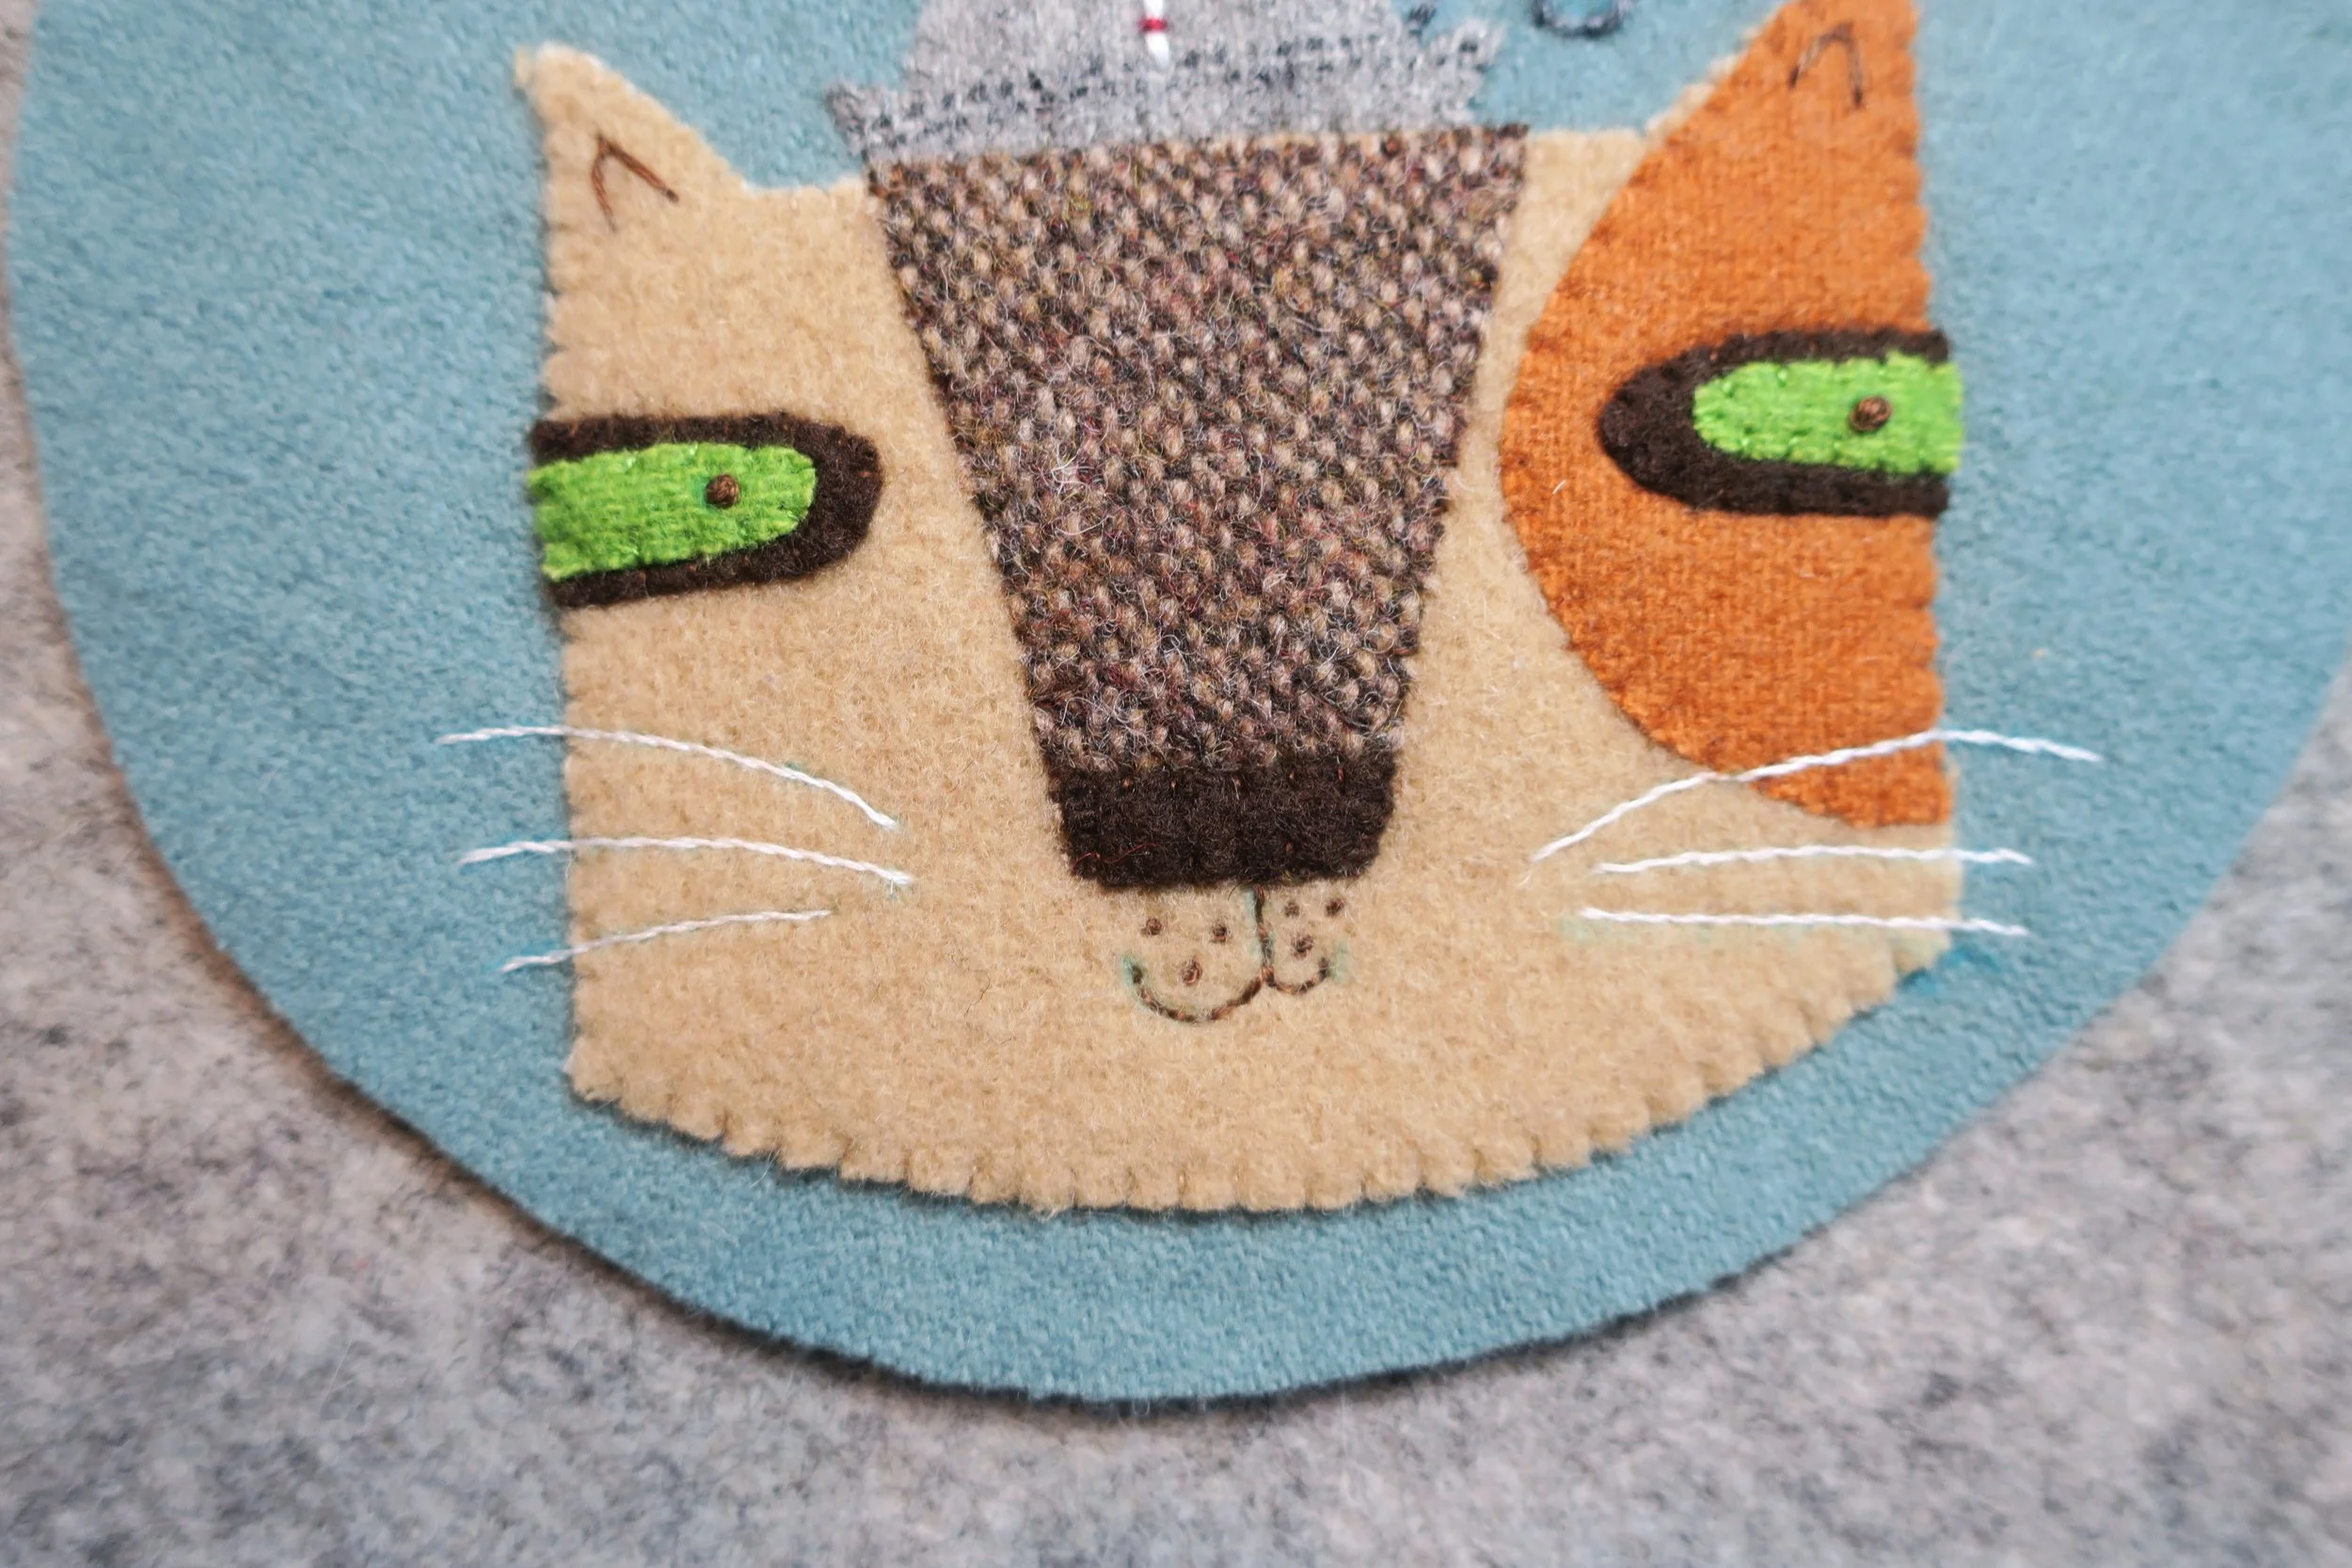
9. Let’s start with Winston. Begin by removing the paper backing from his head, hat fur, and hat. Set your work space onto your ironing board or mat. Then center his neckline along the bottom of the background wool, leaving about a 3/8in space between the neckline and perimeter of the background.
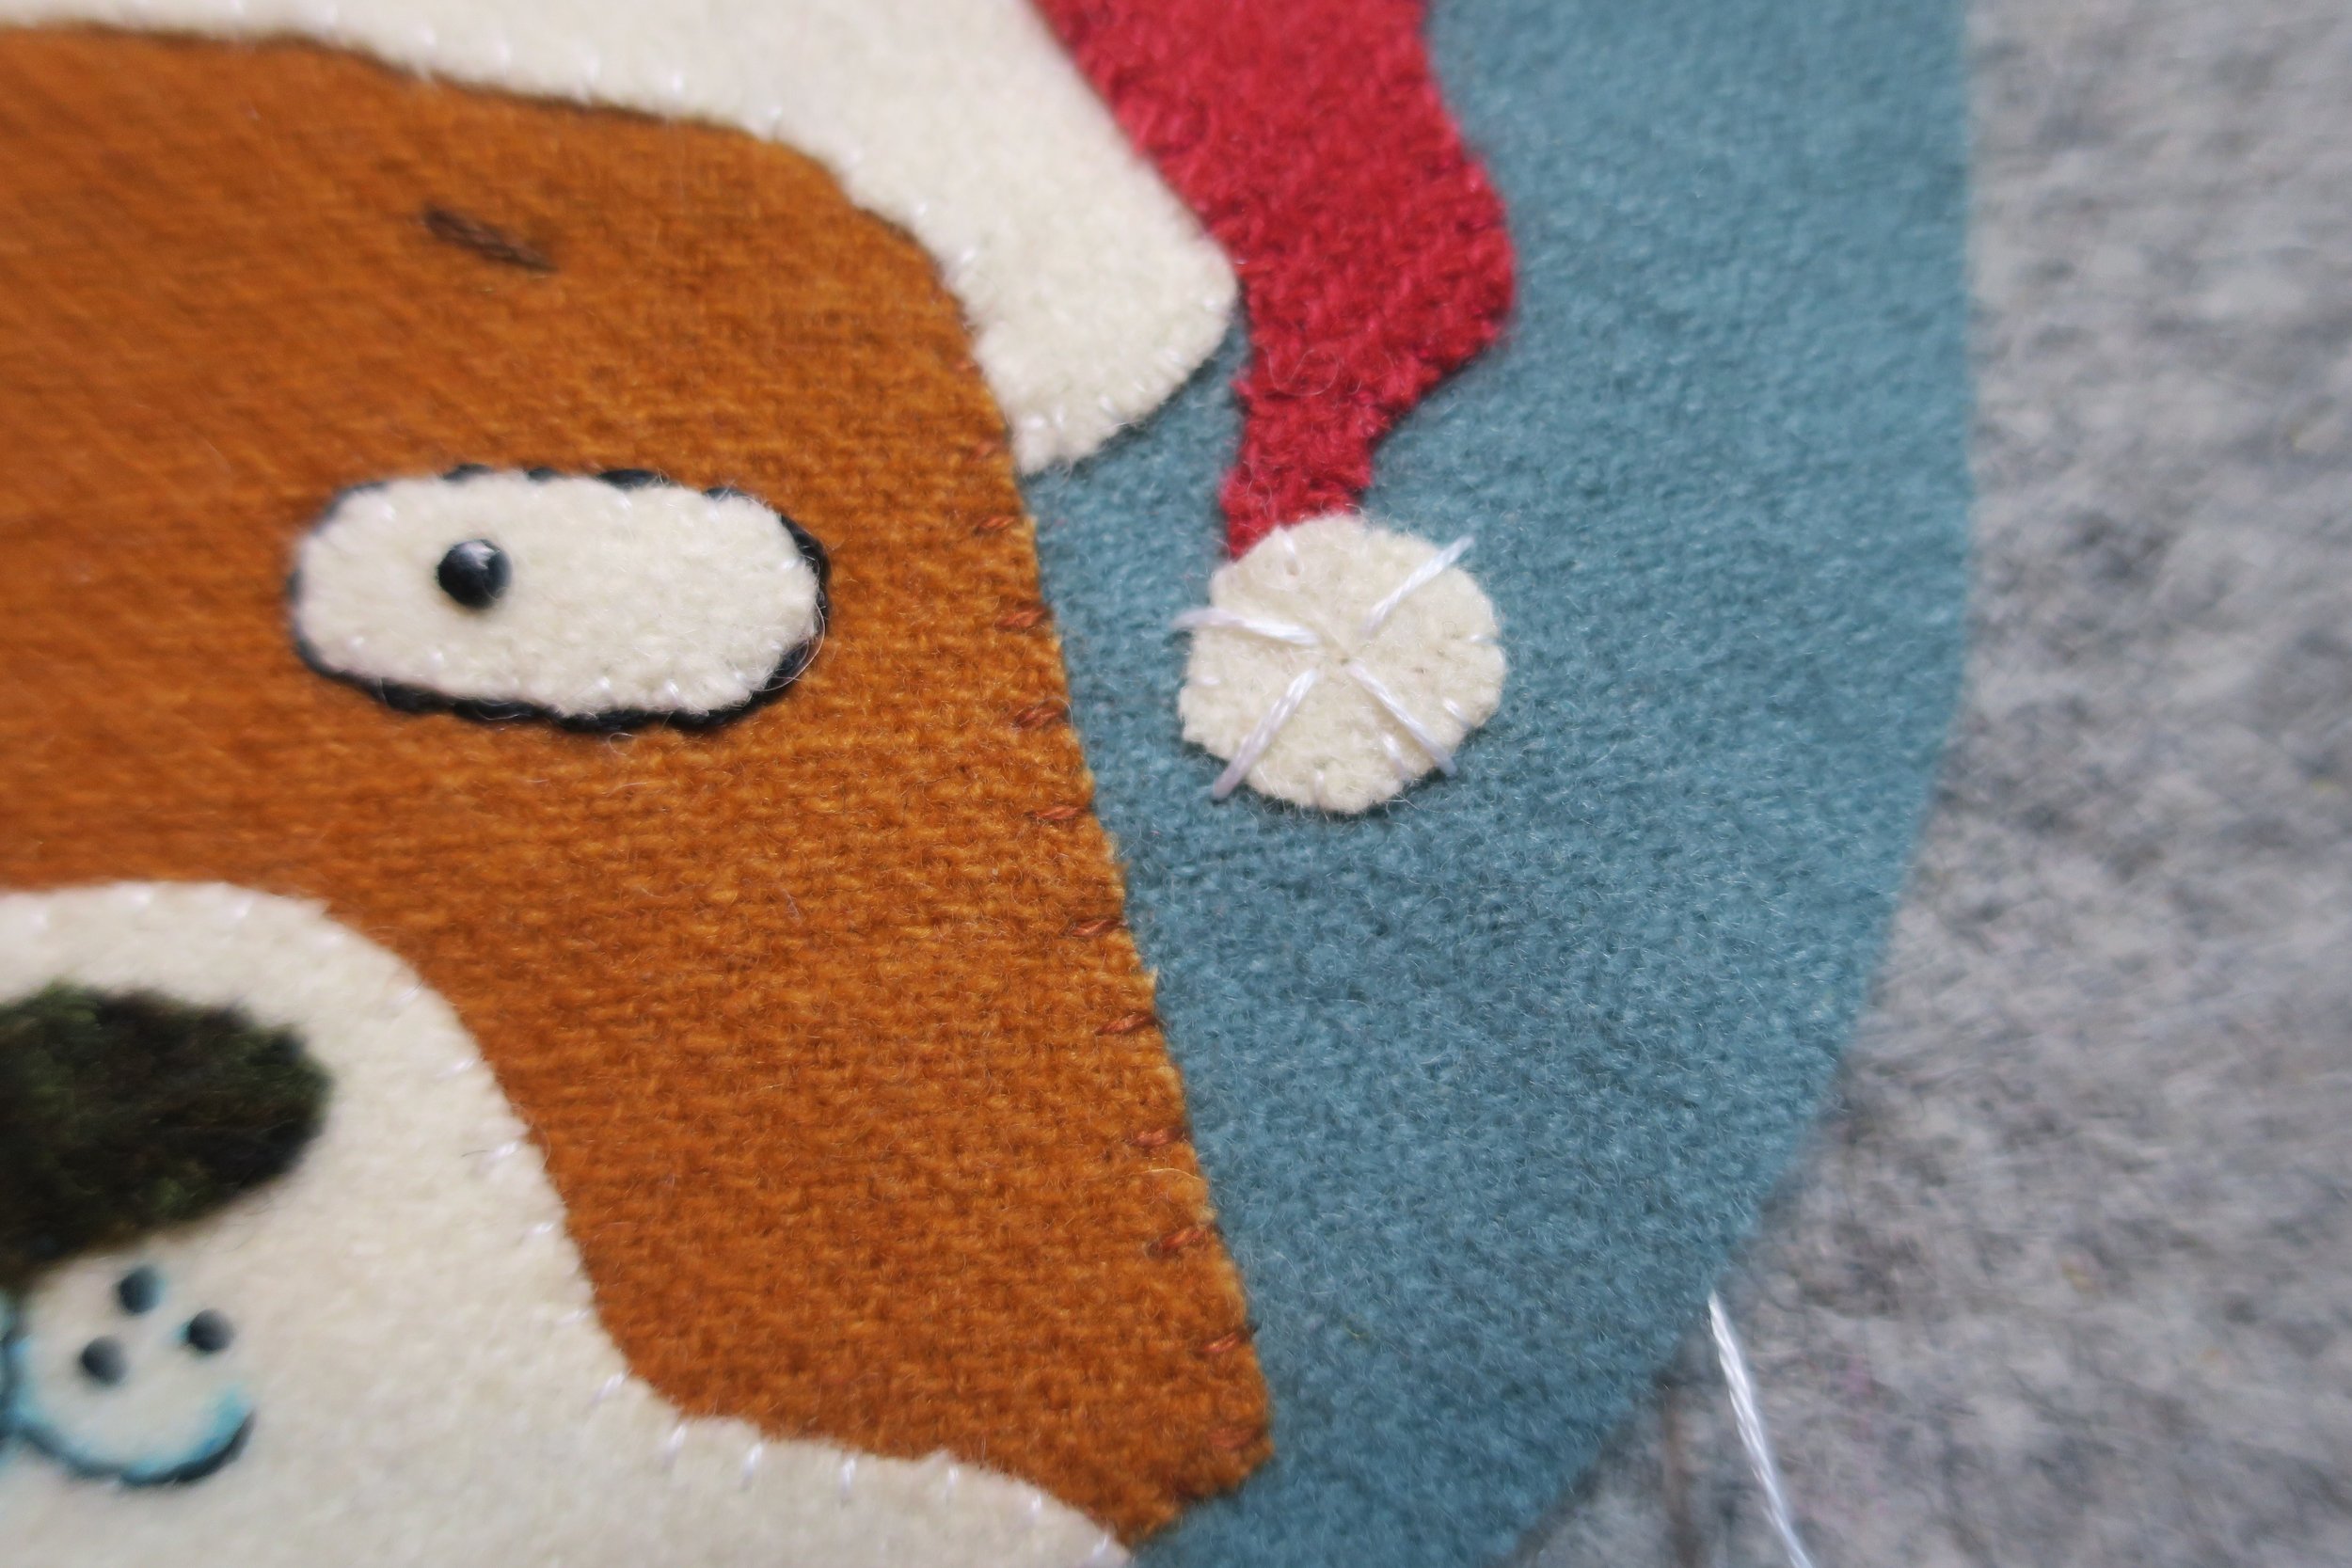
Position the fur of his hat onto the right side of his head using the layout as your guide. It should slightly overlap the top right side.
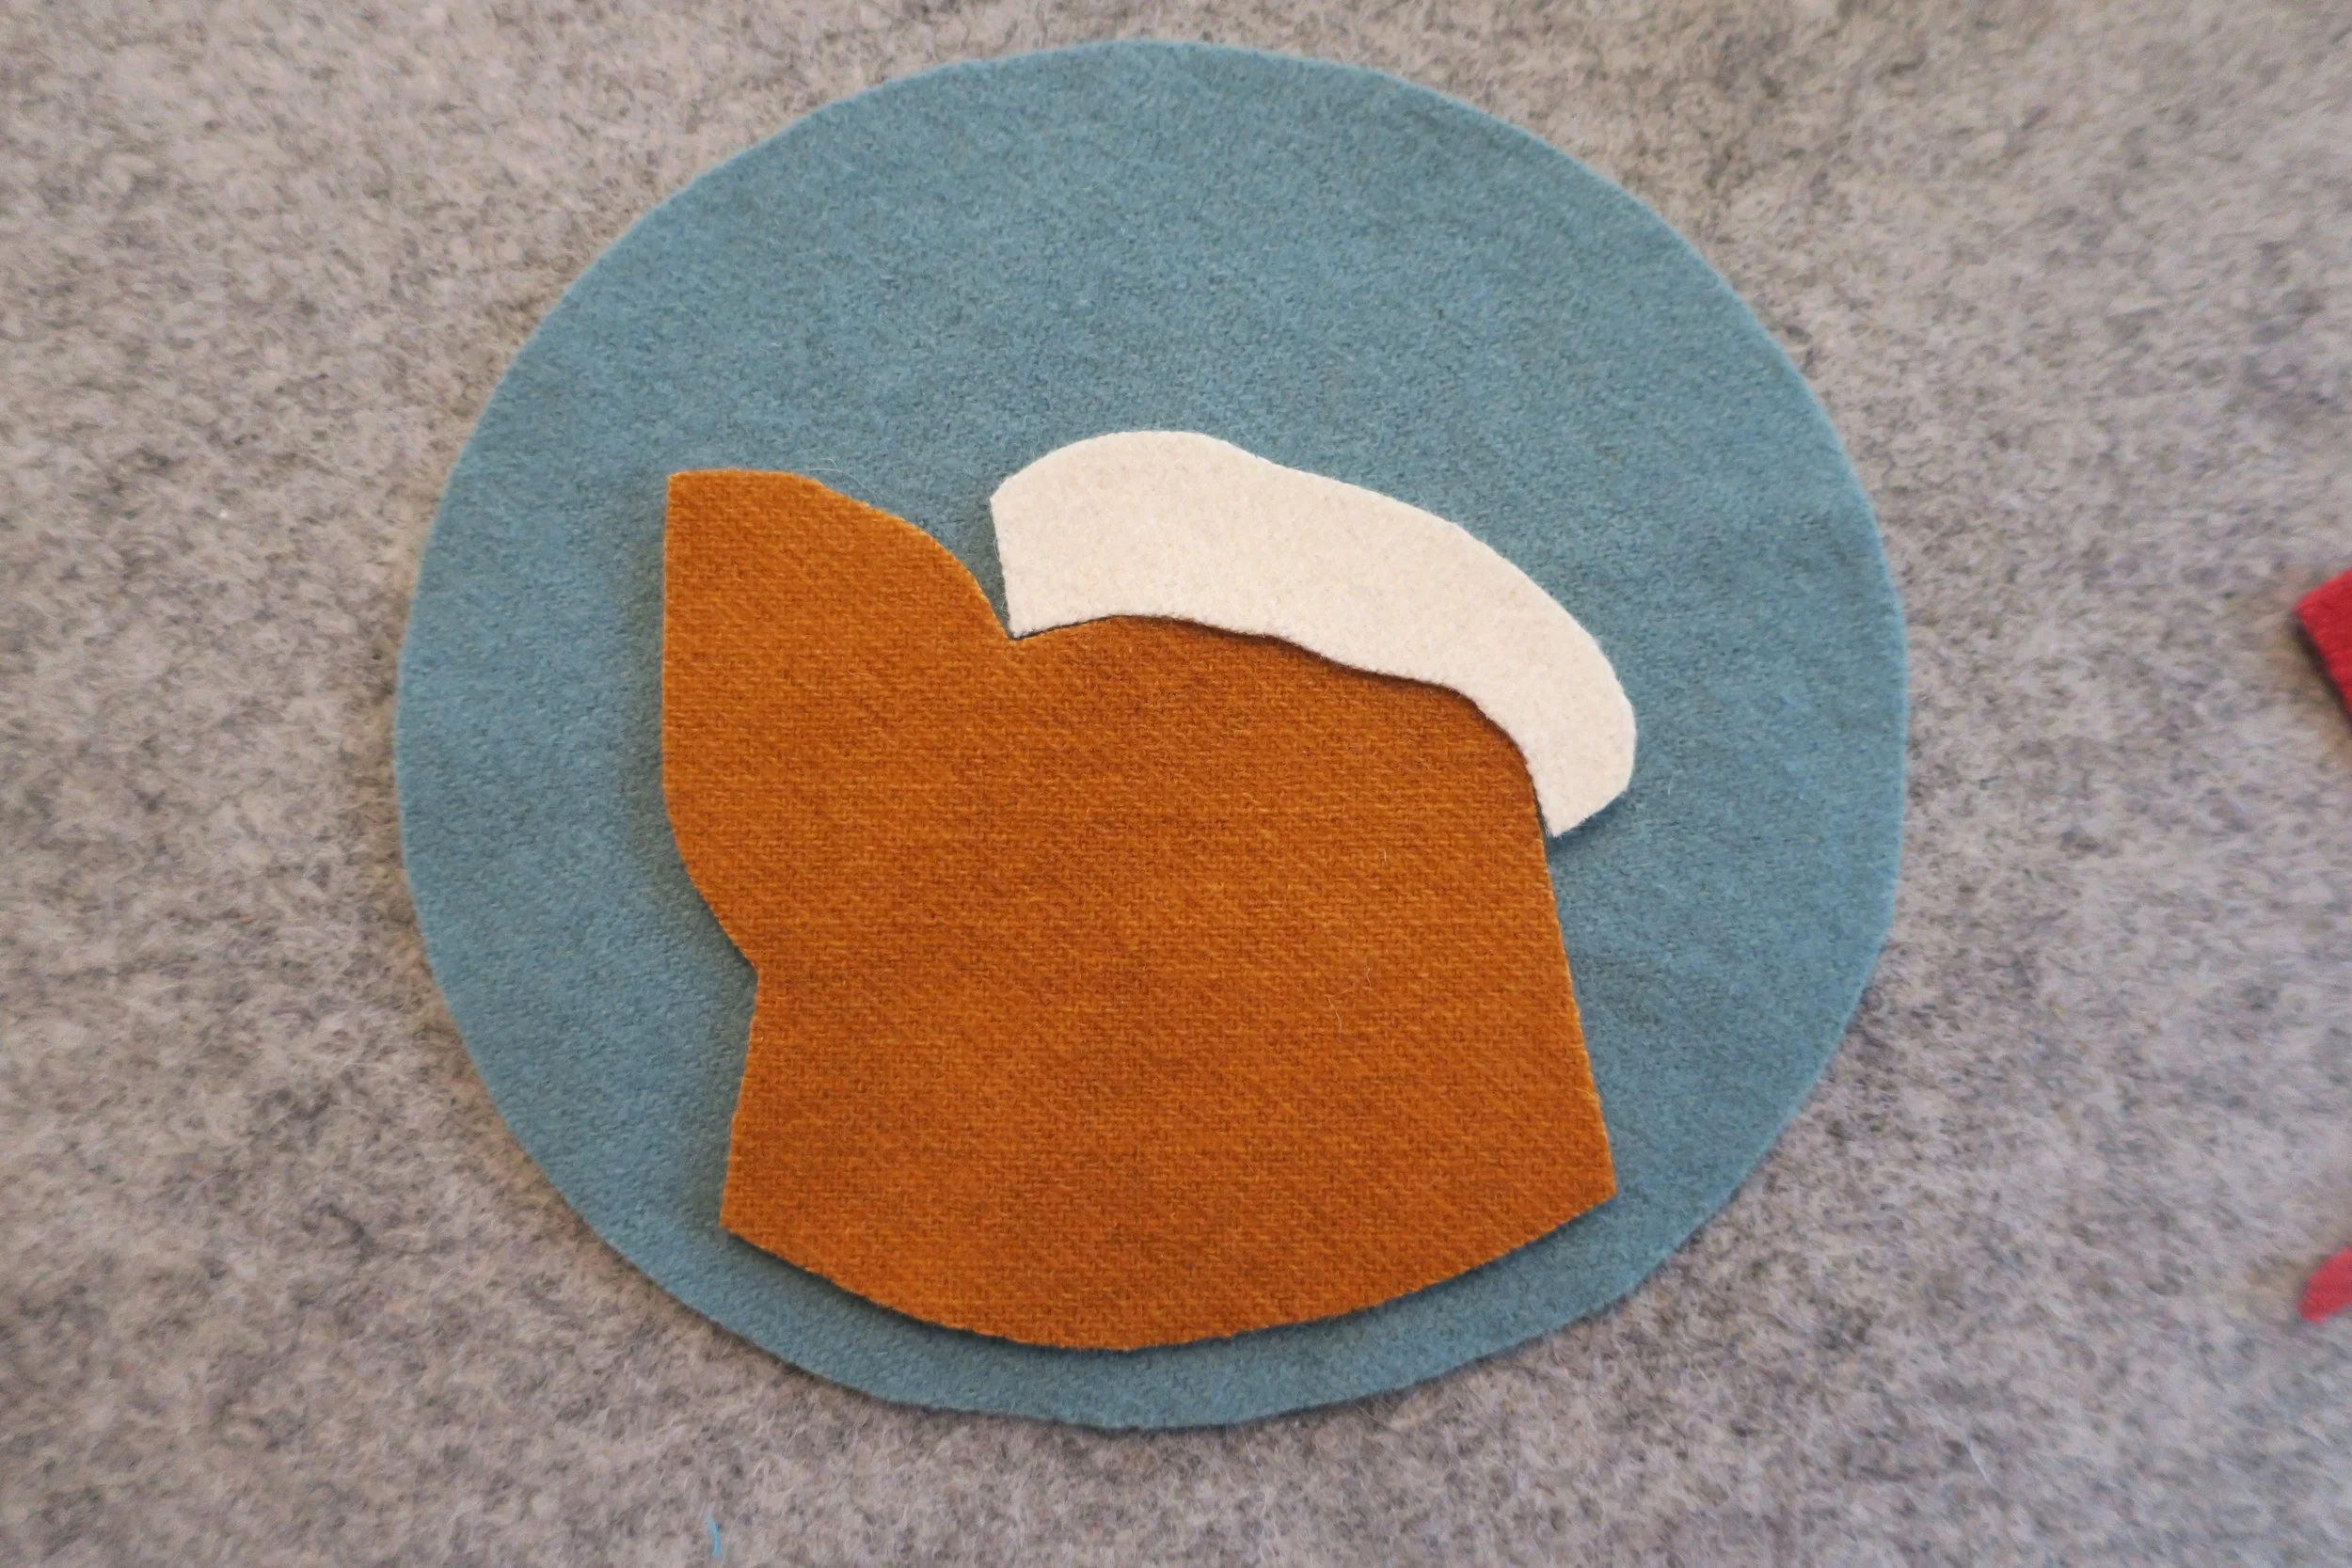
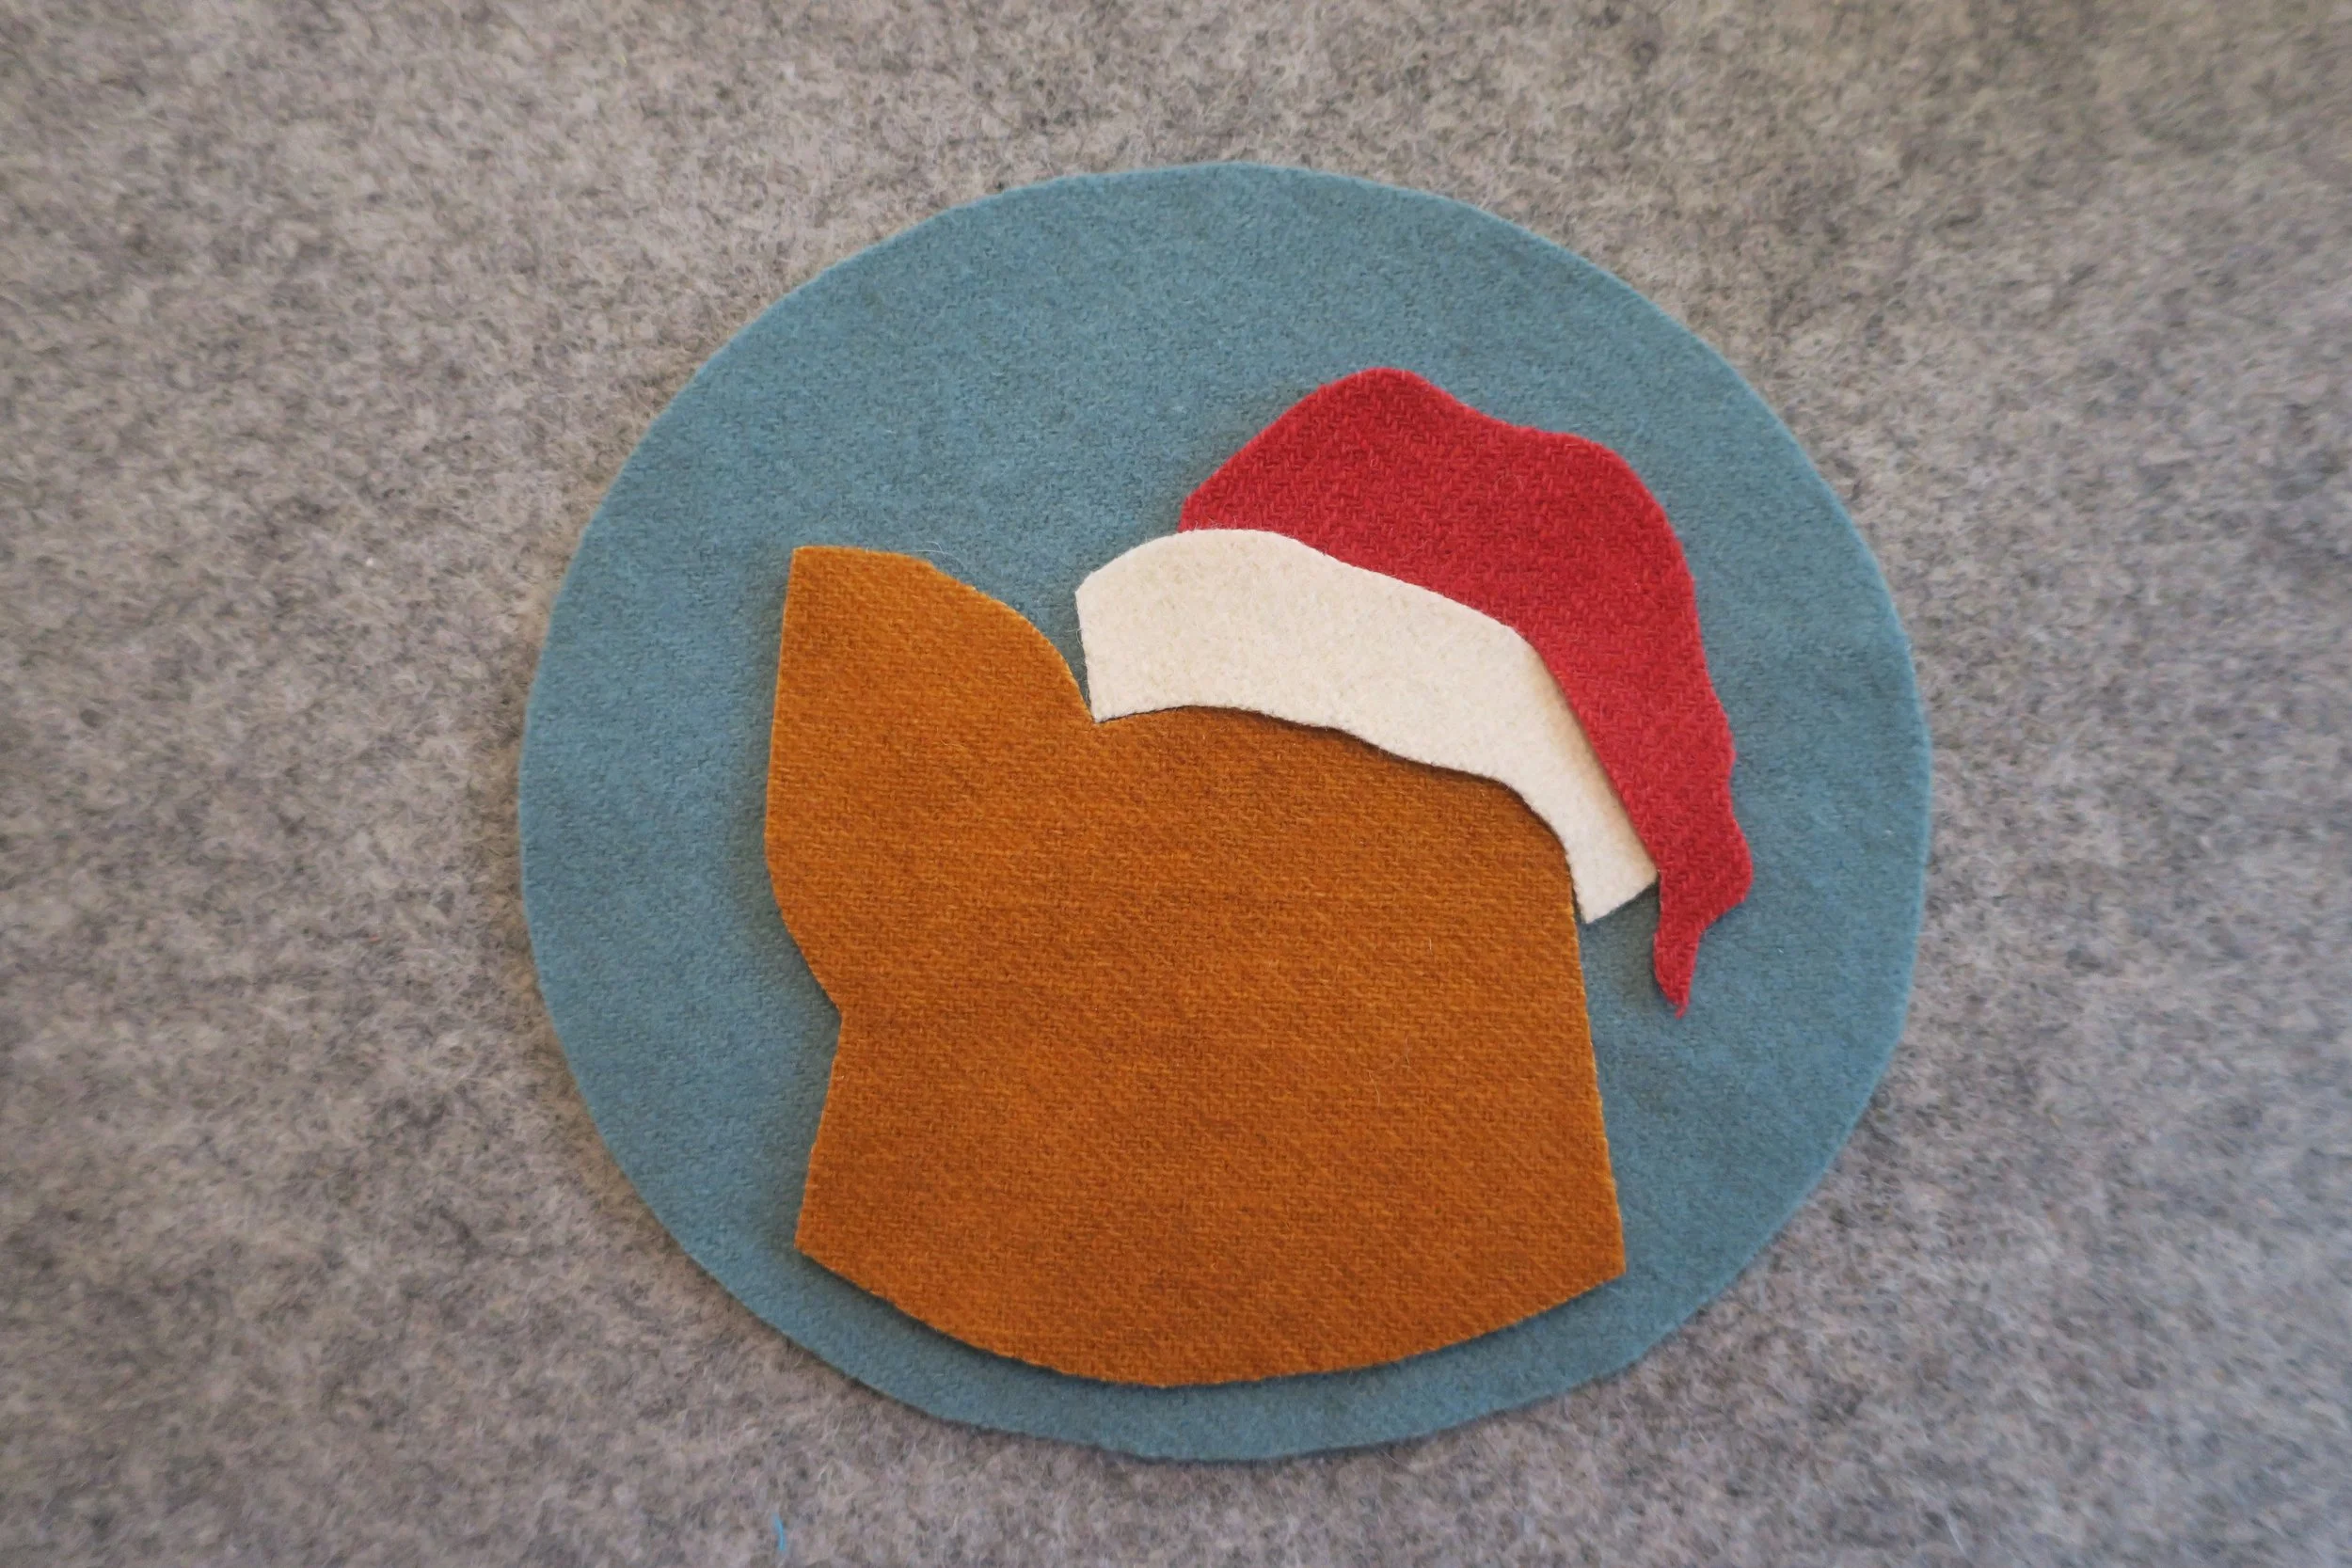
Now add the hat by sliding the bottom left side under the fur, and the bottom right over the fur. Use the layout as a guide.
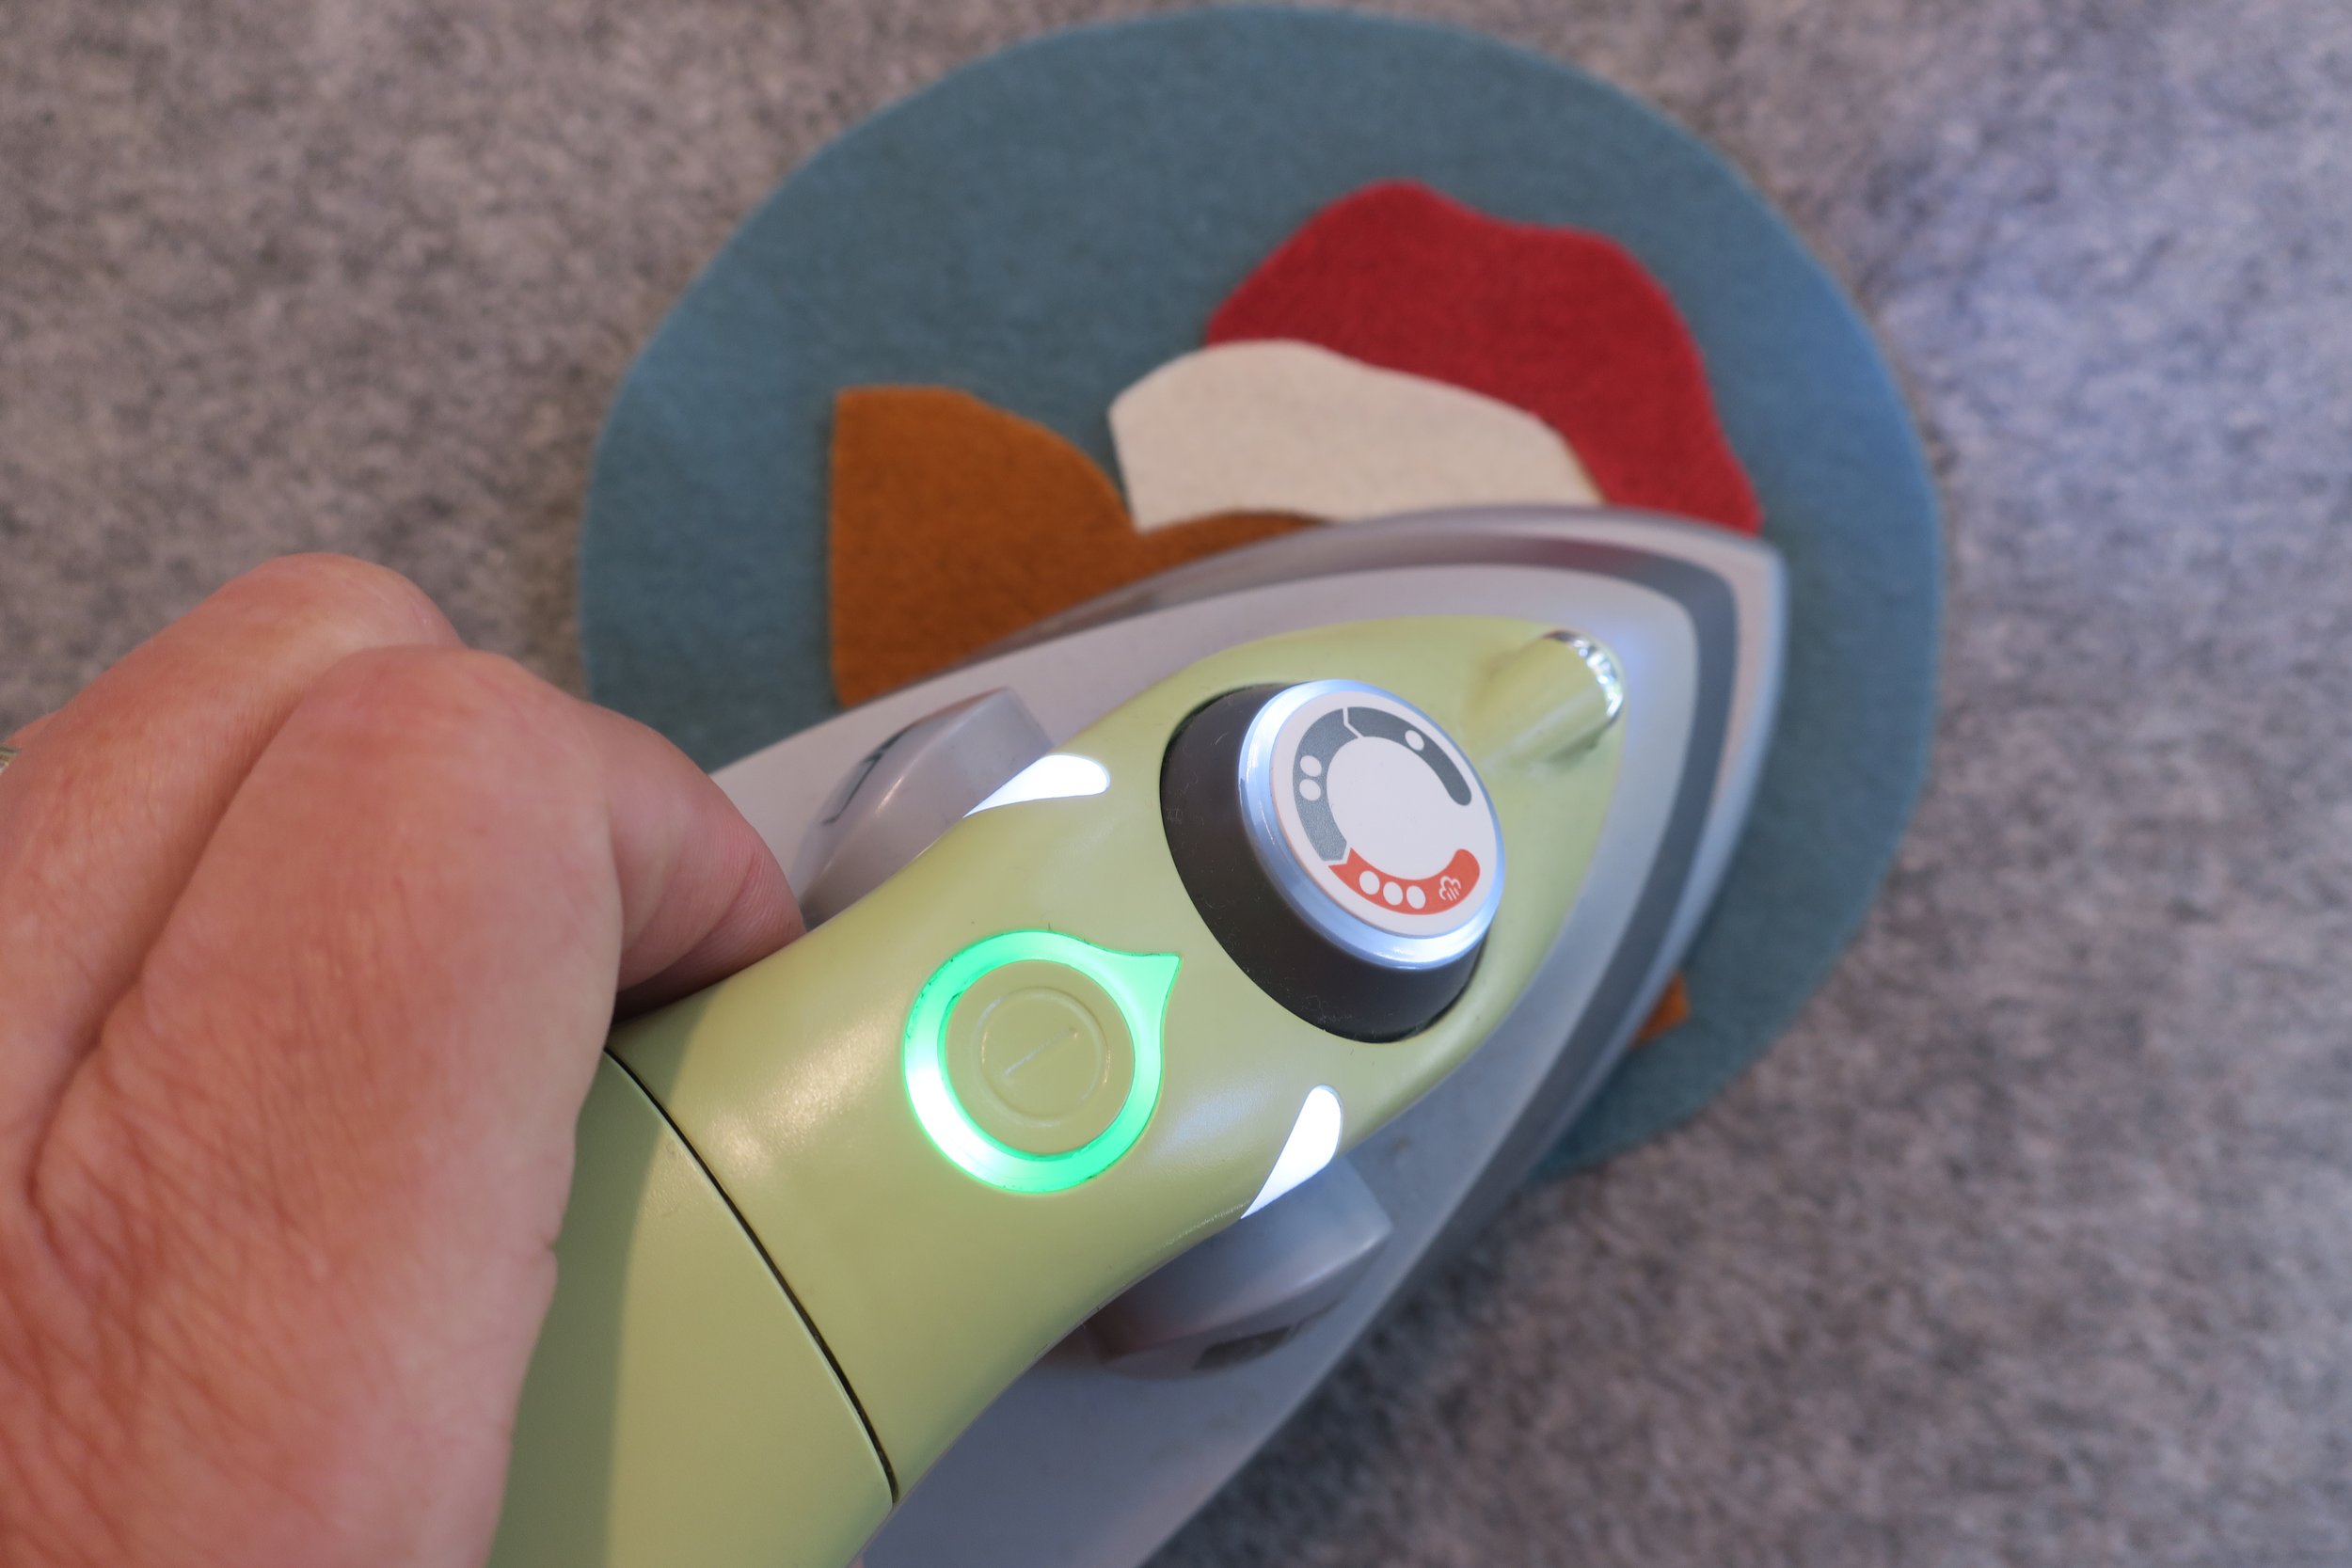
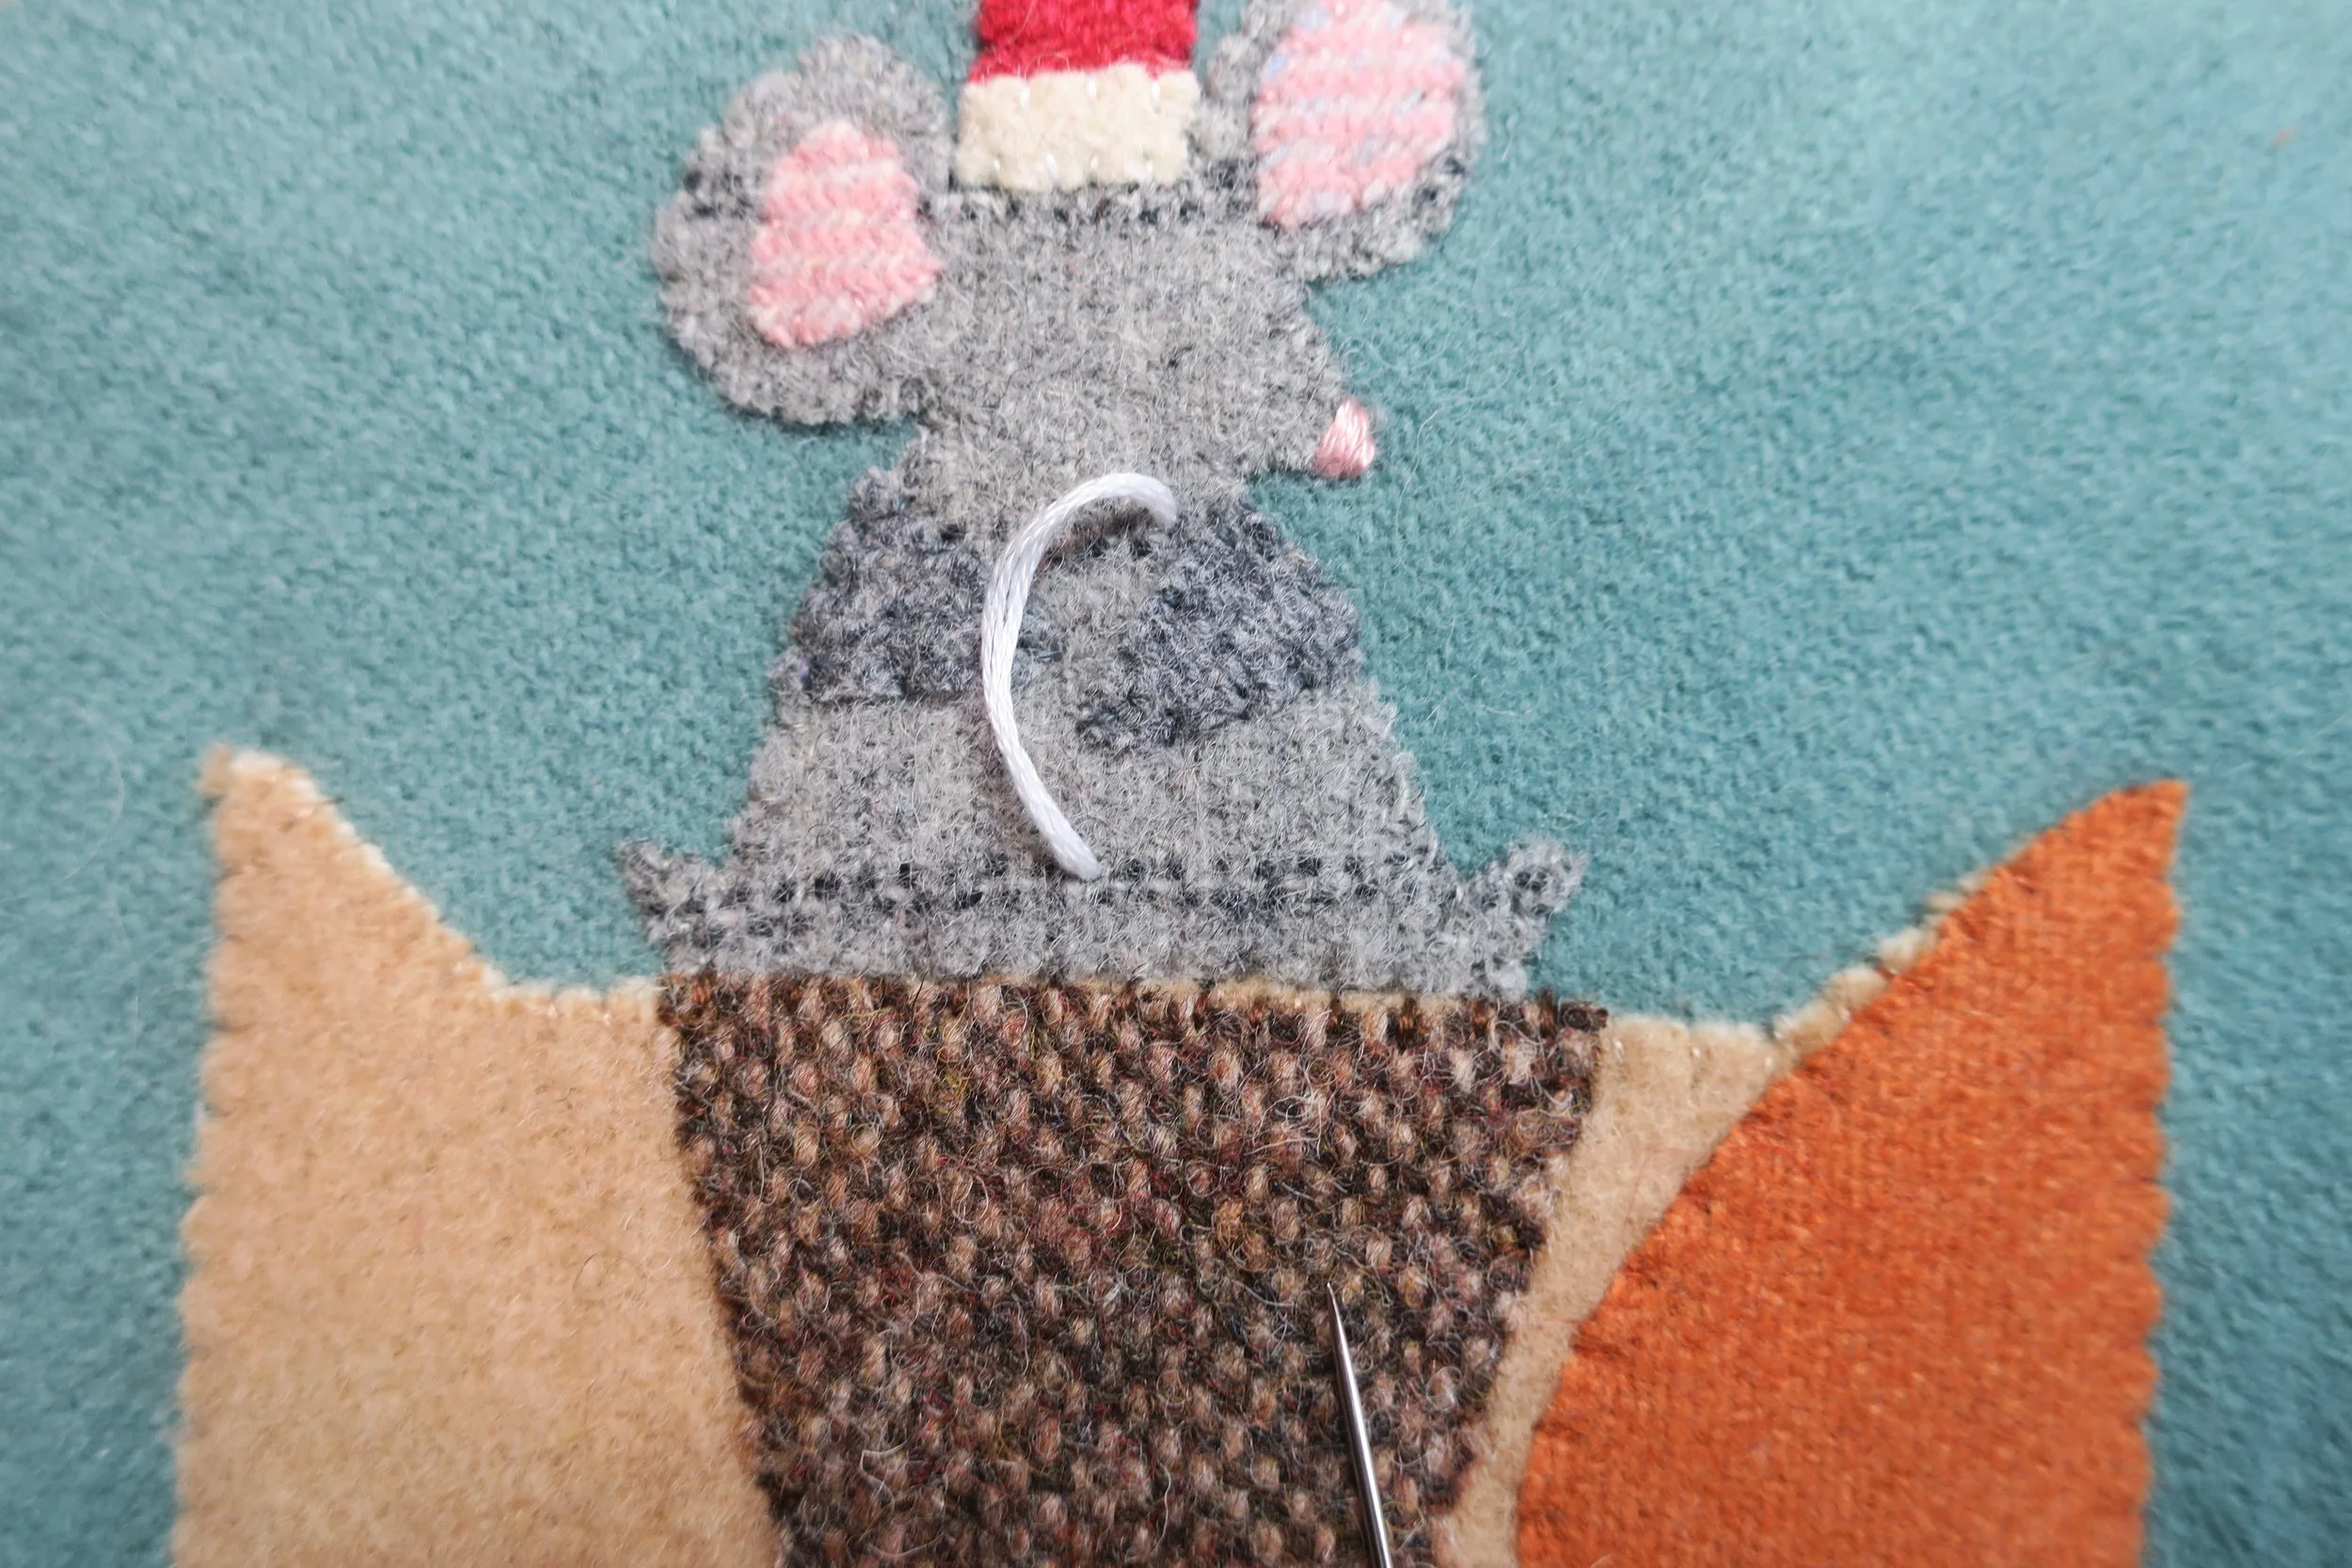
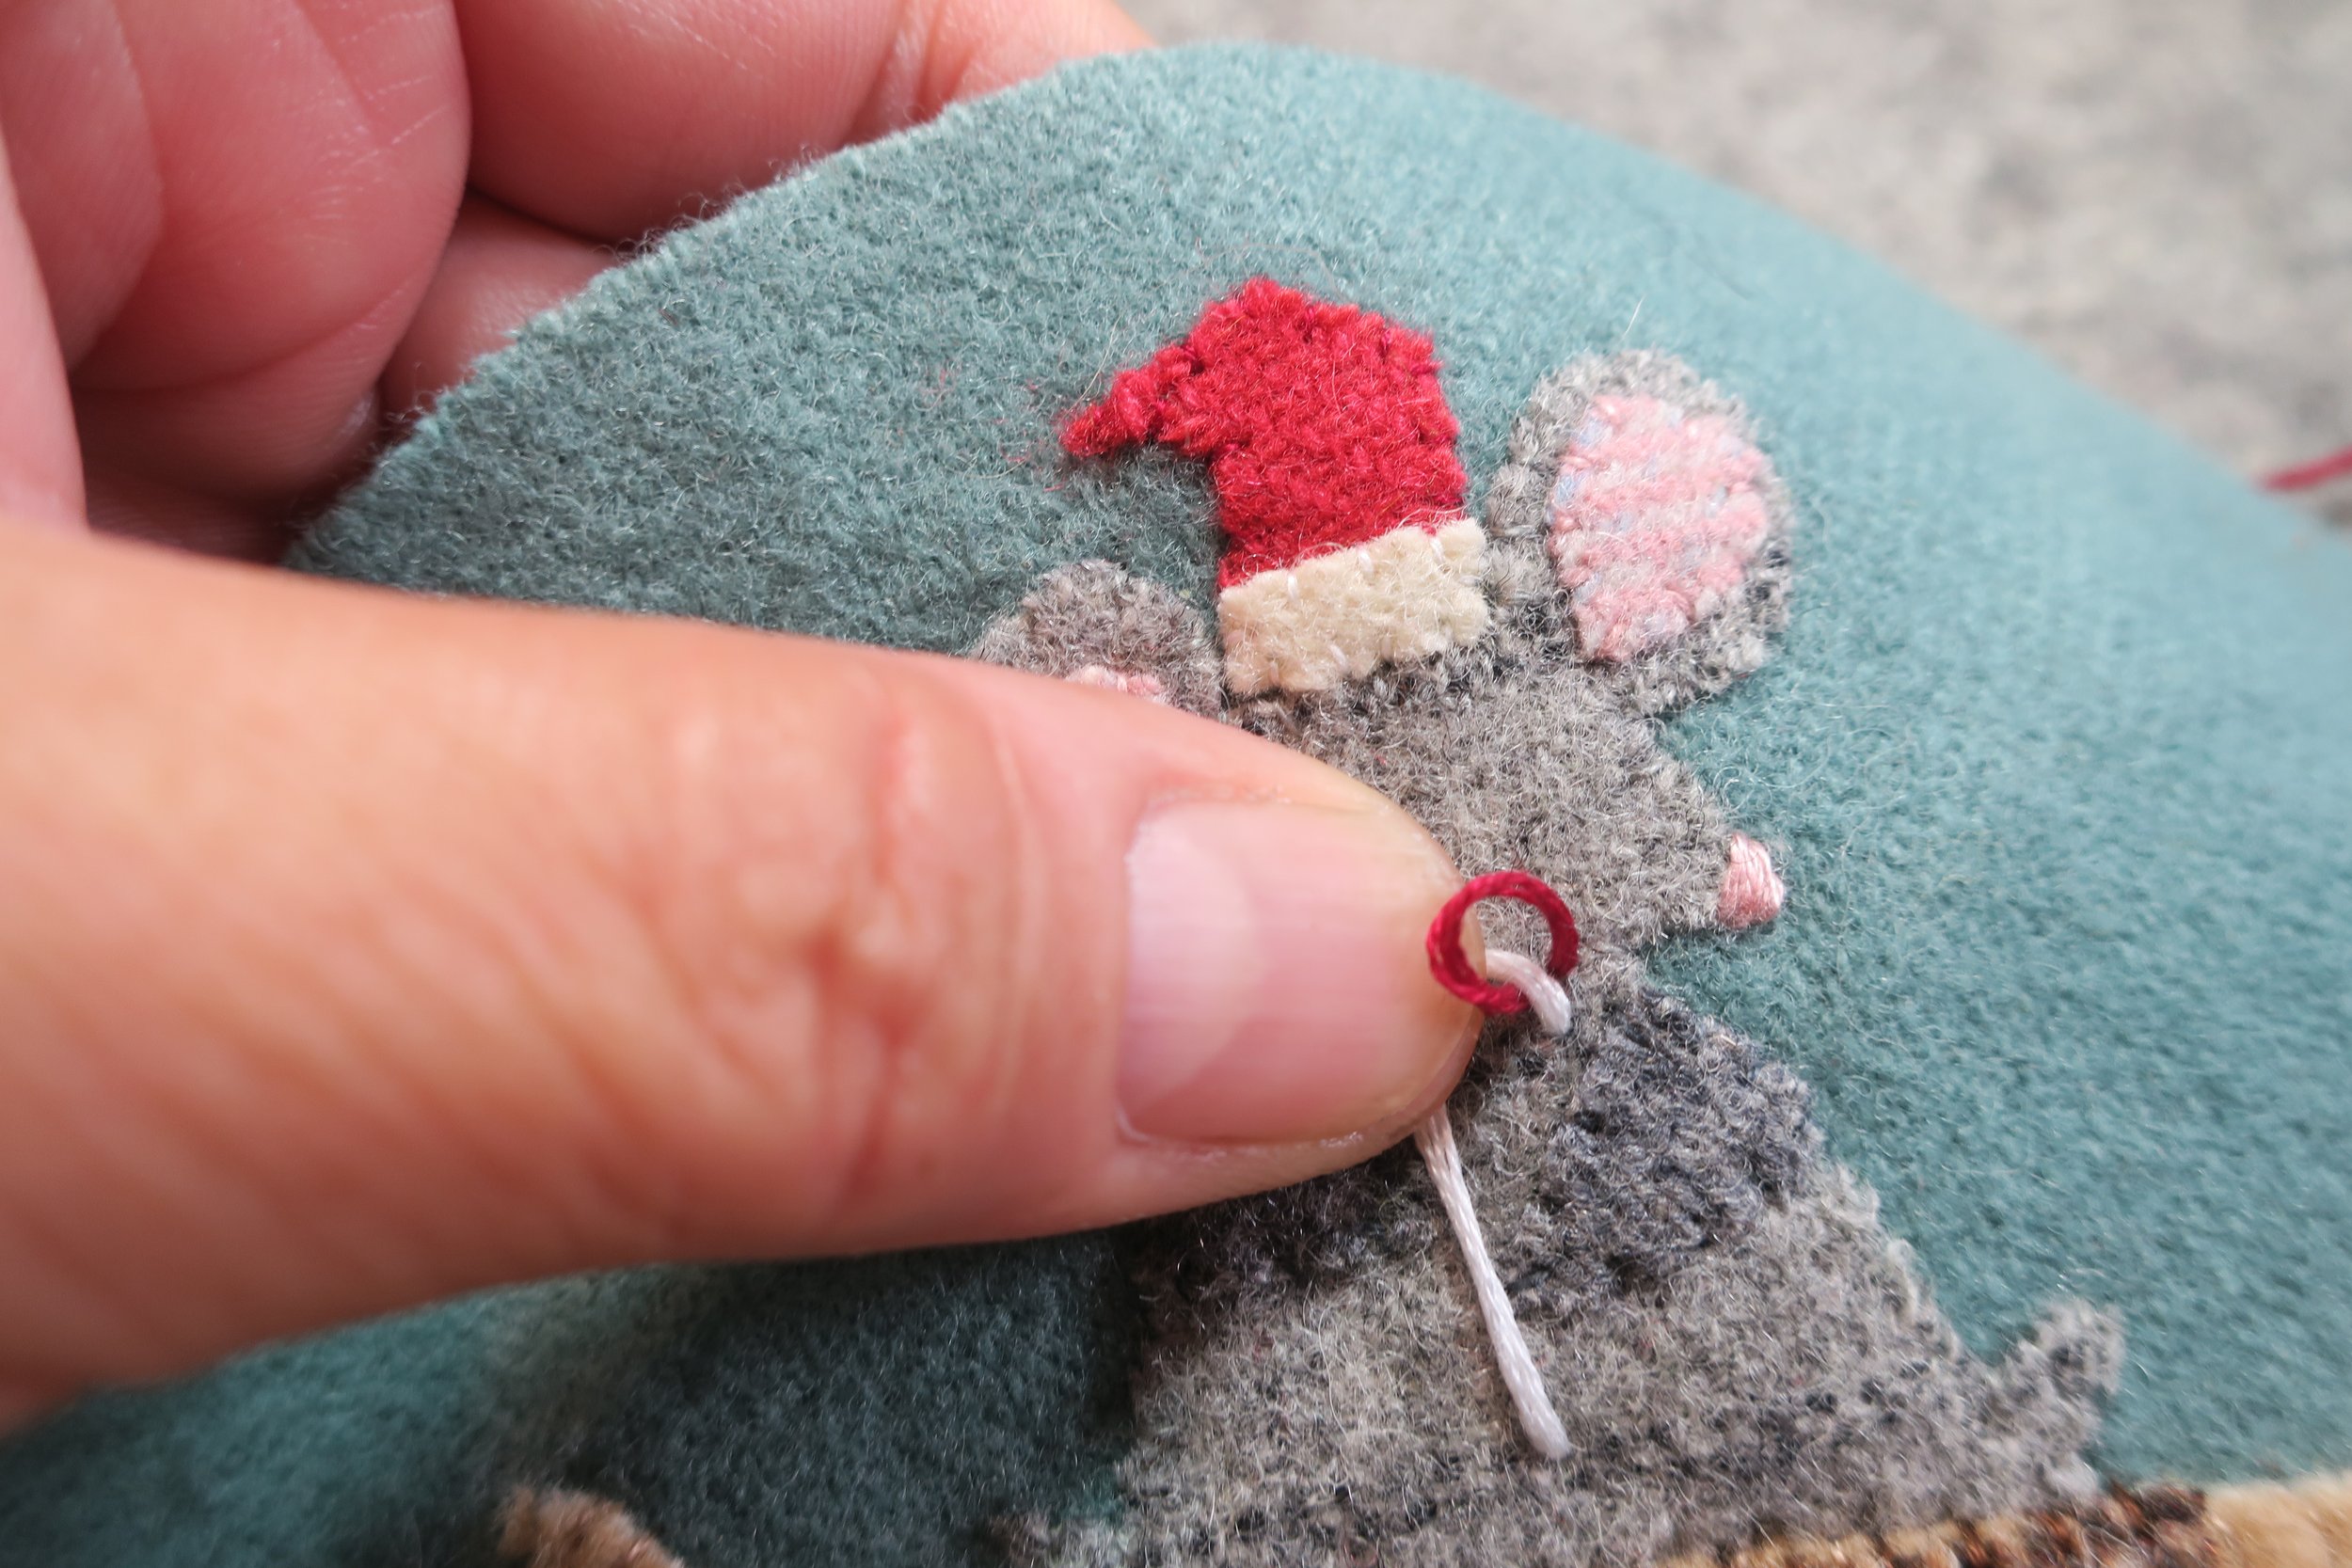
10. Iron in place using steam. Steam will penetrate through the layers of wool to aid in adhesion. I suggest you iron both the front and back sides of your project.
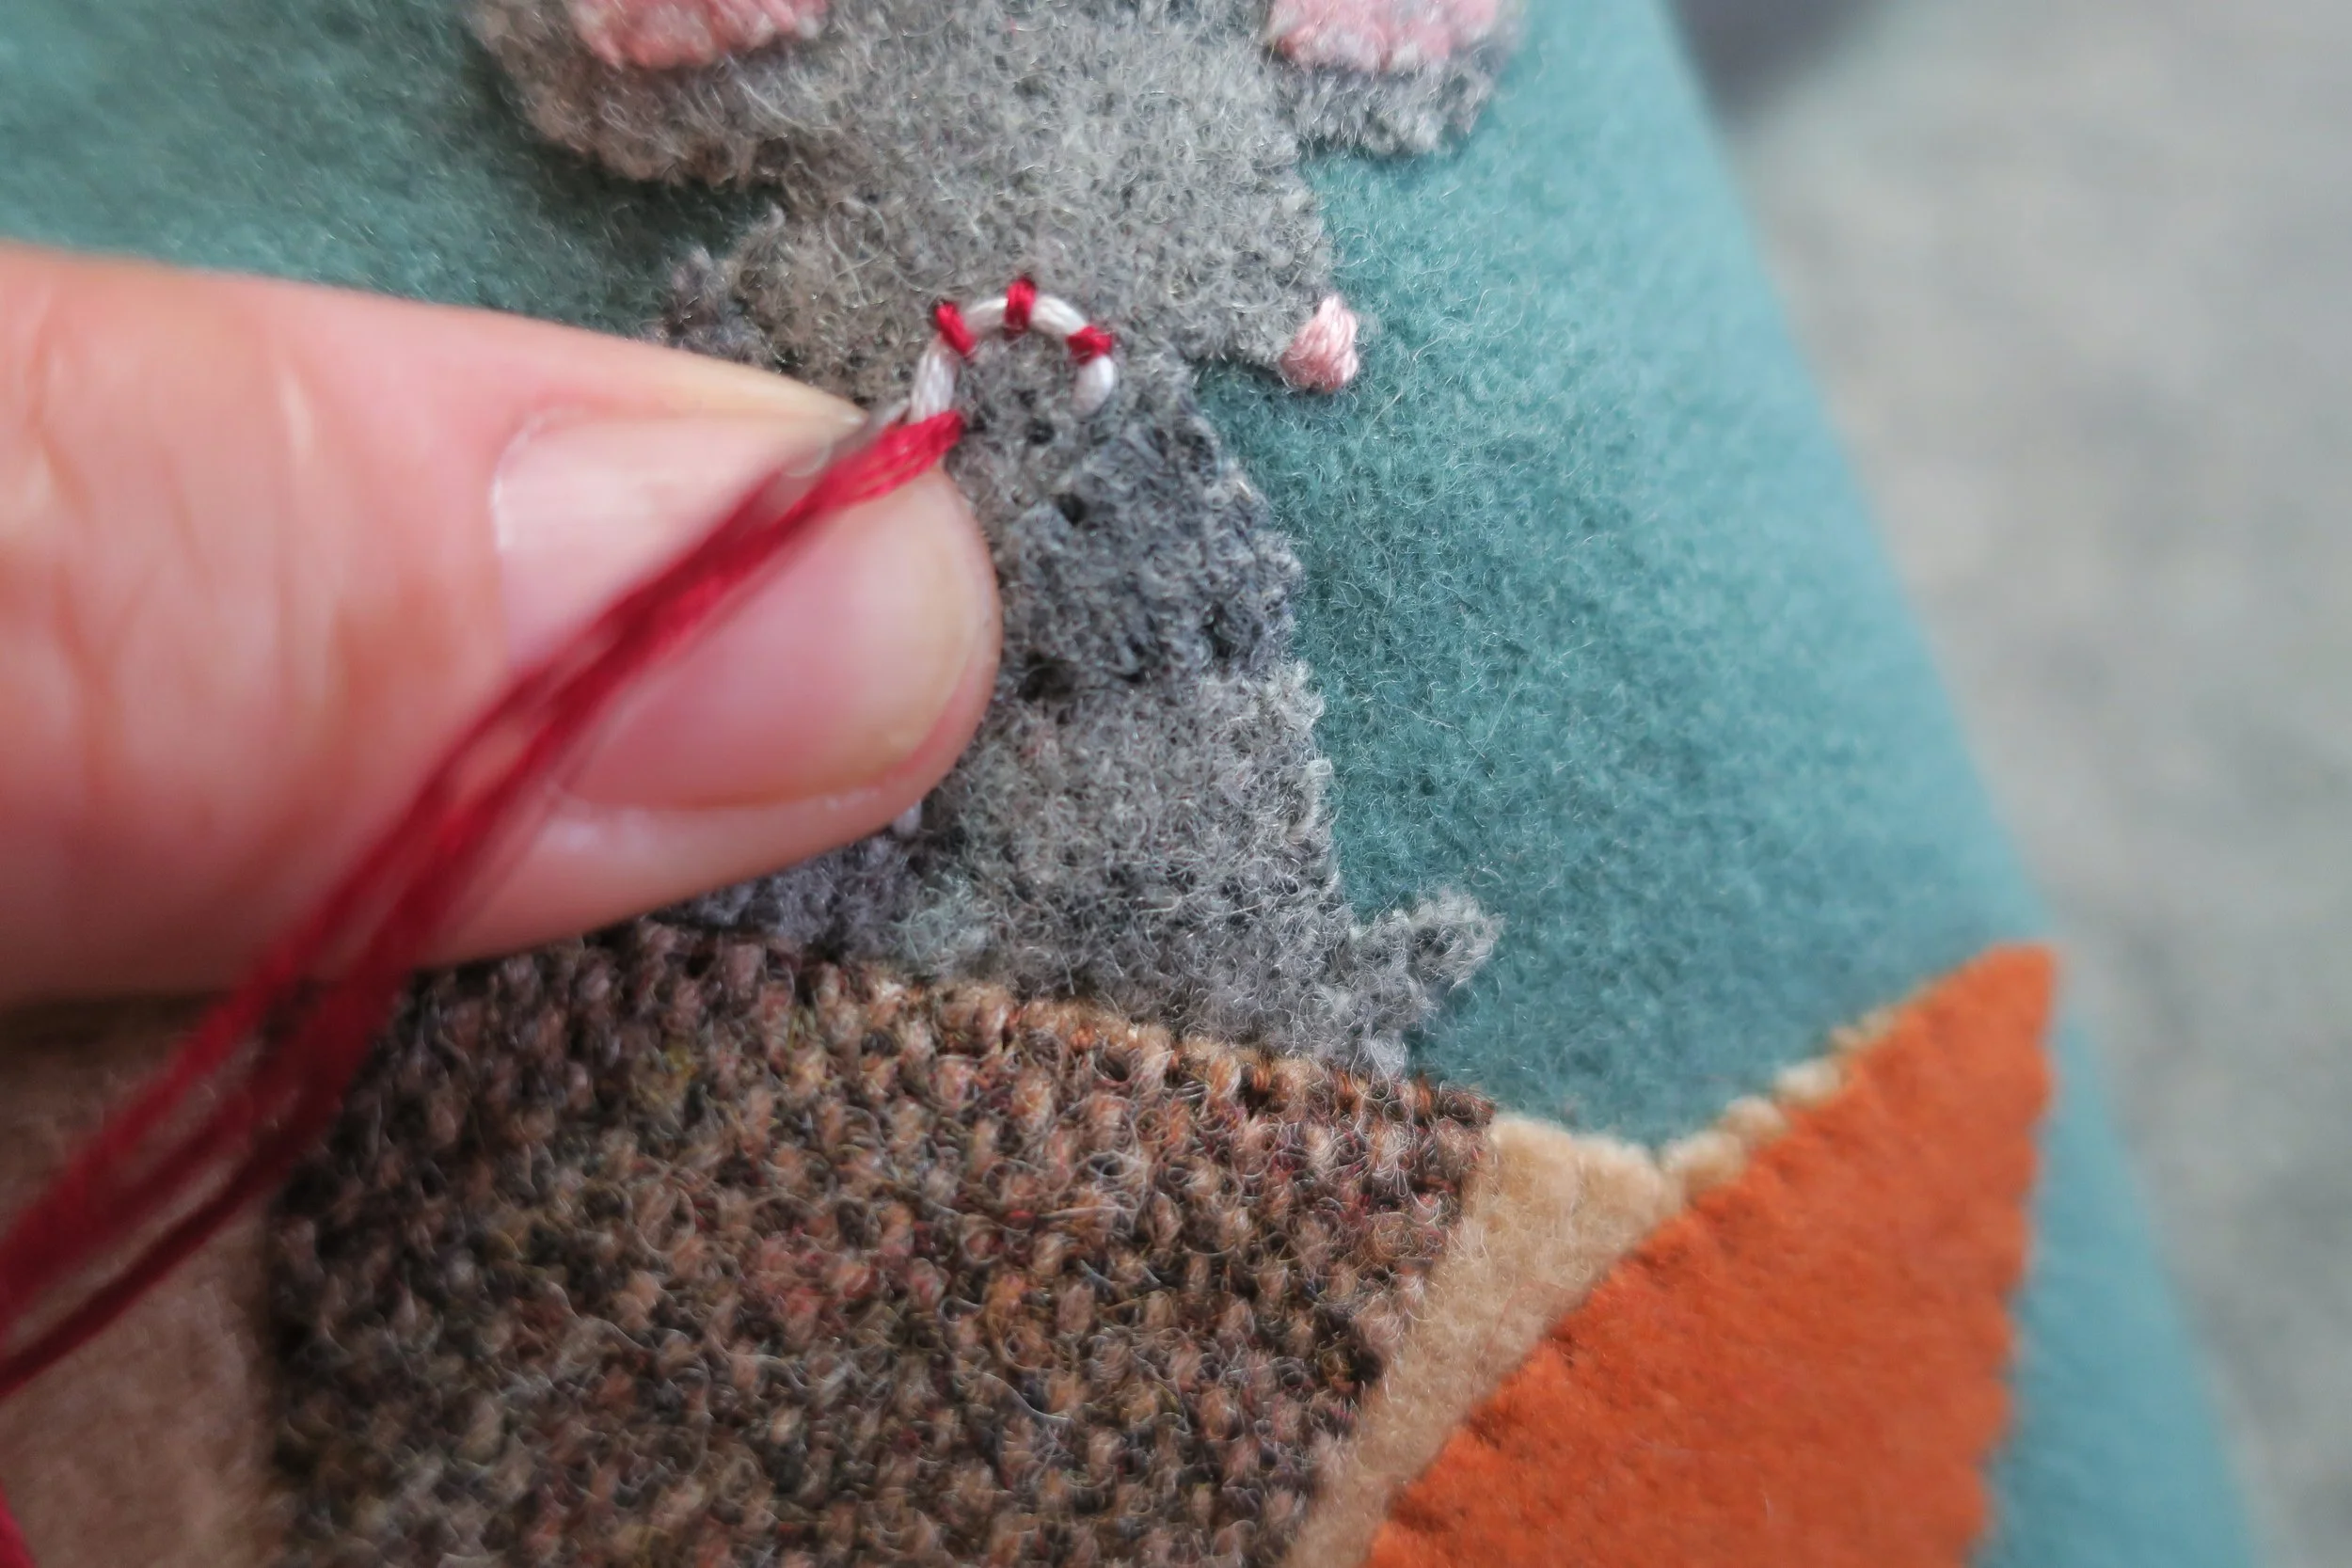
11. Use 1 strand of matching color floss to whip stitch your applique in place.
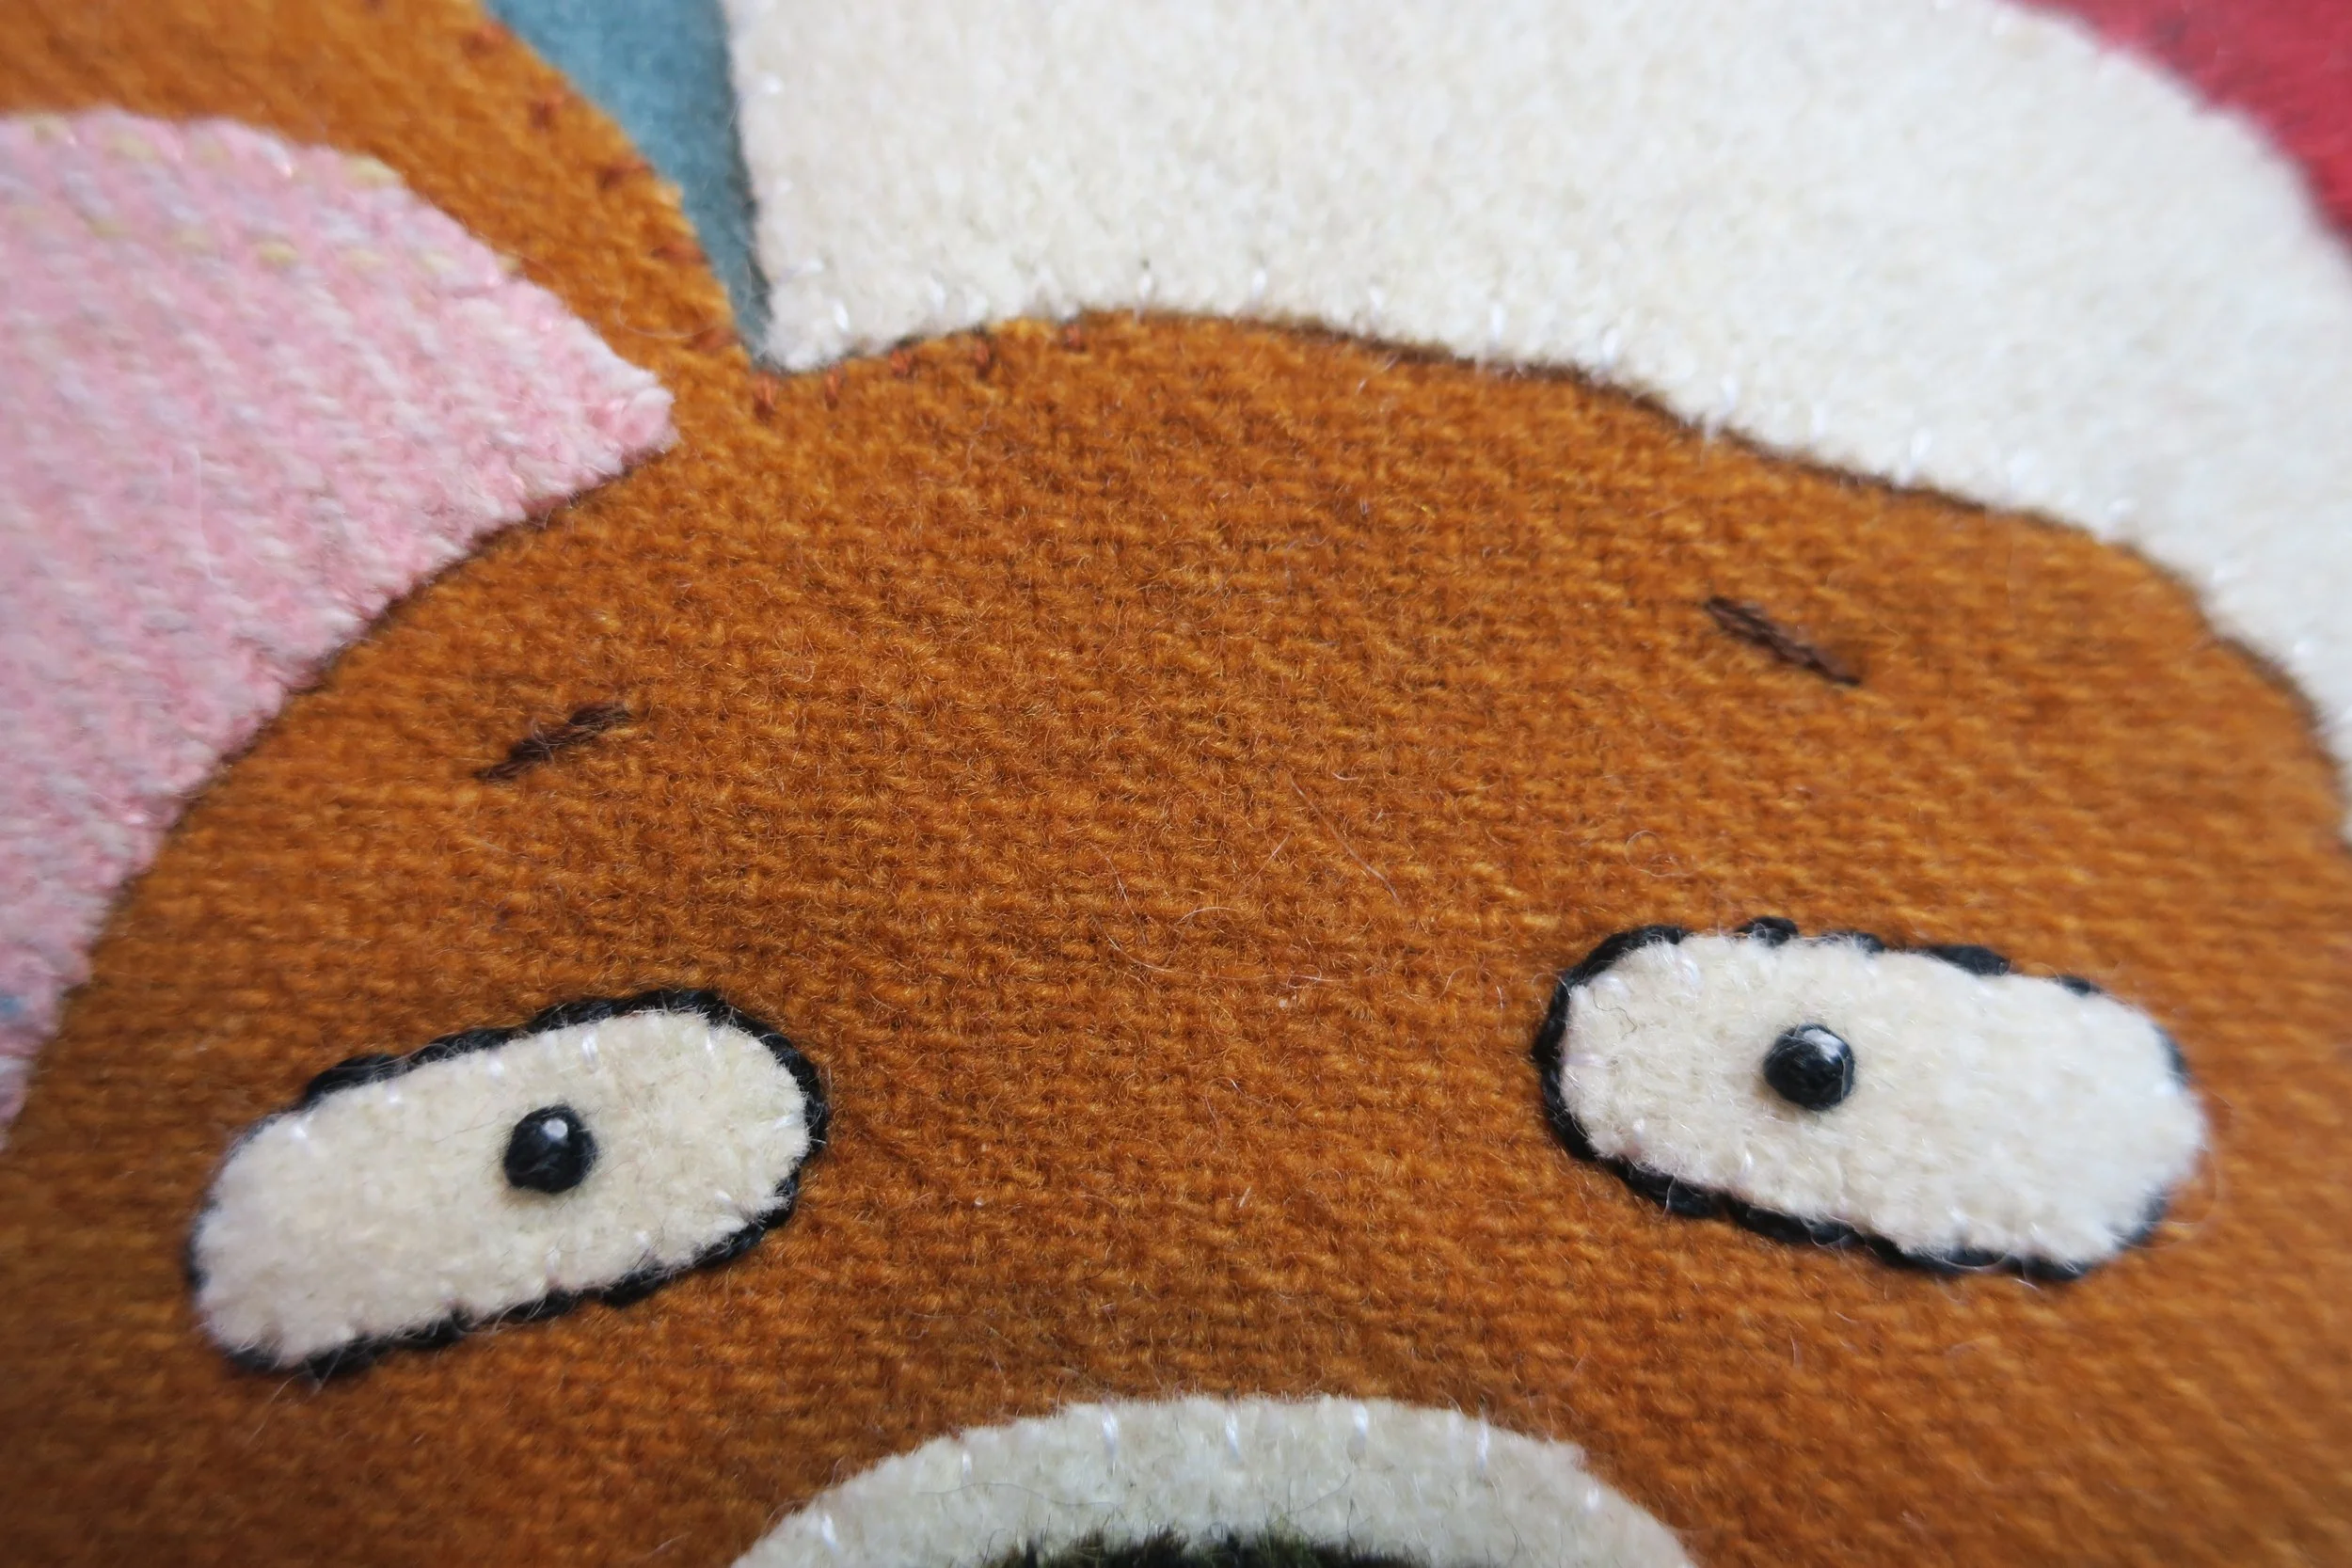
12. Place the eyes, face, ear, and pom pom onto your background using the layout as your guide.
This is the first sample of Winston’s face. I made a second one with his eyes slightly wider apart and tilted downward, I liked the second one better because it reminded me of his puppy face.
13. Fuse wool pieces down, and then whip stitch in place.
14. Position the nose, and then fuse using steam. Use 1 strand of black floss to whip stitch in place.
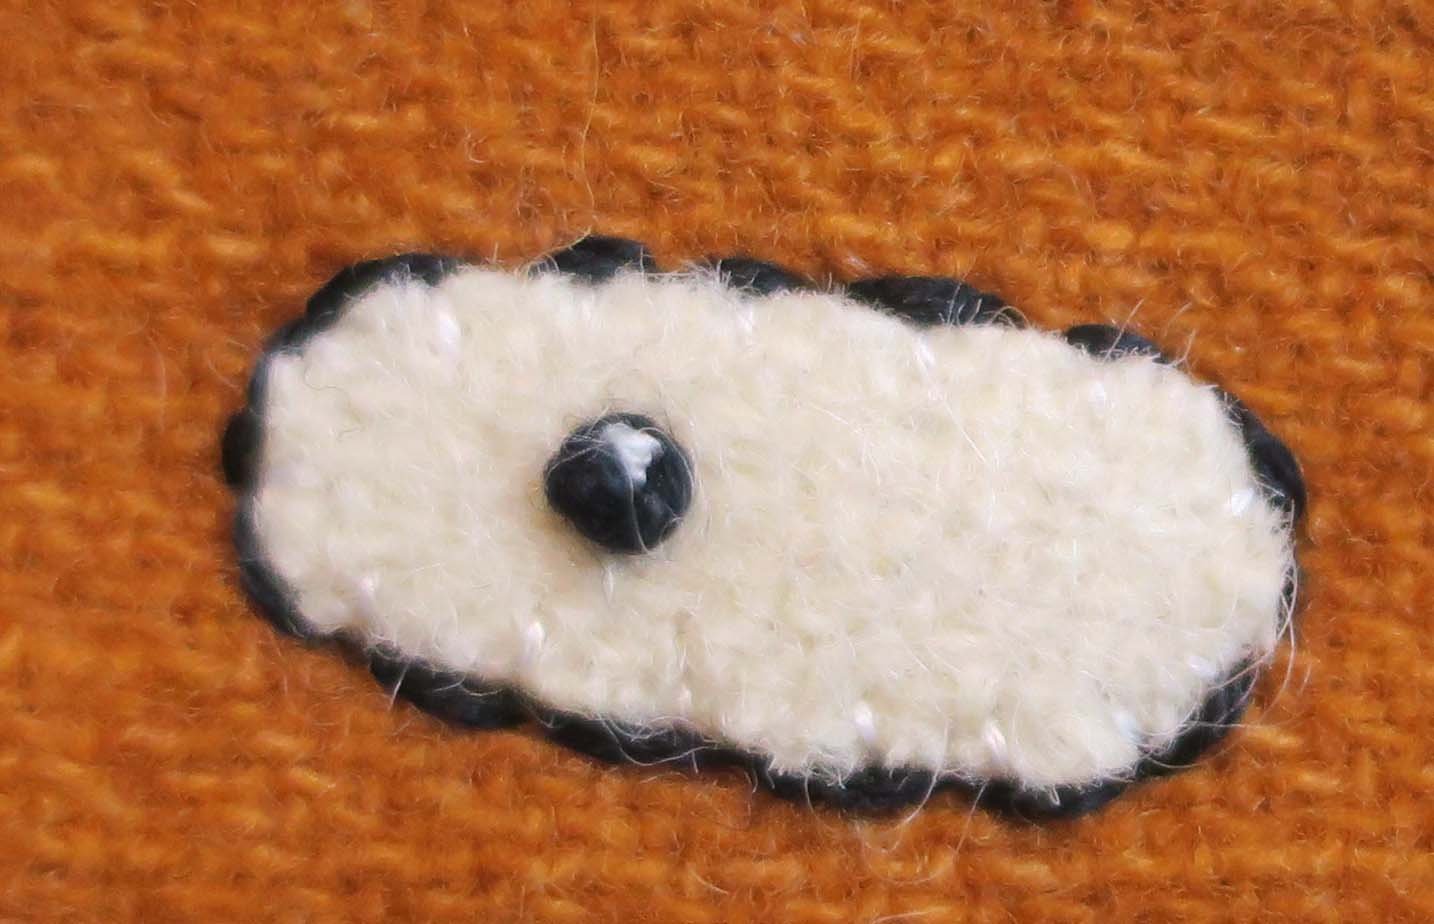
15. Use a washable fabric market to mark the eyeballs.
16. Use 3 strands of black floss to make French knot eyes. I used 2 wraps around the needle for this. Use a damp hand towel to dab away the fabric marker lines.
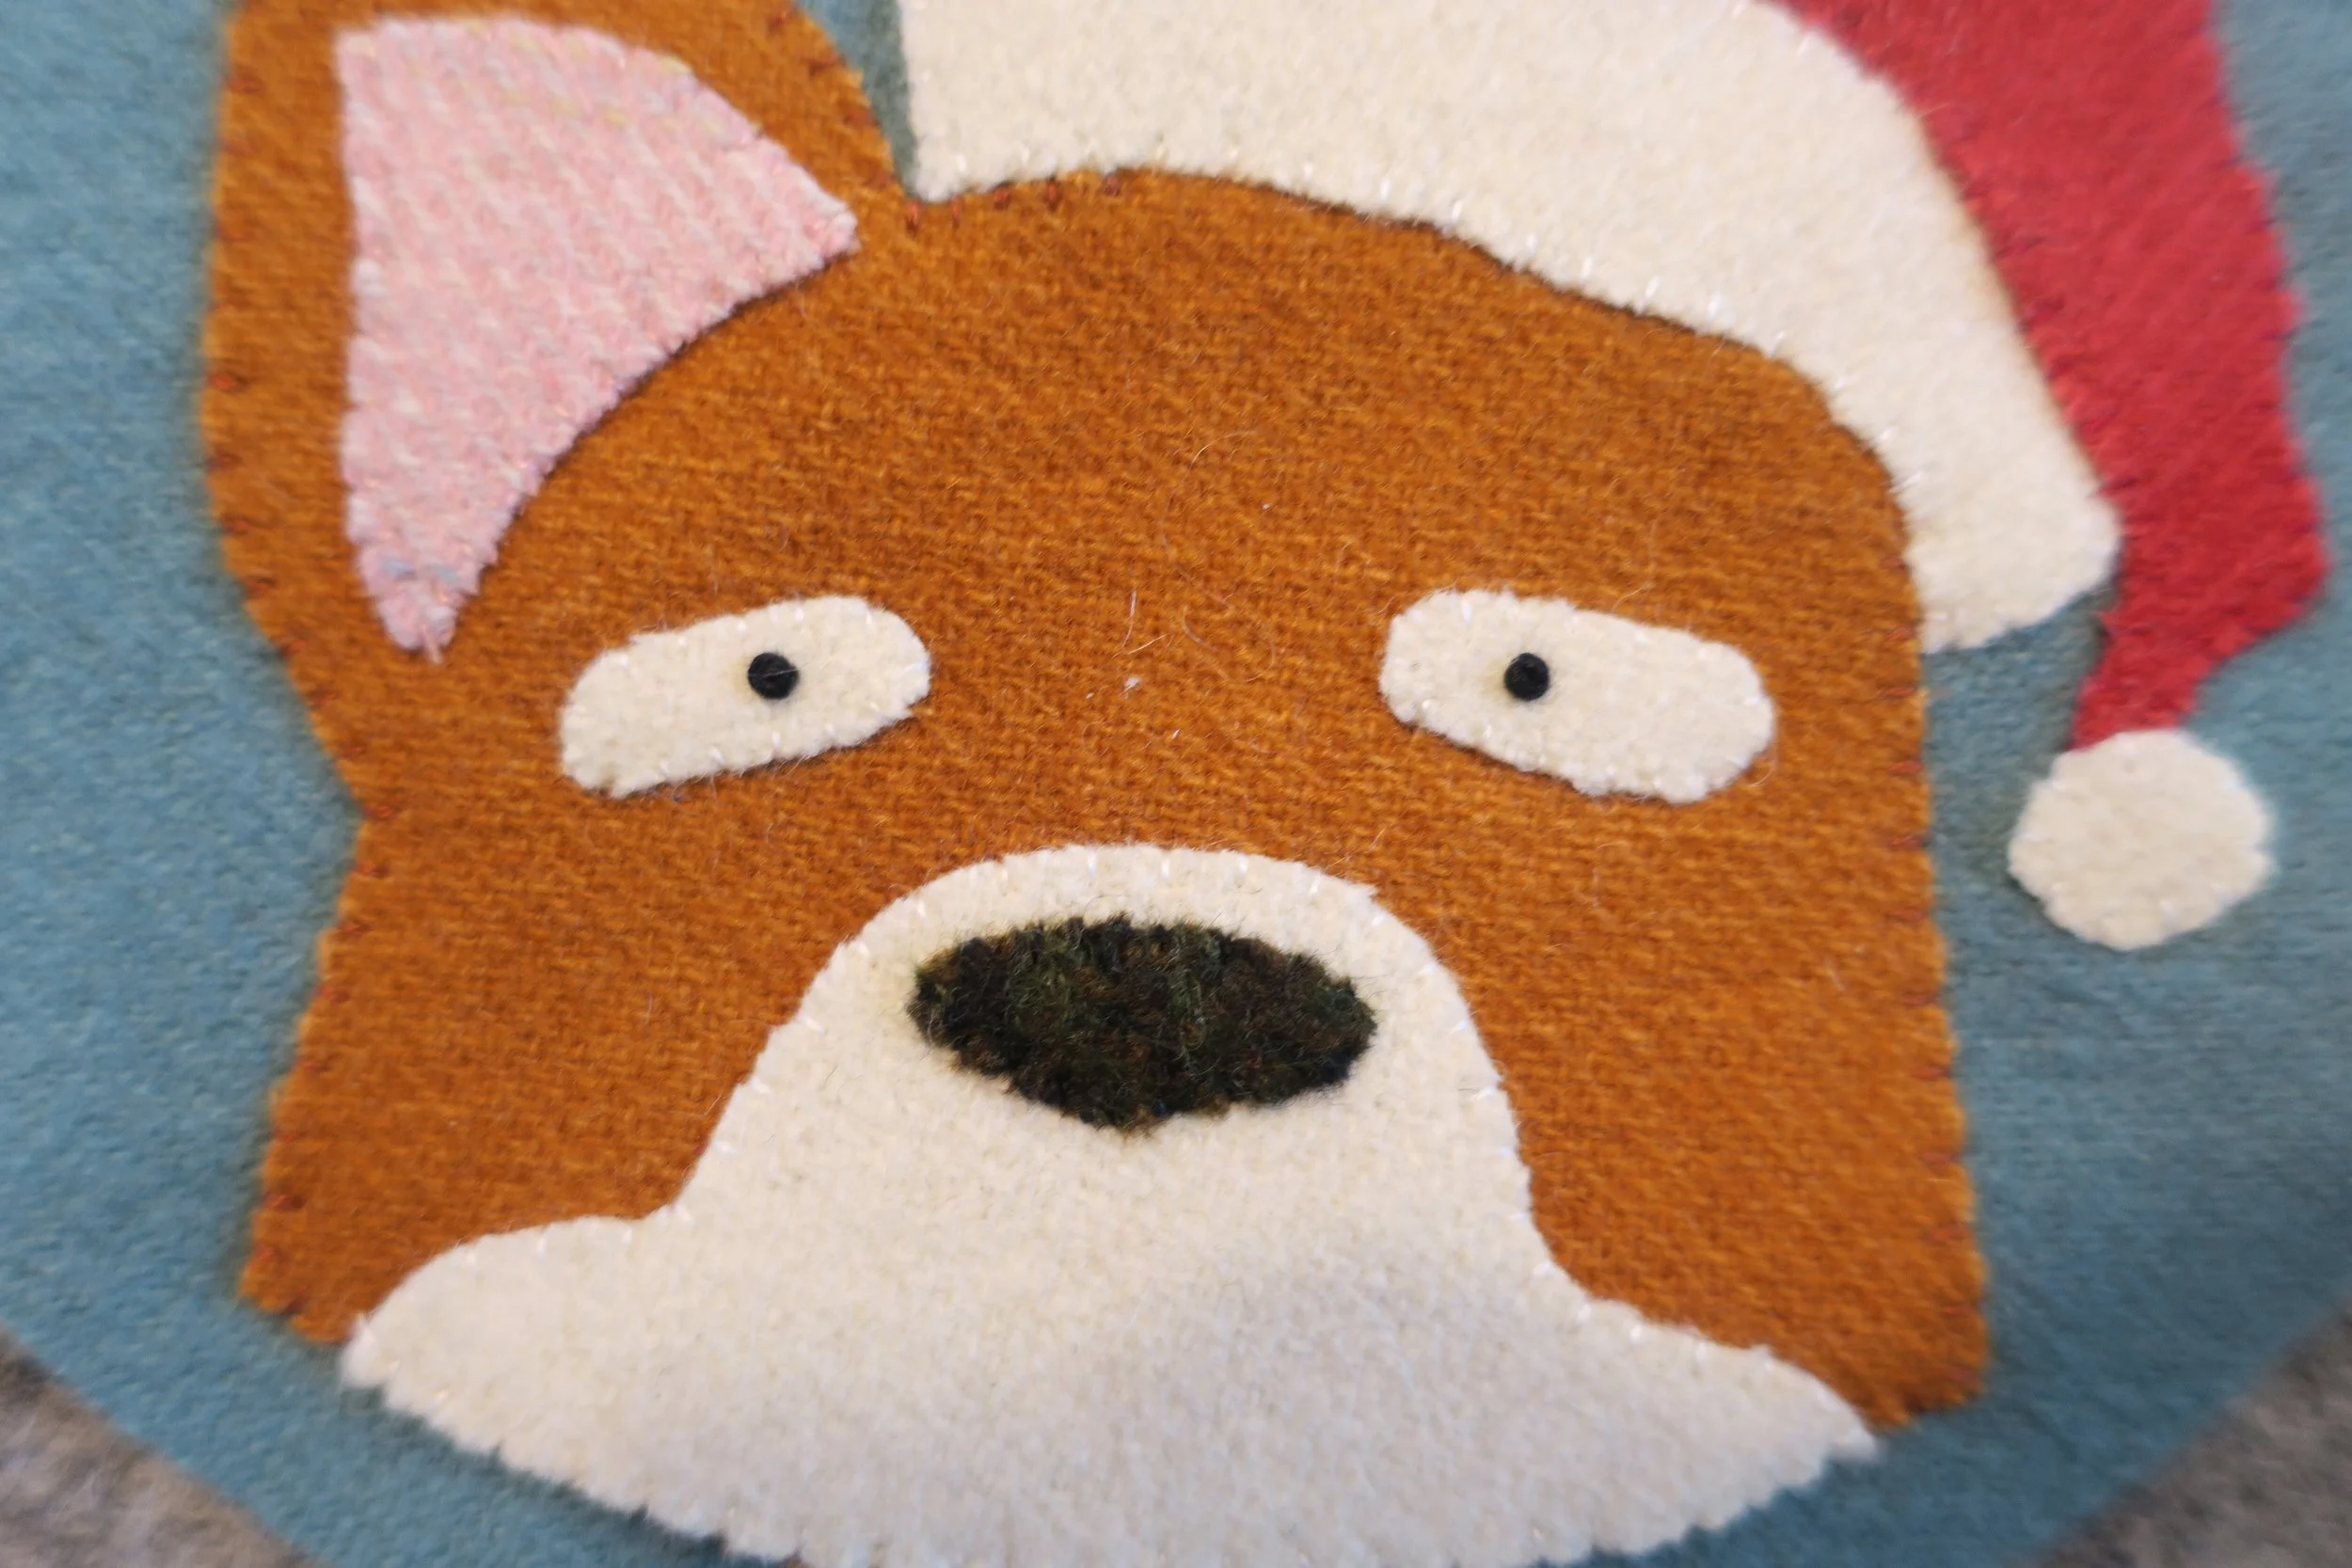
17. Use the same 3 strands of black floss to back stitch an outline around the eyes.
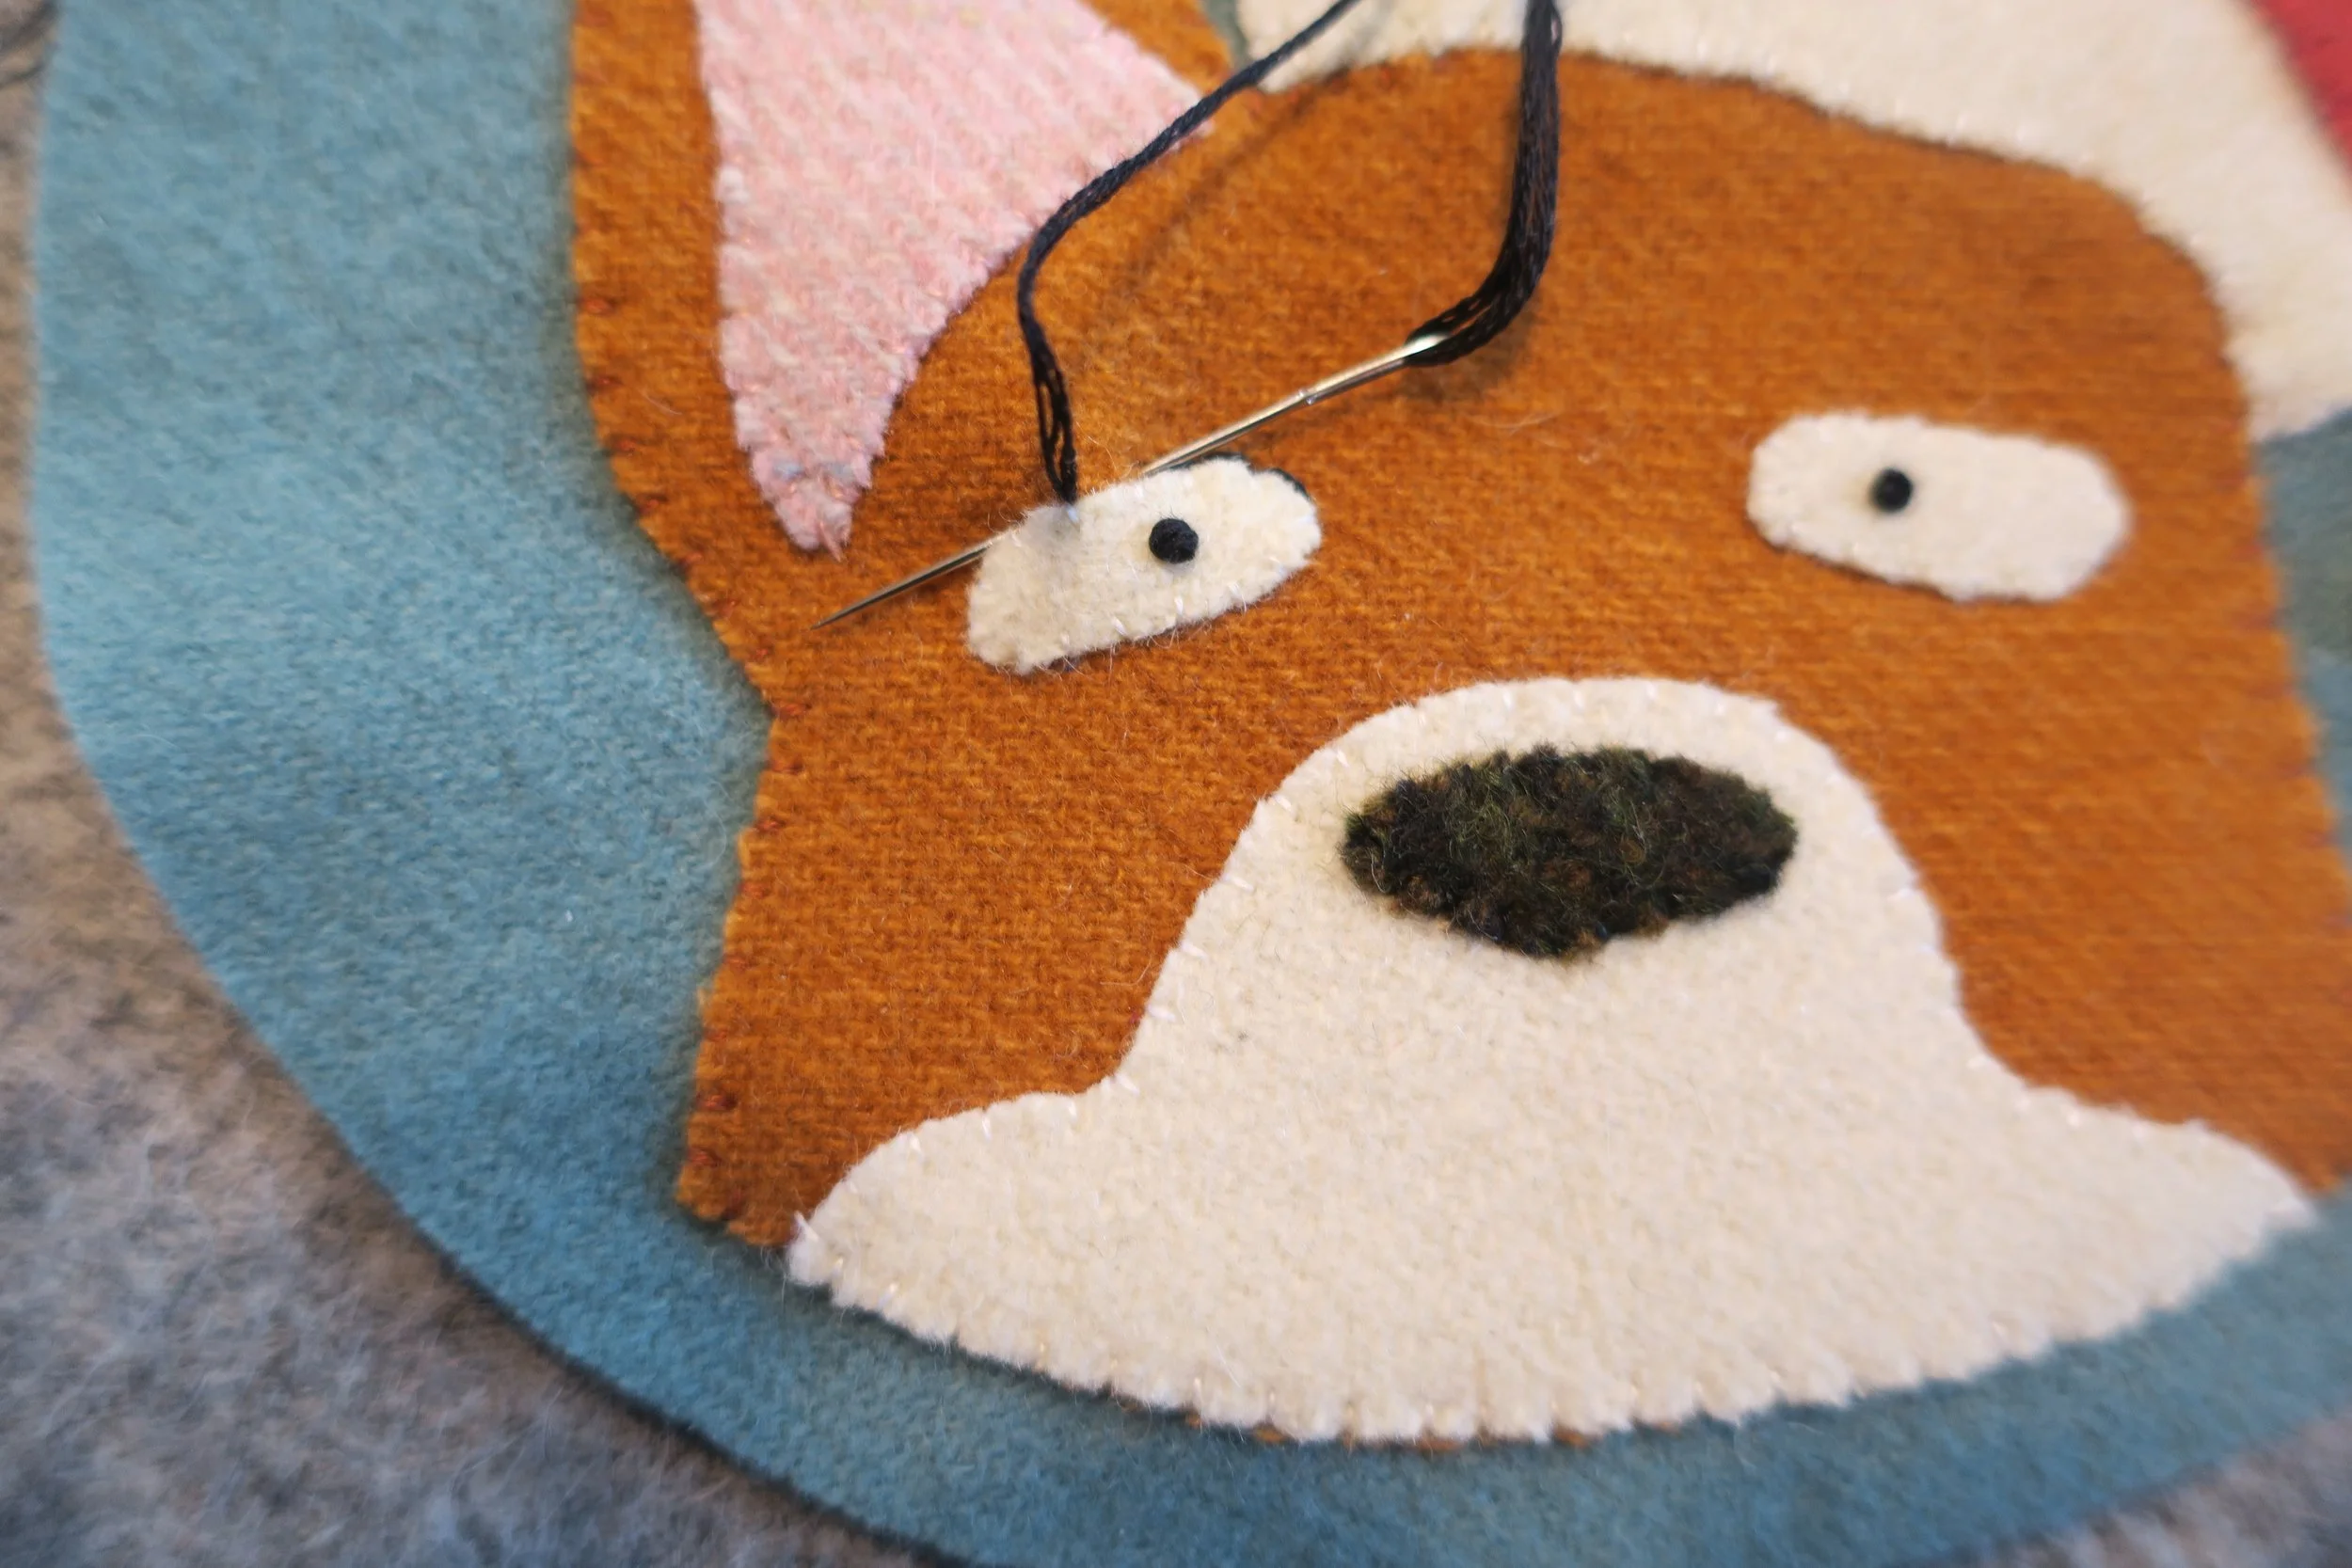
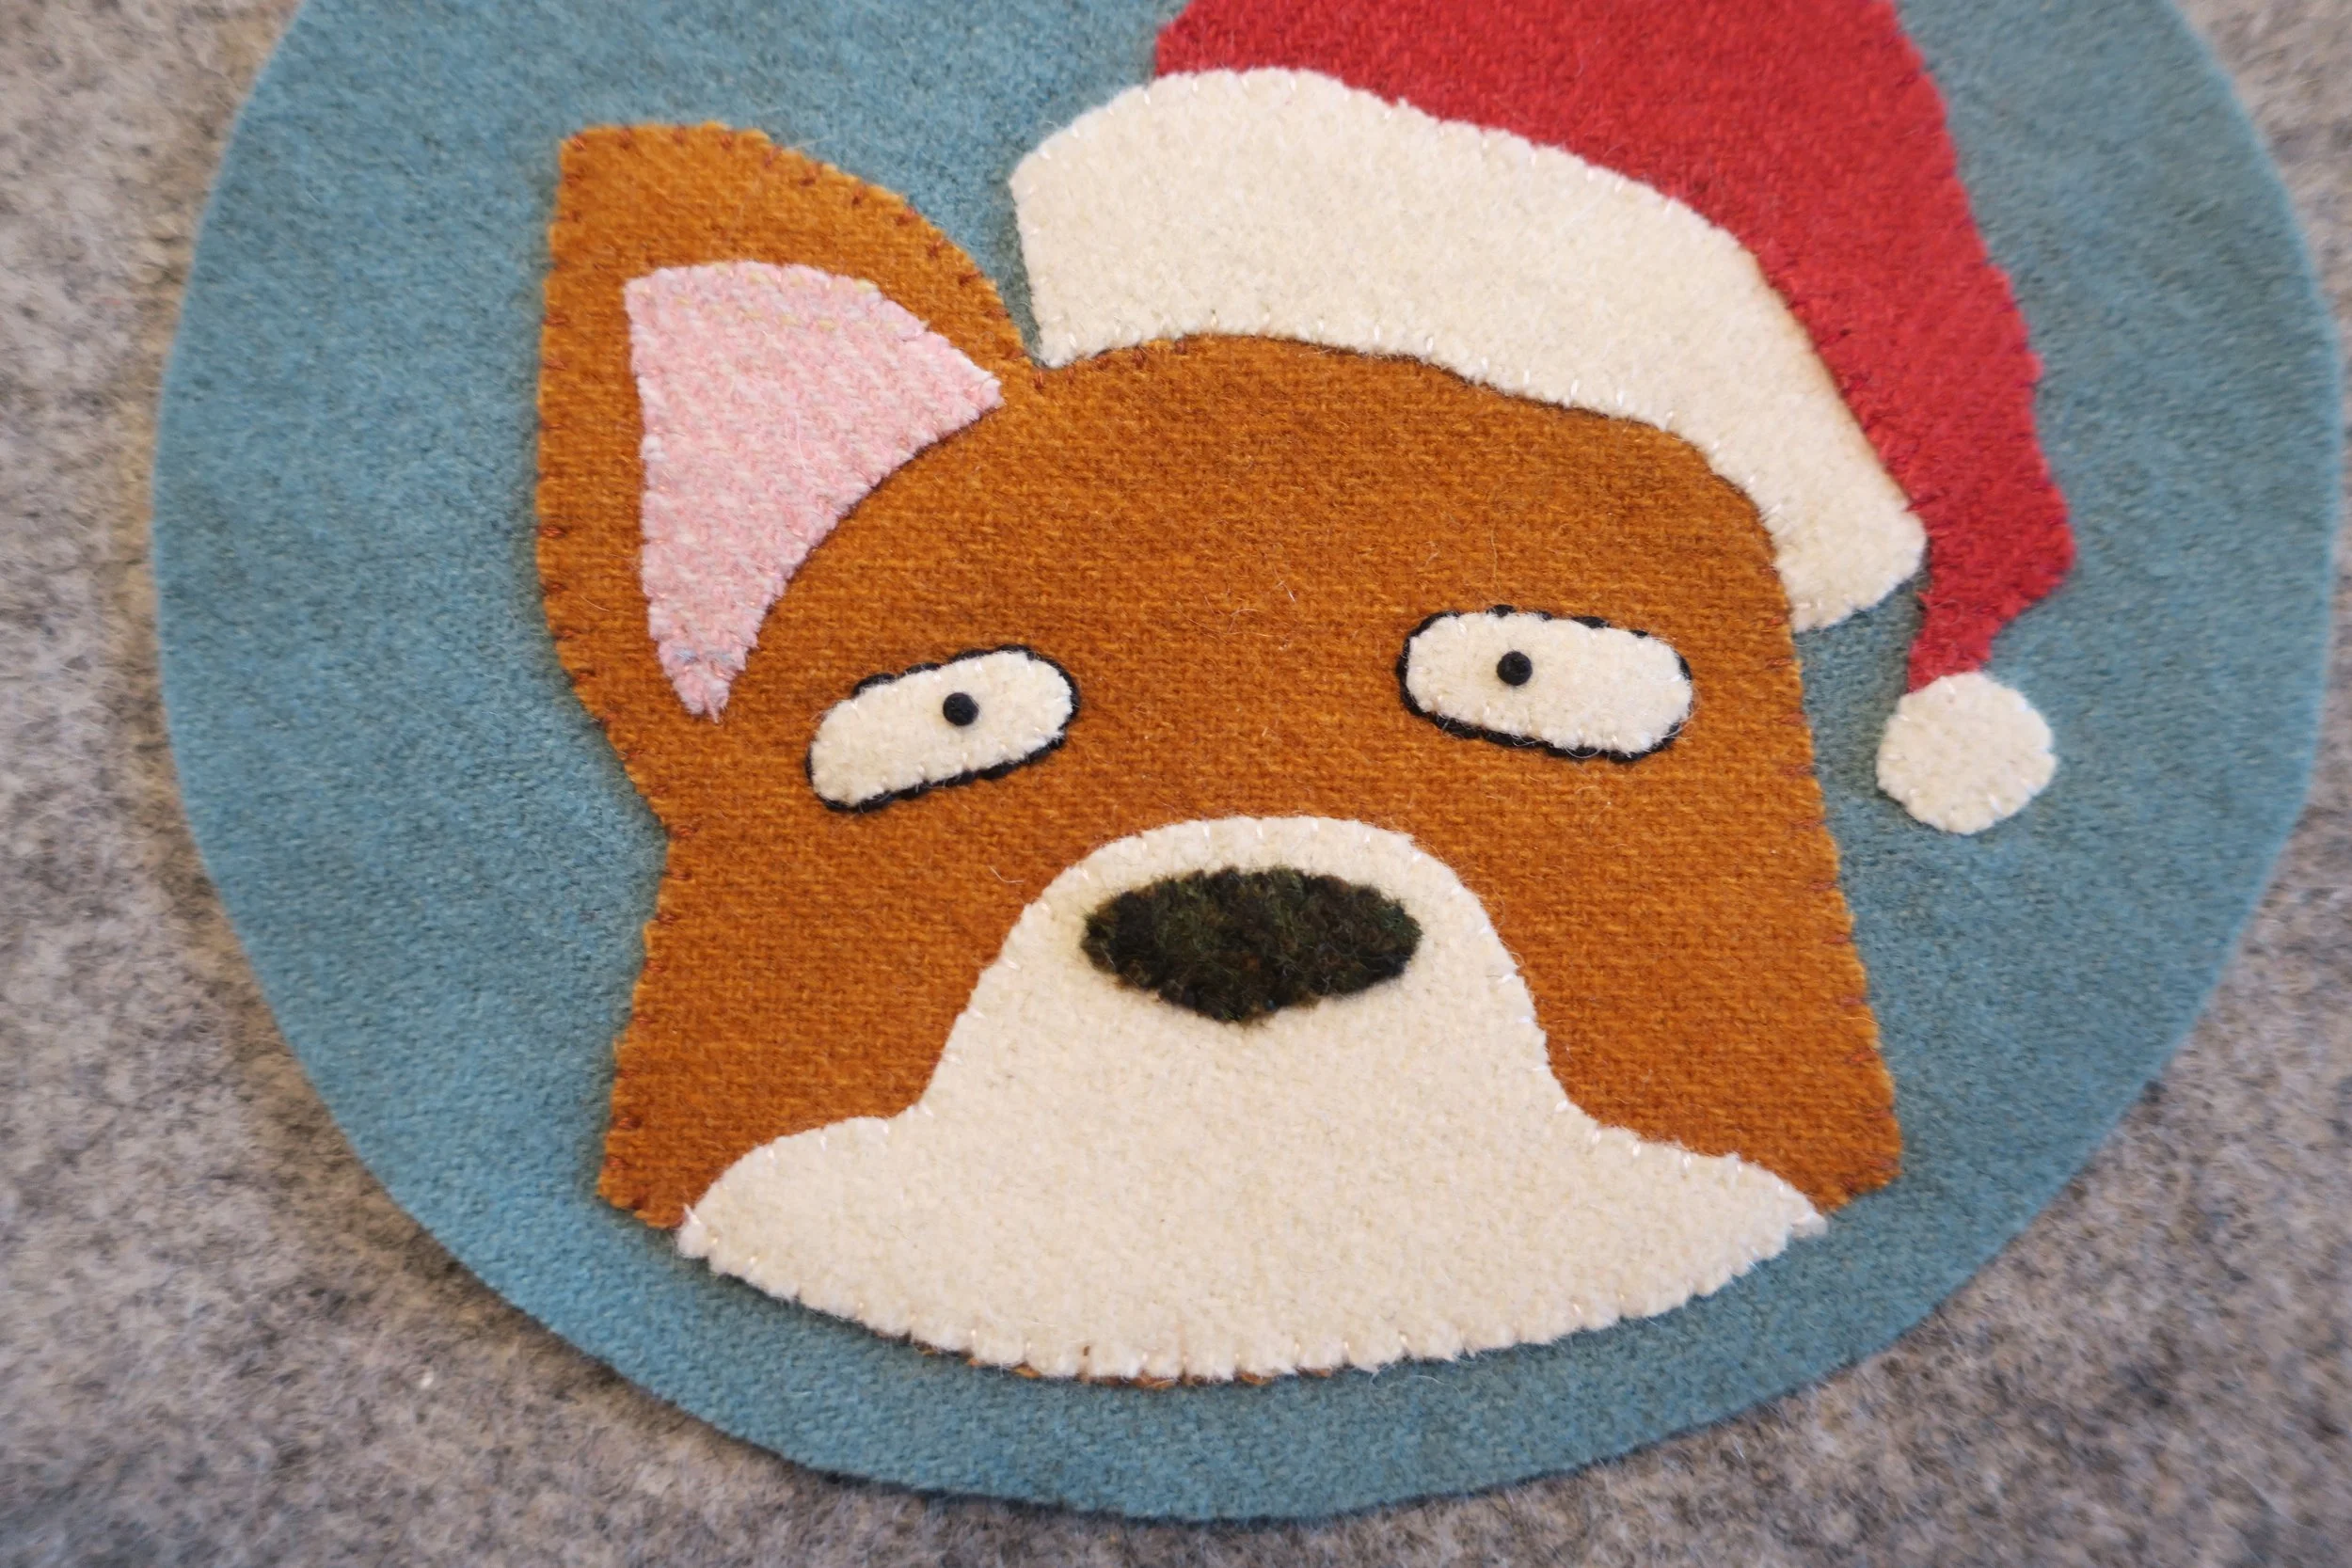
18. Use 1 strand of white floss to make a small French knot at the top of each eyeball. This will add a little sparkle to his eye. Try not to pull it too tight, as it will pull through the black knot underneath.
19. Use a water erasable pen to draw the mouth and whisker dots . Use the layout for guidance.
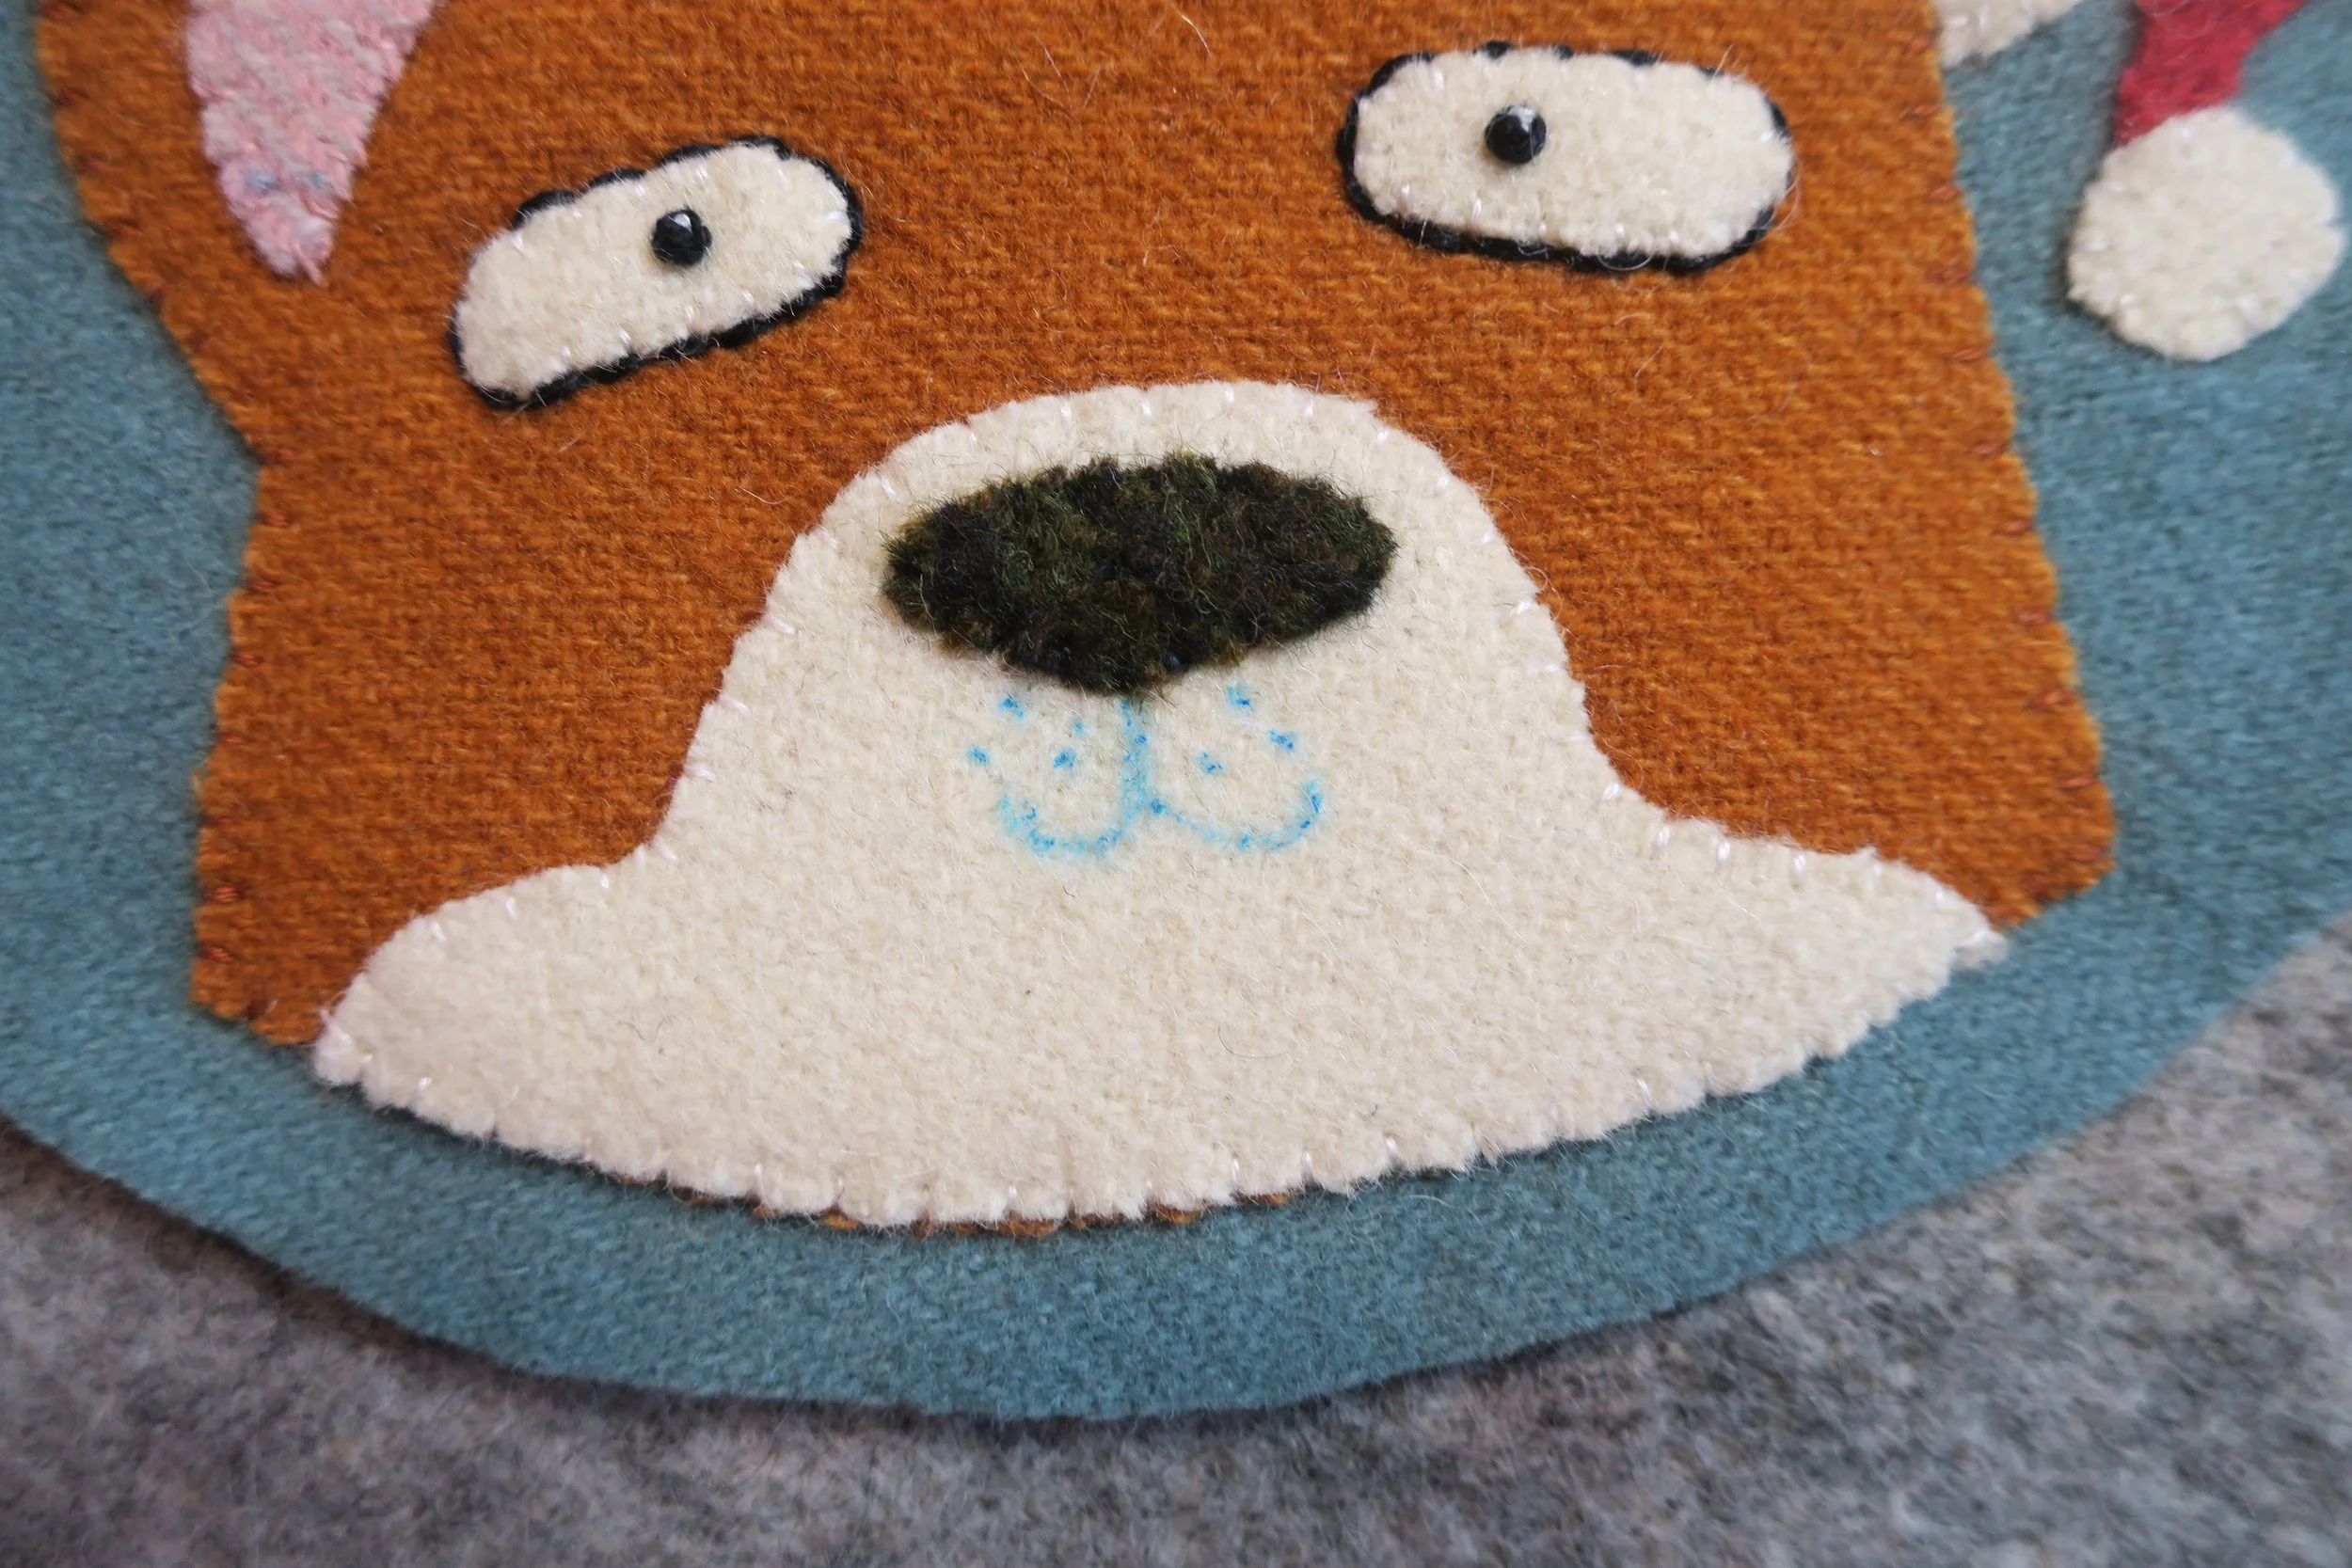
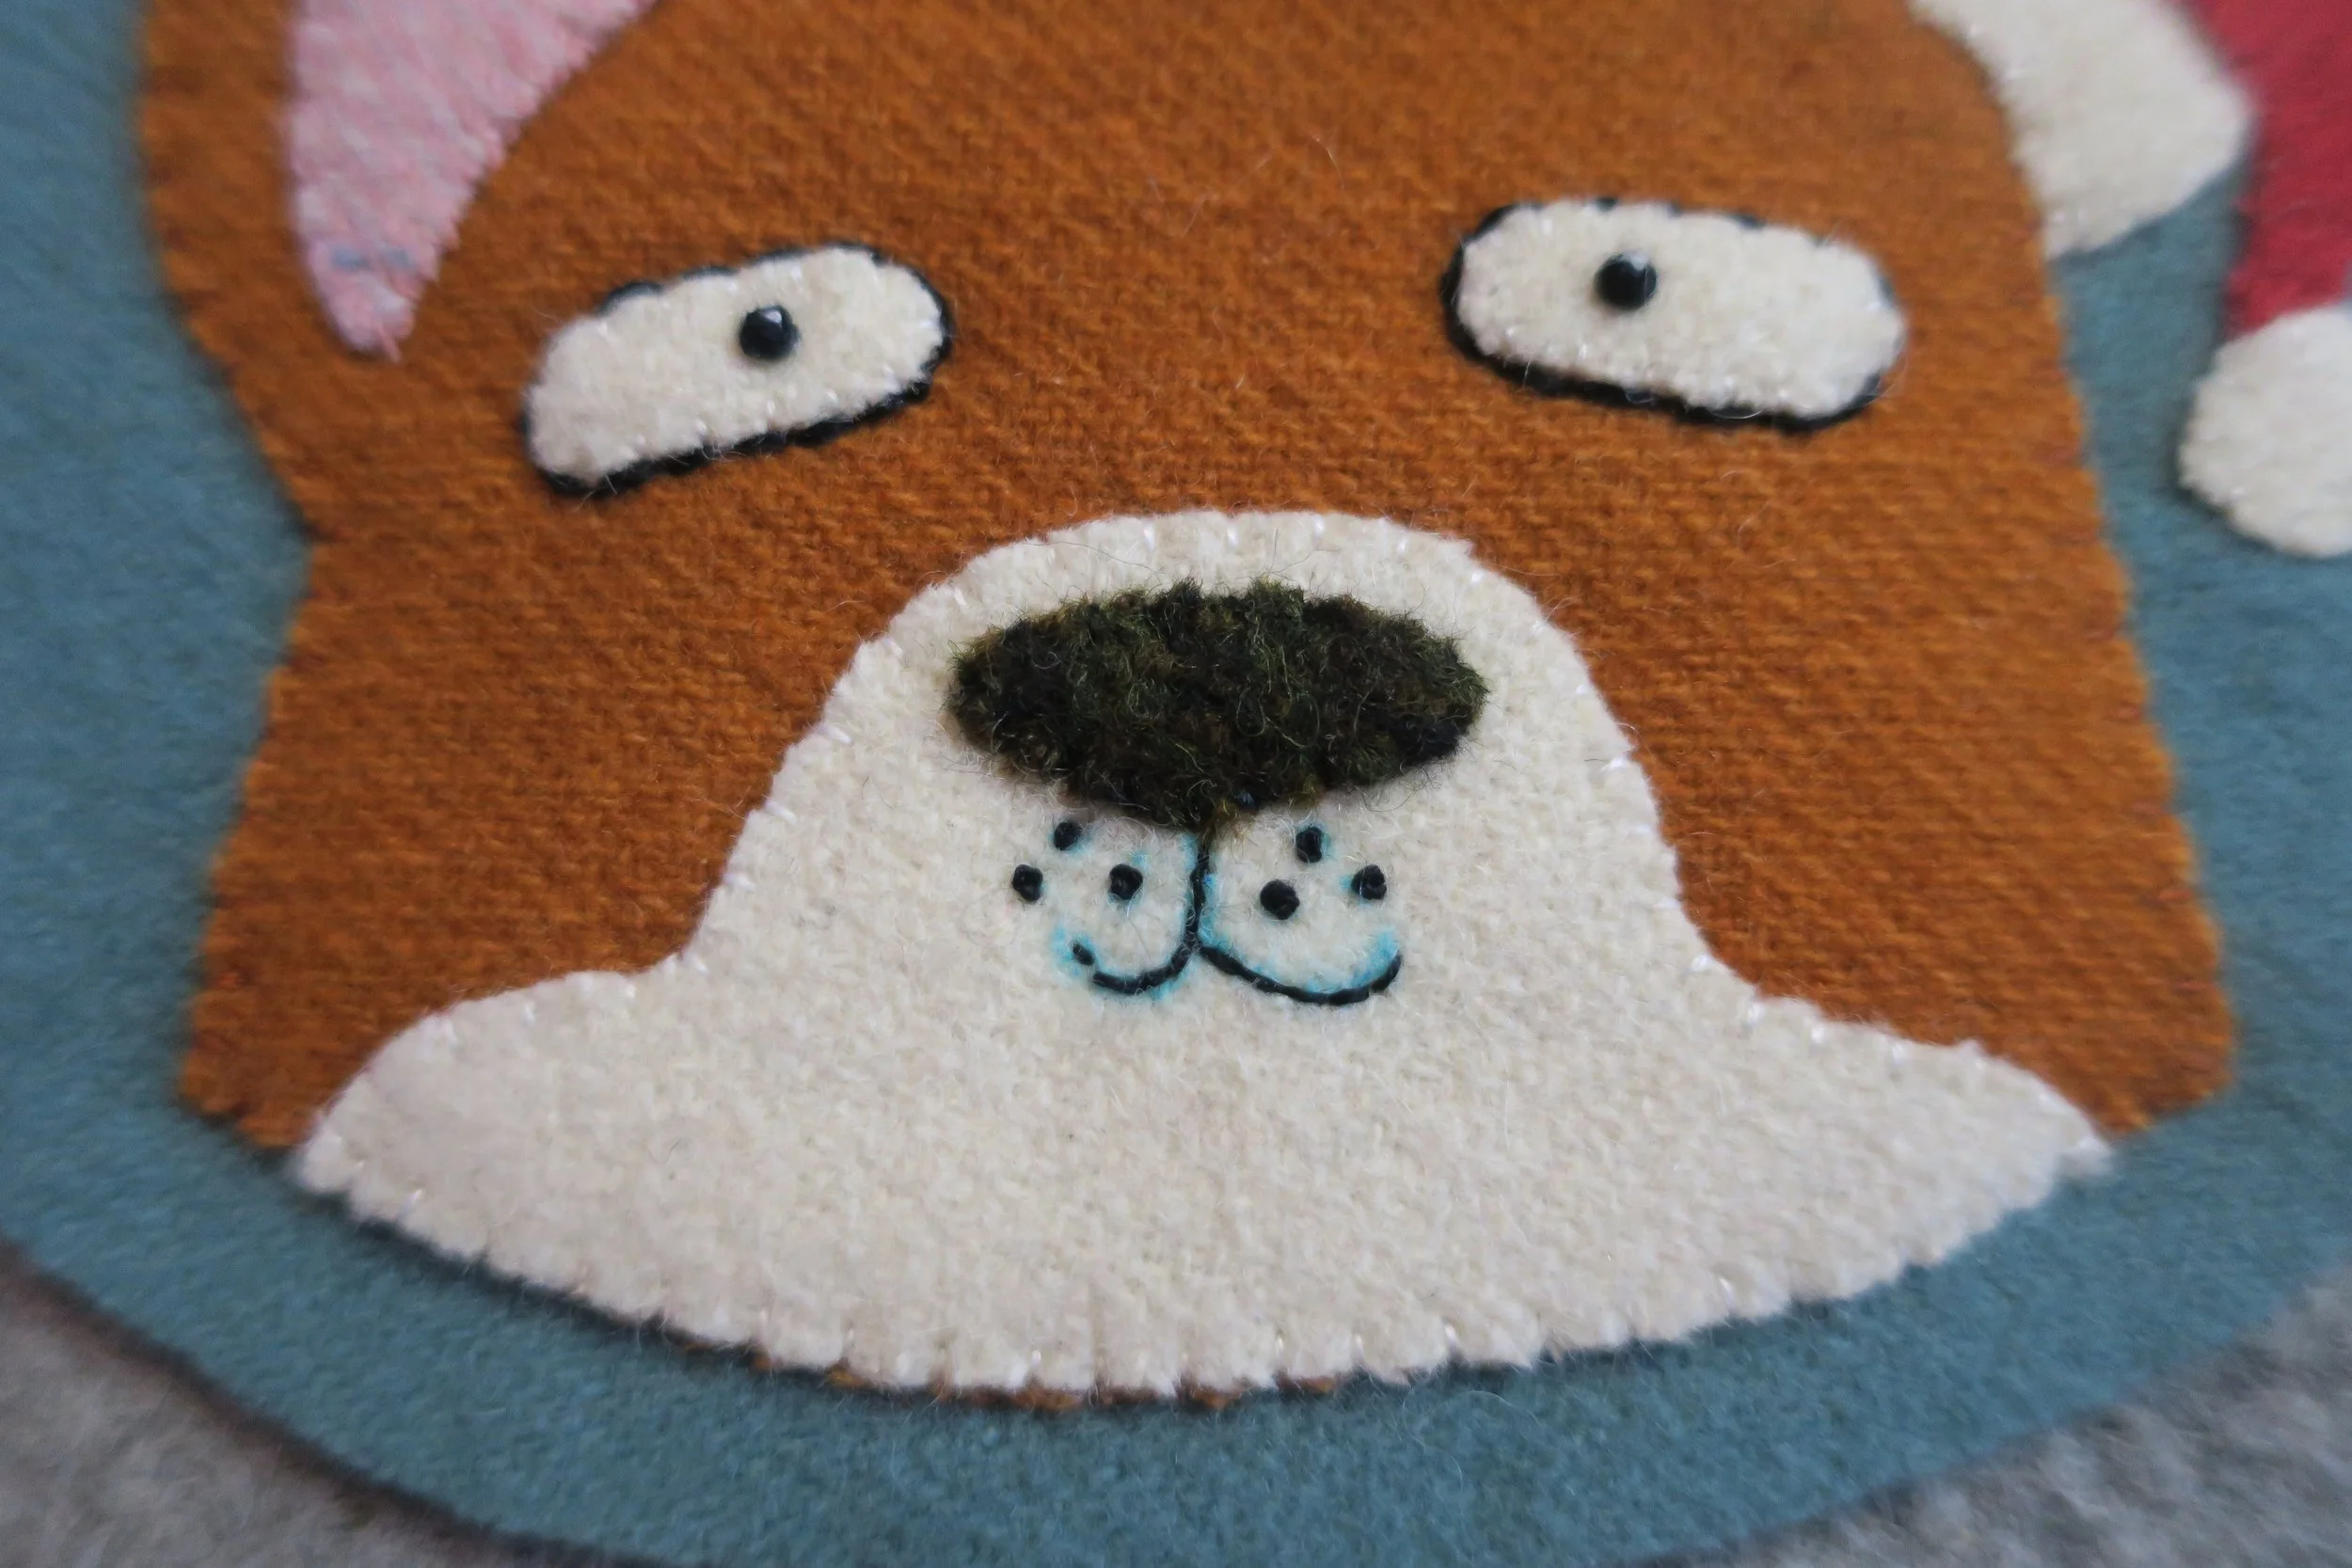
20. Use 2 strands of black floss to back stitch his mouth. Use the same thread to make French knots over the whisker dots.
21, Use 2 strands of brown floss to stem stitch his eyebrows (about 3 small stitches).
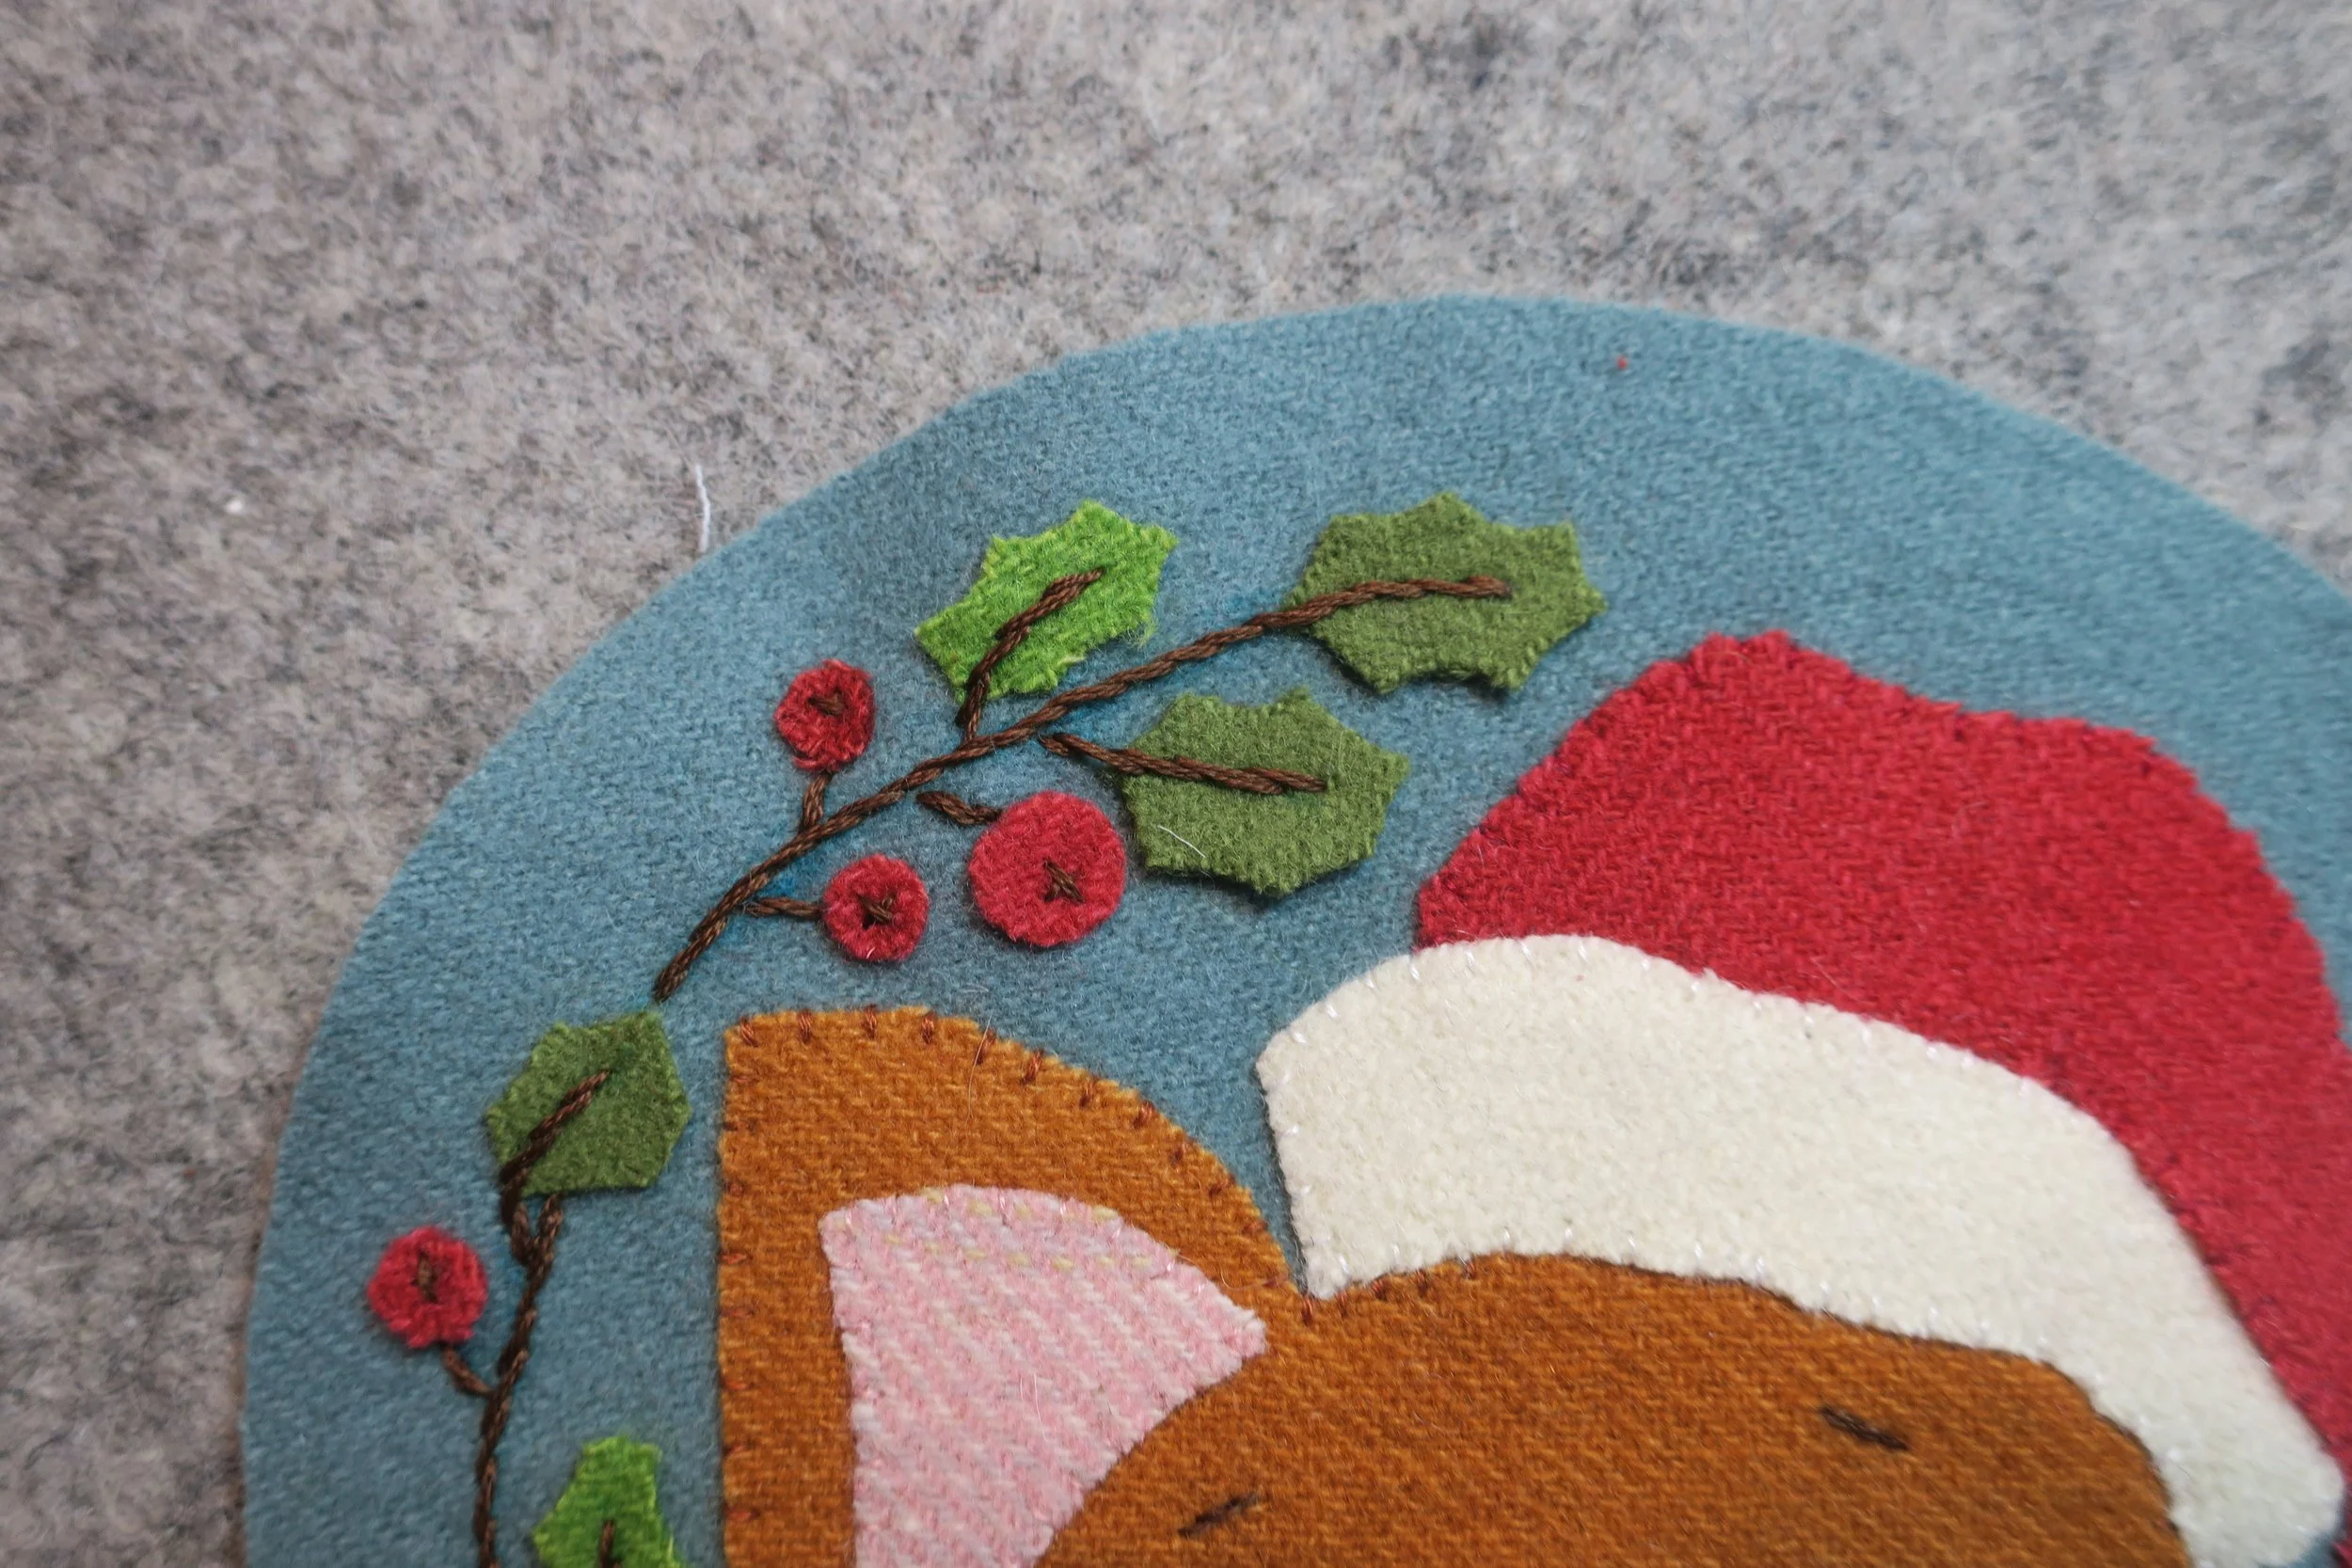
22. Transferring the holly stem can be done by simply drawing the stem onto the background using a water erasable marker and the layout as a guide or using washaway embroidery stabilizer which is more accurate. I used the drawing method with Winston, and the washaway stabilizer with Snickers. For those of you who want to use the stabilizer method, scroll down to step #55.
23. Position the berries and leaves onto the stem using the layout as a guide.
24. Fuse in place, but don’t use steam! The moisture from the steam will erase your drawn line.
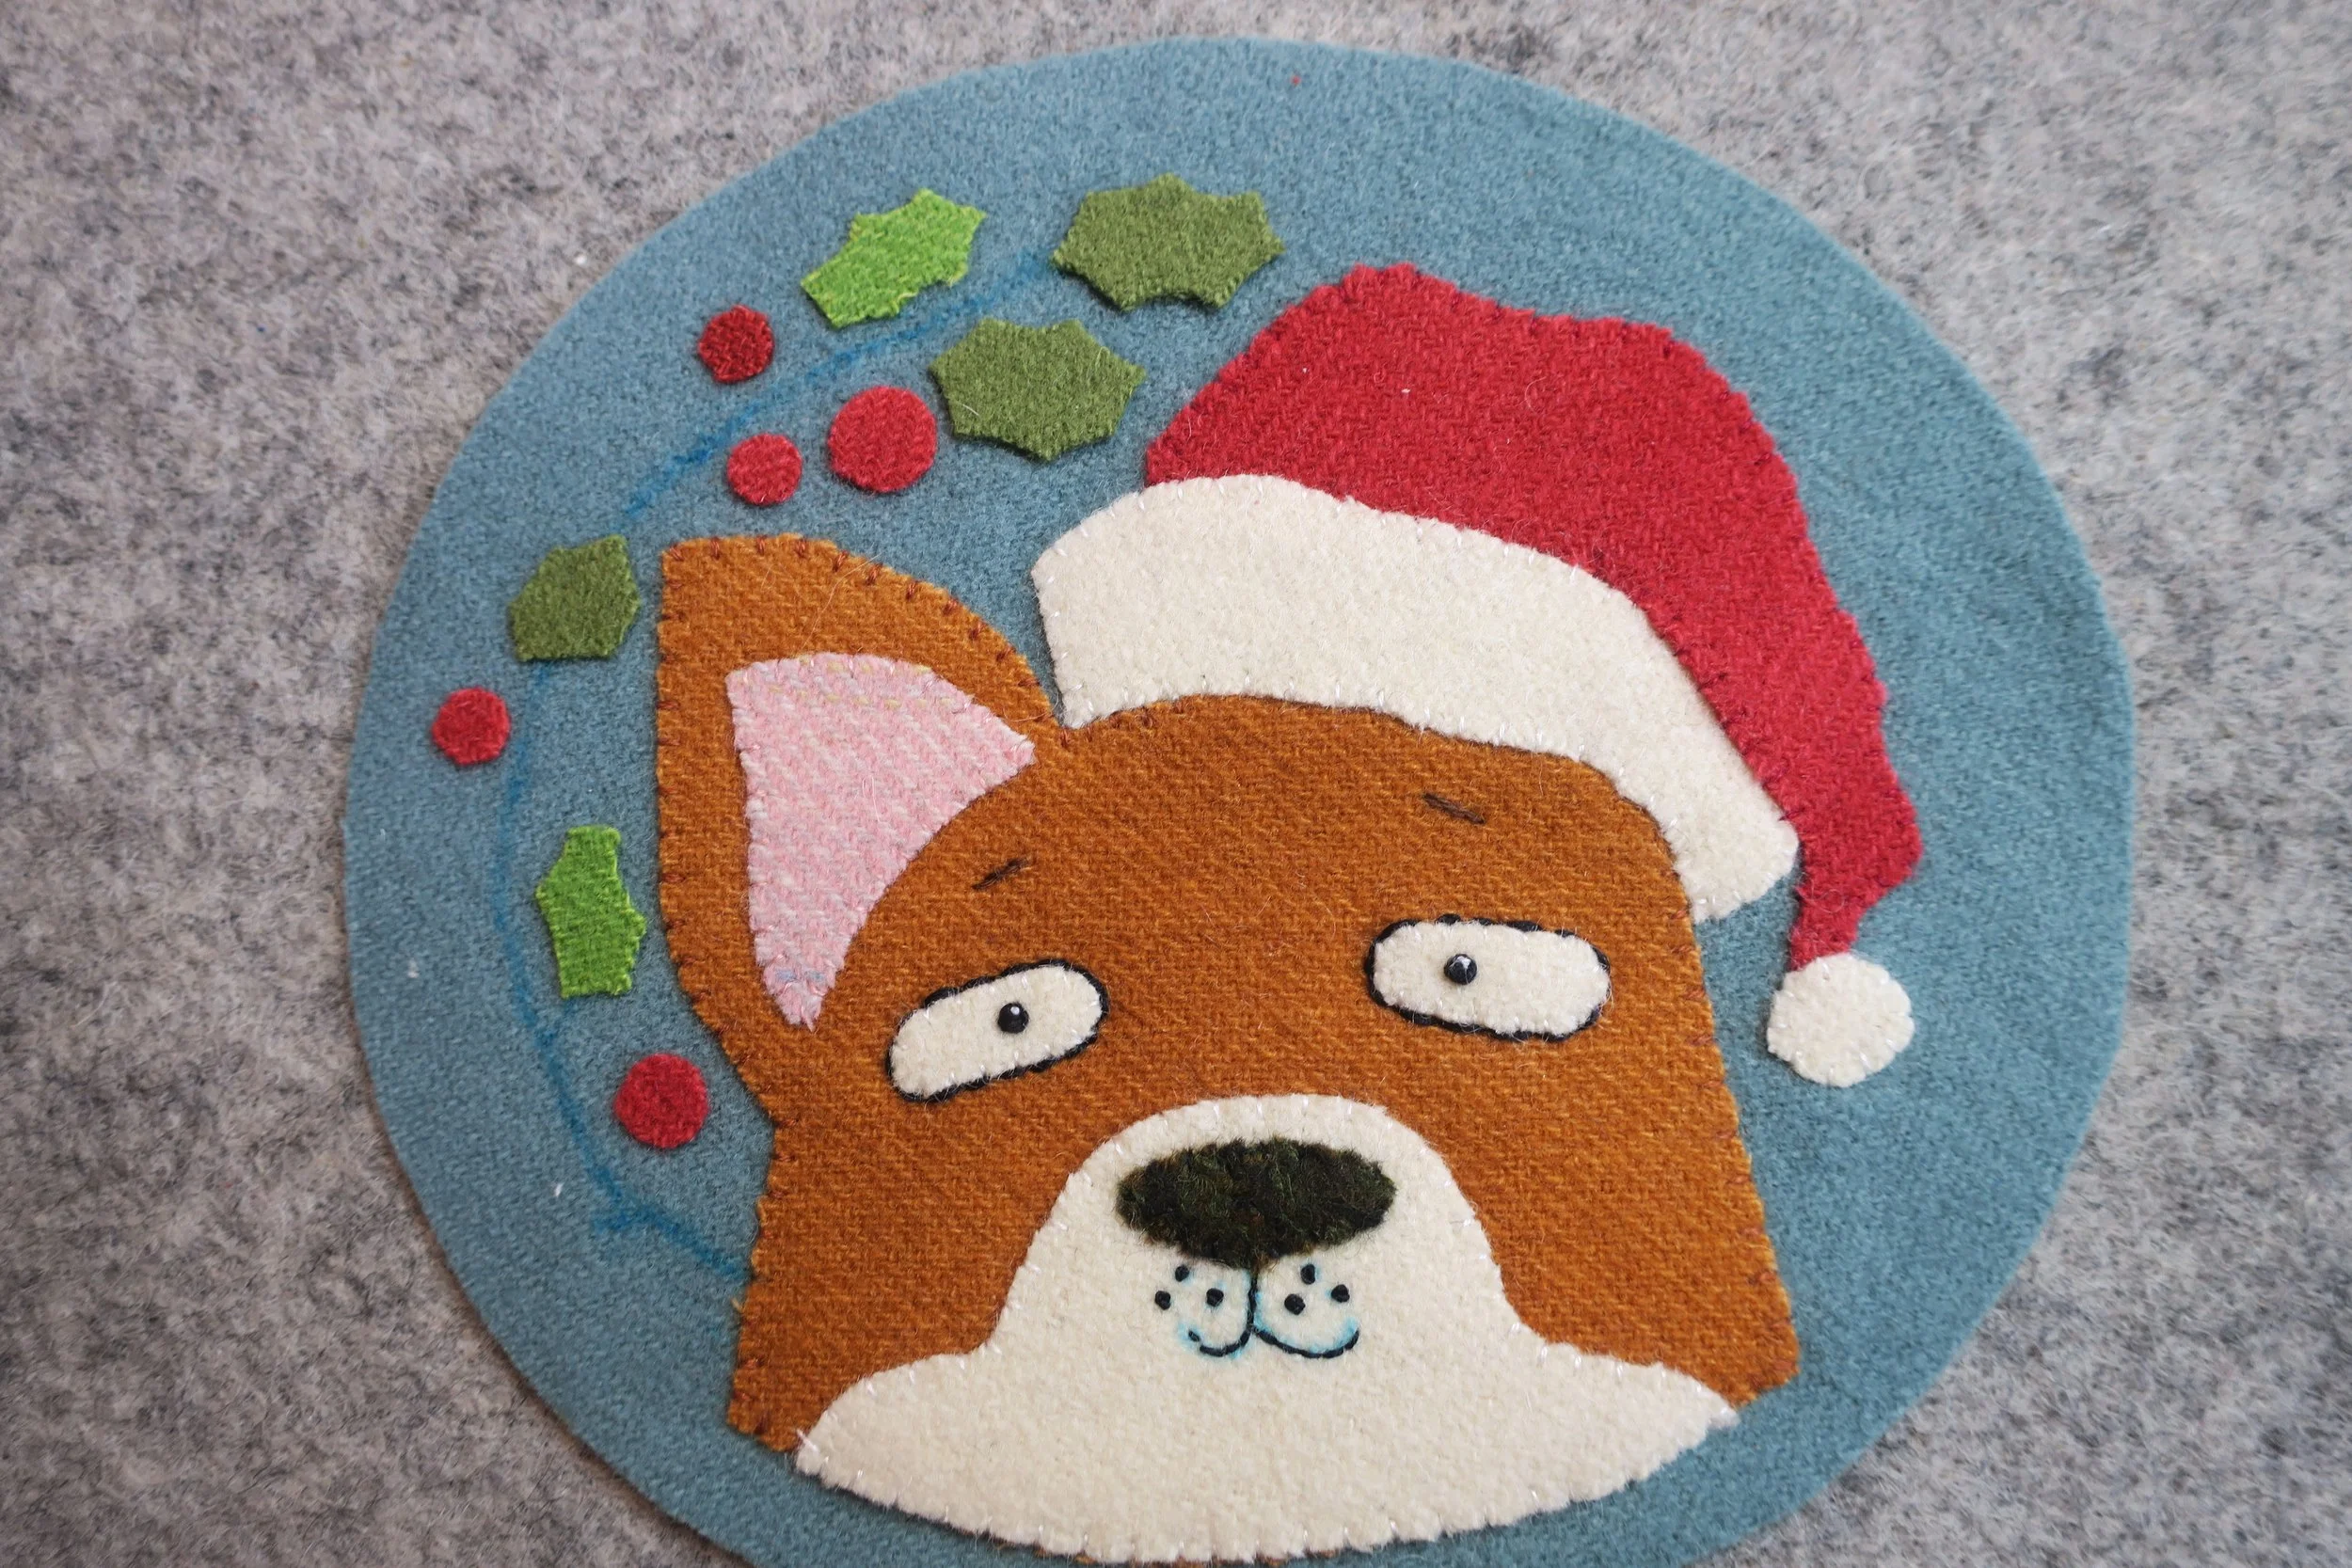
25. Use 2 strands of brown floss to stitch small crosses in each of the berries. The berries are so small that you don’t need to whip stitch to secure them. The small crosses will secure them.
26. Use a marking pen to extend the drawn lines from the stem onto the leaves to create the leaf veins. Then use 3 strands of brown floss to stem stitch the veins of the leaves and the holly branch.
27. Whip stitch leaves in place using 1 strand of green floss.
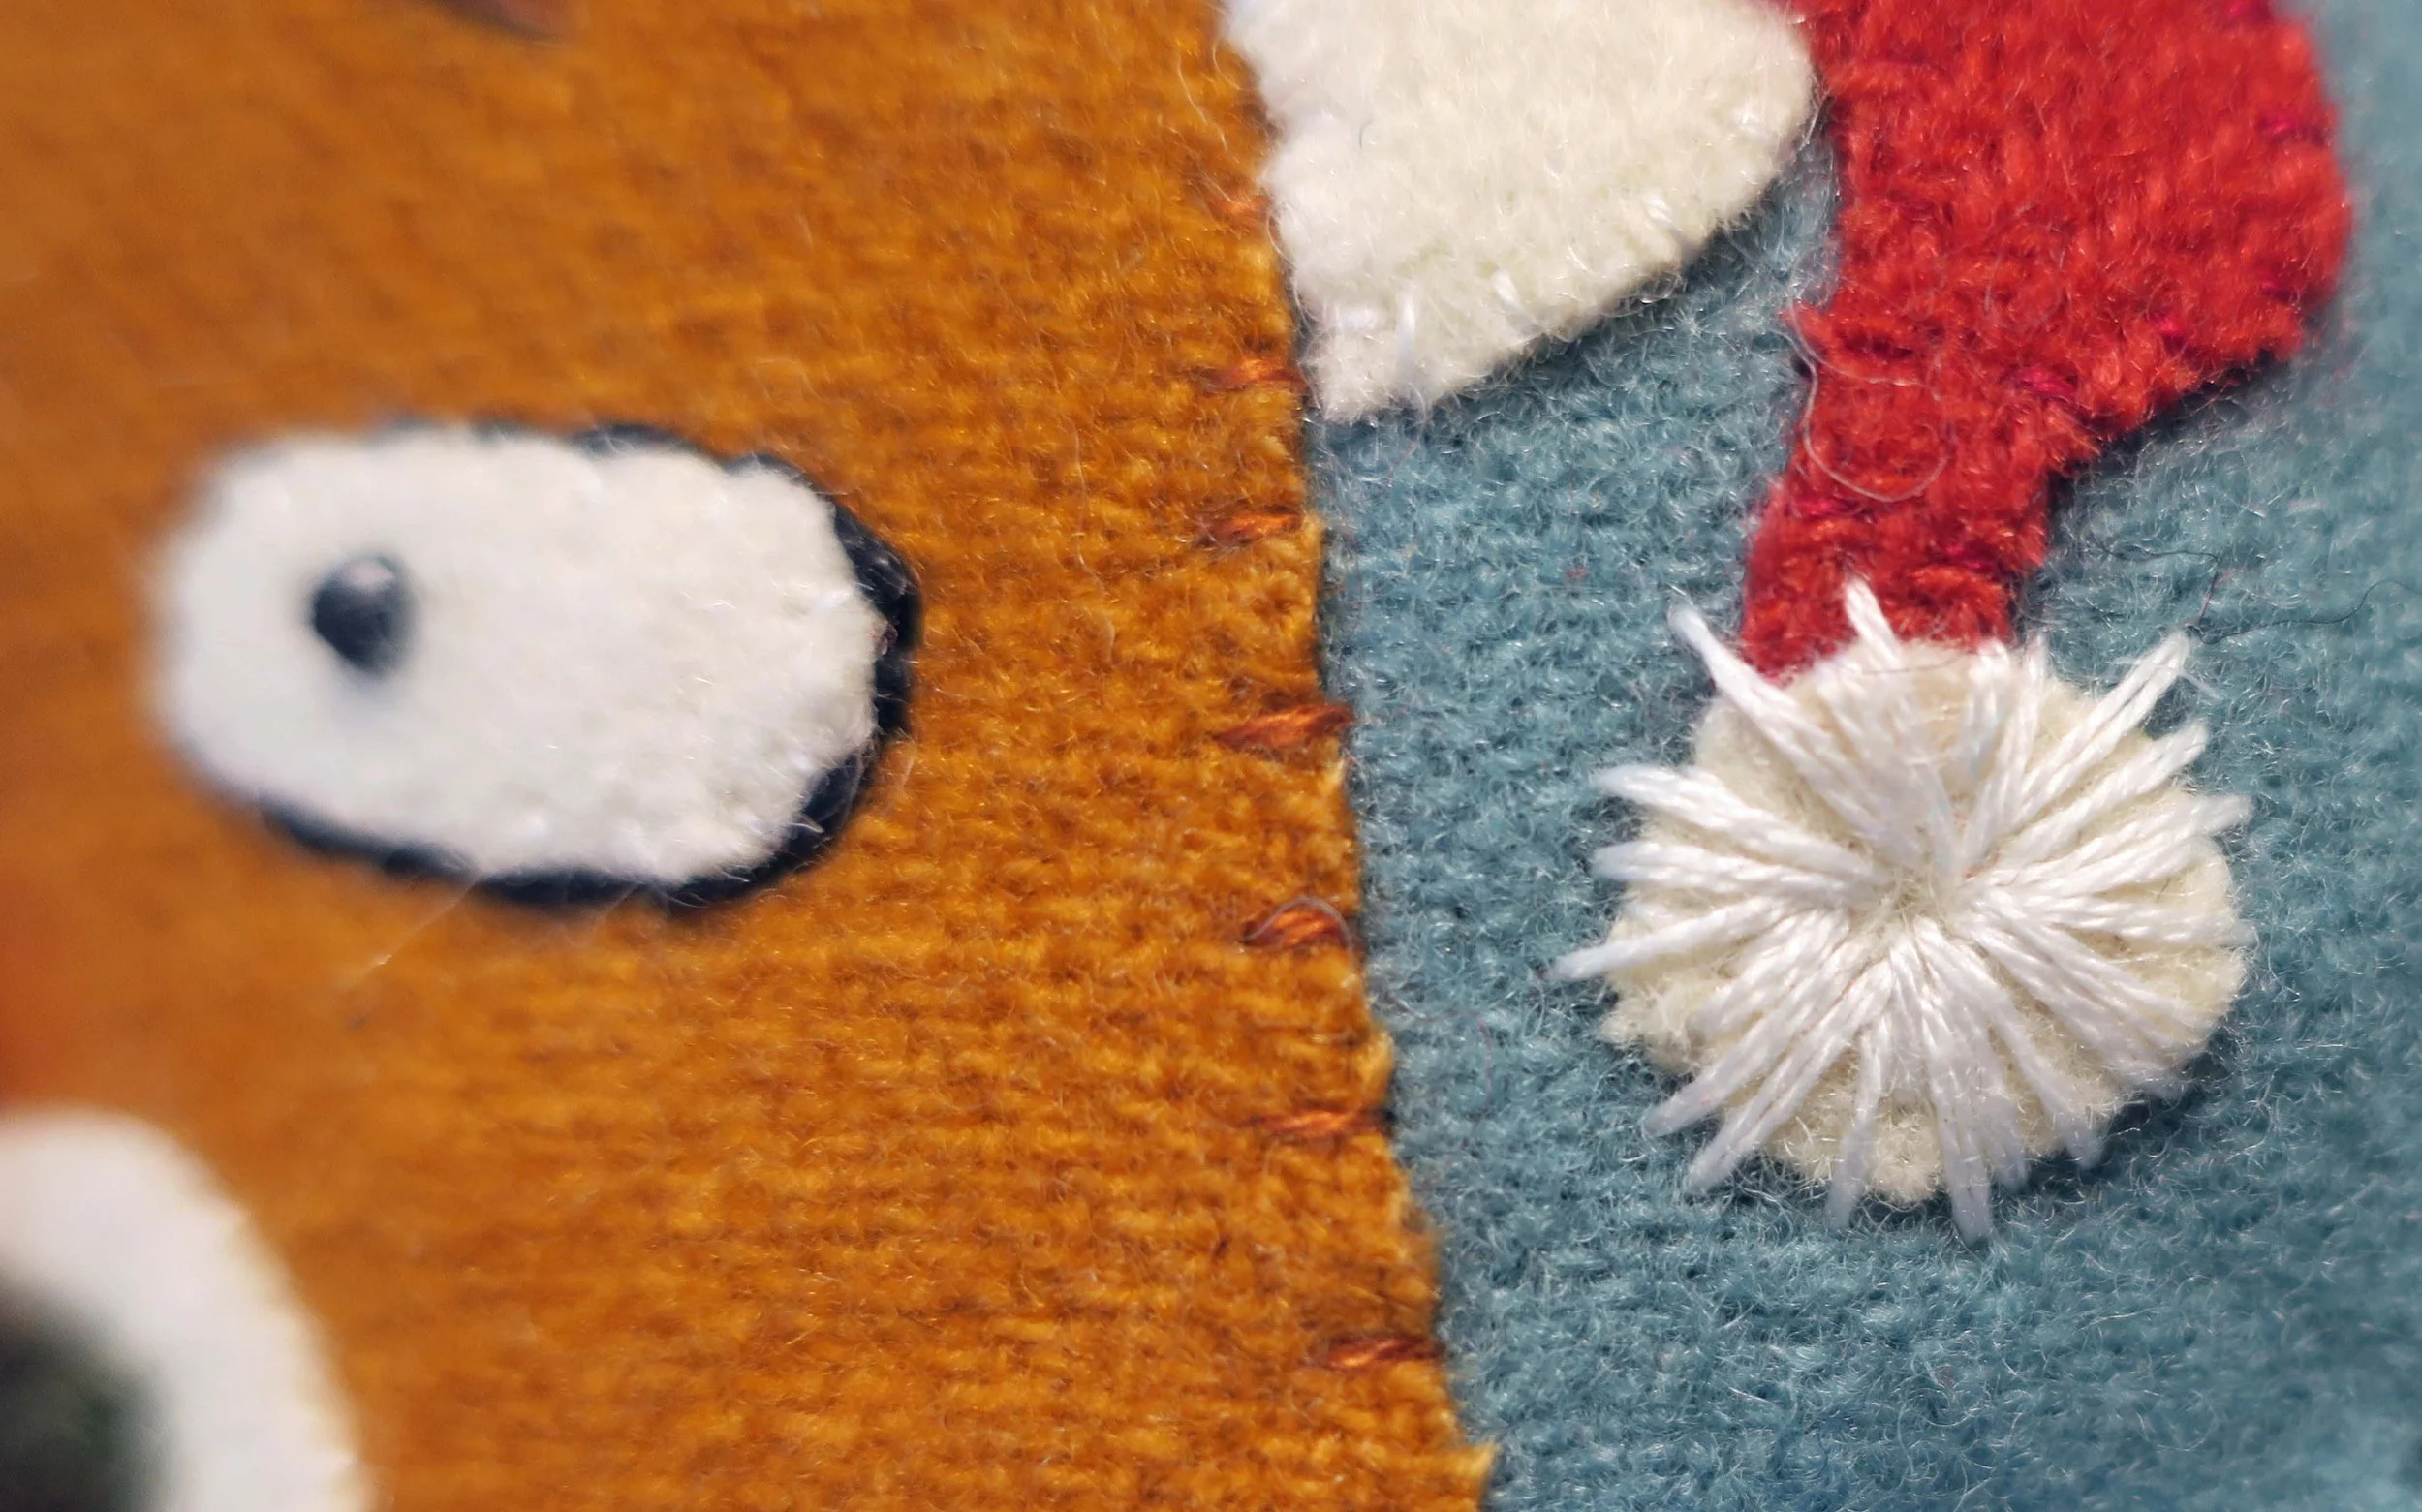
28. The pom pom is looking a little blah, so let’s add a bit of stitching to it. Begin with a few straight stitches radiating out from the center. Then continue with short and long stitches to fill it out.
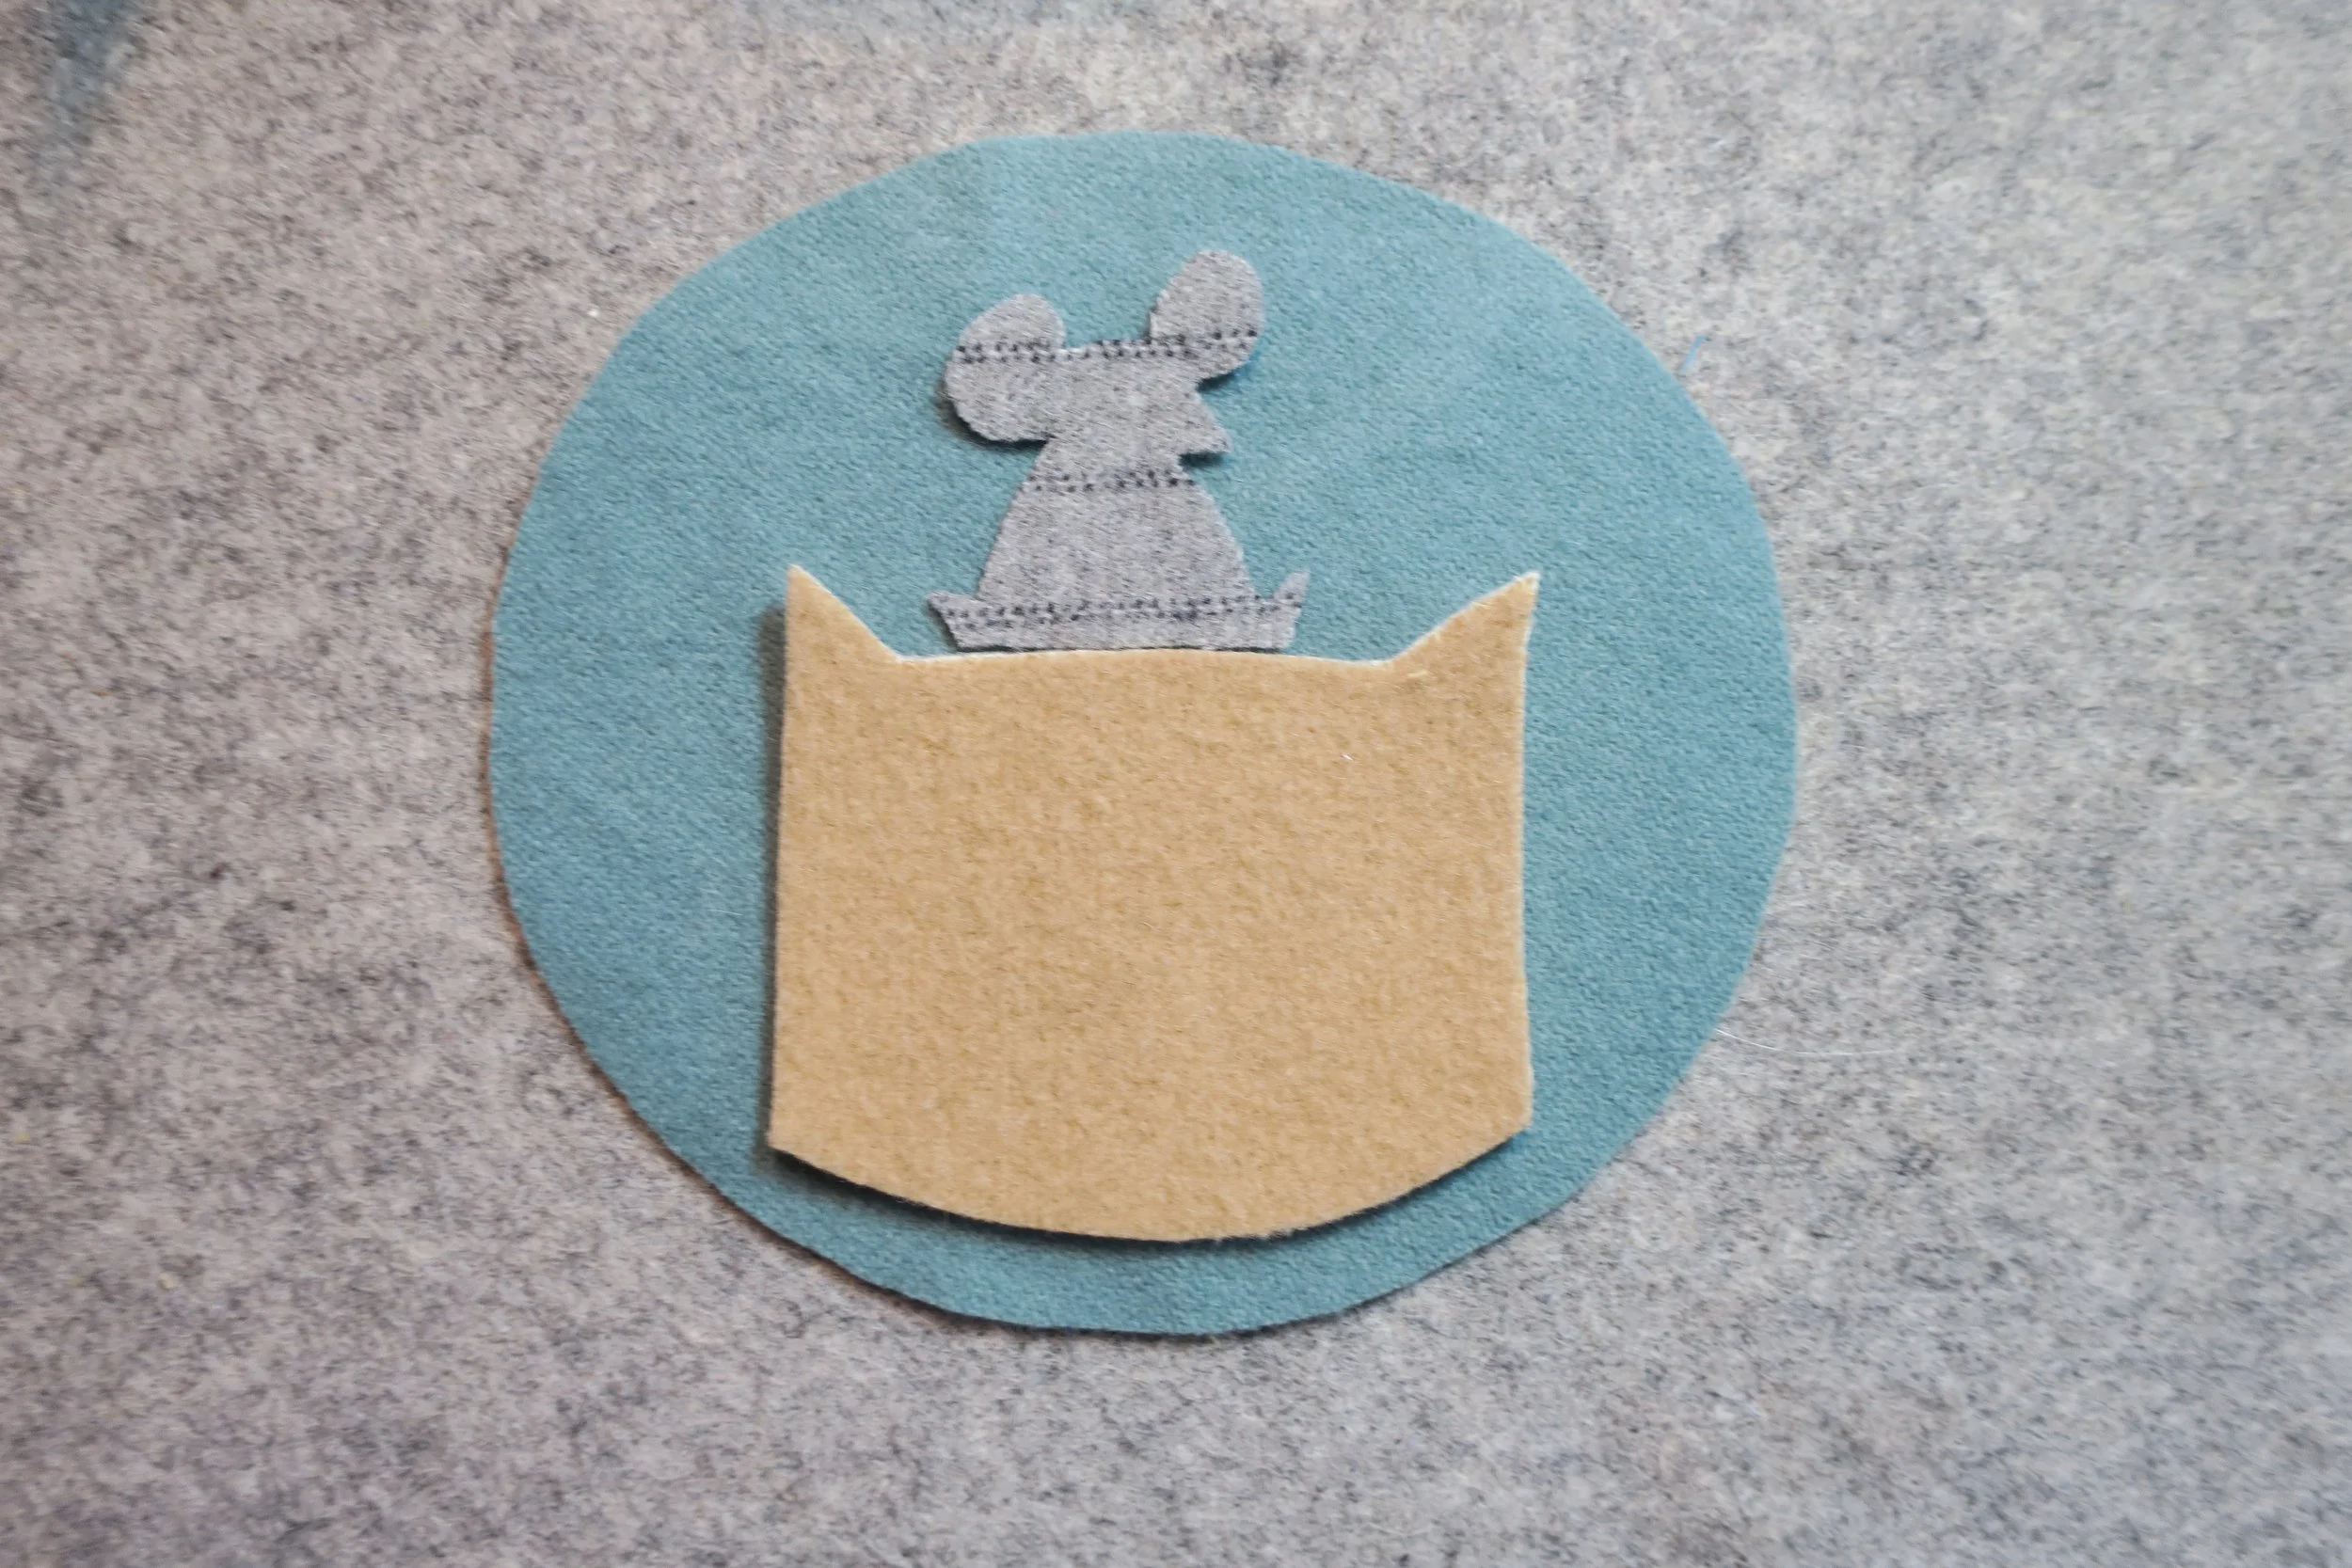
29. Now it’s Snickers turn. Begin by removing the paper backing on Snickers’s head and the mouse body.
30. Position Snickers’s head onto the background using the layout as a guide. Leave a 3/8in border between his neck and the perimeter of the background. Position the mouse on top of Snicker’s head.
31. Fuse in place using steam, and then whip stitch to secure.
32. Position Snicker’s spot, nose bridge, mouse ears and arms.
33. Fuse in place using steam. Then whip stitch to secure.
34. Use 2 strands of pink floss to satin stitch the mouse’s nose. I used 3 stitches.

38. Let’s make the candy cane. Begin with 6 strands of white floss as your lay down stitch. Bring your needle up approximately 1/4in from the top of Snicker’s head, and then down near the left shoulder, leaving enough slack in the thread to make the hook on the top of the cane. Don’t knot the thread on the back yet!
Use 3 strands of red floss in a second needle (working thread) to couch the lay down thread. Use the thumb of your non-stitching hand to hold the curve in place while you couch with the working thread.
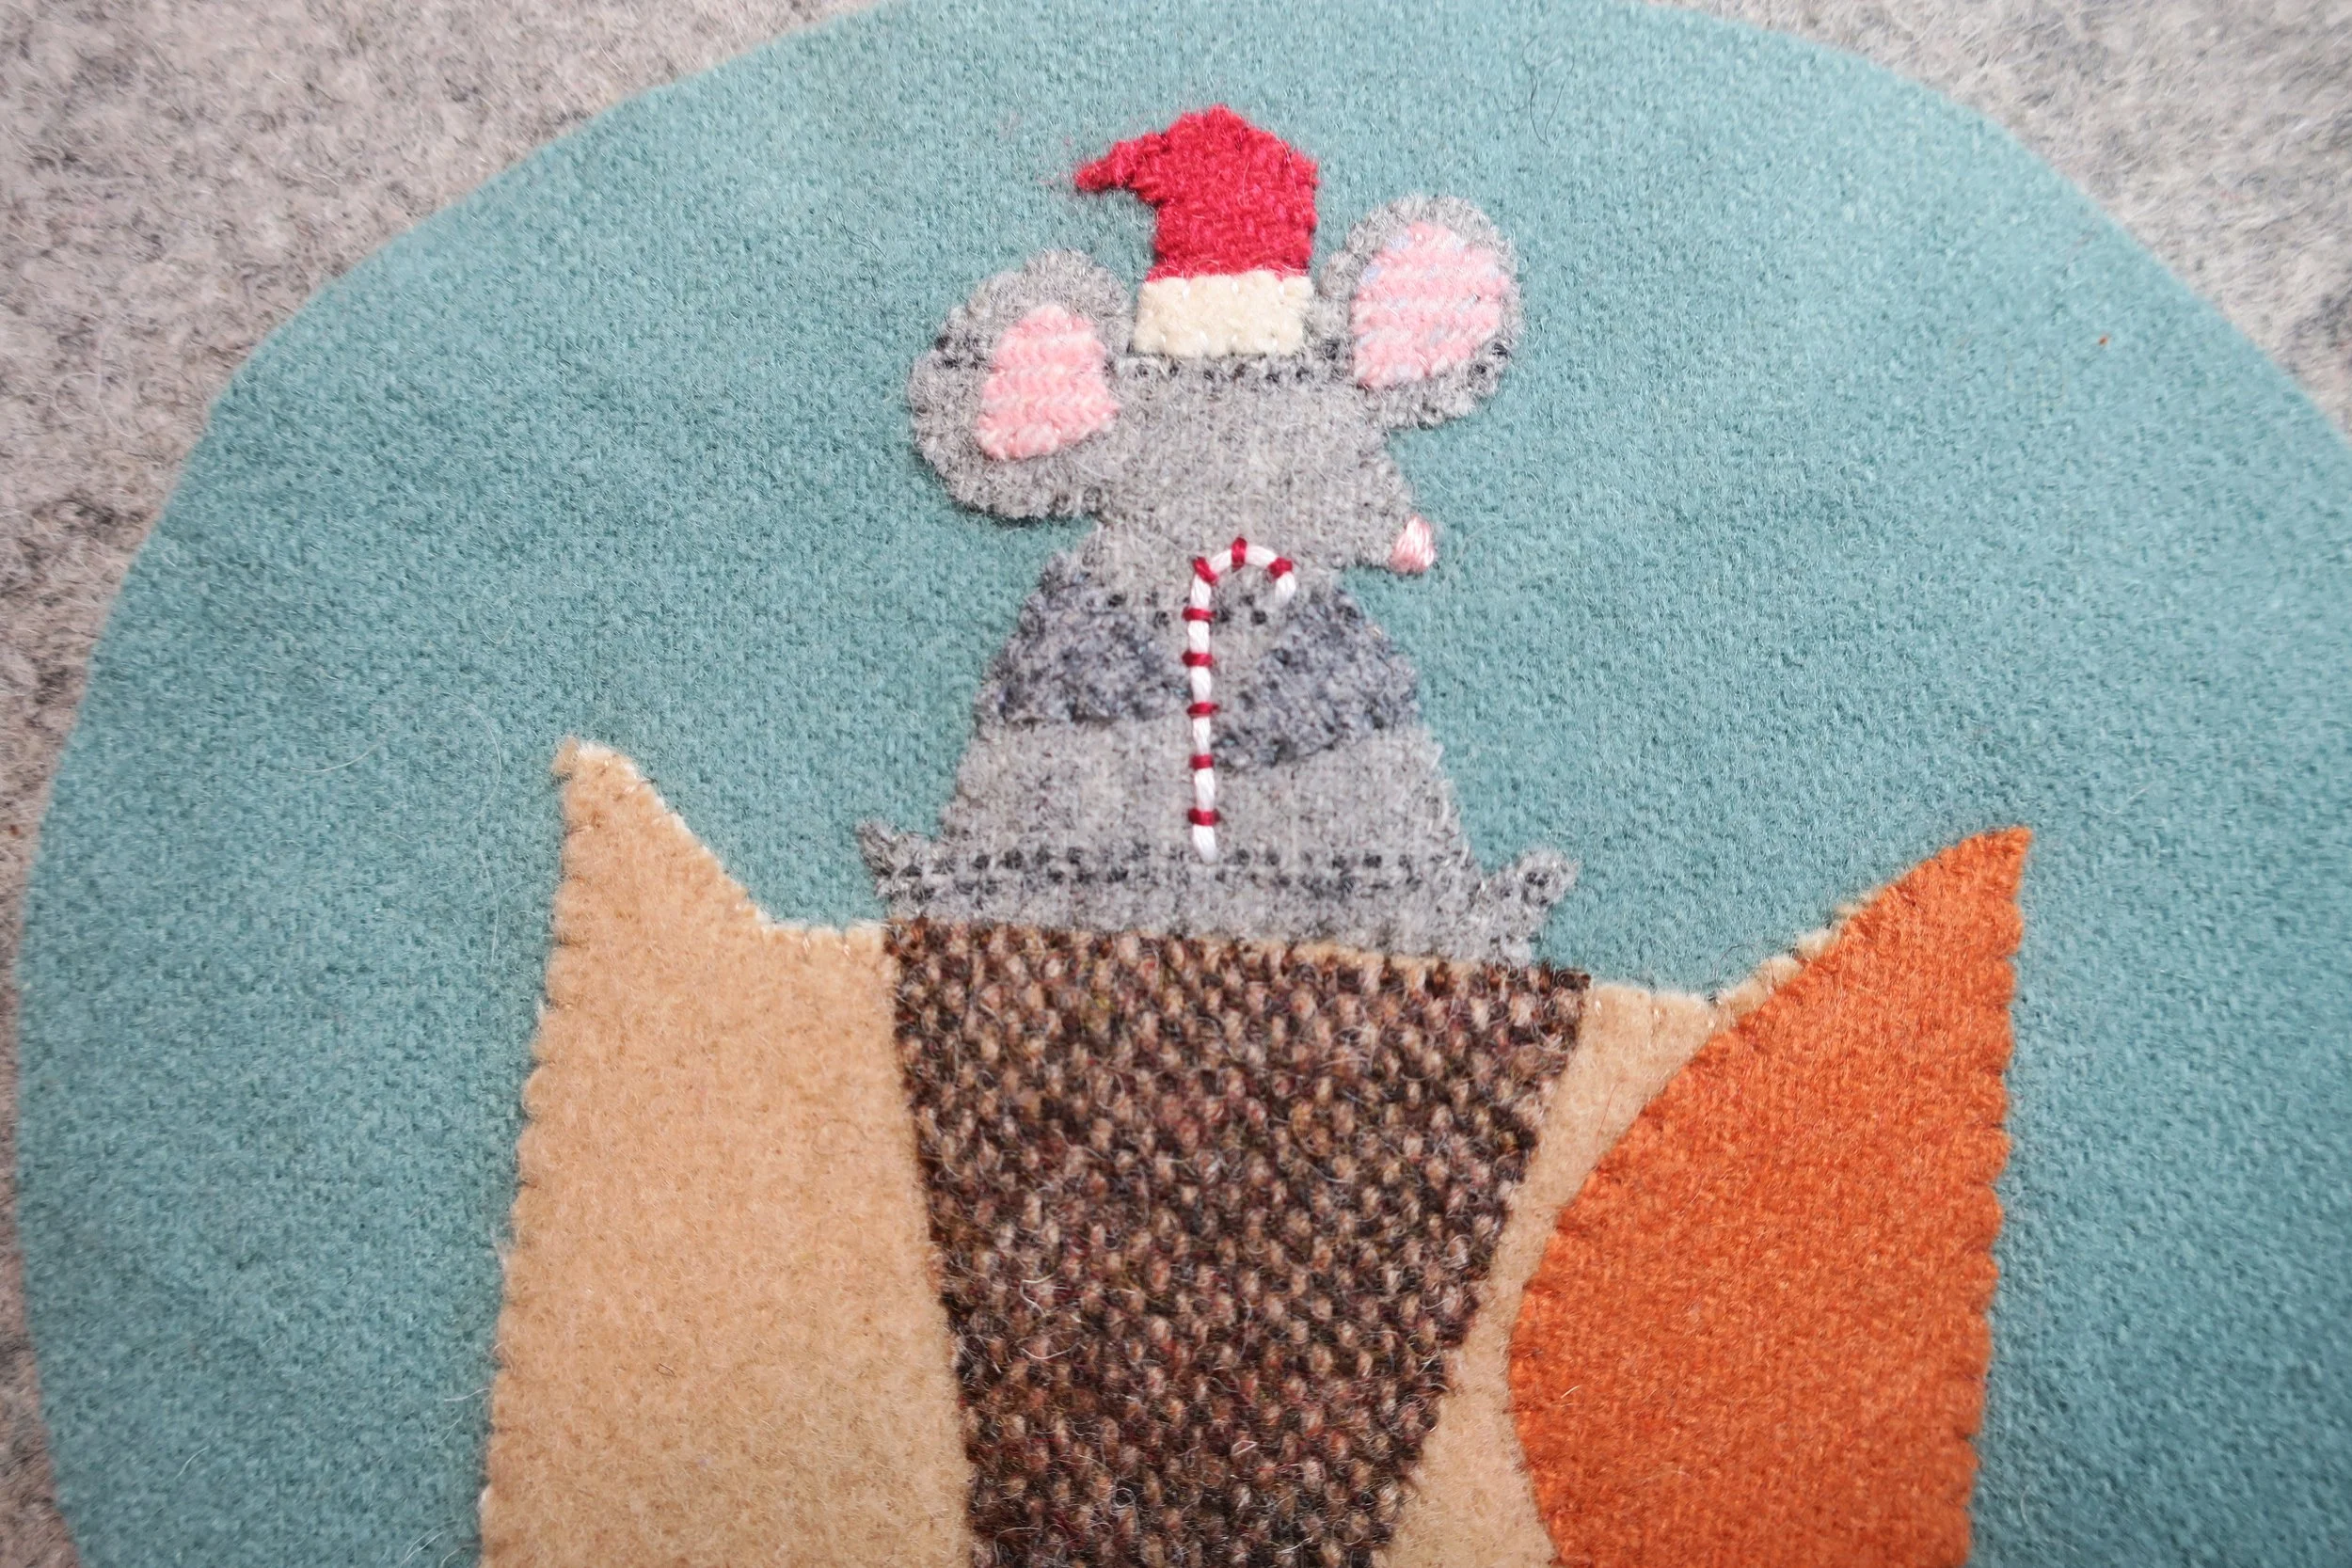
Pull the thread to the back to remove any slack, and then a knot can be made at the end of the lay down thread when the candy cane is completely couched.
39. Use an erasable fabric marker to mark the mouth.
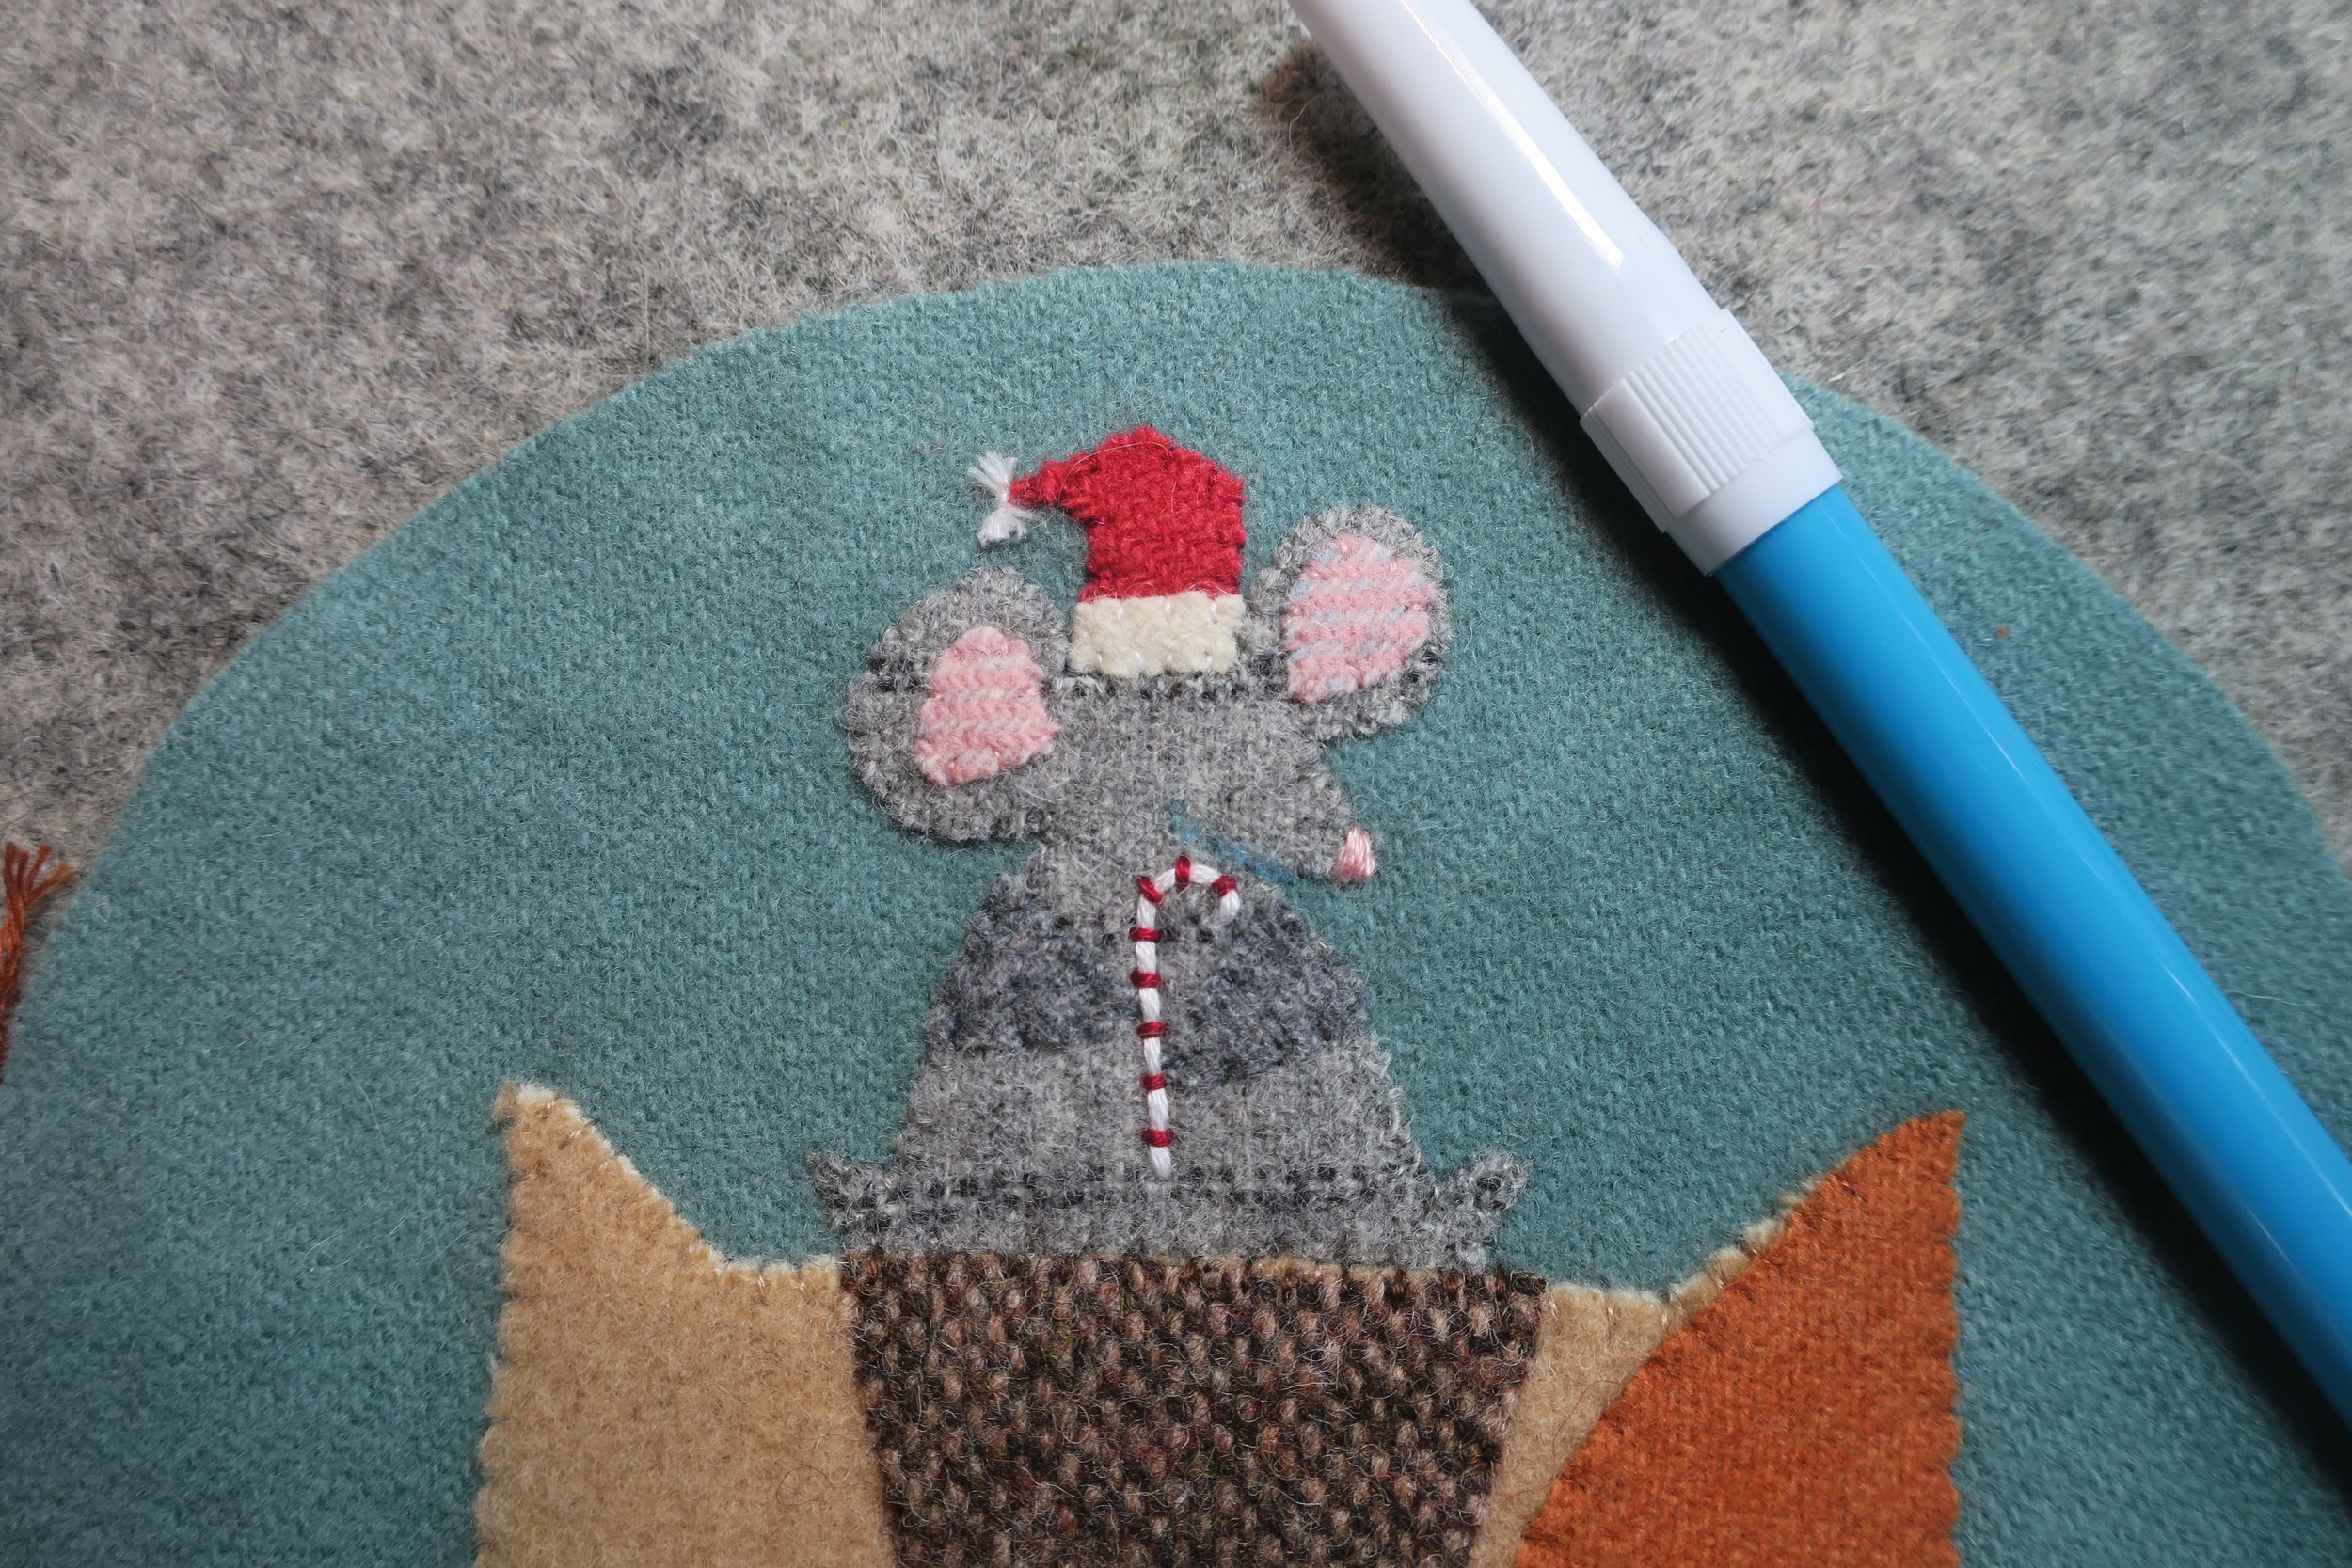
40. Use 1 strand of dark grey + 1 strand of black floss to backstitch over the drawn line.
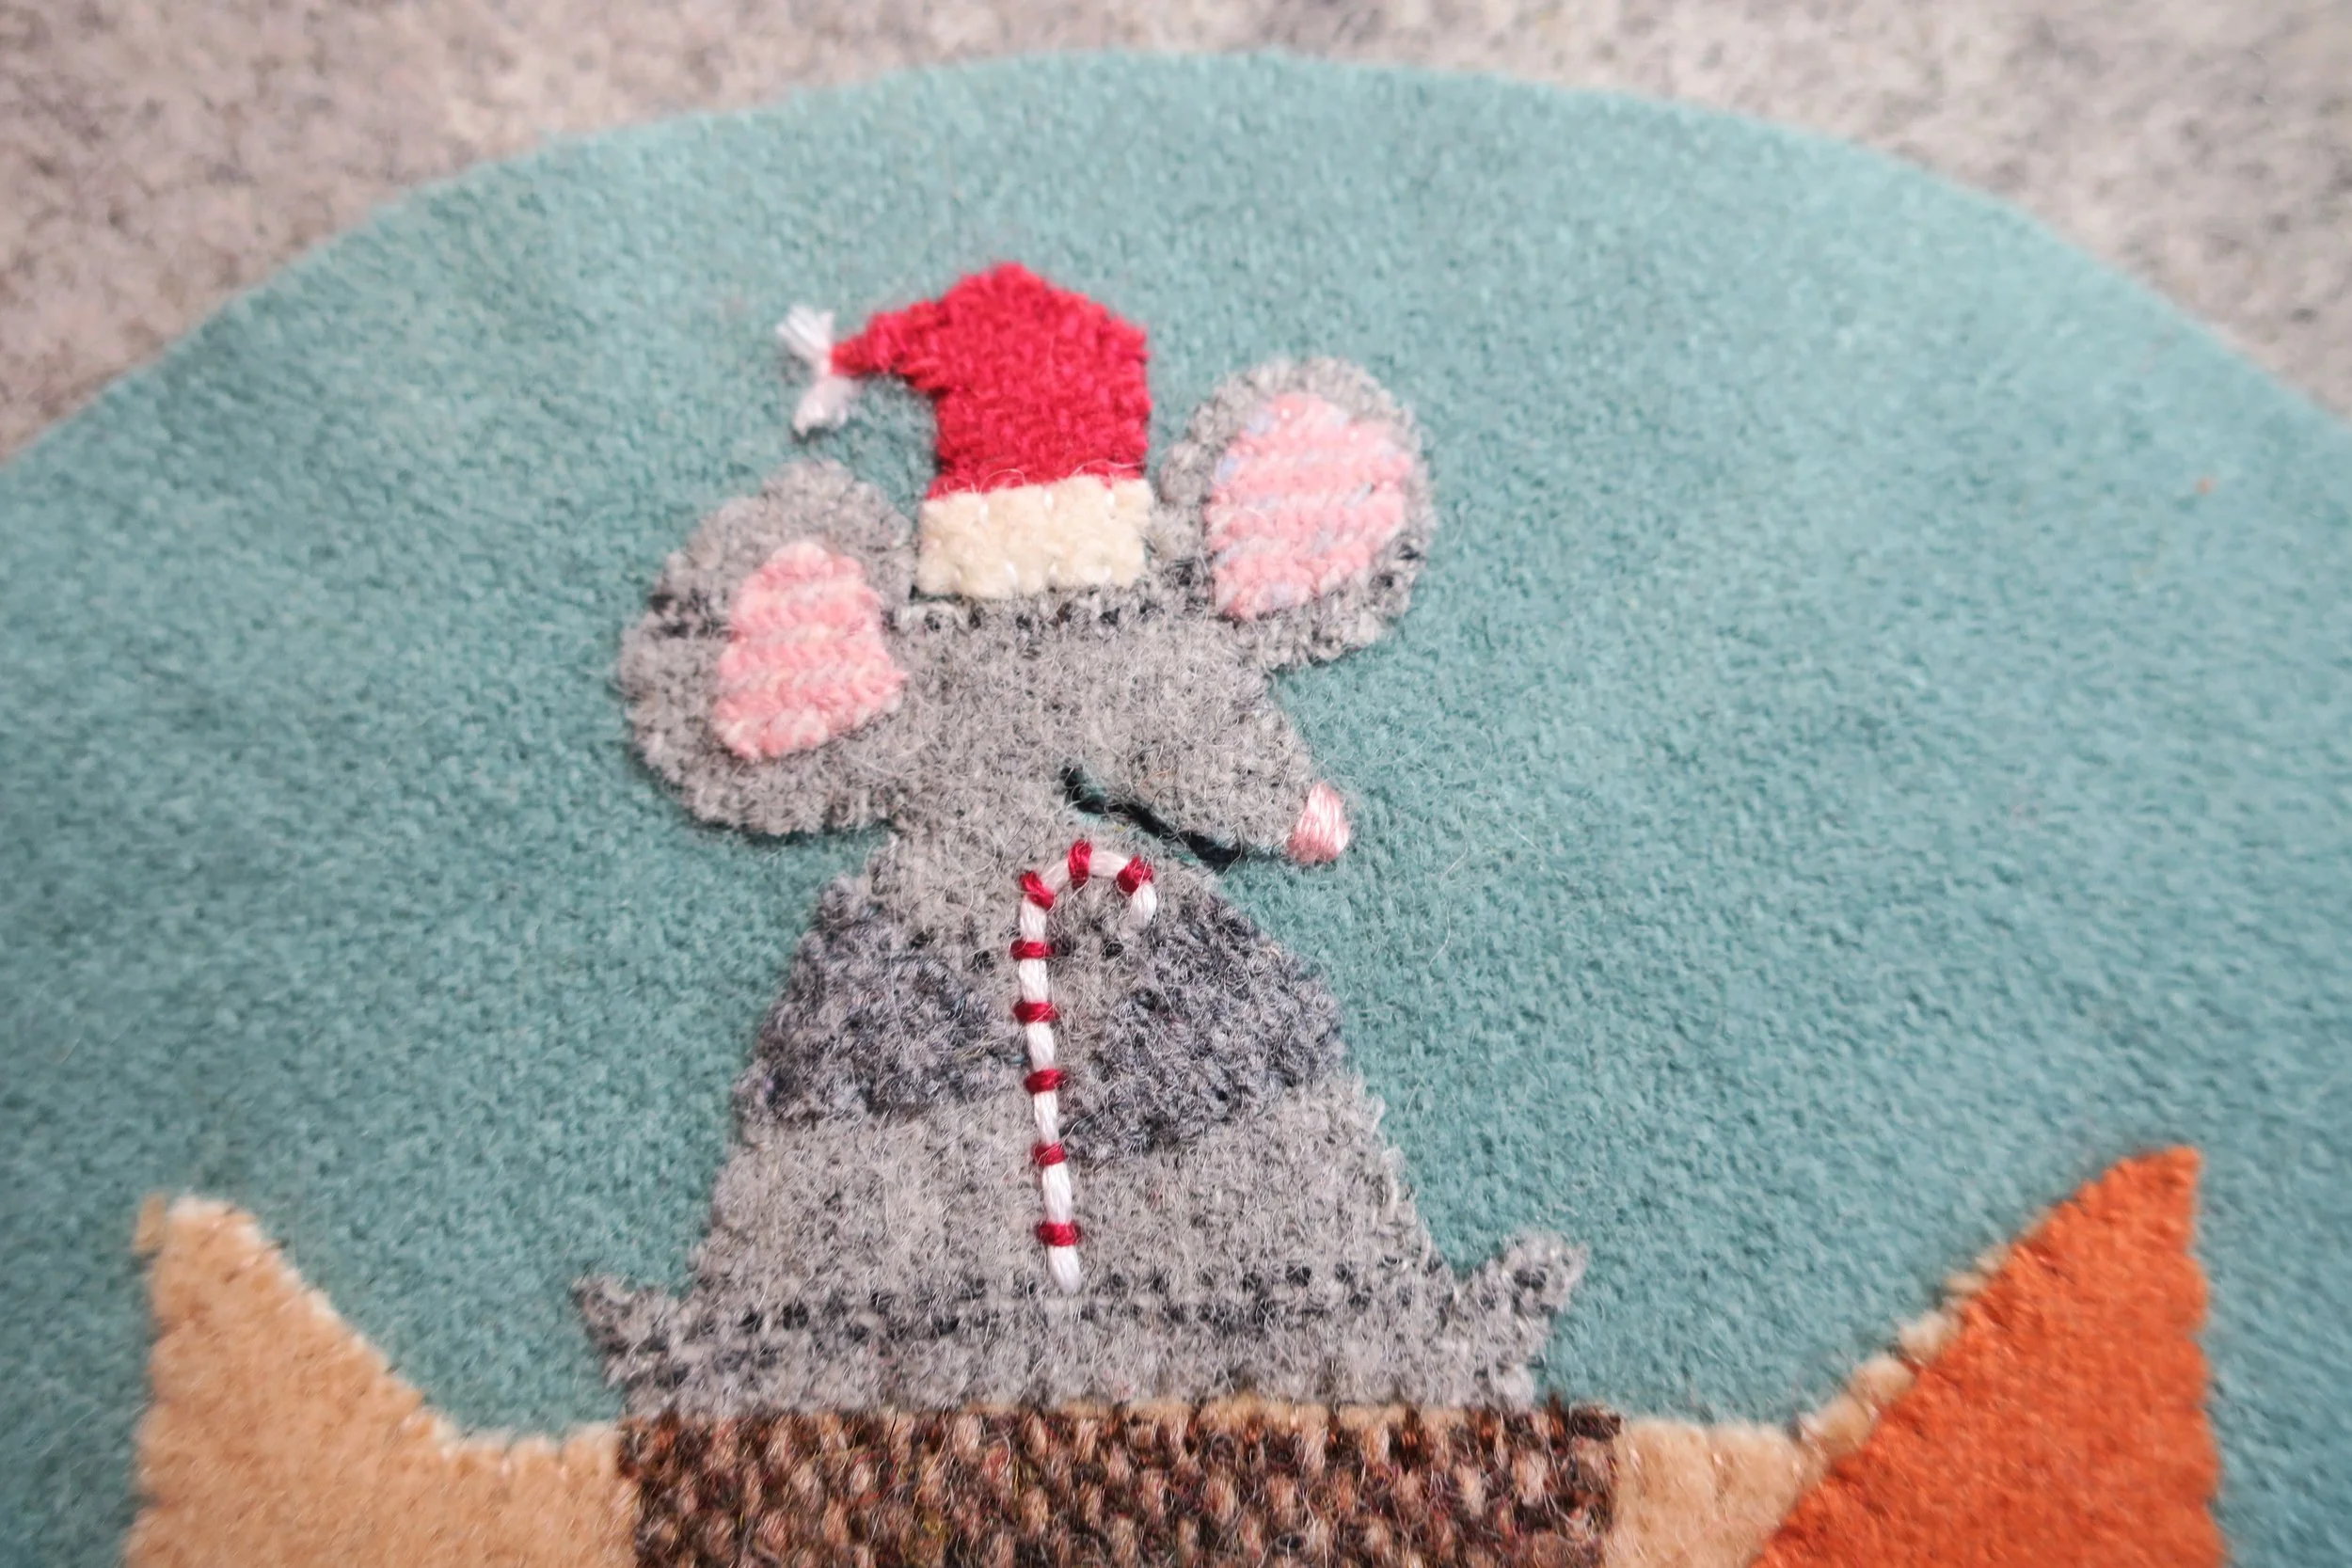
41. Use 2 strands of black floss to stitch French knot eyes, using the layout for placement guidance.
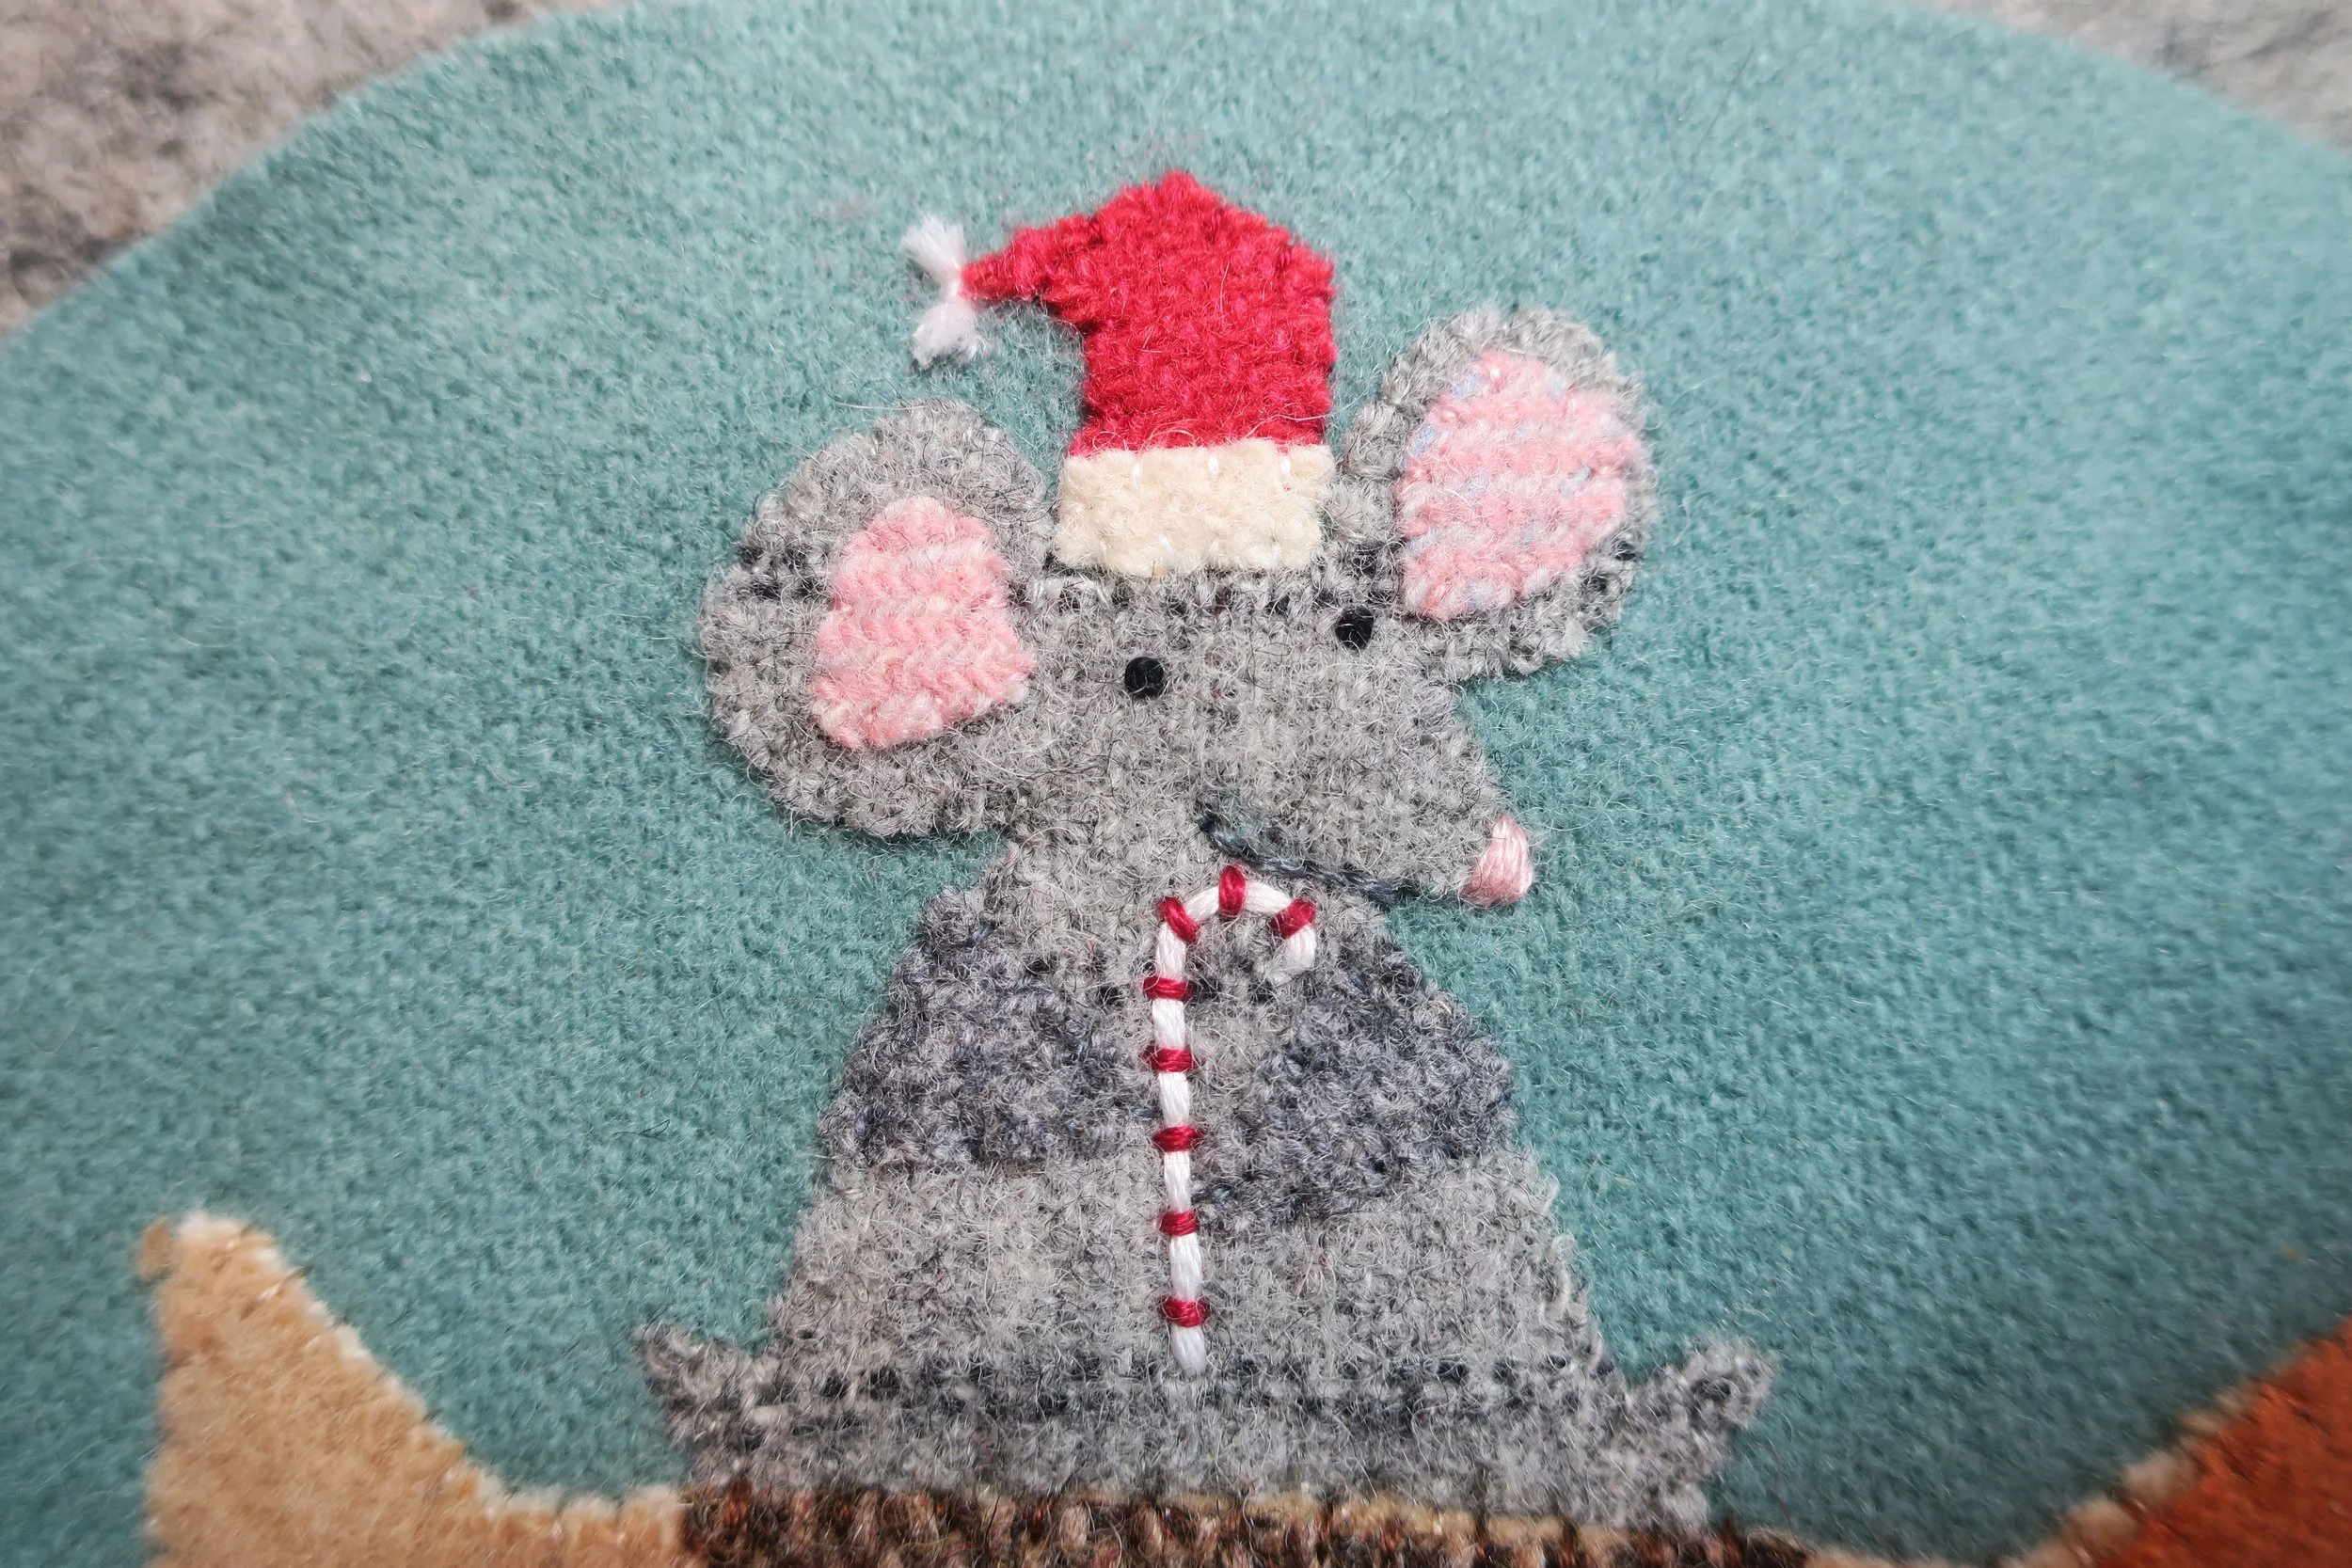
42. Use 1 strand of beige (the same floss used to whip stitch the Snickers’s head) to make 3 straight stitched whiskers on each side of the mouse’s nose. Use the layout for placement guidance.
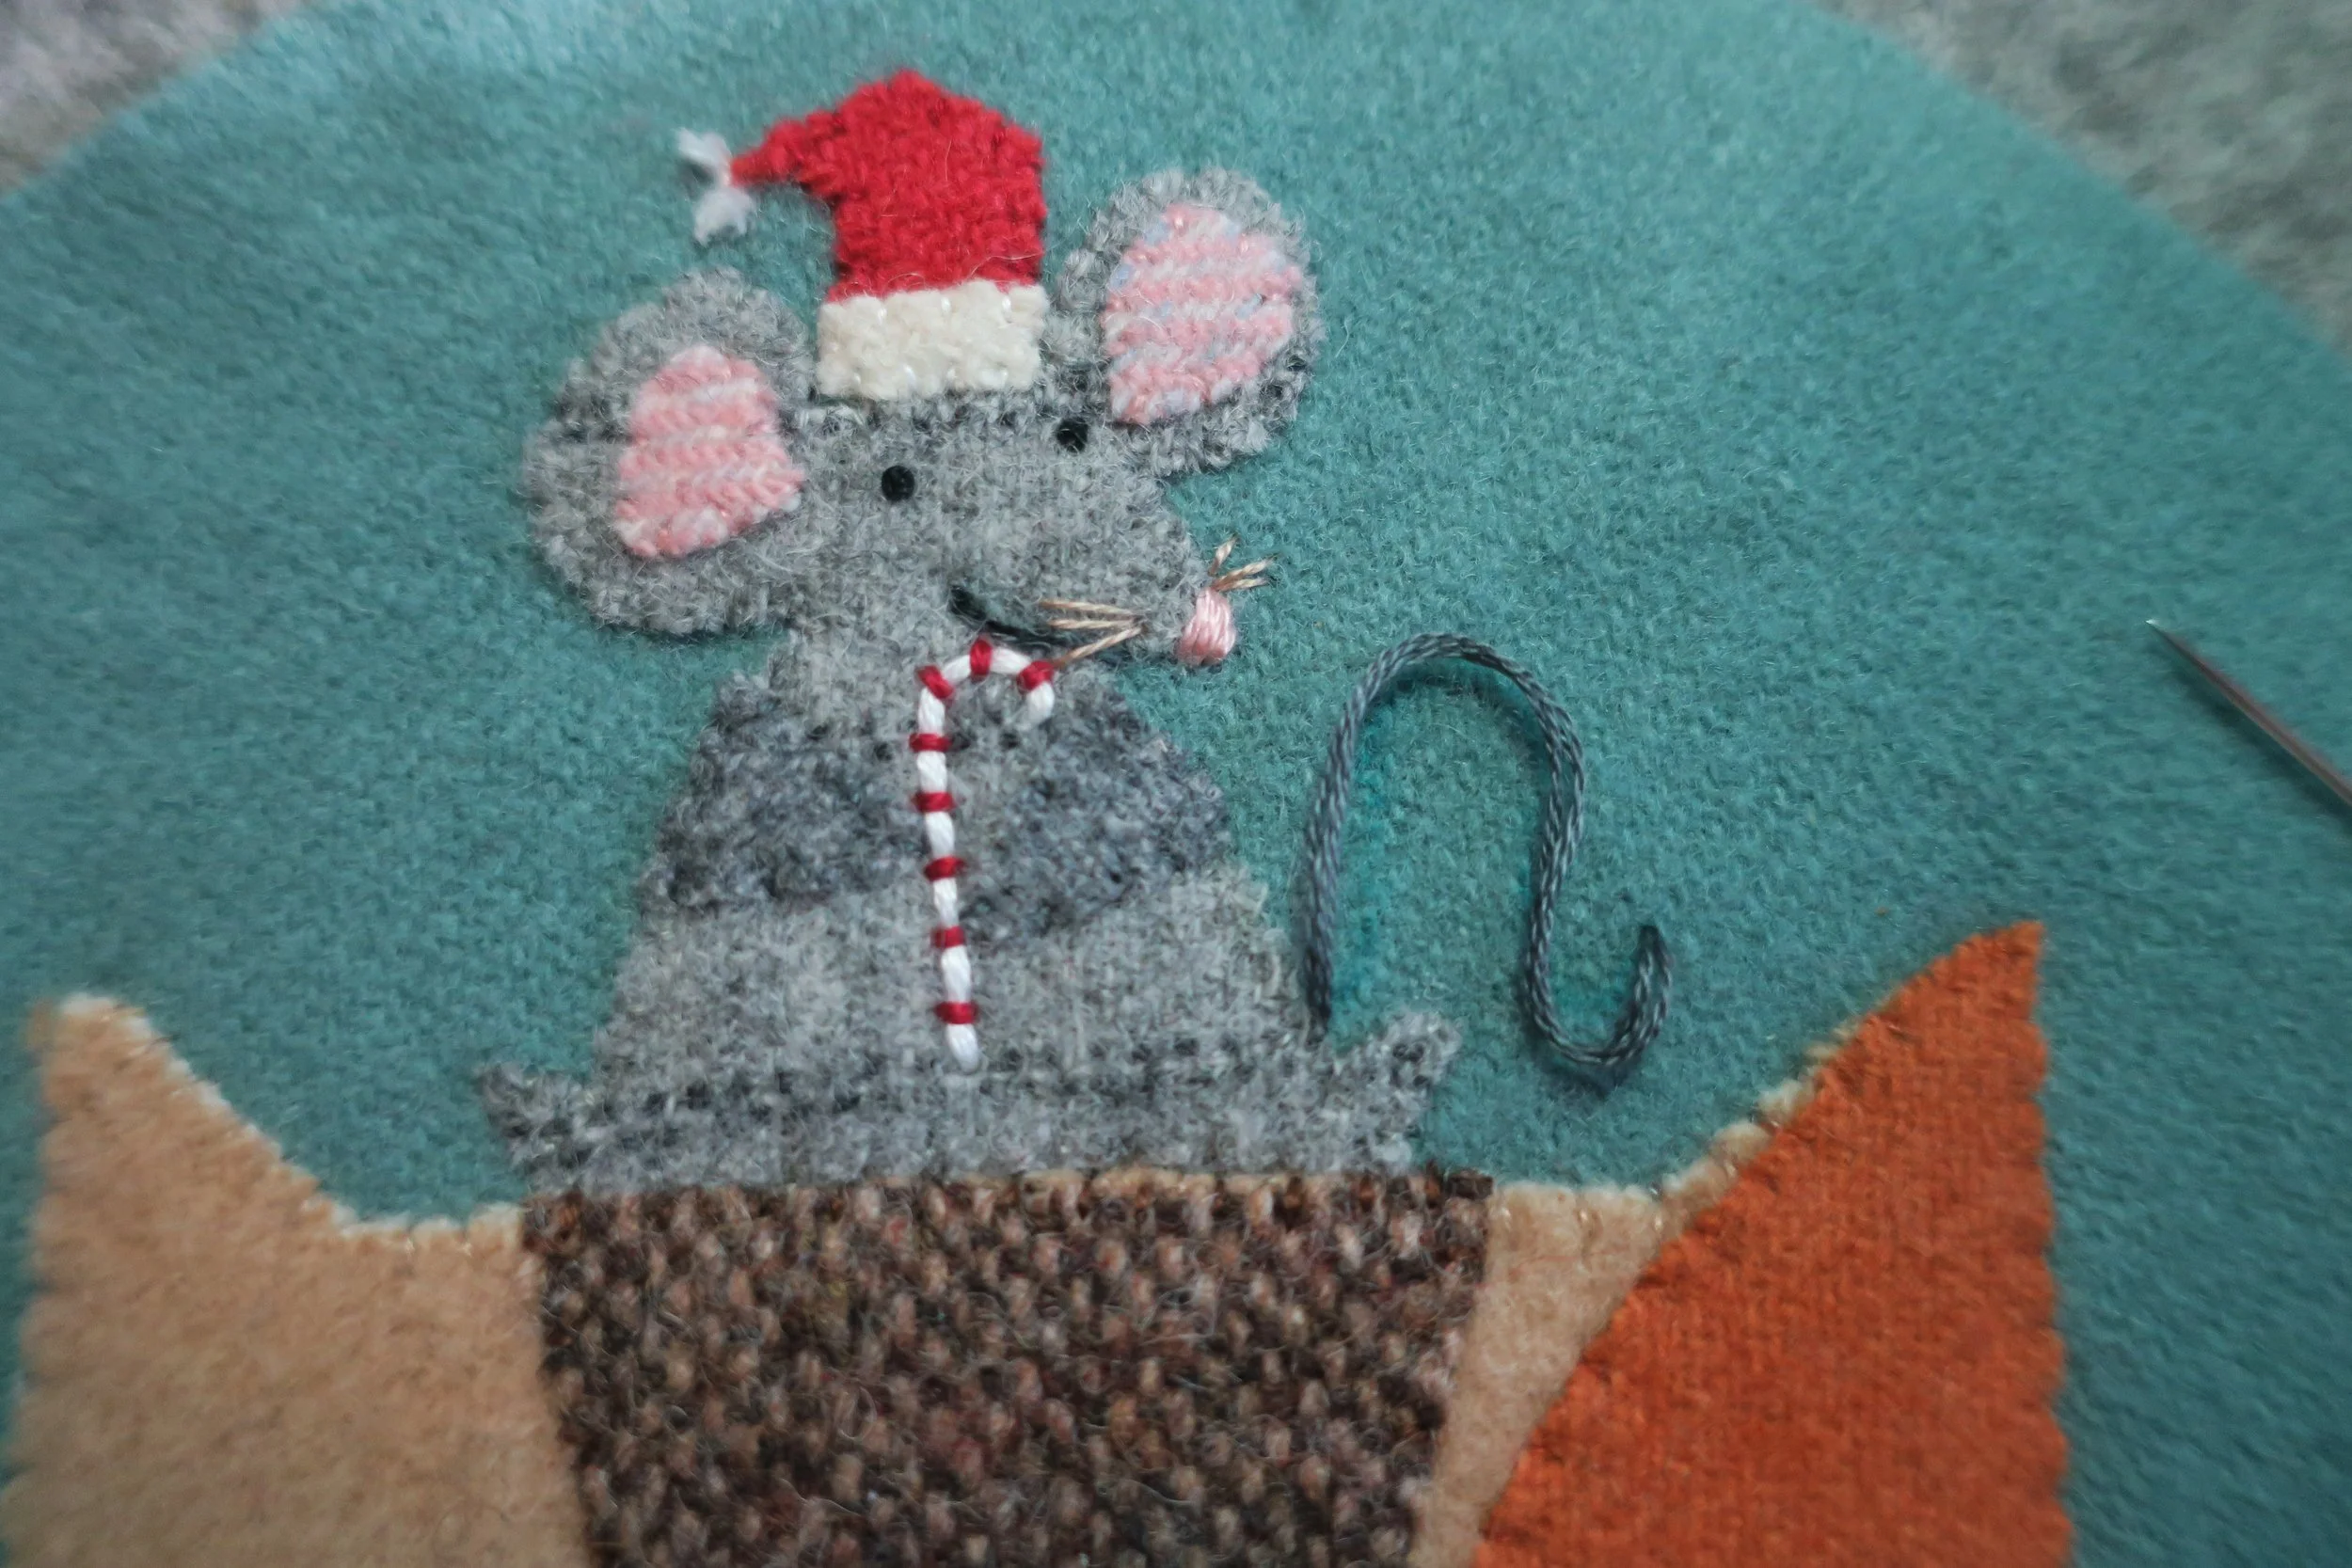
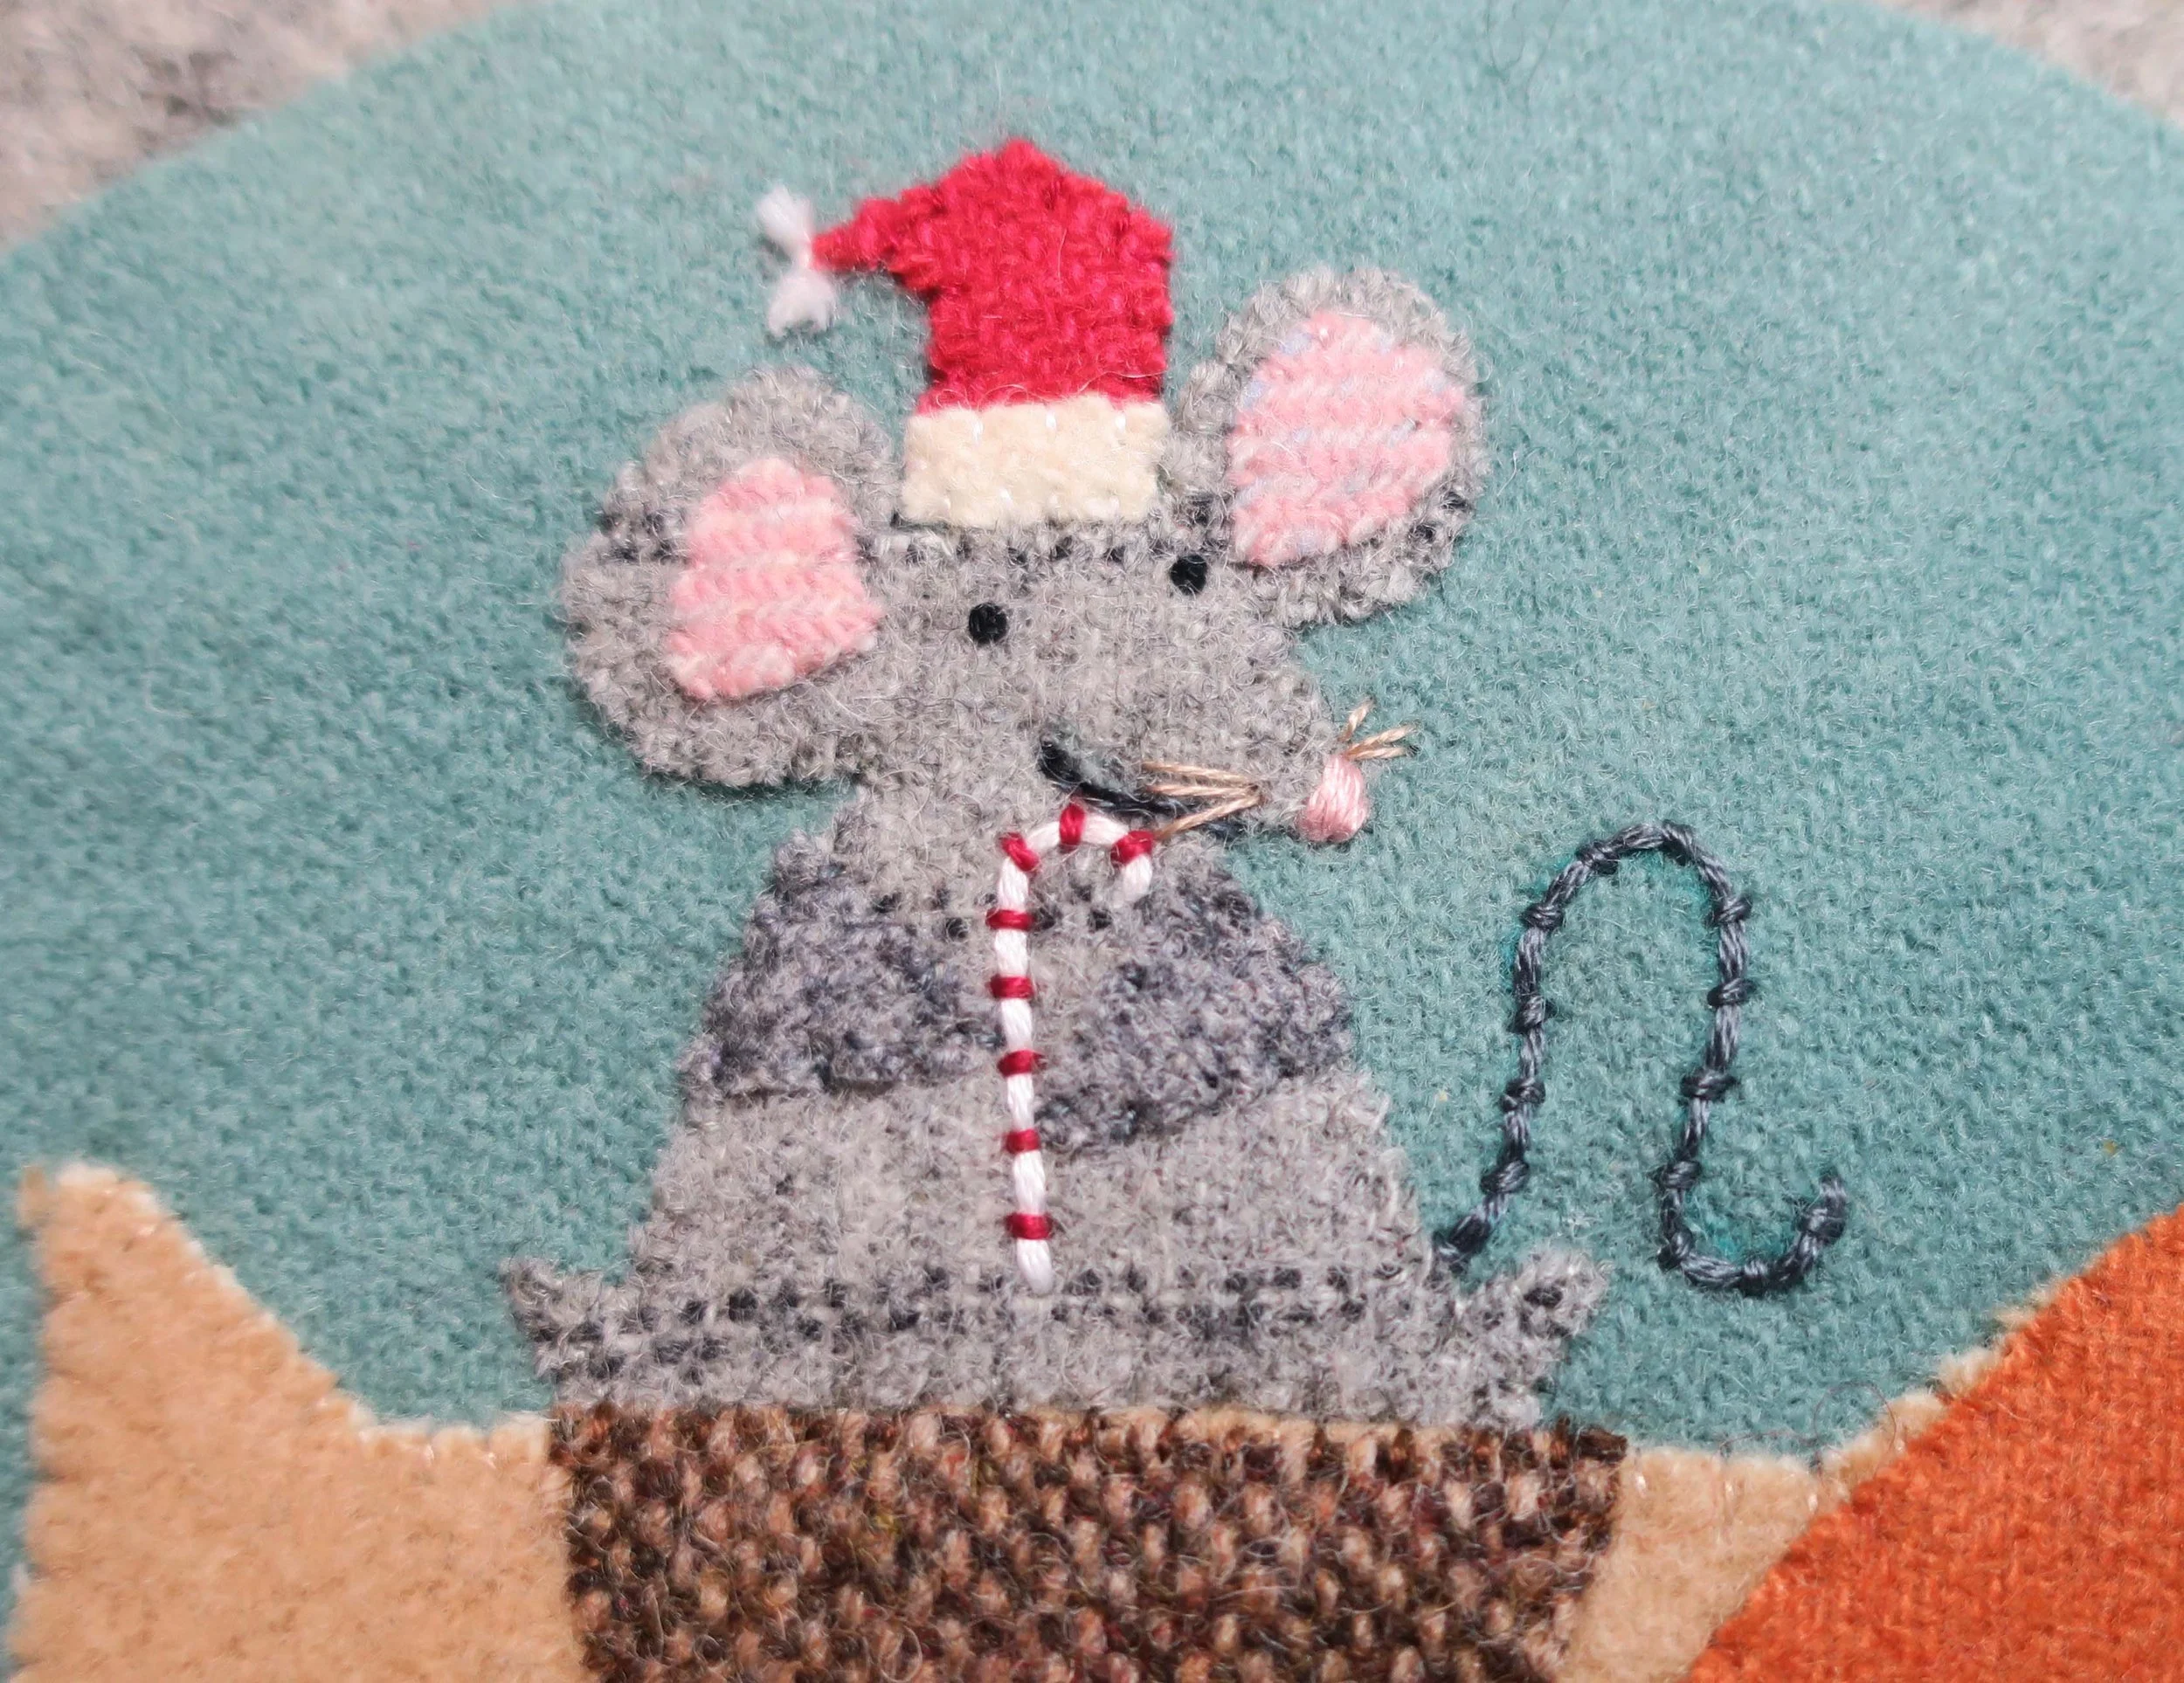
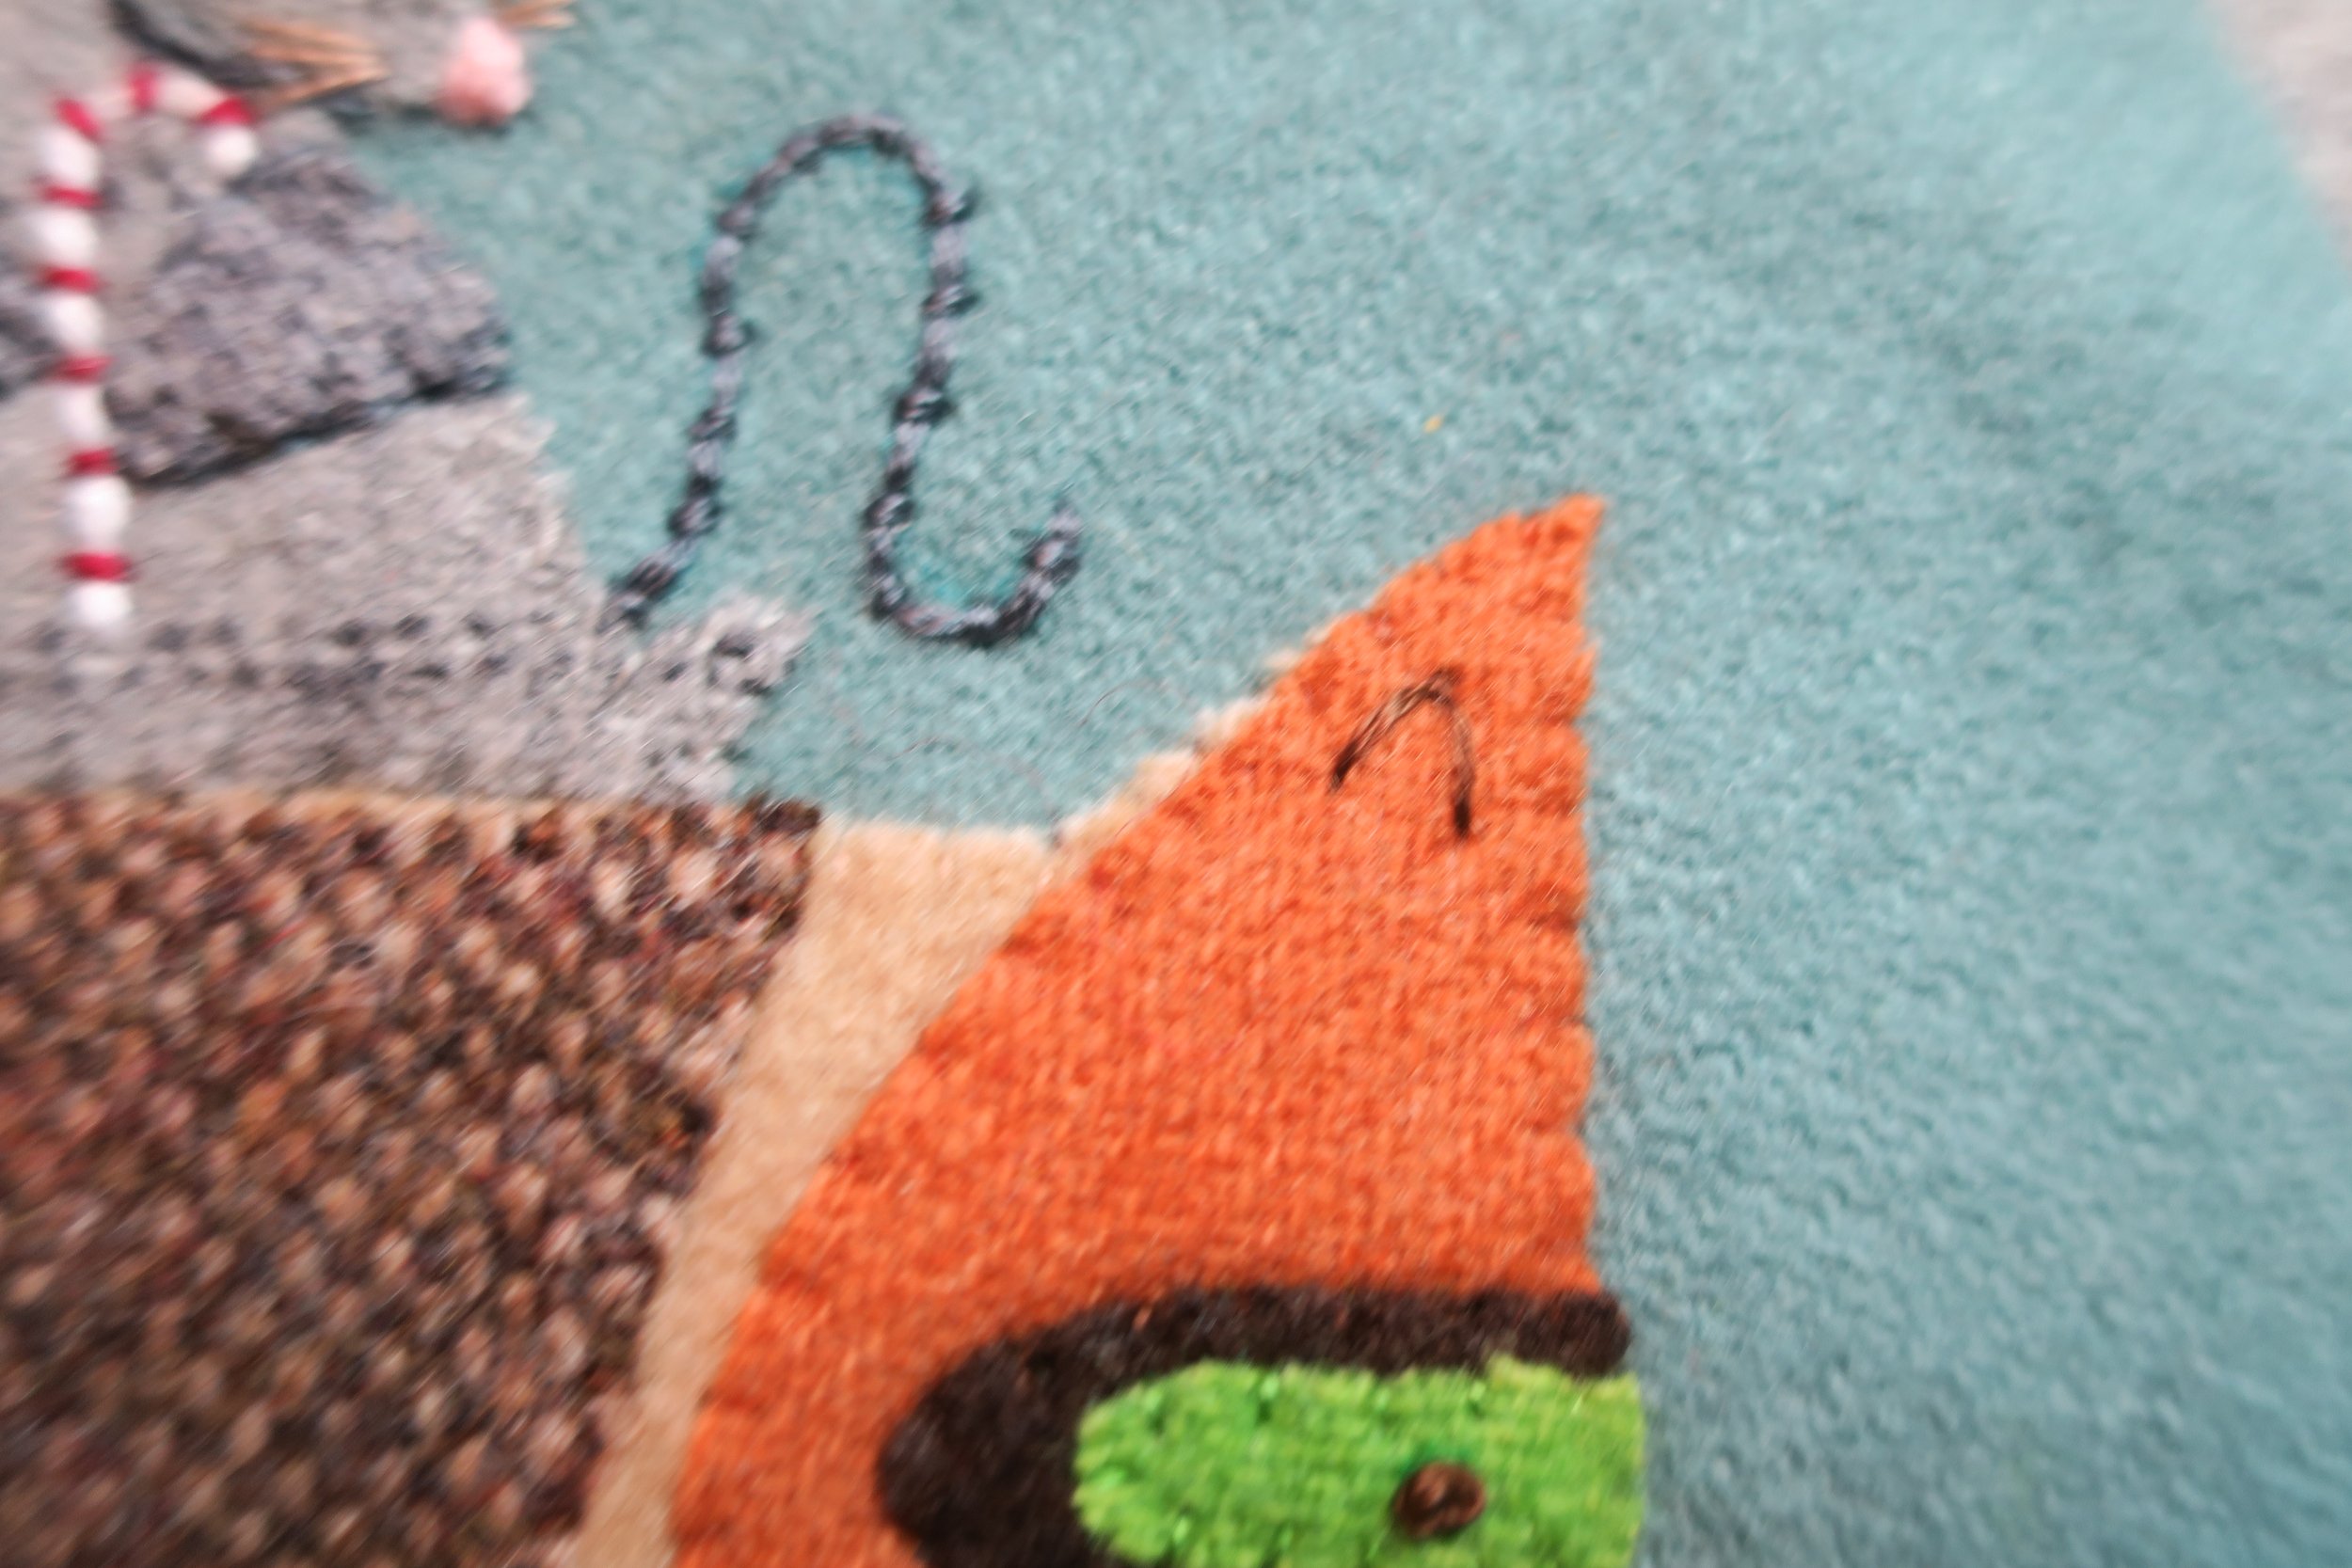
43. Use an erasable fabric marker to draw the mouse’s tail. Use the layout for guidance.
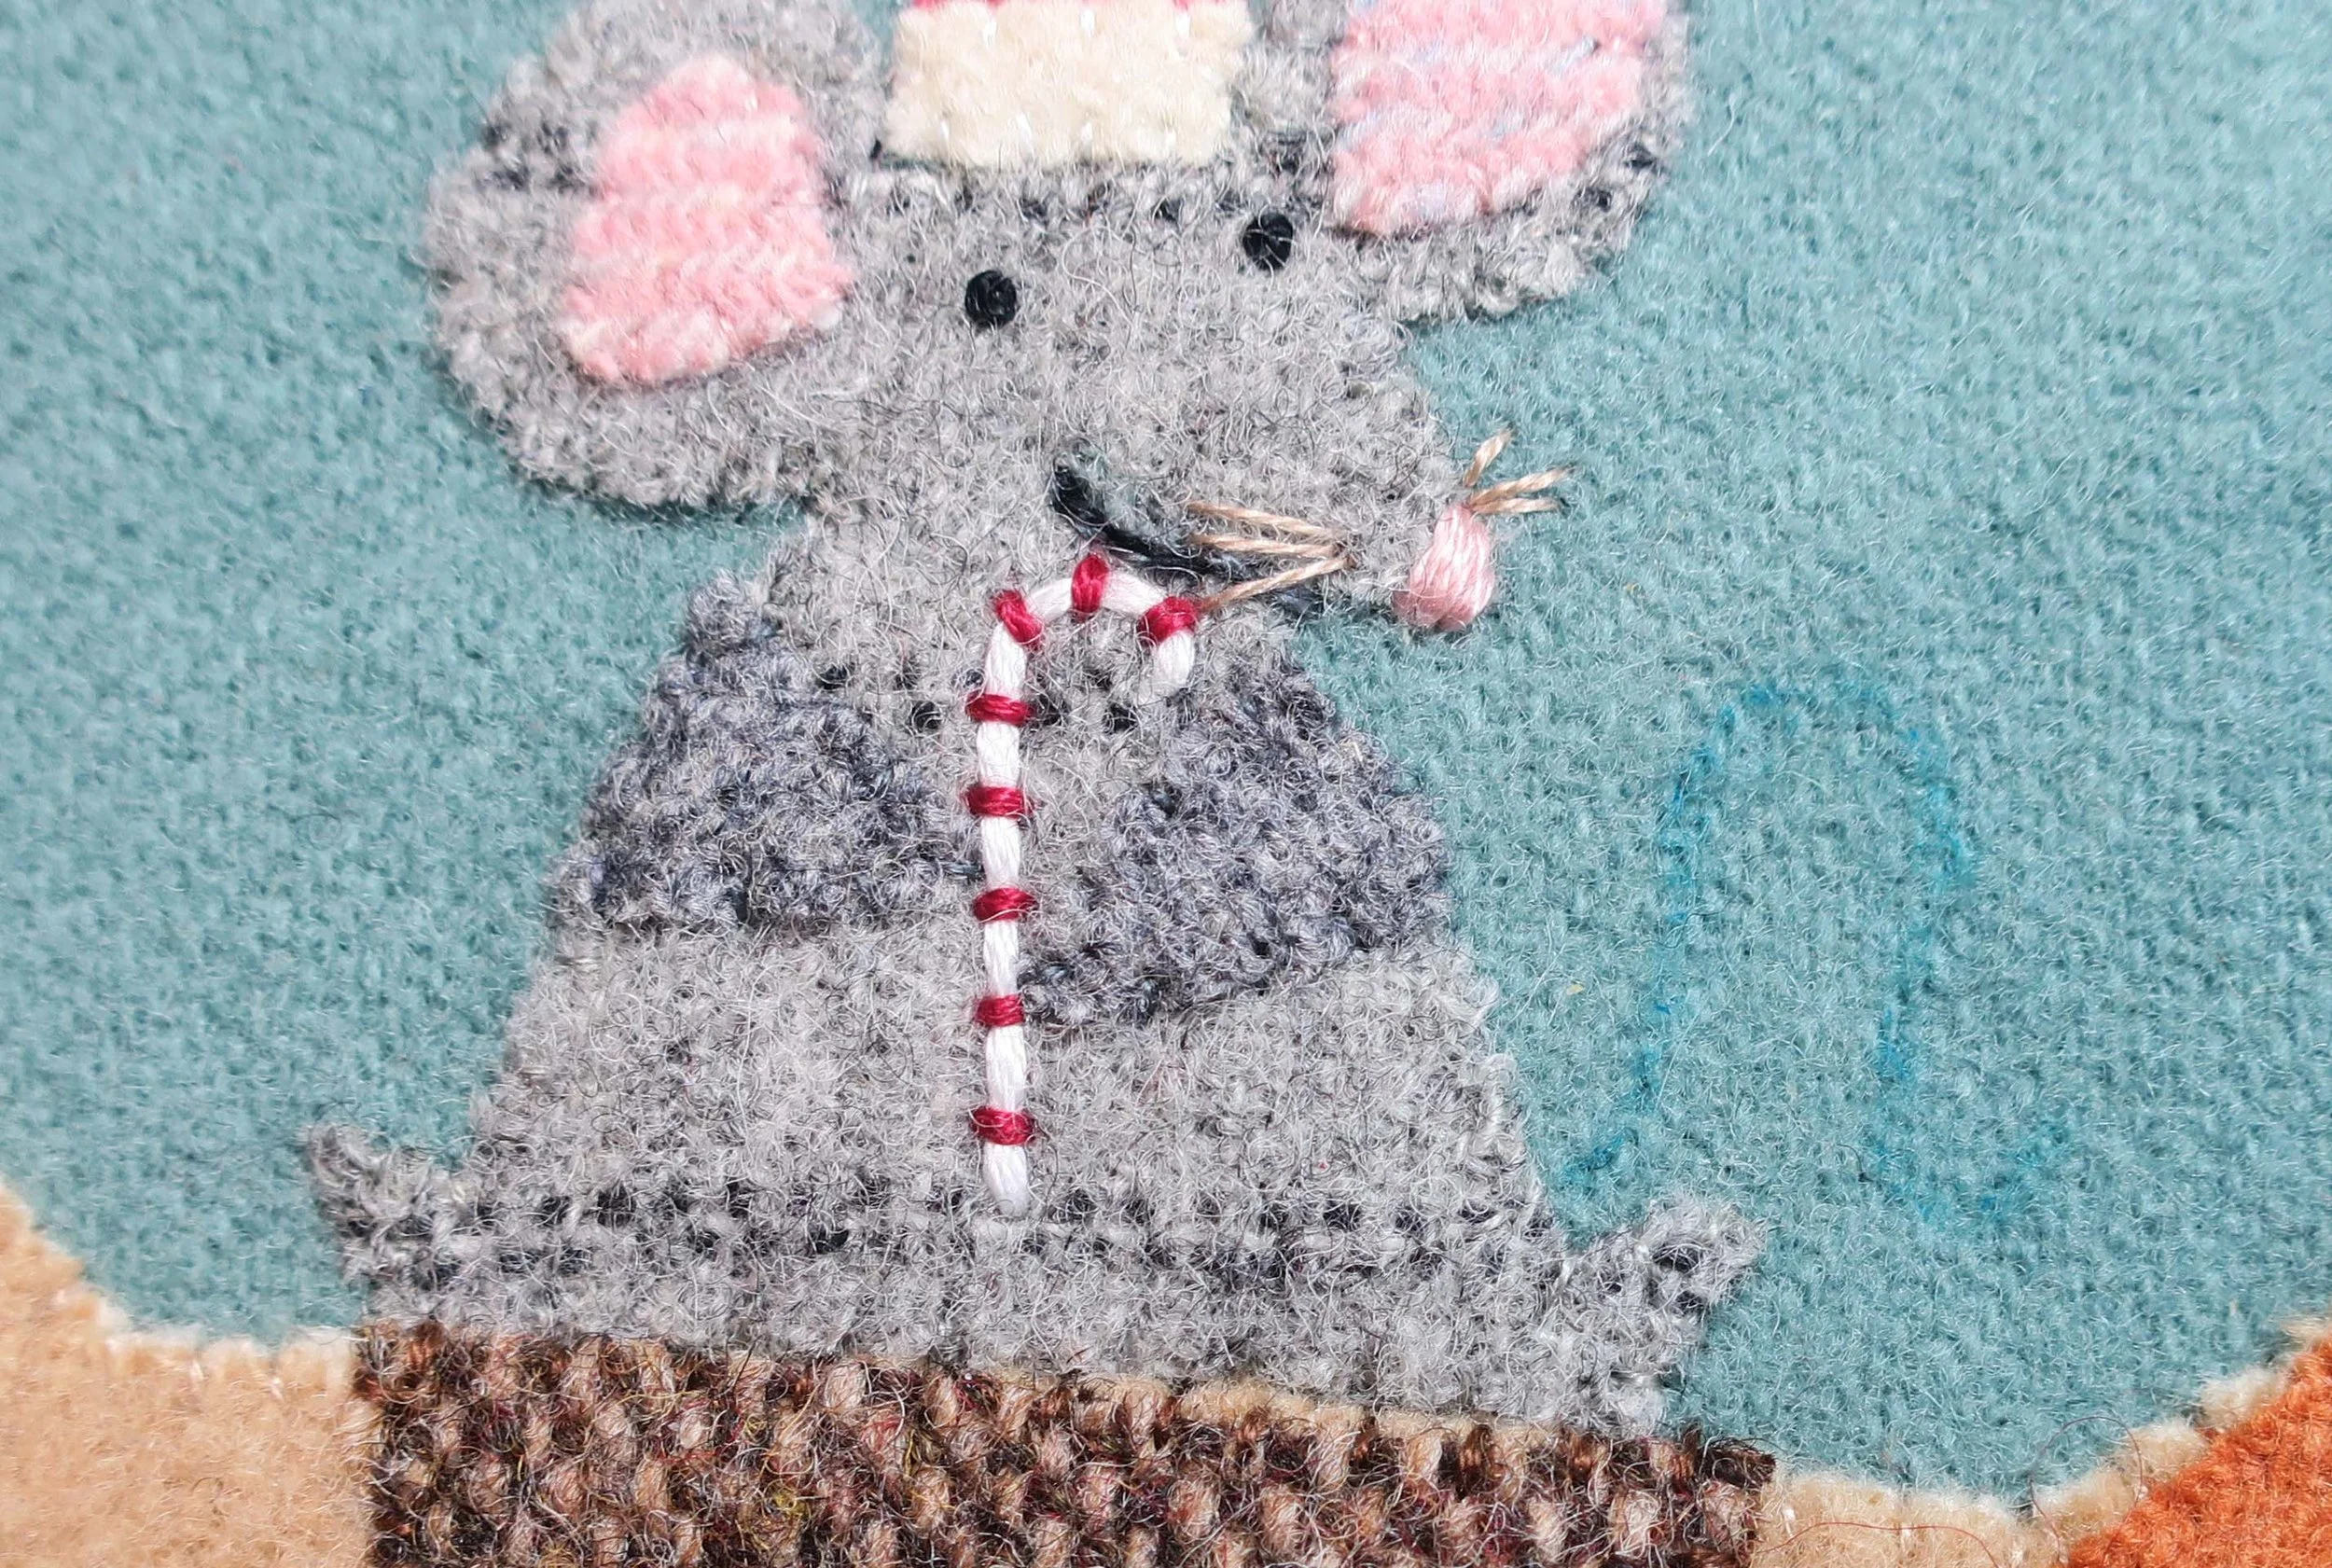
44. Use 3 strands of dark grey floss as your lay down and working thread to couch stitch the tail.
45. Position the eyes (outline wool) and nose using the layout as a guide.
46. Press with steam, and then whip stitch with 1 strand of dark brown floss to secure.
47. Postion the eyes (green wool) onto the outline wool. Press with steam, and then whip stitch with 1 strand of green floss to secure.
48. Use a water erasable marking pen to draw the mouth and pupils of the eyes. Use the layout for placement guidance.
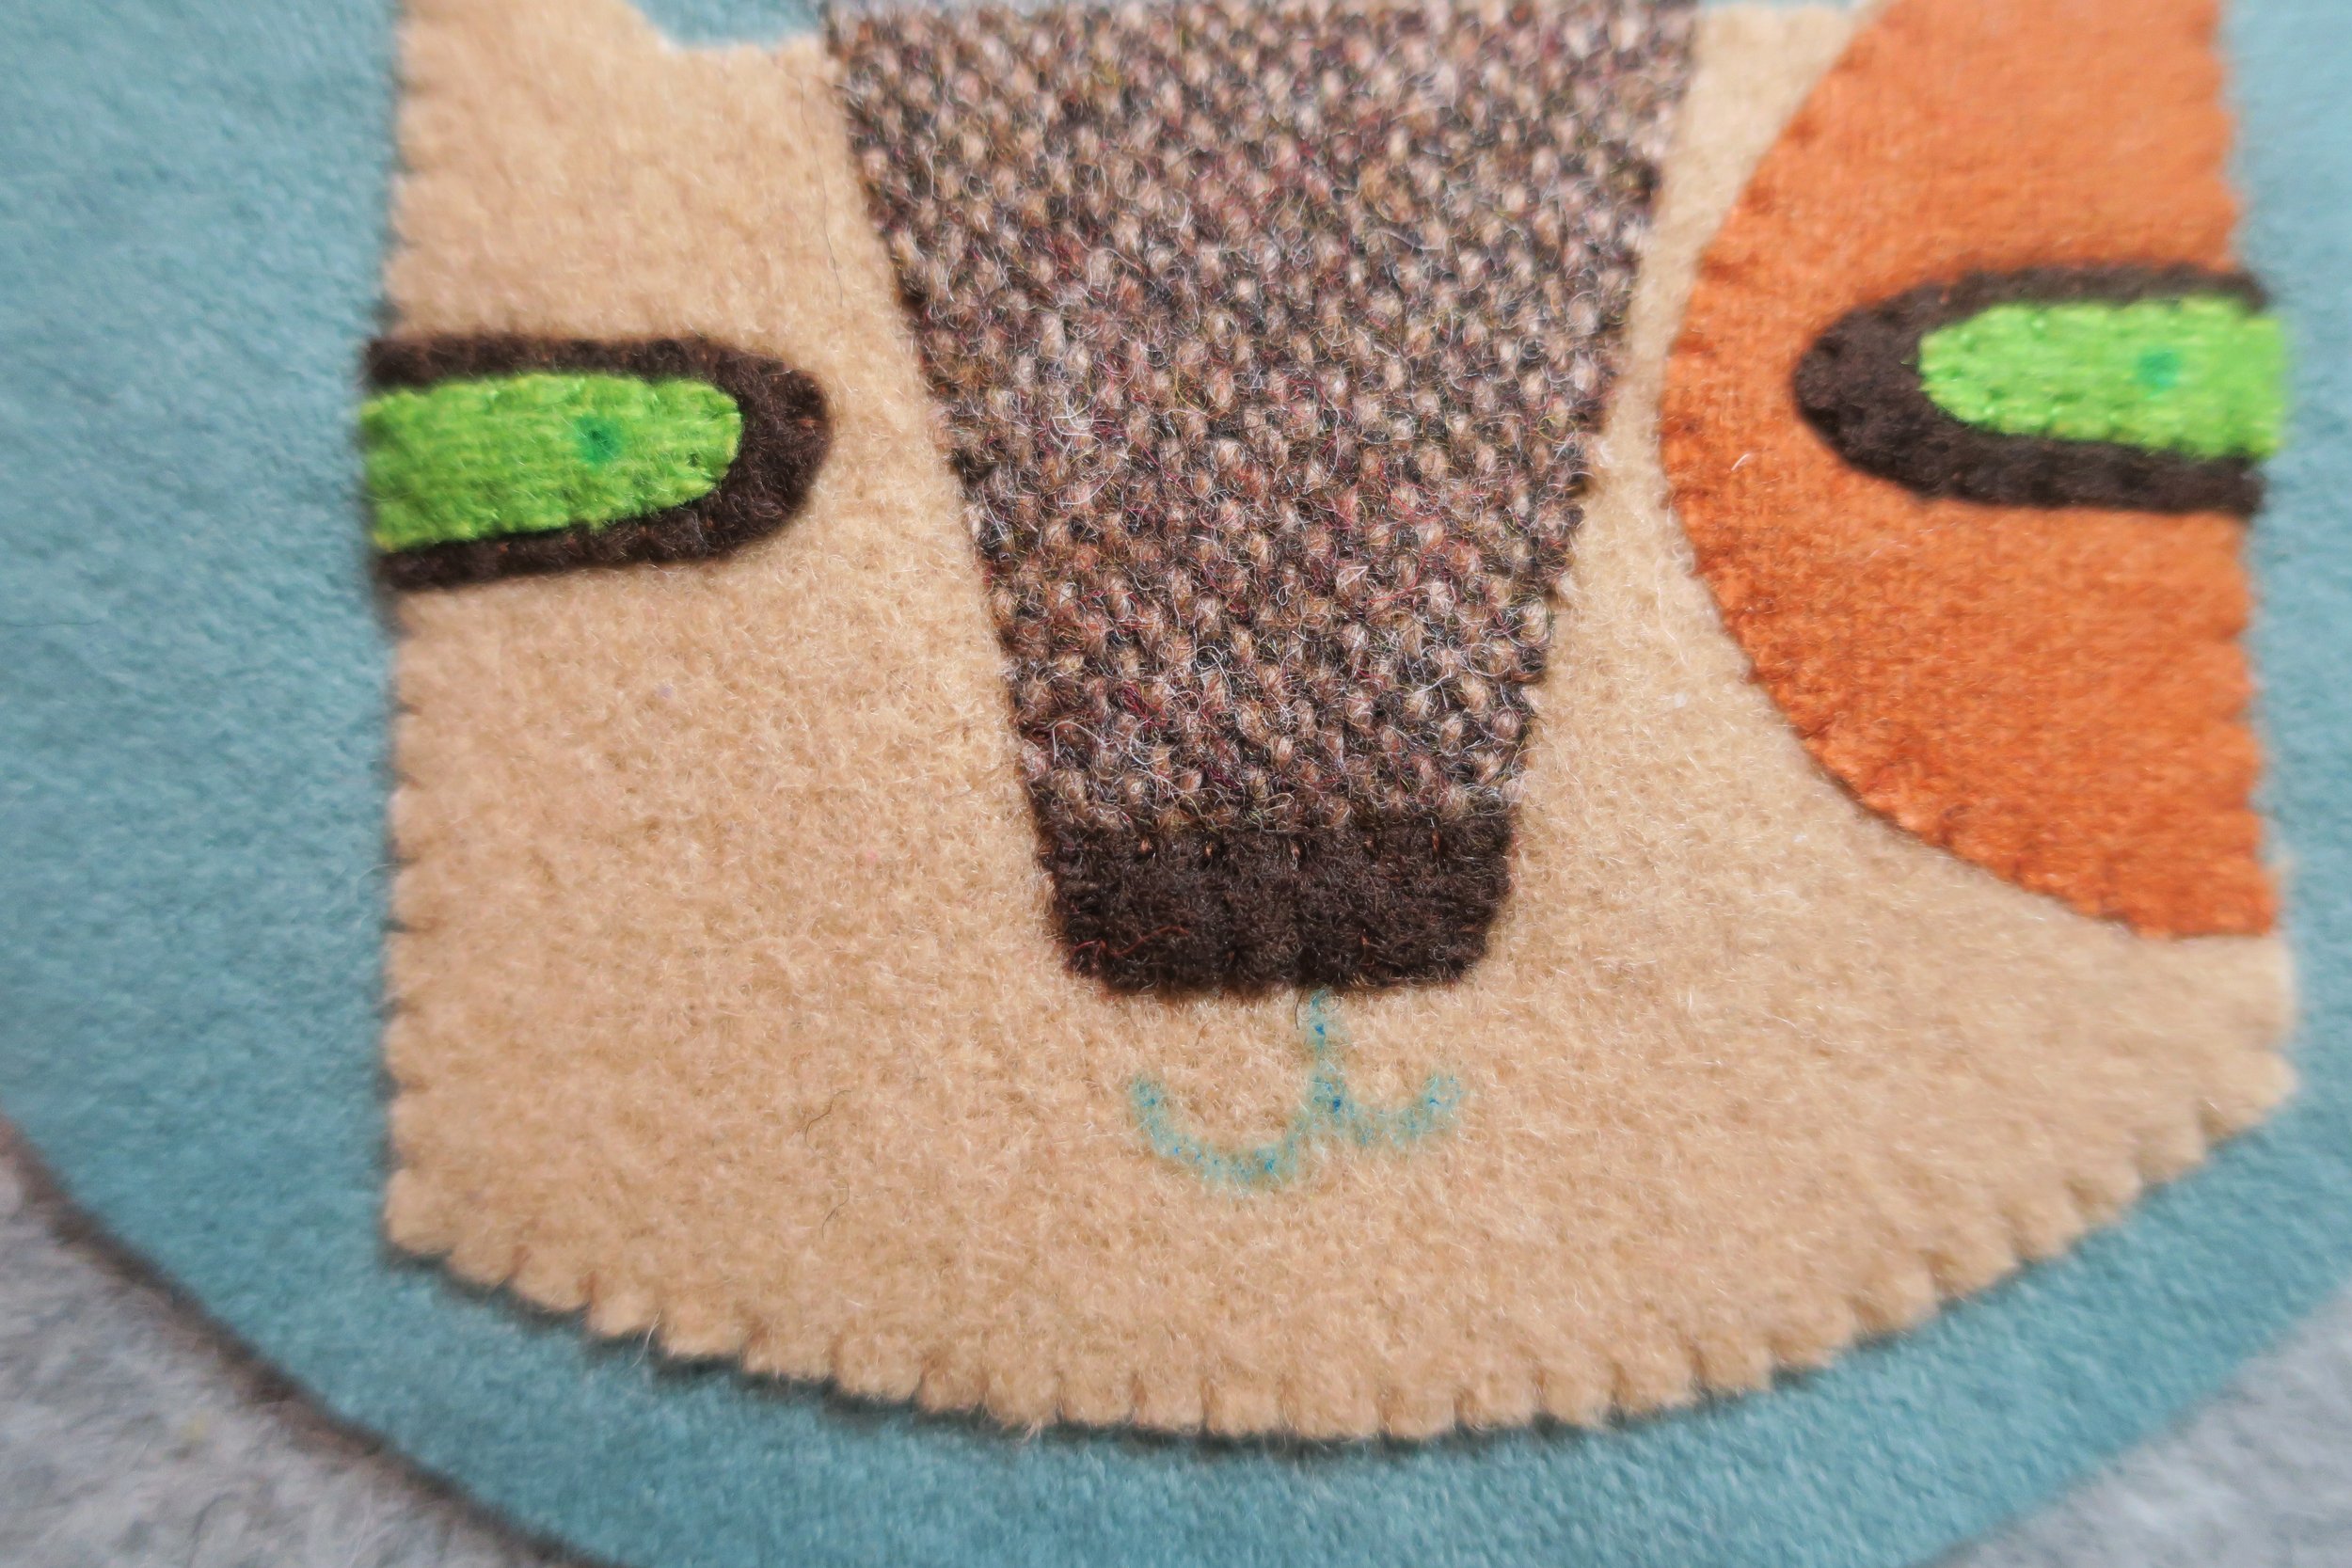
49. Use 2 strands of dark brown floss to back stitch the mouth.
50. Use the same thread to make French knots for the whisker dots.
51. Use 3 strands of dark brown floss to stitch French knot eyes.

52. Use 2 strands of Dark brown floss to stitch a single detatched fly stitch in each ear.
53. Use a water erasable marking pen to draw the whiskers.
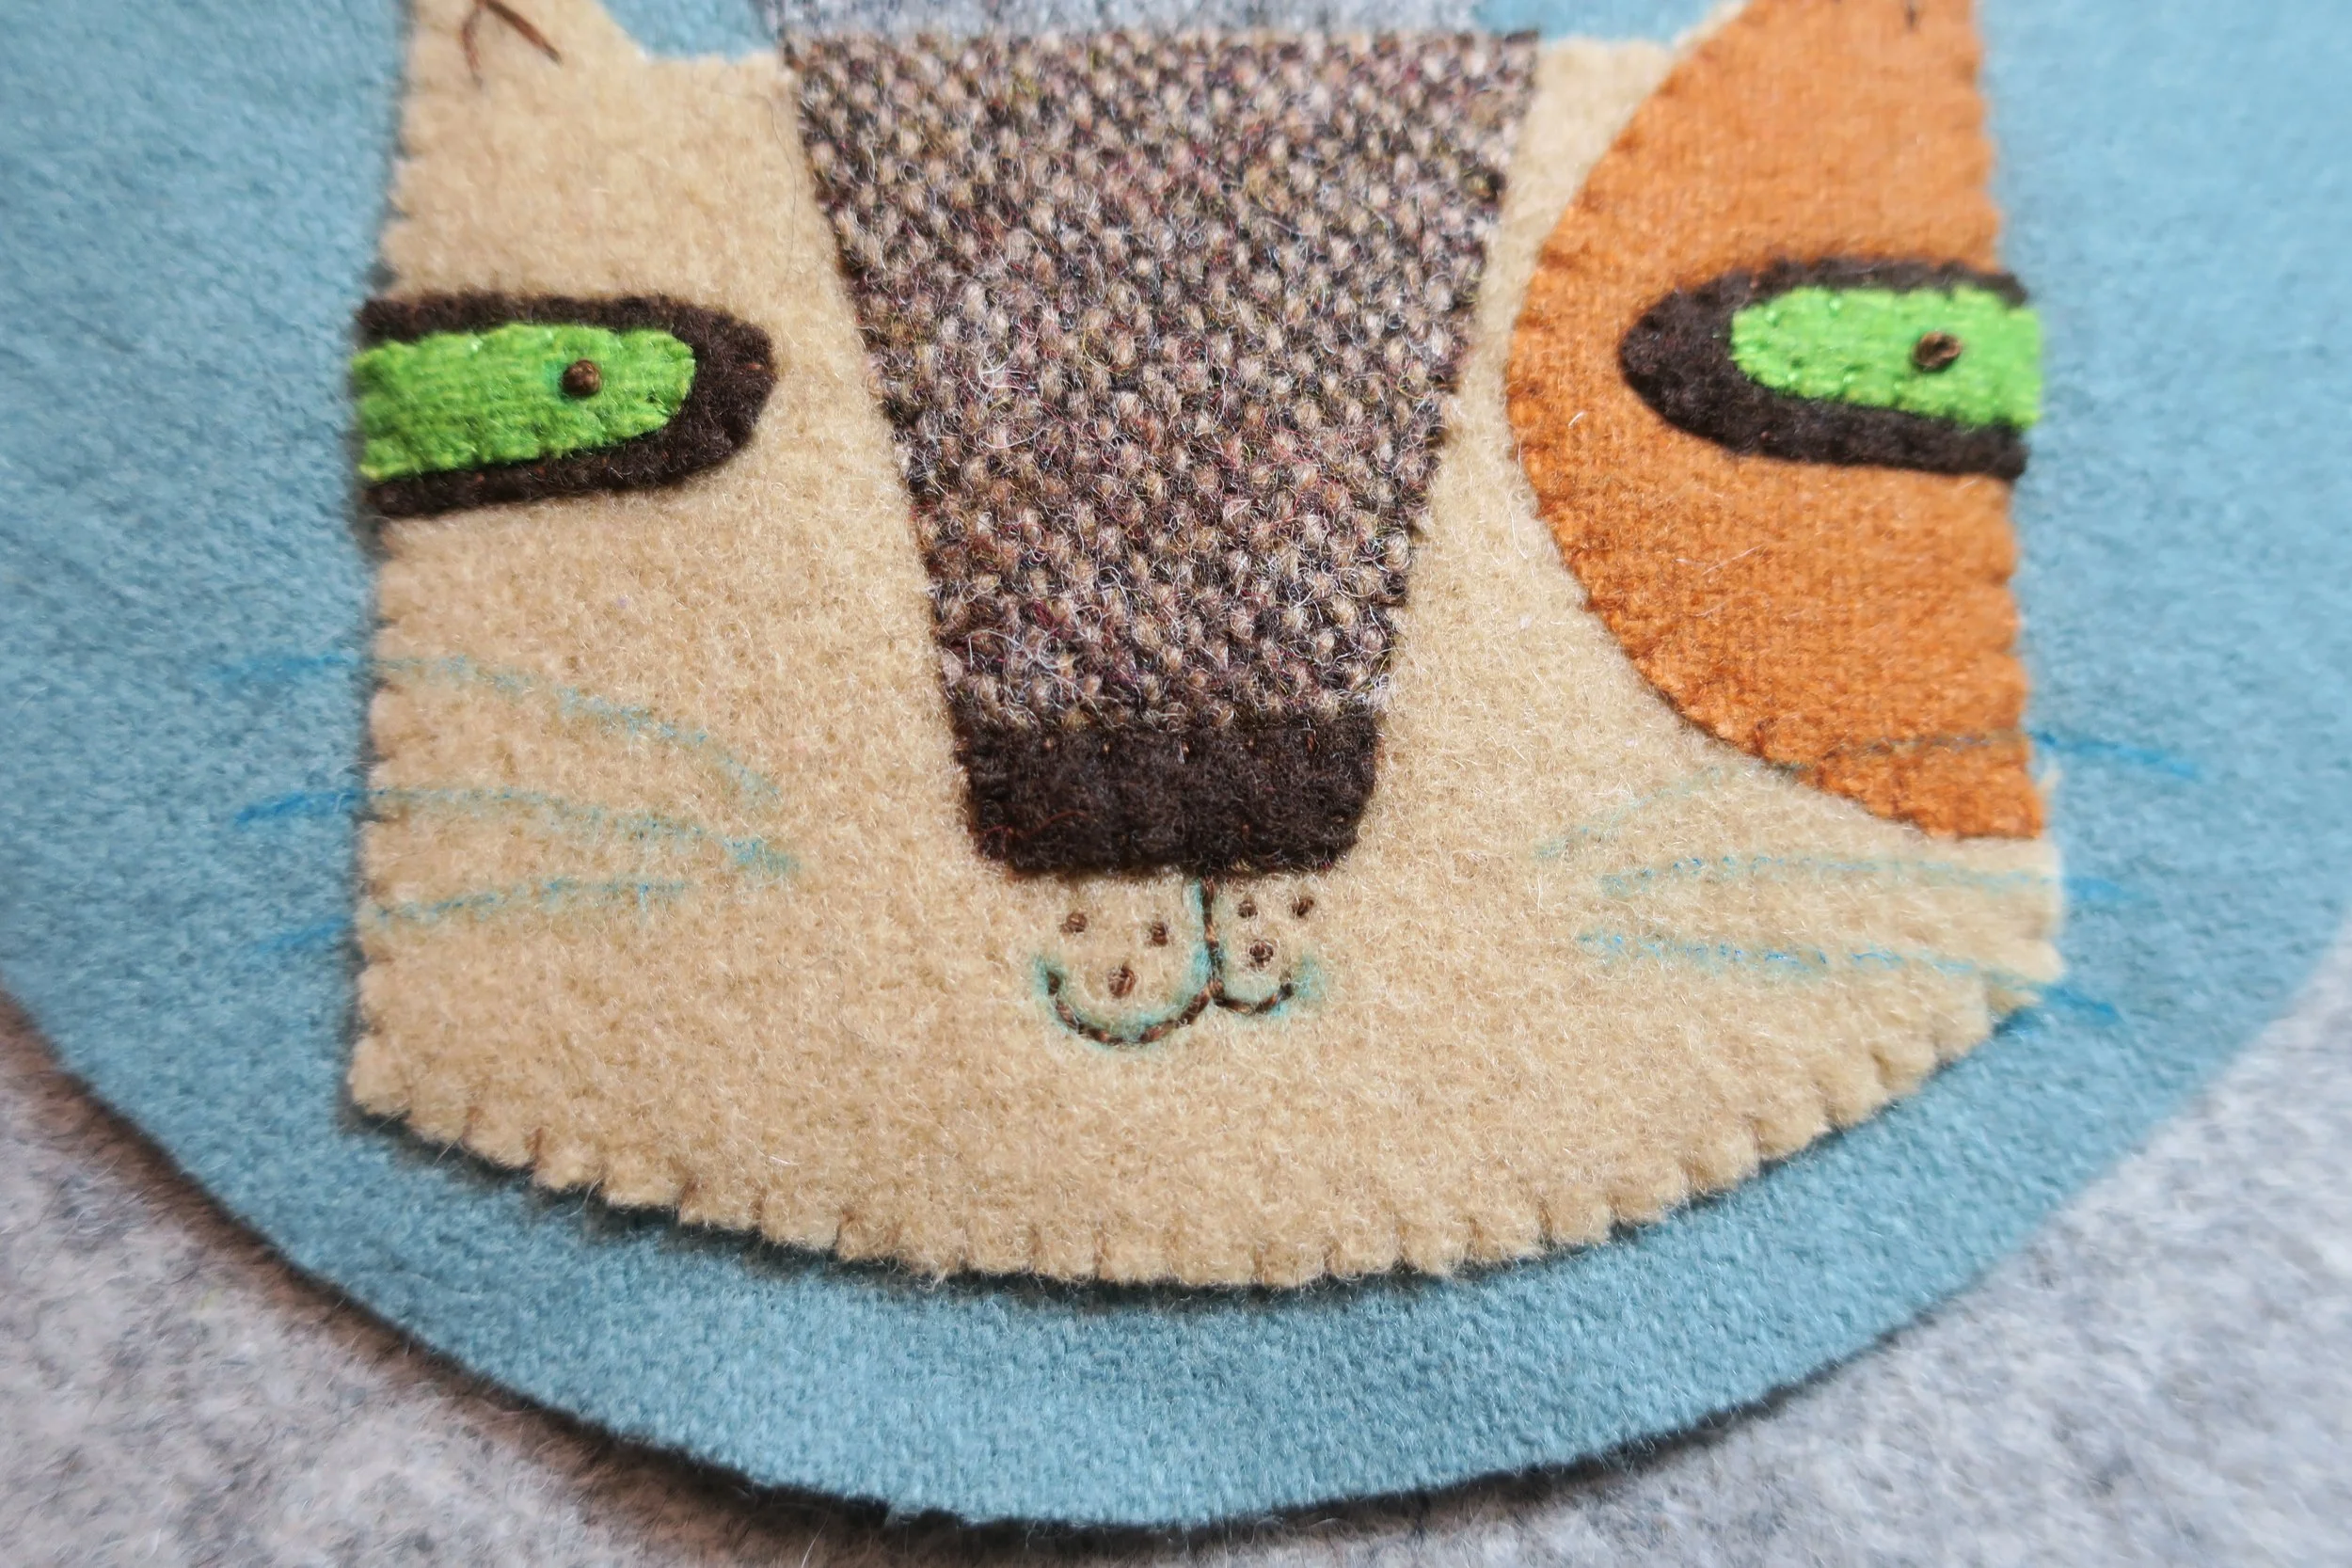
54. Use 1 strand of white floss to stem stitch the whiskers.
55. Now let’s stitch the holly branches using a washaway embroidery stabilizer method. I used this brand that I purchased online. Cut two pieces 2in x 5in. Trace the holly stems onto the stabilizer using a ball point pen (Do a test piece to check for ink bleed). I drew small registration marks to show the outer border and side of Snickers’s head.

56. Pin the stabilizer to the background.
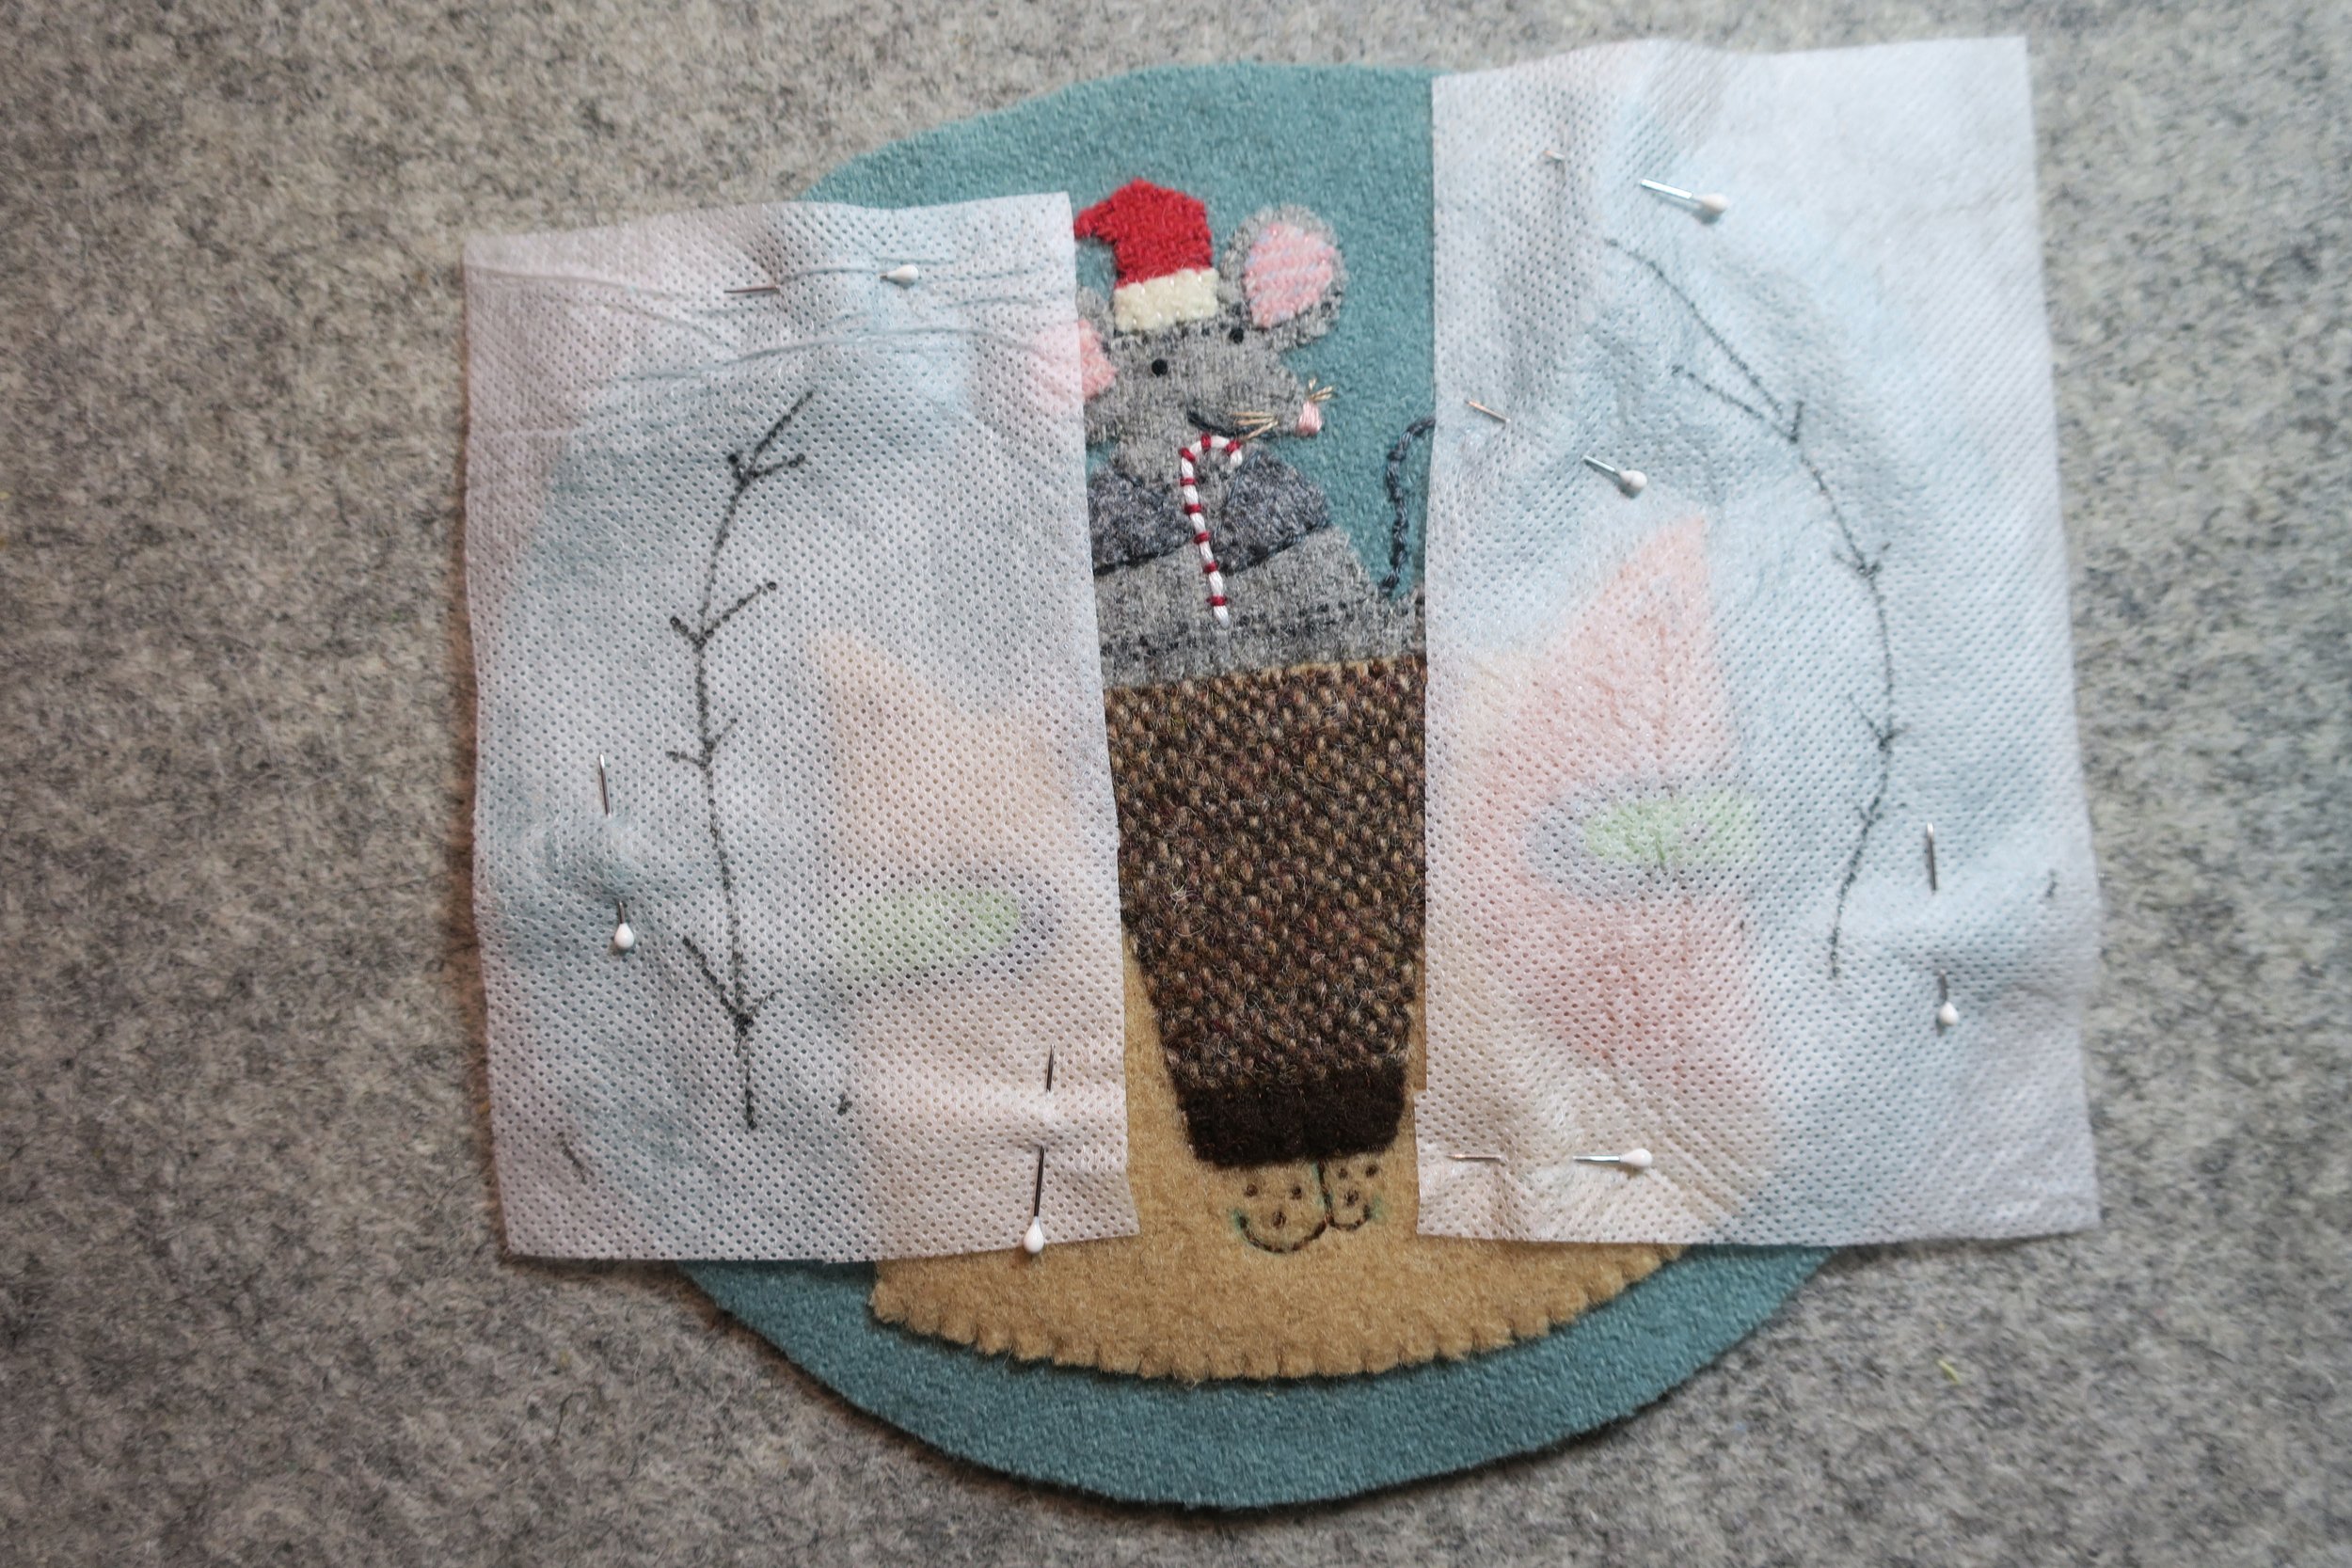
There are two registration marks on each of the stabilizer pieces. Those closest to the head are just dots, but the outside border marks are short lines.
57. Baste around stem to secure the stabilizer to the background.
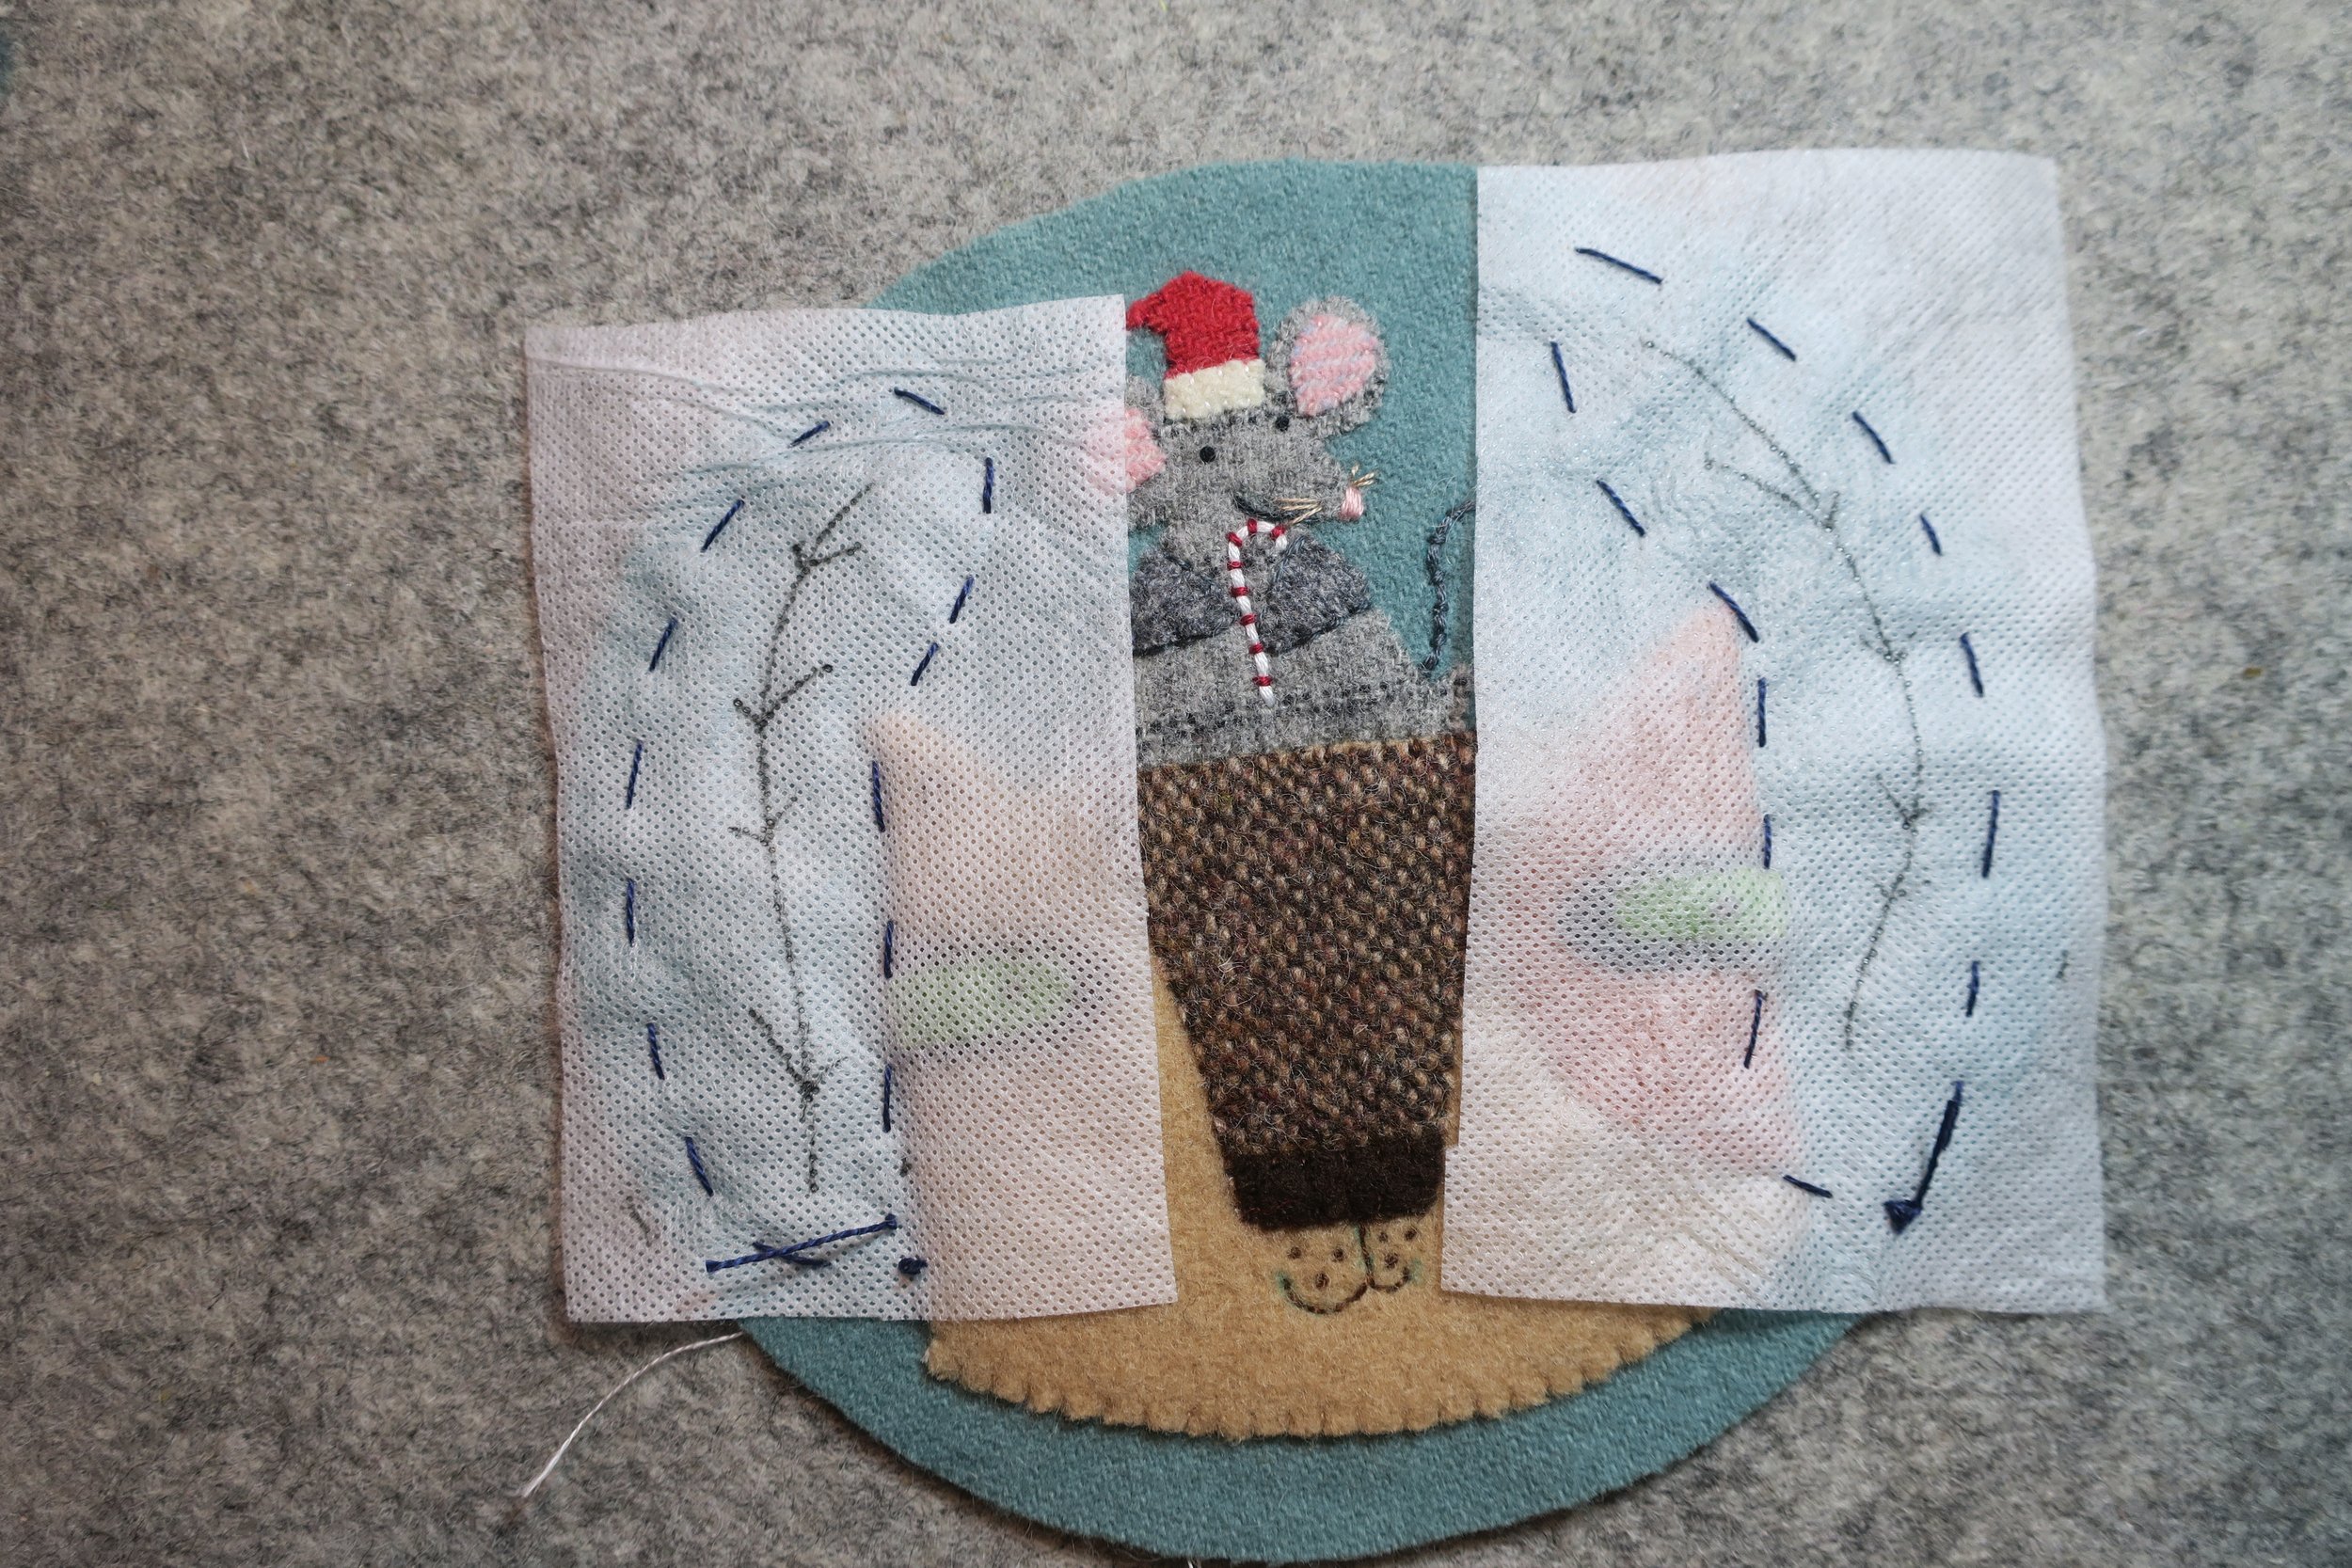
58. Use 3 strands of dark brown floss to stem stitch the holly stems.
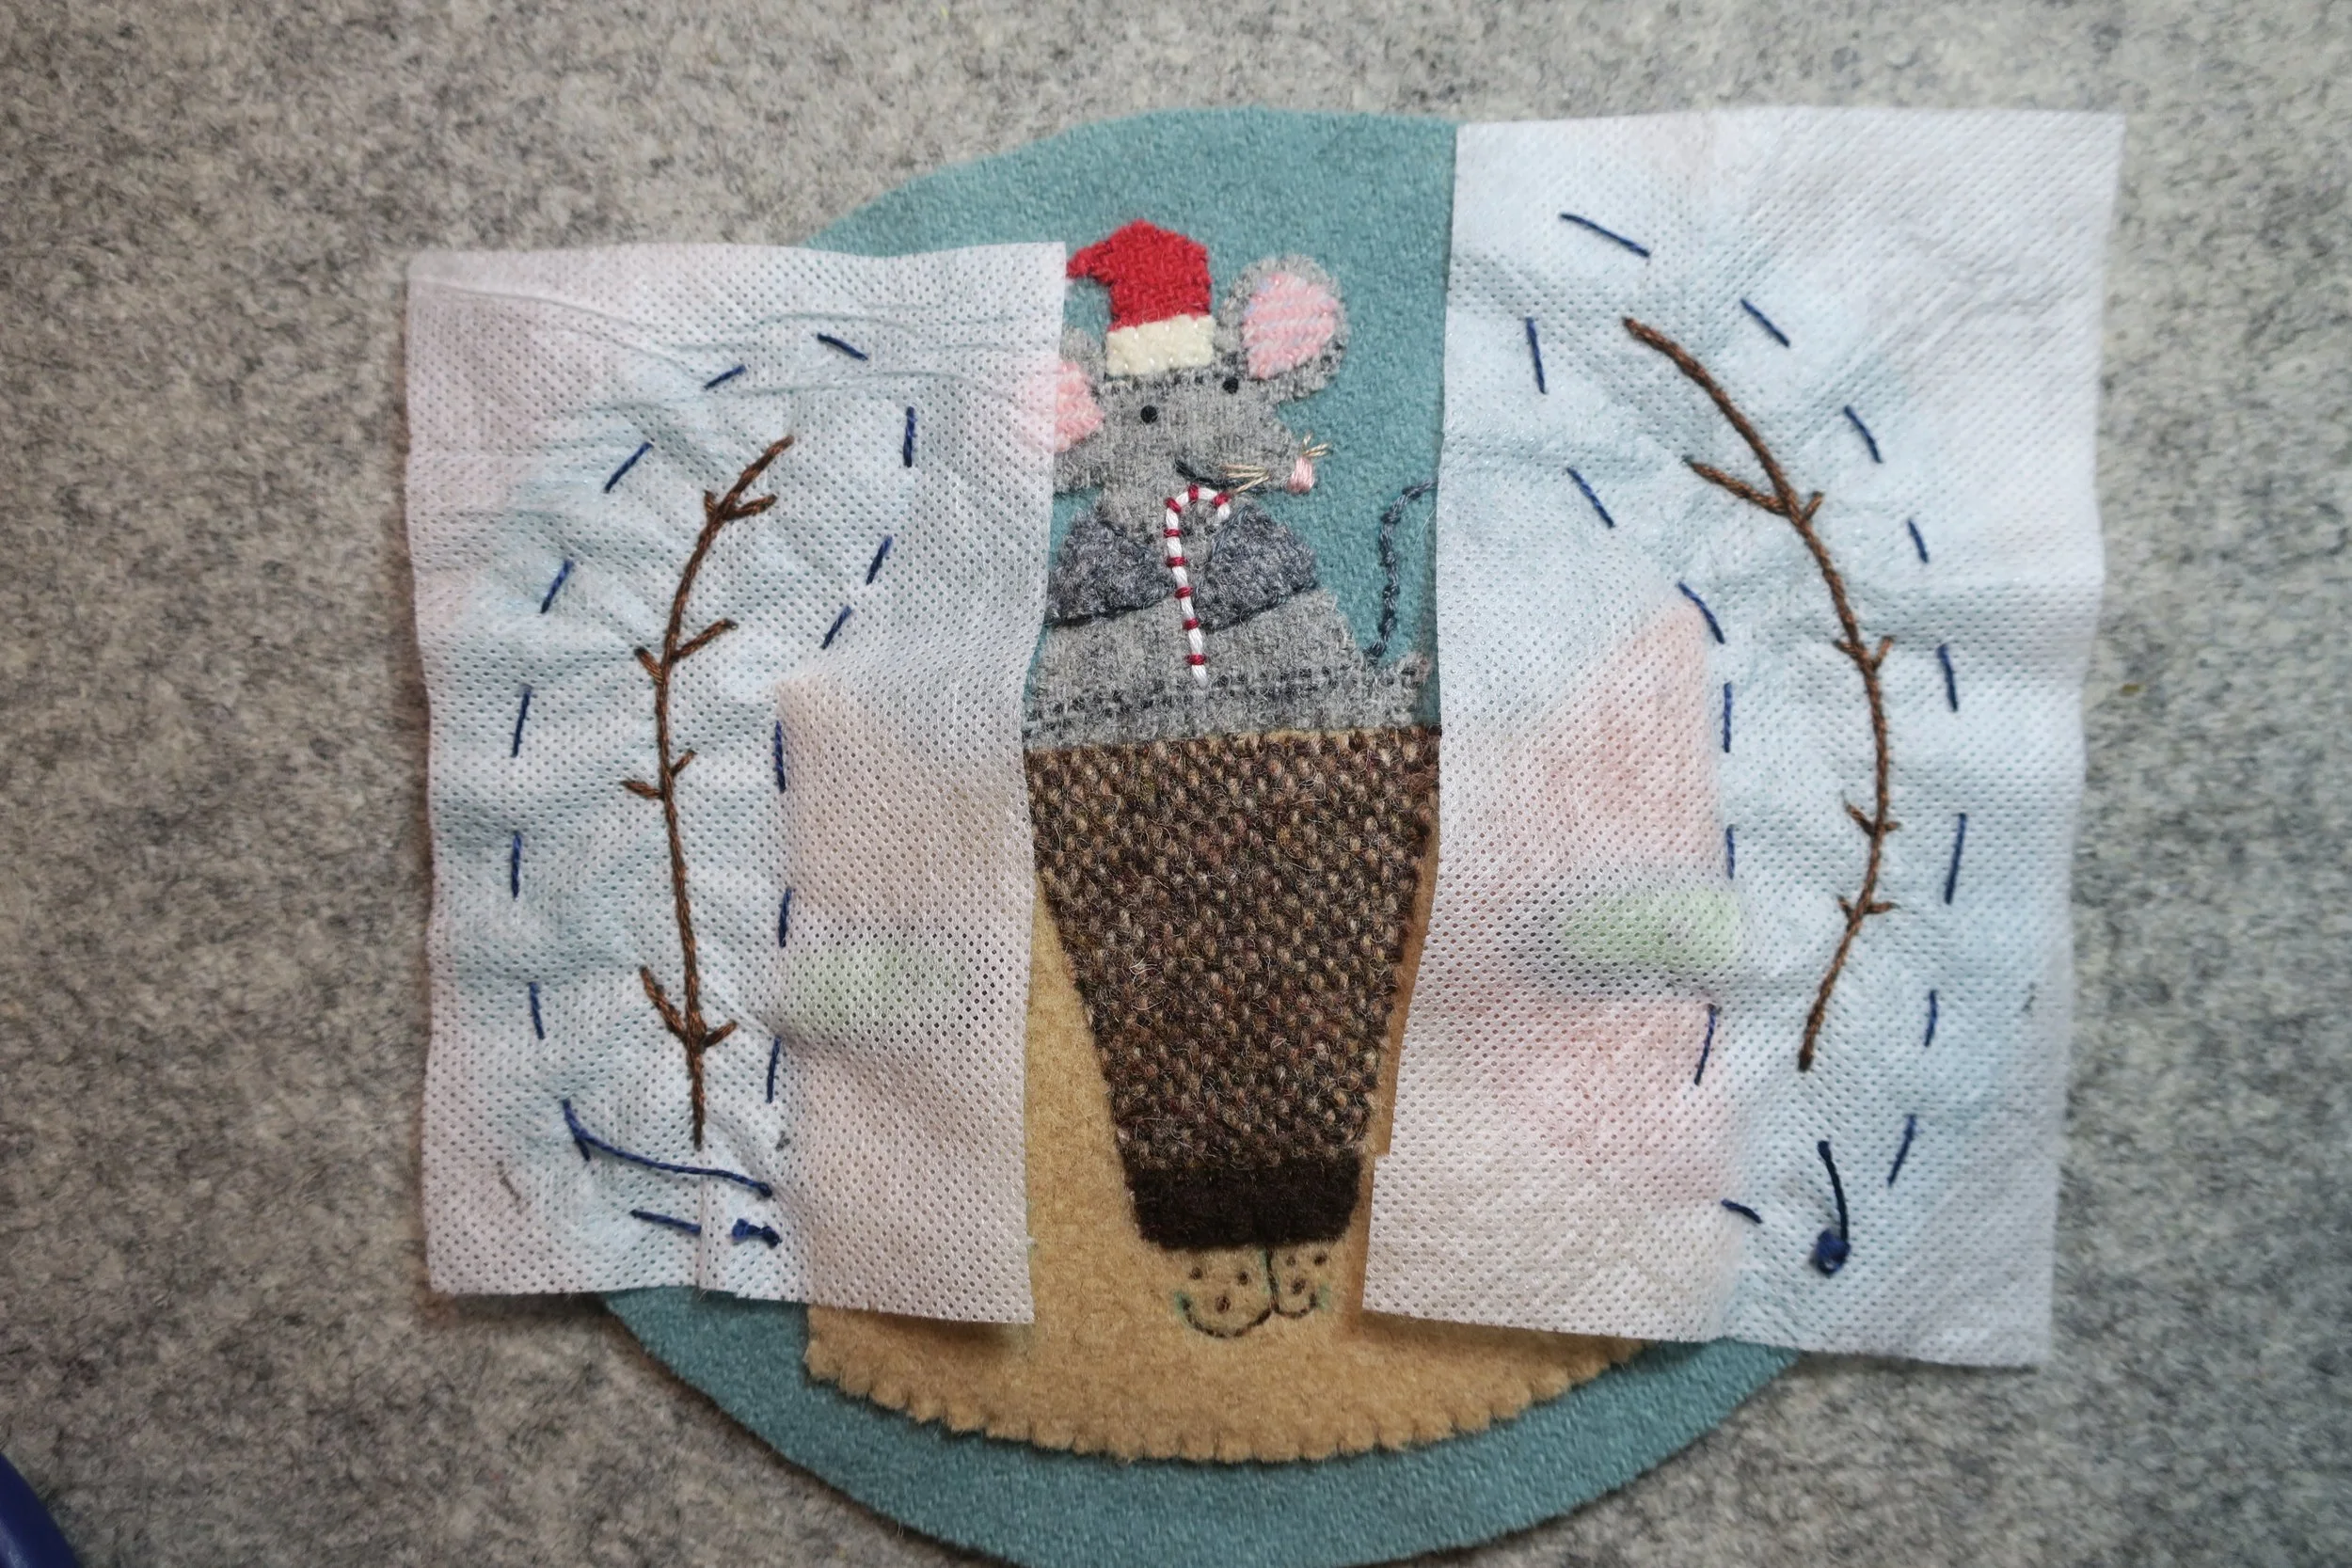
59. Once the stems are stitched you can trim away the excess stabilizer.
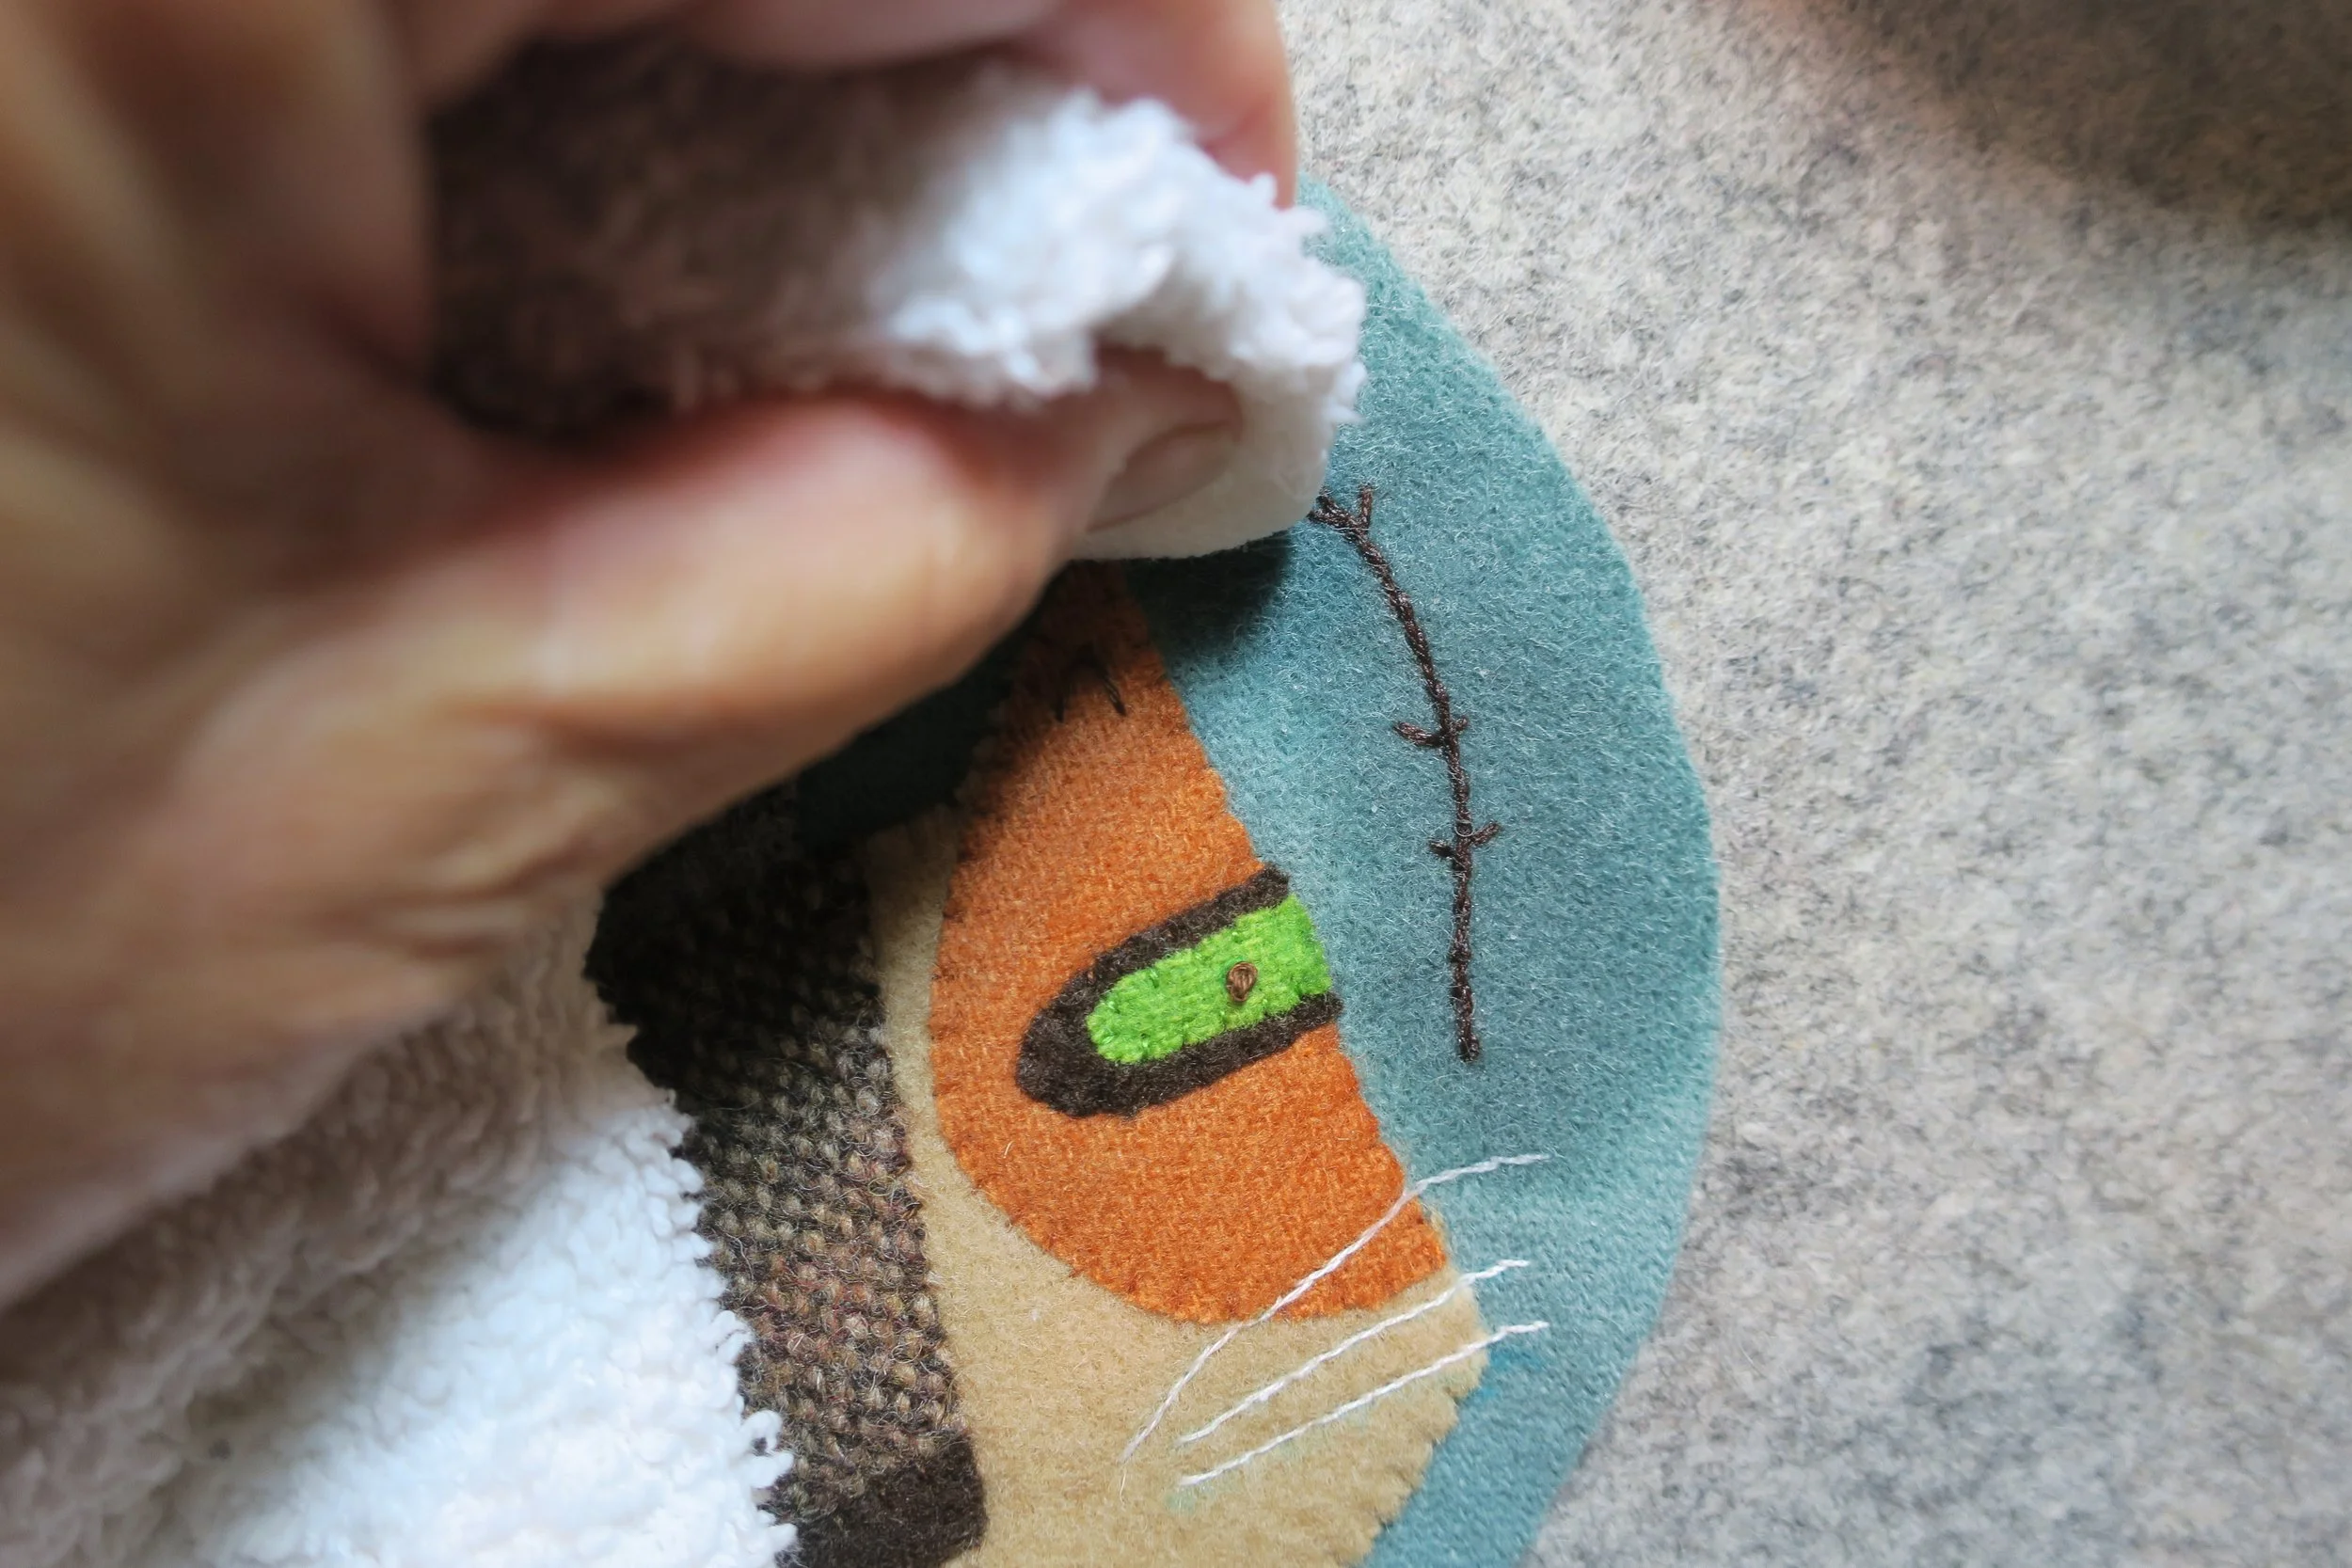
60. Dampen a small towel, and then dab the stabilizer until it dissolves. Allow the wool to dry completely.
61. Position the leaves and berries onto the stem, and then press using steam.
62. Use 2 strands of green floss to stitch a small “X” on each of the berries. Since the berries are so small I don’t whip stitch them. The tiny cross secures it.
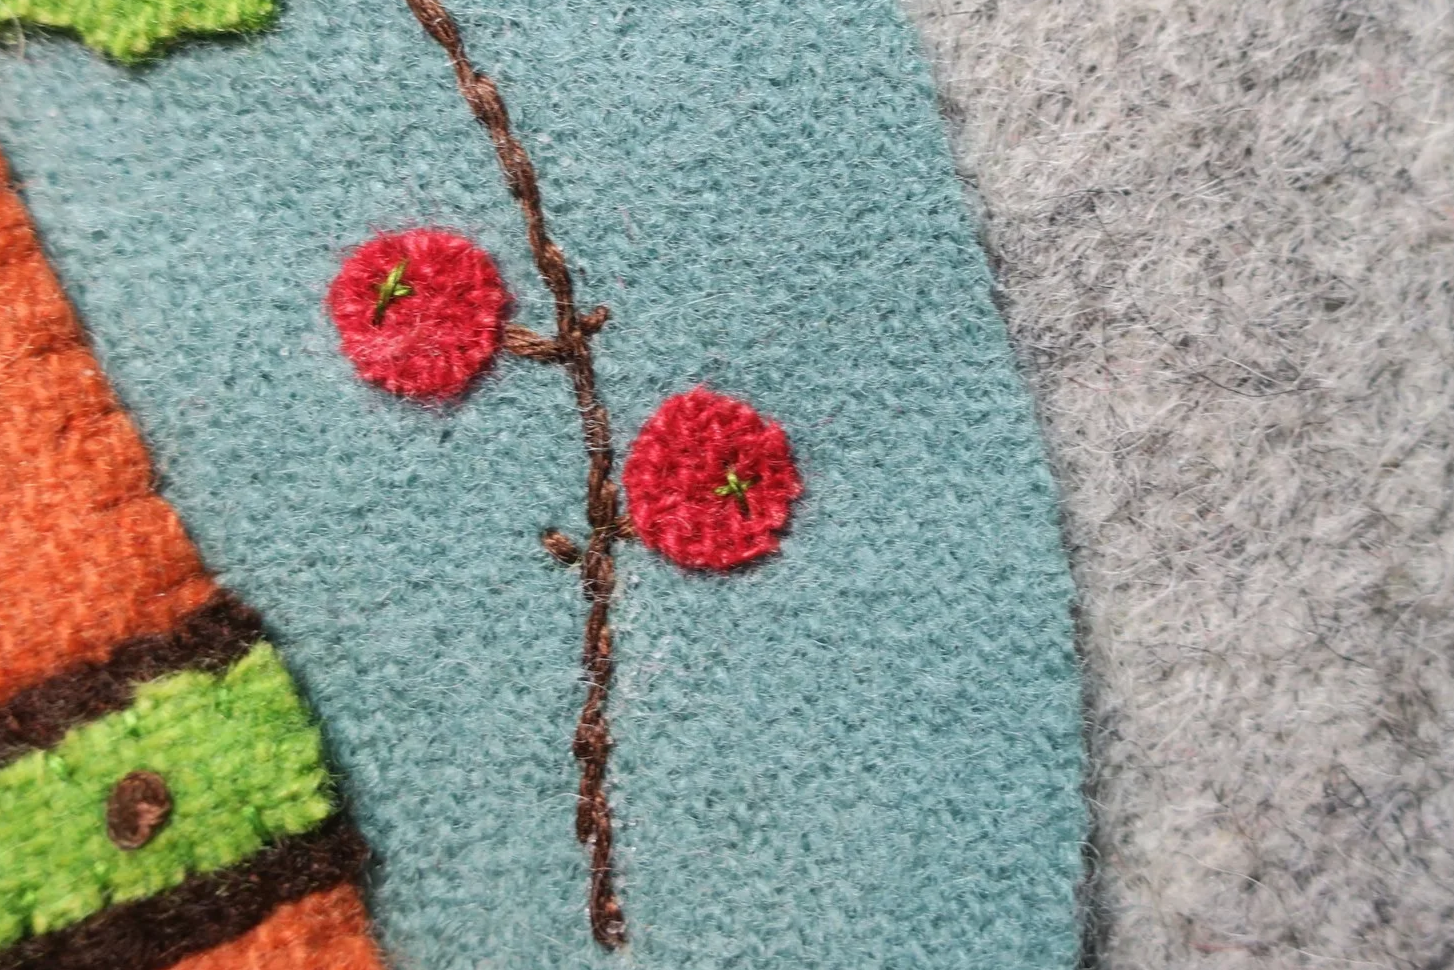
63. Use 1 strand of green floss to whip stitch holly leaves.

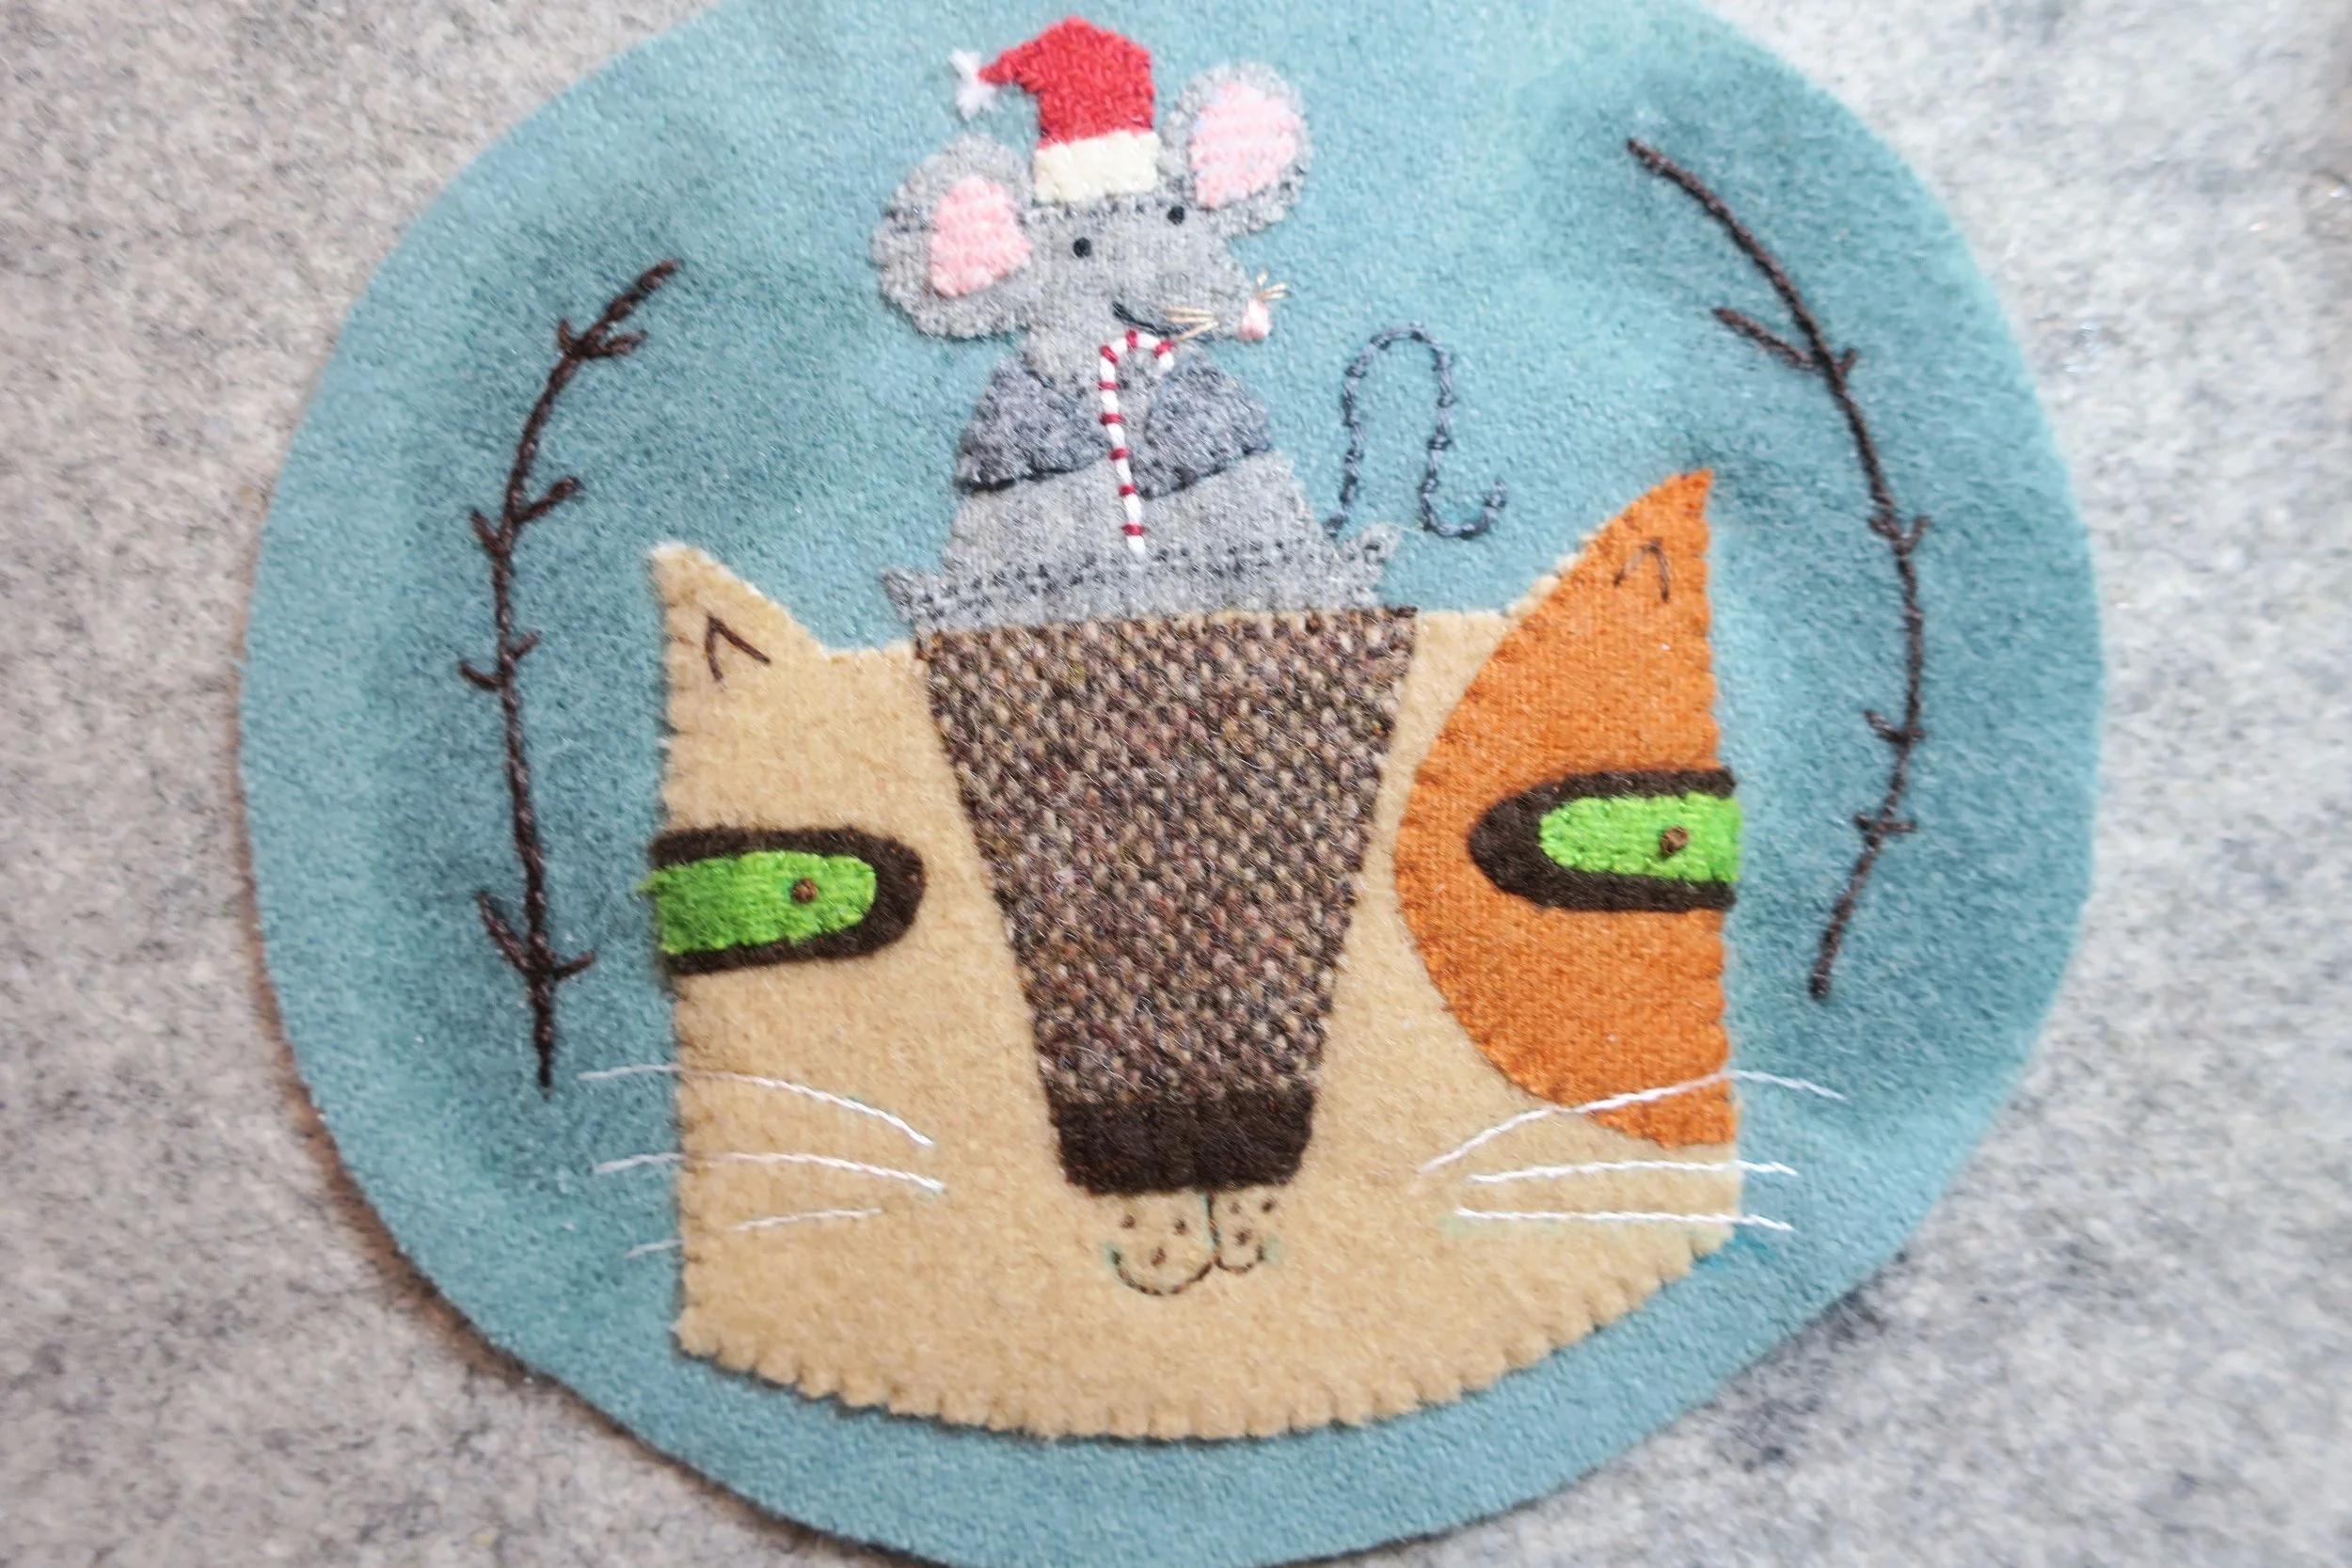
Yay! The applique is complete!
64. Assembly - Refer to step #34 of Tis the Season for full assembly instructions.
Happy Holidays Everyone!