

BIRDS OF A FEATHER BOM - BLOCK #7
This is the 7th block in our BOM. This is our Independence Day holiday block. The colors I chose are red, white and blue, which are our country’s colors. Many of you who follow my blog don’t live in the United States, so you might want to change the colors up a bit, and even change the hat to a beret, or slouch hat. Make it your own.
If you are just joining the BOM you will find general information about block size. and supplies needed on the blog post for block #1. This tutorial will cover block #7 only.
Let’s begin.
Supplies for Block #7
Fabric Requirements
Background - 9” x 9” linen/cotton or quilter’s cotton
Felted Wool requirements - Suggested colors
Blackbird body - 4” x 7” black heather
Wing - 2 1/2” x 3” black and grey herringbone
Rocket and Hat - 2 1/2” x 5 1/2” blue
Rocket stripe - 1” x 3 1/2” off-white
Rocket tip and base, Hat band - 3” x 3 1/2” red and dark grey plaid
Thread Requirements - Suggested Colors
Embroidery floss in colors that match wool colors - Use this to whip stitch wool pieces in place.
Rocket exhaust and Hat brim - Blue Clouds perle cotton, size 12 (Valdani #M68)
Rocket exhaust - Dark Chocolate perle cotton, size 12 (Valdani #200)
Bird legs and beak - Dark Old Gold (DMC #680)
Eye and Hat band stripes - Very light beaver grey embroidery floss (DMC #3072)
Rocket stripe embellishment - Turkey Red perle cotton, size 12 (Valdani #775)
Tail feathers - Tea Dyed Stone perle cotton, size 12 (Valdani #O178)
Instructions
Trace reverse images of pattern pieces onto fusible web, and then cut out leaving a small 1/8” border around each image.
Fuse pattern pieces to designated wools, and then cut out along traced lines.

3. Position the bird’s body, wing, hat and the rocket on the background fabric. Use the layout as your guide. I used my lightbox with the layout for precise placement.


4. Fuse in place using steam.
5. Layout the hat band and the rocket stripe, tip, and base. Fuse in place using steam.

6. Use 2 strands of floss in colors that match your wool to whip stitch all the wool in place.
7. Use a air erasable fabric marker or chalk pencil to draw the hat brim.
8. Use 3 strands of the same blue floss that you used to whip stitch the hat to stem stitch the hat brim.


9. Use 3 strands of Dark Old Gold ( DMC #680) floss to satin stitch the beak.

10. Use 3 strands of Very Light Beaver Grey (DMC #3072) to stitch a colonial/French knot eye.

11. Use 2 strands of the same thread to stitch 4 vertical straight stitches in the hat band.

12. Use 1 strand of Tea Dye Stone (Valdani #O178) to stitch 3 pairs of fly stitches in the tail.

13. Use a fabric marker or chalk pencil to draw the bird’s legs. Use the layout as a guide.

14. Use 3 strands of Dark Old Gold (#DMC 680) to stem stitch over the drawn lines.

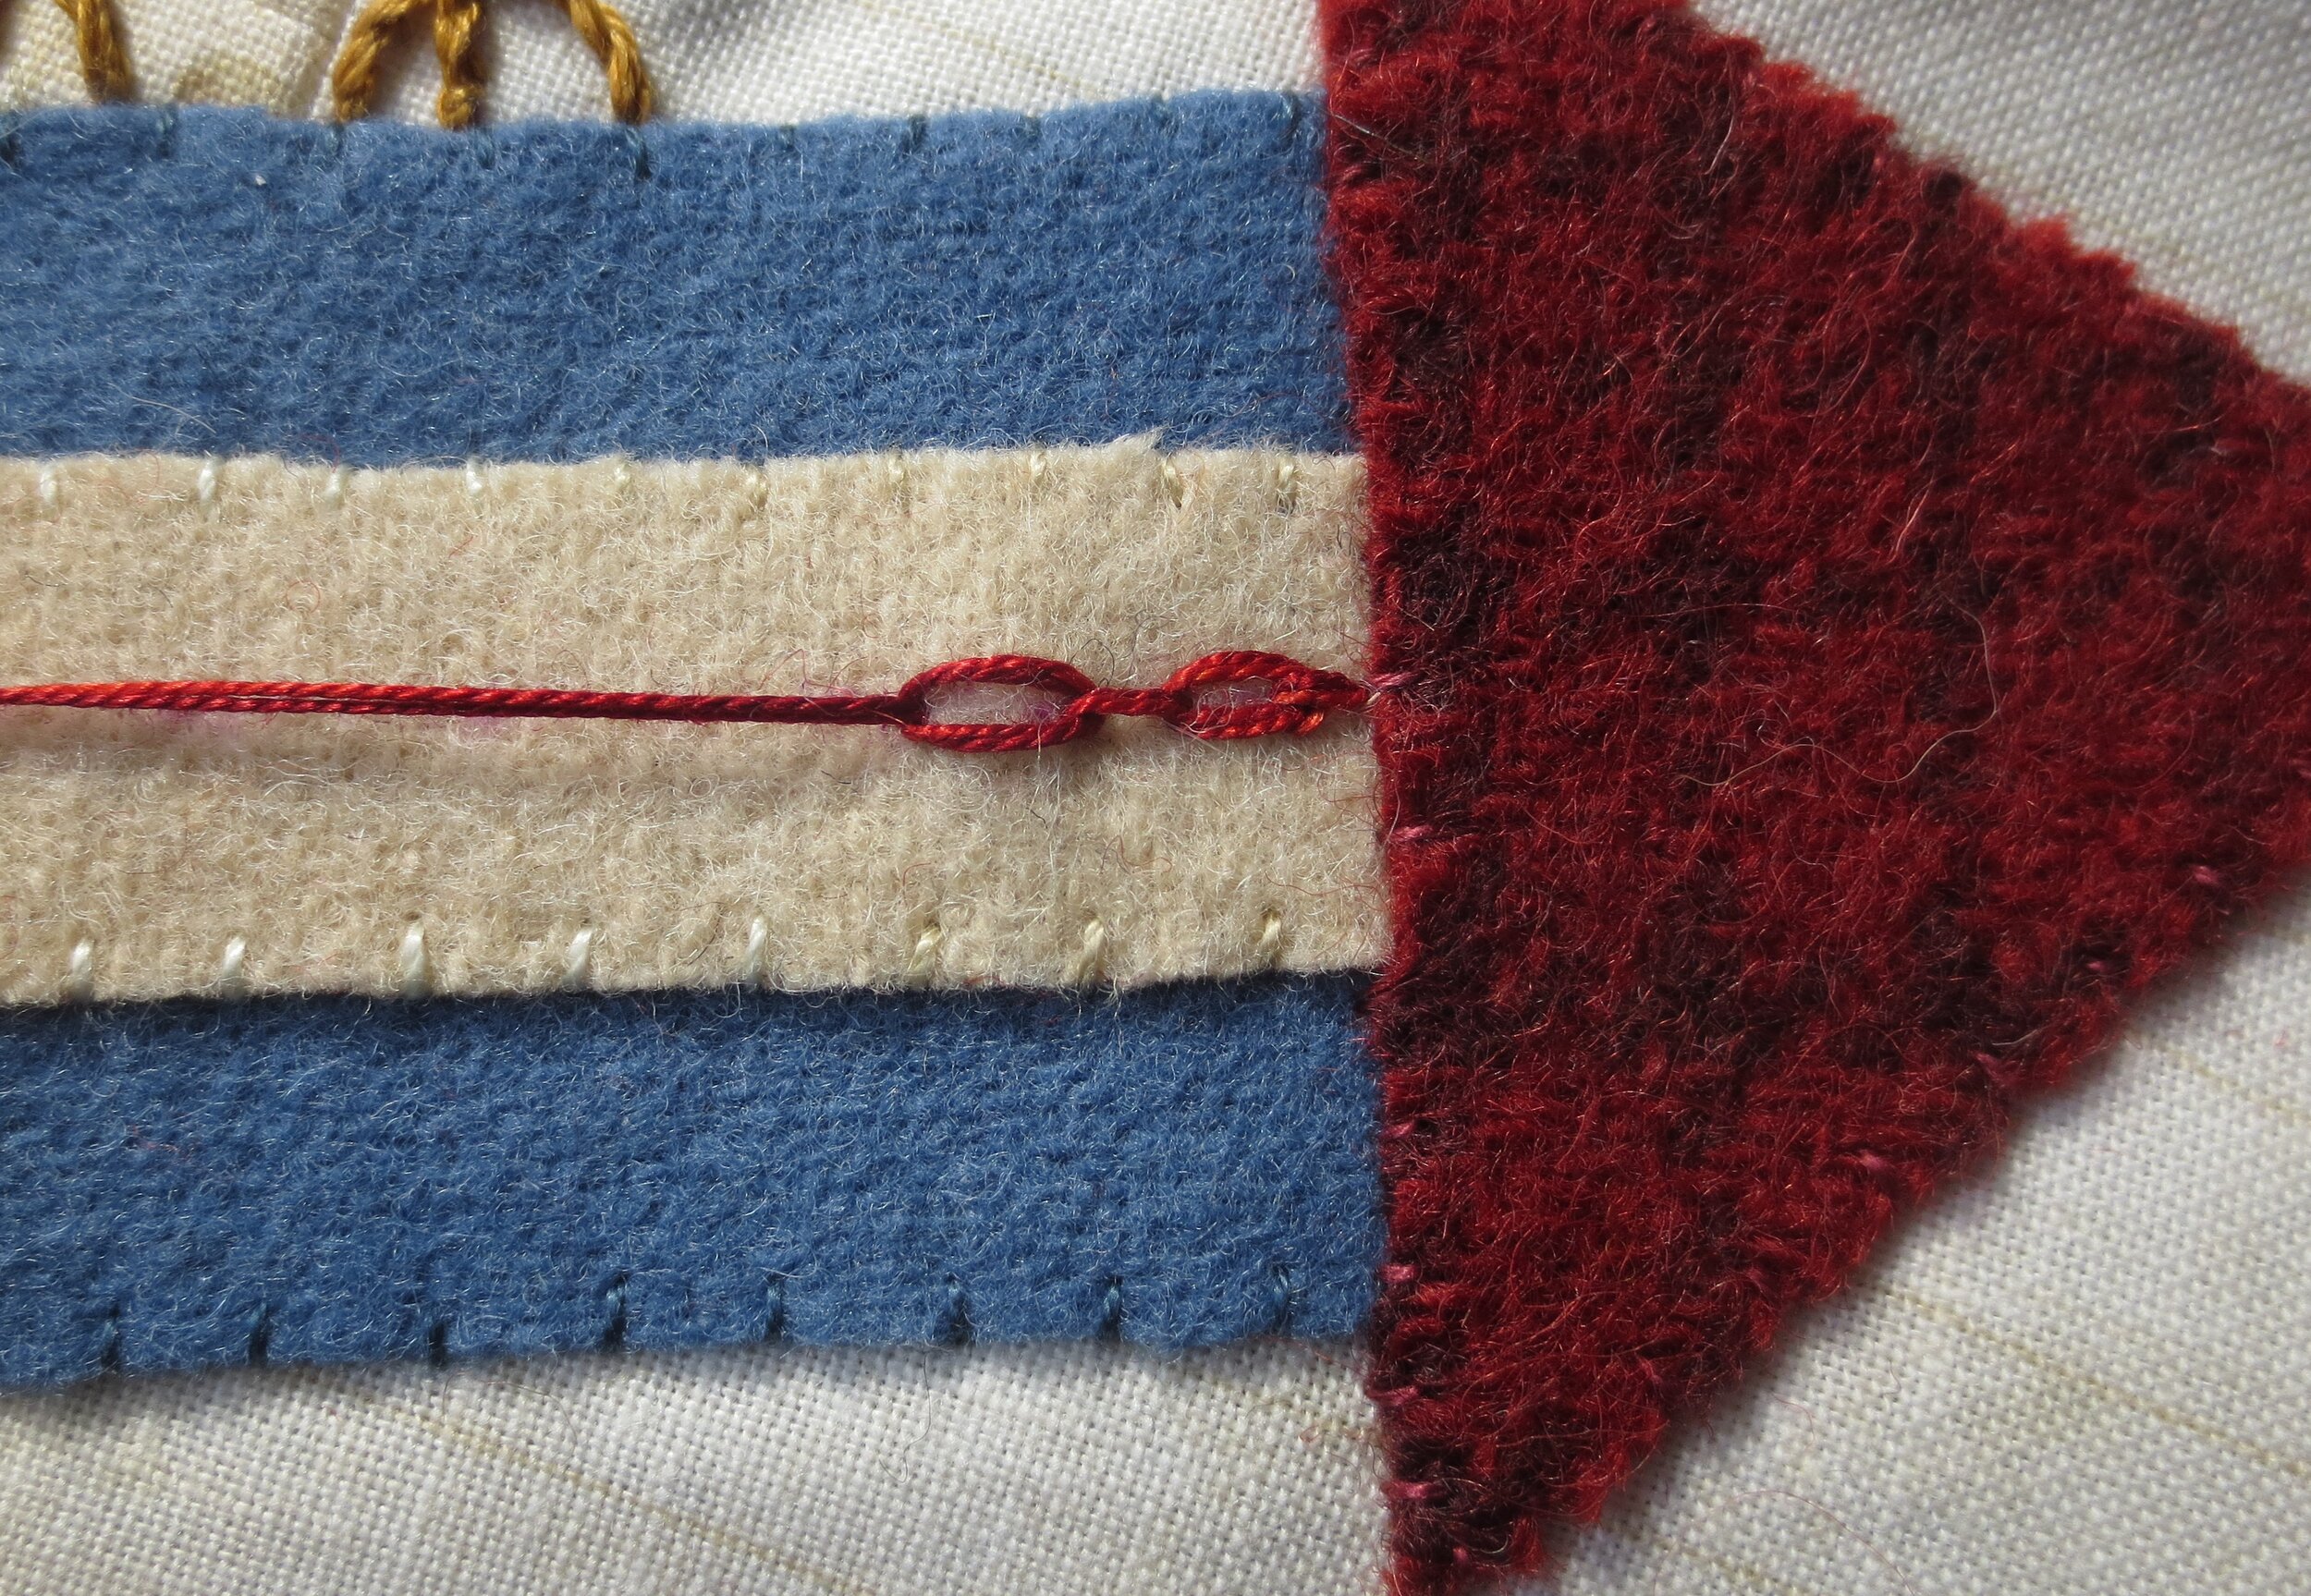
14. Use an air erasable fabric marker or chalk pencil to draw a horizontal line on the stripe of the rocket.
15. Use 2 strands of perle cotton, size 12 Turkey Red ( Valdani #775) to stitch a cable chain over the line.
Working from right to left, bring the needle up the base of the rocket tip at the right end of the drawn line.
Wrap the thread around the needle once, holding the needle parallel to the line and pulling the thread taut towards you with your left hand. This will form the cable of the chain.

Insert the needle back down into the line about 1/8” from where you began and then up again about 3/8” from the insertion point.

Wrap the thread under the tip of the needle and pull the thread through. This will make the first link of the chain.


Repeat the stitch, making links across the line until you reach the end. Anchor the last link with a simple tacking stitch.


16. Use 3 strands of blue floss to a stitch colonial/French knot in each link of the chain.

17. Use an air erasable fabric marker or chalk pencil to trace the rocket exhaust. Use the layout as your guide.

18. Use 1 strand of perle cotton, size 12 (#M68) to stem stitch over the solid lines.
19. Use 1 strand of perle cotton, size 12 (#200) to stitch a running stitch over the dashed lines.

Block # 7 is complete!
Well done!