

Rudolph Ornament
It’s that time of the year again, even though it may not feel like it in this time of Covid. I know it’s hard to be jolly, but hopefully this little project will get you into the holiday spirit. Since many of us are staying home with the exception of essential workers (thank you, thank you, thank you), now is the time to make some of our holiday gifts. This is a quick enough project to make multiples of, or you could pair them with any of the other ornaments in my collection; Tis the Season, Jolly St. Nick, and It’s Beginning to Look a Lot Like Christmas.
I changed the shape of this year’s ornament from a circle to a square, and I added a border with ruched ribbon. I recently saw this ruching tutorial from Three Sheep’s Studio, and I had to try it. I think it frames the ornament nicely. Mini pom pom trim would work wonderfully as a border also. Chenille yarn would be equally lovely. So many possibilities!
Let’s begin.
Supplies
Felted wool or wool felt - suggested colors
Head and chest - 4” square brown
Antlers - 2” square taupe
Scarf - 2” square royal blue
Nose - 1” square Christmas red
Inner ears - 1” square beige
Leaves 1, 4, & 5 - 2” square kelly green
Leaves 2, 3, & 6 - 2” square hunter green
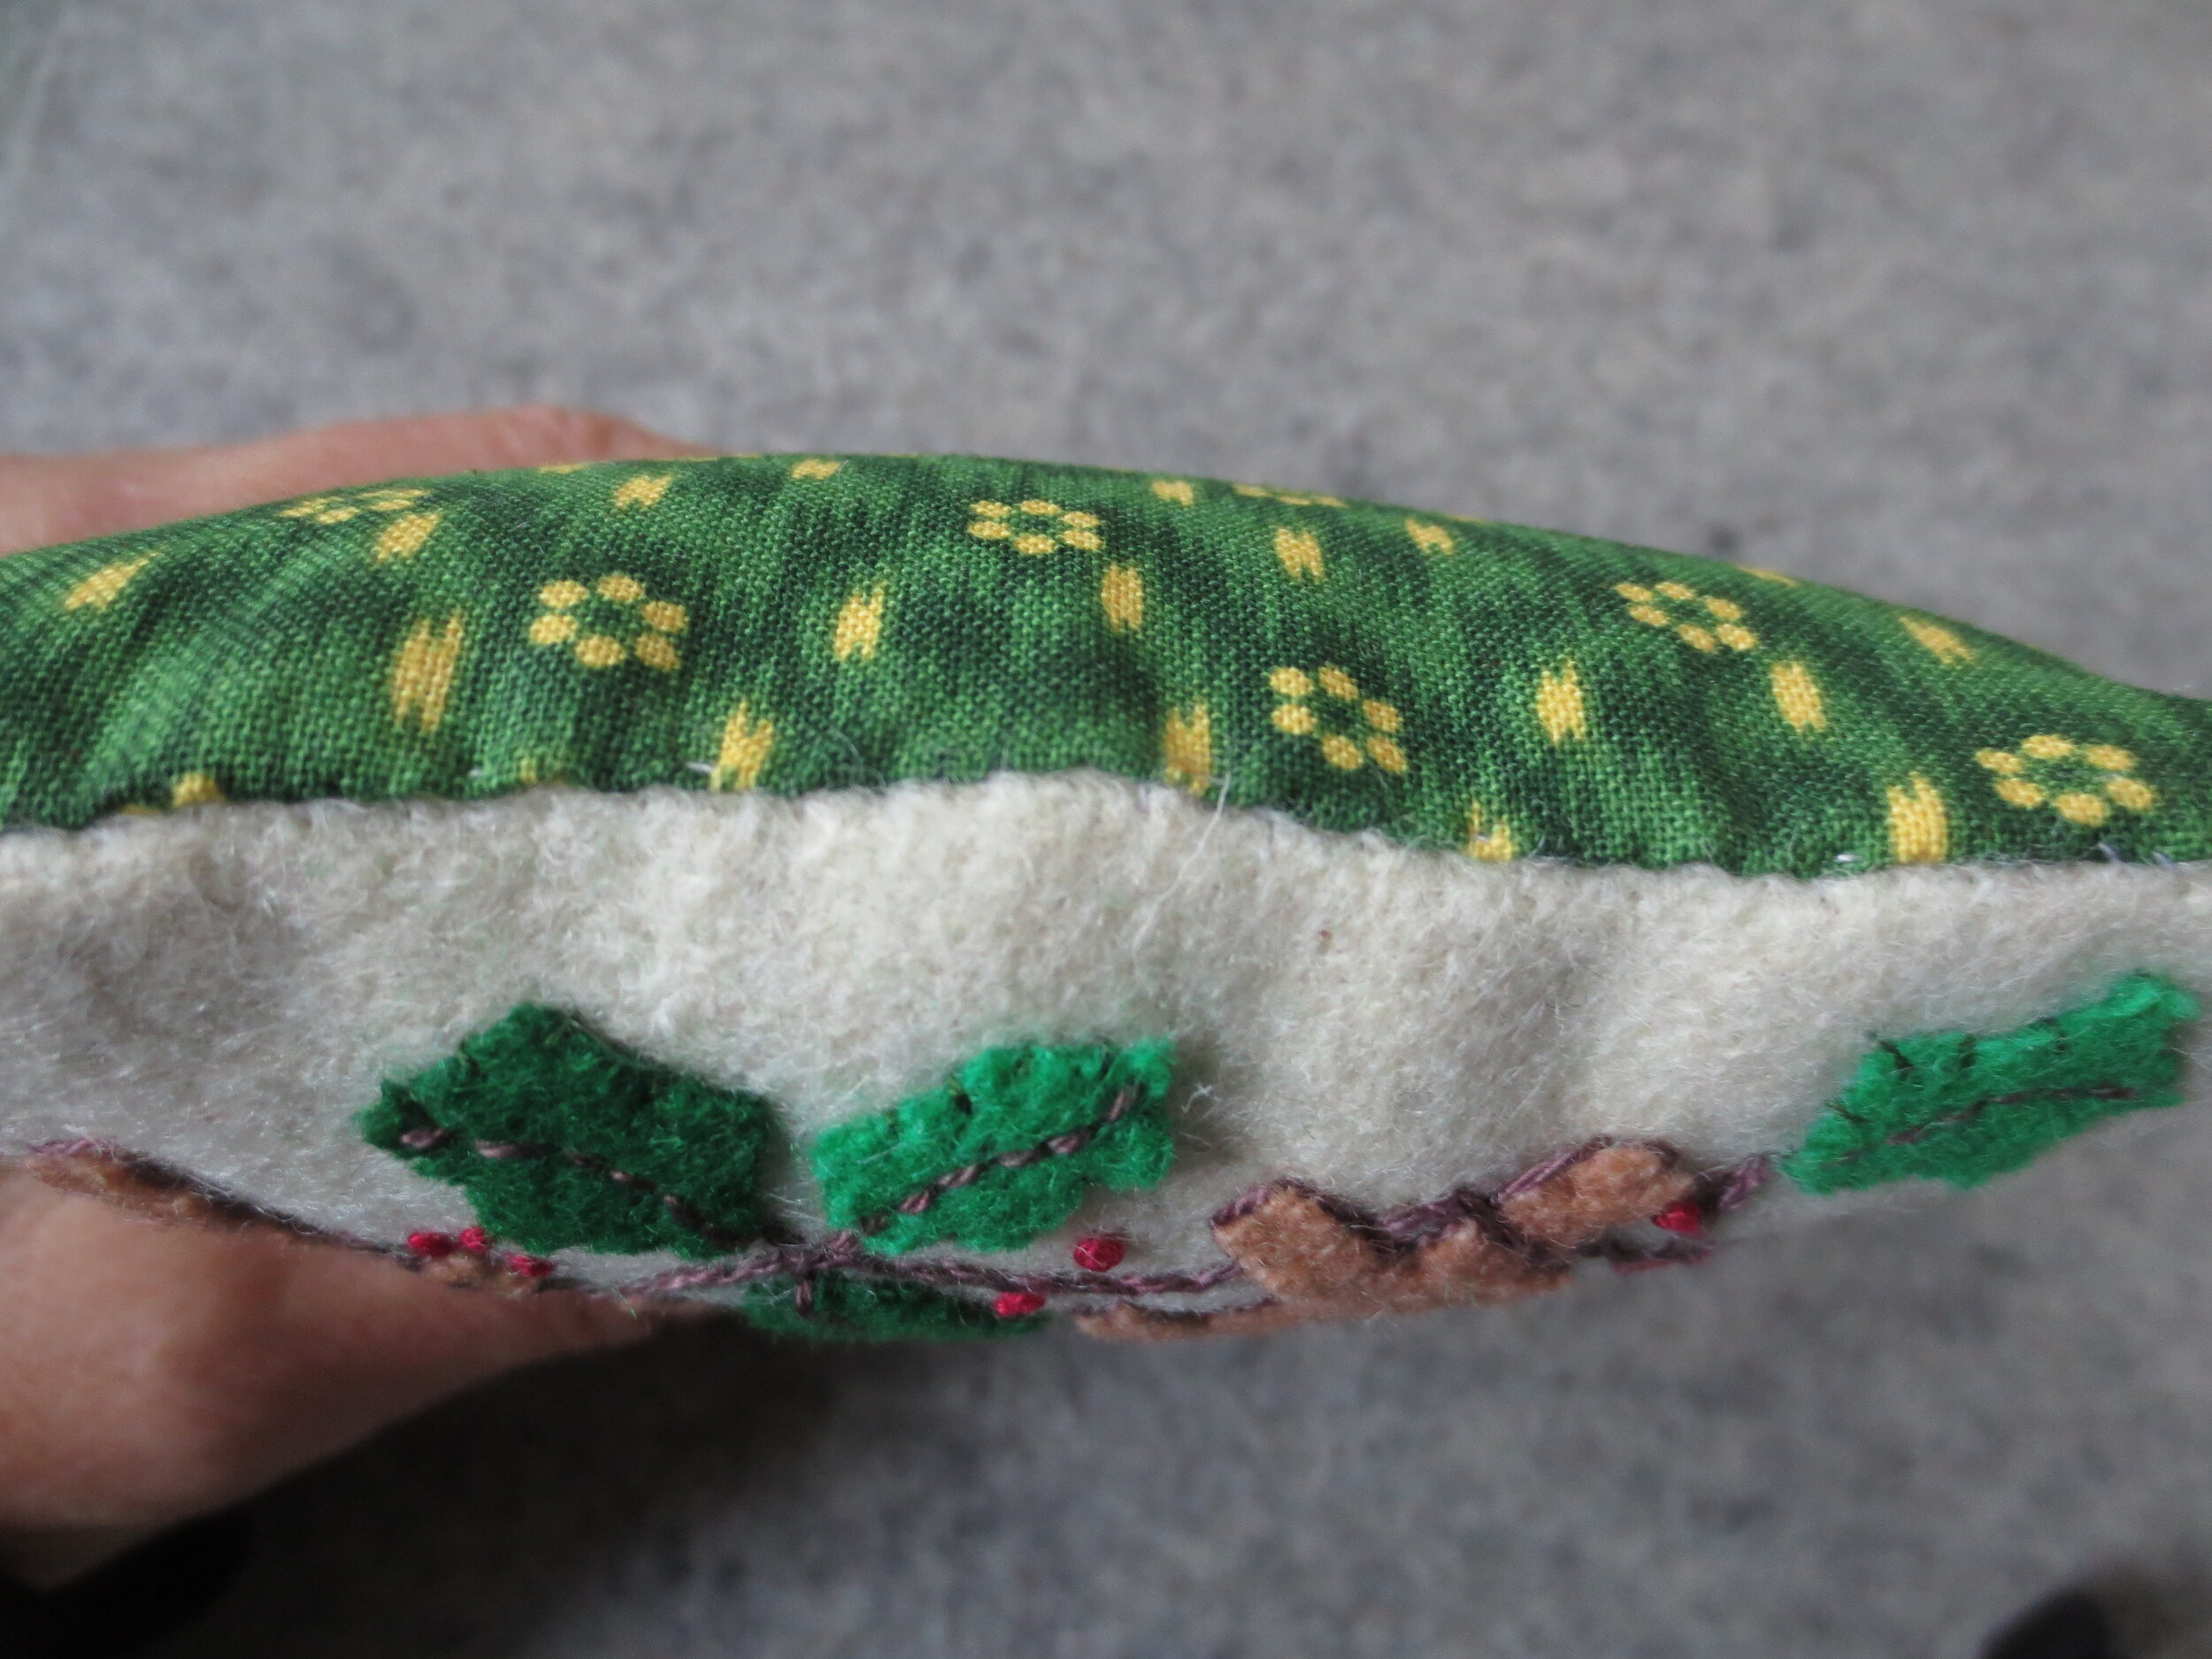
Background - 5 1/2” square off-white ( fabric can be used as an alternative)
Fabric backing - 5 1/2” square of coordinating fabric such as quilting cotton, velvet, or linen/cotton blend. I used quilting cotton in a green print.
Thread
Embroidery floss in colors that match wool colors - used to whip stitch wool in place.
Embroidery floss or perle cotton, size 12 black - eyes and eyebrows
Embroidery floss or perle cotton, size 12 brown - veins of leaves and holly branch
Sewing thread (30 -40 wt.) green color that matches ruched ribbon. Note: The thread used to ruched the ribbon will not show once the ribbon is gathered, but it will show when you whip stitch the ruched ribbon to the ornament.
Miscellaneous
2 1/2 yards of 3/8” wide ribbon. I used hand dyed green cotton twill.
Chenille needle - size 24
Regular sewing needle such as a size 8 sharp to ruch the ribbon and whip stitch the ruched ribbon to the ornament
Small straight pins - applique pins work nicely
Steam iron
Featherweight fusible web such as Heat’N’Bond Featherlite, or Vilene Meltfuse
Fabric marker in light and dark colors (I used a Clover air erasable marker and Bohin chalk pencil)
Stuffing - polyester, cotton, or wool (I used stuffing from an old pillow)
Pellon Shape-Flex (Optional) - Use this stabilizer if you use a fabric background instead of a wool one.
Sewing machine (optional) - I hand sewed my ornament with a tiny backstitch because I don’t have my machine with me at my mom’s house. It will take longer than using a machine, but if you don’t have a sewing machine it can be done.
Butternut plaid stitch guide - This is a basic stitch guide. Here are some links to additional sources for embroidery stitches: https://www.needlenthread.com/ , https://www.embroidery.rocksea.org/
Instructions
Trace the patterns onto fusible web. The images are already reversed for use with fusible web, so there is no need to reverse them prior to tracing. Cut out, leaving a small (1/8”) border around each traced image.
Fuse pattern pieces to designated wools, and then cut out along traced lines.

3. Position Rudolph’s chest on the background wool using the layout as your guide. It should be centered and about 1/2” from the bottom. Fuse in place using steam. Don’t forget to remove the paper backing before you fuse!

4. Position the scarf so that the top edge of the scarf and top of the chest align. Position the end of the scarf that flips up so that the narrow end is covered by the part of the scarf that circles the neck. Fuse in place using steam.

5. Position the remaining scarf piece using the layout as your guide. Fuse in place using steam.

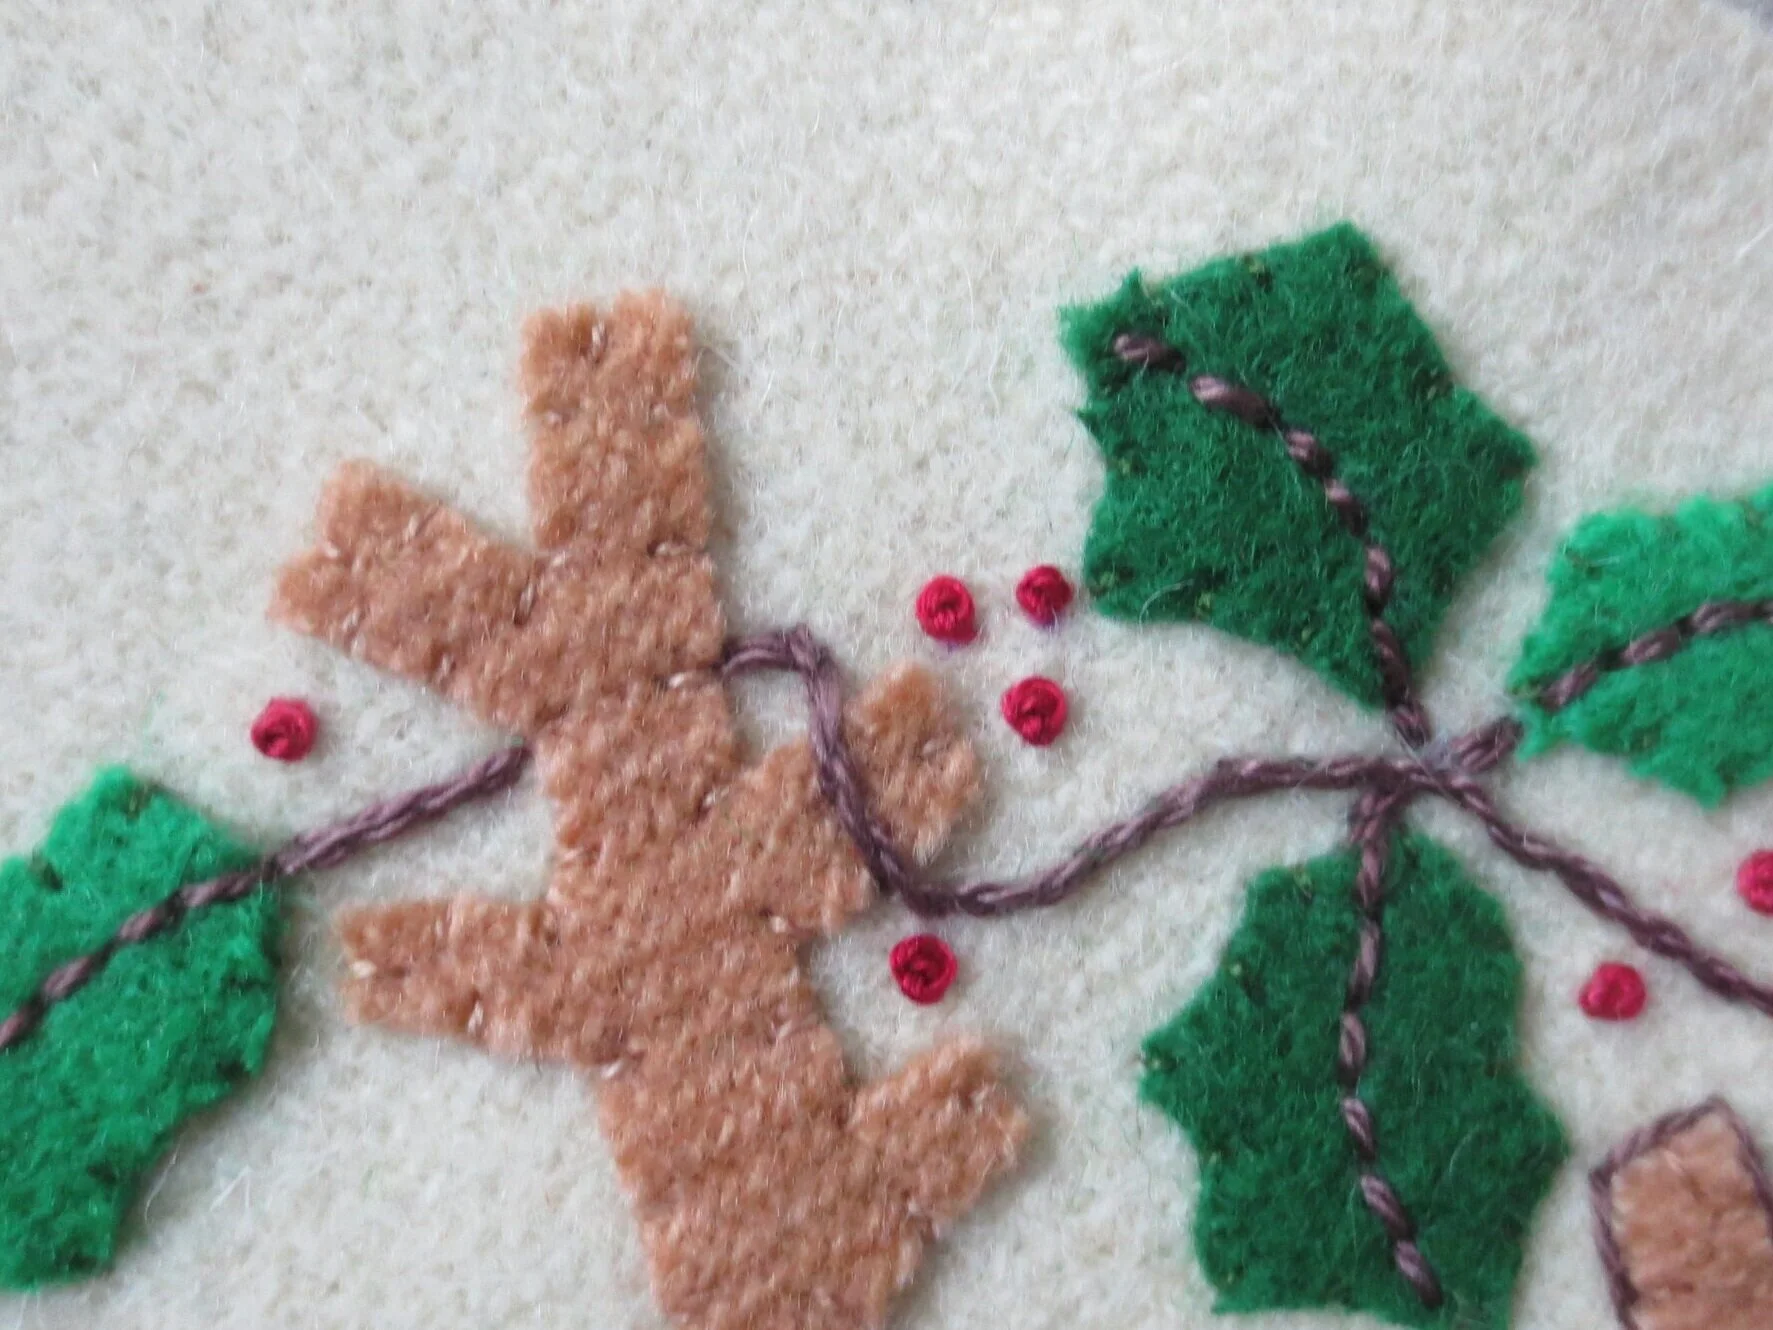
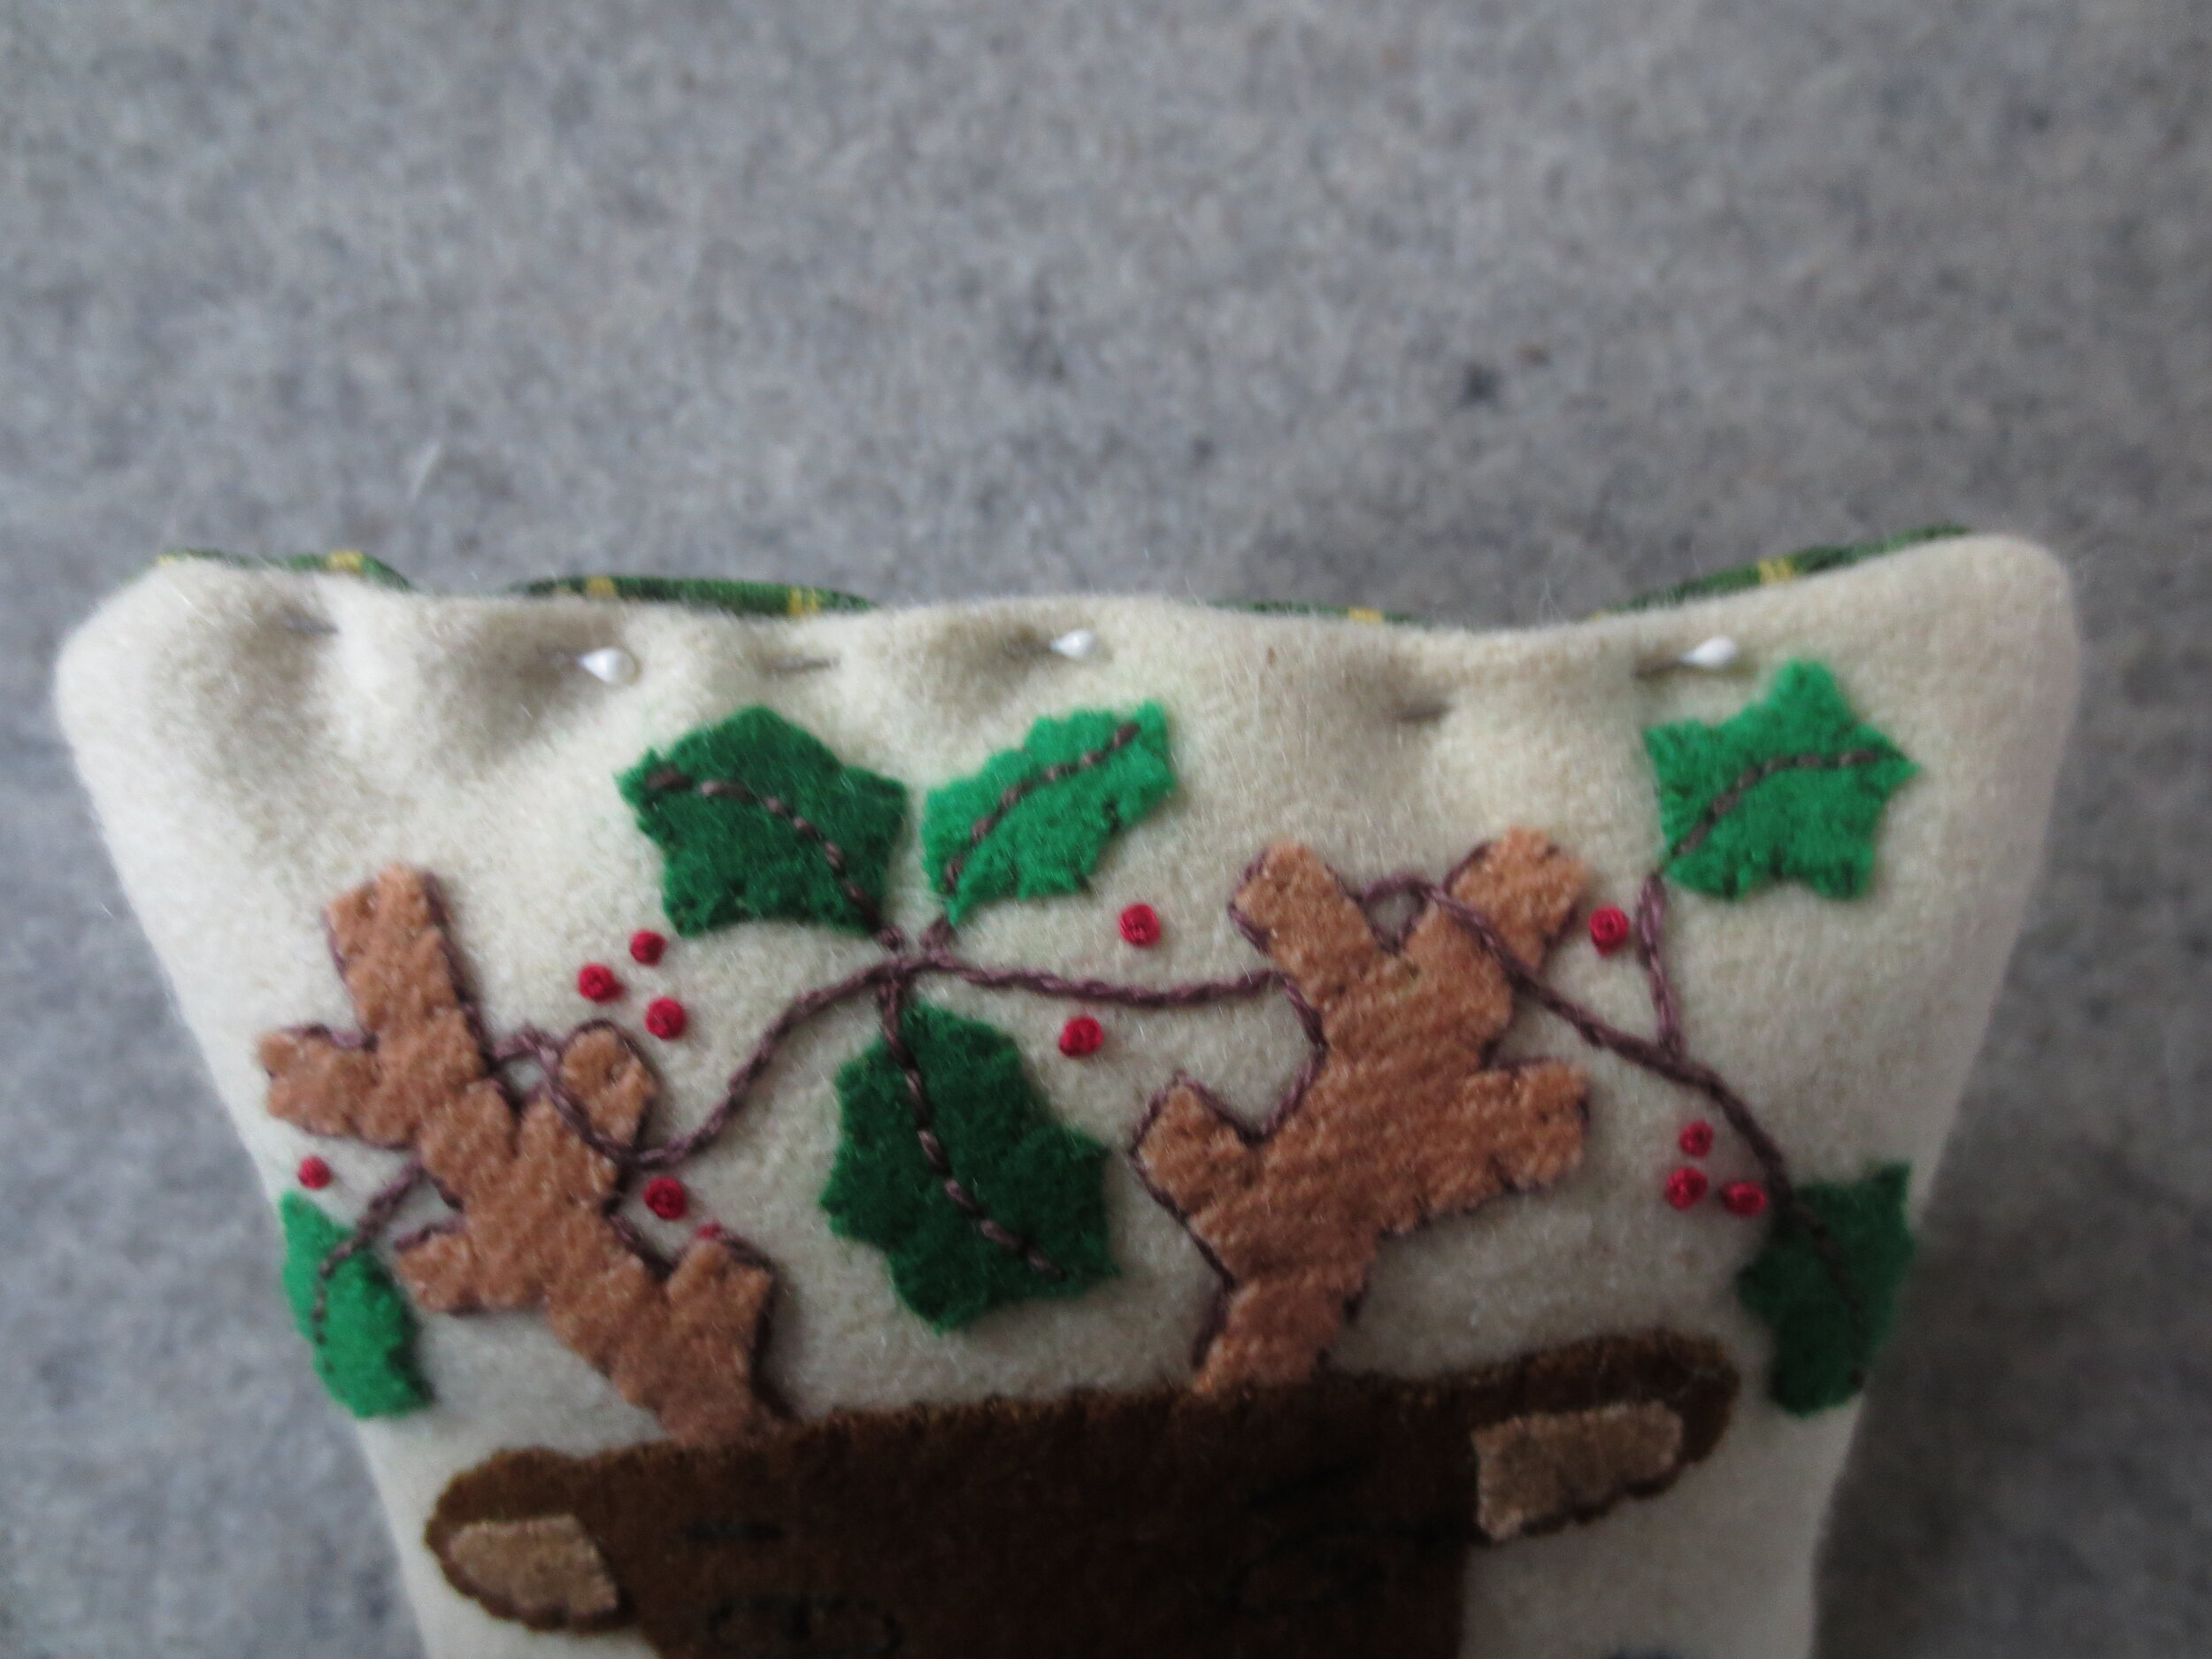
6. Position the head and antlers. If your not sure about the antler placement you may want to lay out the holly leaves also. Make sure the leaves fit in between the antlers. Fuse in place using steam.

7. Position the nose, interior of the ears, and the leaves. Fuse in place using steam.

8. Whip stitch all the pieces in place using 1 strand of floss that matches the colors of the wool.

9. Draw the holly branch and veins of leaves with a fabric marker using the layout as your guide.

10. Use 2 strands of brown floss or 1 strand of perle cotton, size 12 to backstitch the veins of the leaves, and stem stitch the branch. I began by back stitching the vein of leaf #1, and then stem stitching the branch until I got to leaf #6 where I back stitched the vein. Then I back stitched the remaining leaf veins.


11. Use a marker to draw little dots where the berries will be.

12. Use 2 strands of red floss or 1 strand of perle cotton, size 12 to make a colonial knot berry over each dot.
13. Draw the eyes and eyebrows with a fabric marker or chalk pencil.

14. Use 2 strands of black floss or 1 strand of perle cotton, size 12 to back stitch the eyes.
15. Use the same thread to stem stitch the eye brows.
16. Use the same thread to make colonial knot eyes.

17. Use 2 strands of brown floss or 1 strand of perle cotton to back stitch around the antlers.

18. Use a fabric marker or chalk pencil to draw the stripes on the scarf using the layout as a guide.

19. Use 6 strands of kelly green embroidery floss or 3 strands of perle cotton, size 12 to make straight stitches over the drawn lines.

20. Use 2 strands of red embroidery floss or 1 strand of perle cotton, size 12 to couch the green strands. This is just a little tacking stitch.

21. Use 2 strands of blue floss or 1 strand of perle cotton, size 12 to straight stitch the fringe of the scarf.

Yay! The embroidery is done!
Now let’s make into an ornament.
21. Lay the backing fabric, wrong side up, on top of the applique. Pin to secure.

22. Beginning about 3/4” from the top right edge, sew a 1/4” seam around the perimeter of the ornament ending about a 3/4” from the top left corner. This will leave an opening at the top so that it can be turned inside out.

23. Turn the ornament inside out. Use a chopstick or small wooden dowel to push out the corners.

24. Loosely stuff the ornament.

25. Turn the opening edges under 1/4”, pin to secure, and then whip or ladder stitch closed.
26. Ruching the Ribbon - Three Sheep Studio does a far better tutorial on ruching.
Measure the perimeter of the ornament. This will be the length of the ruched ribbon you will need. The length of the ribbon before ruching appears to be about 4x the ruched length.
Cut a 24” piece of thread. Yes, this is long, but you can adjust the thread so that it’s about 15” long and adjust as you stitch.
Fold over 1/4” of one end of the ribbon, and then tack it down with a small back stitch, hiding the ends of the thread in the fold.

Make a knot in the end of the thread, and then begin a series of widely spaced diagonal stitches along the length of the ribbon. I stitched about 6”, gently gather the ribbon, and then continue with the diagonal stitching.

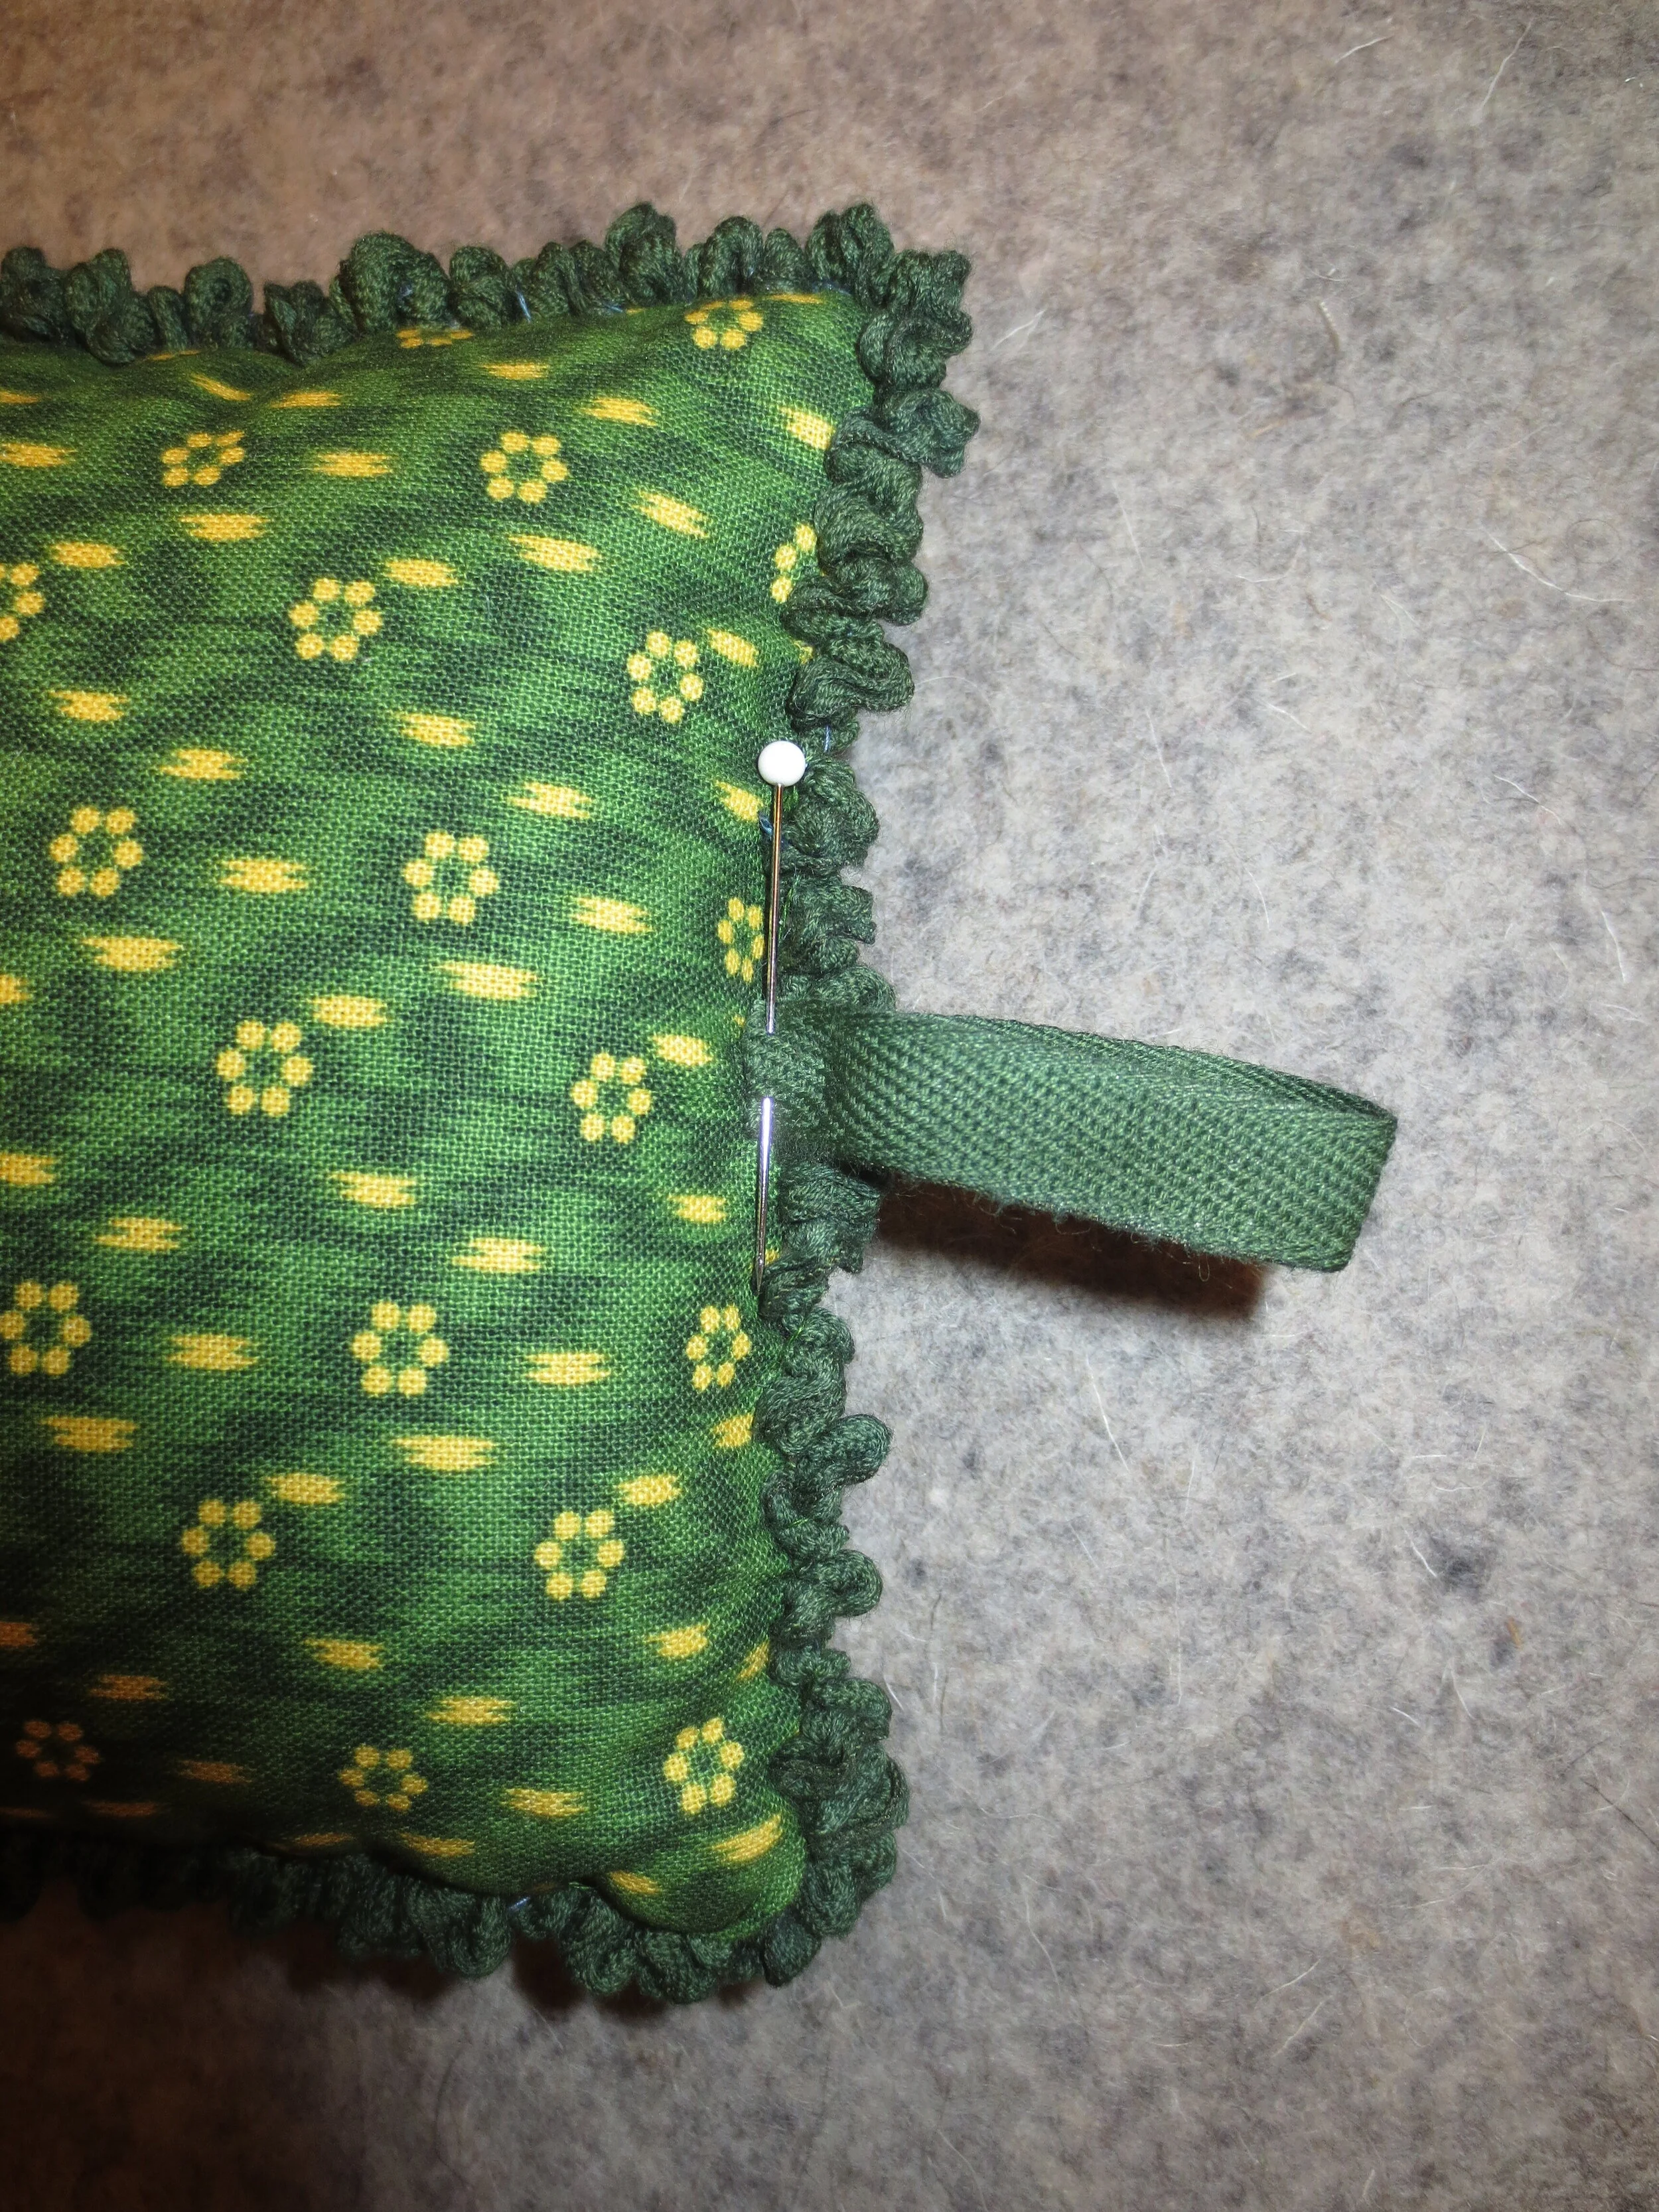
Continue the diagonal stitches and gathering of the ribbon until you achieve the length you need. I used about 80” of ribbon to get 19” of ruched ribbon. You may need more or less depending on the thickness of your ribbon. Cut off the excess ribbon and put it aside to use as the hanging loop.
Fold under the remaining end of the ribbon about 1/4” and tack it down like you did at the beginning.

Align the ruched ribbon along the seam of the ornament, and then pin to secure.
With matching colored thread, whip stitch the ribbon to the edge. I whip stitched in 1/2” intervals.
Overlap the ends slightly and tack in place.
Cut a 4” length of the ribbon you set aside.
Fold under both ends of the ribbon 1/4”. Fold in half, aligning the folded ends. This will form the loop for hanging the ornament.
Pin the loop to the top, center back of the ornament, and then whip stitch in place.
Voila!
You are done!
Happy Stitching!
Stay Home. Stay safe. Be well everyone.
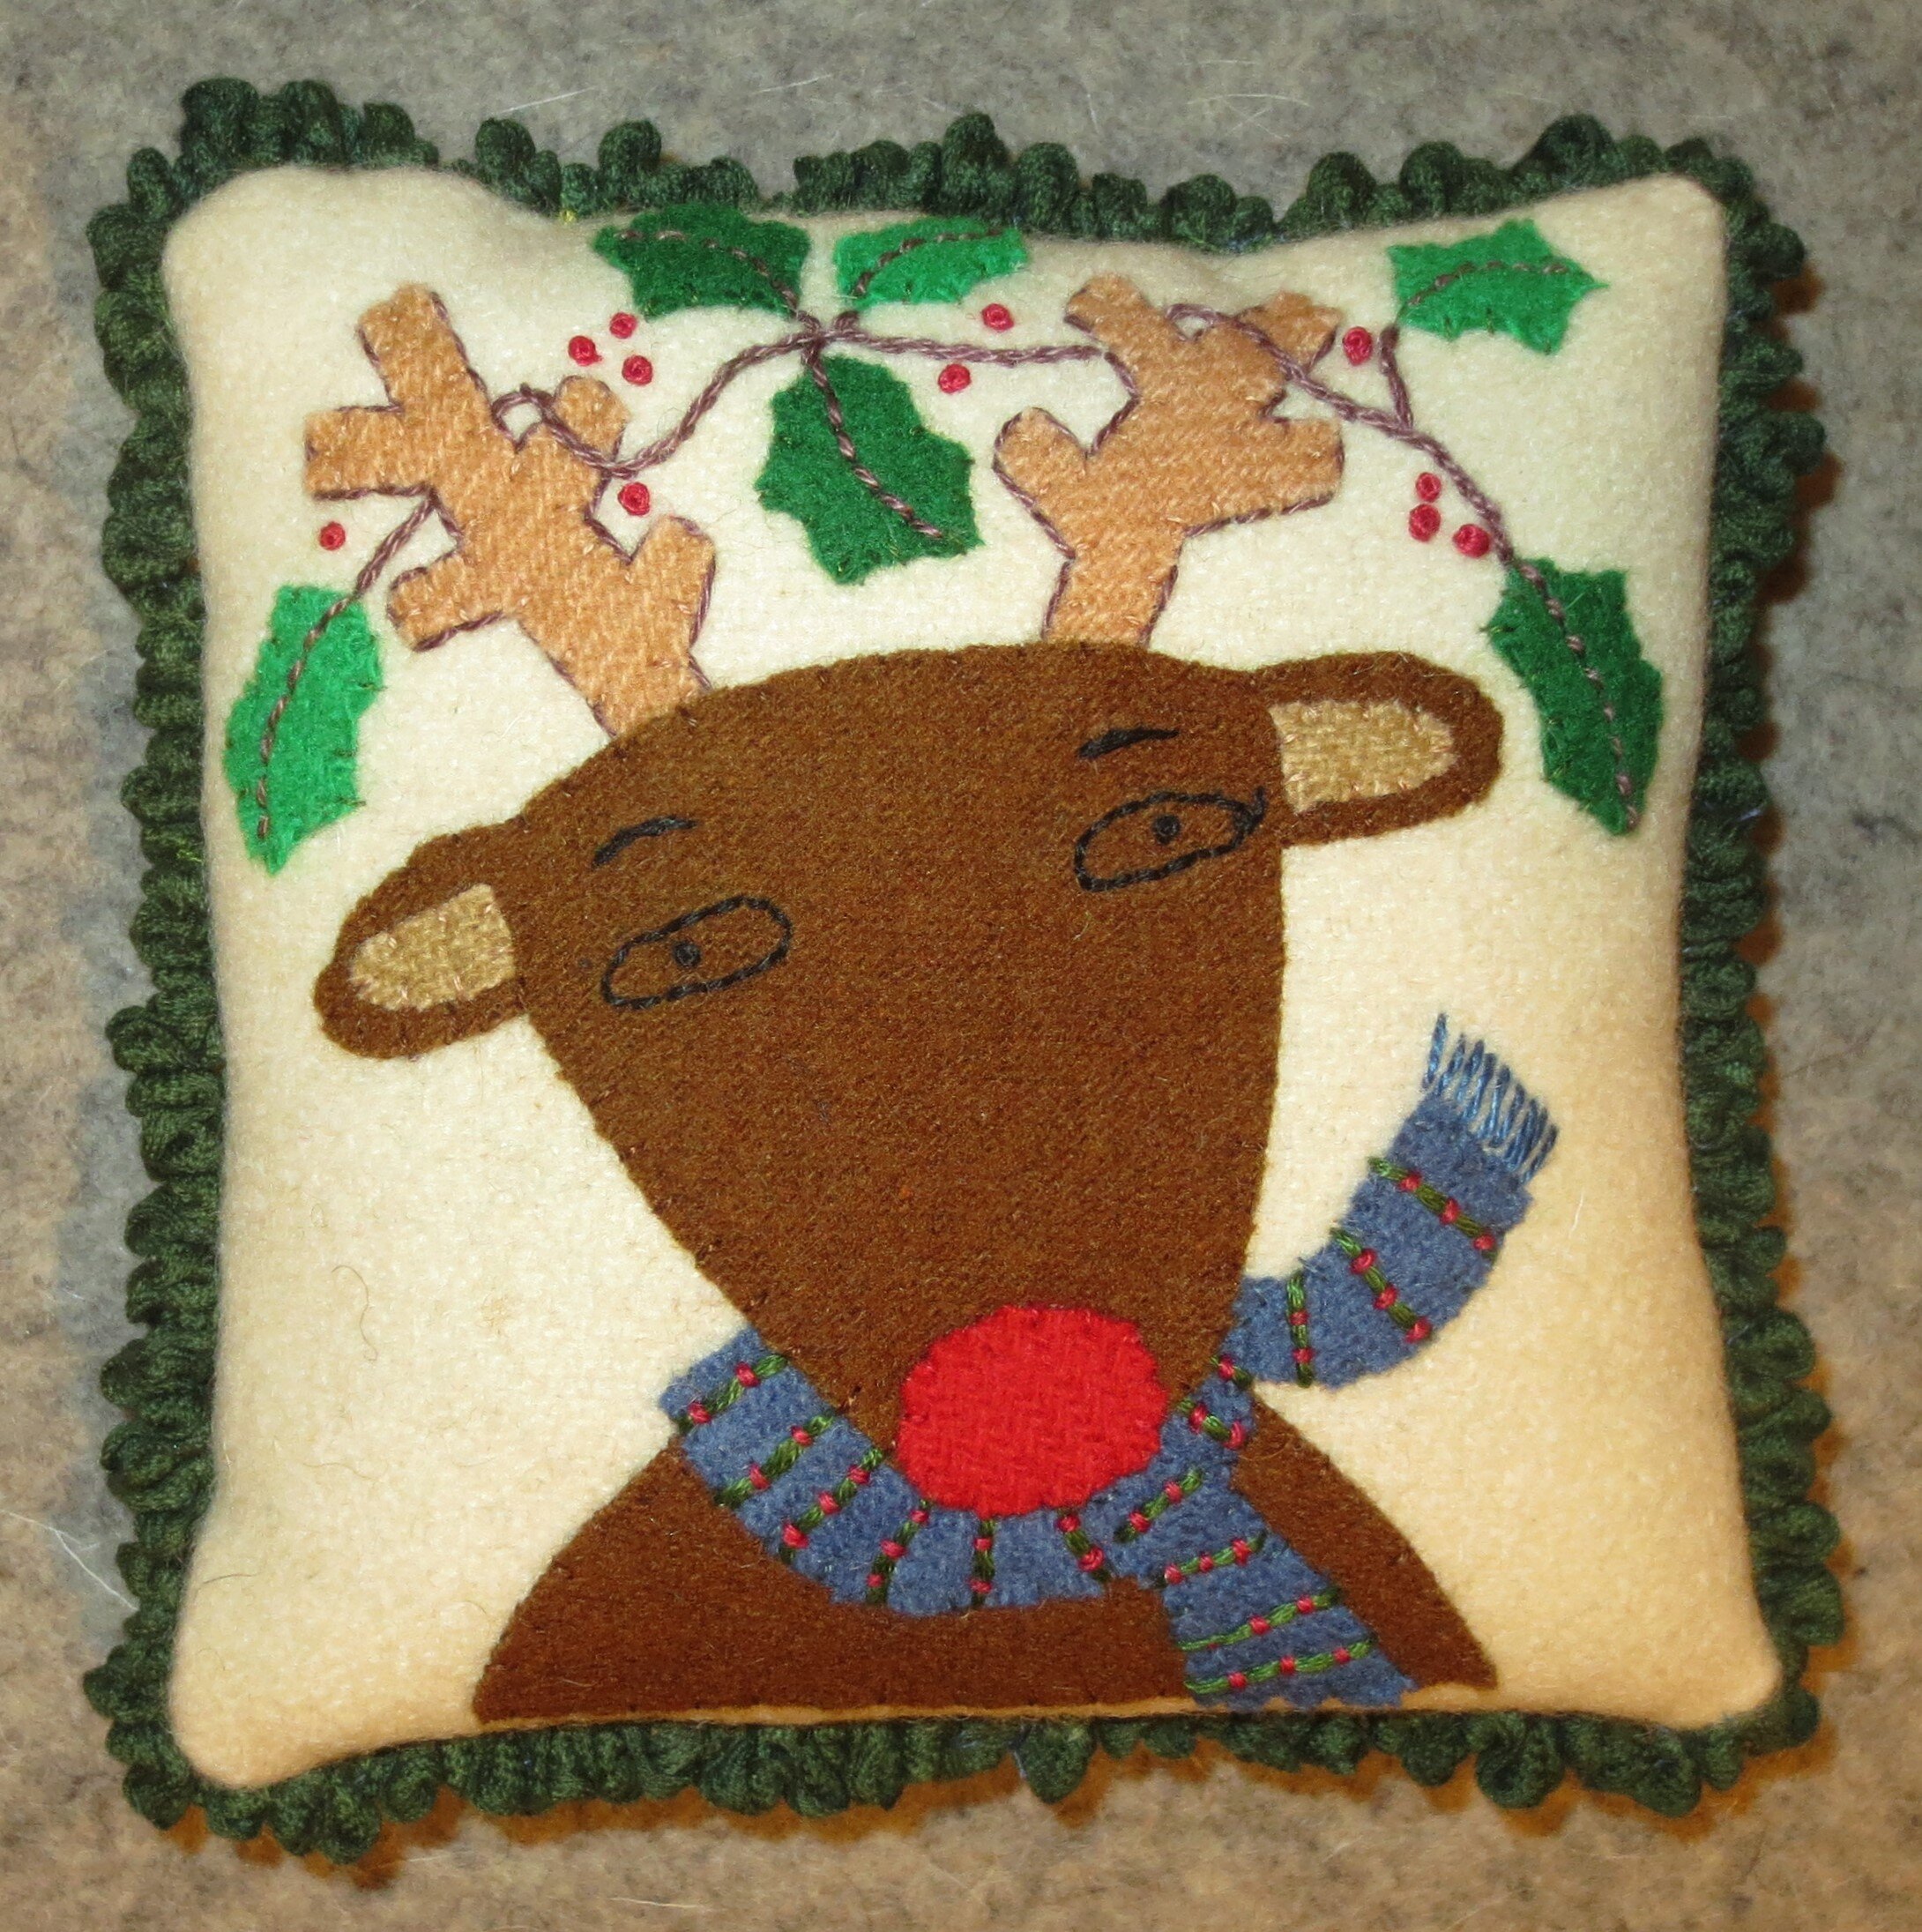
Check out this pillow created by one of the Wooly Gals (Marilyn). Each of the reindeer represent a grandchild. Isn’t it adorable? She is so creative!
