
Baltimore Album Inspired Wool Applique
I love old quilts and the history behind them. Some of my favorites are Baltimore Album quilts with their beautiful applique designs. These quilts were first made in Baltimore, Maryland prior to the American Civil War around 1840. They consisted of elaborately appliqued blocks on white backgrounds.
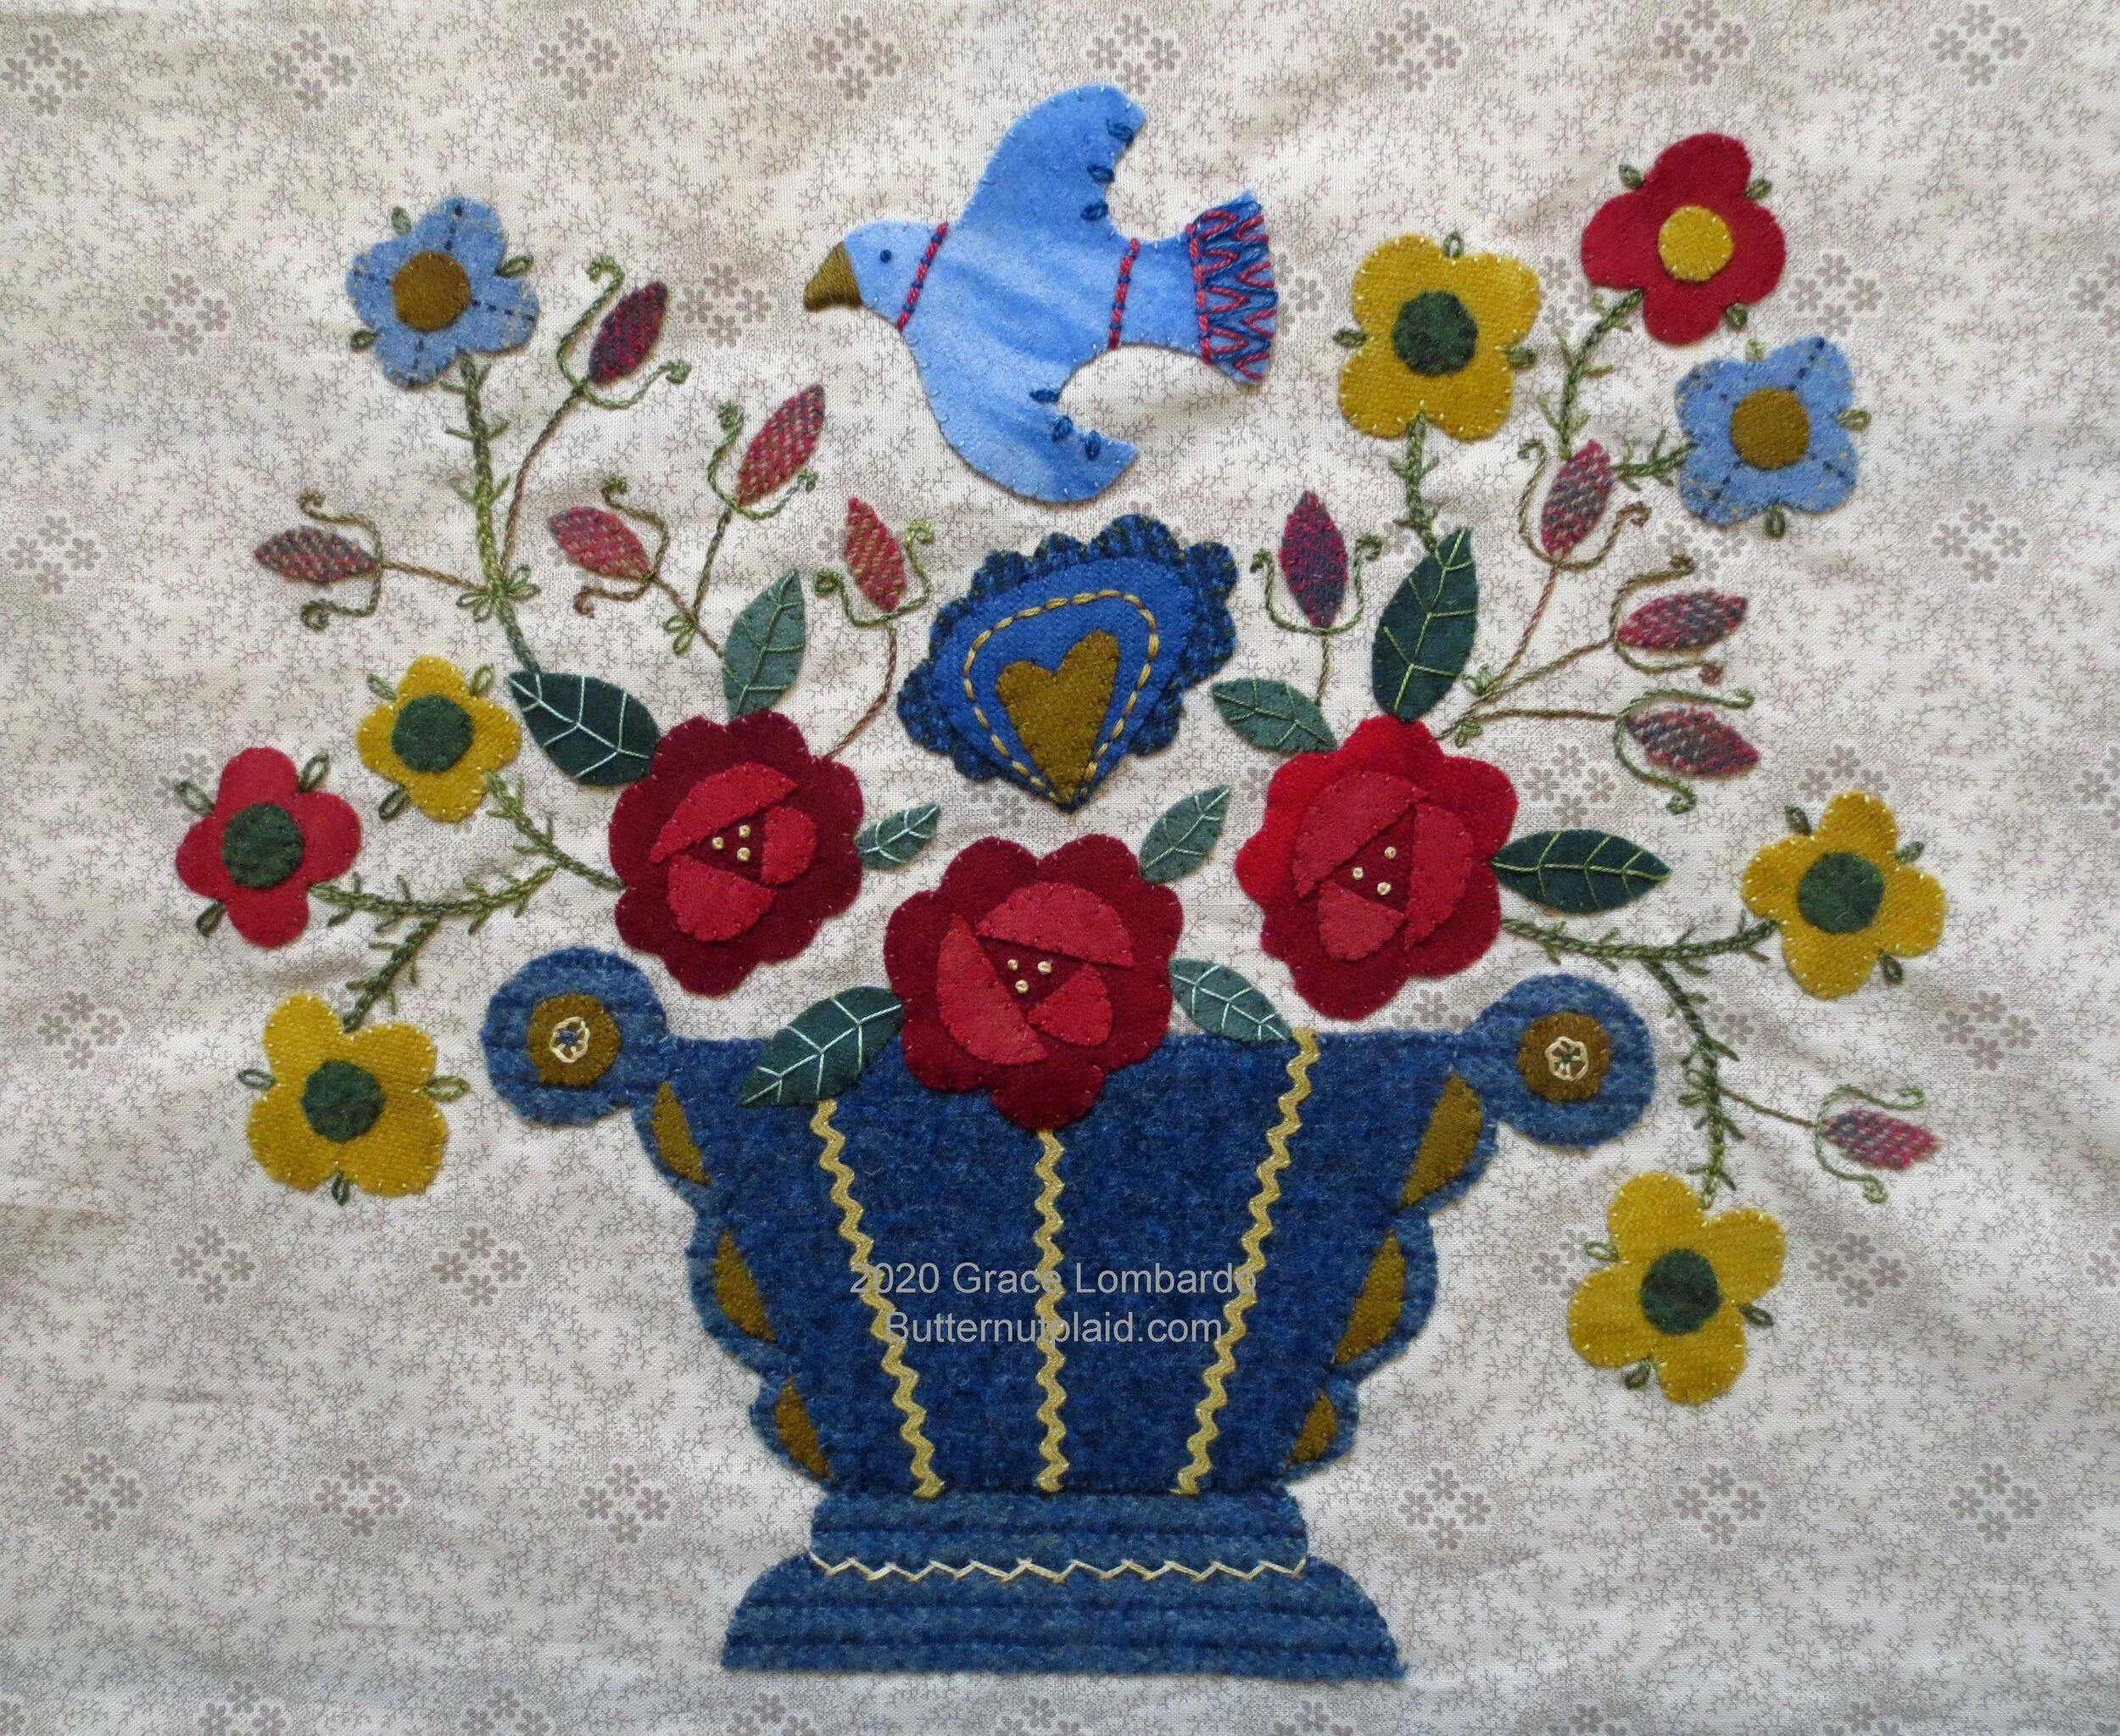
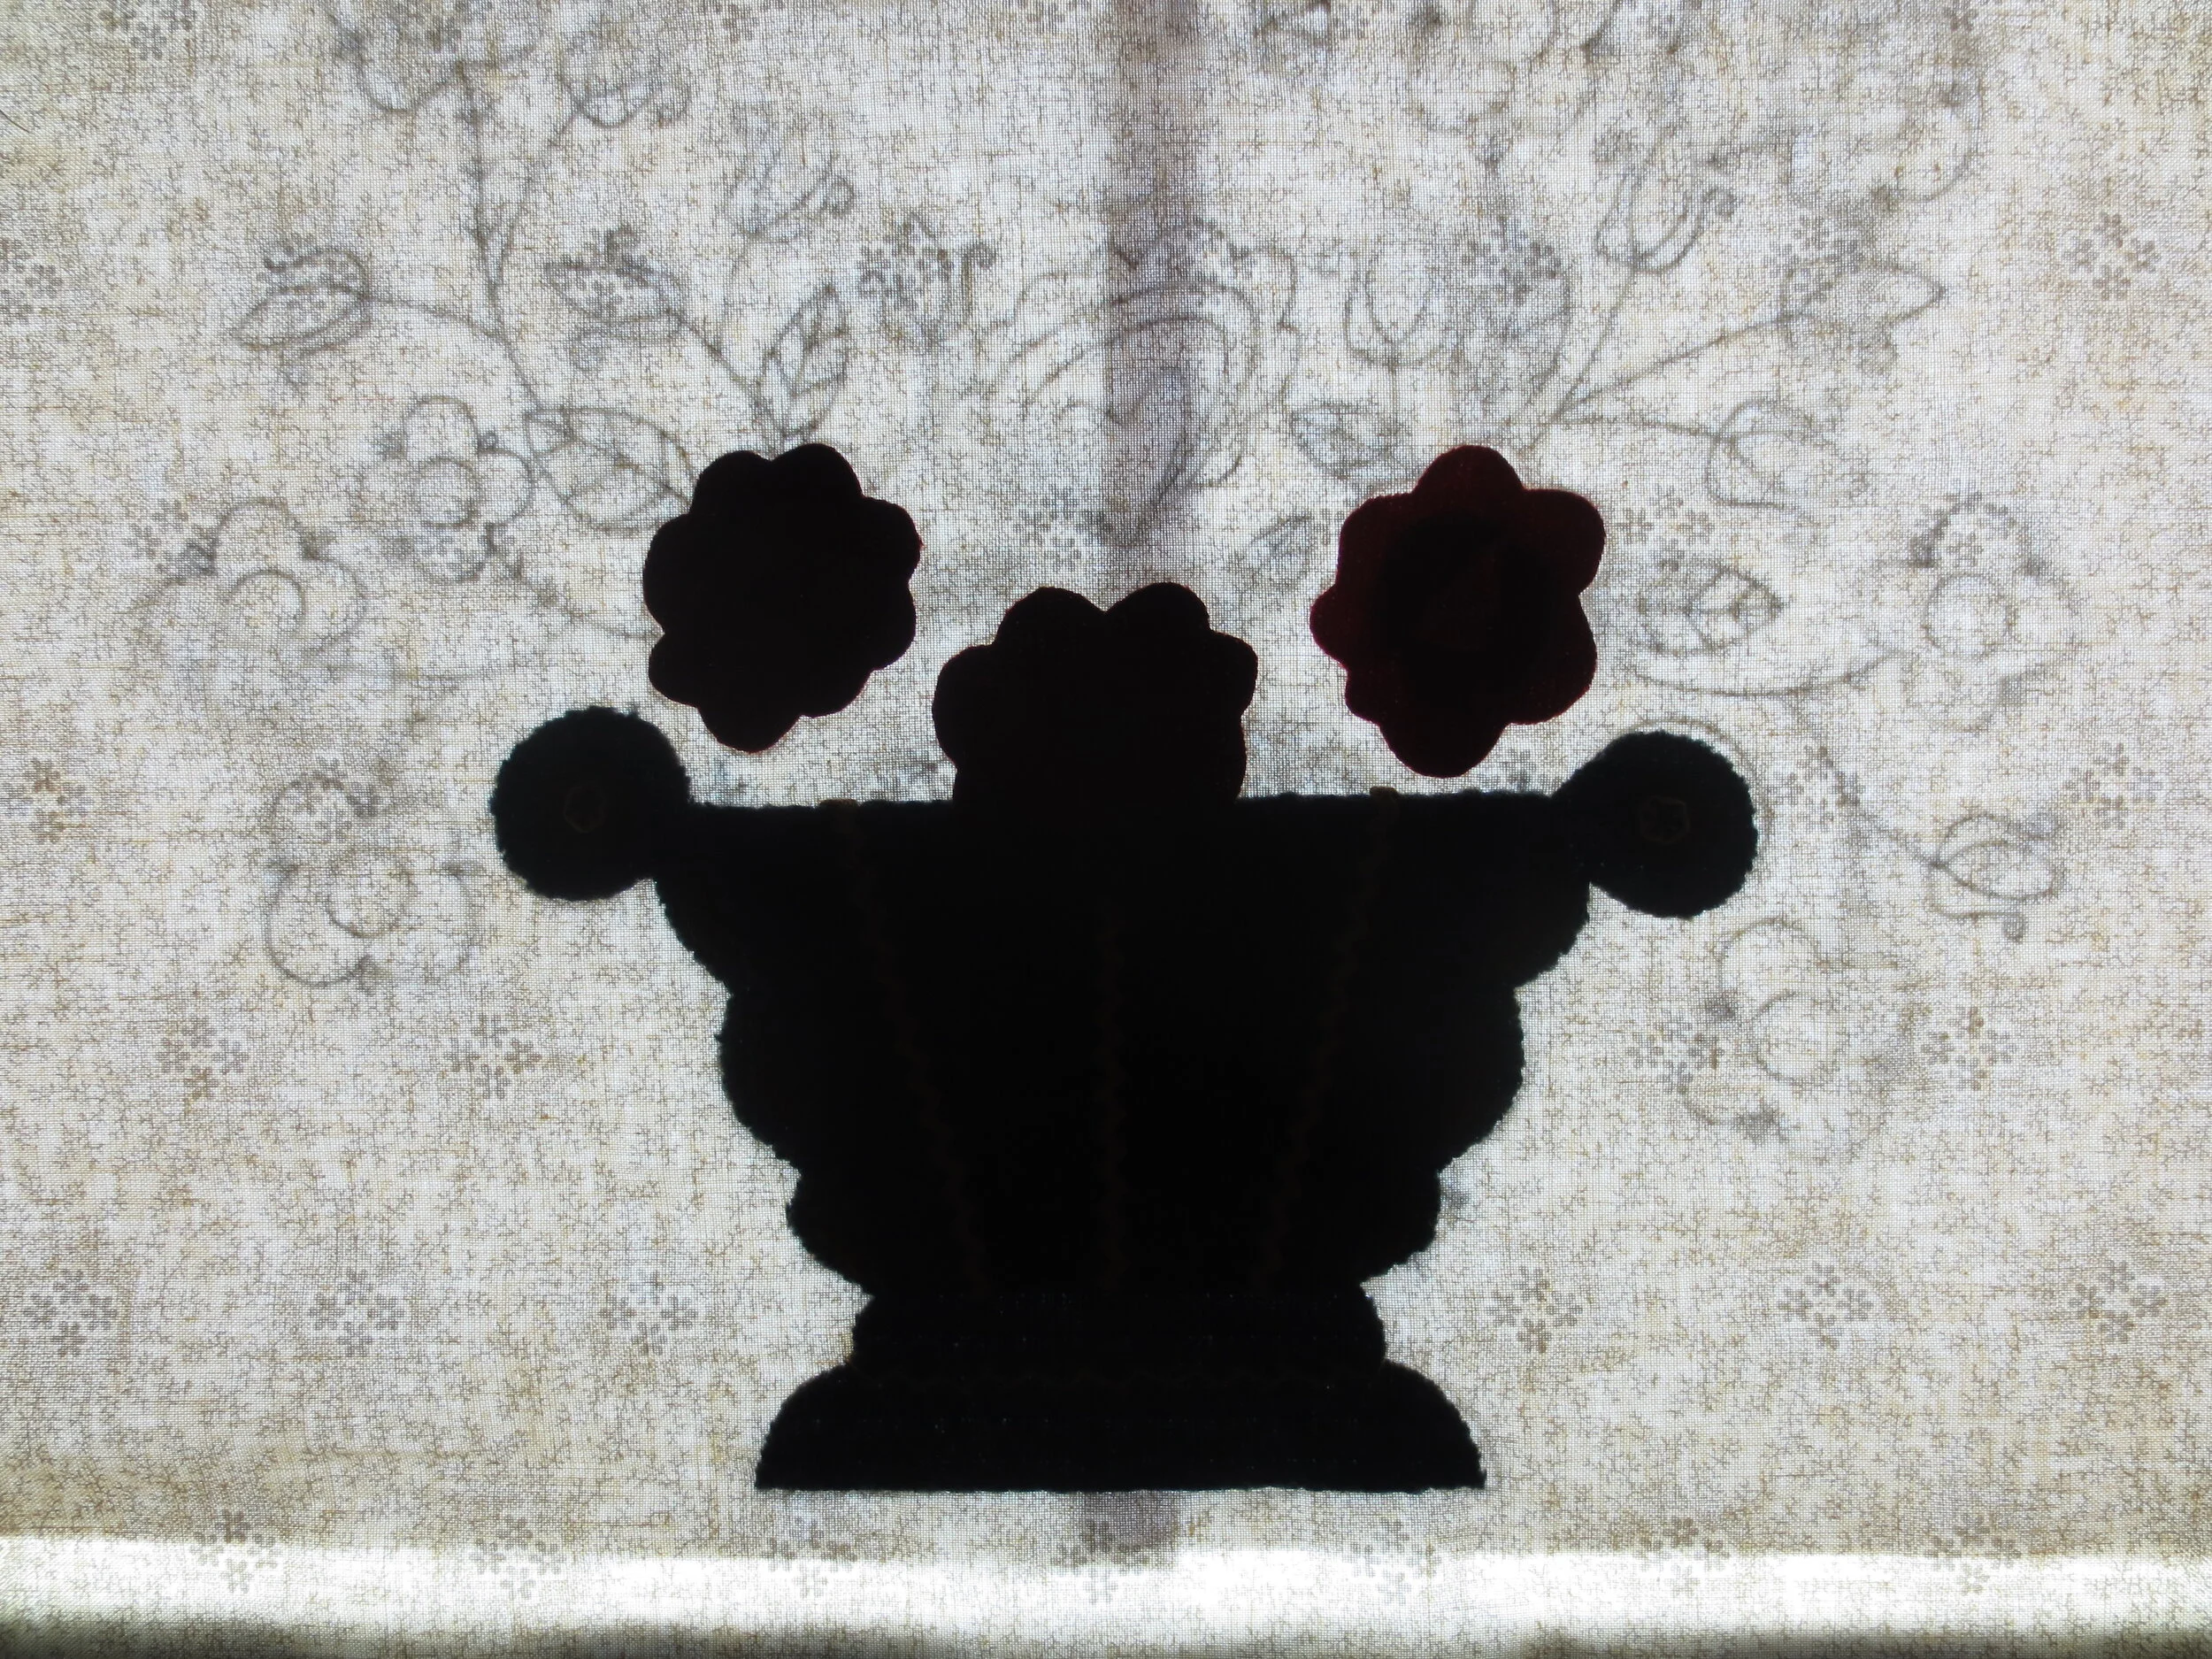
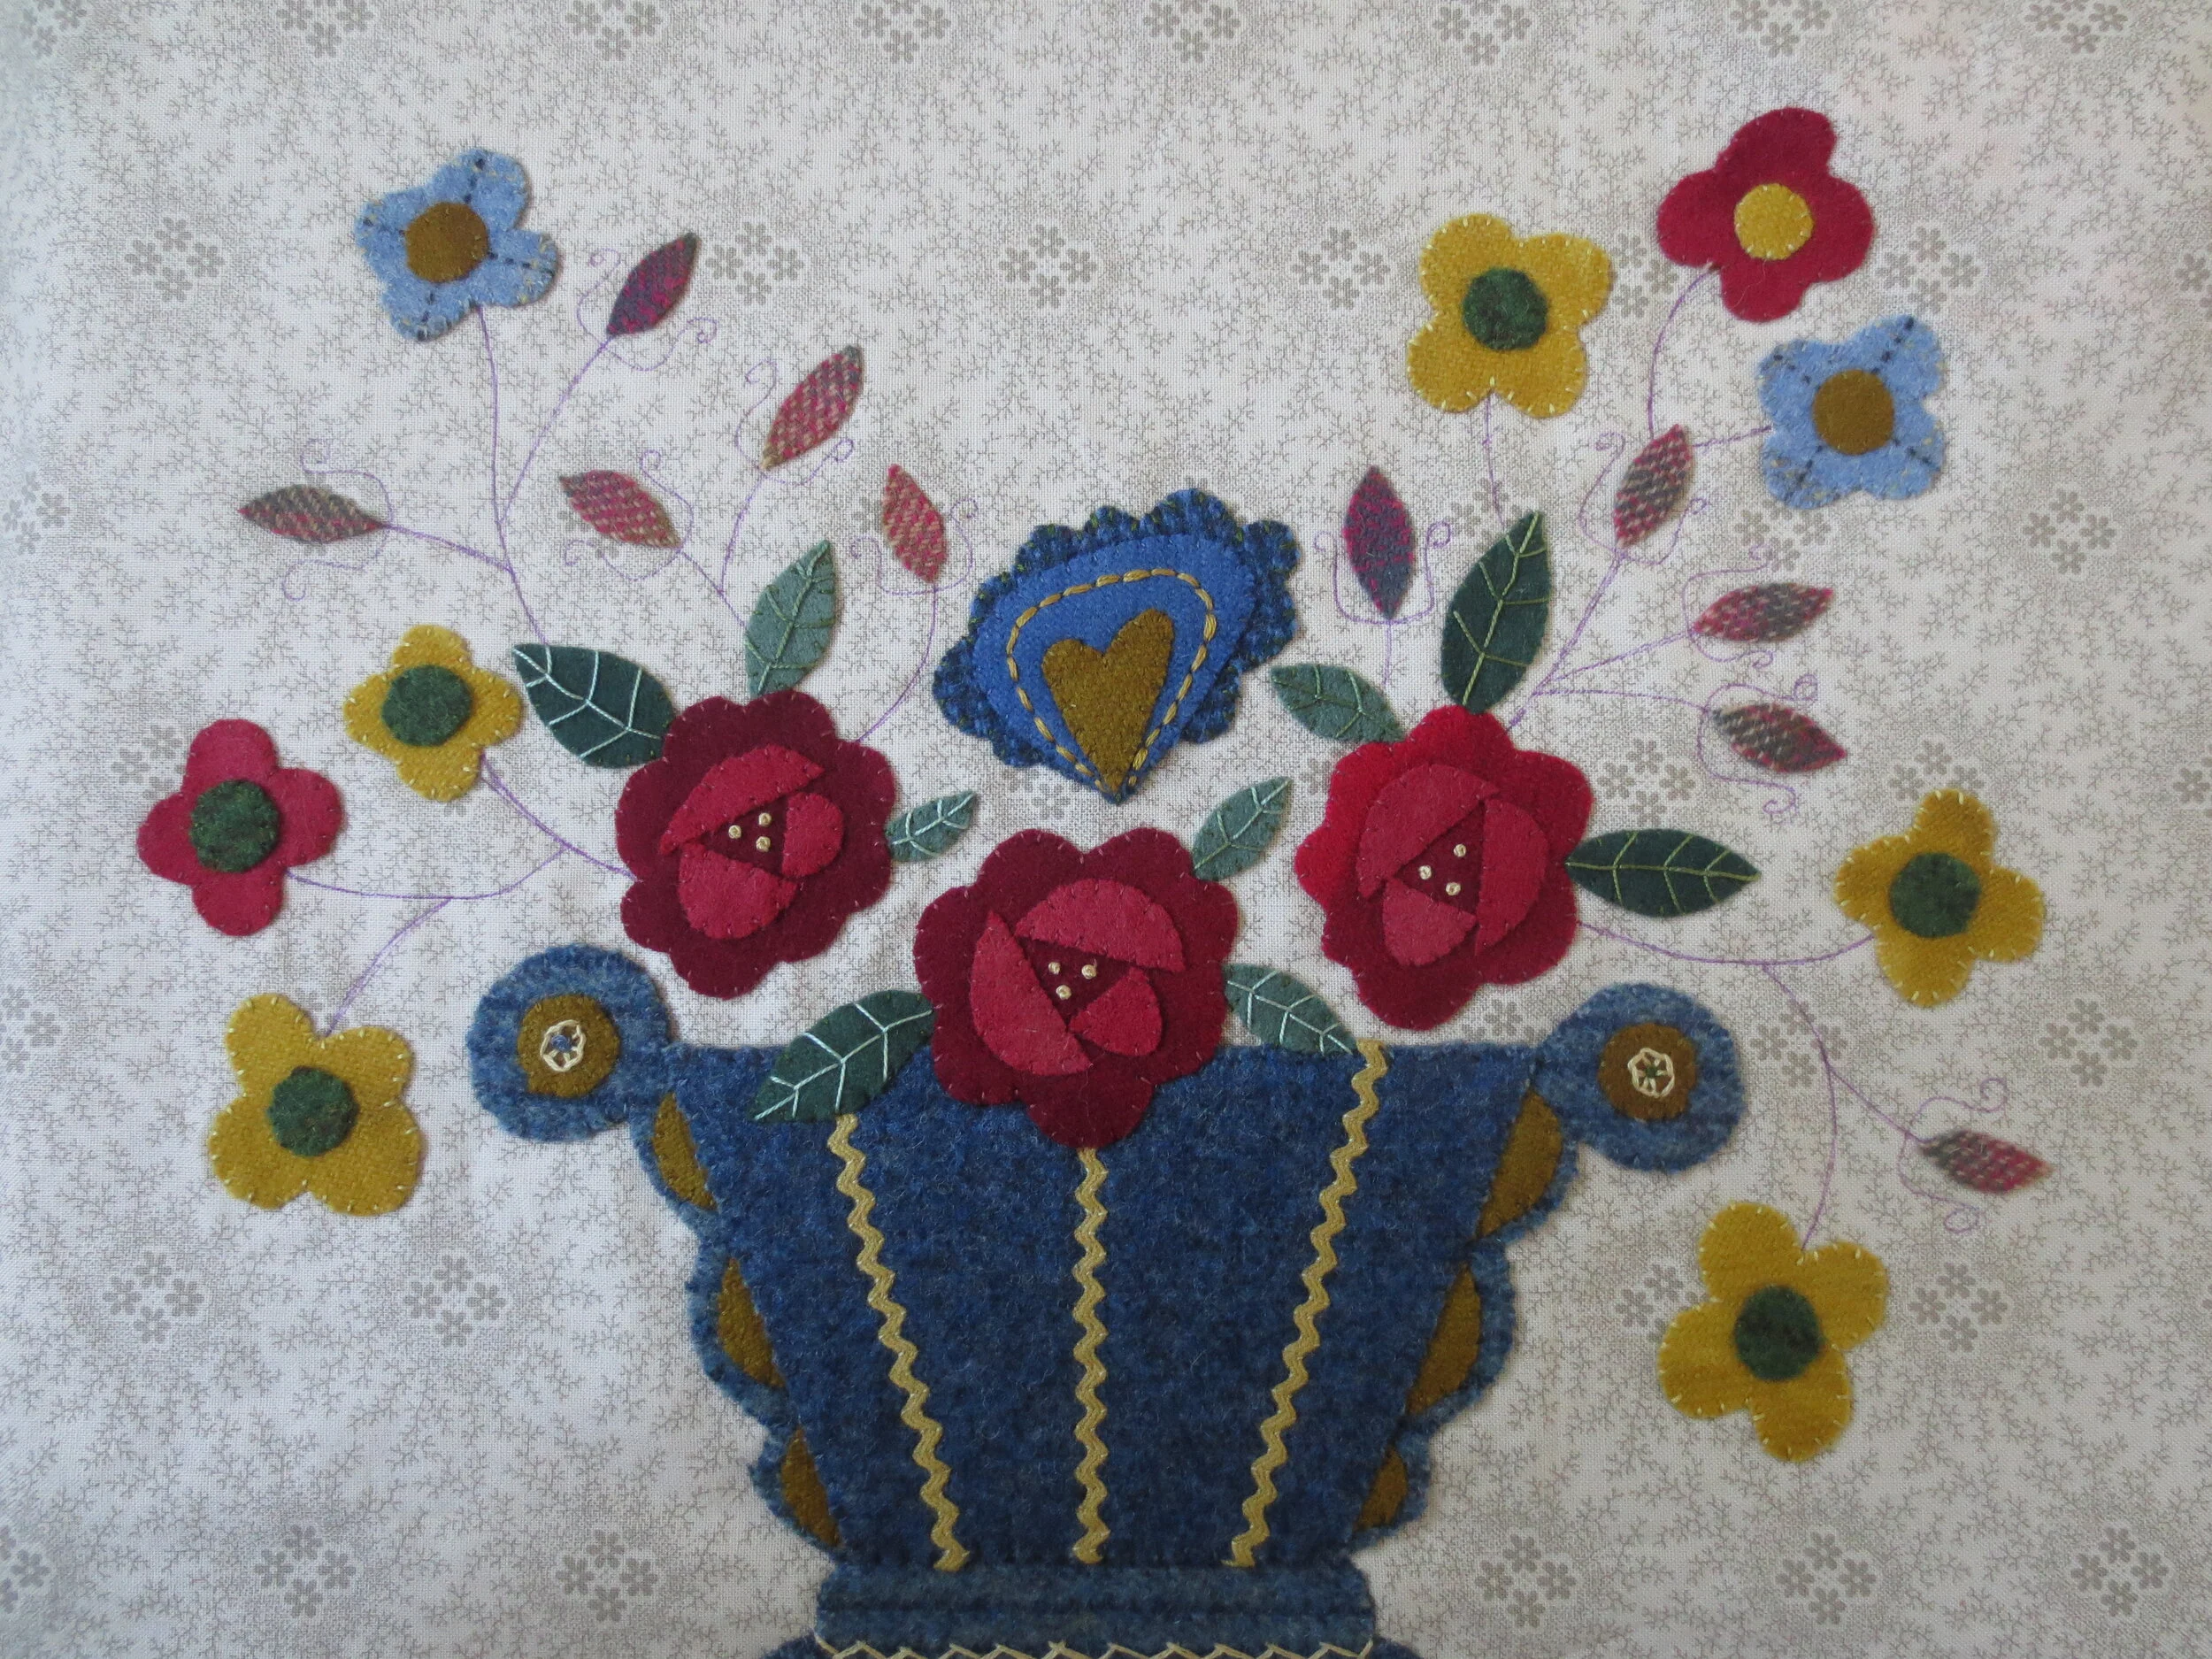
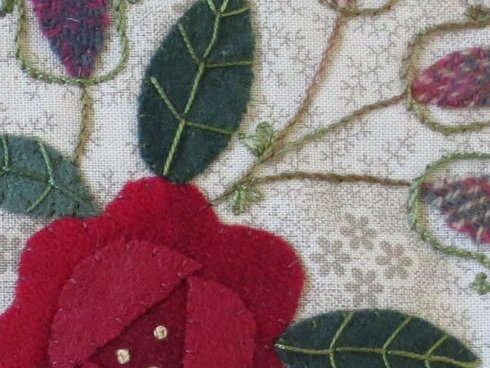
This design is based on a block from a quilt at the American Folk Art Museum in New York City. It was made in Baltimore, Maryland sometime between 1845-1850. The Artist is unknown.
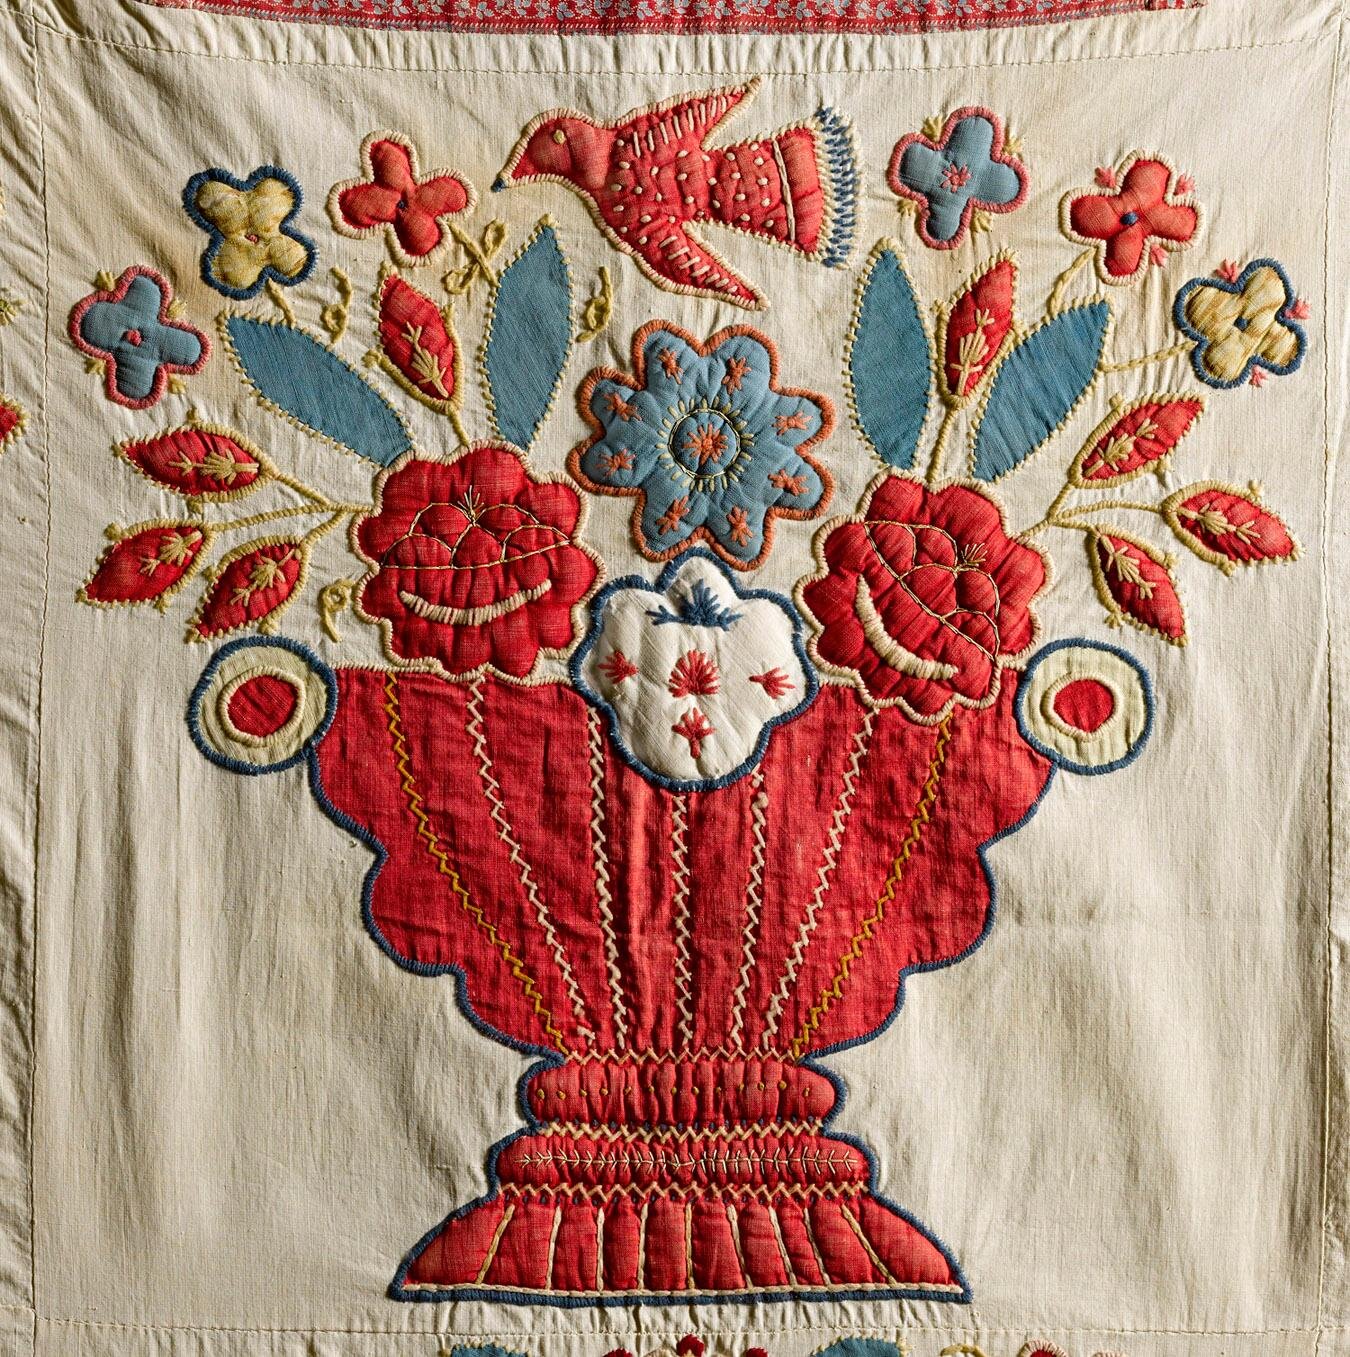
Baltimore Album quilt block from the American Folk Art Museum New York
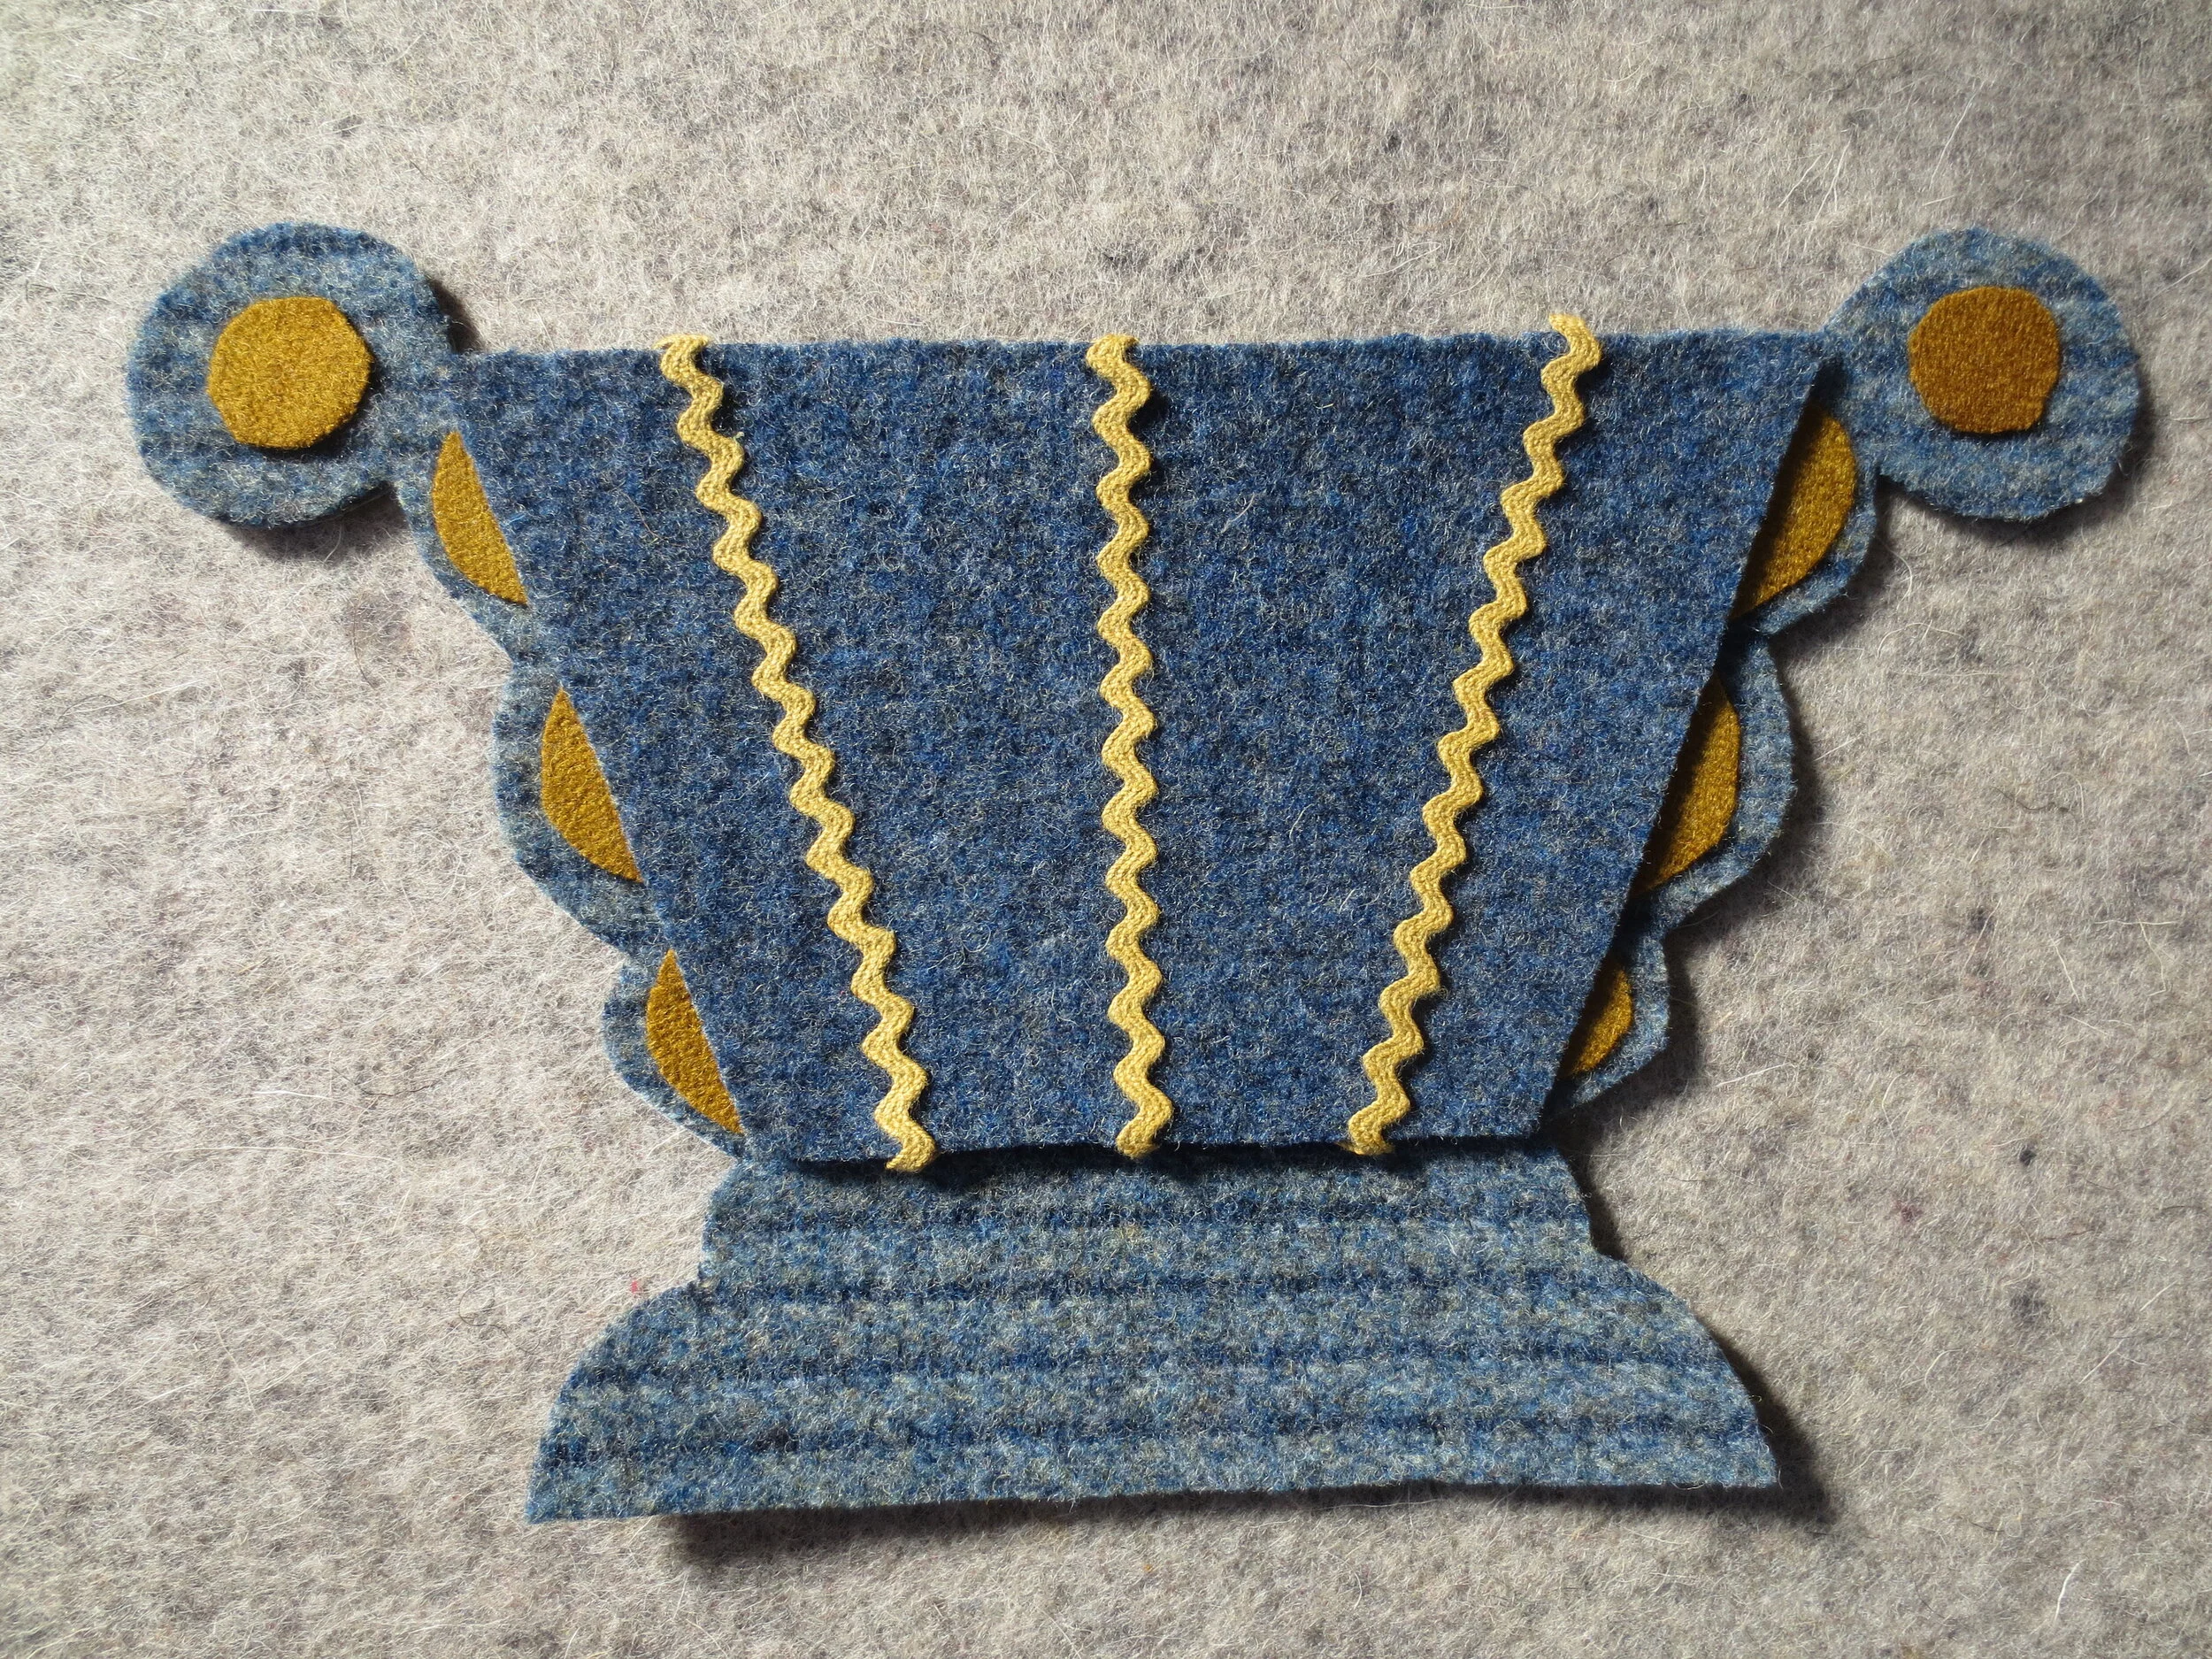
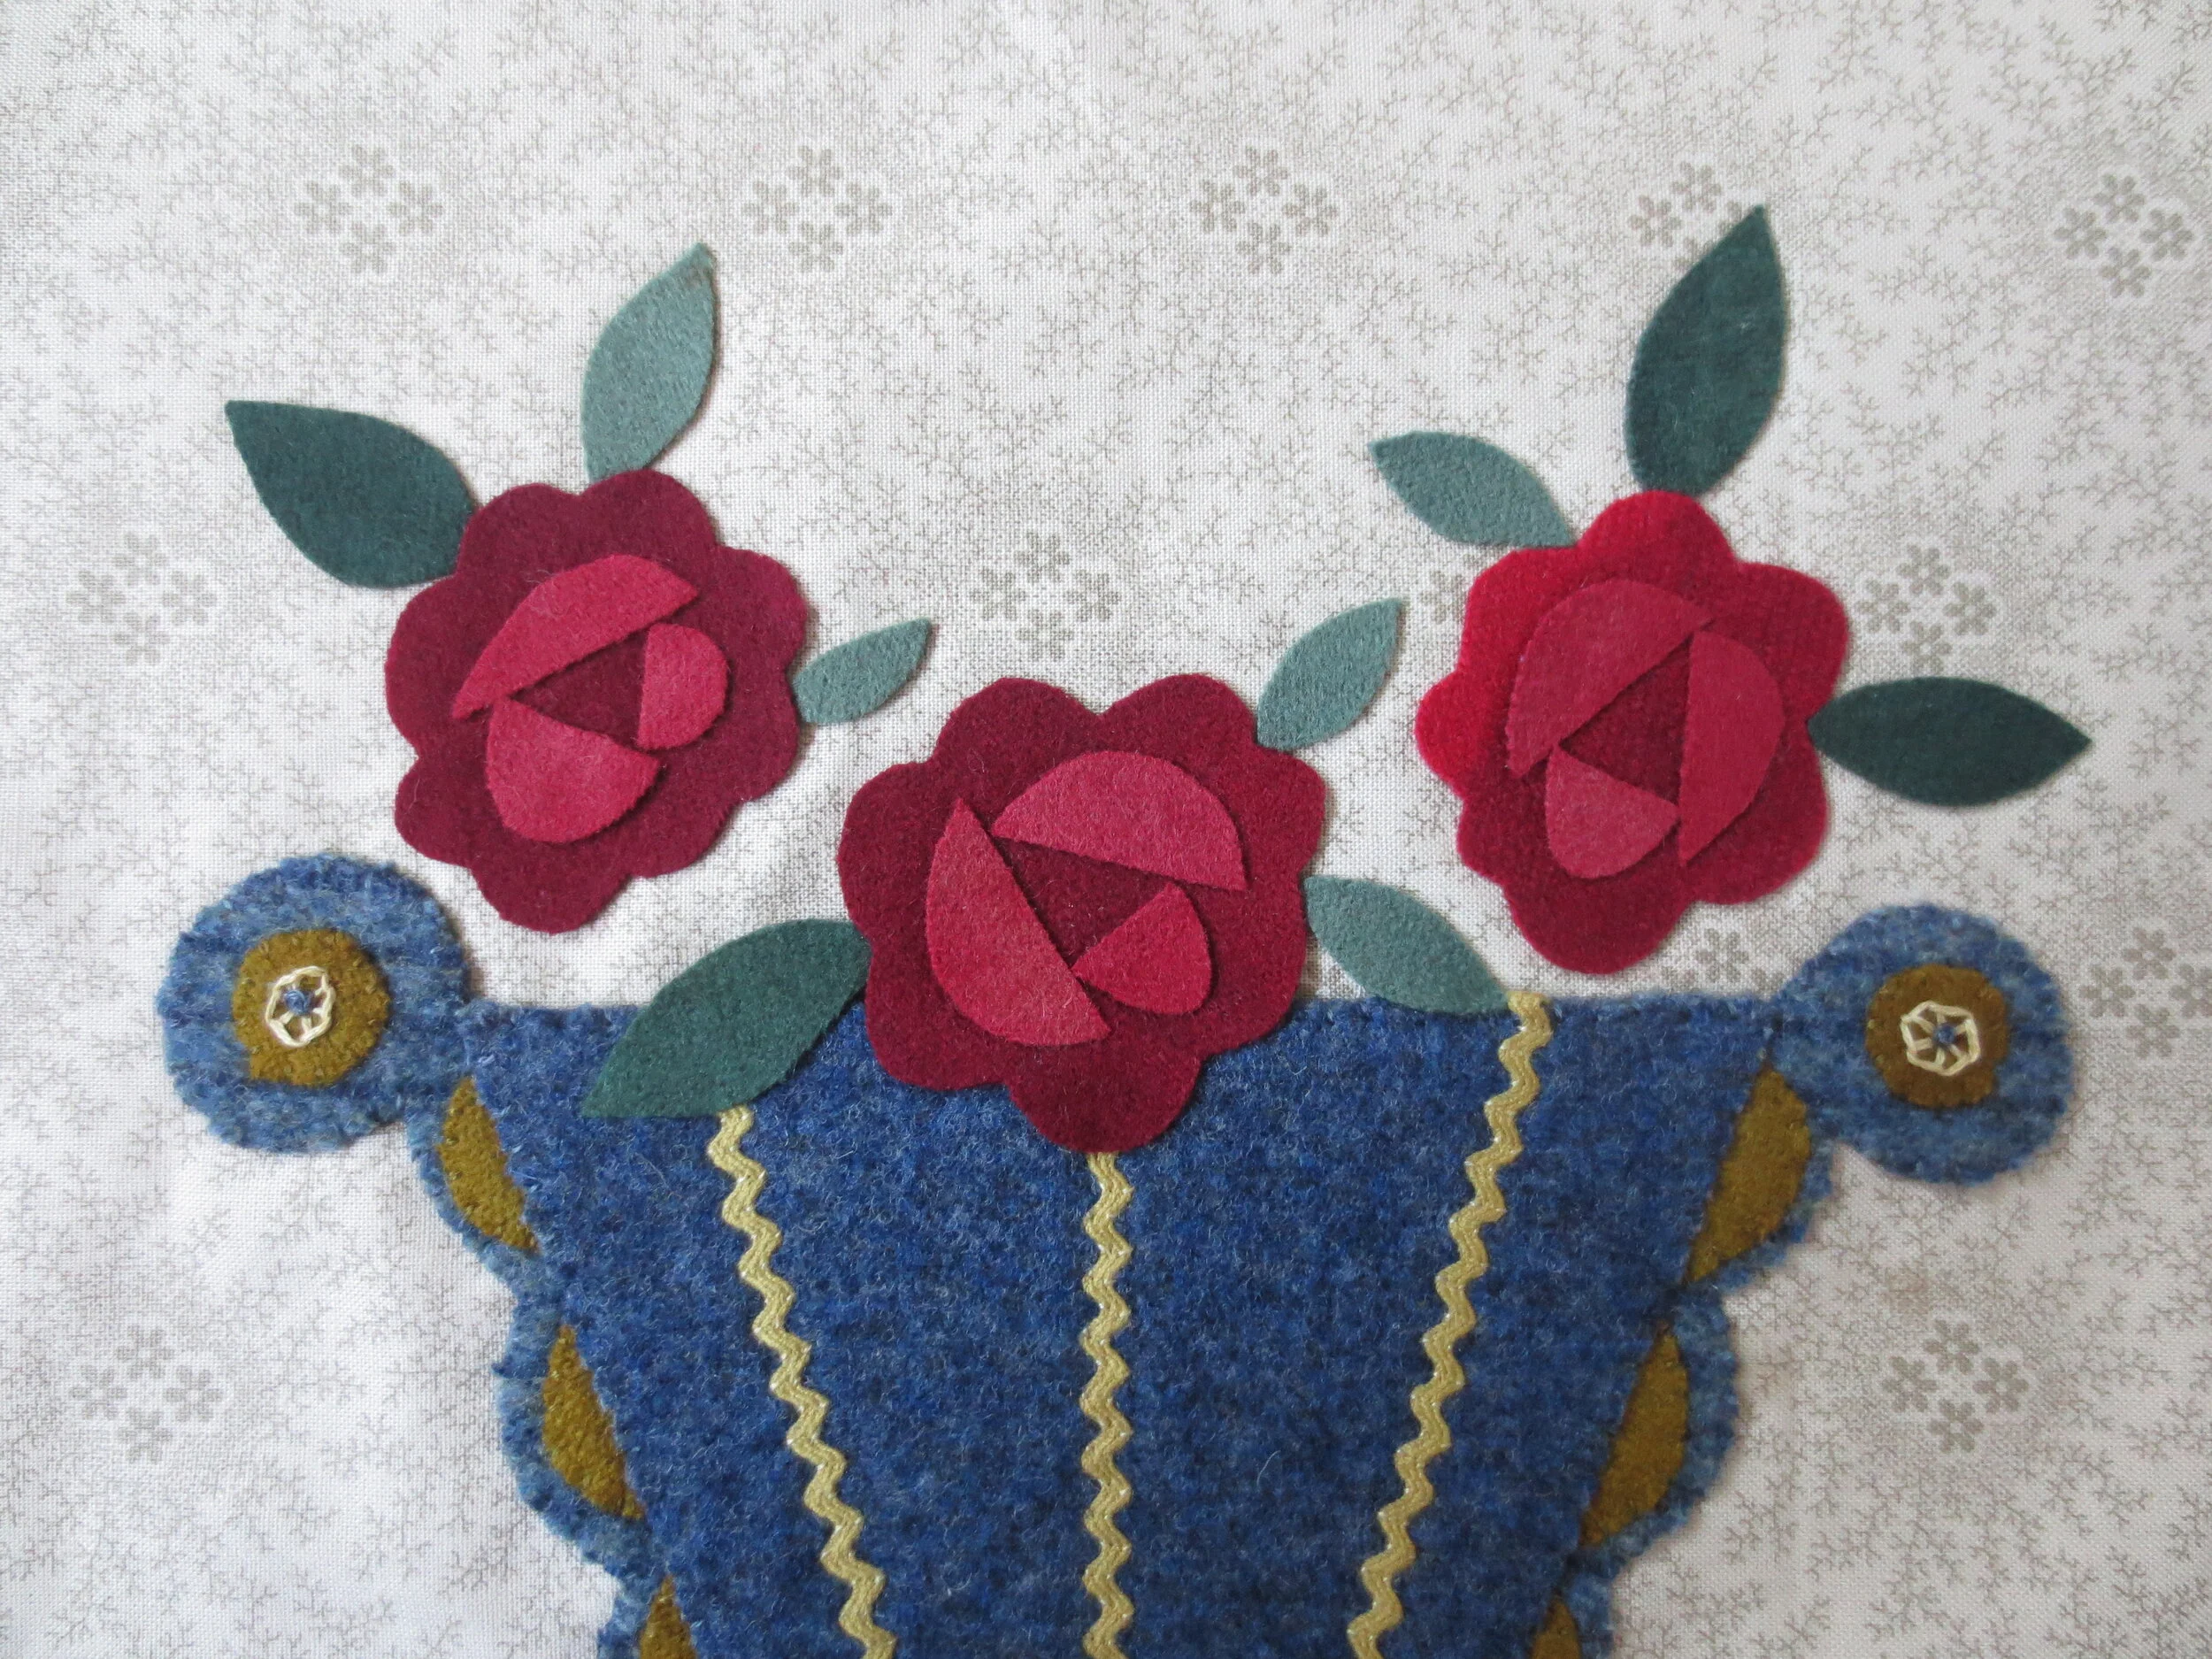
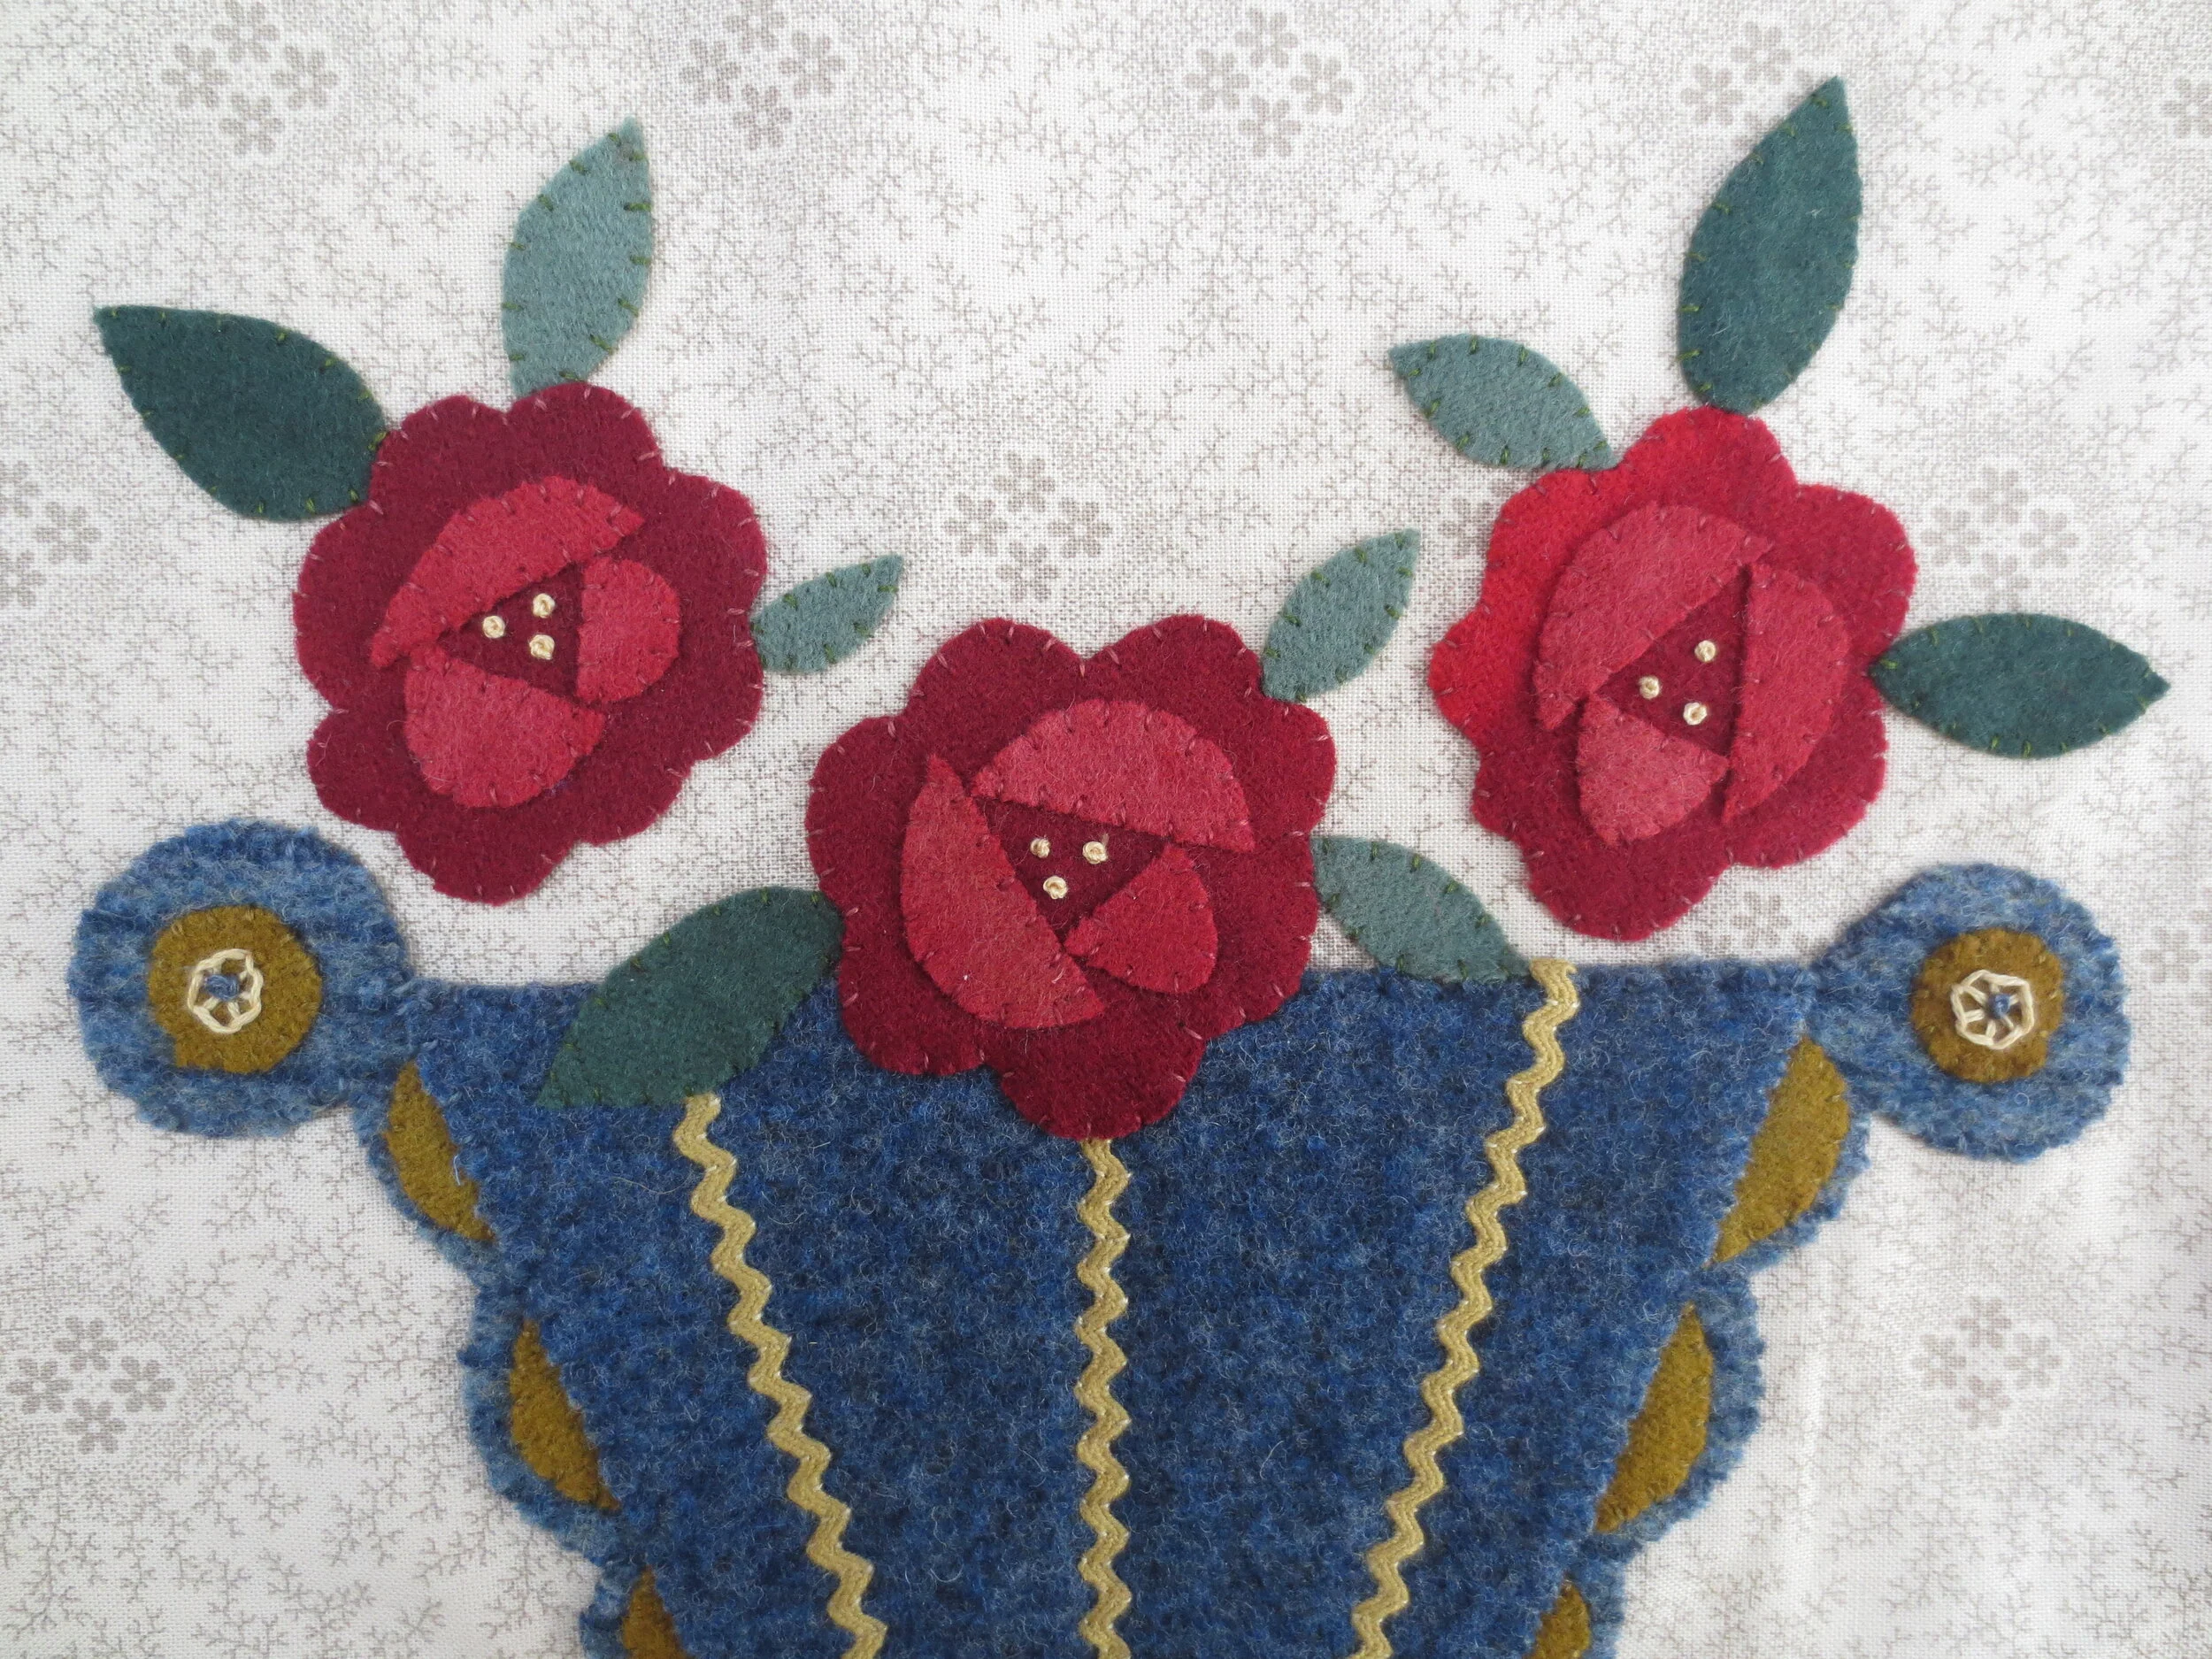
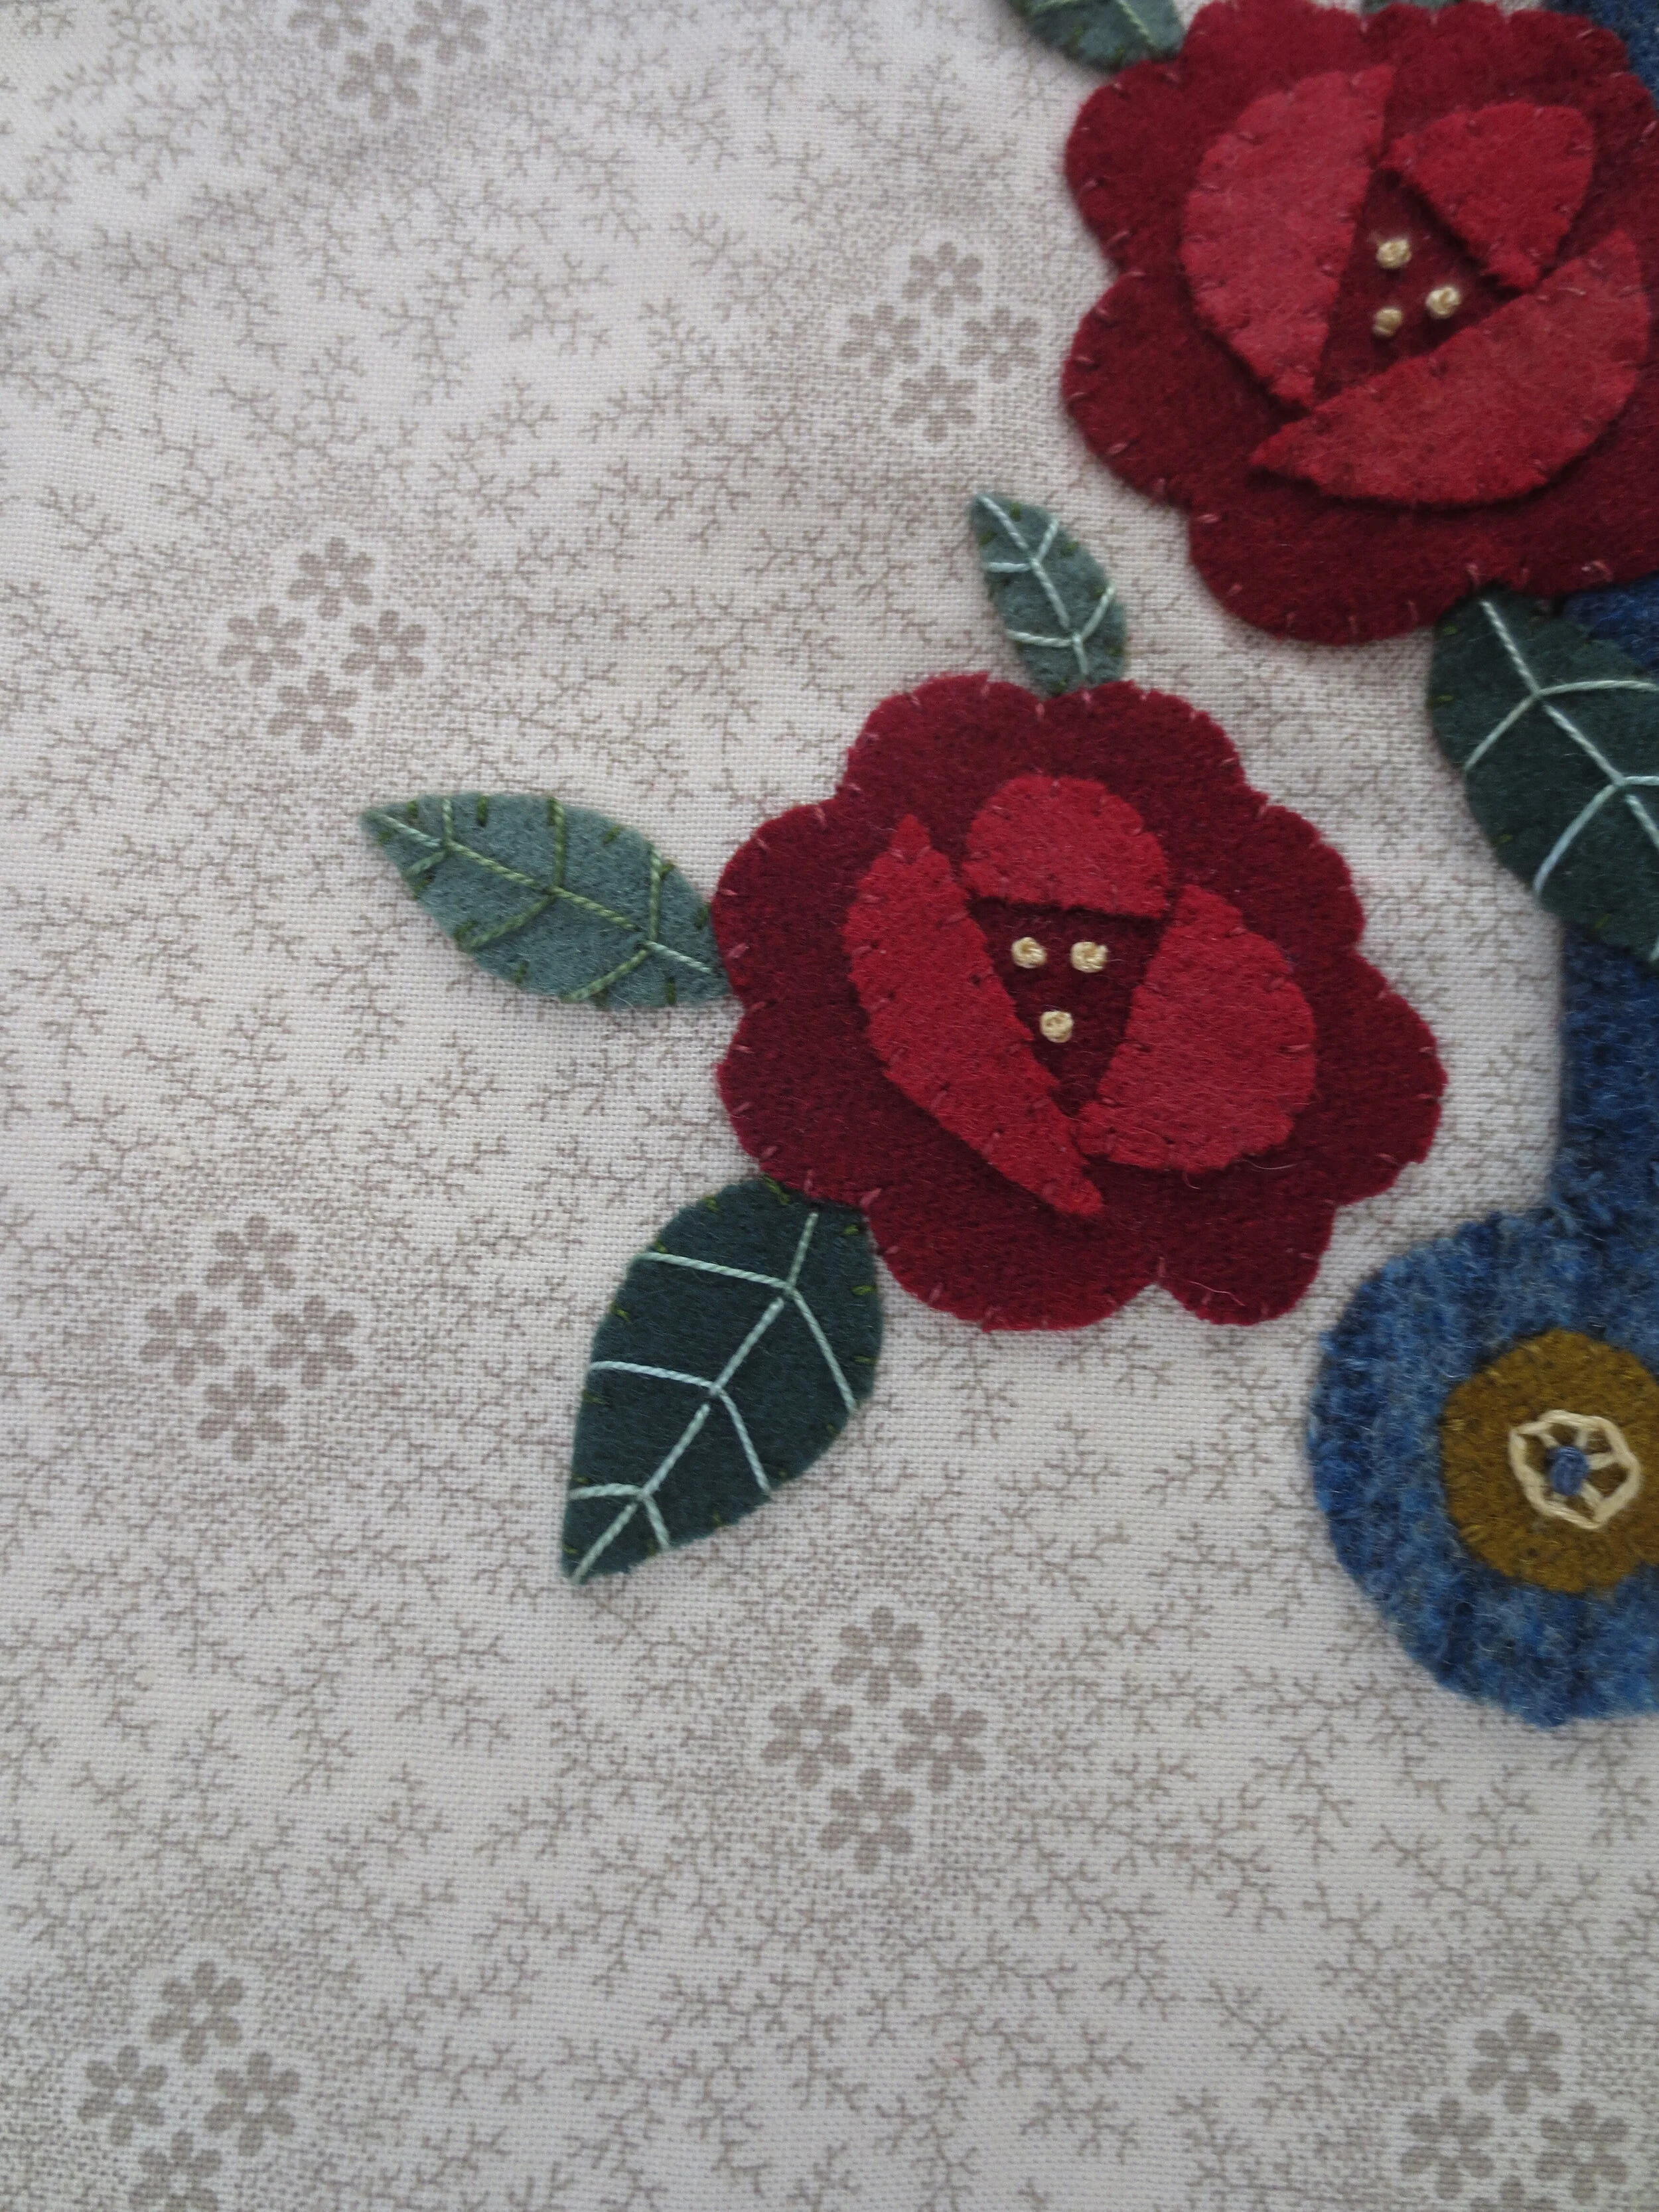
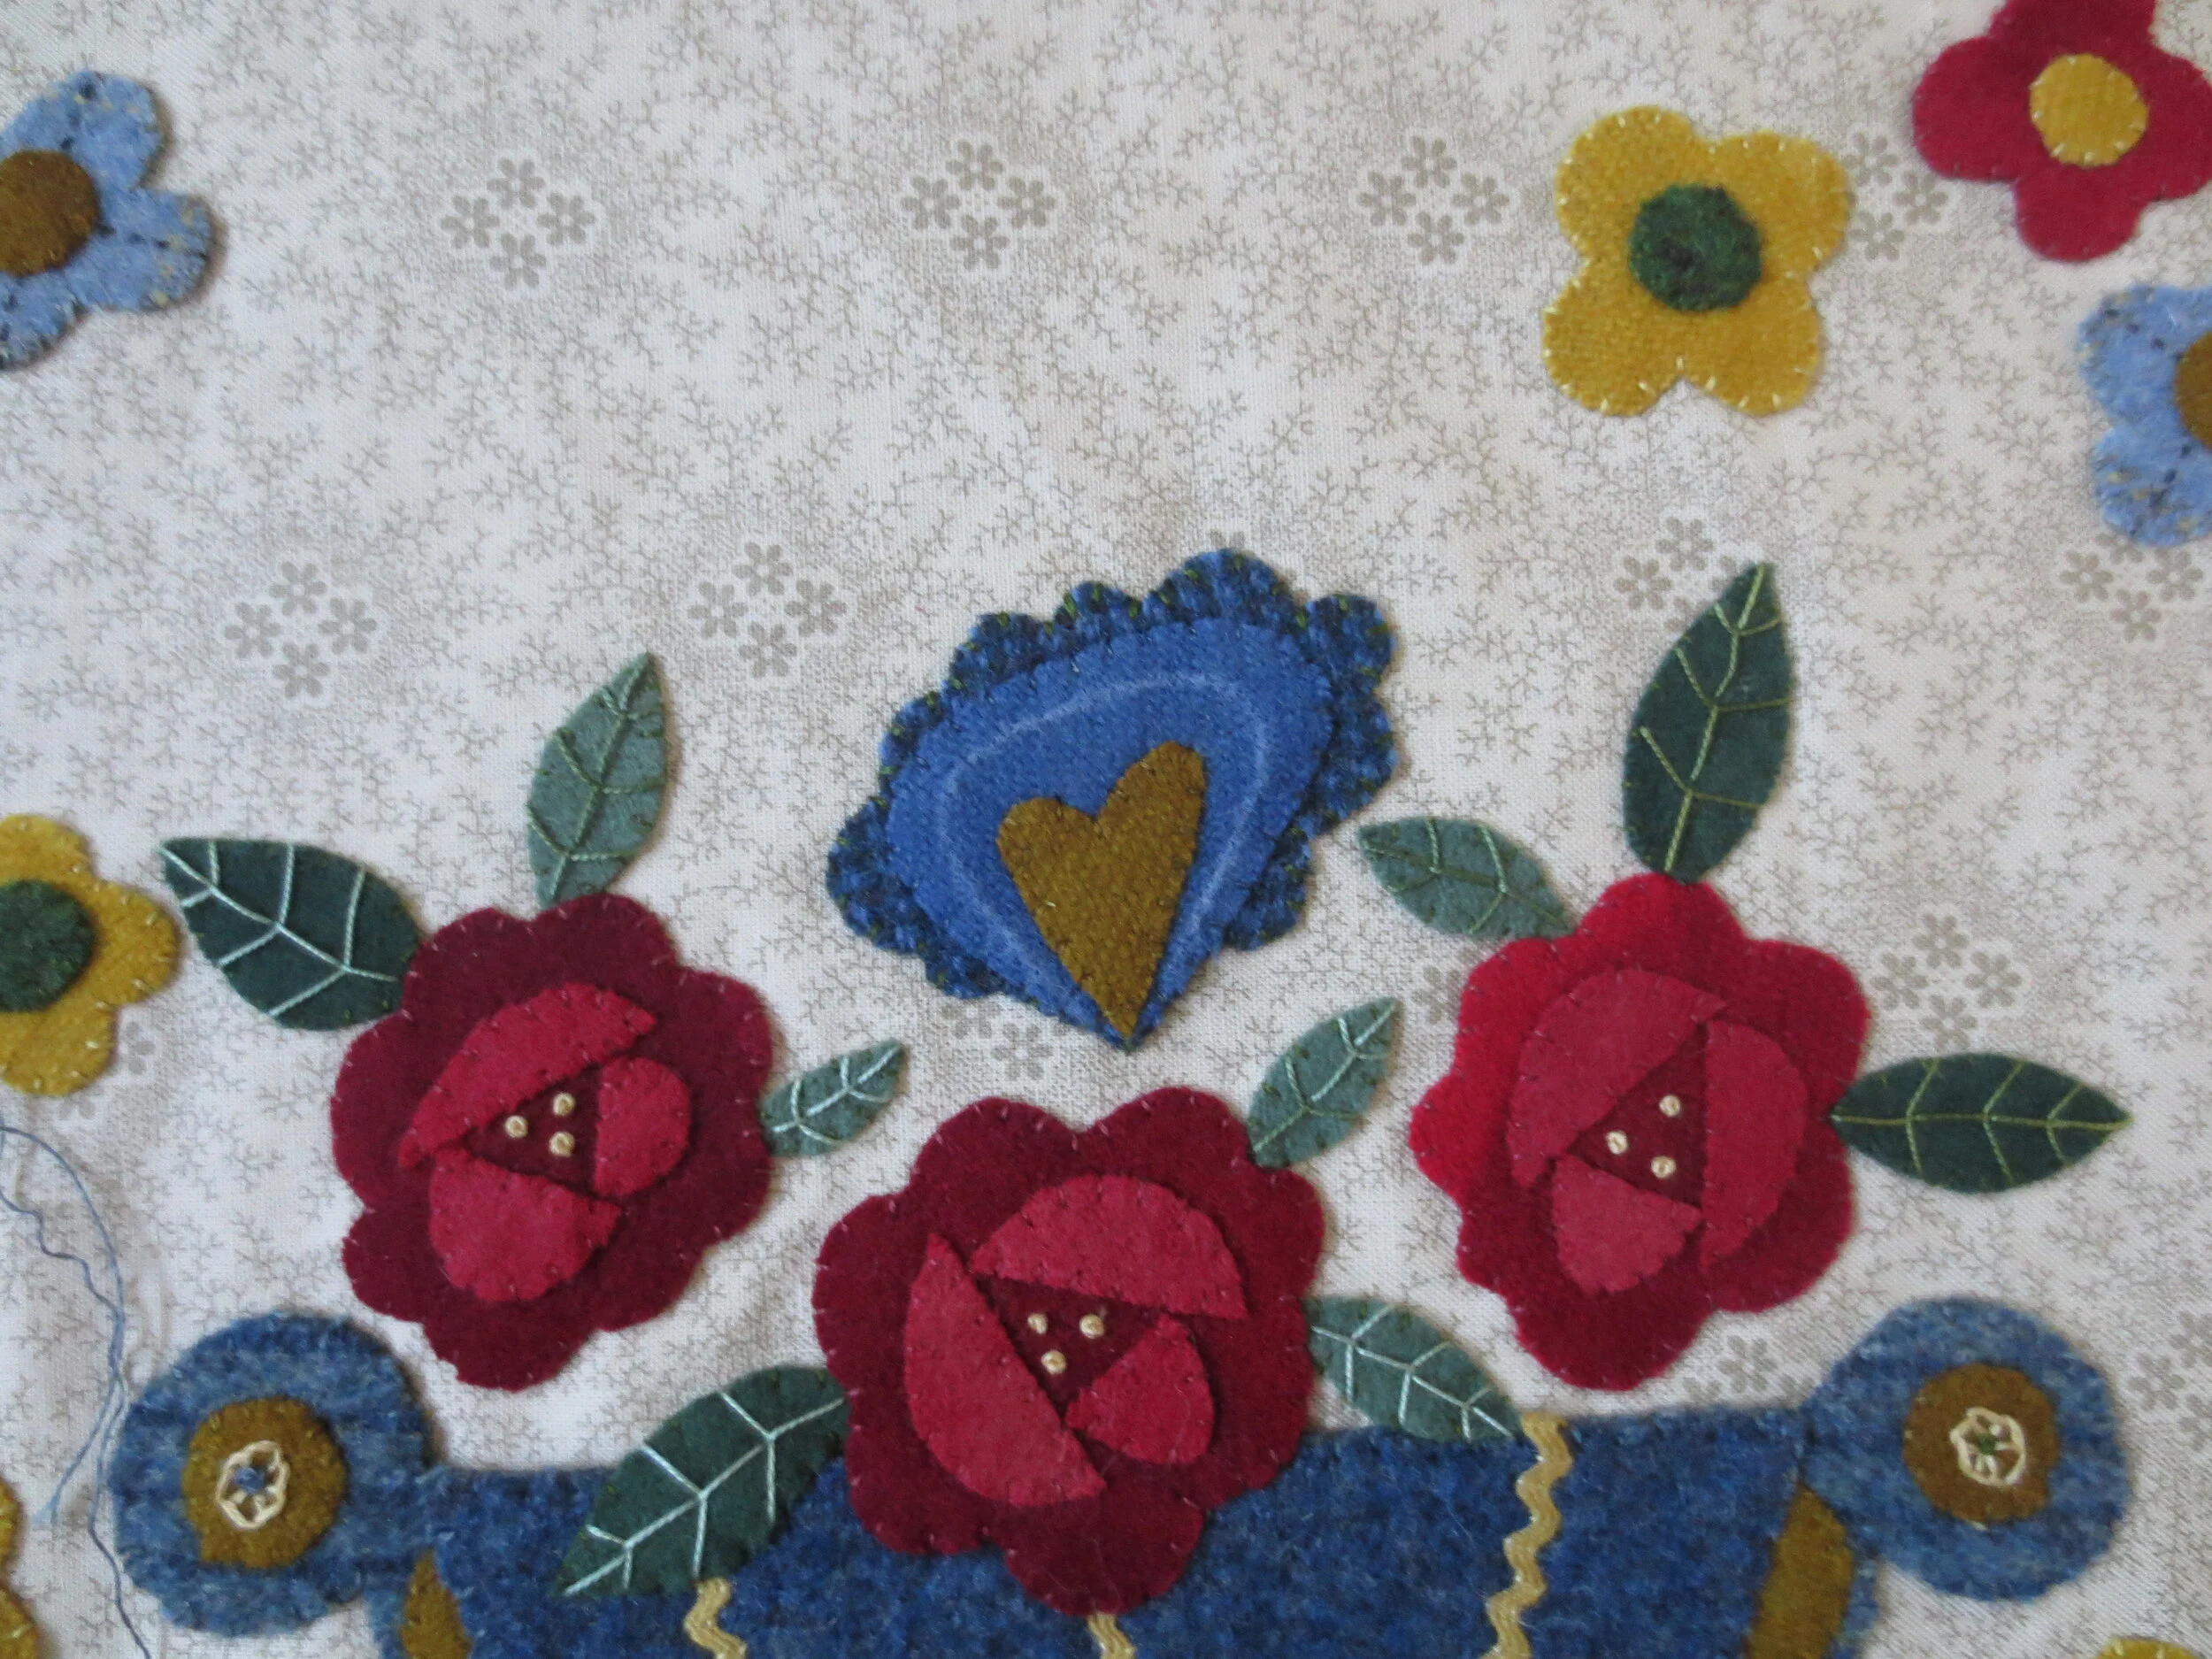
My design is much simpler, but the color combinations of red, blue, and yellow are similar. I added rick rack instead of having to make the herringbone stitched ribs in the upper portion of the vase. If you don’t have access to baby rick rack, then you may want to stitch them like the vase above. As with all of my designs, you can add to them to give them your own touch.
I’m not including any finishing instructions because I’m not sure if It will be a center square of a small quilt, or a large pillow. I just wanted to share a design other than the BOM for those of you who are want an additional challenge, or are looking for idea for a holiday gift.
As I write this, we are getting ready for a more severe lock down. The COVID cases have doubled in my county in just 2 days. The entire state as well as the nation has seen an upsurge in cases. So I’ll hunker down with my 93-year old mom, and stitch away. I’ll seek out joy where I can find it, as the great Scottish author Robert Louis Stevenson advised.
“Find out where joy resides, and give it a voice far beyond singing.”
Robert Louis Stevenson
I hope this project will bring some joy to your lives and give it voice.
Stay safe my friends.
Supplies
Background fabric - 16 1/2” x 18 1/2” piece of light colored quilting cotton, or linen cotton blend.
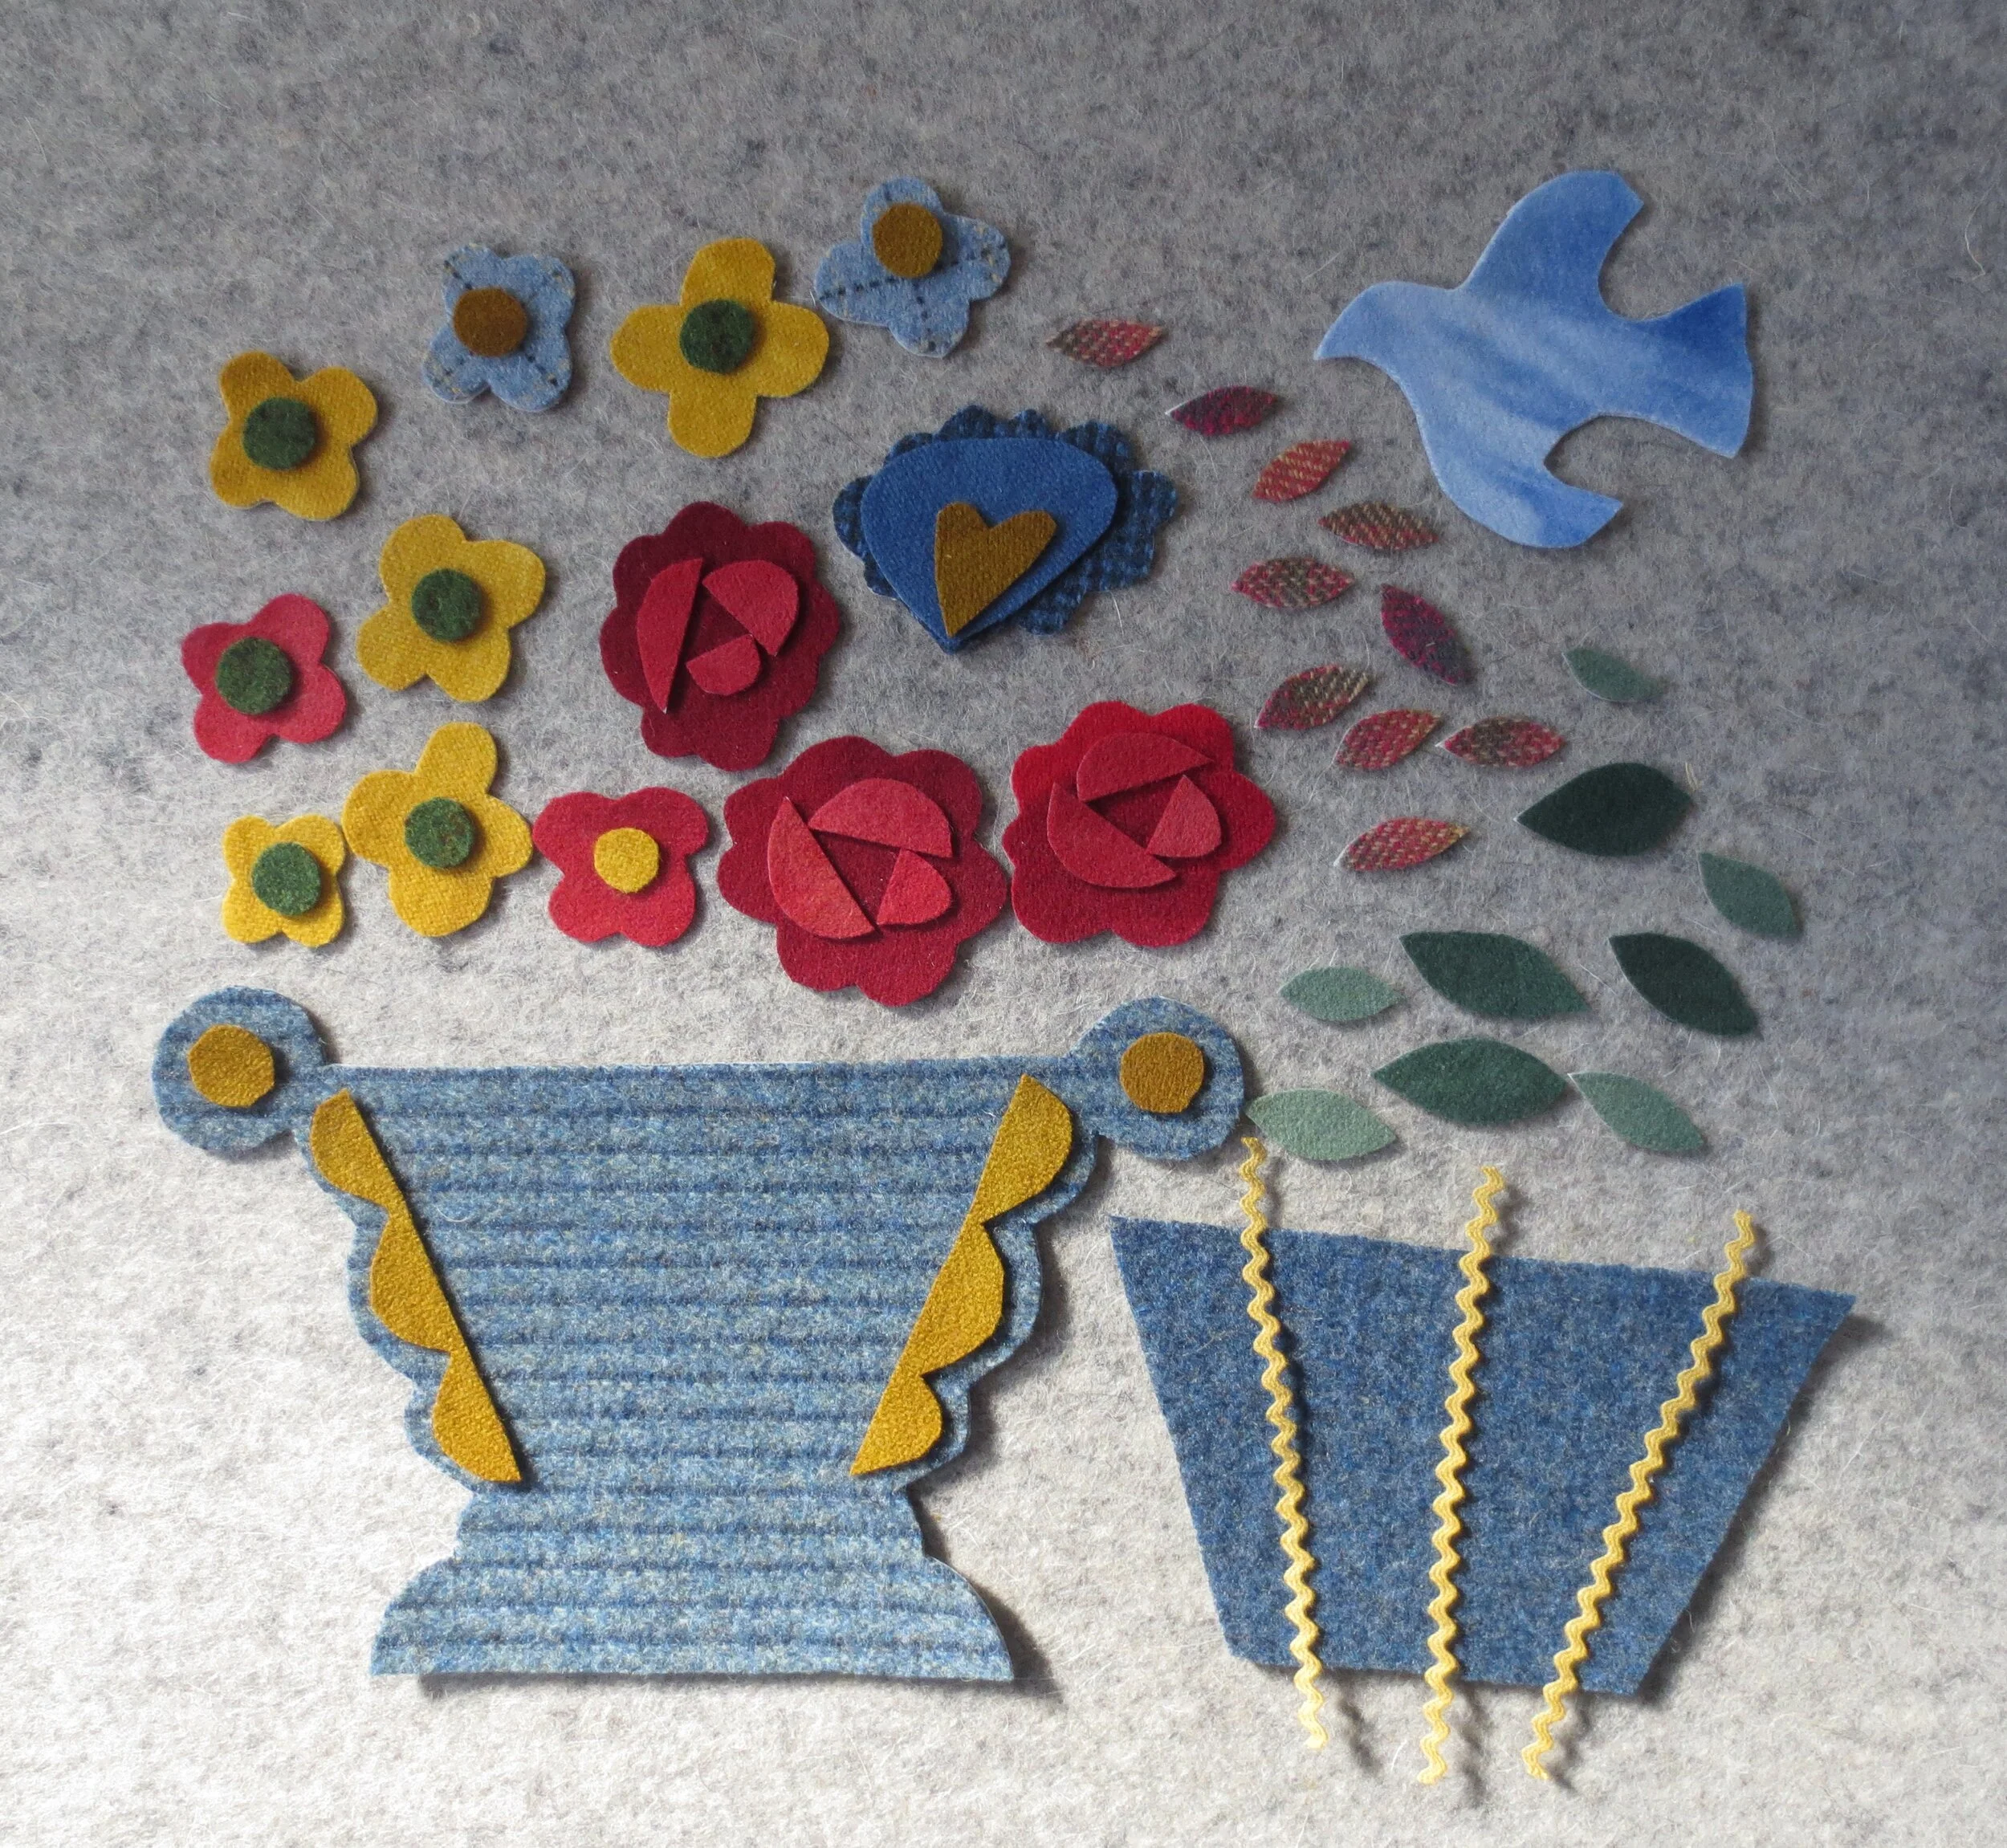
Felted Wool or Wool Felt - suggested colors
Vase back - 5 1/2” x 8” medium textured blue
Vase front - 3 1/2” x 6” dark blue
Vase handles, vase sides, heart in heart flower, small flowers 4 & 7 centers - 5” square tarnished gold
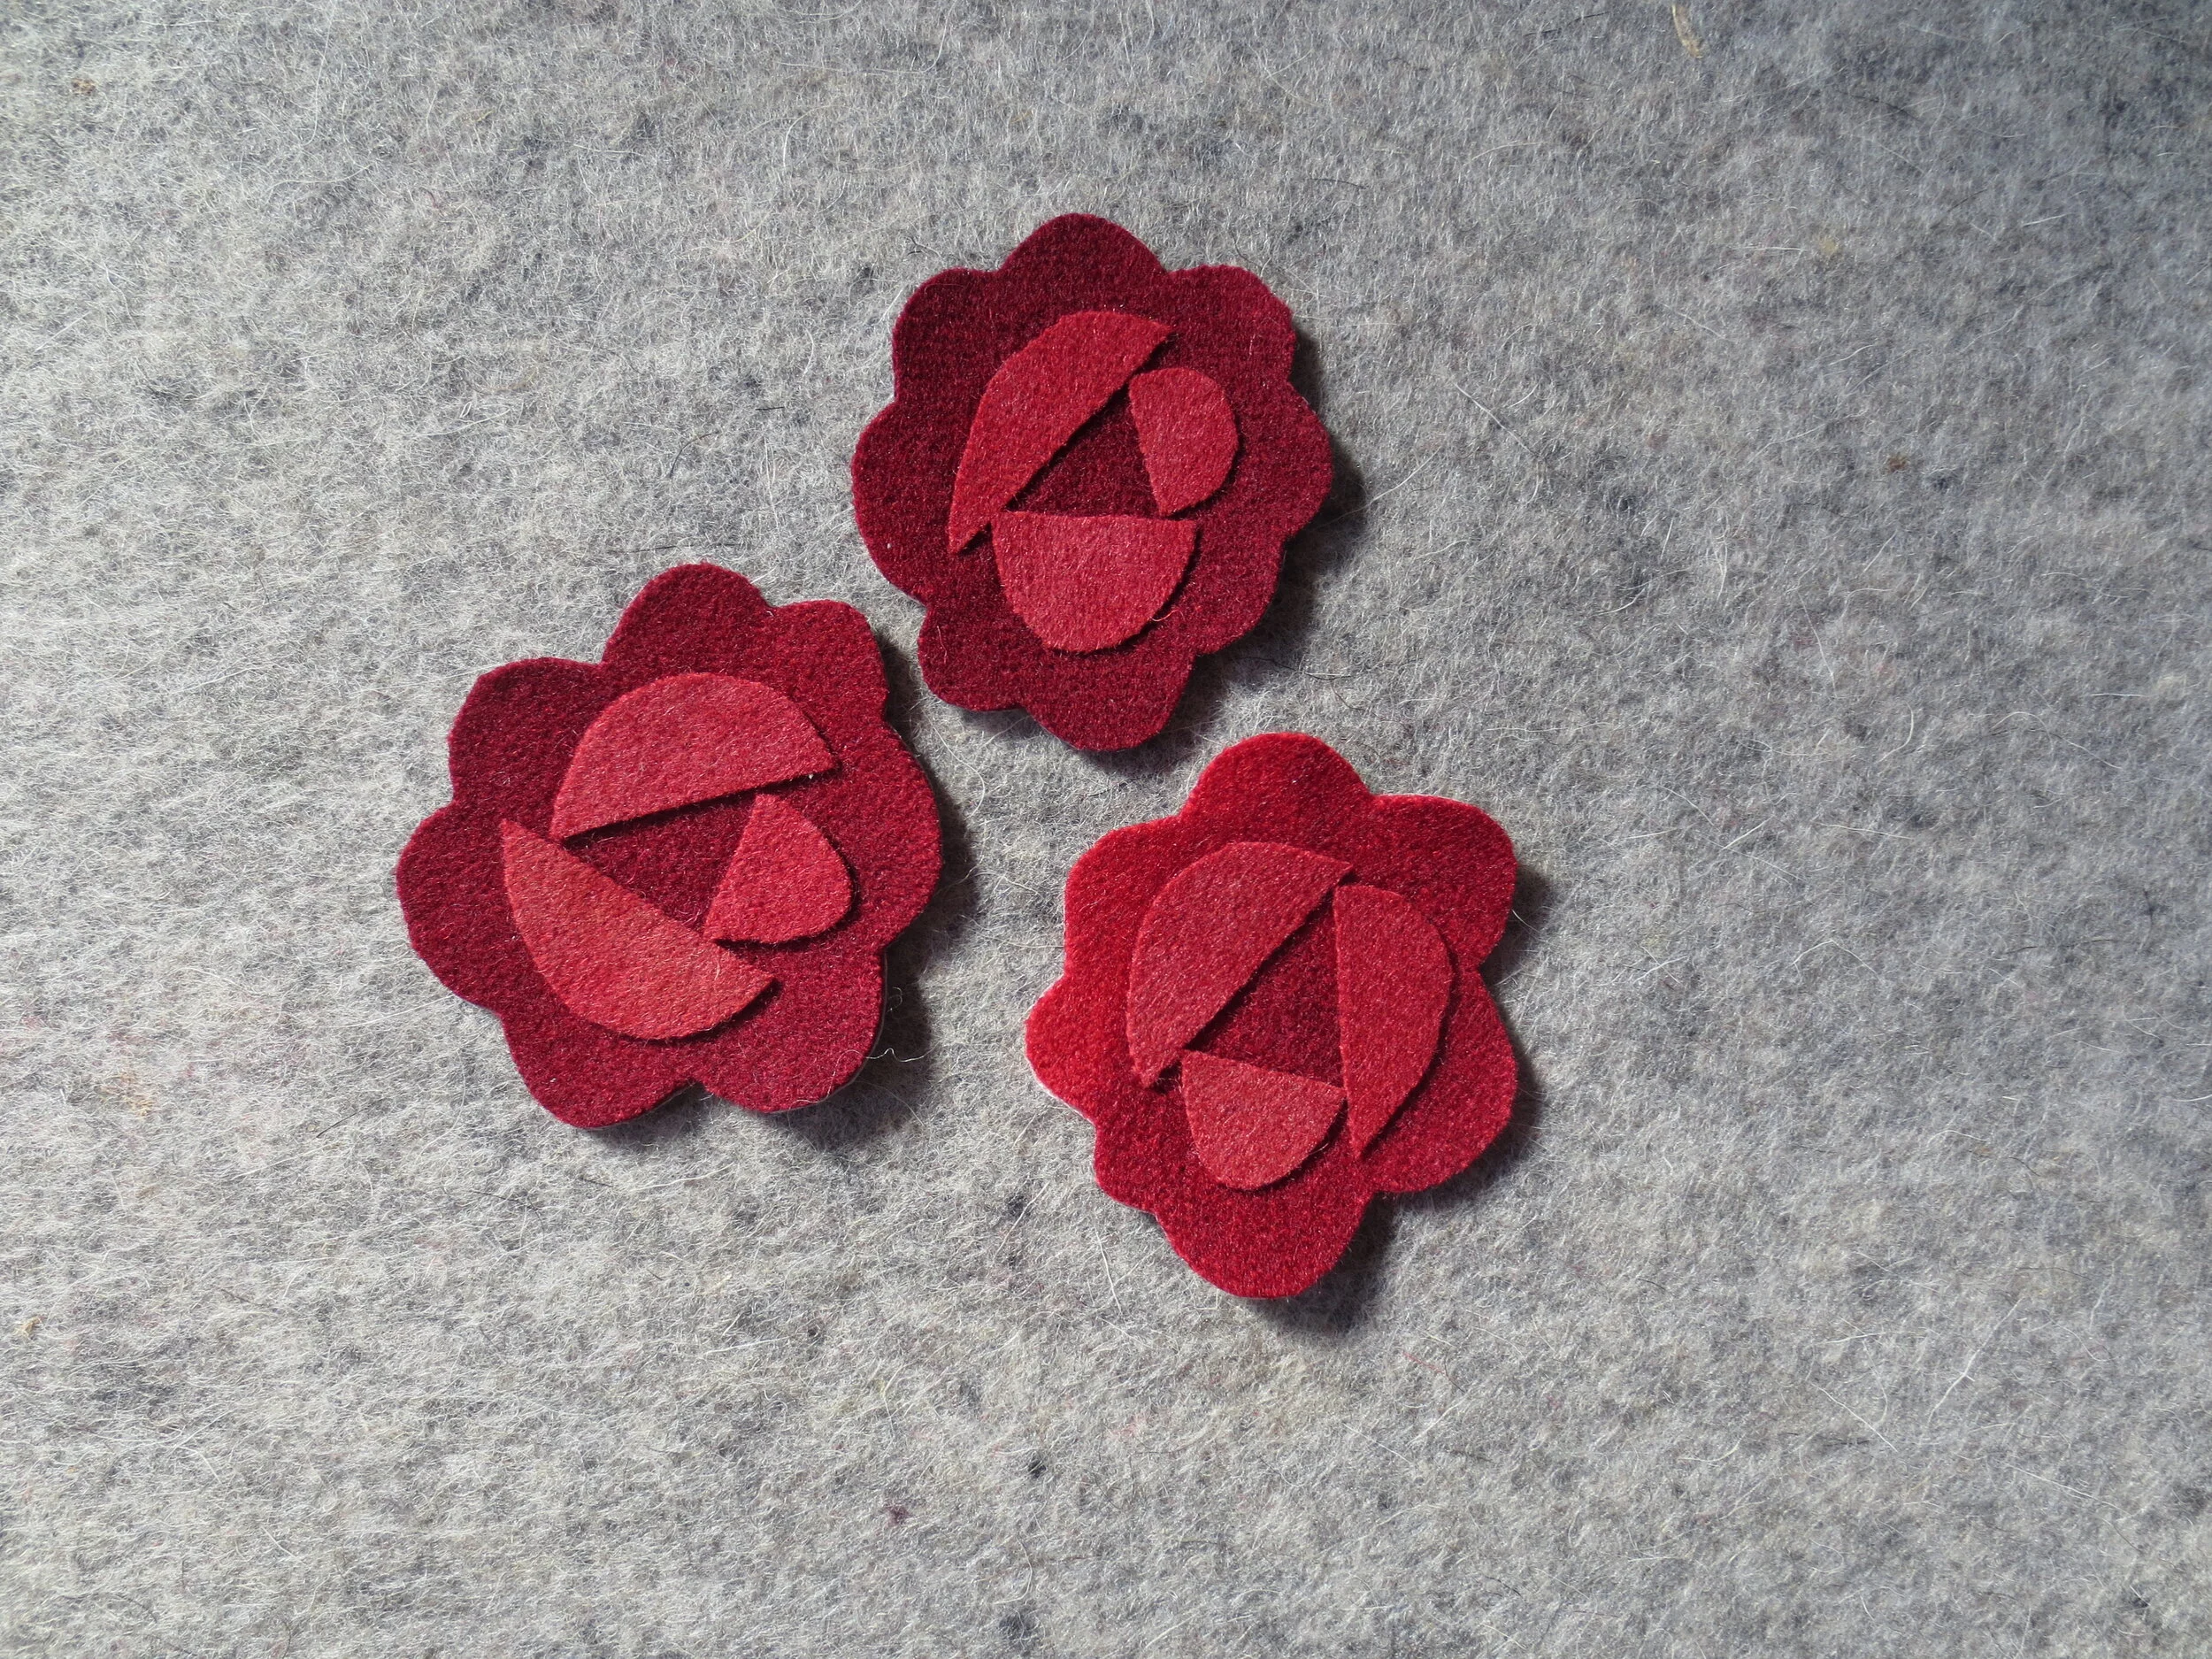
Large flowers - 4” square dark red
Large flower centers (1-3 AB&C) - 3” square medium red
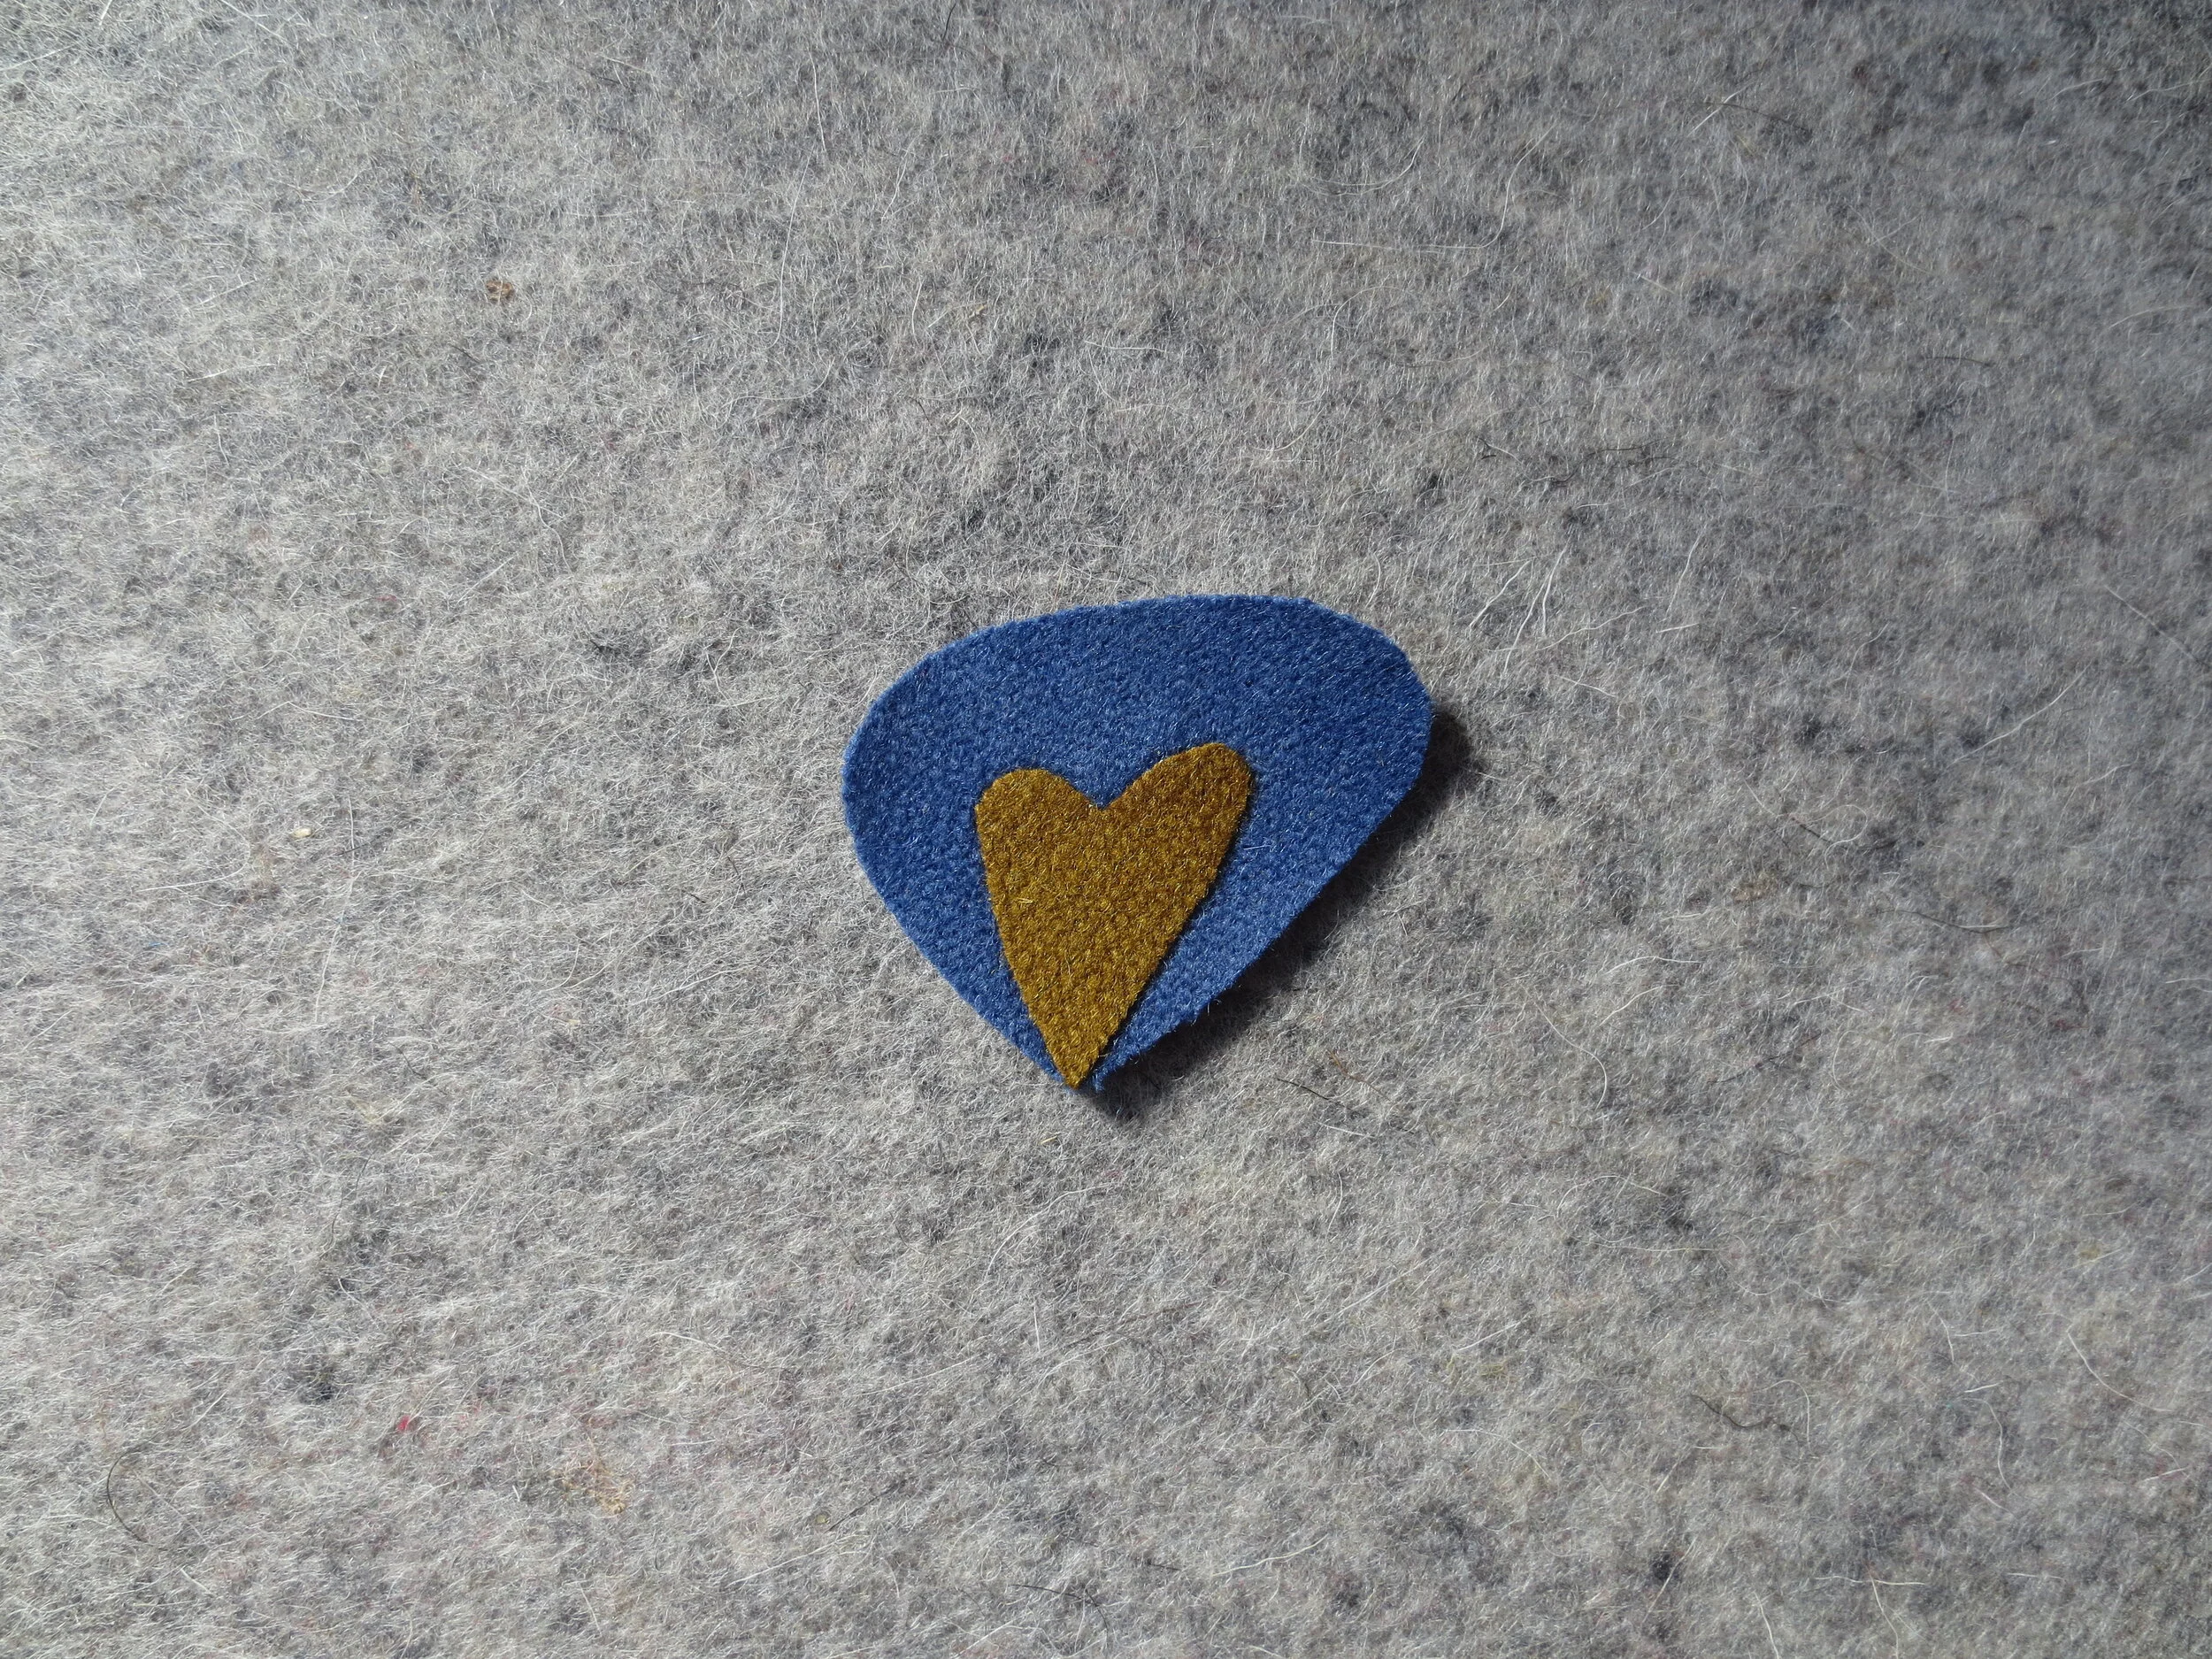
Heart flower back - 2 1/2” x 3” dark blue check
Heart flower front - 2” square medium blue
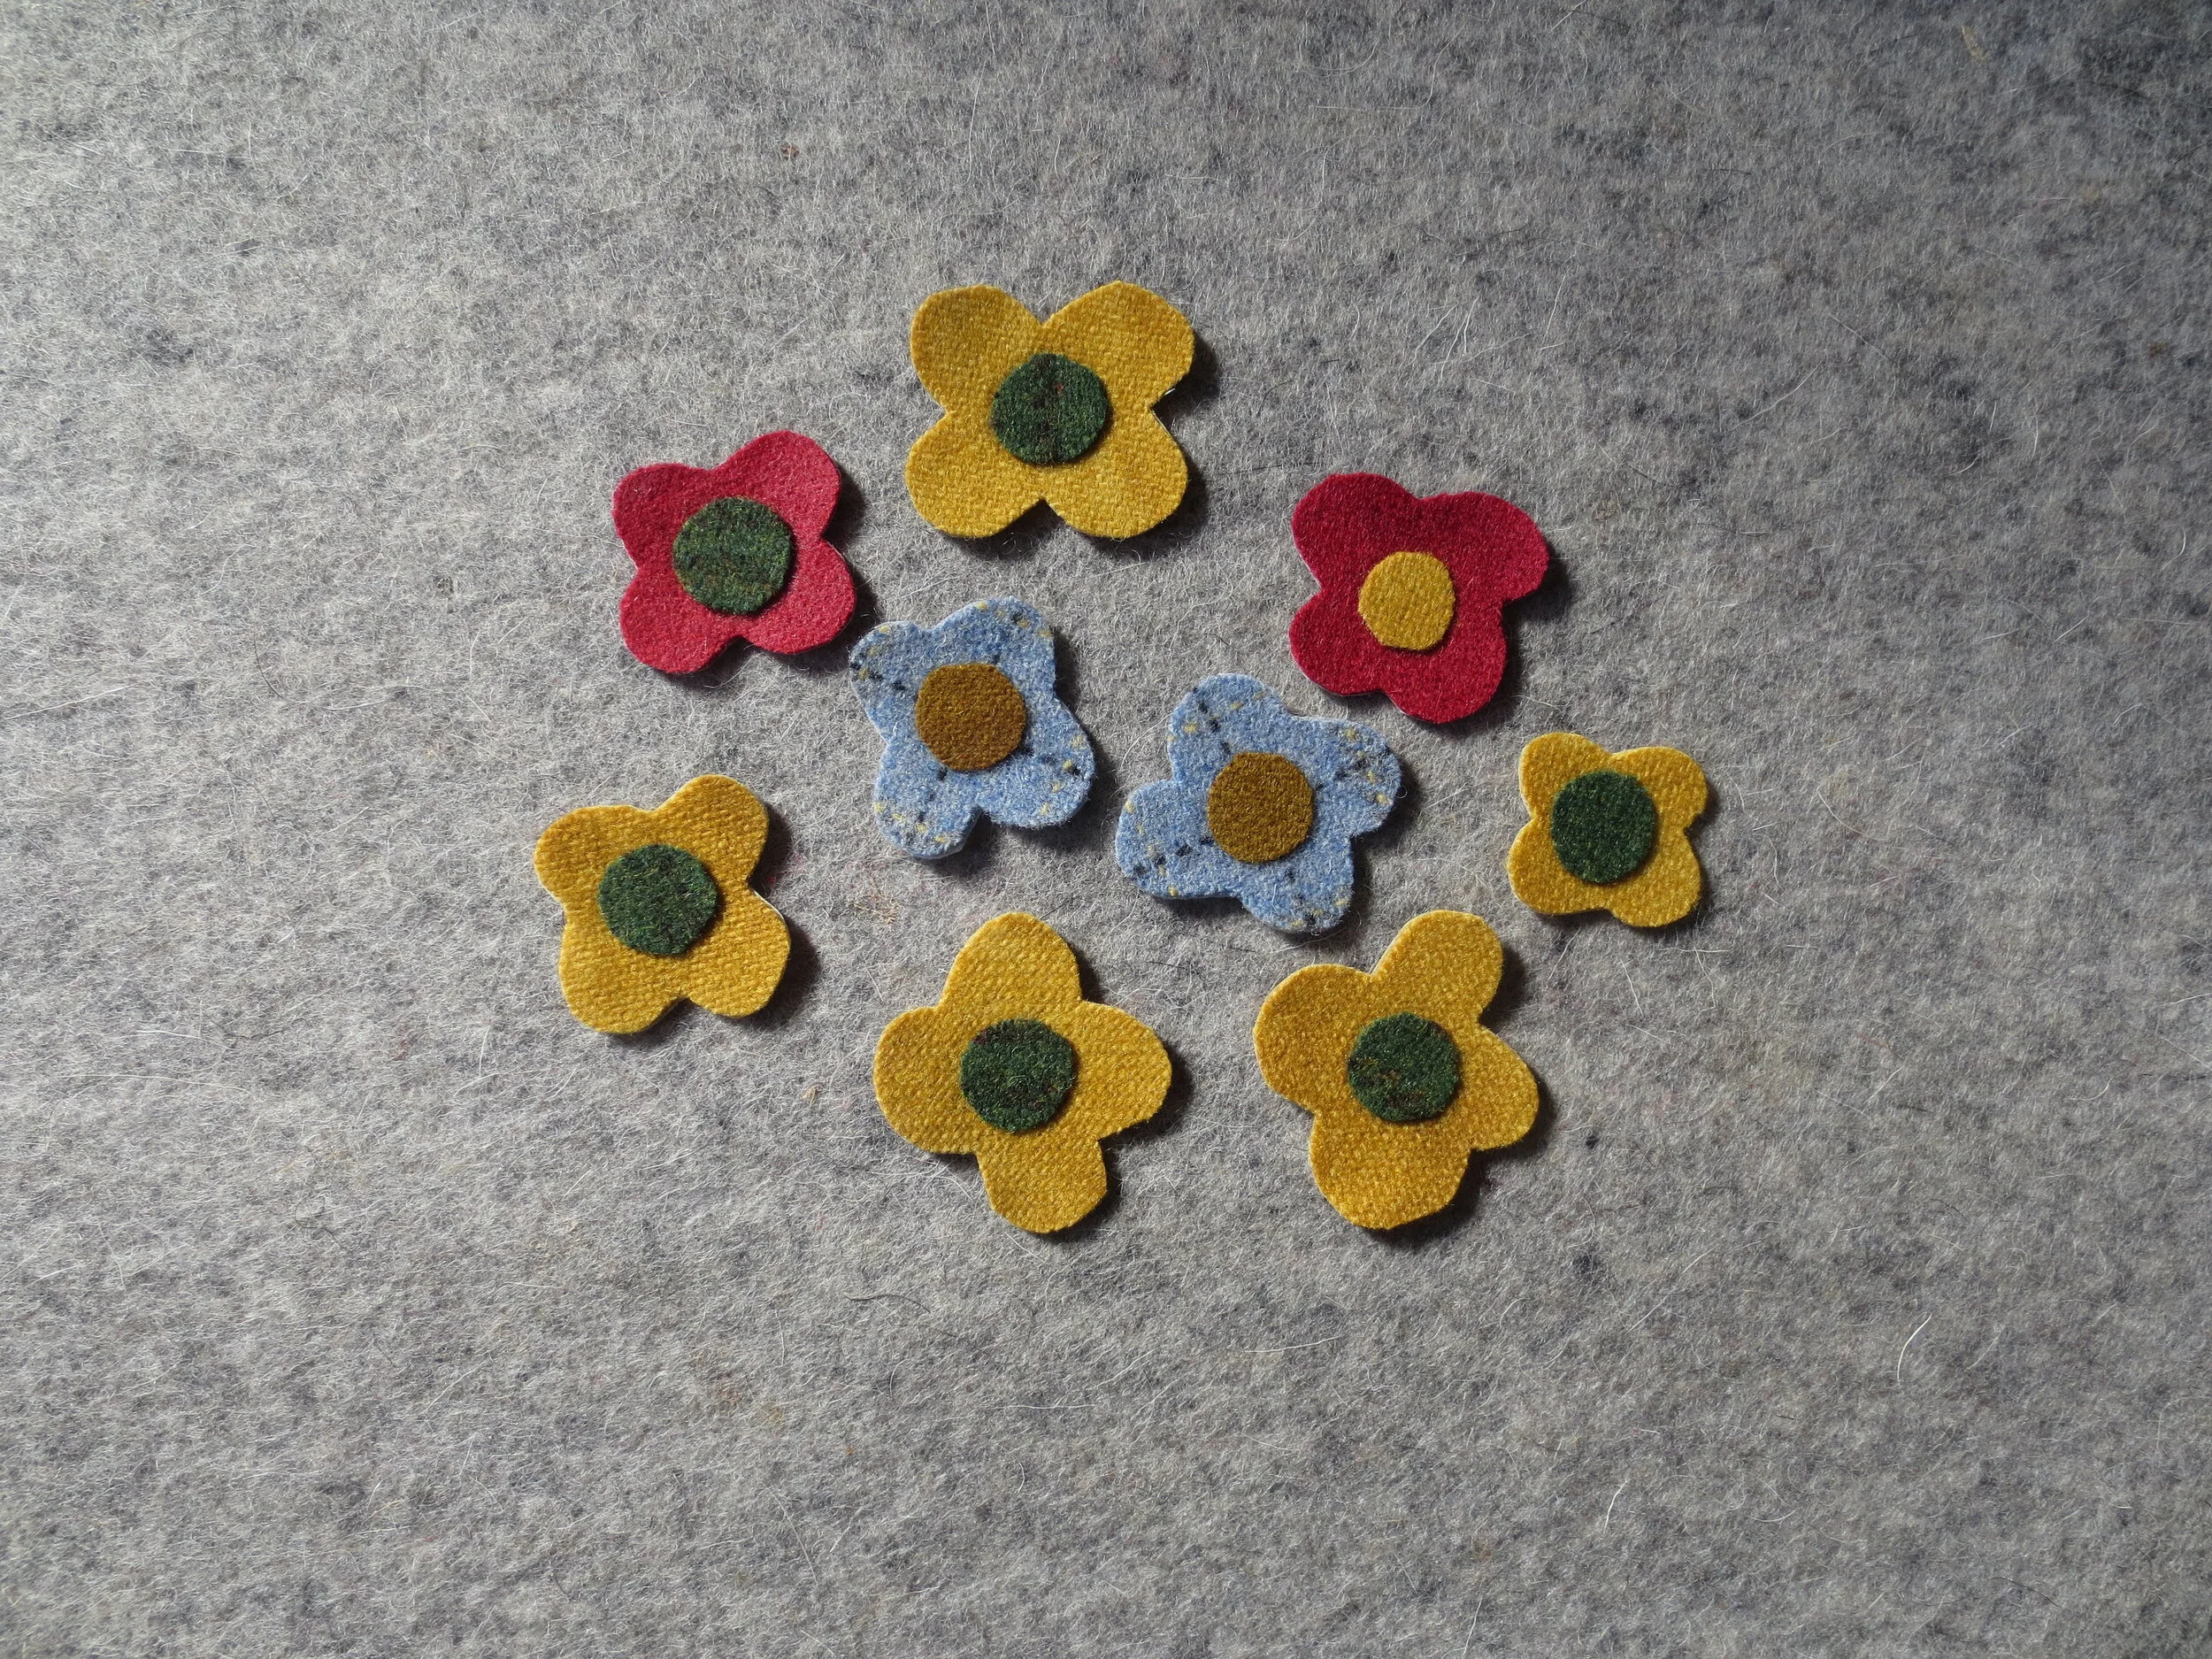
Small flowers 1, 3,5,8,9 - 4” square yellow
Small flowers 2 & 6 - 2 1/2” square red
Small flowers 4 & 7 - light blue plaid
Small flower centers 1 - 3, 5, 8, 9 - 2 1/2” dark green plaid
Small flower center 6 - 1” square yellow
Flower buds - 2” x 3 1/2” red/blue tweed
Leaves 1L, 4L, 8L, 9L - 2” x 3” dark green
Leaves 2L, 3L, 5L -7L - 3” medium green plaid
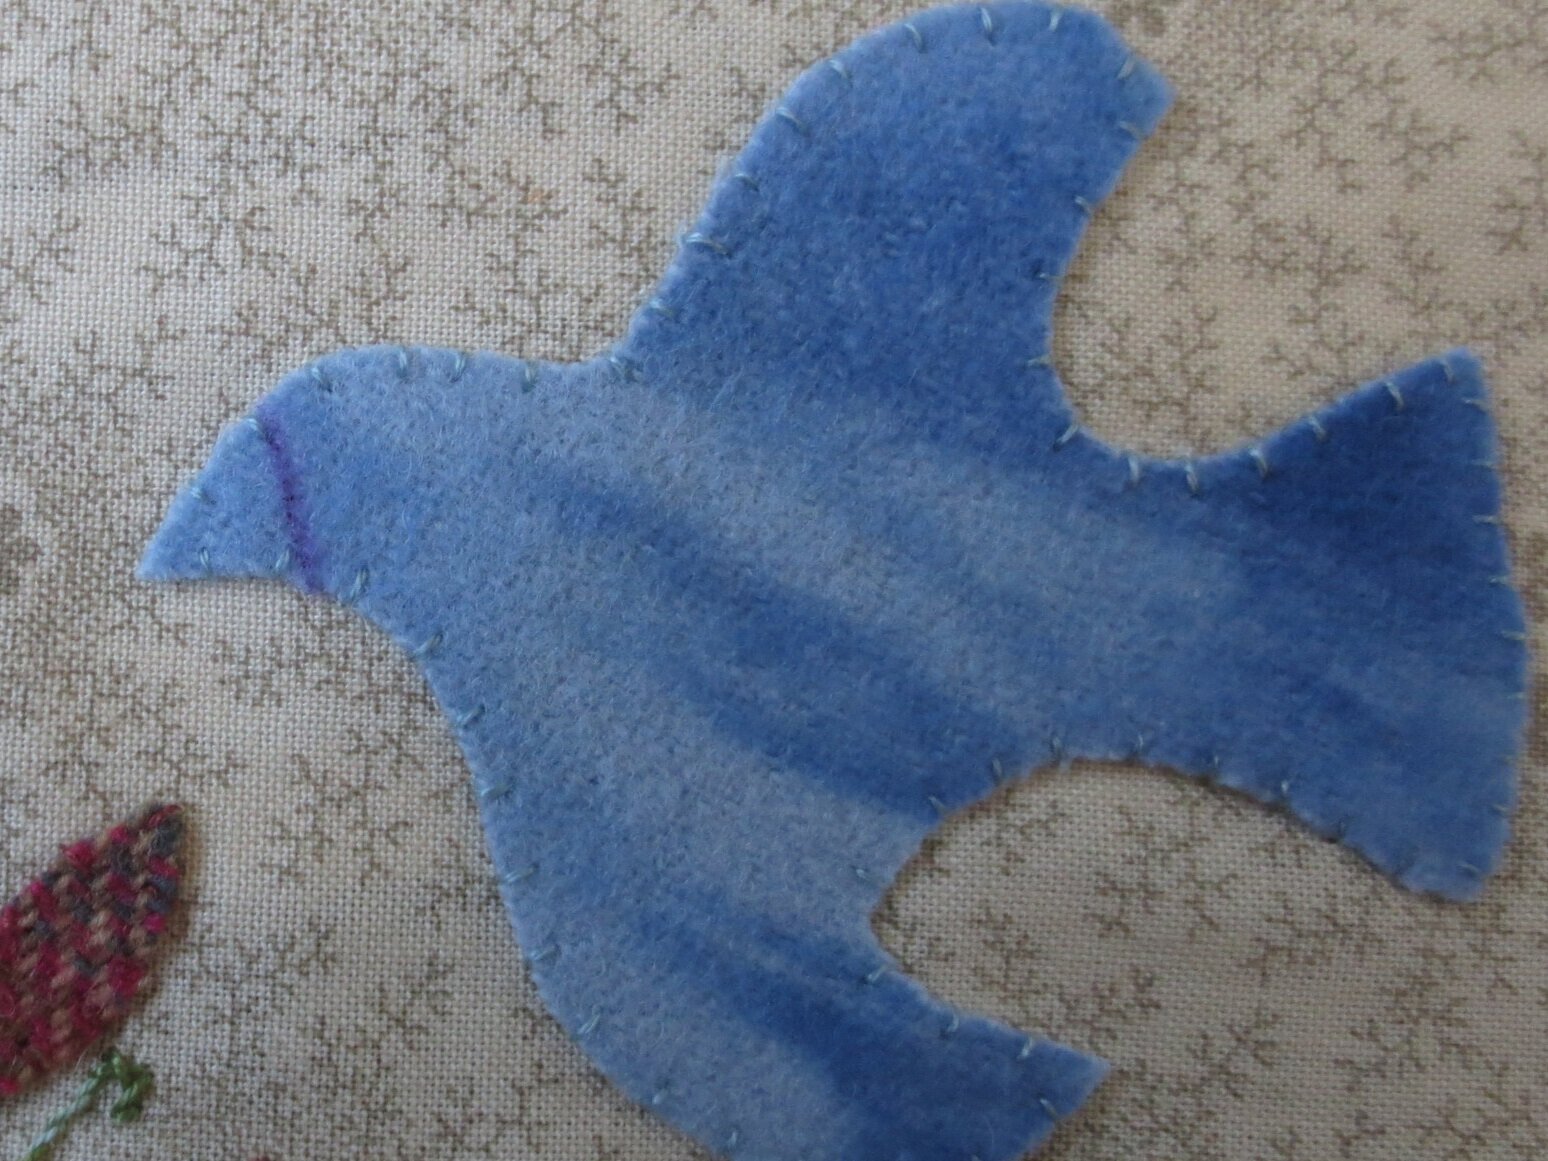
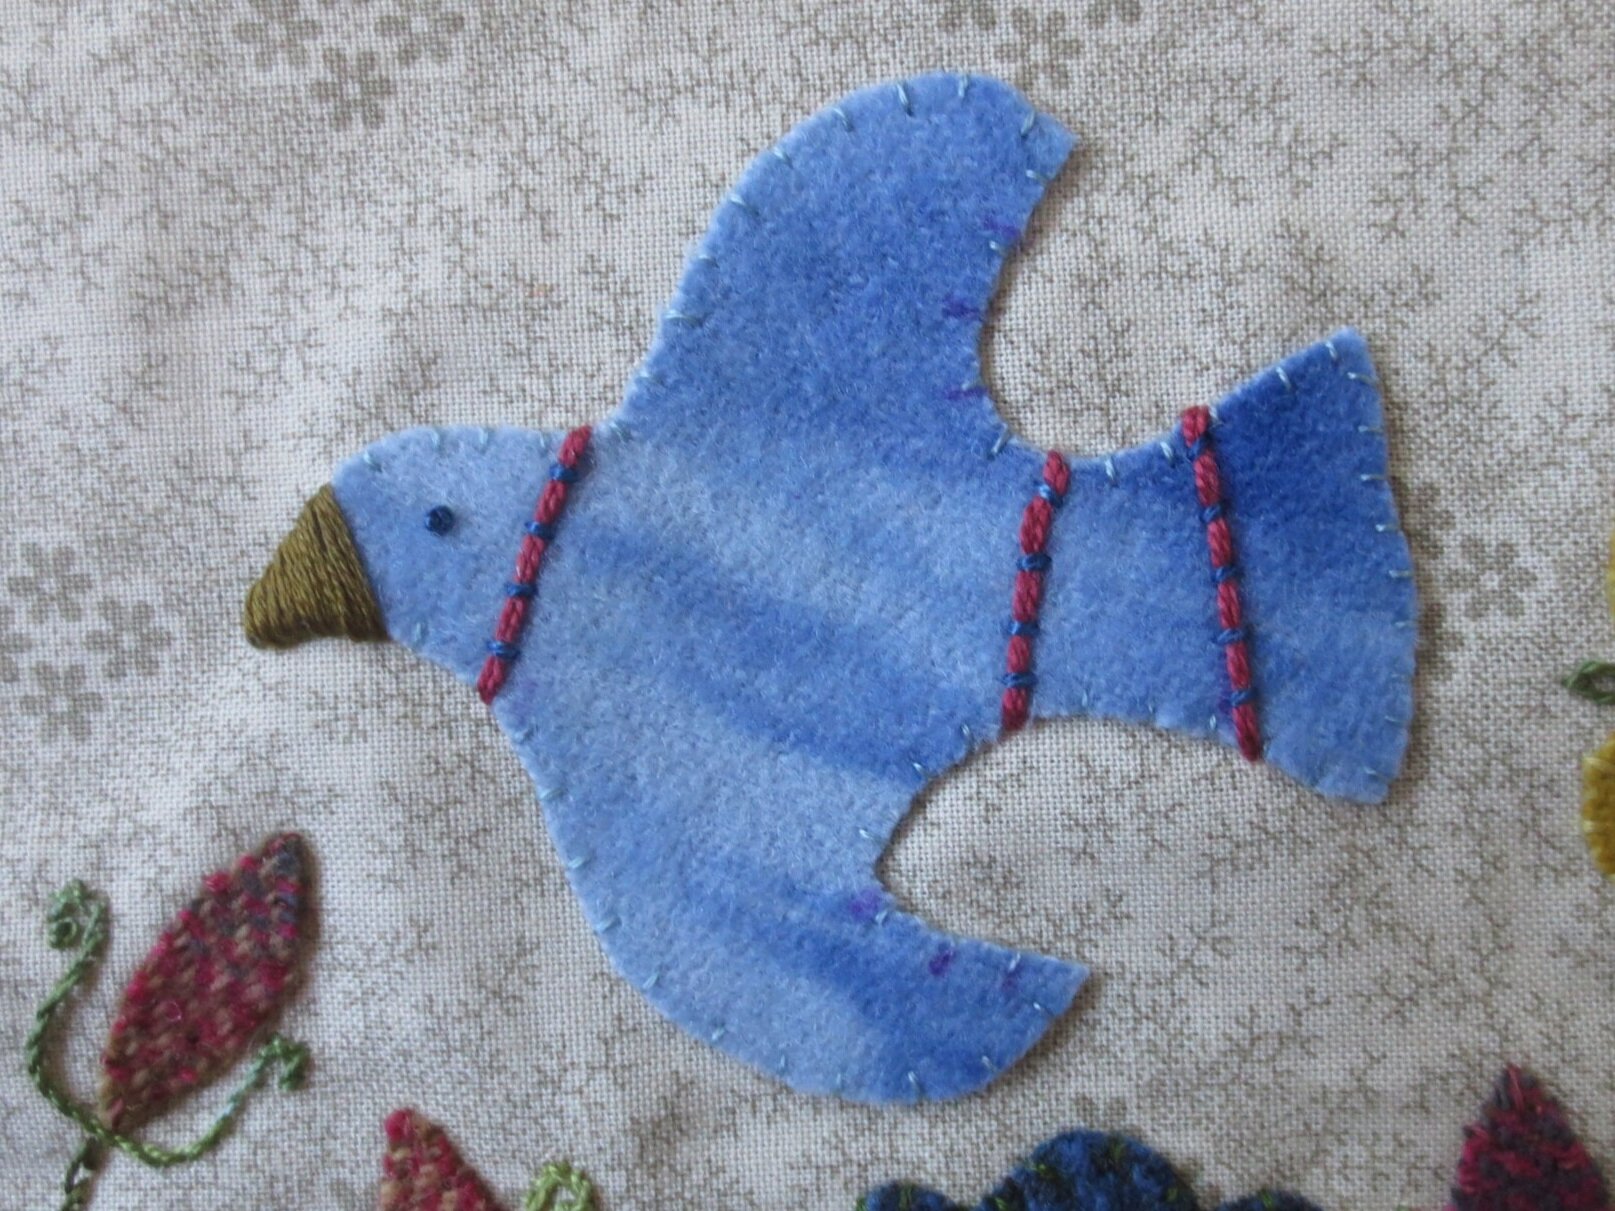
Bird - 3” x 3 1/2” light blue
Gold Rick Rack (baby size 1/4”) - 12” length
Thread - Suggested colors
Embroidery floss or perle cotton, size 12 in colors that match wool colors - Used to whip stitch all wool pieces in place
Embroidery floss or perle cotton, size 12 - variegated pale green for veins of leaves
Embroidery floss or perle cotton, size 12 - variegated brown/green for flower bud stems and leaves
Embroidery floss or perle cotton, size 8 - variegated green for small flower stems, leaves and lazy daisy embellishments
Embroidery floss or perle cotton, size 8 - red for bird’s neck and tail embellishments
Embroidery floss or perle cotton, size 8 - dark blue for bird’s eye, neck, and tail embellishments
Miscellaneous
Feather weight fusible web like Heat ‘n’ Bond Featherlite or Vilene Bondaweb
Steam Iron
Light box
Chenille needles, sizes 22 & 24
Fade away, wash away fabric markers, or chalk pencils for light and dark fabrics
Elmer’s Washable School Glue stick - You will use this to glue the layout sheets together, and to adhere the rick rack to the front of the vase.
HELPFUL EMBROIDERY LINKS
Needle ‘n’ Thread - This is an excellent source of embroidery technique. It’s free, but donating as little as $12/year on her patreon page gets you free patterns and special offers.
Instructions
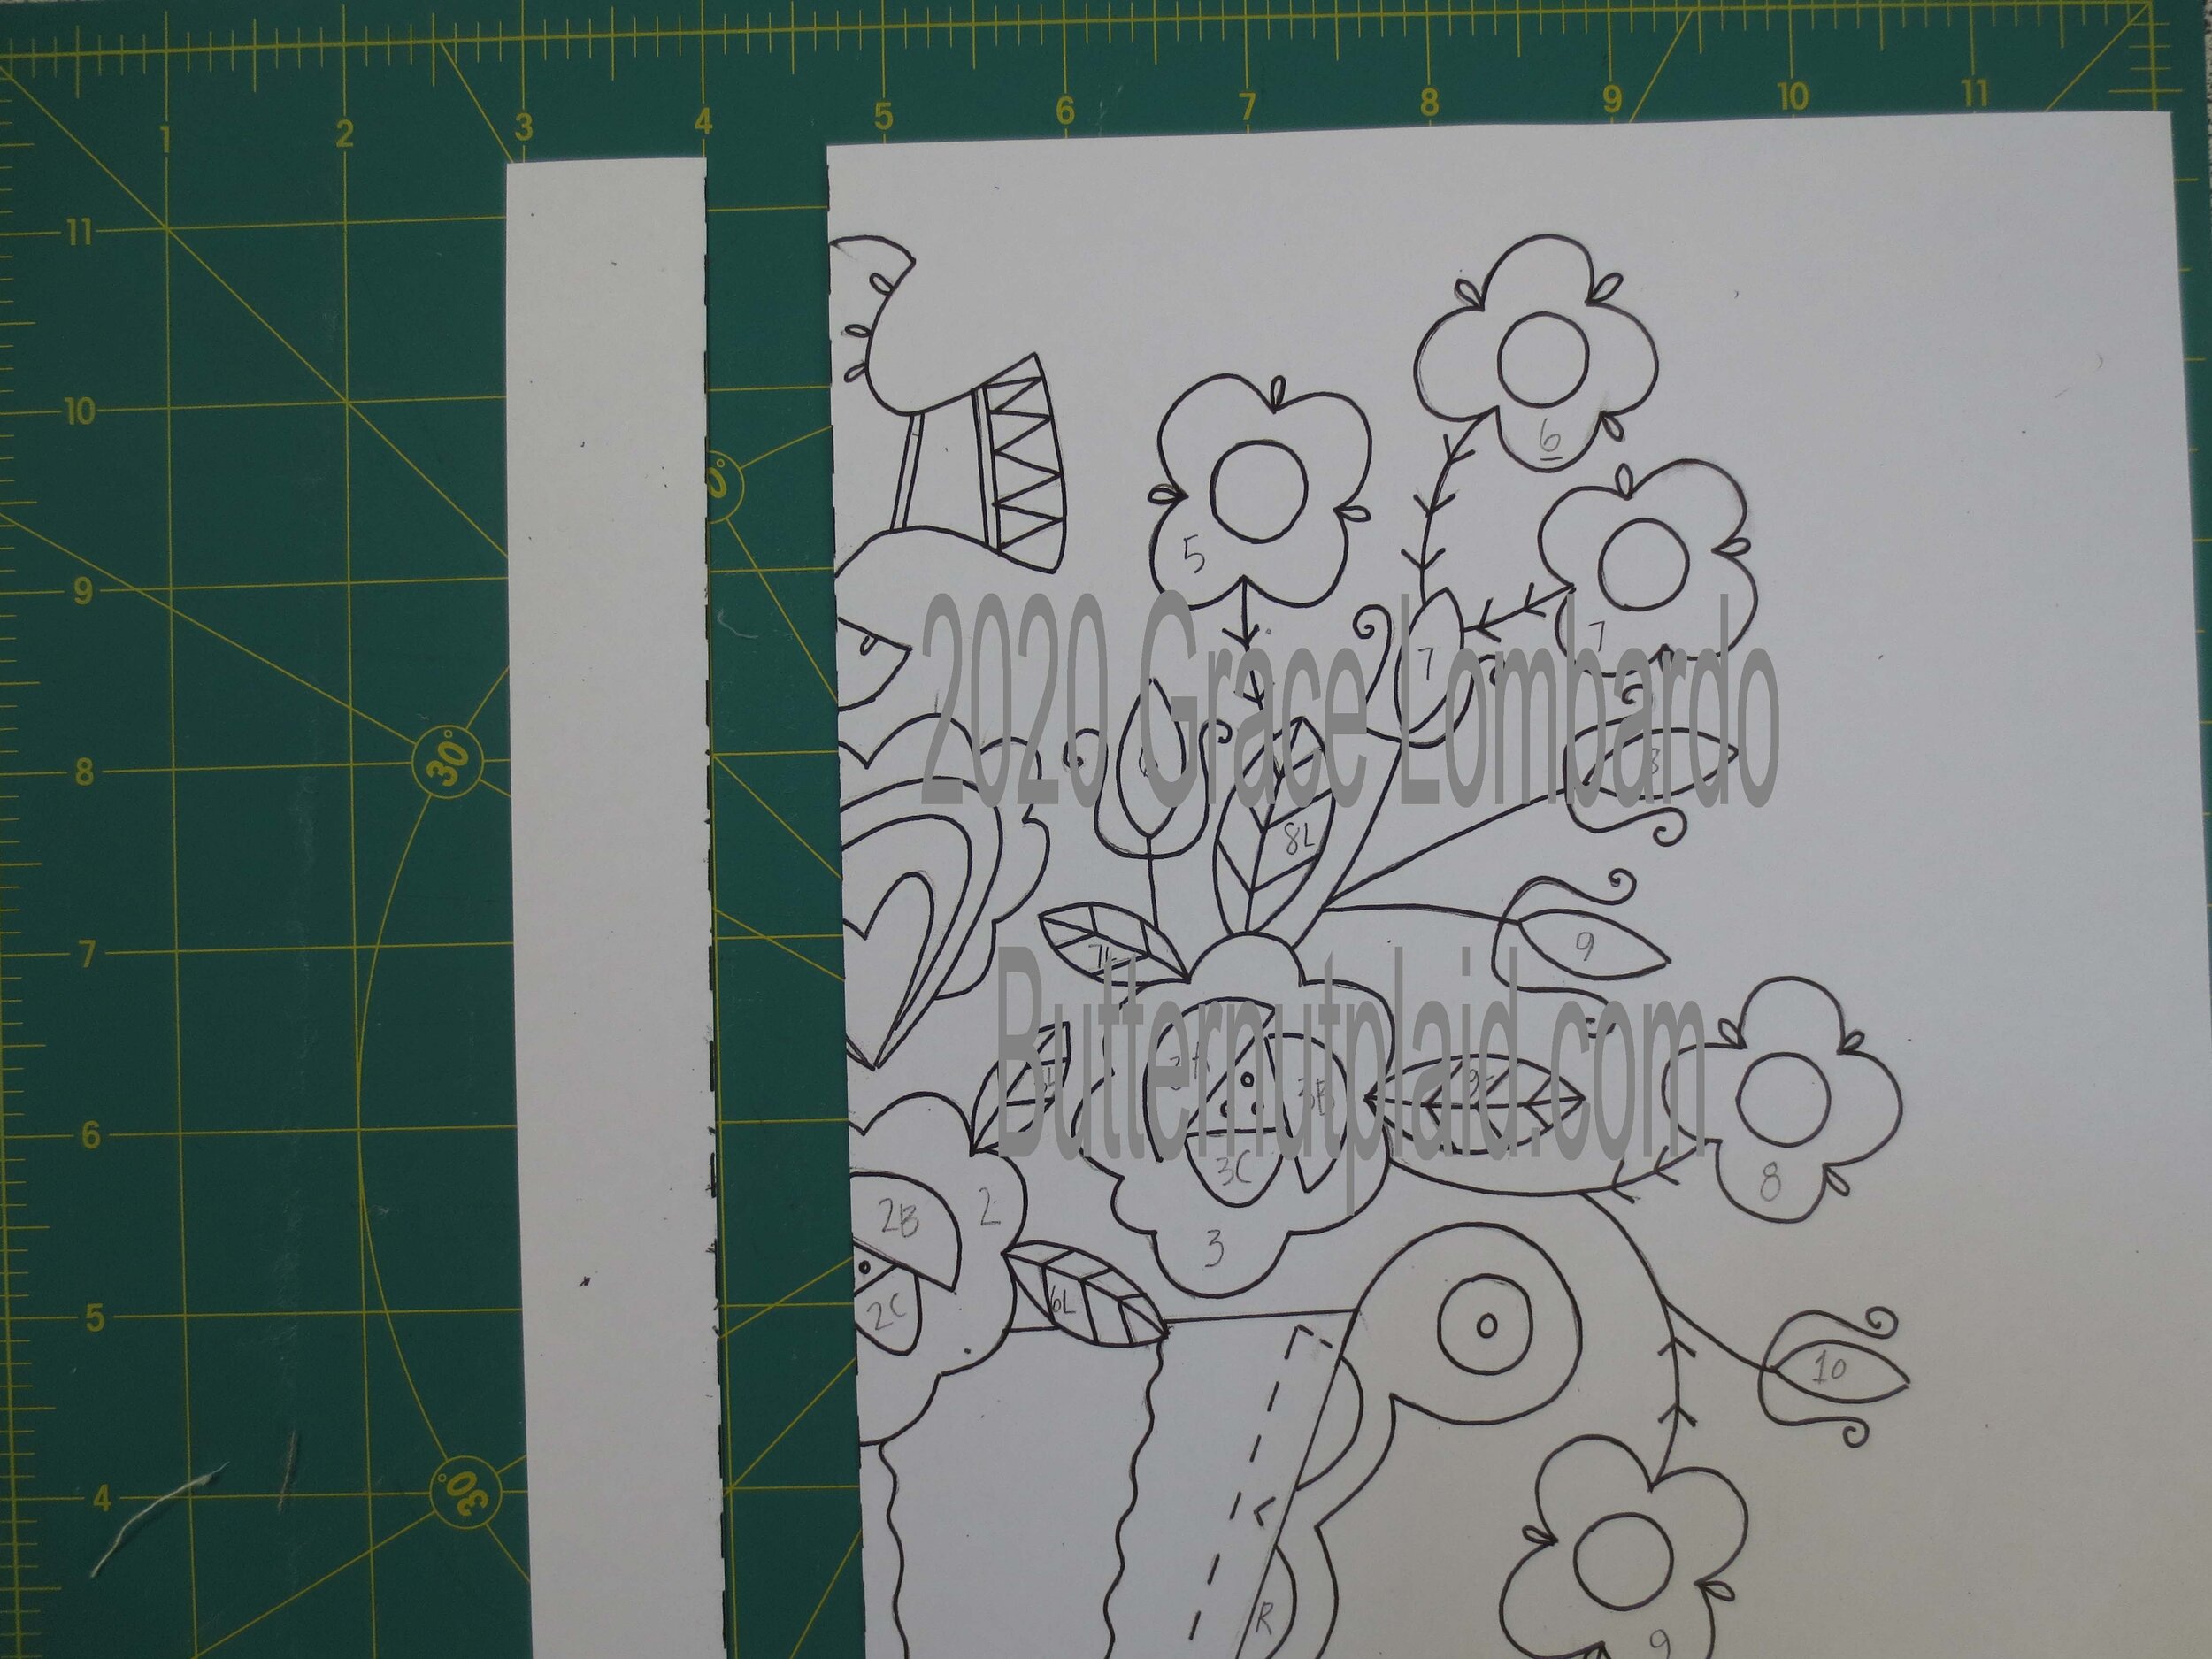
Trace all pattern pieces onto fusible web leaving a small border (1/8”) around each. Don’t forget to label all those tiny pieces.
Fuse patterns to designated wools, and then cut out along traced lines.
Cut rick rack into three 4” lengths.
4. Cut layout sheet #2 along dotted line. Line up the design as close as you can. It won’t be perfect, so don’t get stressed about it.
5. Glue layout sheets #1 & #2 together using a glue stick.

6. Fuse the small pieces of the three large flowers (let’s call them petals) to the large flowers. Don’t take the paper backing off the large flowers when you do this.
7. Fuse the small flower centers to the small flowers. Don’t take the paper backing off of the small flowers.
8. Fuse the heart to the heart flower front. Don’t take the paper backing off the back of the heart flower front.
9. Rub the glue stick over one side of each rick rack strip, and then position each strip onto the vase front using the layout as a placement guide. Press with an iron to set the glue. Don’t remove the paper backing from the vase front pattern.
Note: Skip this step if you are stitching your vase ribs instead of using rick rack.
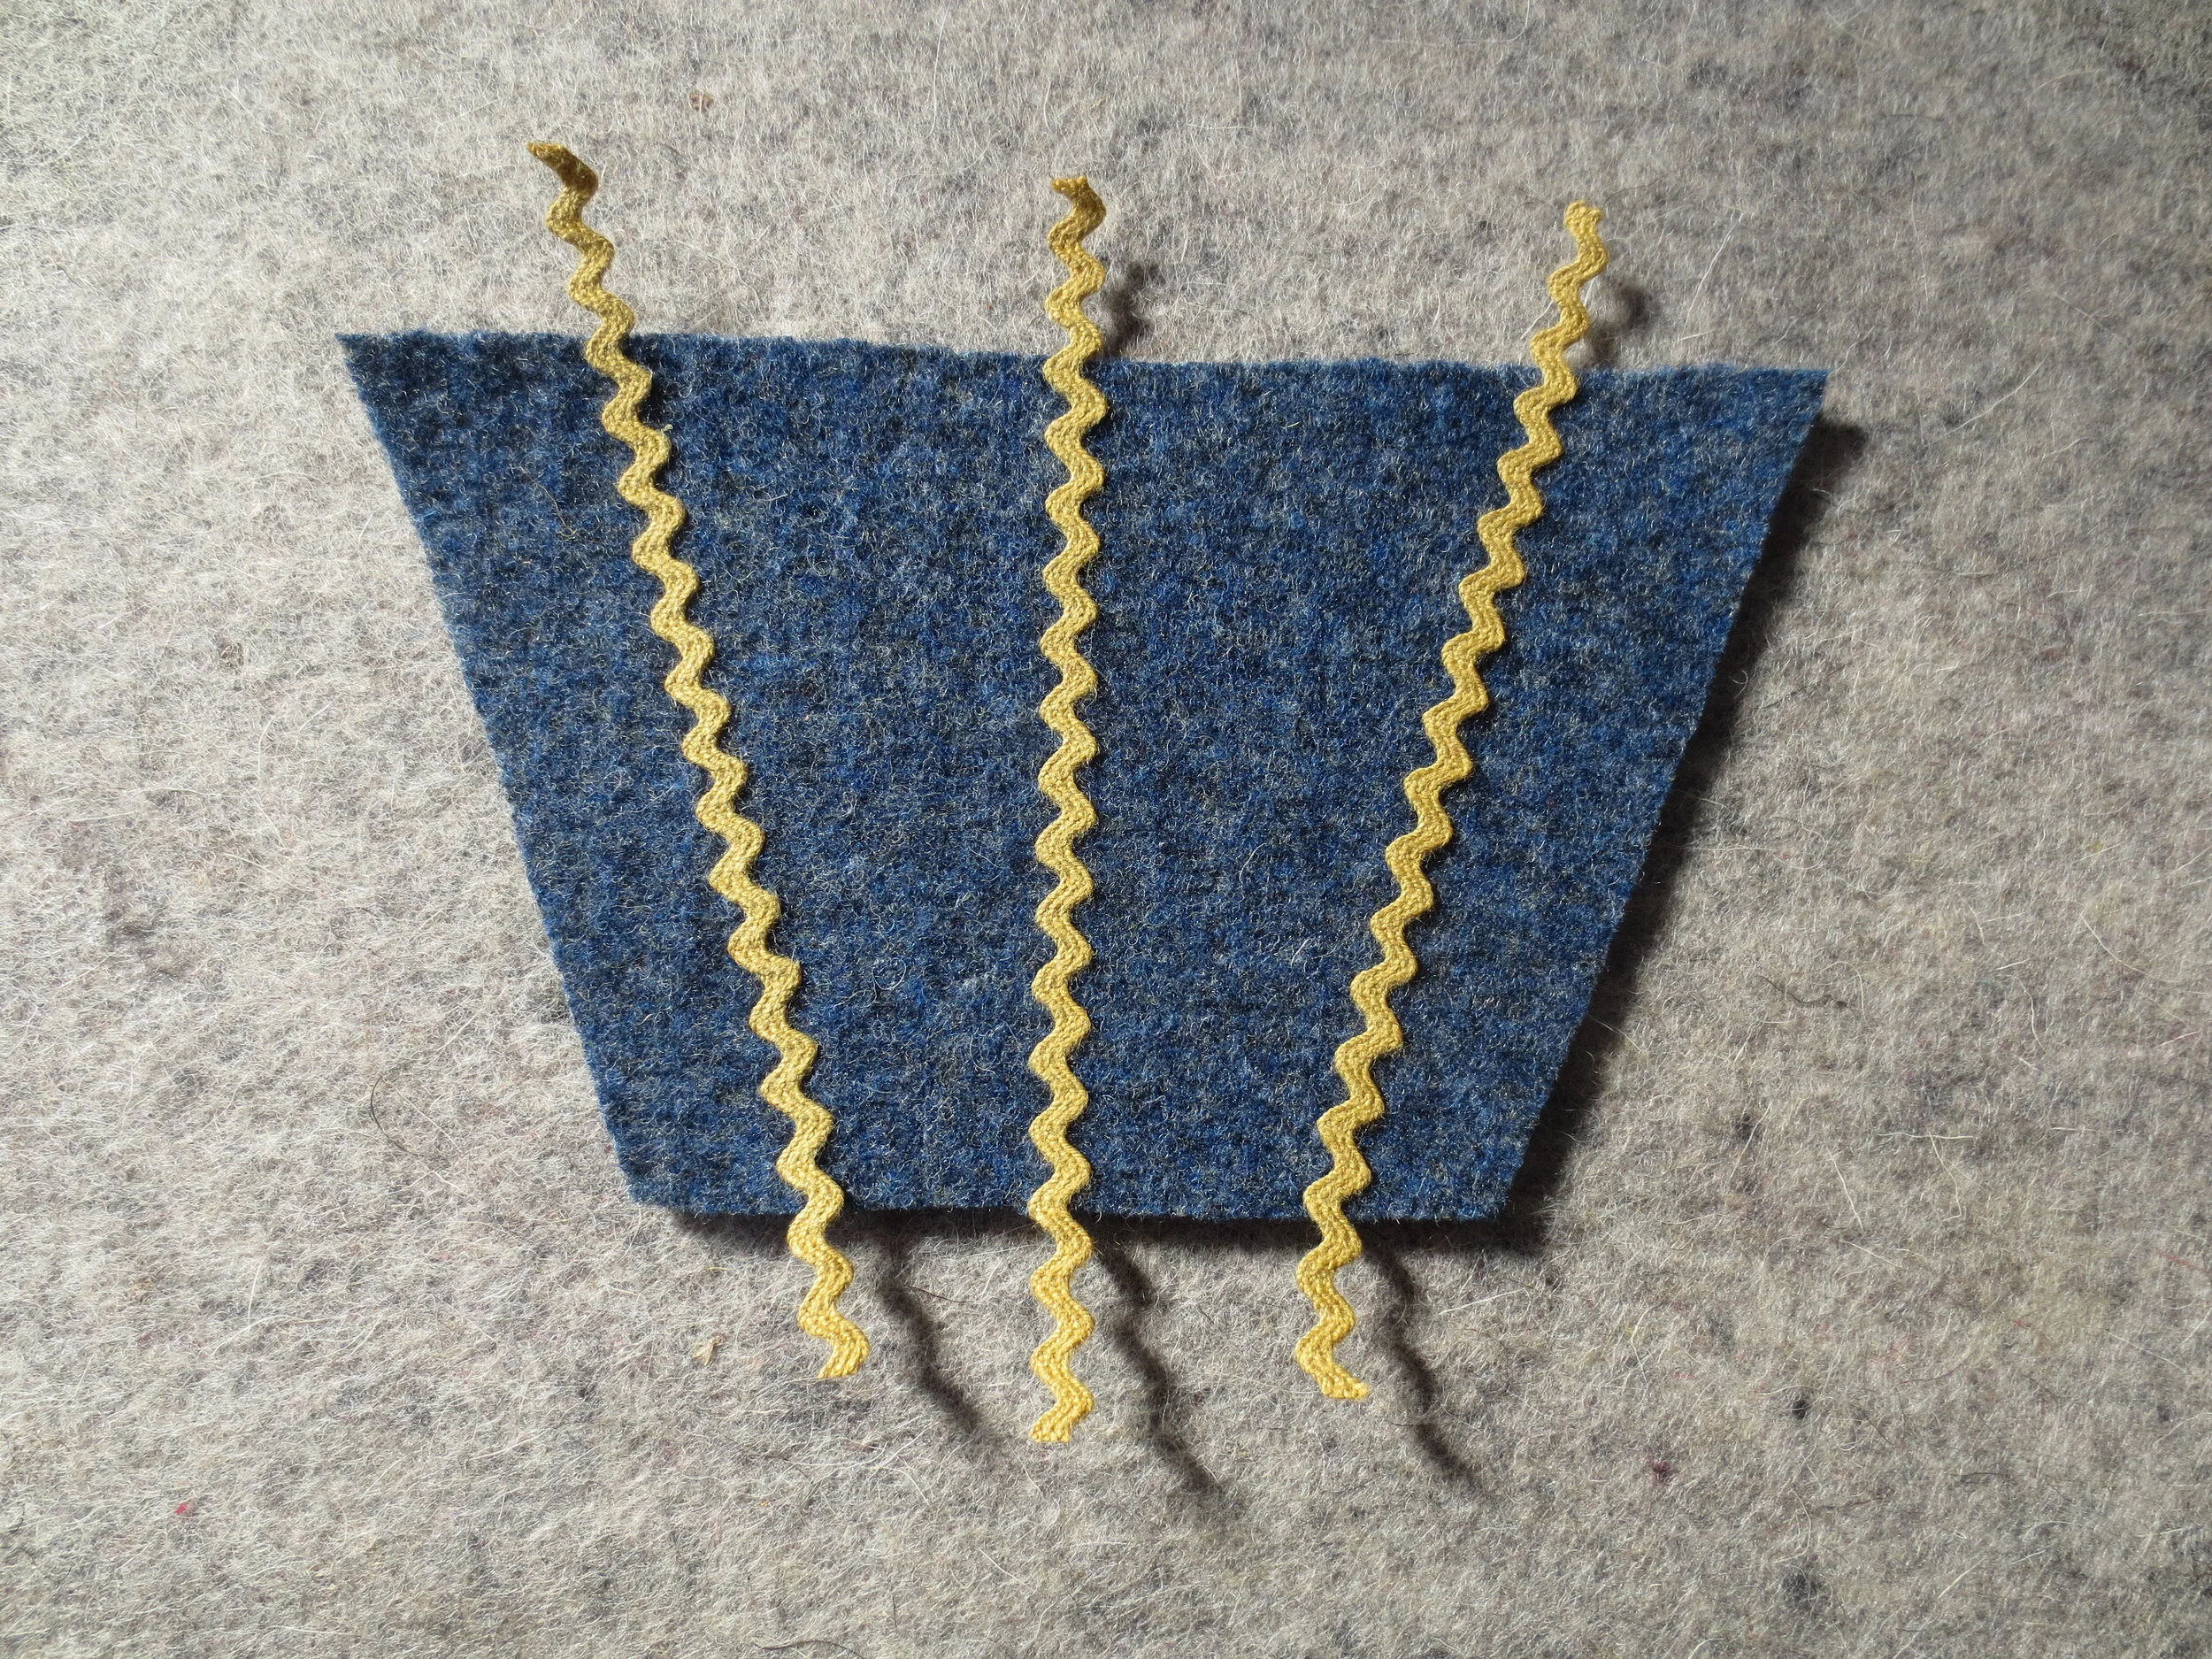
10. Now remove the paper backing from the vase front pattern, handles, and side pieces. Position the side pieces and vase handles on the vase back. Fold the ends of the rick rack under and fuse the vase front to the vase back.
11. Remove the paper backing from the vase back, and then position the vase onto the background fabric using the layout as your guide.
Note: This is where the lightbox comes in handy. Place the layout onto your light box, and then center your background fabric on the layout. The design will be visible through the fabric enabling accurate placement. Use a cookie sheet or stiff piece of cardboard to transfer the block to your ironing board or pad.
12. Fuse in place using steam. Steam is important in this step because of the many layers of wool. After pressing from the front, turn the fabric over and press the back also to insure adhesion.

13. Whip stitch all the pieces down, beginning with the smallest pieces first, using 2 strands of embroidery floss, or 1 strand of perle cotton, size 12.
Note: I used 1 strand of embroidery floss on the rick rack because I didn’t want it to show. This is a personal preference, not a requirement.

14. Draw a straight line near the bottom of the vase (see layout) using a chalk pencil or fabric marker.
Note: My wool had a horizontal line in it, so I didn’t need to draw one.
15. Use 3 strands of floss, or 1 strand of perle cotton, size 8 to stitch a herringbone stitch over the line. I used the same color as my rick rack.

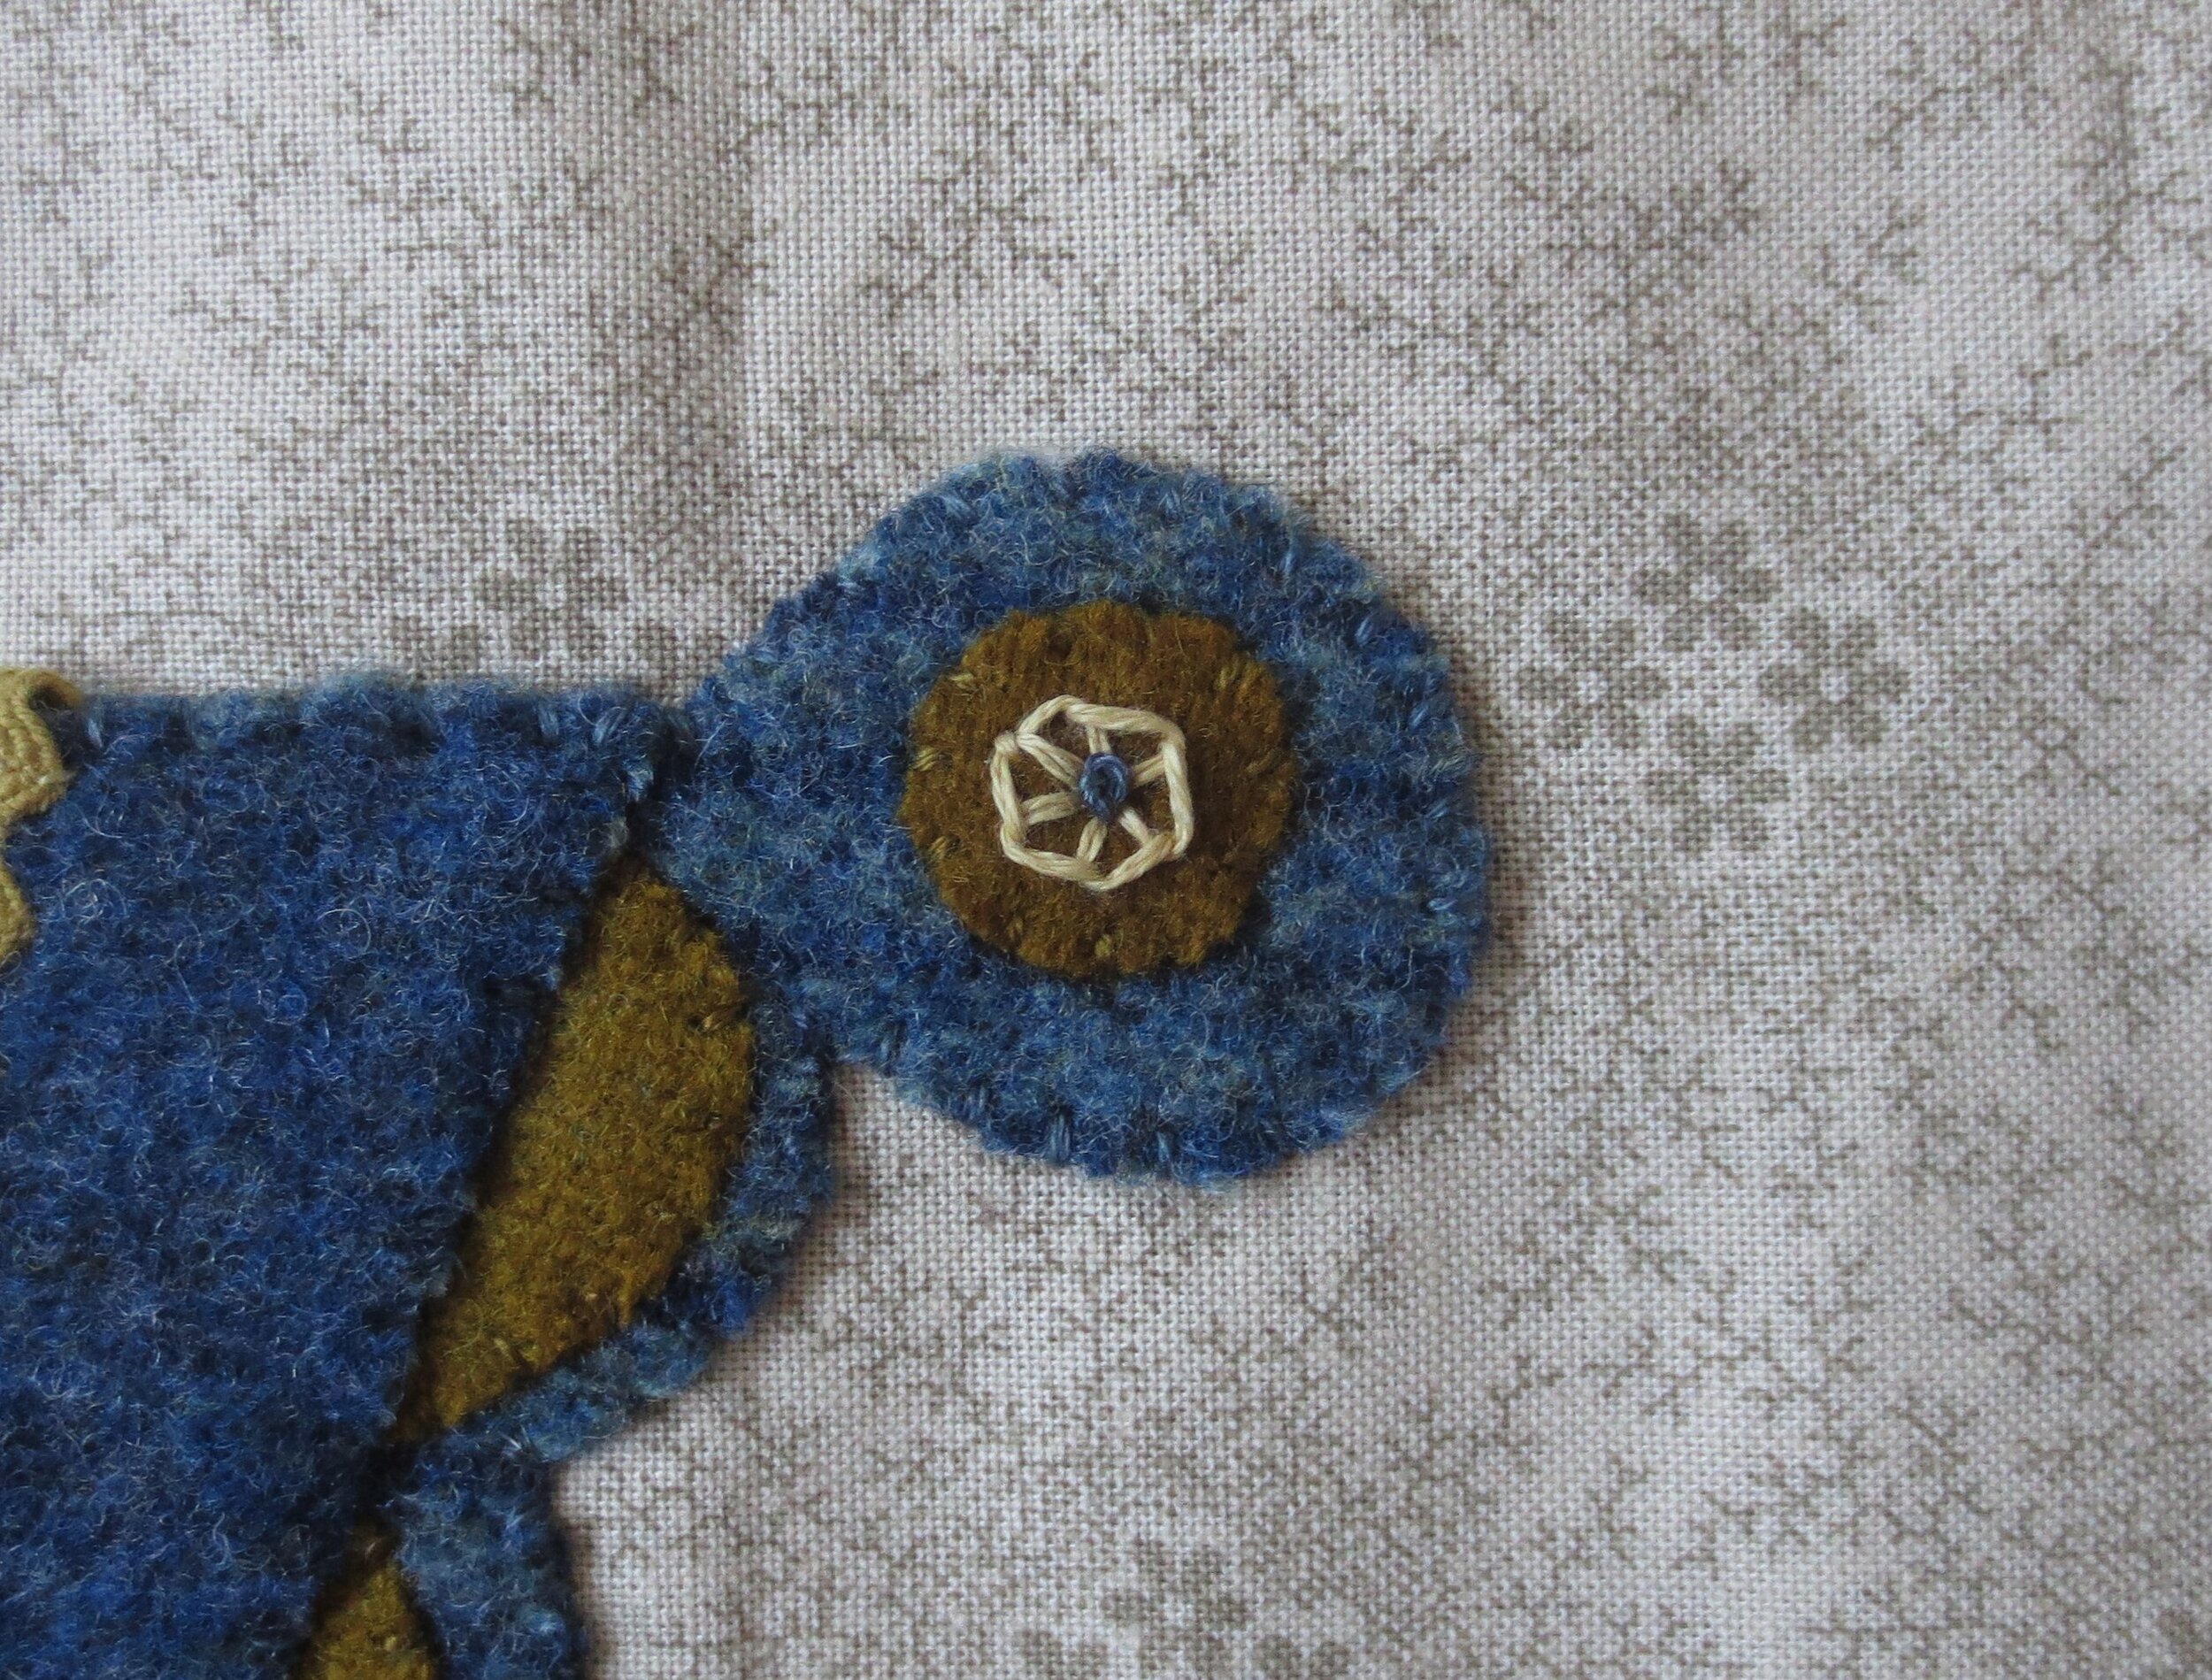
16. Draw a circle on each vase handle, and then use 2 strands of floss, or 1 strand of perle cotton, size 12 to make a buttonhole wheel stitch over the drawn circle. Mary Corbet of Needle ‘n’ Thread has an excellent tutorial on this stitch. I used the same thread that I used for the herringbone stitch.
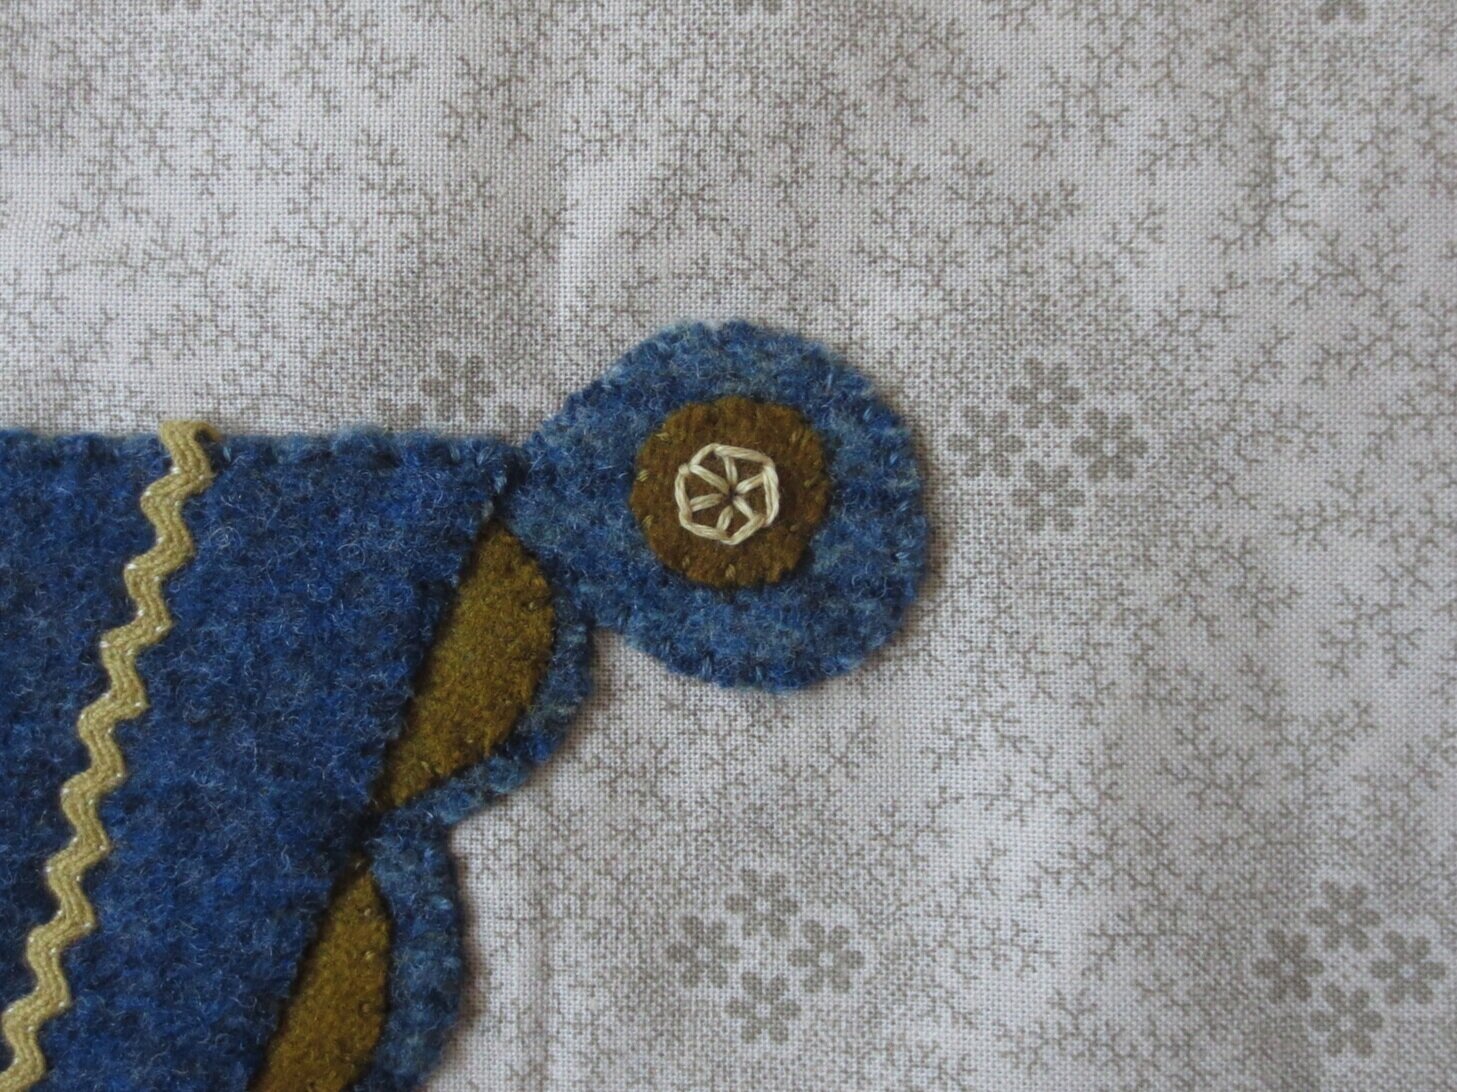
17. Use 2 strands of blue floss, or 1 strand of perle cotton, size 12 to make a colonial knot in the center of the wheel.
18. Let’s return our project to the light box layout to position the large flowers.
19. Layout the large flower leaves, and then fuse flowers and leaves in place using steam. Don’t forget to remove the paper backings before you fuse!
20. Whip stitch the smallest pieces first with 1 strand of floss. Whip stitch the larger pieces with 2 strands of floss, or 1 strand of perle cotton, size 12.
21. Stitch 3 colonial knots in the center of each large flower using 3 strands of floss, or 1 strand of perle cotton, size 8.
22. Draw the center vein of each leaf. Then use 2 strands of floss, or 1 strand of perle cotton, size 12 to stitch a closed fly stitch over the drawn line to make the center and side veins.
23. Back to the light box! Lay out the small flowers and heart flower back, and then fuse in place using steam.

24. Now place the heart/flower top on the heart flower back. Don’t forget to remove the paper backing! Fuse in place using steam.

25. Whip stitch the small flowers and heart flower using 2 strands of floss, or 1 strand of perle cotton, size 12.
26. Draw a guide line for a back stitch on the heart flower. Use 3 strands of floss, or 1 strand of perle cotton, size 8 to back stitch over the line. I used the same thread that was used for the earlier herringbone stitch.

27. It’s back to the lightbox for us. Draw the flower bud stems, and layout the flower buds.
28. Fuse the flower buds in place. Don’t use steam because your fabric marker stems will disappear with the moisture. Iron from the front and the back to secure.
29. Whip stitch the flower buds in place with 1 strand of floss.
Note: I use 1 strand of embroidery floss for very small wool pieces.
30. Stem stitch the stems of the flower buds using 2 strands of floss, or 1 strand of perle cotton, size 12. I used a variegated brown/green perle.
31. Chain stitch the small flower stems using 3 strands of embroidery floss, or 1 strand of perle cotton, size 8. I used a variegated green perle.
32. Stitch the small flower stem leaves with the same thread. I brought my needle and thread up on one side of the stem, and then slid my needle under one of the links of the chain stitched stem, and ending the stitch on the other side. I continued down the stem as needed.
33. Stitch lazy daisy leaves on the stems of the flower buds using 2 strands of floss, or 1 strand of perle cotton, size 12.
34. Stitch Lazy daisy embellishments on each of the small flowers using 3 strands of floss, or 1 strand of perle cotton, size 8.

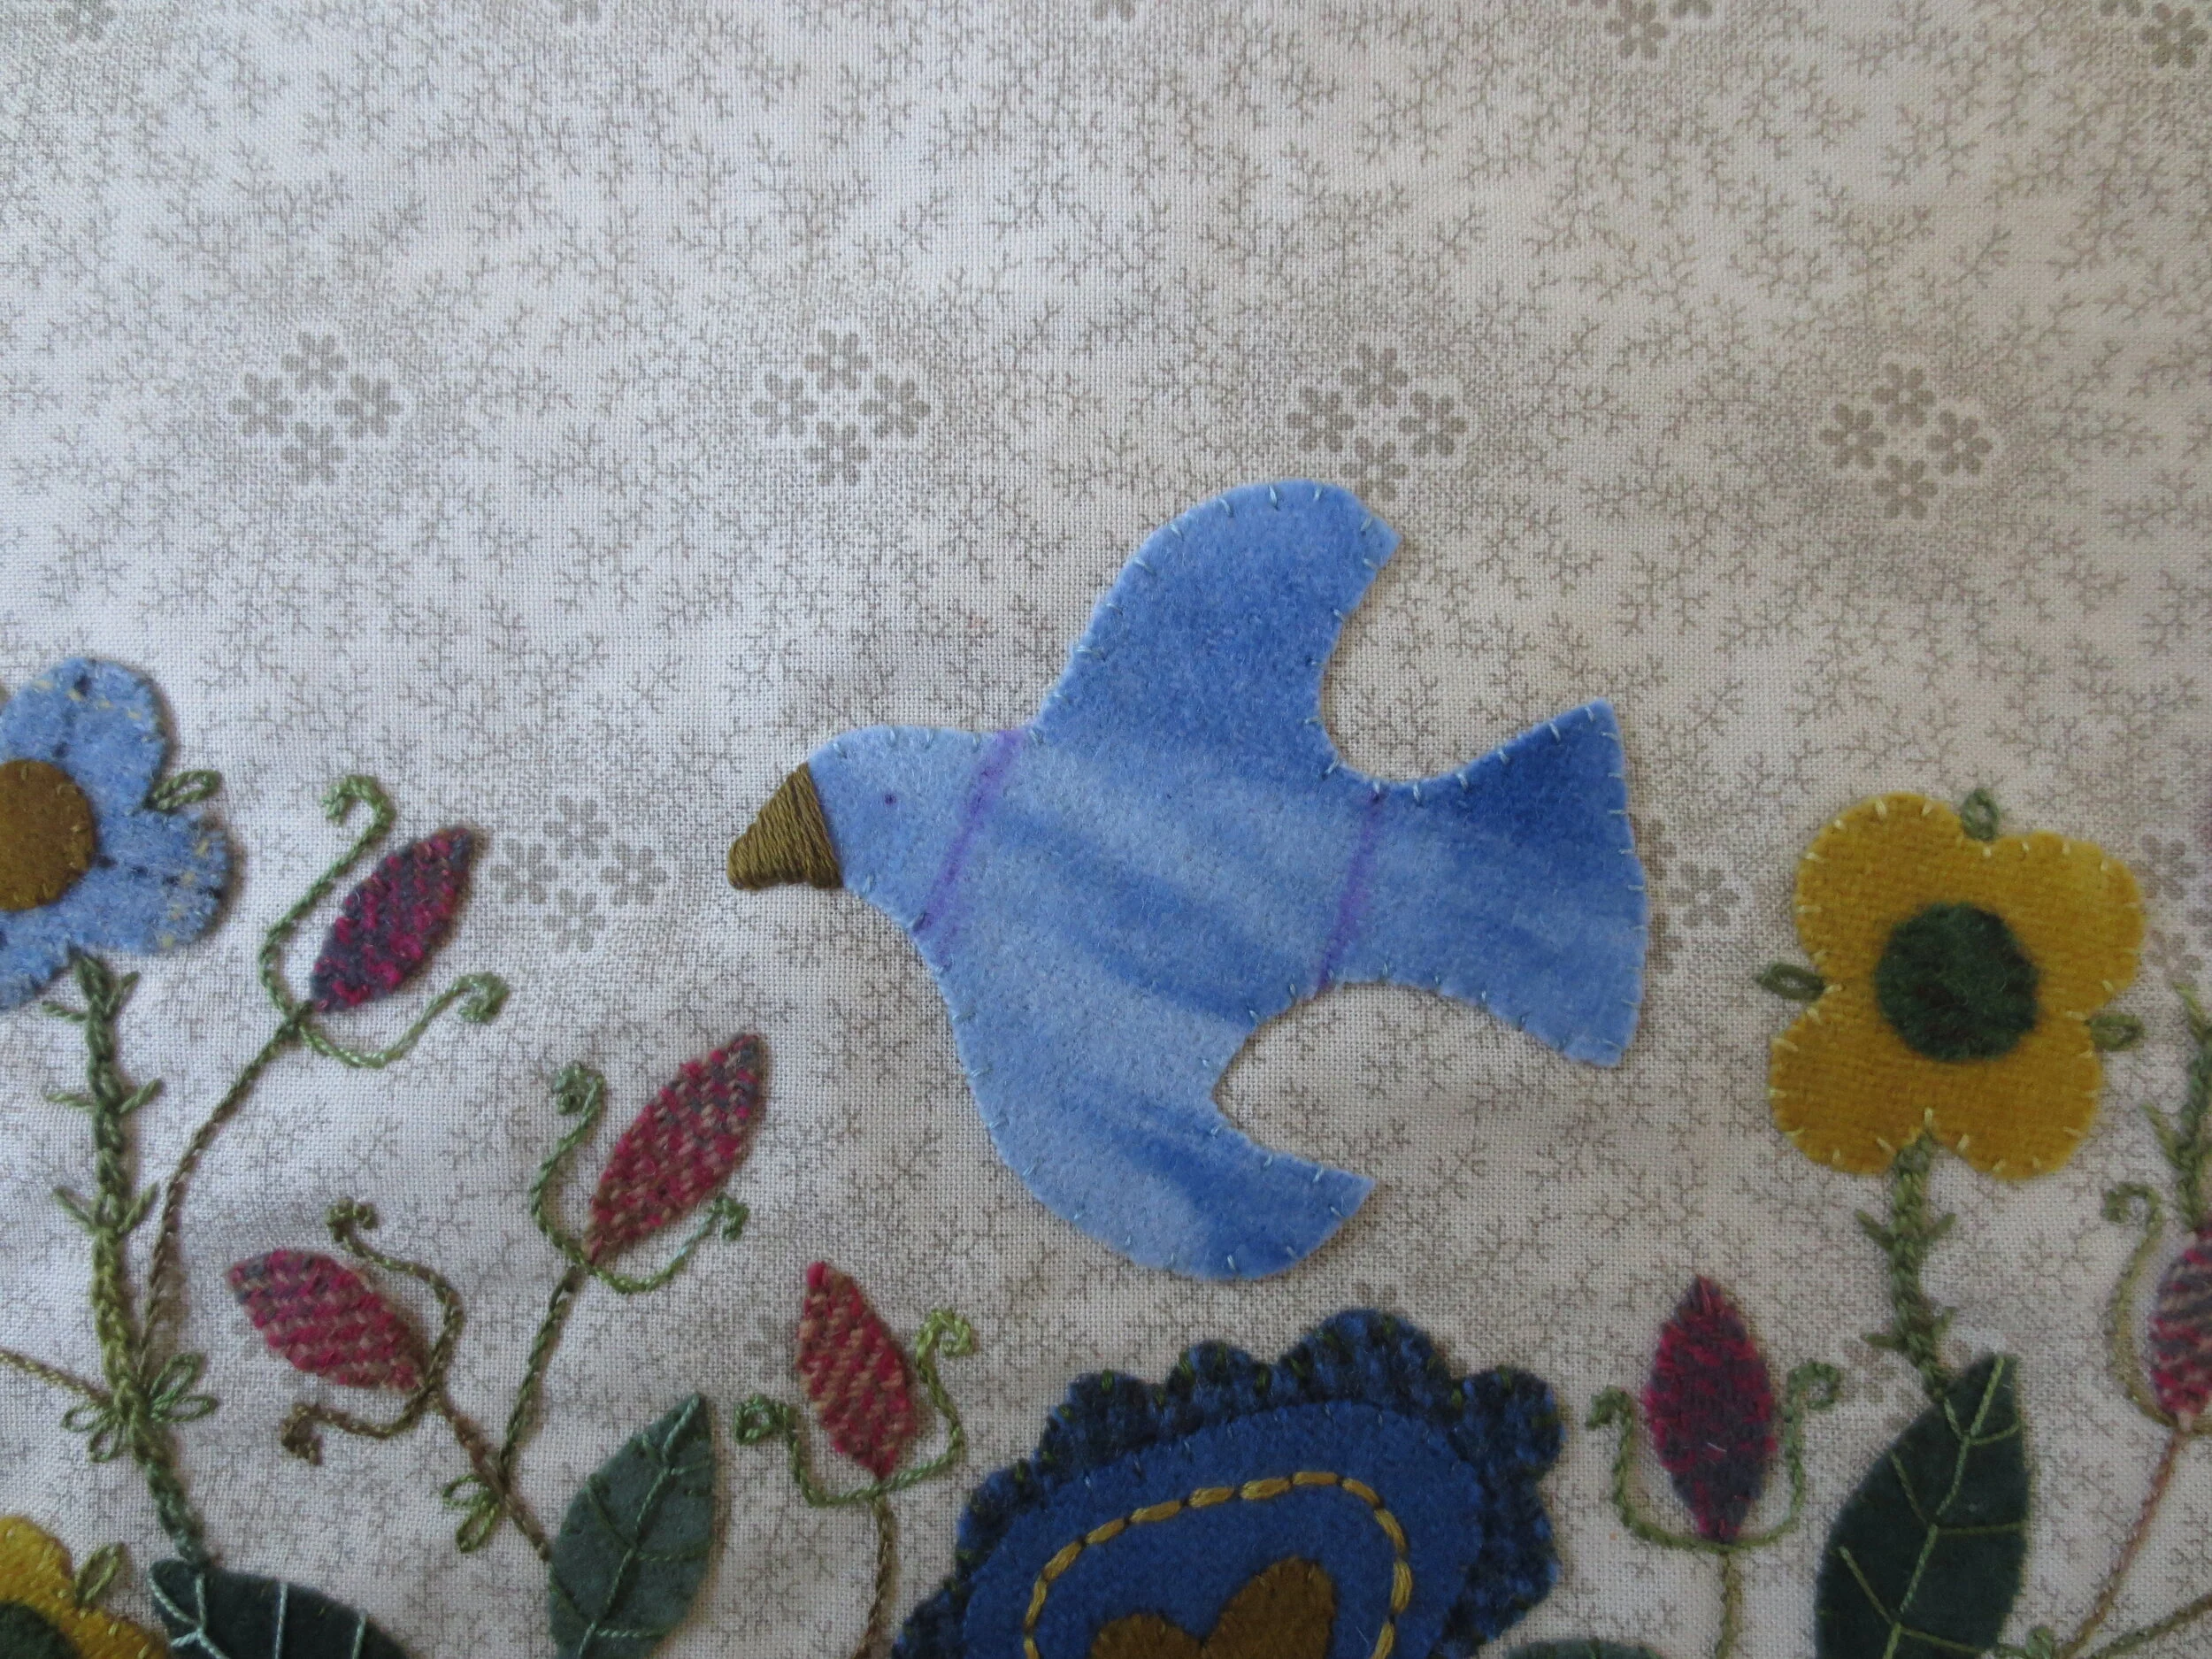
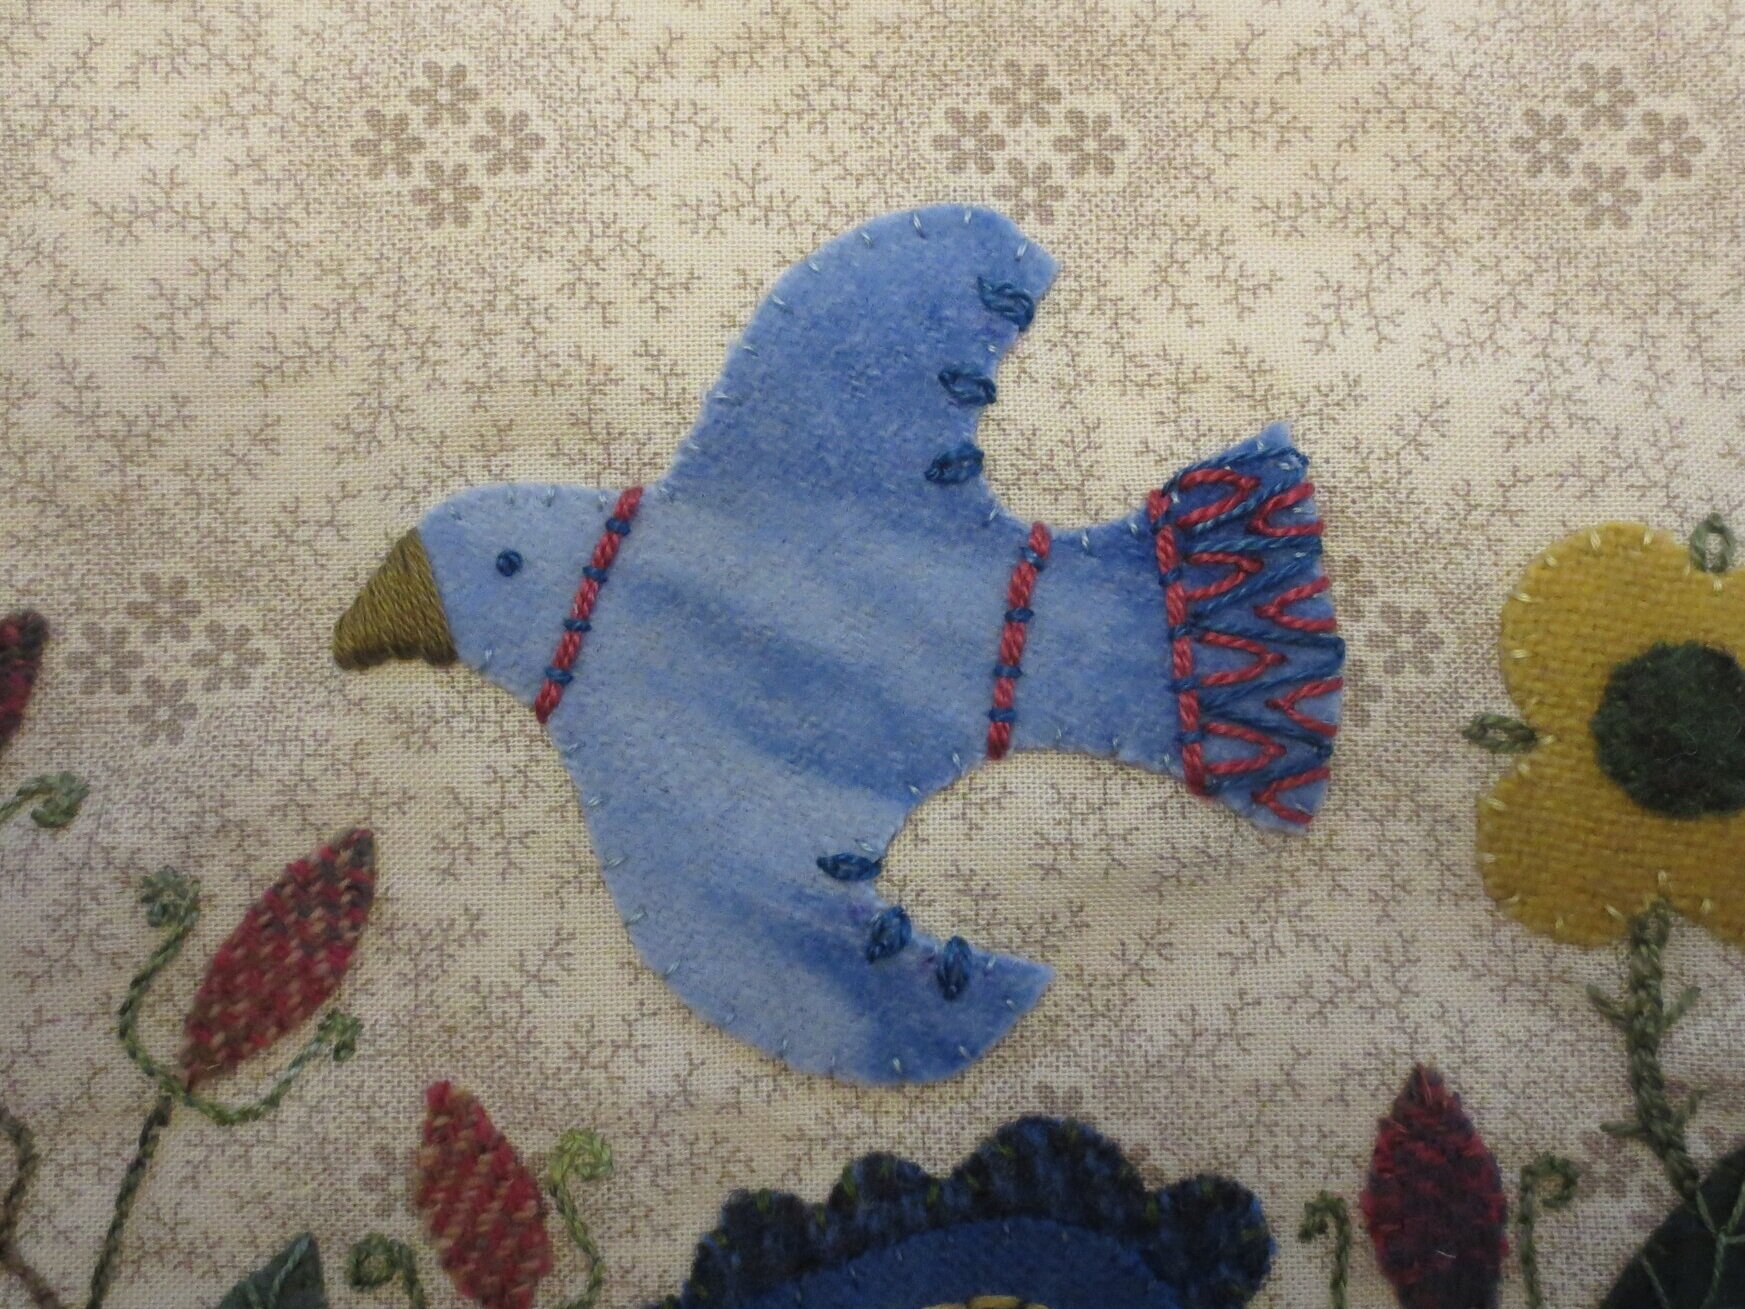
35. Position the bird on the background fabric, and then fuse in place using steam.

36. Whip stitch bird in place using 2 strands of floss, or 1 strand of perle cotton, size 12.
37. Draw the beak. Use 3 strands of floss, or 1 strand of perle cotton, size 8 to stem stitch the beak. I used an old gold color that matched the heart flower.
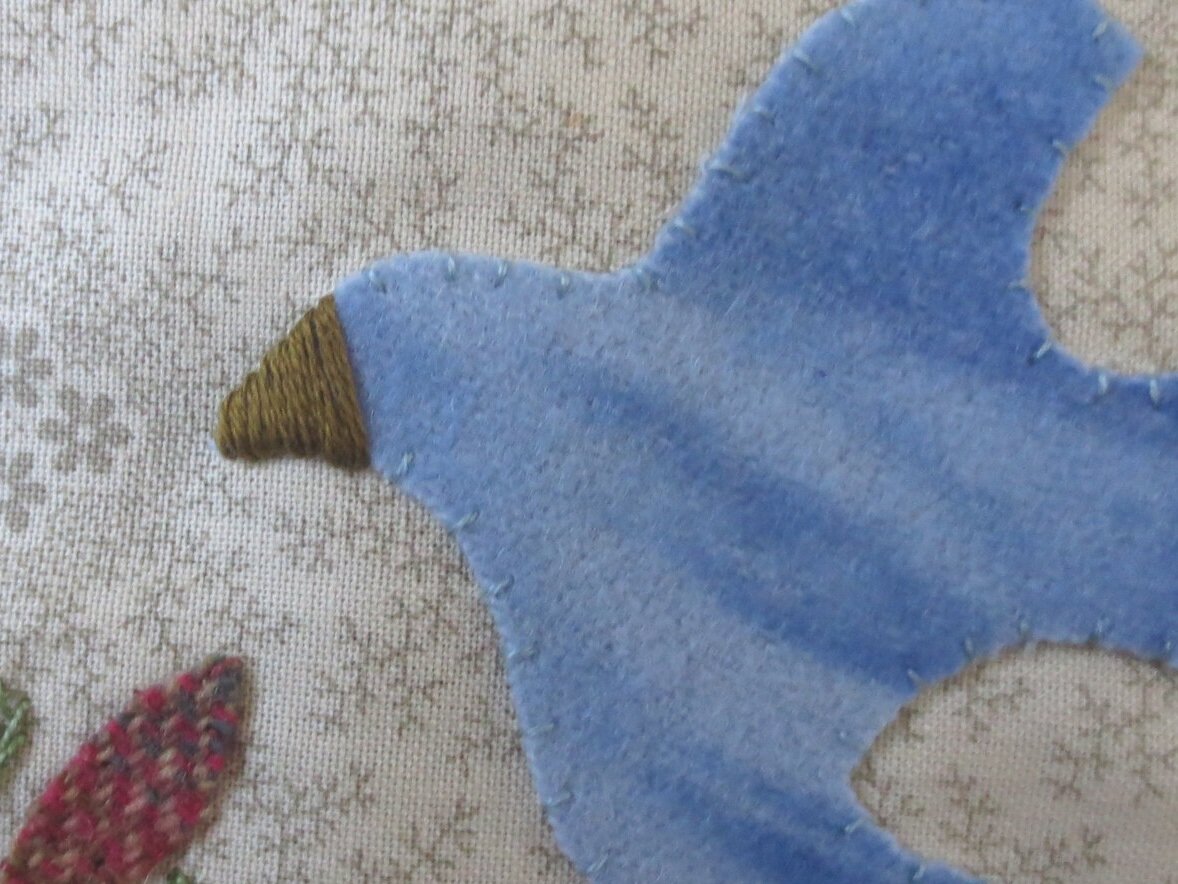
38. Draw the eye, and the neck and tail bands.
39. Use 2 strands of red perle cotton, size 8, or 6 strands of floss to straight stitch the neck and tail bands.
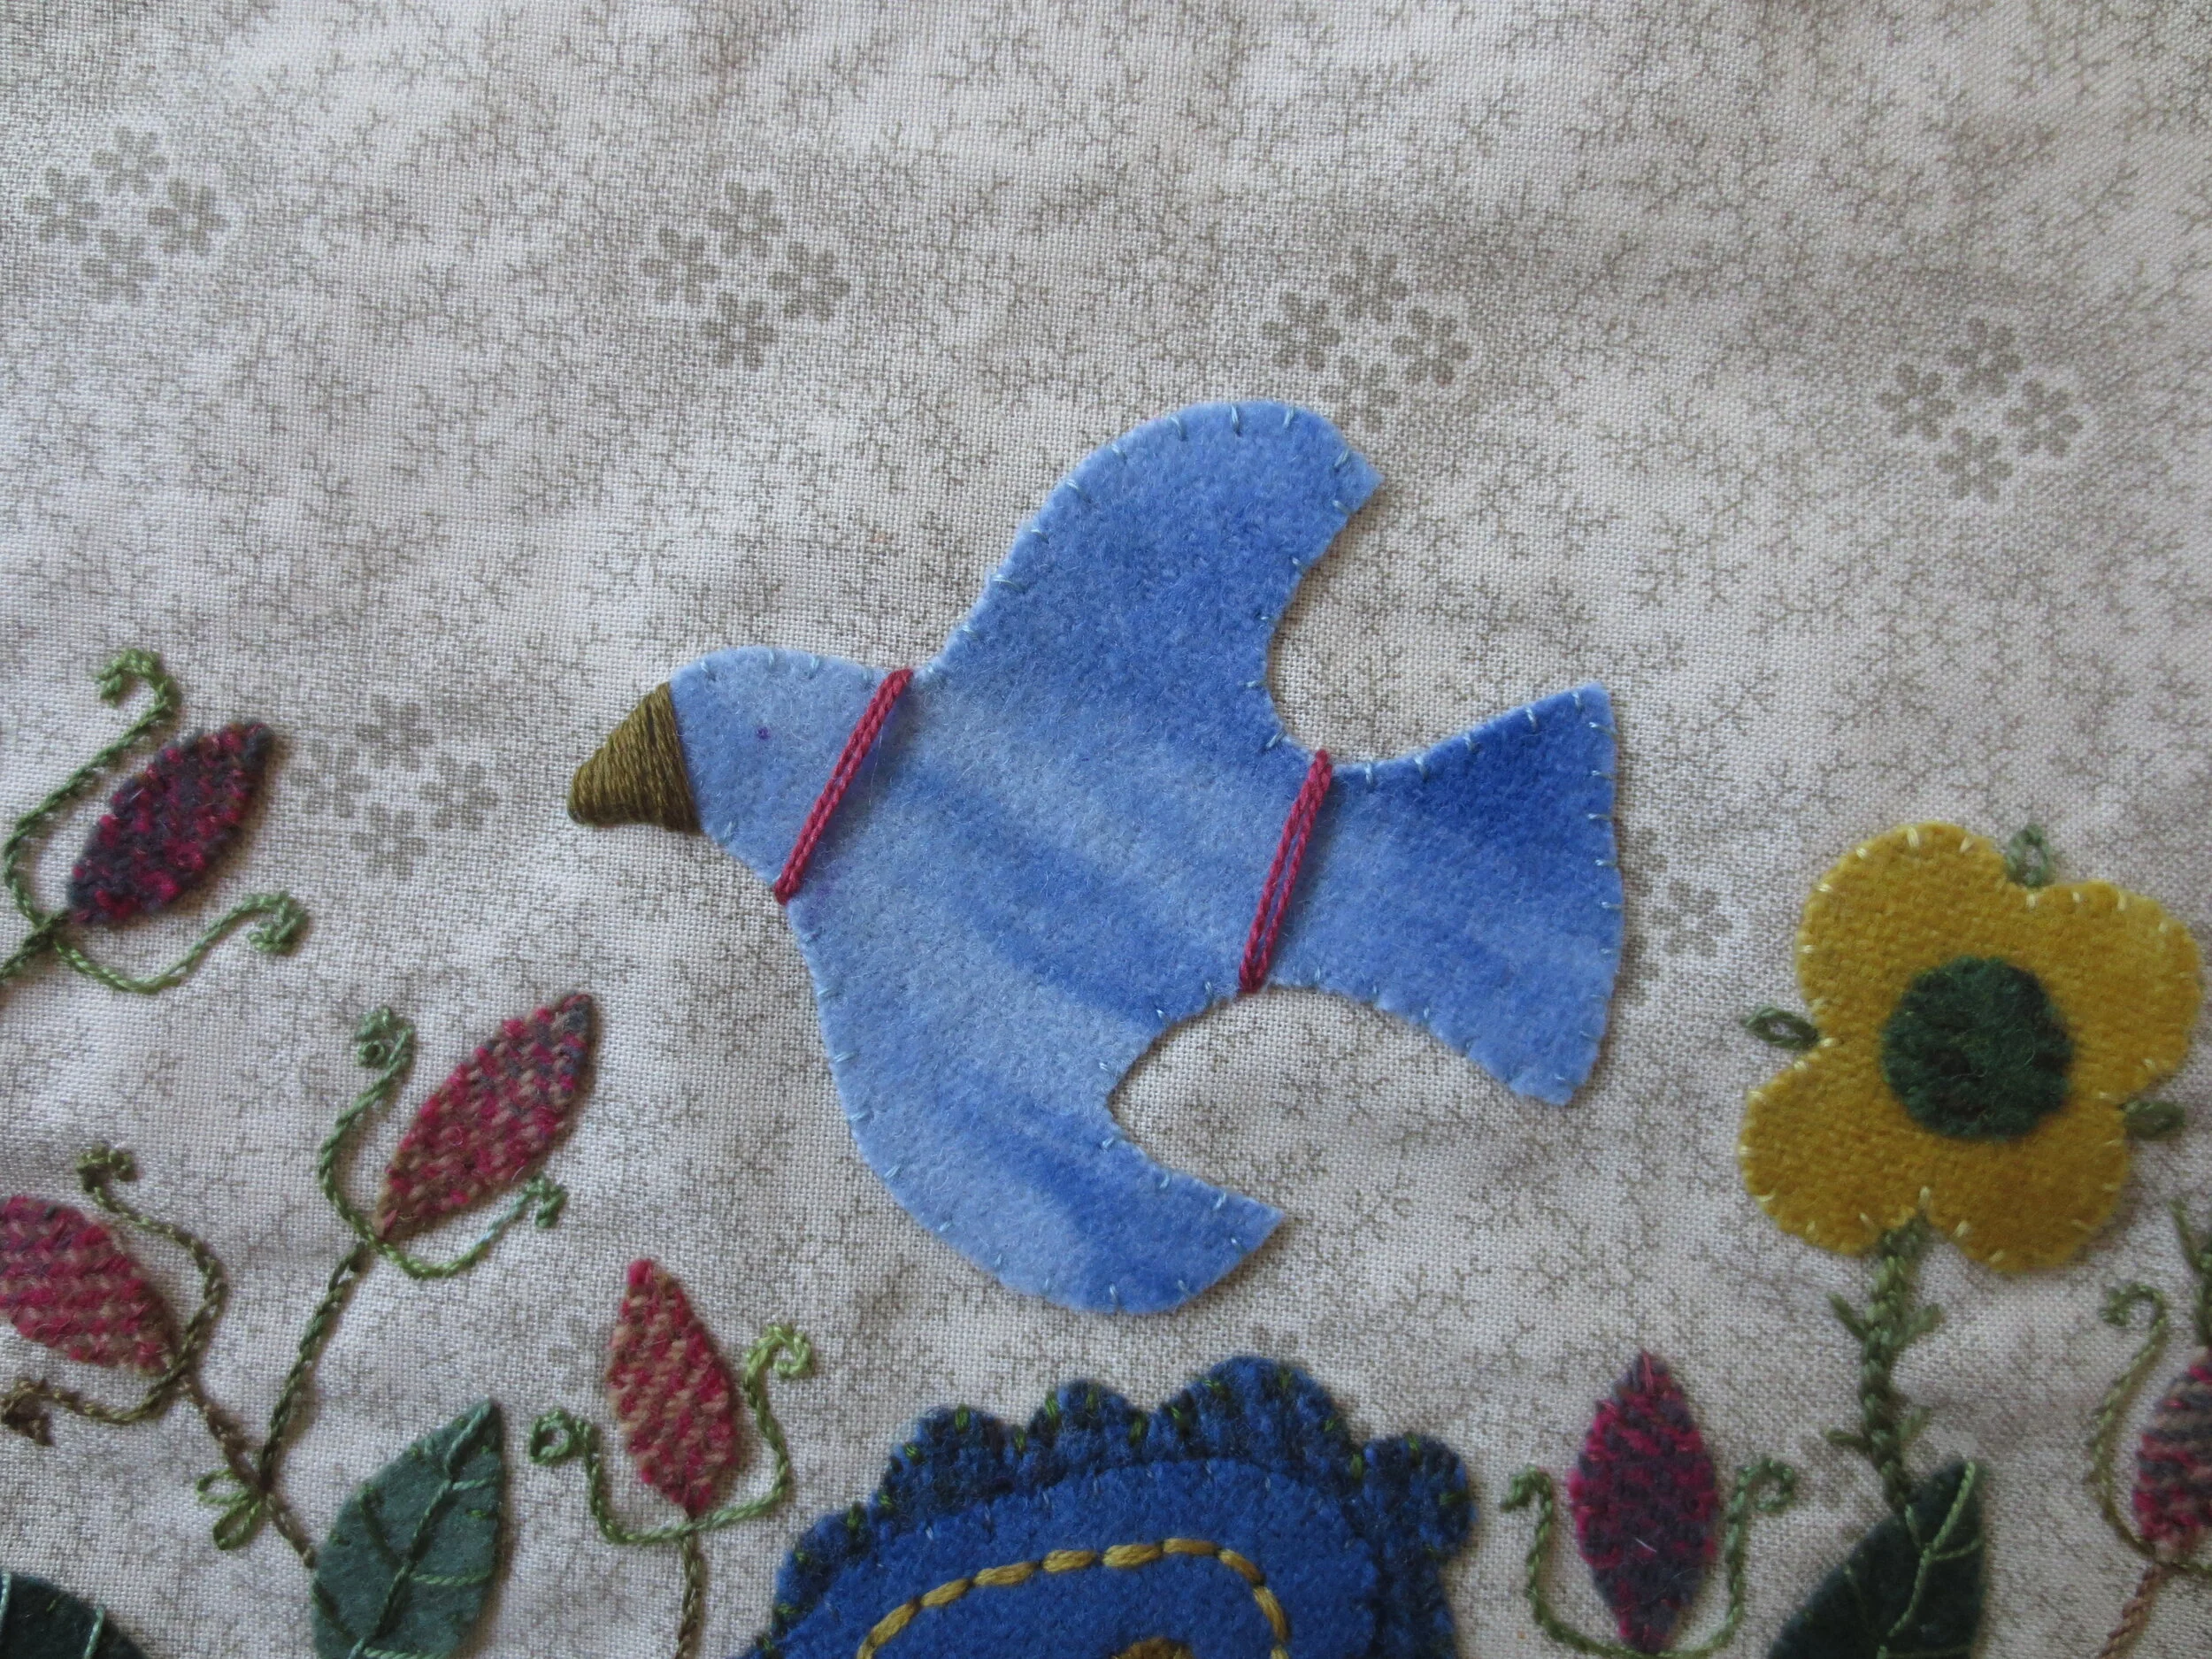
40. Use 3 strands of dark blue floss, or 1 strand of perle cotton, size 8 to make a colonial knot eye.
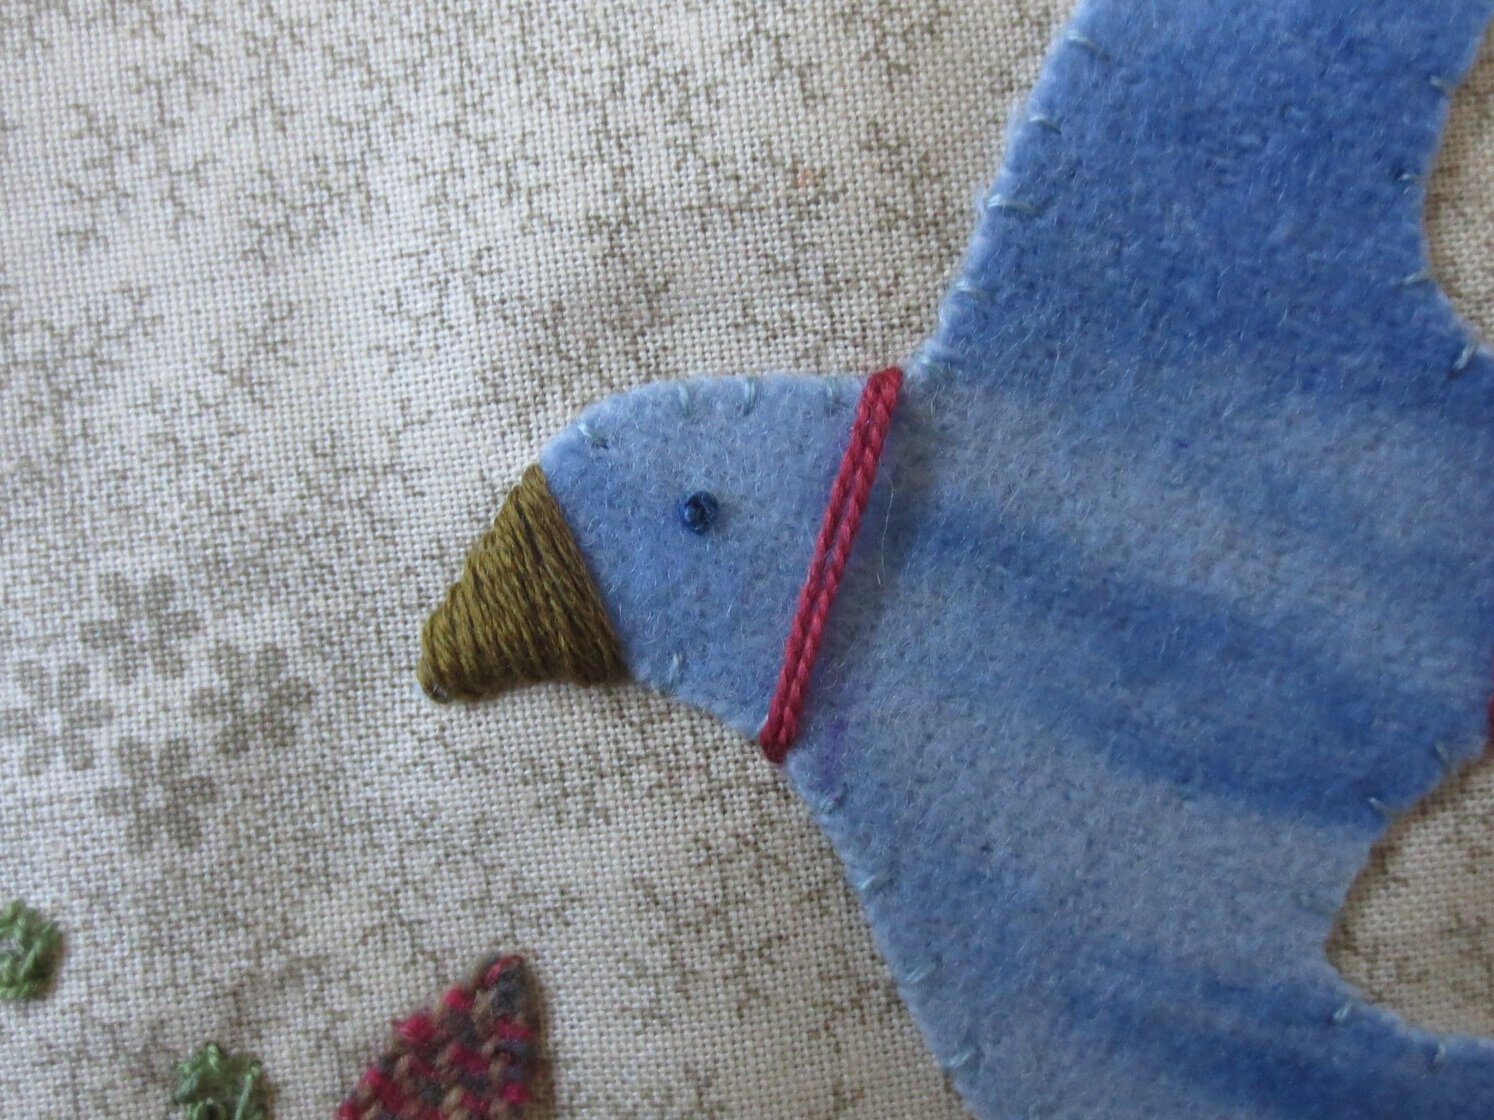
41. Use that same thread to couch the neck and tail bands.

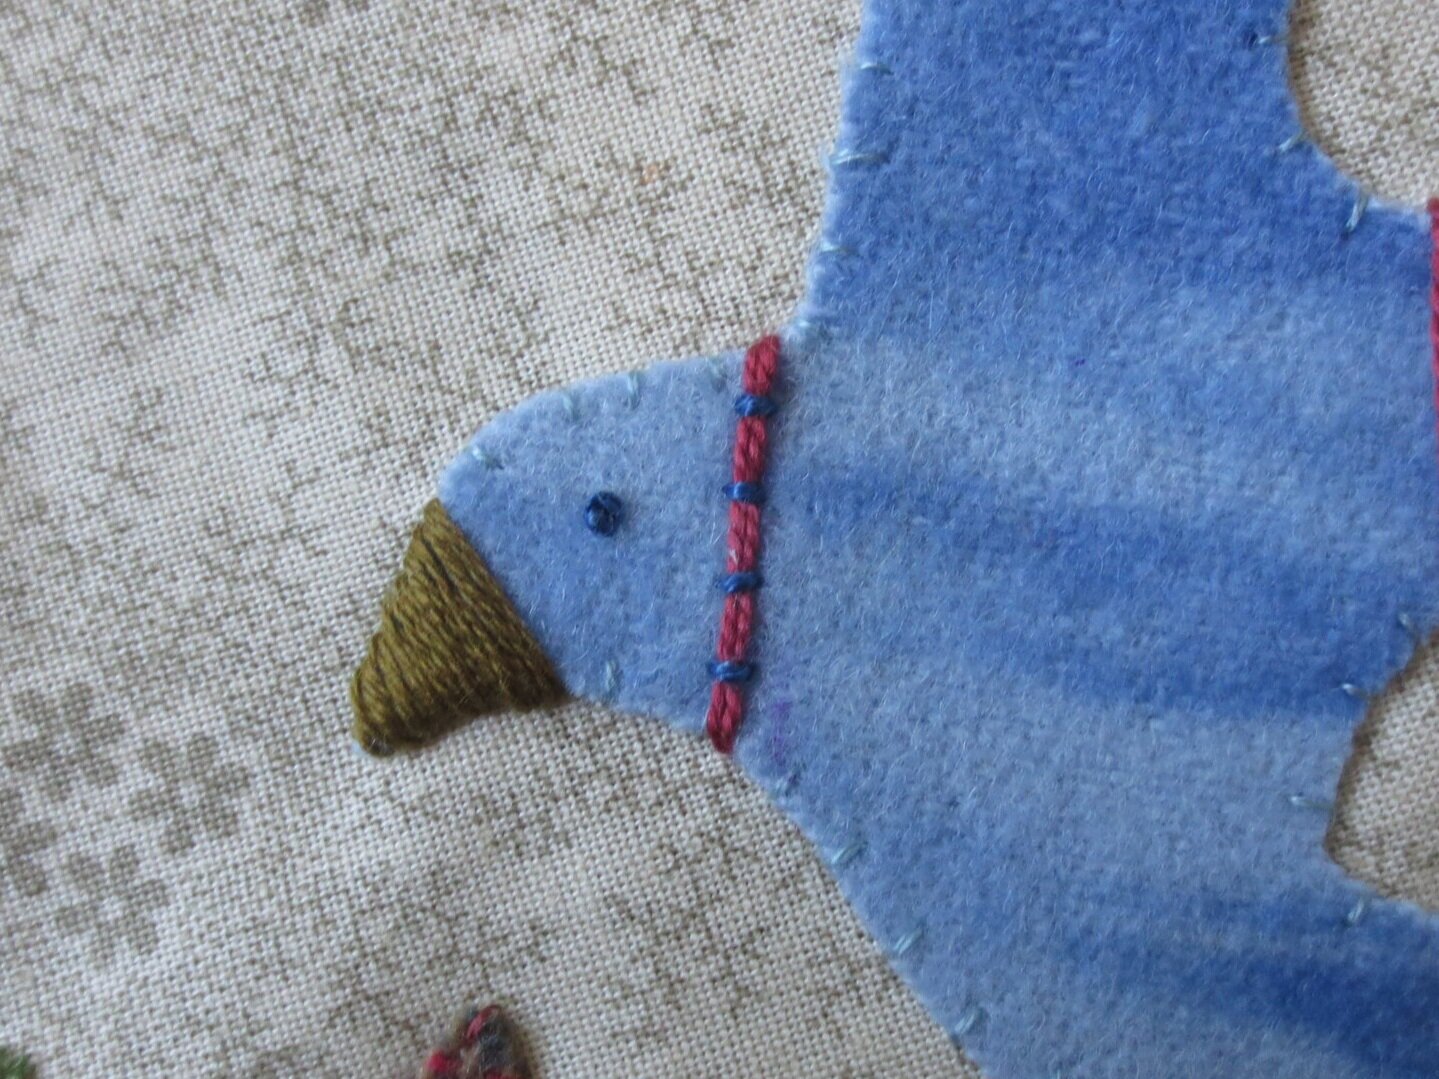
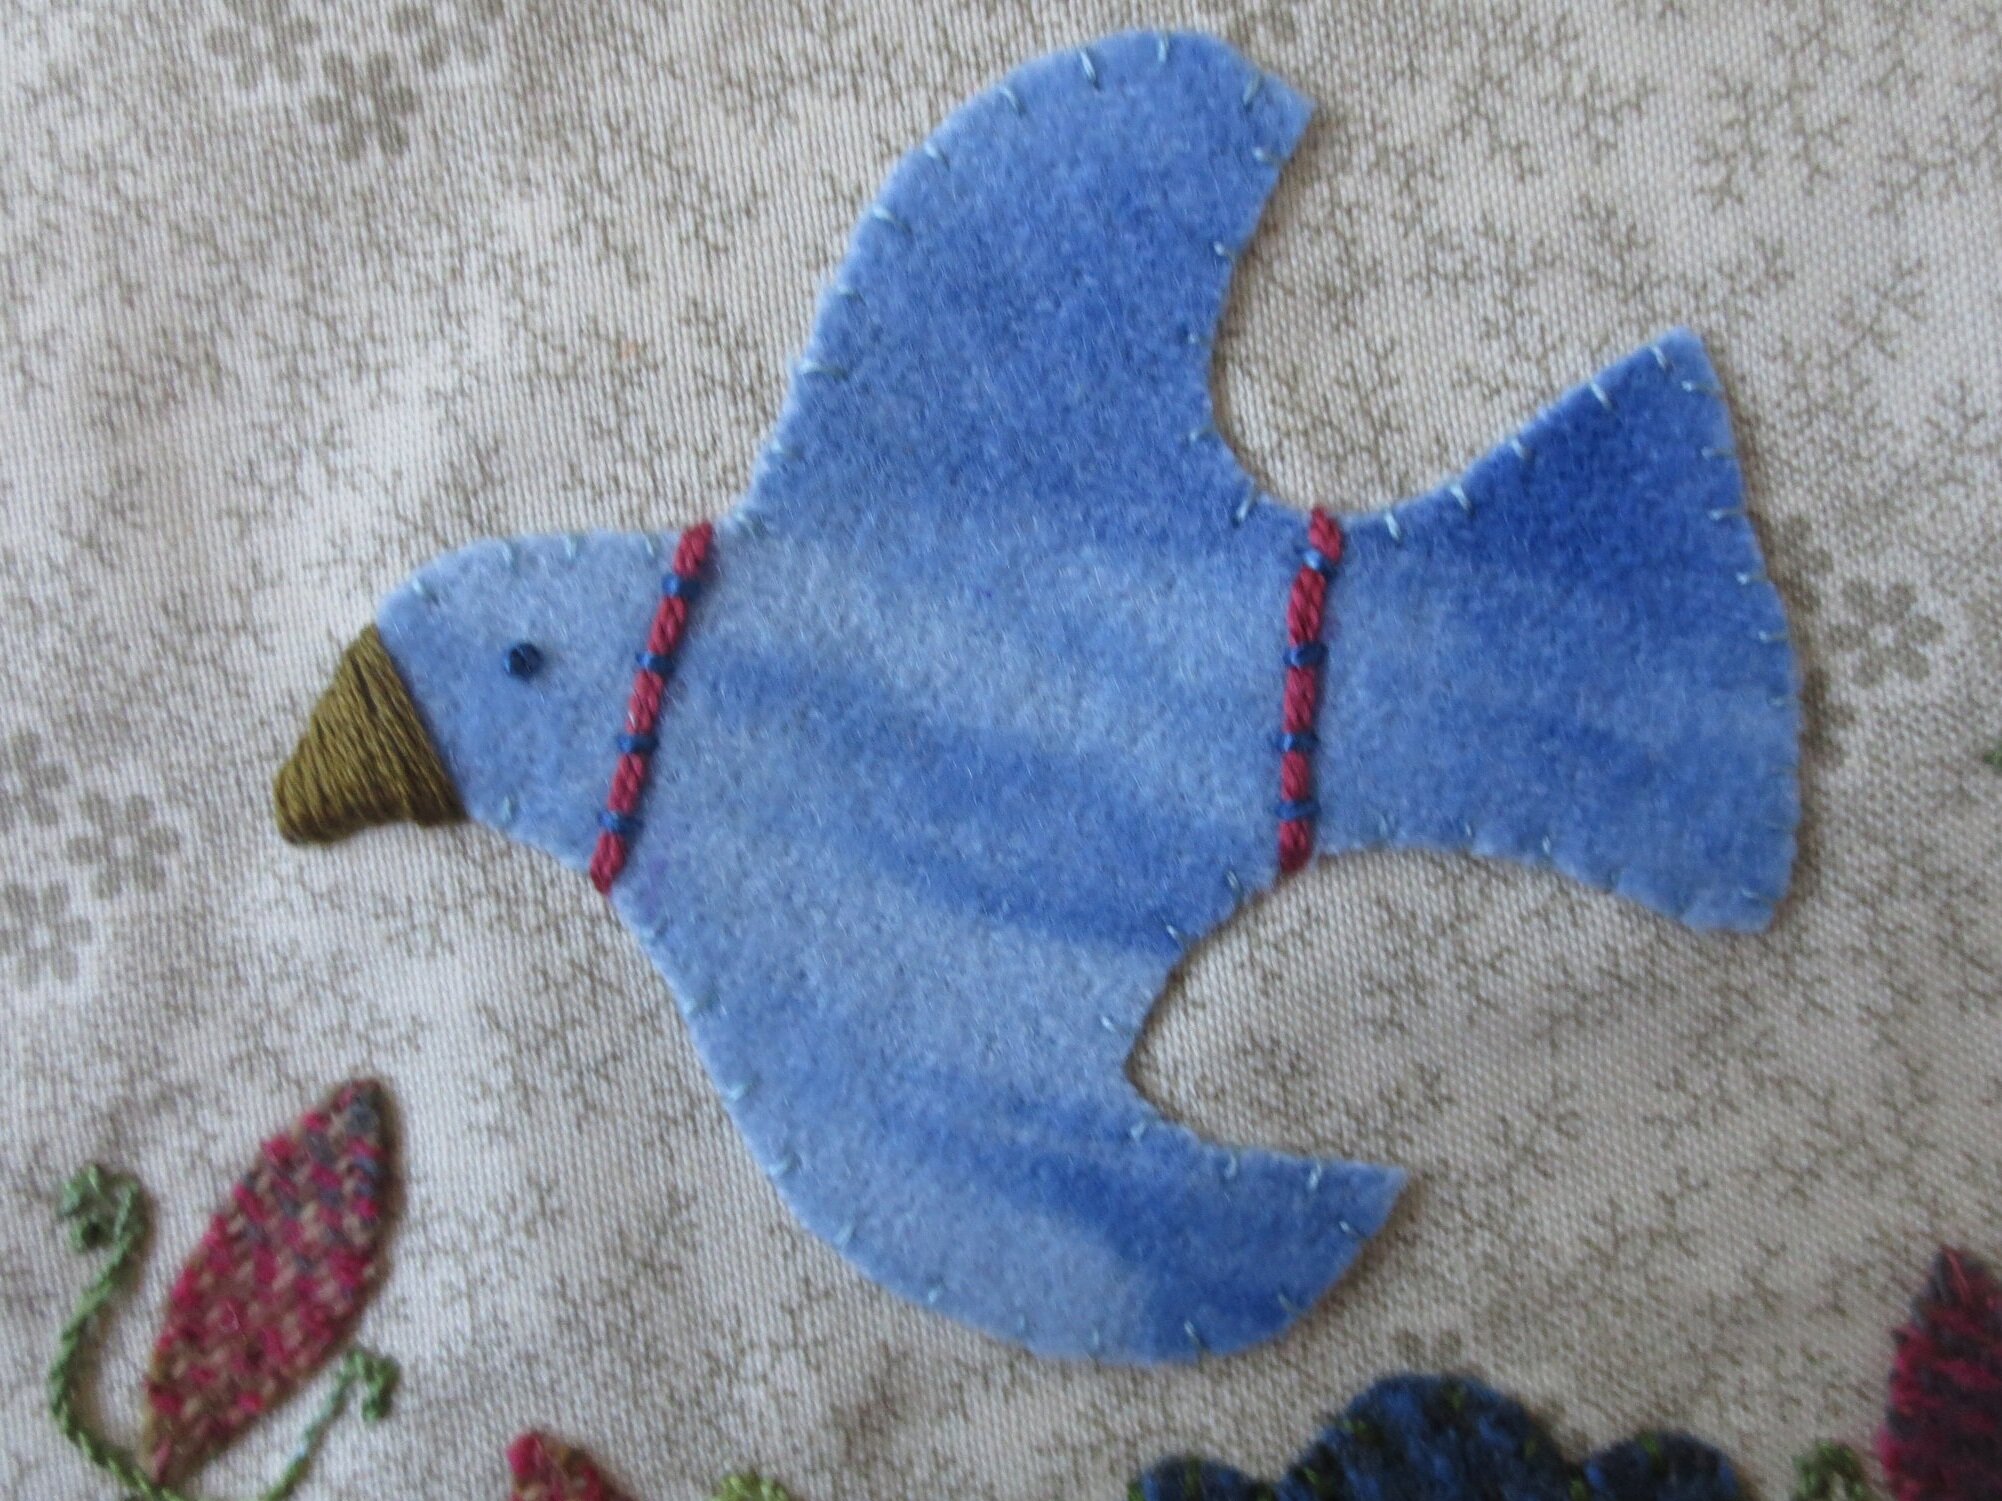
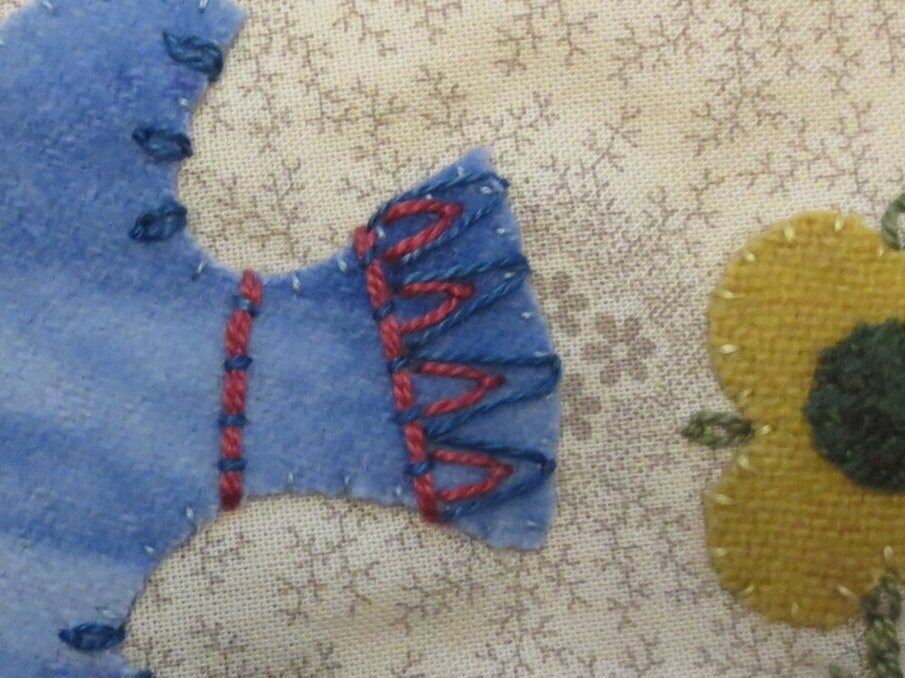
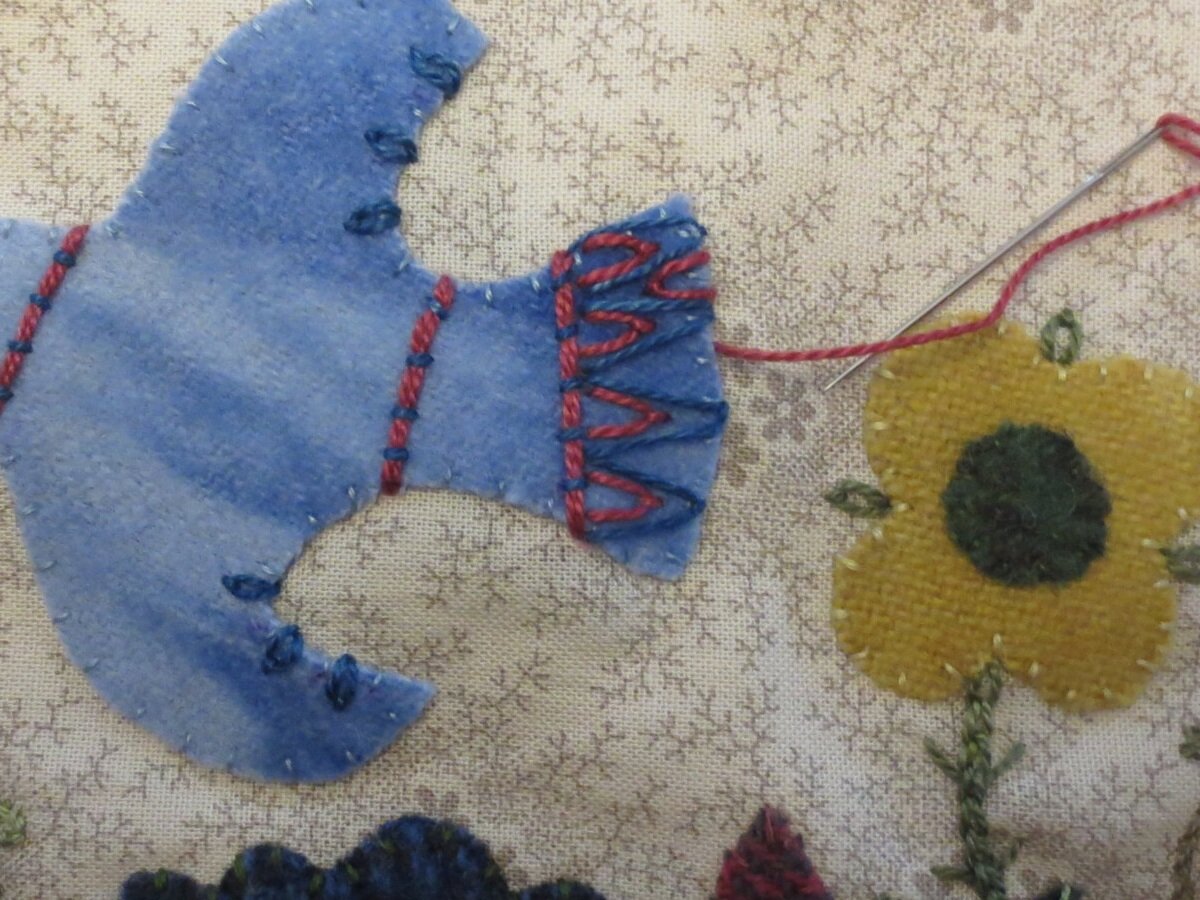
42. Let’s add an additional band at the base of the tail.
43. Use the same blue thread that you used for the eye and couching to stitch 3 lazy daisy stitches in each wing.

44. Use that same thread to stitch 4 fly stitches in the tail. I began my stitches at the base of the tail near the band, and then tacked the fly stitches at the end of the tail.

45. Use the same red thread that you used for the bands to make smaller fly stitches inside the larger fly stitches.
Voila! Your done!