

Signs of Spring
Spring is on its way to Southern California right now! The much needed rain during the last few months has brought us carpets of wild flowers and shamrock colored hills. The past few days have truly been glorious! It’s been difficult to sit inside to stitch when there’s so much to enjoy outside.
The inspiration for this design are the birds, the flowers, and the migrating butterflies that are heralding the arrival of spring. The style, like the Blooming Hearts pillow, is influenced by Pennsylvania German Fraktur art. Many of the frakturs are framed with pen and ink borders that could easily be translated into embroidery, but I wanted something a little bolder, so I used some hand dyed twill ribbon and I embellished it with embroidery. And, of course, the ribbon is green, the color of spring!
Happy Stitching!
You will need:
Fabric - 14 inch x 18 inch piece of medium weight cotton/linen blend (I antiqued Robert Kaufman Essex natural with walnut husk dye). Use a light colored background that you can see through when using a tracing light box.
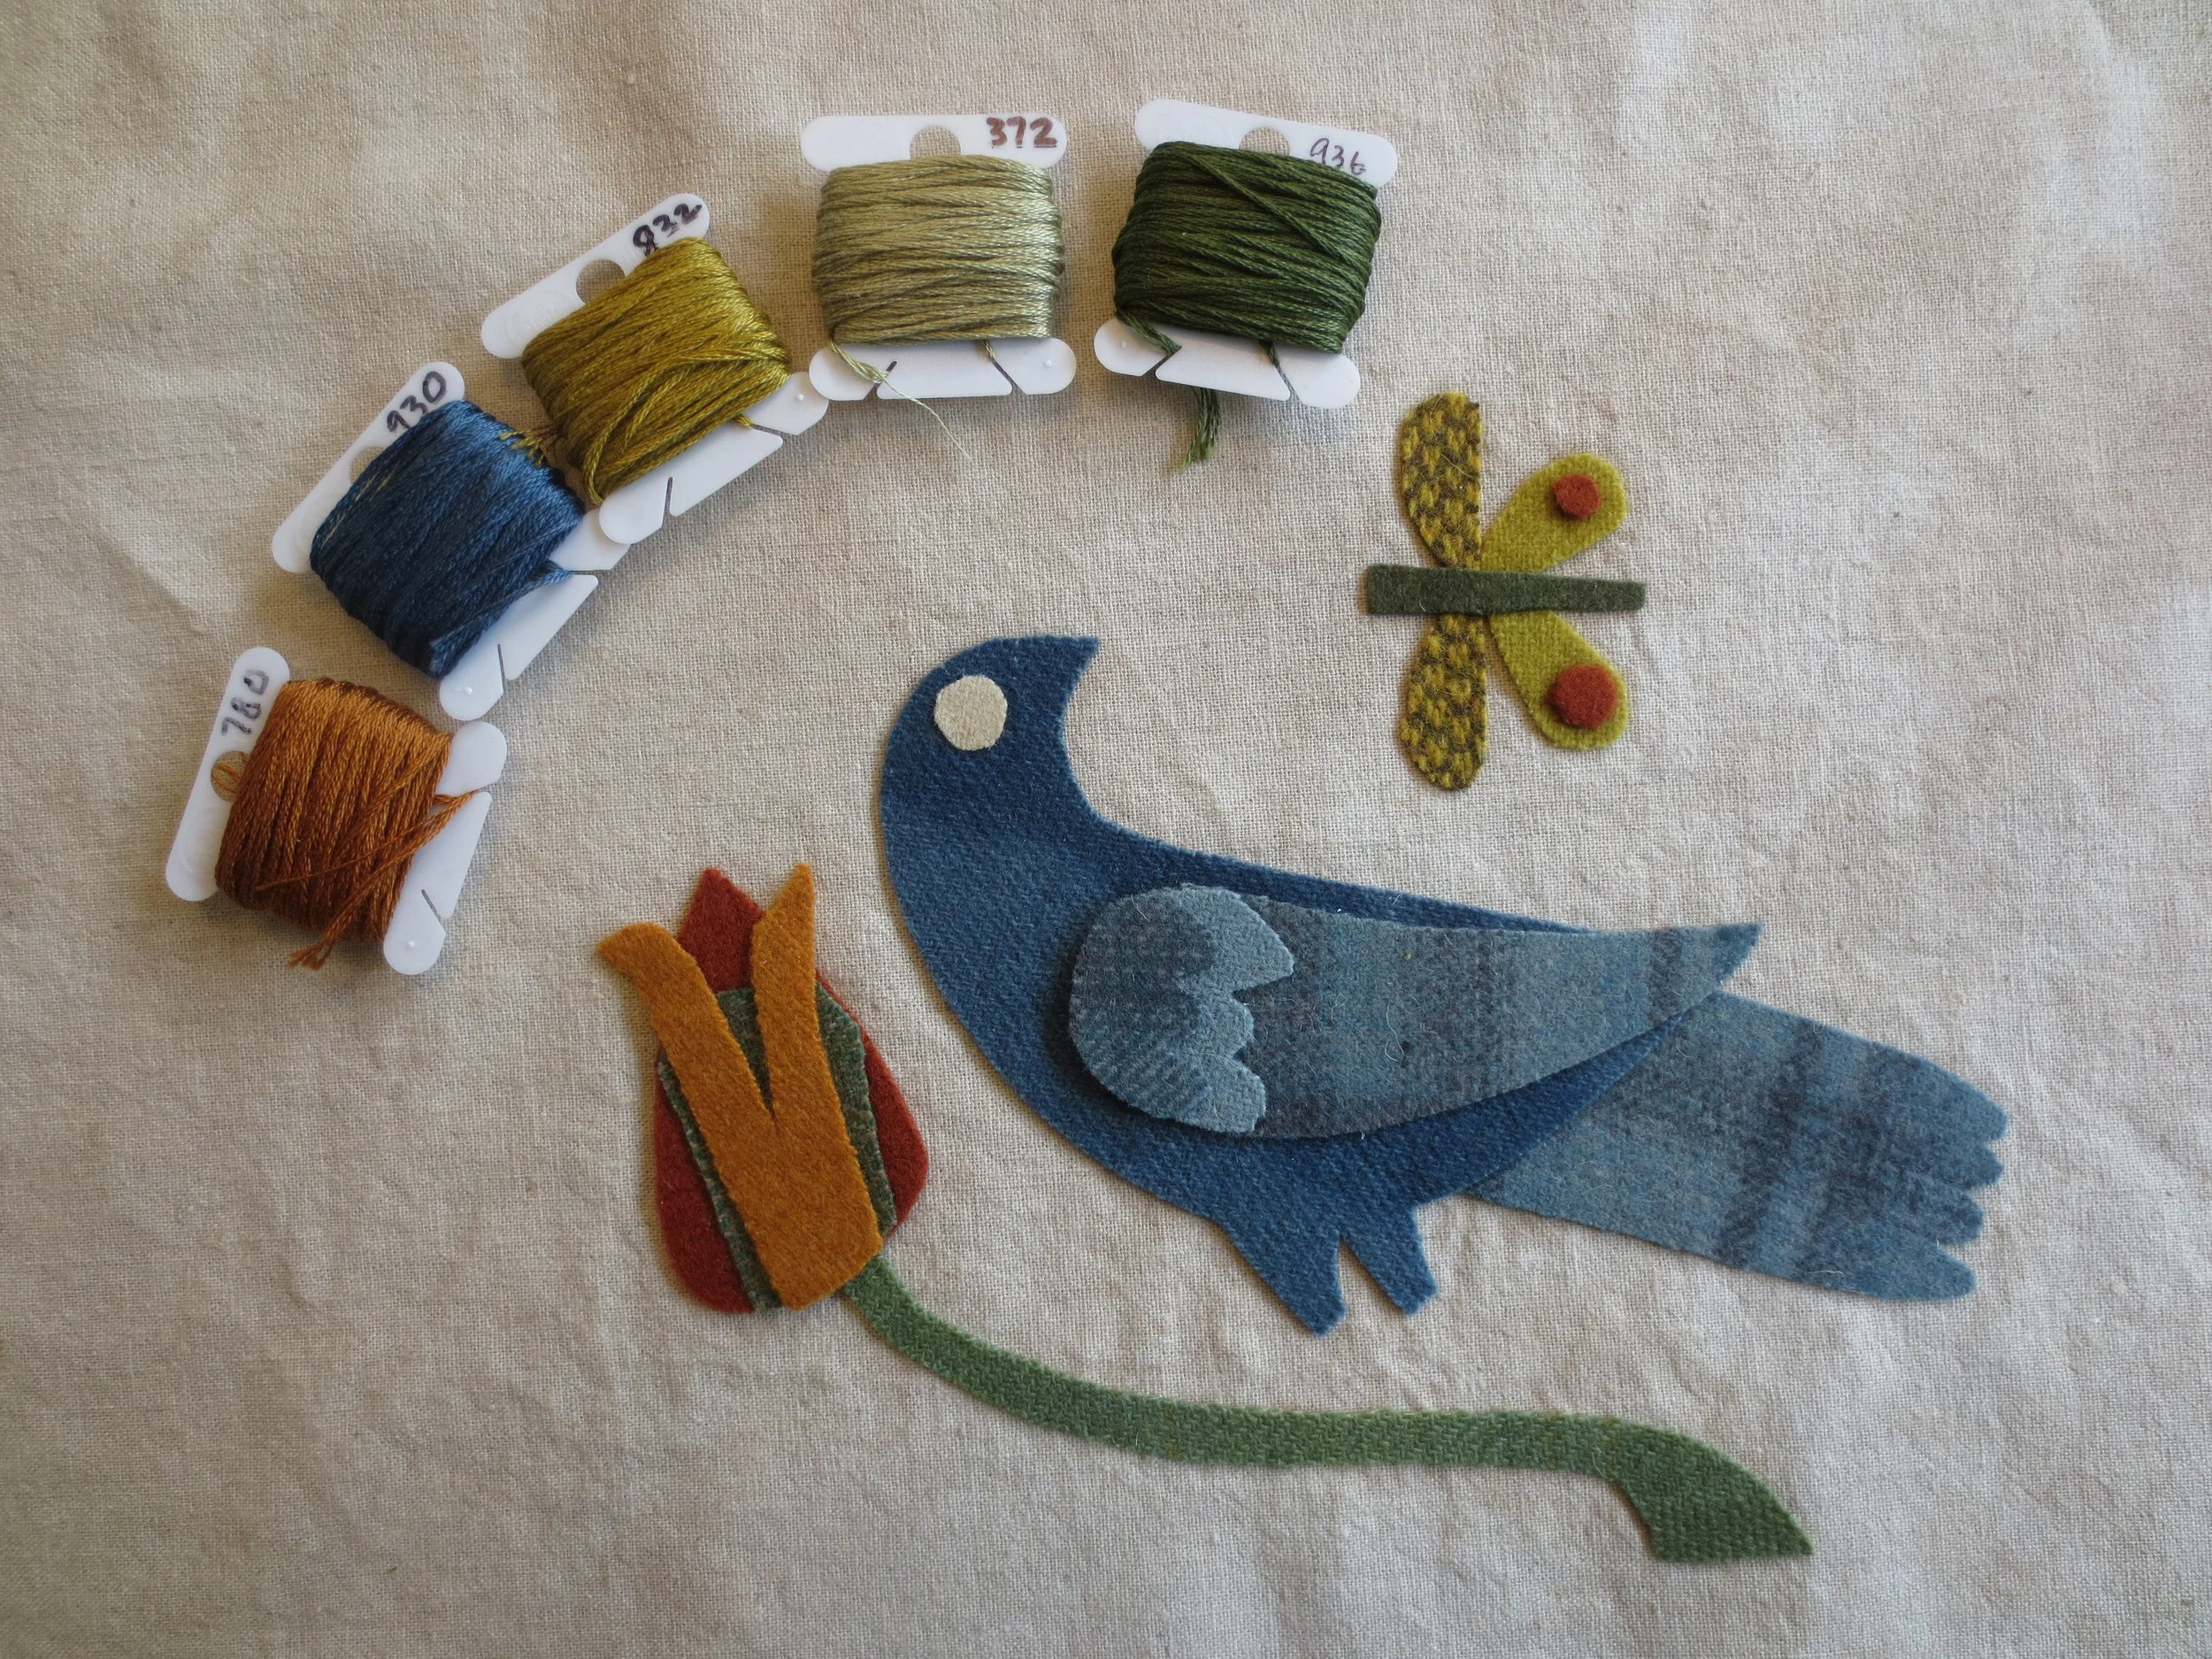
Felted wool or wool felt - These are suggestions. Your colors may vary.
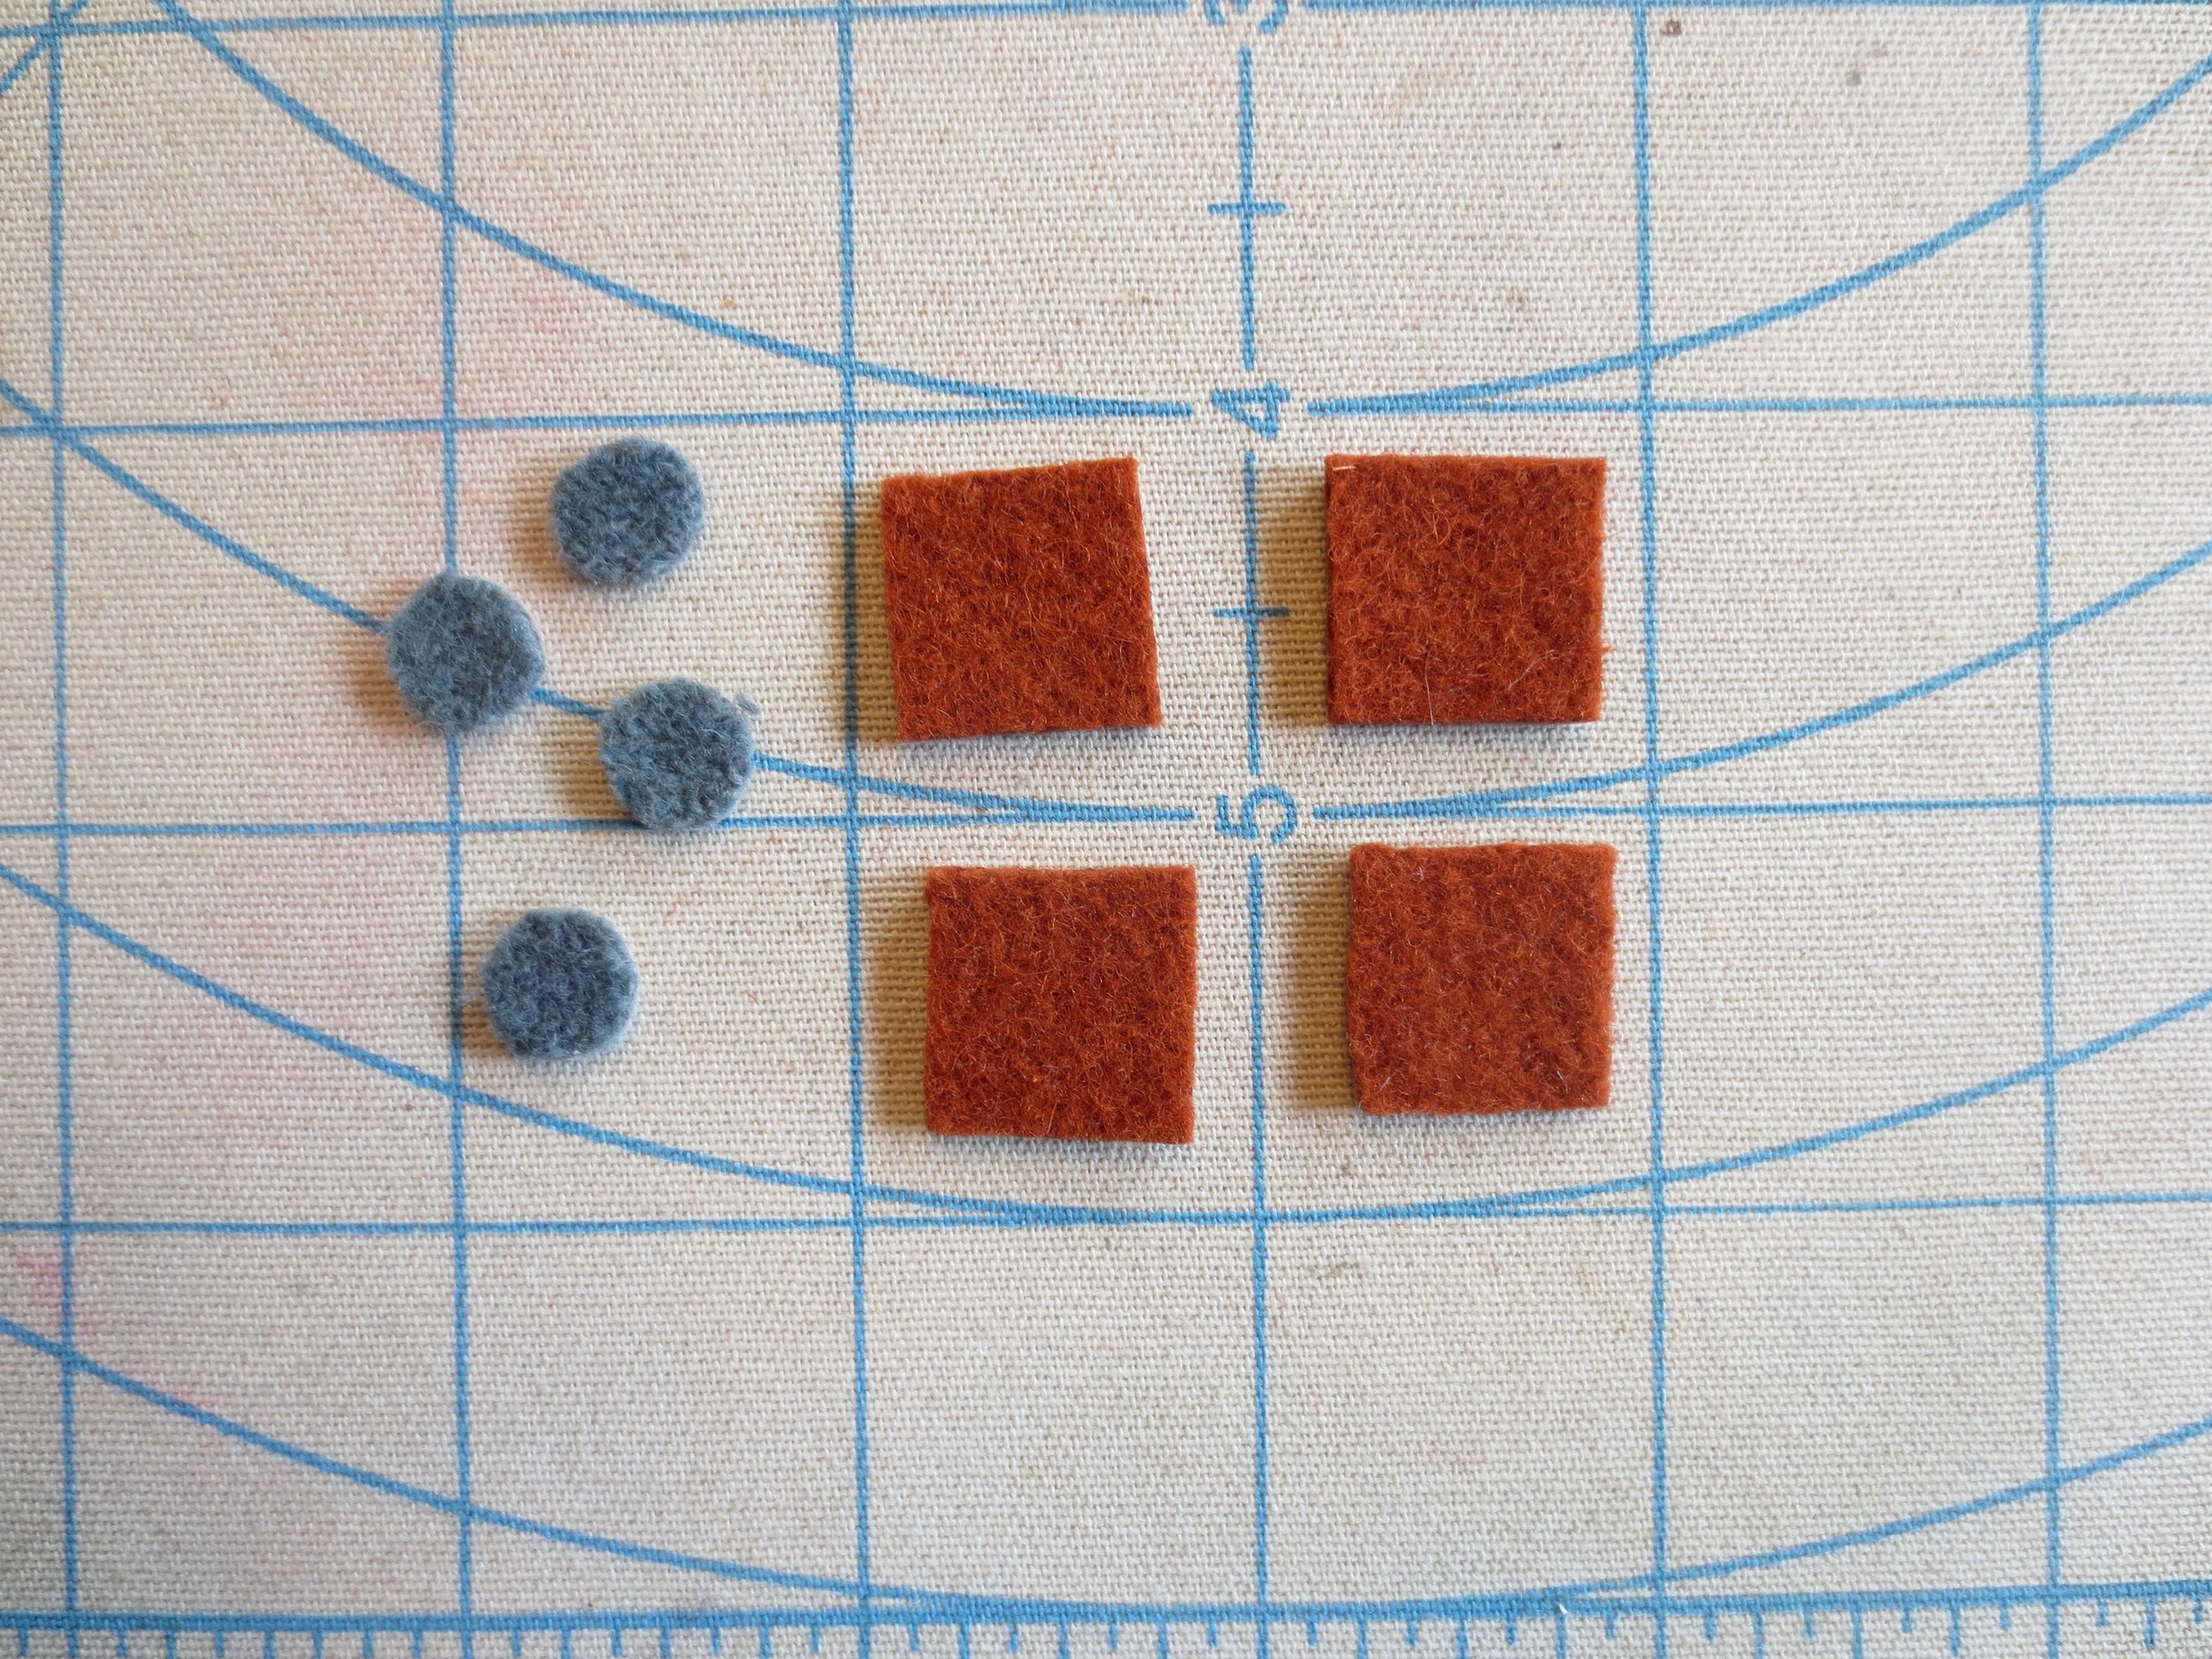
Bird body and corner block circles - 5 inch square solid blue
Bird wing, tail, and wing cap B - 5 inch square blue plaid
Bird wing cap A - 2 inch square light blue
Flower A, corner blocks, and butterfly spots- 4 inch square burnt orange
Flower B - 2 inch square green herringbone
Flower C - 2 inch x 2 1/2 inch medium orange
Stem and butterfly body - 3 inch x 6 1/2 inch green
Butterfly wing top - 1 1/2 inch x 2 1/2 inch gold check
Butterfly wing bottom - 1 1/2 inch x 2 inch gold
3/8 inch wide ribbon - 1 yard green
Thread
6-strand embroidery floss
Bird, flower, butterfly - colors that match wool colors ( I used DMC #930, #780, and #372)
Leaves and flower stems - two shades of green ( I used DMC #936 and #3711)
Bird’s legs, butterfly antennae, and flower stamens - dark brown (I used DMC #3781)
Perle cotton, size 8
Flower anthers (the balls on top of the flower) - green ( I used Eleganza color EZM09)
Miscellaneous
light weight fusible web - Heat' ‘N’ Bond Lite
Clover fusible web tape 5mm wide - I used this for the ribbon border. You can also cut thin strips of the feather weight fusible web instead.
Fine point Sharpie Marker or any fine point permanent marker
Tracing light box
Chenille needle, size 24
Steam iron
Frame - 10 inch x 13 inch or 11 inch x 14 inch (I used a 10 inch x 13 inch)
Instructions
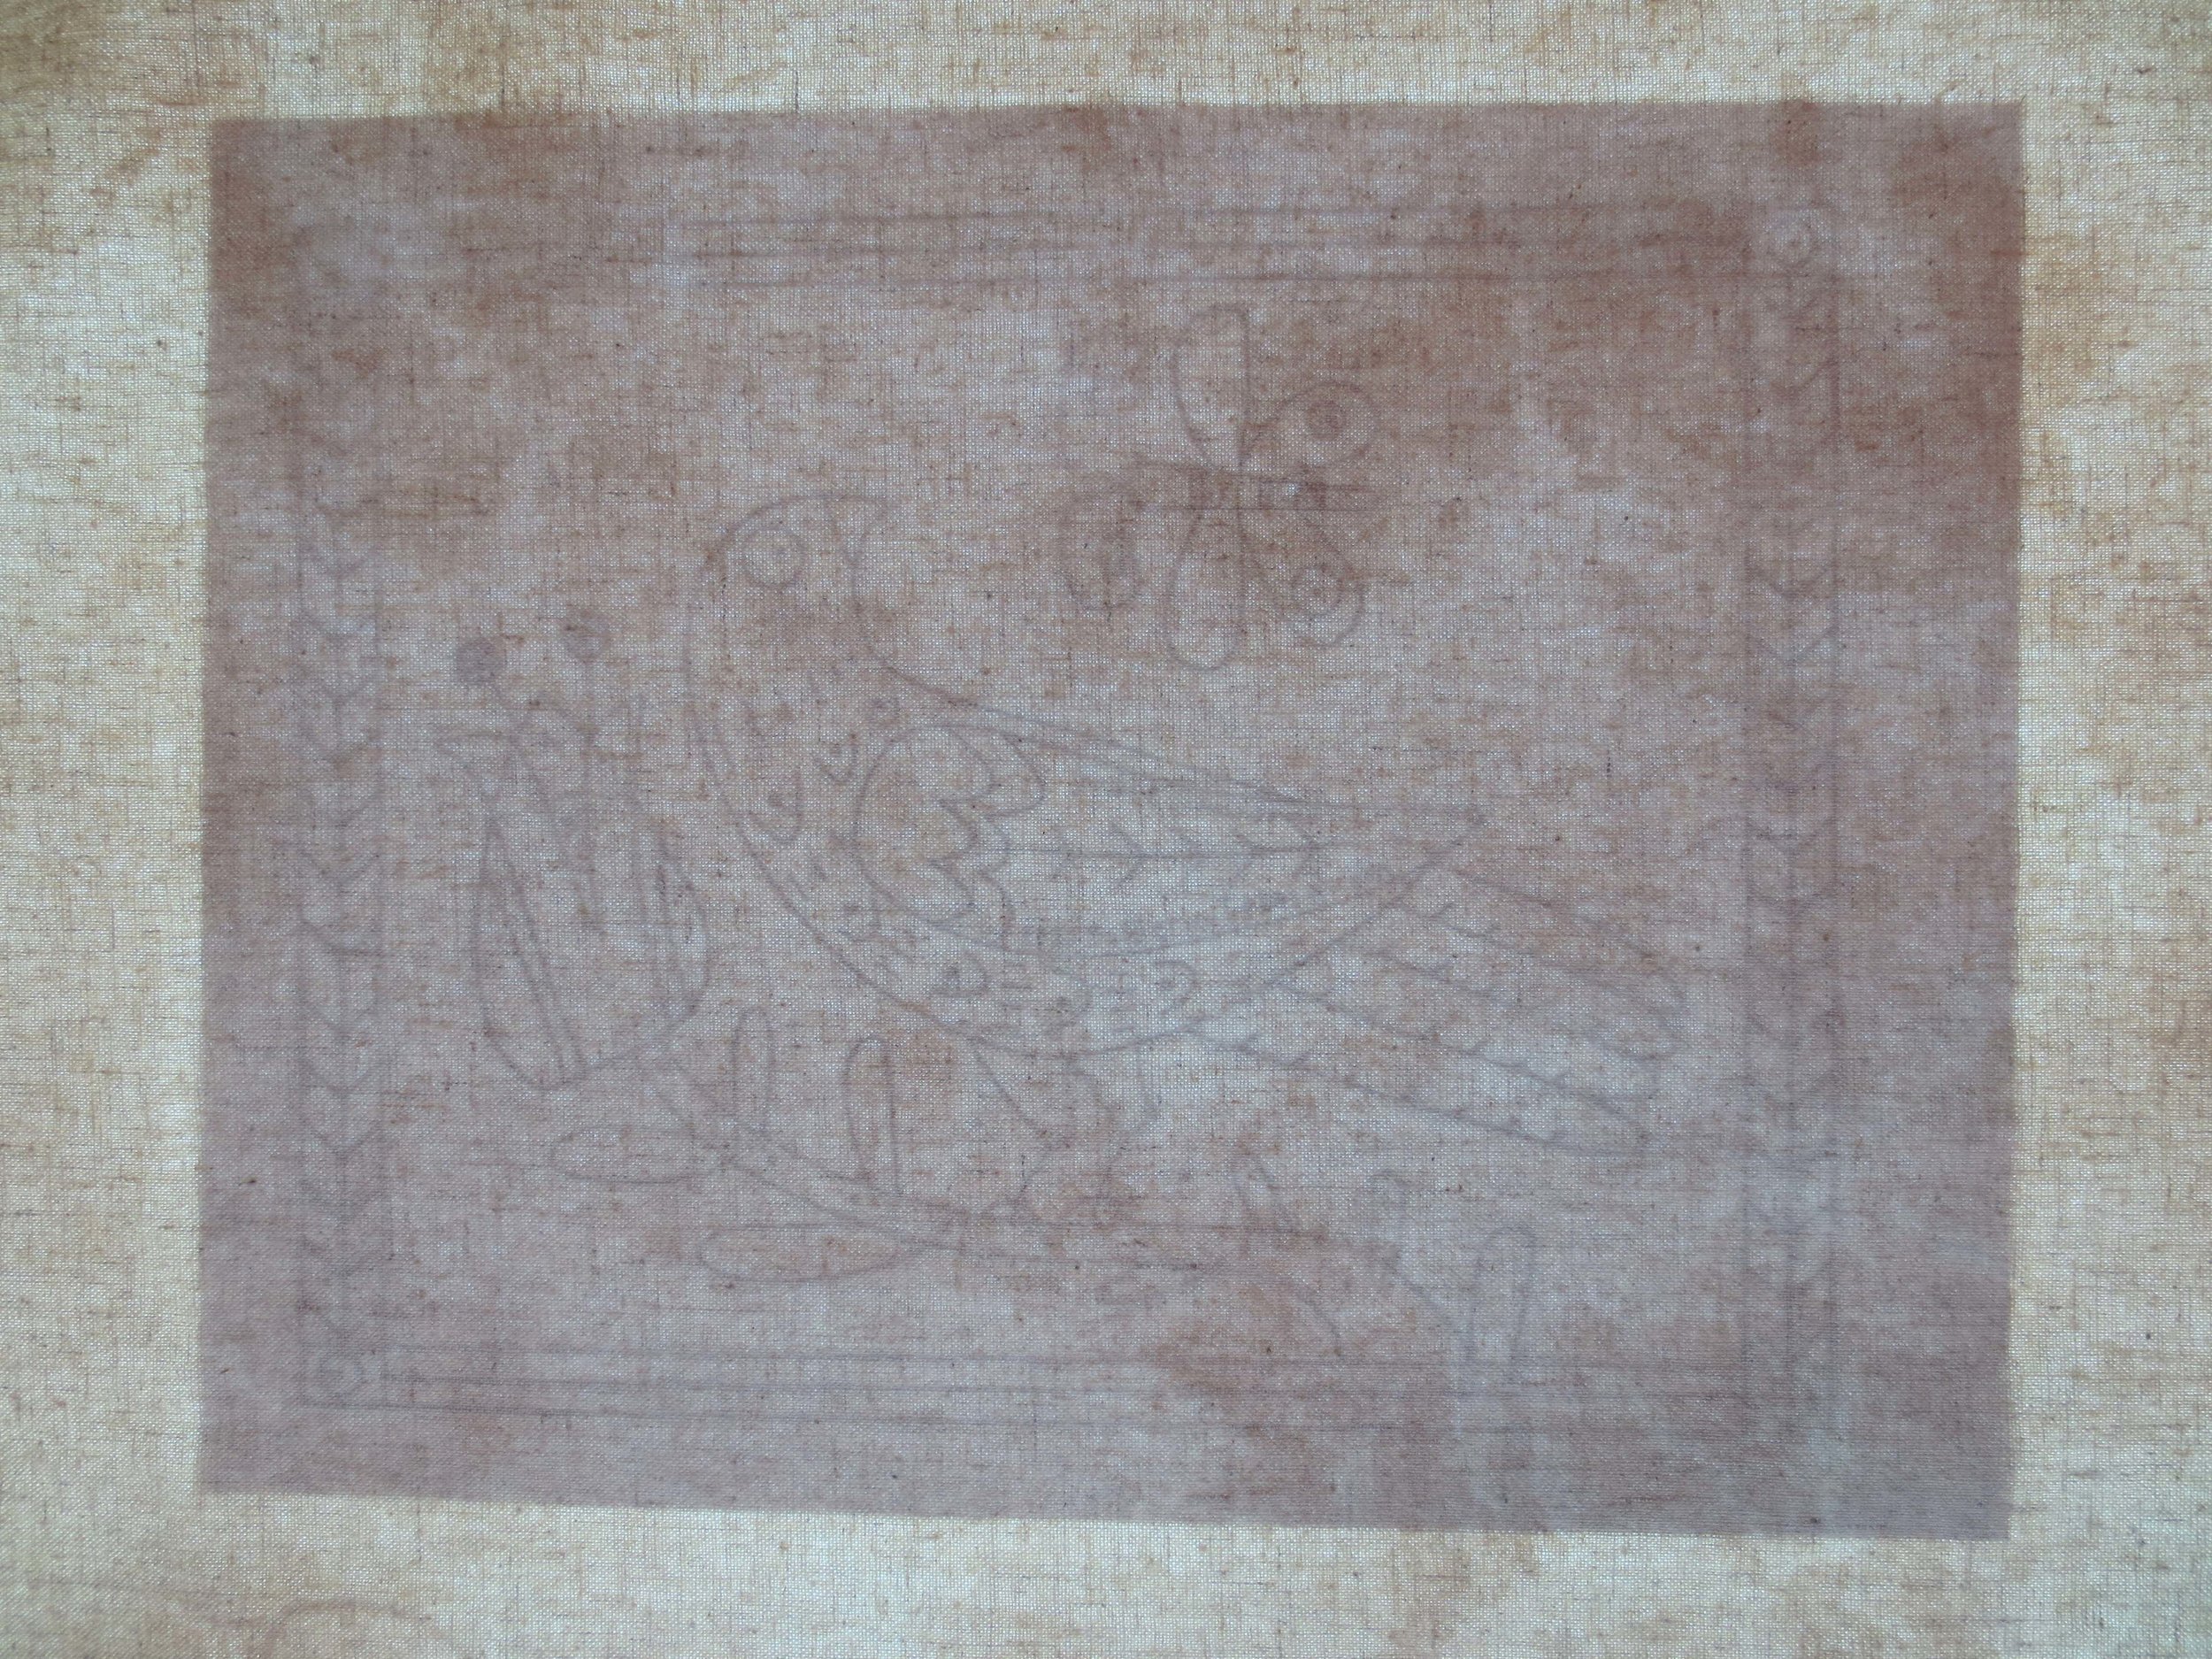
Download the Layout and Pattern. For those of you who are new to my tutorials, download the Stitch Guide.
Trace the patterns onto fusible web. The patterns are already reversed for use with fusible web.
Cut out the patterns leaving a small border around each outline.
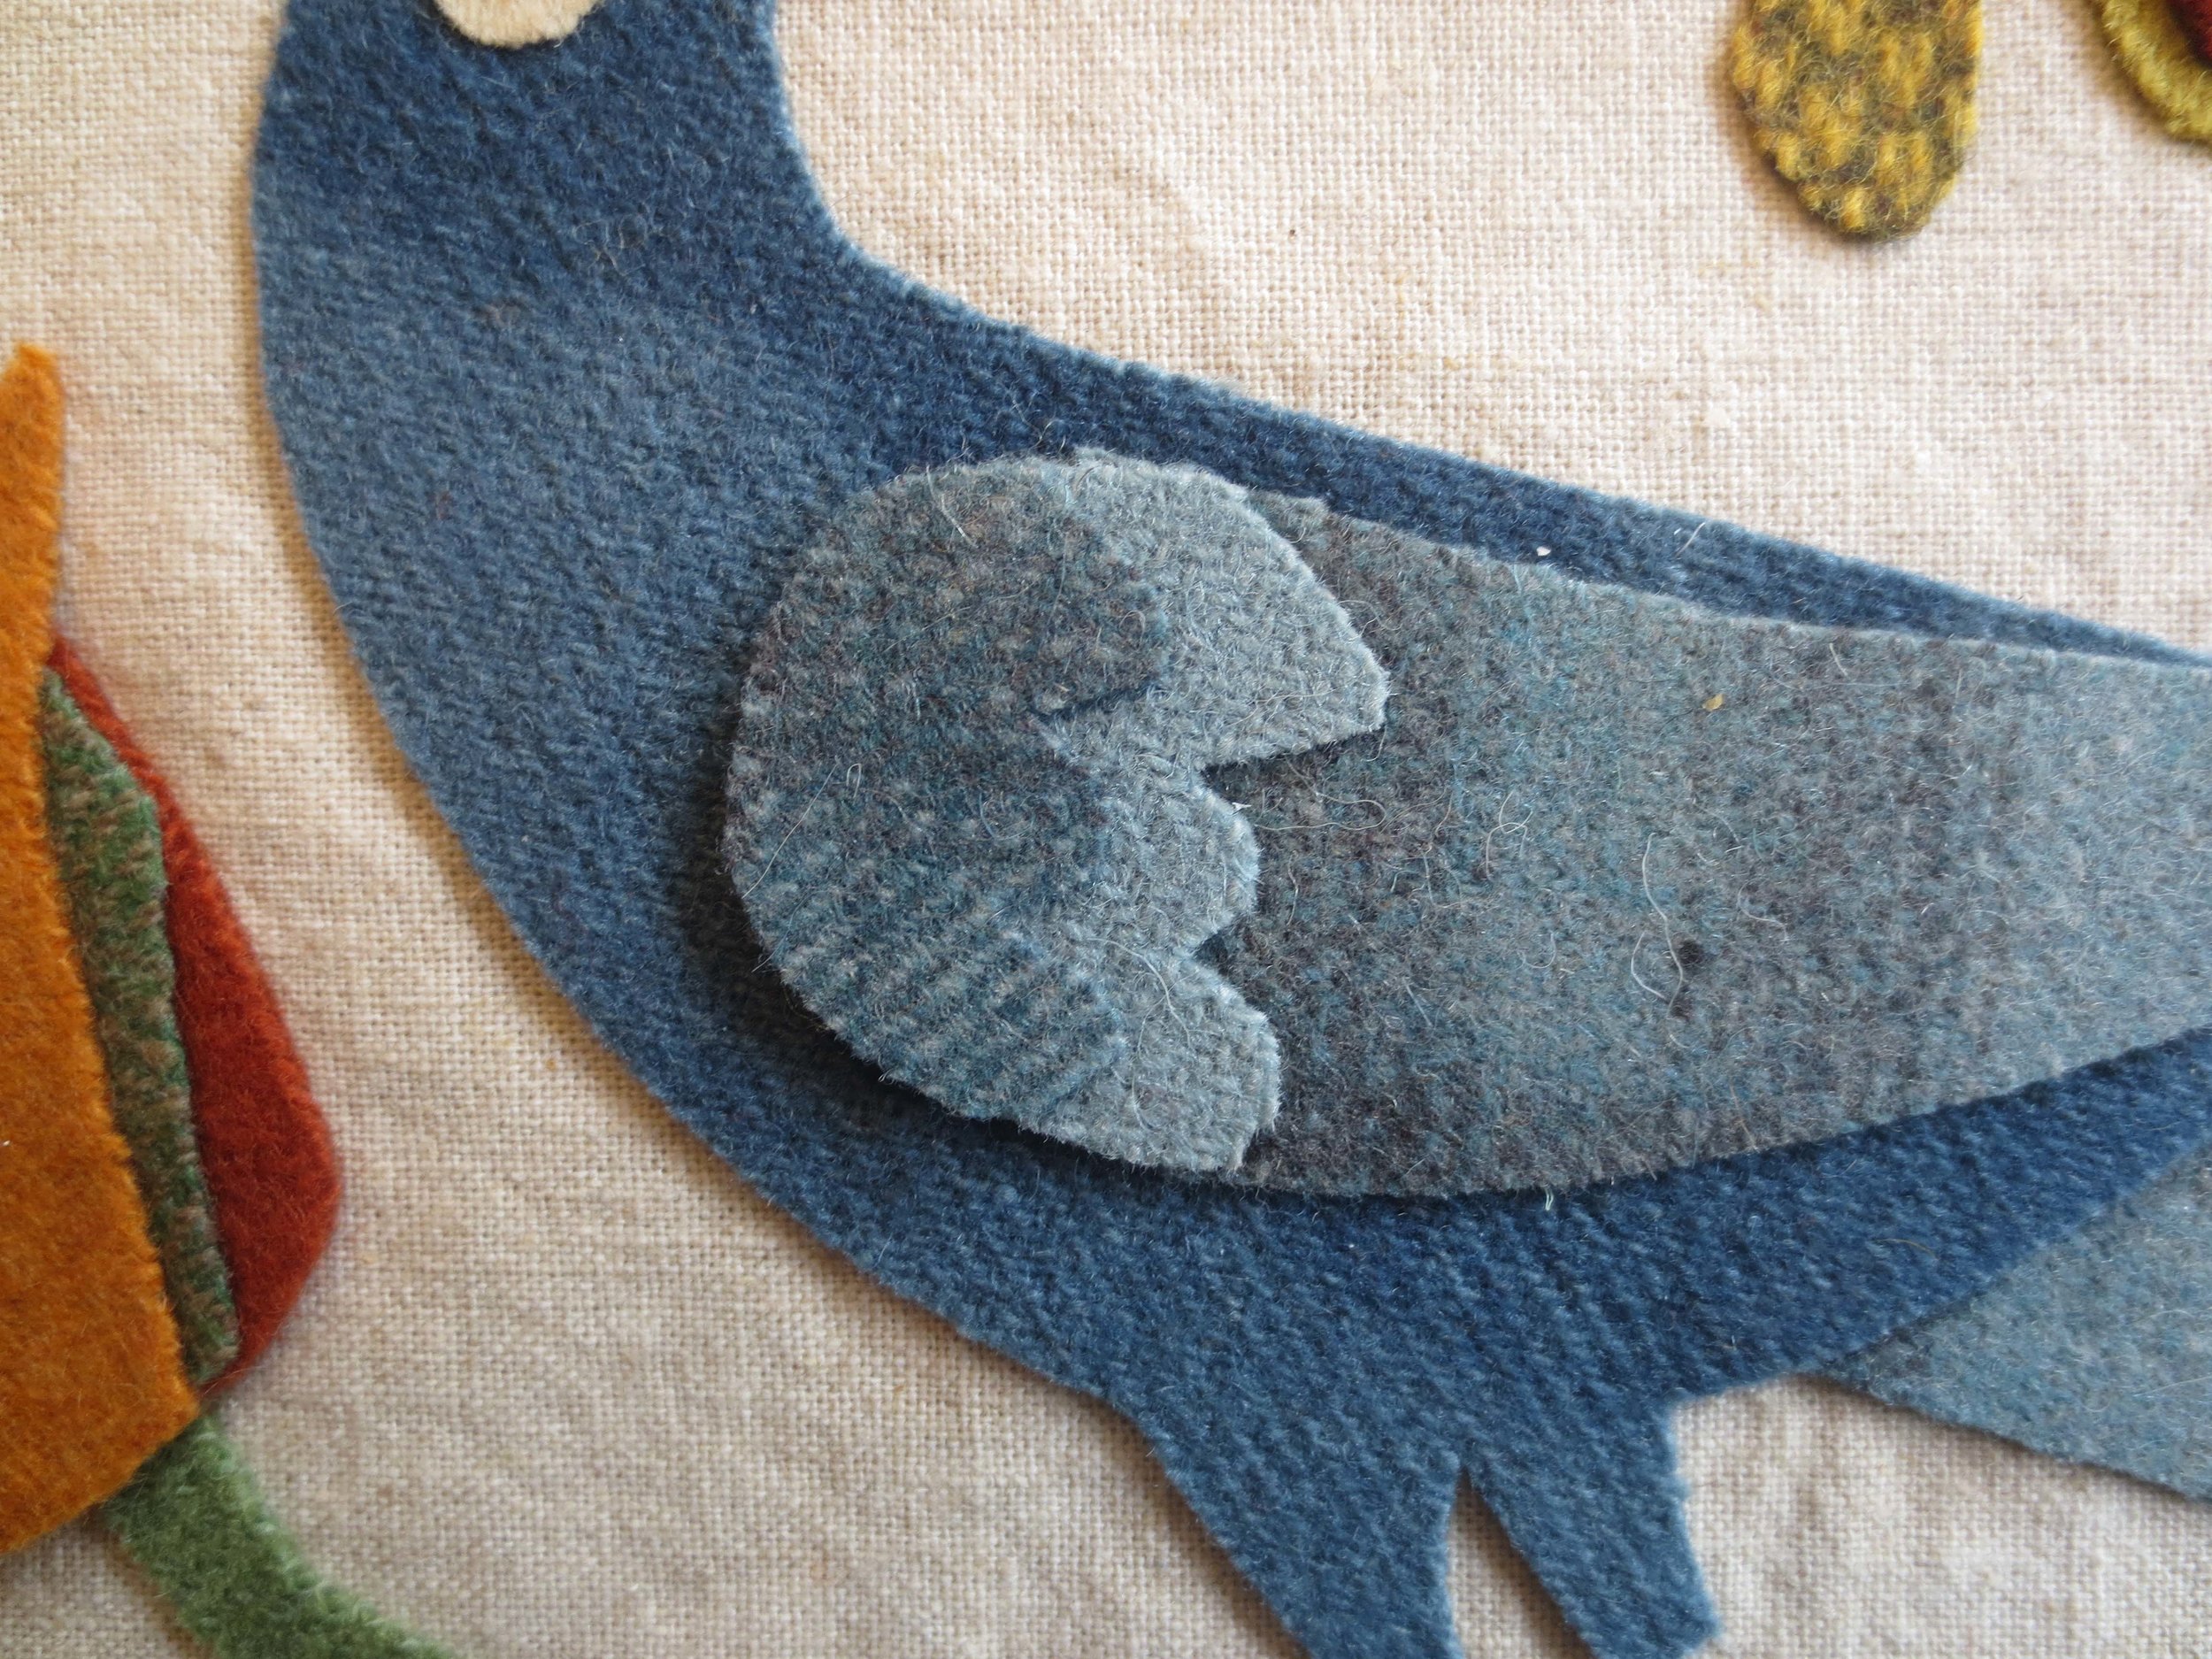
Fuse the patterns to designated wool, and then cut out along traced lines. I fussy cut the wing, tail, and wing cap B from the same blue plaid.

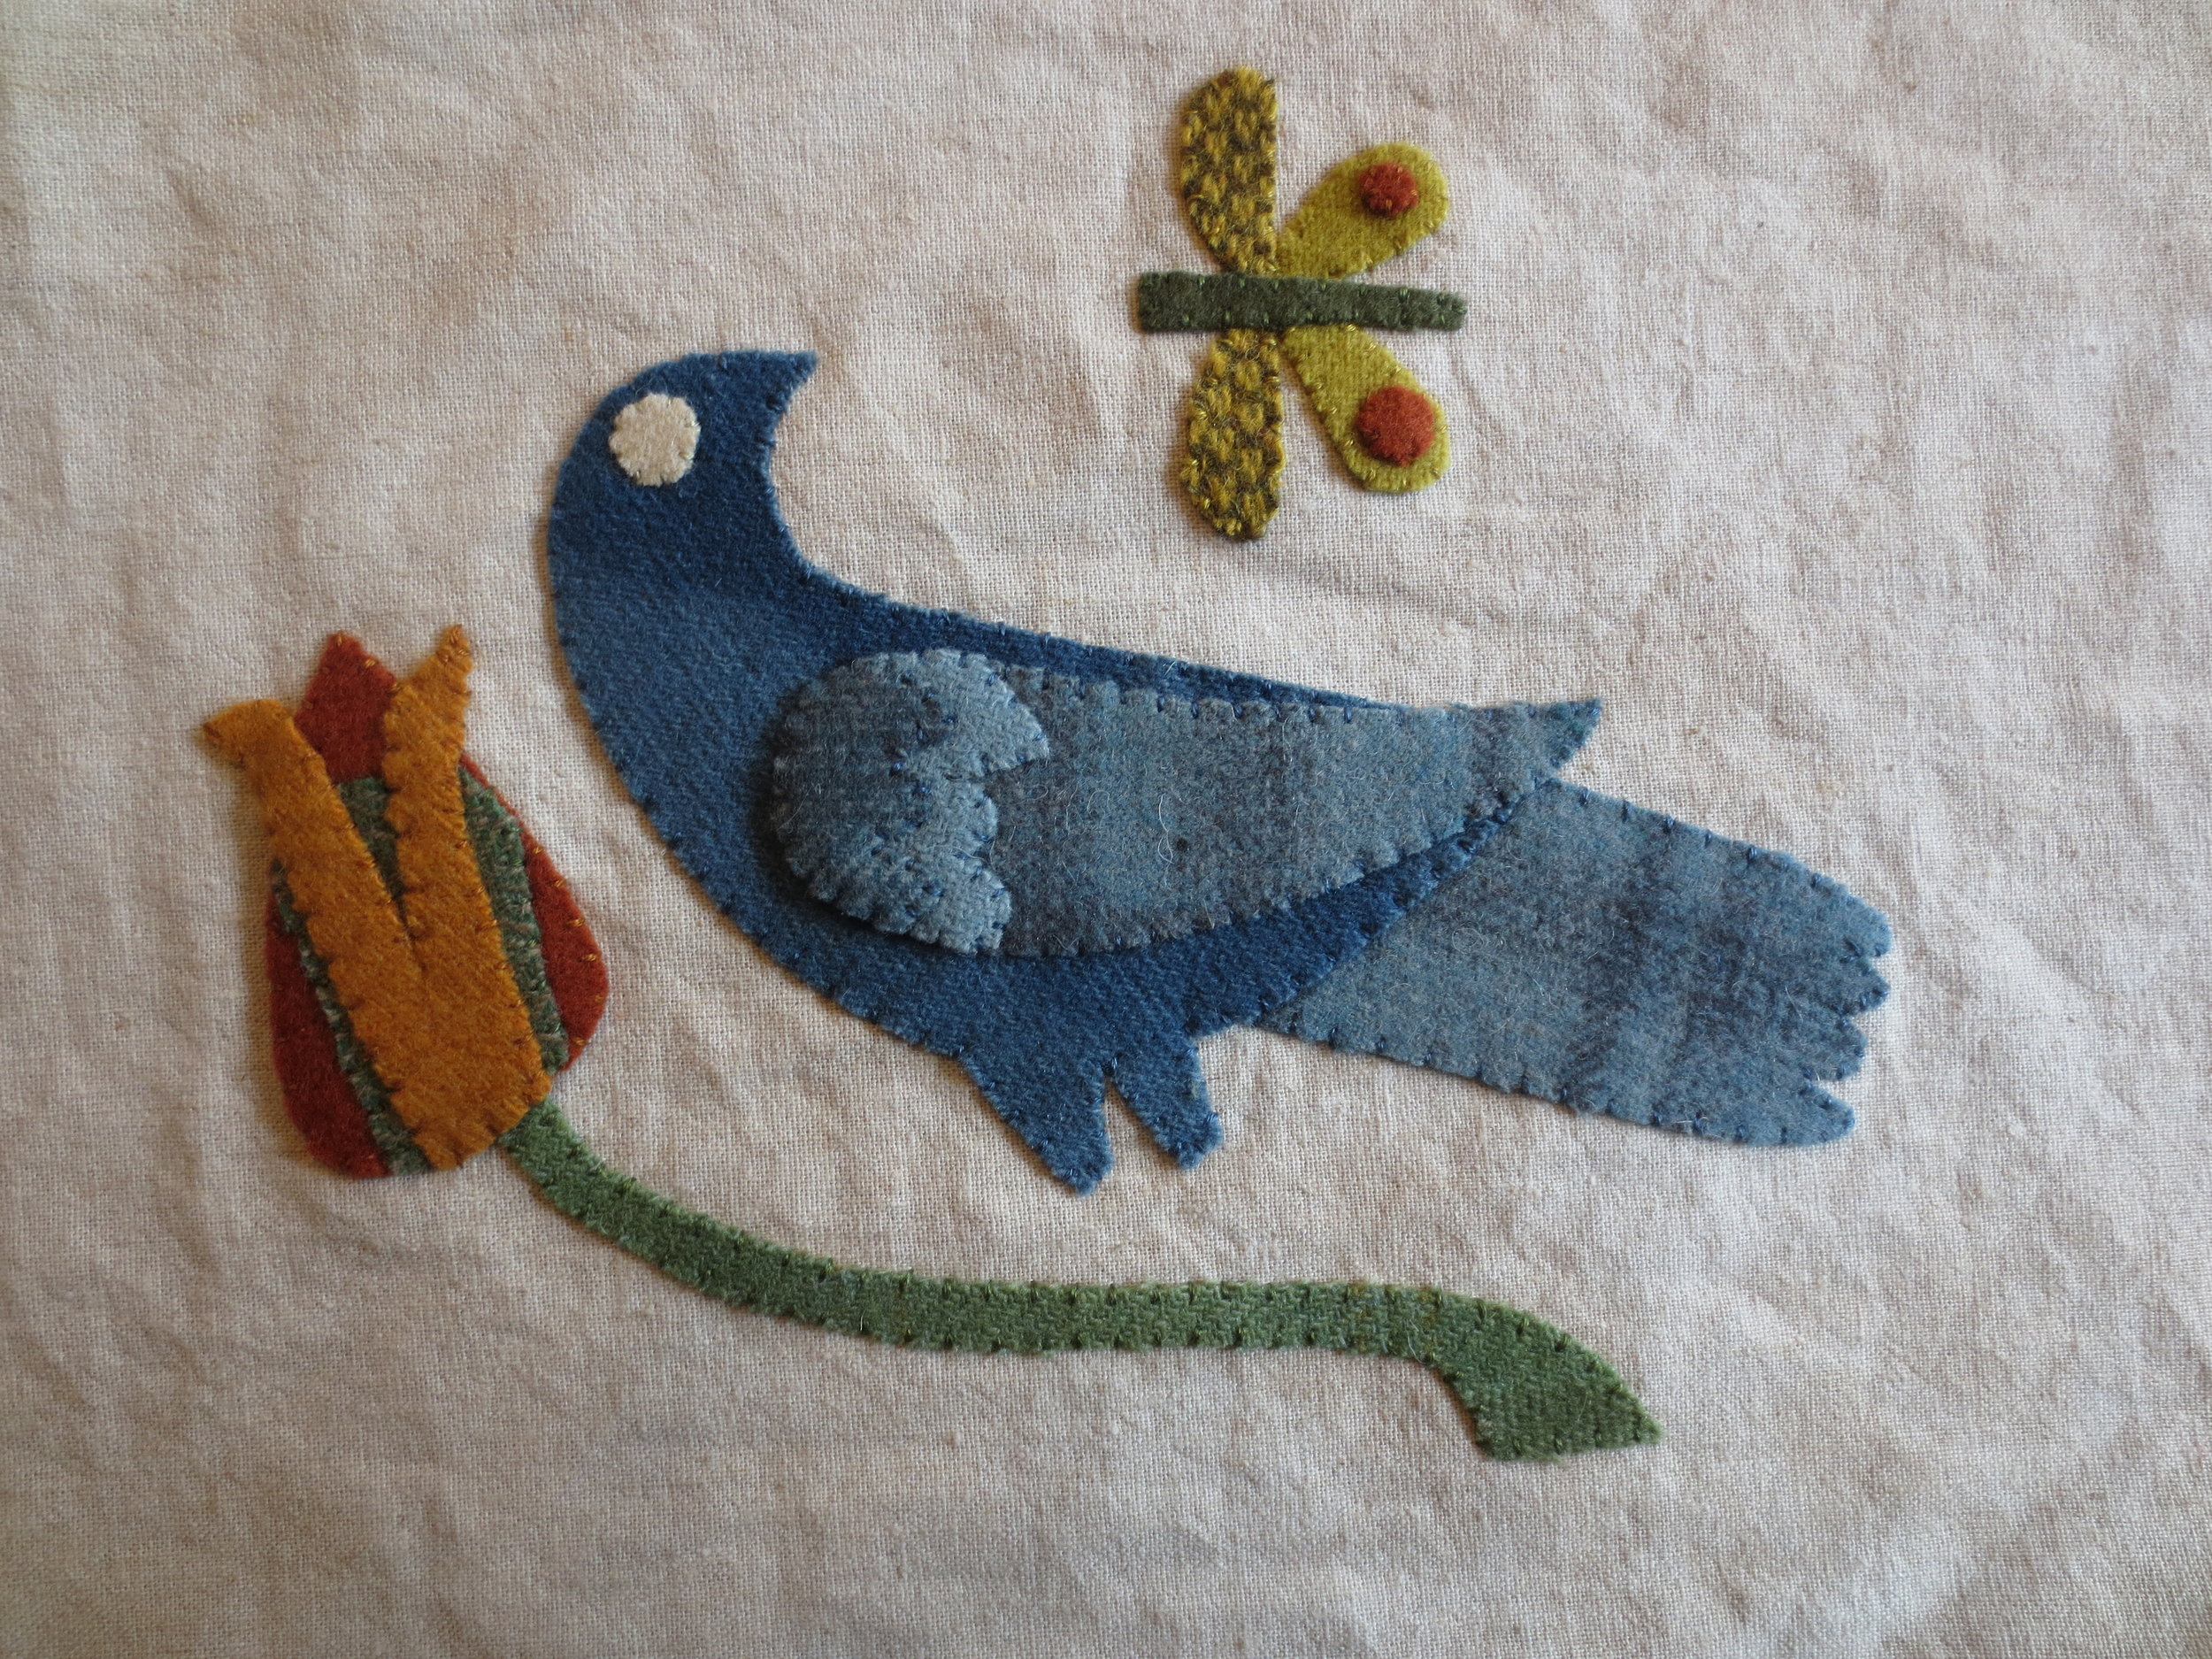
5. Position the bird’s body and tail, flower A, flower stem, and butterfly wings on the background fabric using the Layout as your guide.
Note: This is where a tracing light box is crucial. Place the Layout on top of the light box, and then center the background fabric on top of the Layout. You should be able to see the Layout through the fabric.
After positioning your pieces, carefully transfer your project to an ironing board (I used a cookie sheet to slide under my project to keep it flat during transfer). Fuse the pattern pieces in place using steam.
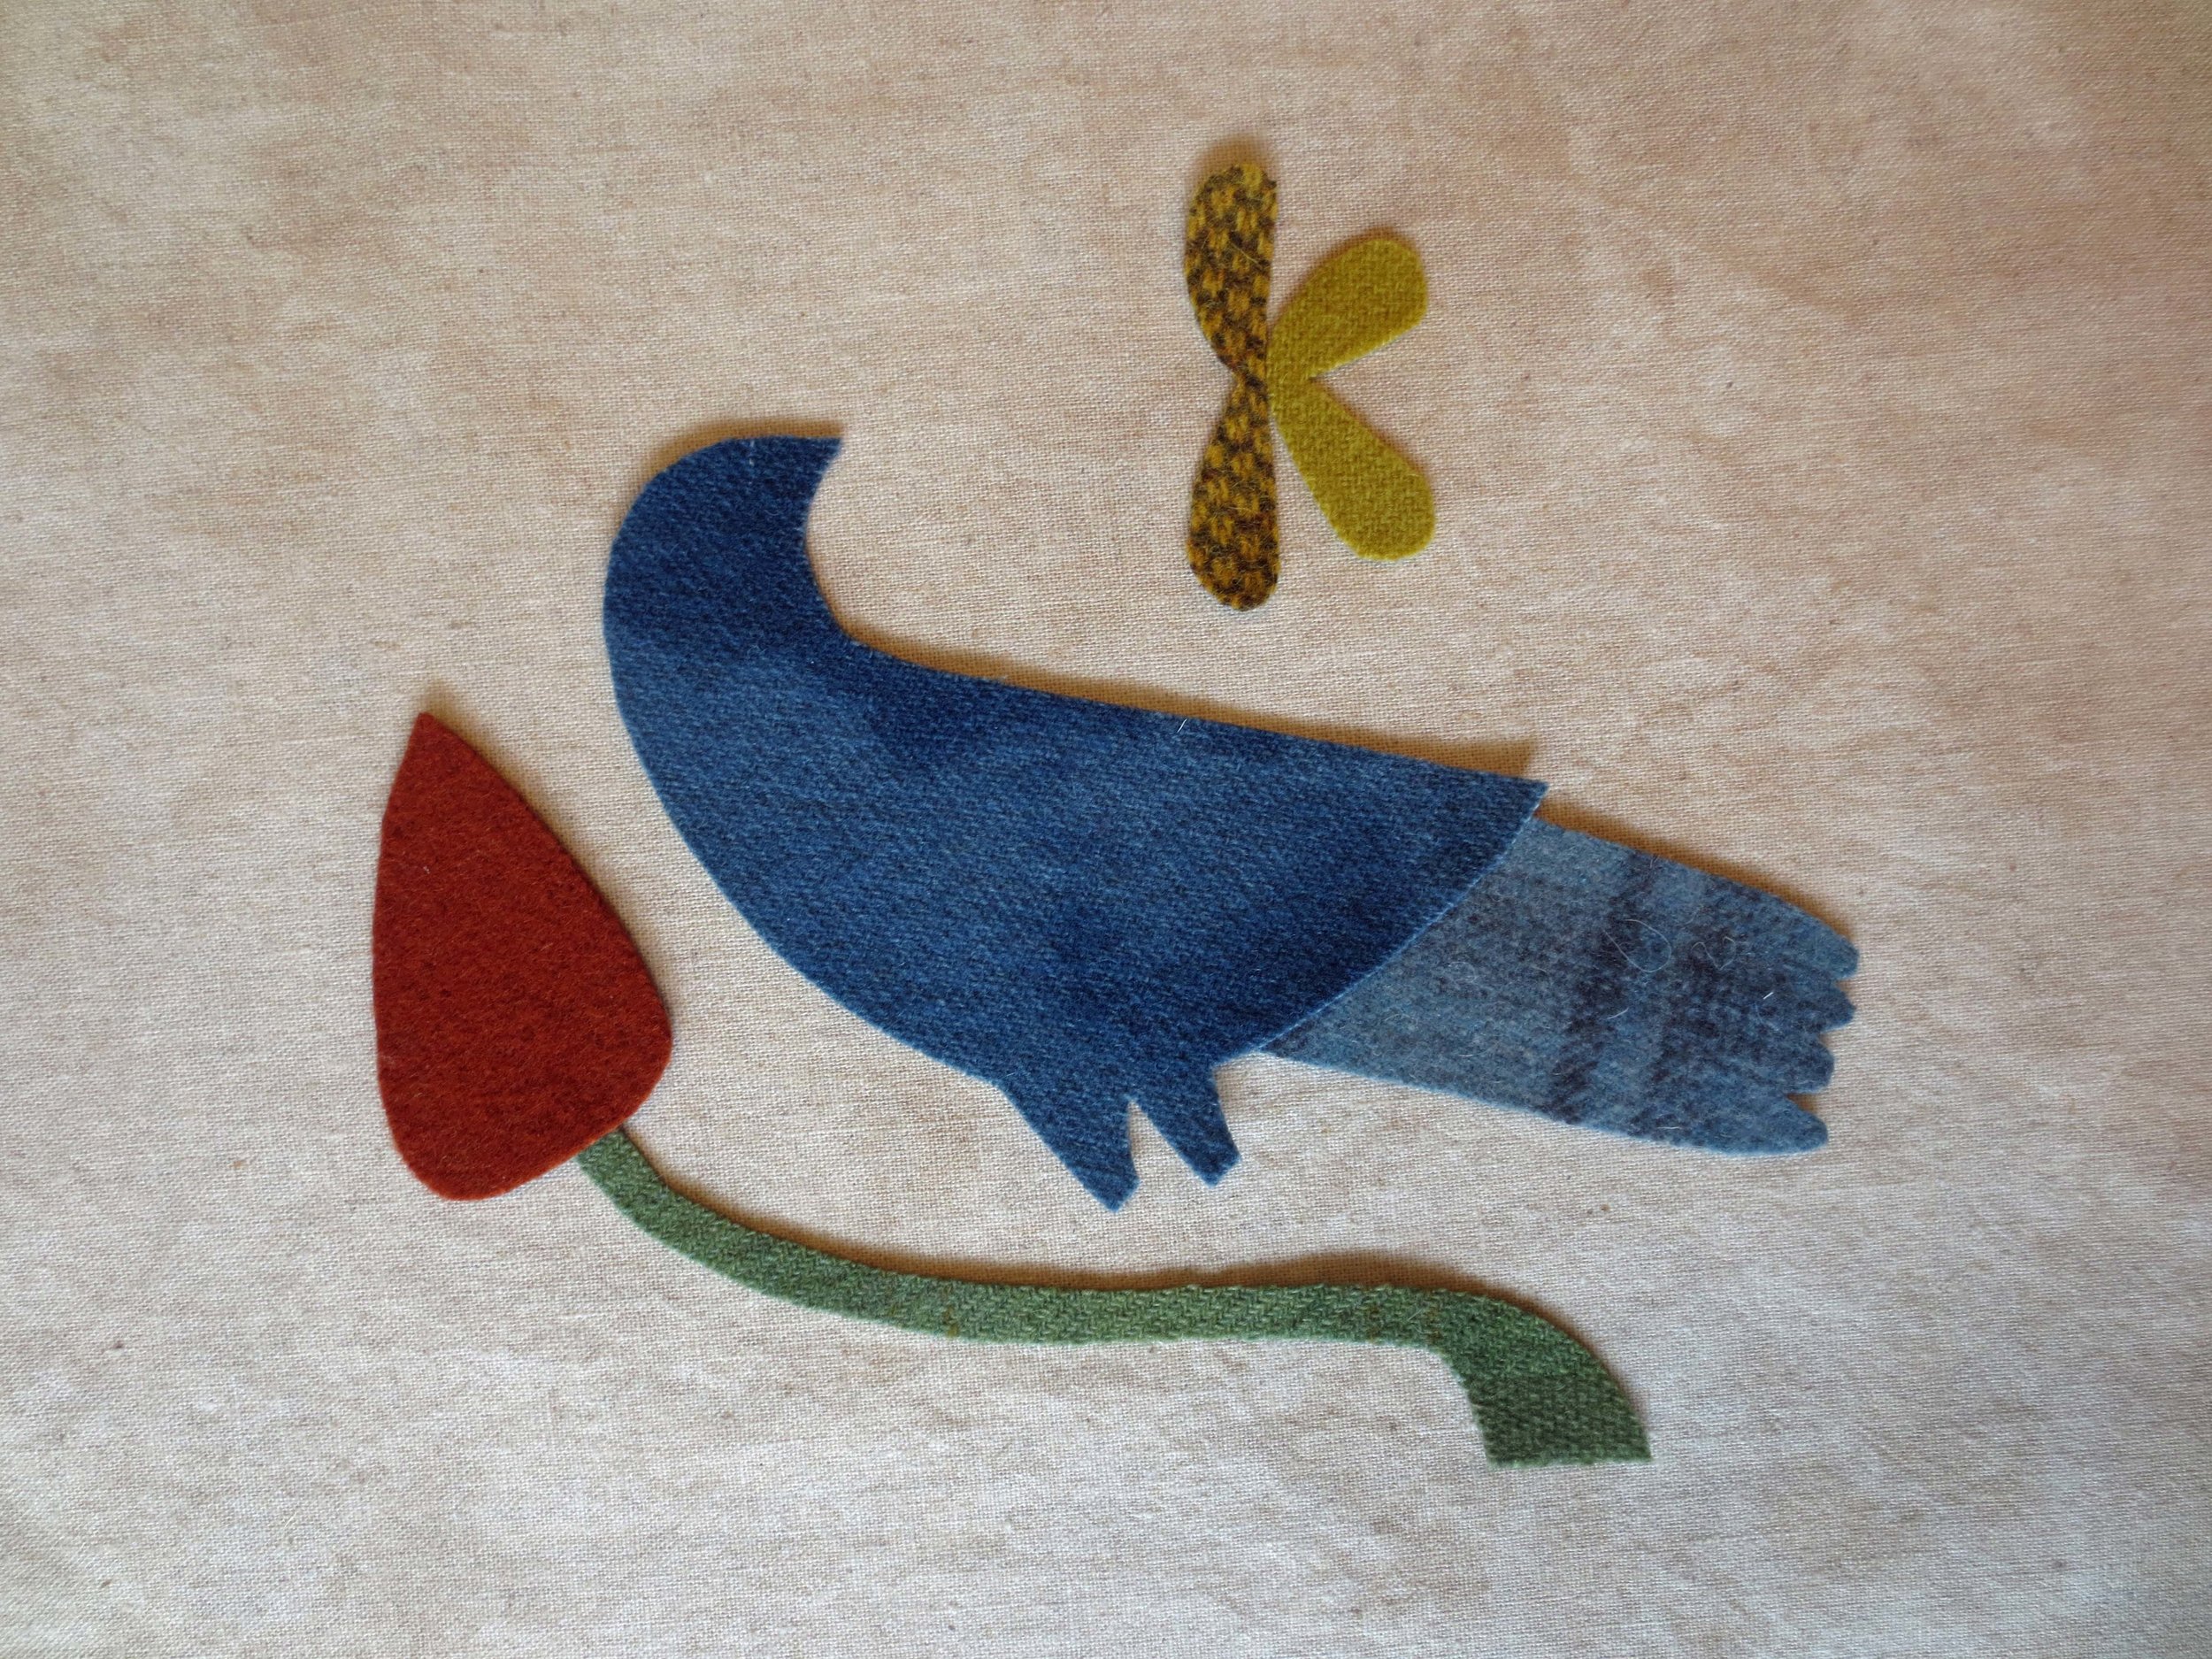
6. Position the bird’s wing and eye, flower B, and the butterfly body and spots. Fuse in place using steam.

7. Position flower C, and wing cap A. Fuse in place using steam.

8. And finally, position wing cap B on top of wing cap A. Fuse in place using steam.
9. Whip stitch all the pieces with two strands of embroidery floss that matches your wool colors.
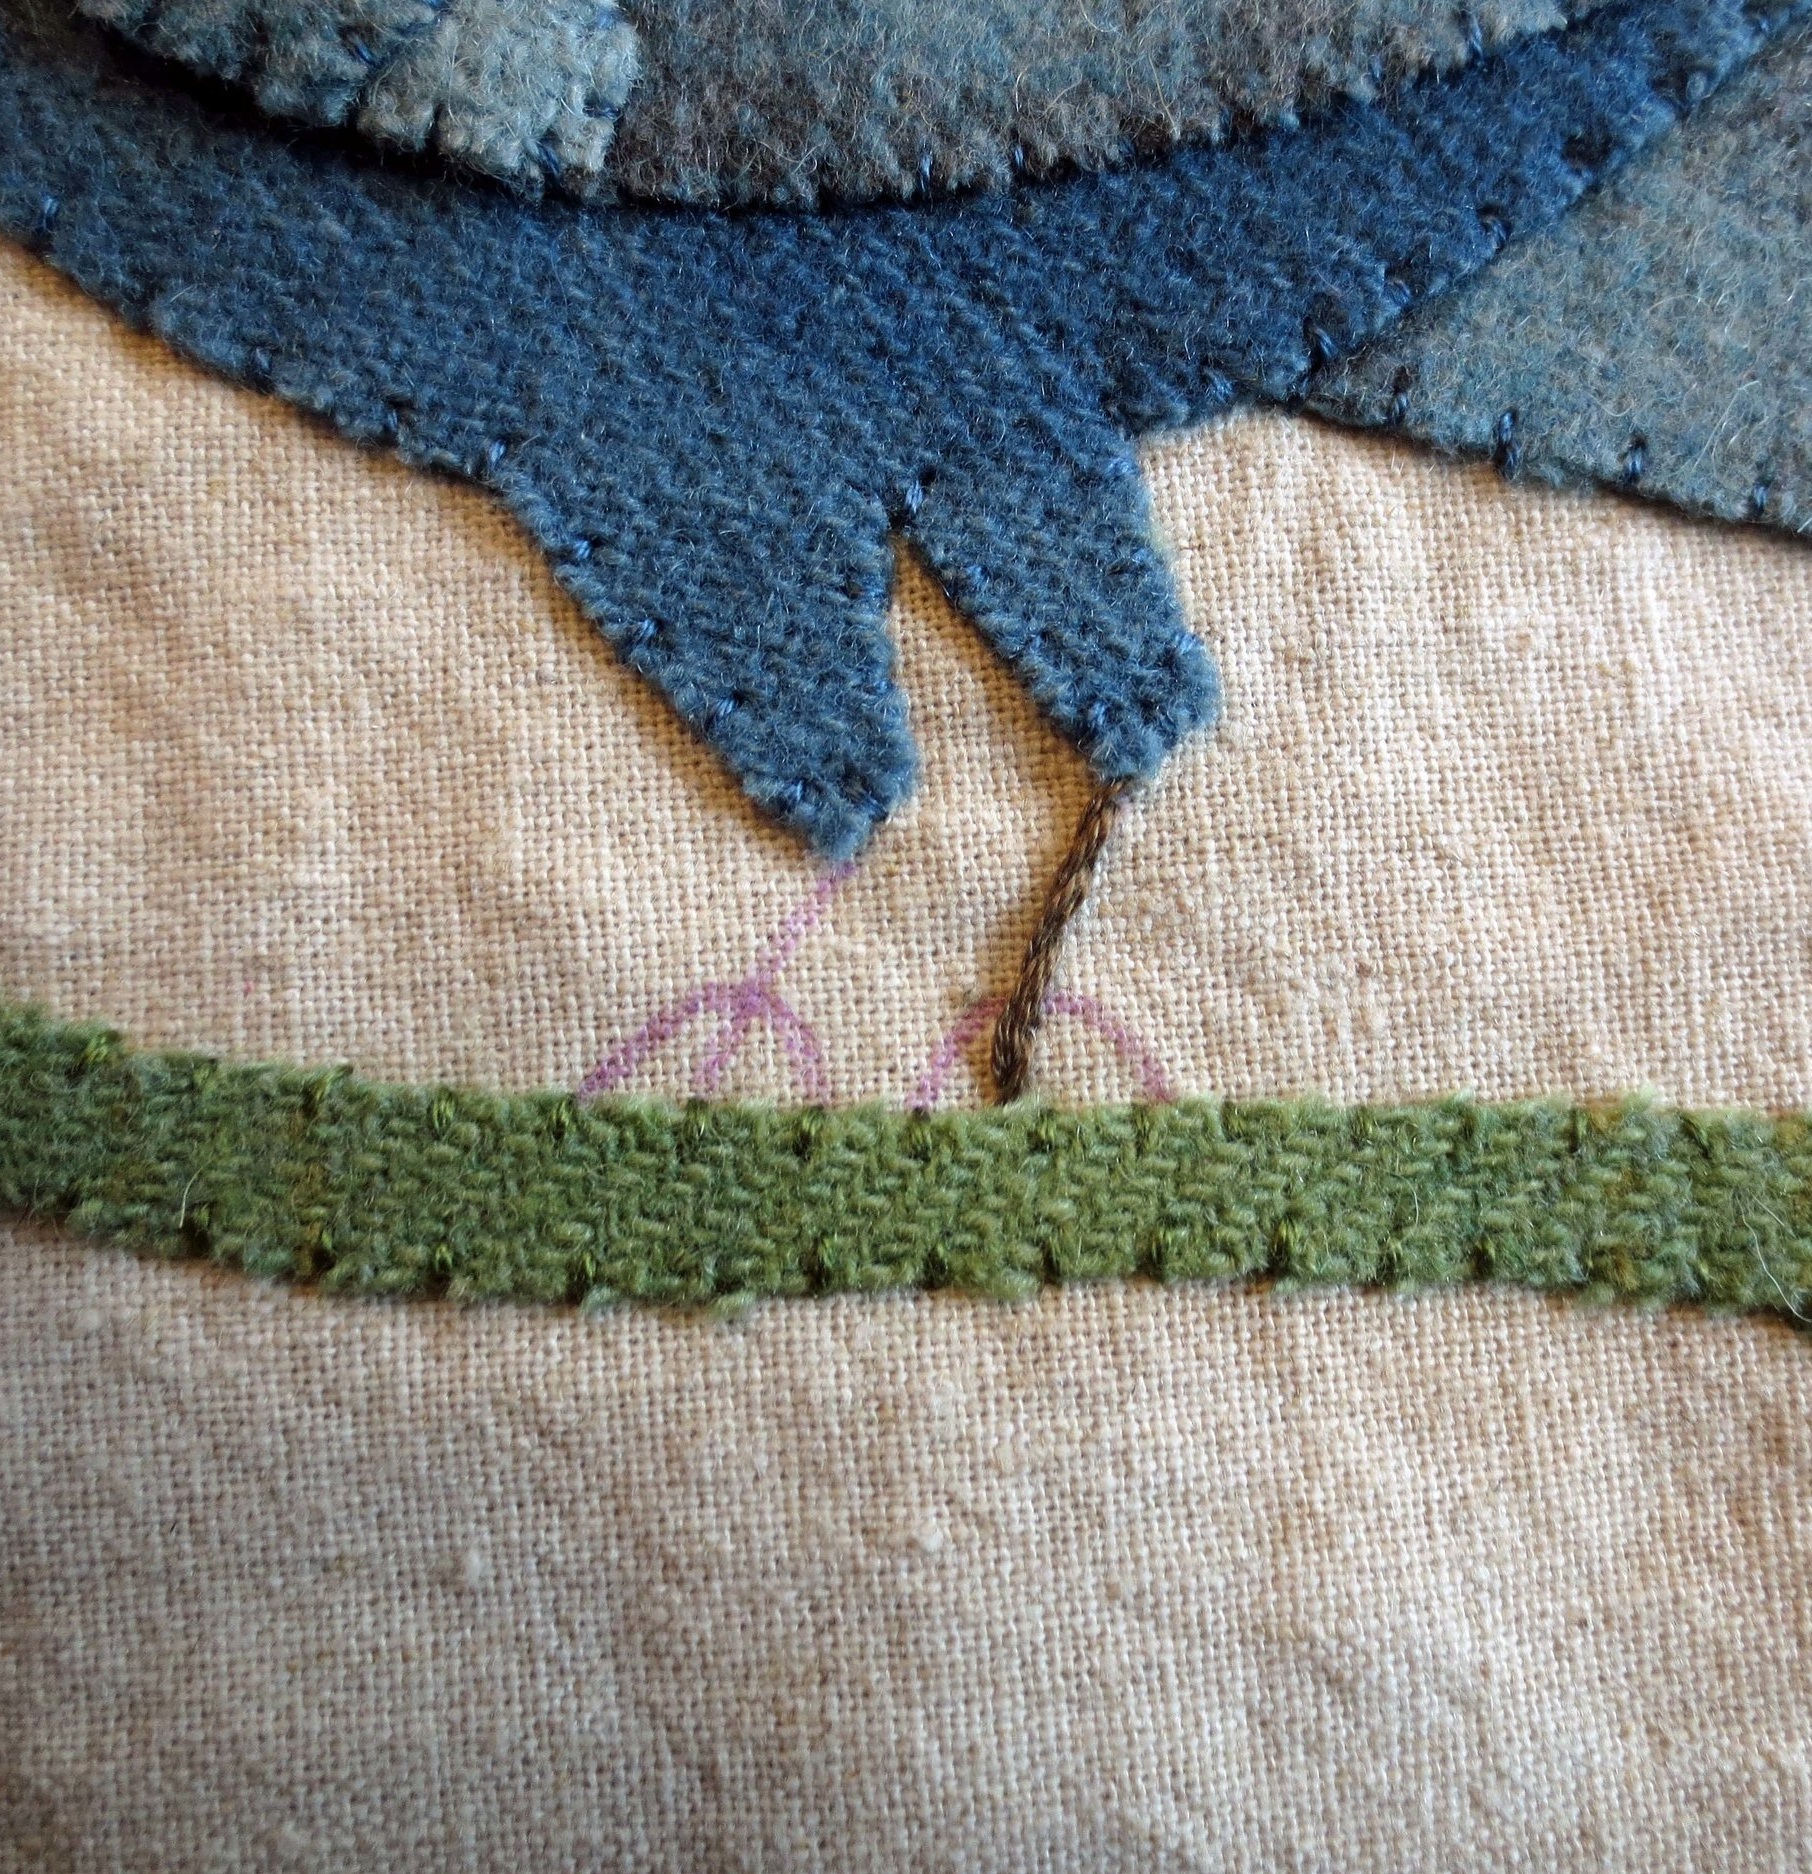
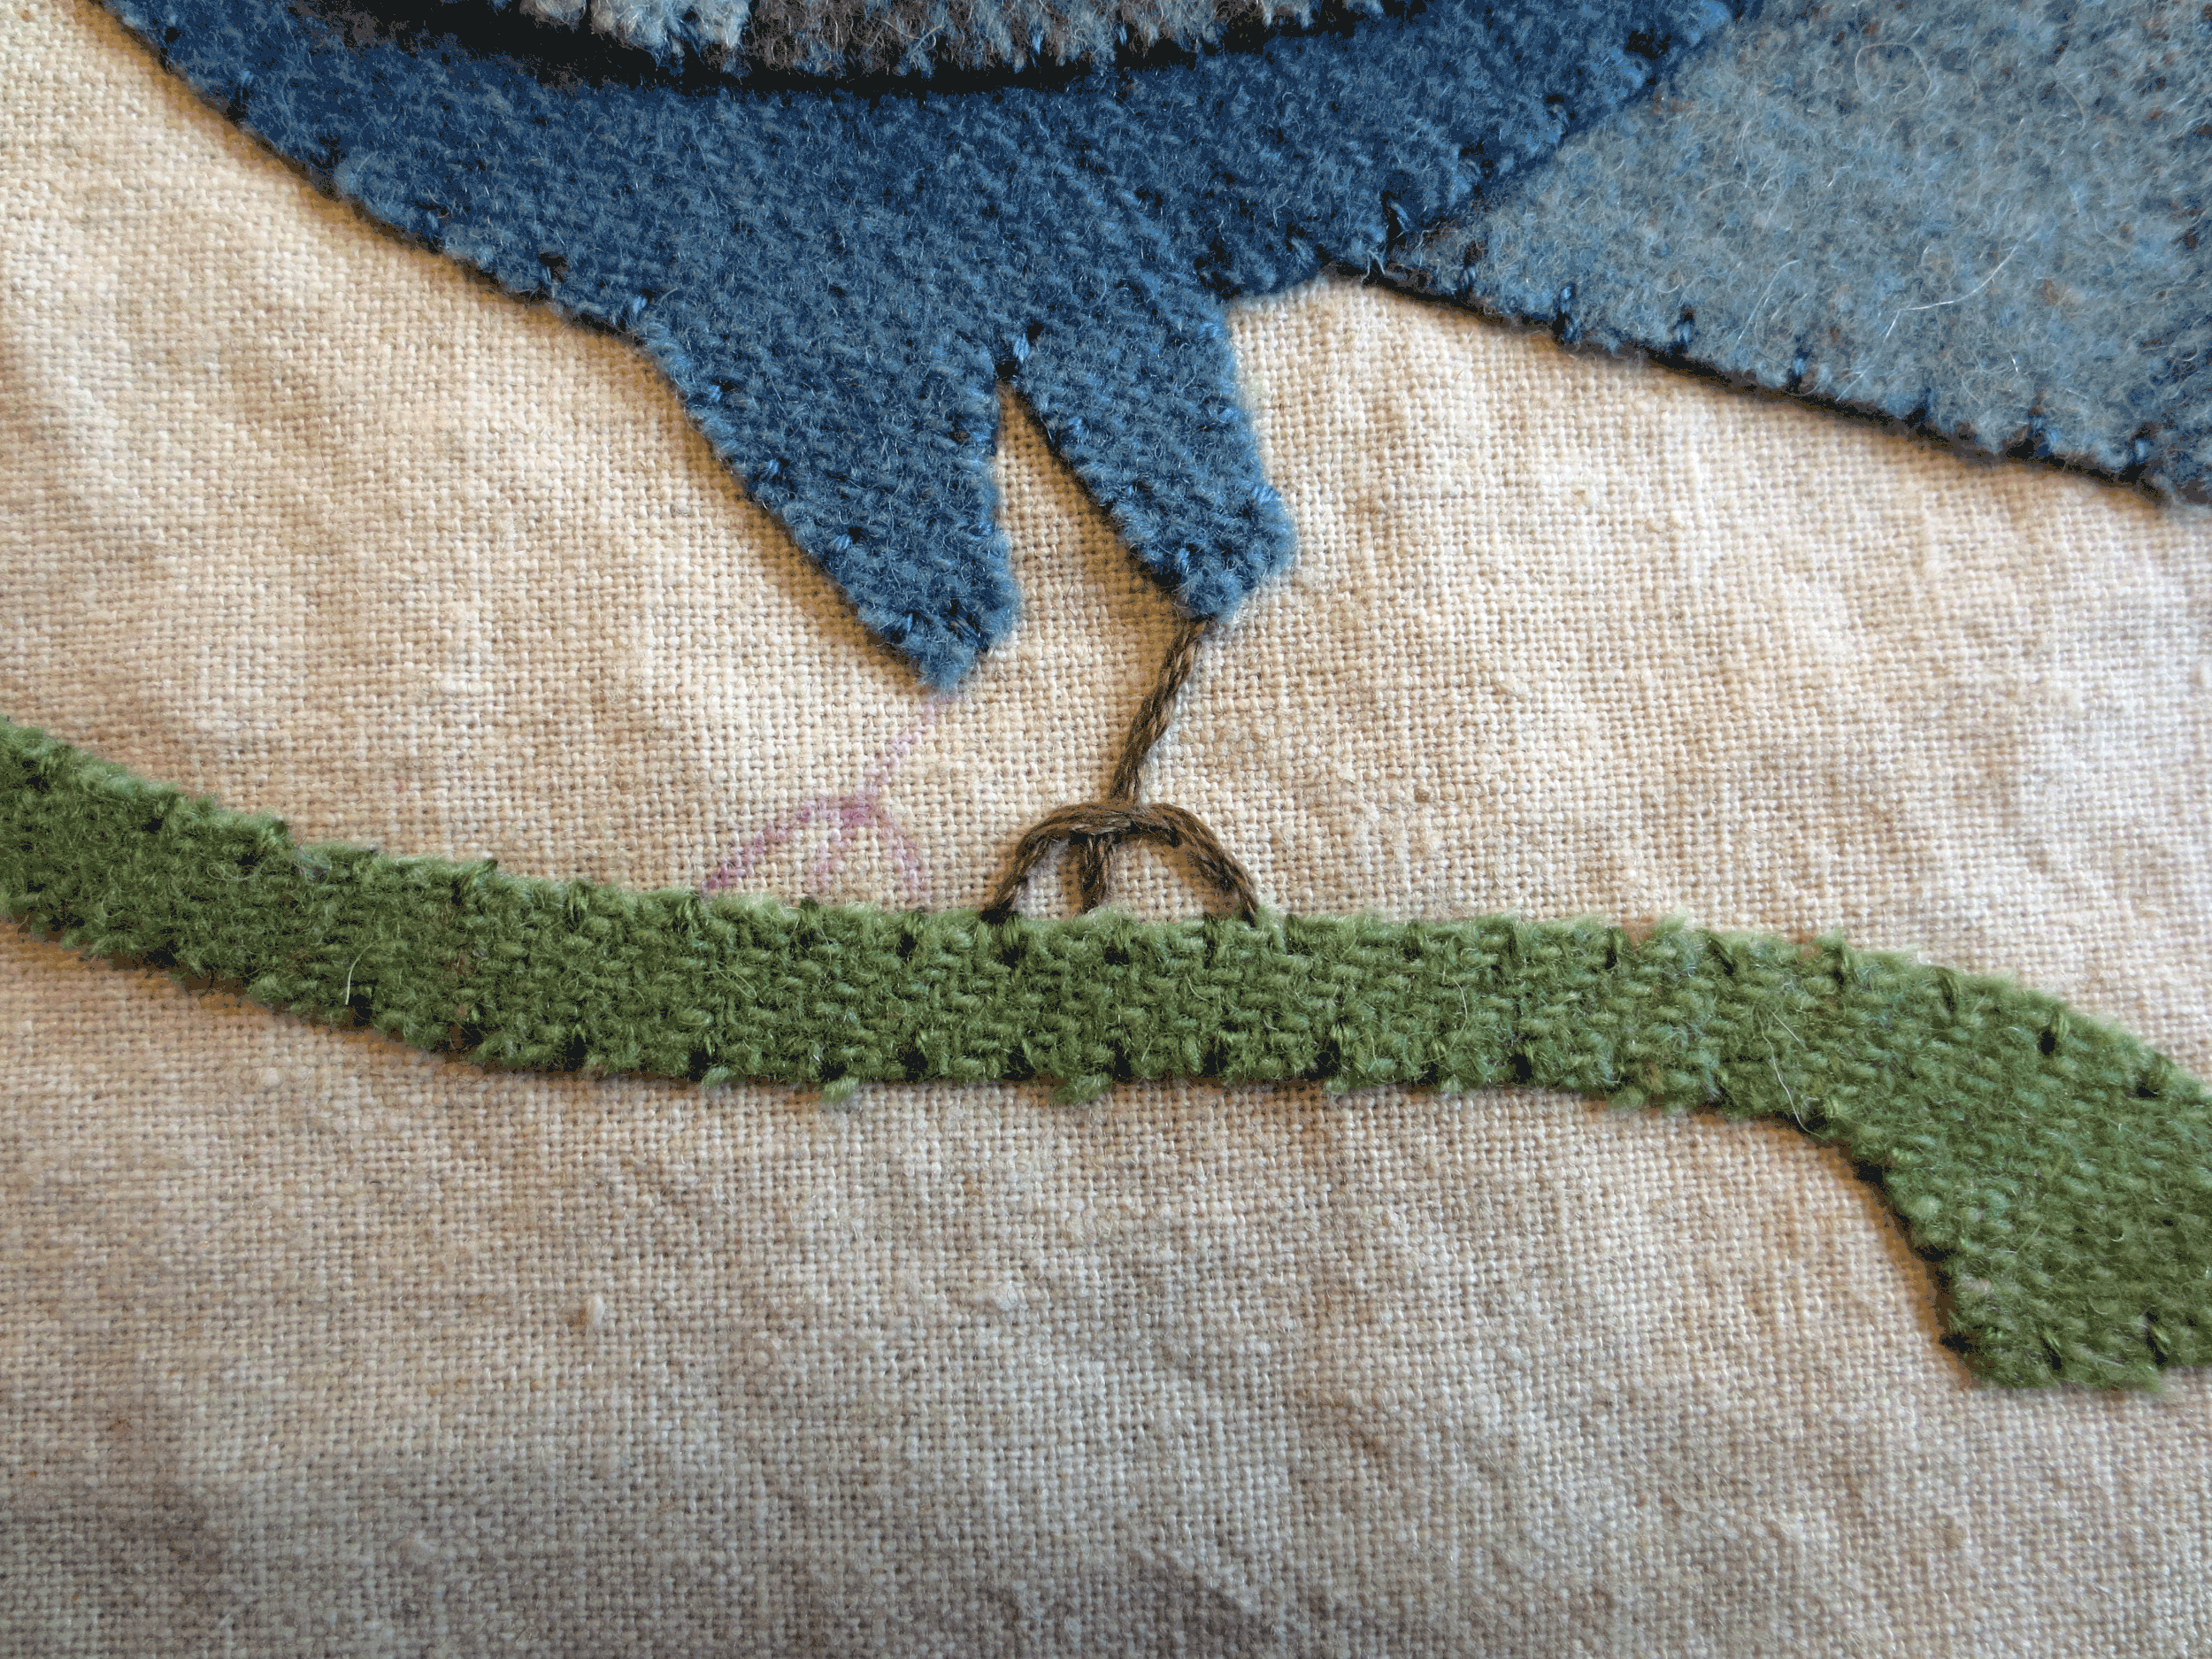
10. Place your project back onto the light box with the Layout. Using a disappearing ink pen, trace the bird’s legs, flower stamens, and butterfly antennae.

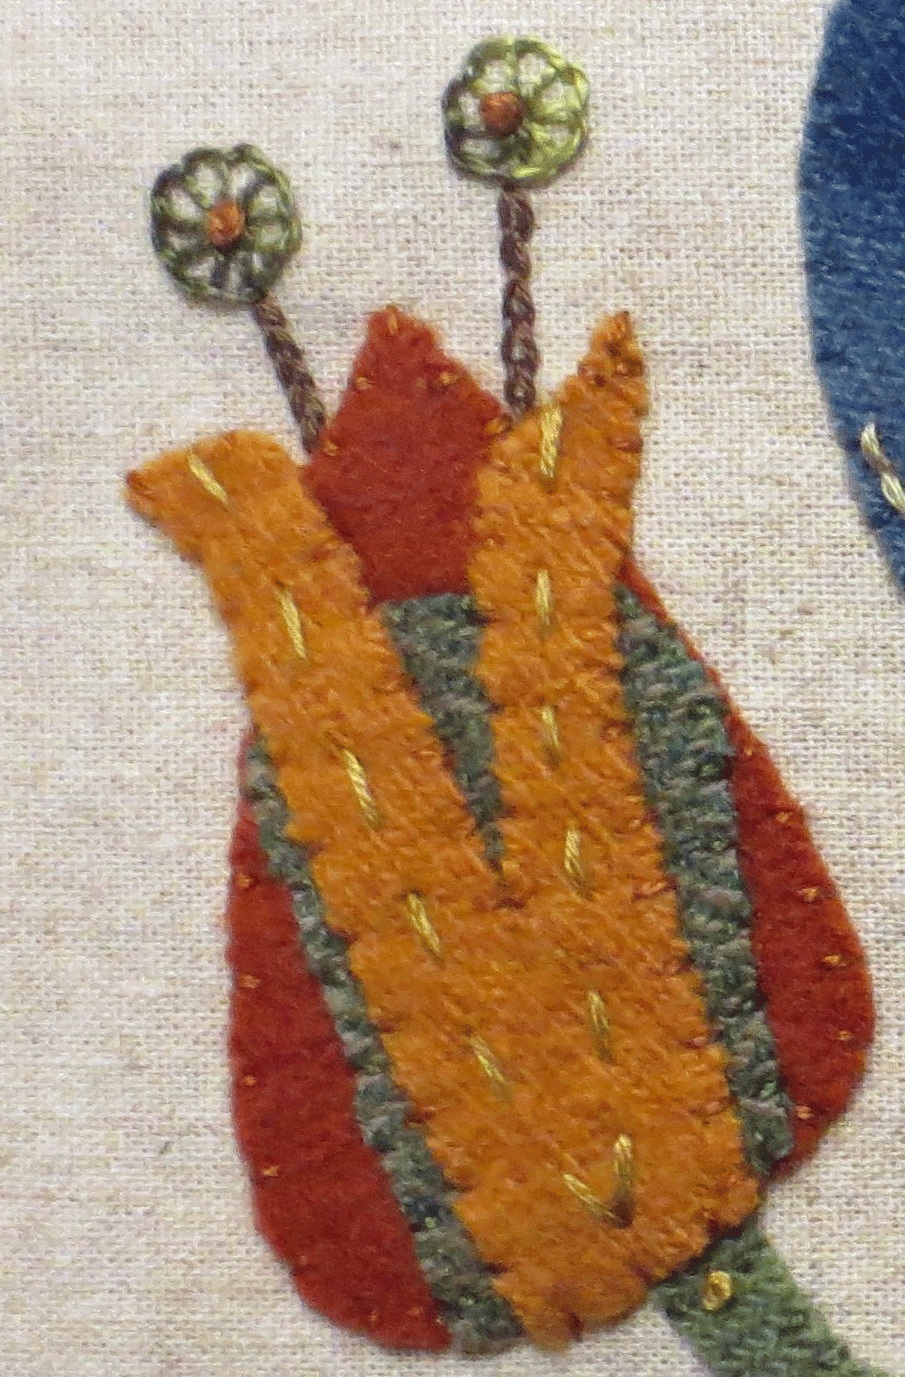
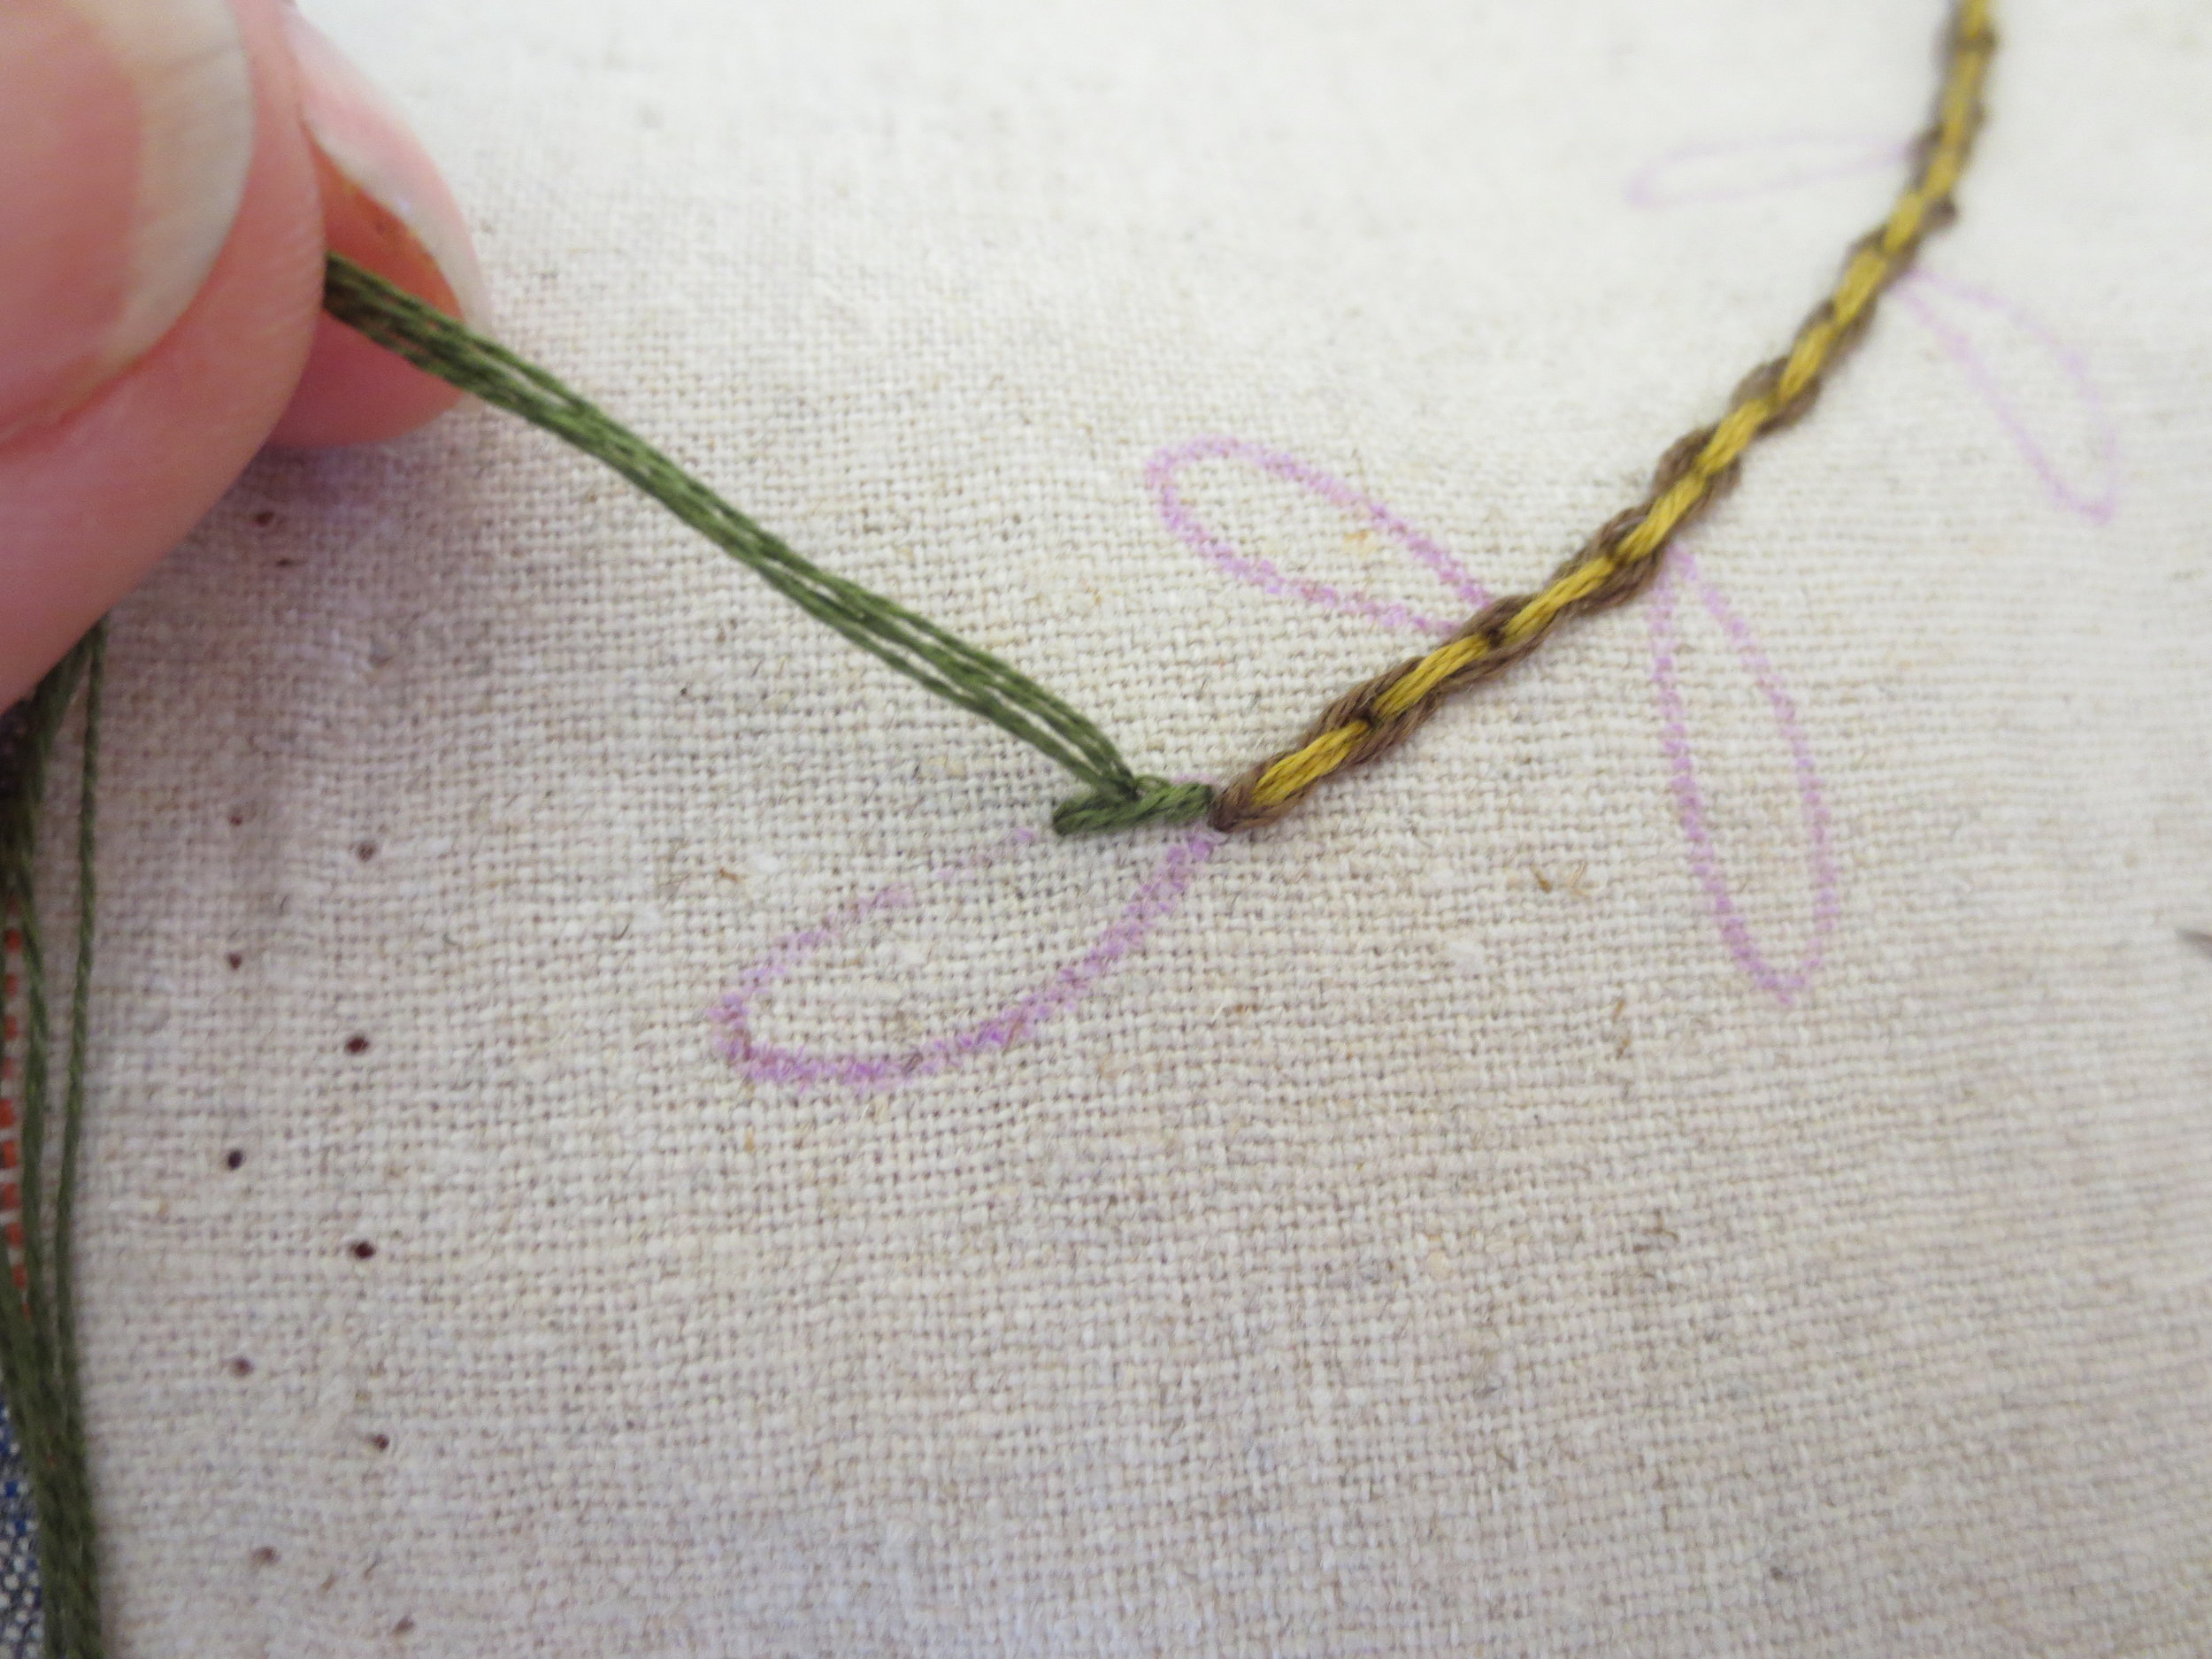
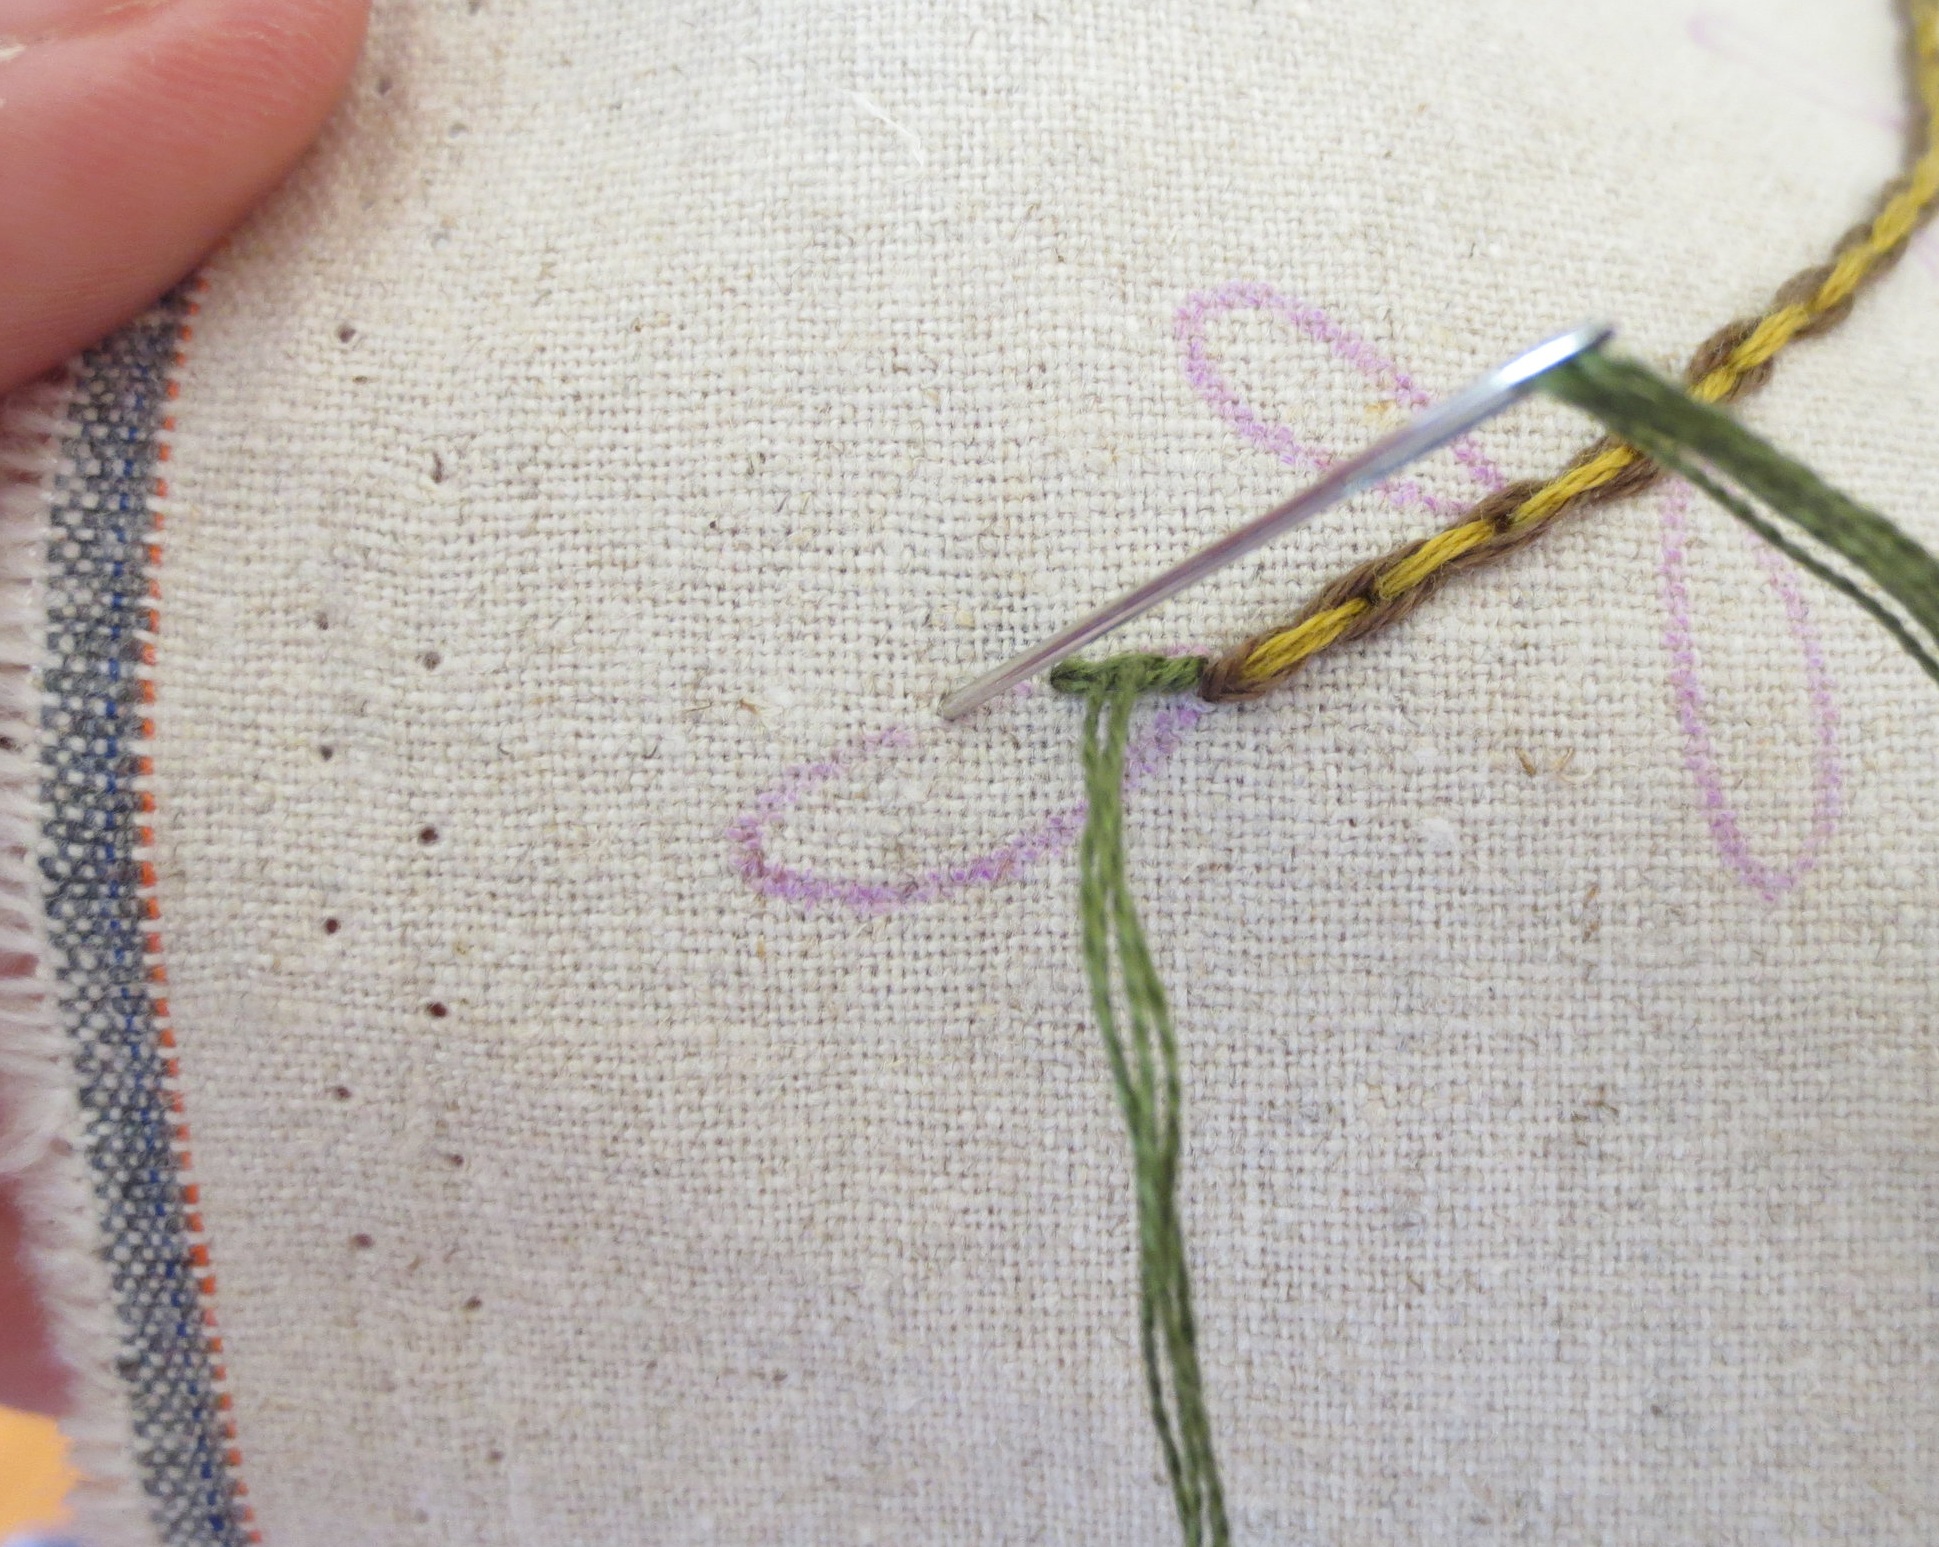
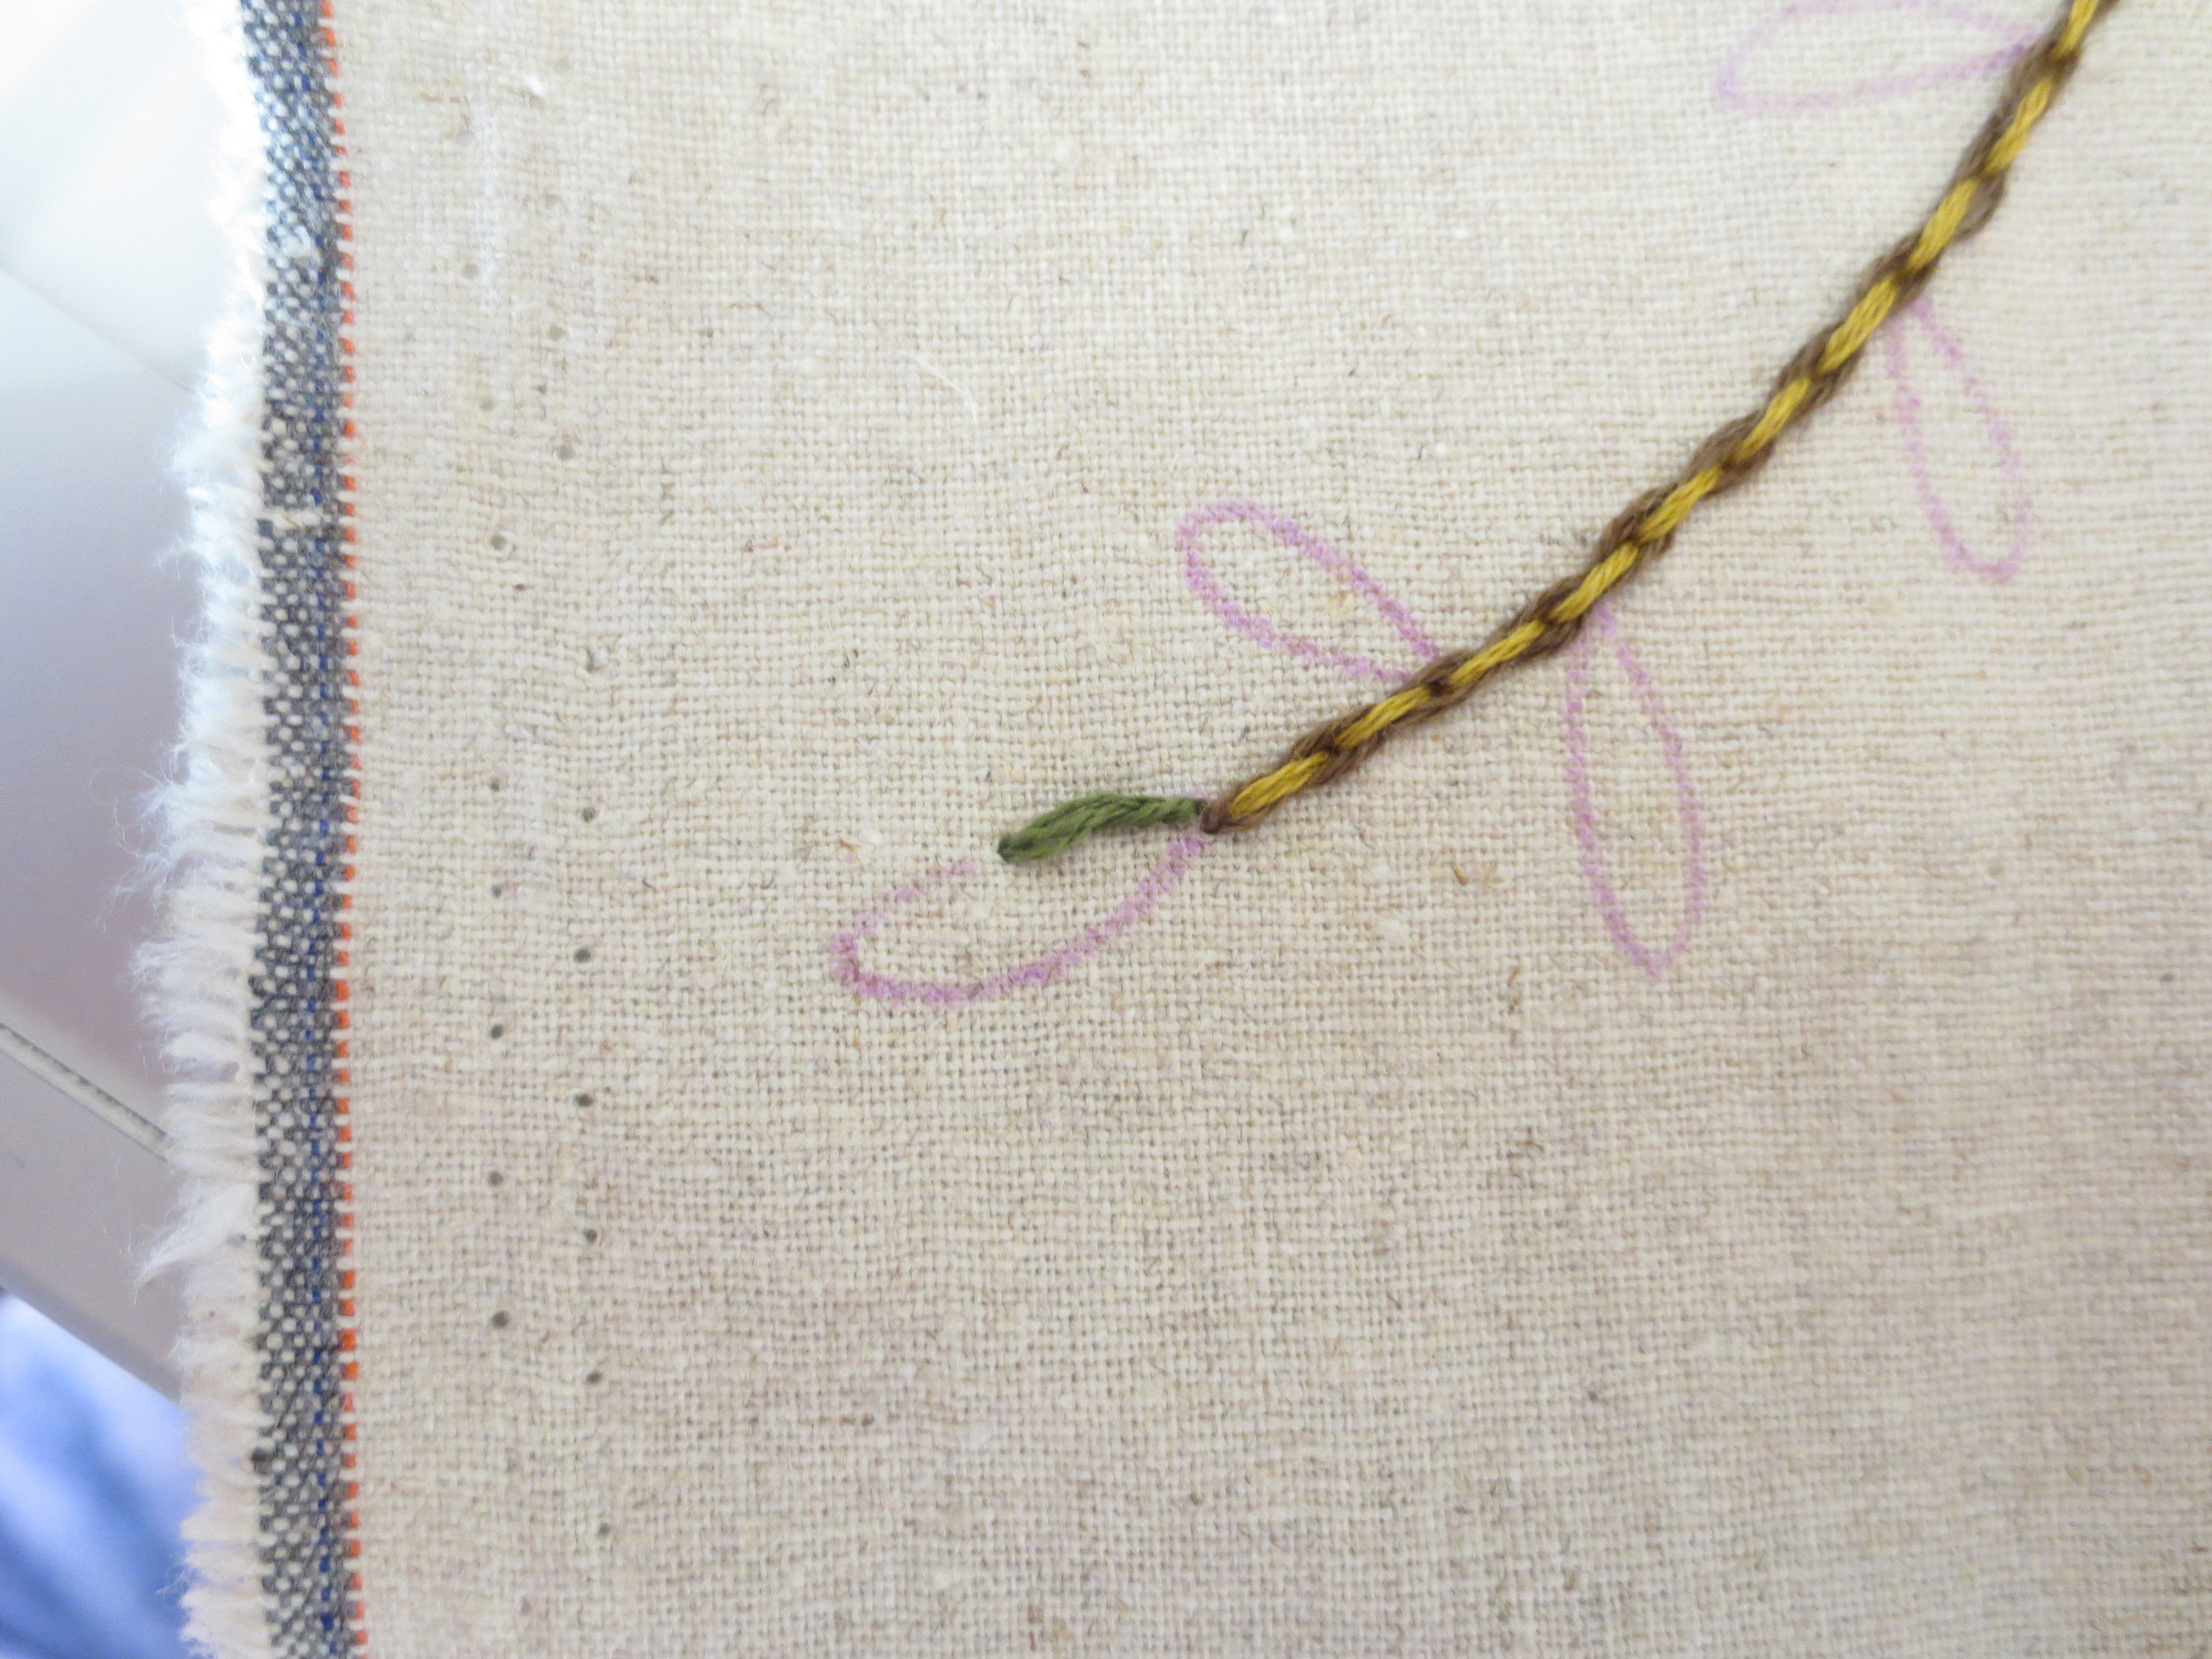
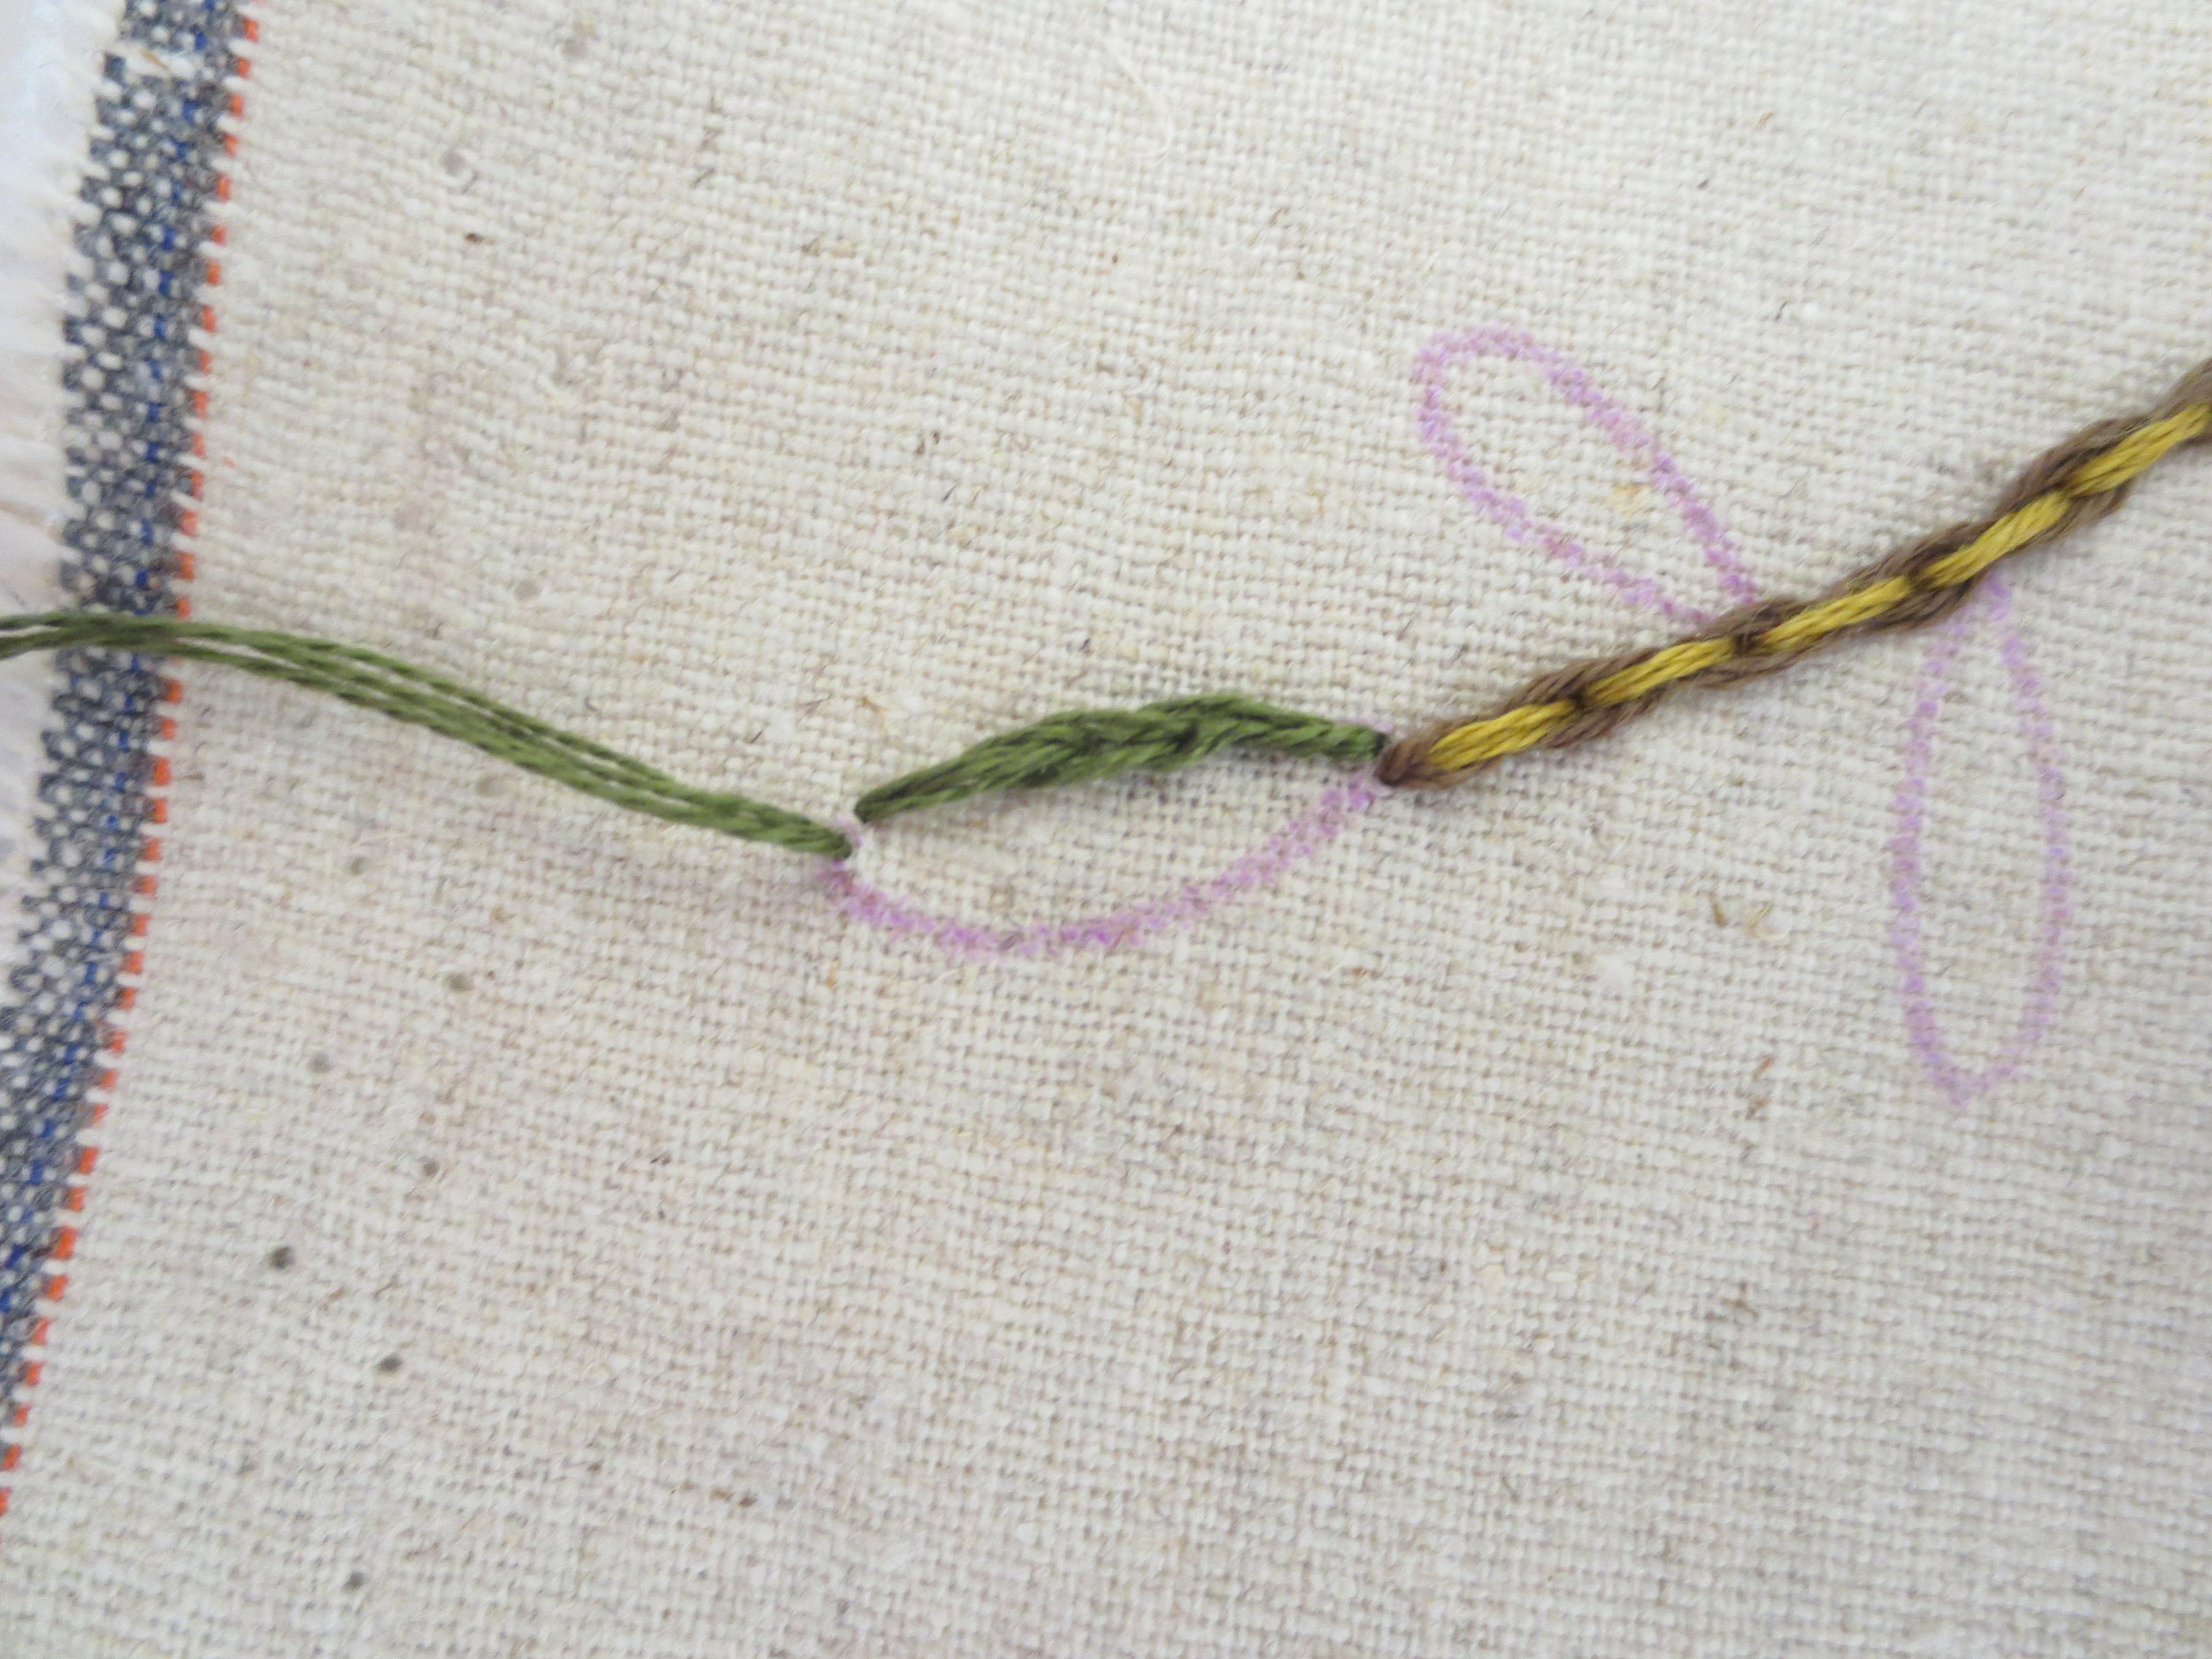
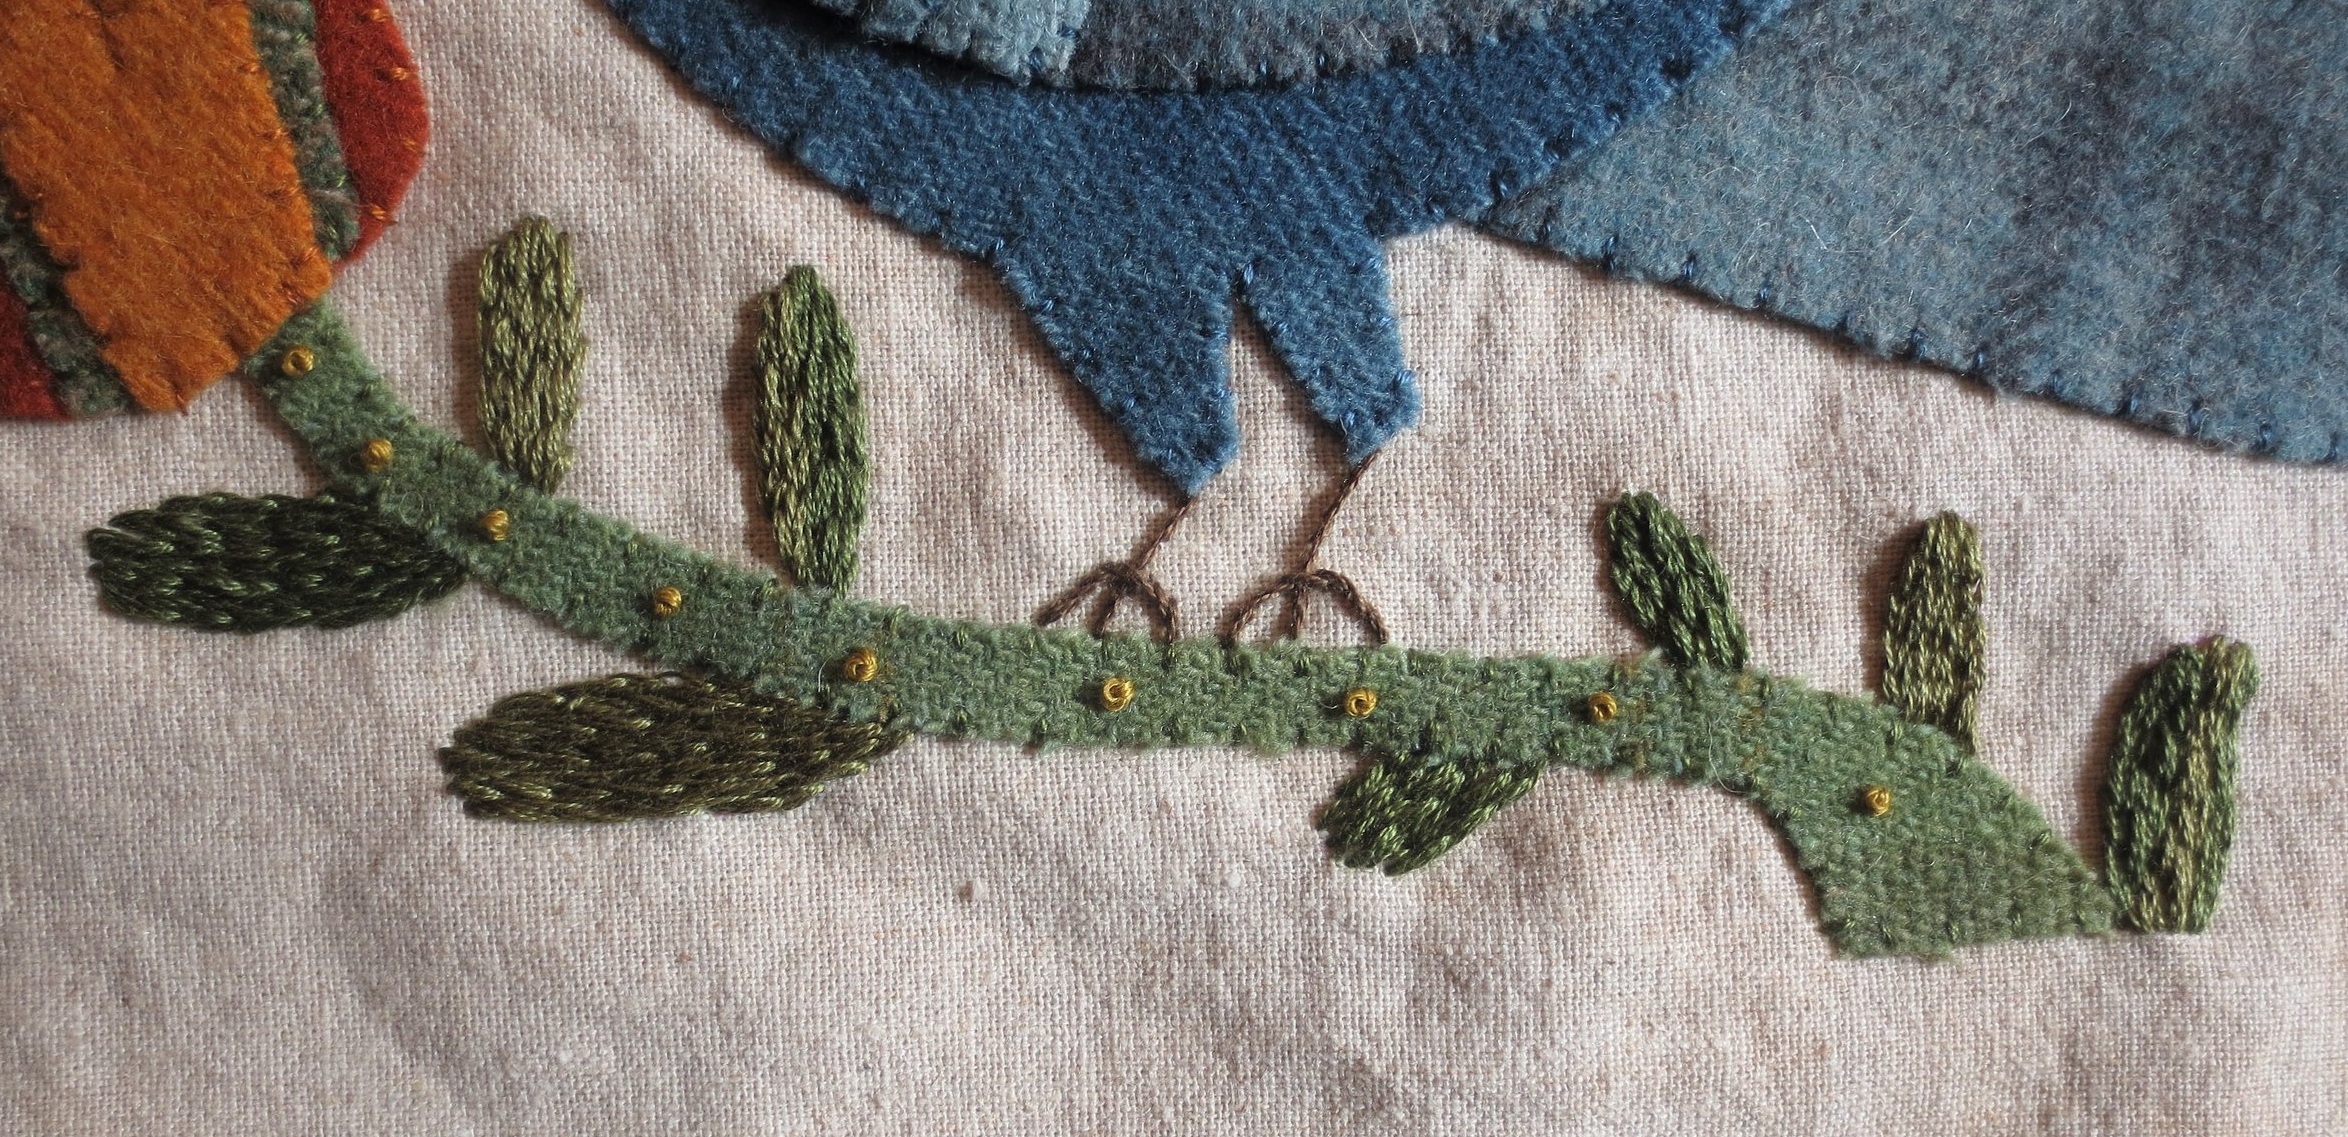
11. Use two strands of dark brown floss to stem stitch the leg and center toe, and then stem stitch the side toes. These are tiny stitches approximately 1/8-inch long.

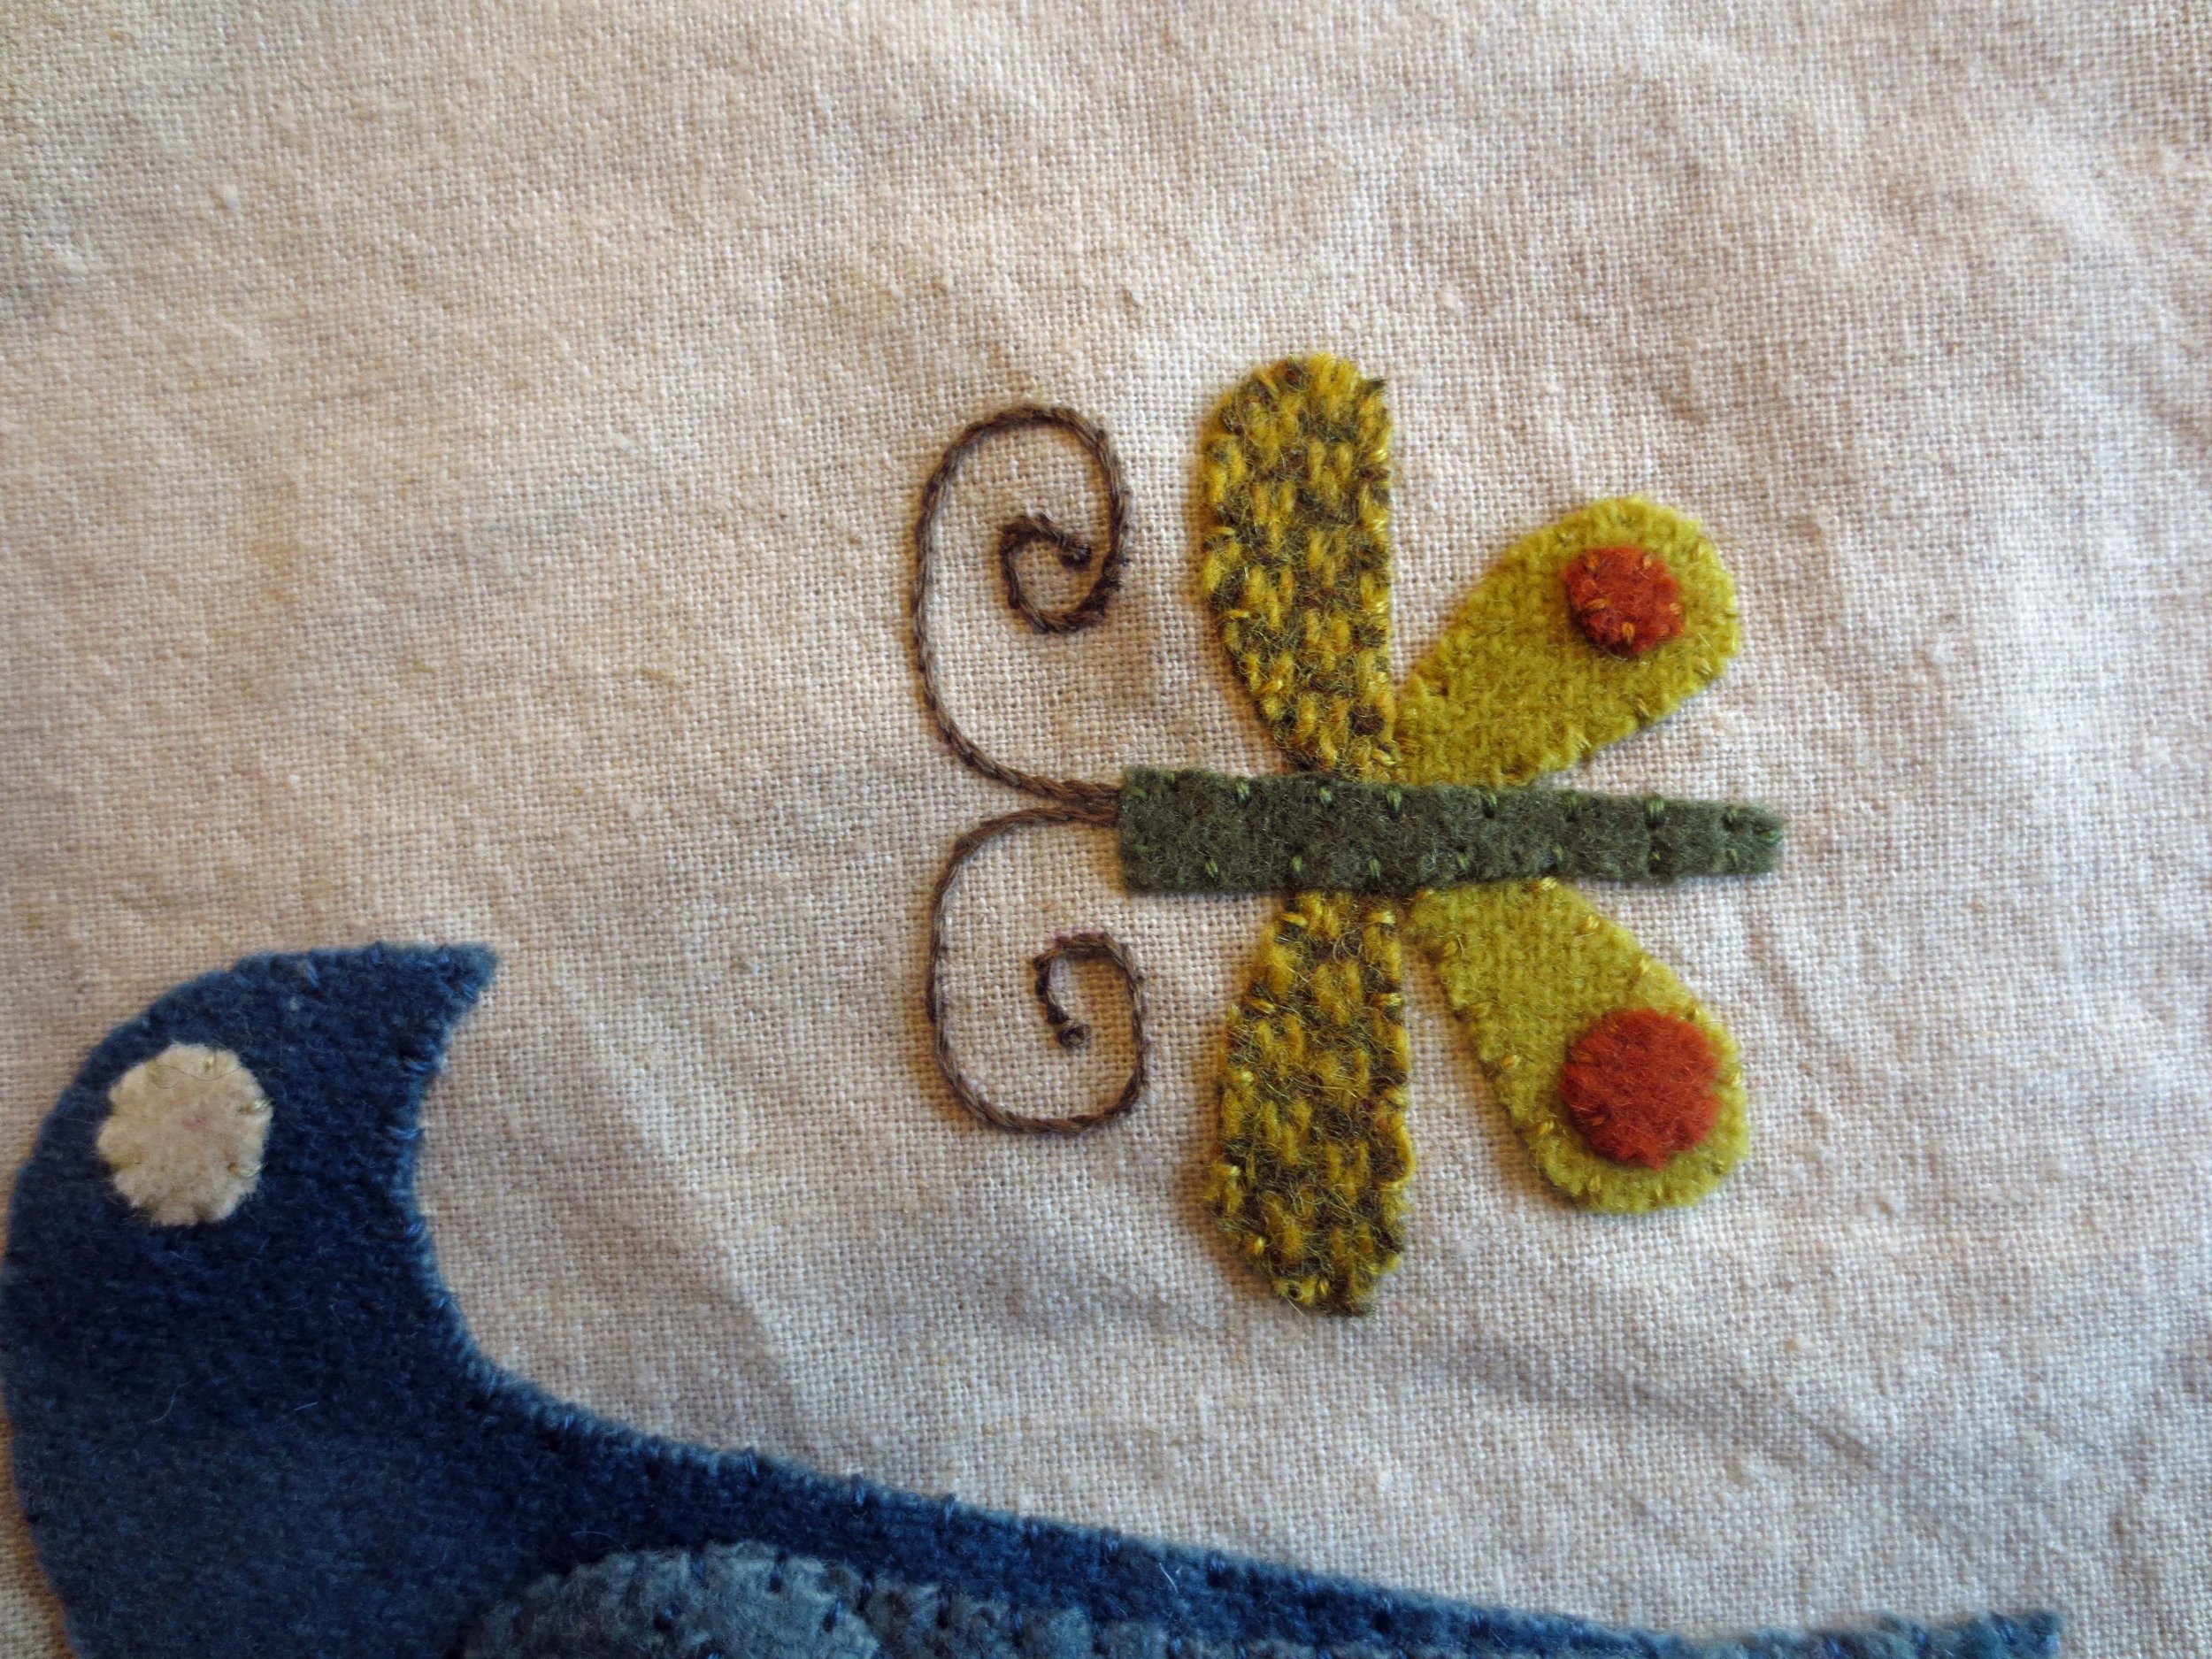
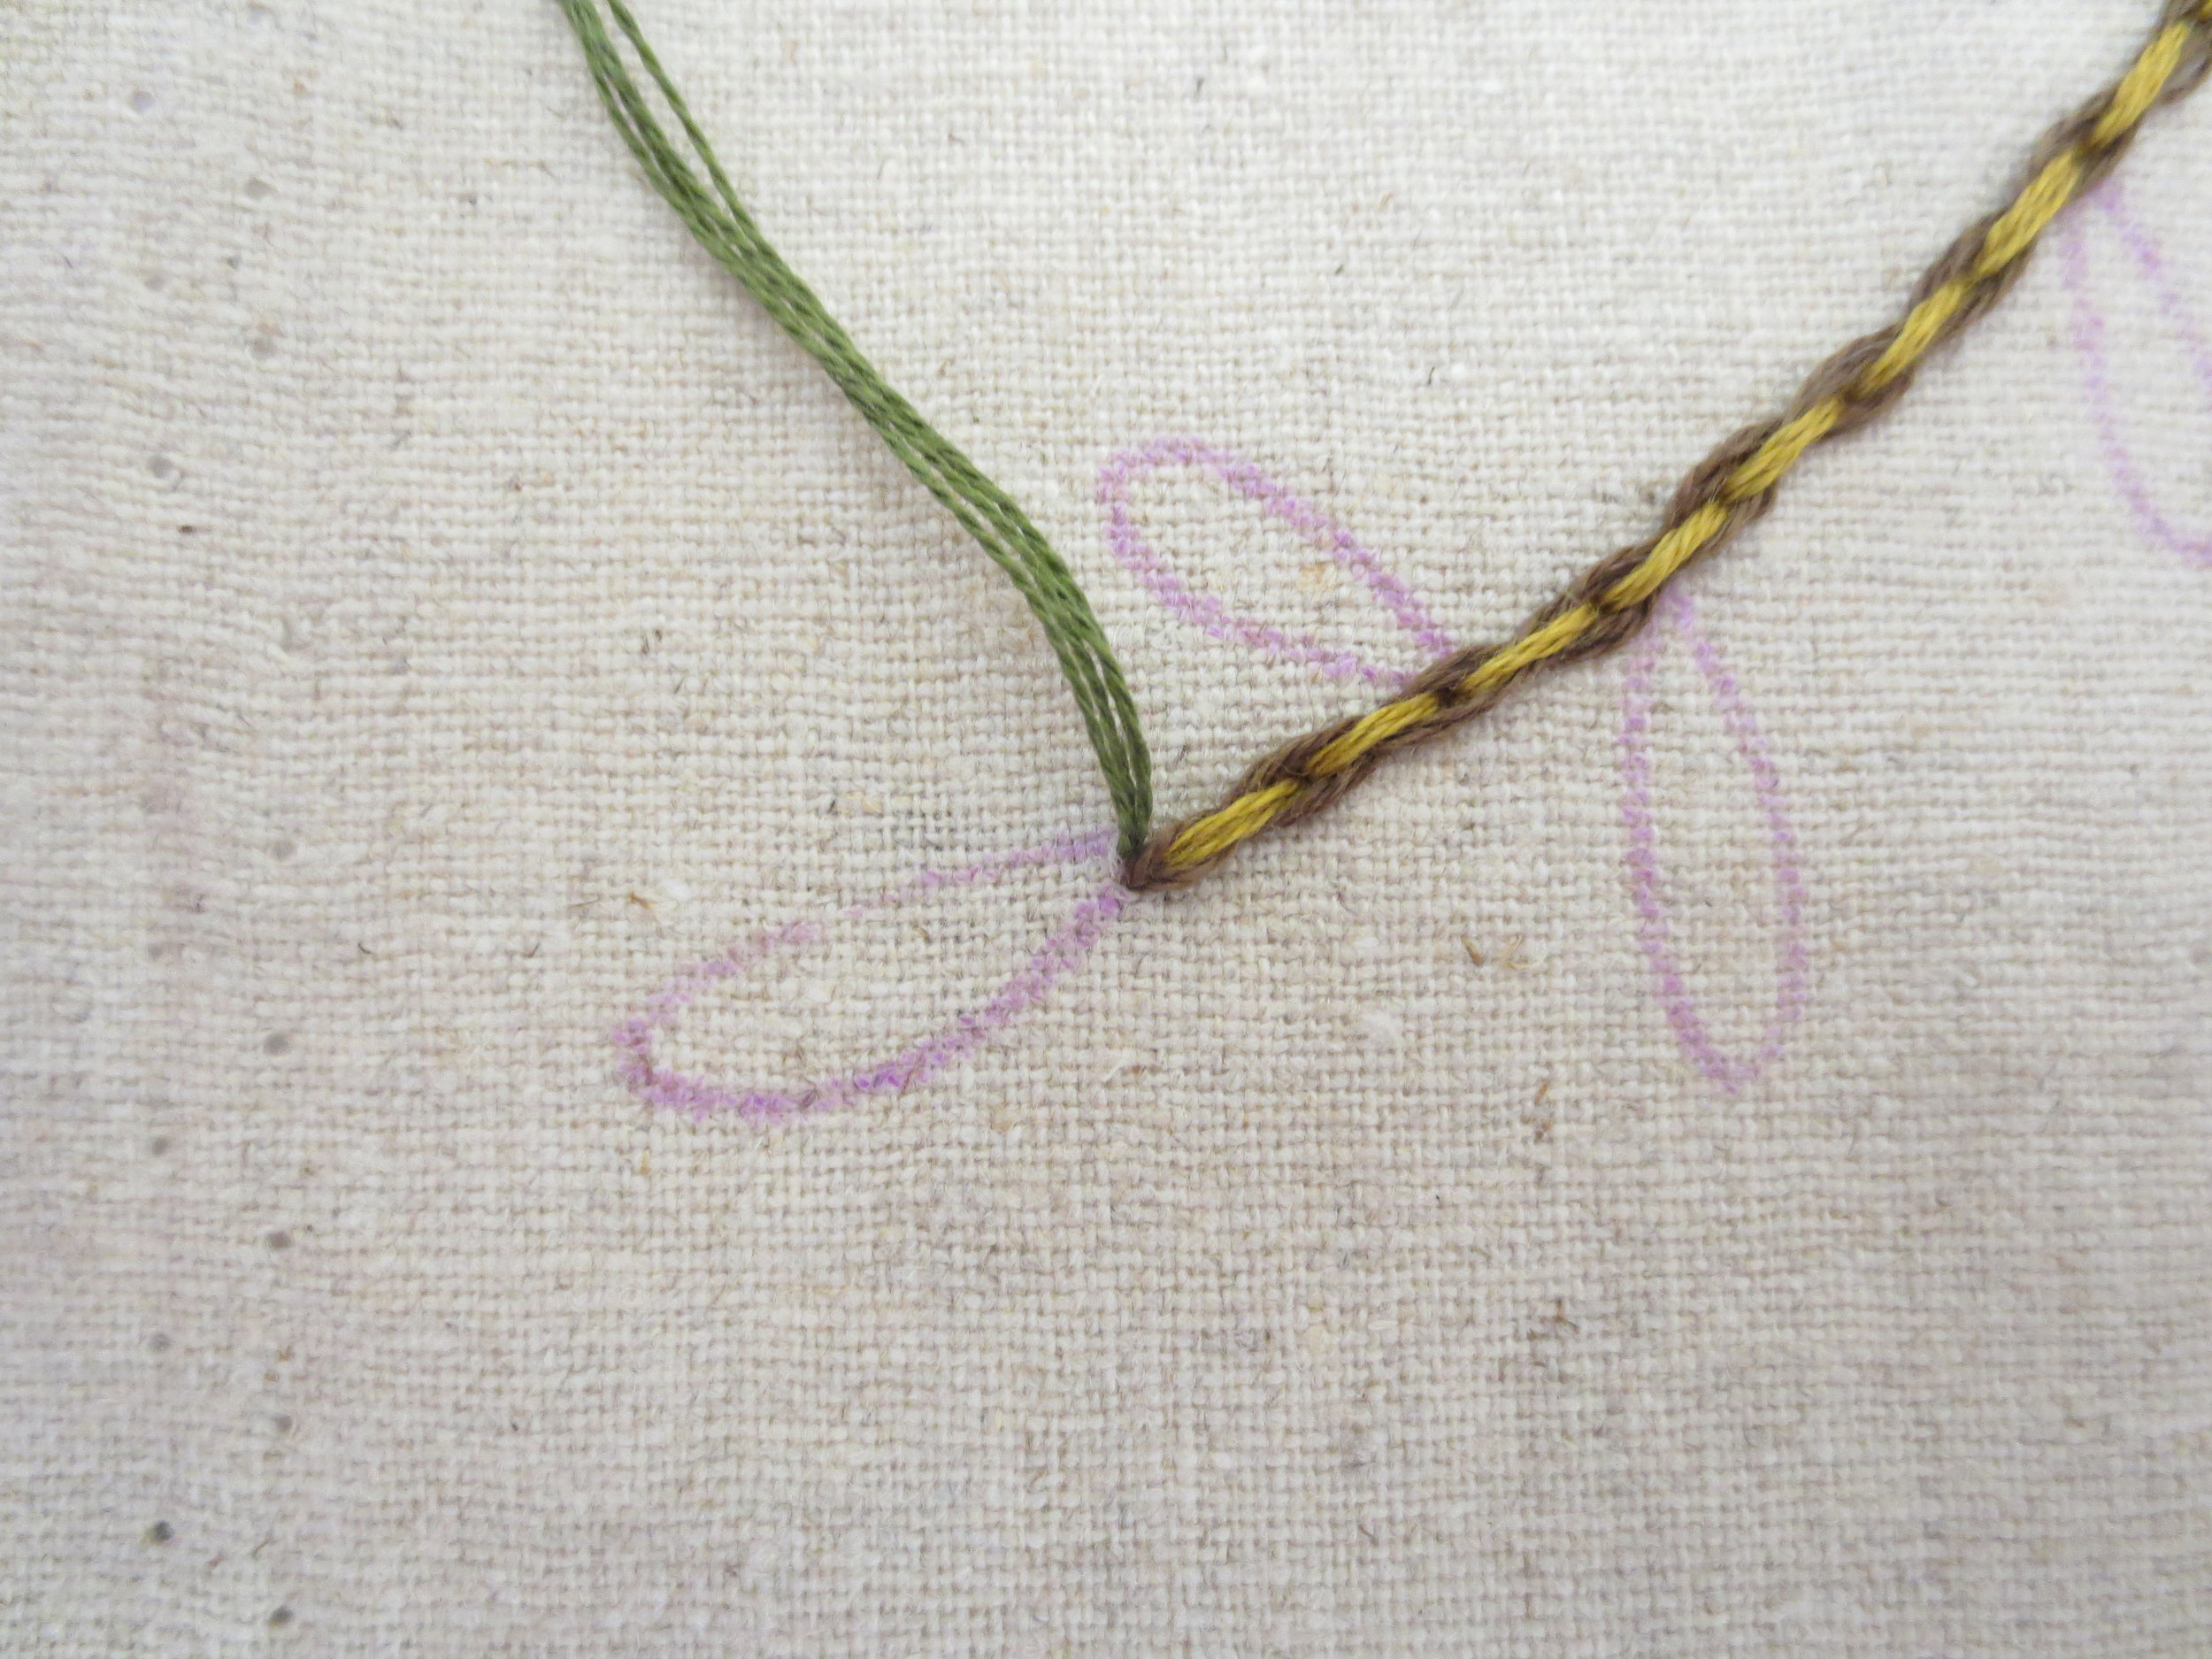
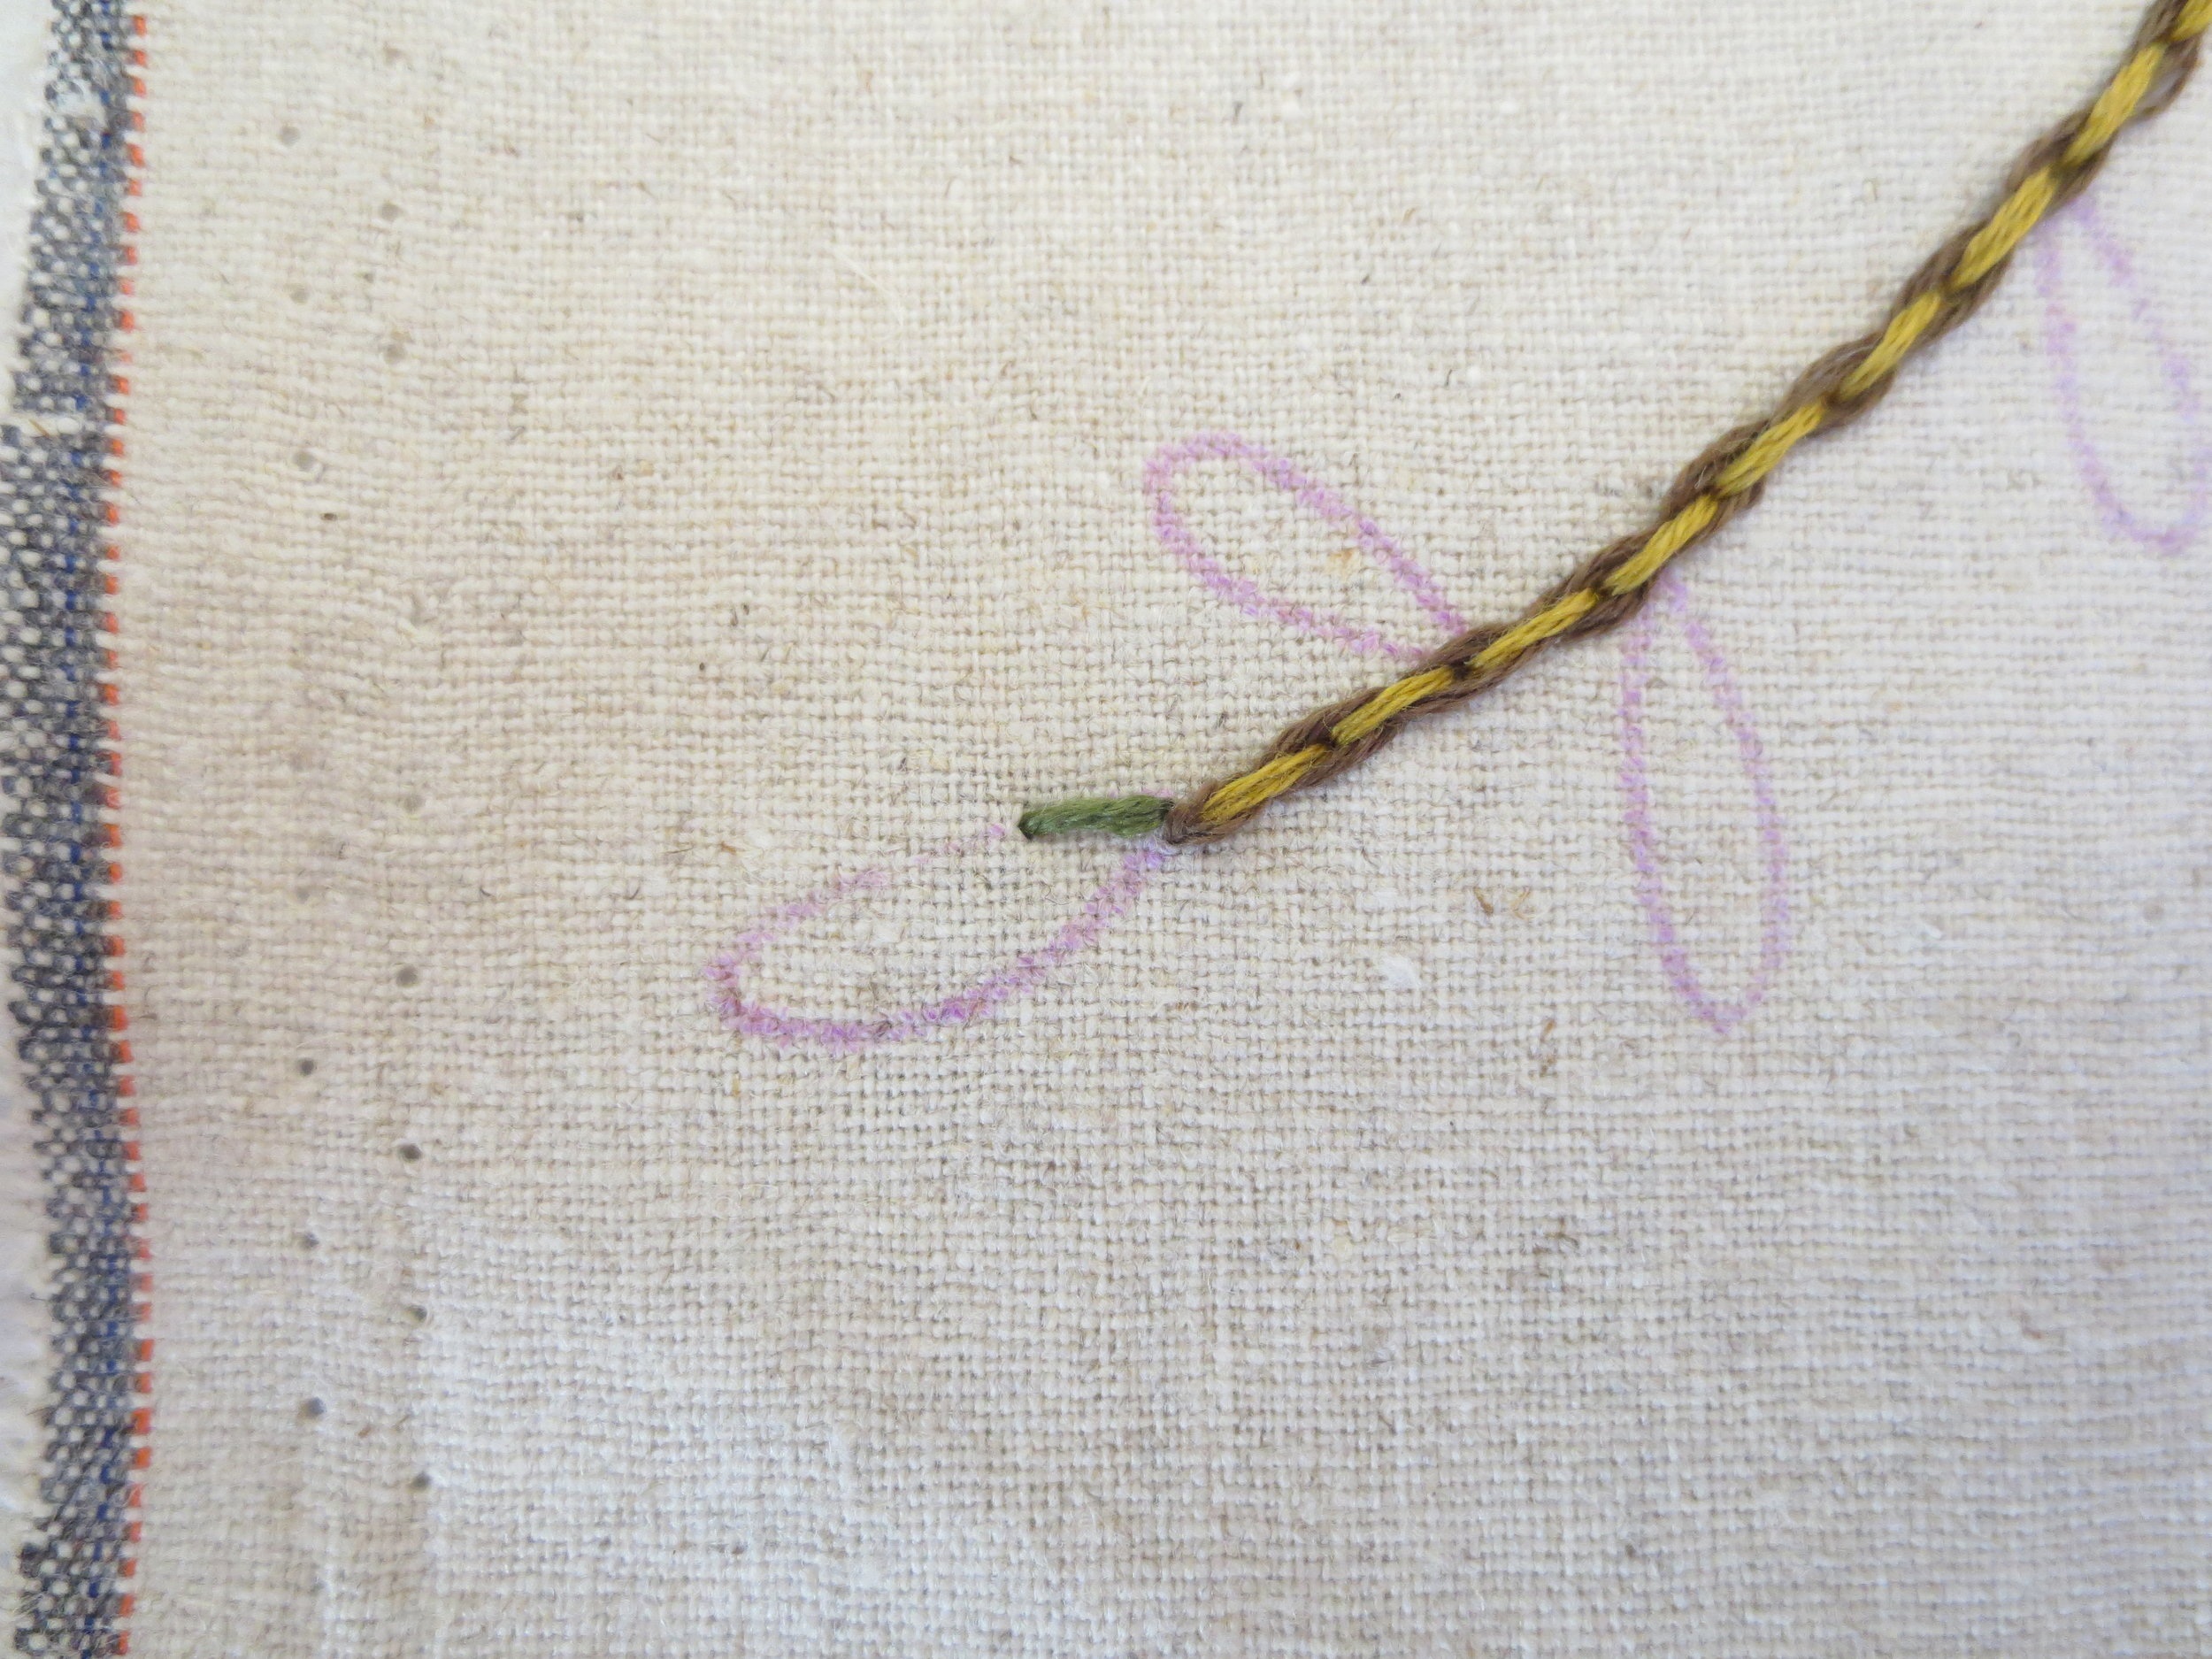
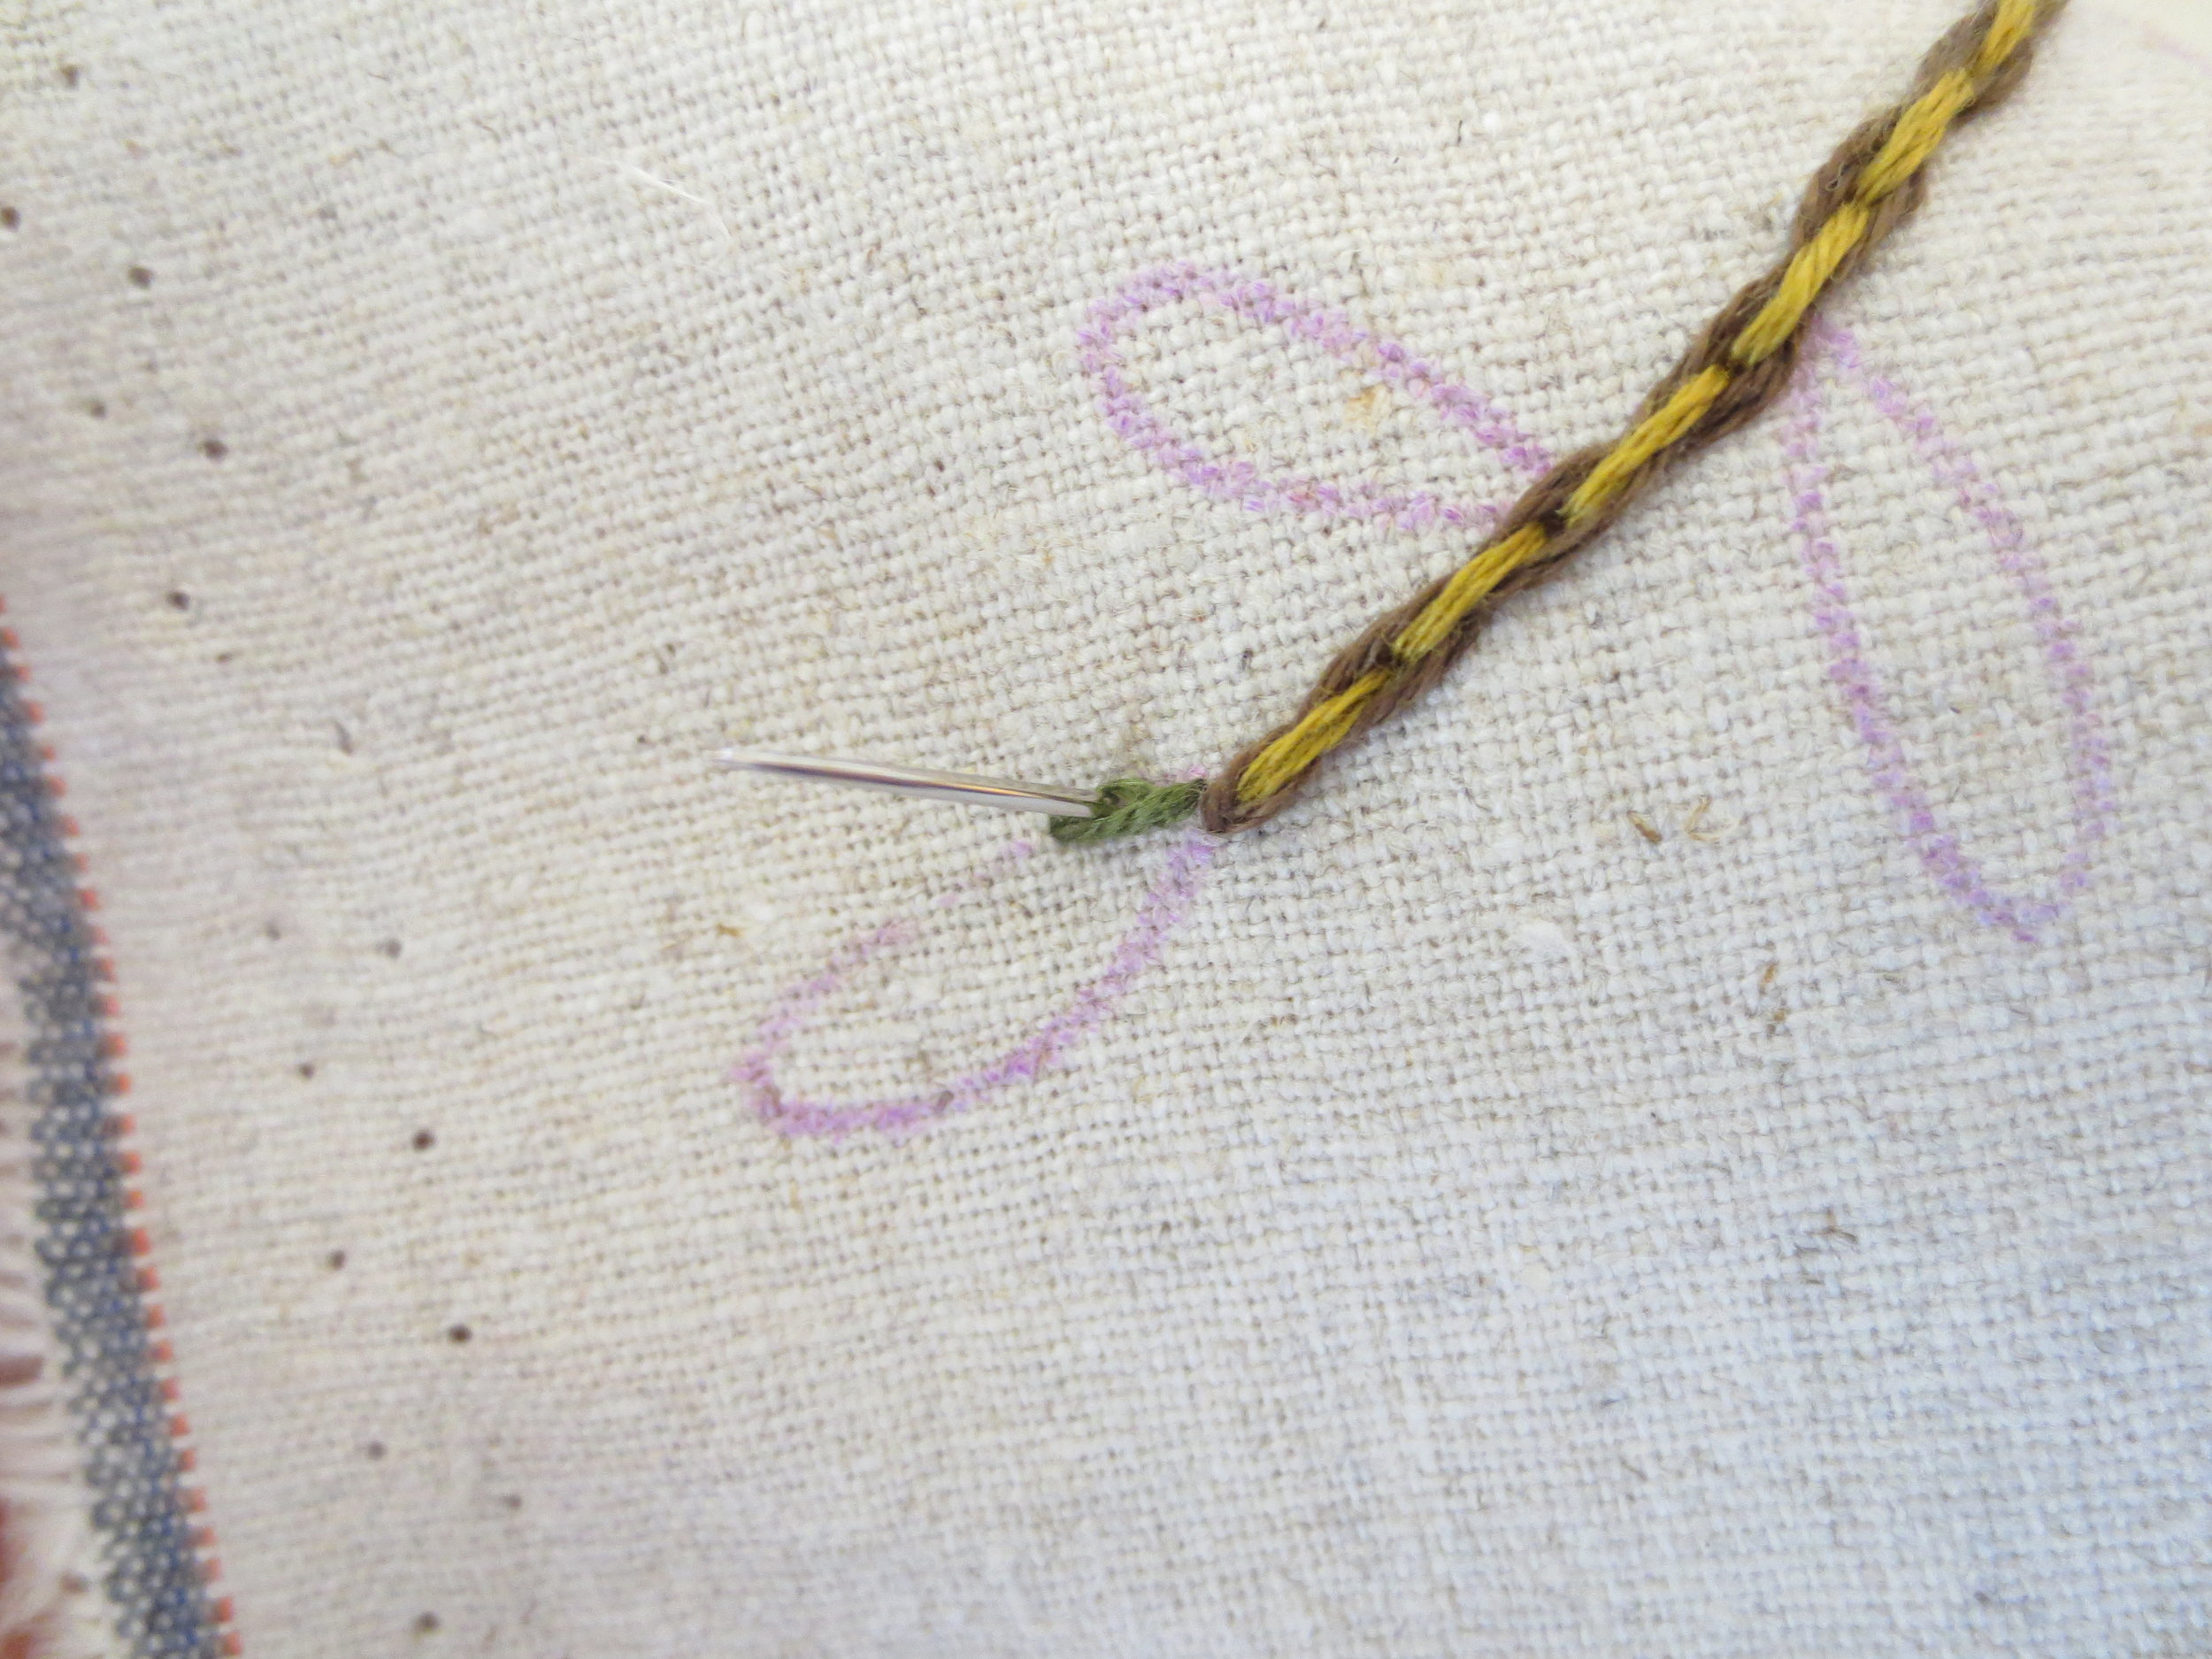
12. Use the same two strand thread to stem stitch the butterfly antennae. Add a single french knot to the end of each antennae.
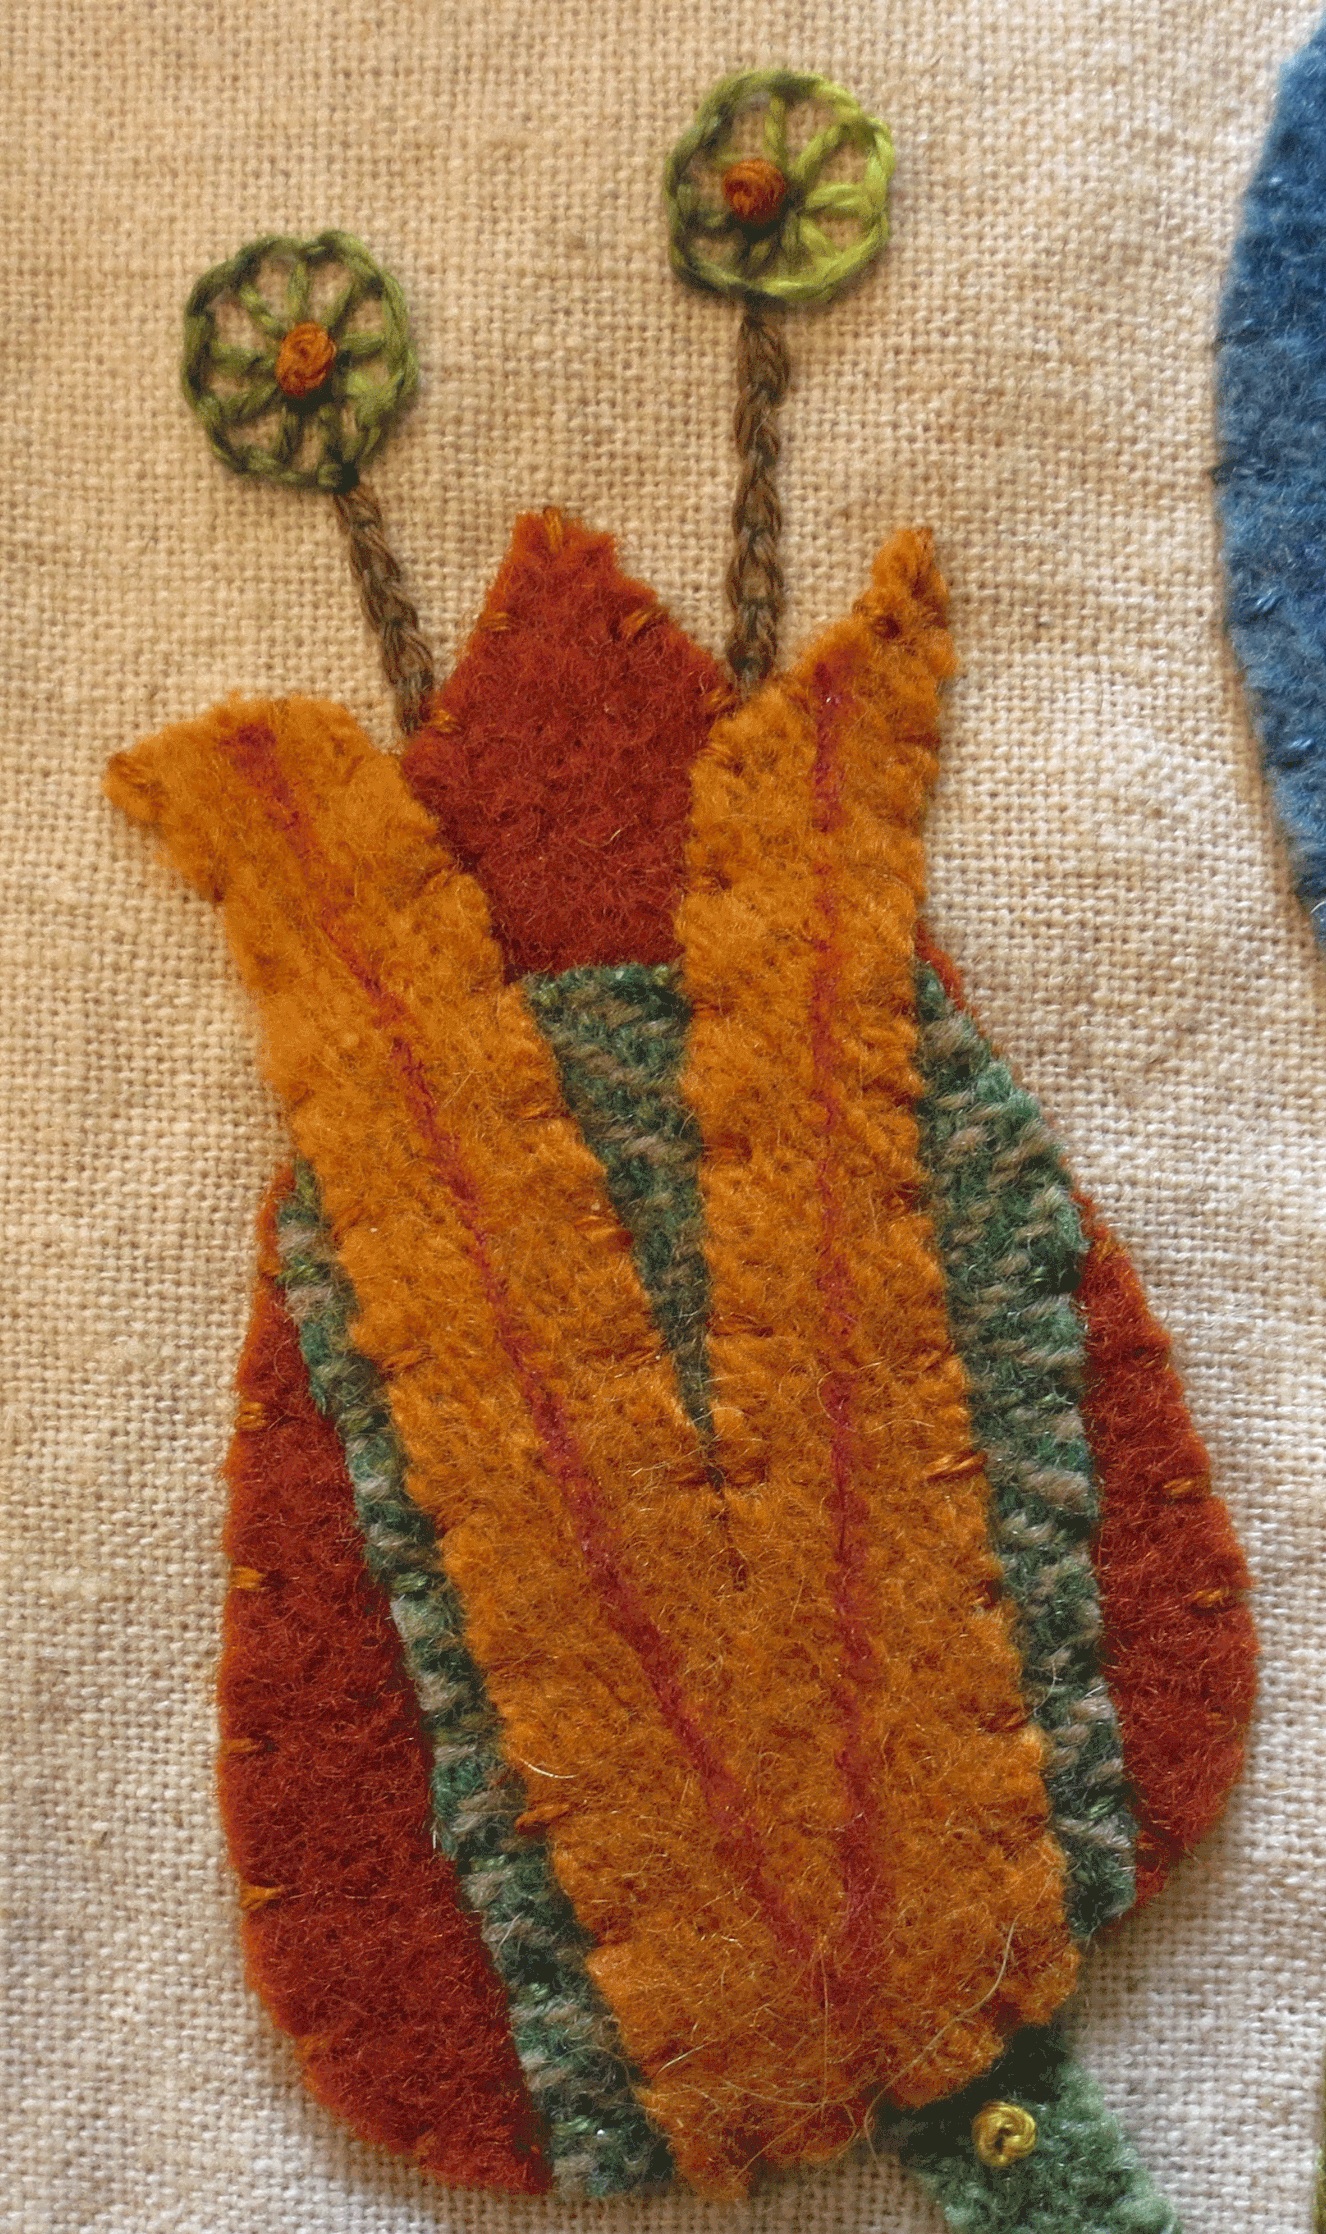
13. Using the same two strand thread, chain stitch the flower stamens.
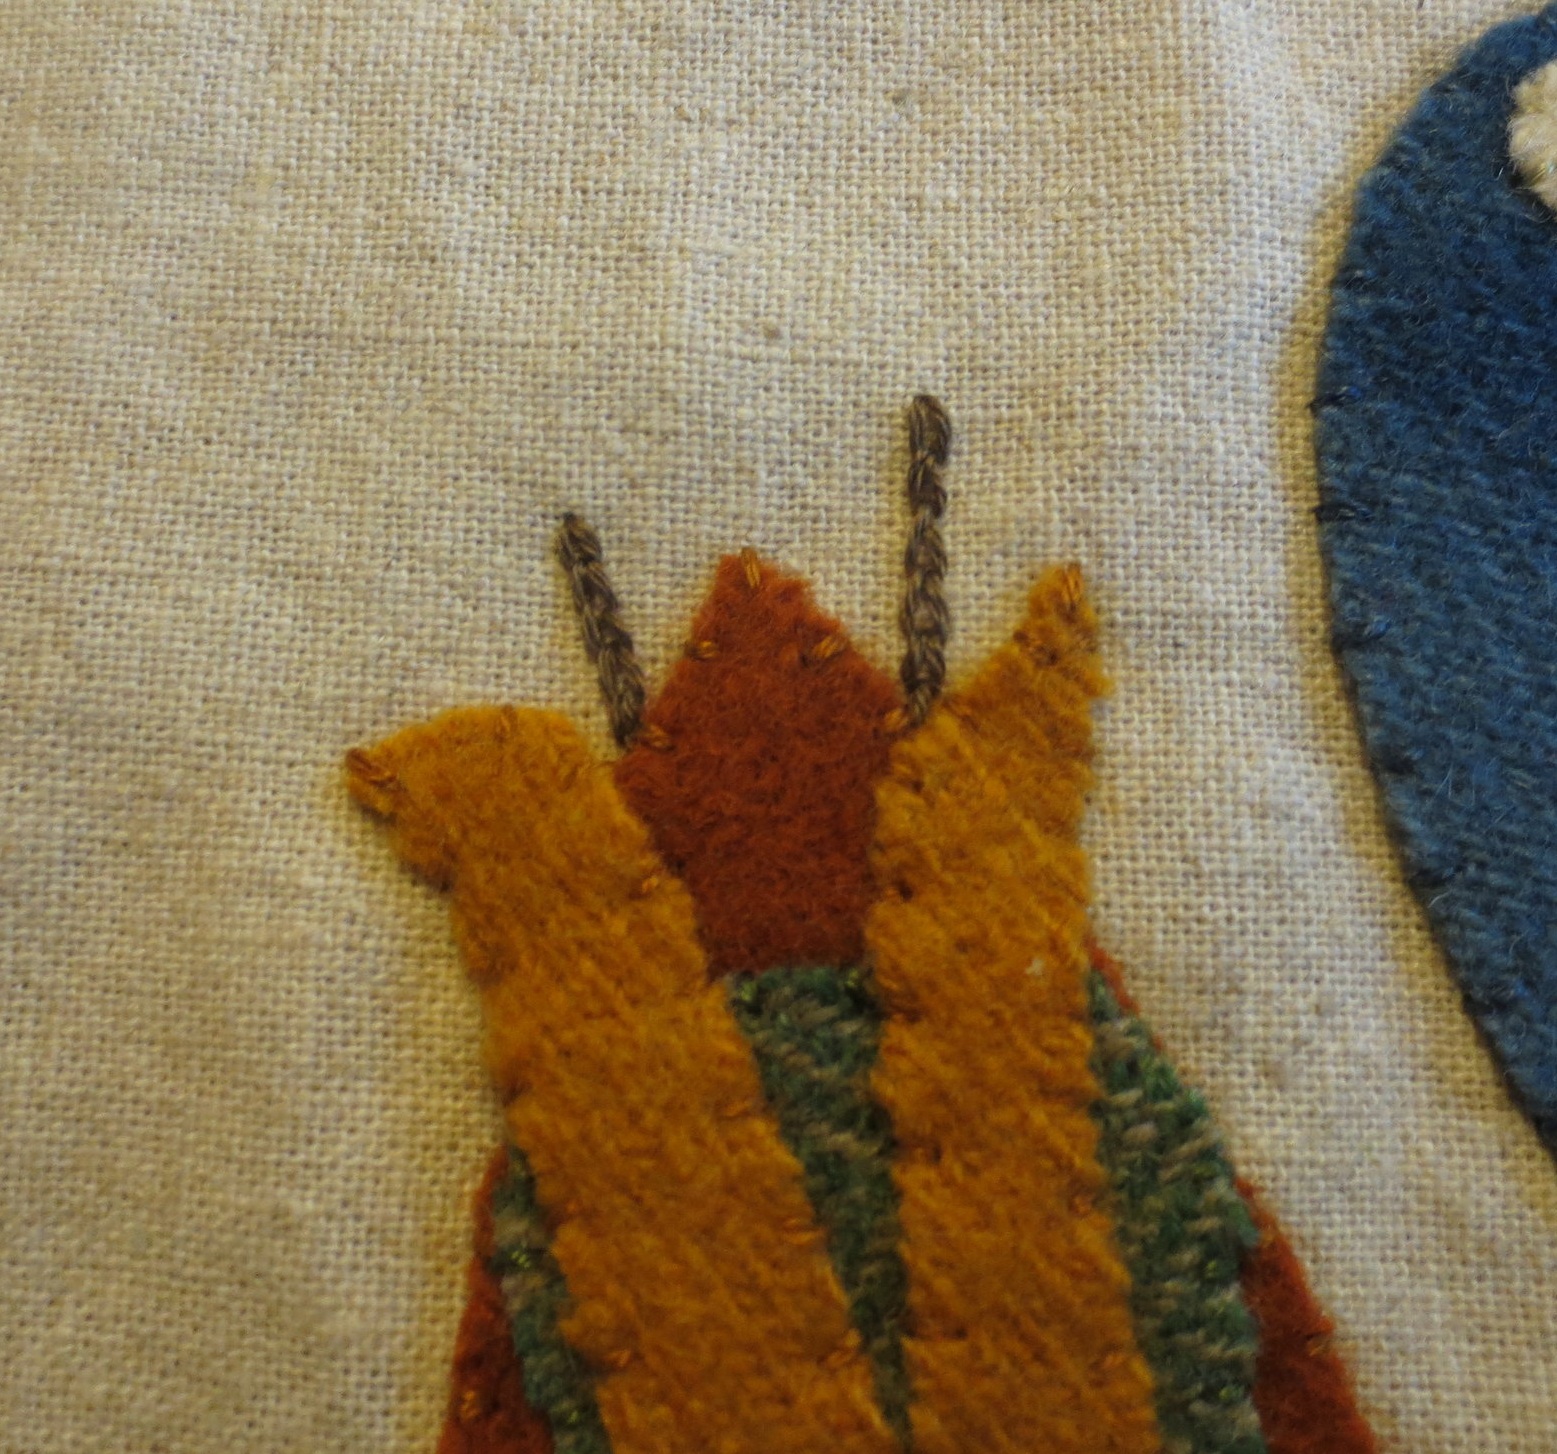
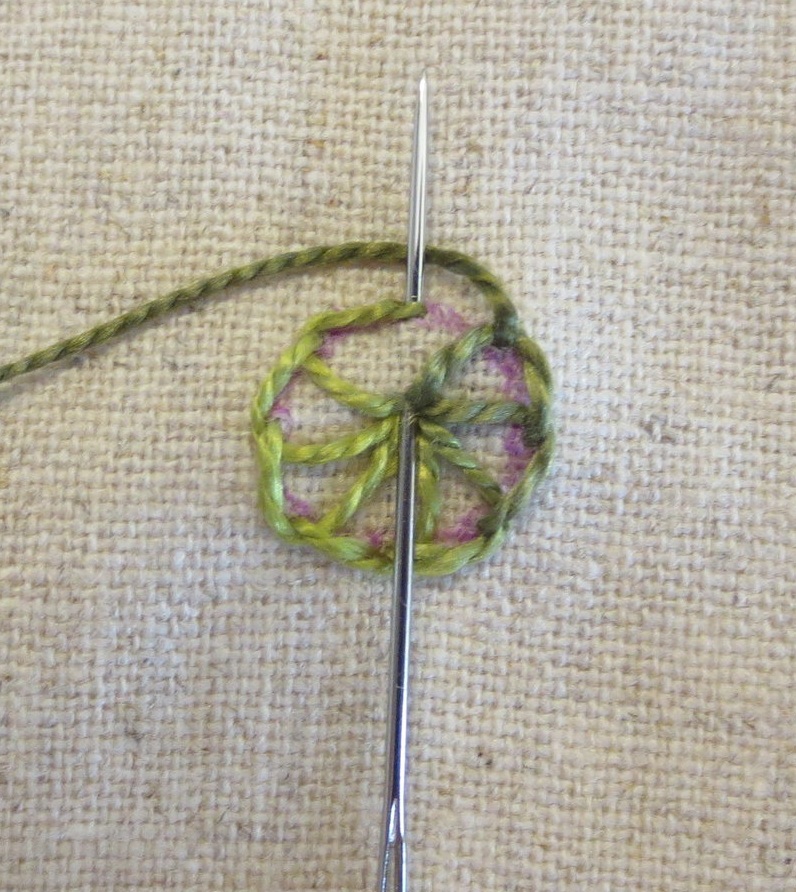
14. Using the disappearing ink pen, trace the anthers on the stamens by using the light box and Layout.
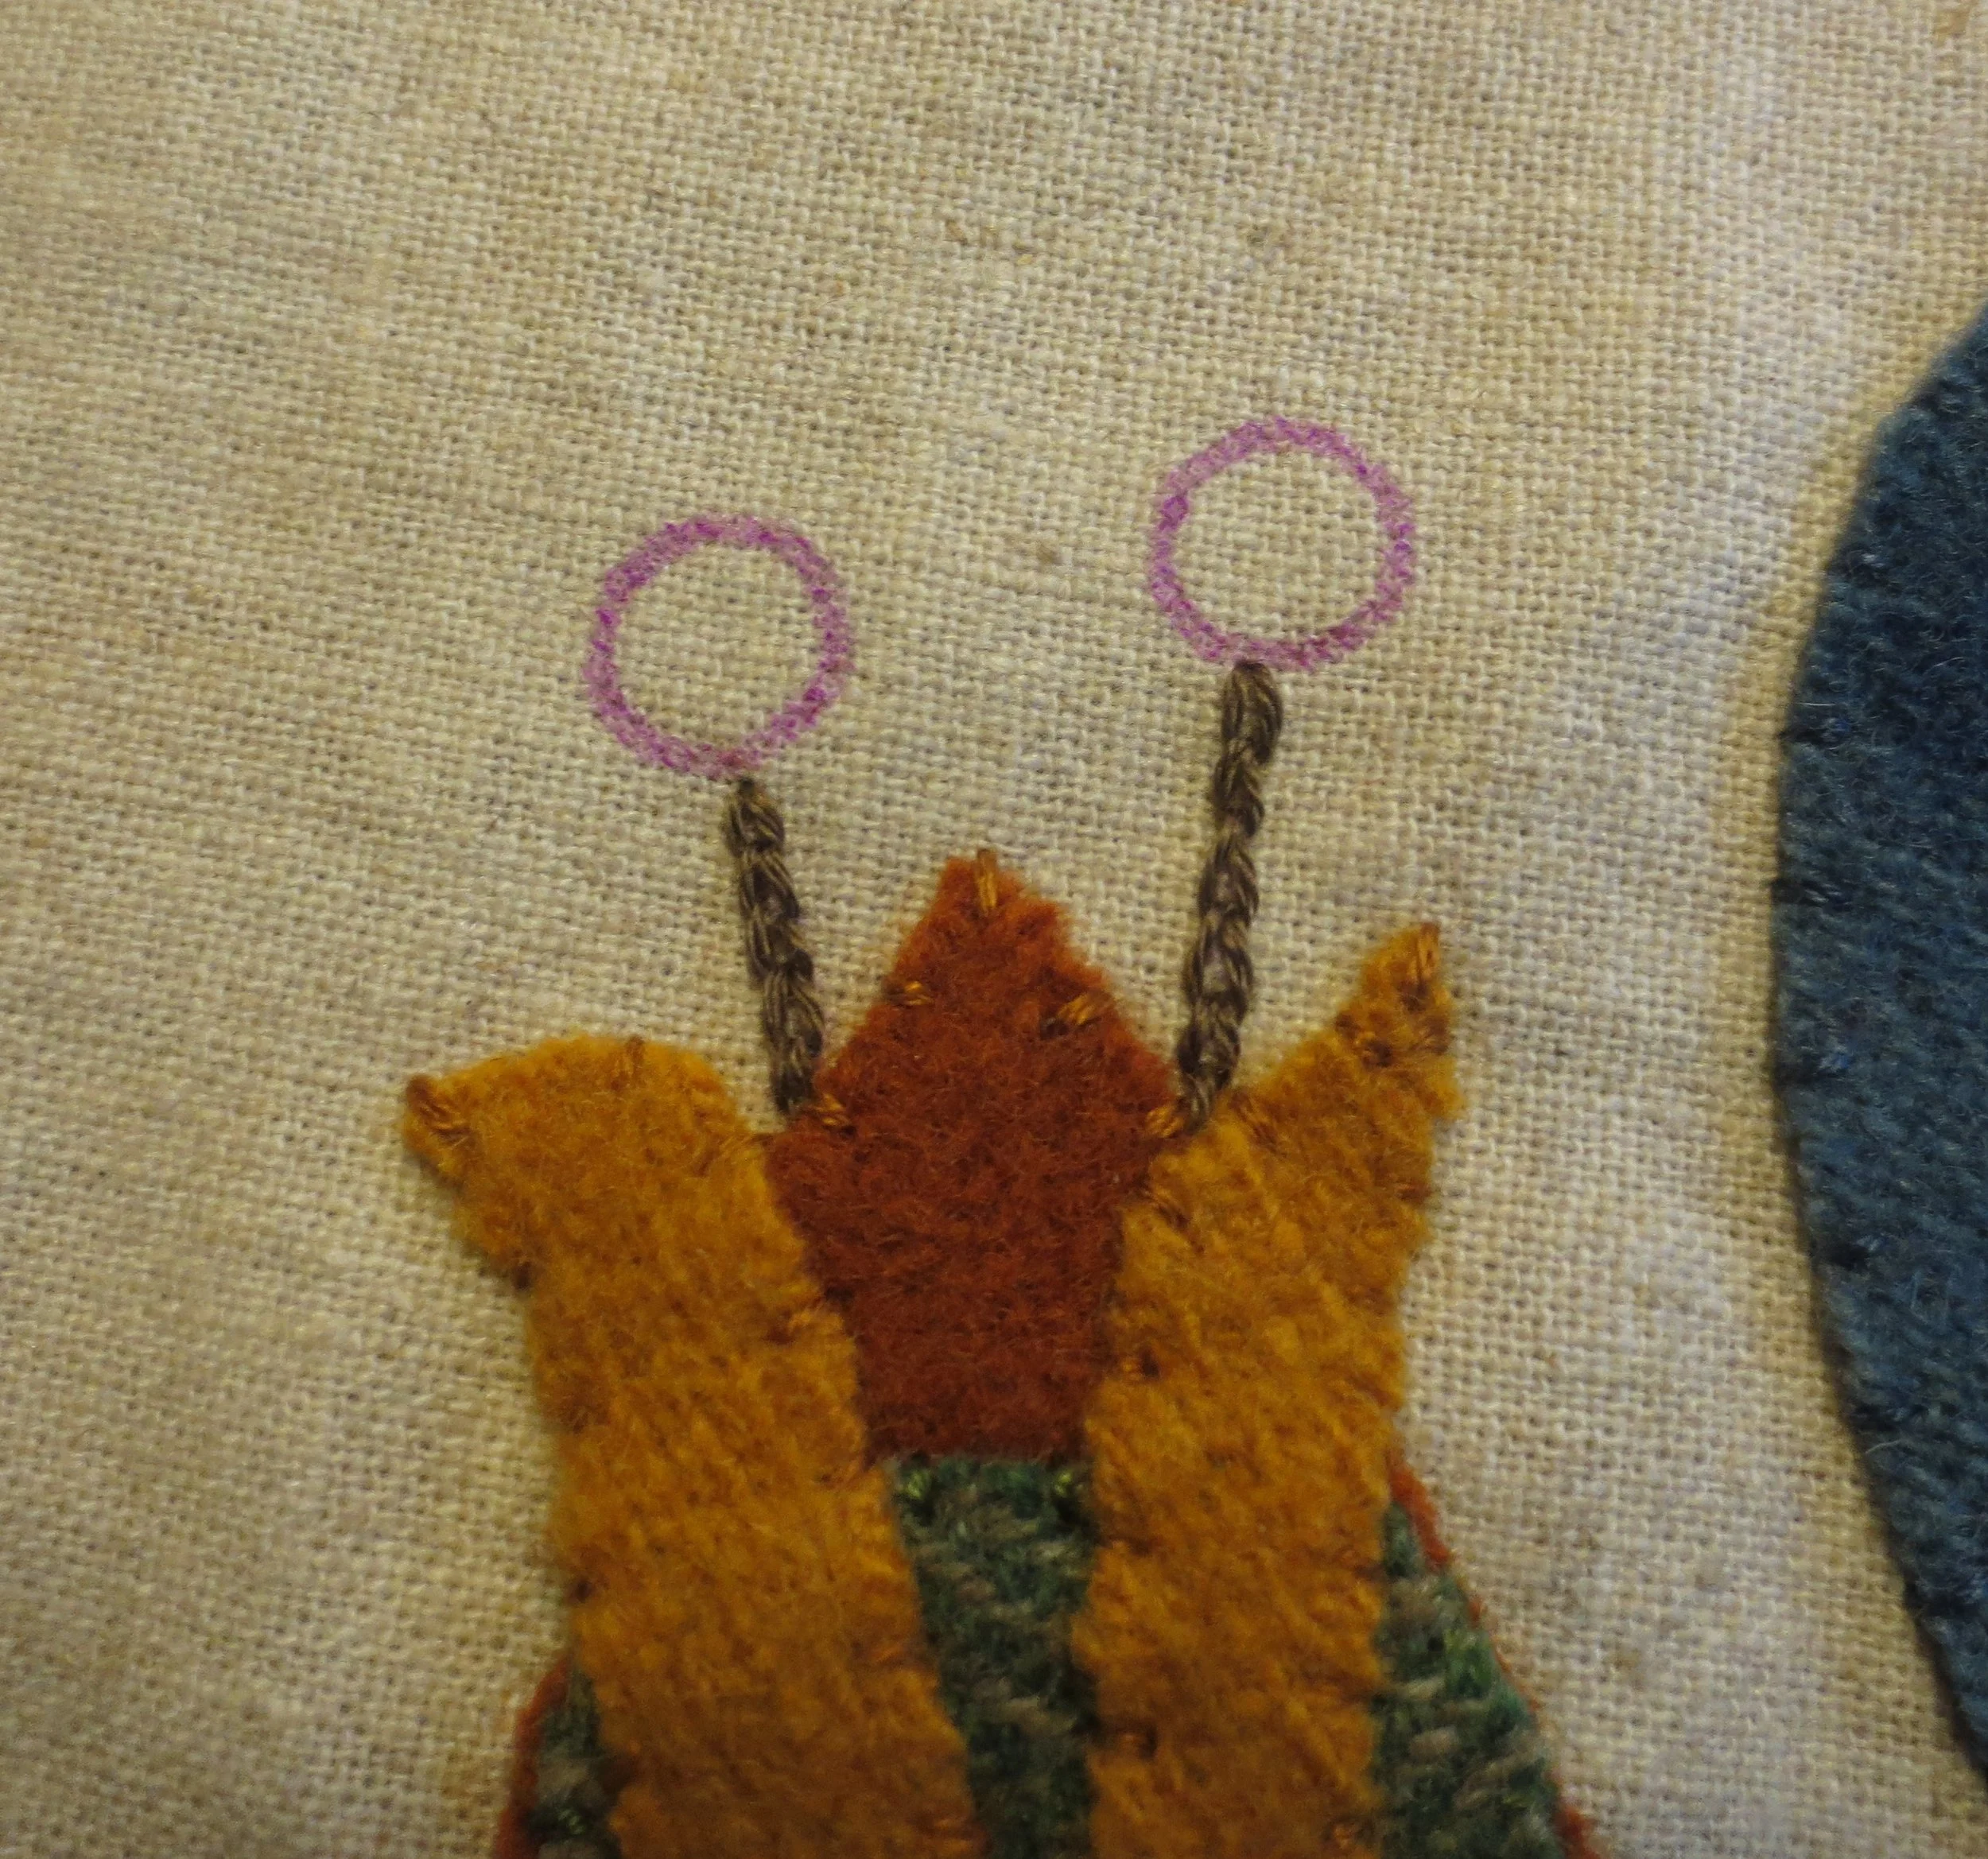
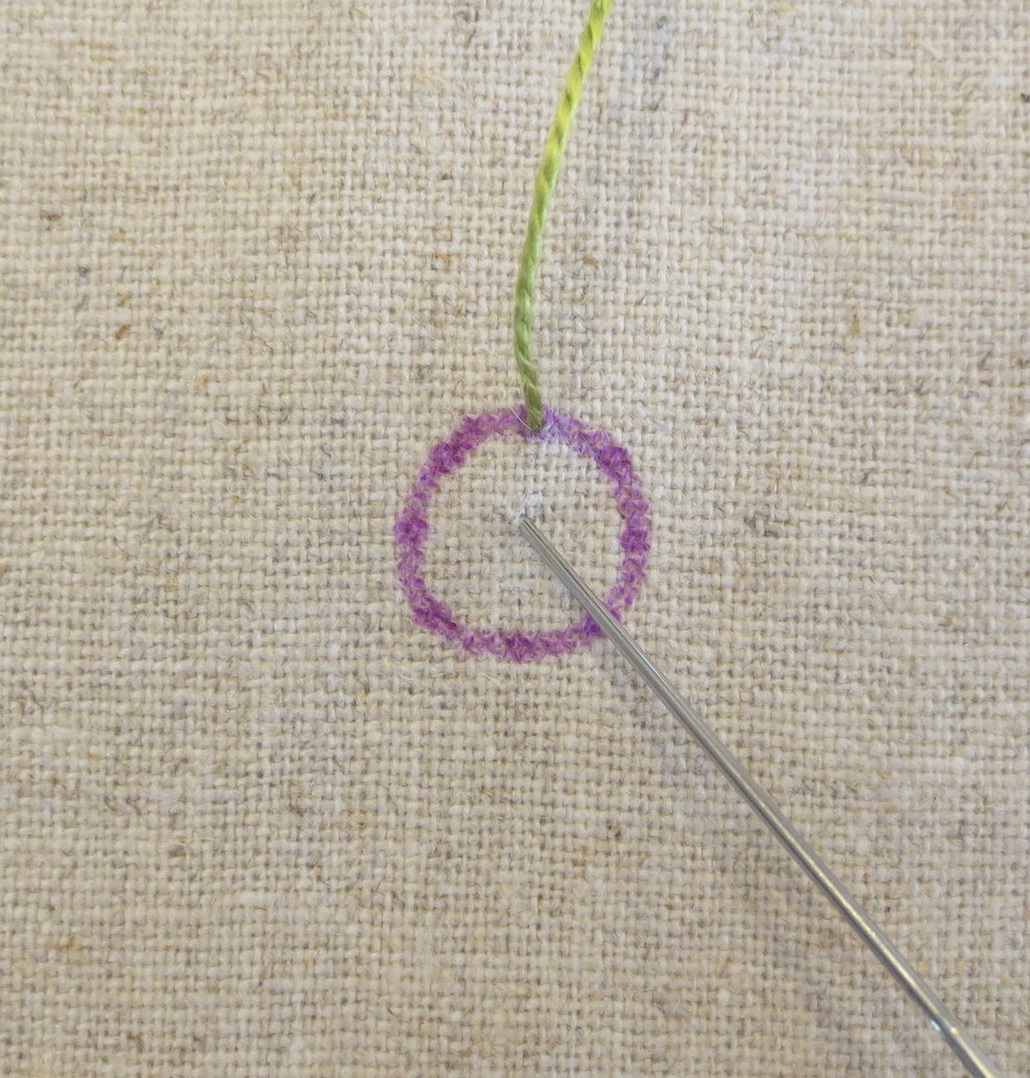
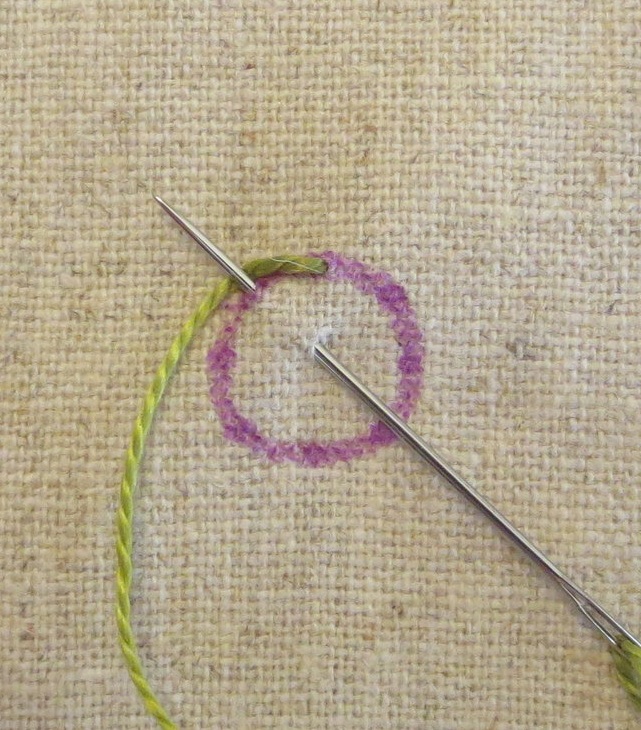
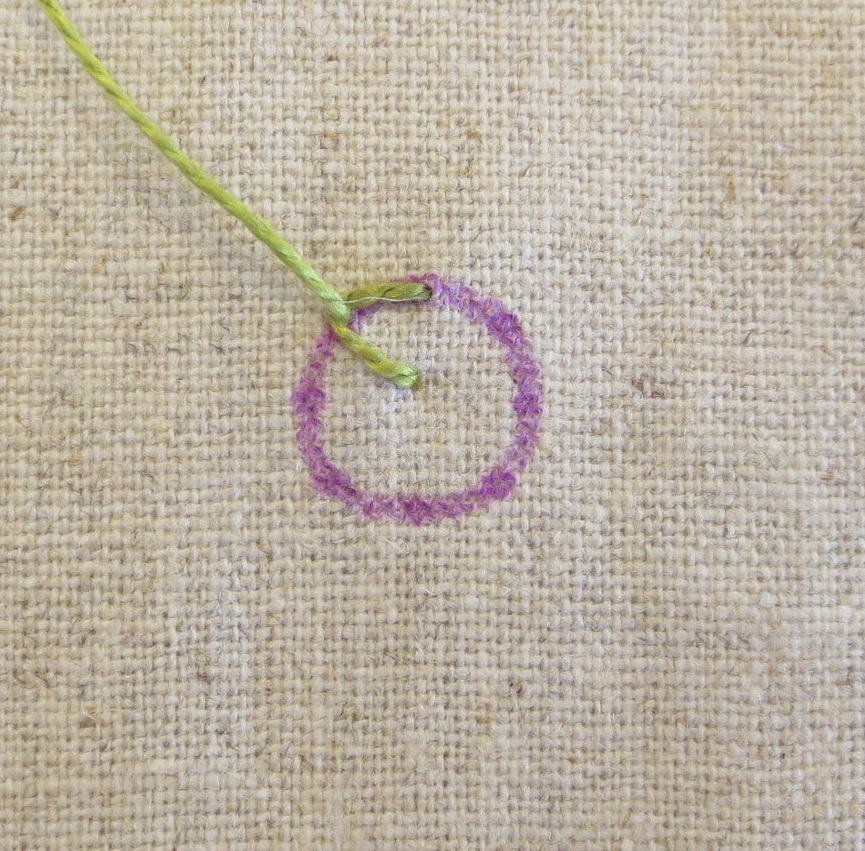
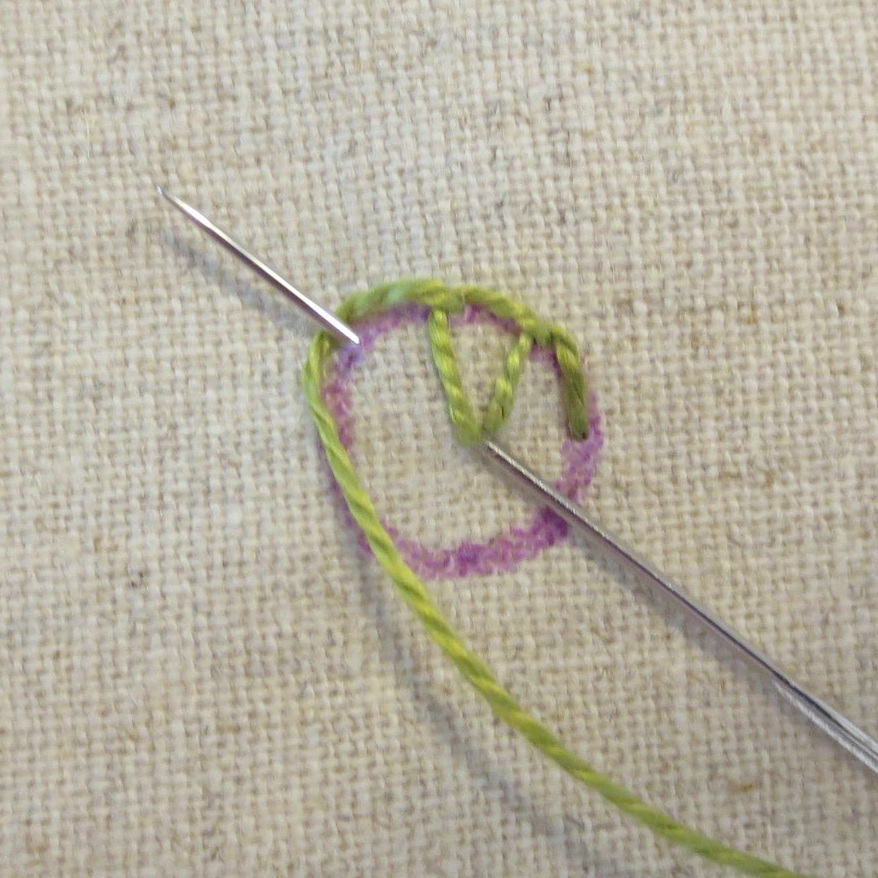
15. Use a single strand of green perle cotton, size 8 to wheel stitch the anthers. See wheel stitch tutorial below.
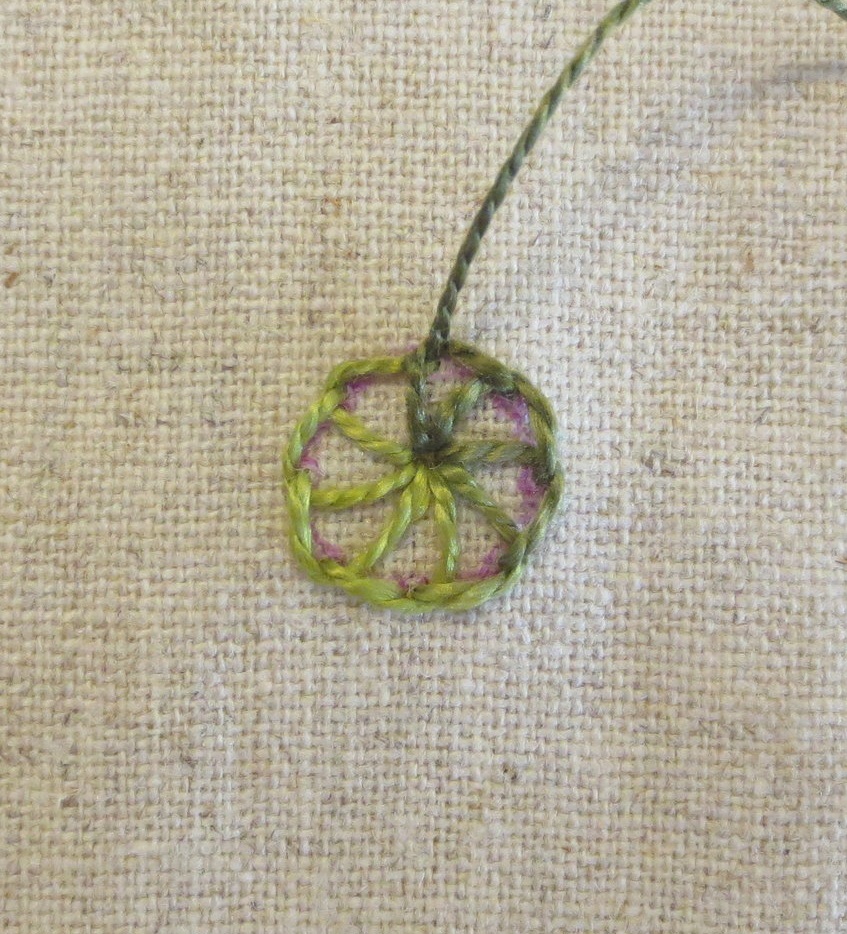
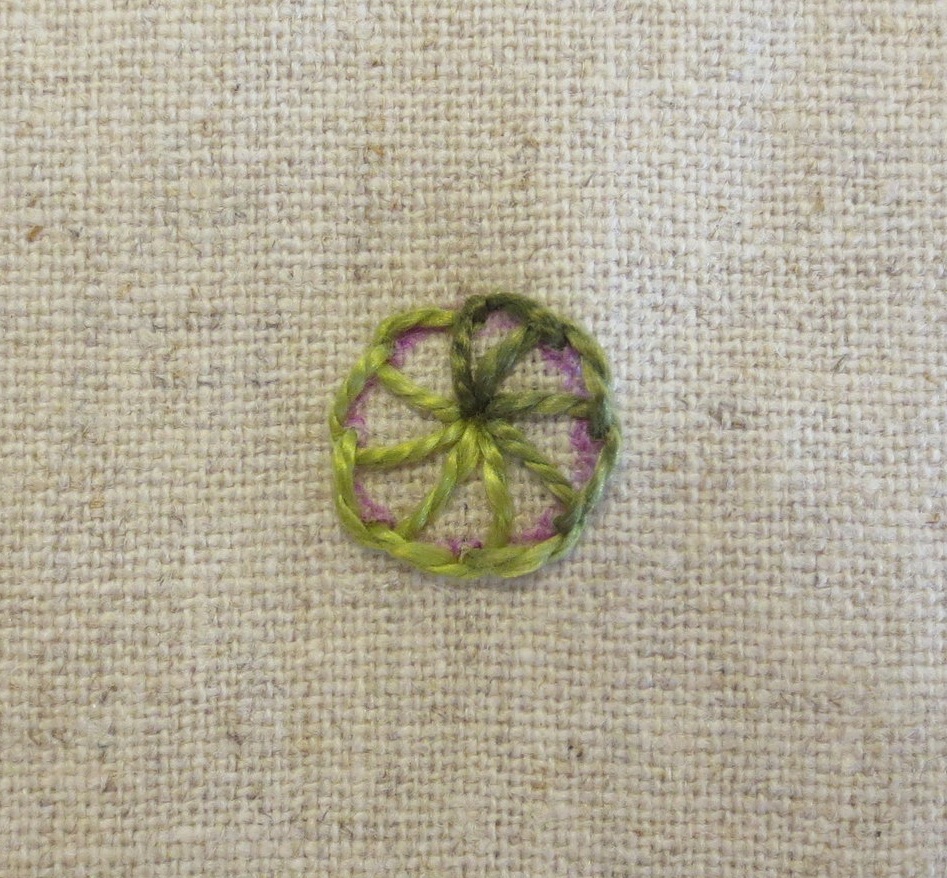

16. Use three strands of orange floss to make a single french knot in the center of each wheel.

17. Use the disappearing ink pen to draw a V shape on flower C.
18. Use three strands of gold floss to stitch a running stitch over the lines.
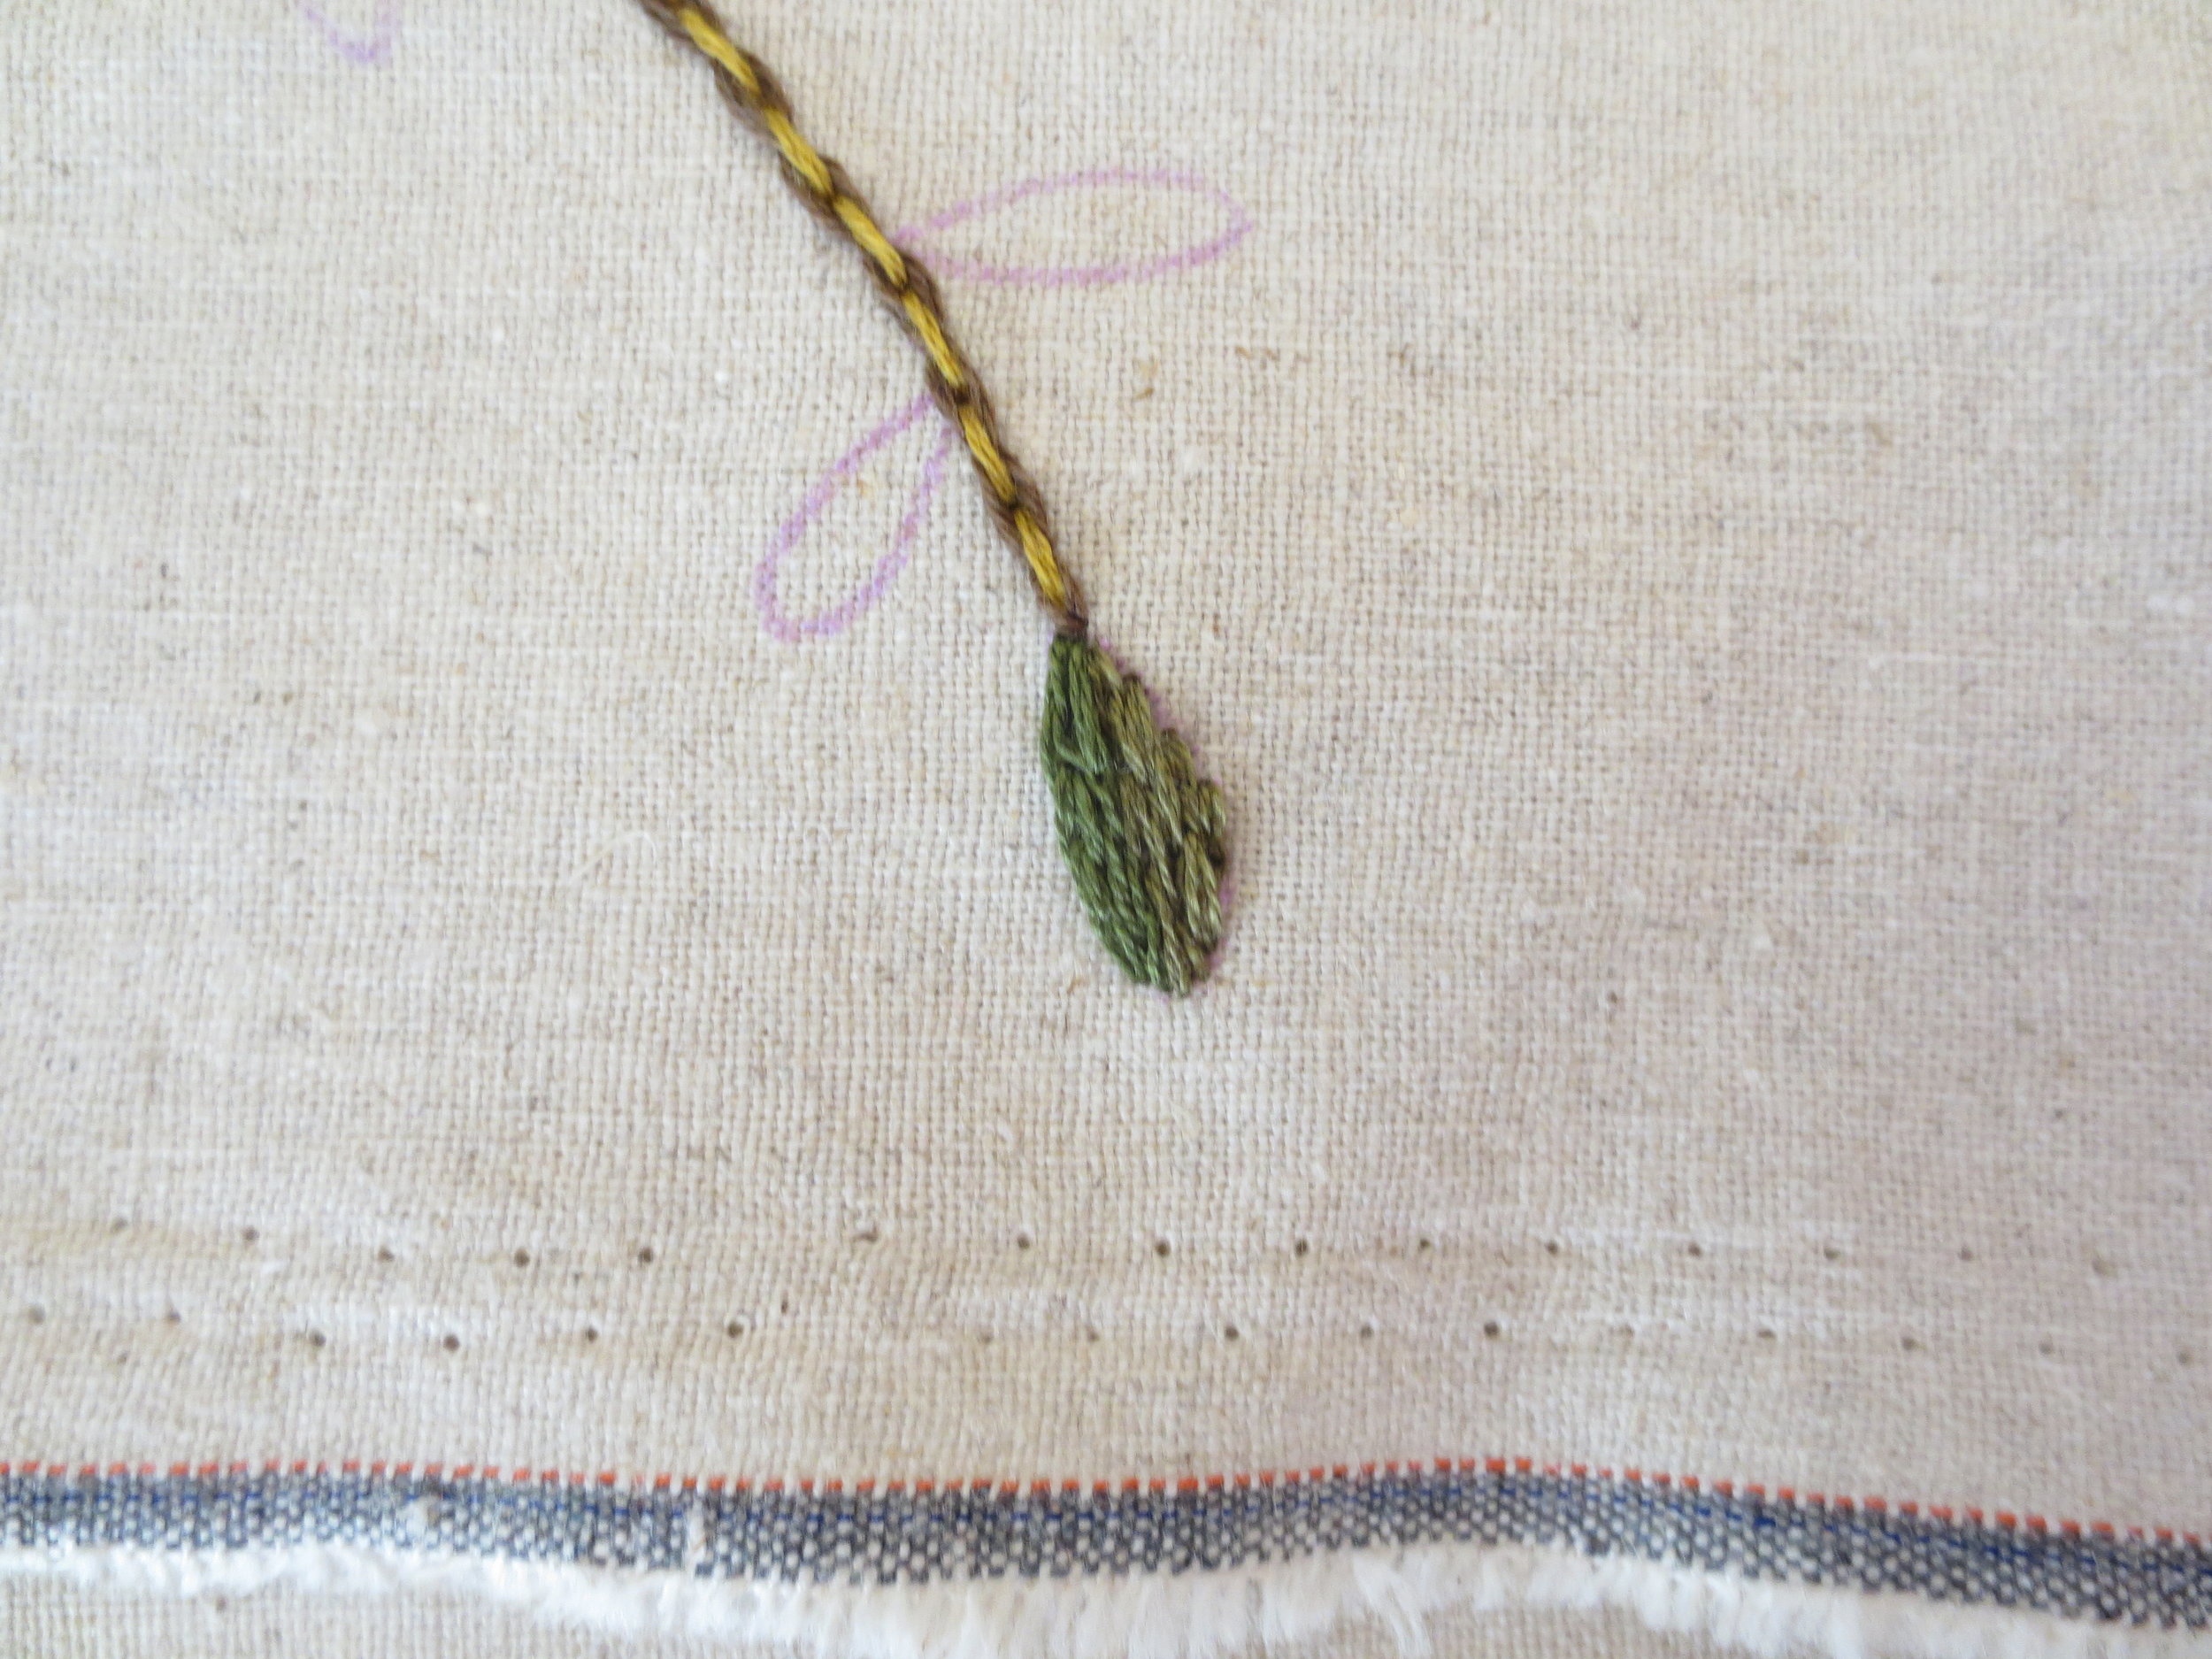
19. Place your project back onto the light box and Layout, and then trace the leaves.

20. The leaves are all split stitched (see tutorial below) using four strands of green floss in two different shades. Some of the leaves are all one color, and others are a random mix of the two shades. There are no rules. Be creative!
Begin with a single straight stitch at the base of the leaf, following the outline.
Begin your second stitch by bringing the needle up through the center of the first stitch splitting the bundle of threads, and then pulling the thread through.
Insert the needle on the outlined edge making a stitch approximately 3/16” in length.
Repeat stitches to just below the curve of the leaf.
Now flip the project around and repeat the stitches in the opposite direction, starting from the outlined edge. You can fill the leaf with all the same color, or change colors half way through.


21. Mark the dots on the stem using the marking pen. Use three strands of gold floss to make french knots at each of the dots.
22. Now let’s work on the butterfly.
Use three strands of brown floss to make a single french knot in each of the wing spots.
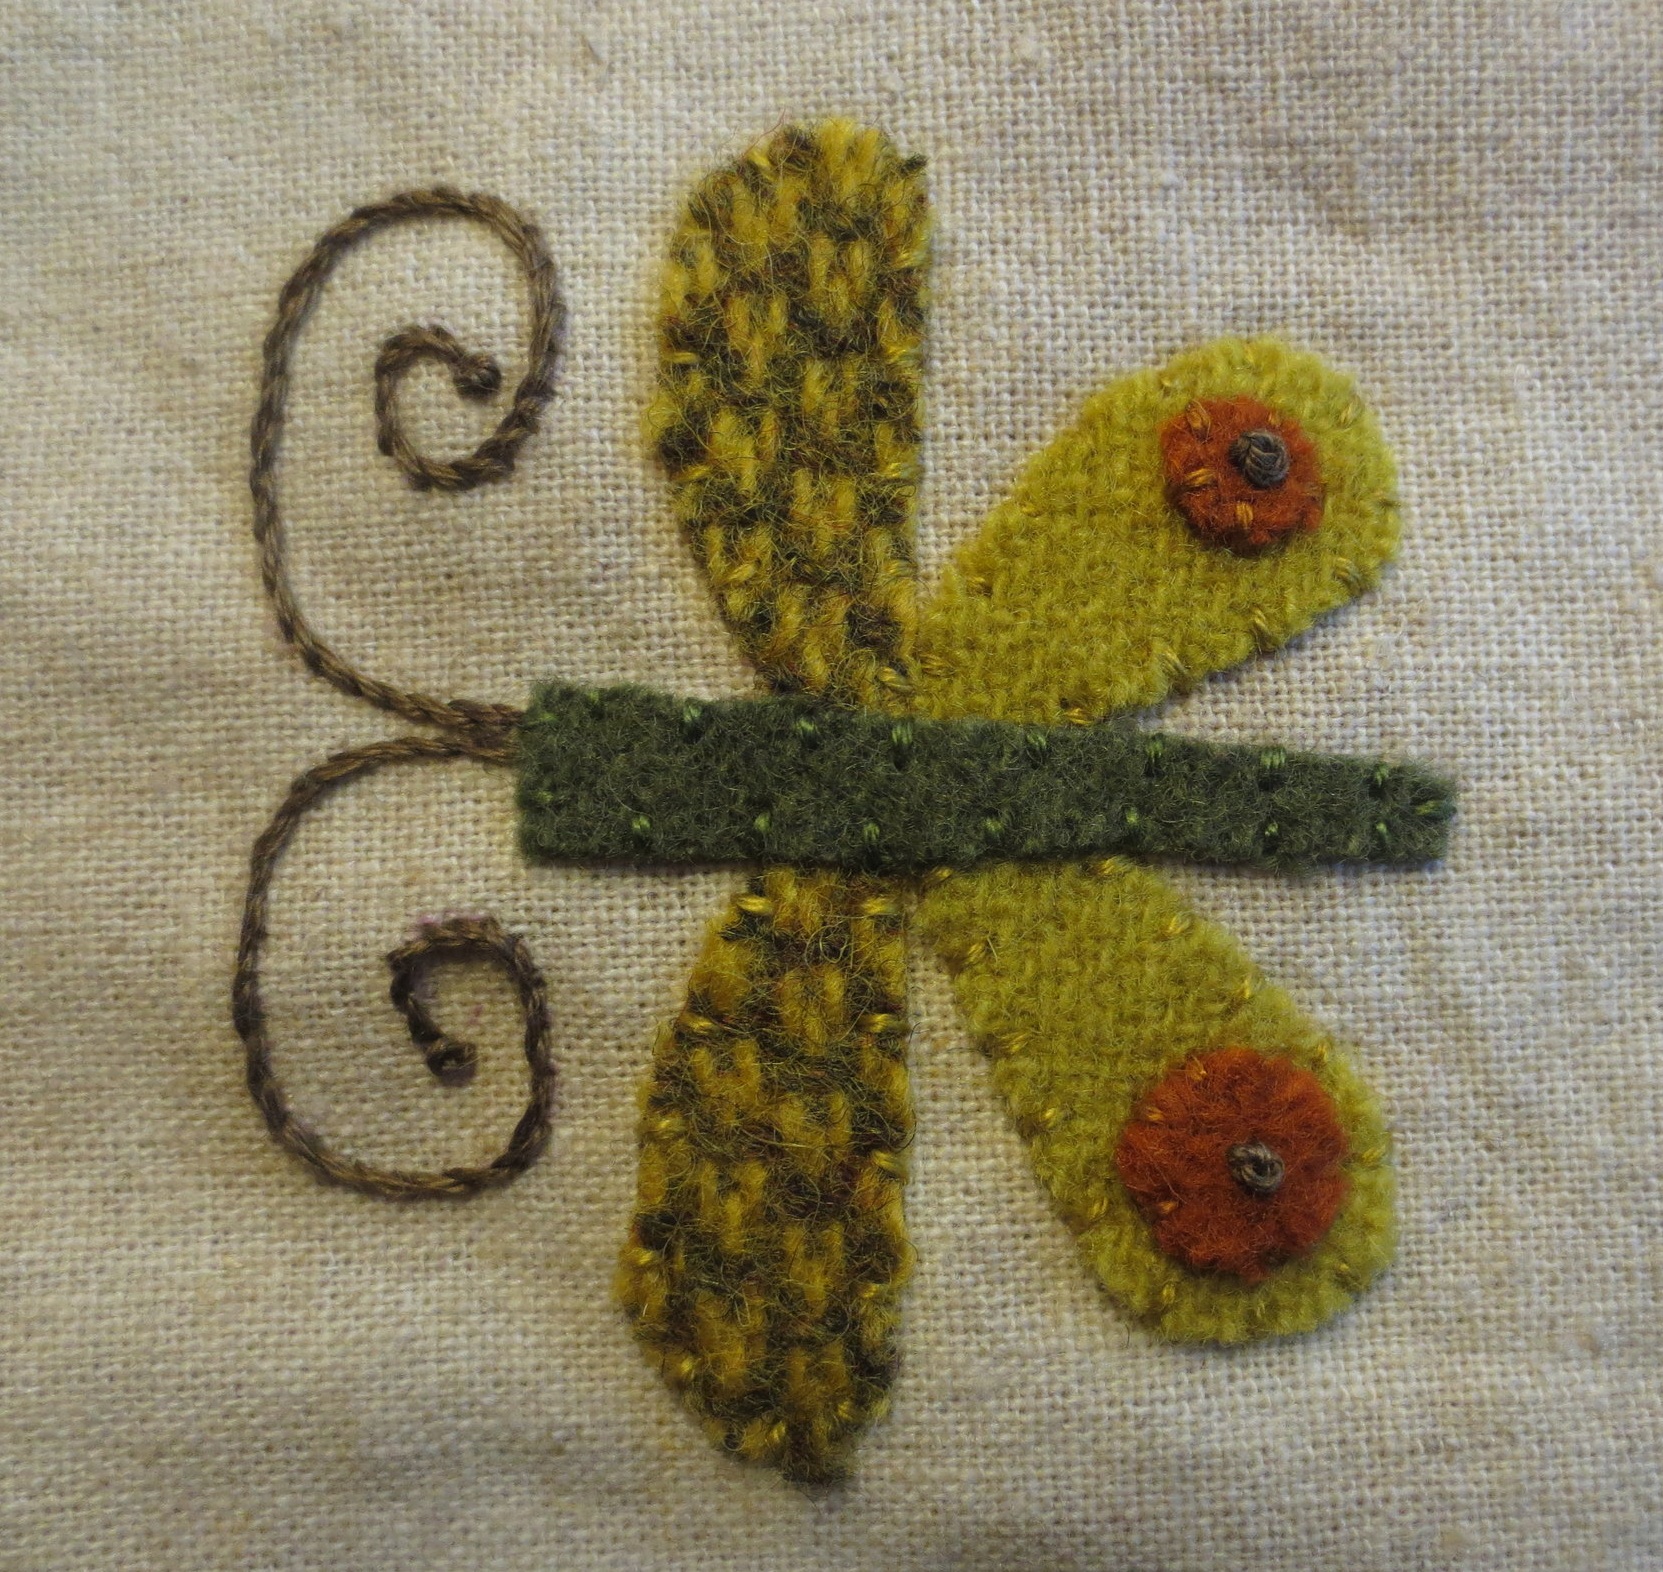
Use a marking pen to draw the lines on the body (use the Layout for placement hints).
Use three strands of gold floss to straight stitch over the lines.
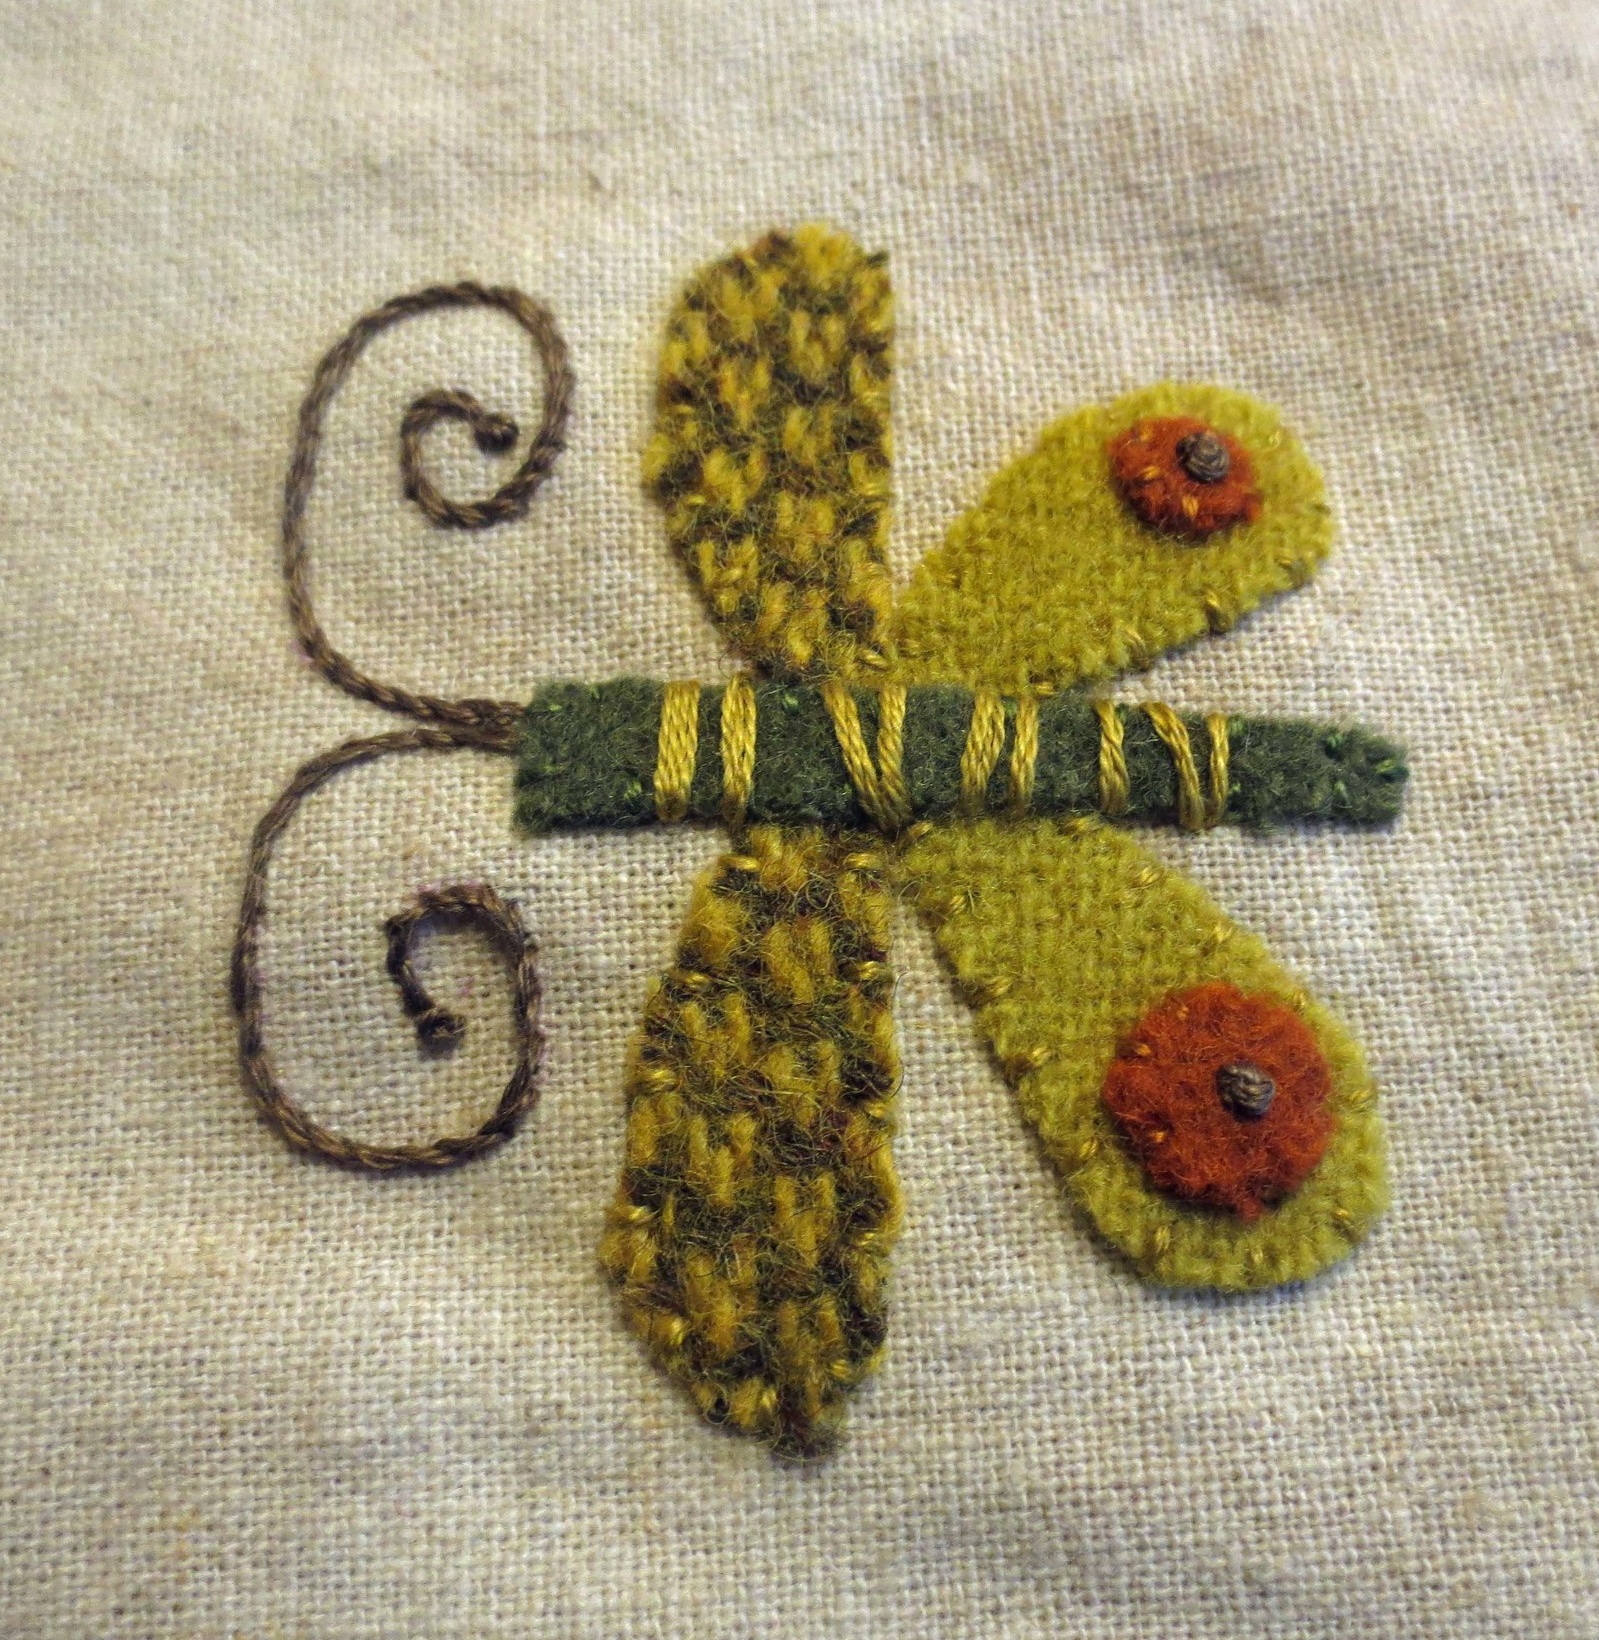
Use three strands of orange floss to make french knot eyes.
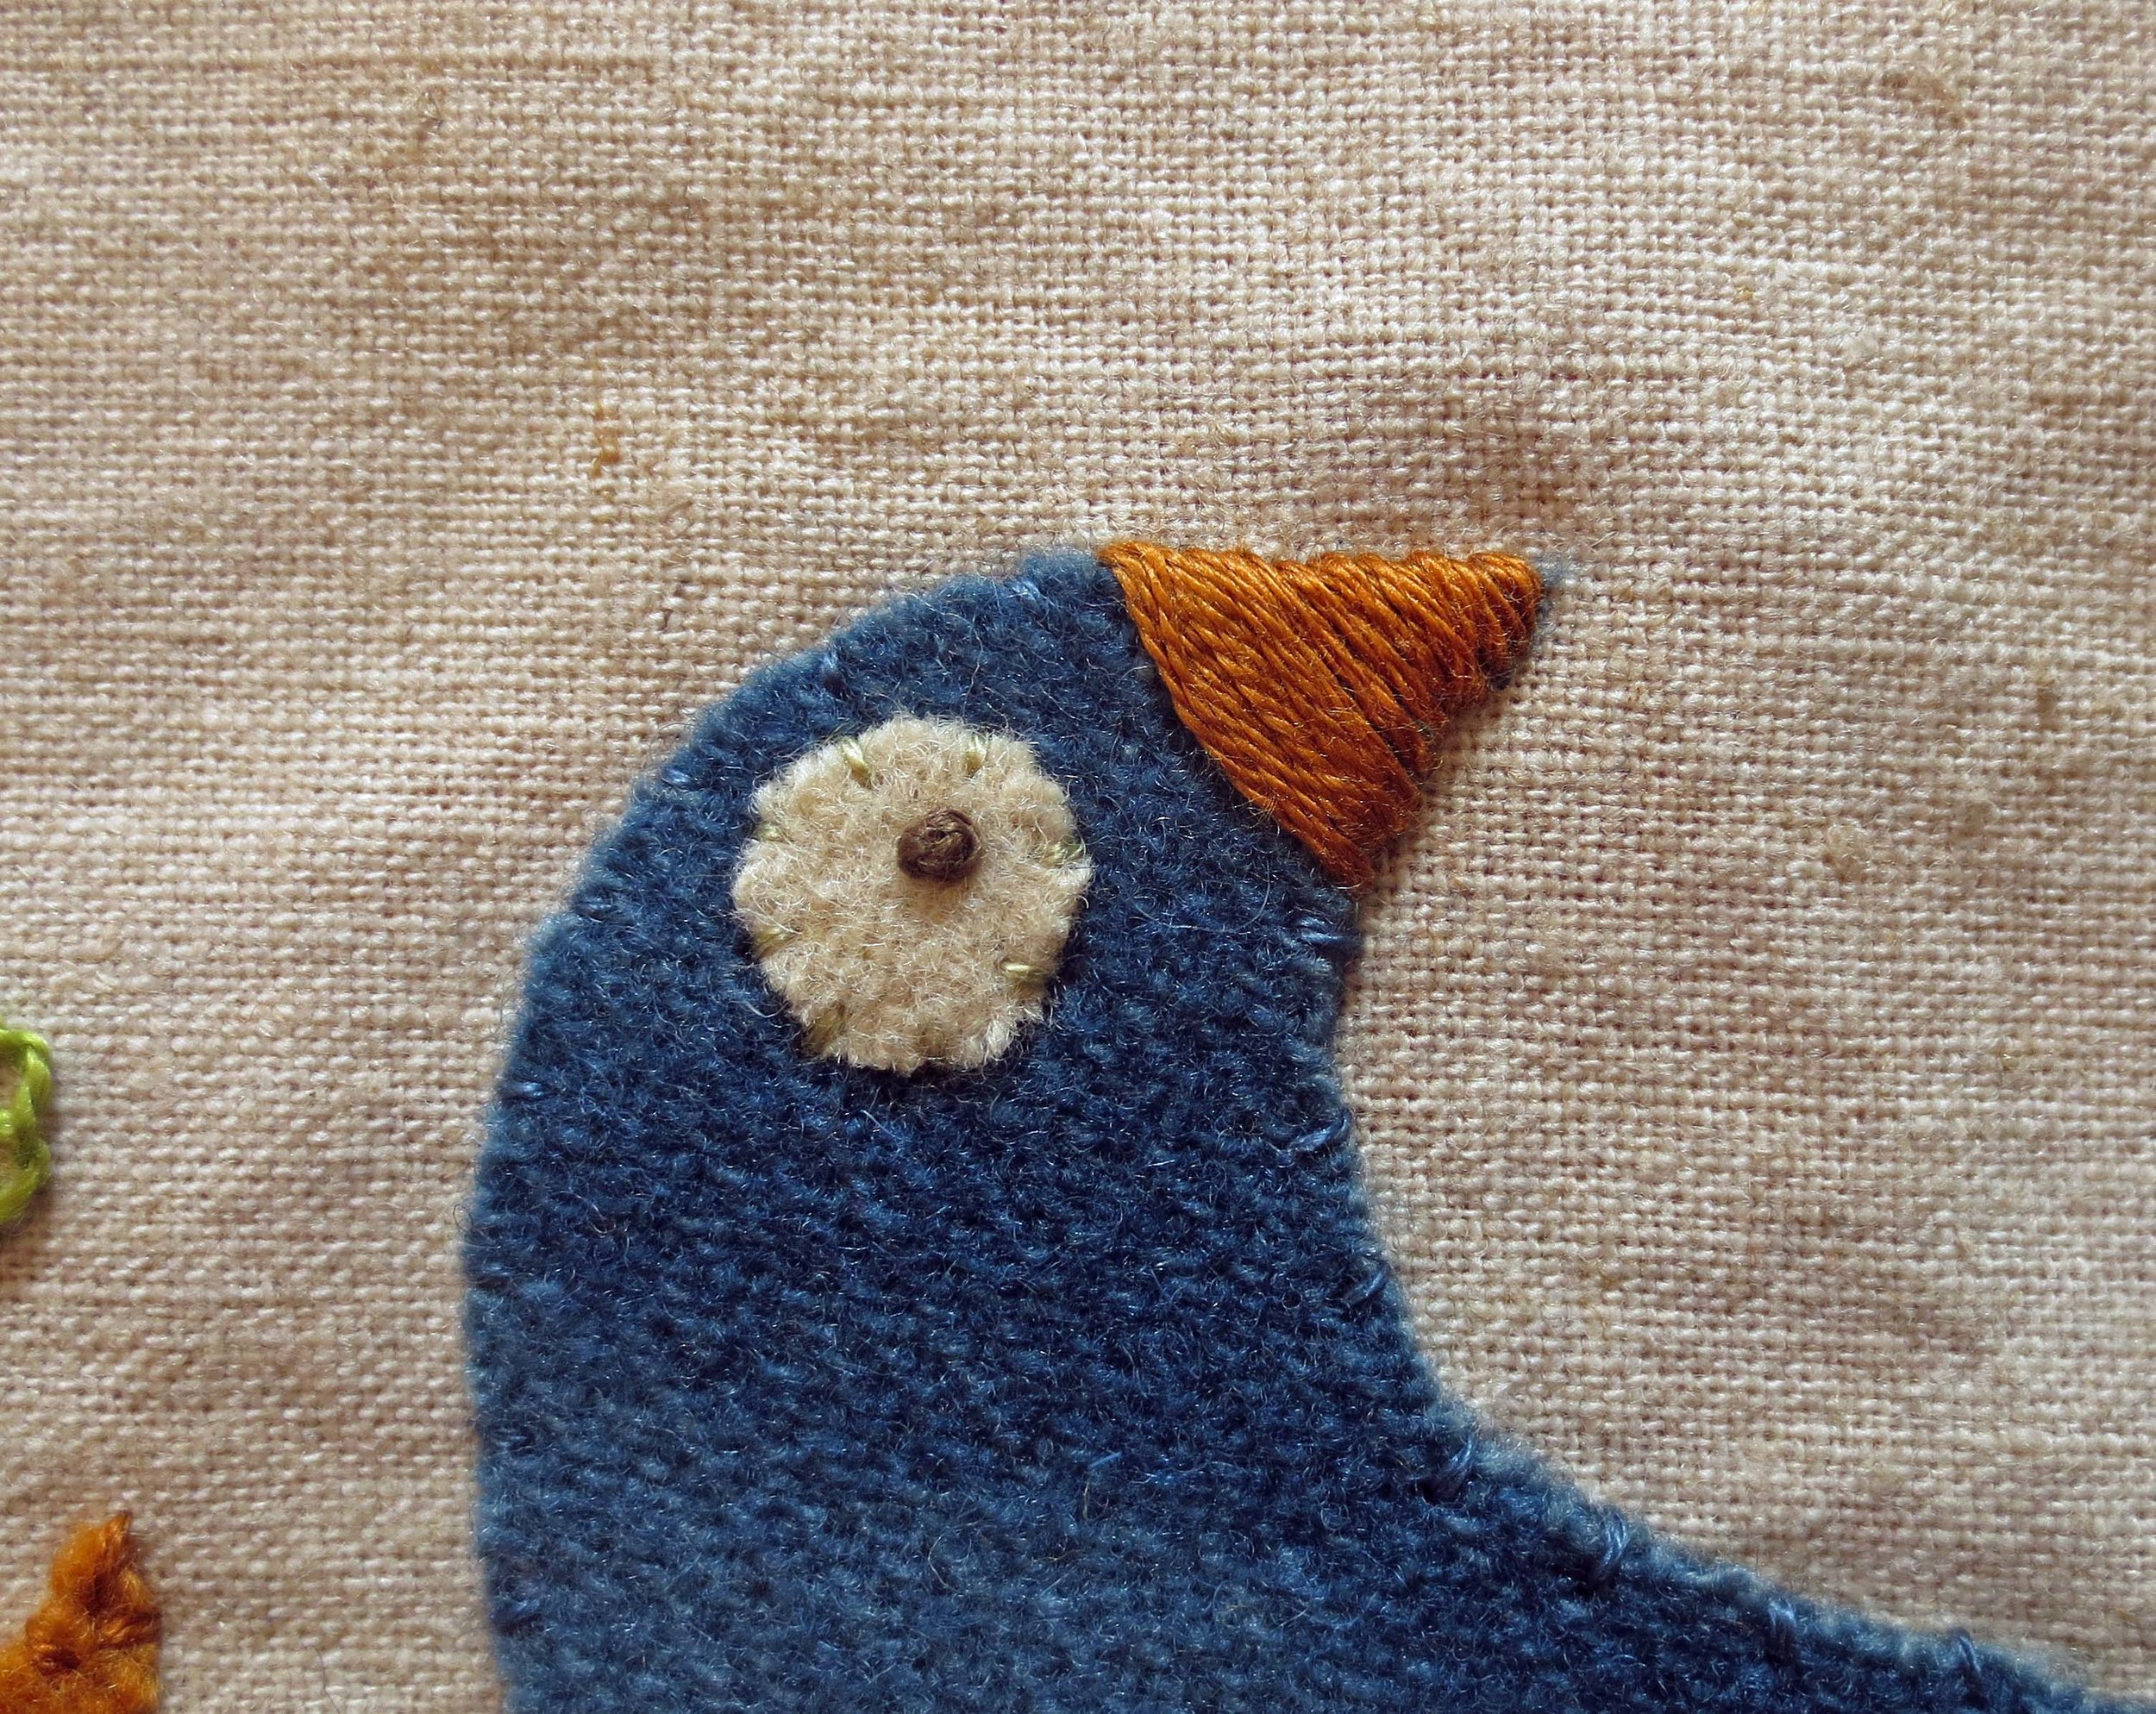
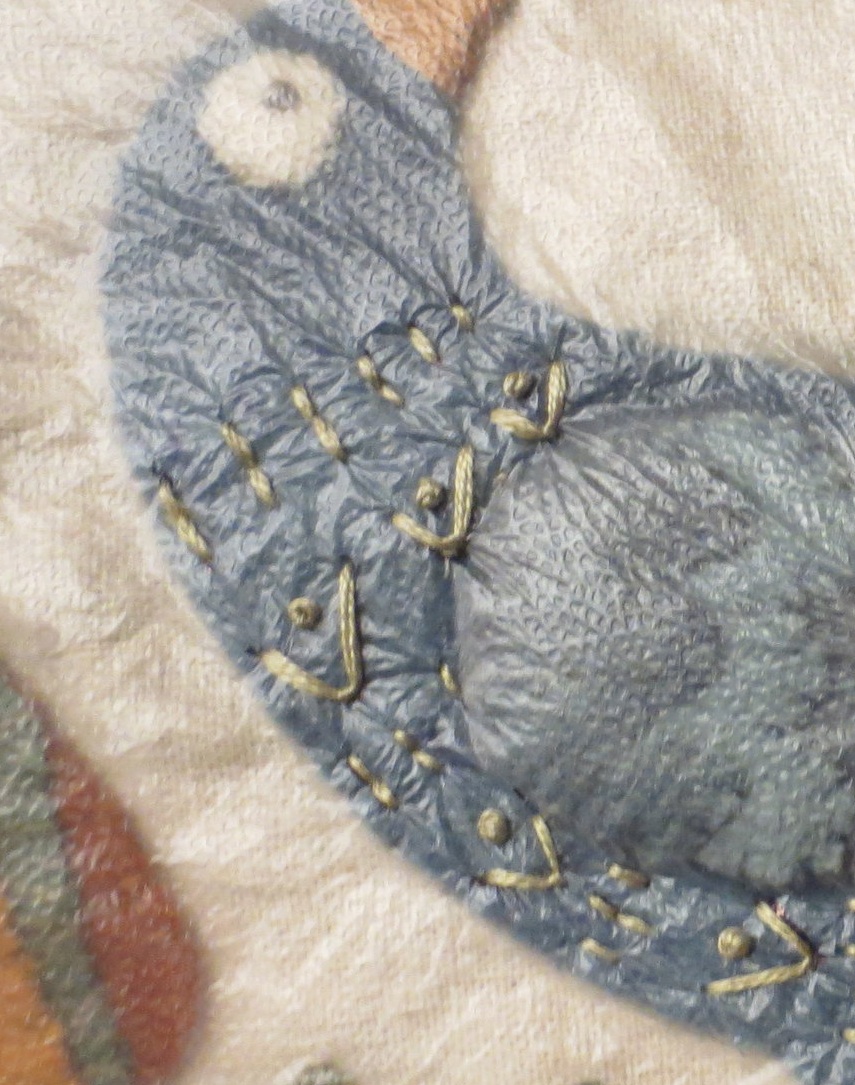
23. Bird Embellishment
Stitch a single french knot eye using 3 strands of brown floss.
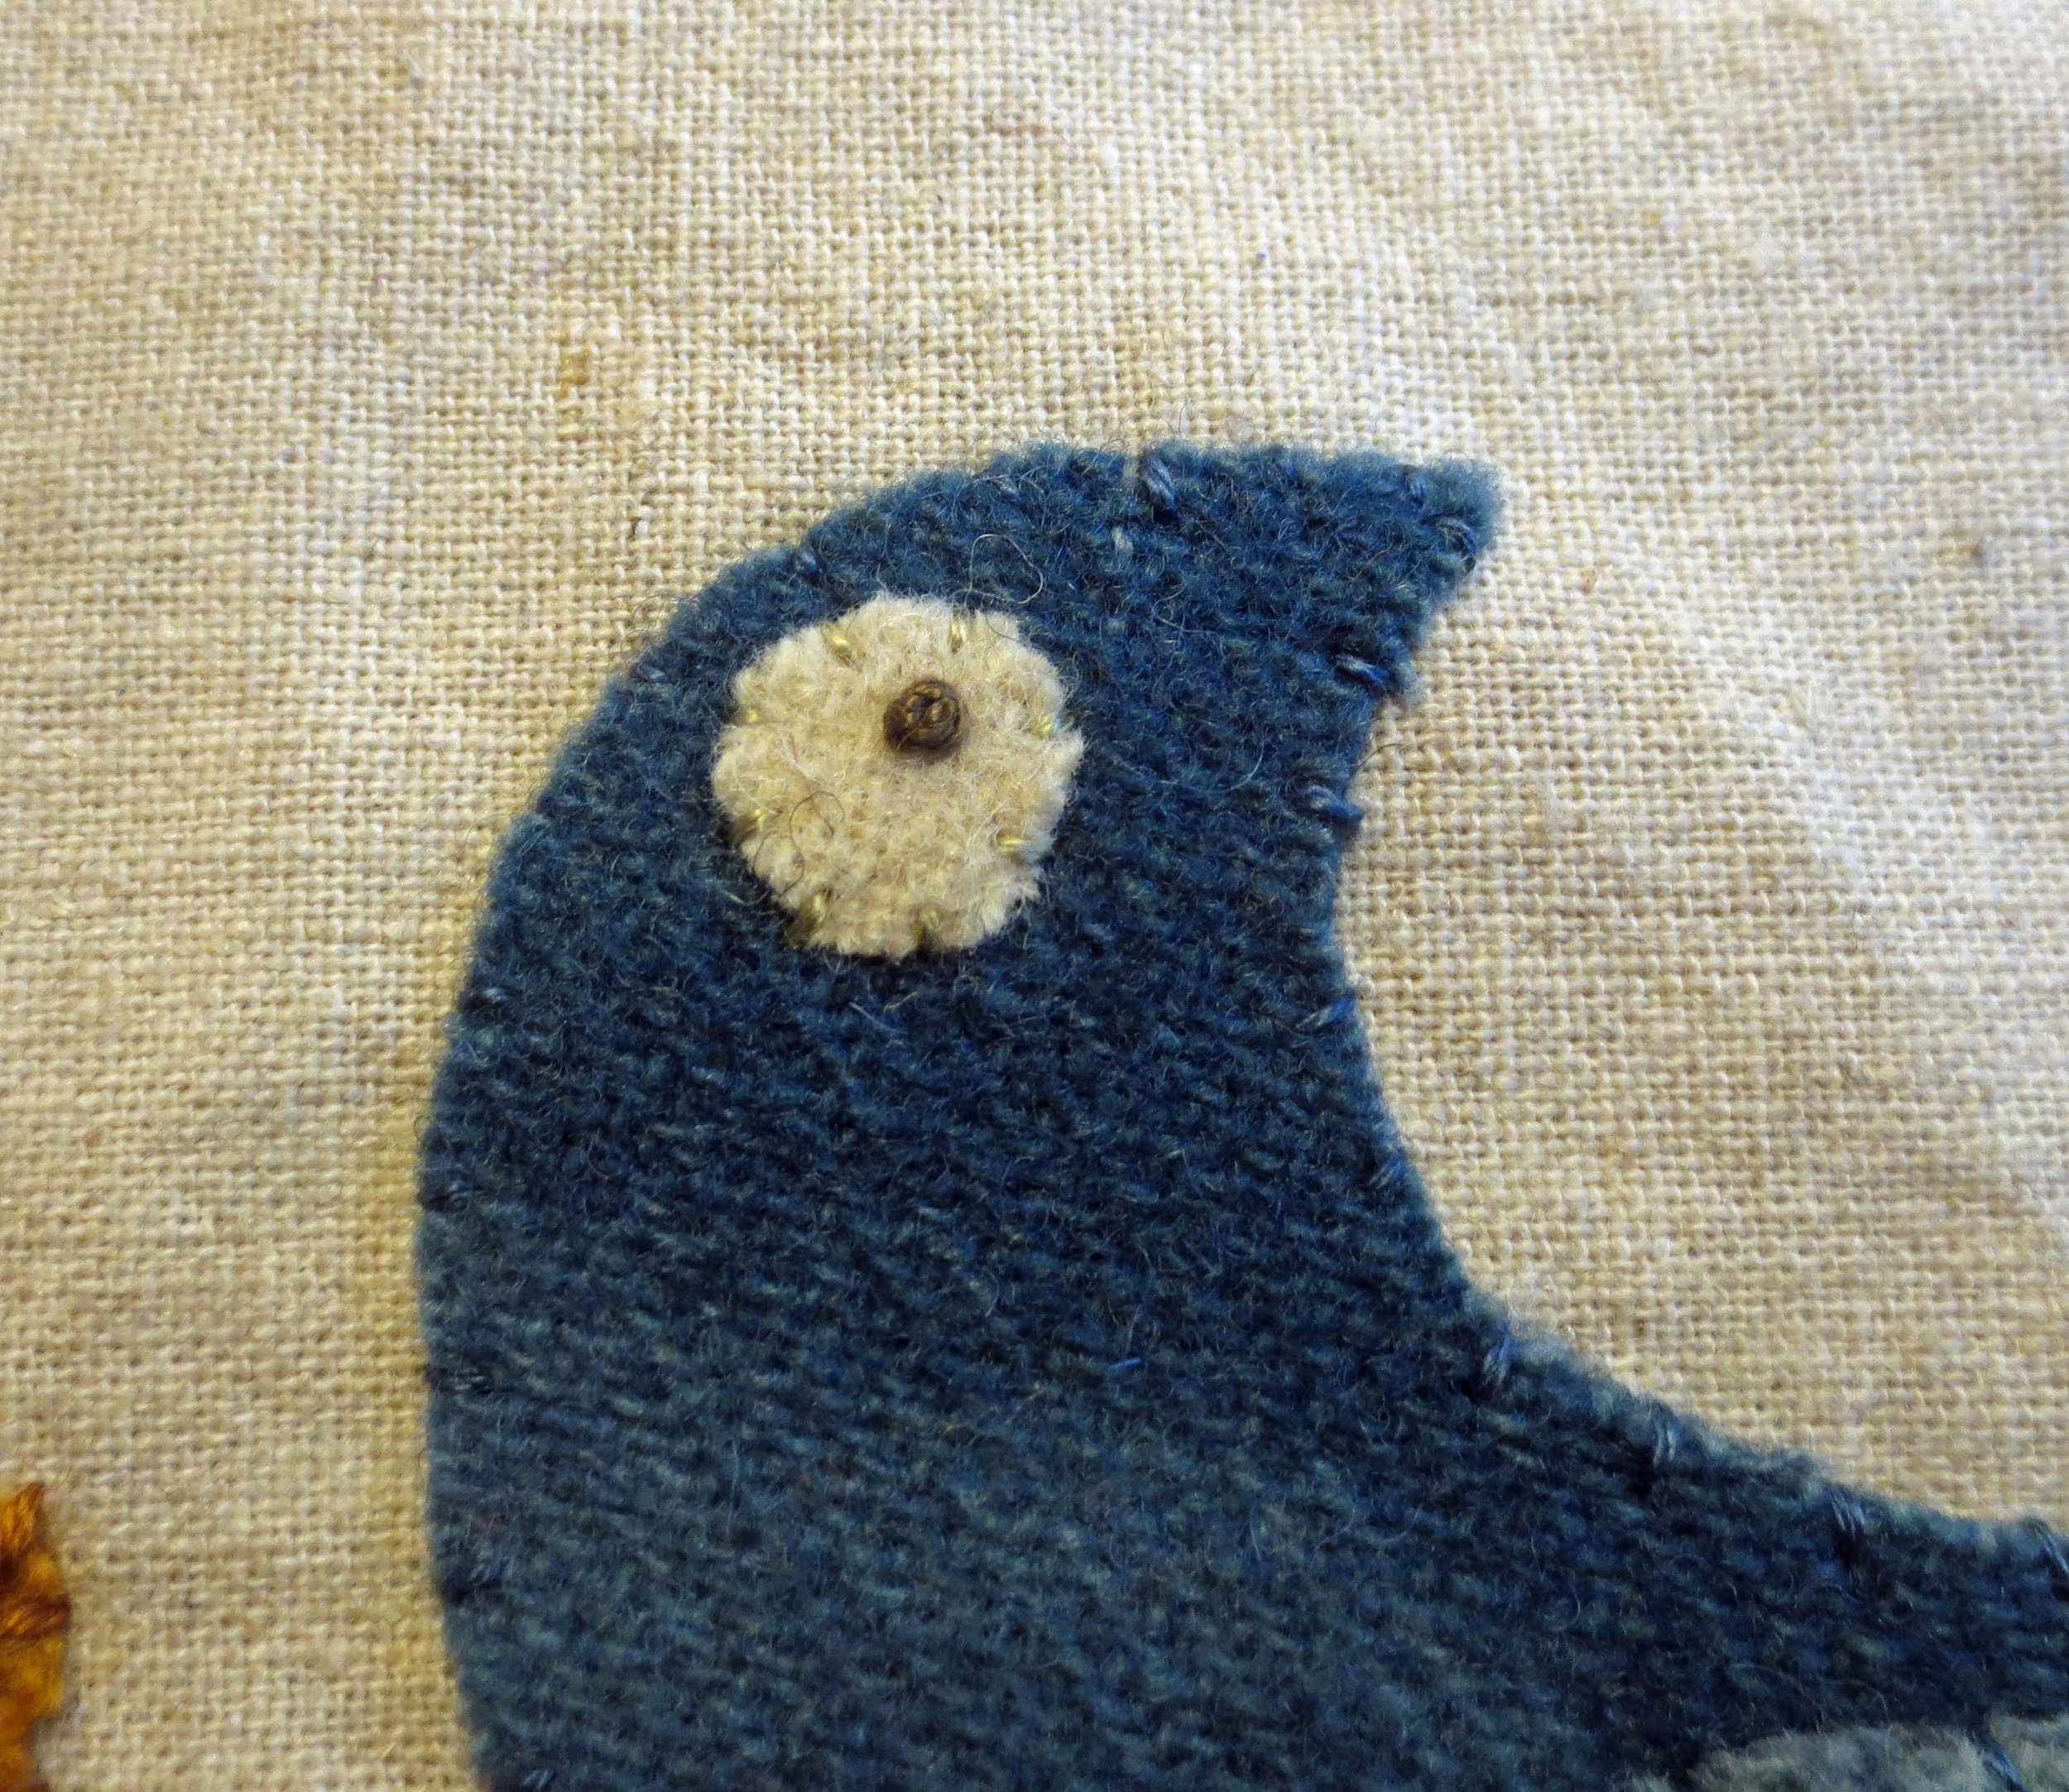
Use Three strands of orange floss to satin stitch the beak.
Cut a piece of Glad Press ‘n’ Seal large enough to cover the bird’s body, wing, and tail.
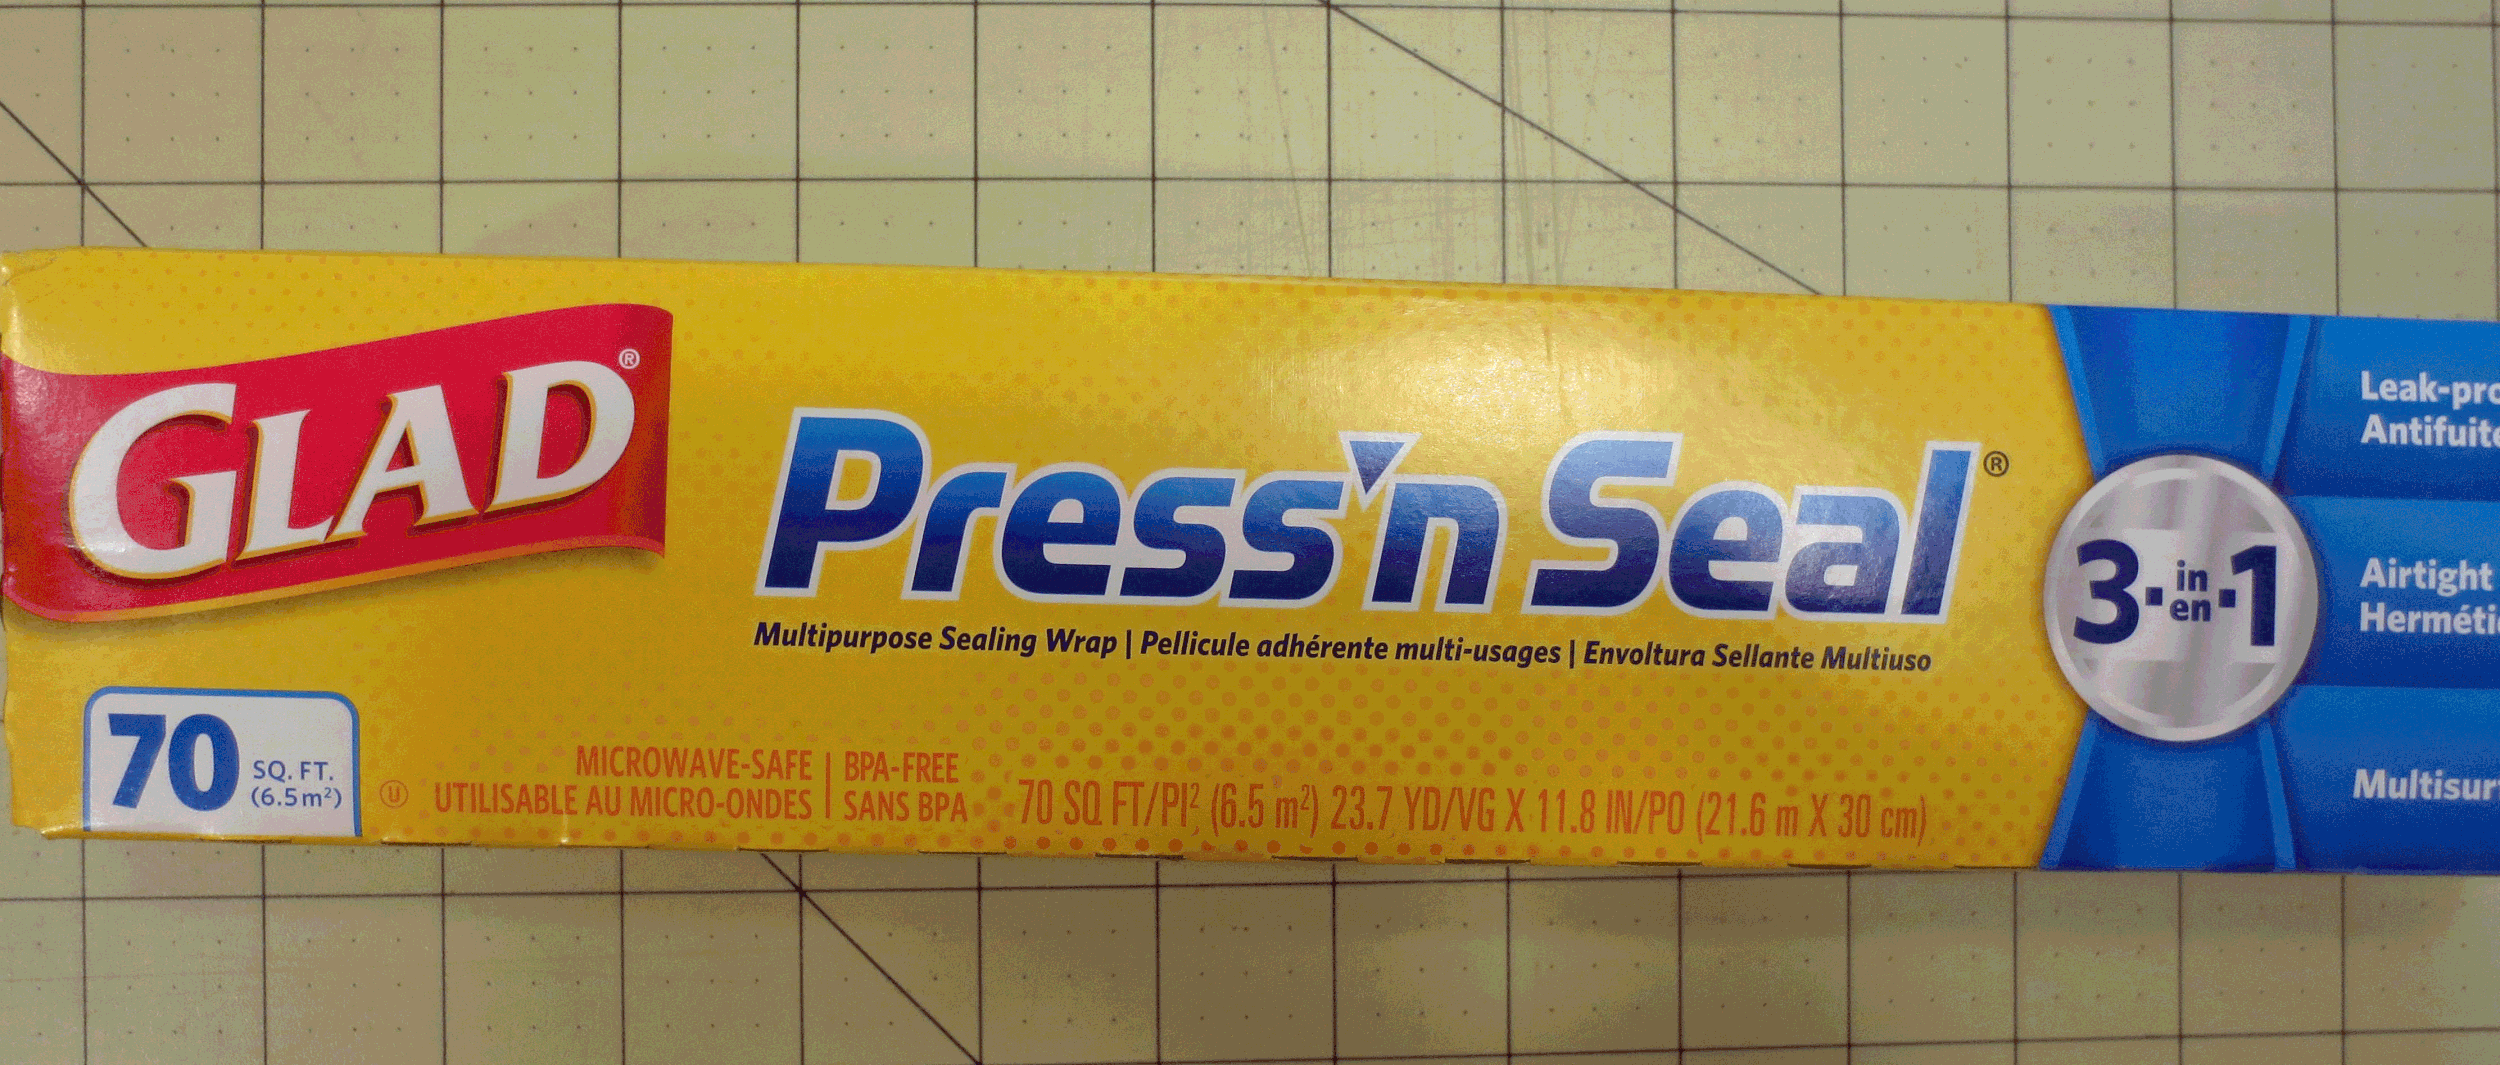
Place the Press ‘n’ Seal on top of the Layout, and then trace the stitches onto the Press ‘n’ Seal using a fine point Sharpie marker.
Carefully peel the Press ‘n’ Seal off of the Layout, and position it onto the appliqued bird. Smooth out any folds or creases.
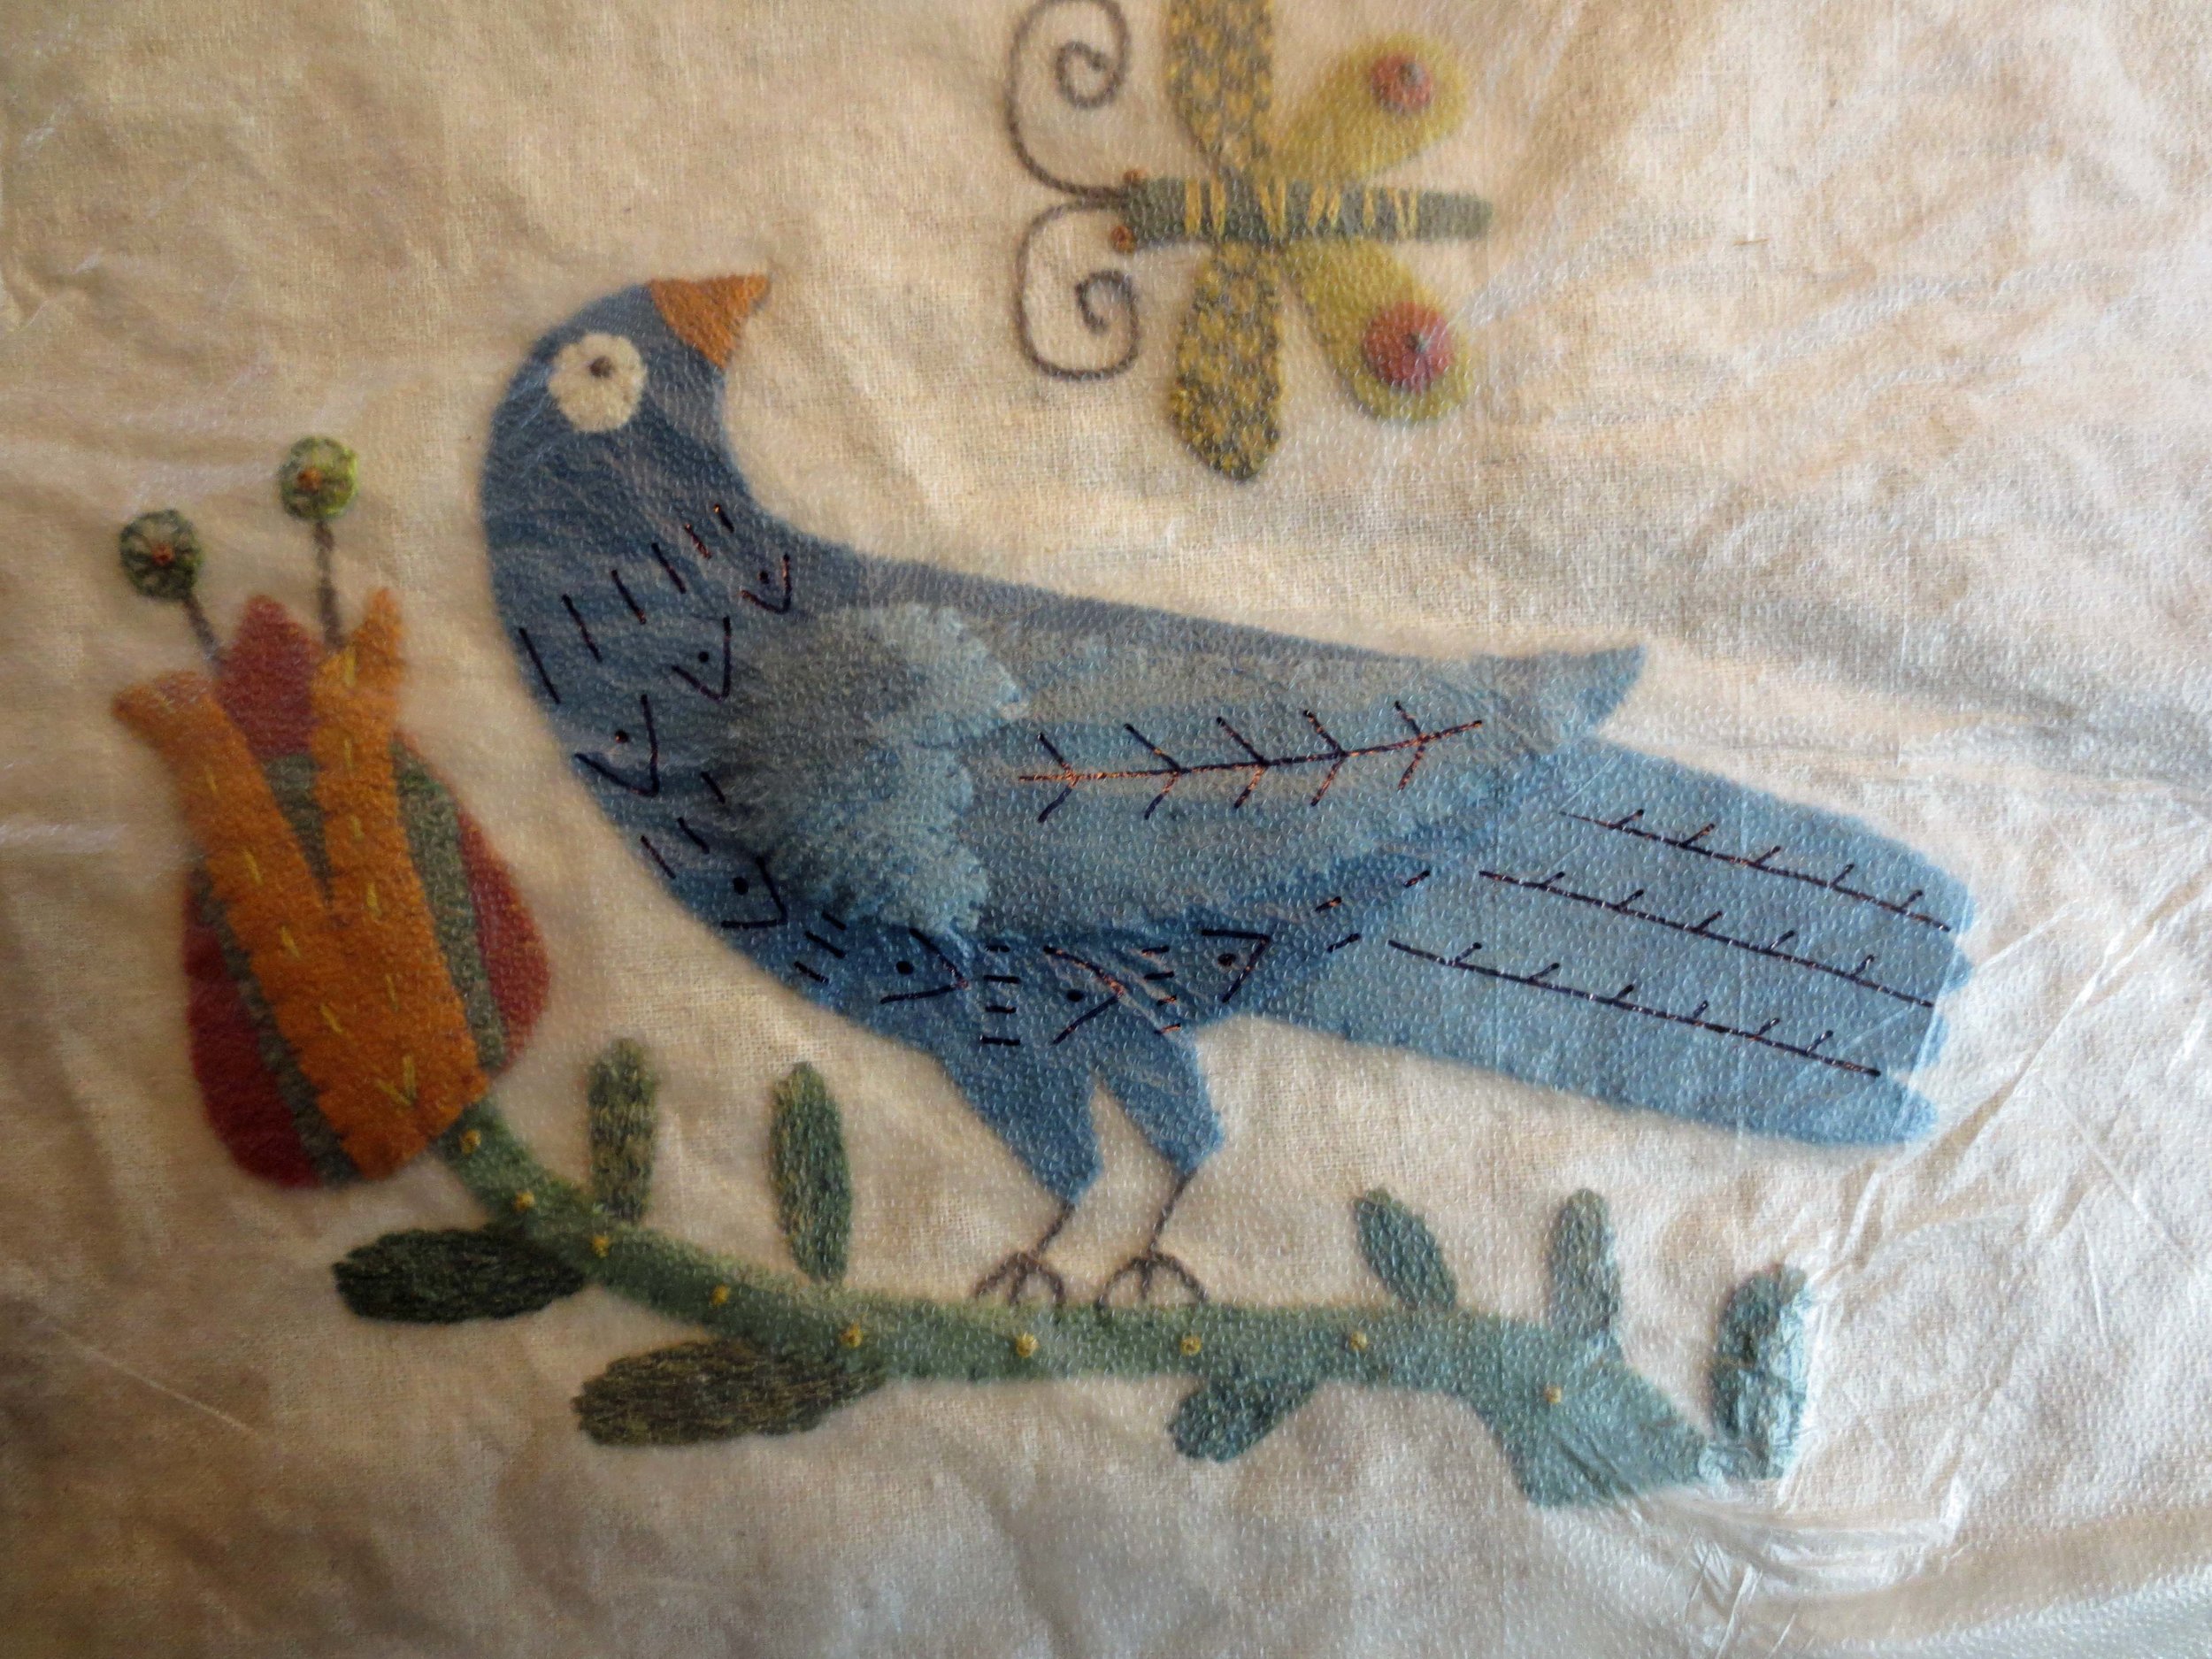
Use two strands of pale olive embroidery floss for all of the stitches on the bird.
Note: When the Press ‘n’ Seal is pulled off it tends to pull the stitches, so make your stitches a little tighter than usual.
The stripes at the neck and along the belly are made with back stitches and straight stitches. The longer stripes are made with two back stitches and the short stripes are made with a single straight stitch (see below).
The V design is made with a fly stitch and a french knot (see below).
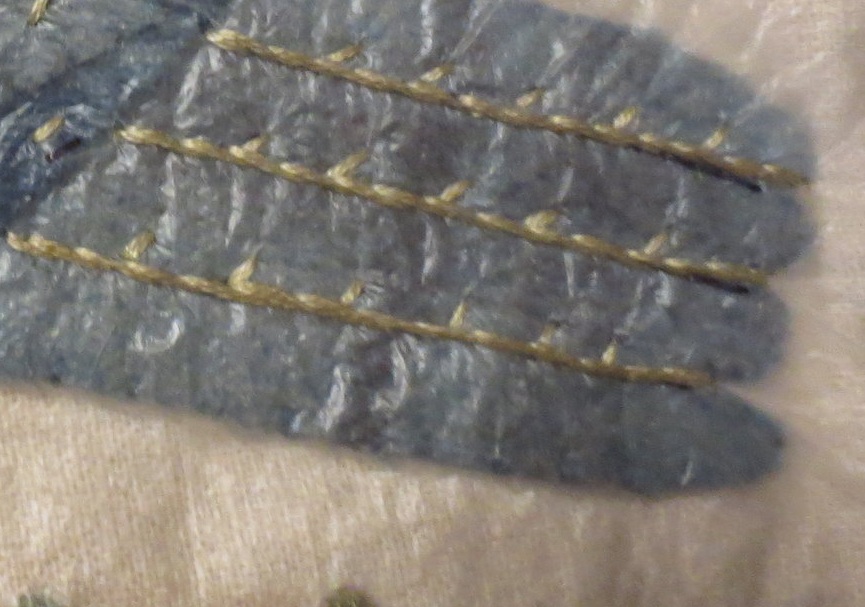
Stem stitch each of the tail lines. Stitch six slanted straight stitches on each stem stitched tail line.
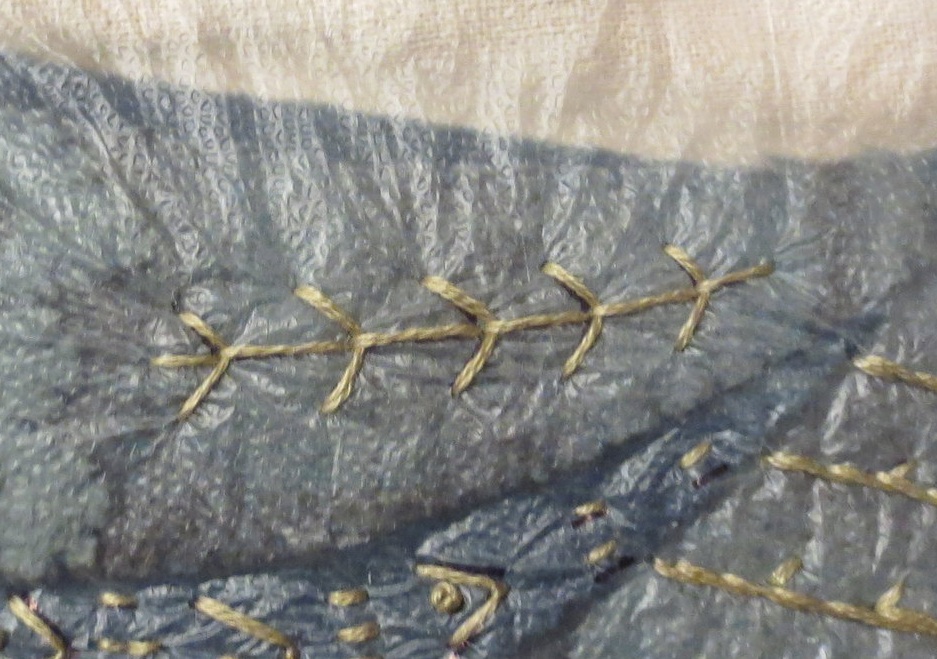
Stitch a series of closed fly stitches on the wing.
Almost finished!

Gently pull away the Press ‘n’ Seal. Hold down the stitches with your thumb of one hand while you pull with the opposite hand. This will minimize the stretching of your stitches. Sometimes you will need to use tweezers to get those little bits out from under the stitches.
Voila! The center applique is complete!

24. Let’s work on the border.
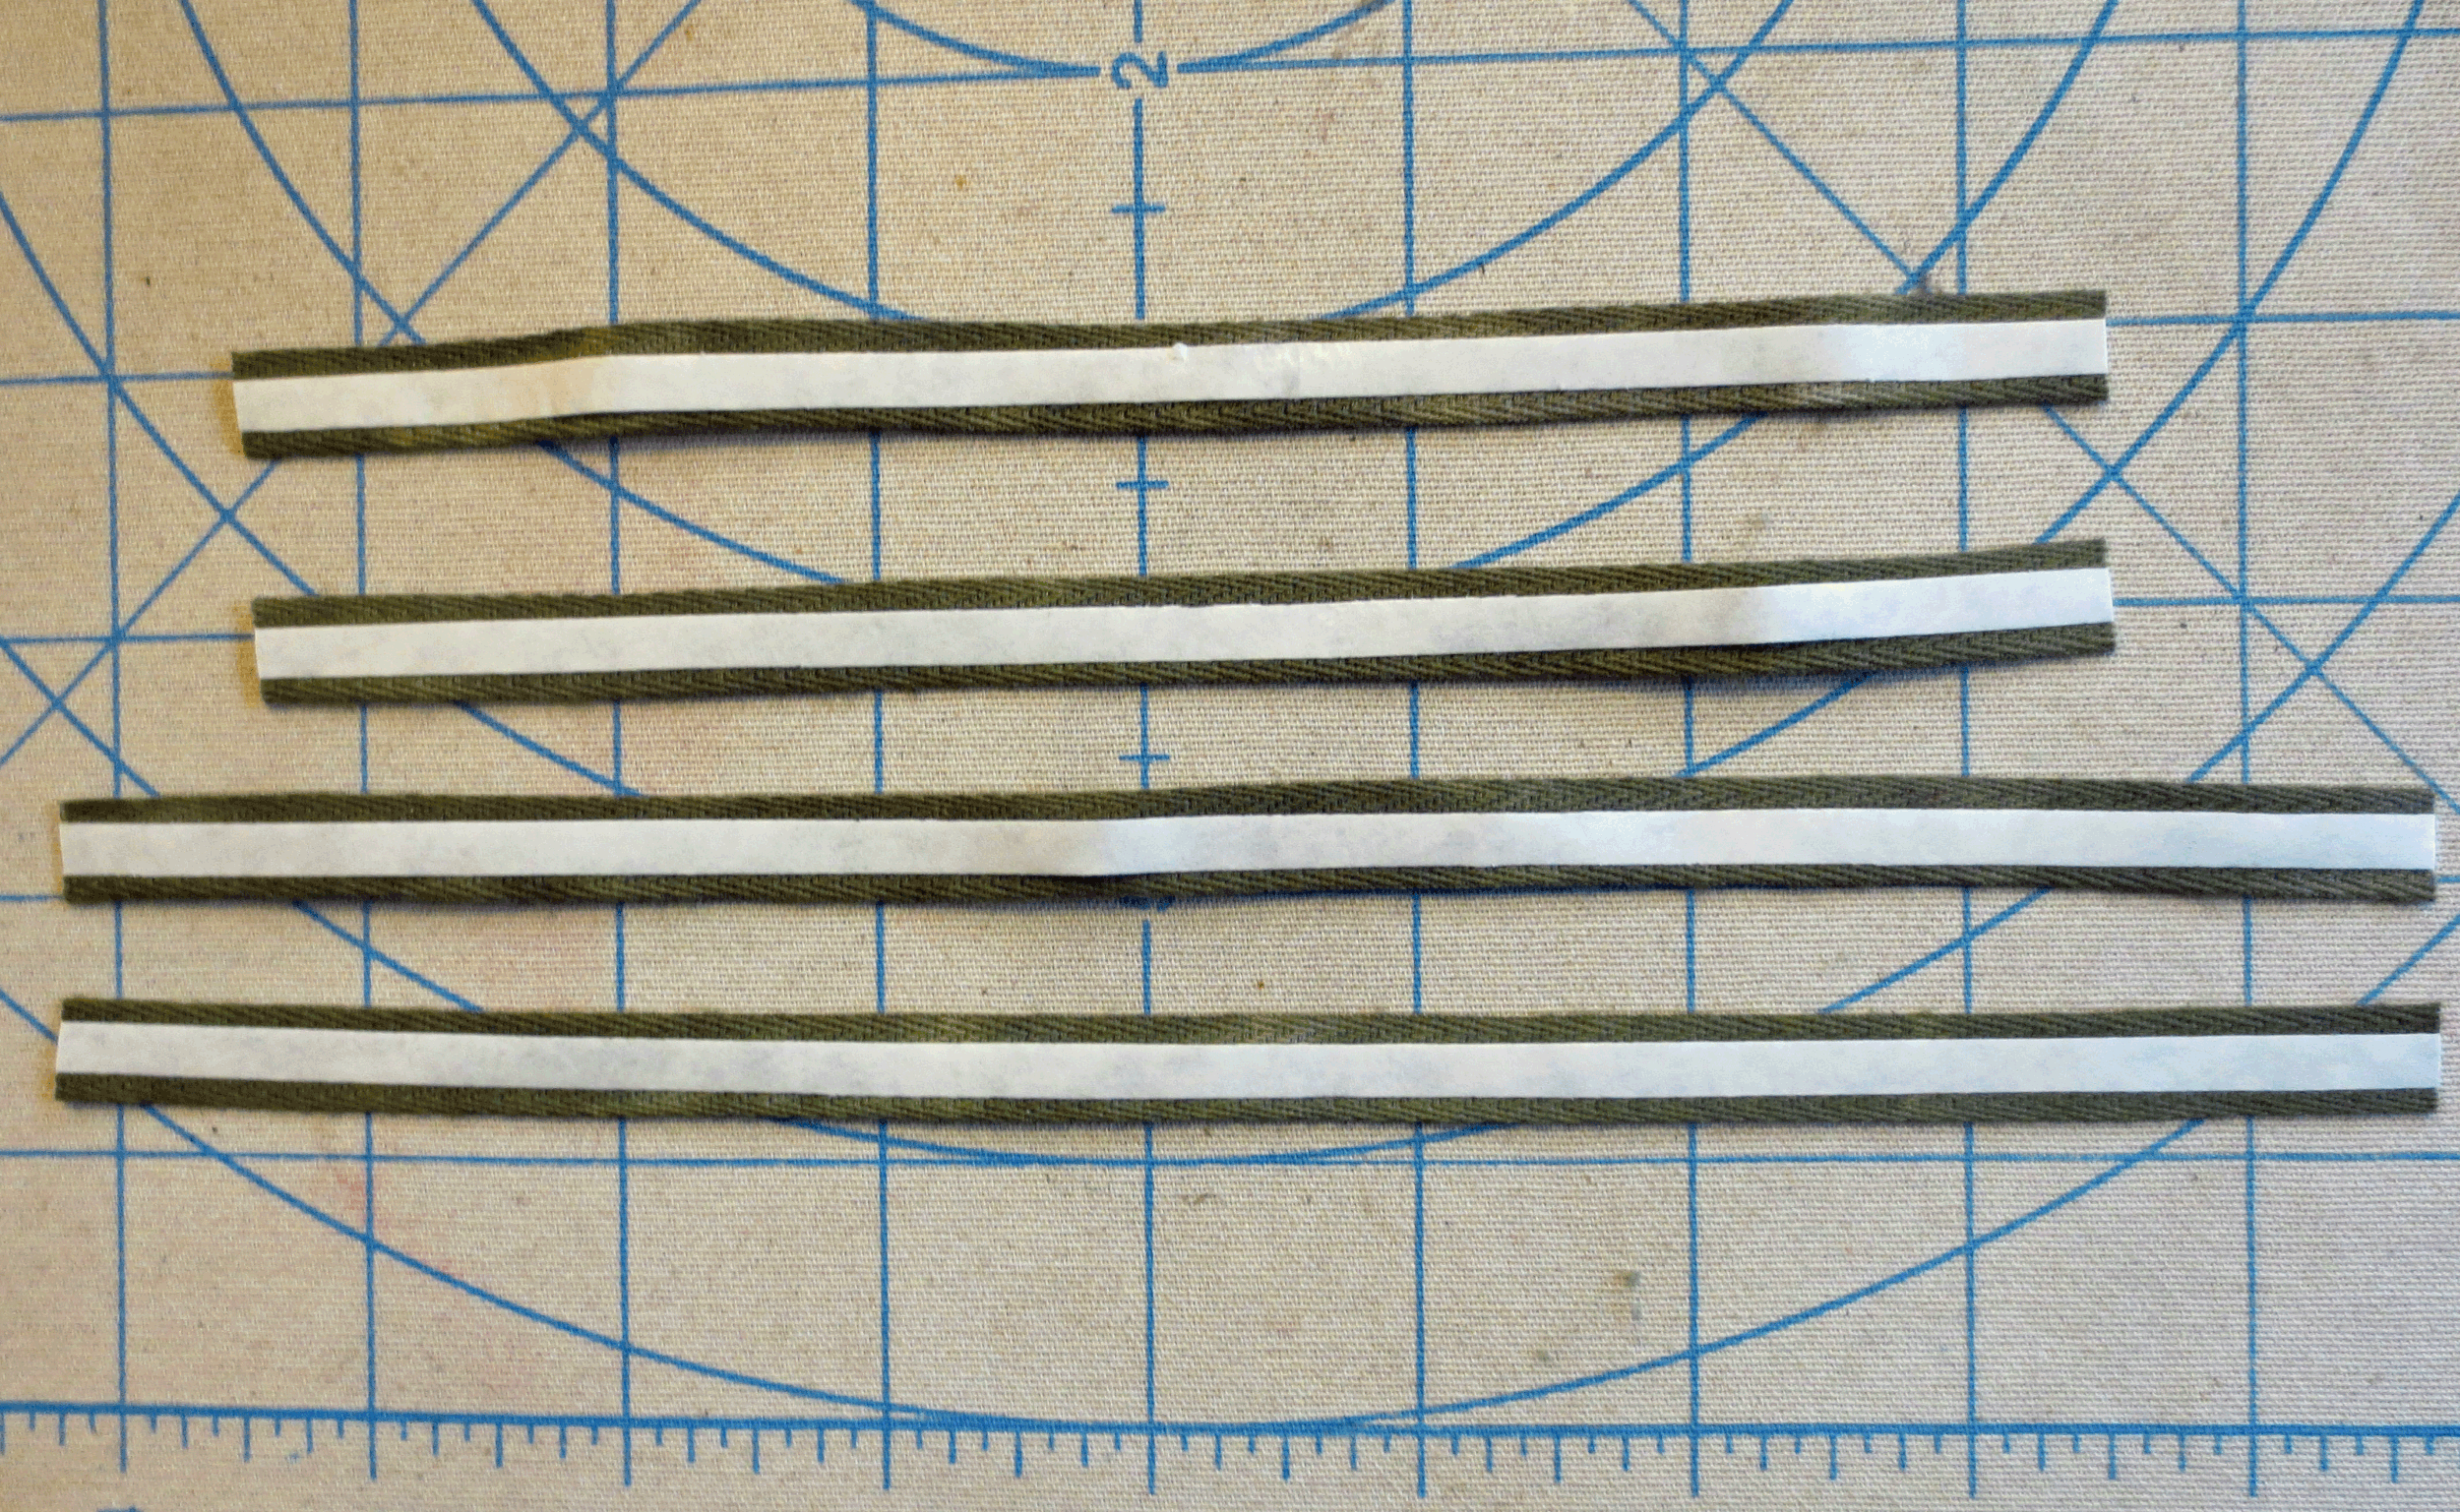
Cut a 32 inch strip of Clover 5mm fusible tape.
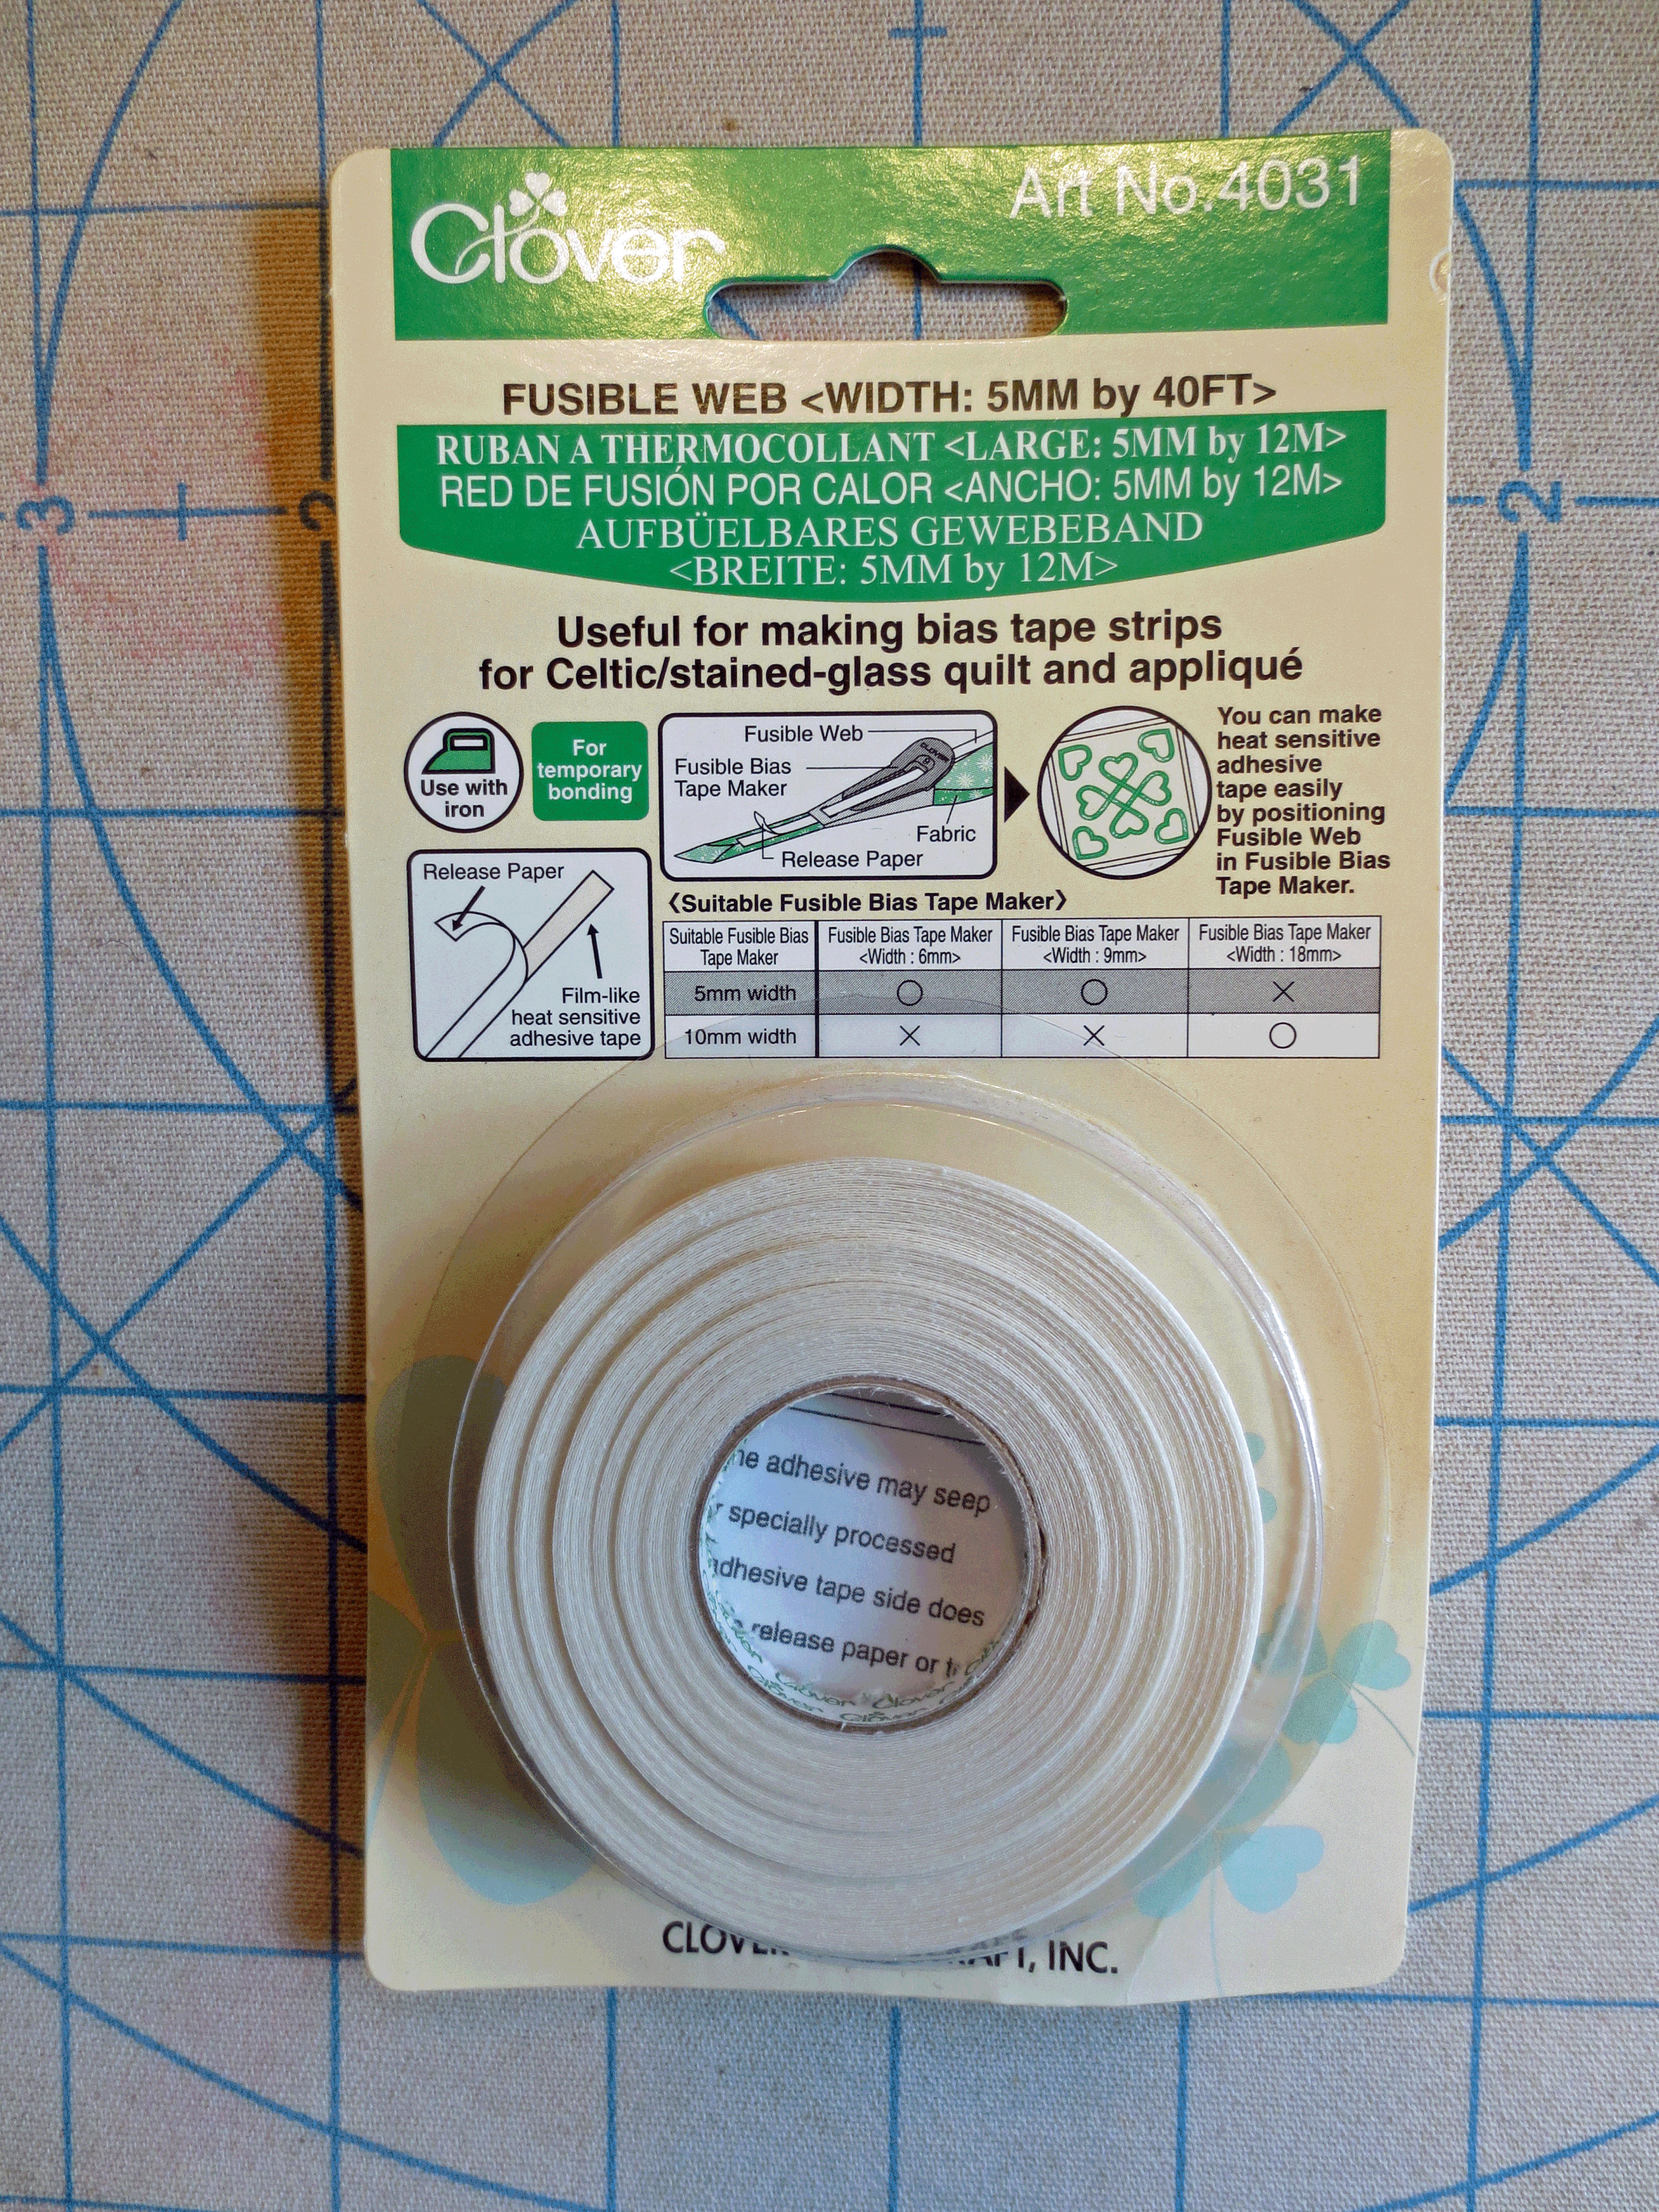
Iron this onto the 3/8-inch wide ribbon.

Cut the ribbon into the following lengths:
Two 6 3/4 inch
Two 8 1/2 inch
Lay your appliqued piece back on the light box with the Layout.
Remove the paper backing from the fusible tape.
Line up the top and bottom ribbons with the top and bottom borders. The ends will be under the corner blocks that will be added later.
Line up the side ribbons with the side borders overlapping the ends of the top and bottom borders about 1/8 inch.
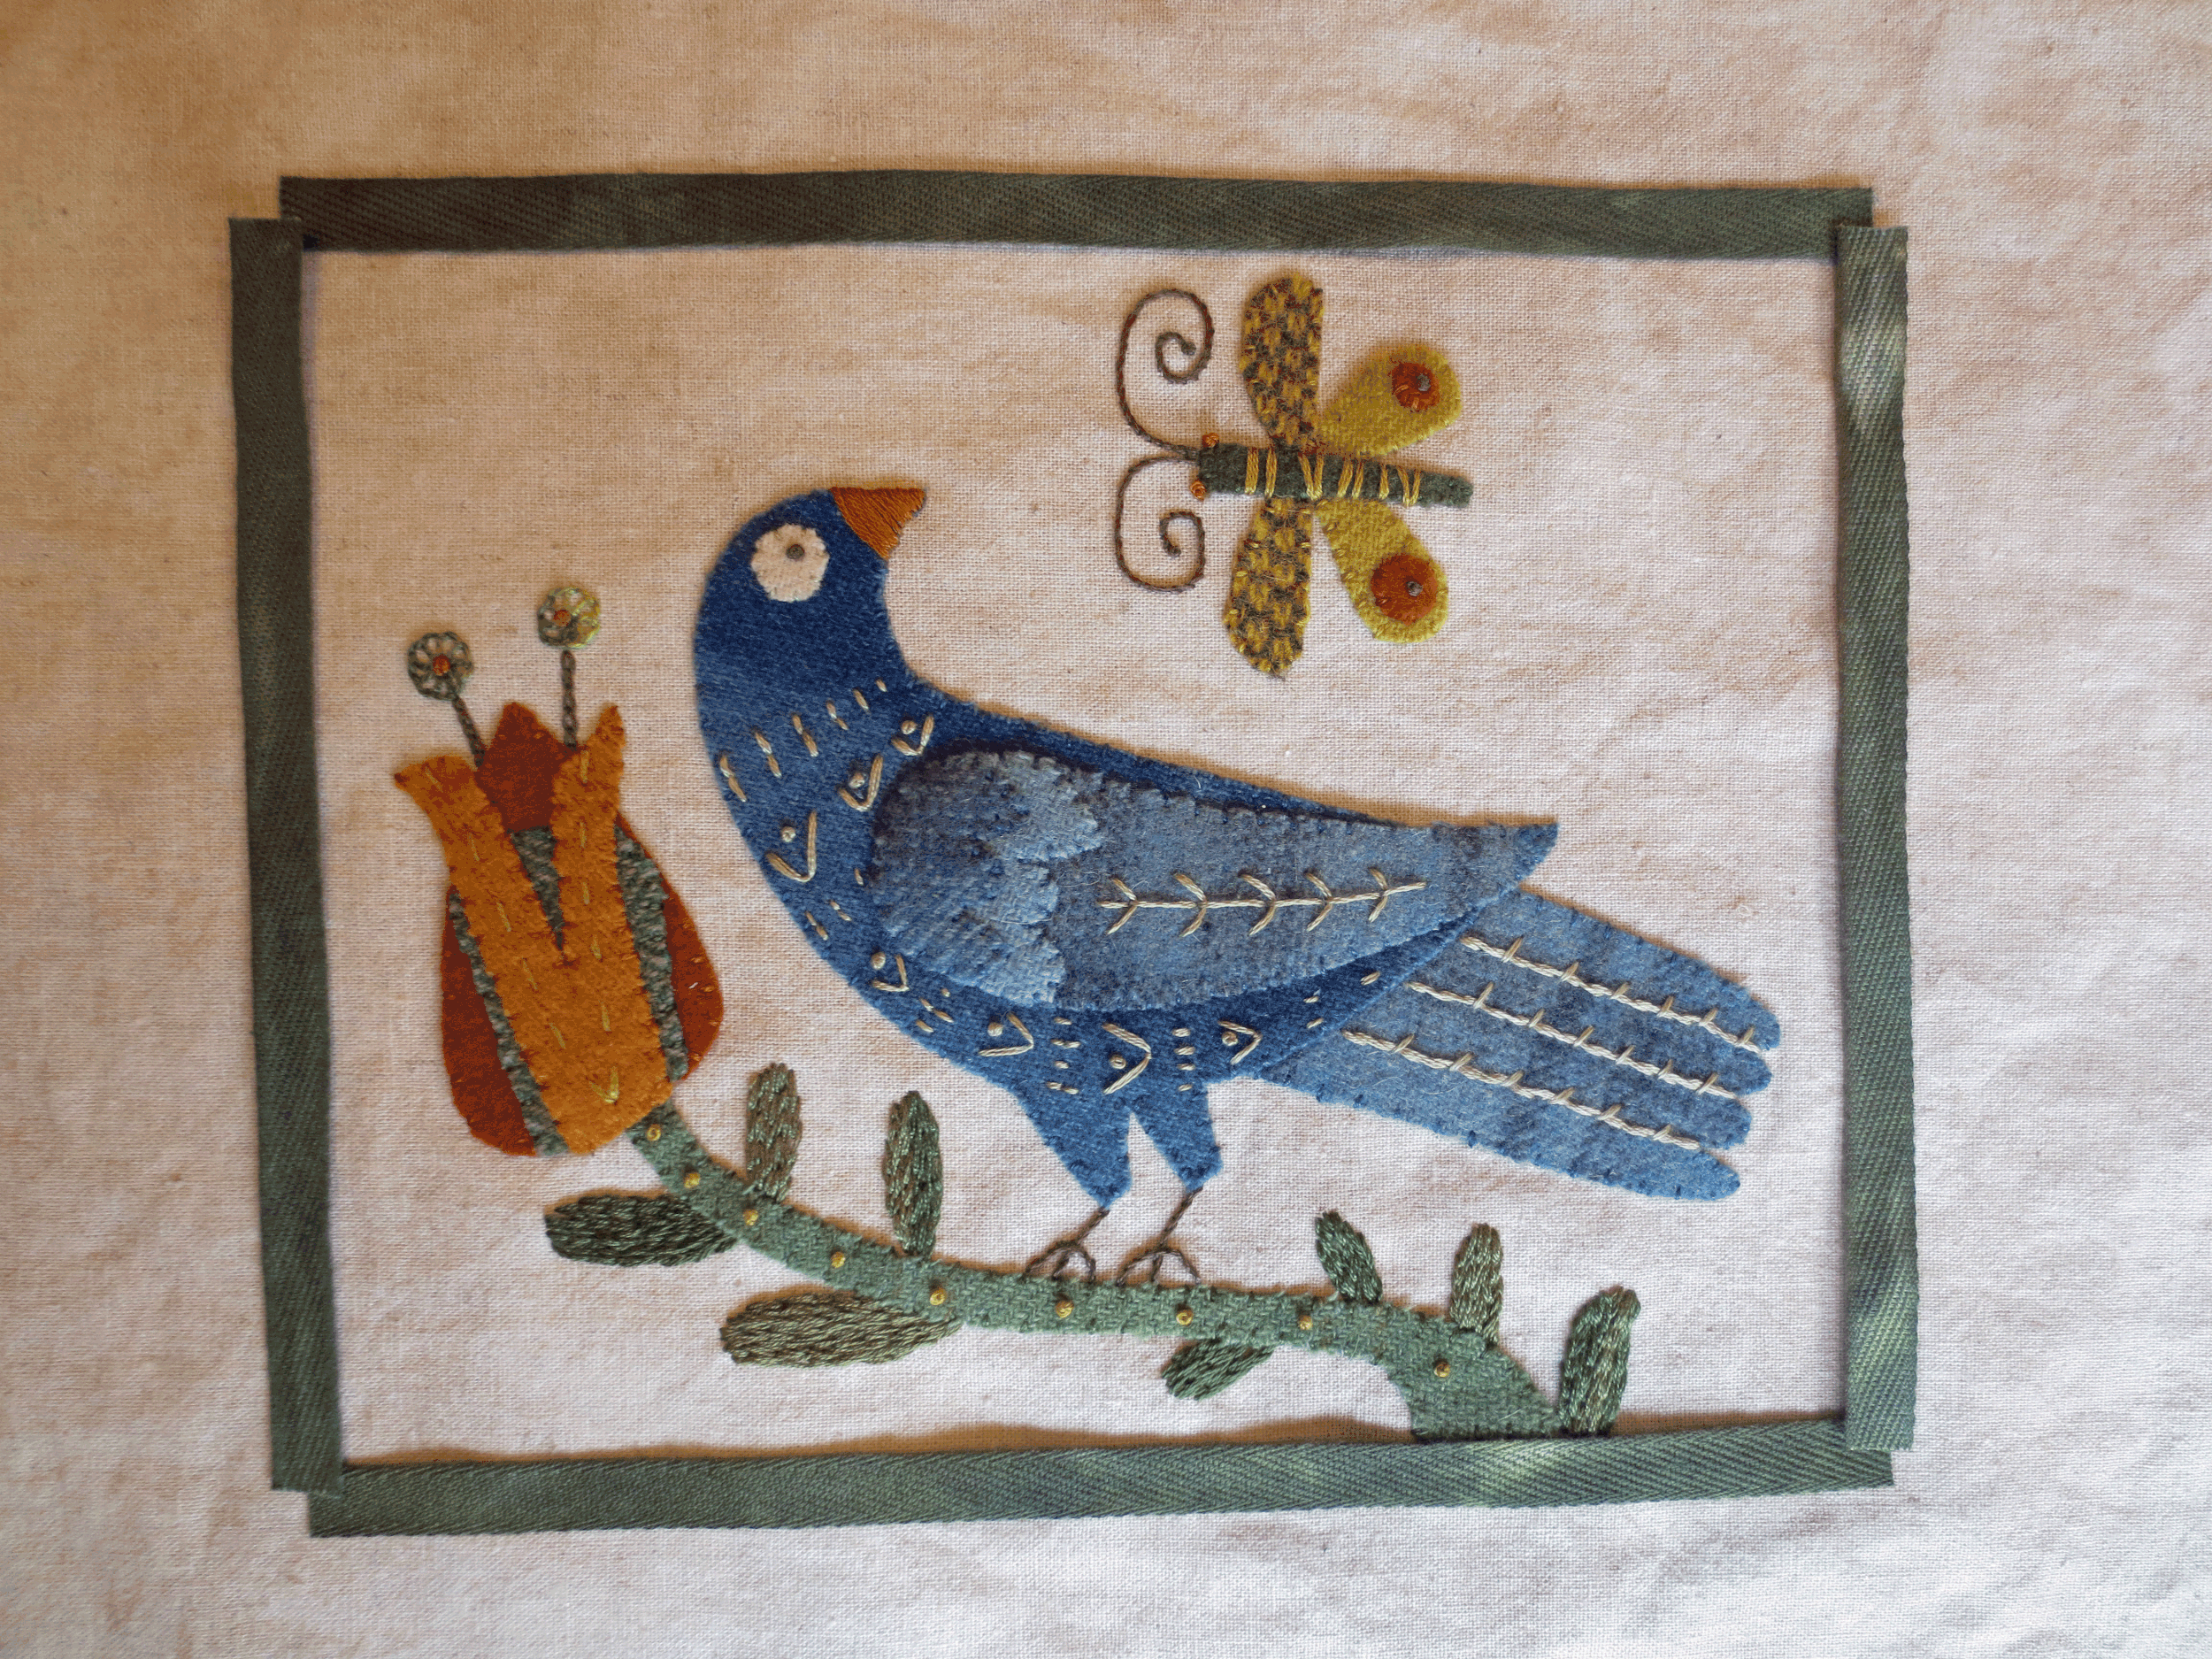
Carefully transfer the project to your ironing board. Use steam to fuse.
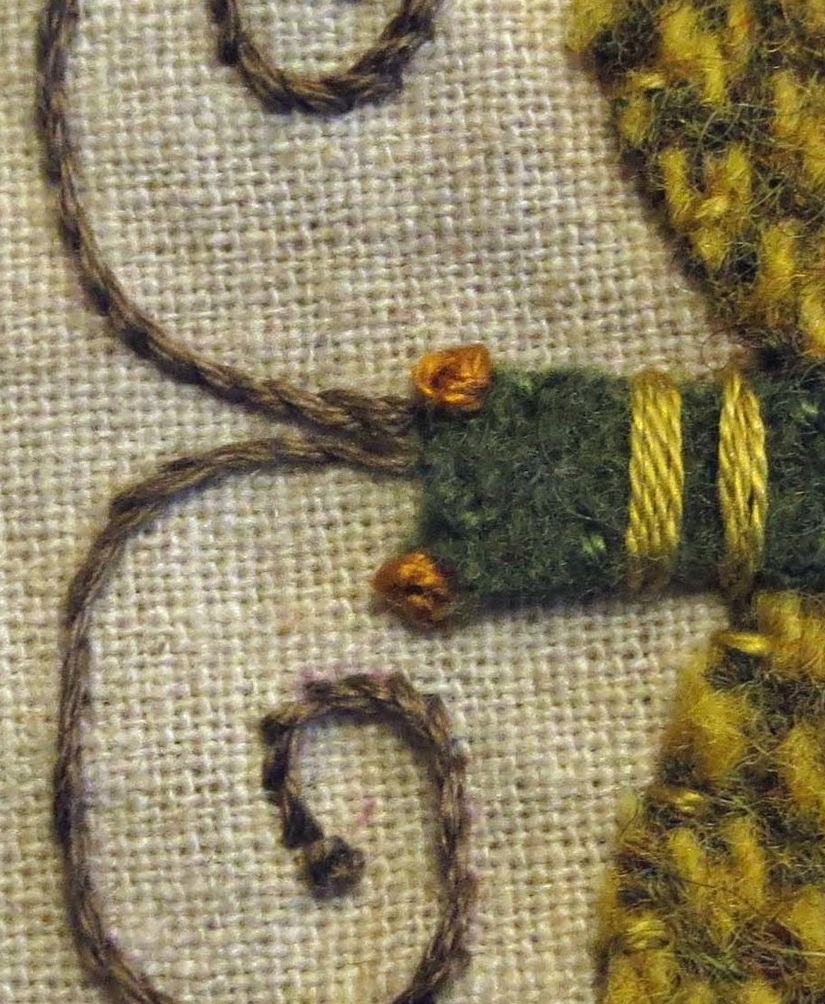
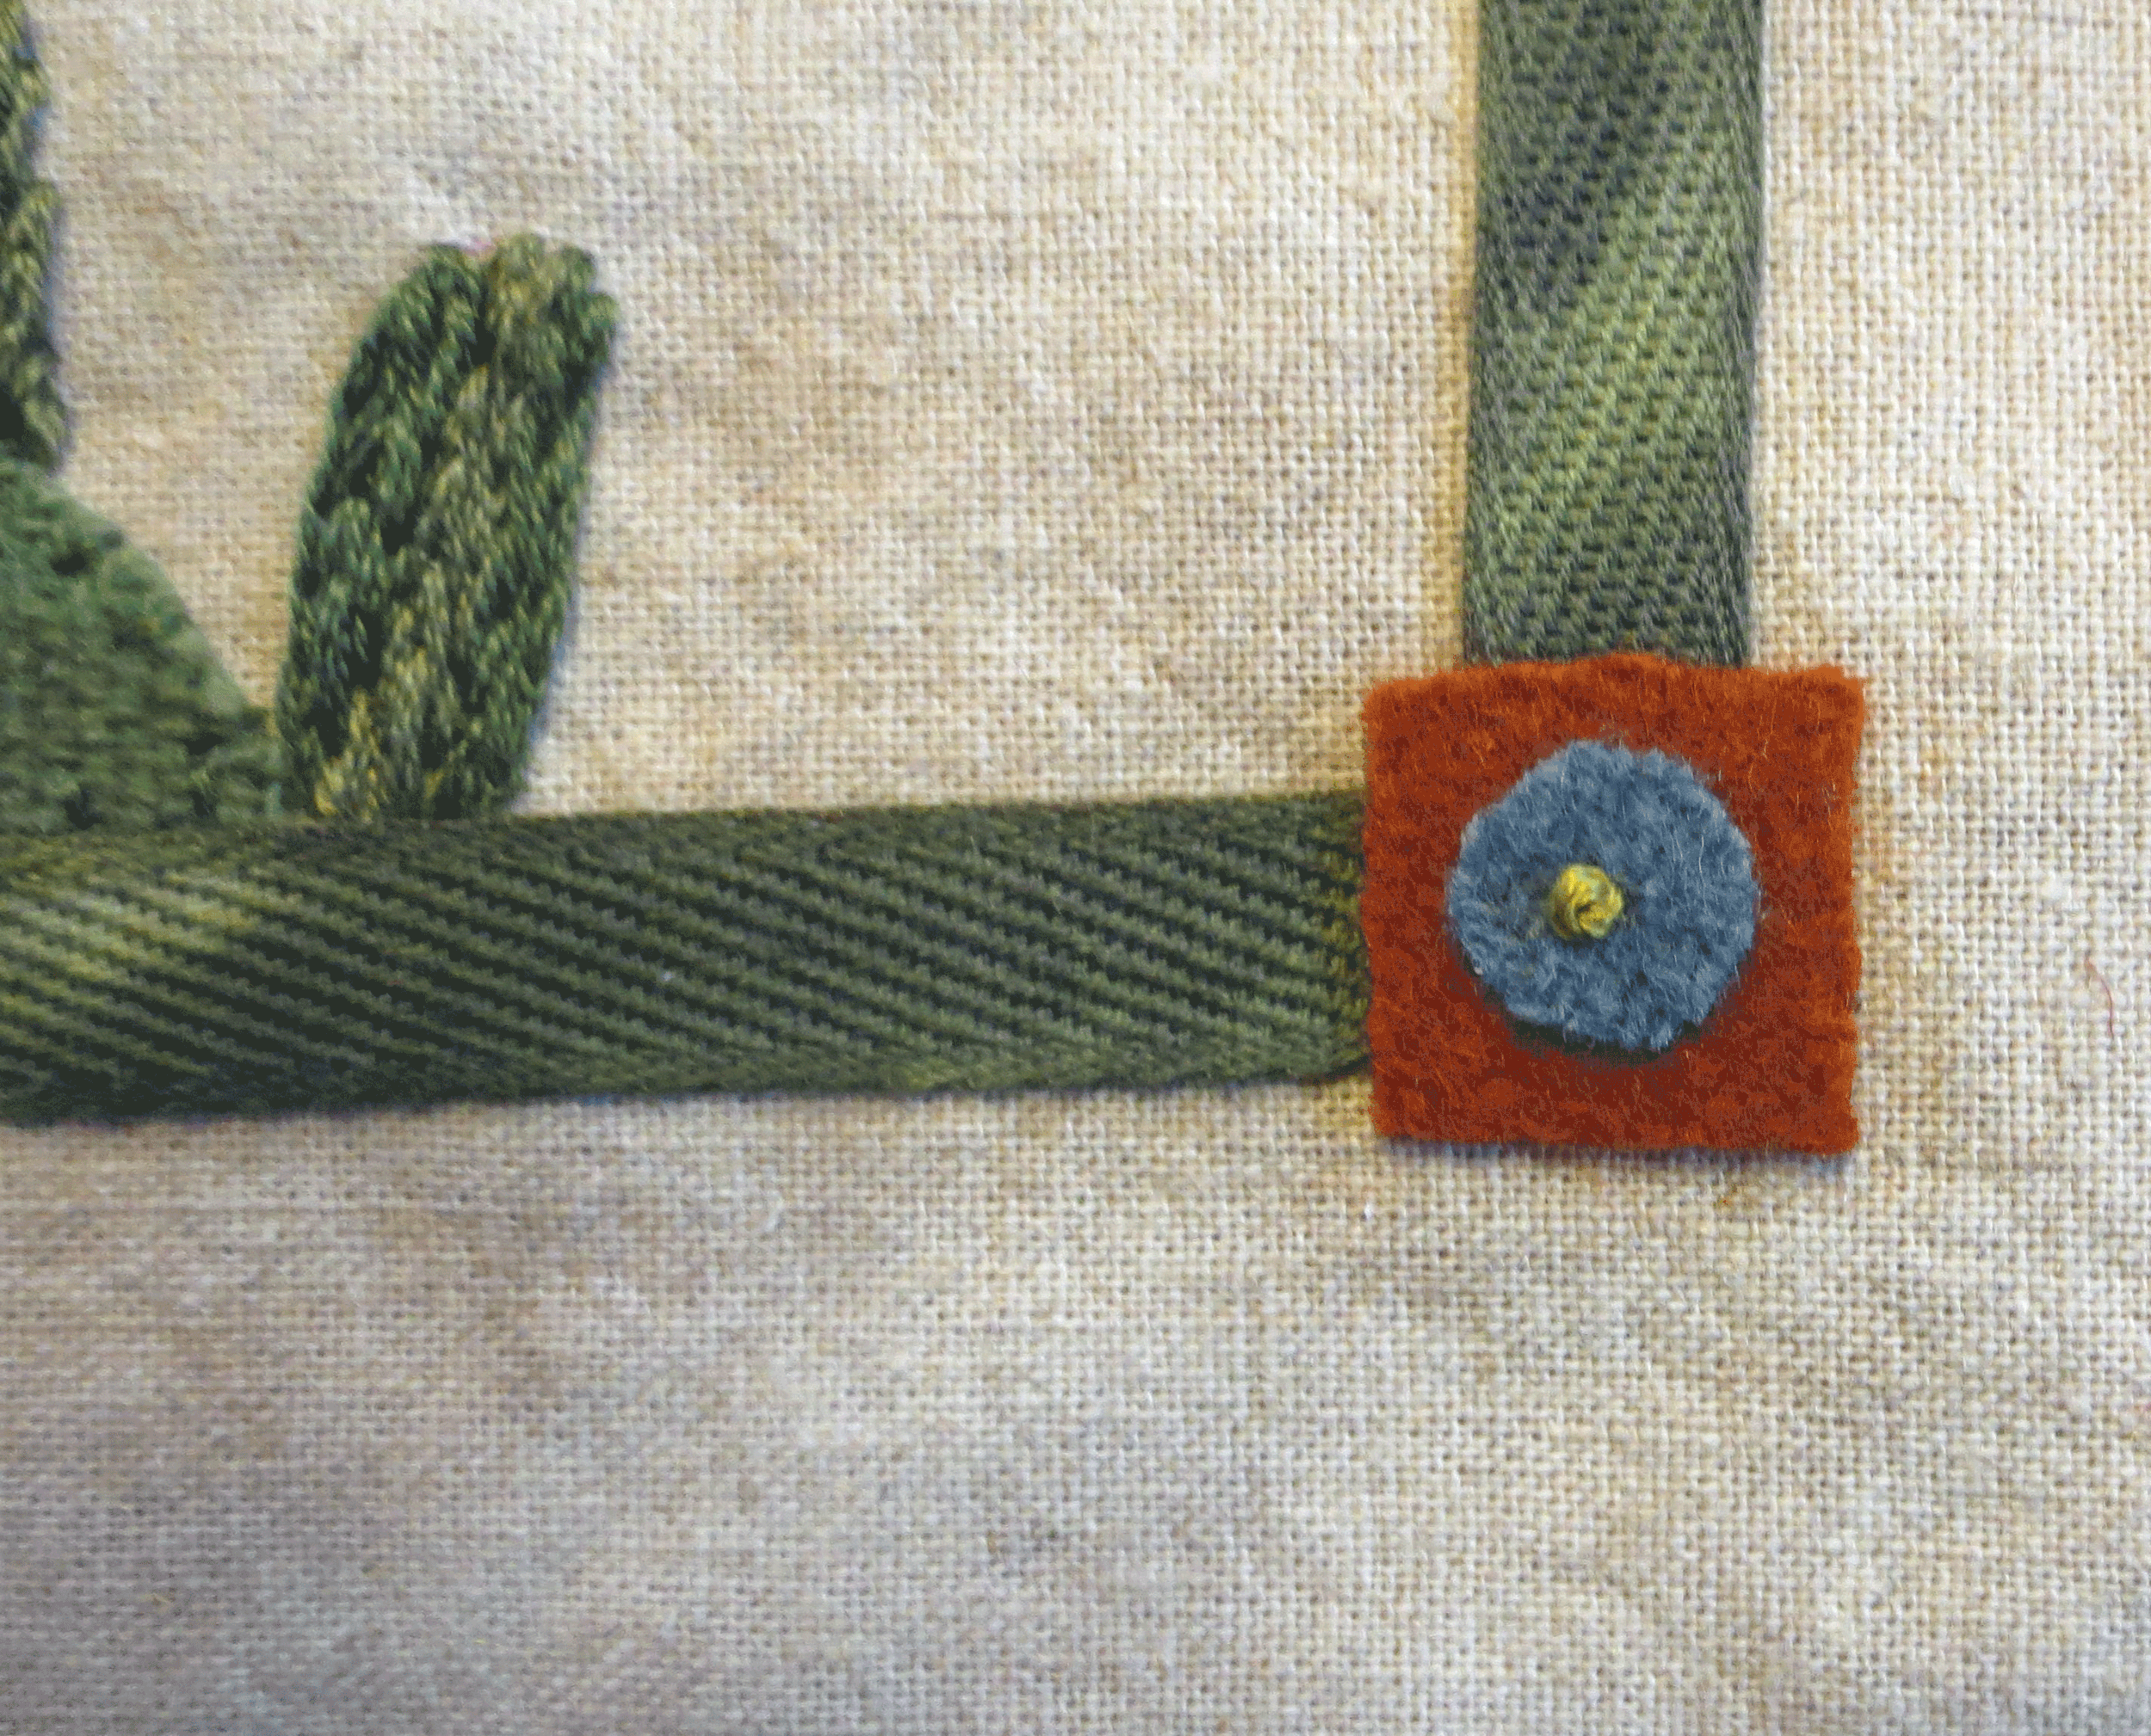
Position the corner block using the Layout as your guide. Fuse in place using steam.
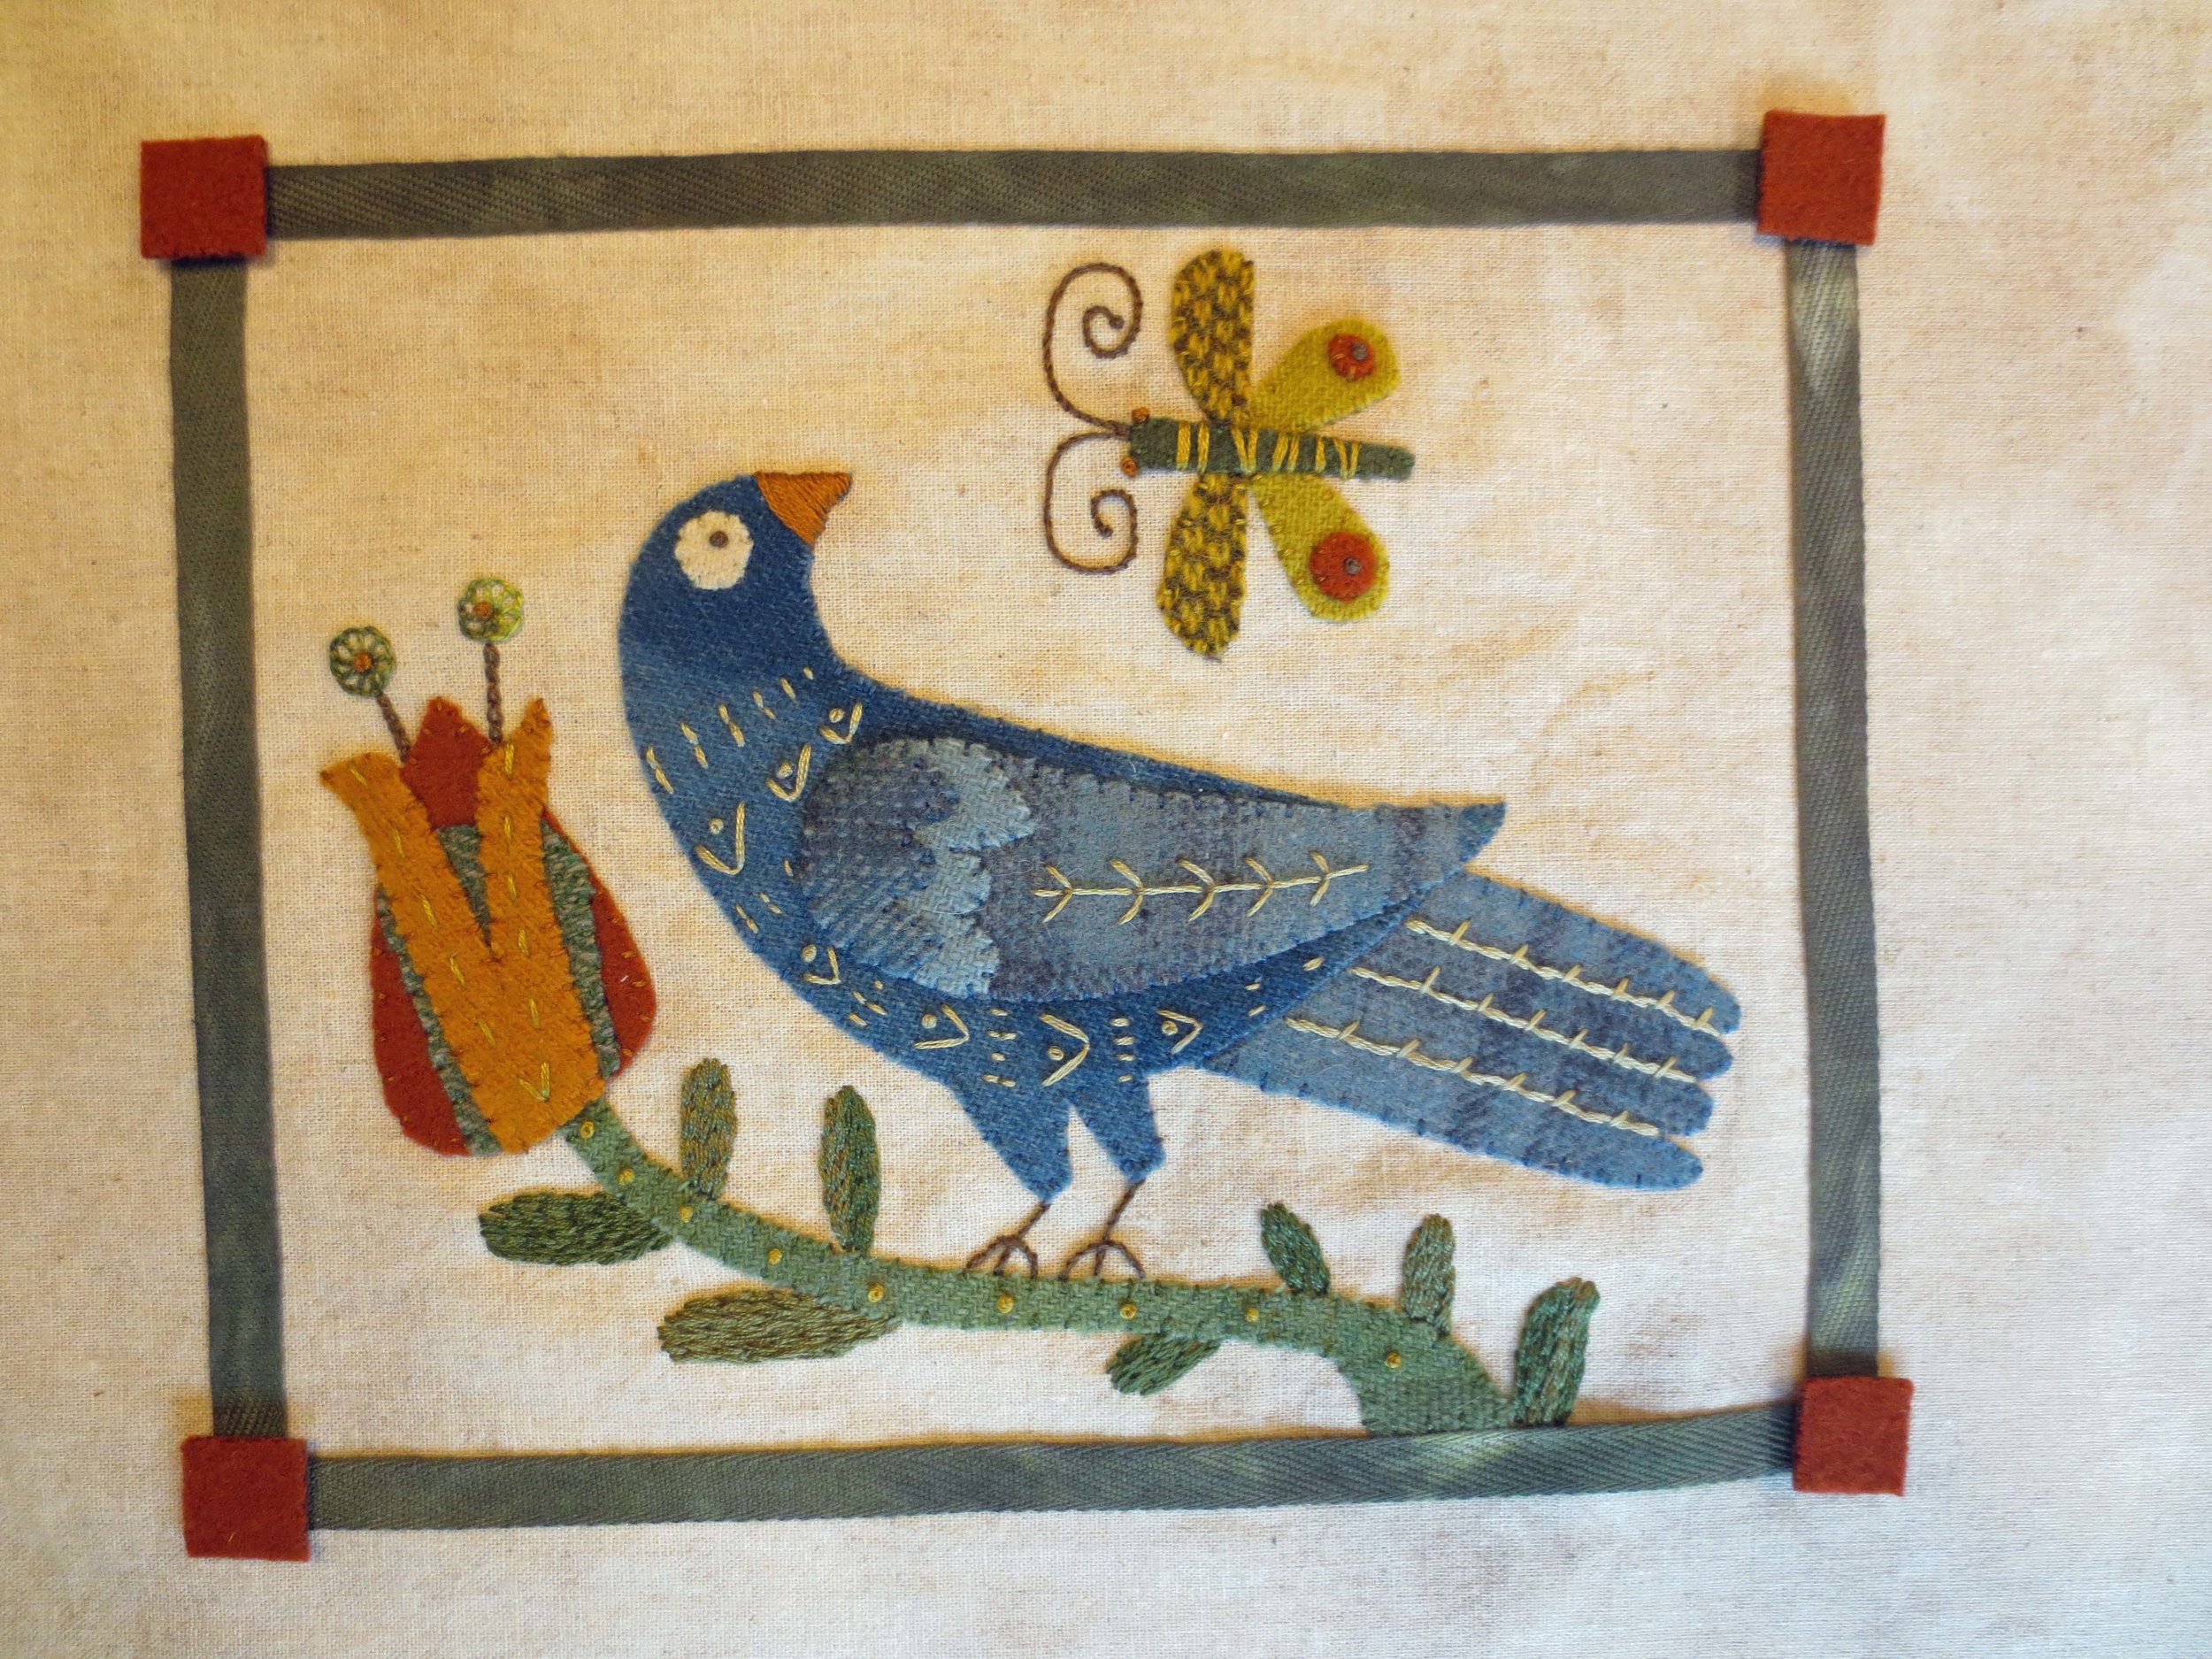
Position the circles in the center of each corner block. Fuse in place using steam.
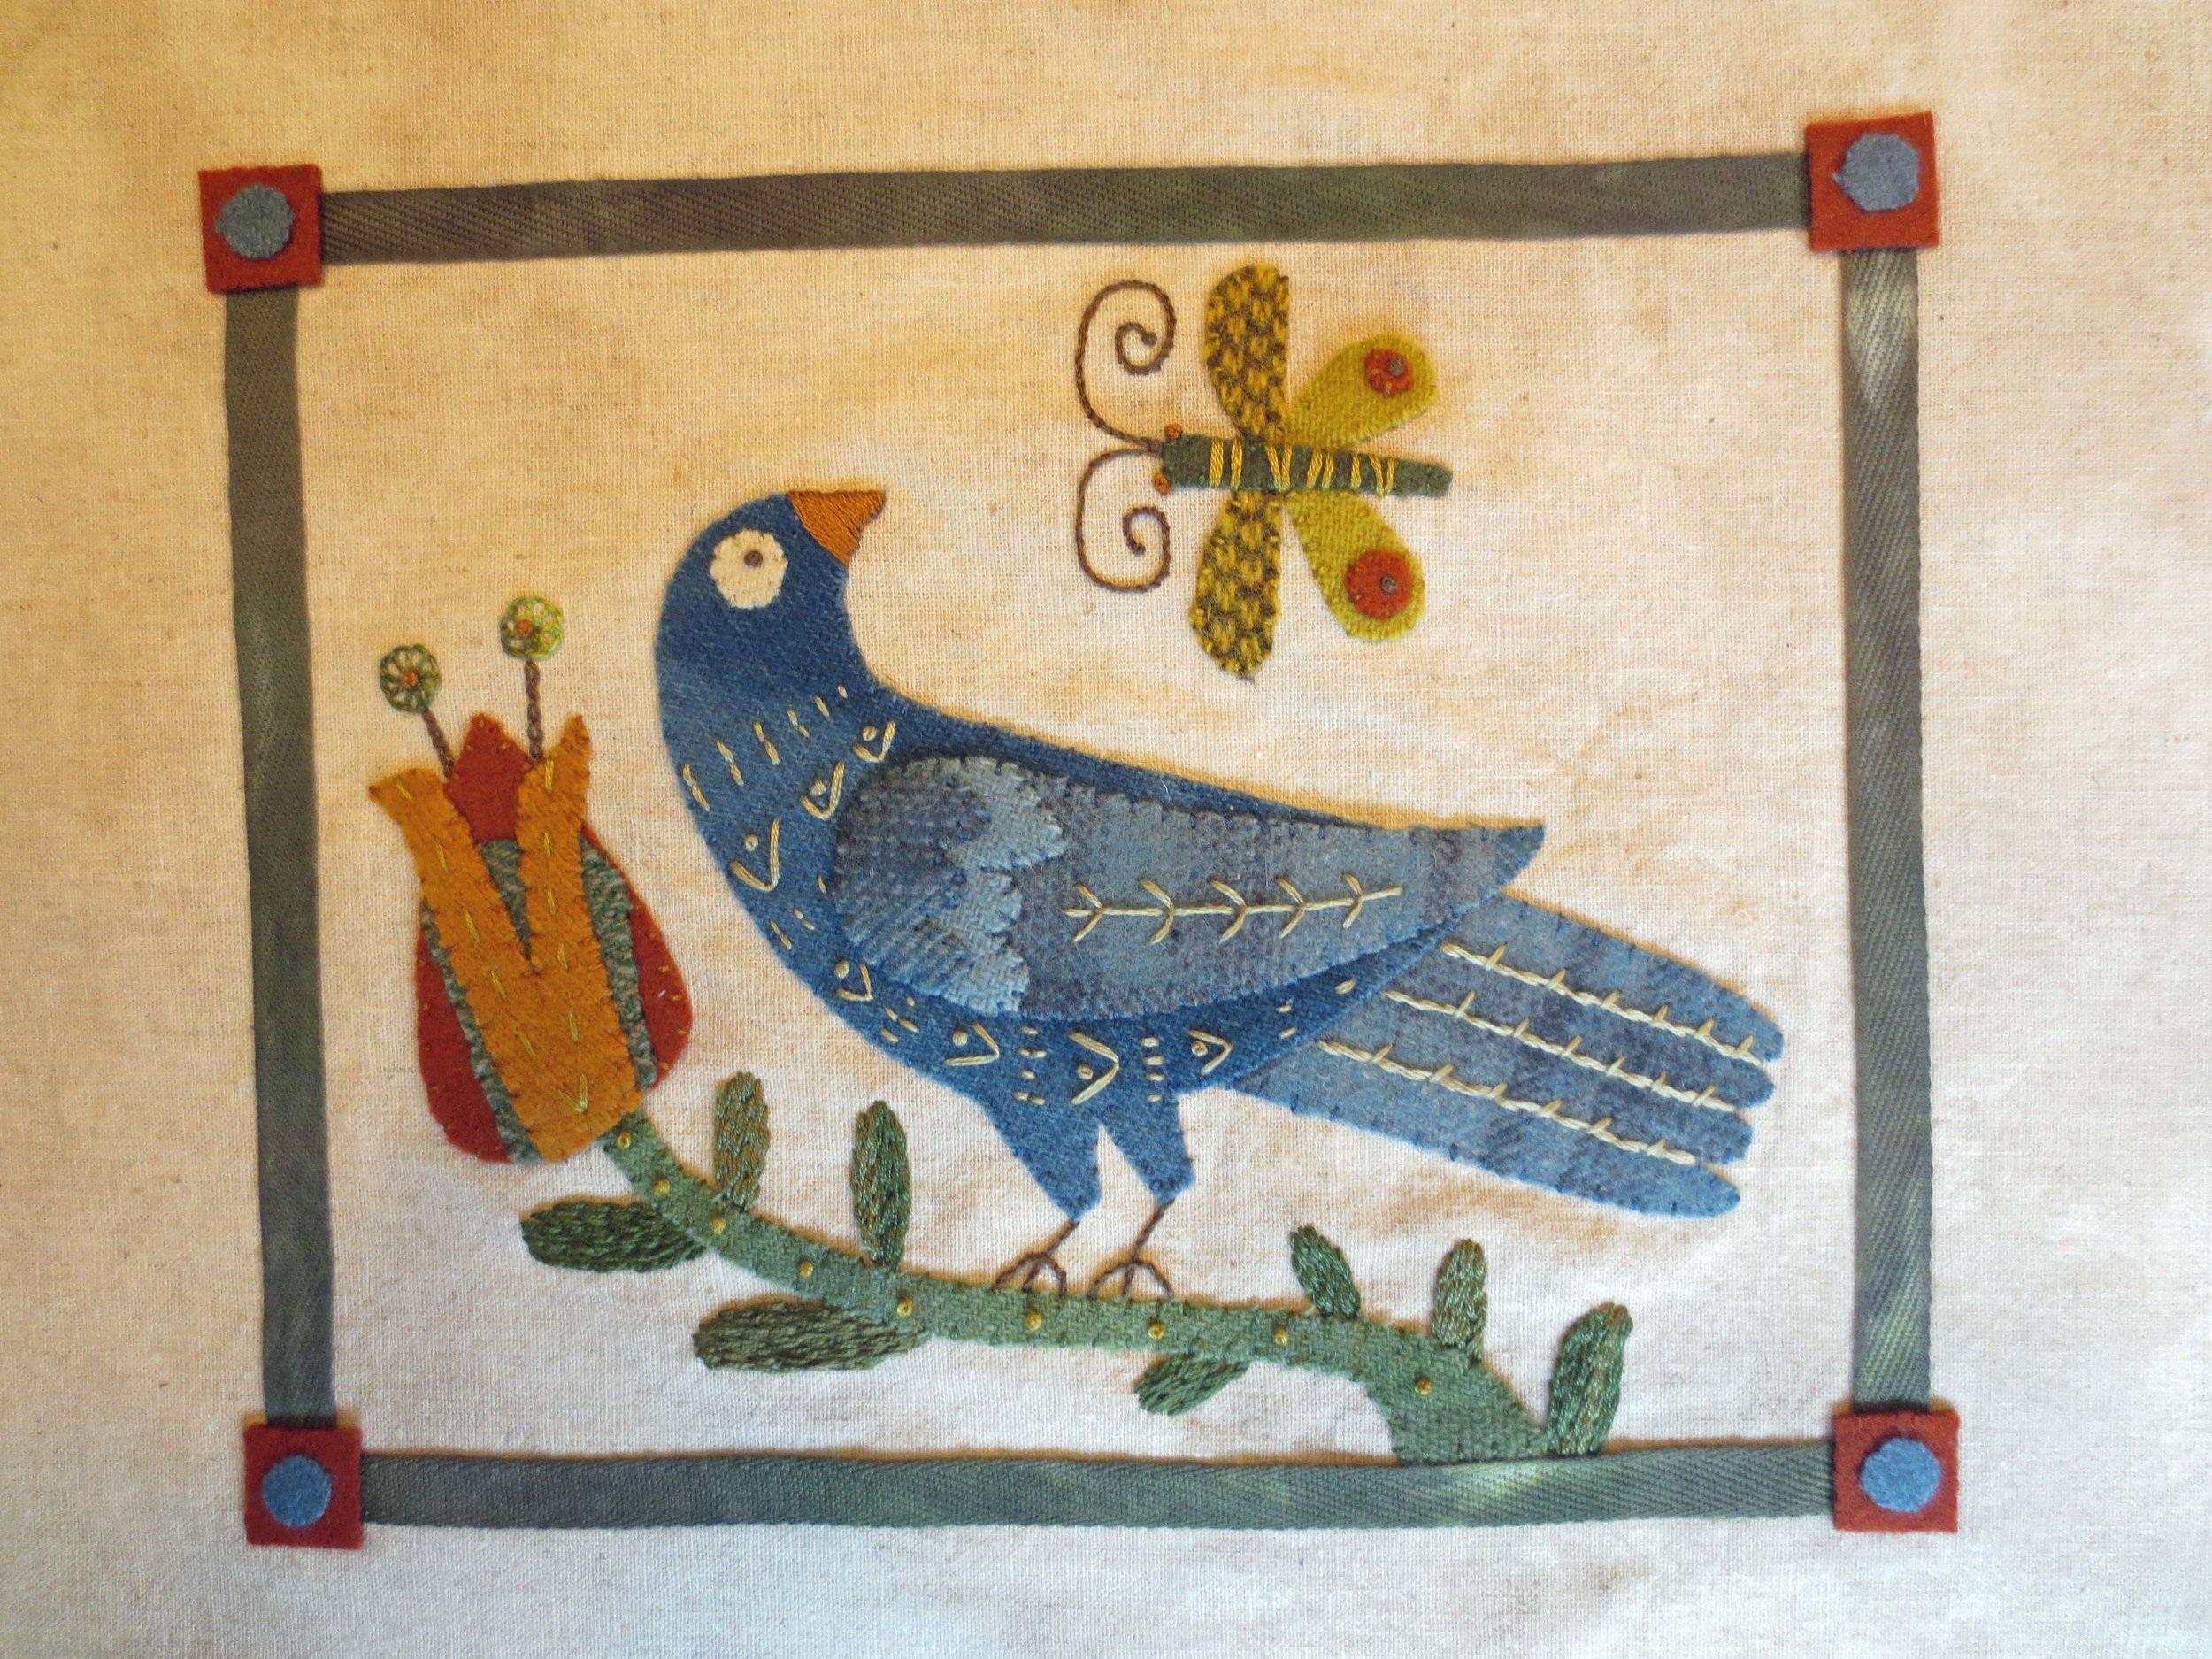
Use three strands of gold floss to make a single french knot in the center of each corner block circle. This will anchor the corner block pieces while you work on the ribbon border. You can whip stitch the wool down with two strands of matching colored floss at this time if you wish.
Whip stitch the ribbon borders using two strands of green floss.
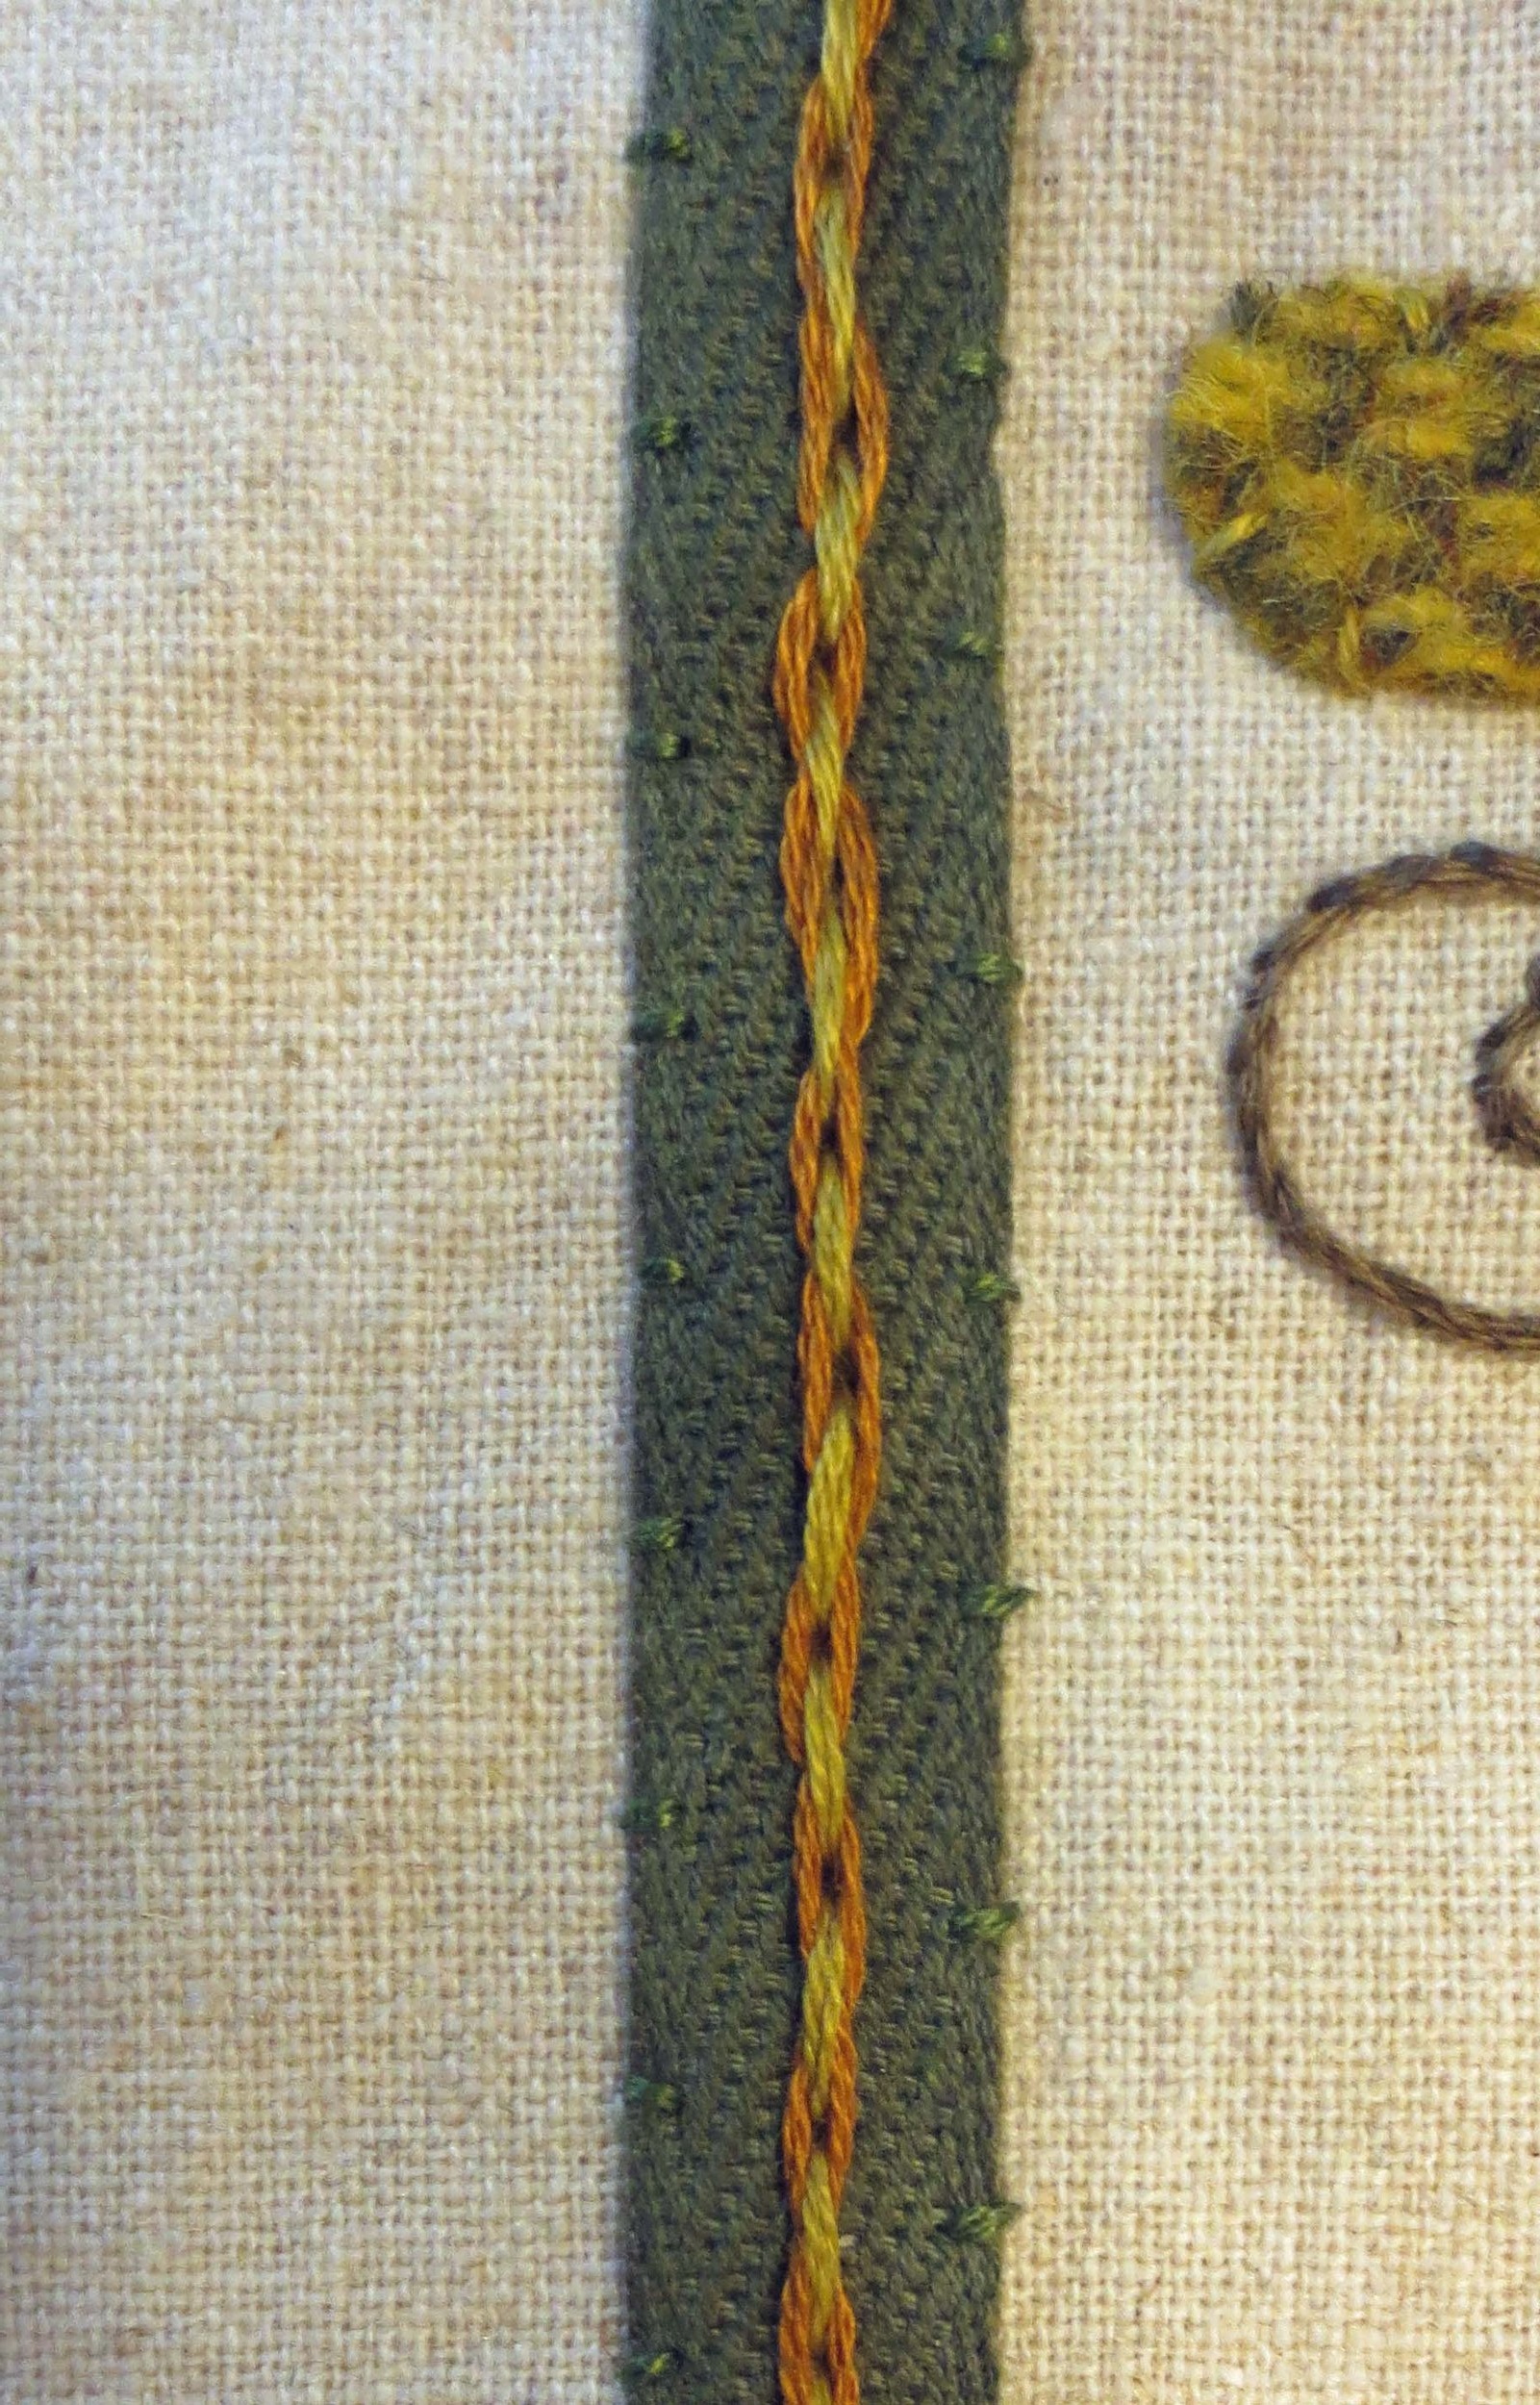
Draw a vertical line down the center of each side ribbon border. Draw dots every 1/4 inch down the entire length of the line. Although I didn’t illustrated it, mark the approximate center of the line between two dots. It should be about three inches down.

Use three strands of gold floss to stitch a closed fly stitch over the line, spacing each 1/4 inch apart, stopping a the last dot before the center mark.

Flip the project upside down, and then start the closed fly stitches from the opposite direction, finishing at the last dot.
Stitch a single french knot at the center mark.
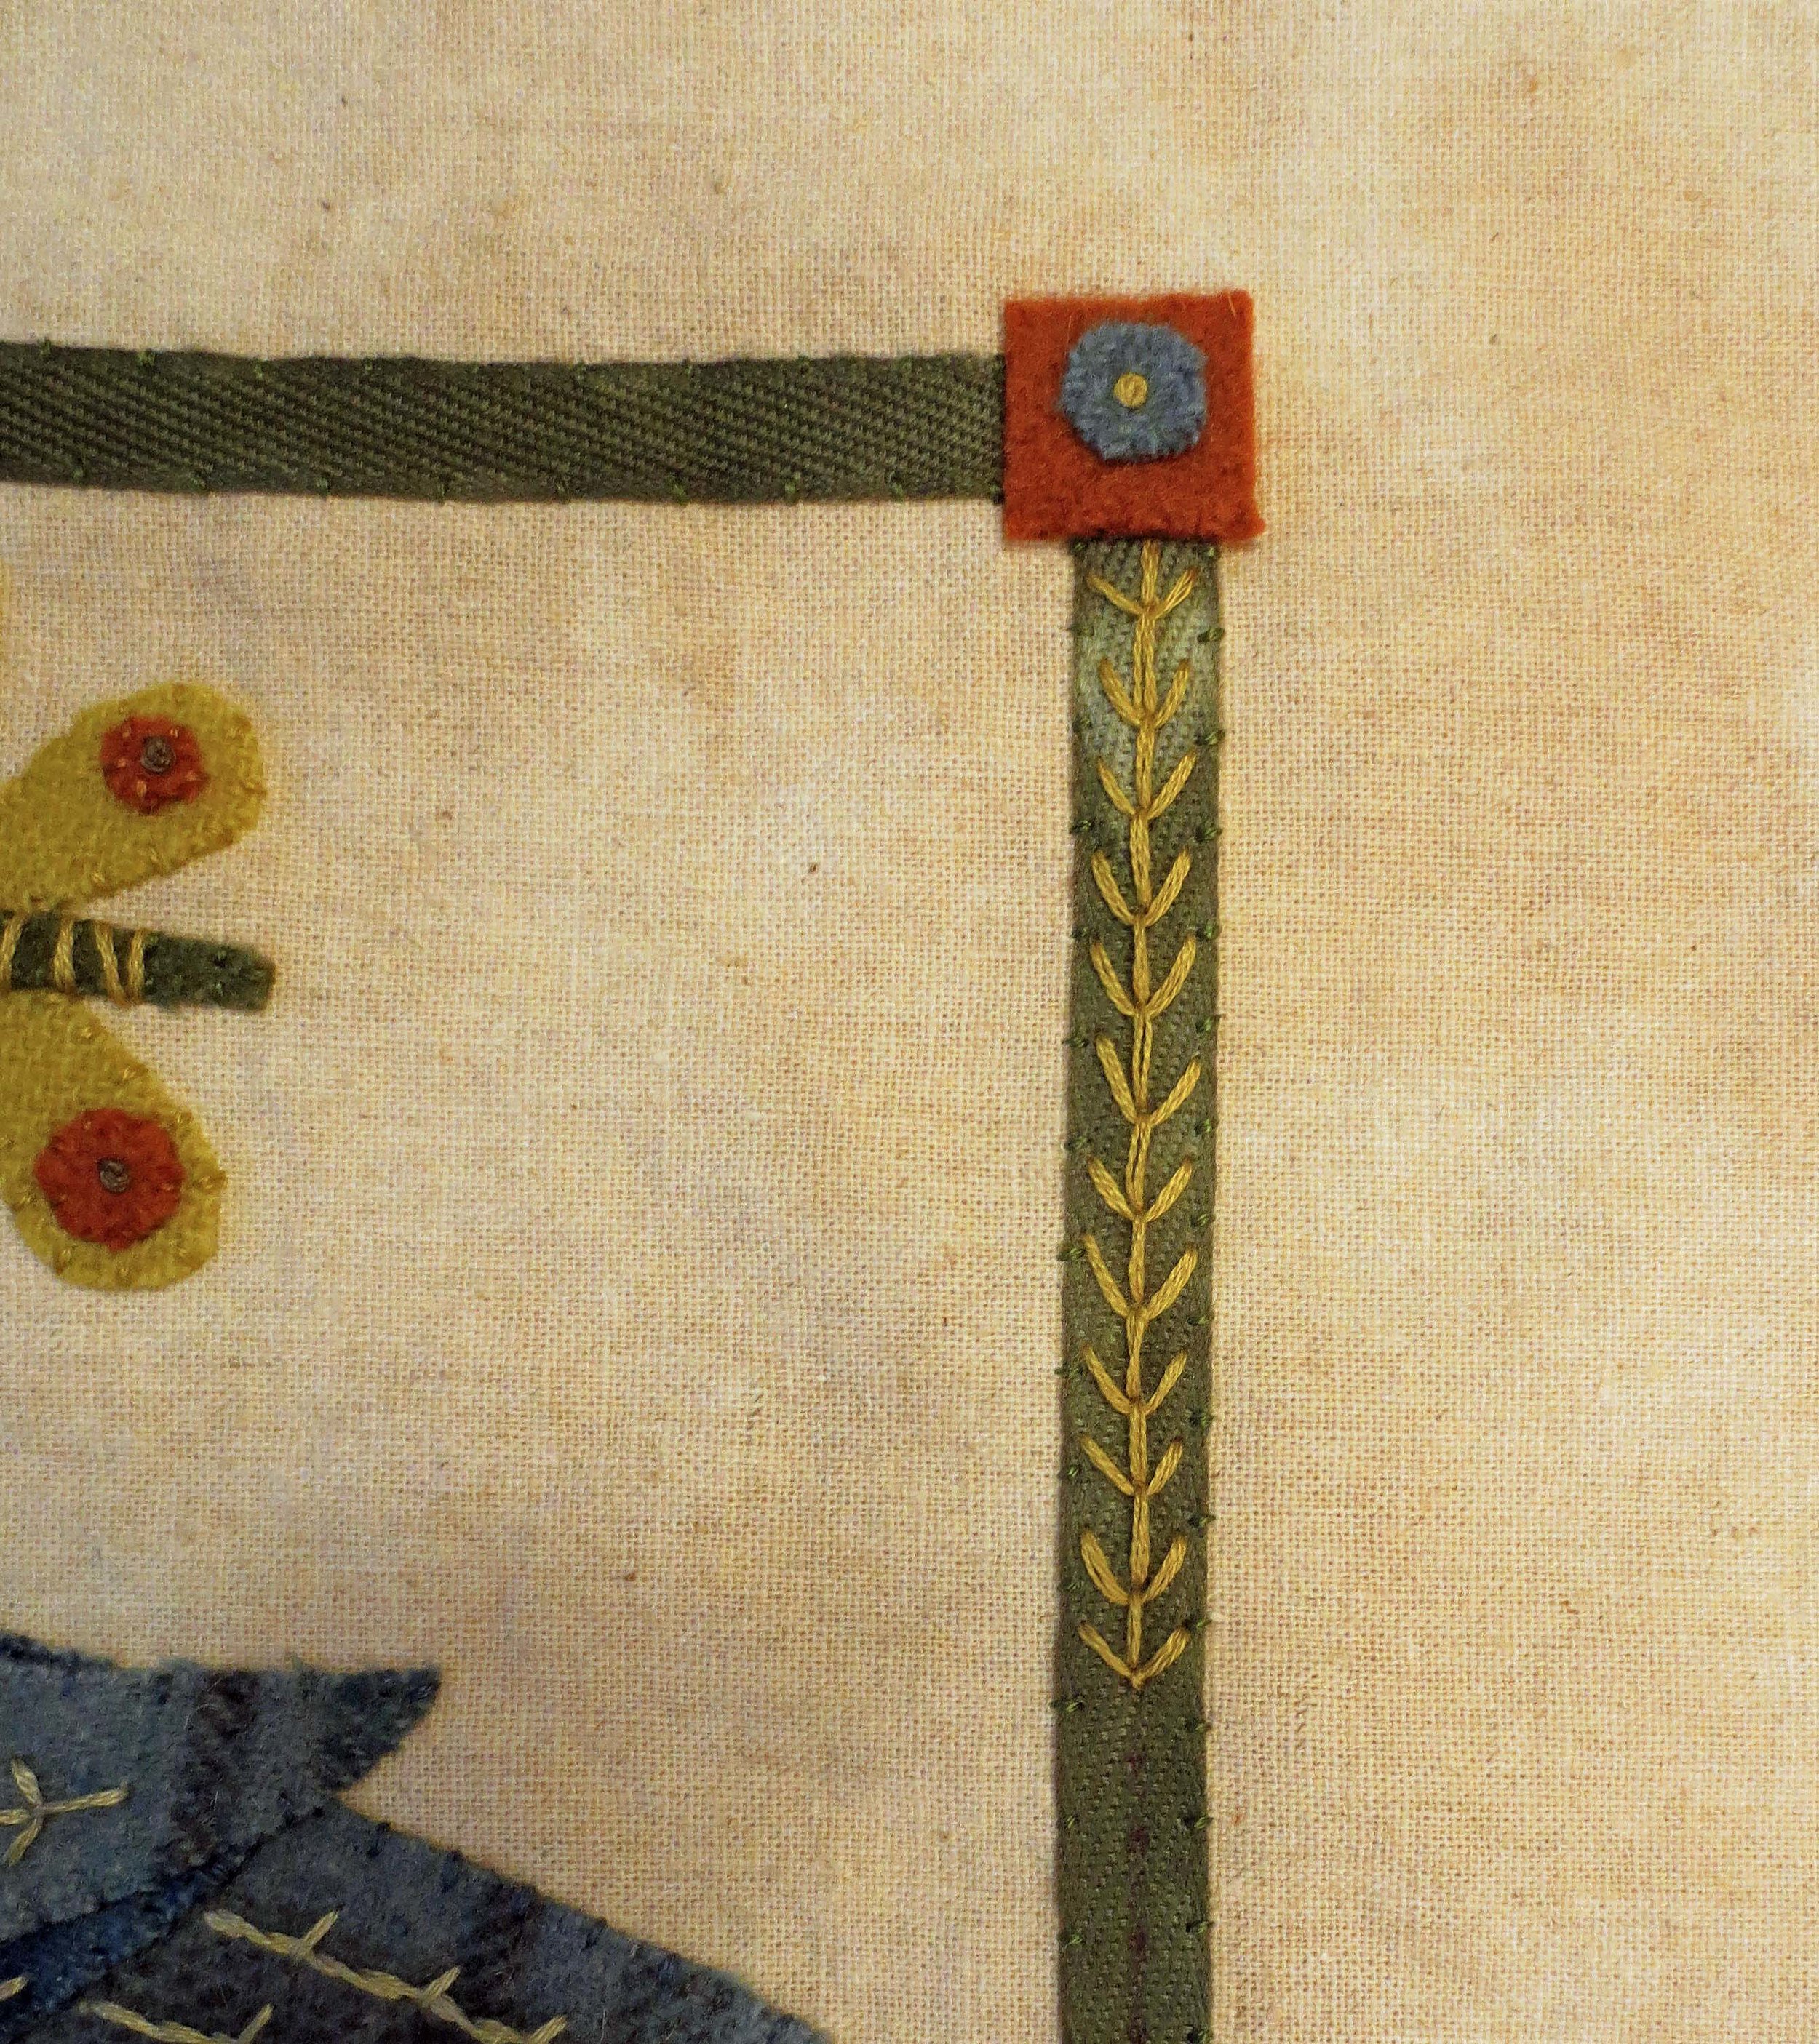

Repeat on the opposite side.
Draw a line down the center of the bottom ribbon border. Place a dot every 1/4 inch along the entire length of the ribbon.

Use two strands of gold floss to back stitch over the drawn line, making each stitch 1/4 inch in length.

Use two strands of orange floss to make a threaded back stitch. Did you notice that I finally whip stitched the corner blocks?
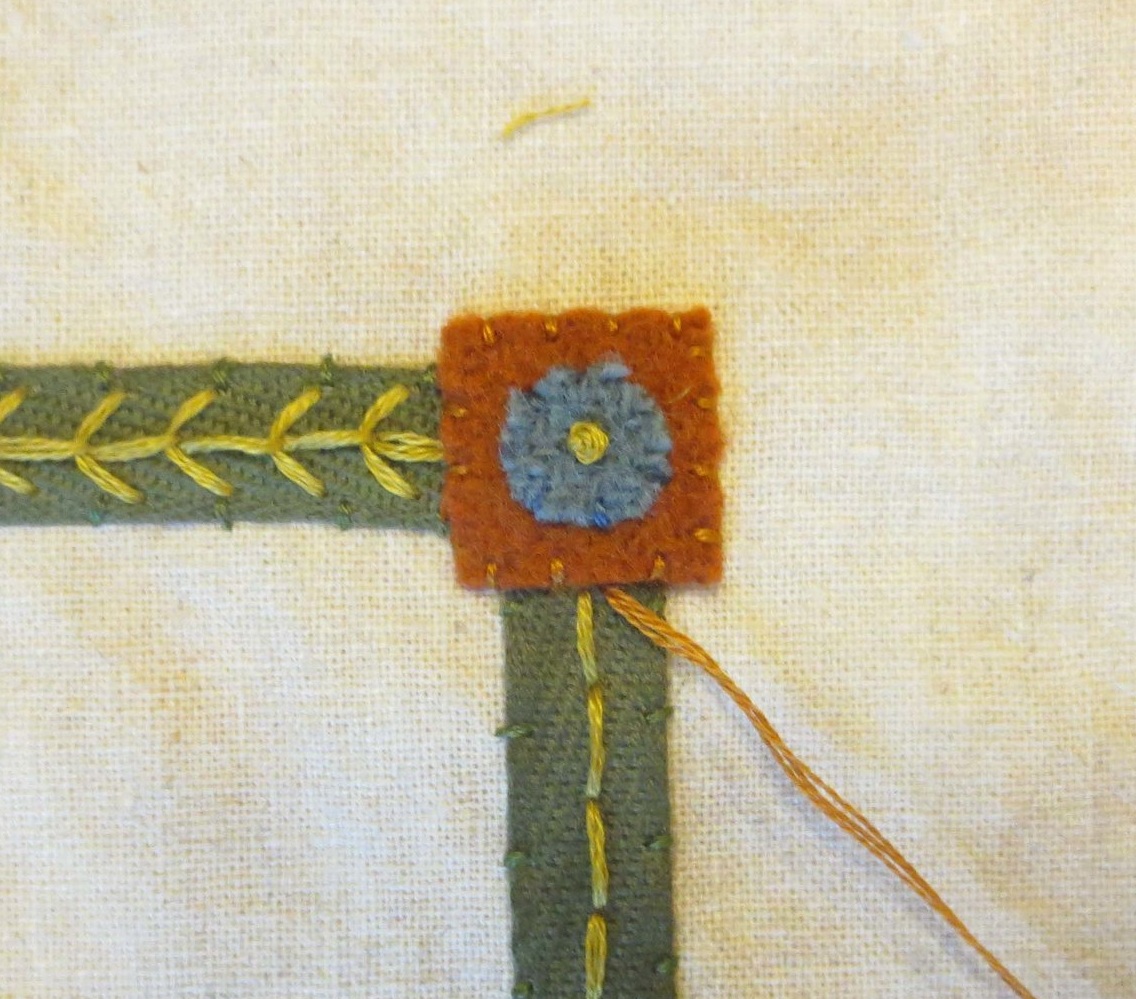
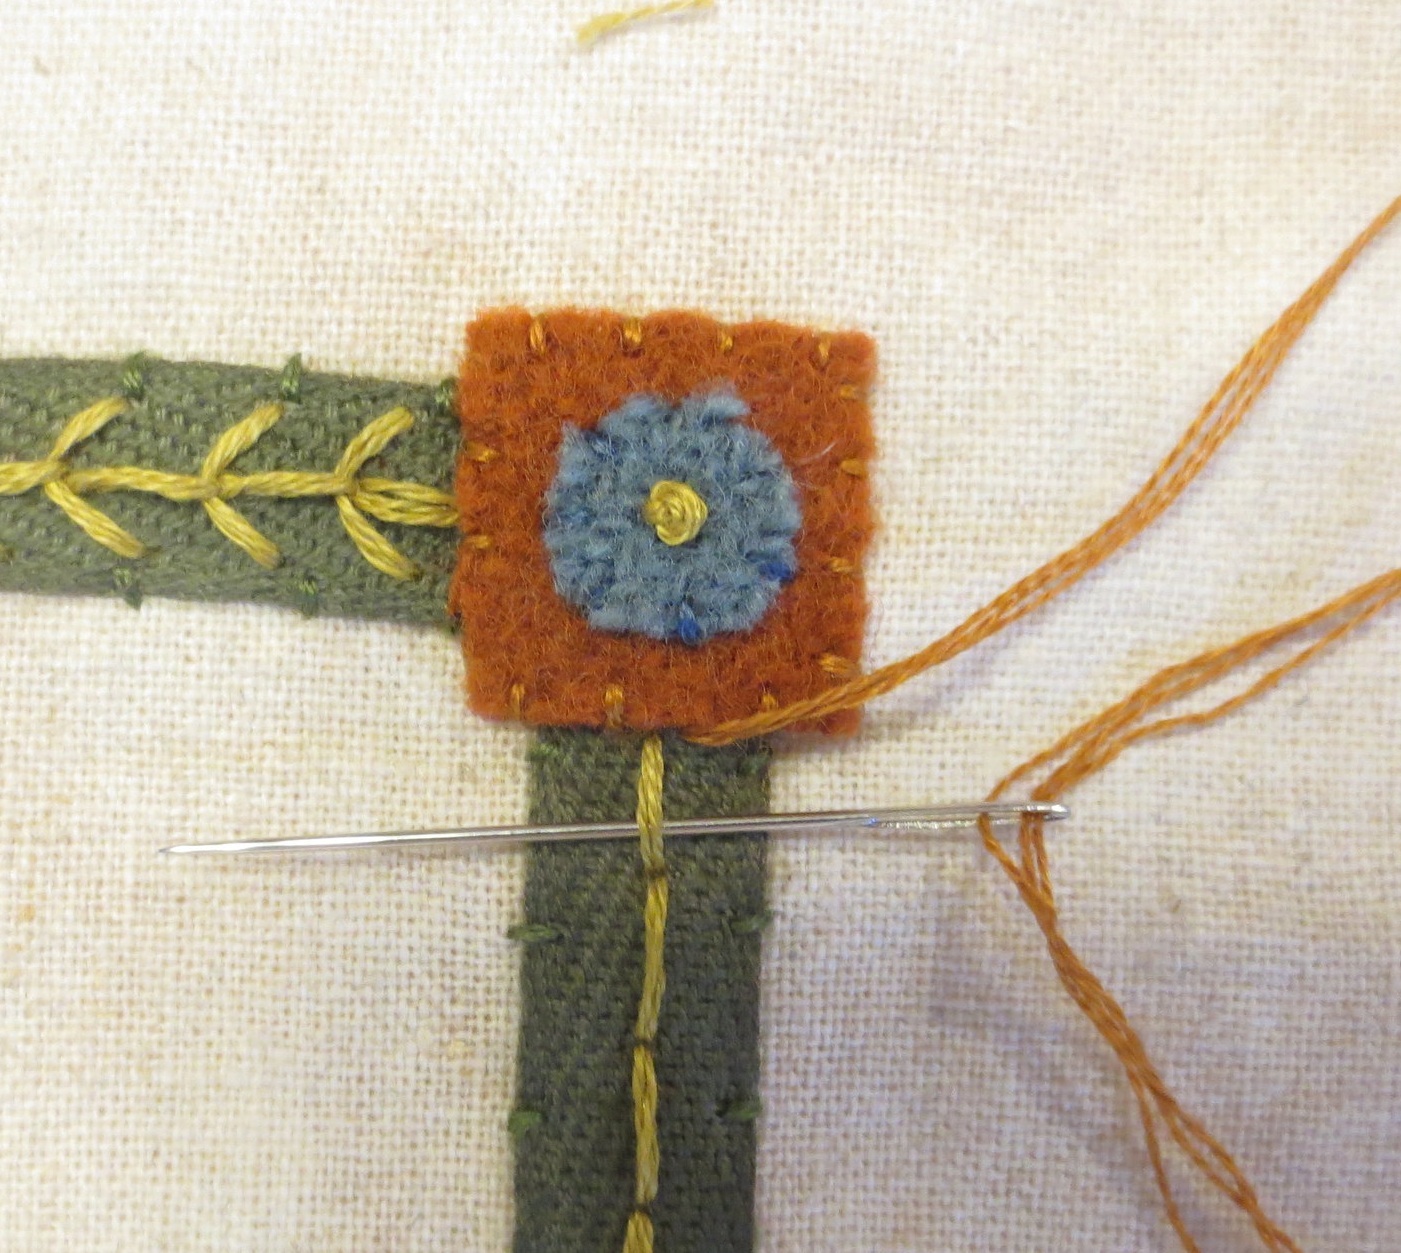
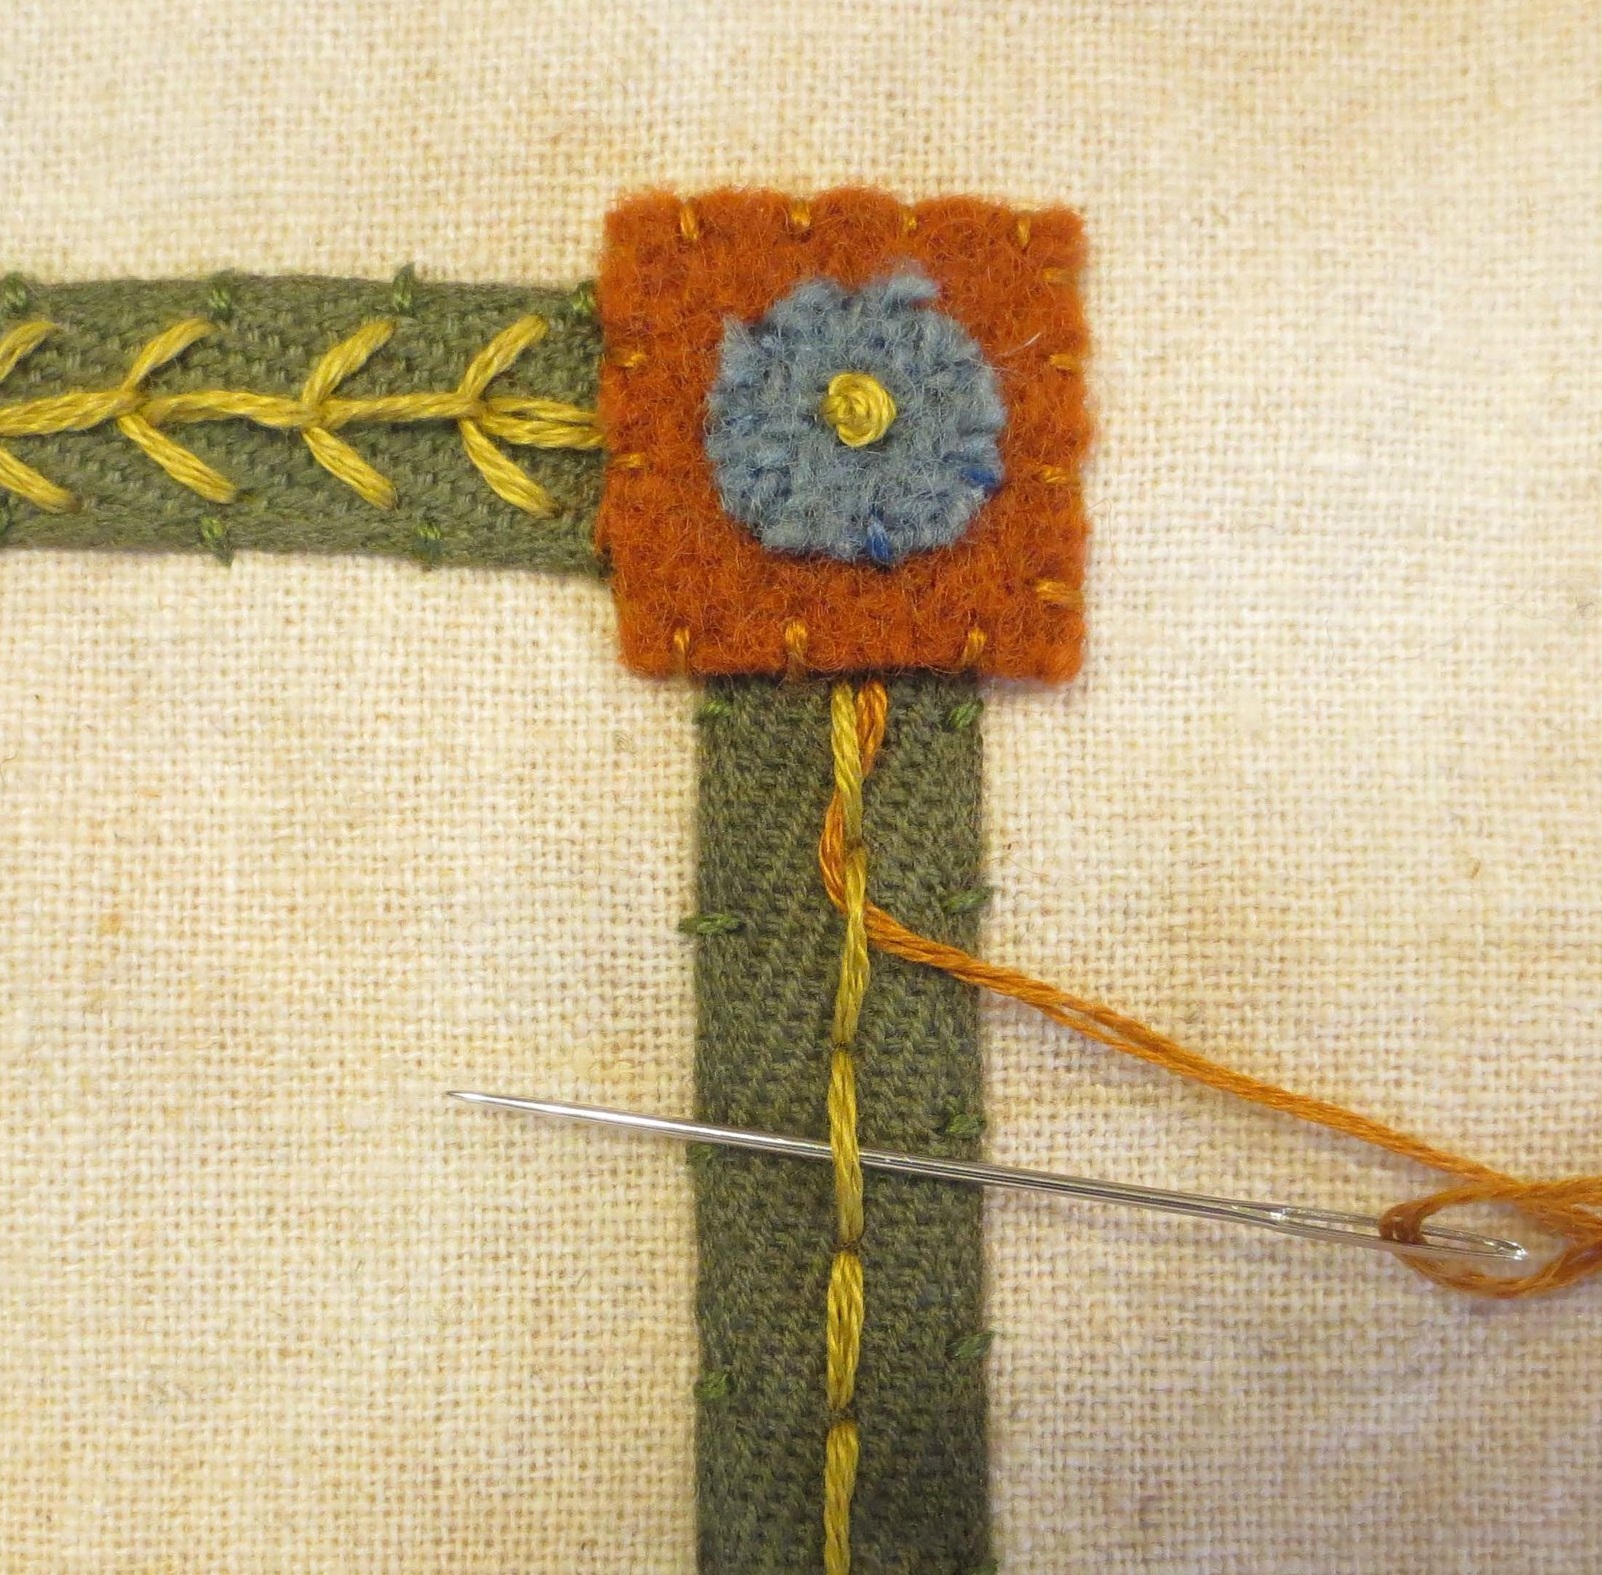
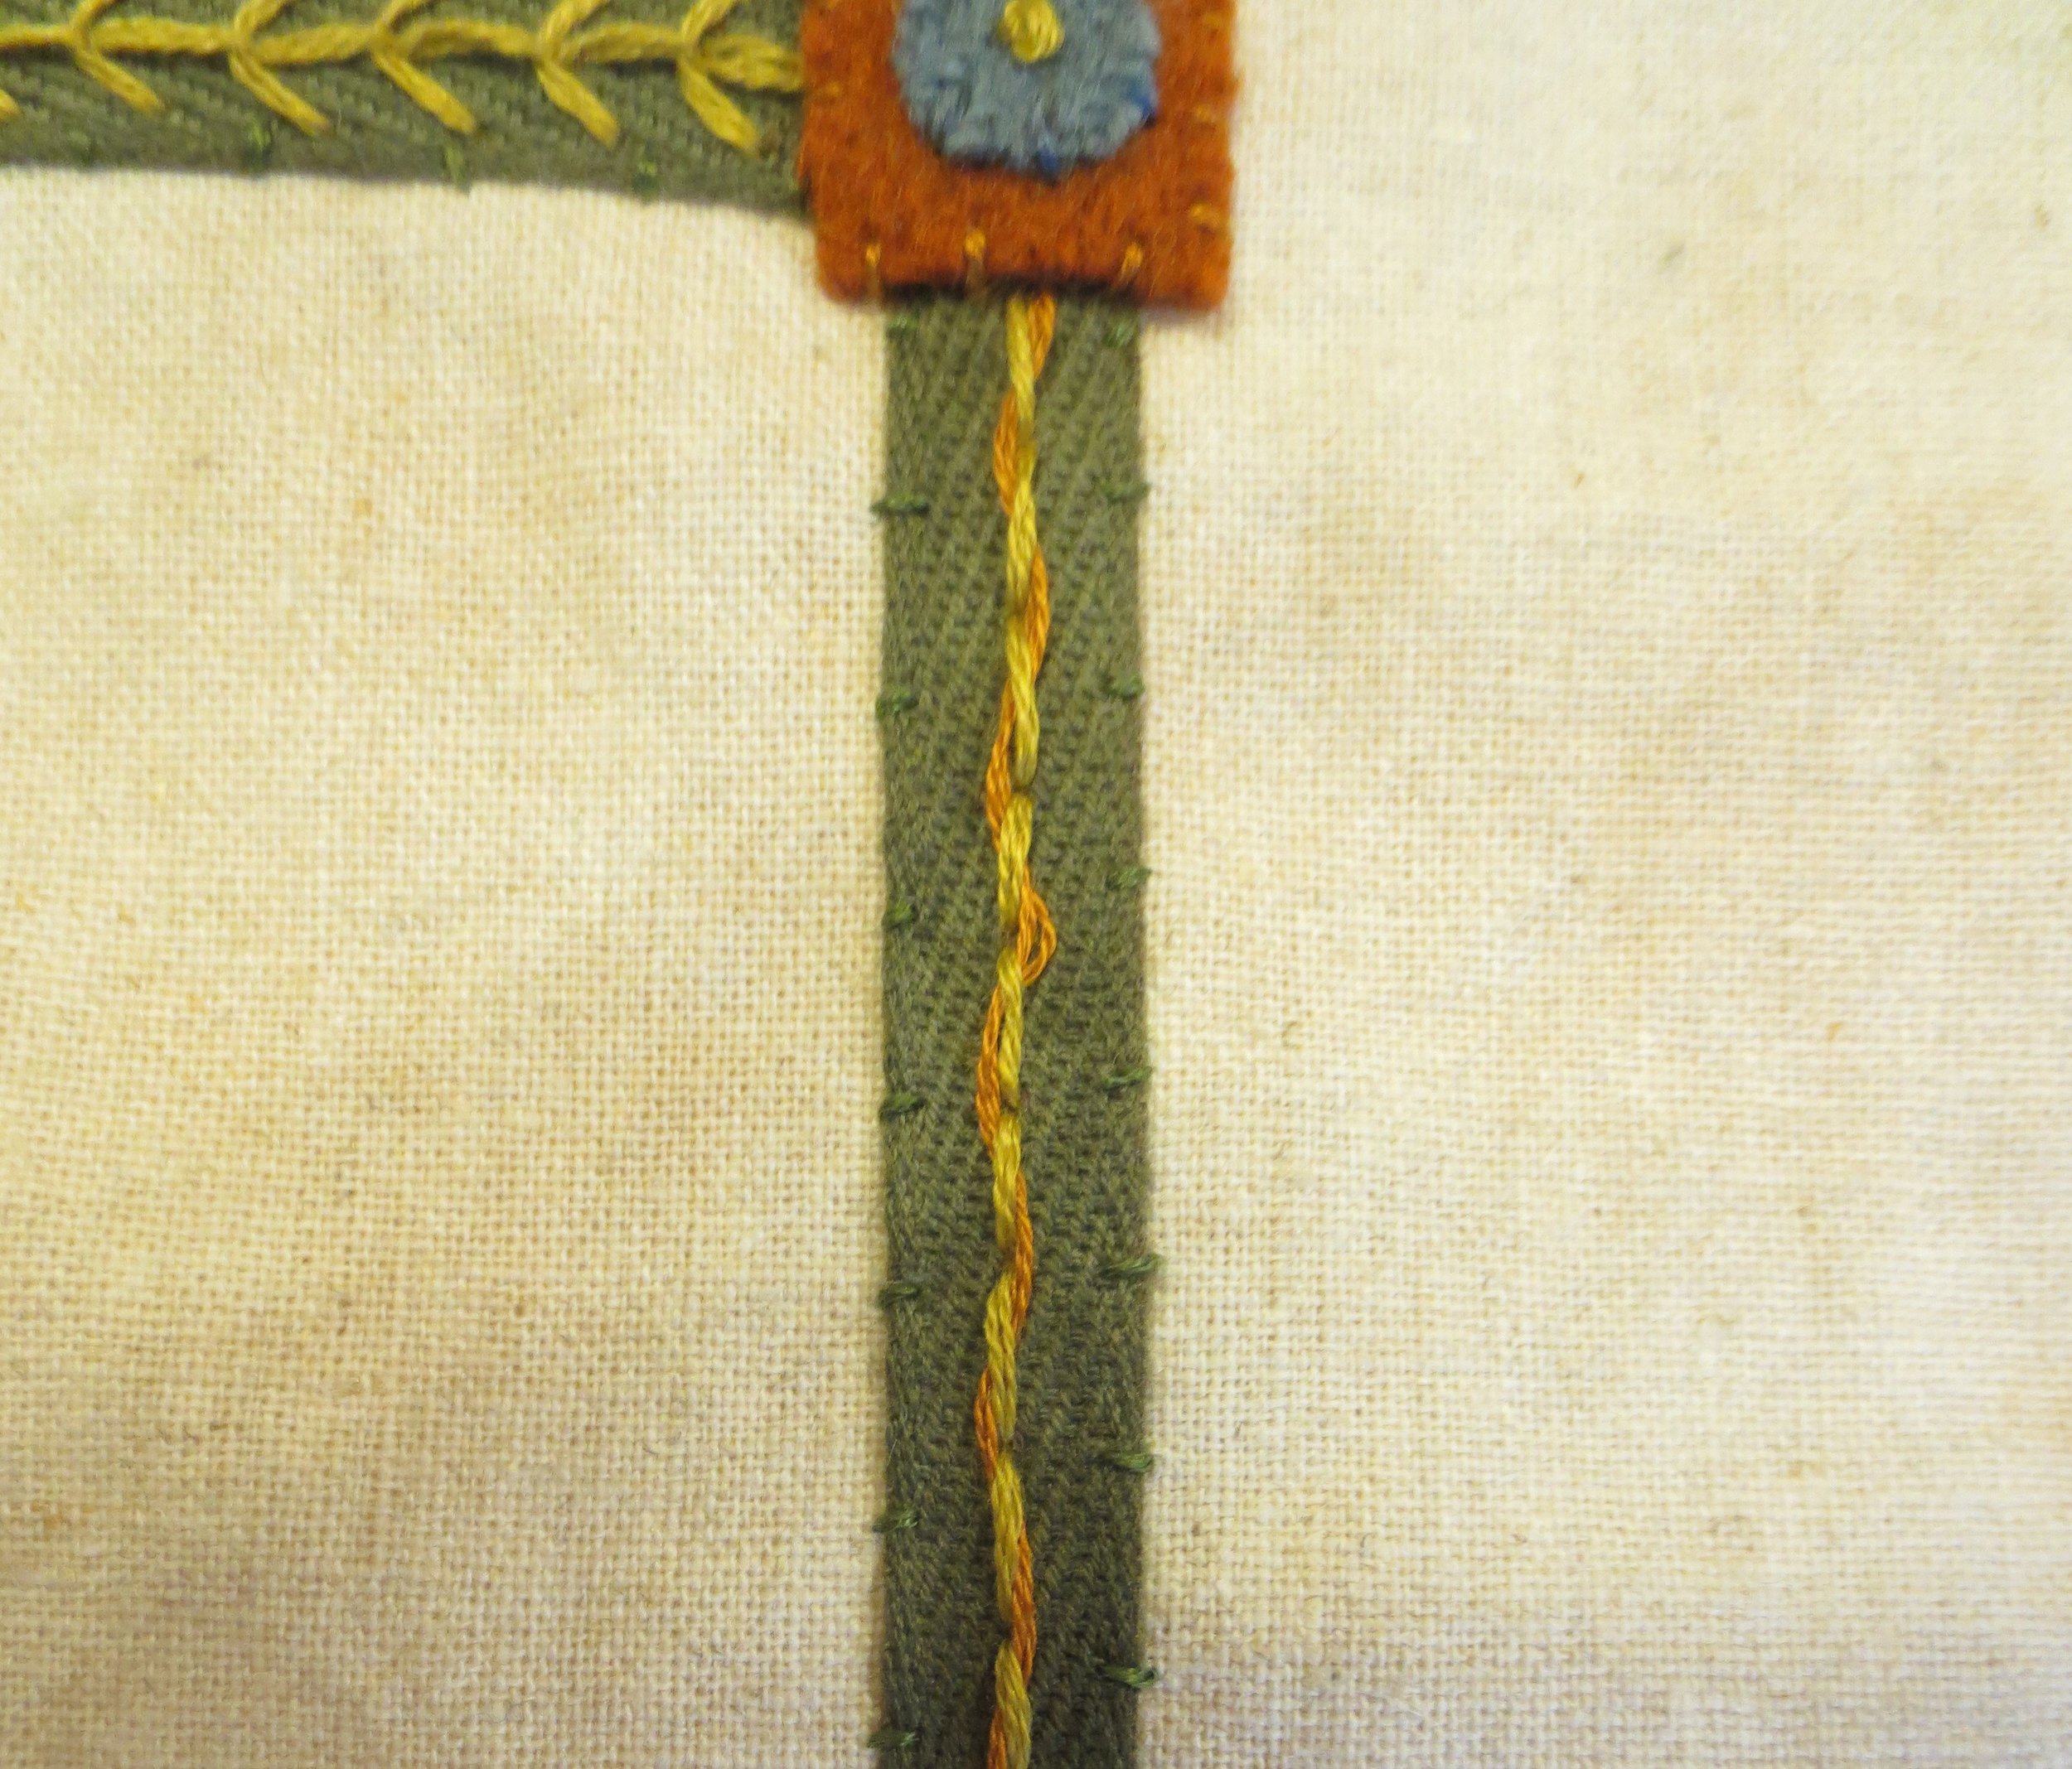
Using the same thread to weave through the opposite side of the gold back stitch, creating a double threaded back stitch.
See those spaces between the back stitches that the woven threads make? Use three strands of blue floss to make a french knot in each of the spaces.
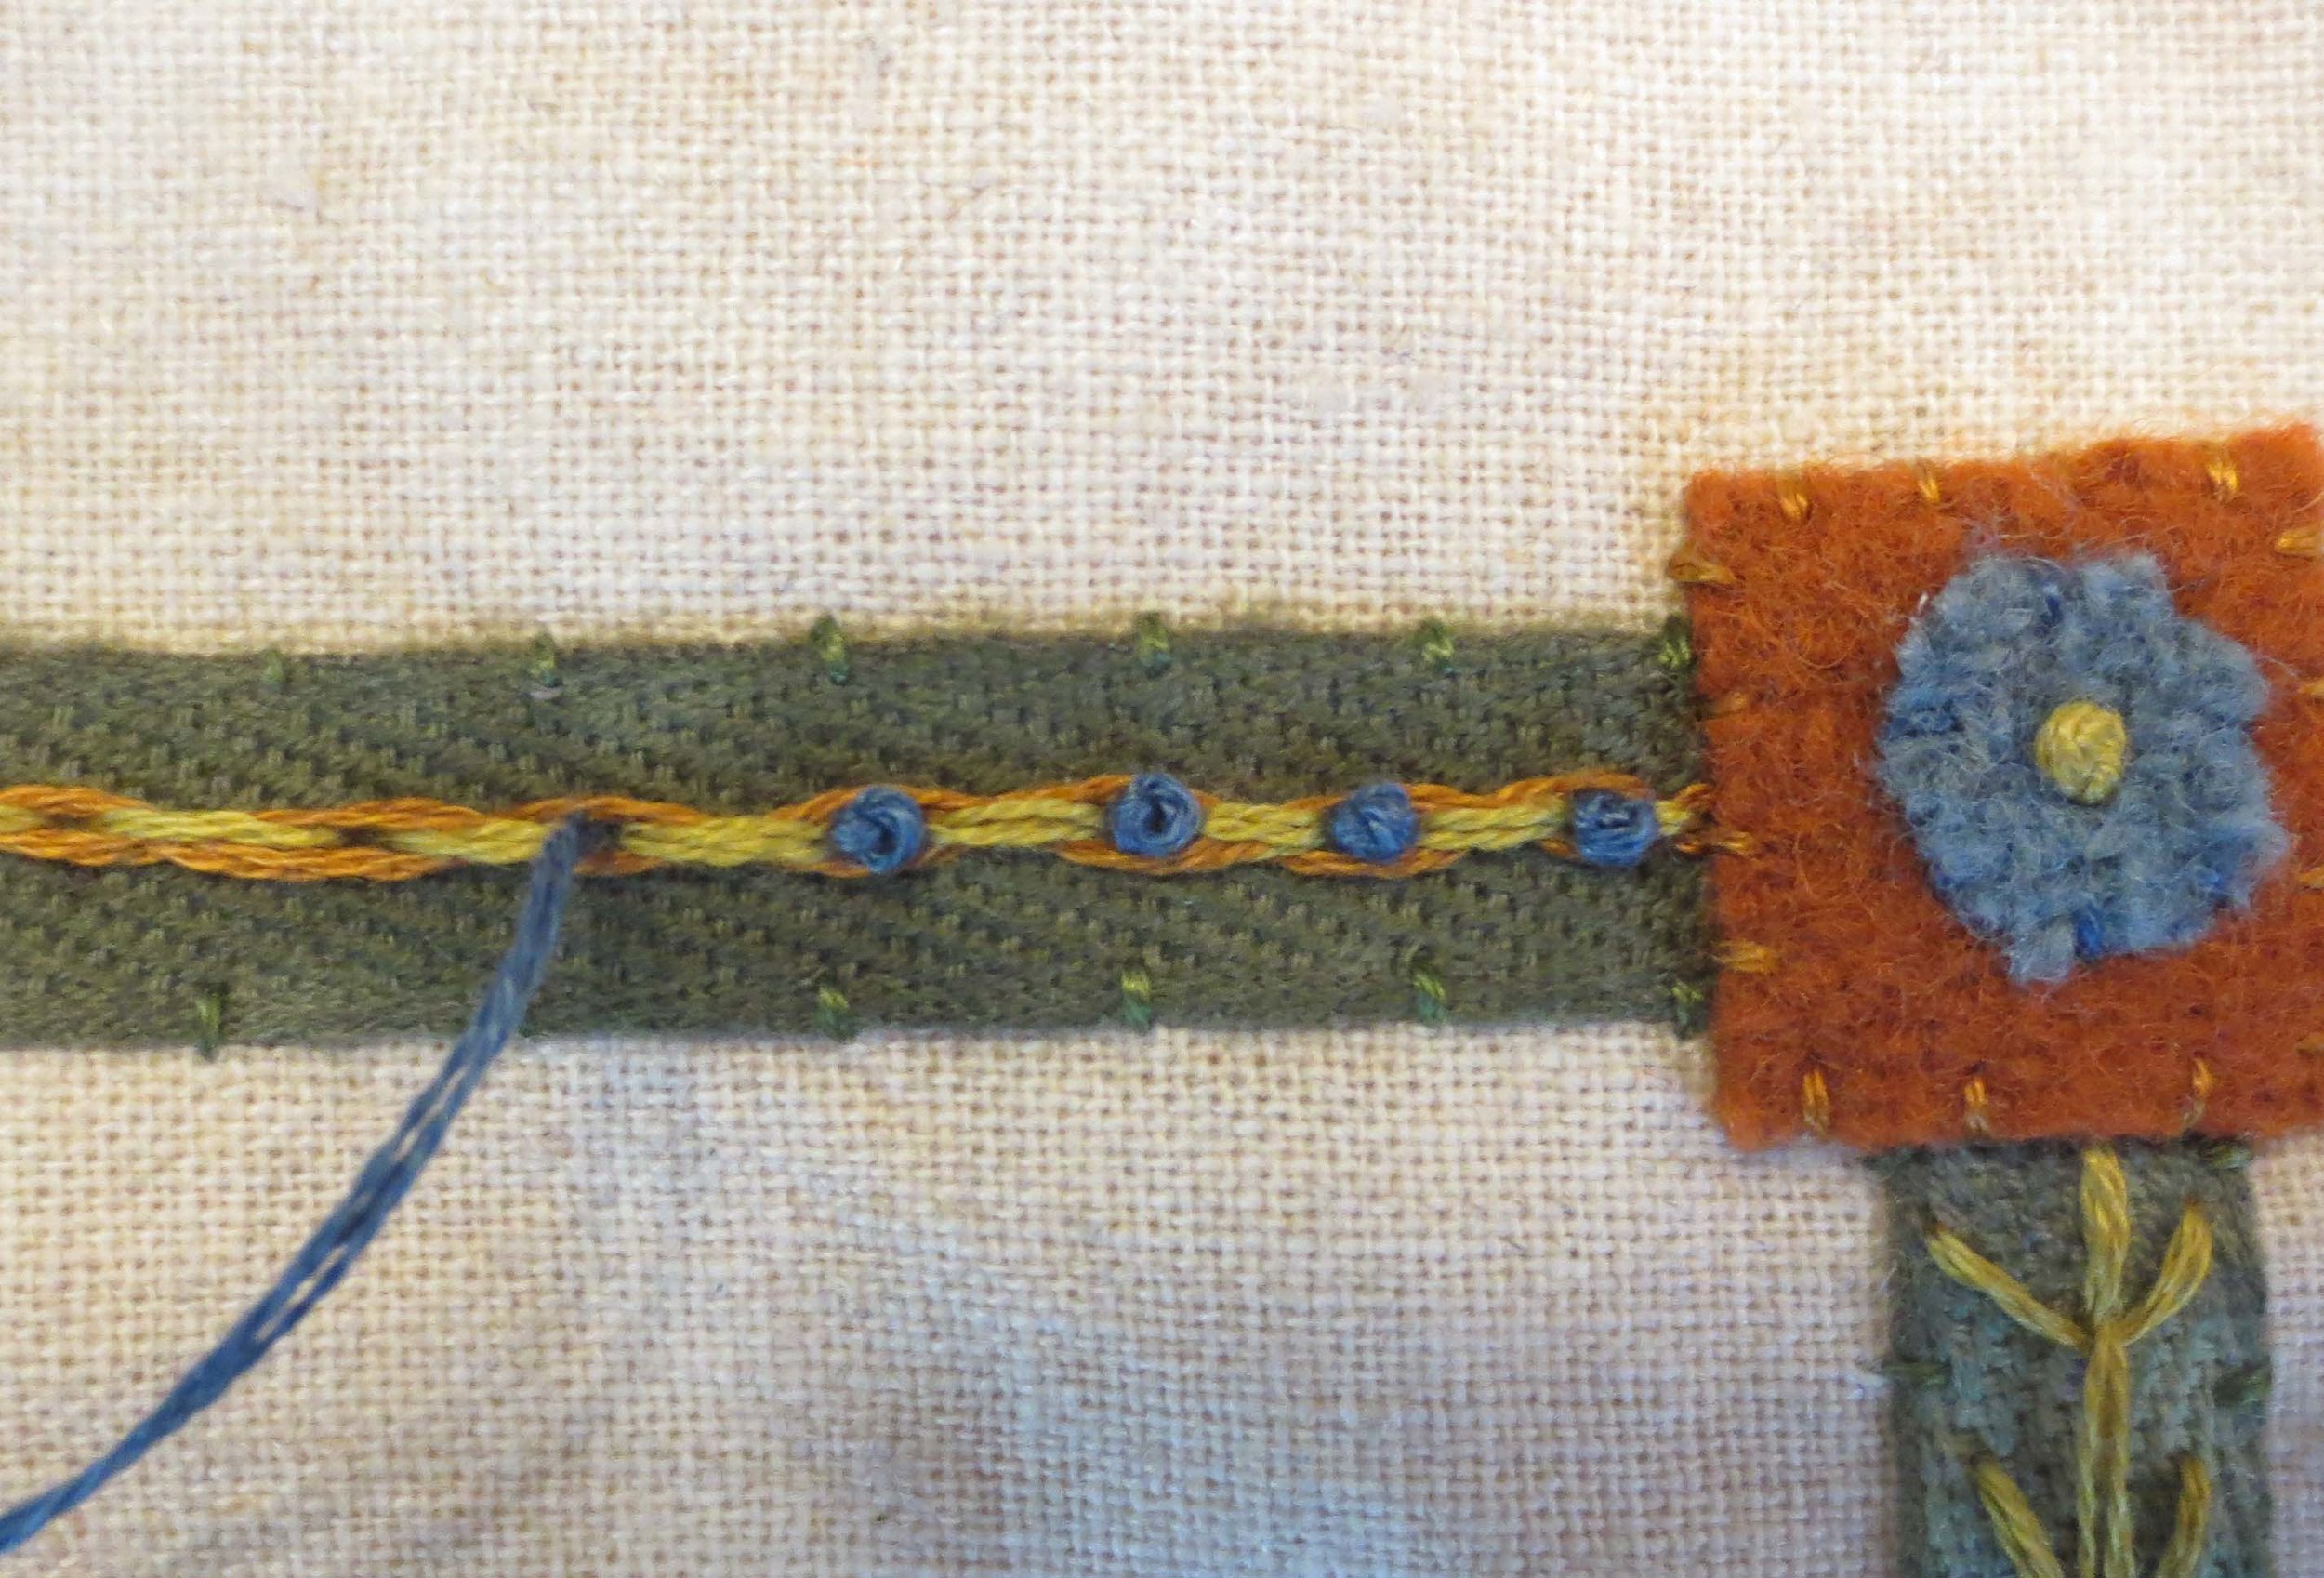
Repeat on the opposite side.
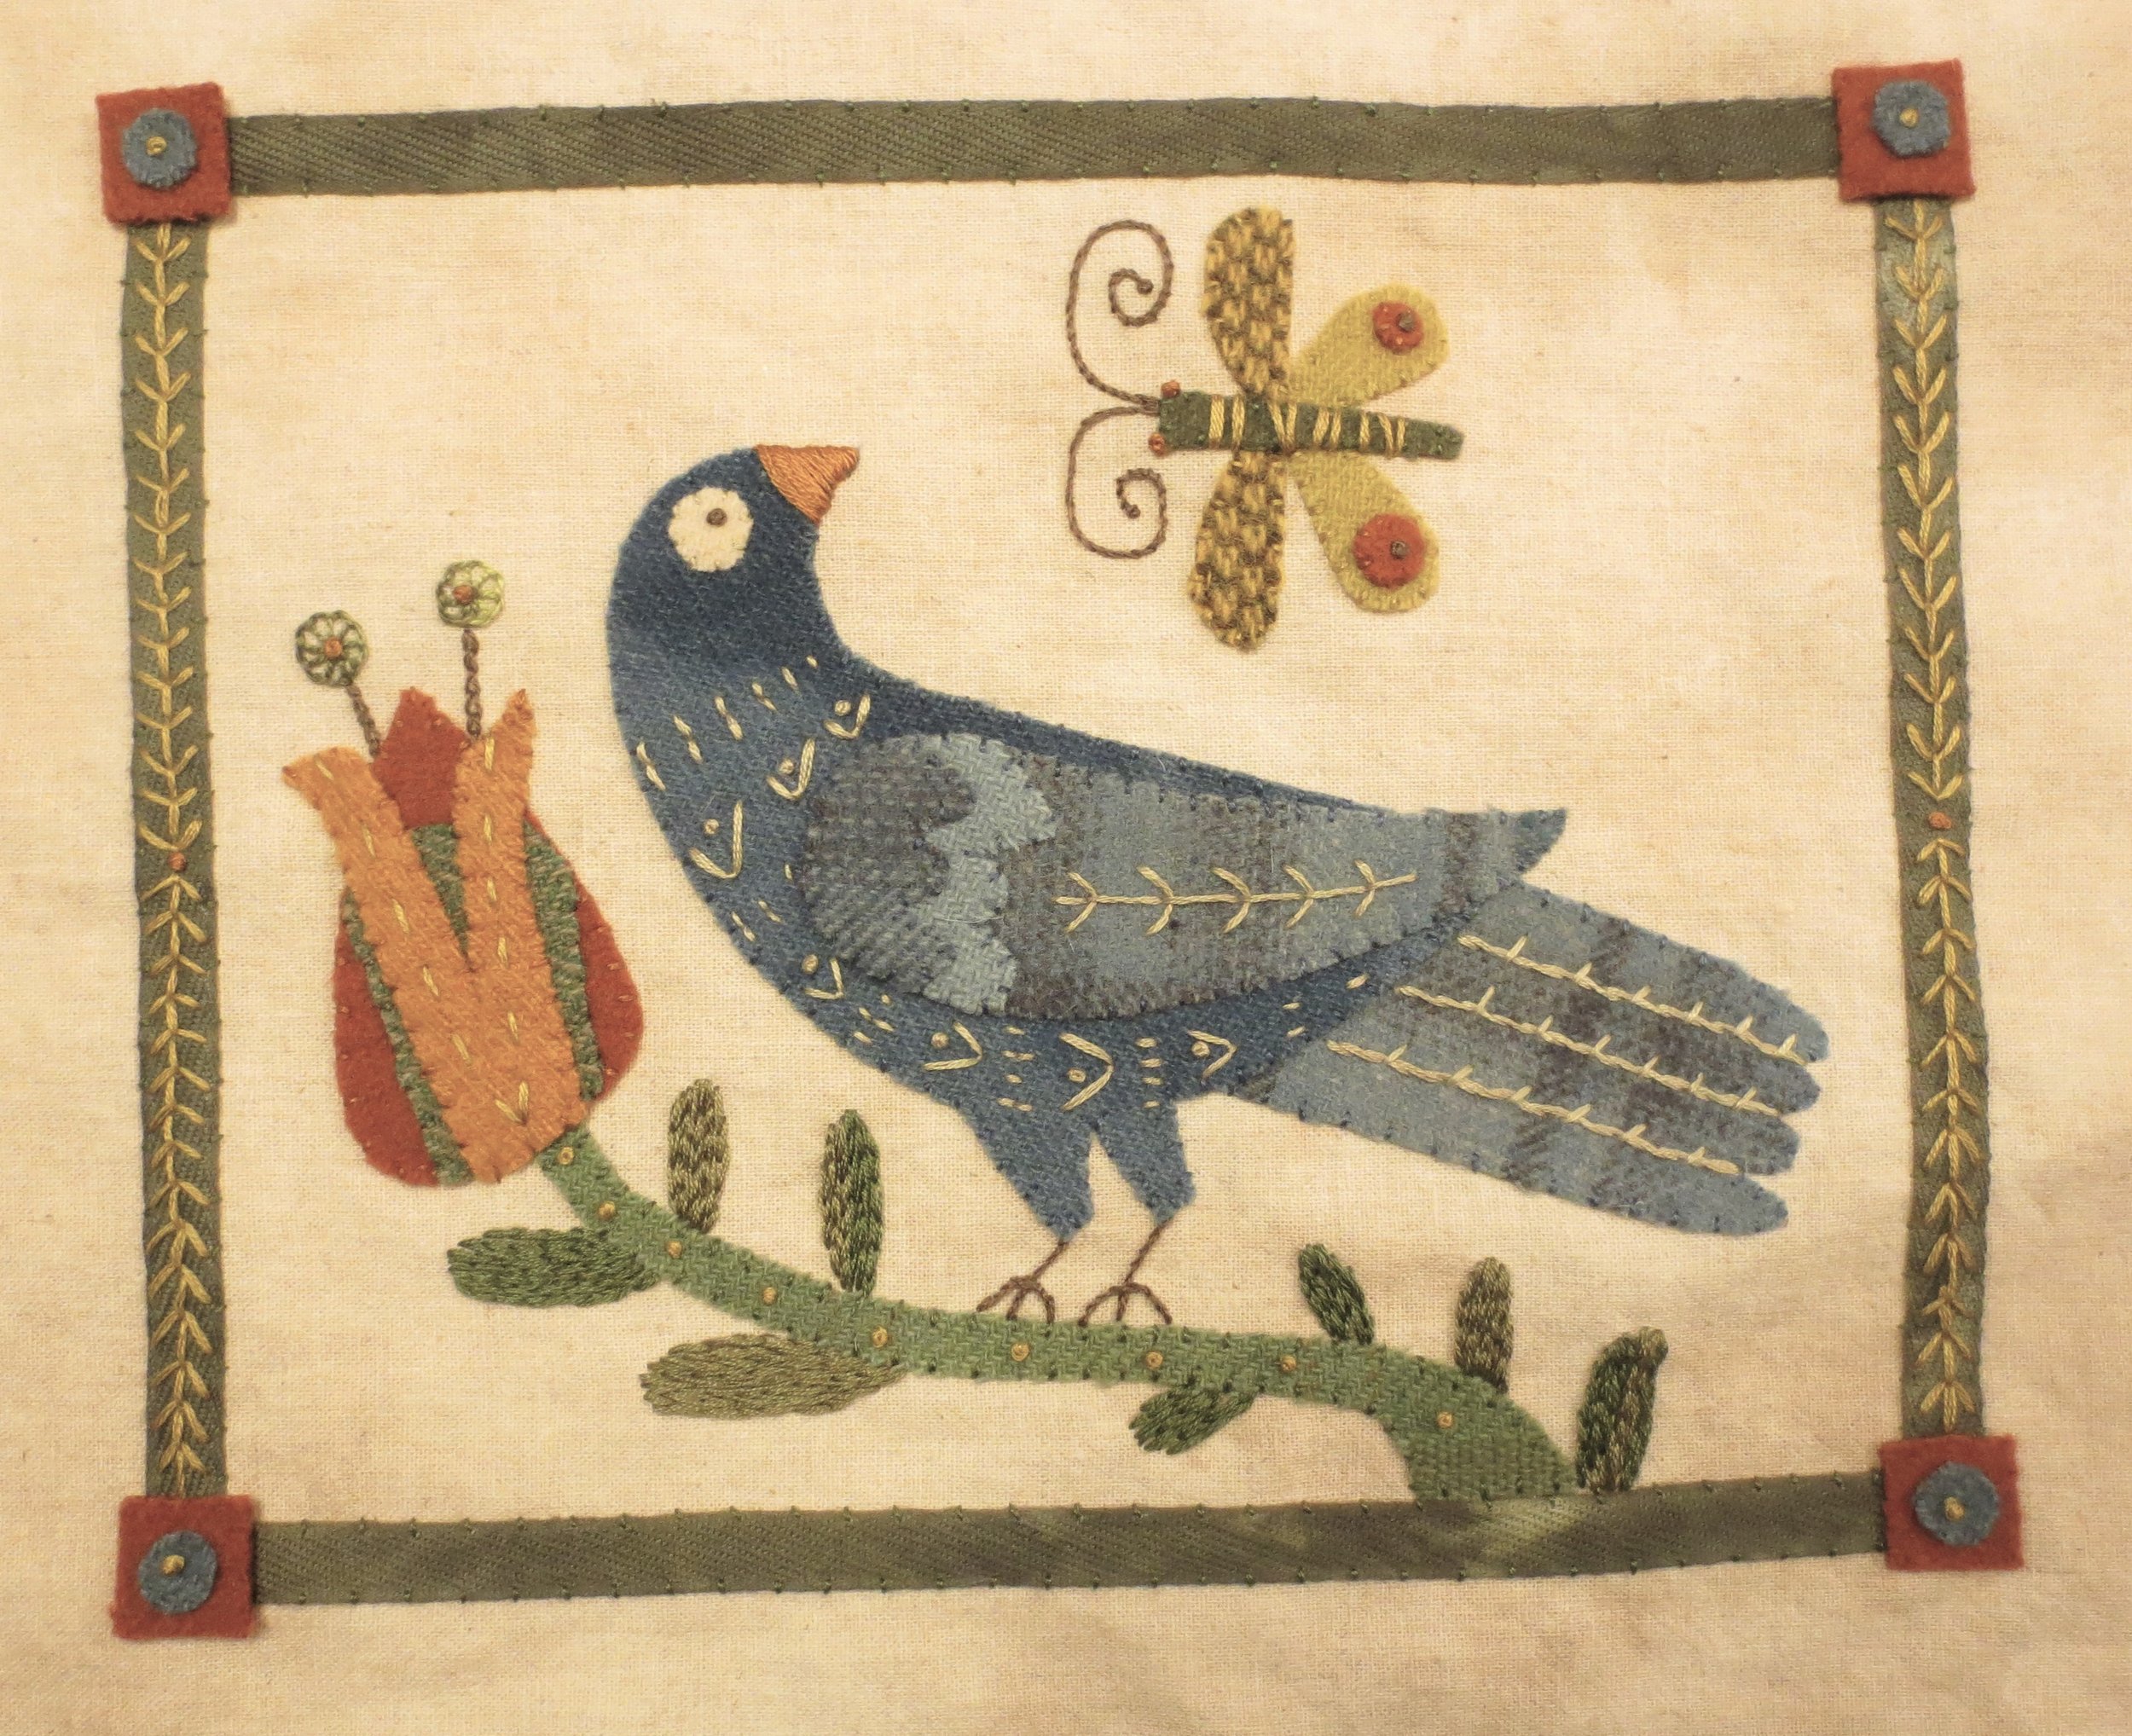
You’re done!

This will fit in a 10 inch x 13 inch frame or a 11 inch x 14 inch frame.