
Flowers From My Garden Mystery Quilt Border - Part III
We are approaching the finish line! This is the final Mystery Quilt post.
You will need
1. Felted Wool (The wool requirements and patterns for the flowers, leaves, and berries are found in Part I)
- Grasshopper
- Head and legs - 2" x 3" light teal solid
- Body - 2" x 4" light teal texture (I used houndstooth)
- Wing - 1 1/2" x 3" medium teal solid
- Eyes - 1" square dirty white
- Flowers - cut
- #1 - one
- #2 - two
- Leaves - cut
- #2 - three
- #3 - one
- #4 - one
- #5 - three
- #6 - three
- #7 - one
- #10 - three
- Berries - cut
- #1 - one
- #2 - one
- #3 - five (2 green, 3 blue)
2. Thread - The following are for the grasshopper only. See Part I for flower, leaf, and berry threads.
- Valdani perle cotton, size 12 (Two strands of embroidery floss can be used instead)
- Legs - #O518
- Body, legs, head - #O31
- Body embellishment - #O592, P4
- Eyes - P4, #O135
3. Miscellaneous
- Fusible web - feather weight
- Chenille needle - size 12
- Steam iron
- Chalk pencil
4. Grasshopper pattern and layout
Instructions - Use one strand of thread unless otherwise noted.
1. Trace pattern pieces onto fusible web (images are reversed already). Cut out pattern pieces leaving a small border (1/8") around each piece.
2. Fuse pattern pieces to designated wools. Cut out along tracing lines.
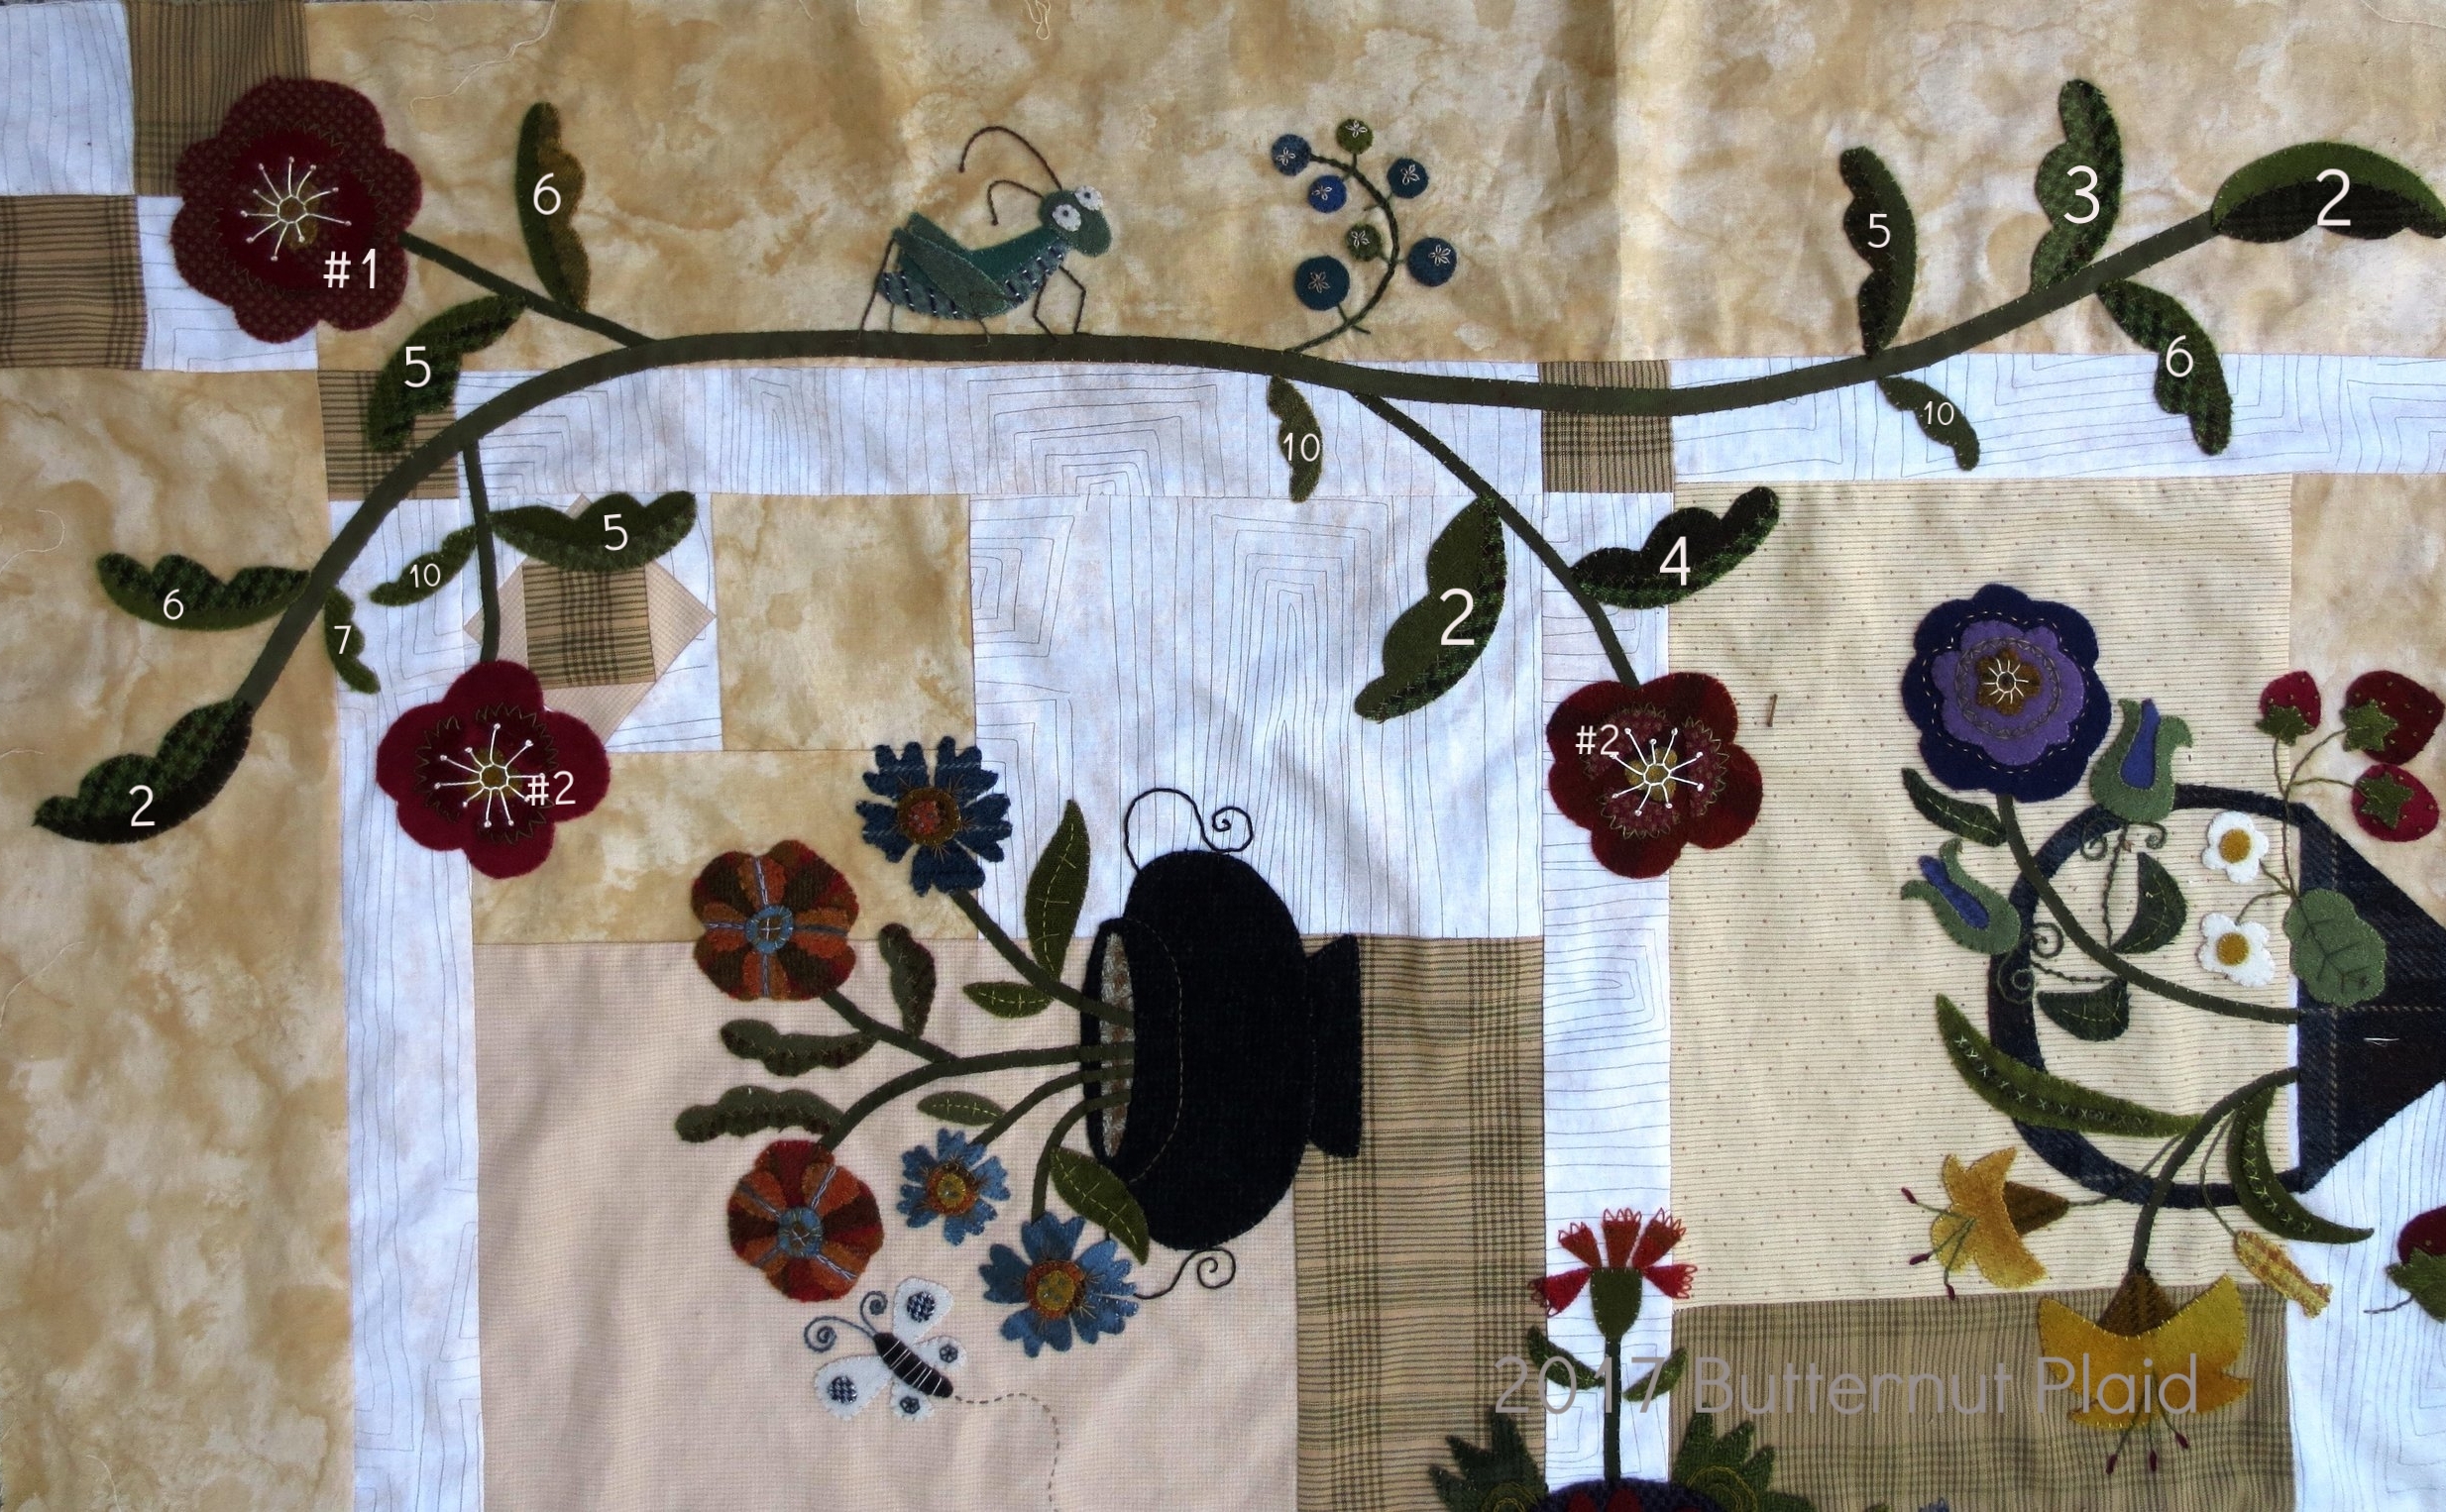
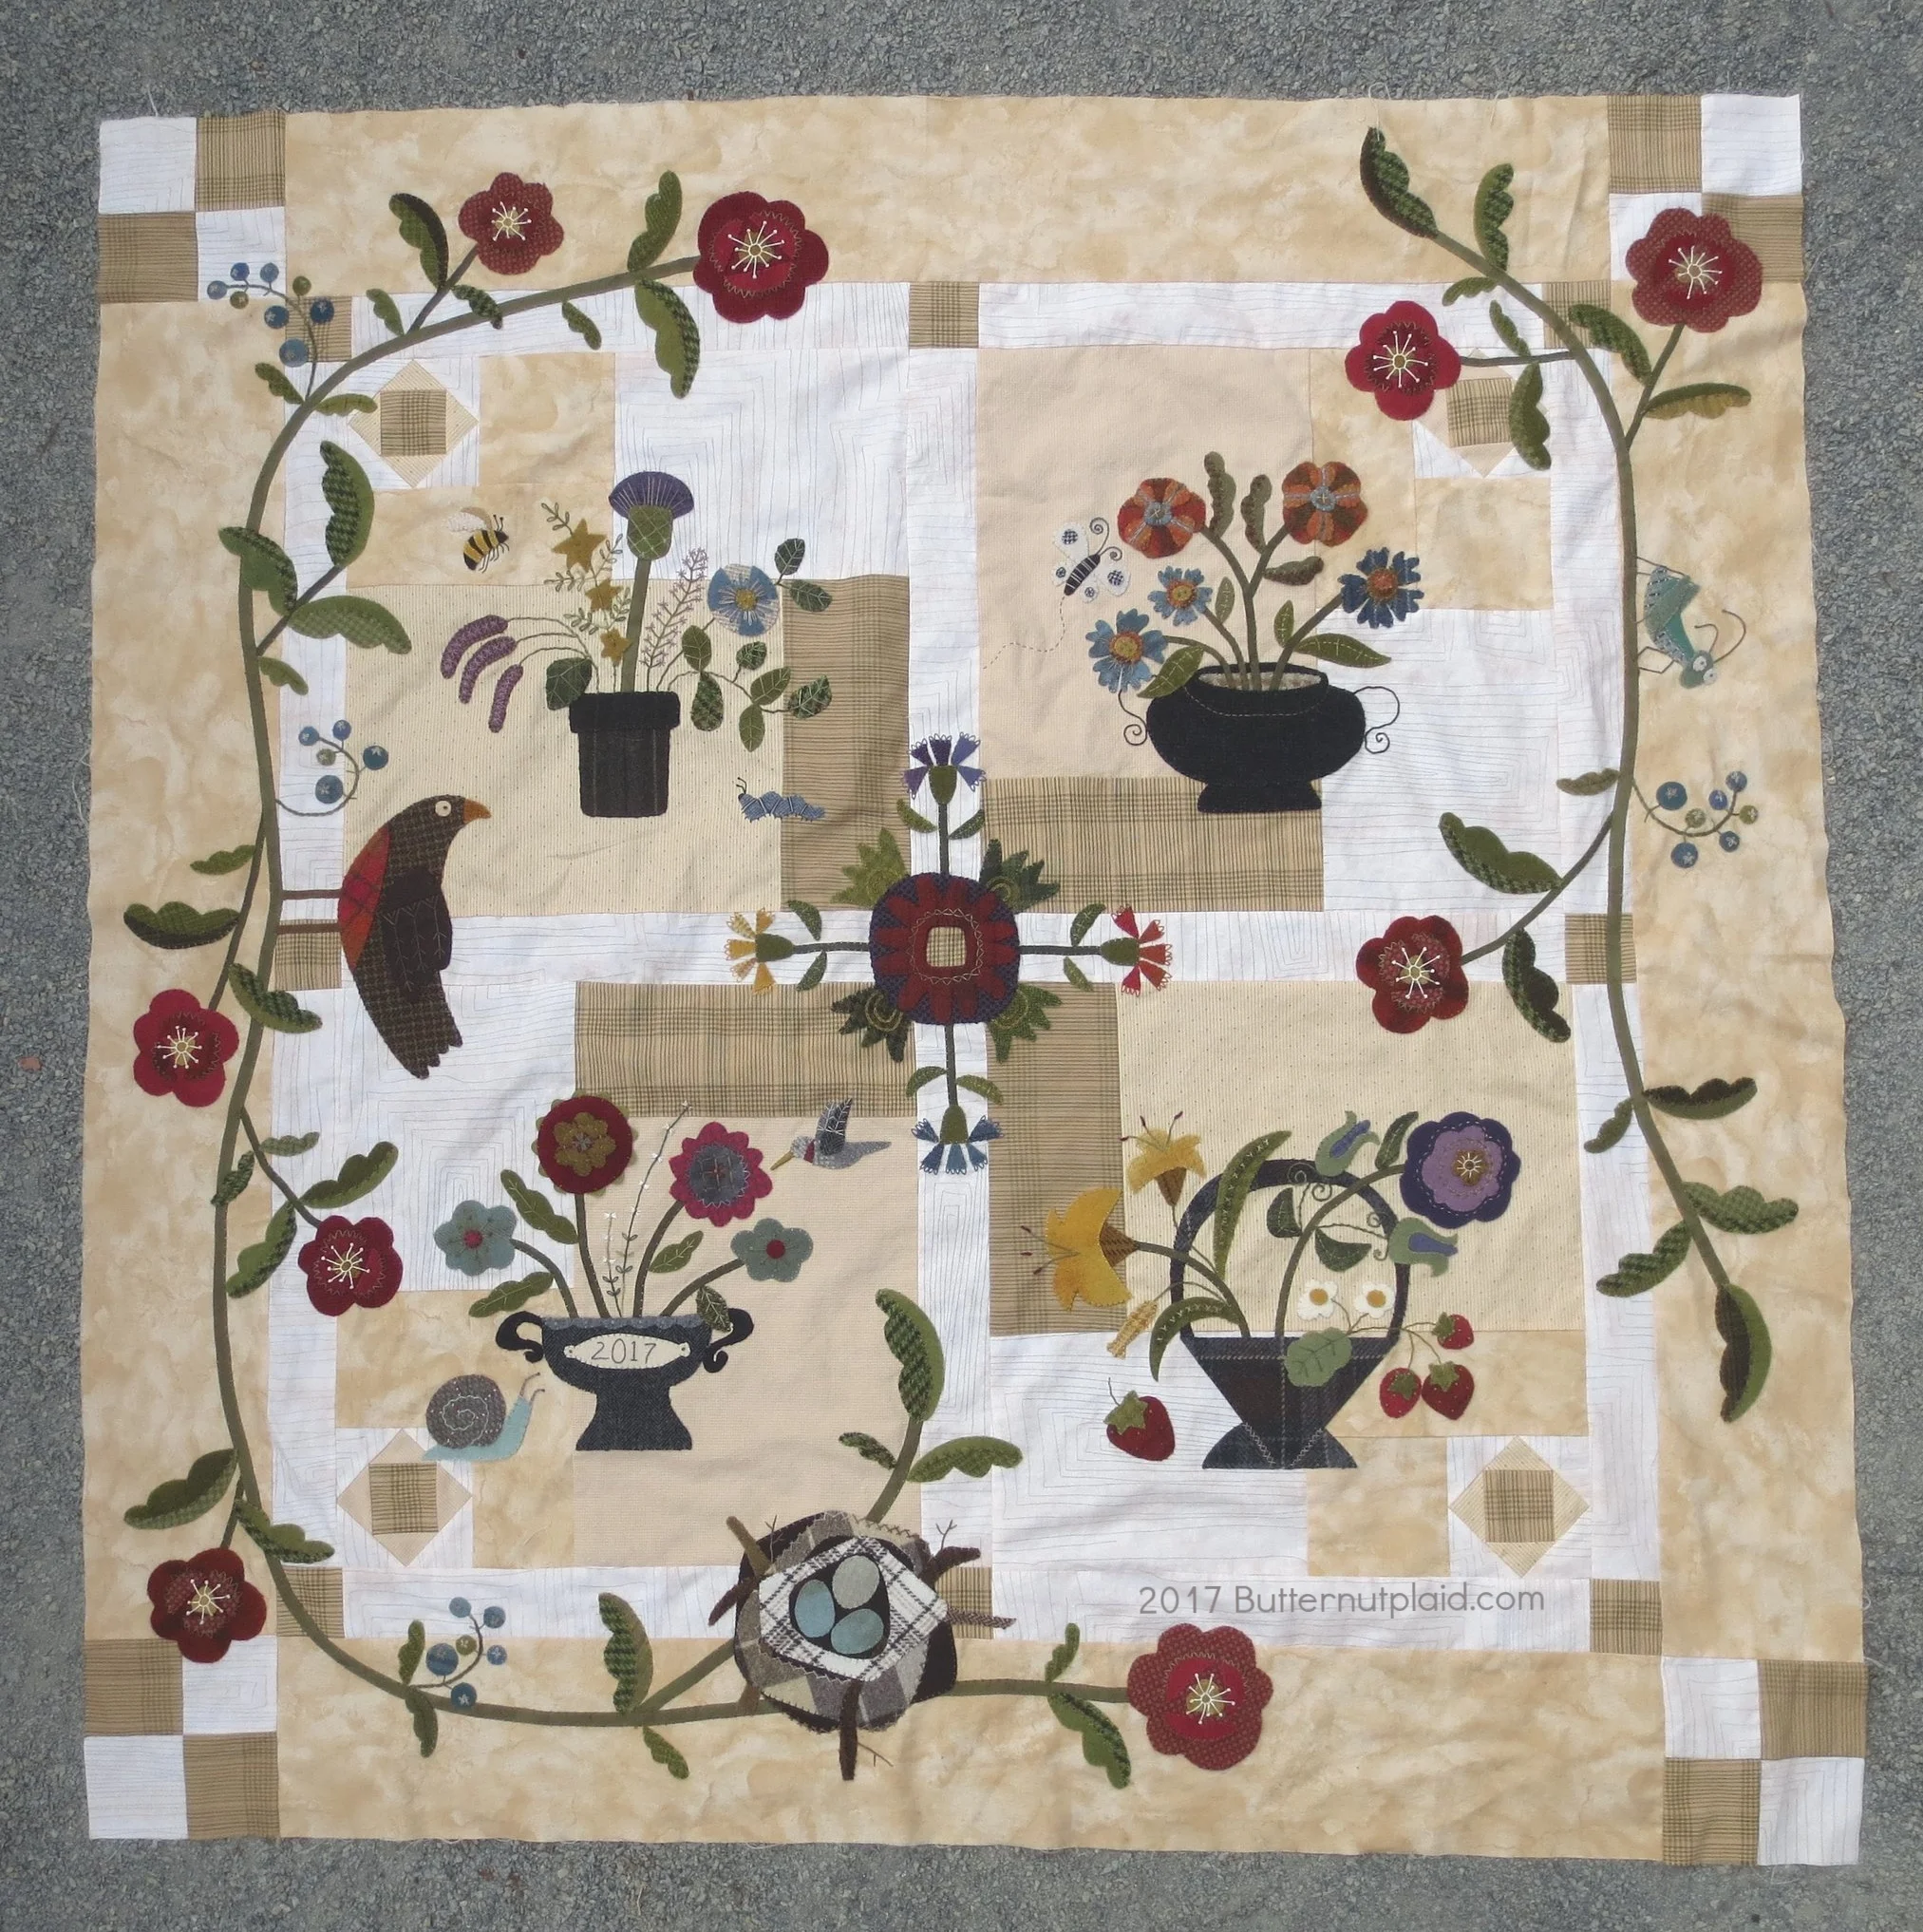
3. Position flowers and leaves on the upper right hand side of the quilt as shown below. Fuse with steam.
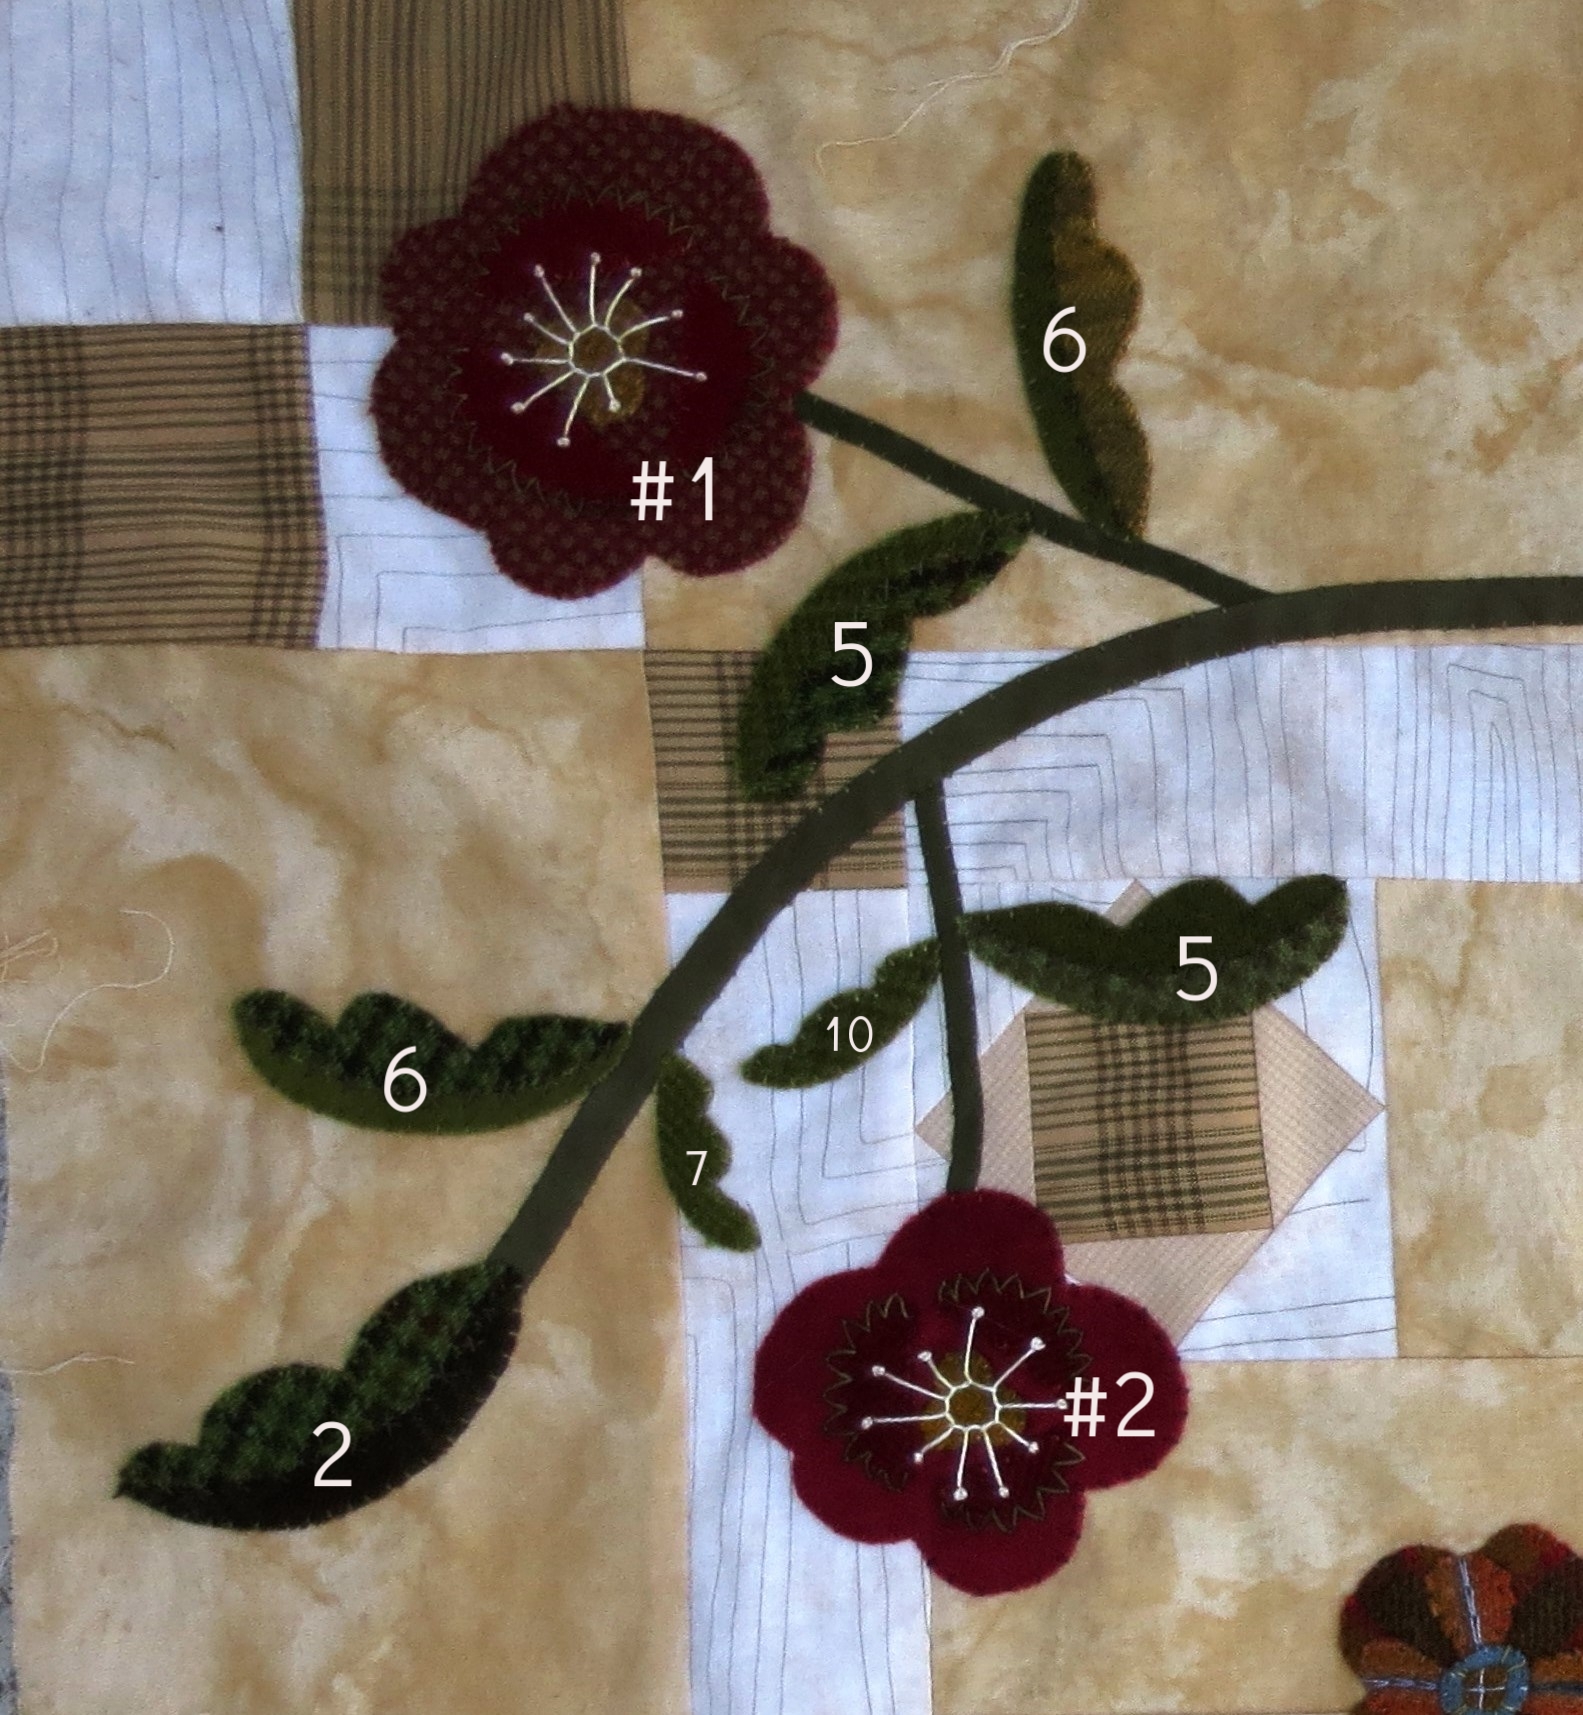
Layout of flowers and leaves on border vine
4. Follow the stitching instruction for the leaves and flowers from Part I of the border posts.
5. Position leaves on the opposite end of the rose vine as shown below.

Layout of leave on border vine
6. Position flower and leaves on the remaining portion of the stem as shown below. Fuse in place using steam.

Layout of border flower and leaves on border vine
7. Stitch flowers and leaves as directed in Part I.
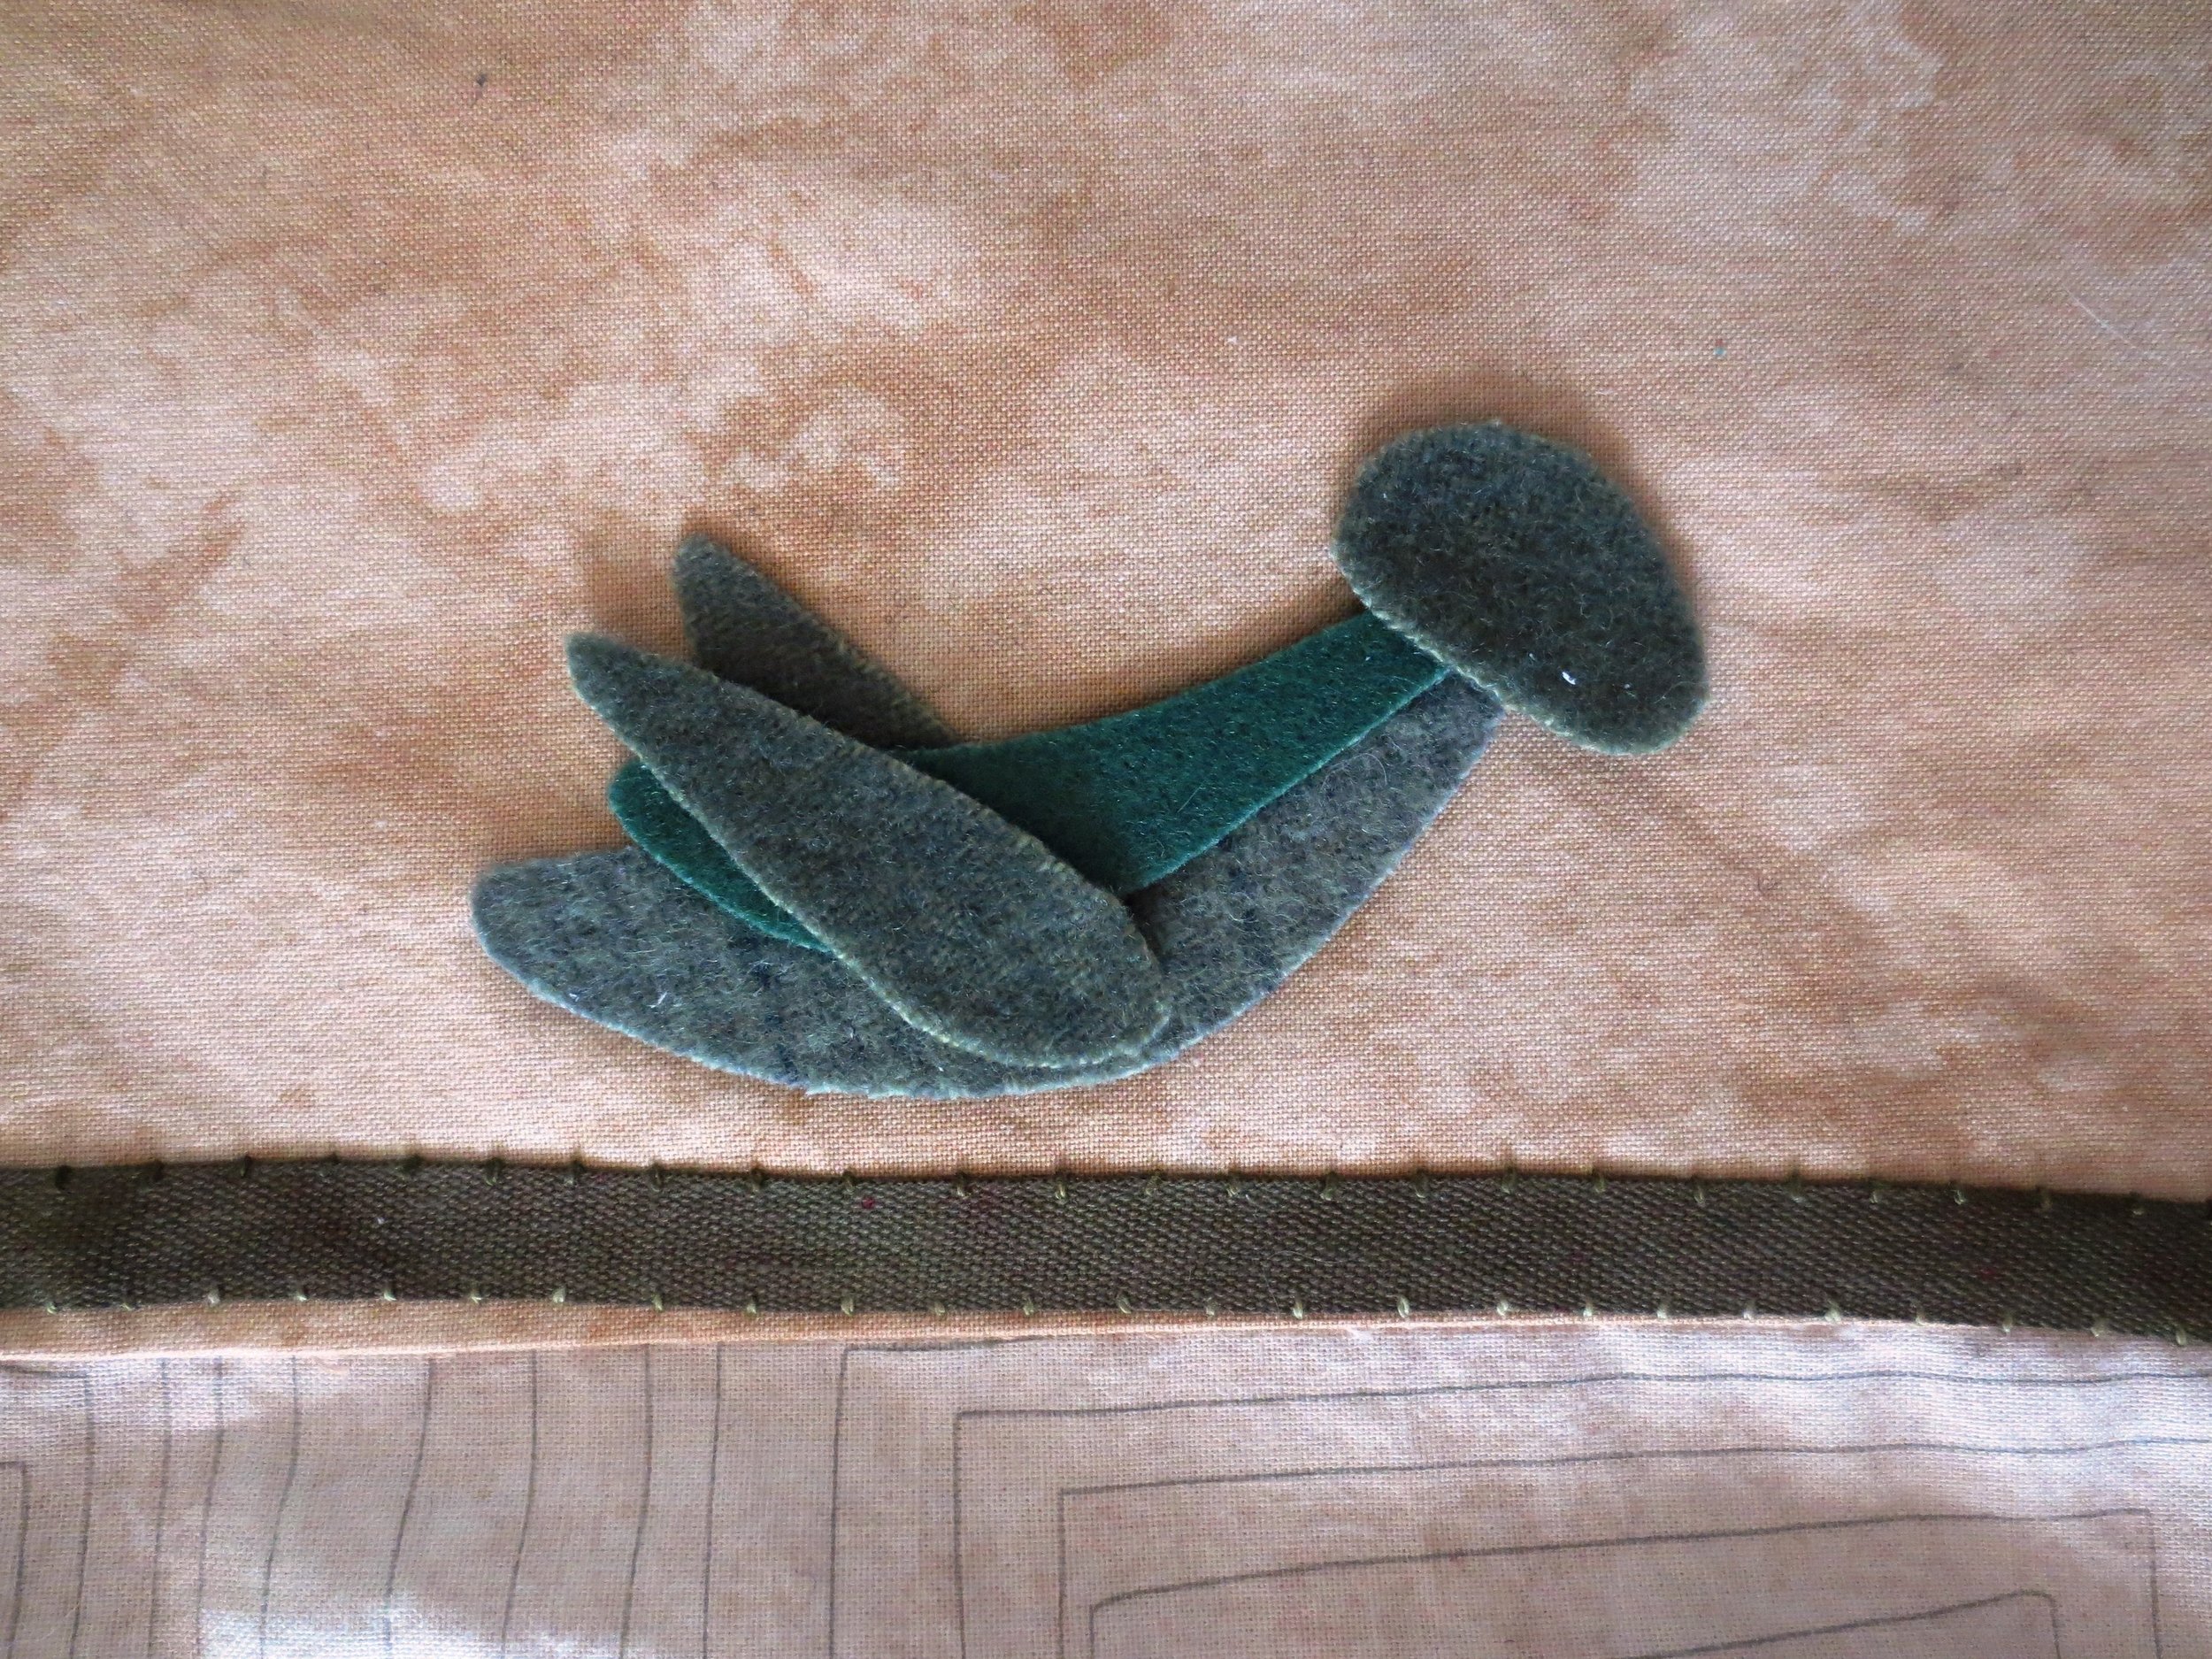
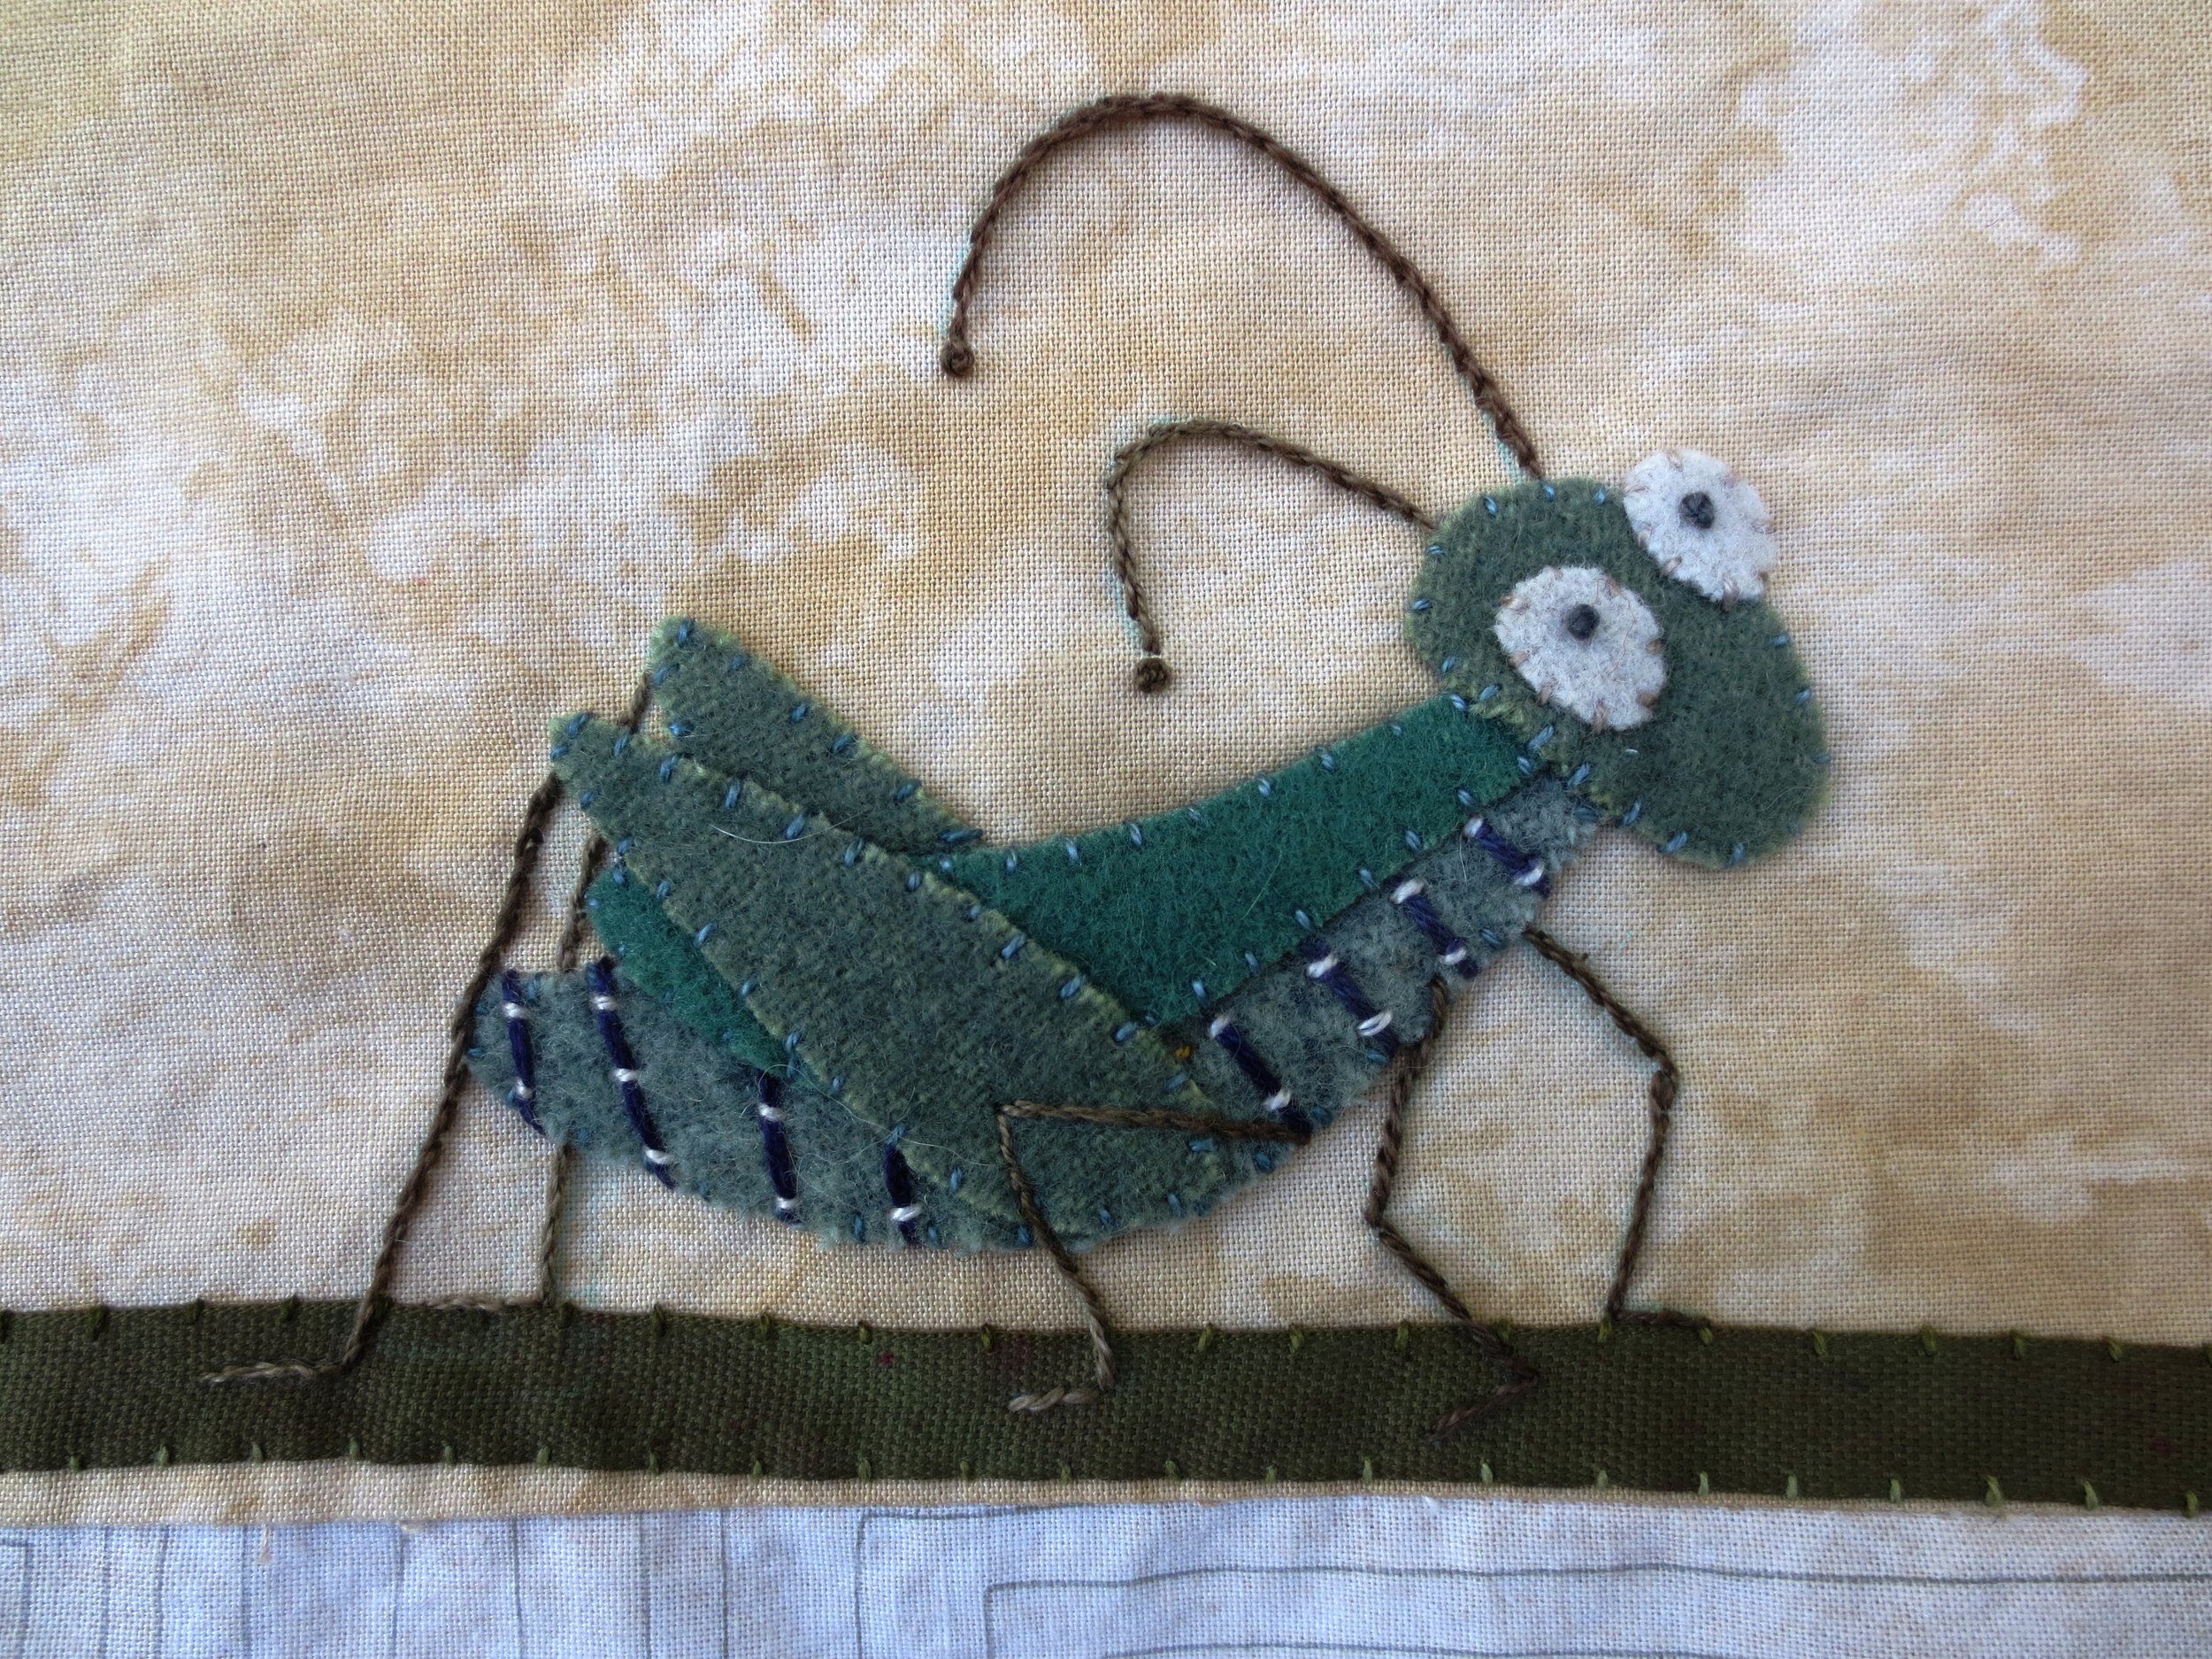
8. Position grasshopper pattern pieces between stems of flower #1 and the second flower #2. The body of the grasshopper is 1/4" above the ribbon vine (see picture at beginning of the blog for placement hint). Fuse in place using steam.
Hint: Lay out all the pieces except for the eyes. Then remove everything but the body and leg #1. Fuse in place. Add the wing and fuse again. Then add the head and leg #2. fuse again. Add the eyes and fuse.
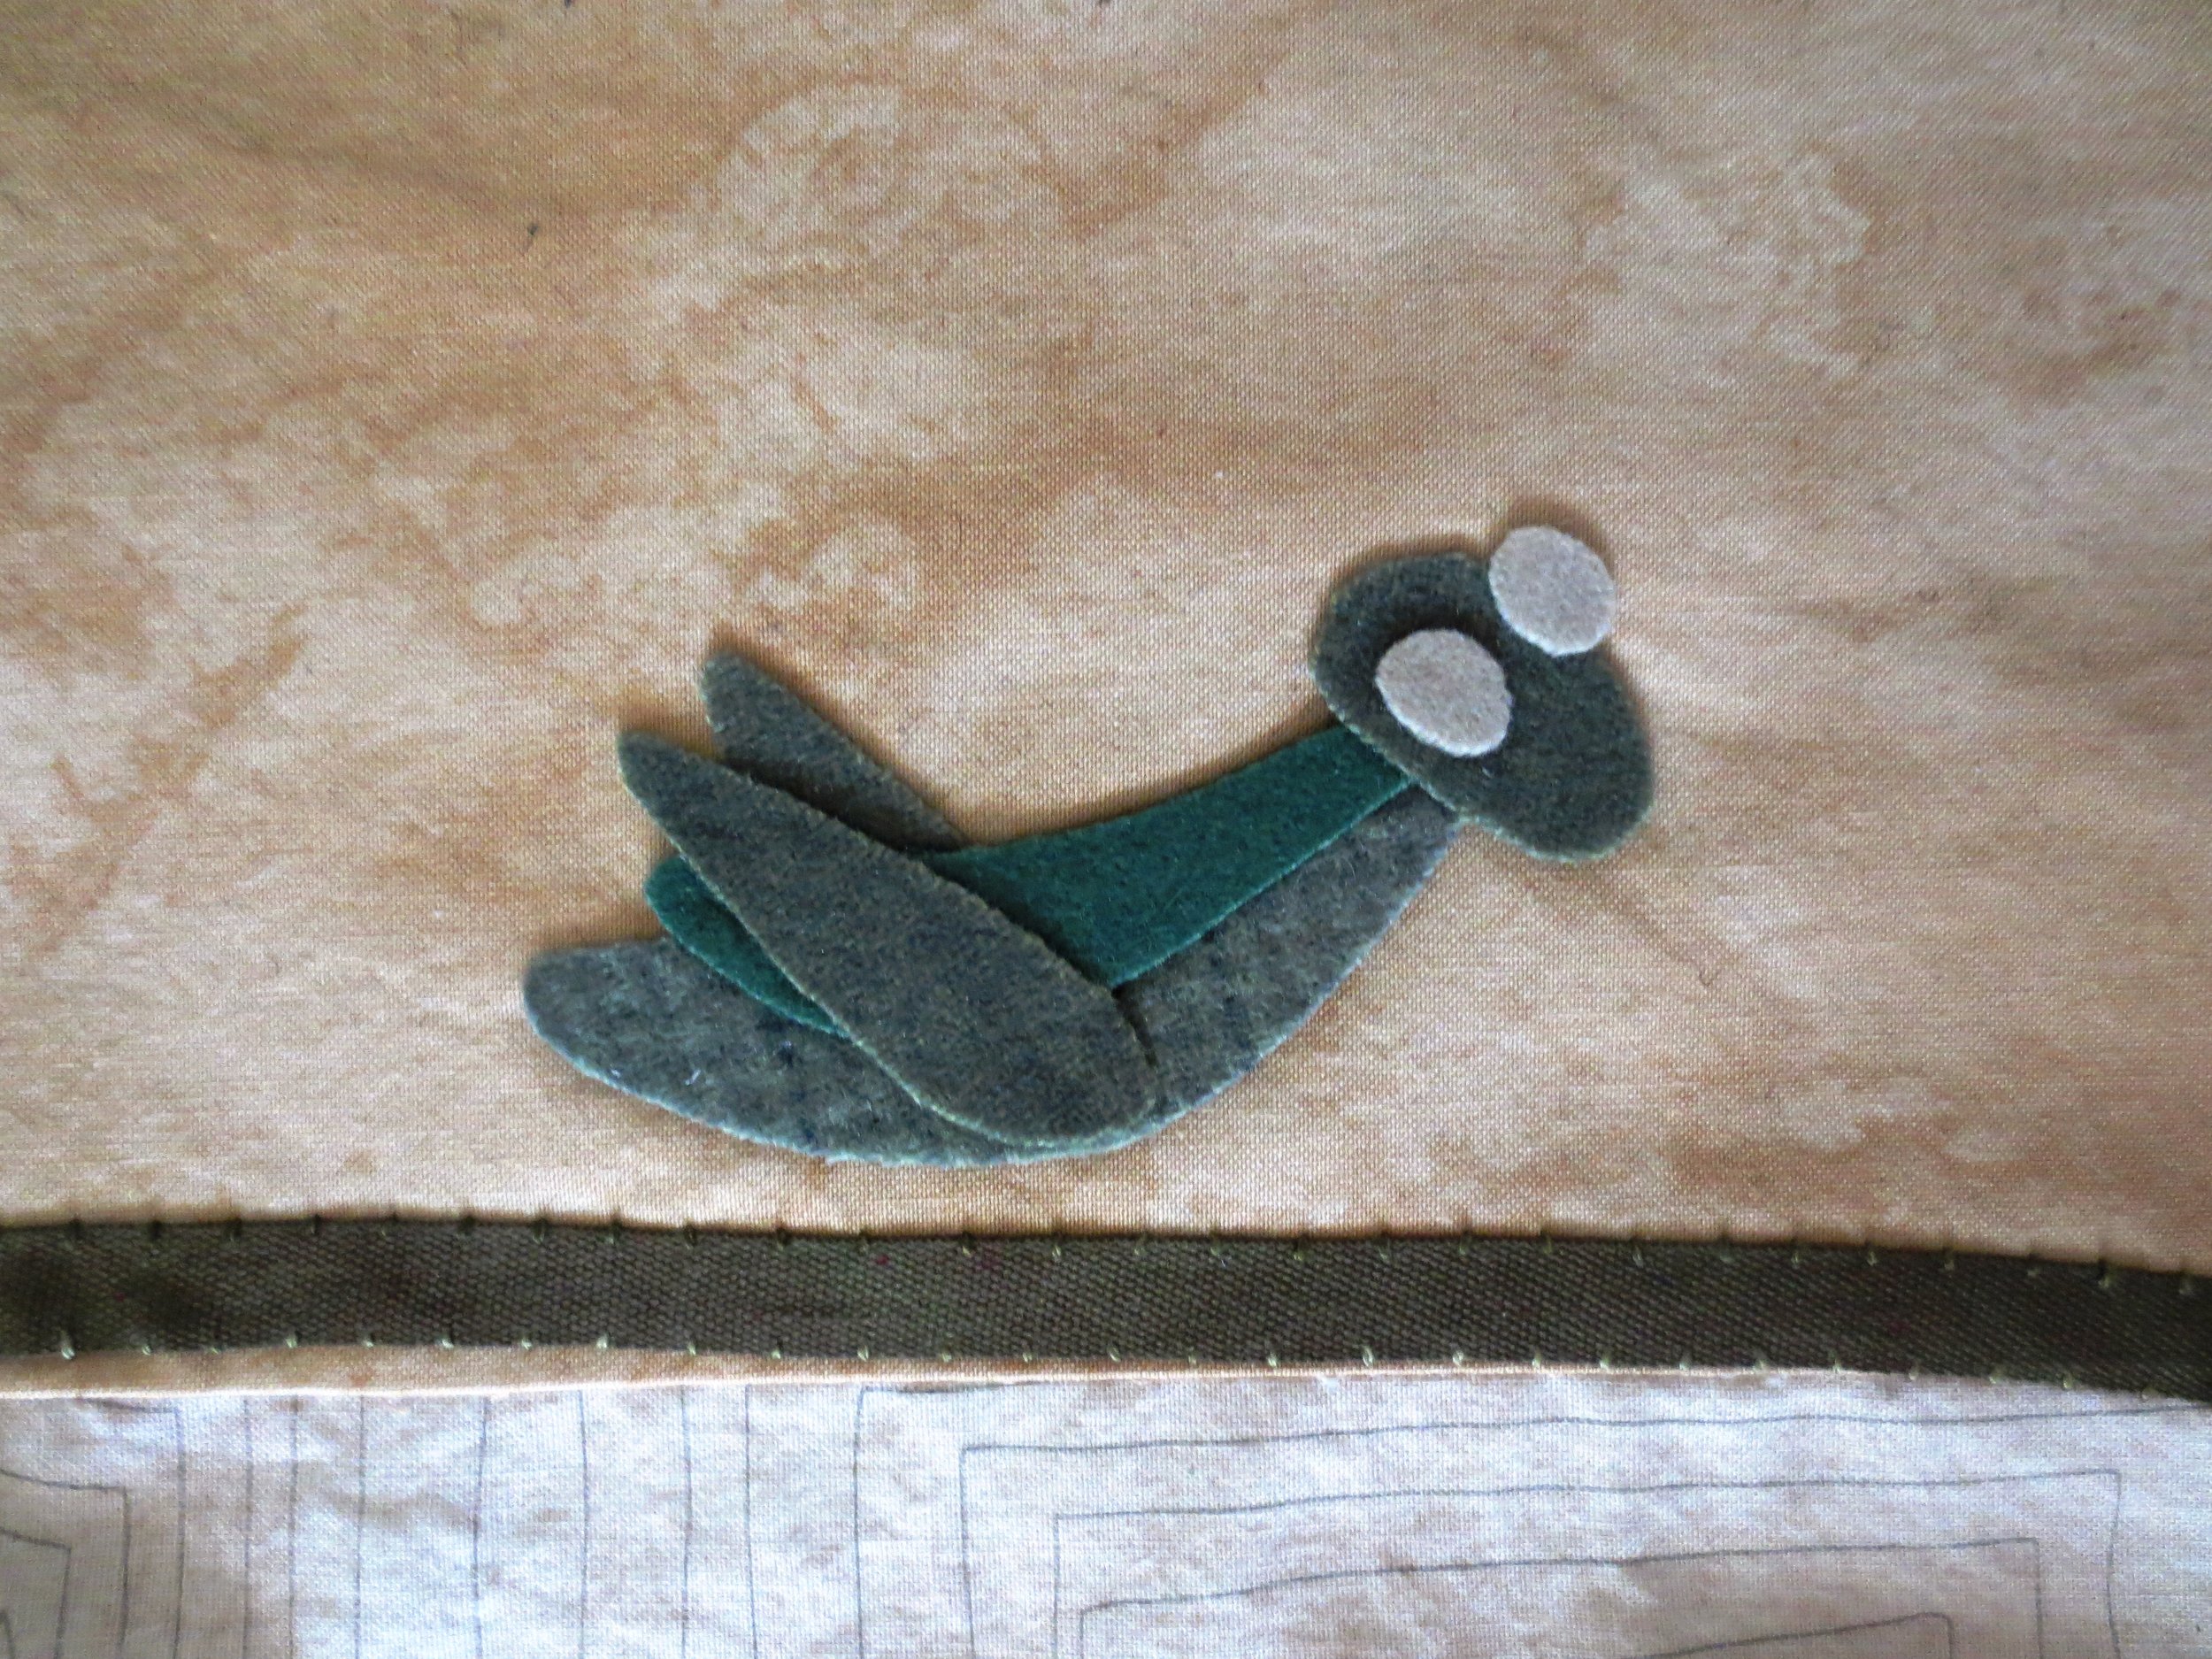
9. Whip stitch all the pieces using thread that matches the wool colors.
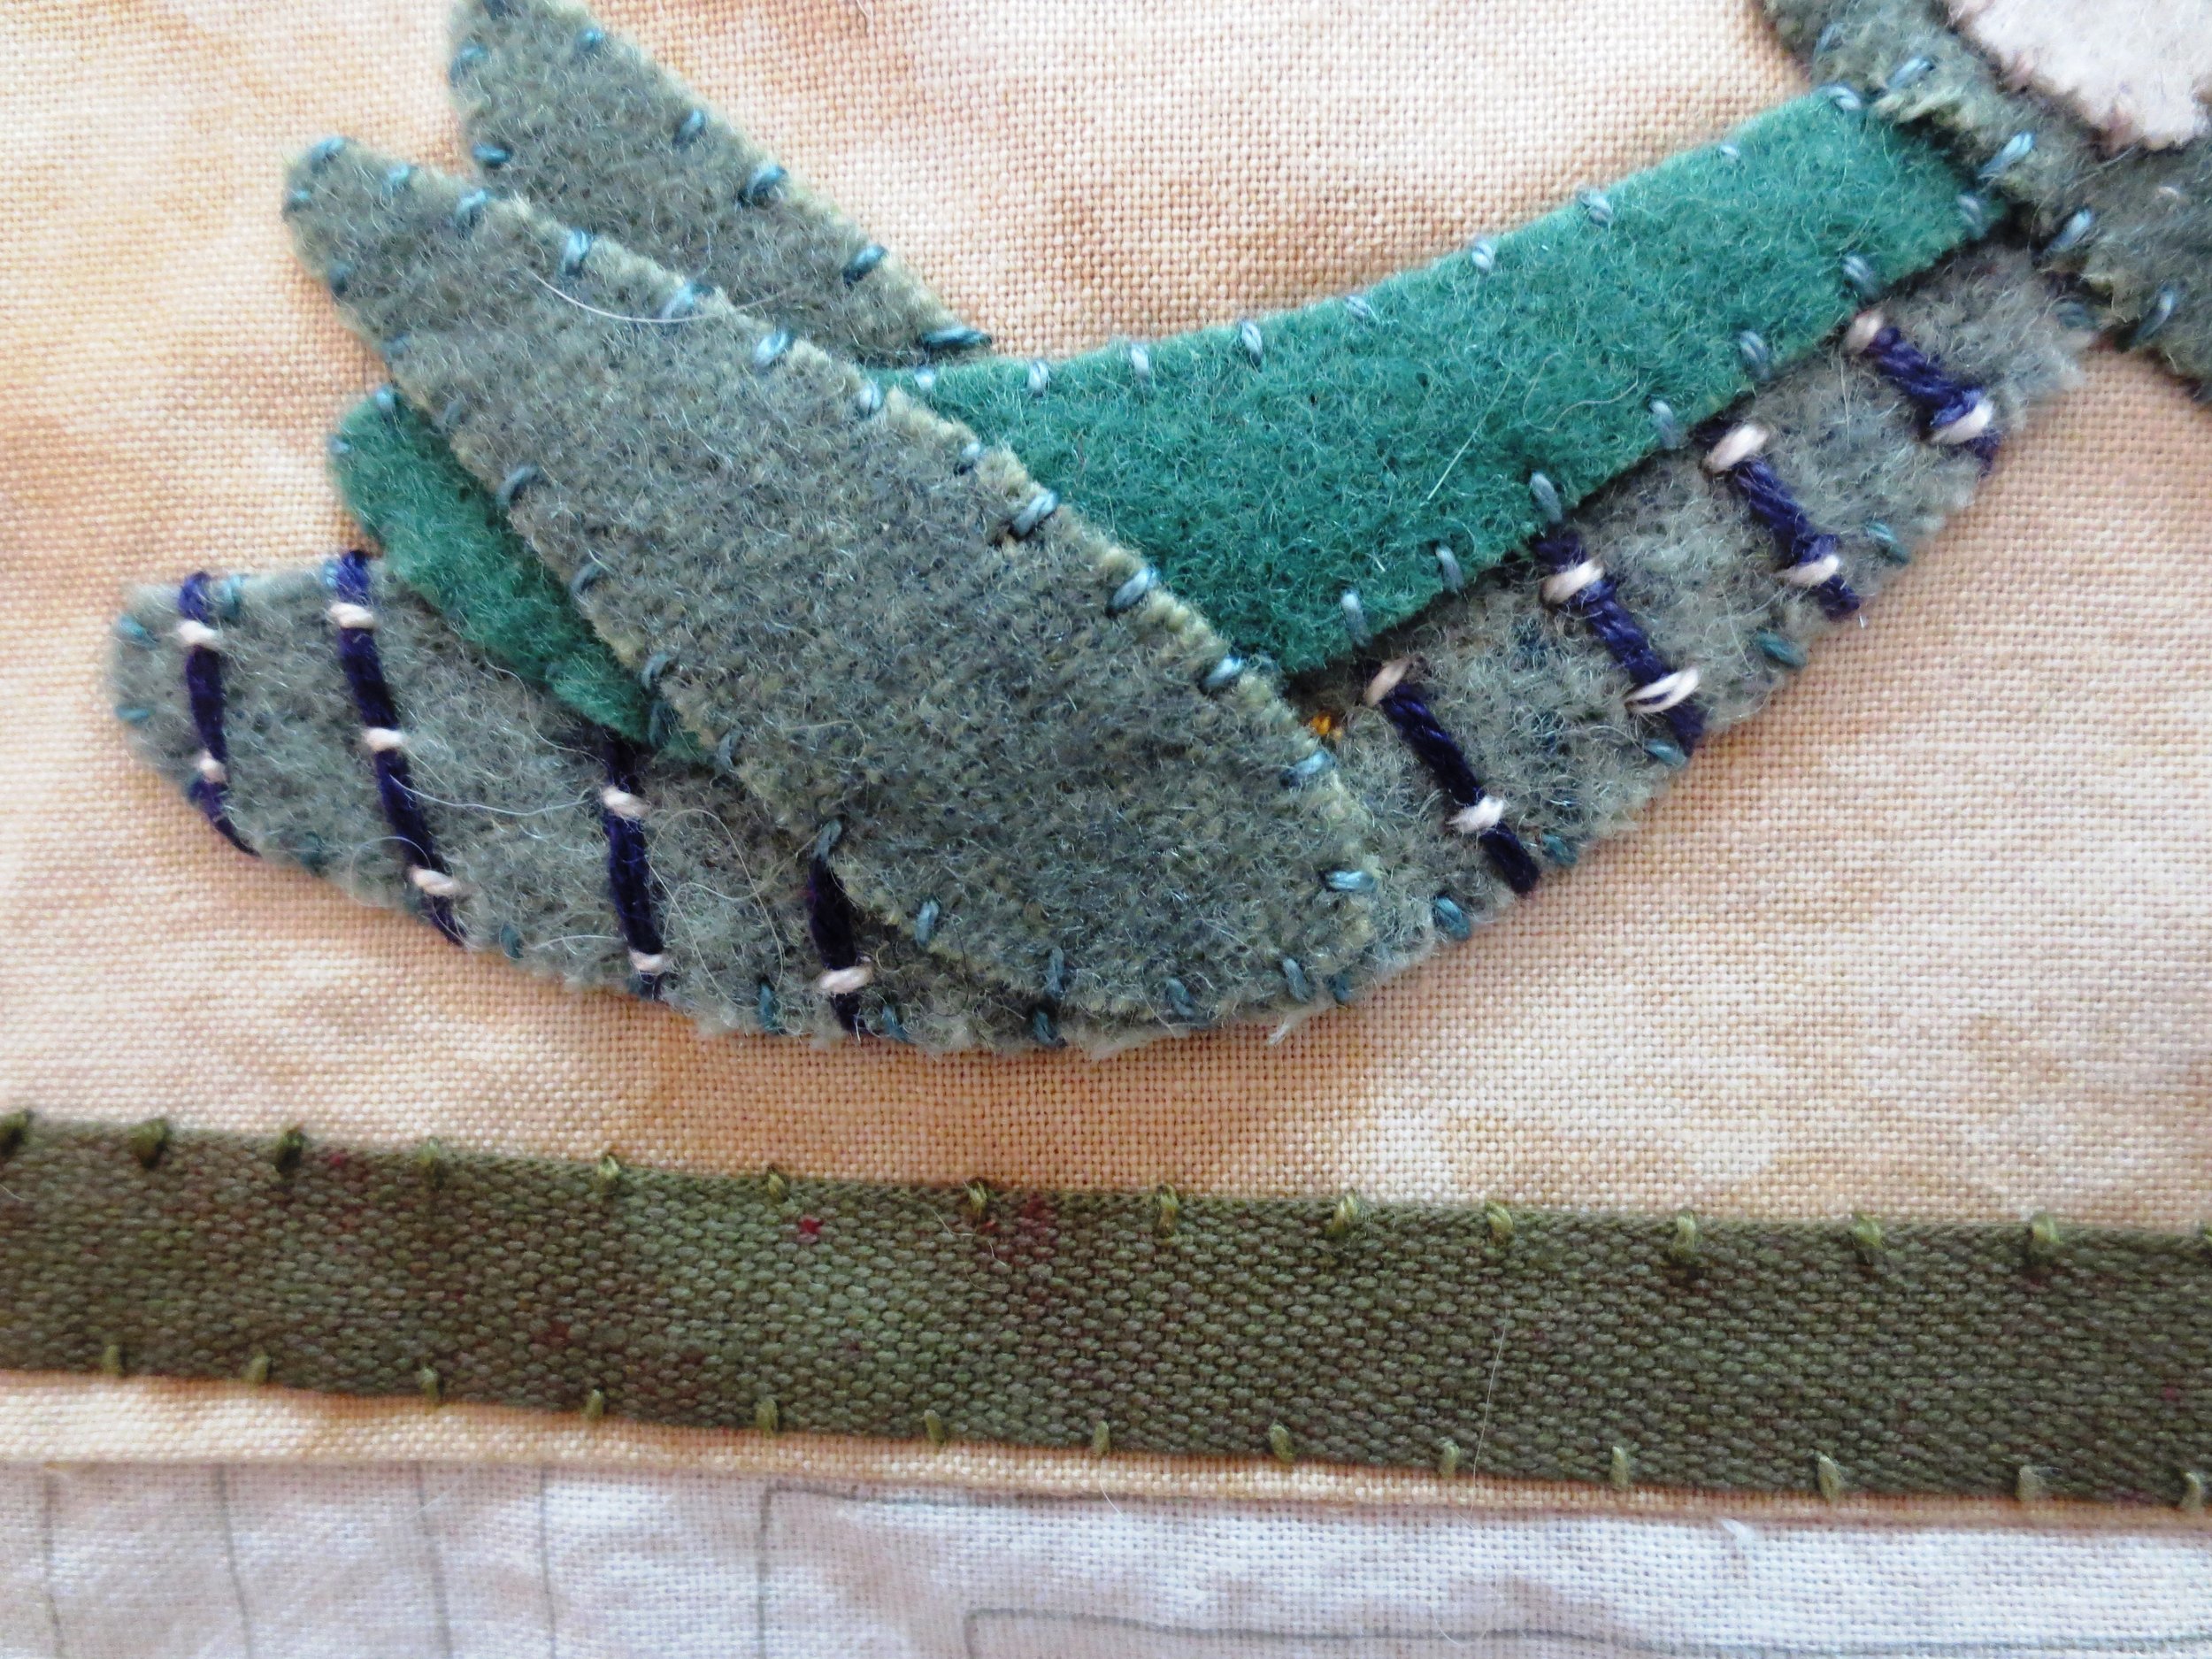
10 Use a chalk pencil to draw eight vertical lines on the body.
11. The body embellishment is a couch stitch. Begin by using #O592 (dark purple) to stitch two parallel lines over each chalk line. Use P4 to stitch a tacking stitch over the parallel line. The number of tacking stitches varies depending on the length of of the vertical lines (see below)
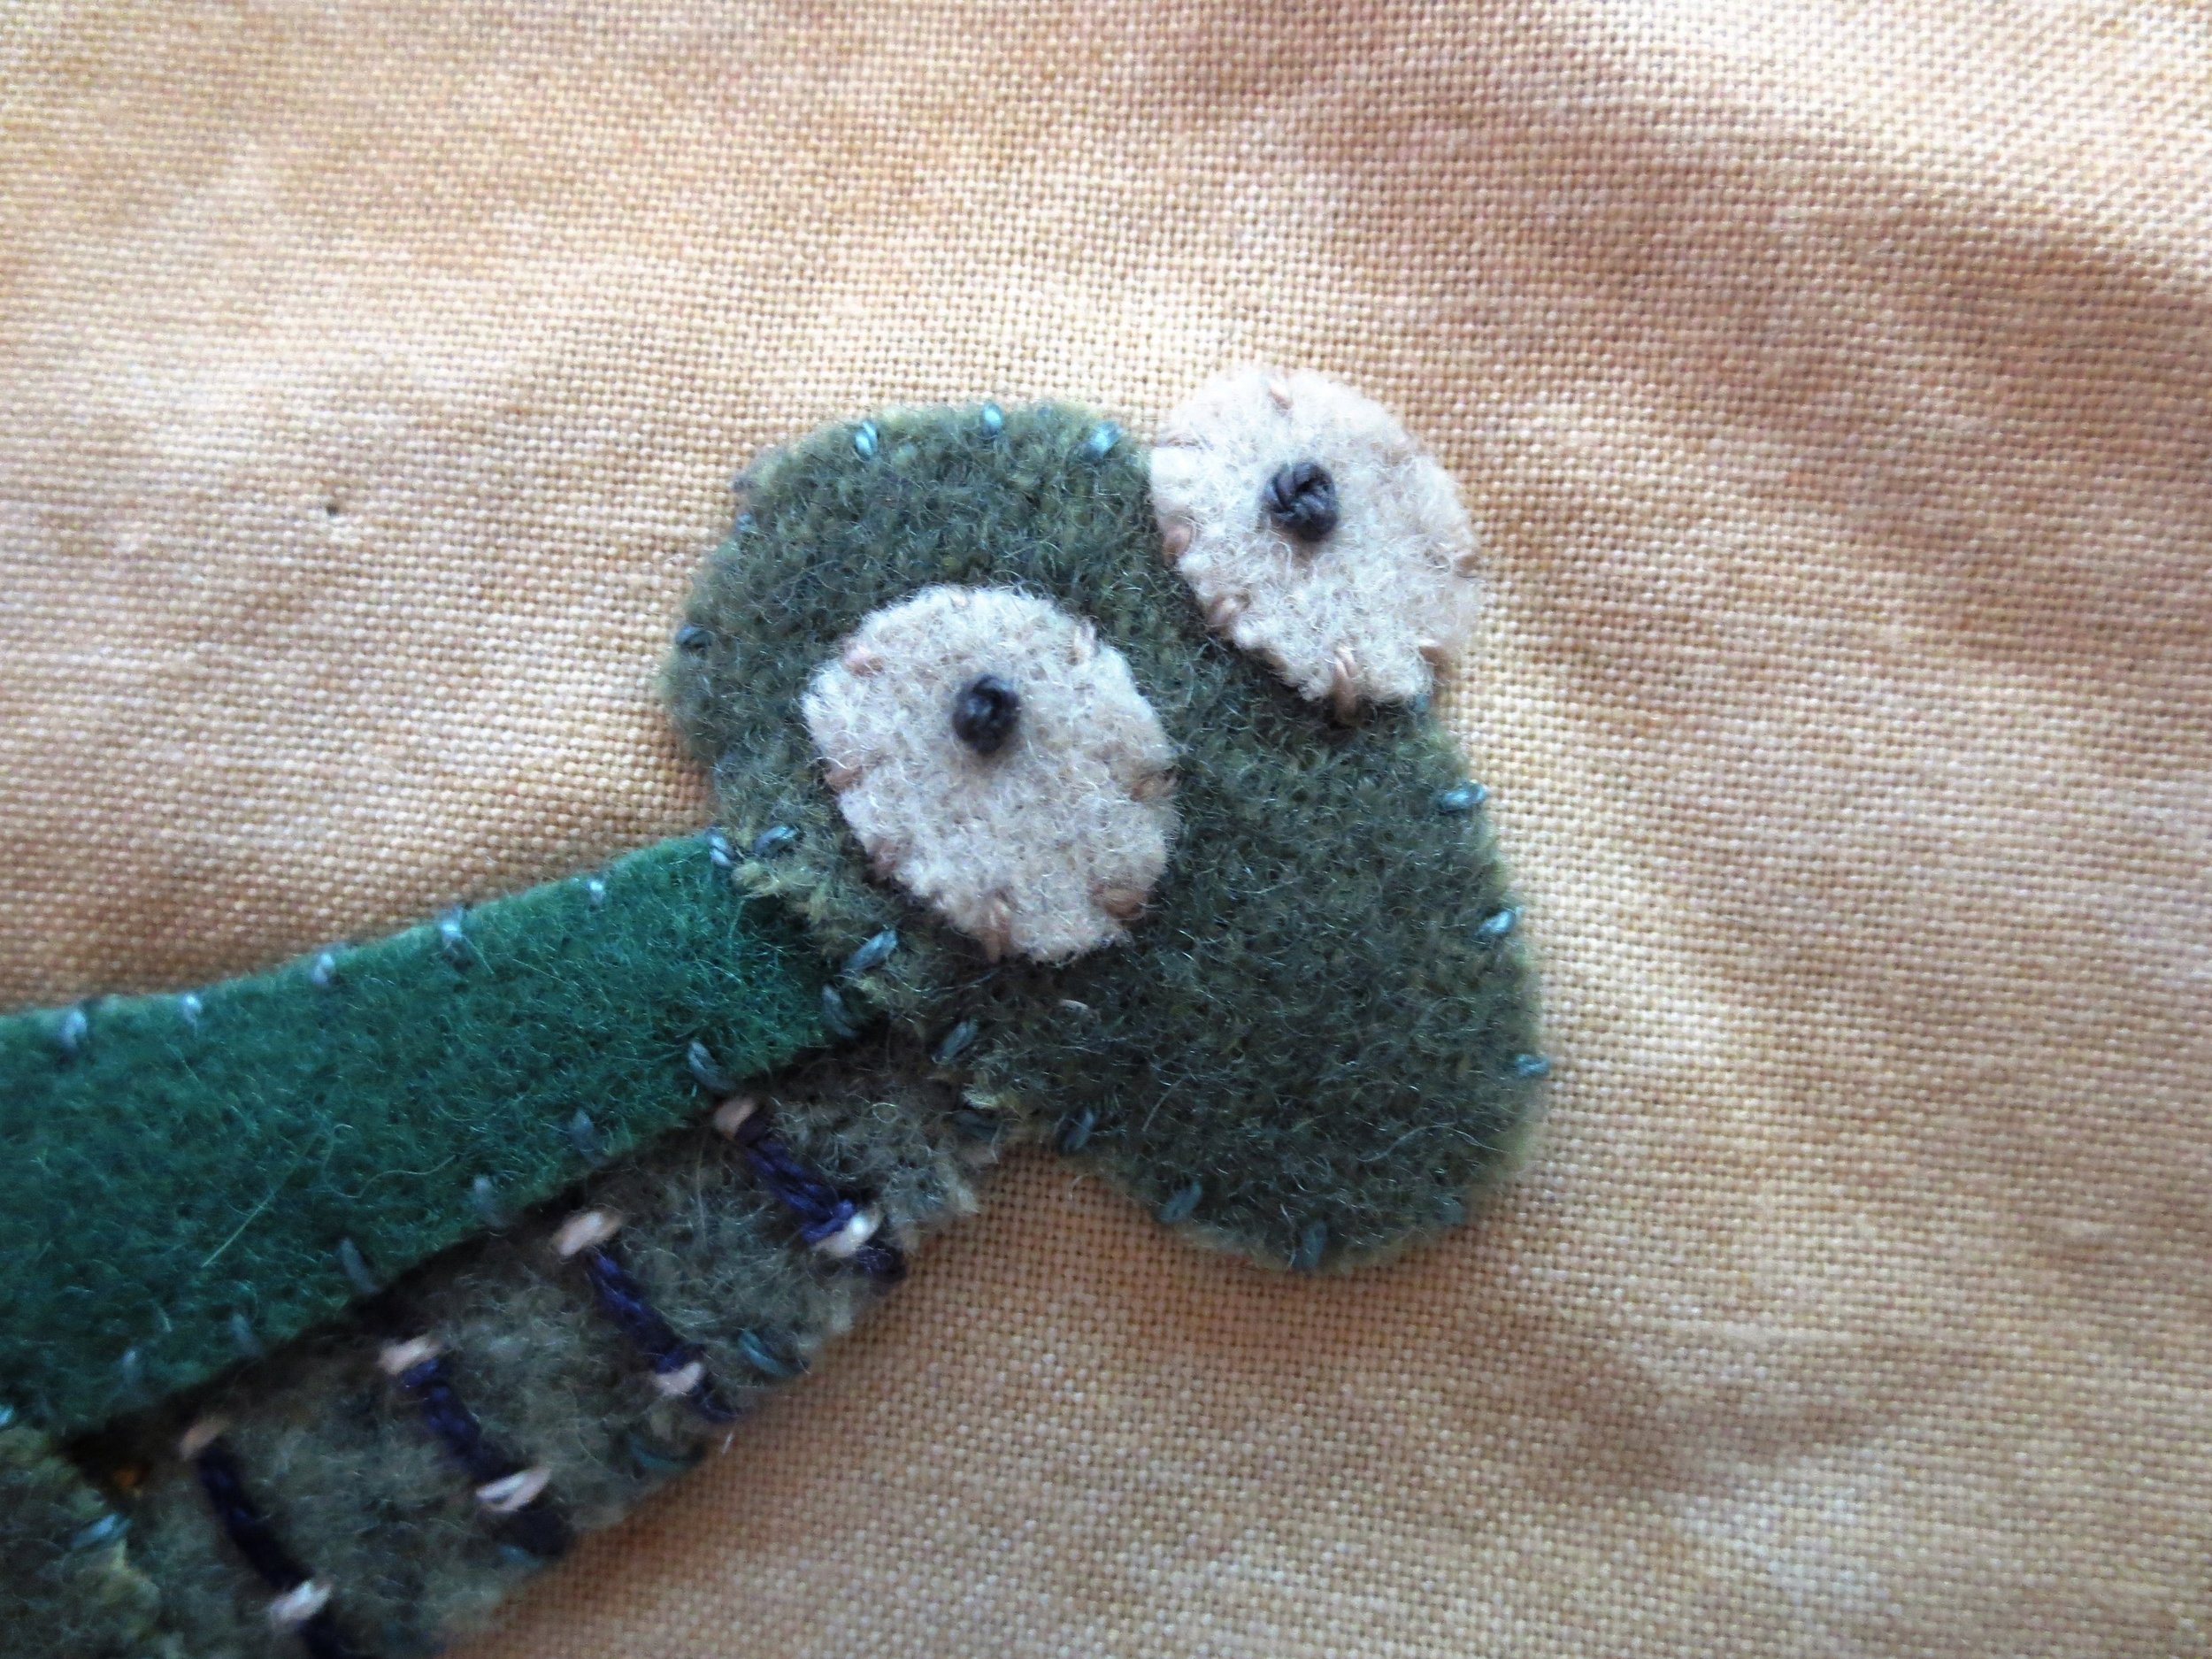
12. Stitch a single colonial knot slightly off-center in each eye. I used #135 (dark blue gray). I perfer that color over black.
13. Use a chalk pencil to draw the legs and antennae. Use the layout for placement.

14. Use #O518 to stem stitch over the lines.
15. Stitch a single colonial knot at the end of each antennae.
The finish line is in sight!
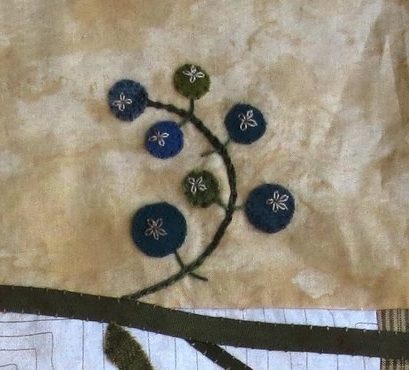
16. Draw a berry stem extending from the ribbon vine, approximately 2 3/4" from the head of the grasshopper.
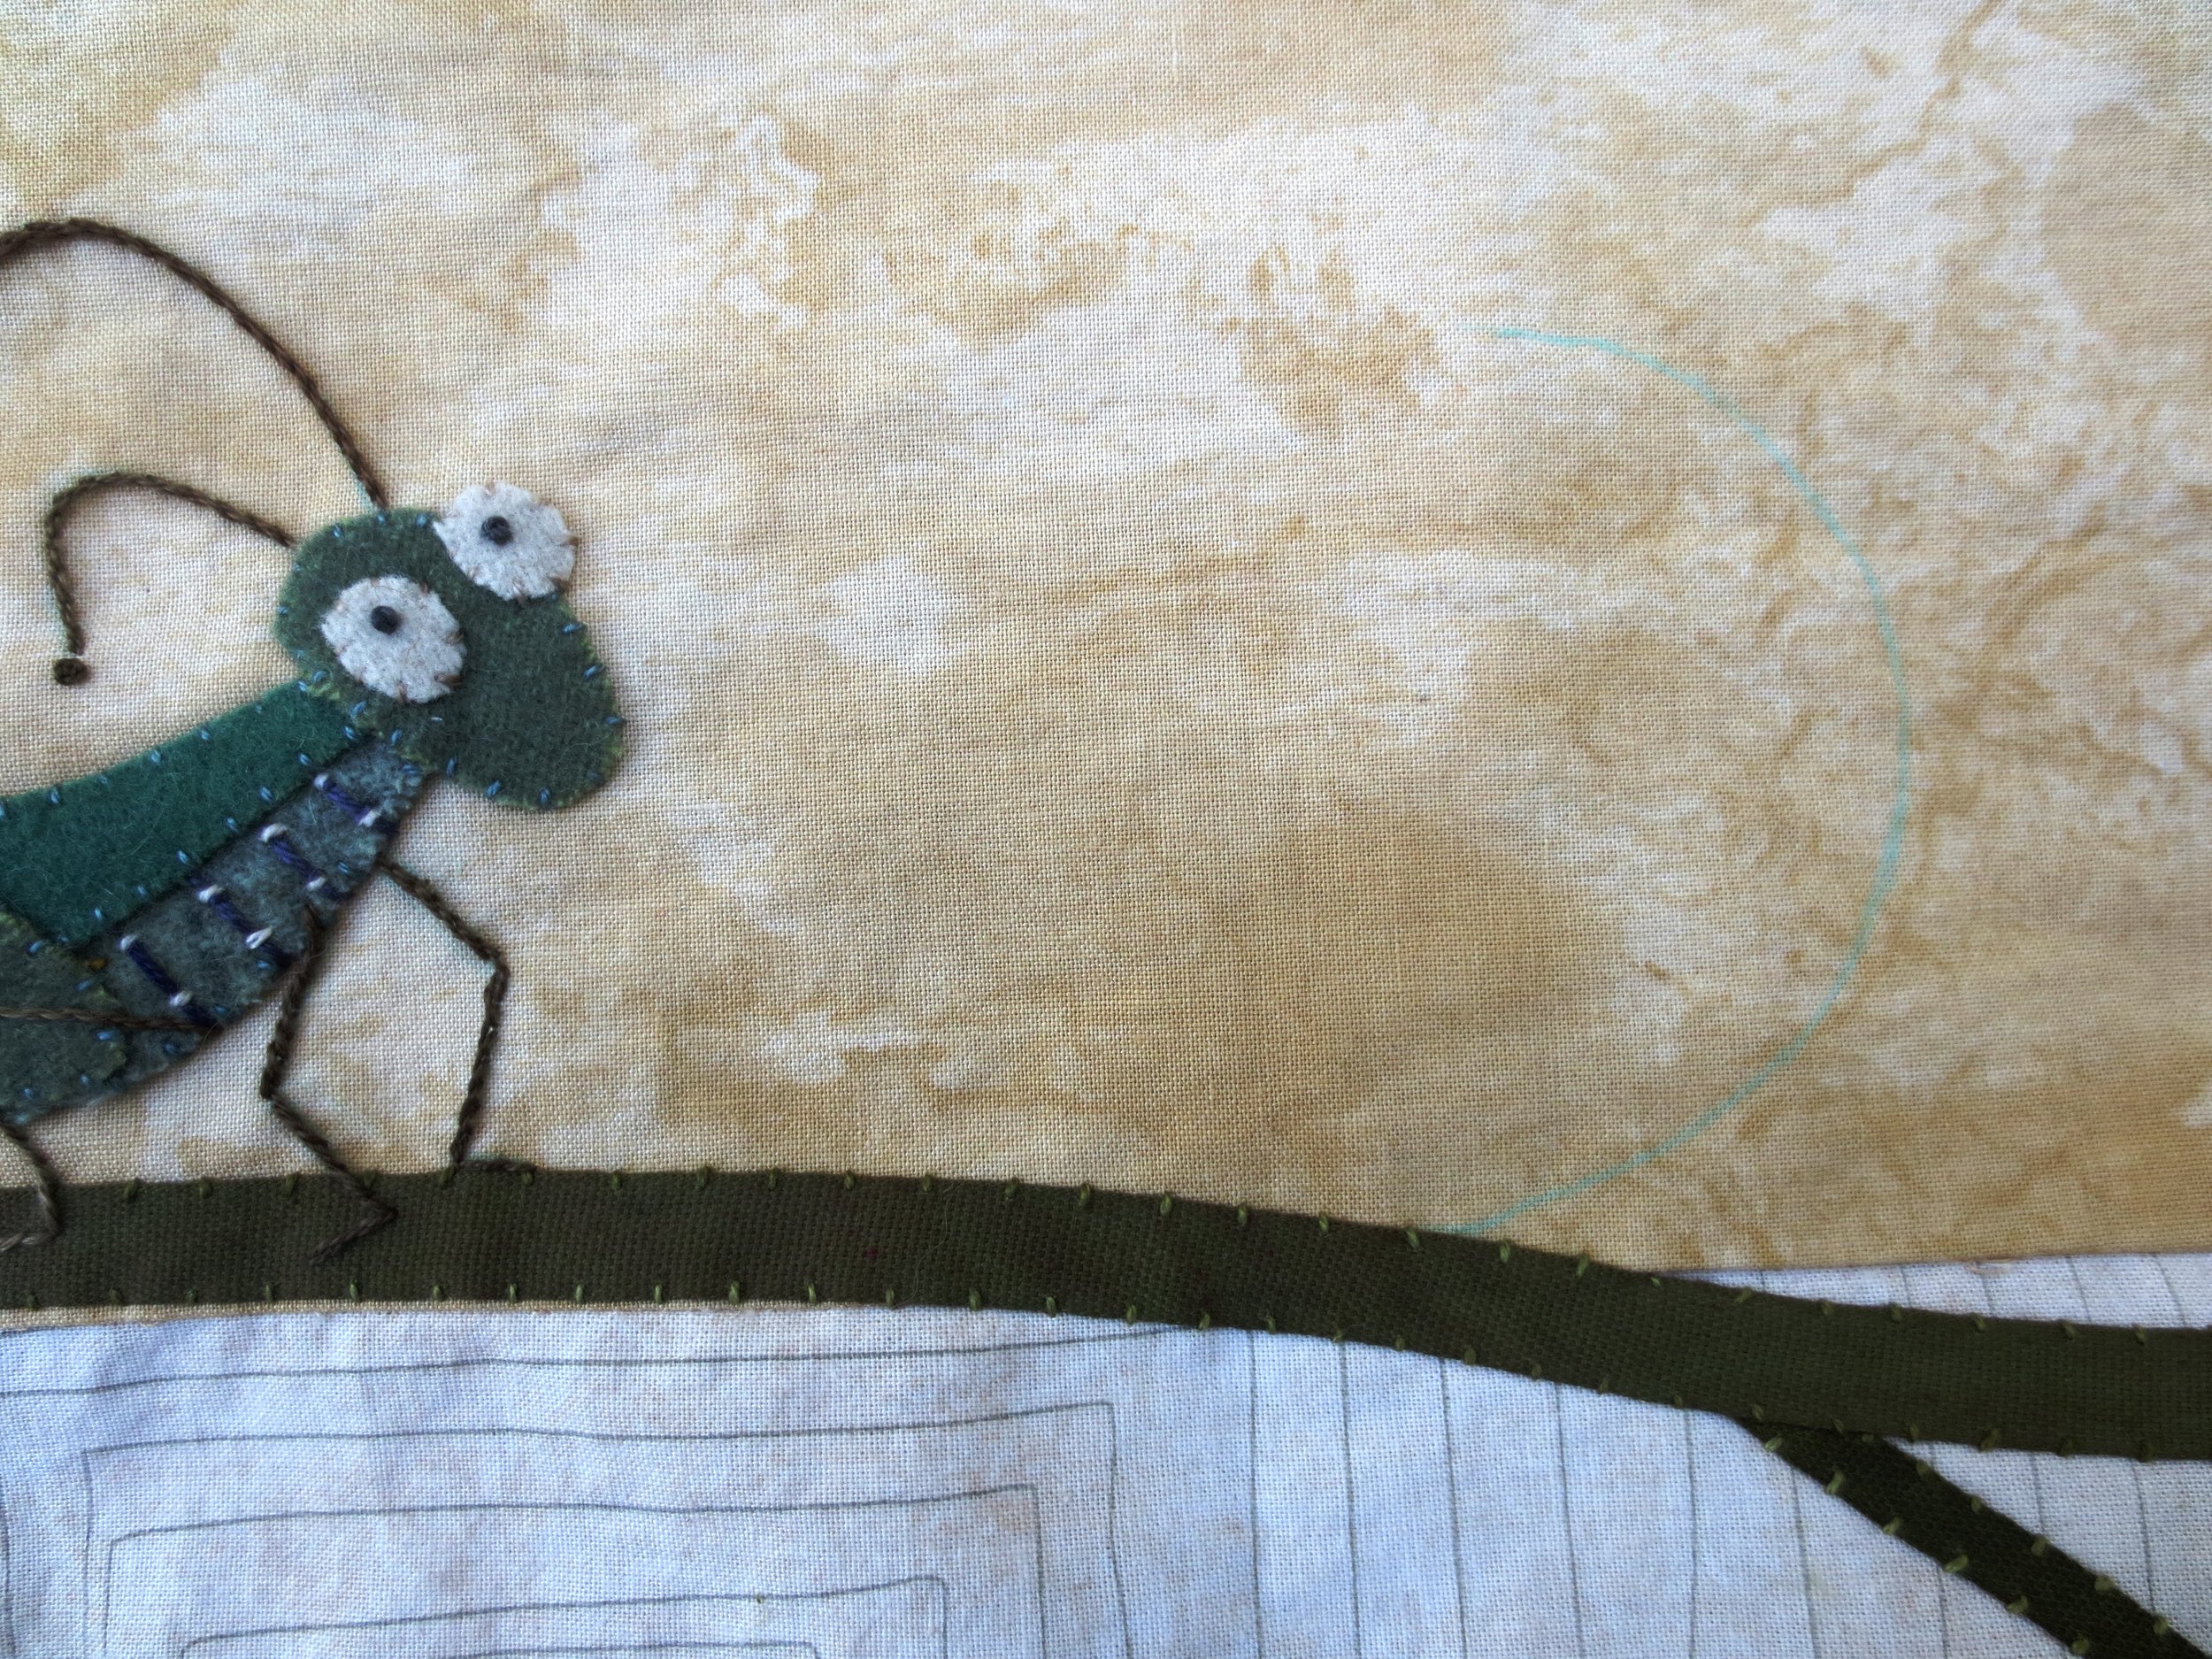
17 Stitch main stem and stems of berries as directed in Part I.
18. Position berries and leaf #10. Fuse in place using steam.
19. Whip stitch all pieces using thread that matches wool colors.
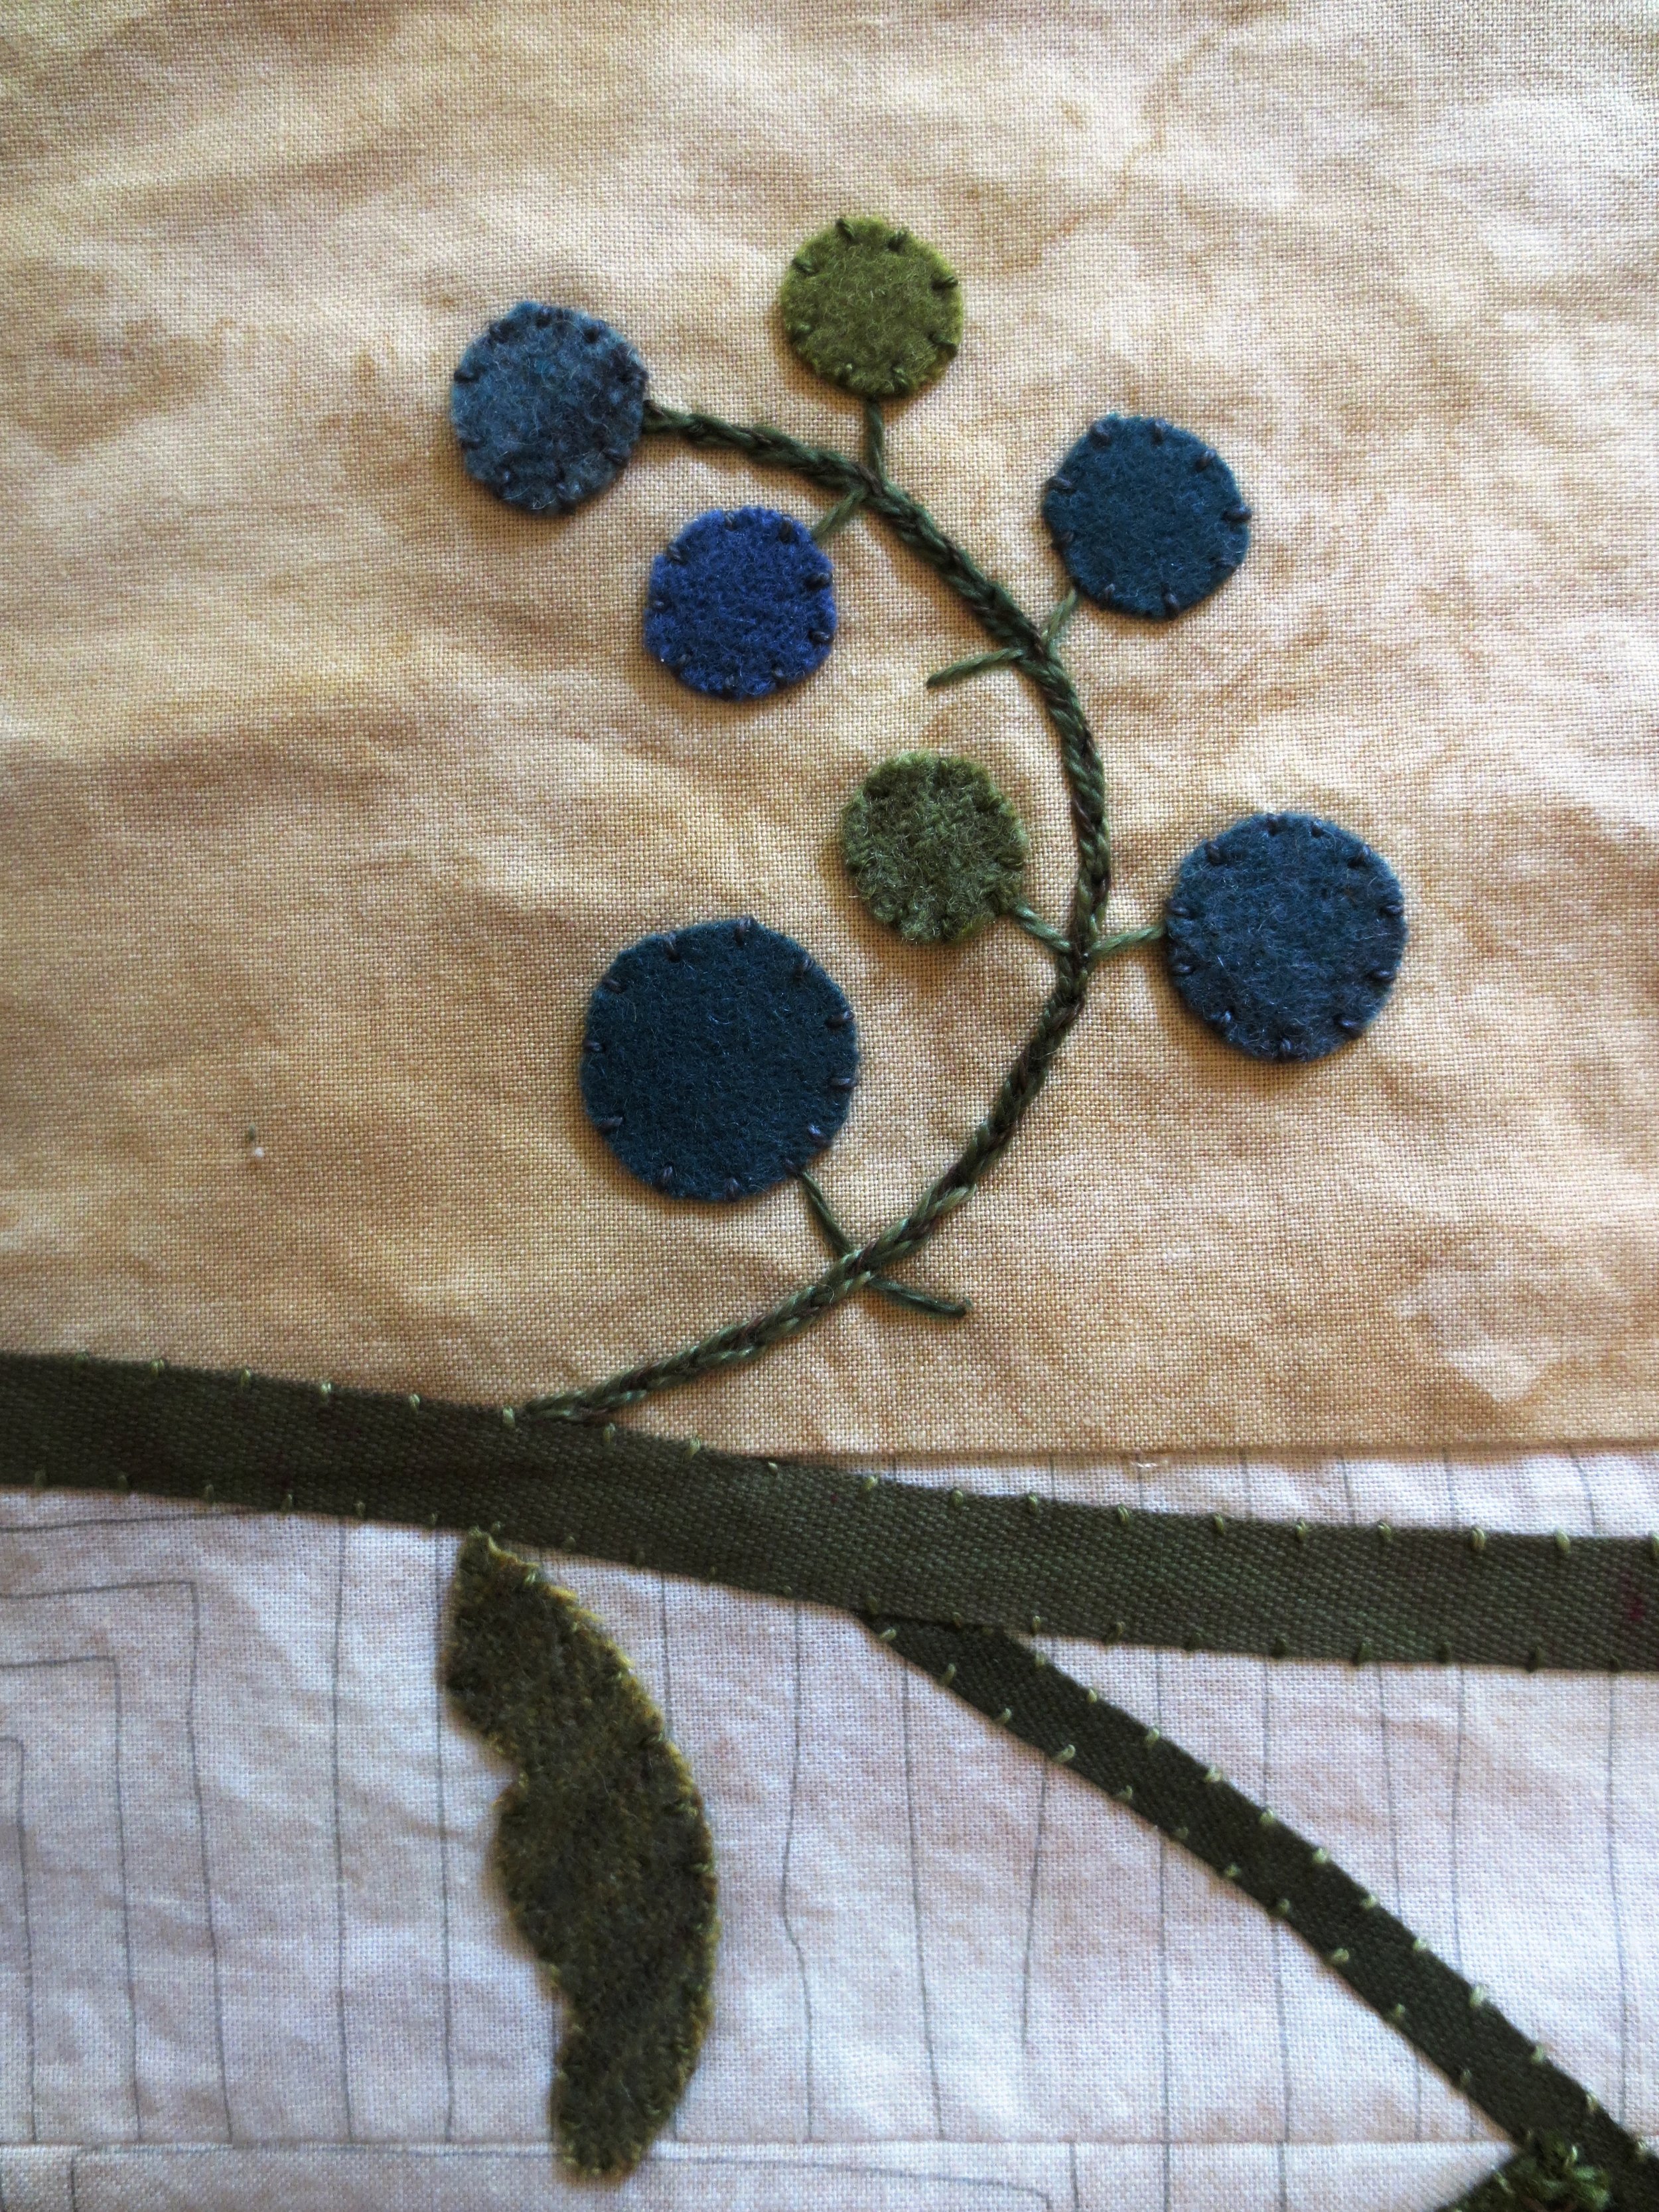
20. Stitch berry embellishment and leaf veins as directed in Part I.
That's it! The applique is complete!
Flowers From My Garden Mystery Quilt
This blog won't cover the making of the quilt sandwich or the quilting. There are plenty of blogs that can instruct you on finishing your quilt. I'm going to send mine out to be sandwiched and basted, then I will hand quilt it.
Your yardage requirements for binding, batting, and backing fabrics are listed below. A great website to use for calculating your fabric and batting requirements can found here:
http://www.quiltersparadiseesc.com/Calculators/Backing%20and%20Batting%20Calculator.php
- Binding - 1/2 yard of 43" wide fabric
- Batting - twin size 72" x 90"
- Backing - 3 1/3" yard of 43" wide fabric
Happy Stitching!