

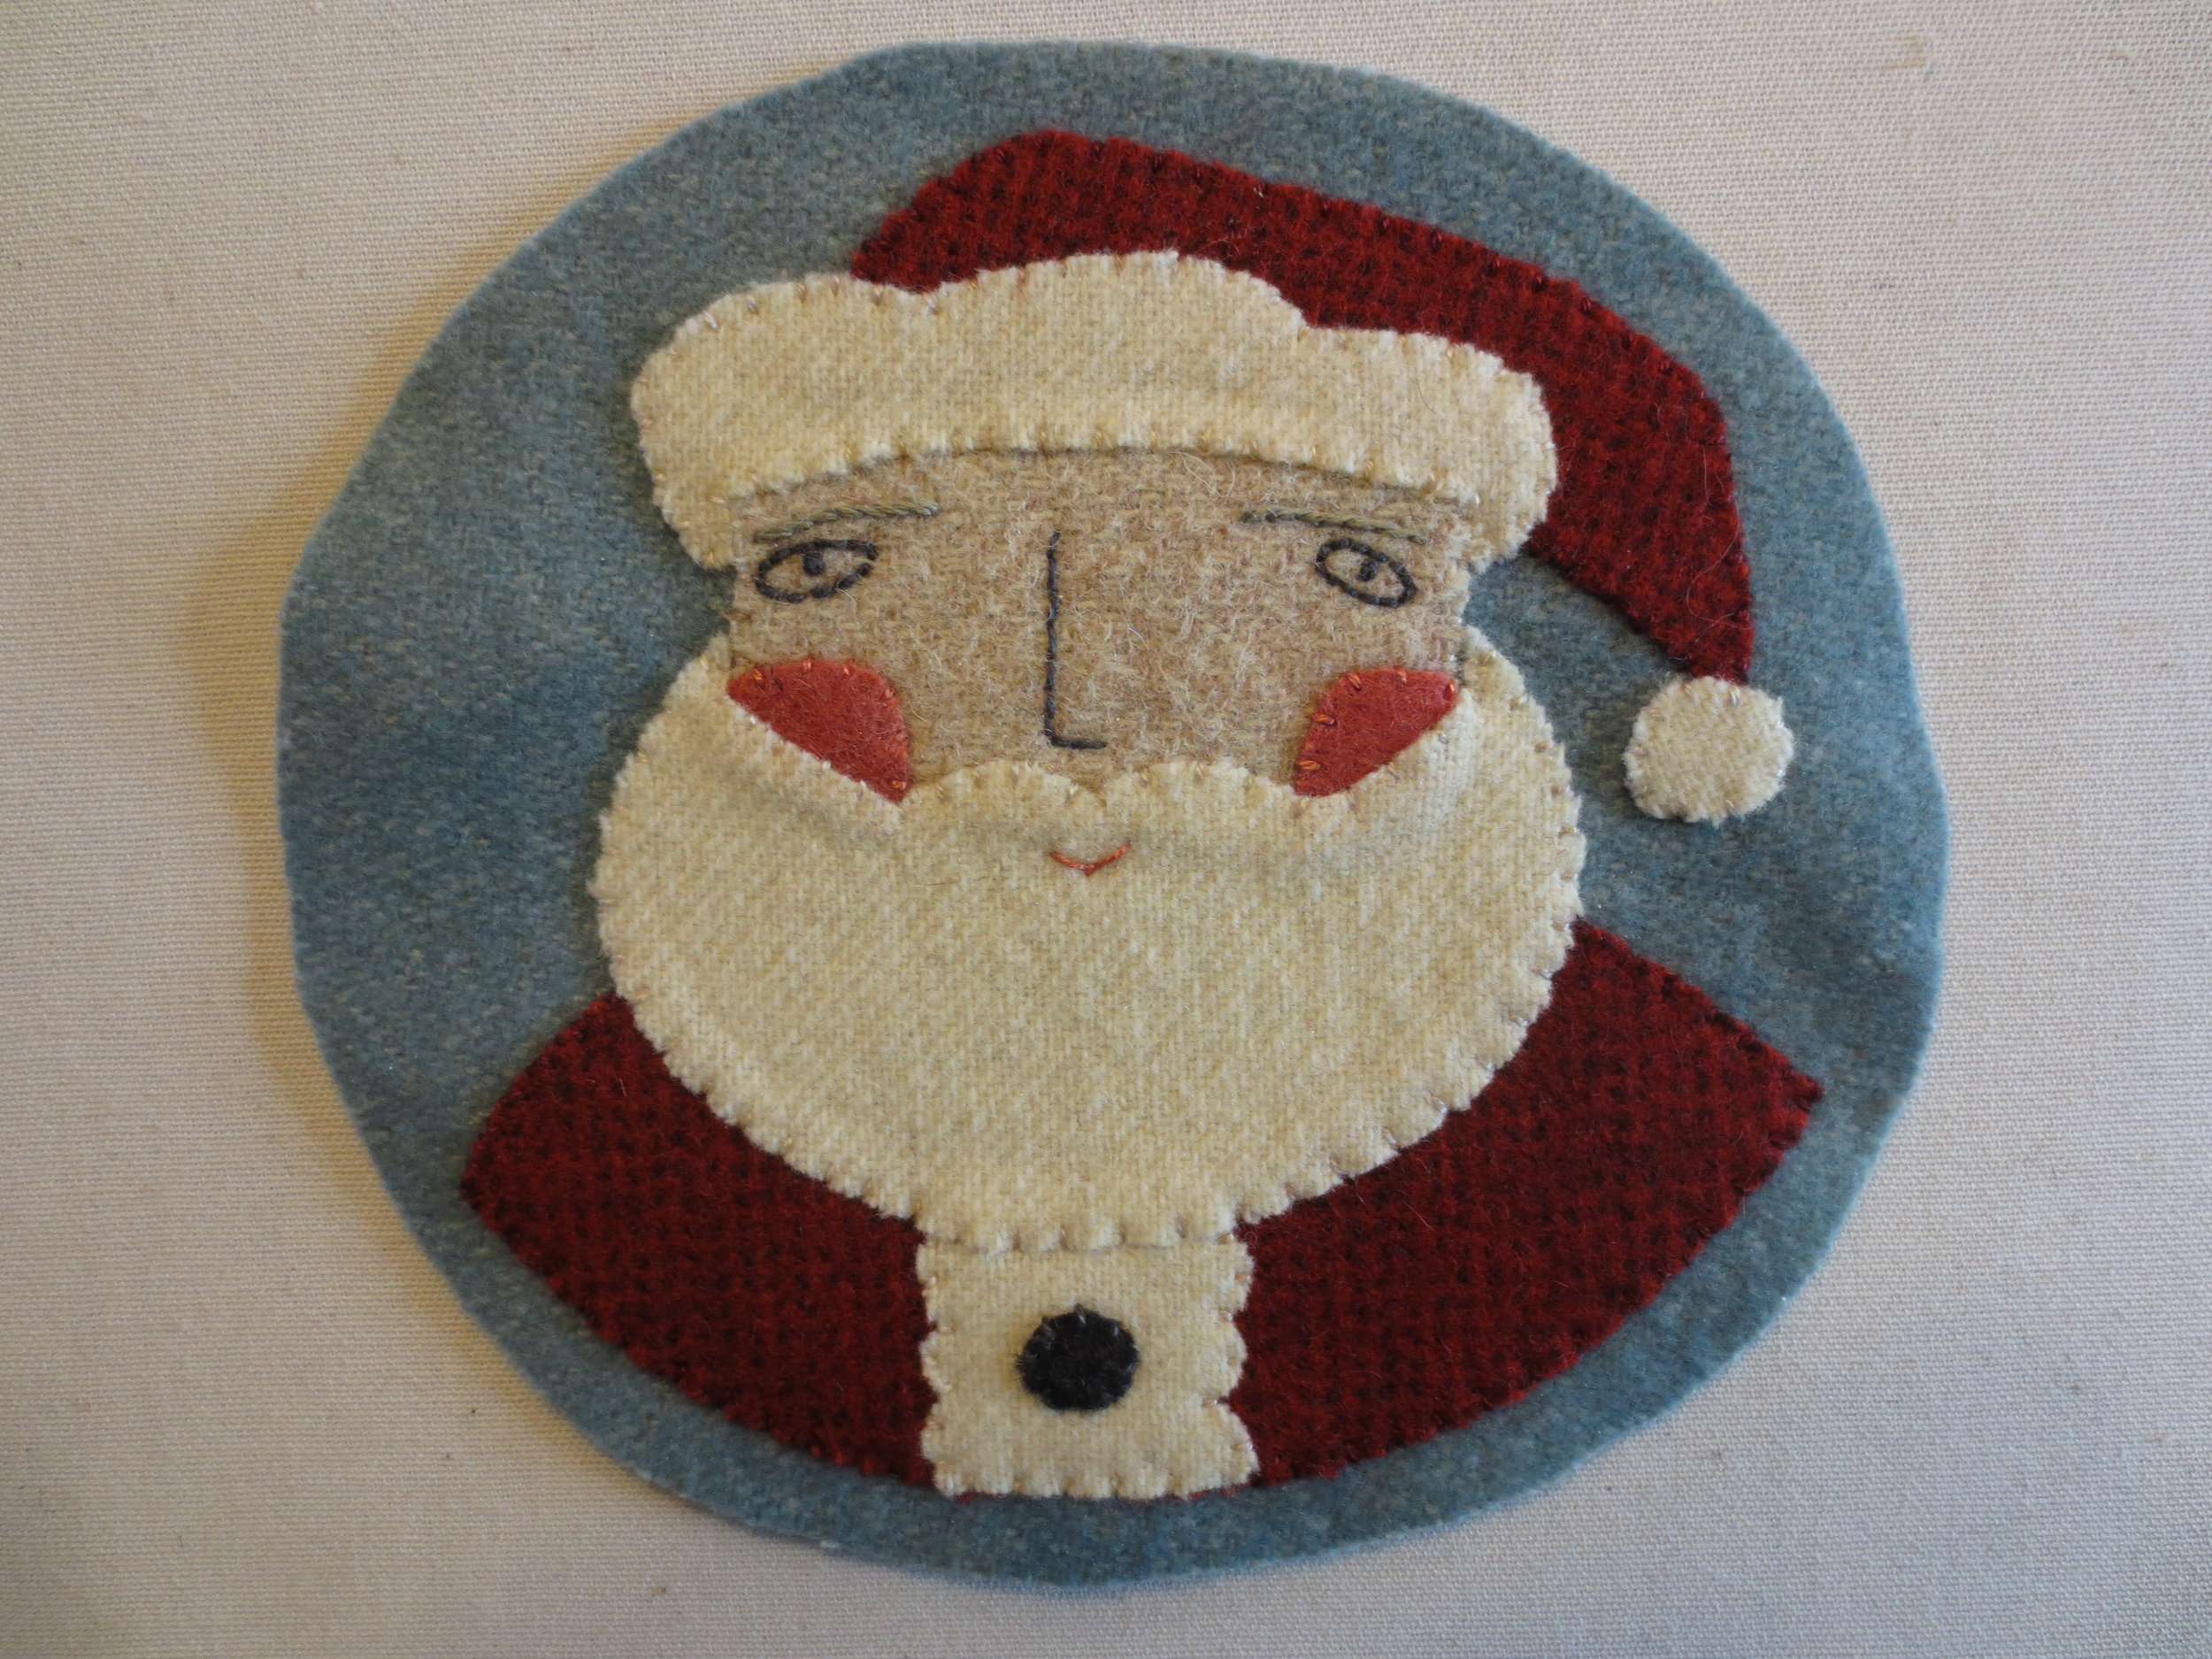
Jolly St. Nick

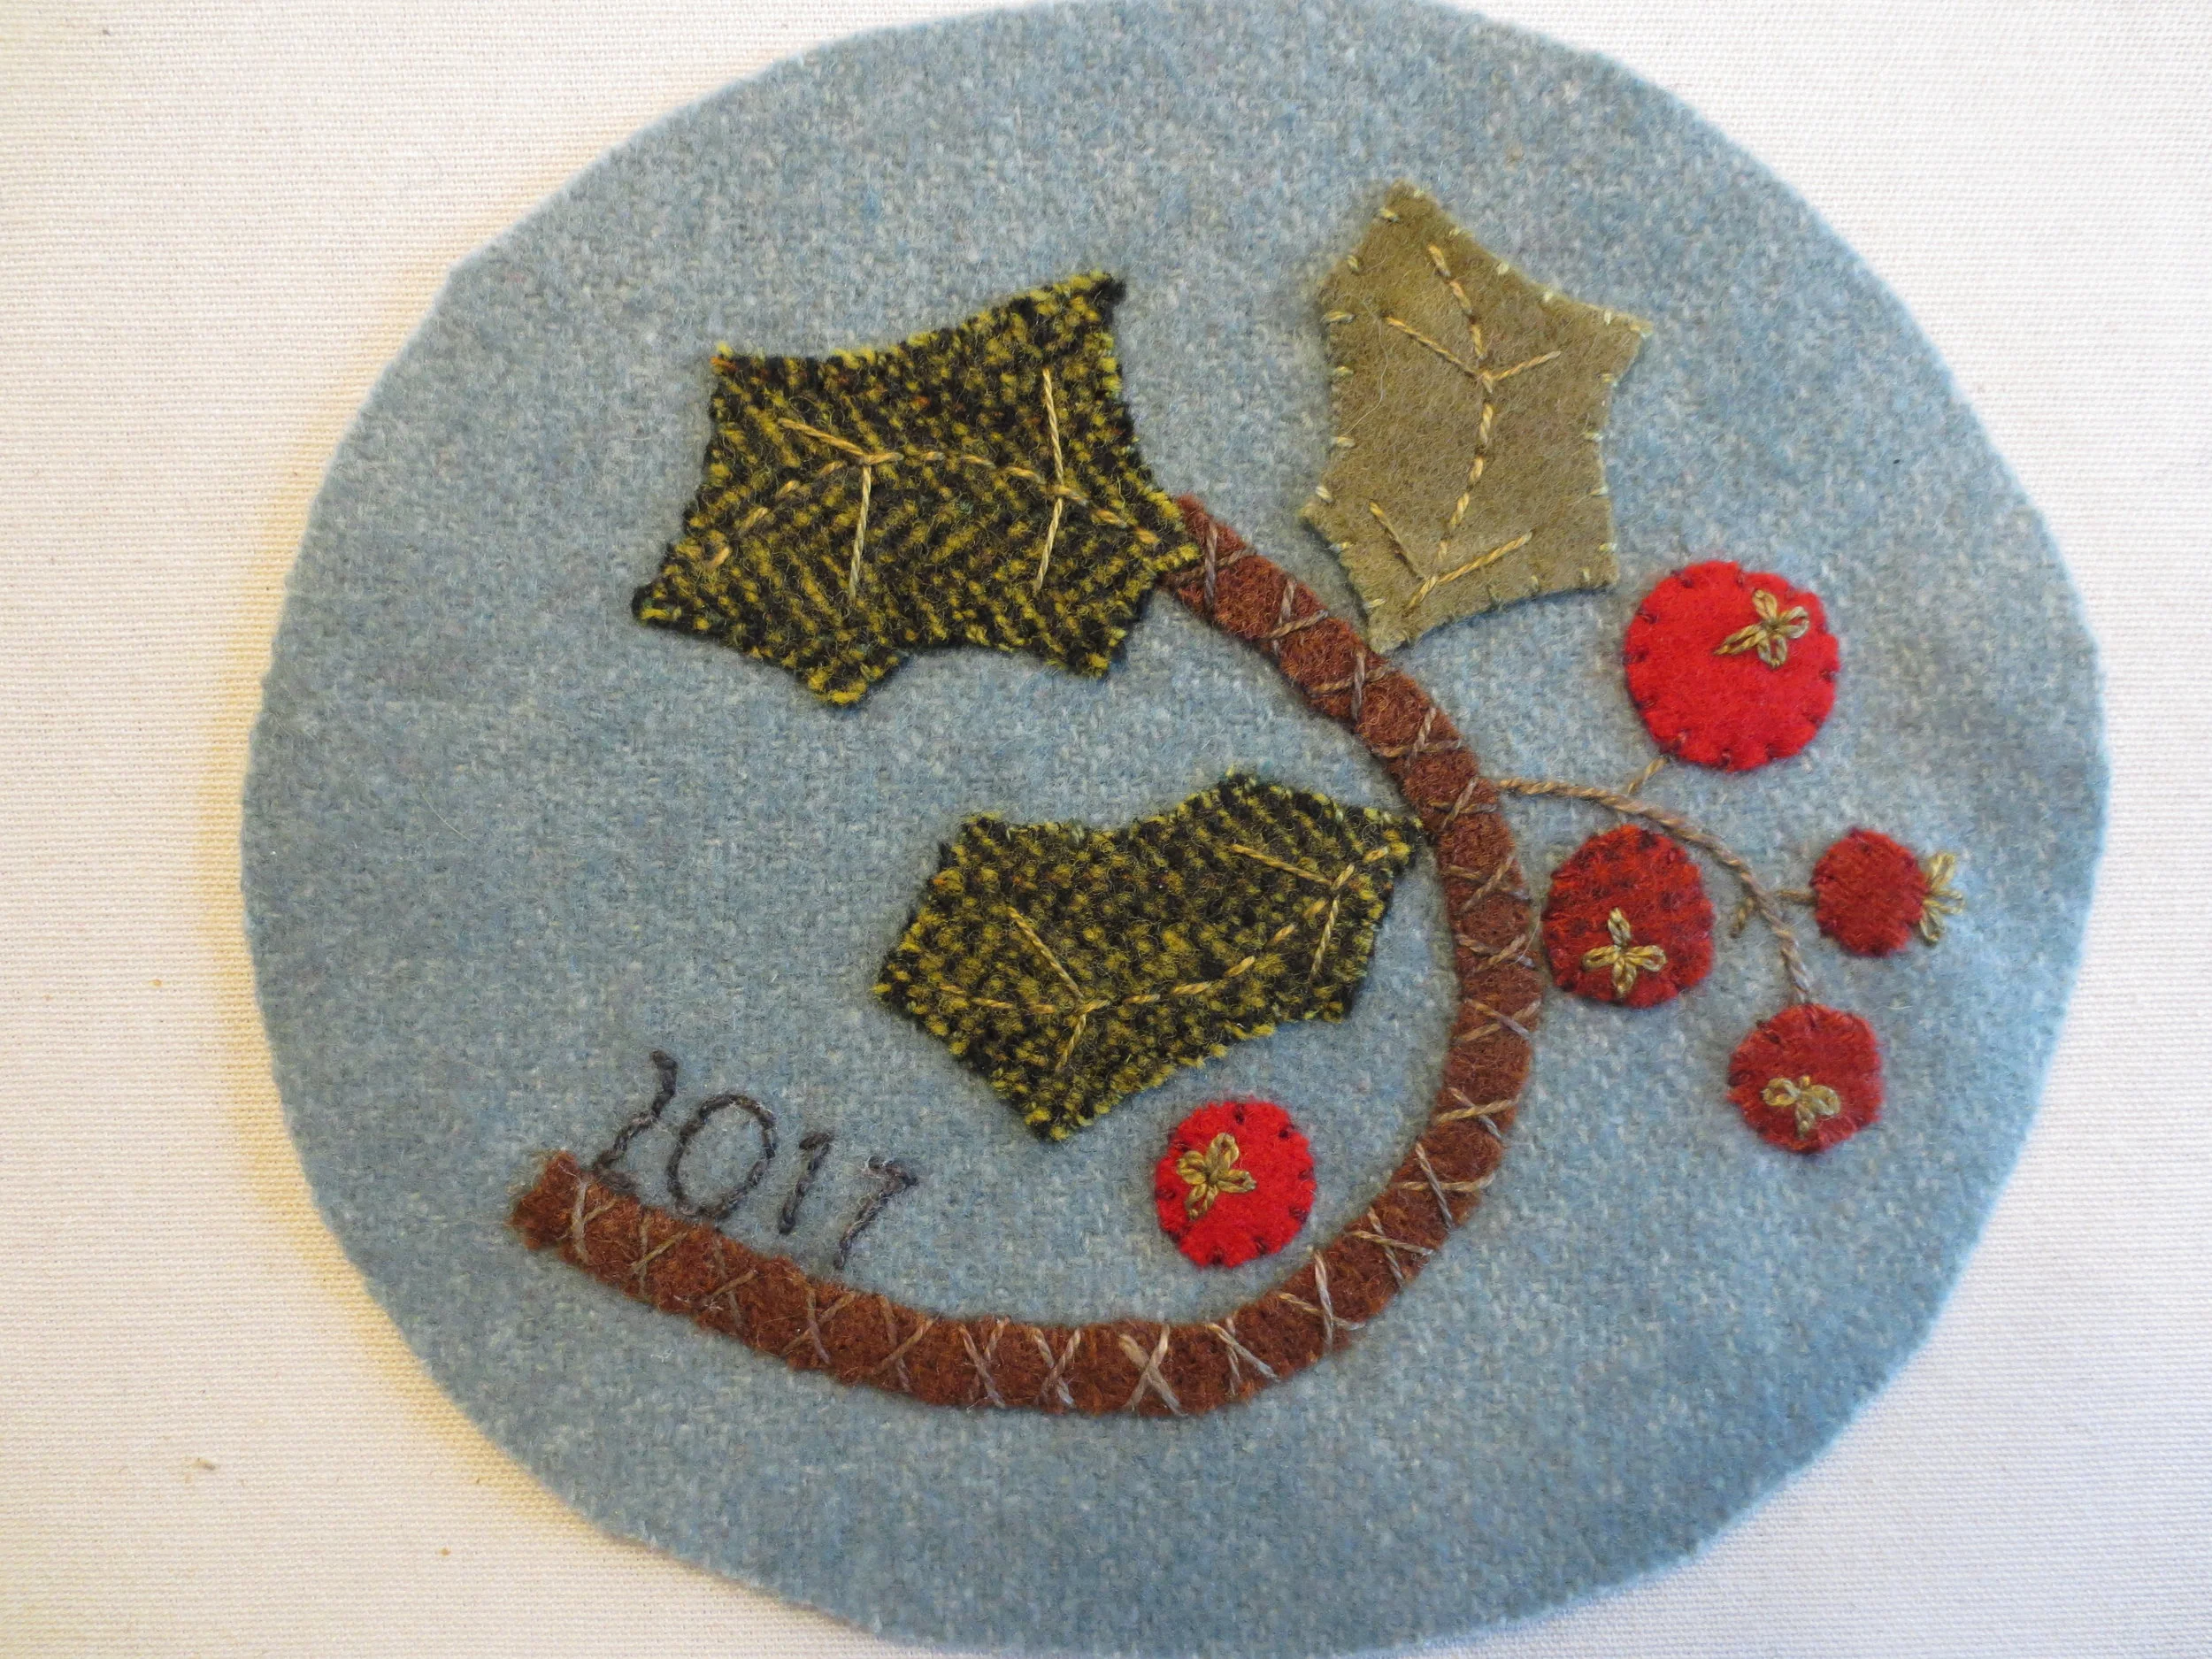
Jolly St. Nick Ornament (Back)
Remember the snowman ornament from my "Tis The Season" post? Well I made a Santa ornament at the same time, but I didn't make the instructions for it until now. It's an easy project that doesn't require a lot of wool, so get your scraps together and make two or three.
You will need:
Felted Wool
7" x 14" sky blue - background
4" x 6" red - hat and coat
2" x 5" white - fur and hat pom pom
3" x 4 1/2" Off white - beard
2 1/2" x 3 1/2" beige, tan, or brown - face
1" x 2" pink - cheeks
1" square - button
2 1/2" x 4" green plaid - leaves #1 & #3
2" square green solid - leaf #2
1" red plaid - berries #1
1 1/2" x 2" red solid - berries #2 & #4
1" x 2" dark red solid - berries #3 & #5
1" x 6" brown solid - holly stem
Thread - Perle cotton, size 12 or 2 strands of embroidery floss
ecru - fur, beard, face
red - coat, hat, berries
pink - cheeks
grey - eyes, nose, blanket stitch border
pale grey - eyebrows
antique gold - veins of leaves, berry embellishment
brown - holly stem
green - leaves
Misc
light weight fusible web (Feather weight Heat 'n' Bond or Vilene Melt Fuse)
Freezer paper
Fine point chalk pencil
Sulky Sticky Fabri-Solvy -used to transfer Santa's face and date onto wool
Fine point permanent marker
Chenille needle, size 24
Polyester fiberfill - I used Soft n Crafty from JoAnn Fabric and Craft.
8" length of 20 gauge wire (Optional) - hanger (Look for this in the jewelry section of your local craft store)
Instructions - Use one strand of the thread unless otherwise noted.
Download layout and pattern, and stitch guide if needed.
Trace all patterns, except for background, onto fusible web (images are reversed for use with fusible web).
Cut out patterns leaving a small (1/8") border around each piece.
Fuse patterns onto designated wools and cut out along outline.
Trace background pattern onto freezer paper.
Cut out leaving a small border.
Fuse onto blue background and cut out along outline.
Remove the freezer paper from wool background and repeat step 7 to make an additional background.
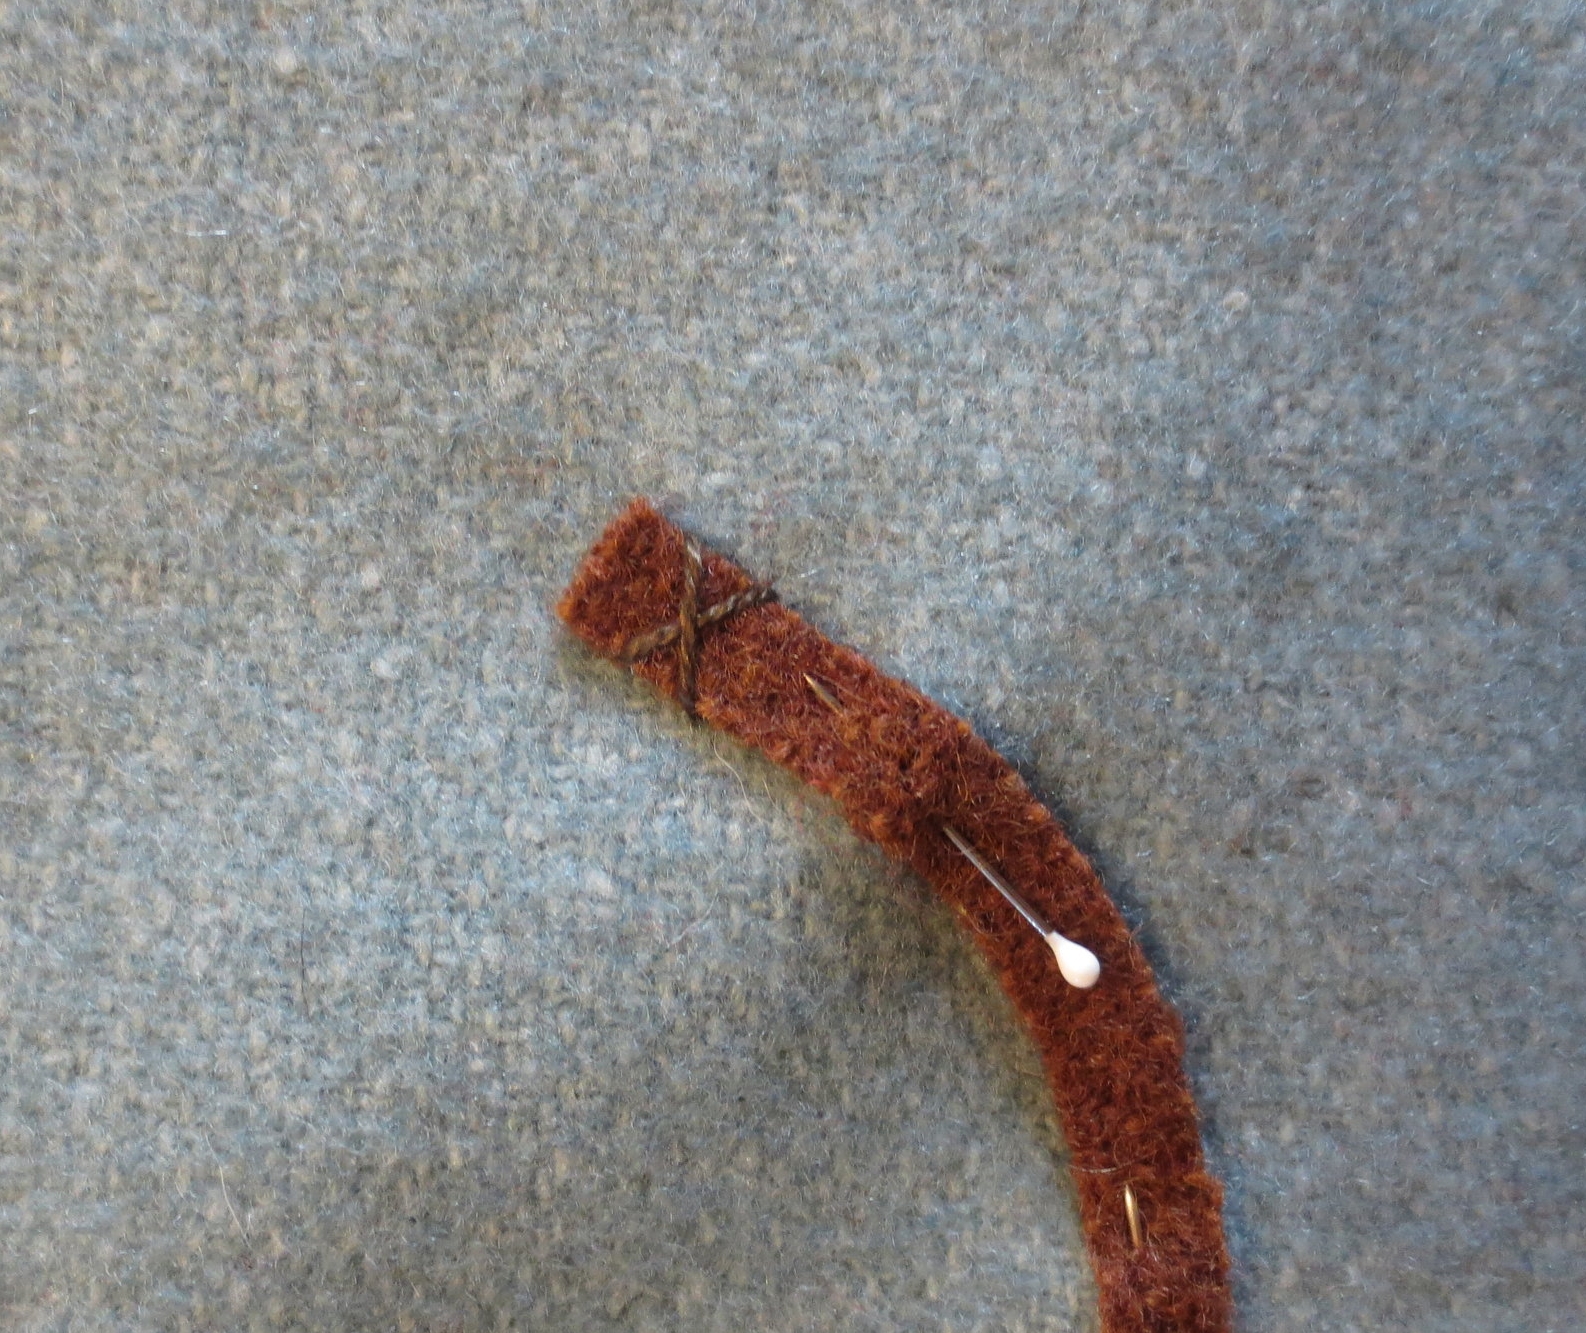
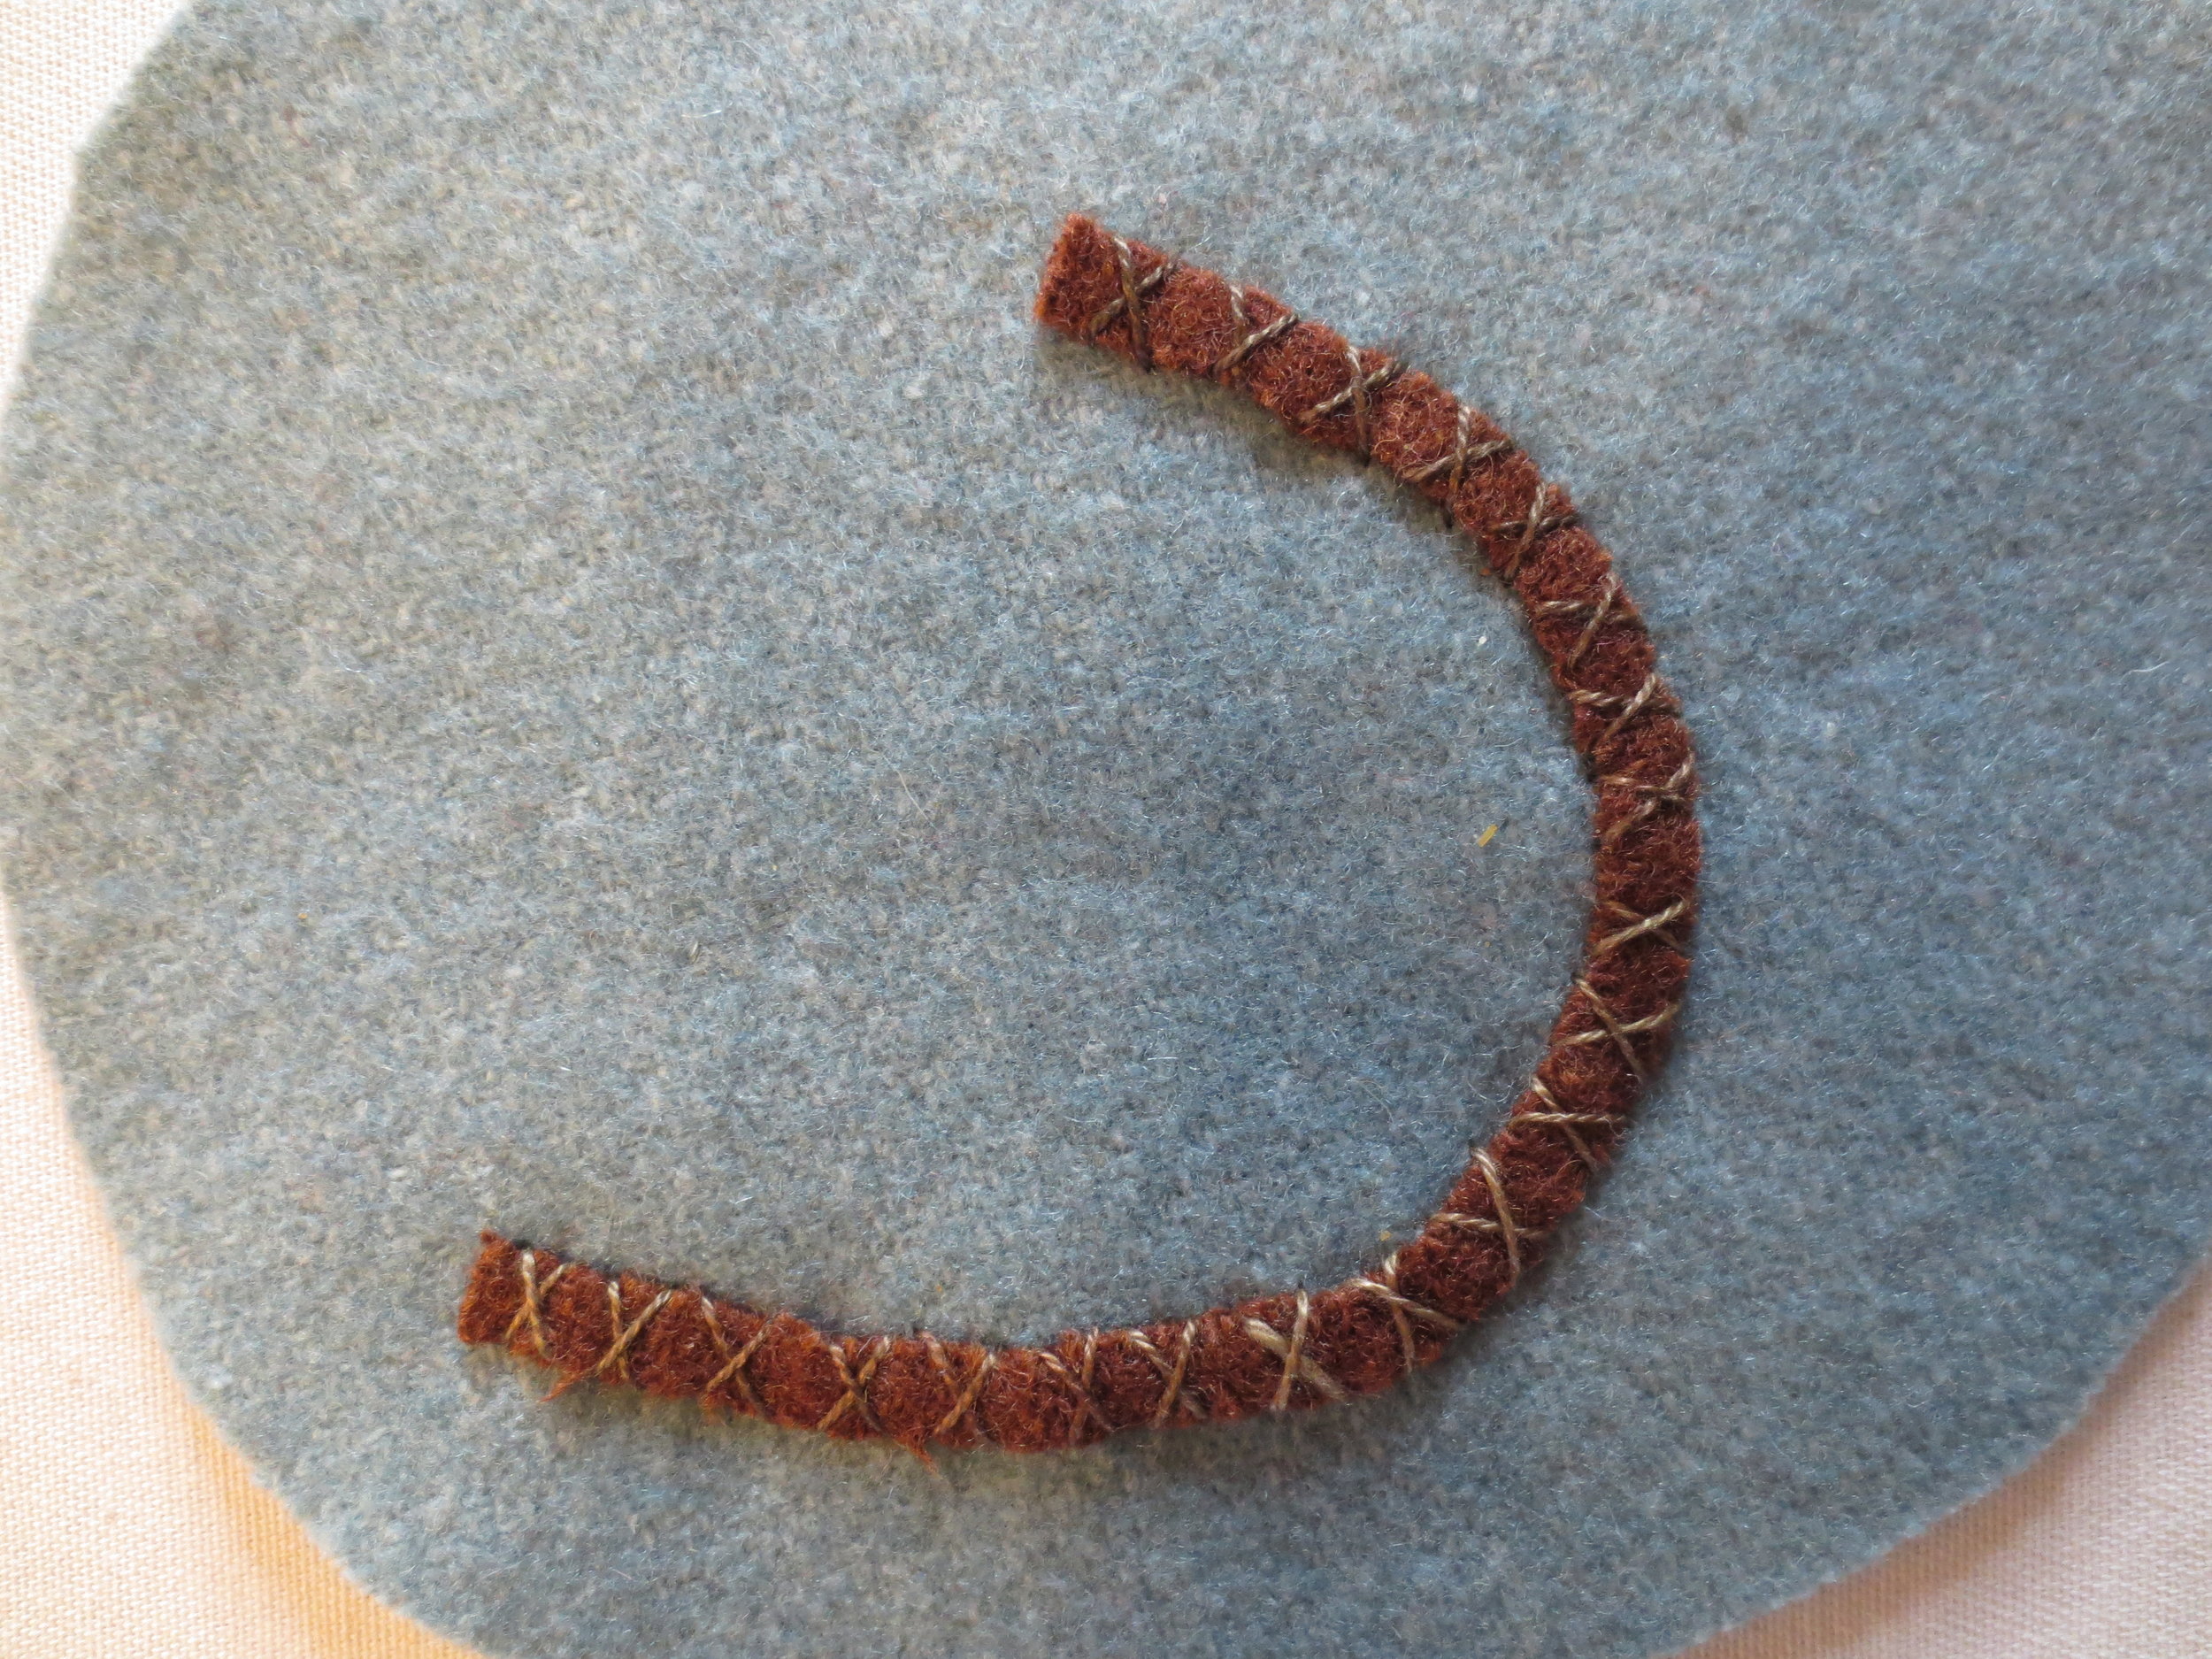
Cut a 1/4" x 6" strip of brown wool for the holly stem.

Wool for Jolly St. Nick ornament
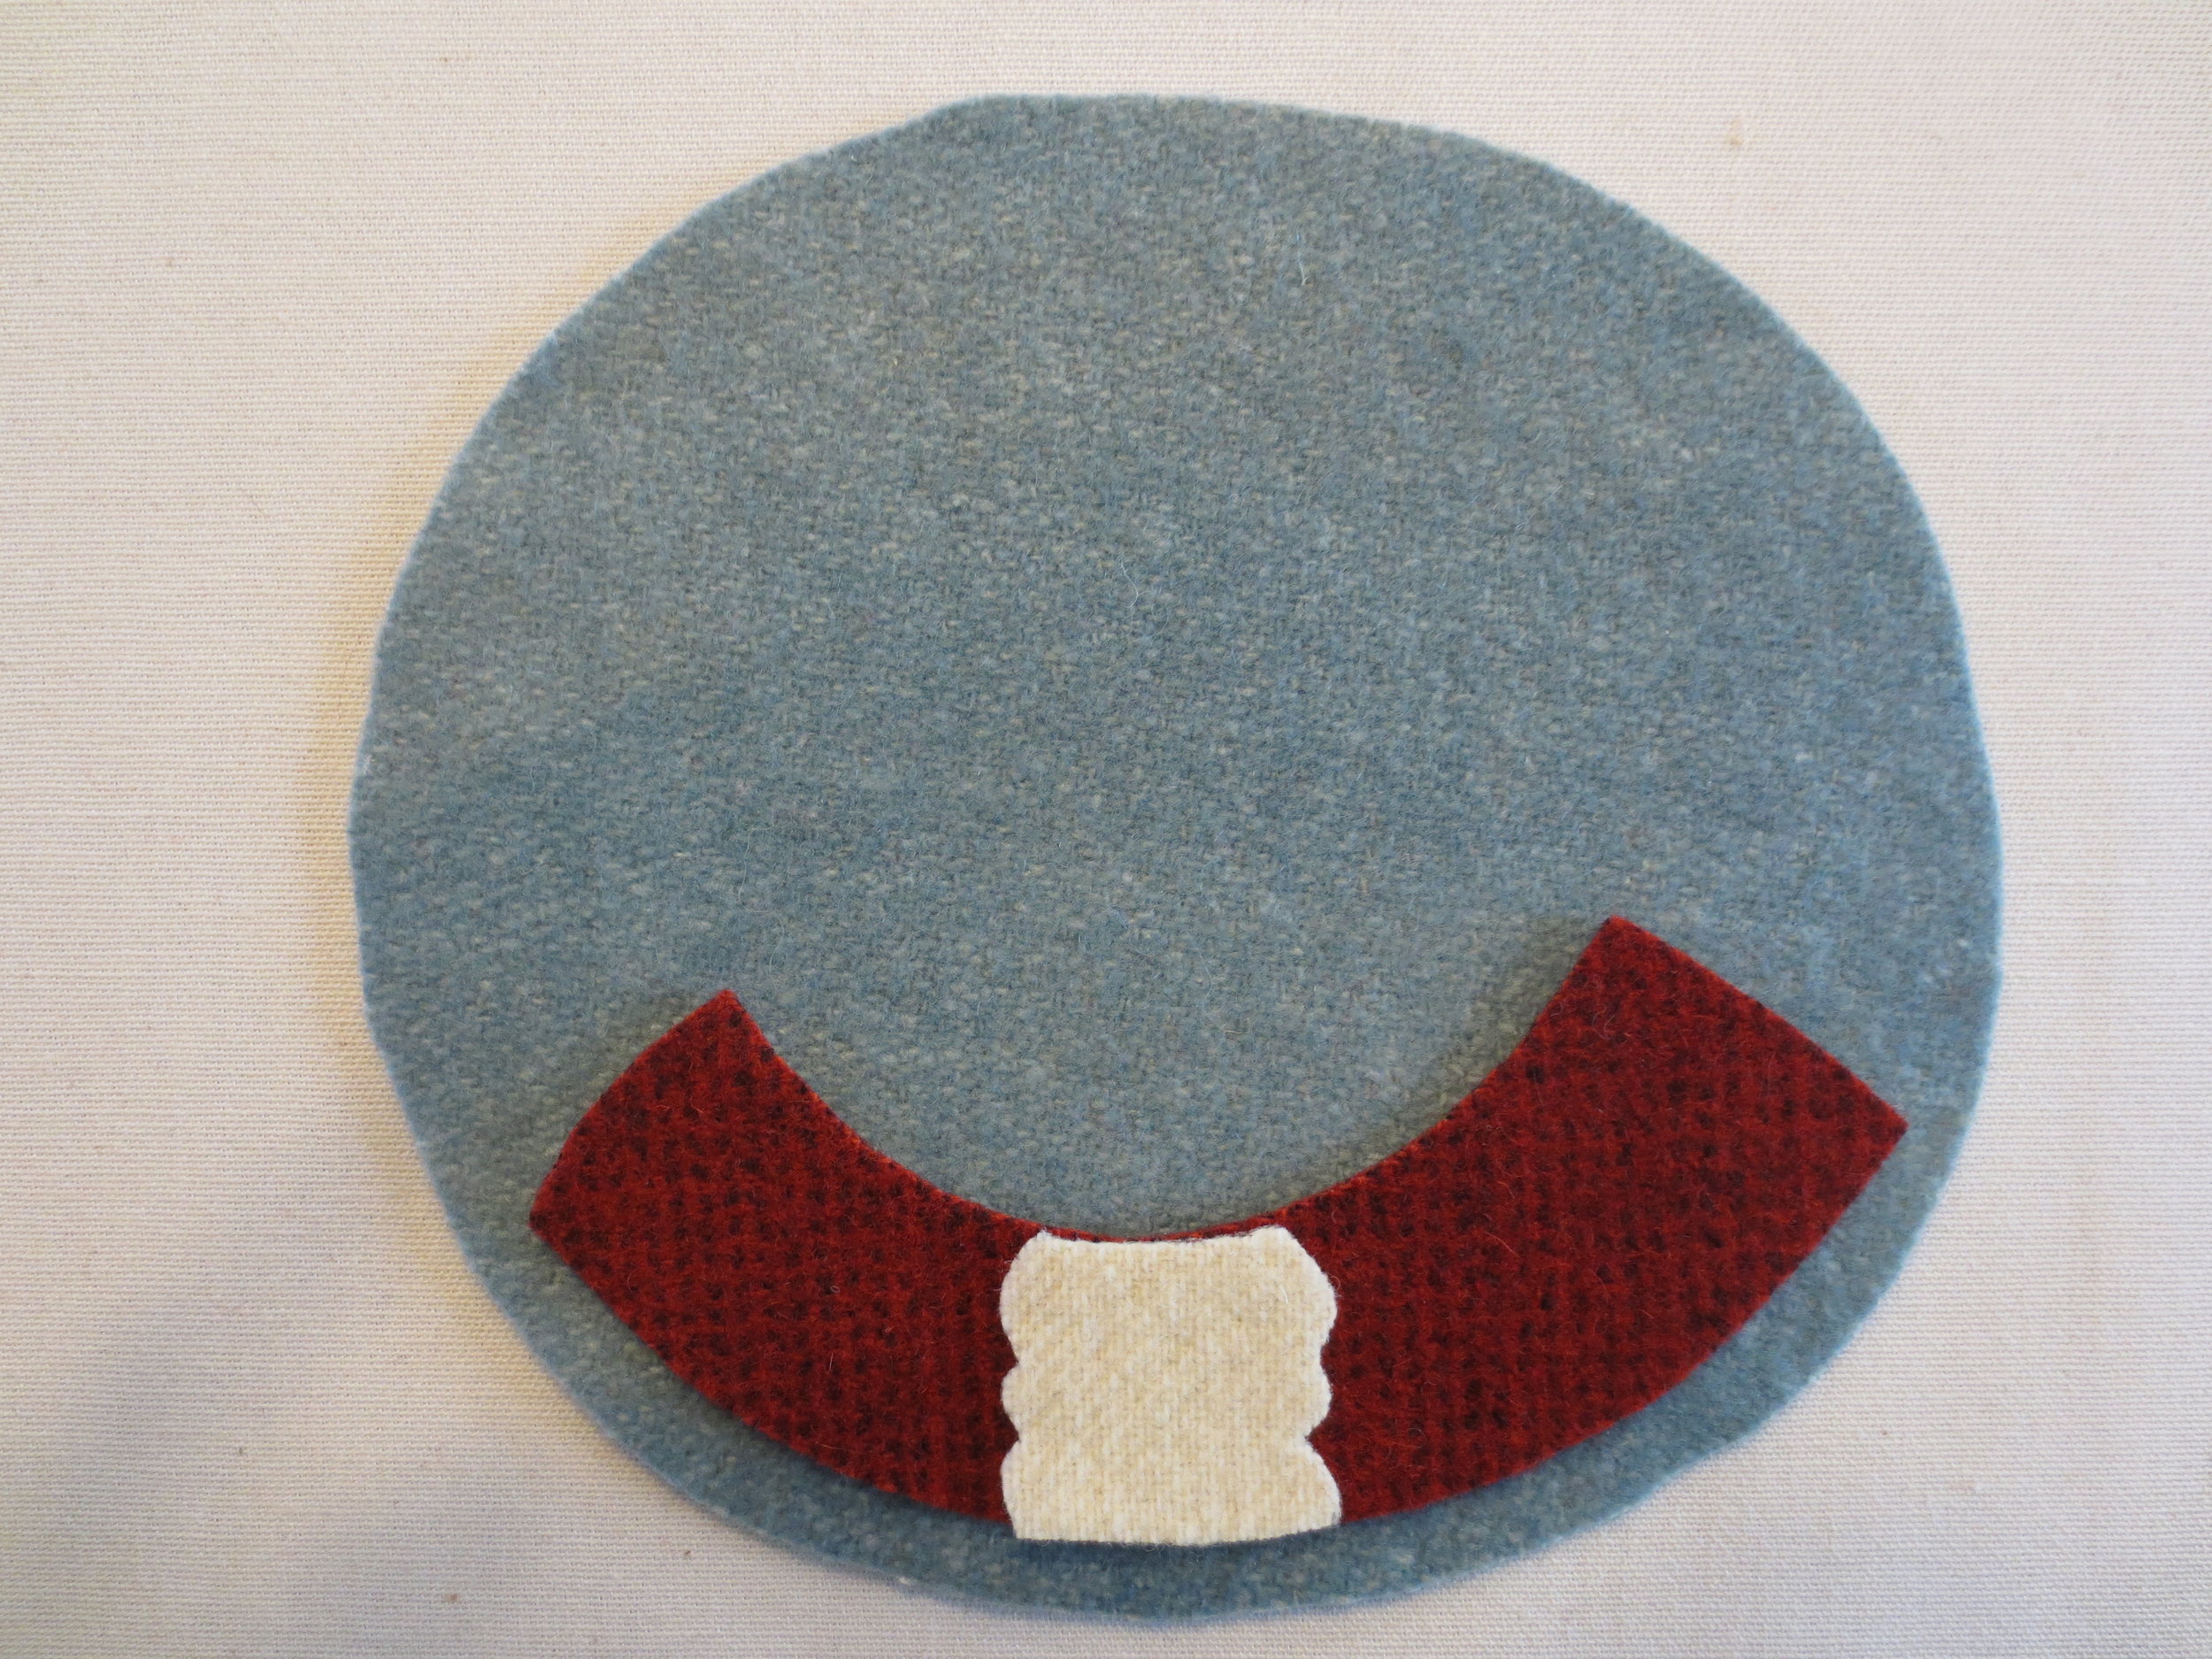
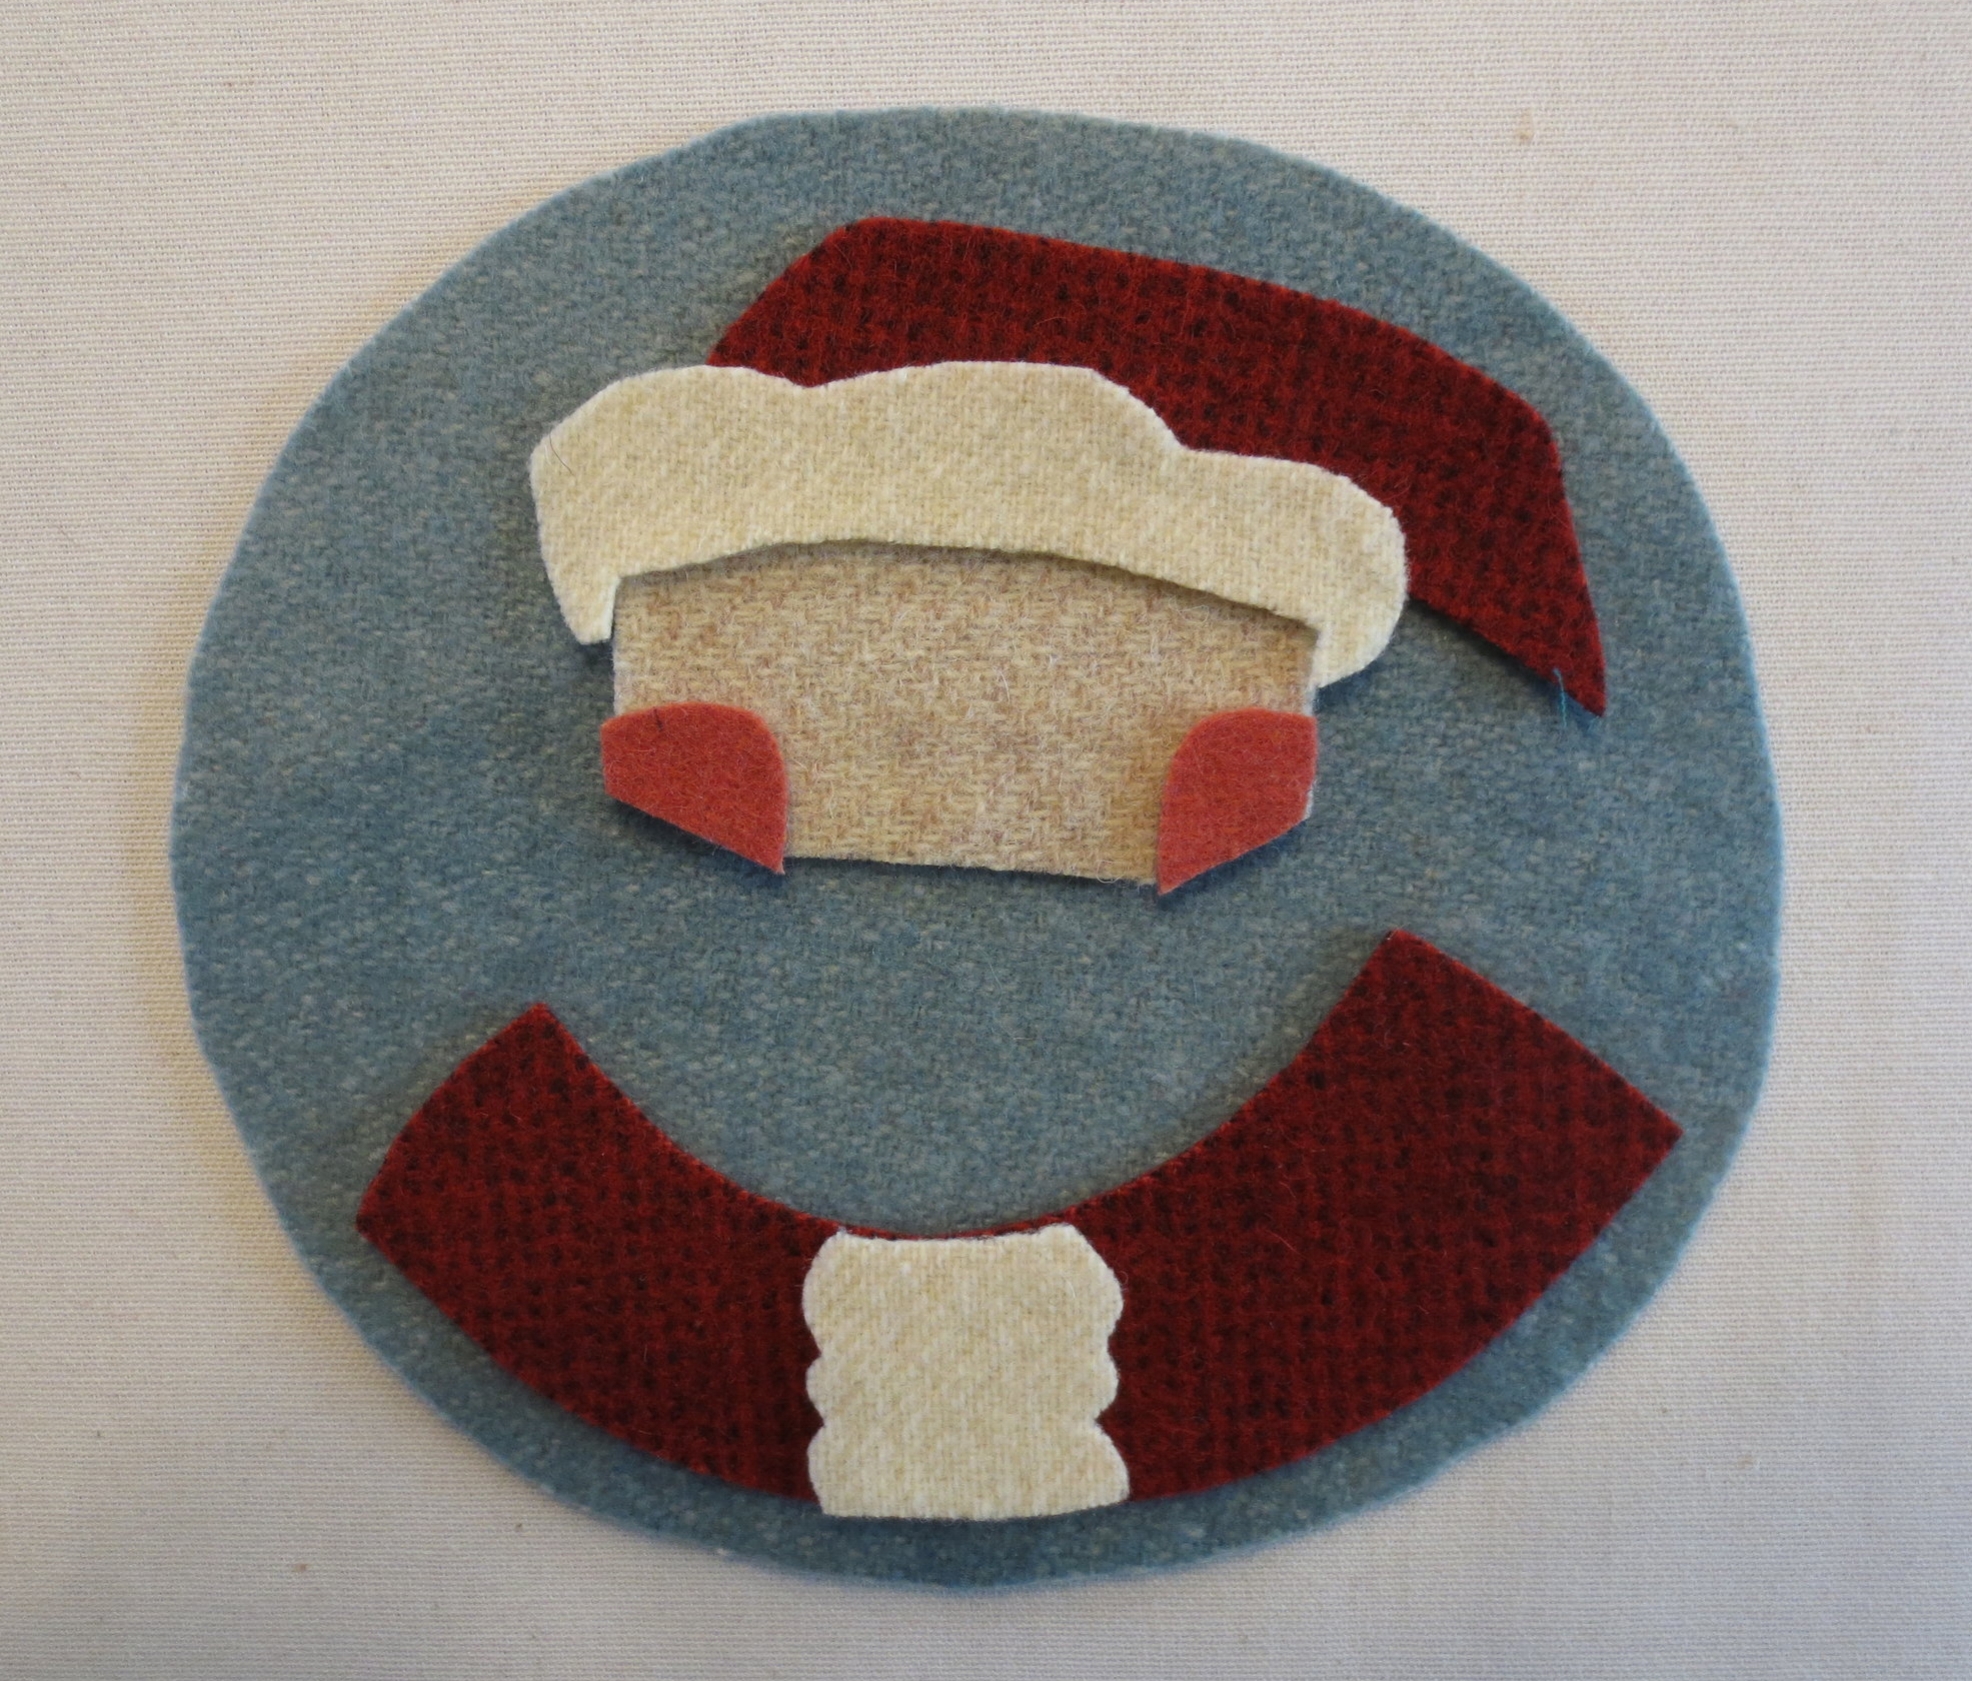
8. Position the coat and fur onto one of the blue background wools. DO NOT FUSE!
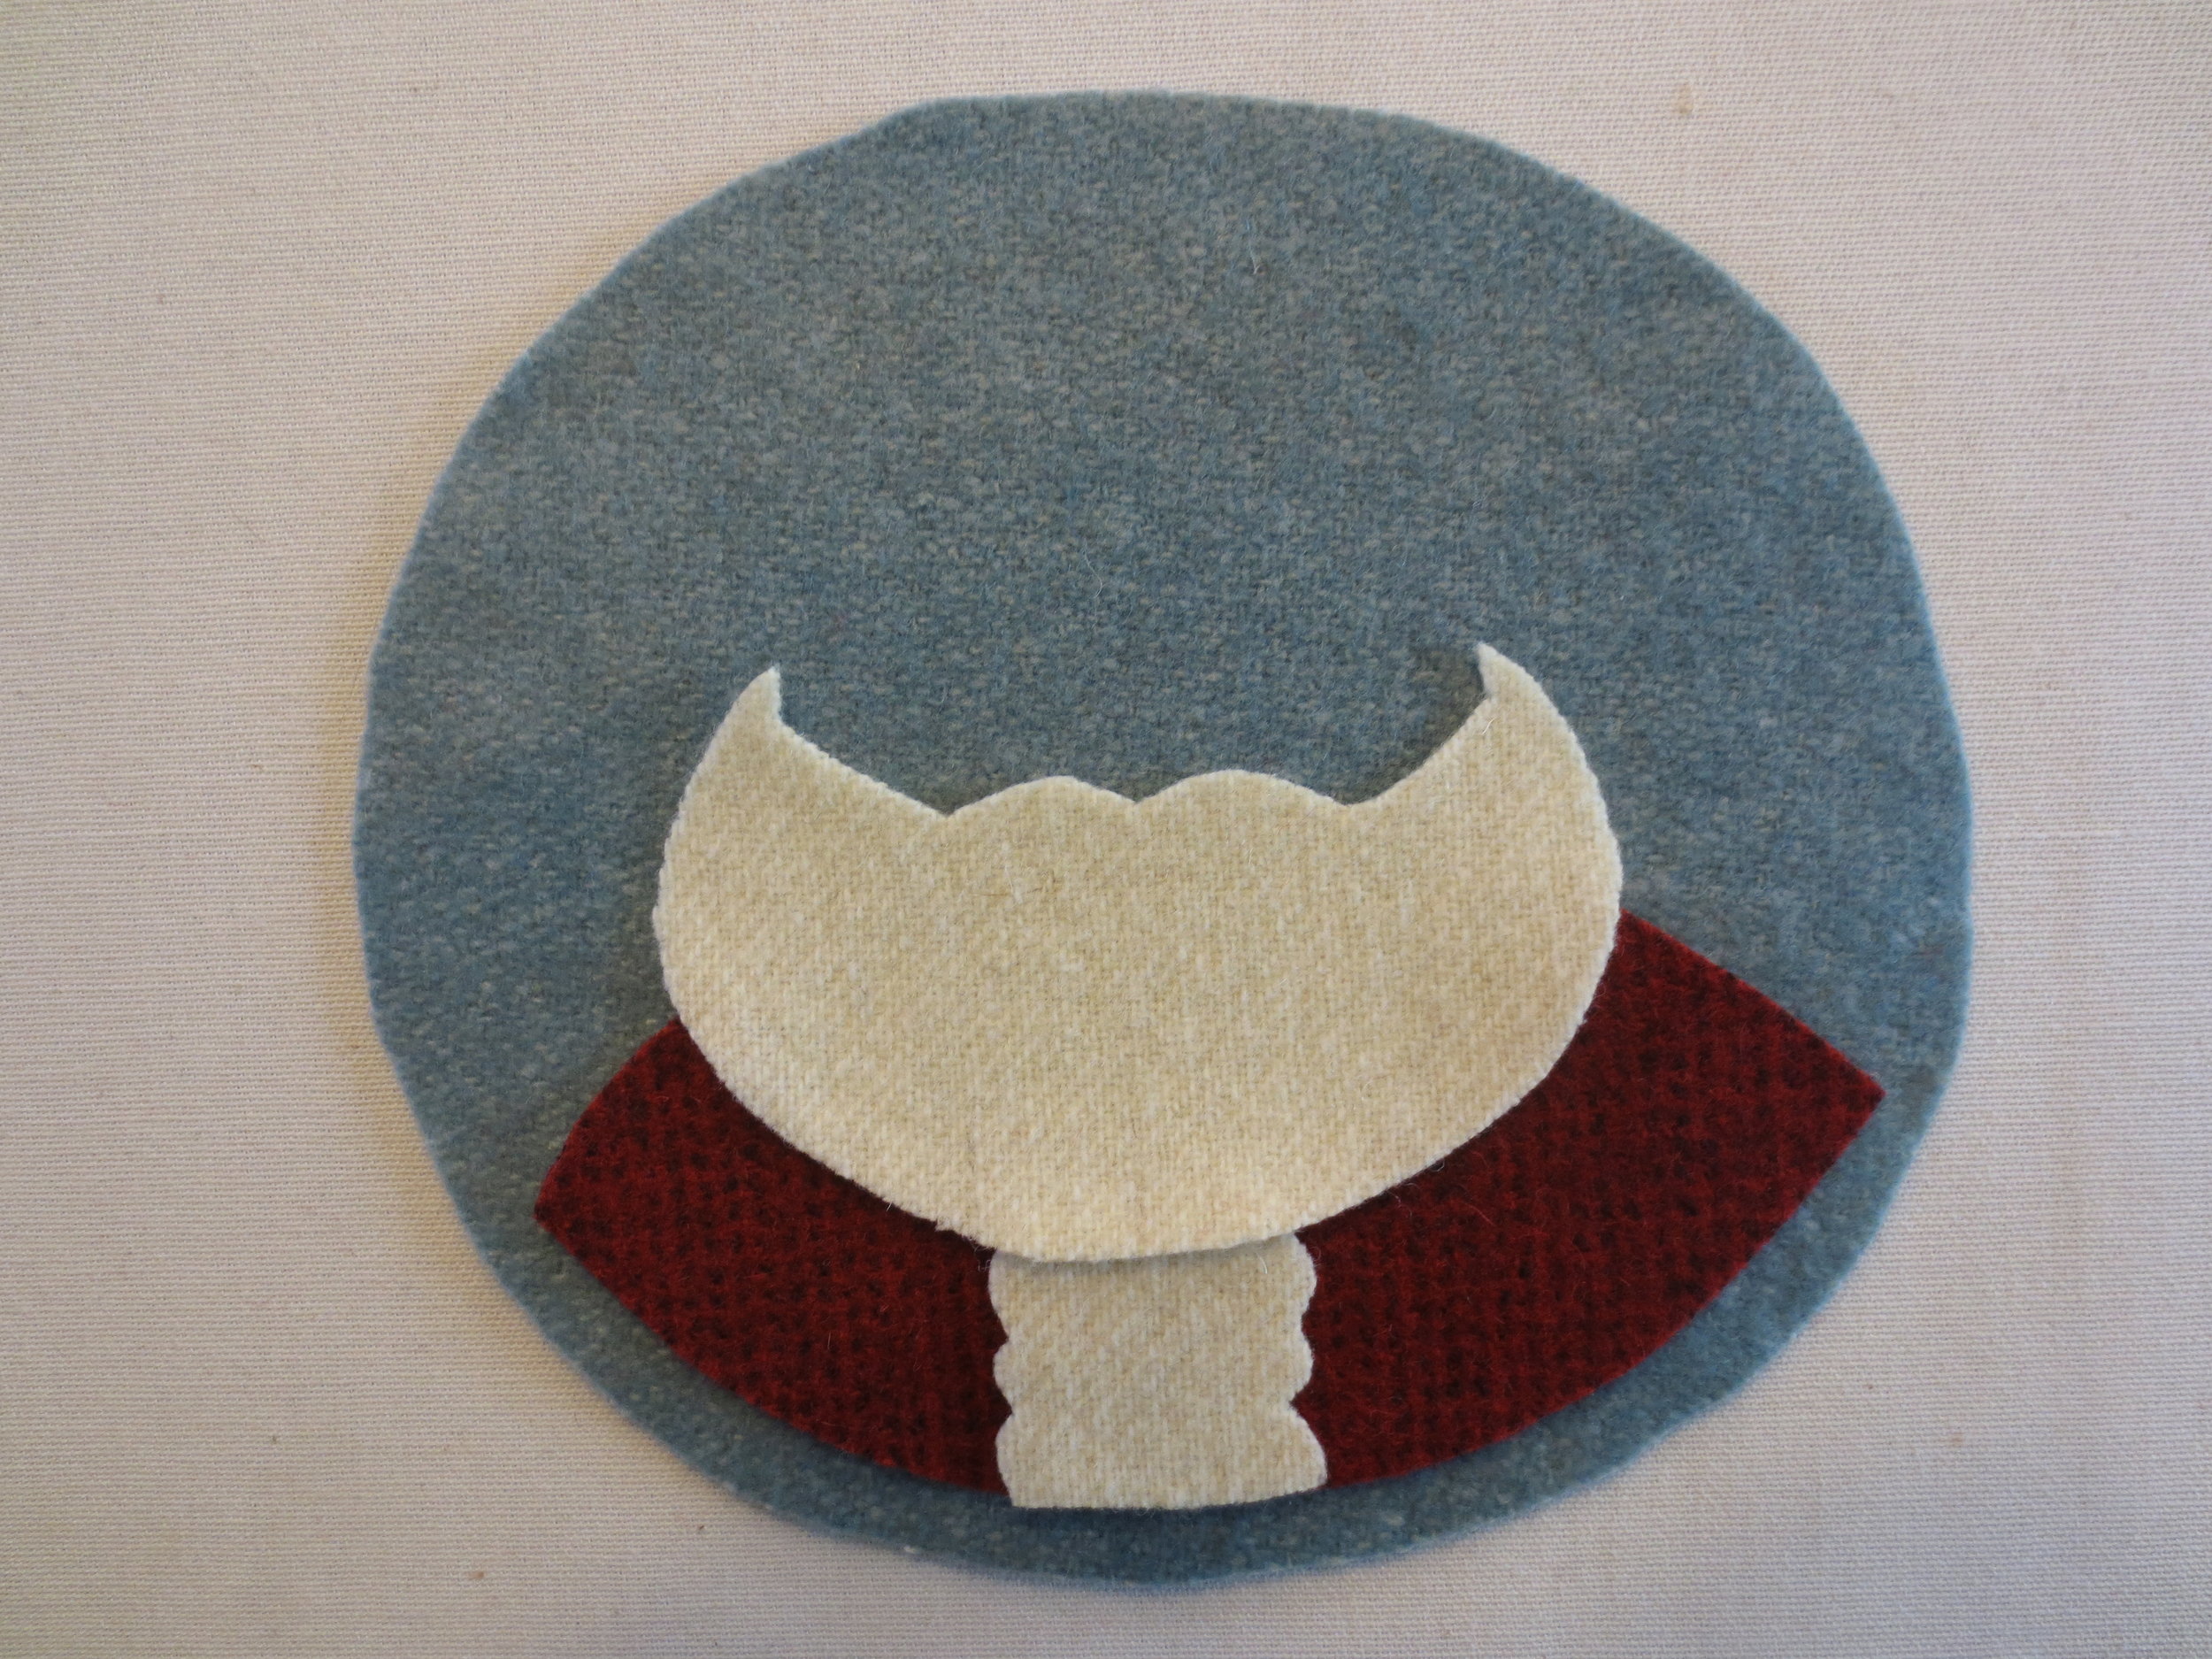
9. Position the beard, overlapping the coat and fur slightly. DO NOT FUSE!
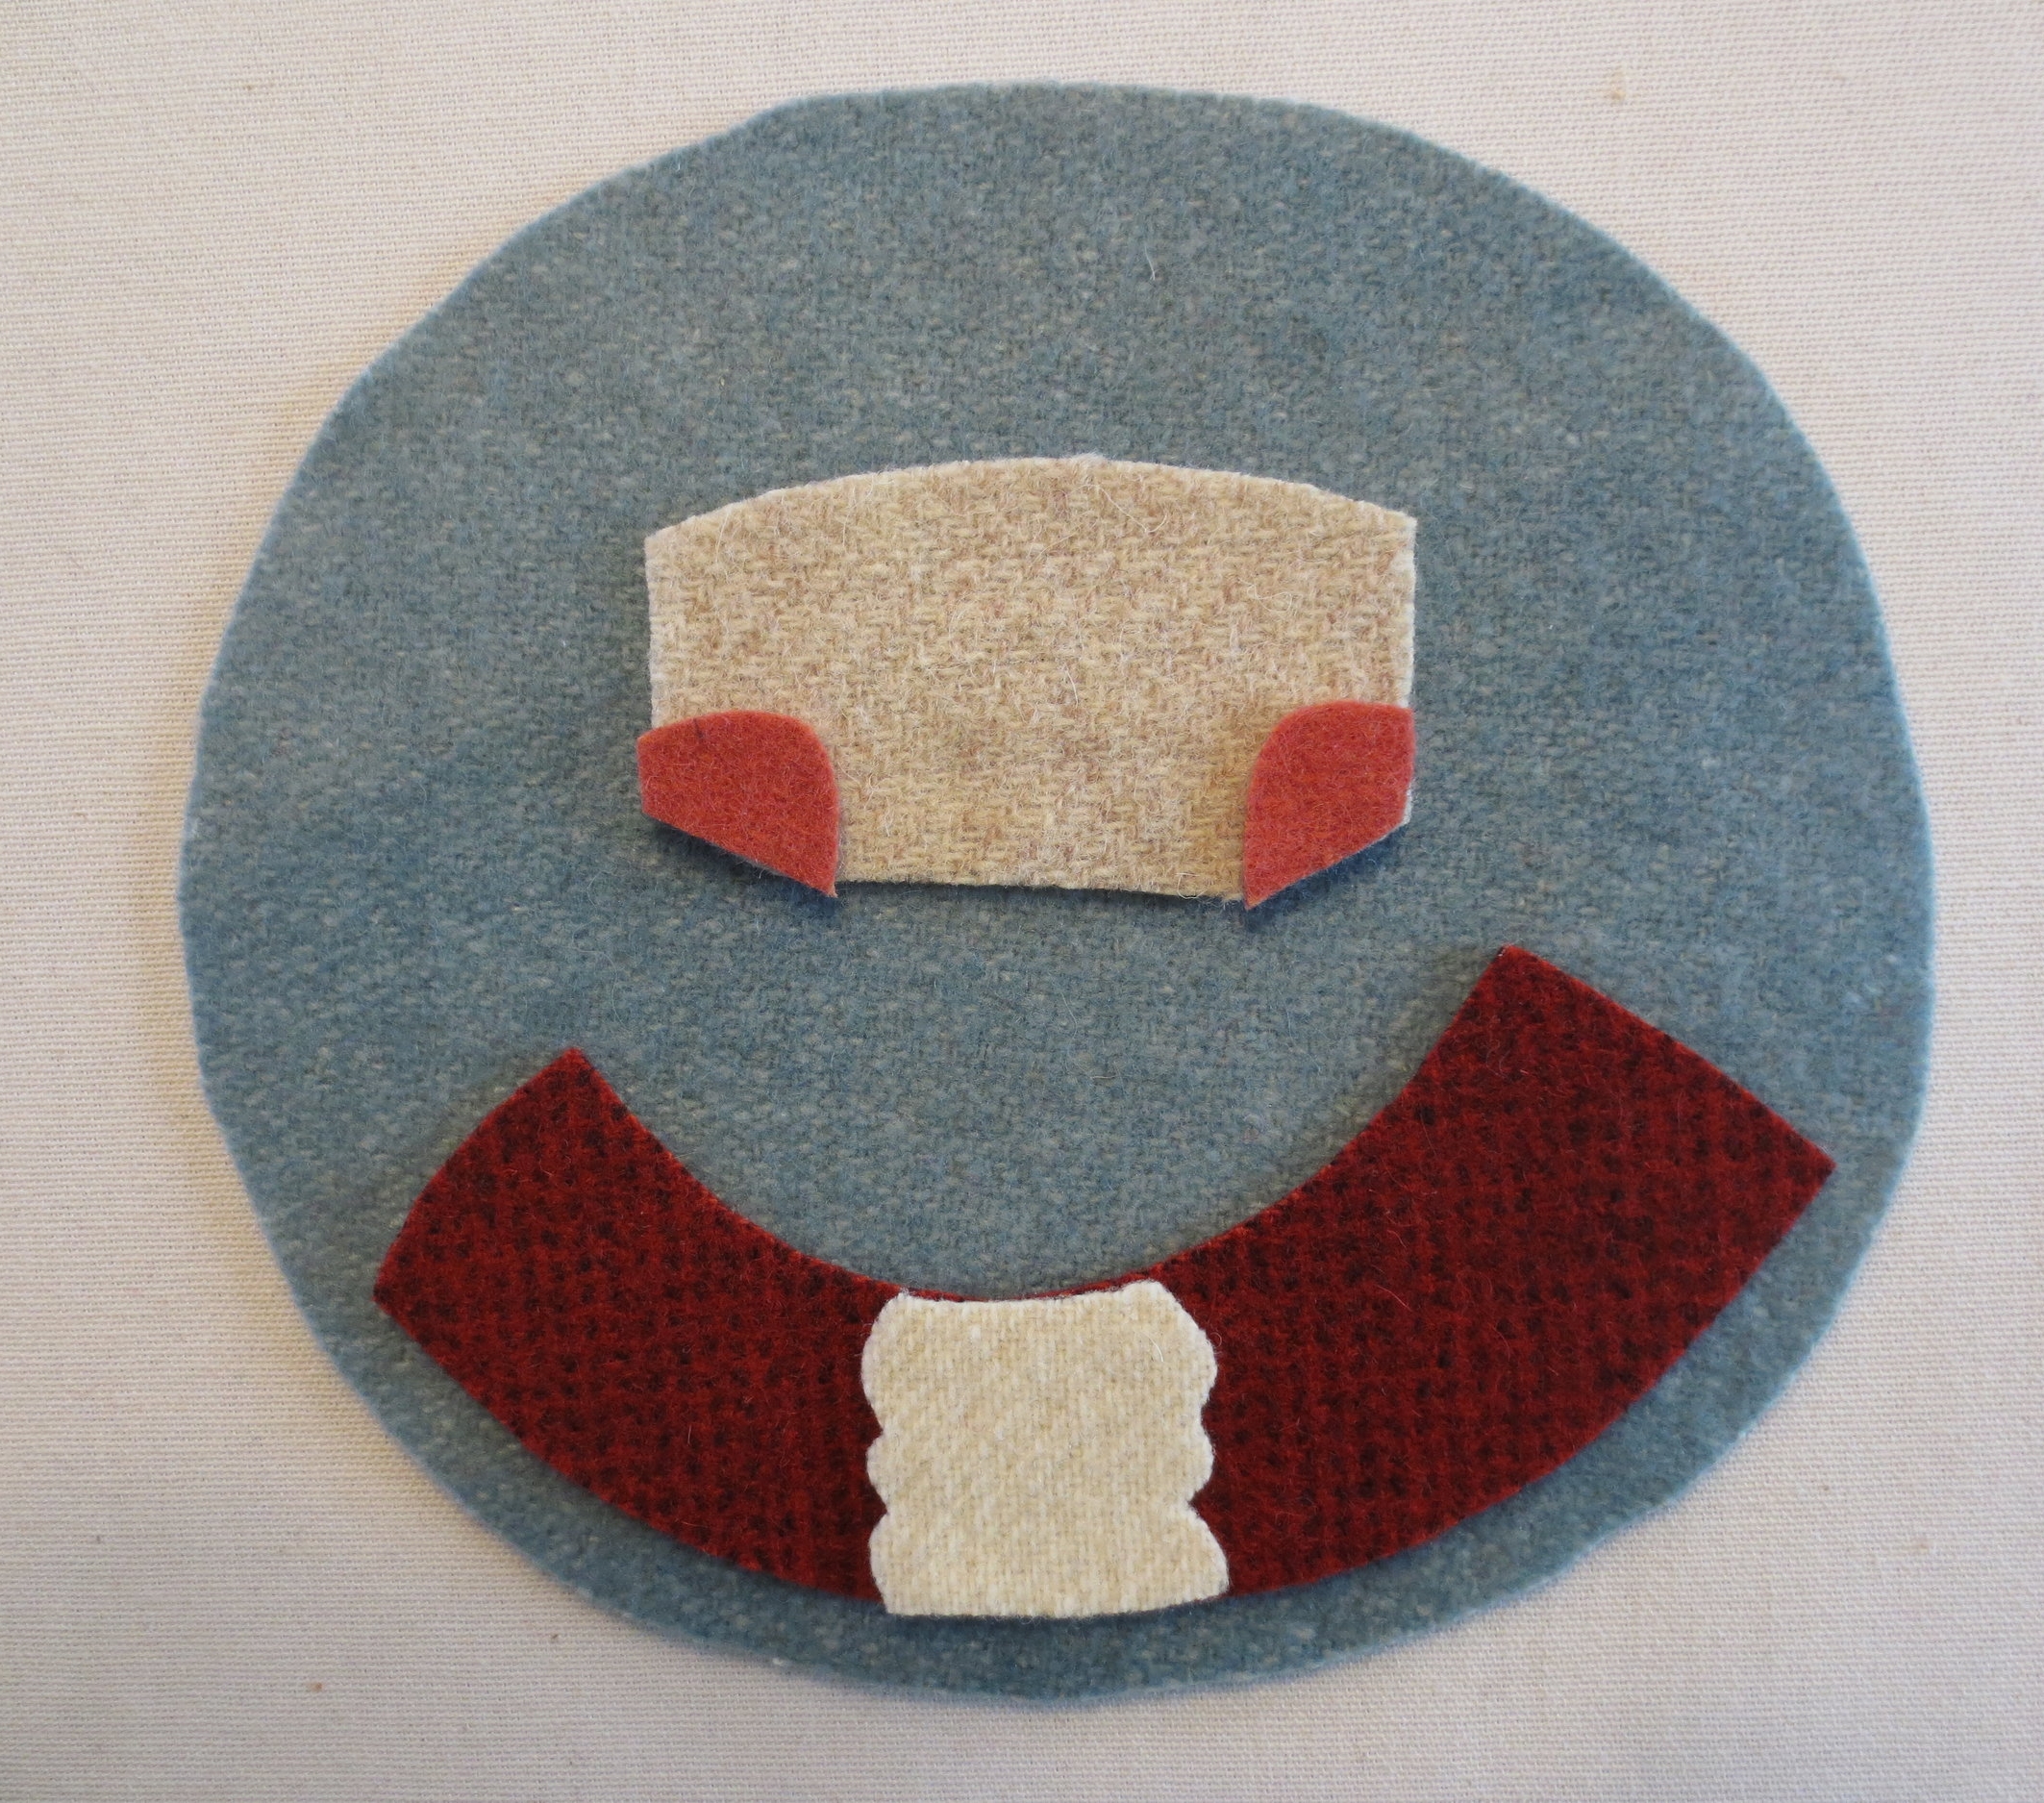
10. Position the face and cheeks under the beard. DO NOT FUSE!
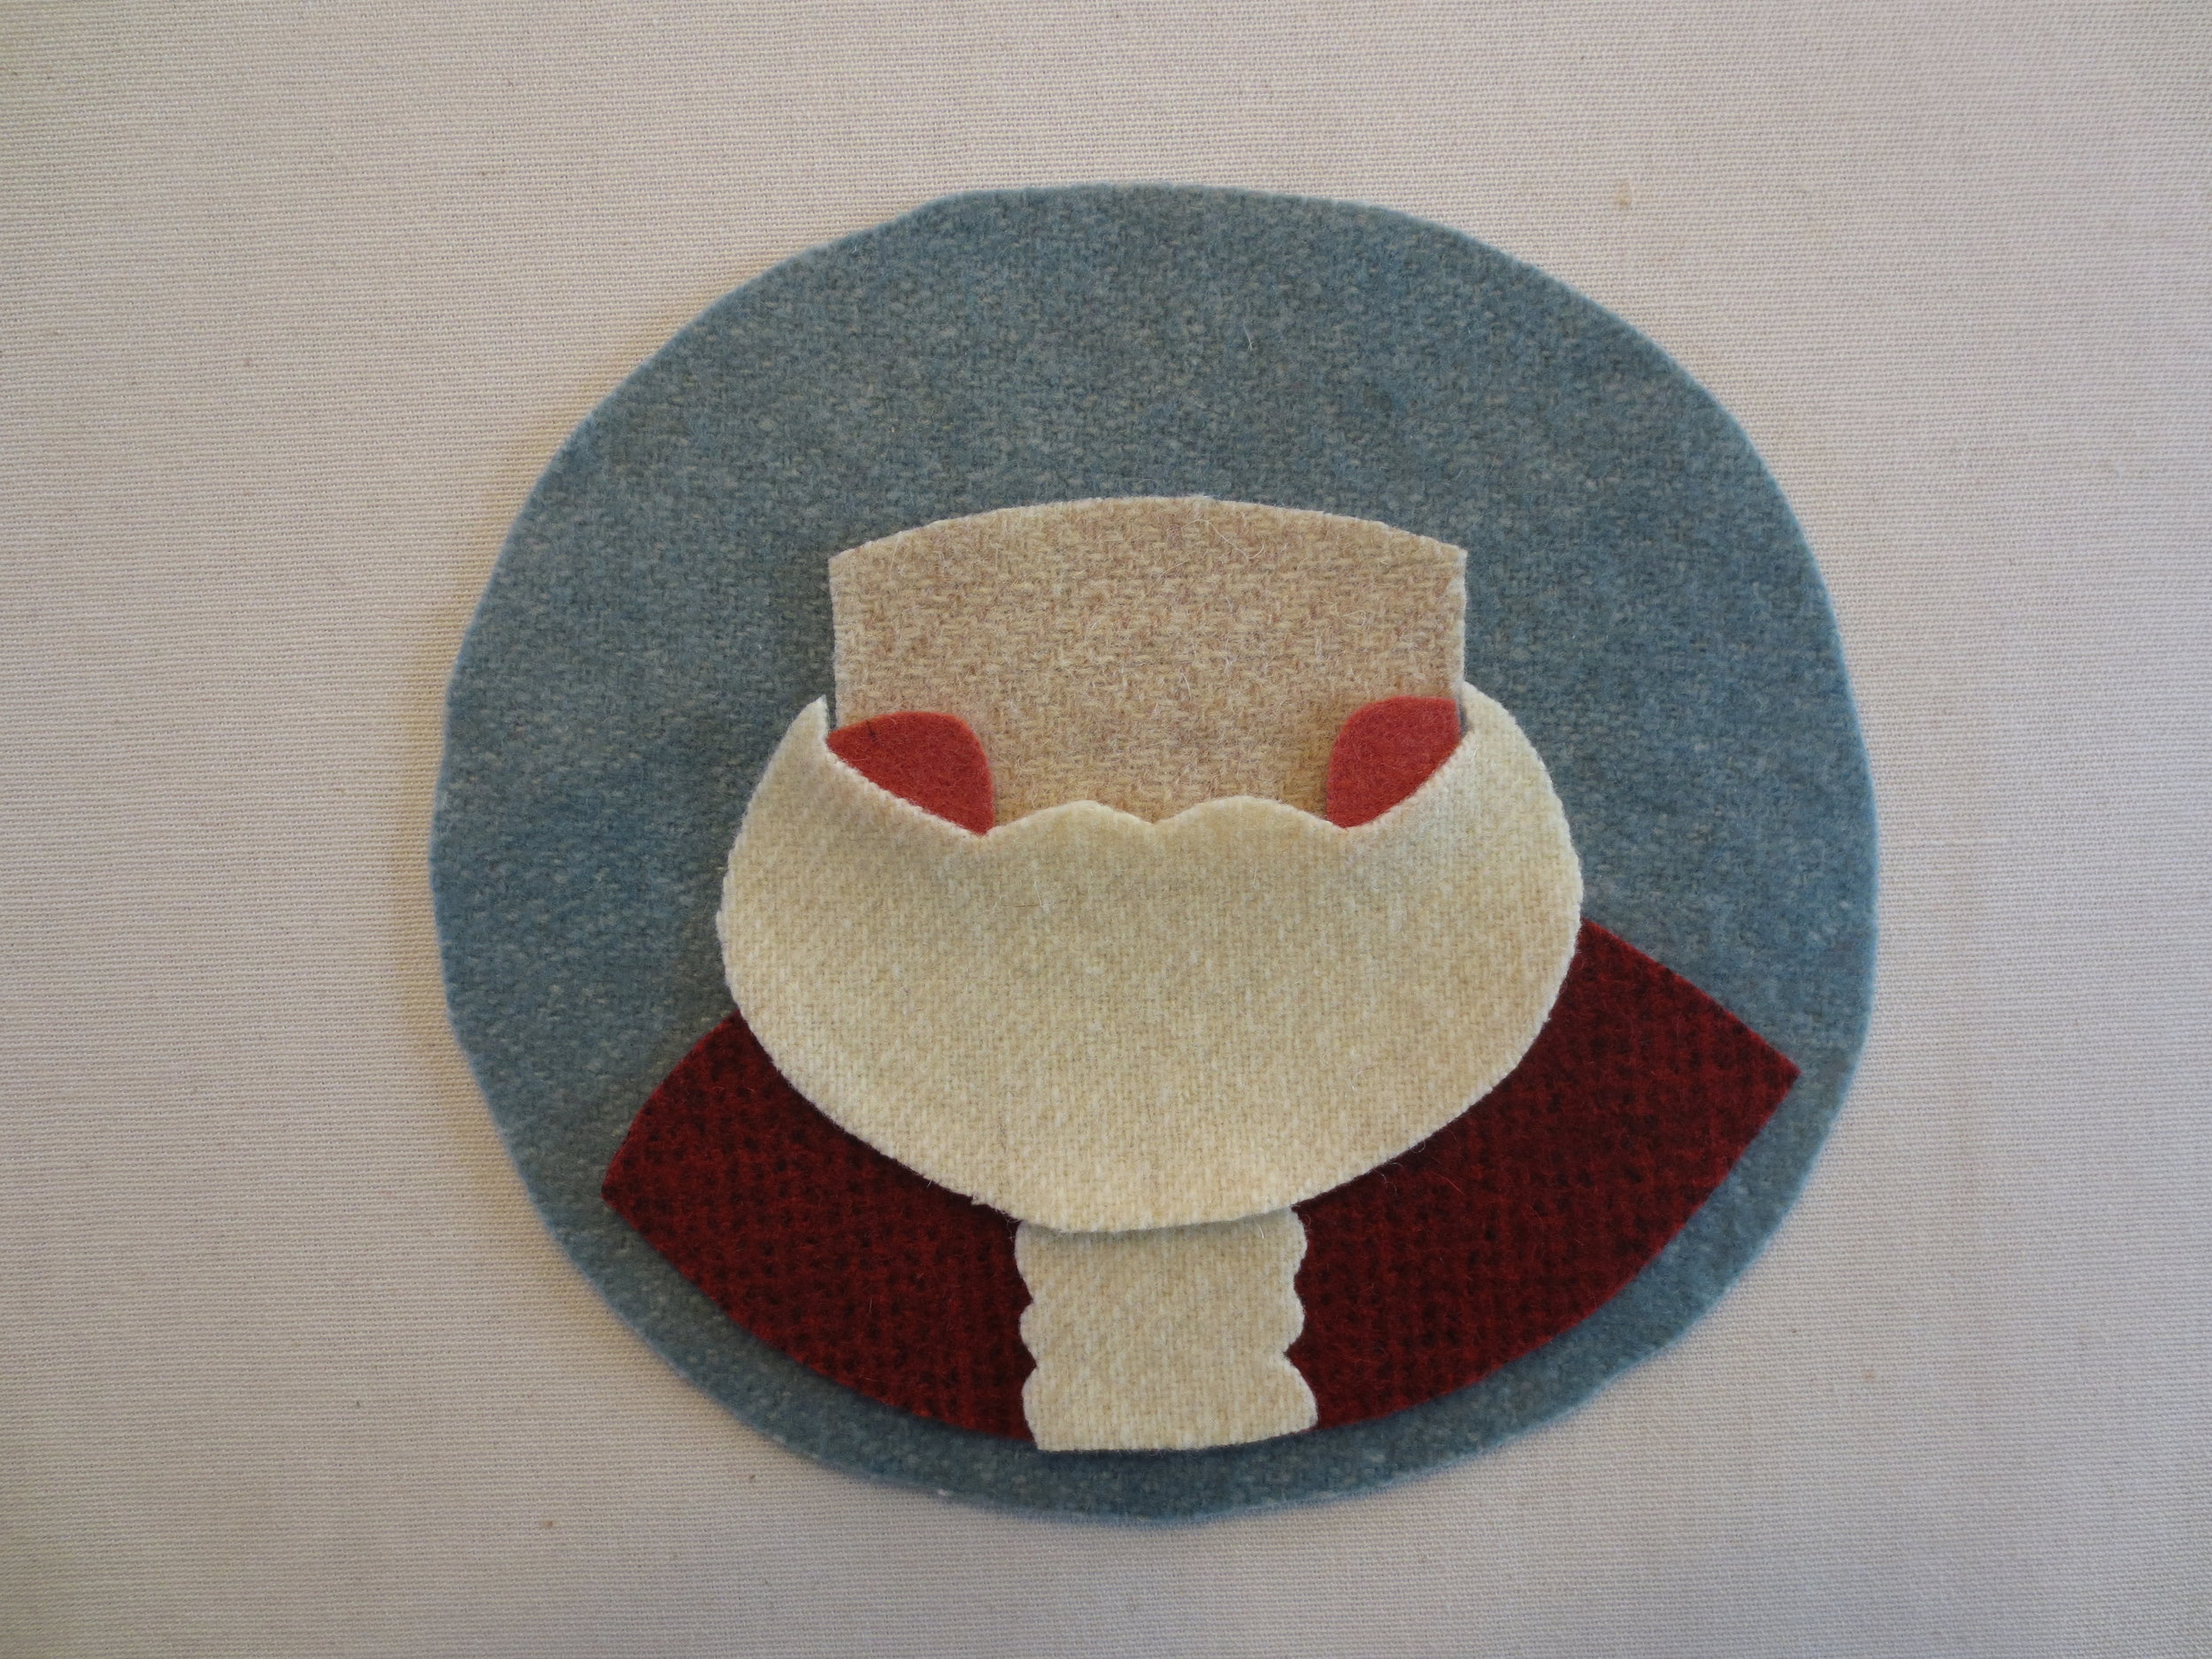
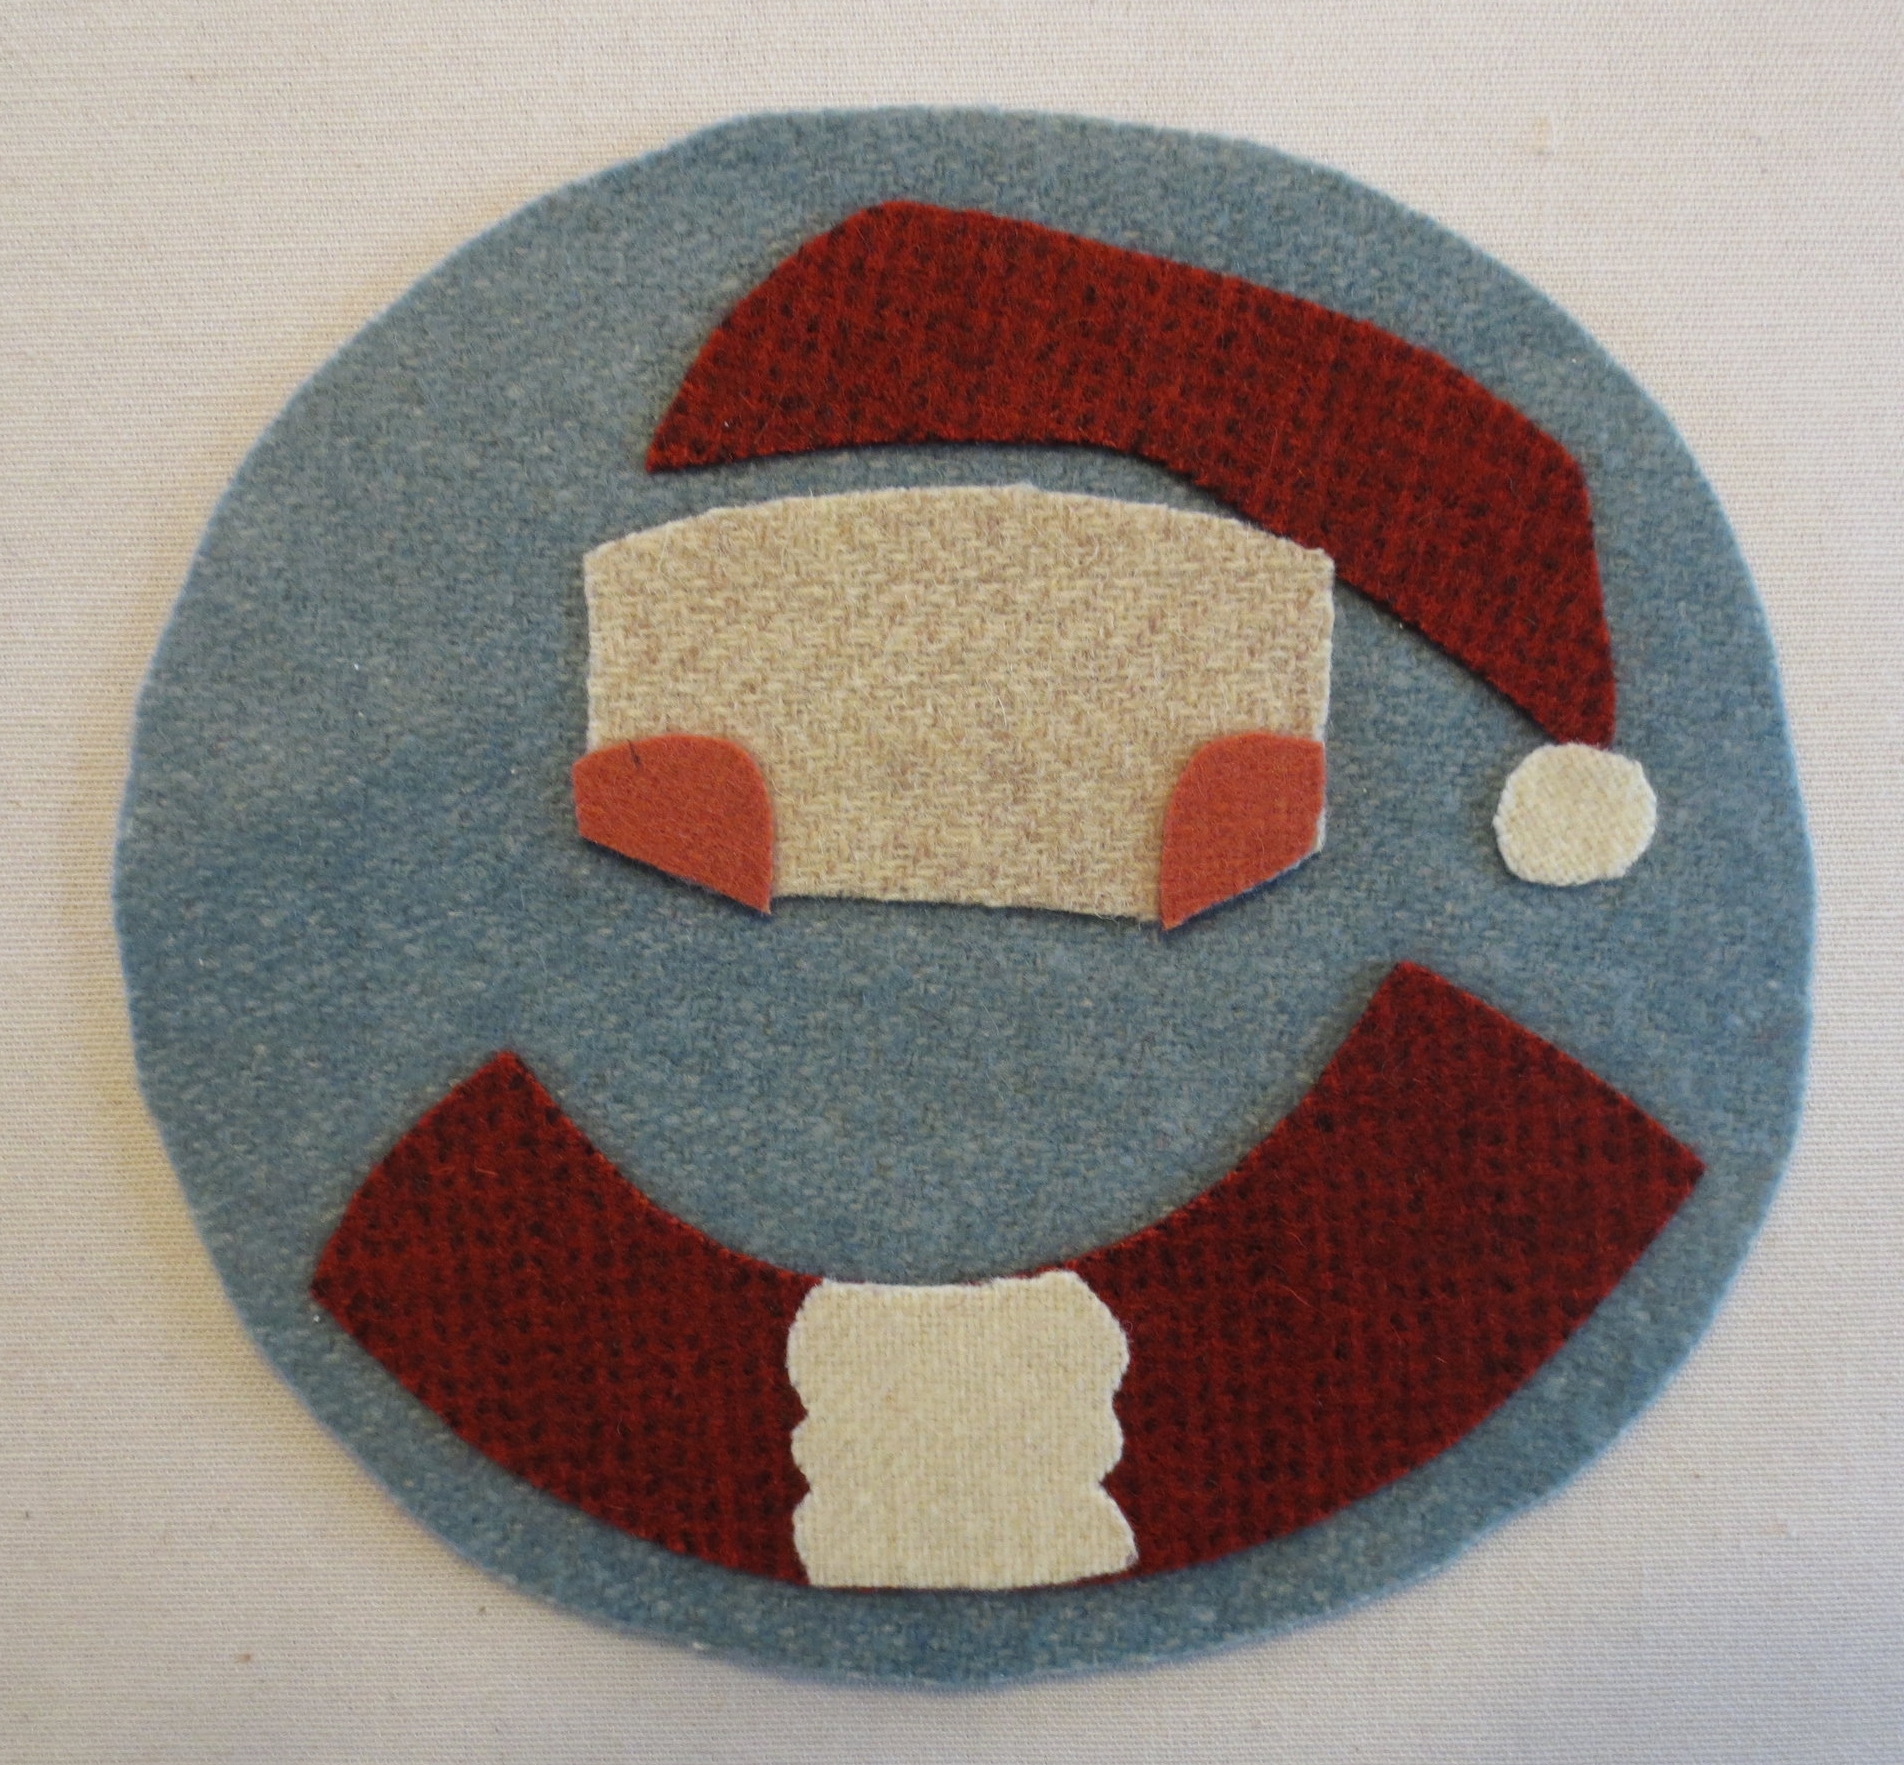
11. Remove the beard and postion the hat, and hat fur on top of Santa's face. DO NOT FUSE!
12. Add the hat pom pom and remove the hat fur.
13. Now you can fuse the coat, coat fur, face, cheeks, hat and pom pom.
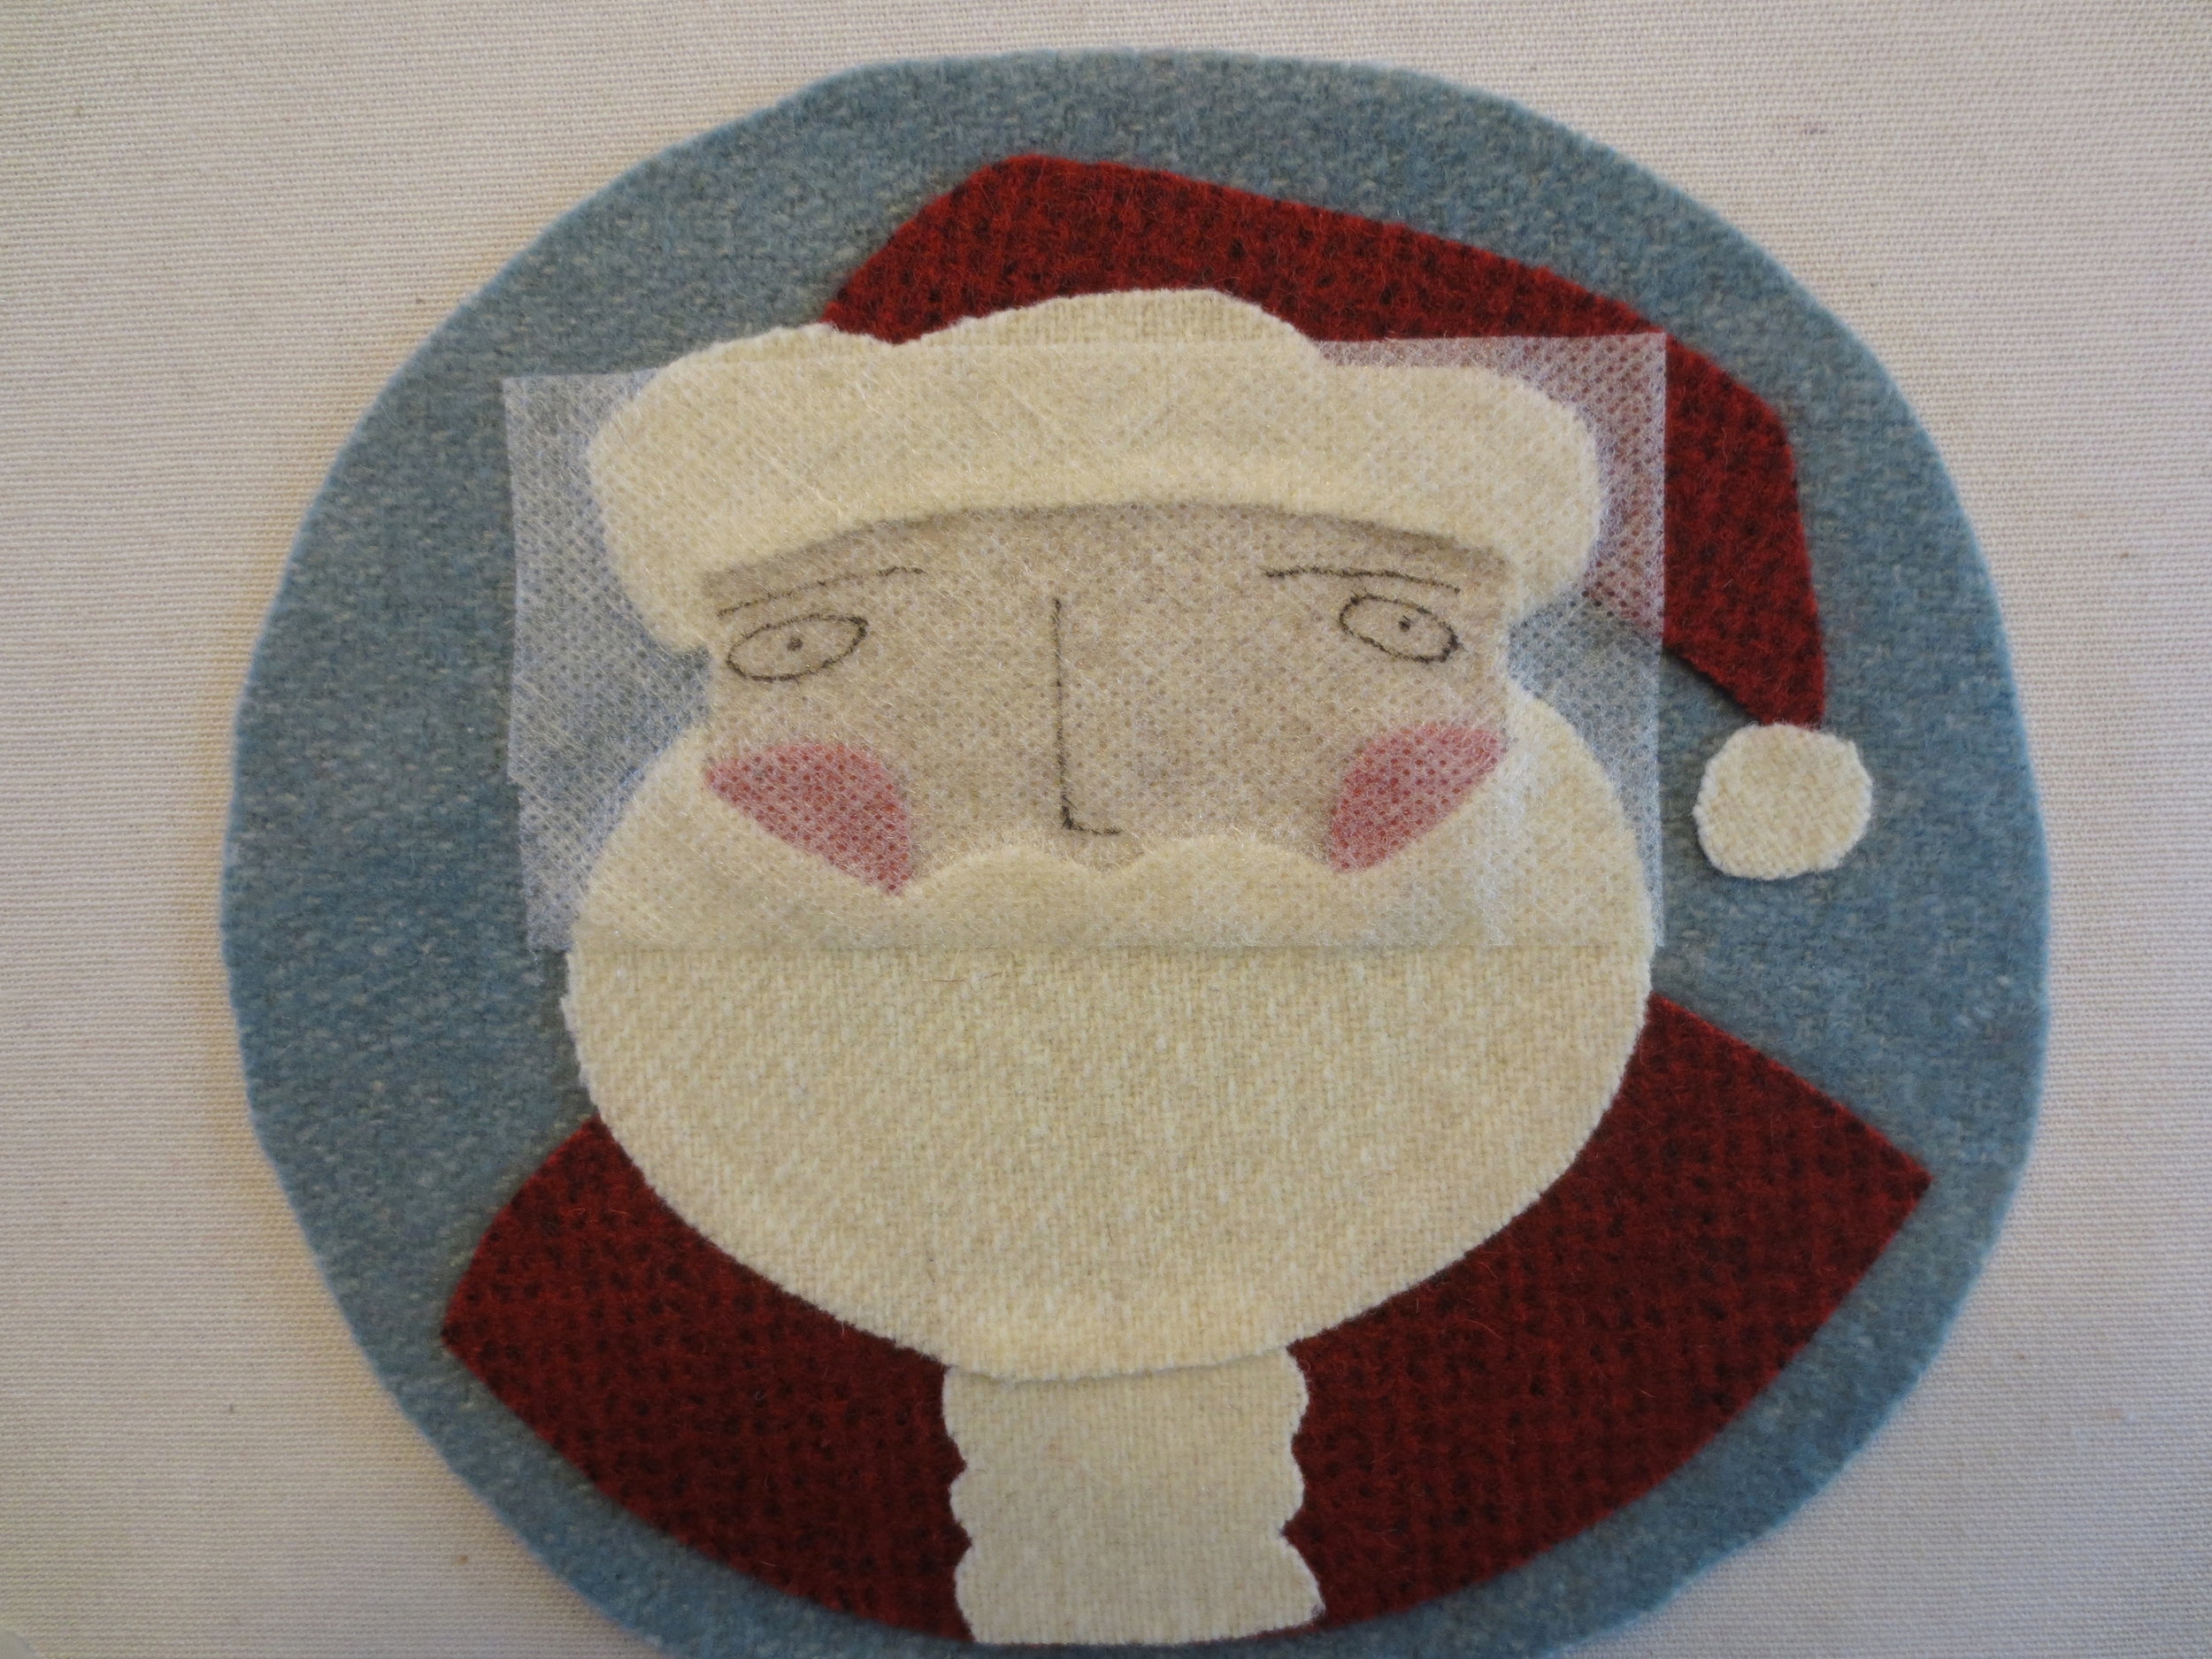
14. Reposition the beard and hat fur. Fuse in place.
15. Cut a 2" x 3 1/2" piece of Sulky Sticky Fabri-Solvy.
16. Lightly press this on the layout of Santa's Face. Trace the eyes, eyebrows, and nose using a fine point permanent marker.
17. Remove the Fabri-Solvy from the layout and reposition it onto Santa's face, pressing it firmly in place.
18. Use grey thread to back stitch the nose and outlines of eyes.
19. Use the same thread to make a french knot for the eyes.
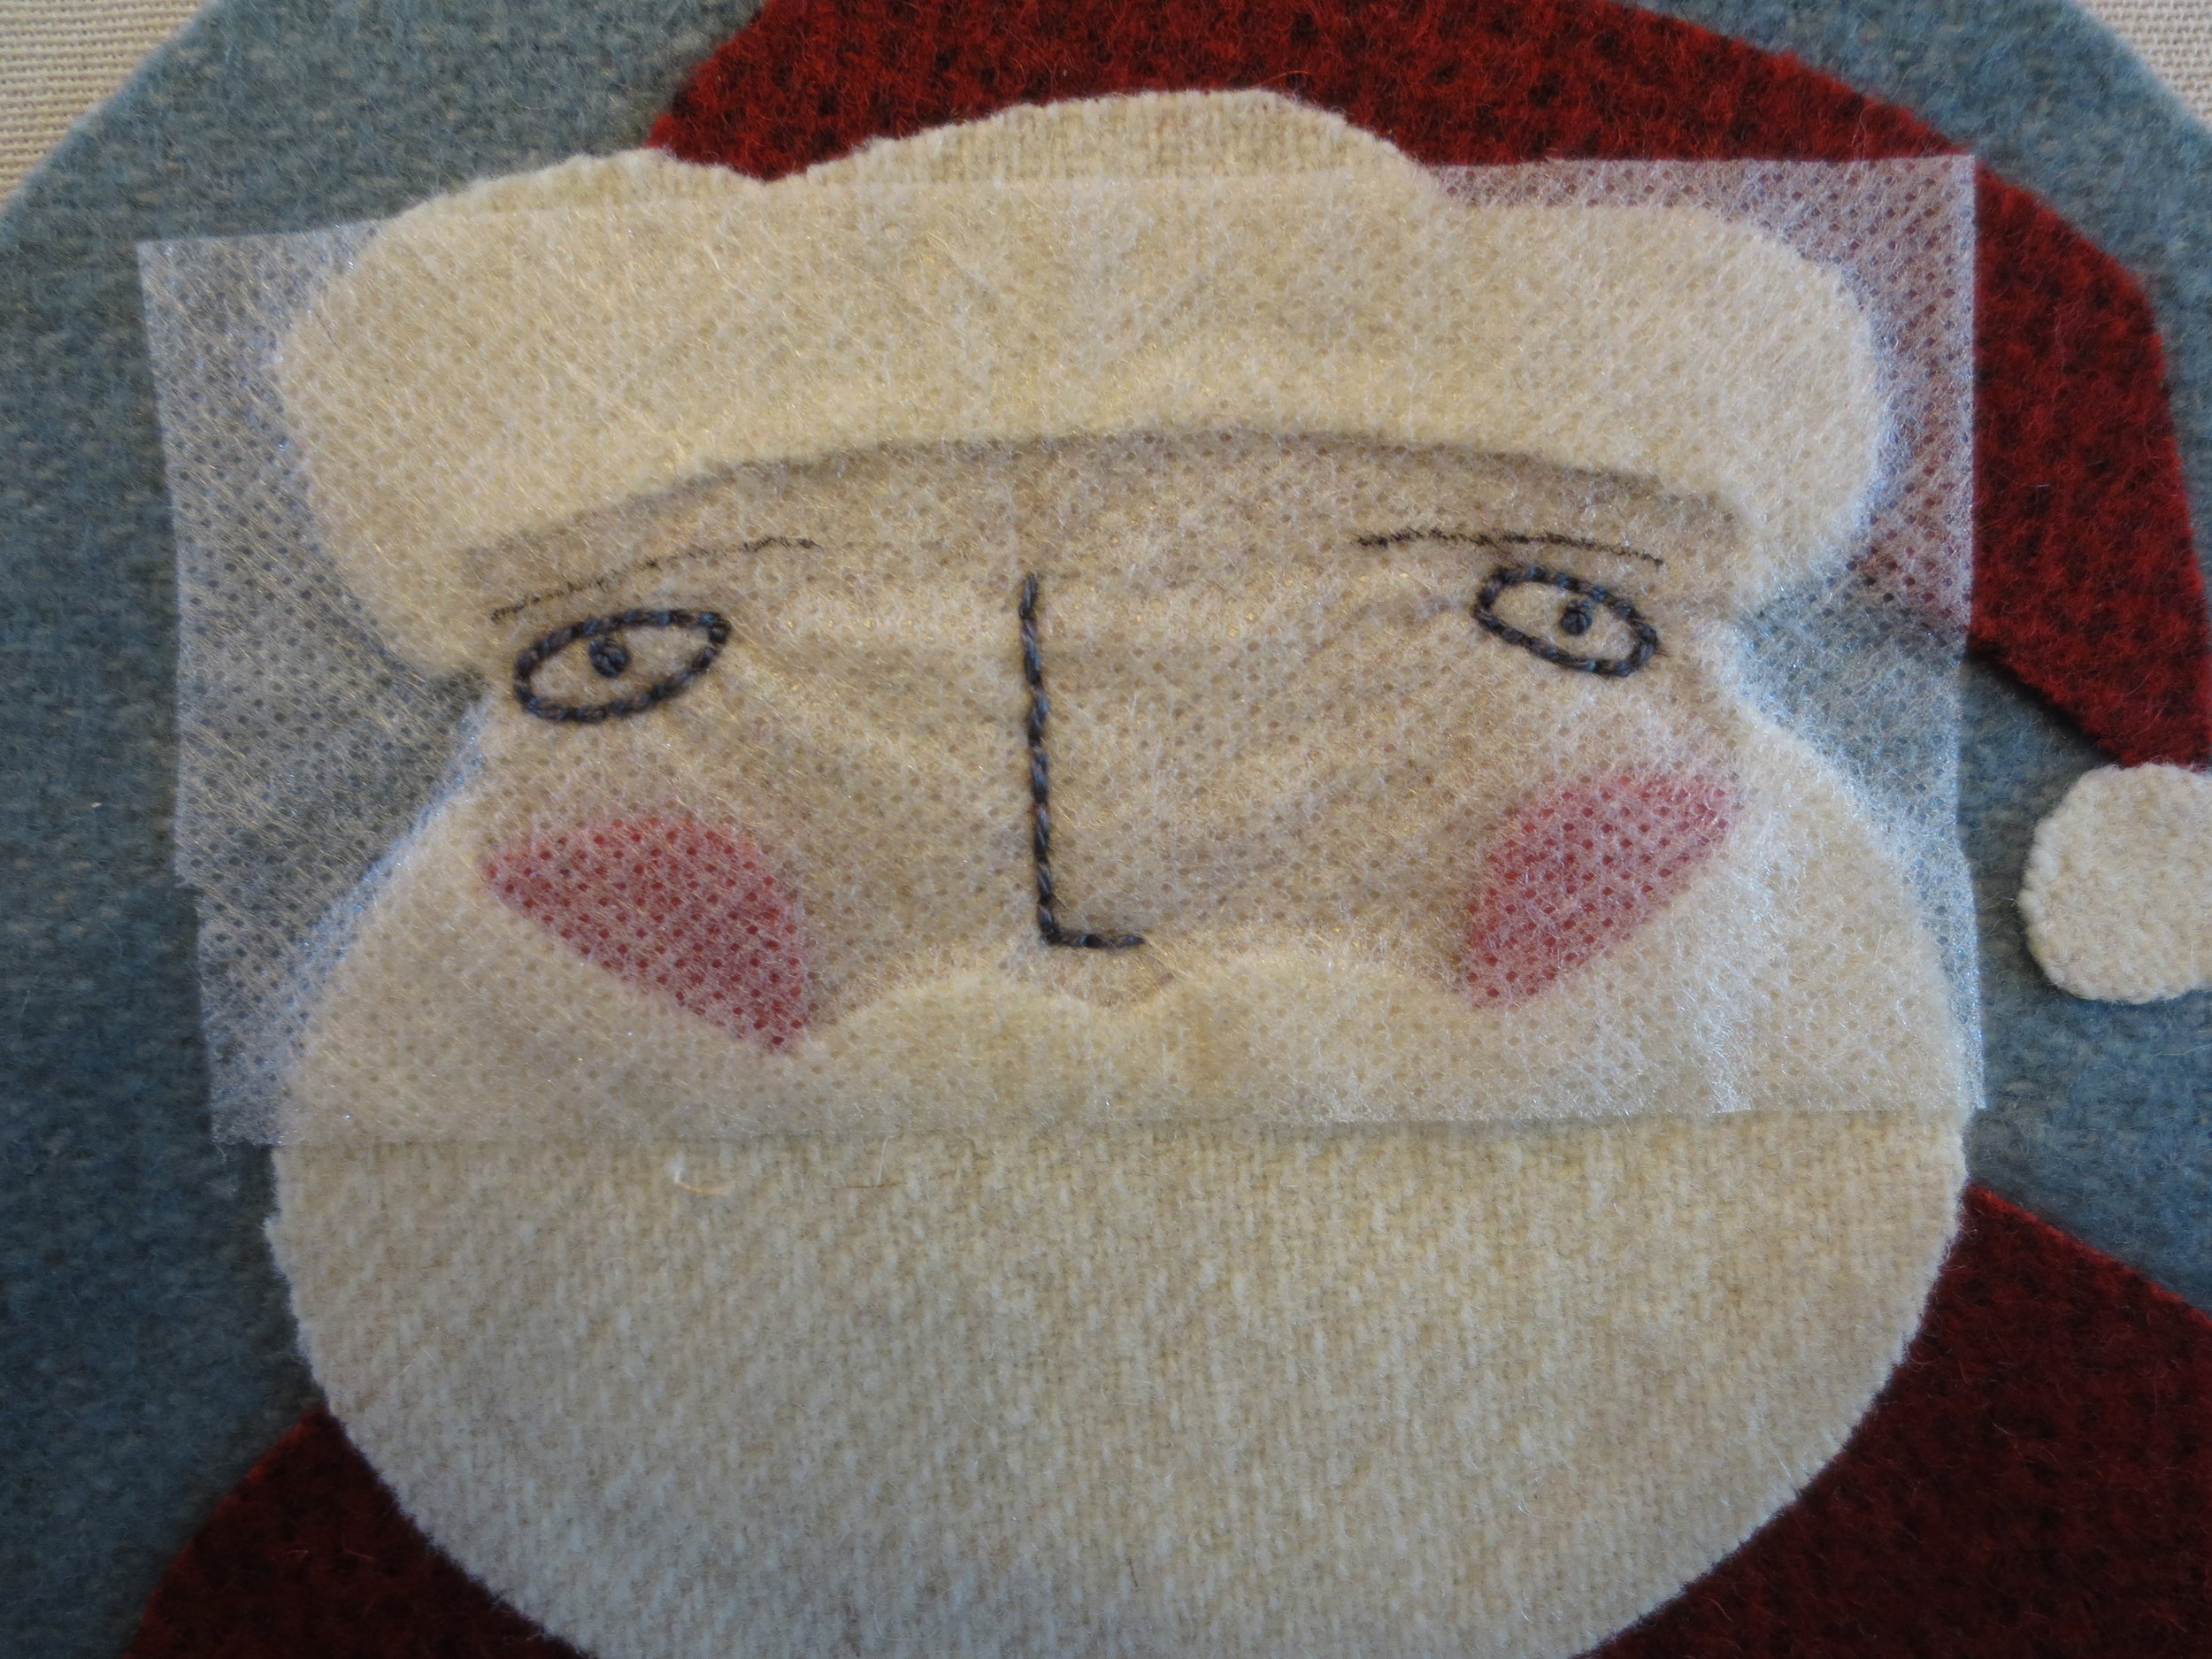
20. Use light grey thread to stem stitch the eyebrows.
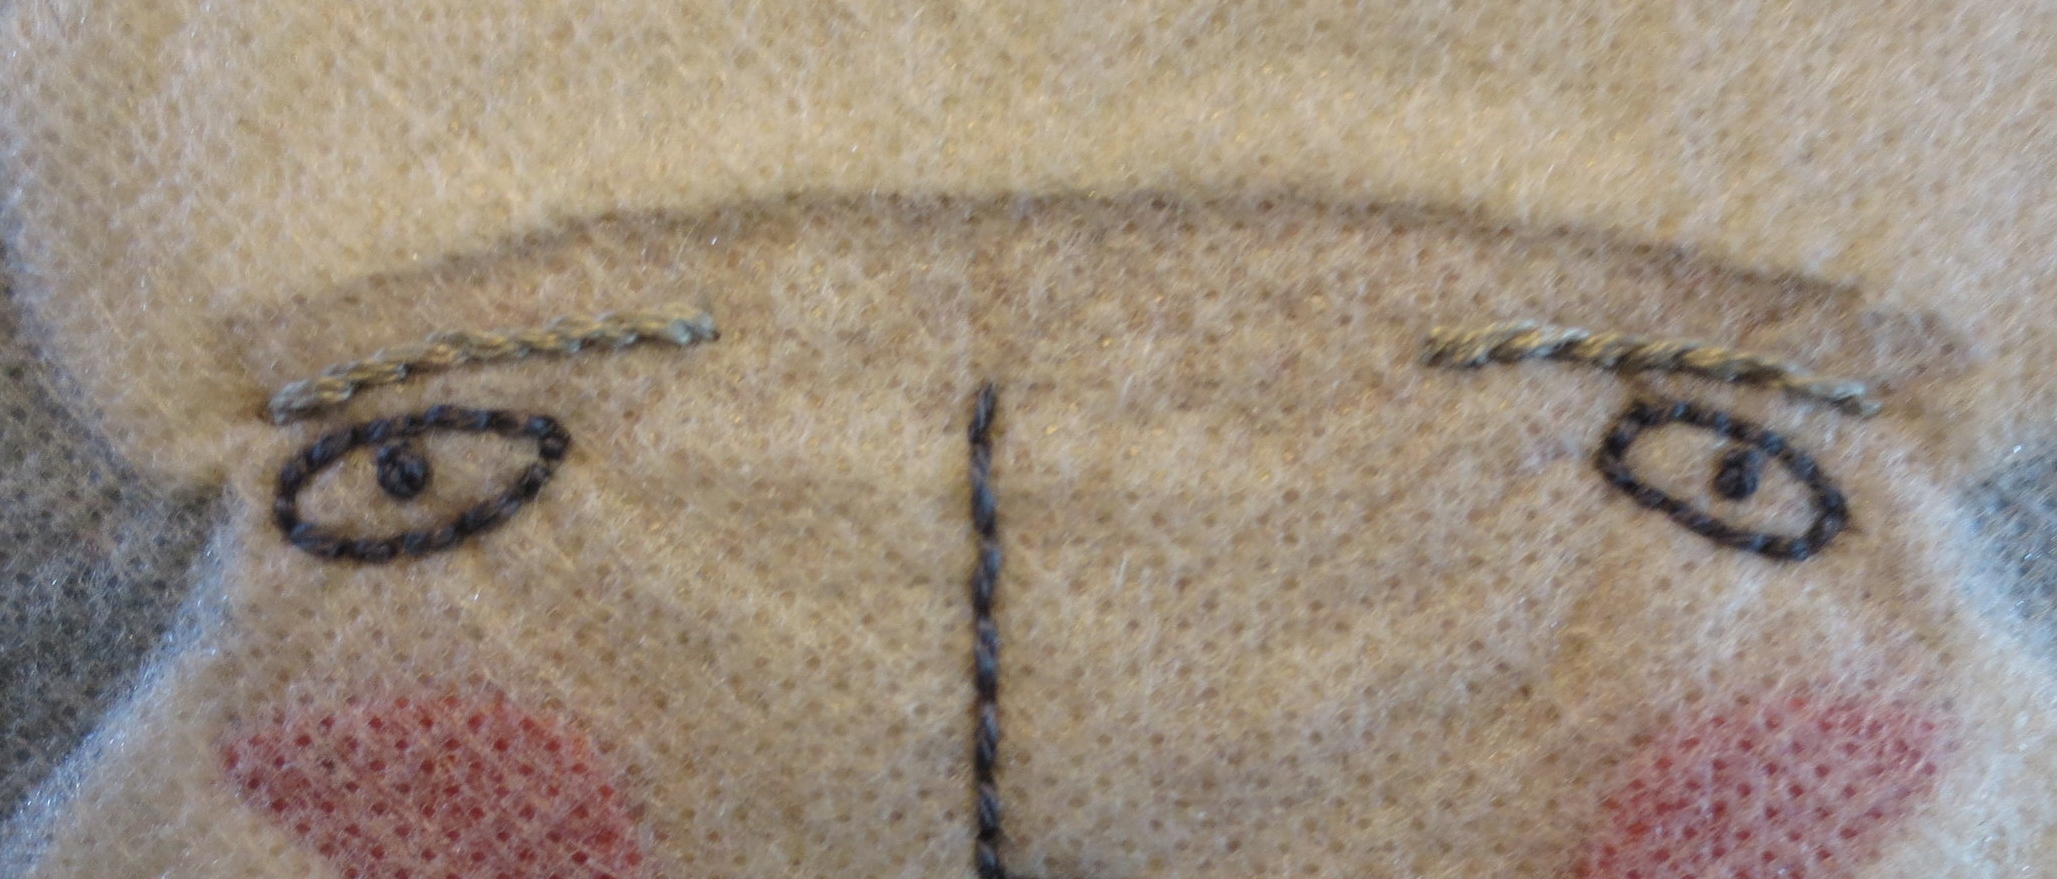
21. Use a damp cloth to loosen/dissolve the Fabri-Solvy. Dab around the embroidered area first until it no longer feels sticky. The remaining Fabri-Solvy can be peeled away.
22. Whip stitch the cheeks, beard, face, fur, coat, and hat with matching colored thread.
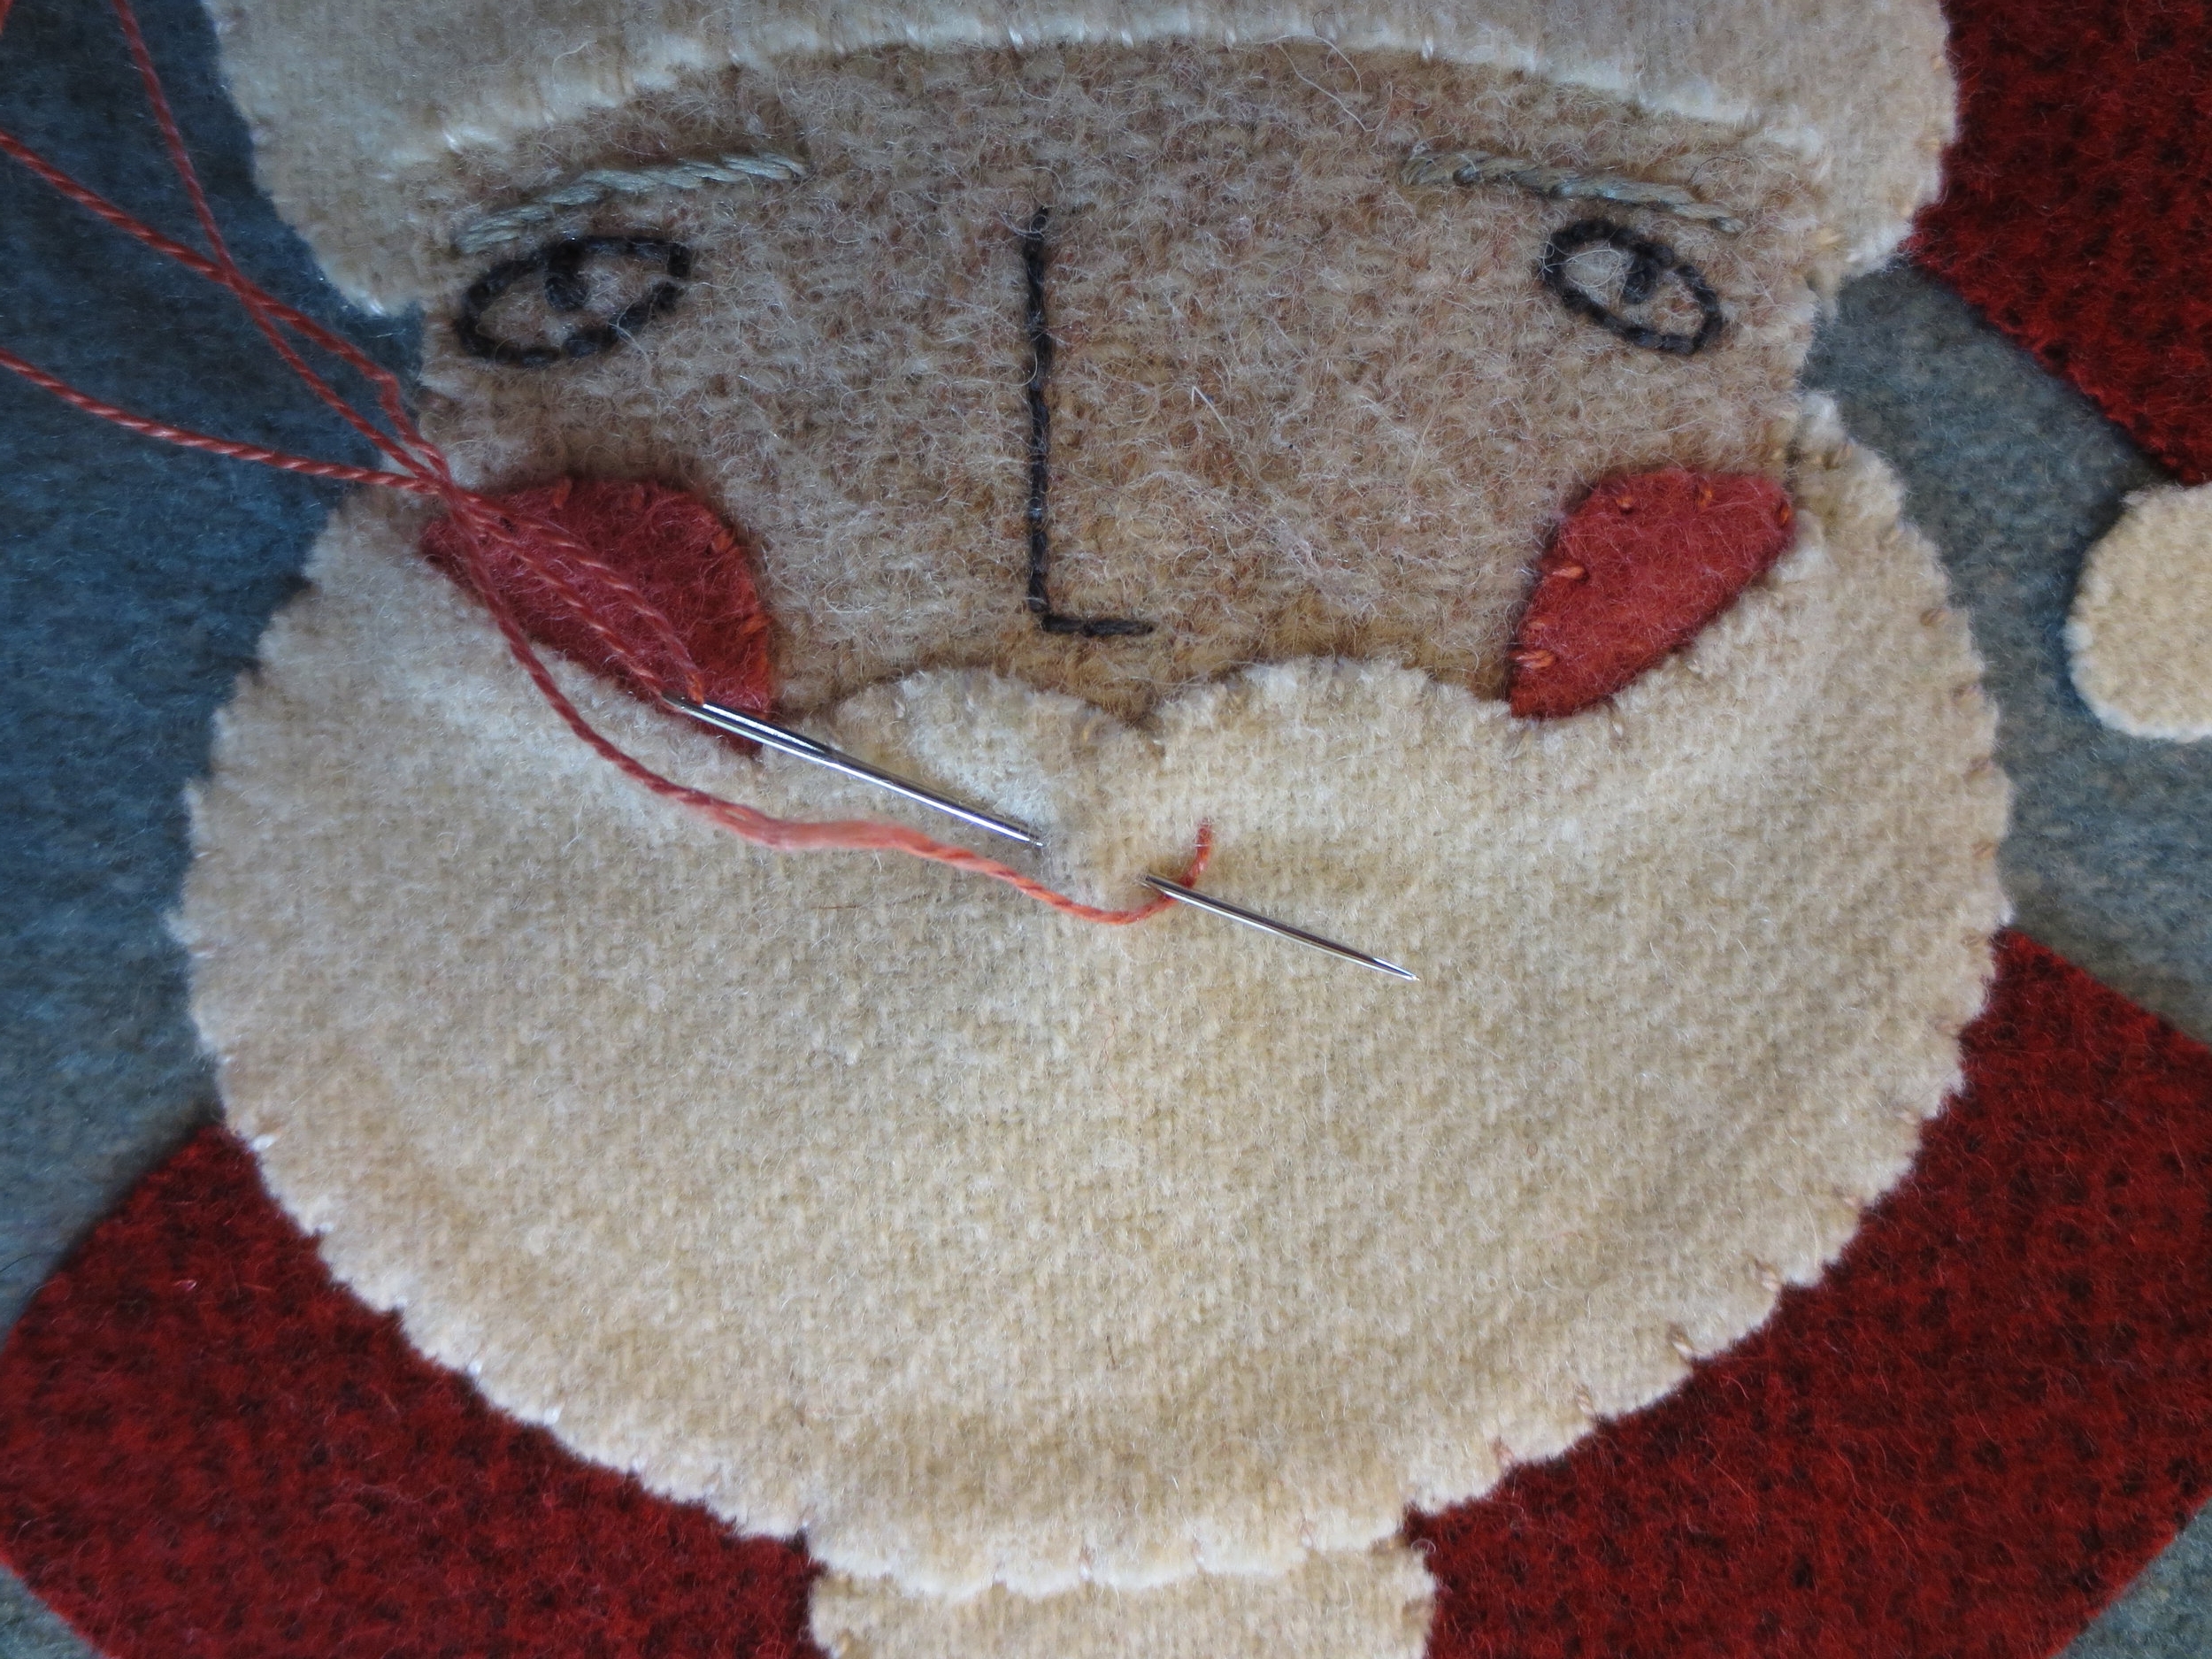
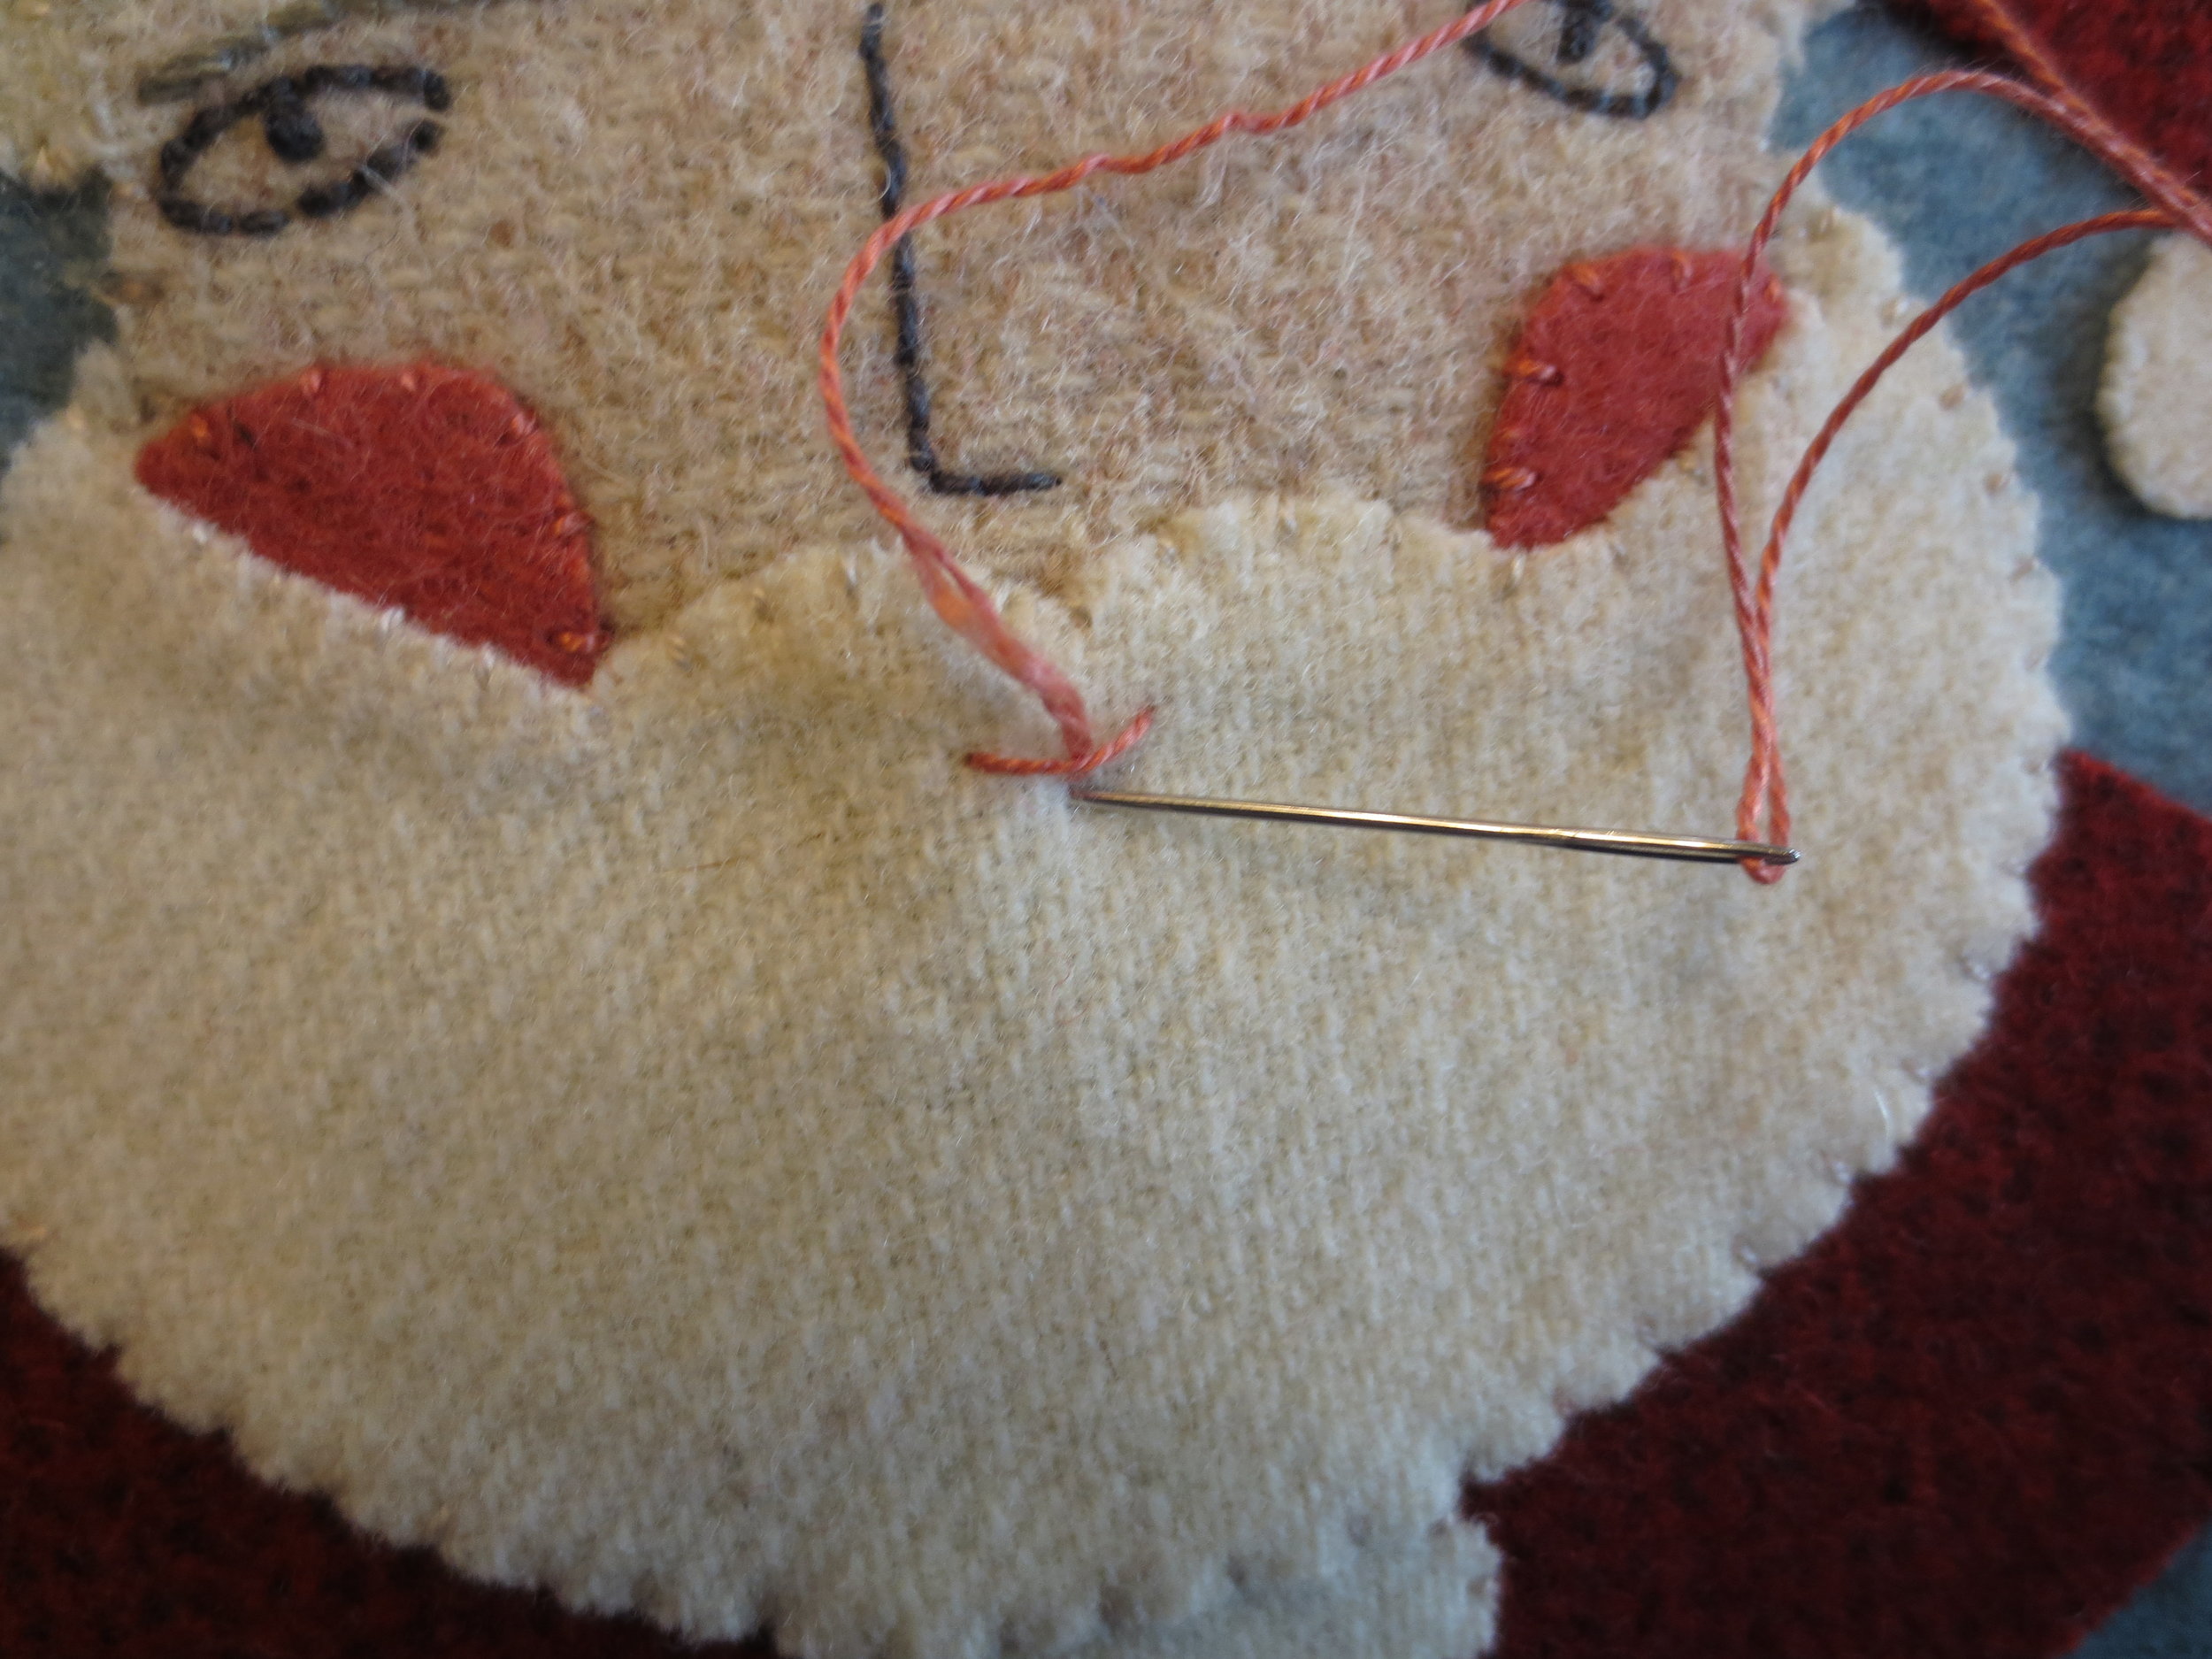
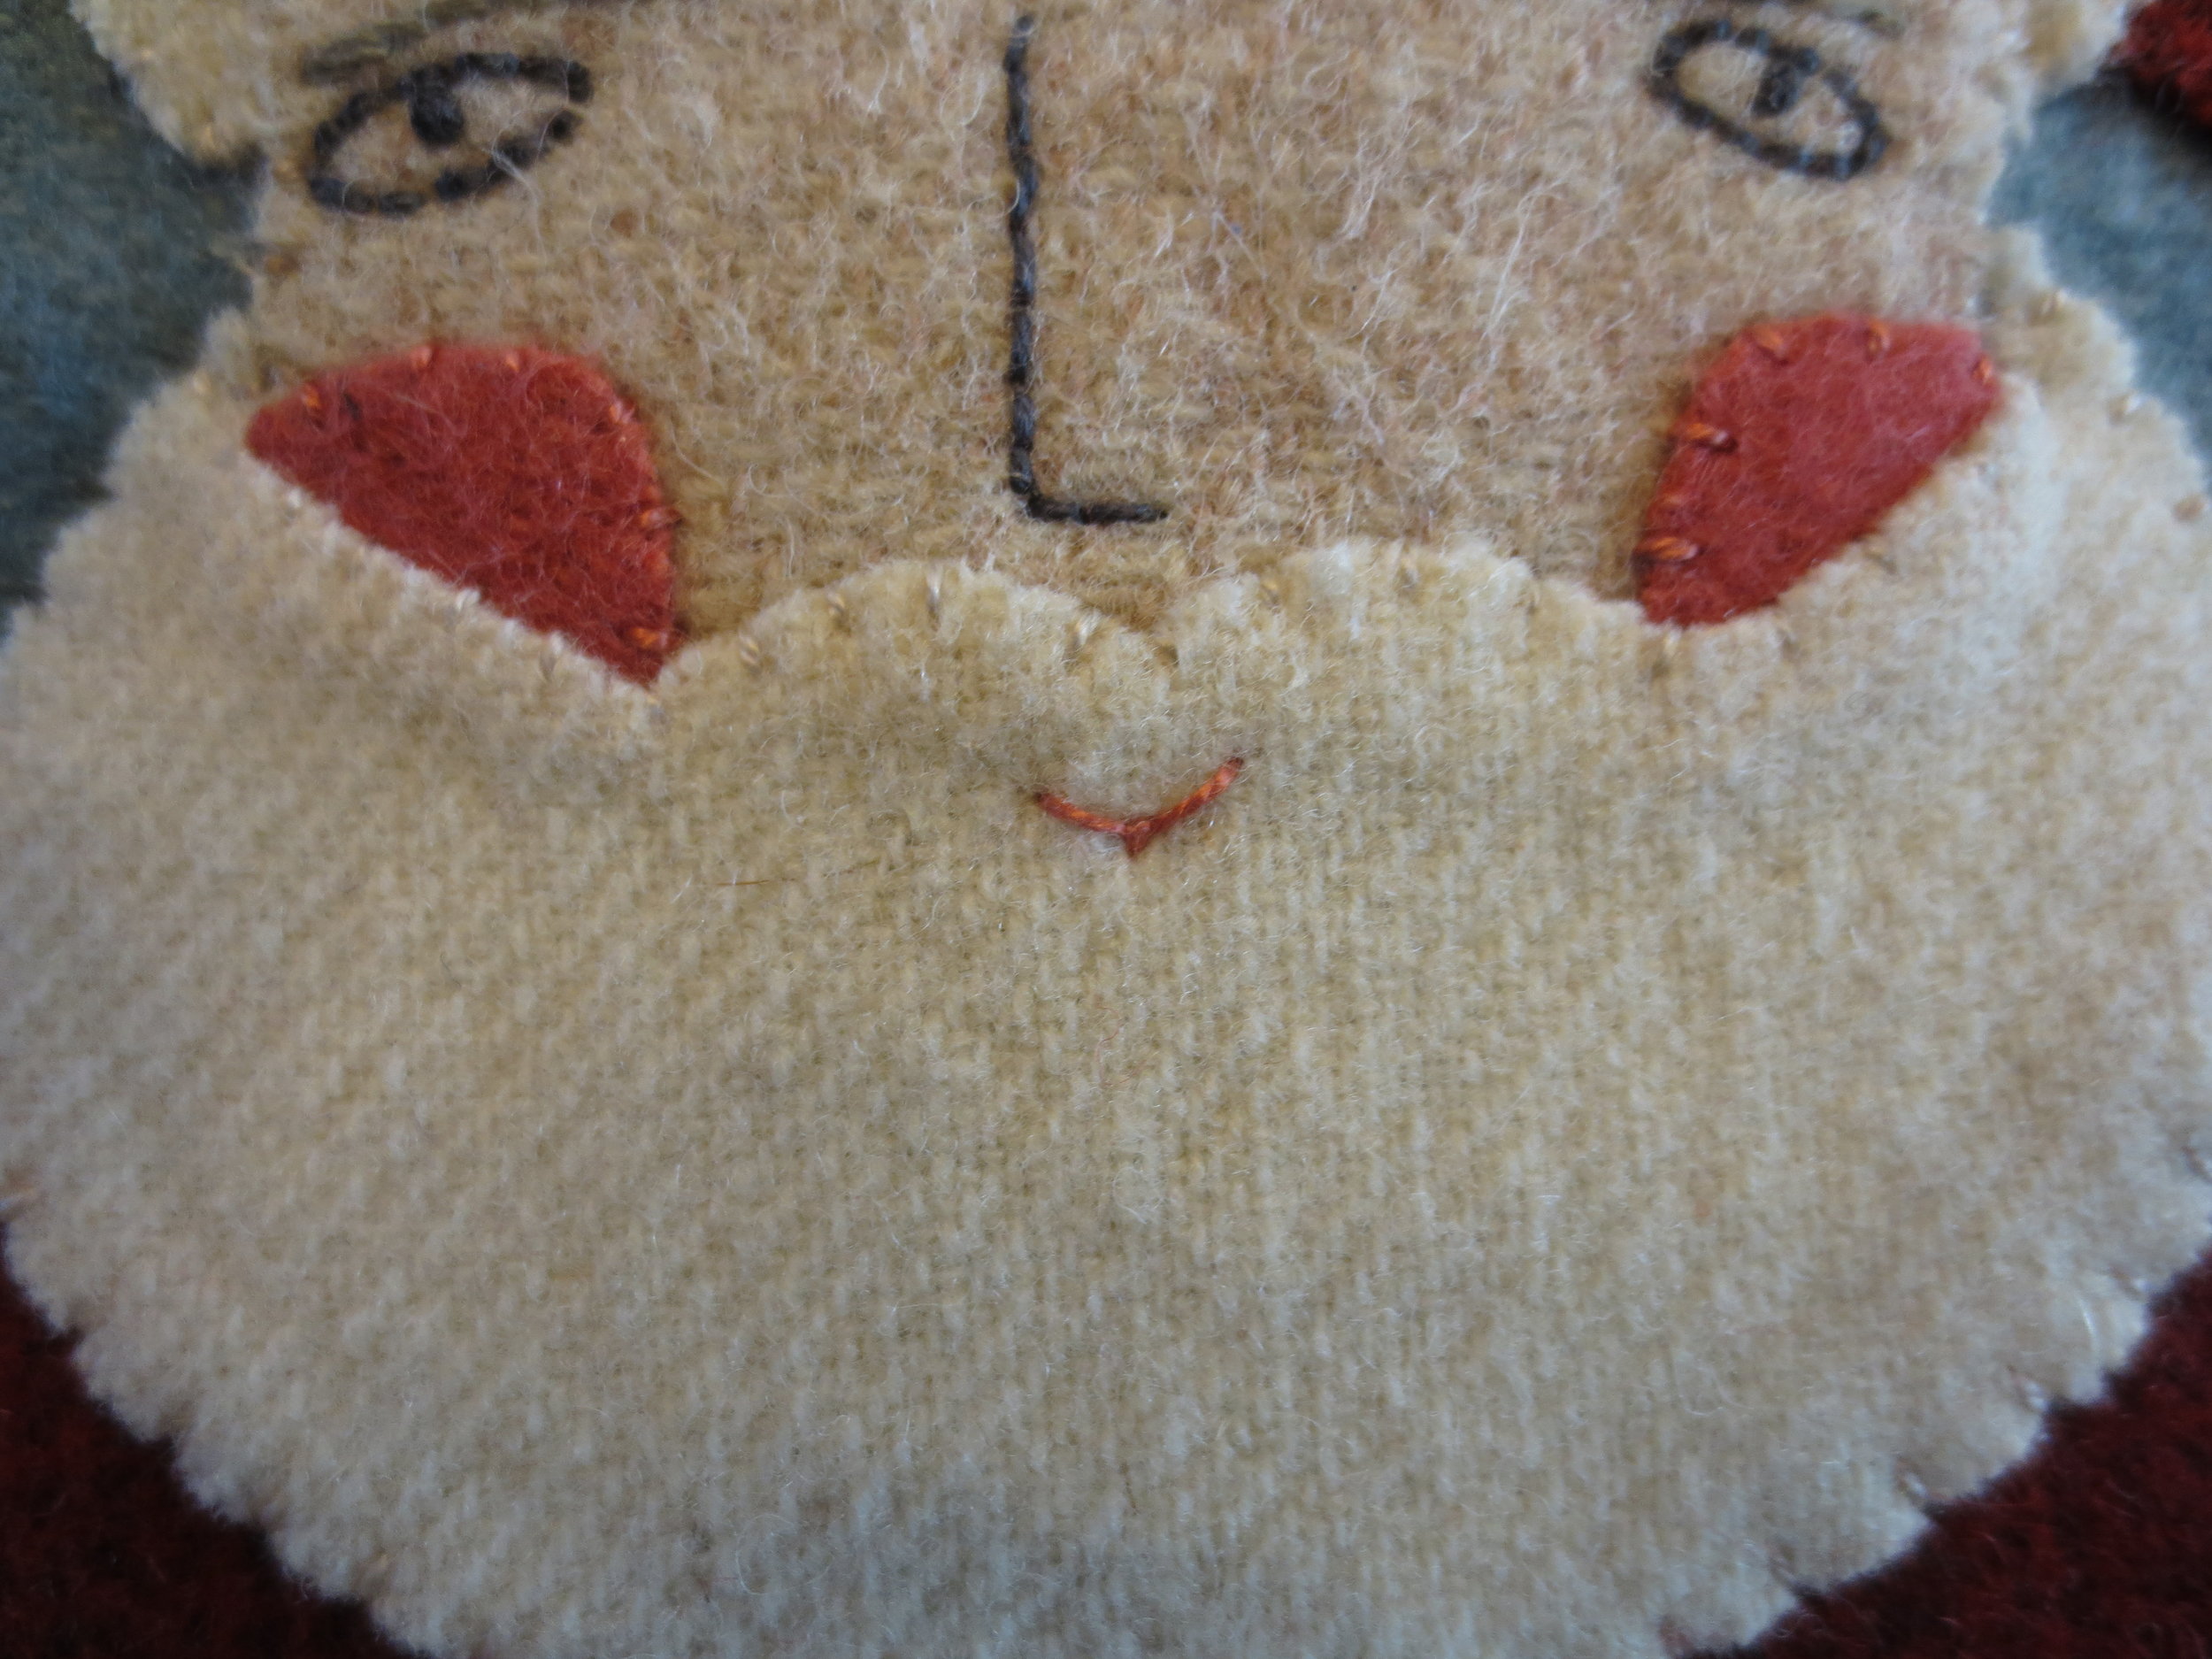
23. Use the same pink thread used for the cheeks to make a fly stitch mouth.

24. Fuse the button to the coat. Whip stitch in place with the grey thread.
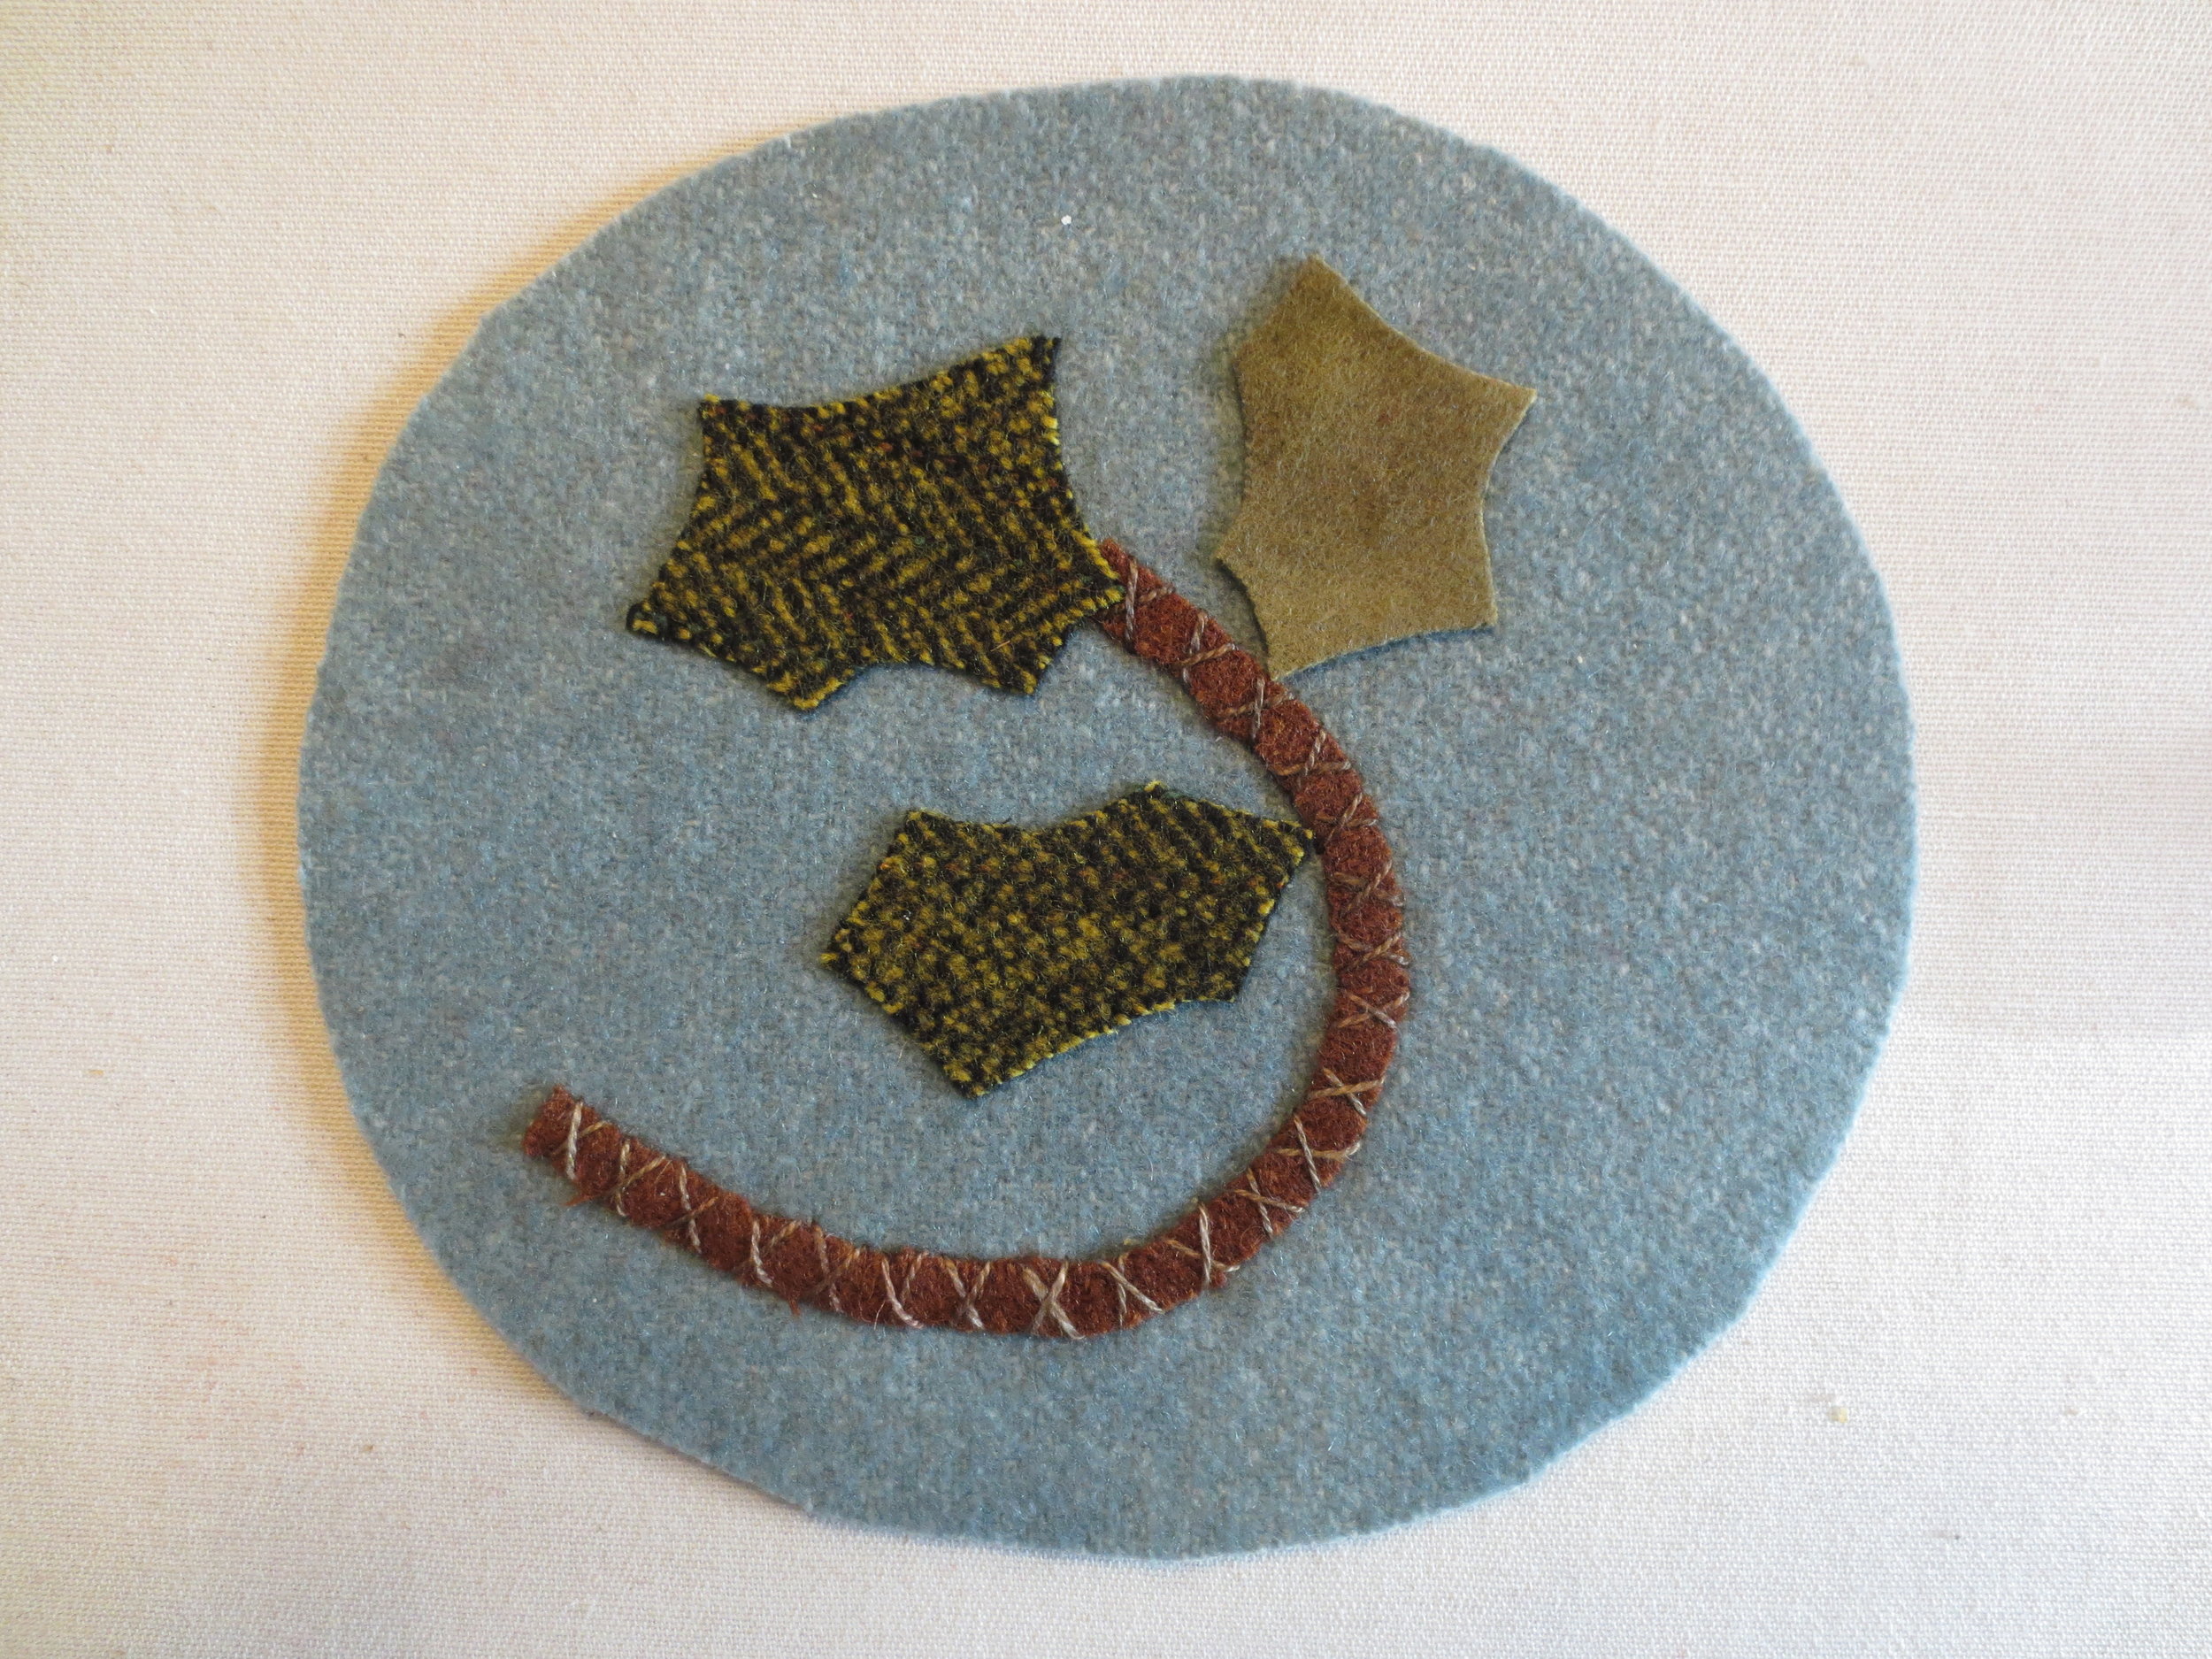
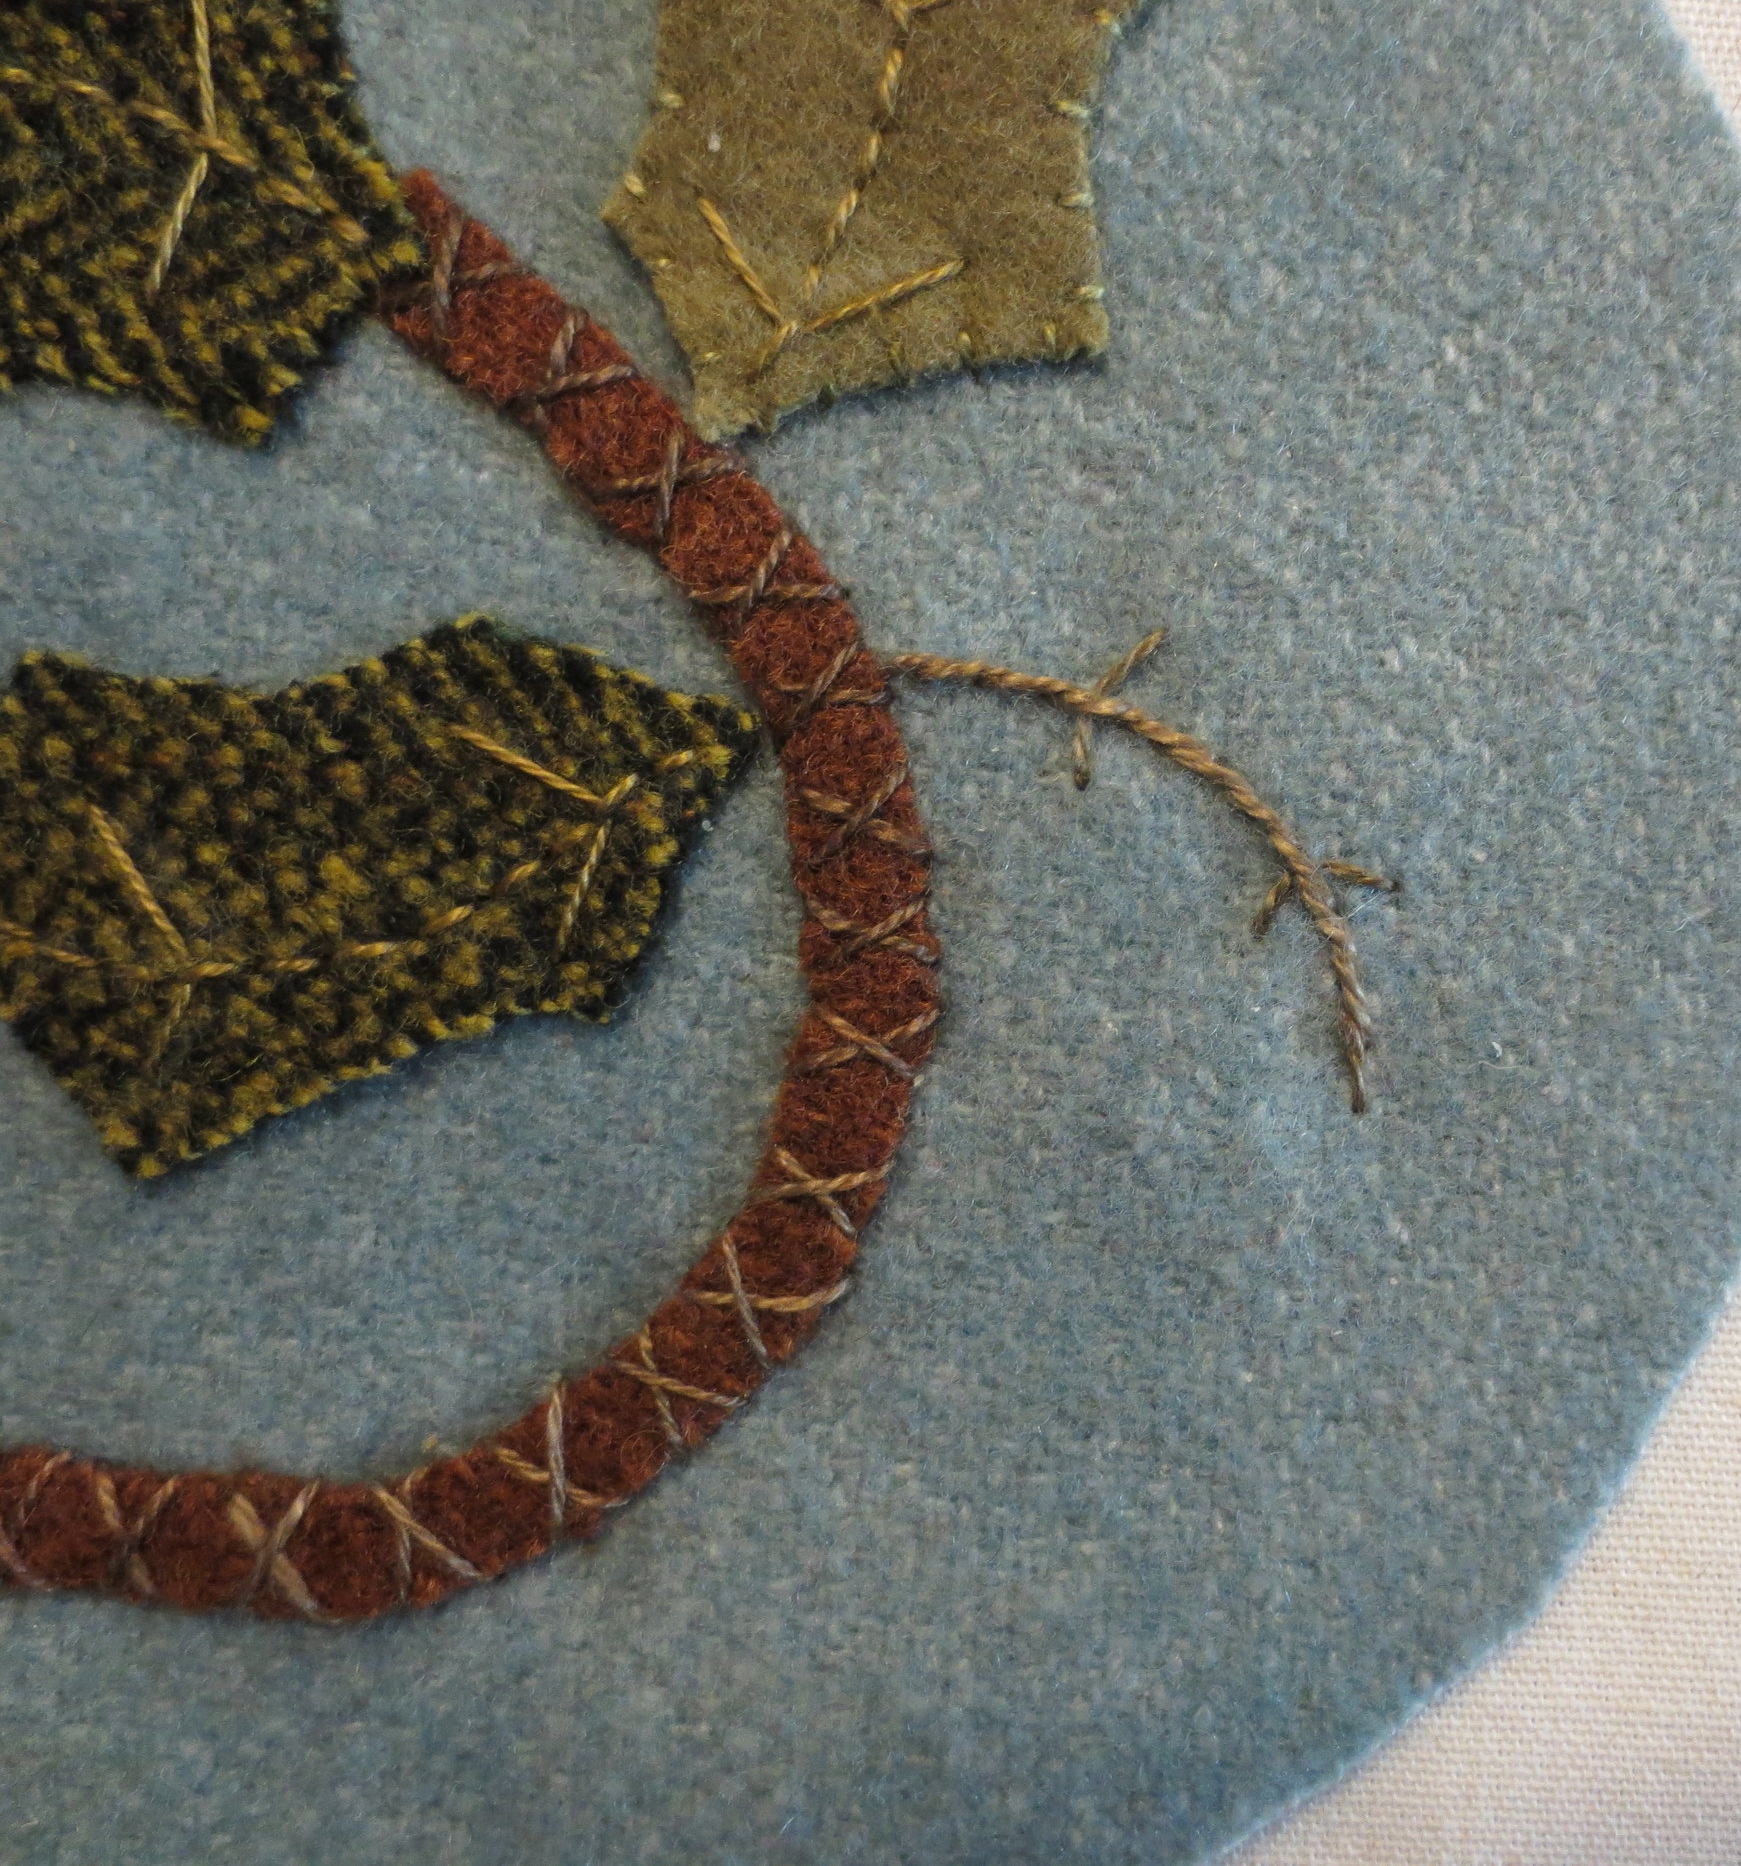
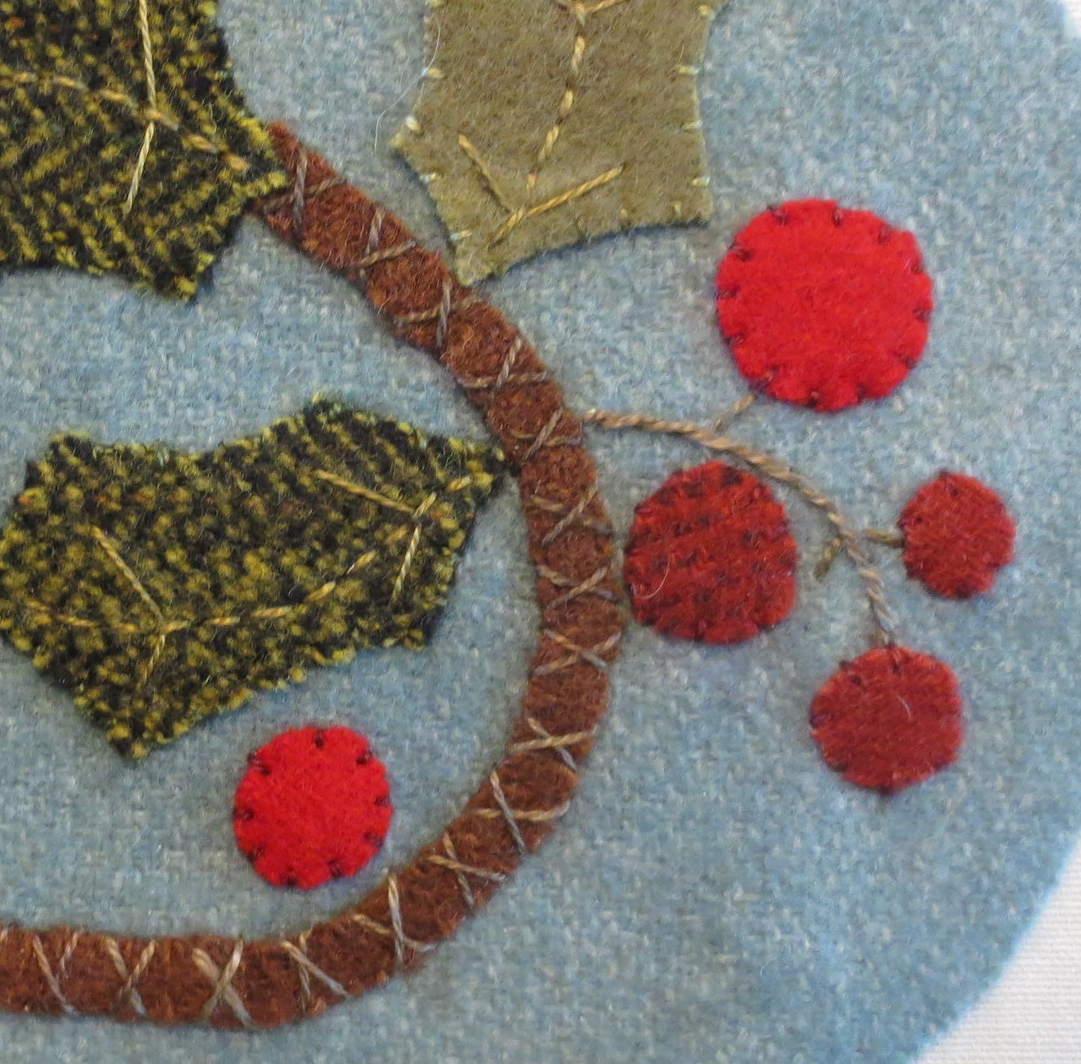
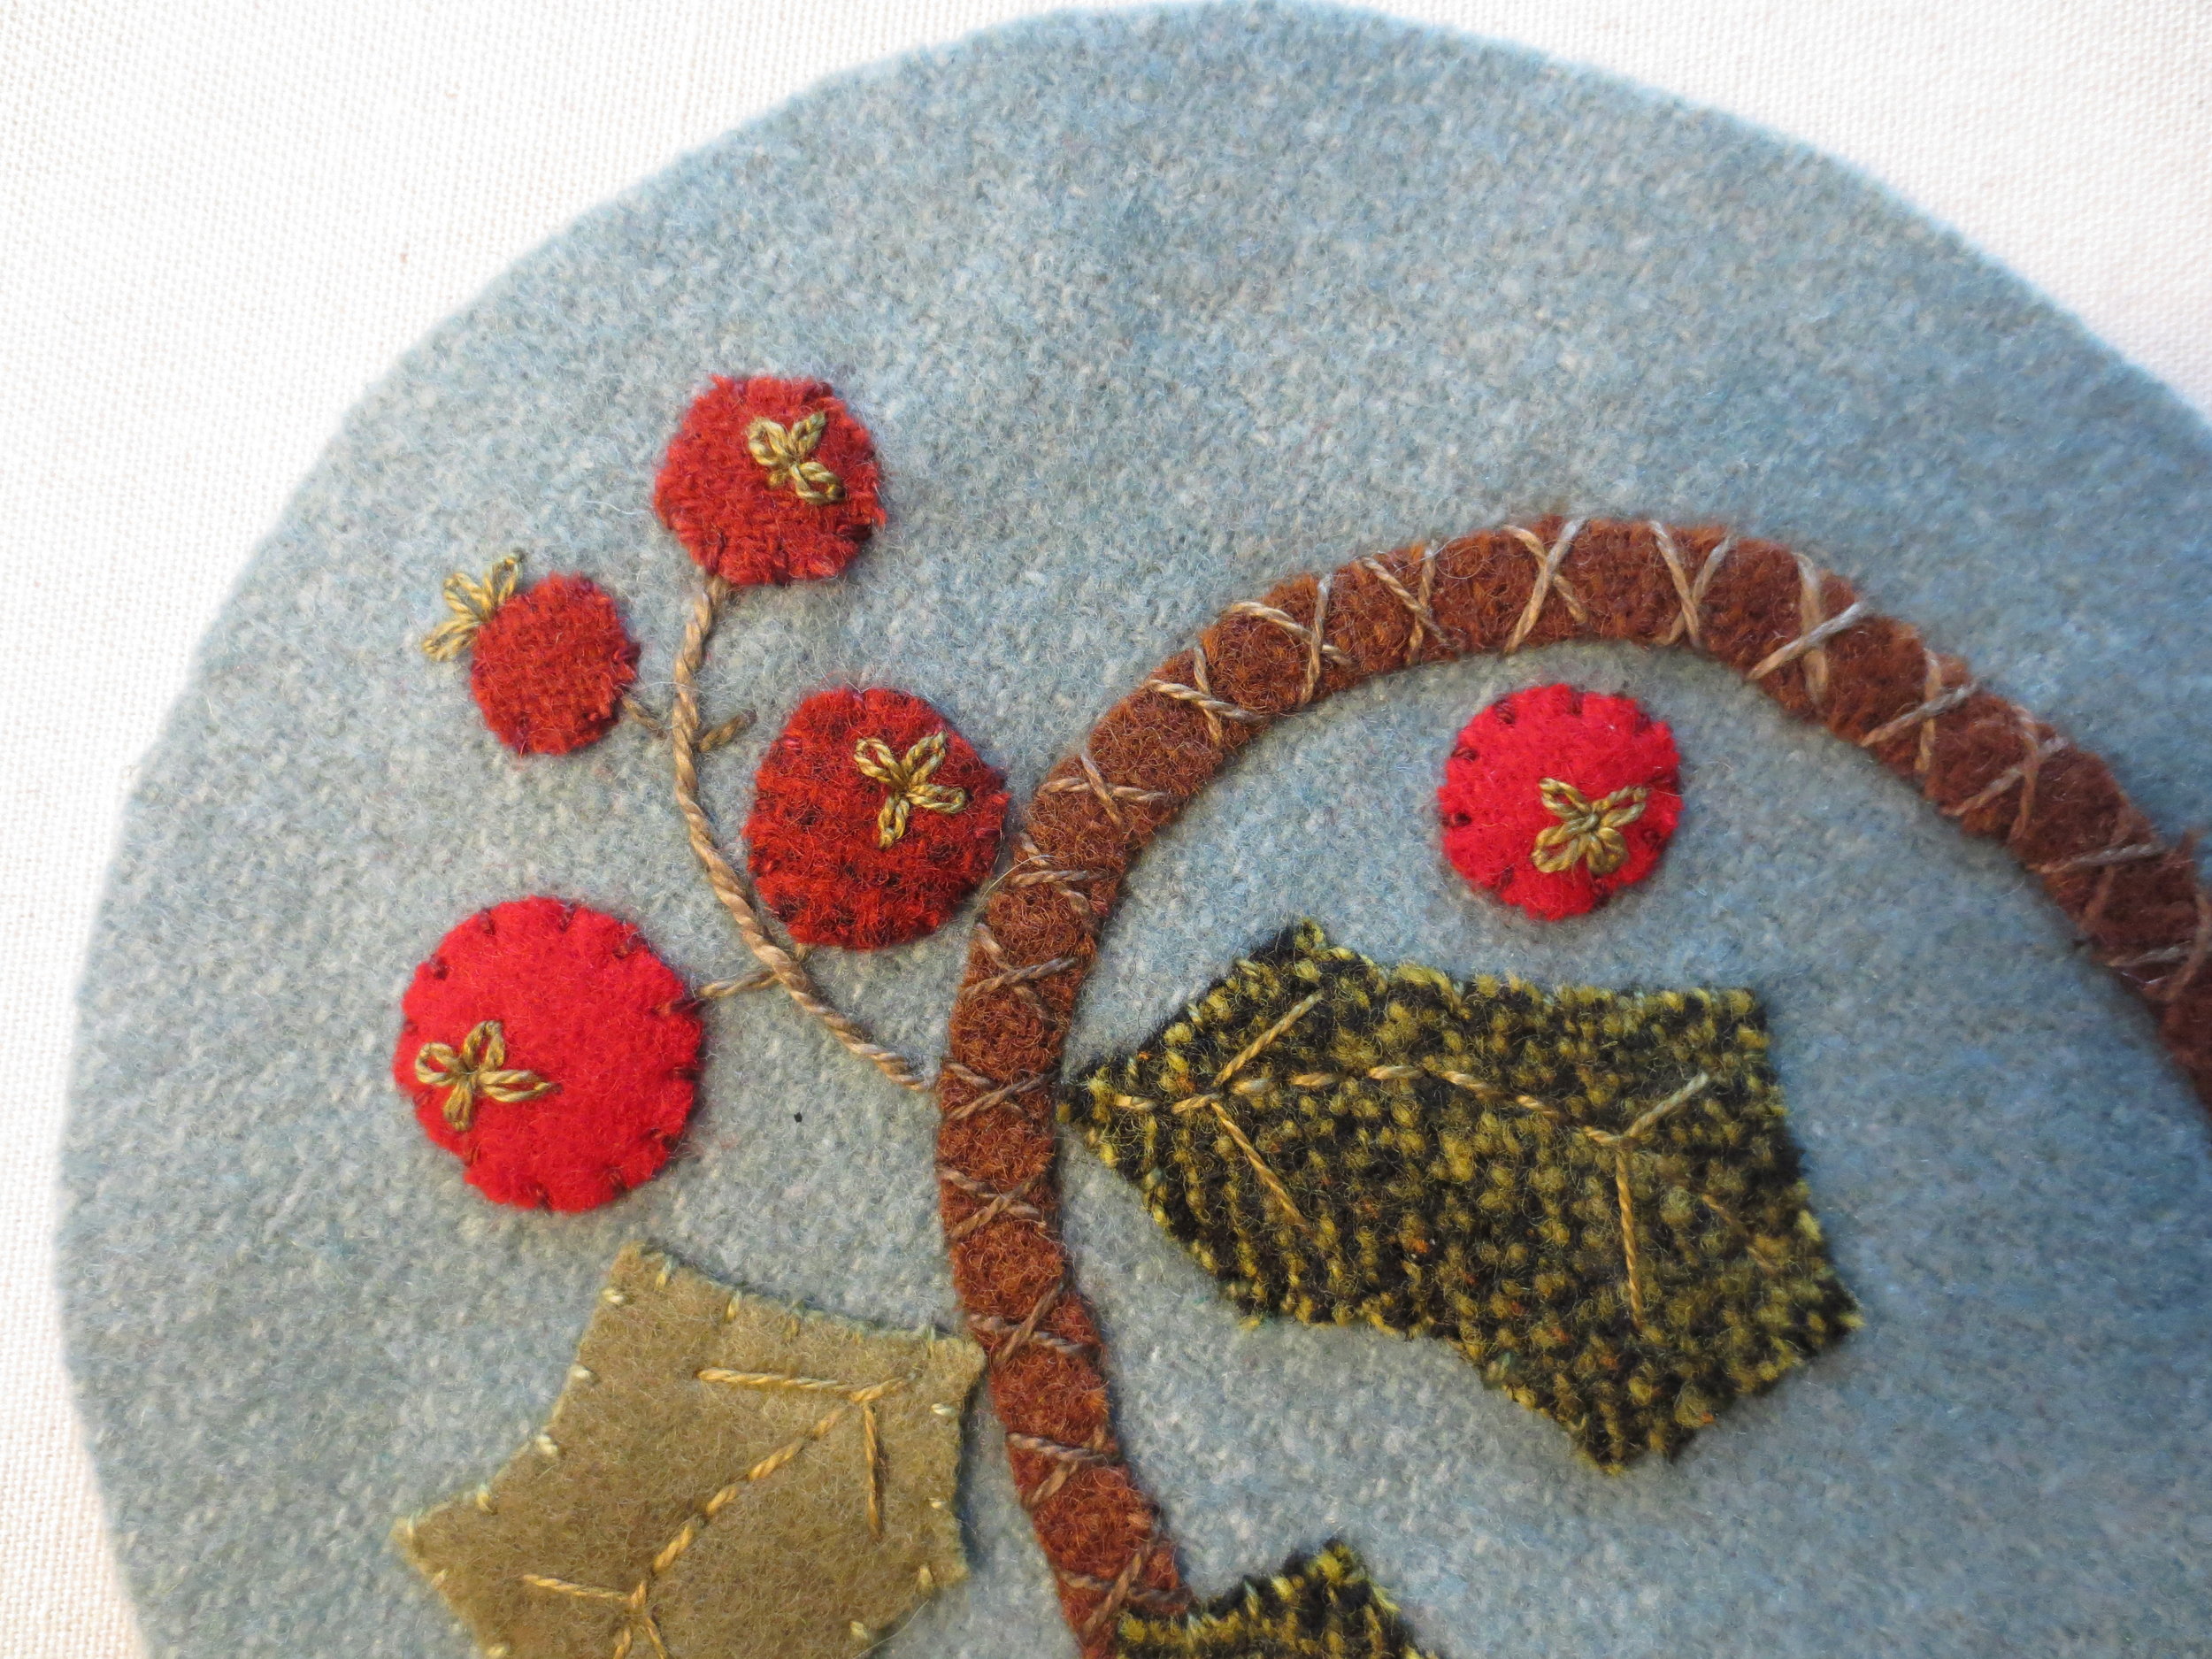
25. Lay out the holly branch, leaves, and berries. Since the the branch does not have fusible web you will need to pin the branch in place.
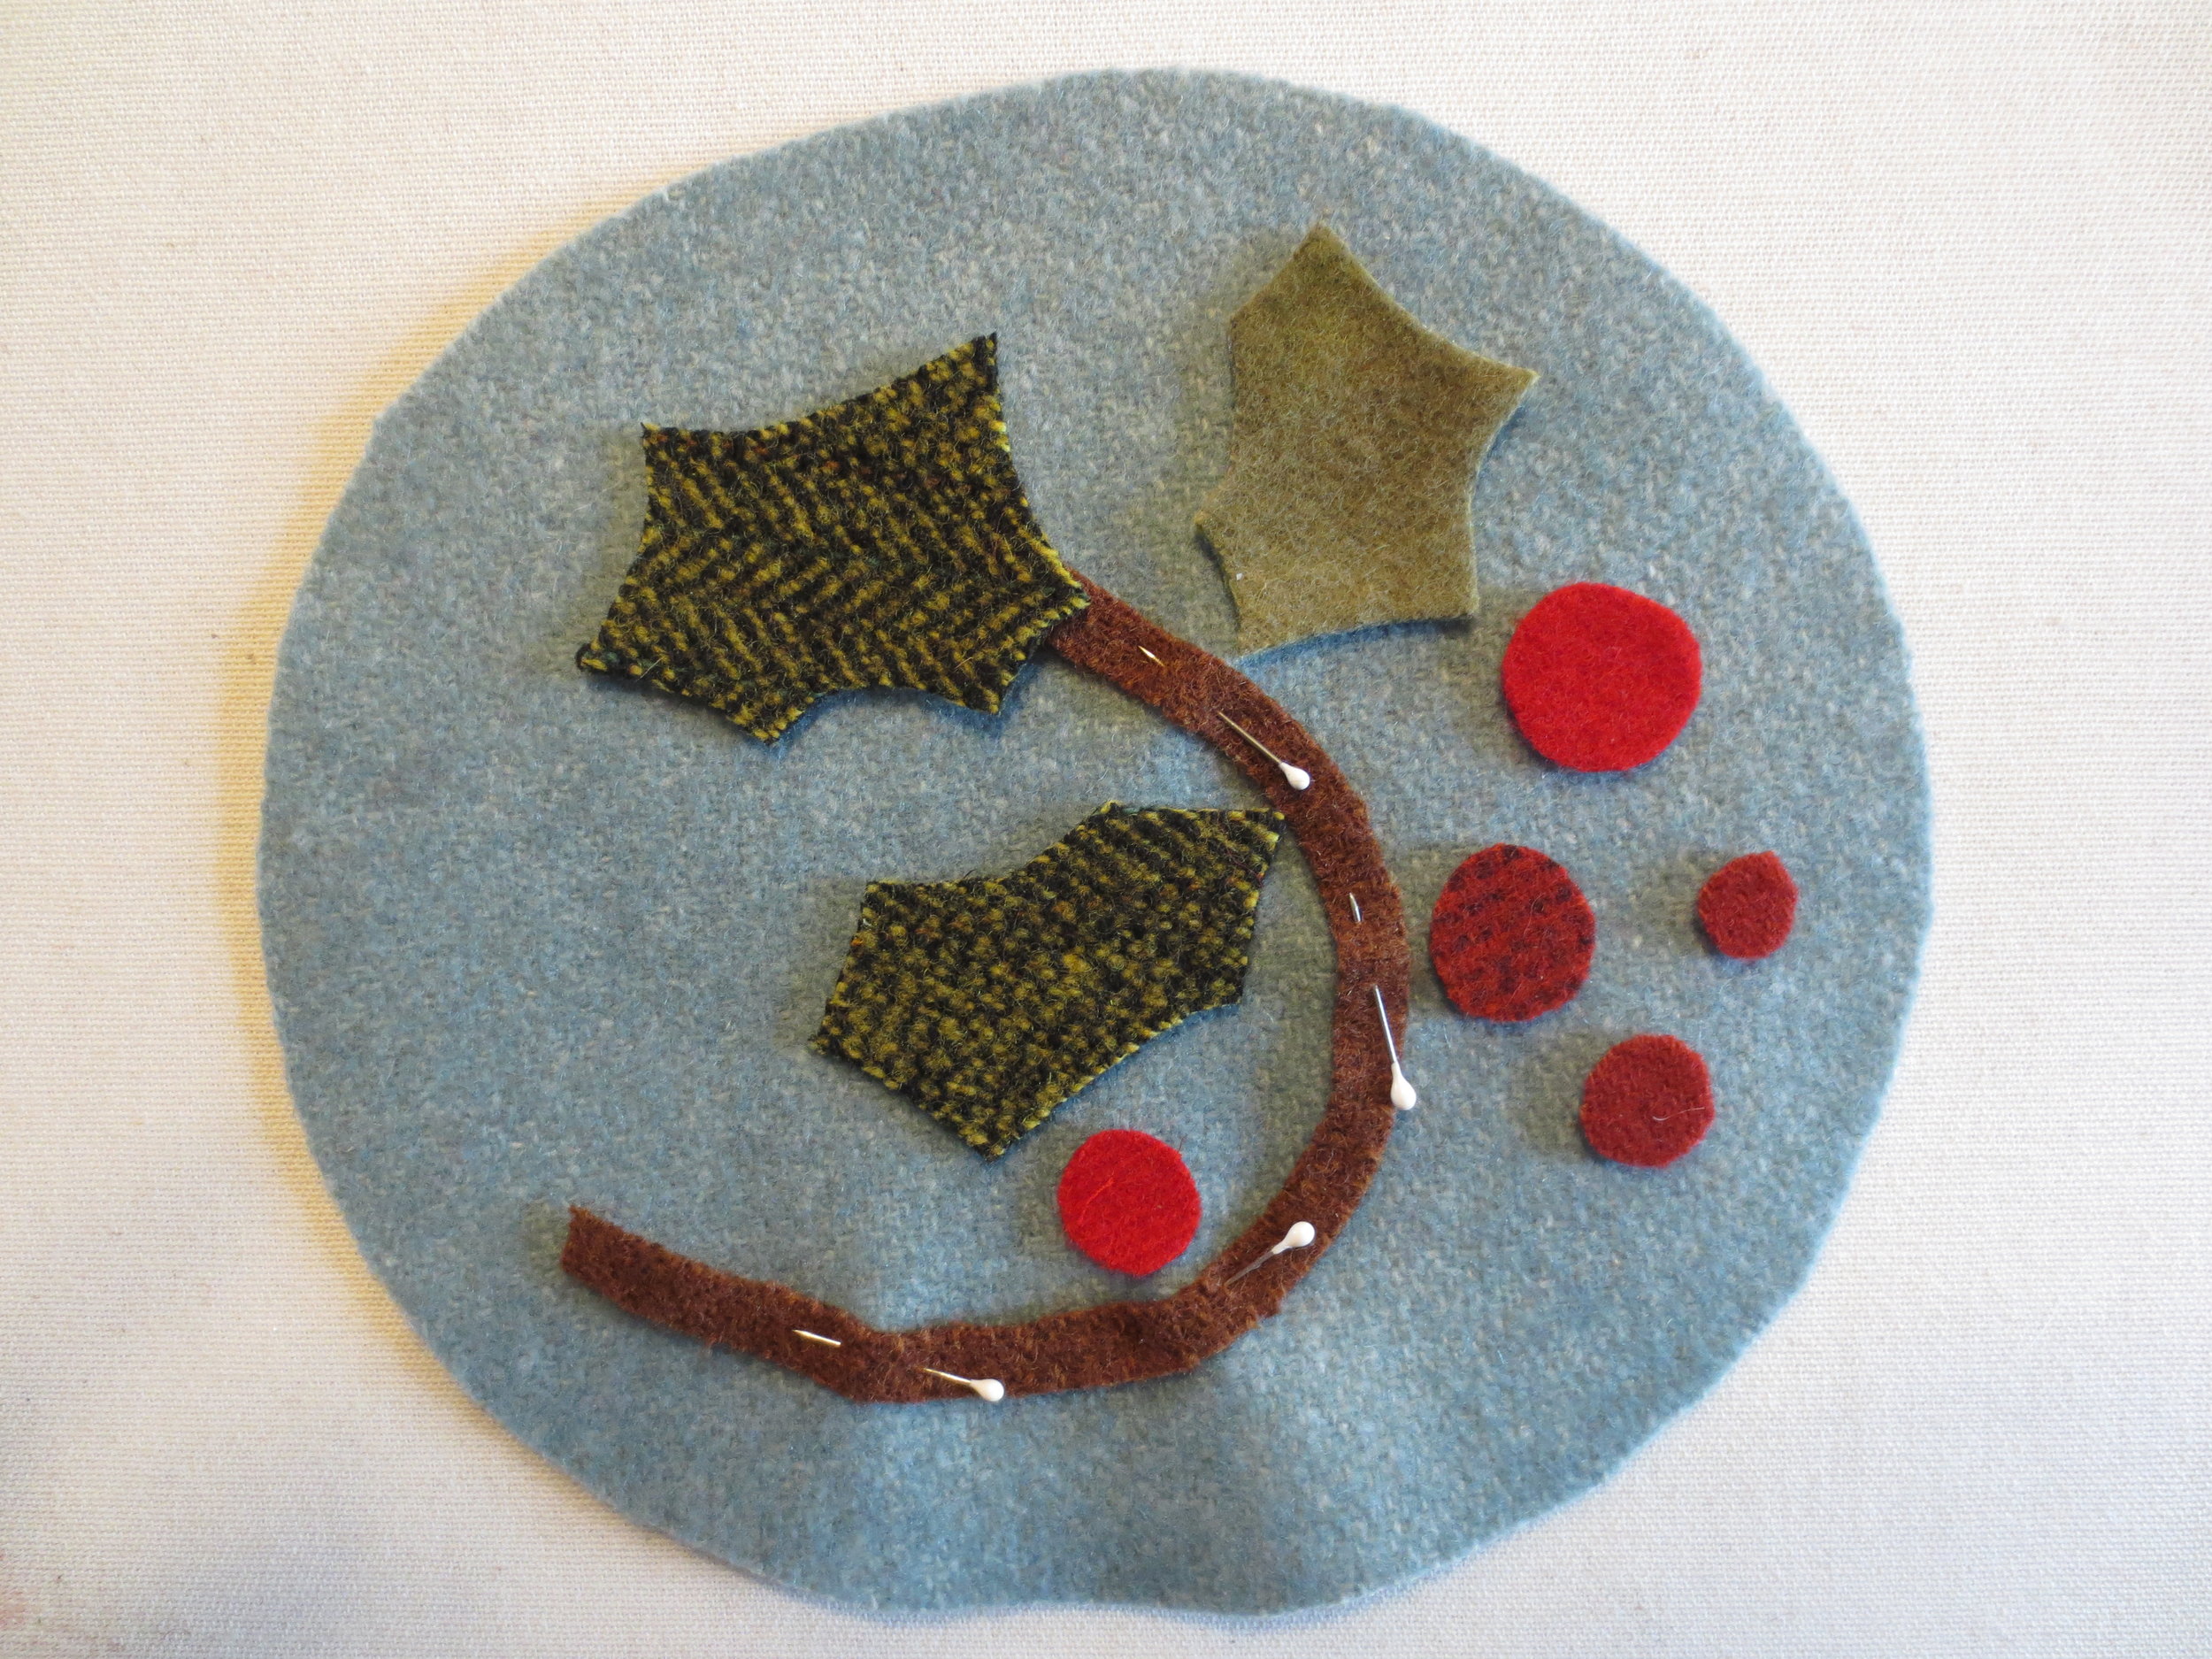
26. Remove the leaves and berries.
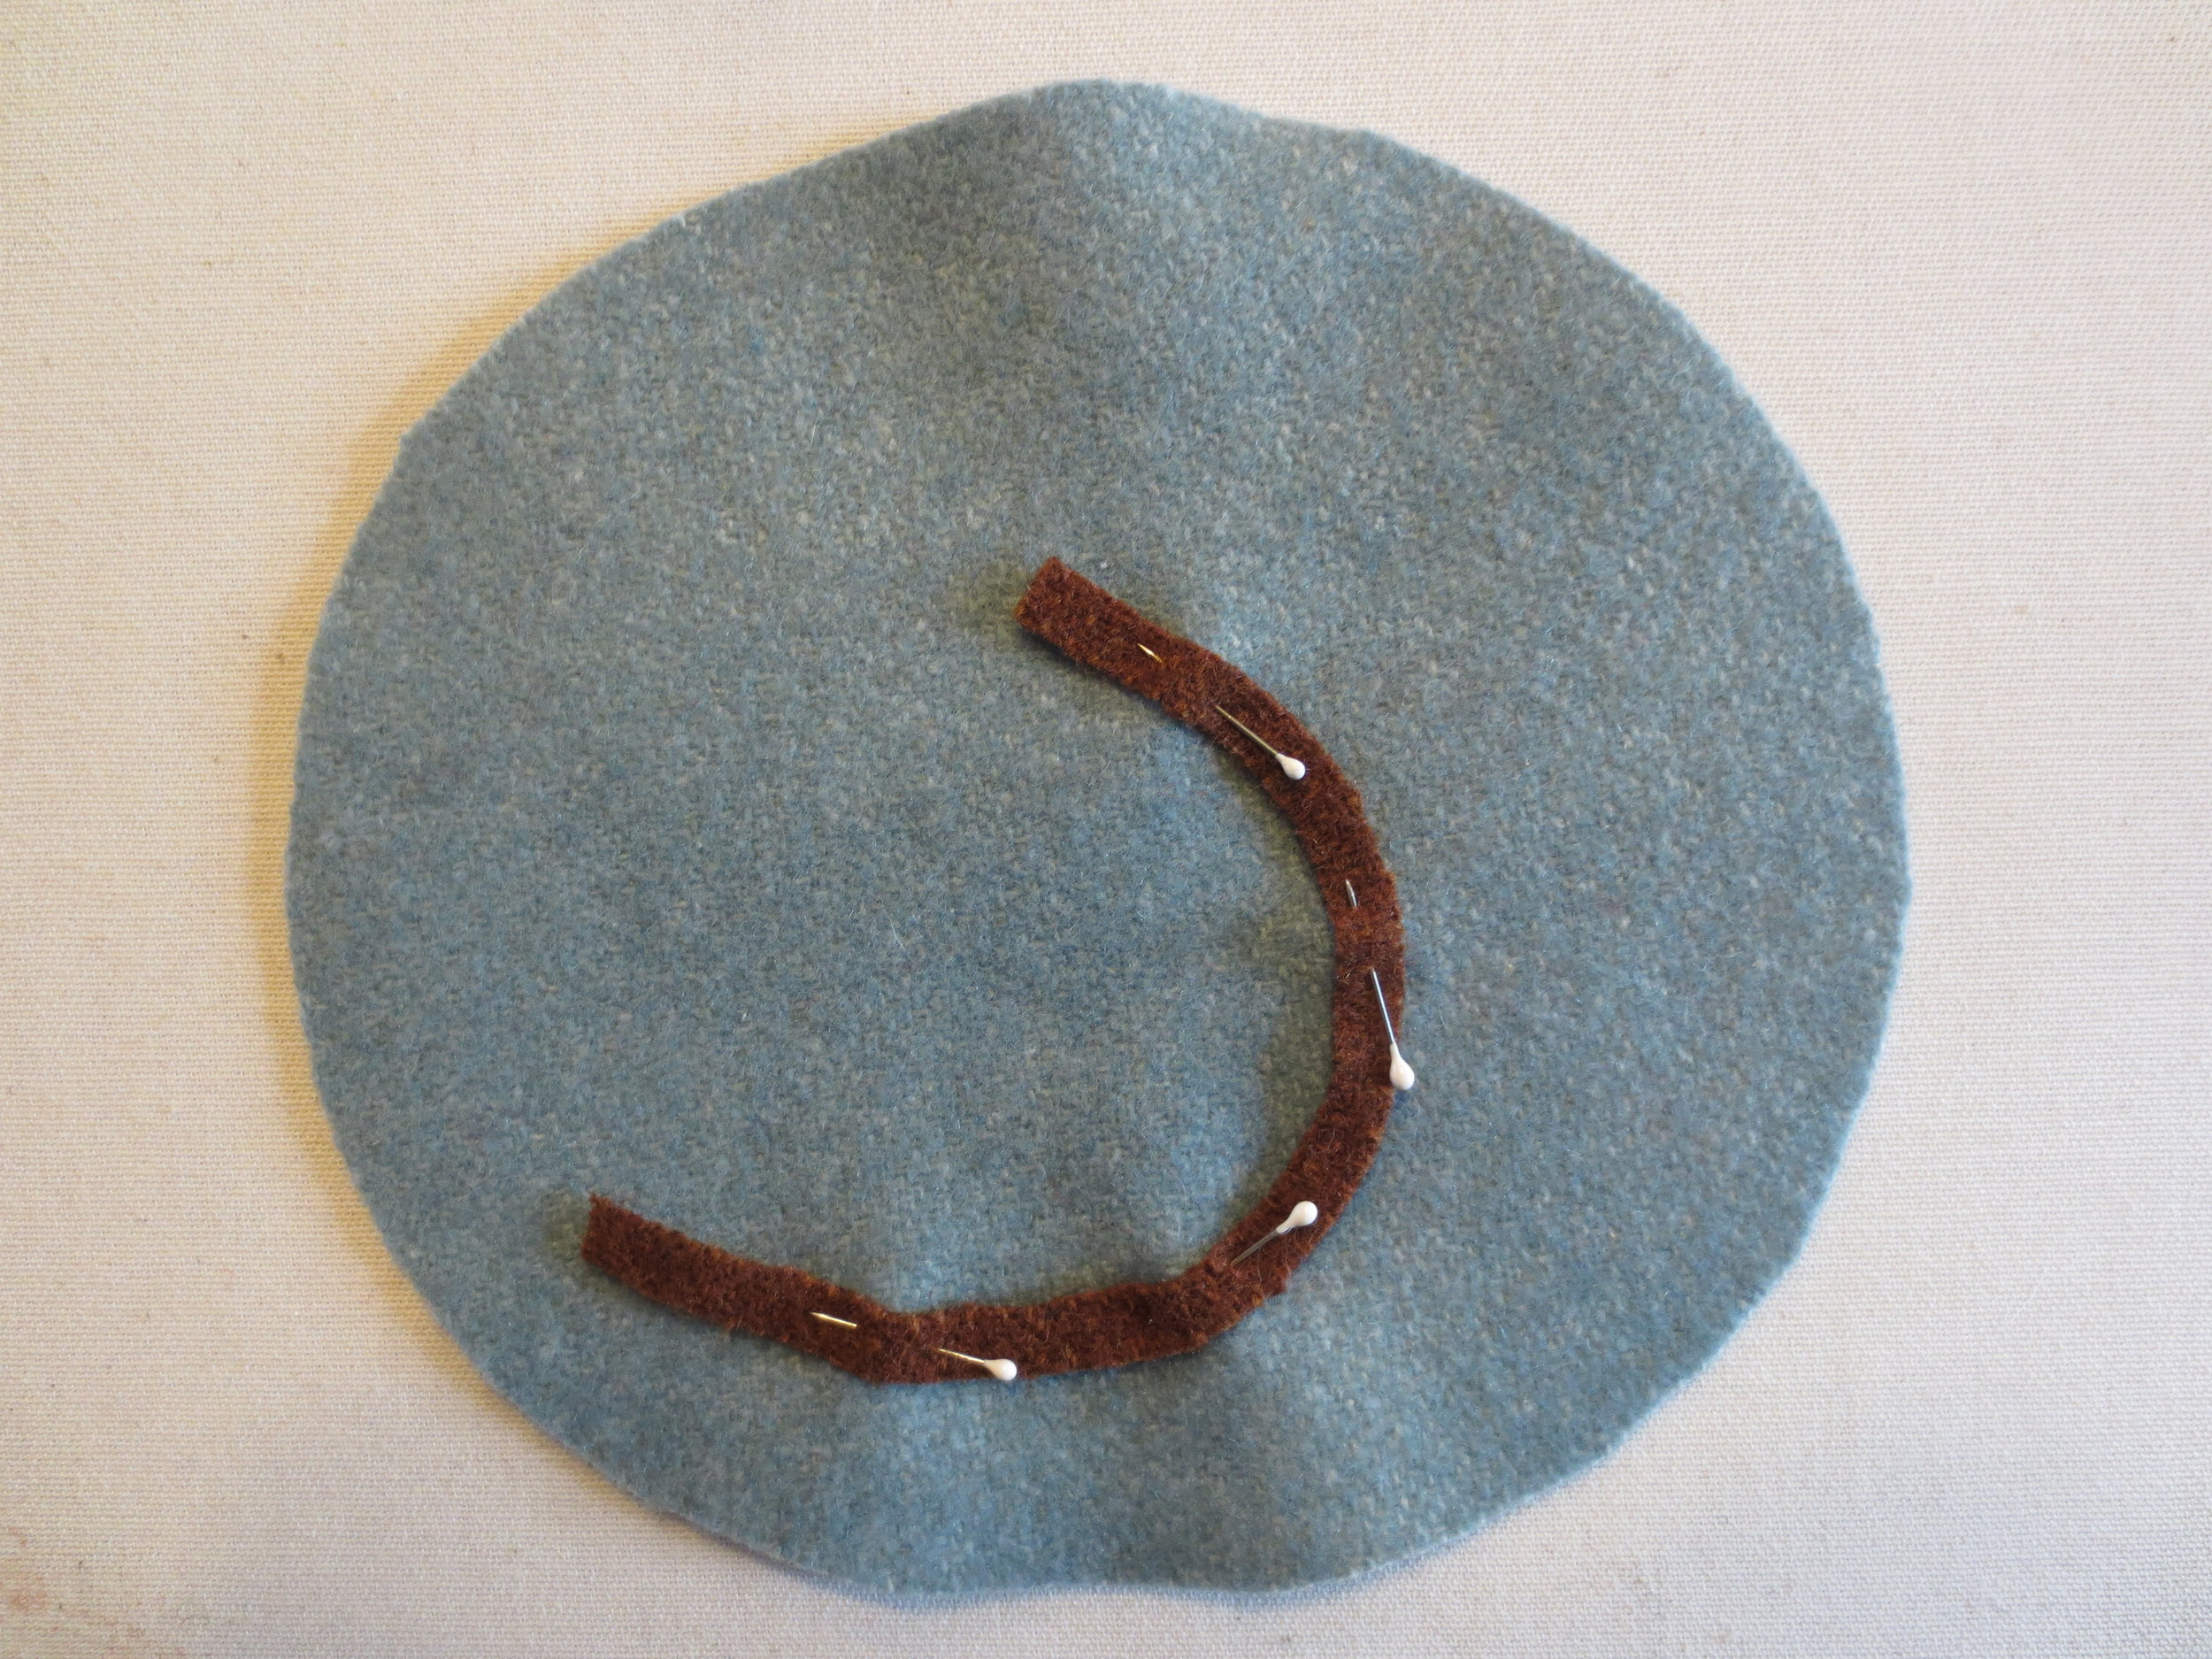
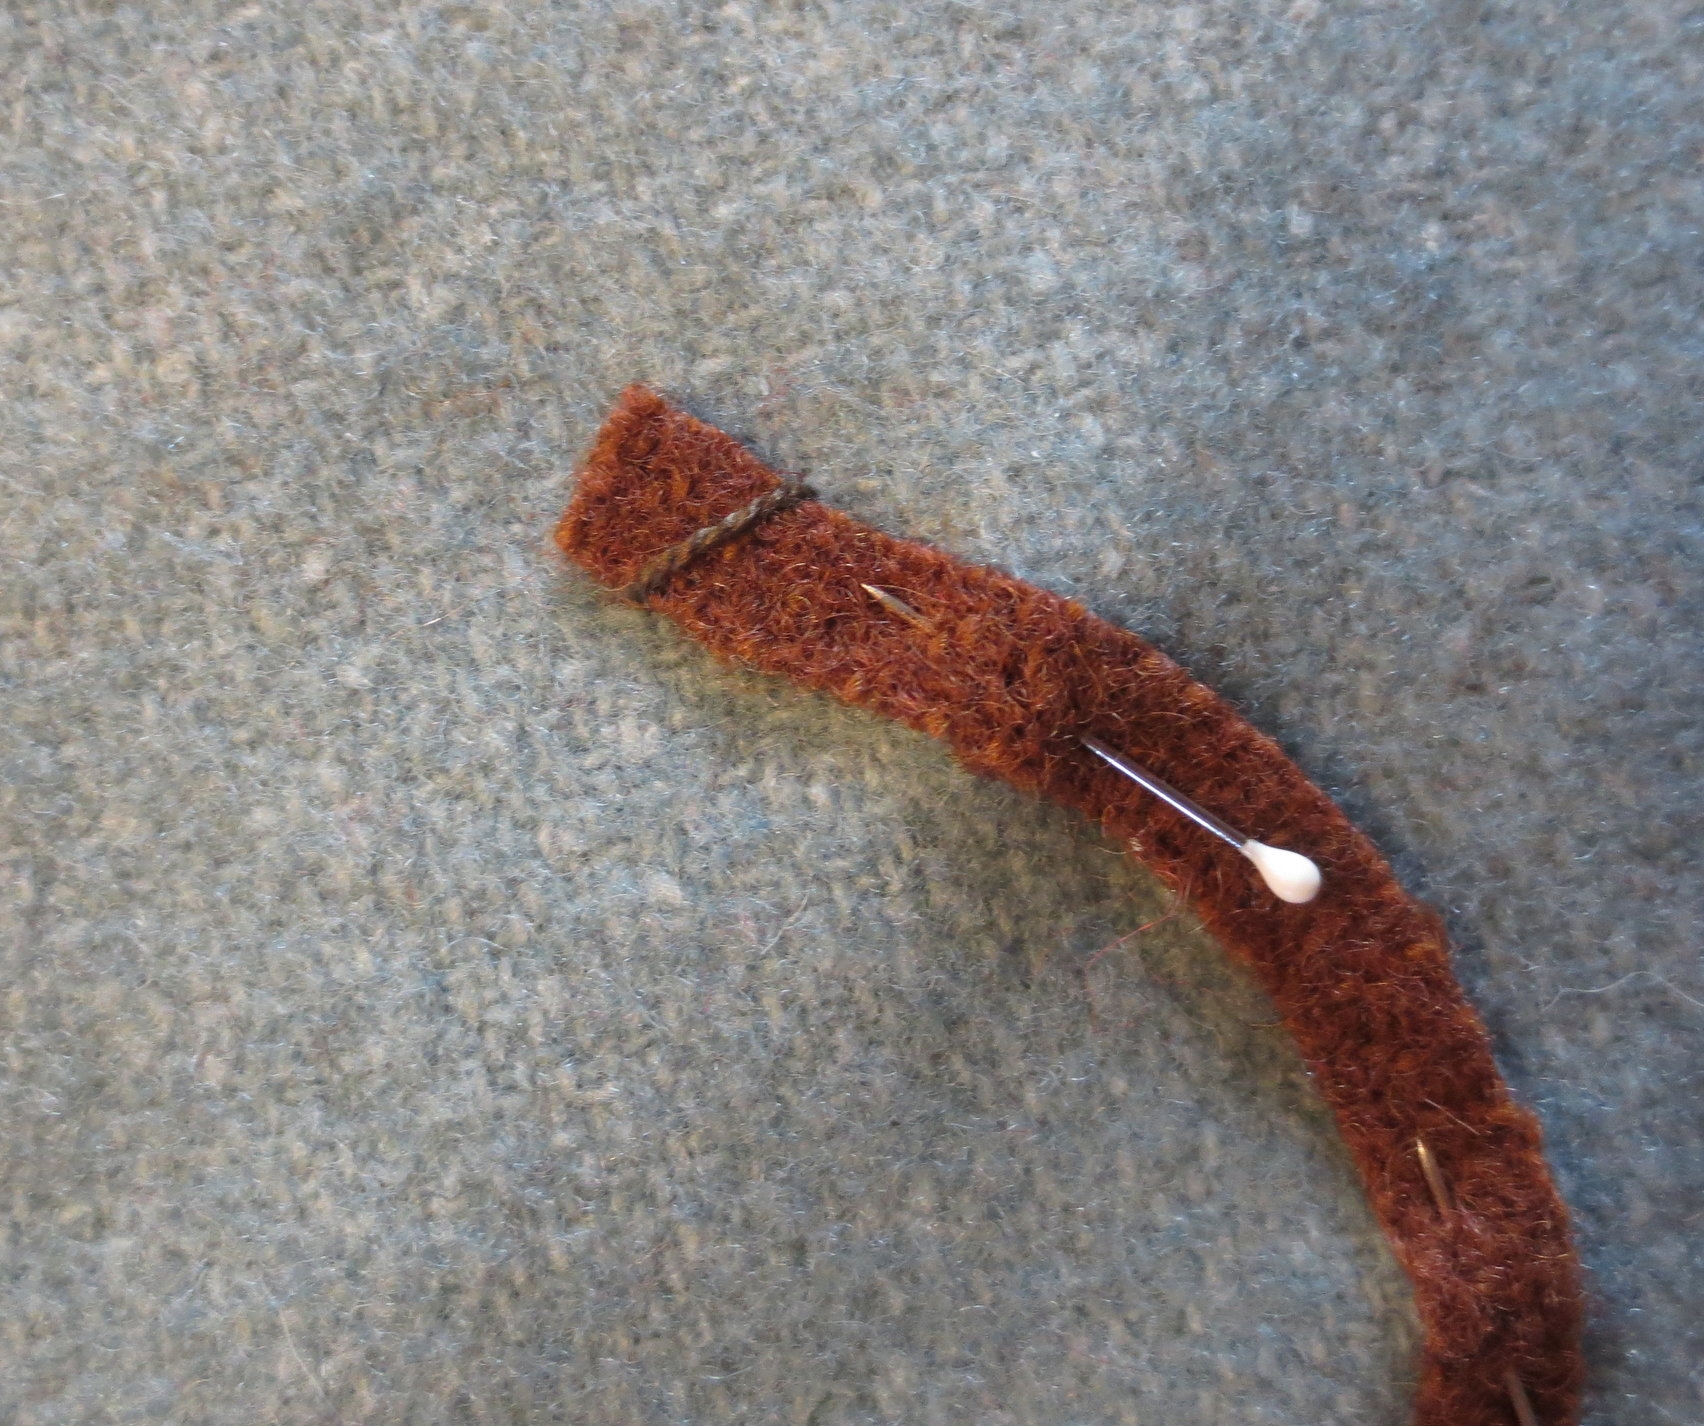
27. Use a contrasting colored thread (I used #O519) to make a couching stitch with a series of crosses to secure the branch in place.
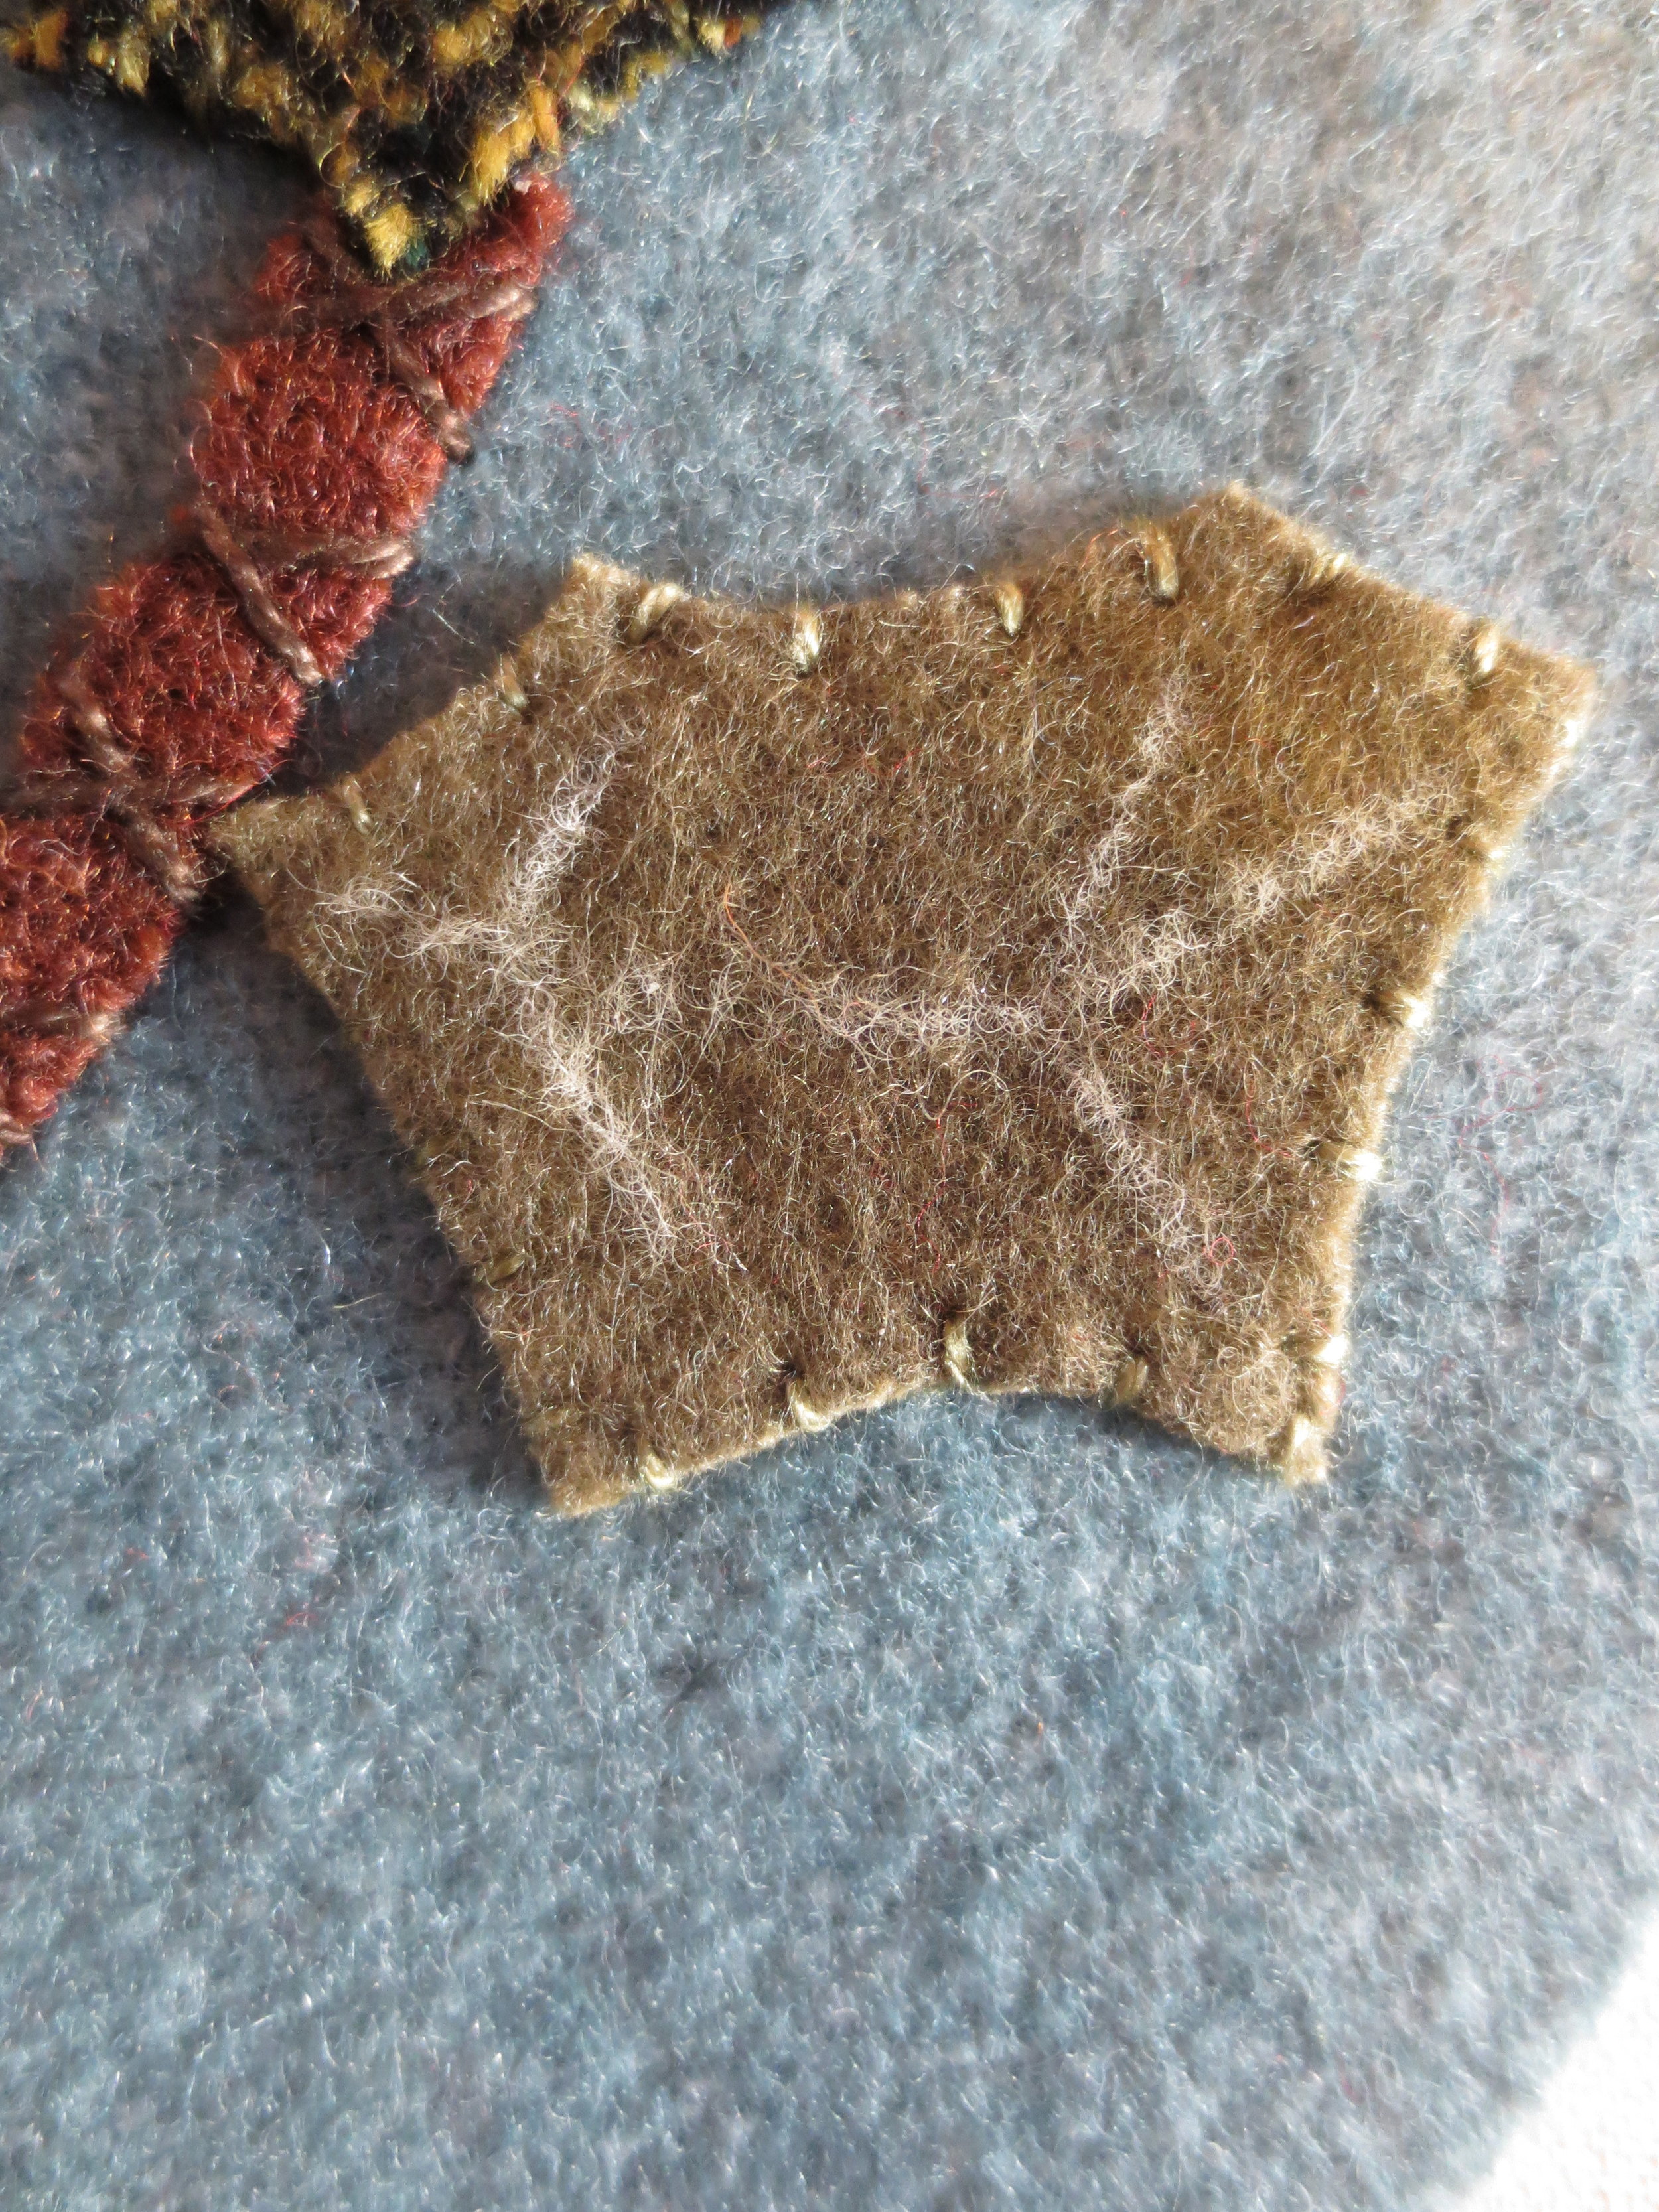
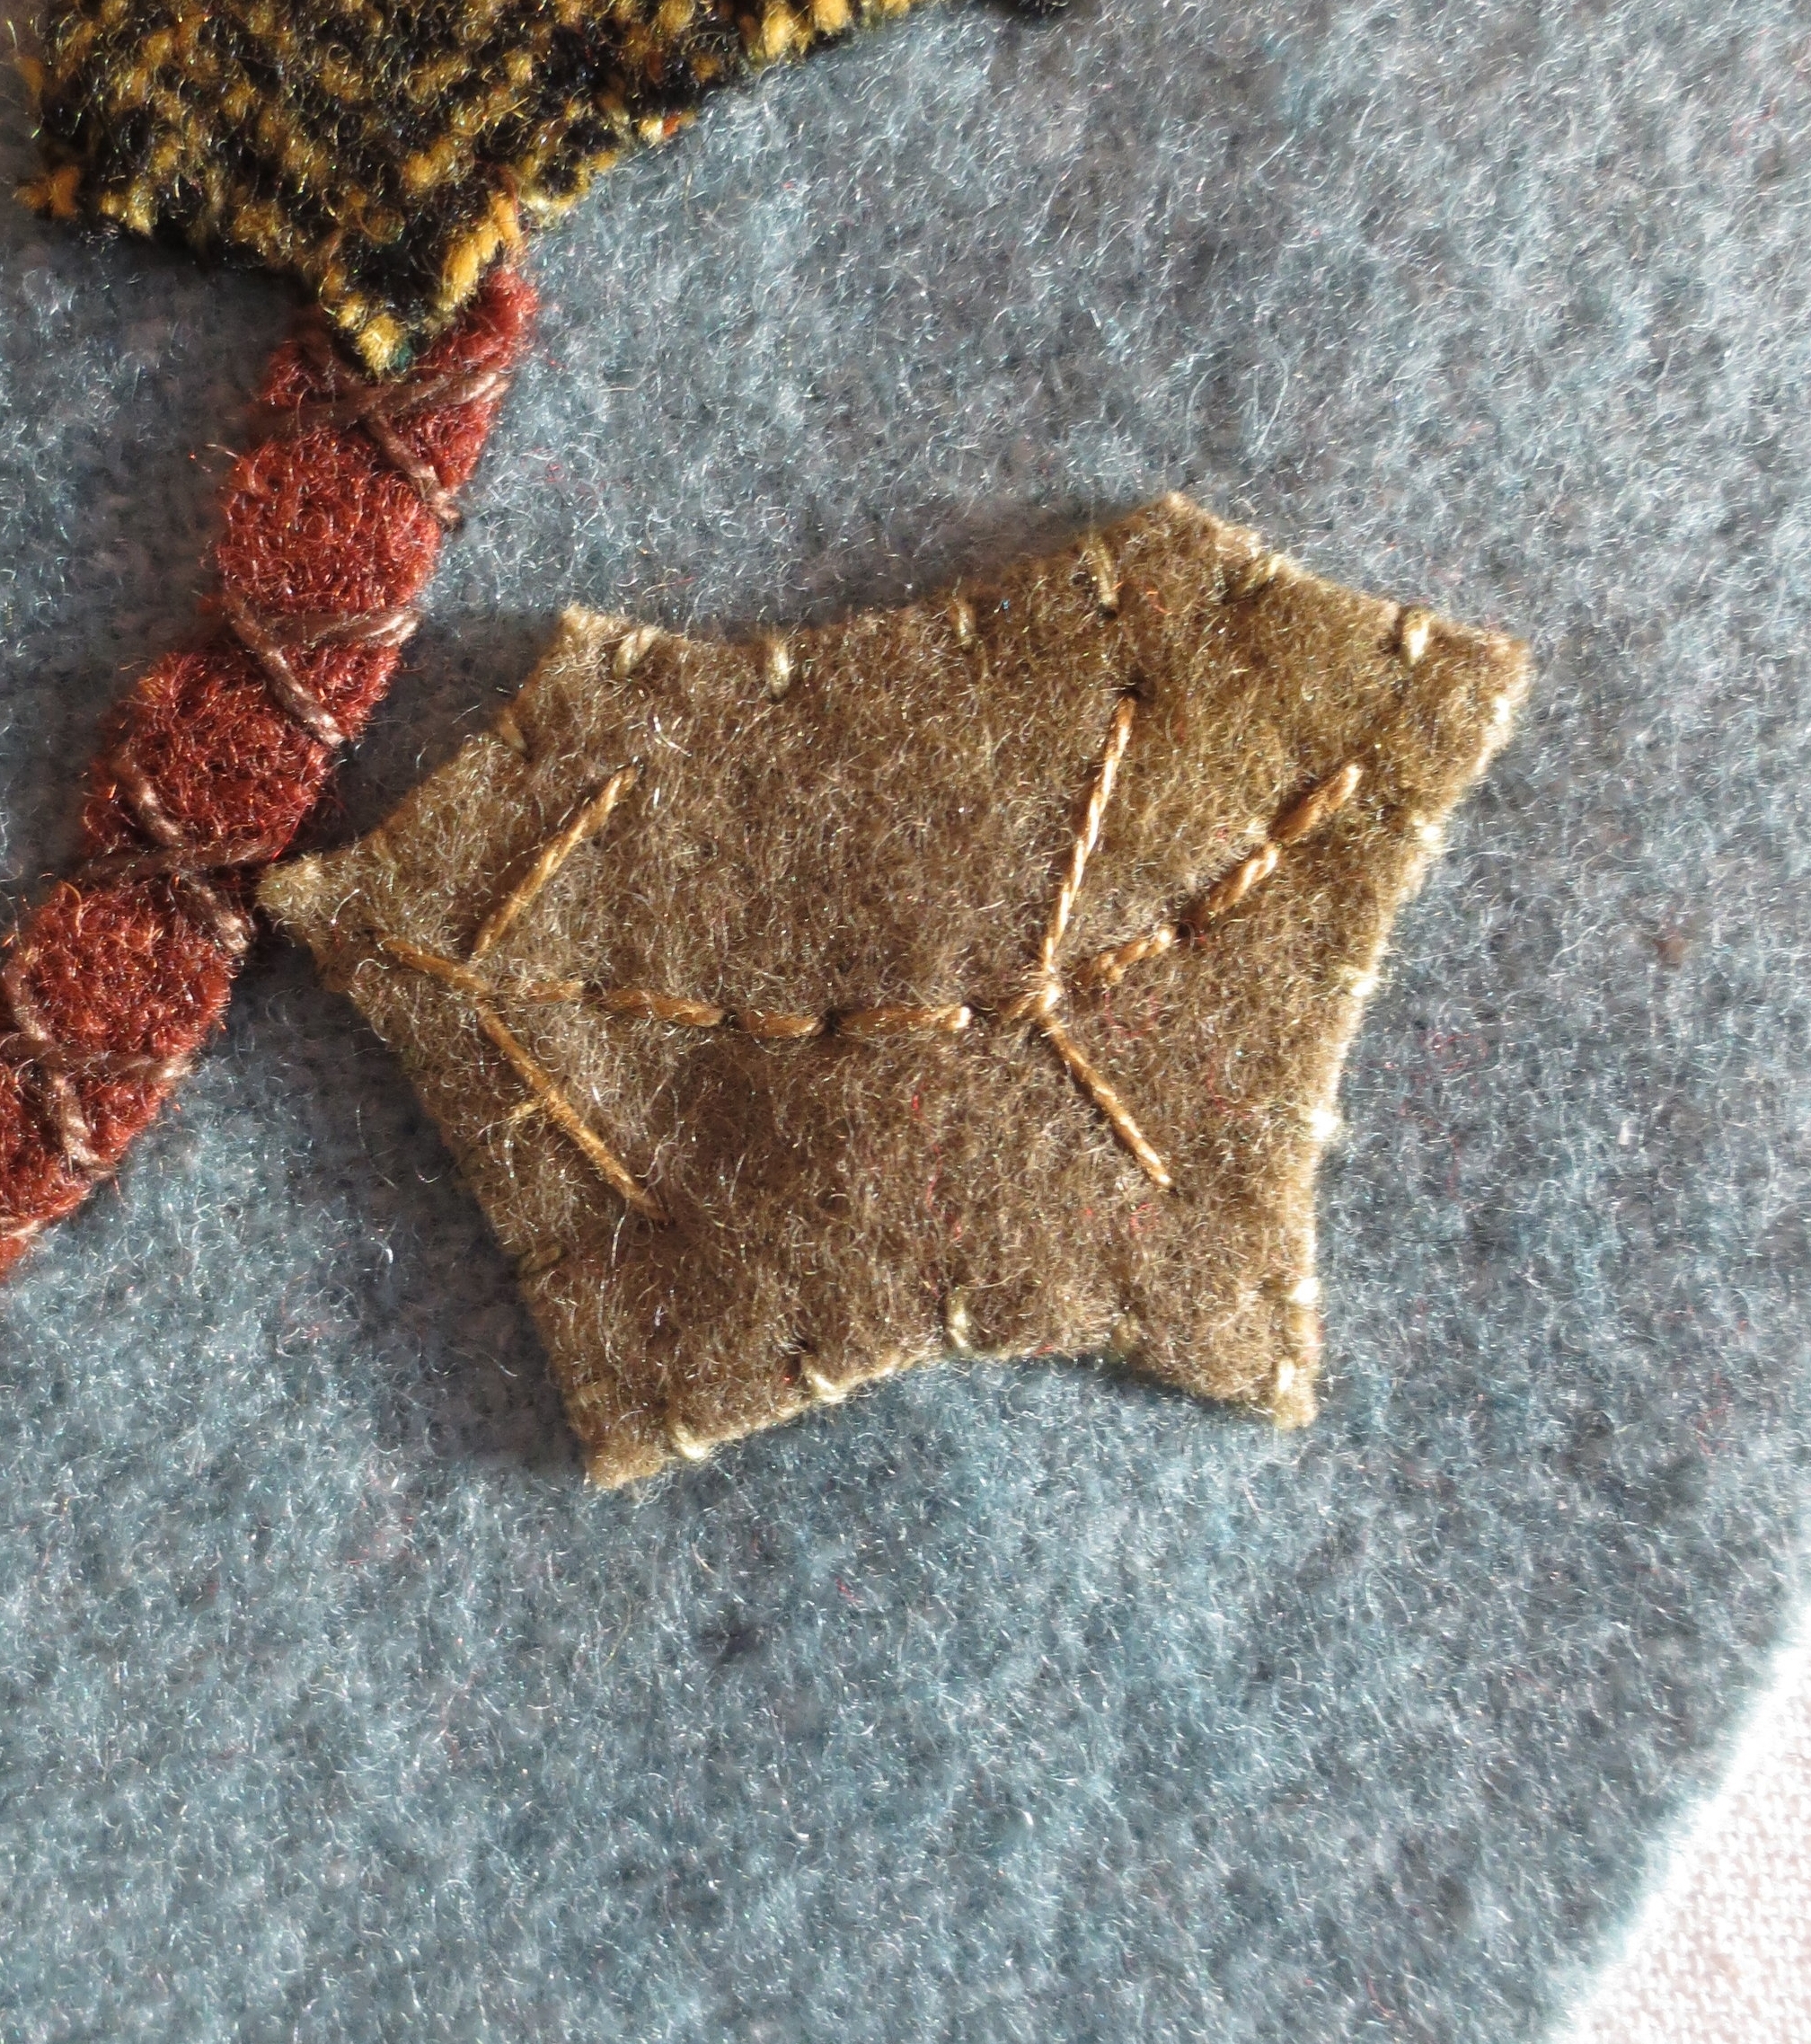
28. Reposition the leaves and fuse in place.
29. Whip stitch the leaves with green thread.
30. Use a chalk pencil to draw the veins of the leaves.
31. Use antique gold to back stitch the central vein.
32. Use the same thread to stitch the side veins. Begin each stitch by bringing the thread up at one end of the side vein, pulling the thread through. Then slide the needle under one of the back stitches of the central vein, pulling the thread through. Insert the needle at the end of the leaf vein on the opposite side, pulling the needle through.
33. Reposition the berries, but do not fuse.
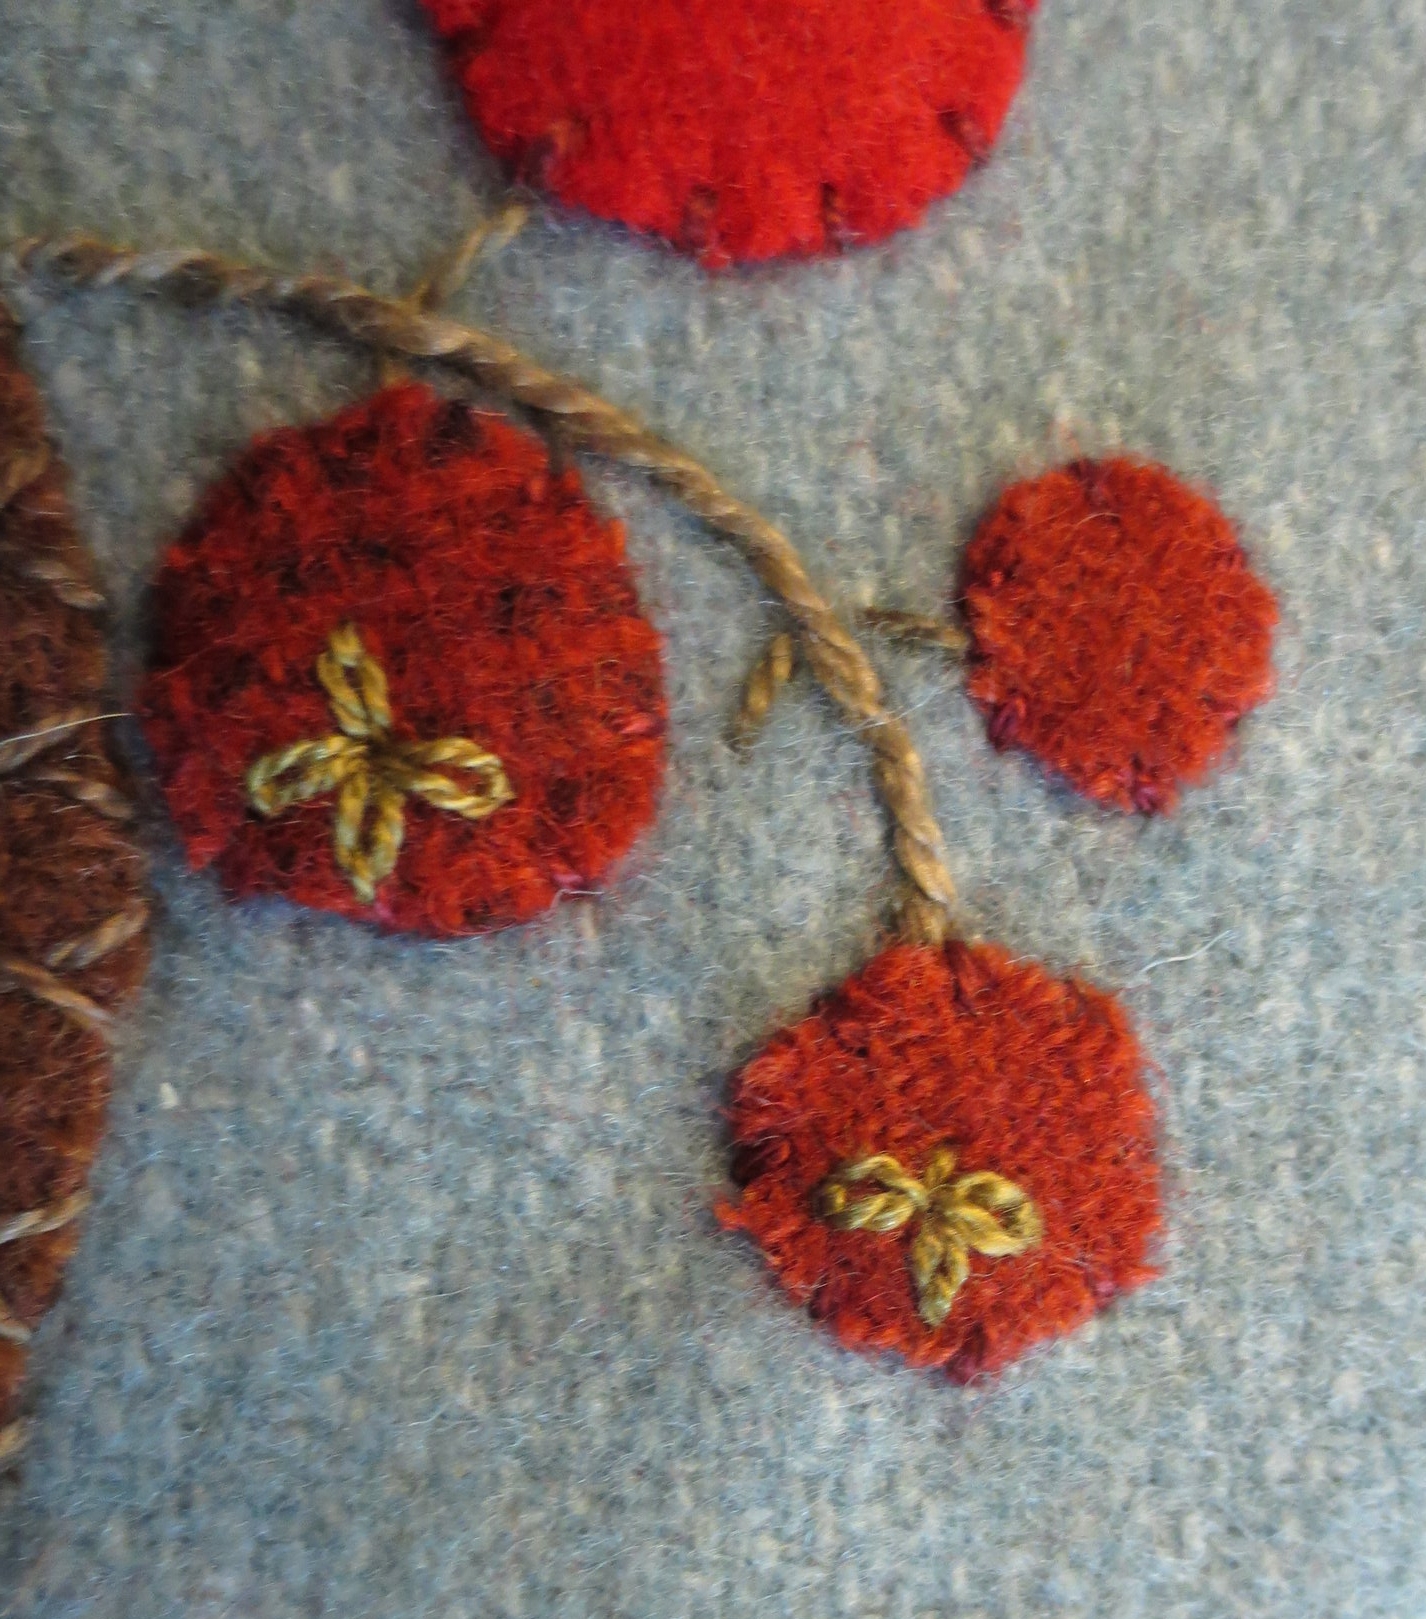
34. Use a chalk pencil to draw the berry stem. Remove the berries.
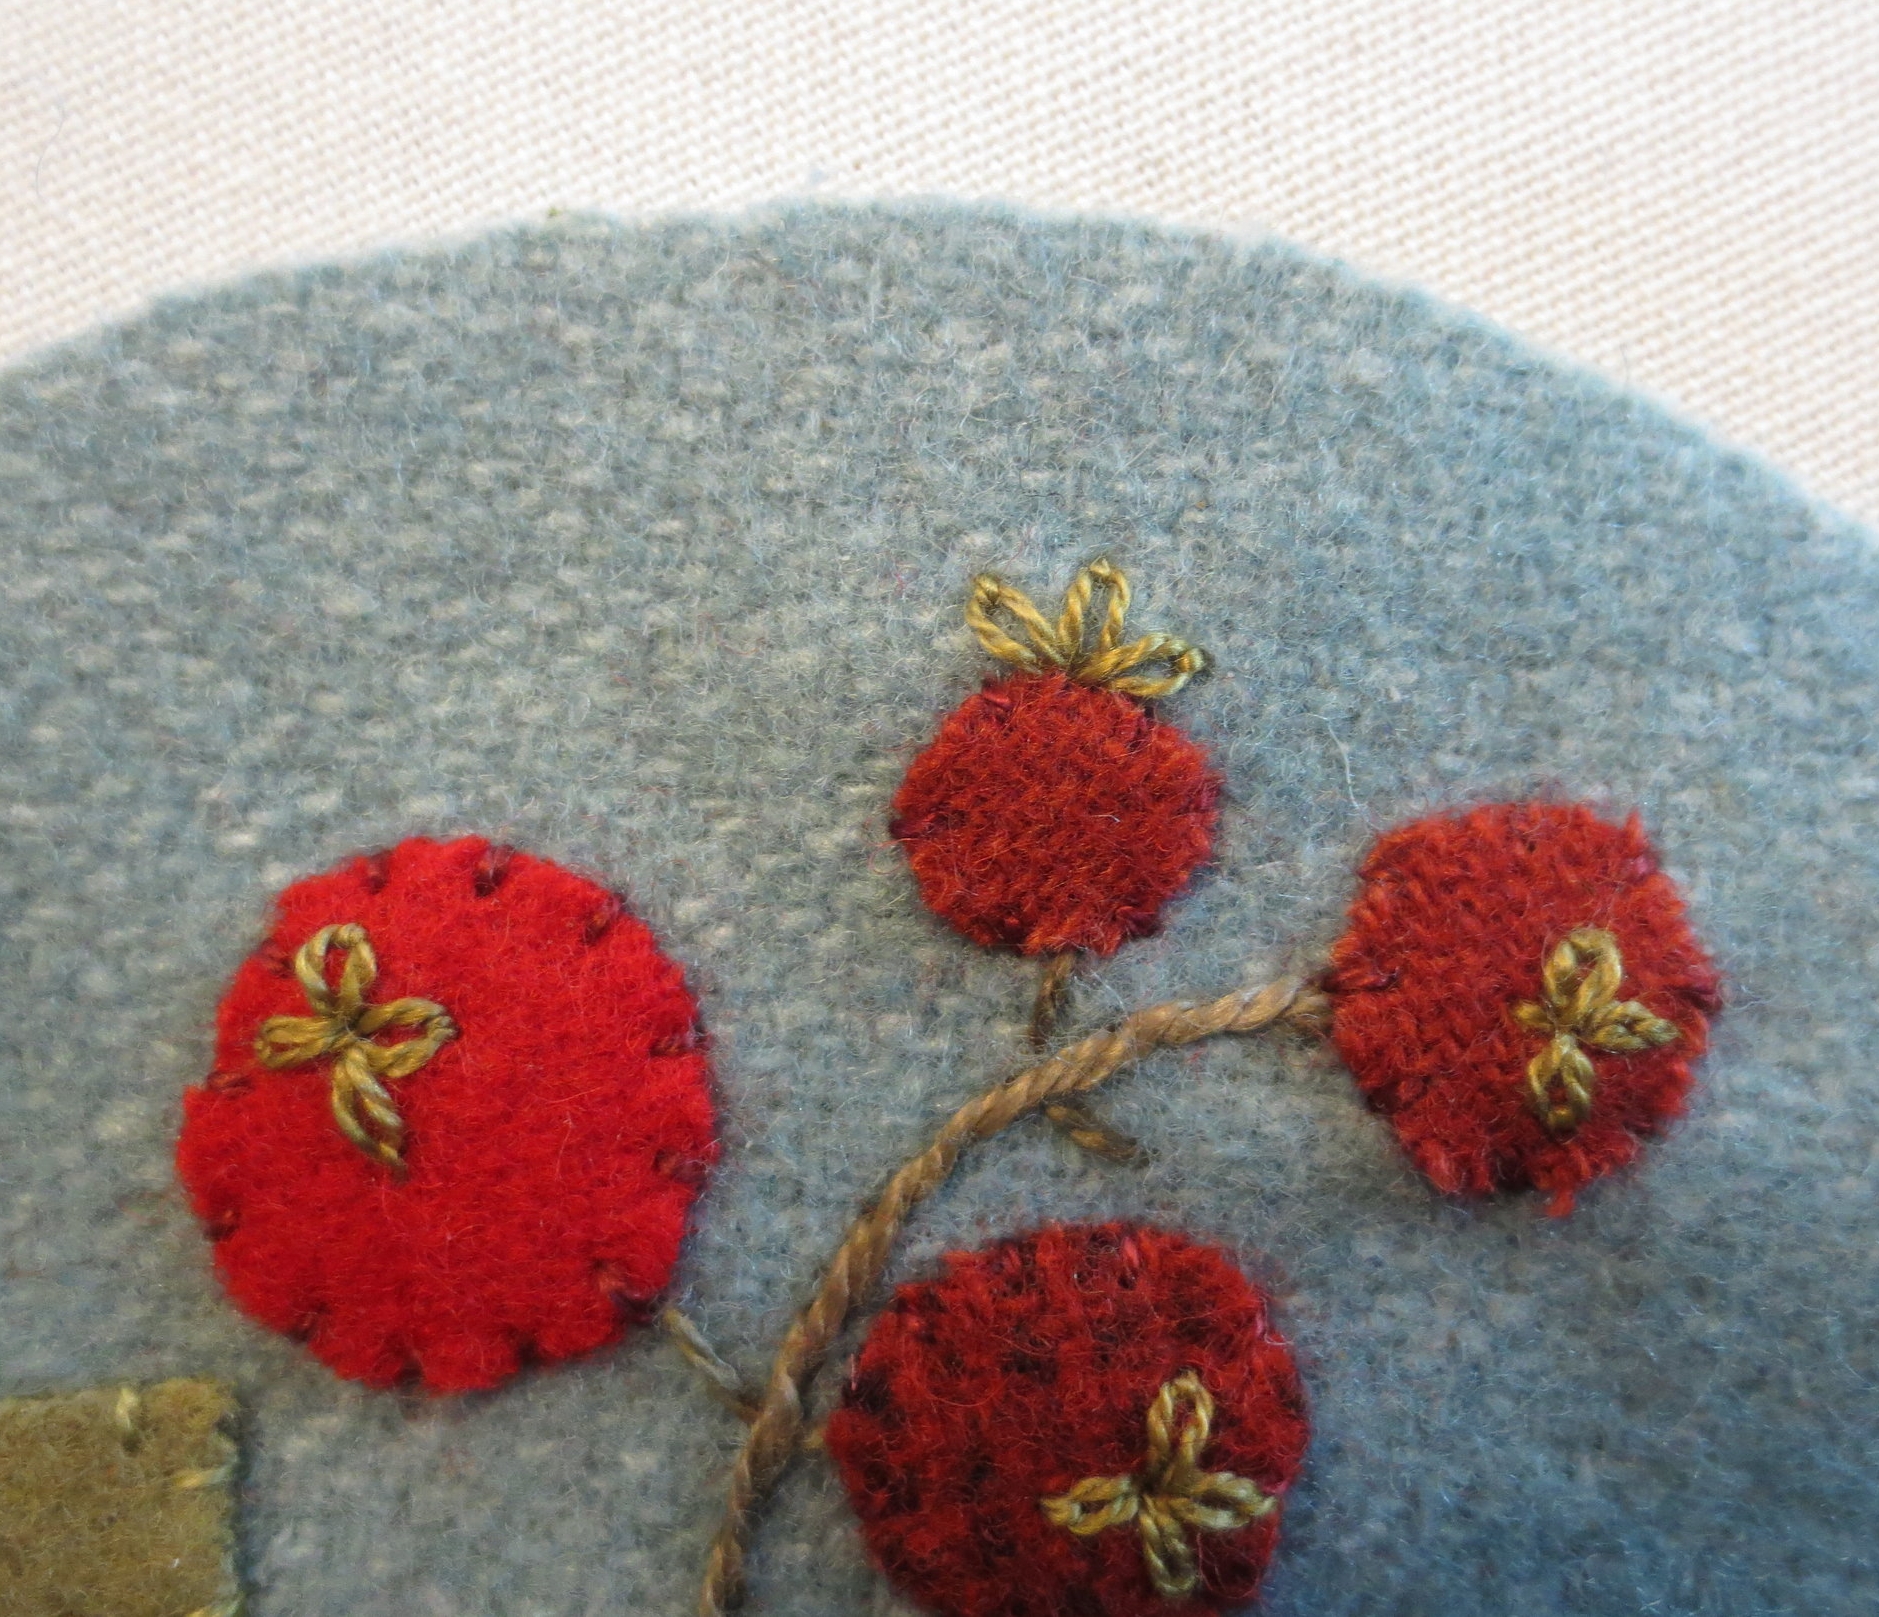
35. Use the same thread used to whip stitch the leaves to stem stitch the berry stem. Use a straight stitch to make the side stems.
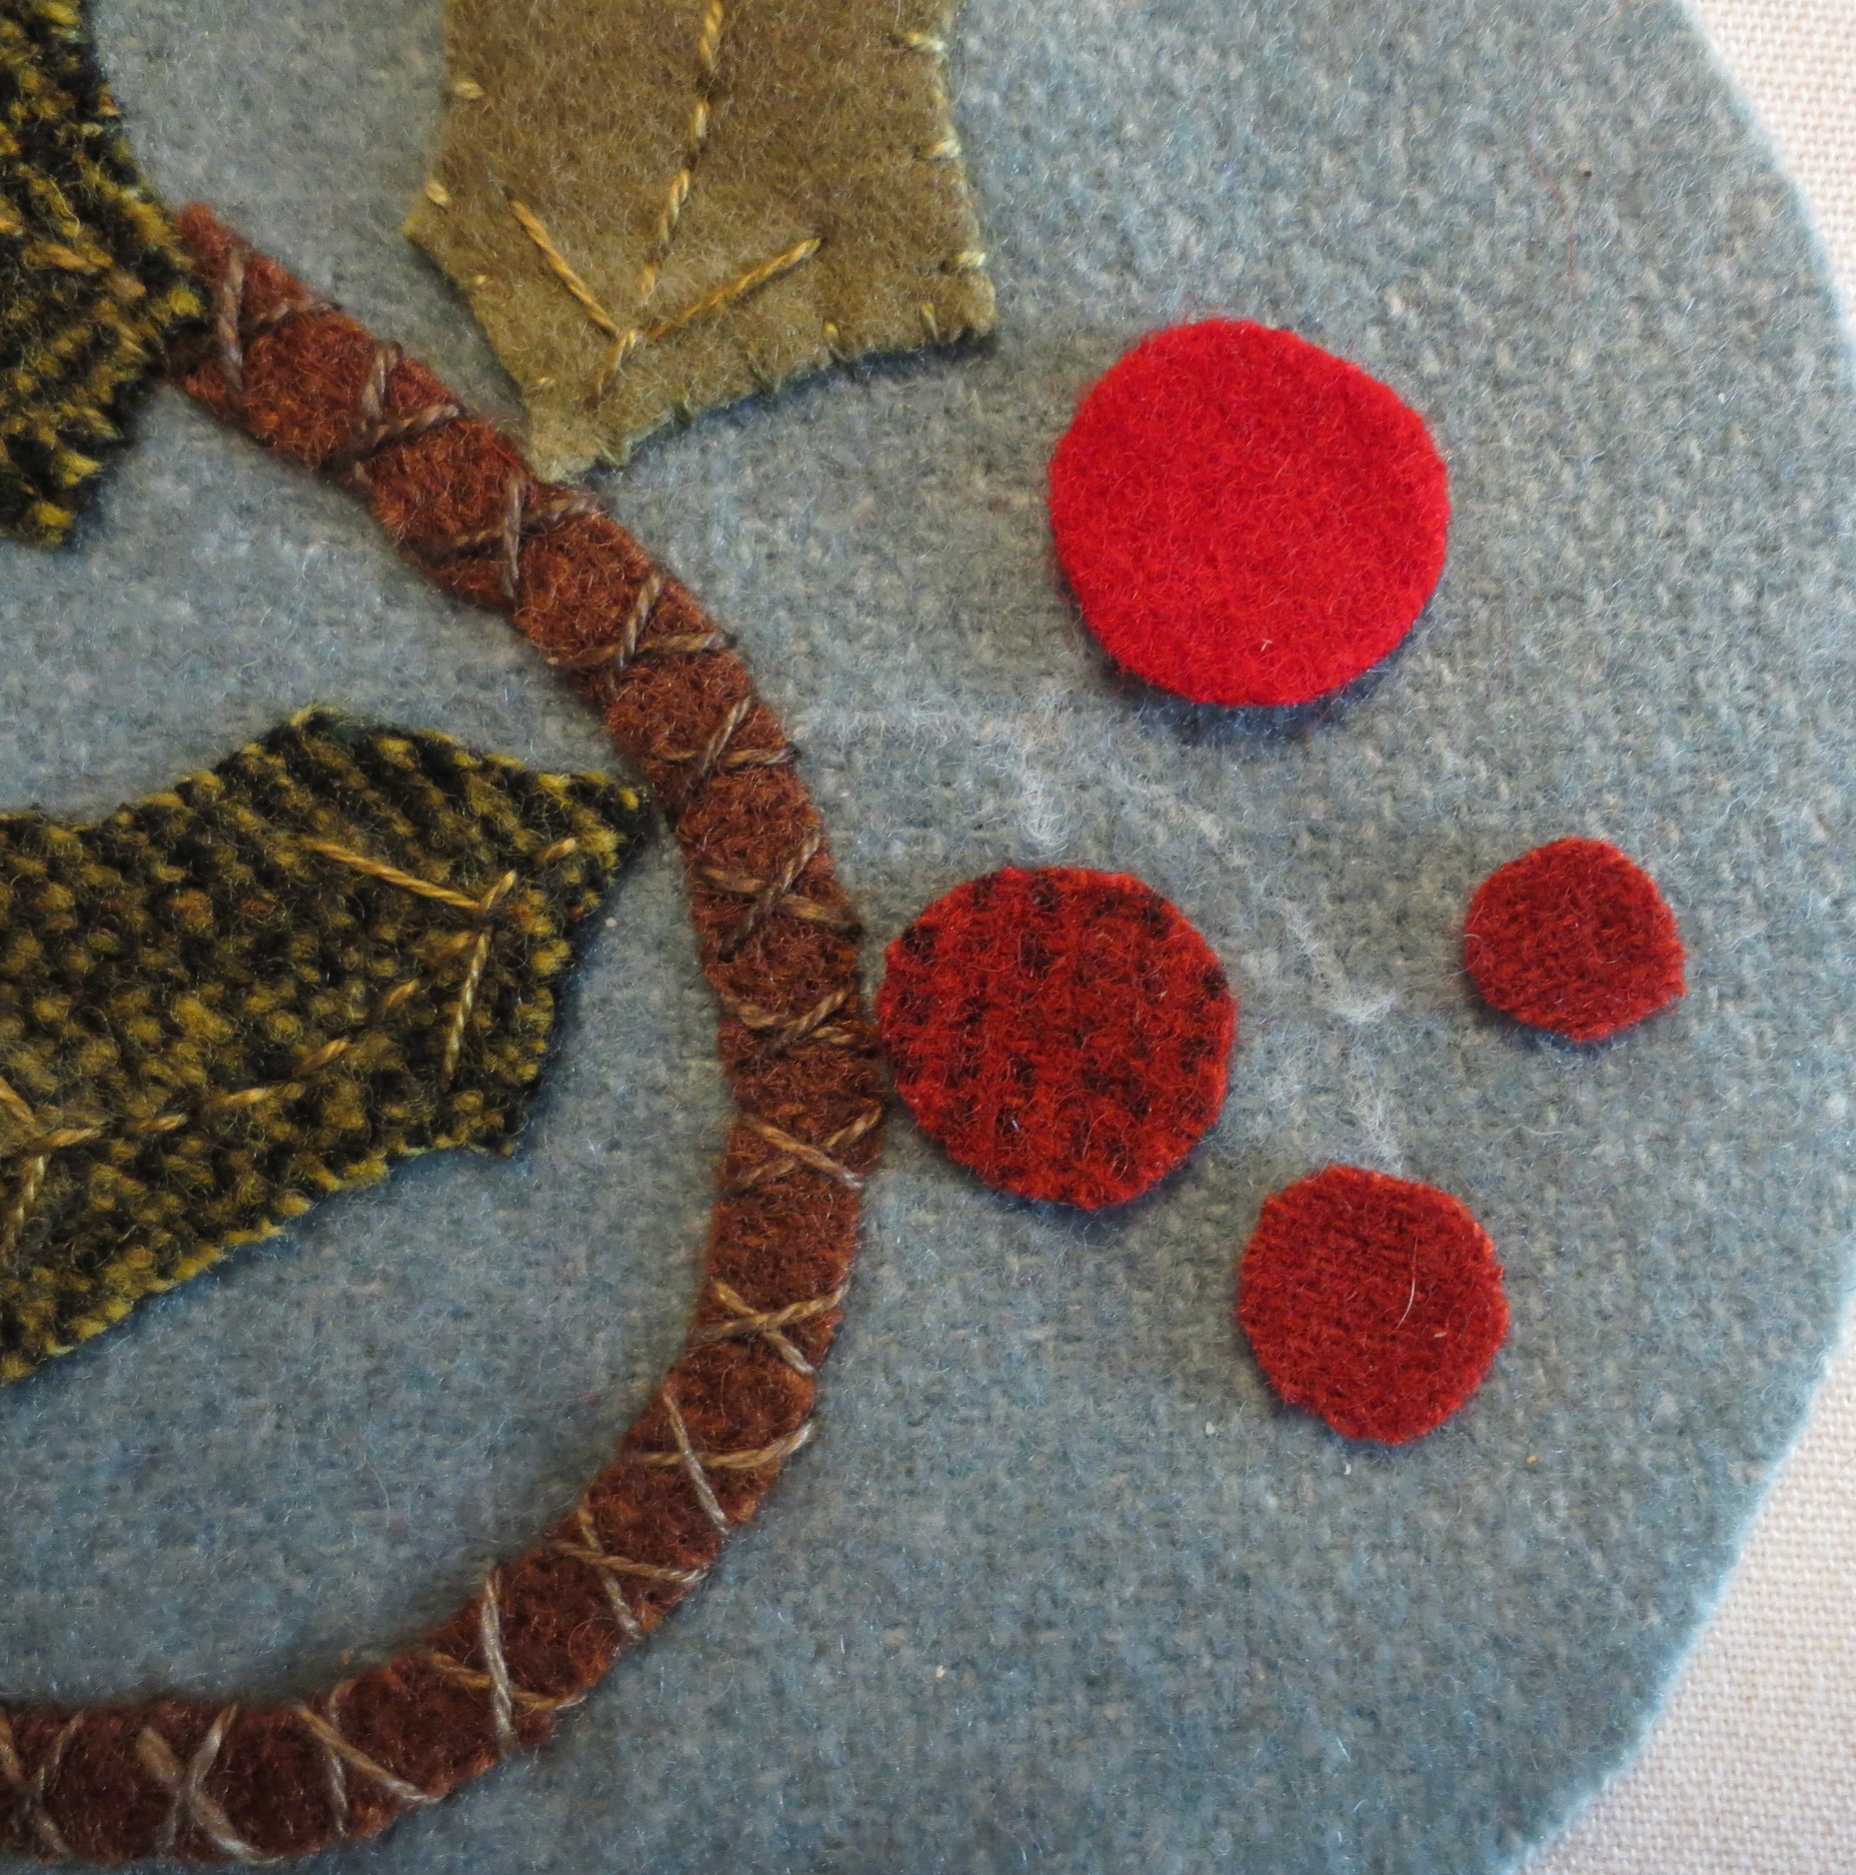
36. Reposition the berries and fuse in place.
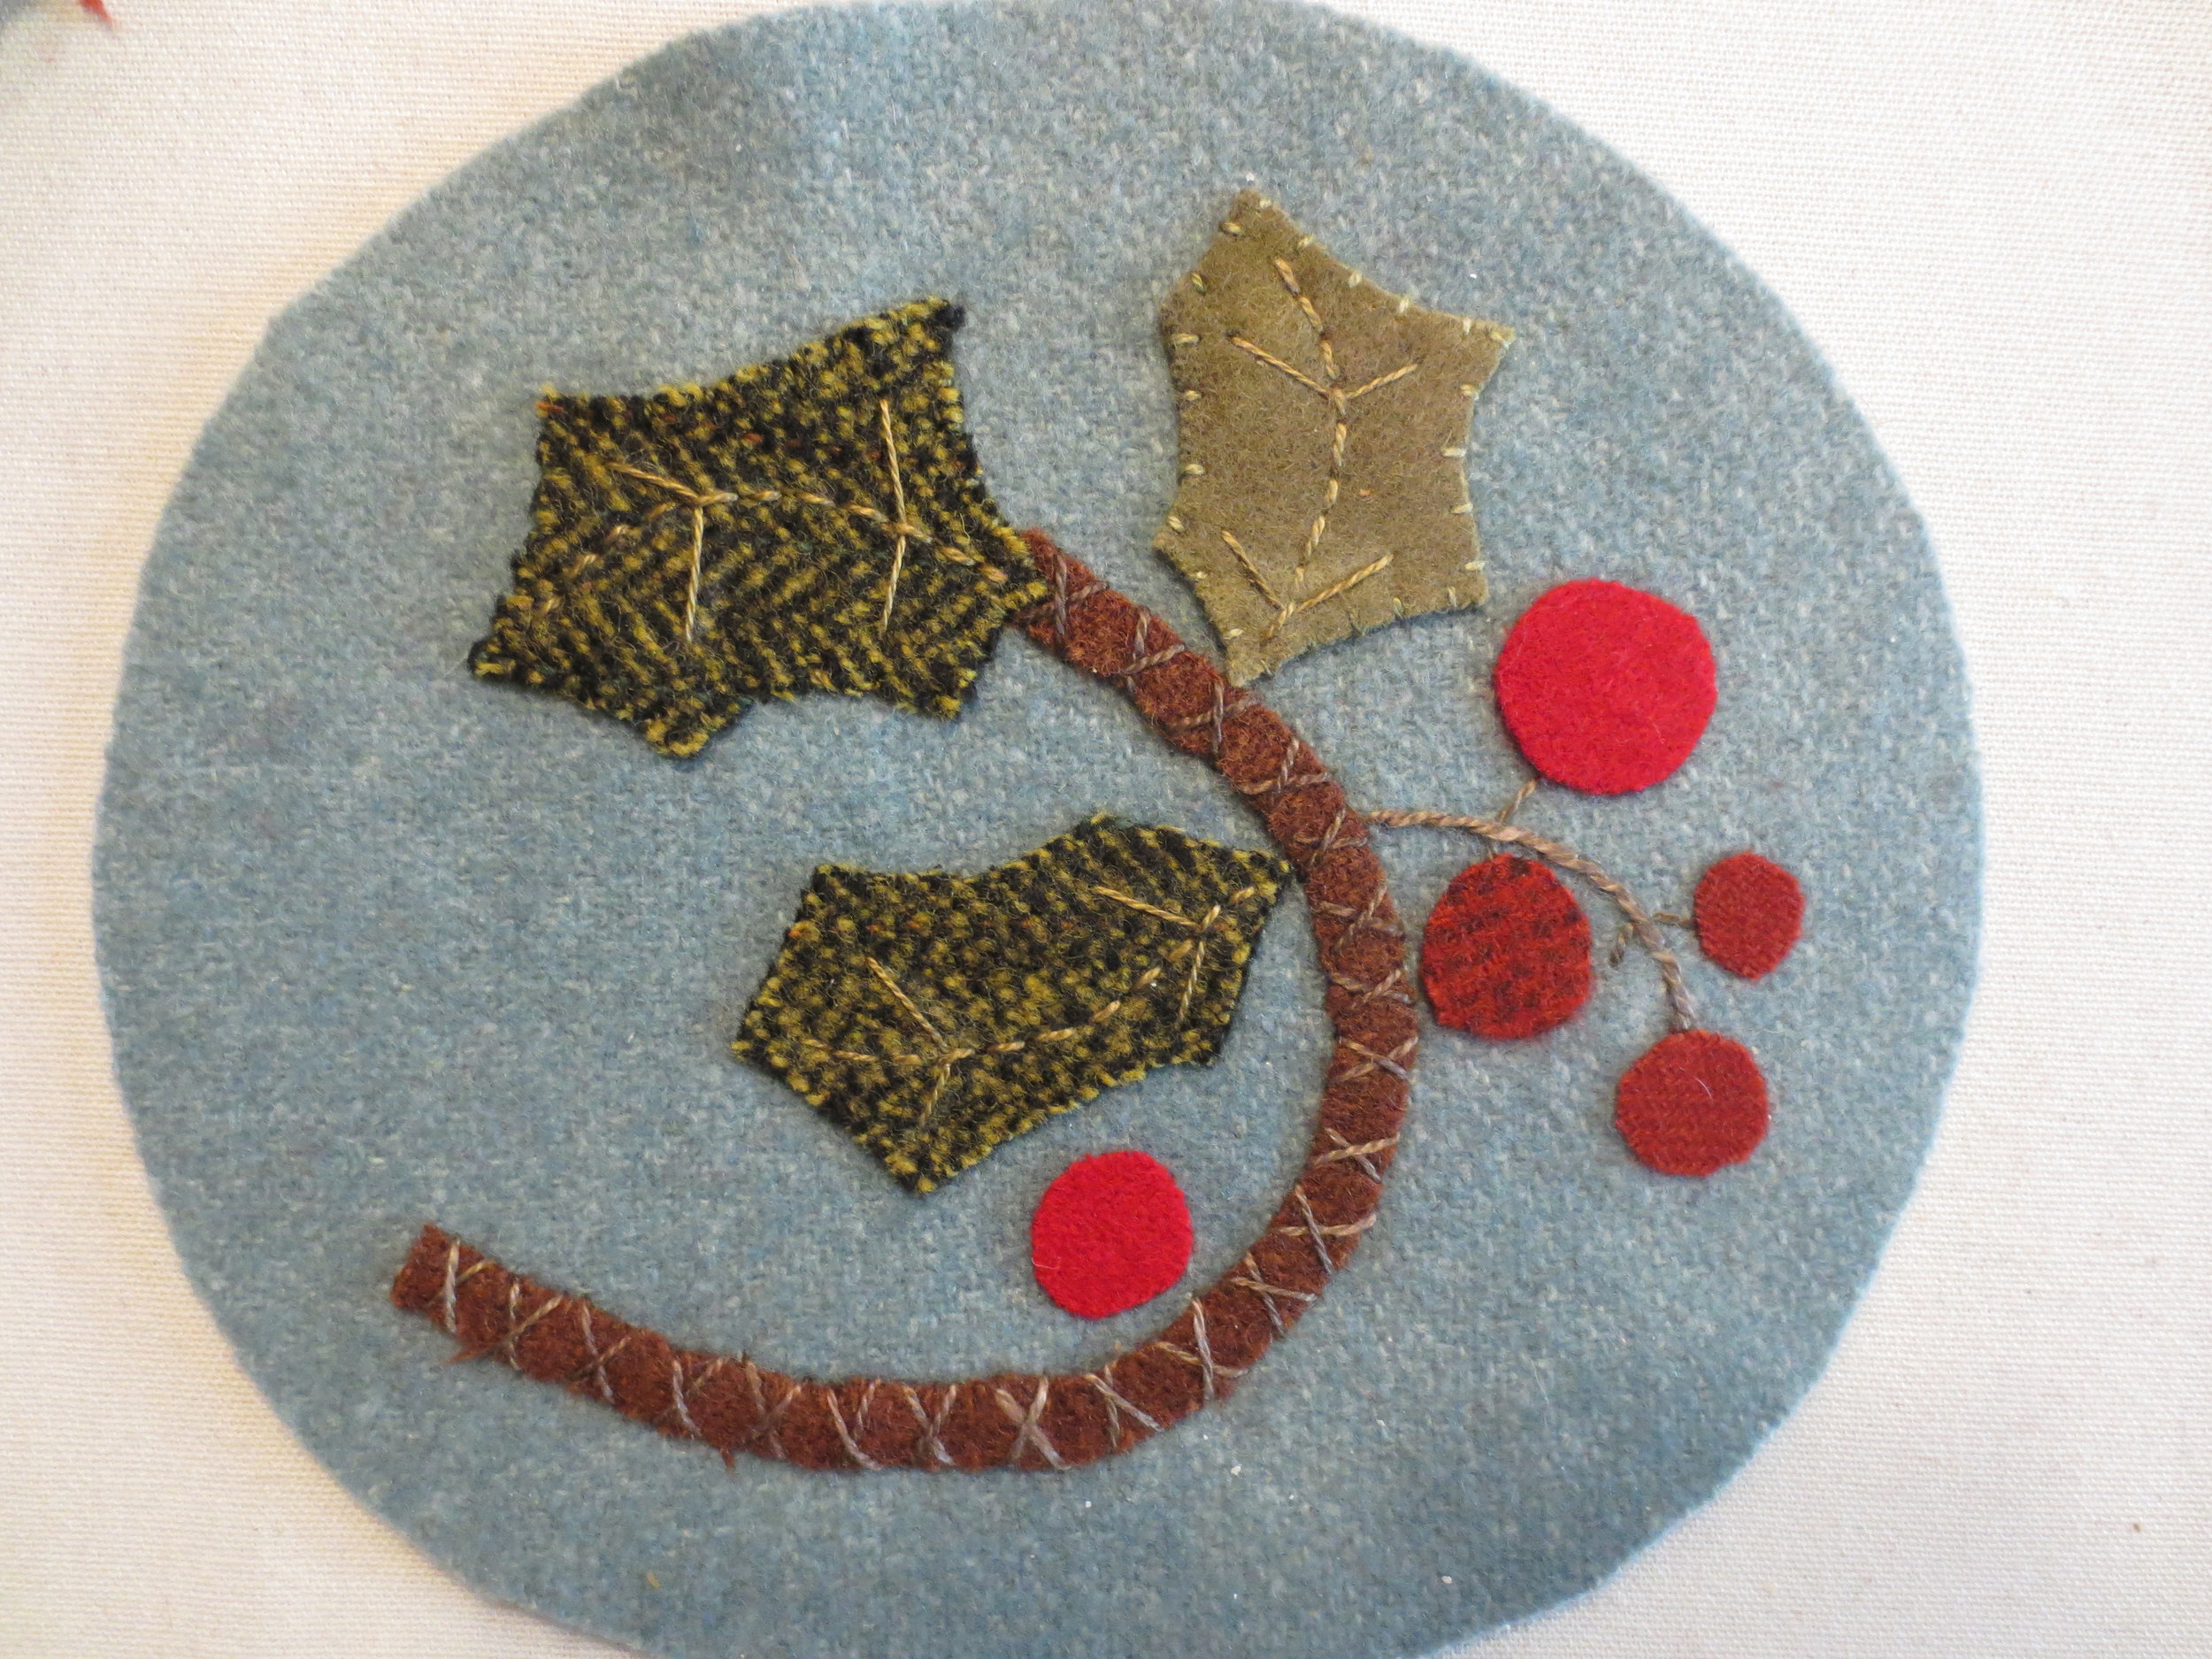
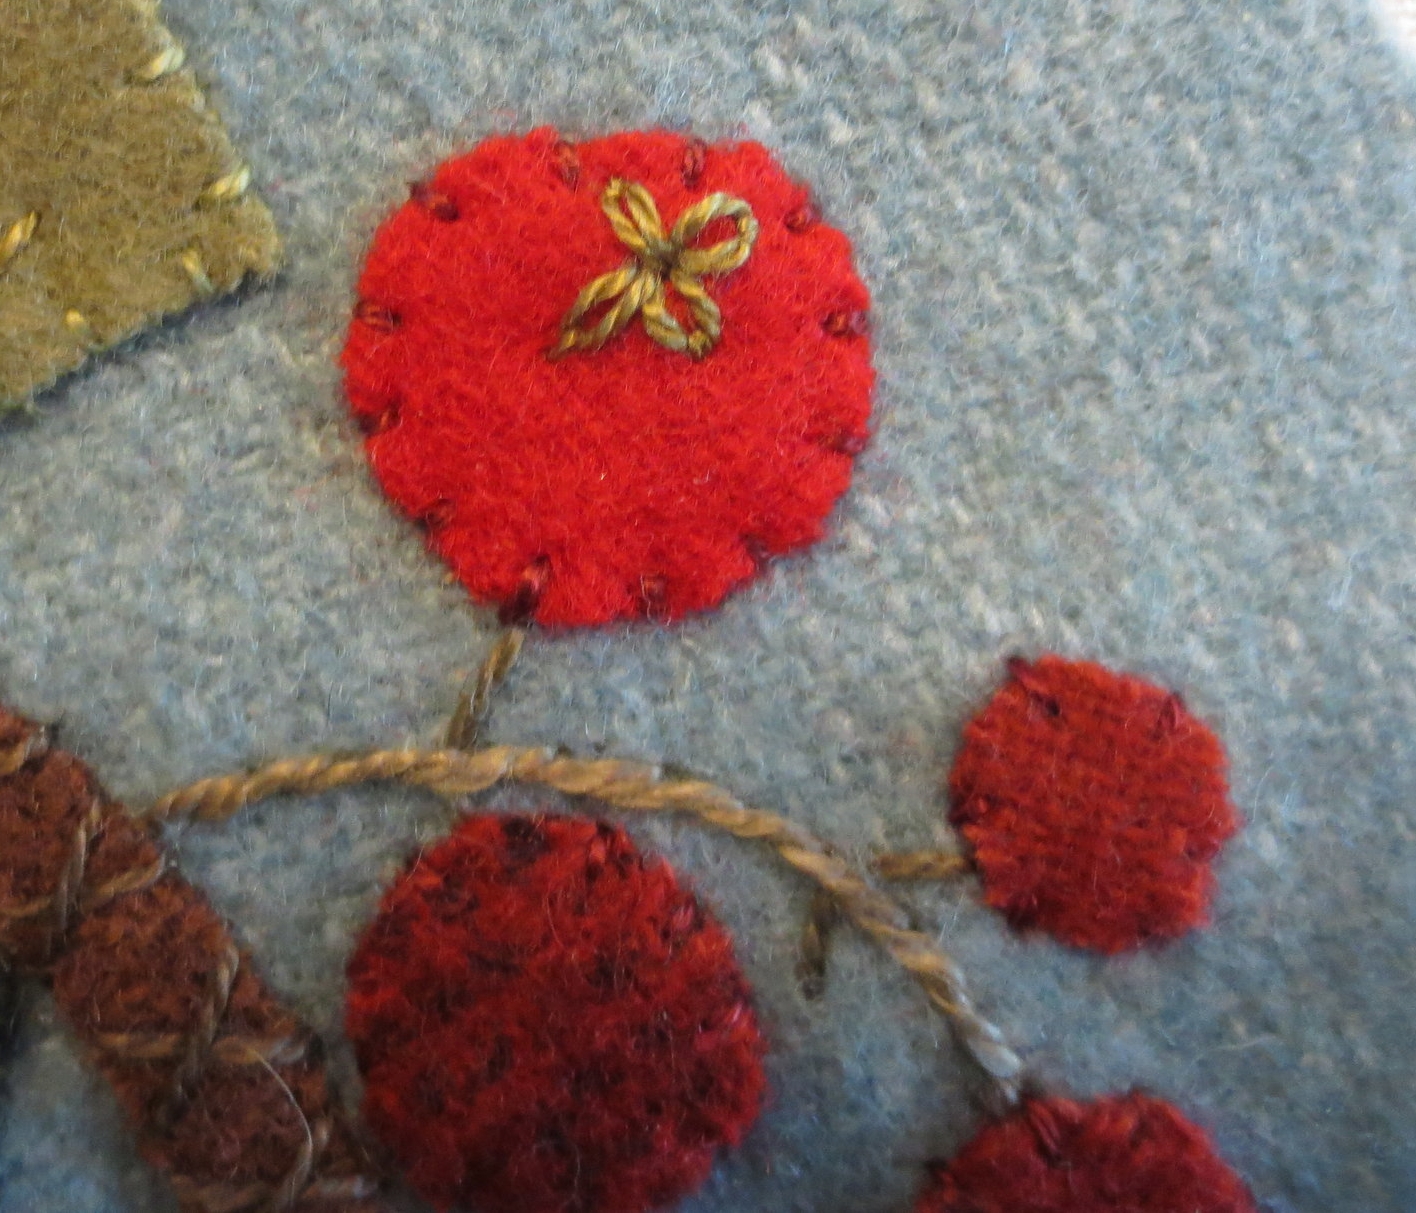
37. Whip stitch berries with red thread.
38. Use antique gold to make lazy daisy embellishments on each berry. Use layout for placement.
39. Cut a 1 1/2" x 2" piece of Fabri-Solvy and trace the numerals for the year.
40. Position the Fabri-Solvy with the traced date on the end of the stem. Press firmly in place.
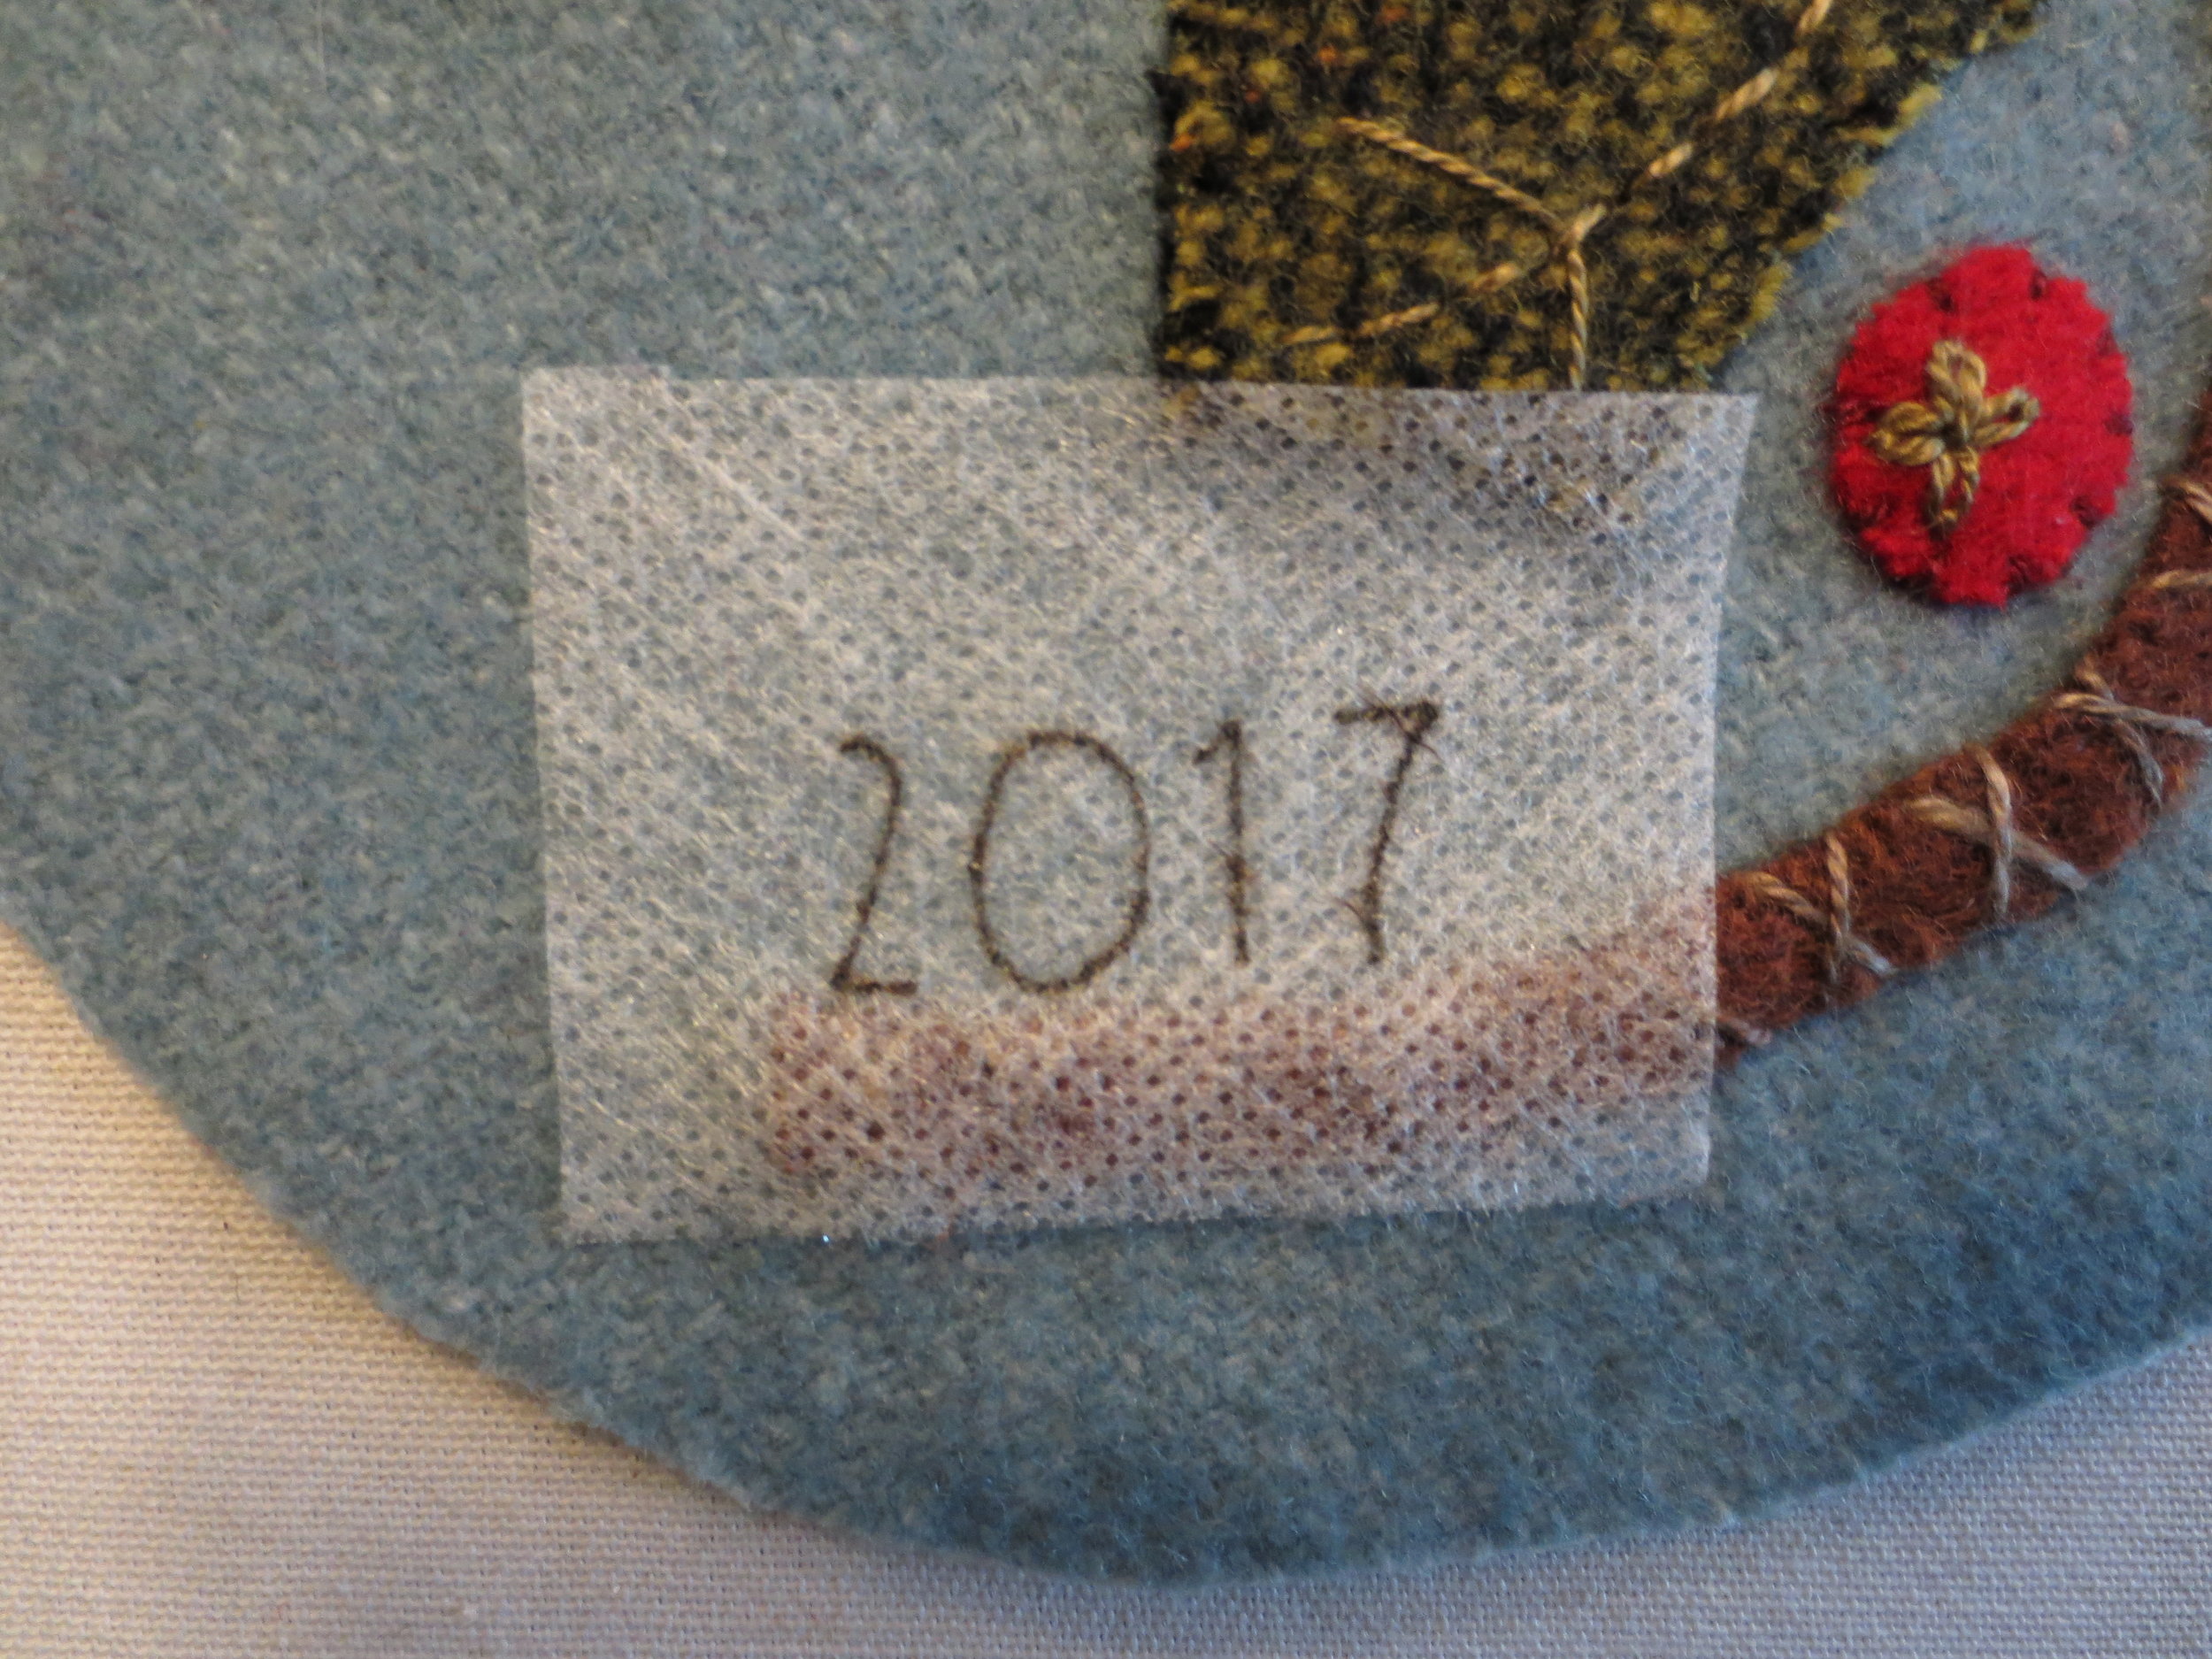
41. Use the grey thread to back stitch over the traced lines.
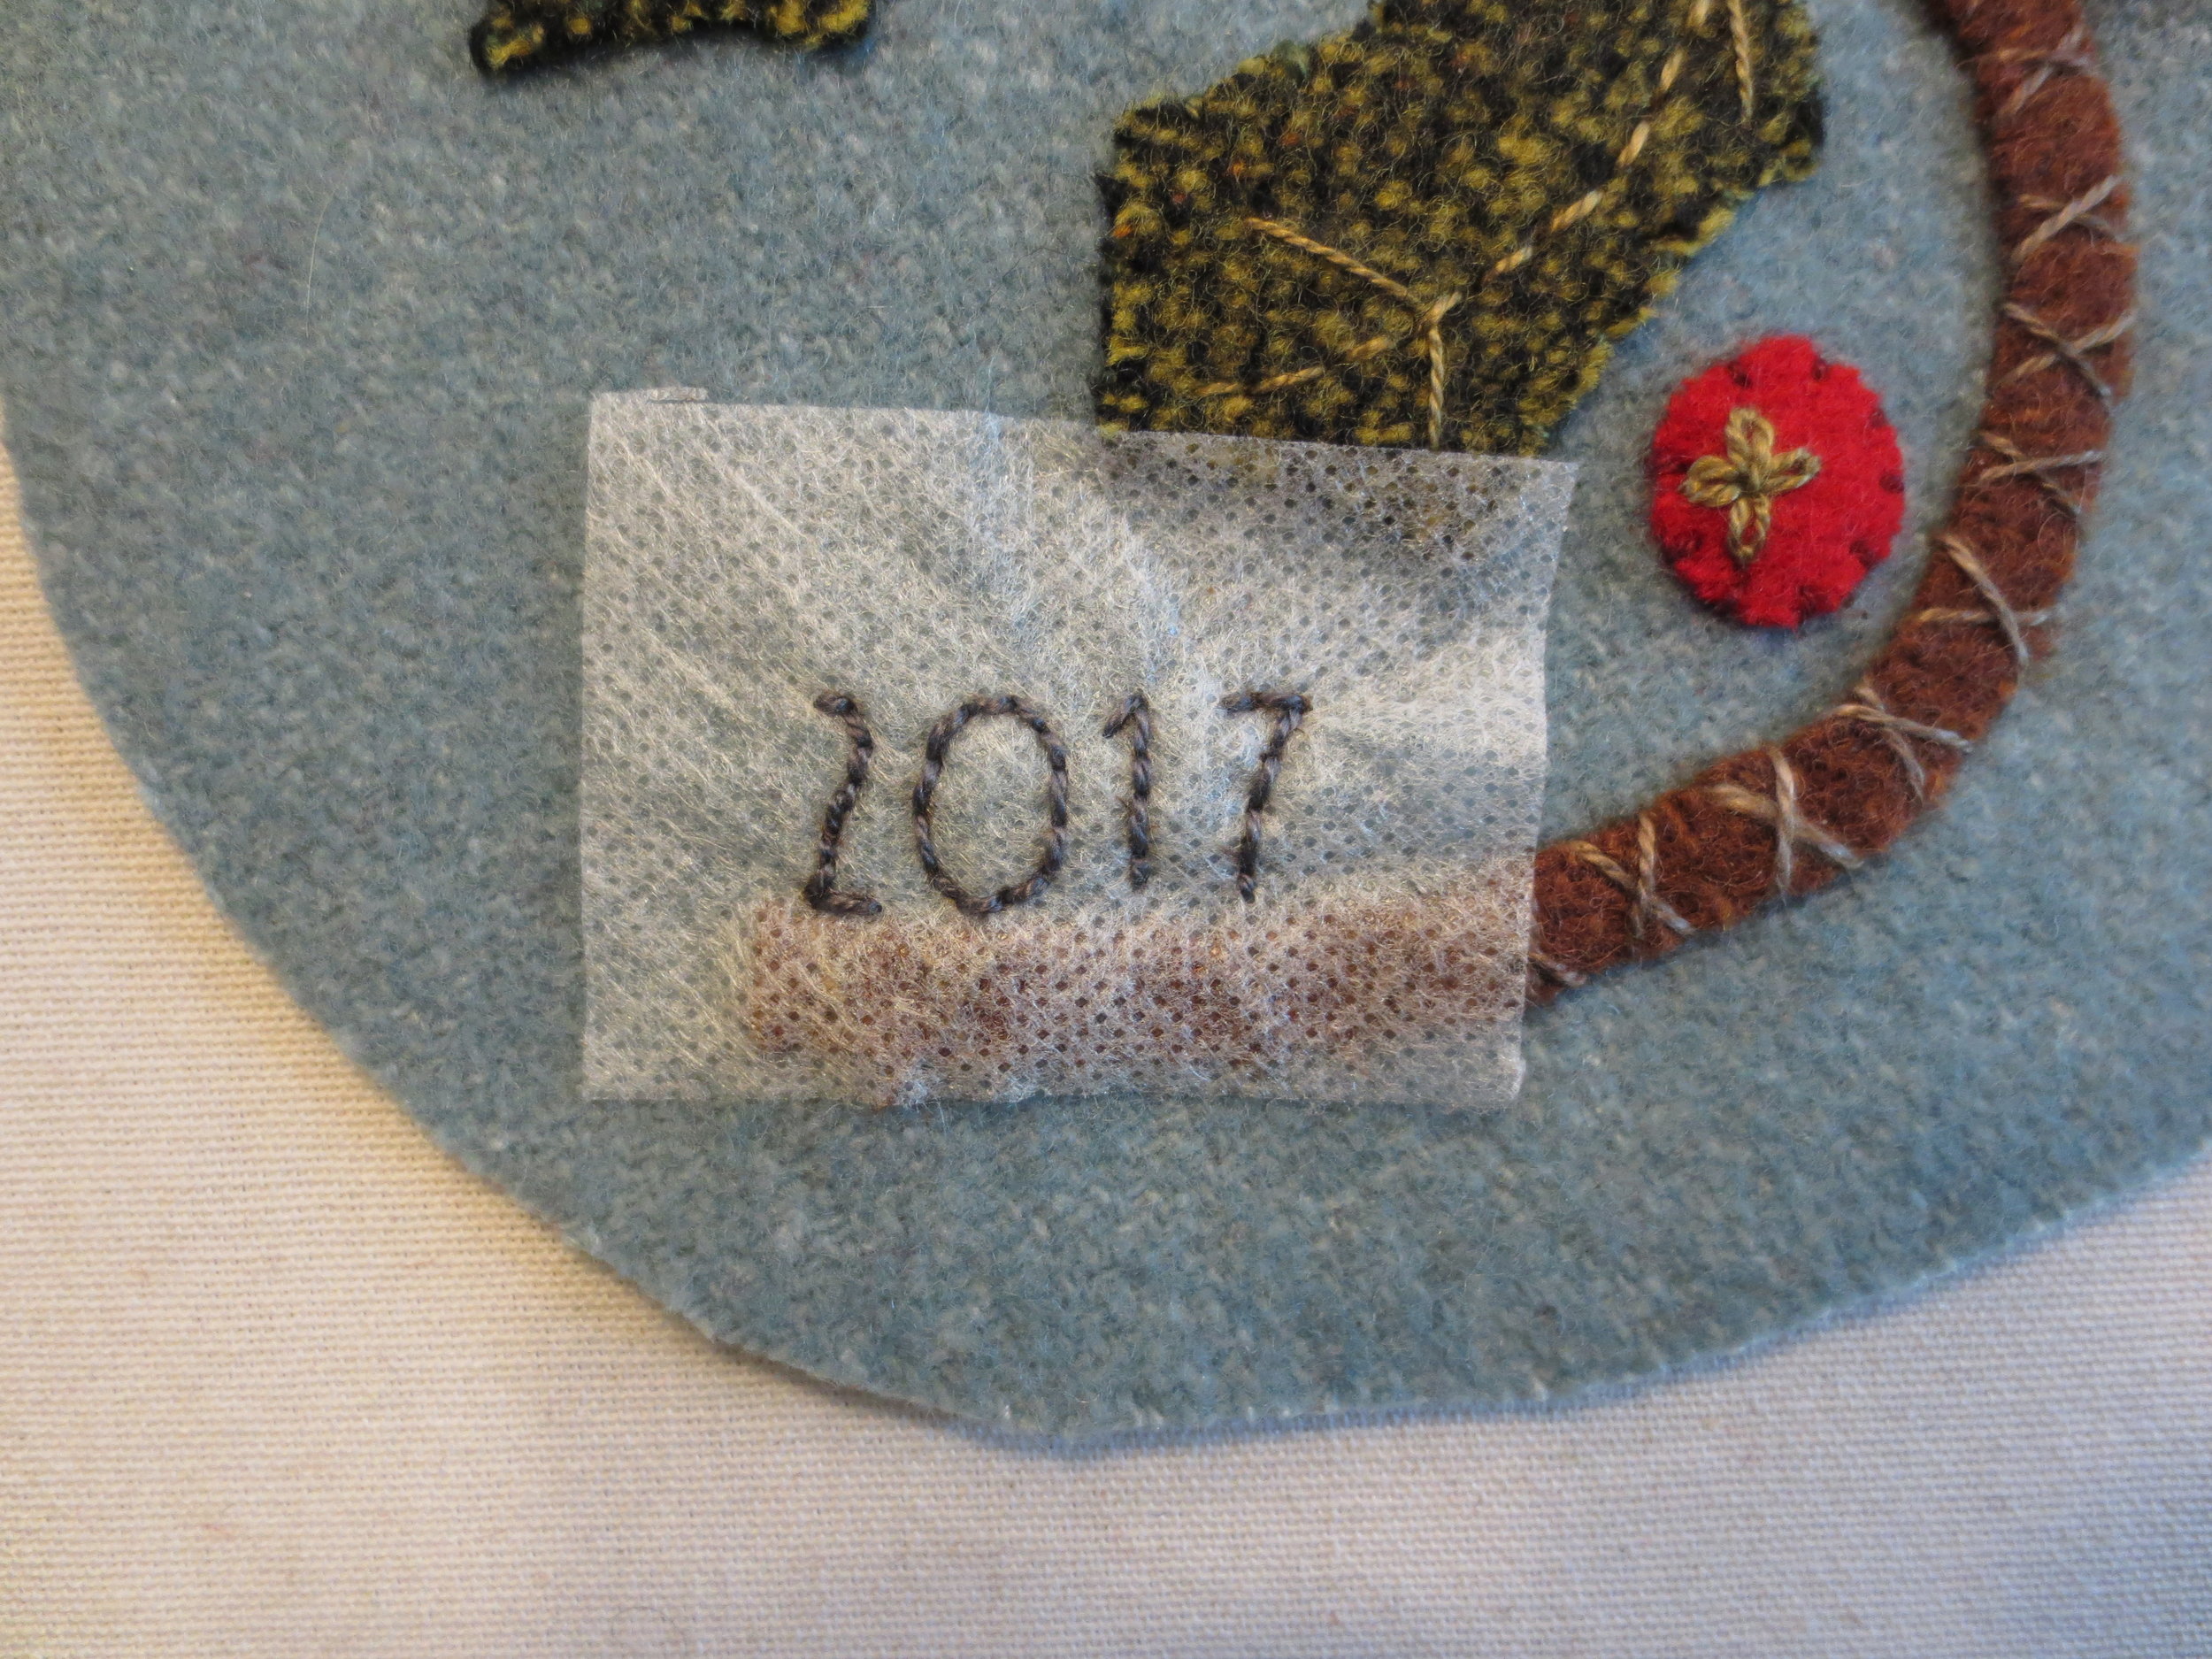
42. Use a damp cloth to remove the Fabri-Solvy.
43. Refer to "Tis The Season" for instruction on how to construct the ornament. Scroll down to #34 Ornament Assembly.
44. The wire hanger instruction can be found in Step #35 of the same post.
Happy Stitching!