
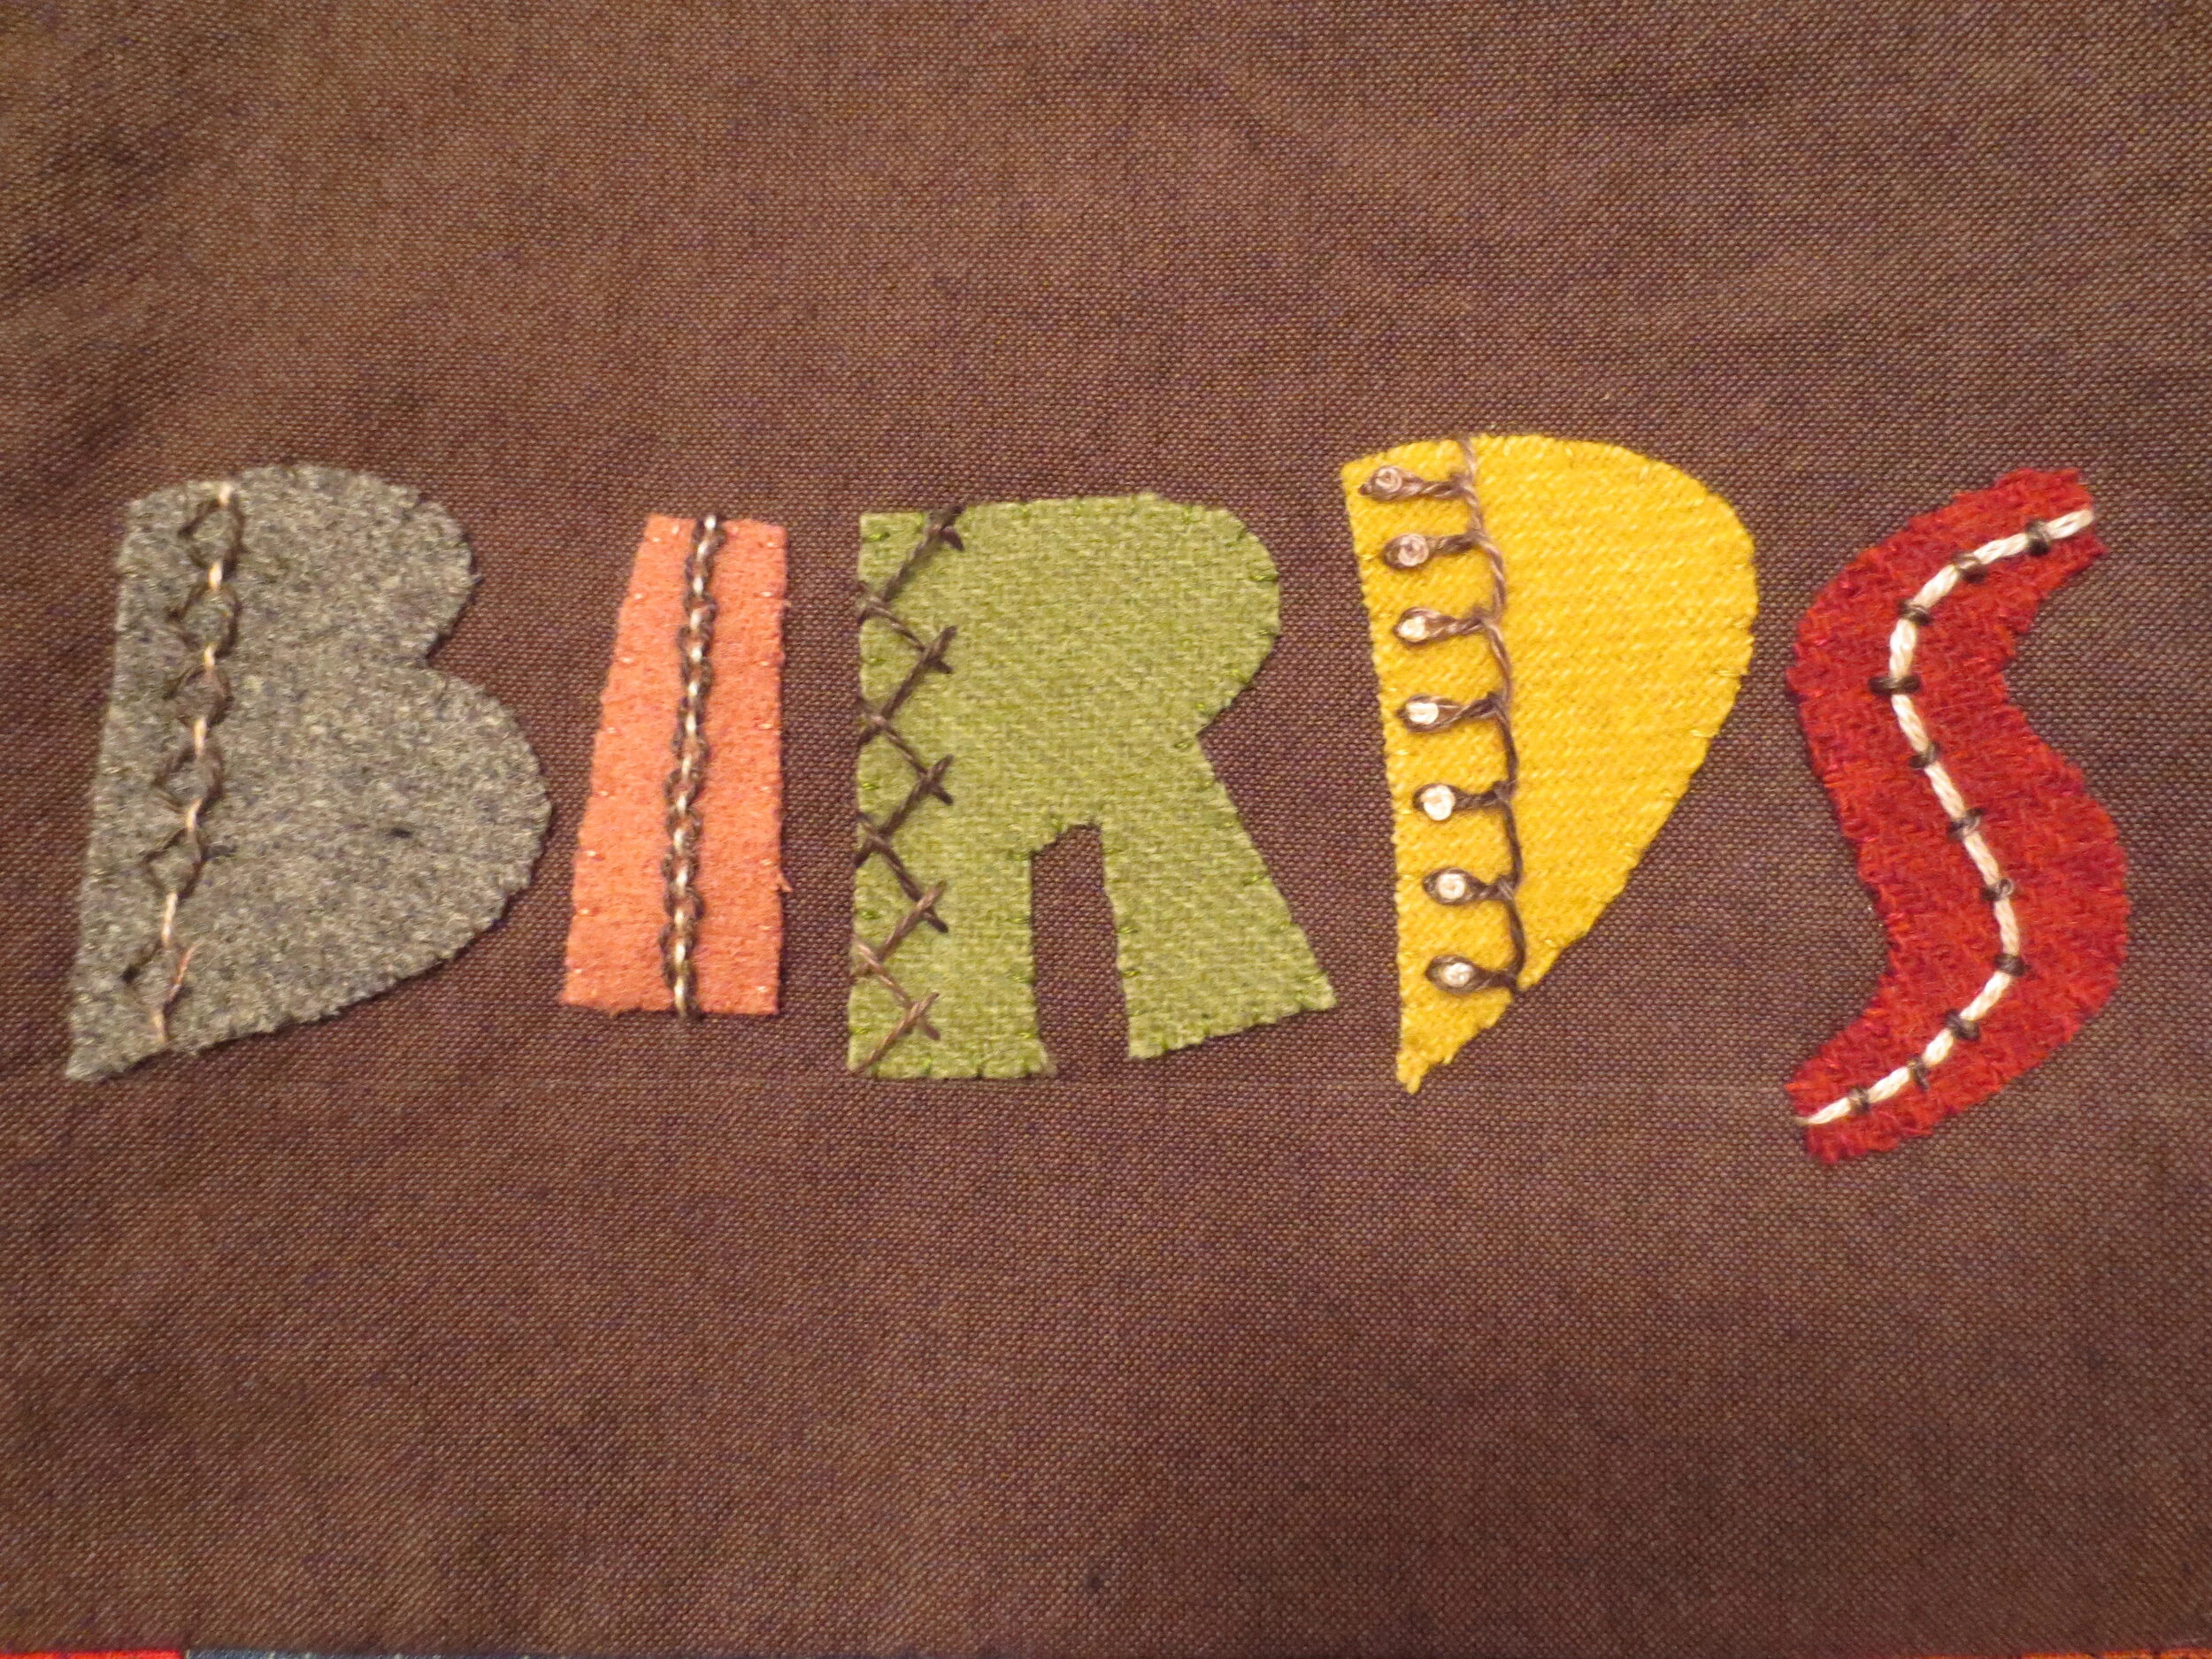
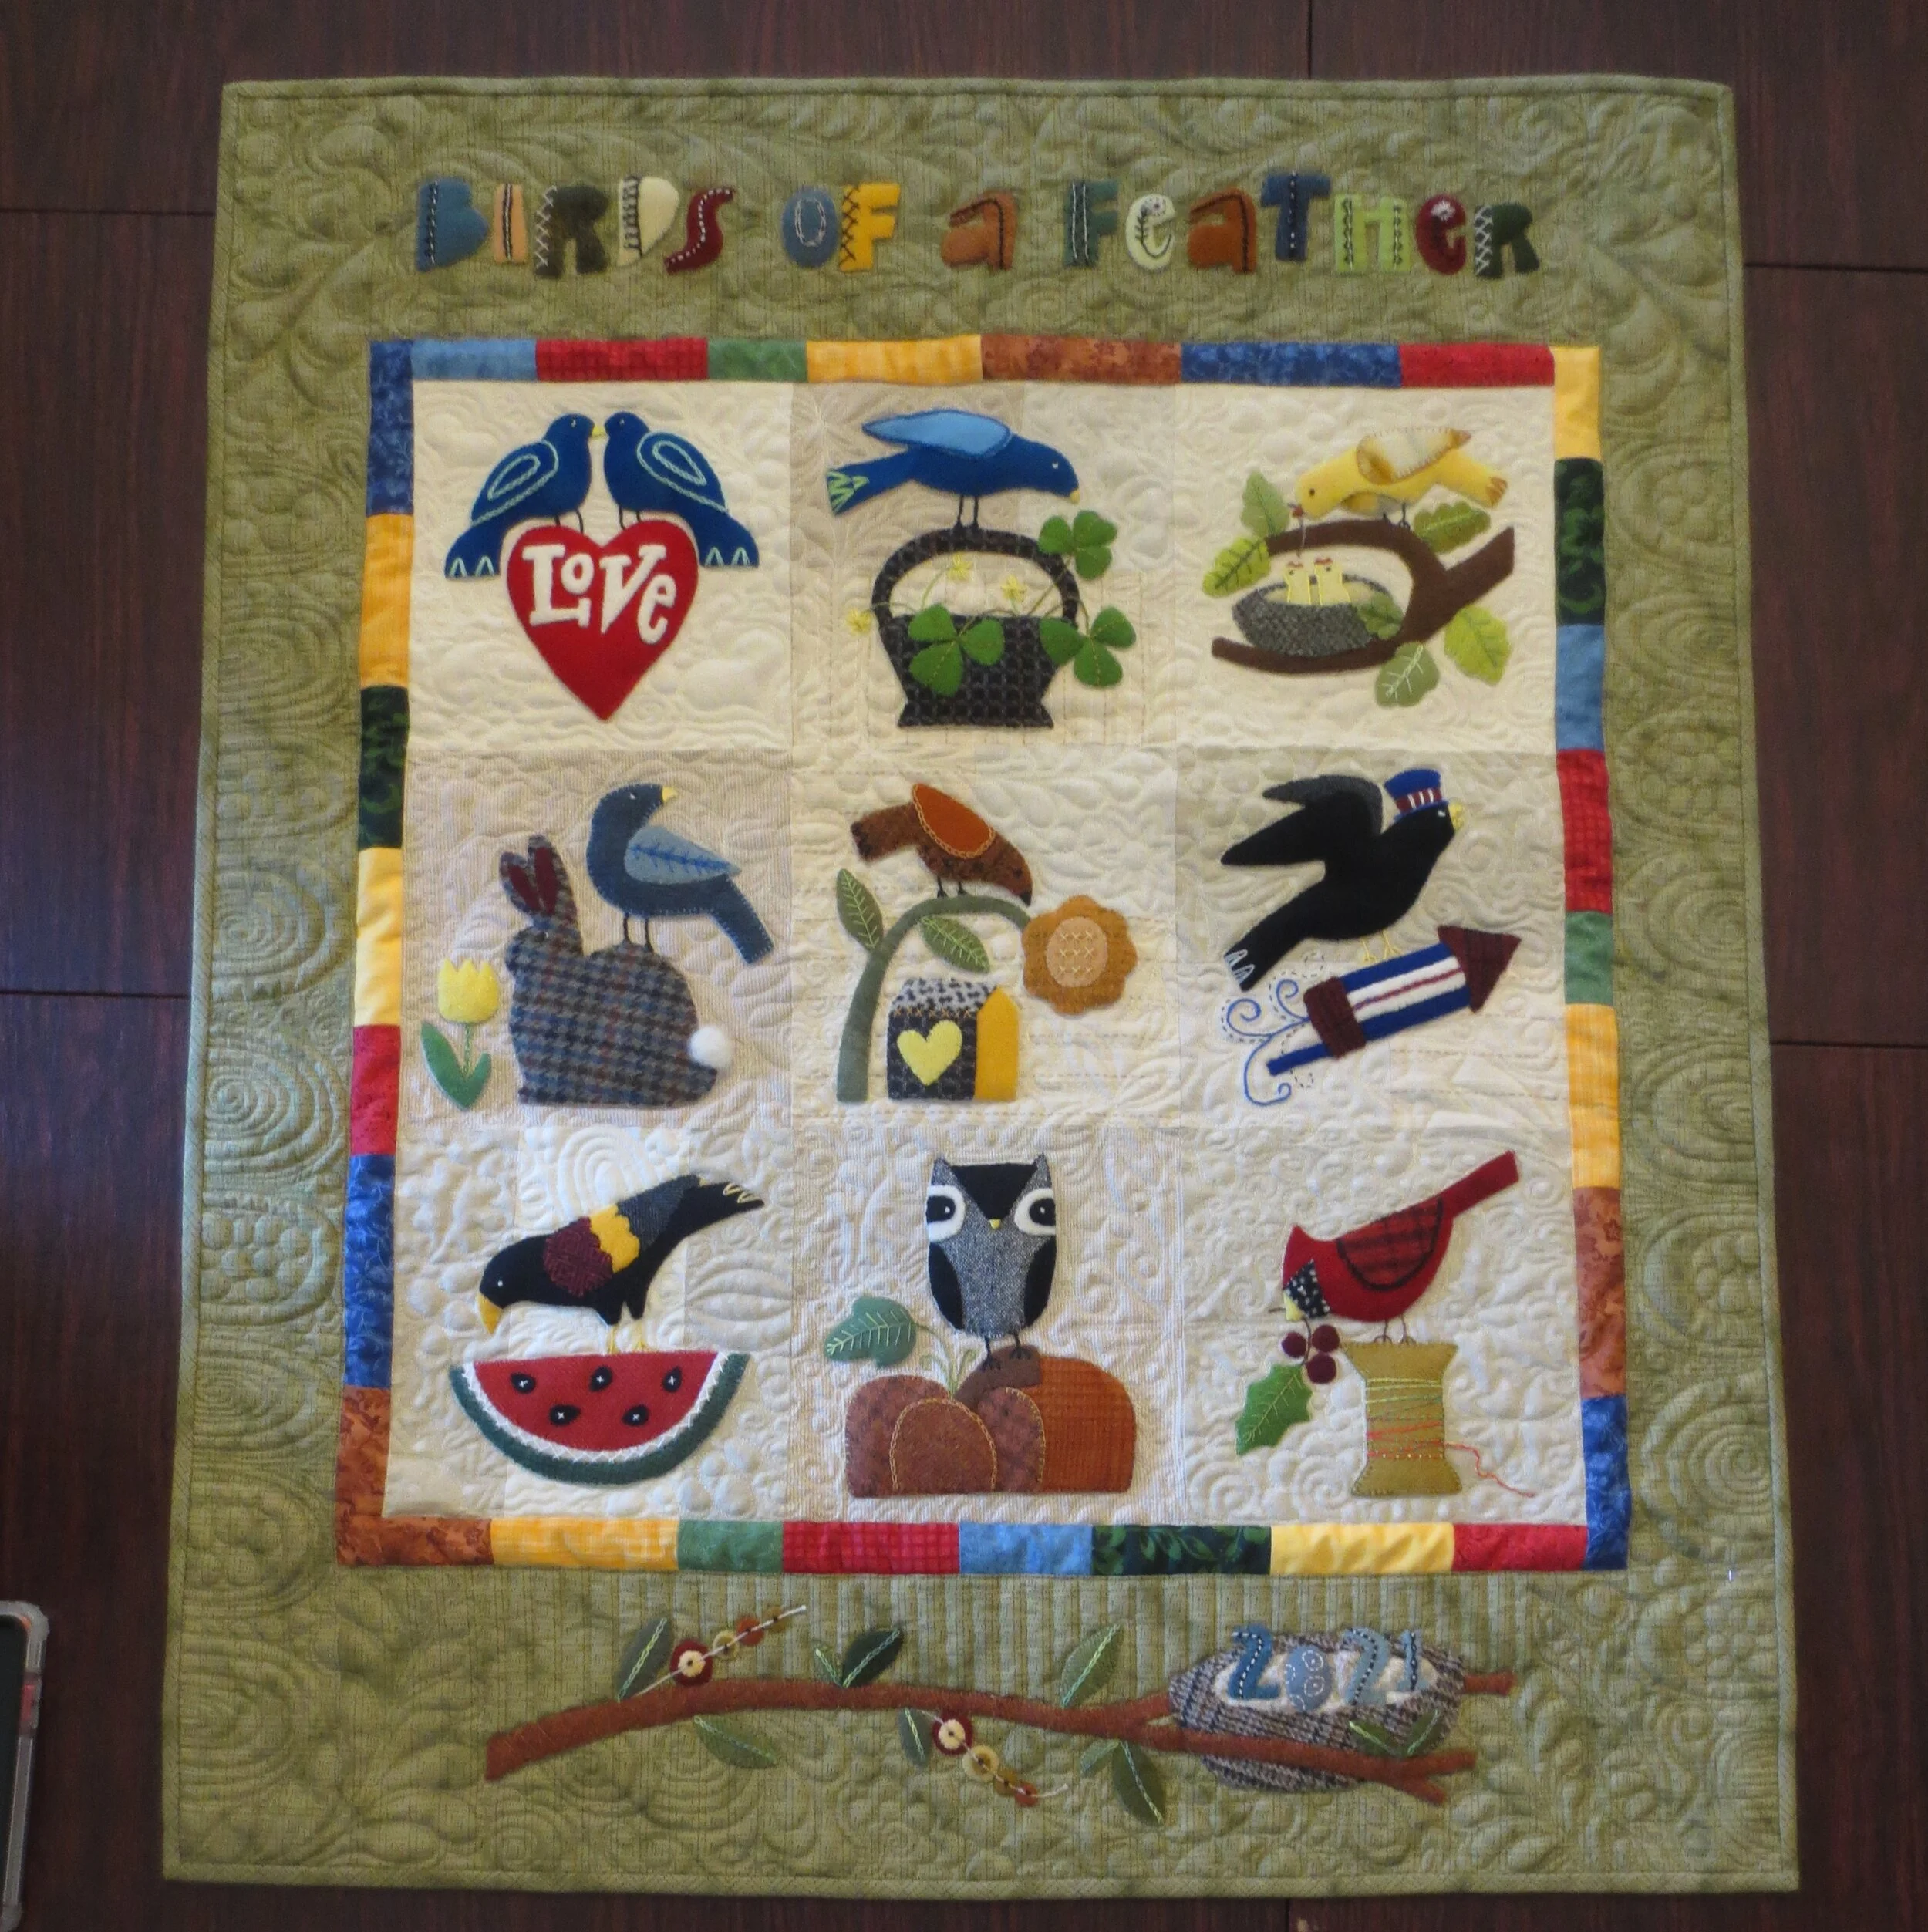
BIRDS OF A FEATHER BOM - BORDER APPLIQUE

Top border of BIRDS OF A FEATHER BOM
We’re getting close to the finish line with this BOM! This is the final post for BIRDS OF A FEATHER. I’m thrilled that it almost finished, but a bit sad to say goodbye to it.
I’m writing this post in April when the garden is calling to me. It’s so difficult to be inside typing away on my computer when the sun is shining, the birds are singing, and the seeds and plants need to be planted.
The inspiration for the border design came from a desire to learn some new embroidery stitches and a lettering class that I took many ages ago. I used leftover wool from the appliqued blocks in the body of quilt and two shades of thread for the embroidery embellishment that mimicked the colors of the border and background blocks (a variegated brown and a variegated cream). I did make the exception for the veins of the leaves for which I used a variegated green perle cotton.
I have included photos of the various stitches used, but you may want to refer to other embroidery tutorials for greater clarification. The list of my favorite websites for embroidery instruction are the same as those listed in the block #1. They are as follows:
https://www.needlenthread.com/videos I consider this the best site for embroidery tutorials. The site is free to use, but please consider donating to Mary Corbett’s Patreon page. As a patreon member you will receive additional patterns and tutorials not found on the site.
https://www.embroidery.rocksea.org/reference/picture-dictionary/ This is also an excellent source for embroidery instruction. She also has a e-book version of her stitch dictionary that you can purchase to download to your kindle.
Let’s begin.
Supplies
Wool Requirements
Top Border
Wording - Use wool left over from what was used in your blocks, or at least wool colors that are similar to the wool in your blocks. Try to use solid colors or wools with patterns that are not busy. You will be adding a decorative stitch, so you don’t want the design to be lost in a busy background. I used 11 different wools, but that’s because I didn’t have enough of some of the leftover wools to make more than 1 letter. I suggest that you use no less than 5 colors.
Bottom Border – Try to use wools that were used in your blocks, or wool colors that are similar to the wool in your blocks.
Branch Part A – 2” x 8” russet brown
Branch Part B & D – 1 ½” x 7 ½” golden brown
Branch Part C – 1 ½” x 5 ½” green/brown tweed
Nest – 3 ½” x 6 ½” beige/pale blue/brown plaid
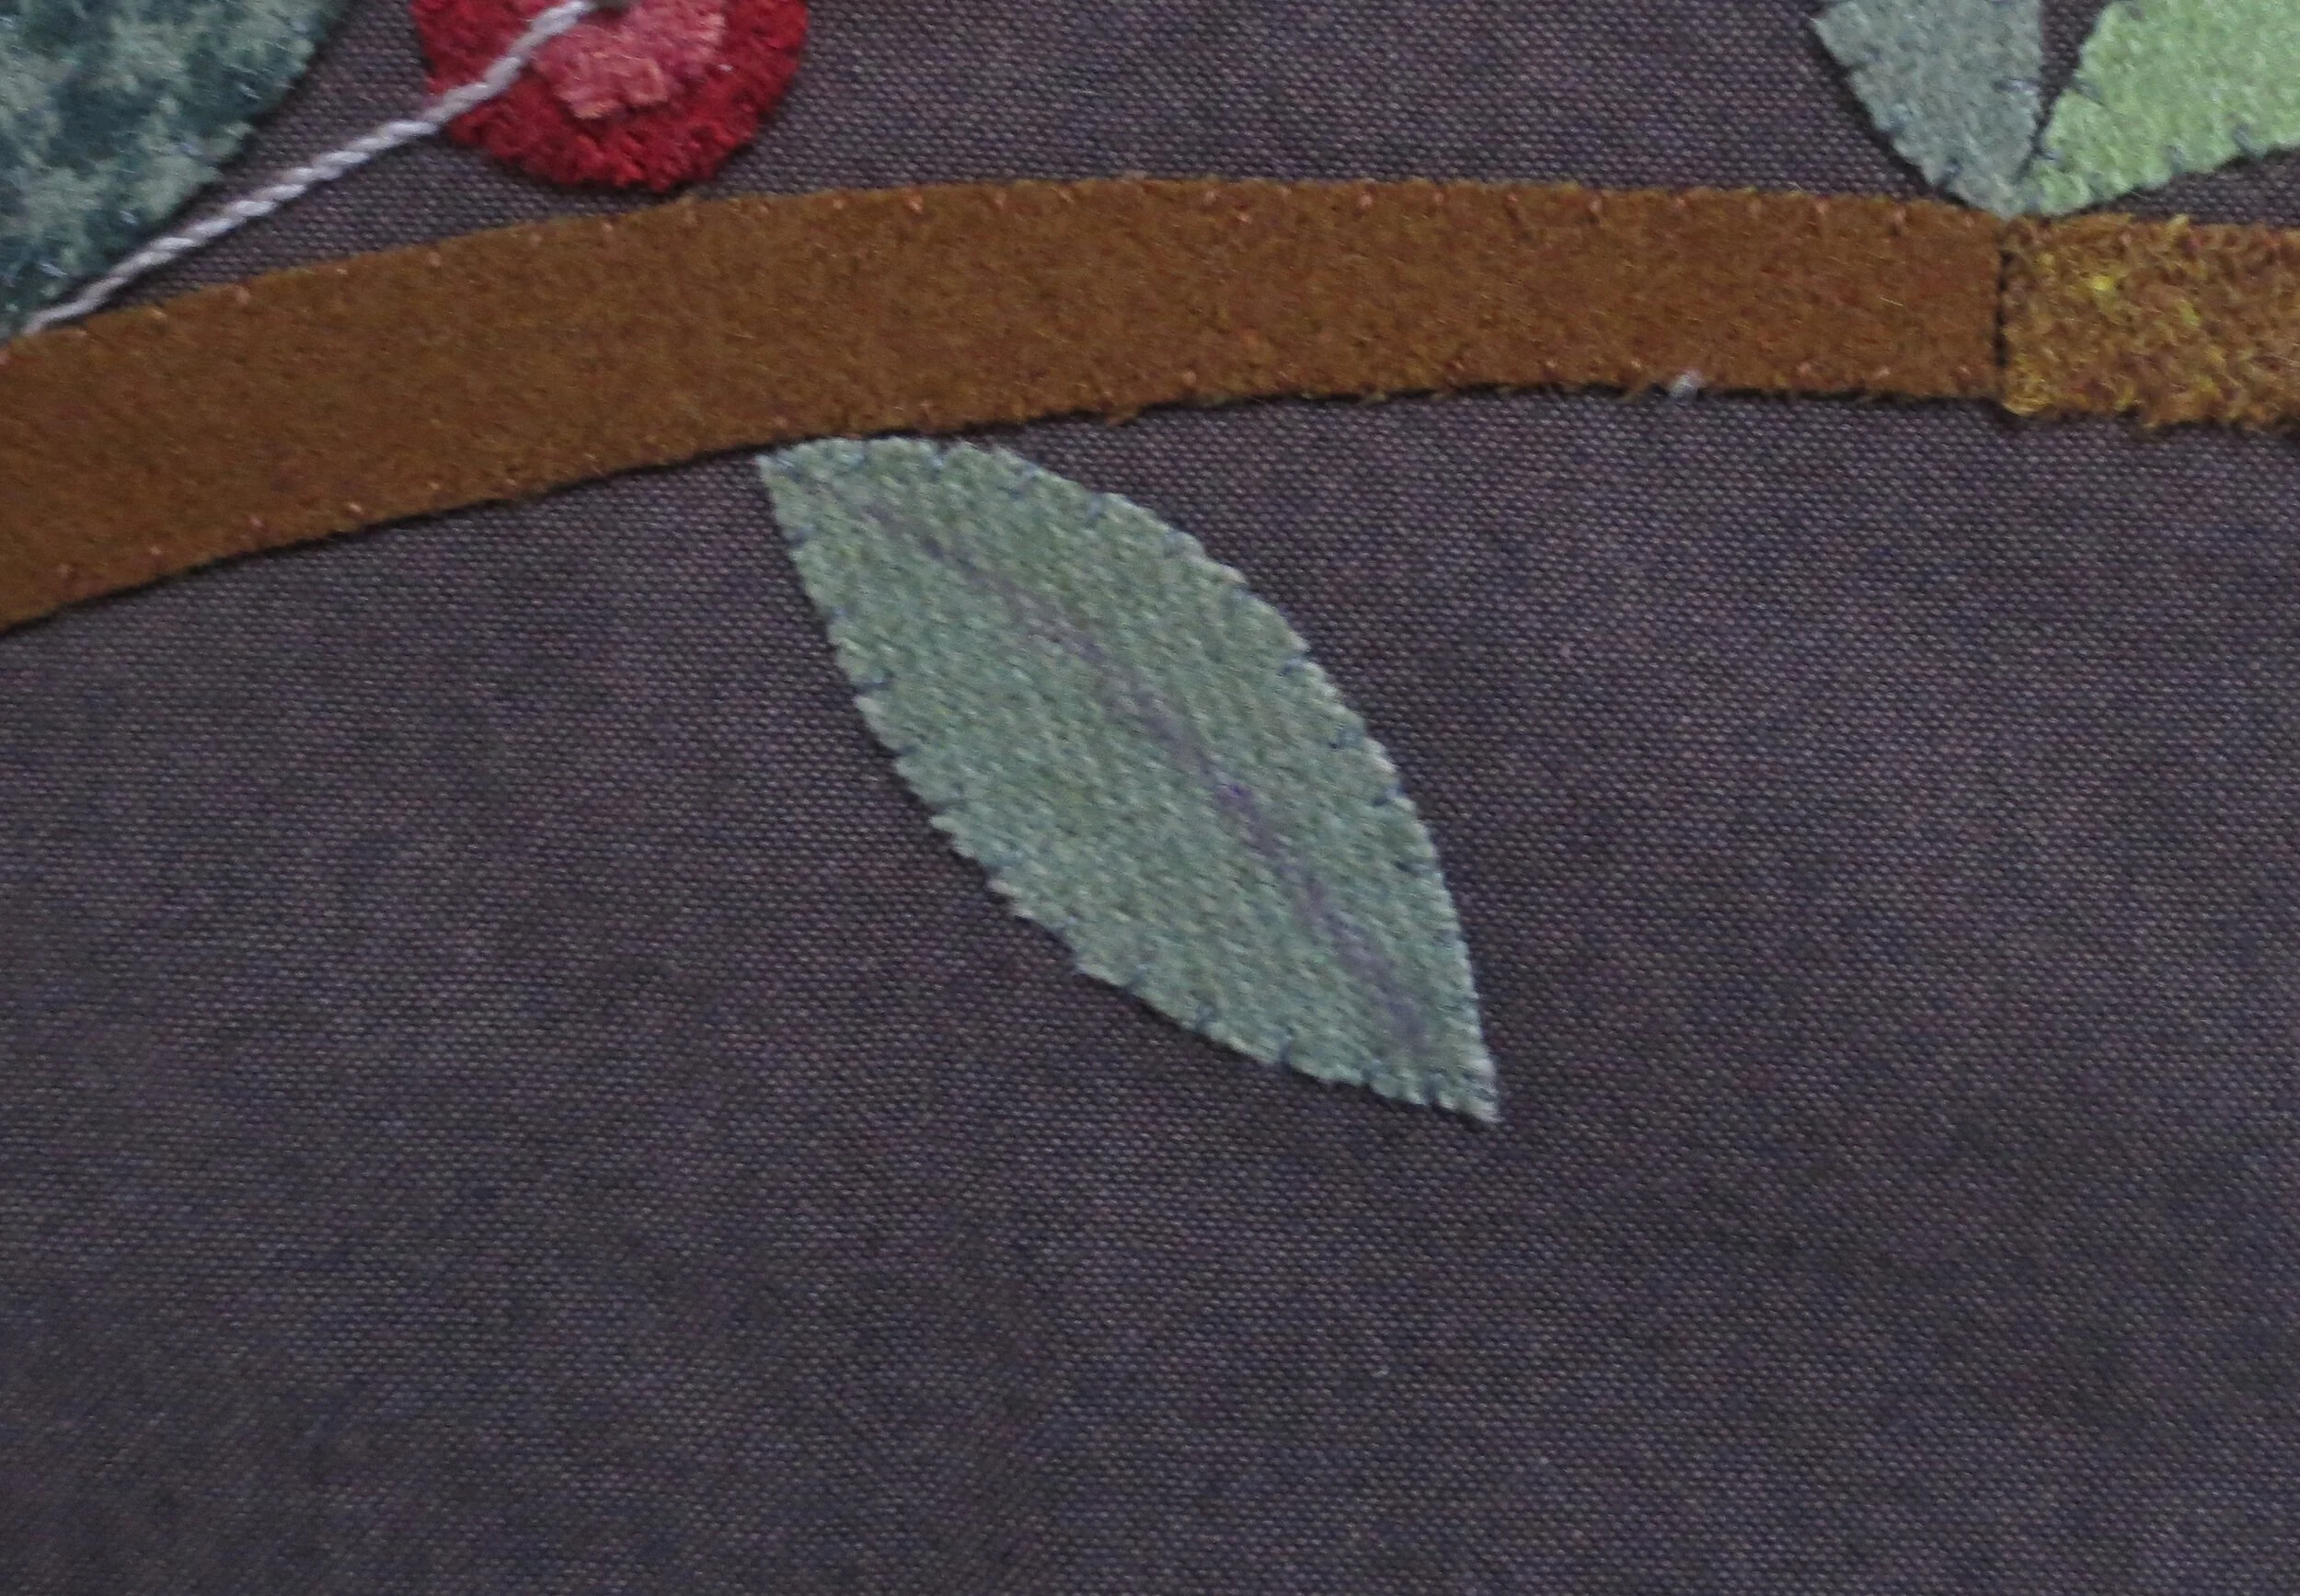
Leaves 1, 8, 10 – 2 ½” x 2 ½” grass green and dark forest houndstooth
Leaves 2, 3, 9 – 2 ½” x 2 ½” sage green
Leaves 4 & 7 – 2” x 2 ½” grass green
Leaves 5 & 6 – 2 ½” x 2 ½” forest green
Berries A & E – 1” x 2” burgundy
Berries A1 & E1, C & G – 1 ½” x 2” mauve
Berries B & F – 1 ½” x 1 ½” orange
Berries D & H – 1” x 1” golden orange
Berries B1 – 1” x 1” tangerine
Fabric Requirements
Nest Interior – 2” x 5 ½” quilting cotton in brown print
Thread Requirements
Decorative stitches on words and date - Use one light color and one dark colored perle cotton, size 8 thread, or embroidery floss. The dark color thread should be similar in color to the outer border color. I used Valdani P12. The light color should be similar to the background of your blocks. I used Valdani O538. Three strands of floss can also be used.
Whip stitching around each pattern piece - Embroidery floss or perle cotton, size 12 in colors that match your wool colors
Veins of leaves – Since the leaves are both light and dark I used a variegated green thread that had both dark and light greens (Valdani perle cotton, size 8, color #O526). Three strands of floss can be used in place of 1 strand of size 8 perle cotton.
Miscellaneous Requirements
Chalk pencil – I used Bohin Extra Fine Chalk Pencil (for dark fabrics)
Air erasable fabric marker – I used Clover Air Erasable fine point marker (for light fabrics)
Feather weight fusible web – Vilene Melt-fuse or Heat’n’Bond Featherlite
Chenille needles sizes 22 & 24
Steam iron
Instructions
1. Trace the reversed images of the pattern pieces onto fusible web and then cut out leaving a small (1/8”) border around each piece. Set the bottom border pieces aside for later use. We will be working on the top border first.
2. Fuse patterns onto designated wools and then cut out along traced lines. Set the bottom border pieces aside for later use. We will be working on the top border first.
3. Top Border
Use a chalk pencil or air erasable marker ( a marker will work for light fabrics) to mark a horizontal guide line 1 1/2” above the seam line.
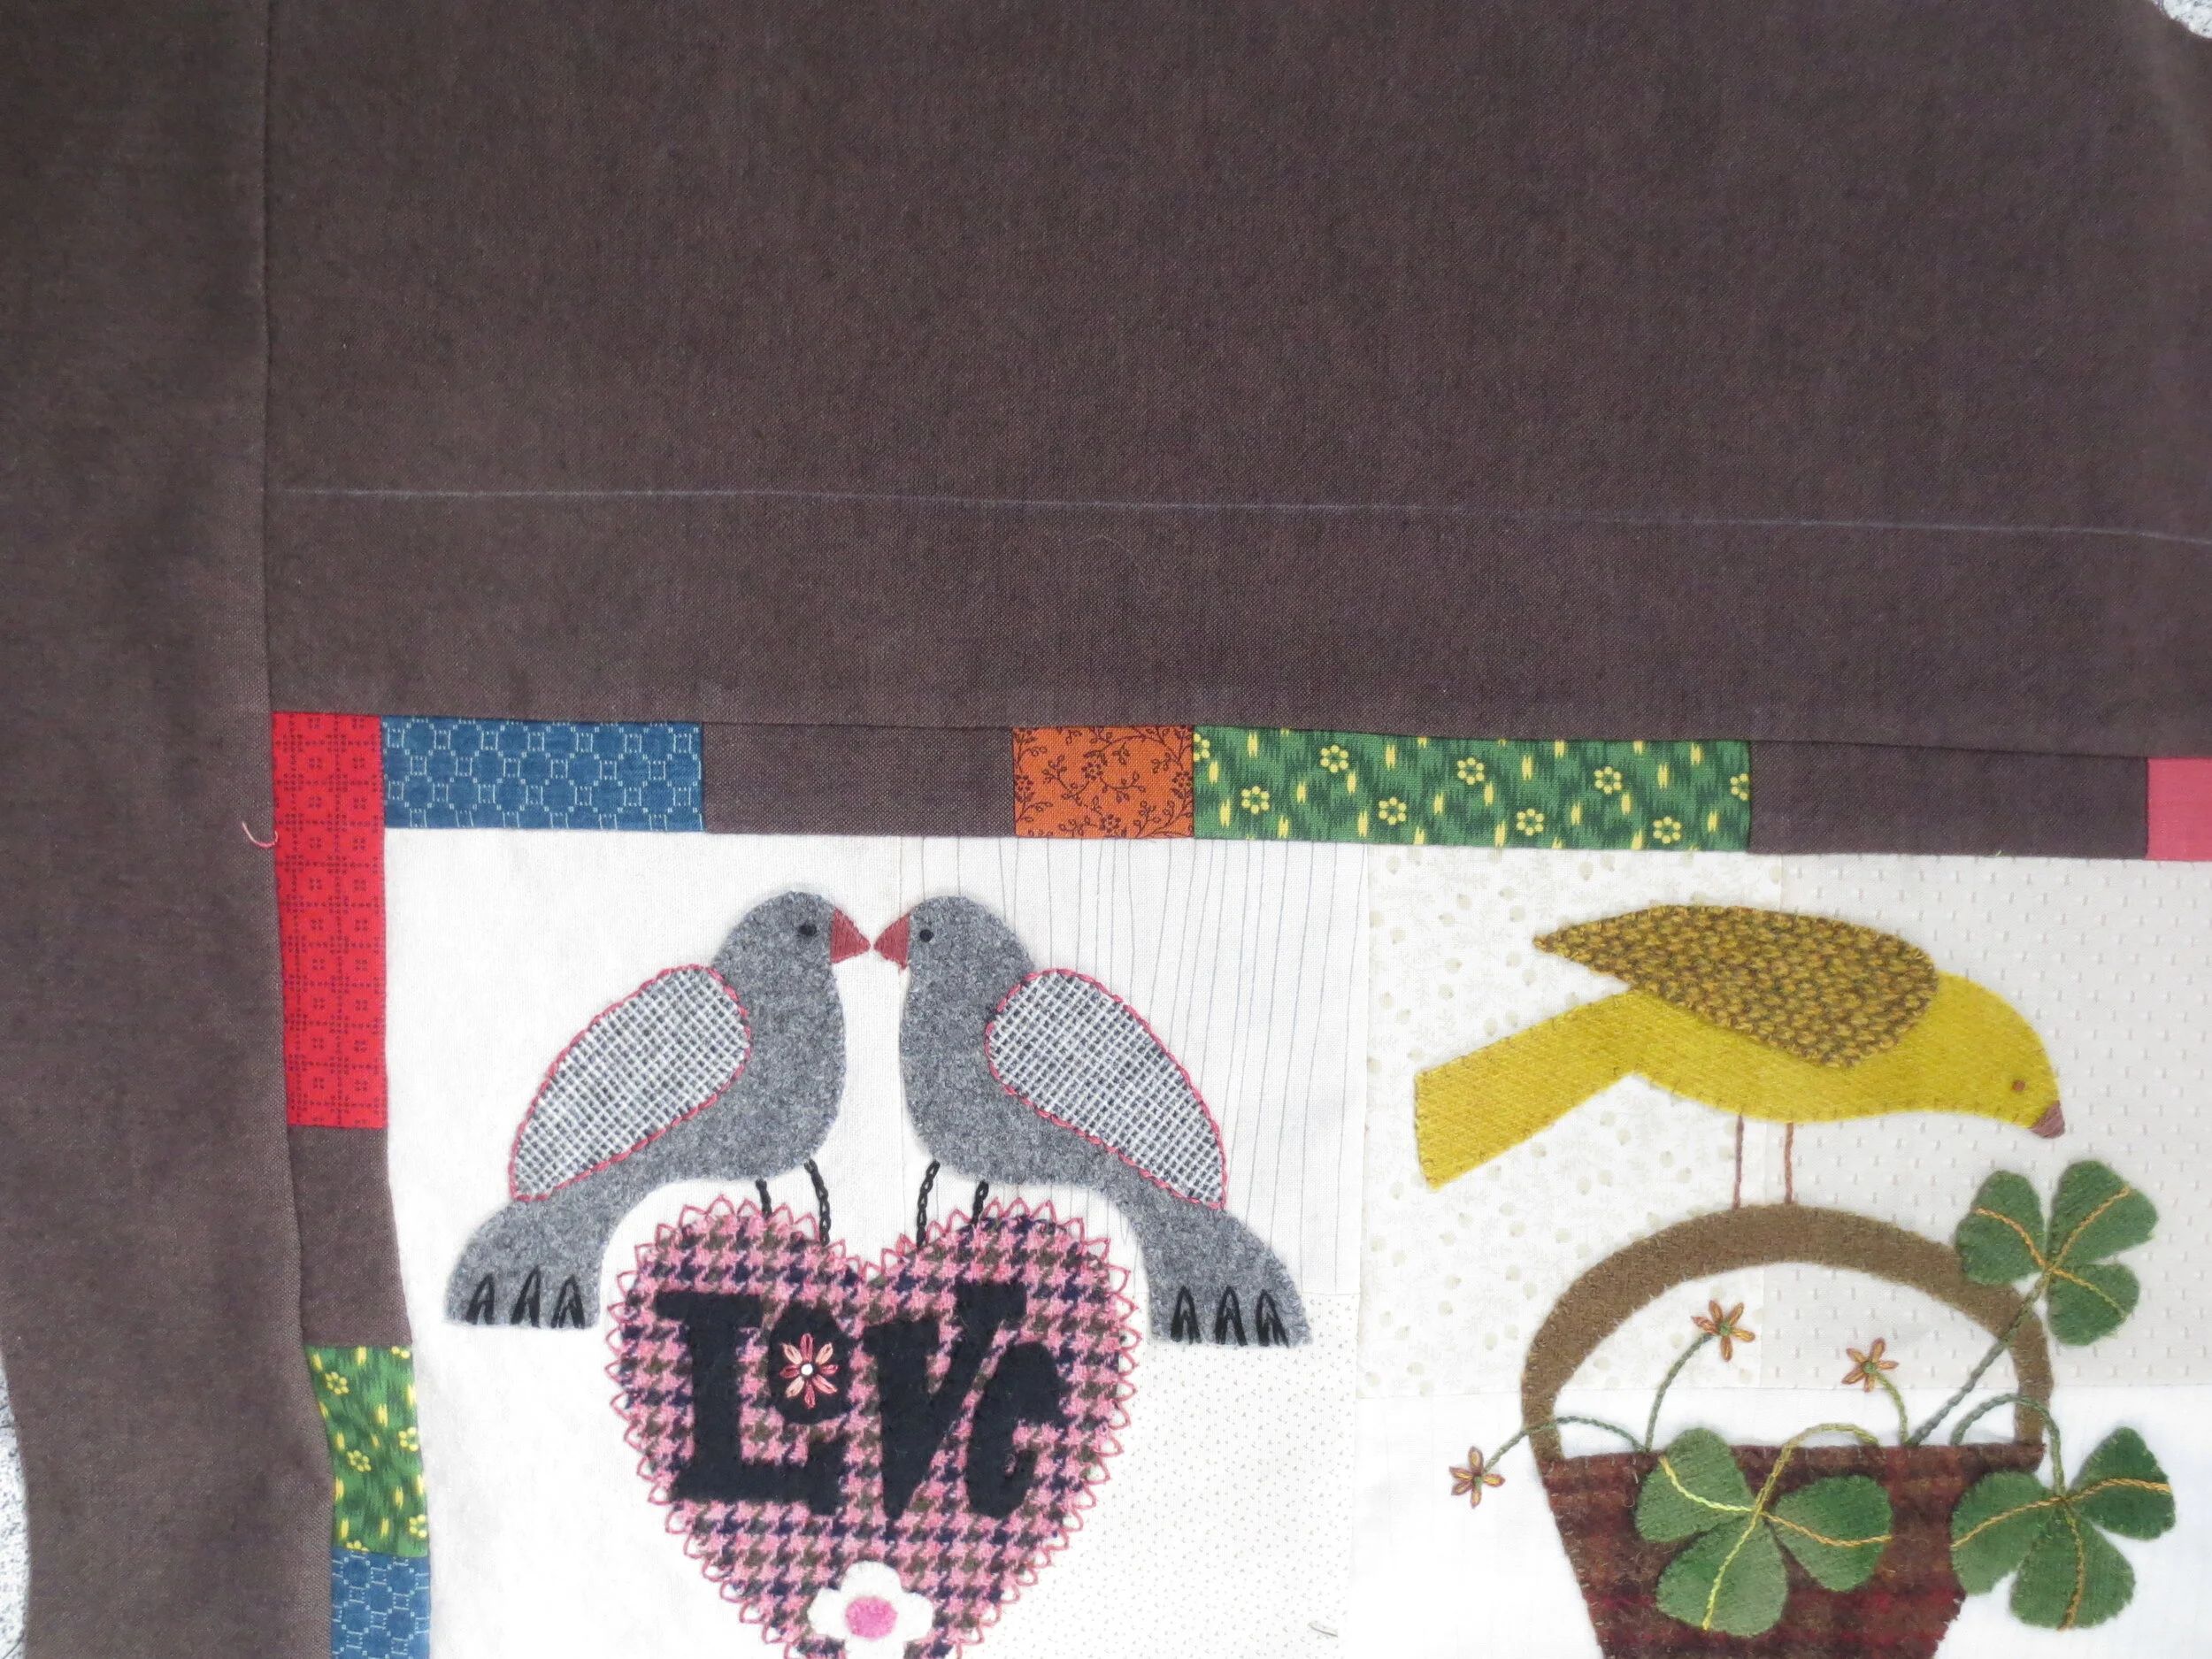
Position the letters along the guide line using the layout as your placement guide.
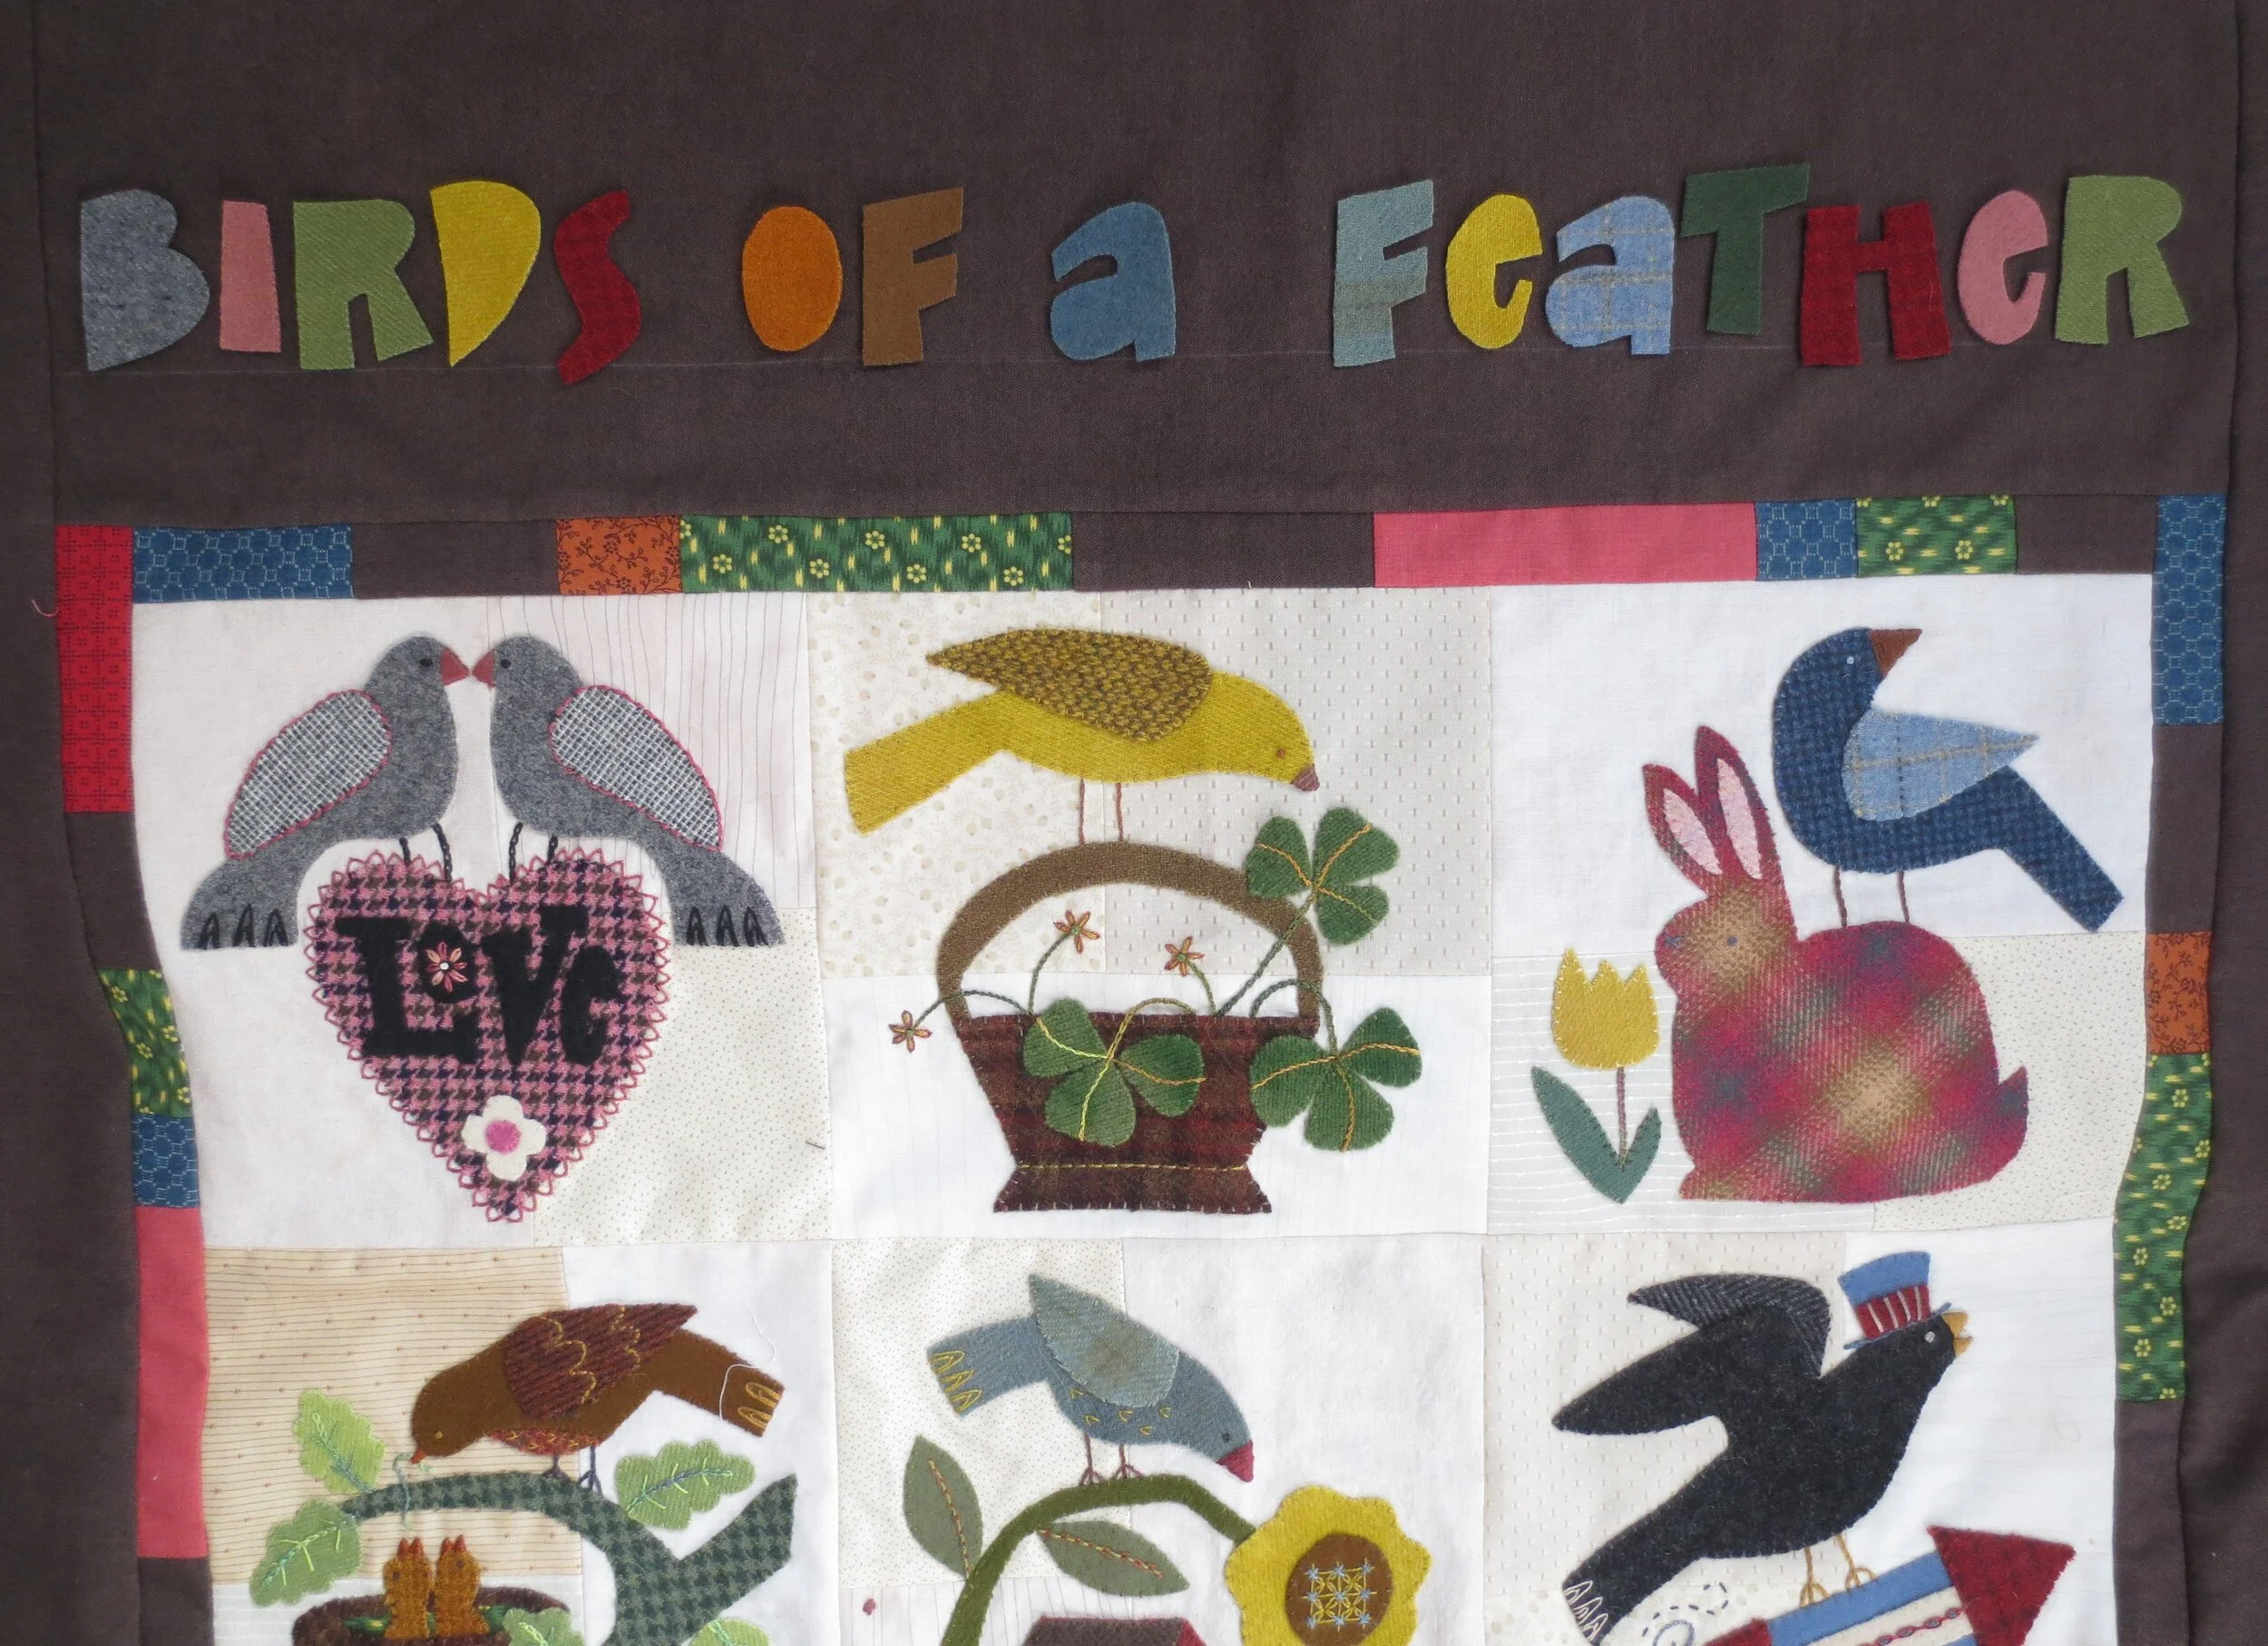
Fuse in place using steam.
Whip stitch all the letters using 2 strands of floss or 1 strand of perle cotton, size 12 that matches your wool.
Note: All the following stitches are made with perle cotton, size 8 unless otherwise noted.
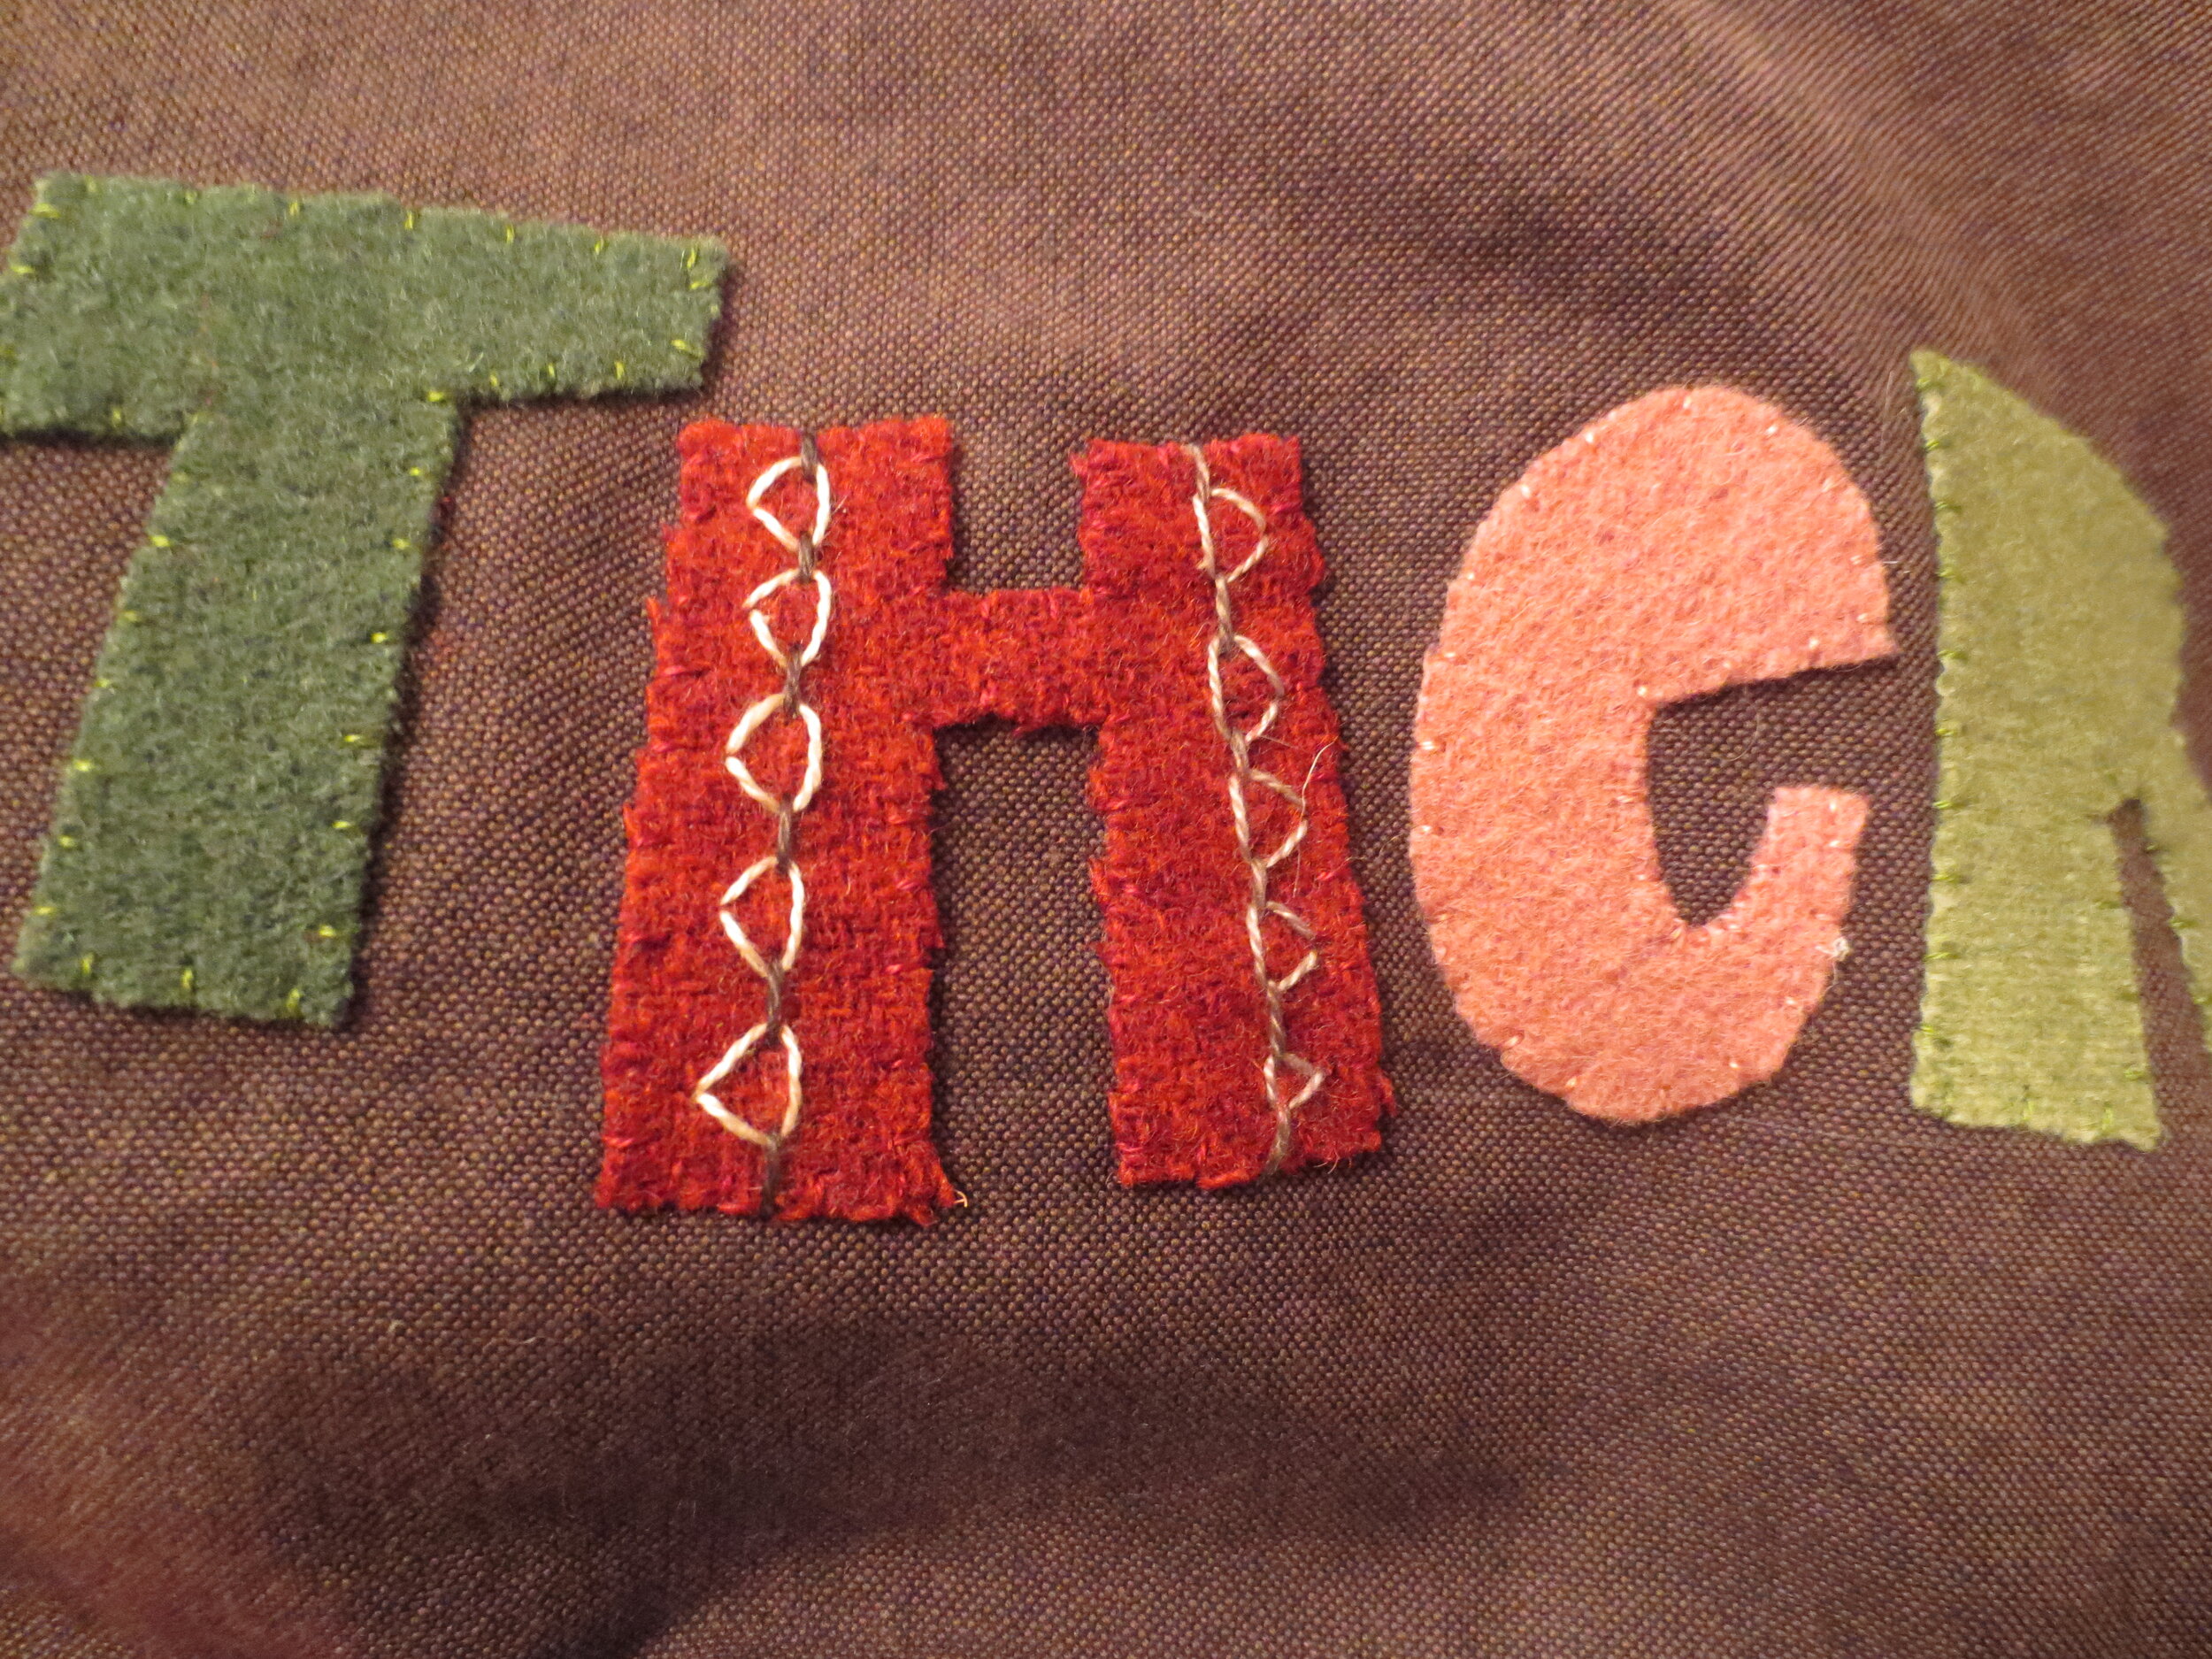
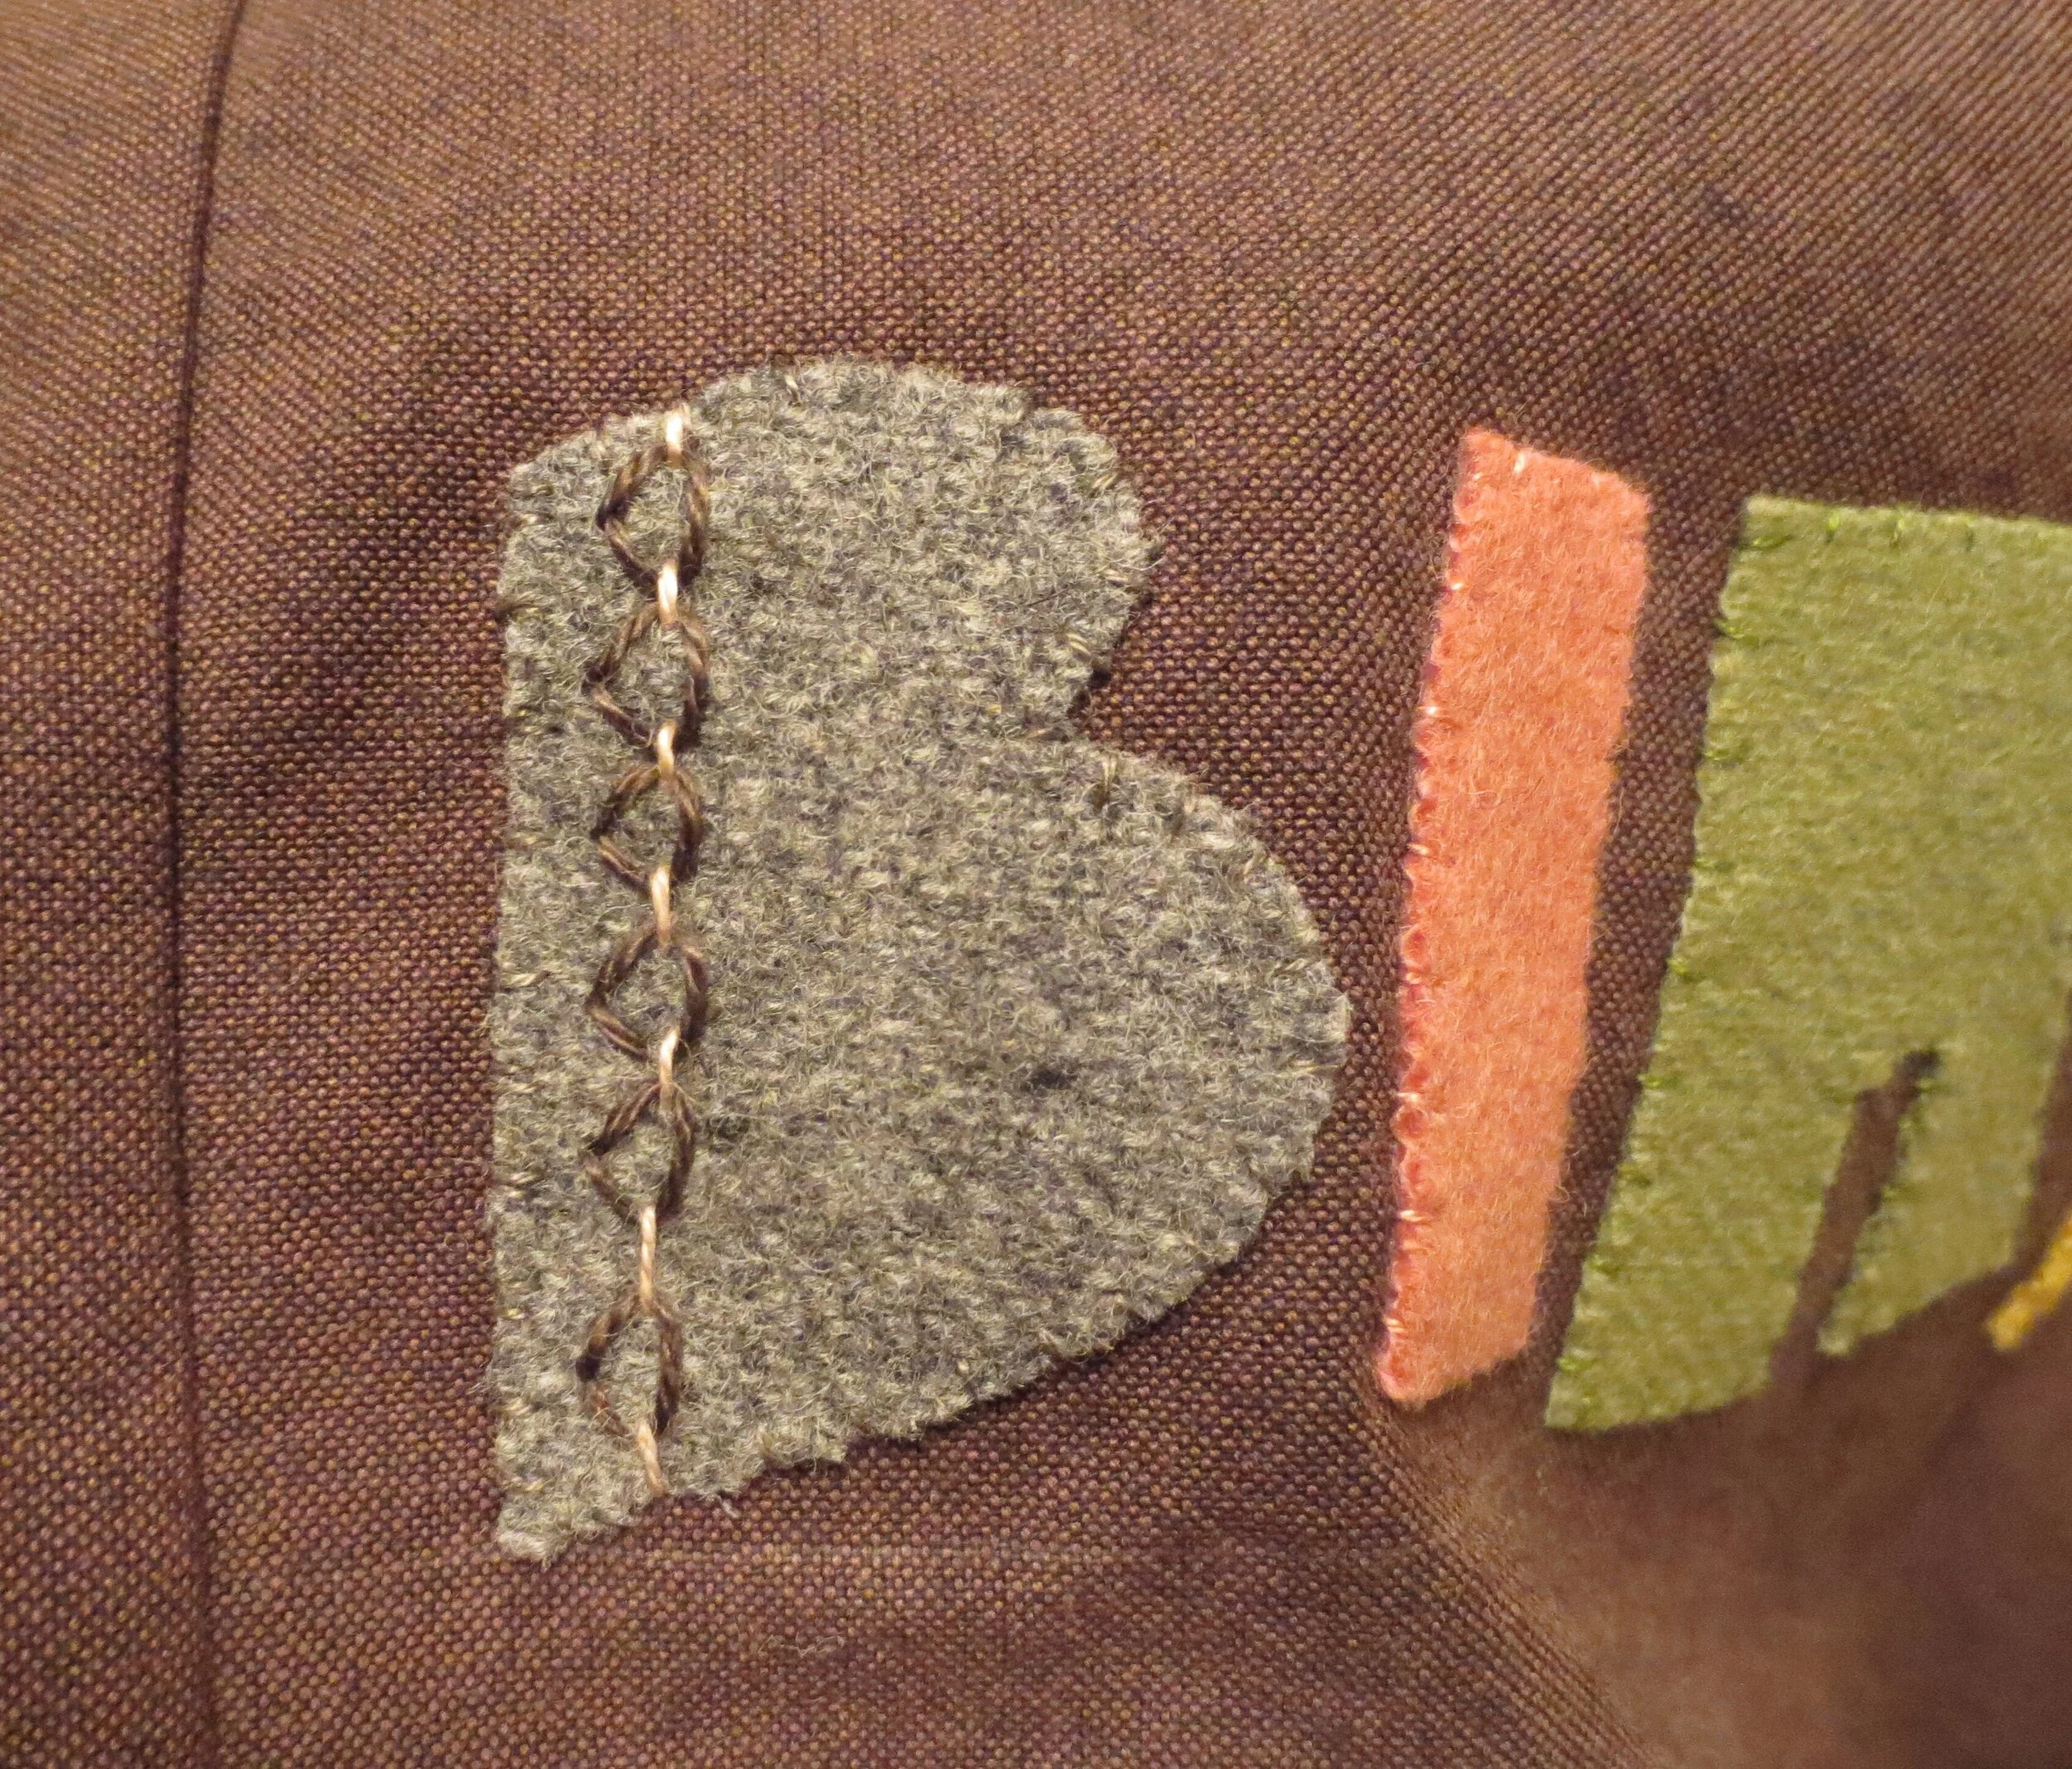
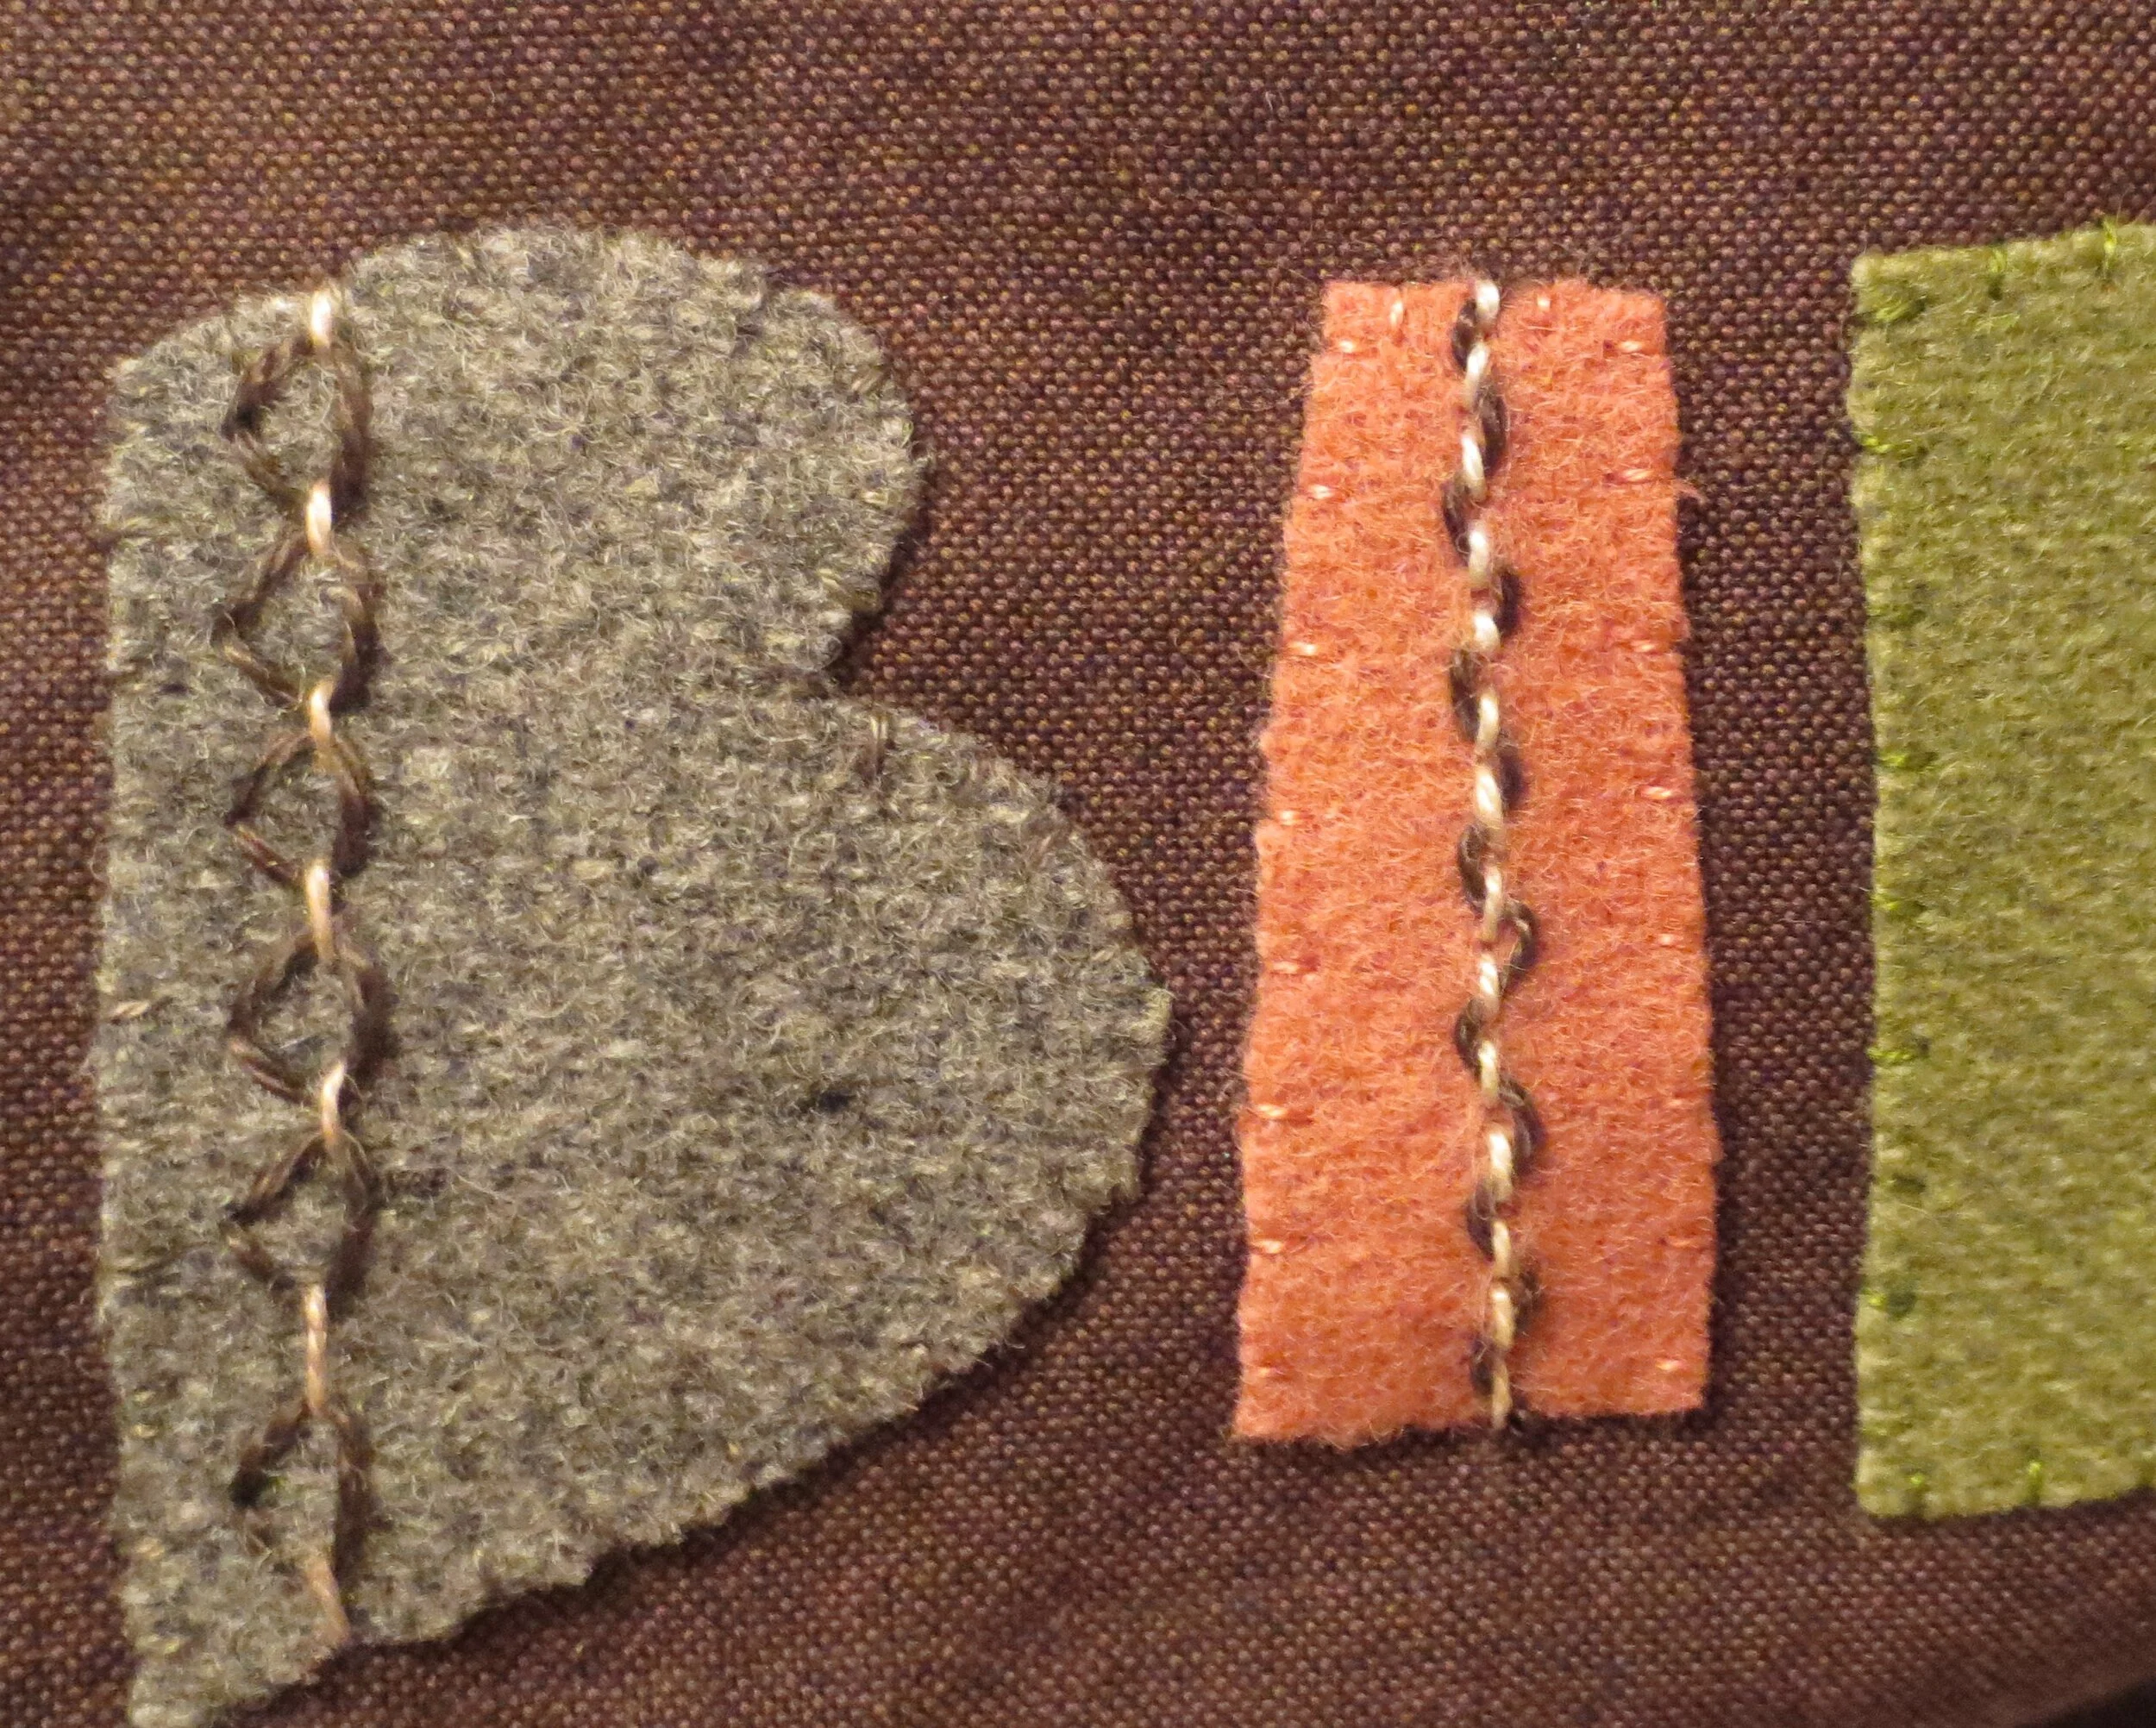
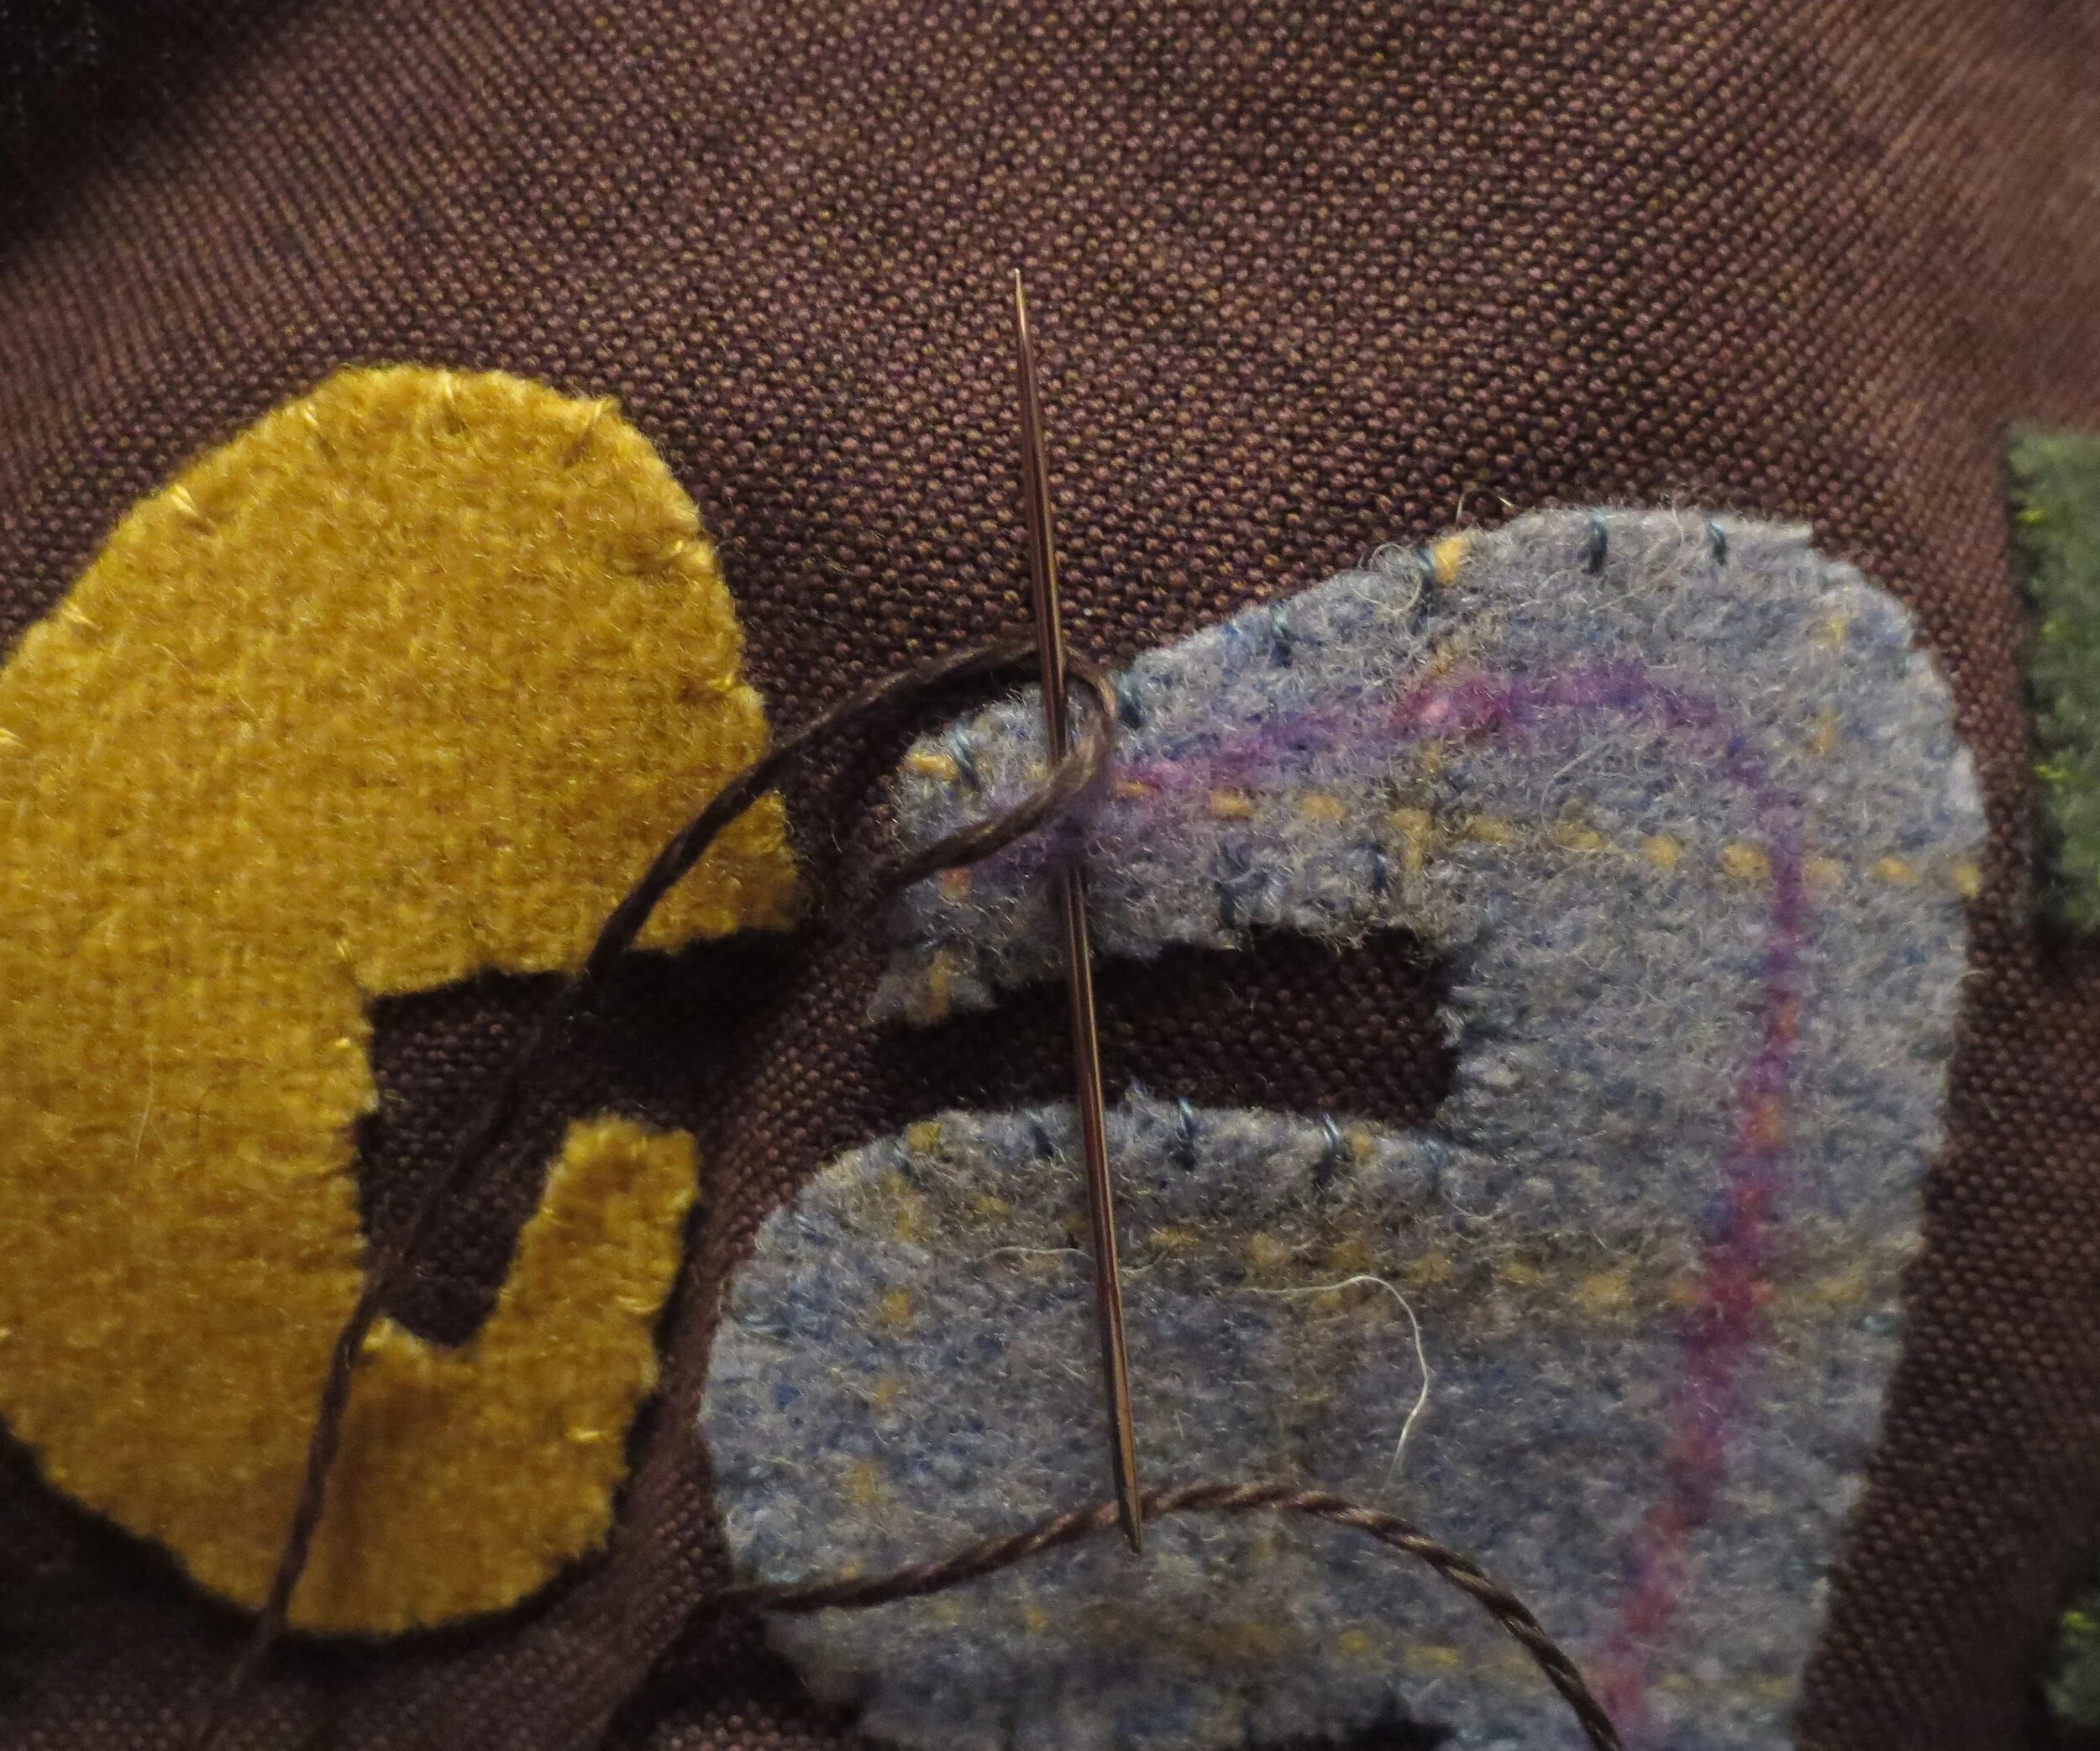
Let’s start with the letter’s B and H. They will both be embellished with an Inuit Lacing stitch.
Draw a vertical line down both legs of the H and the spine of the B using a chalk pencil or air erasable fabric marker.
Use 1 strand of perle cotton, size 8 to stitch a running stitch over the drawn lines. Note: I used the darker color (Valdani P12) for the dark wool, and the lighter color (Valdani O538) for the light colored wool.
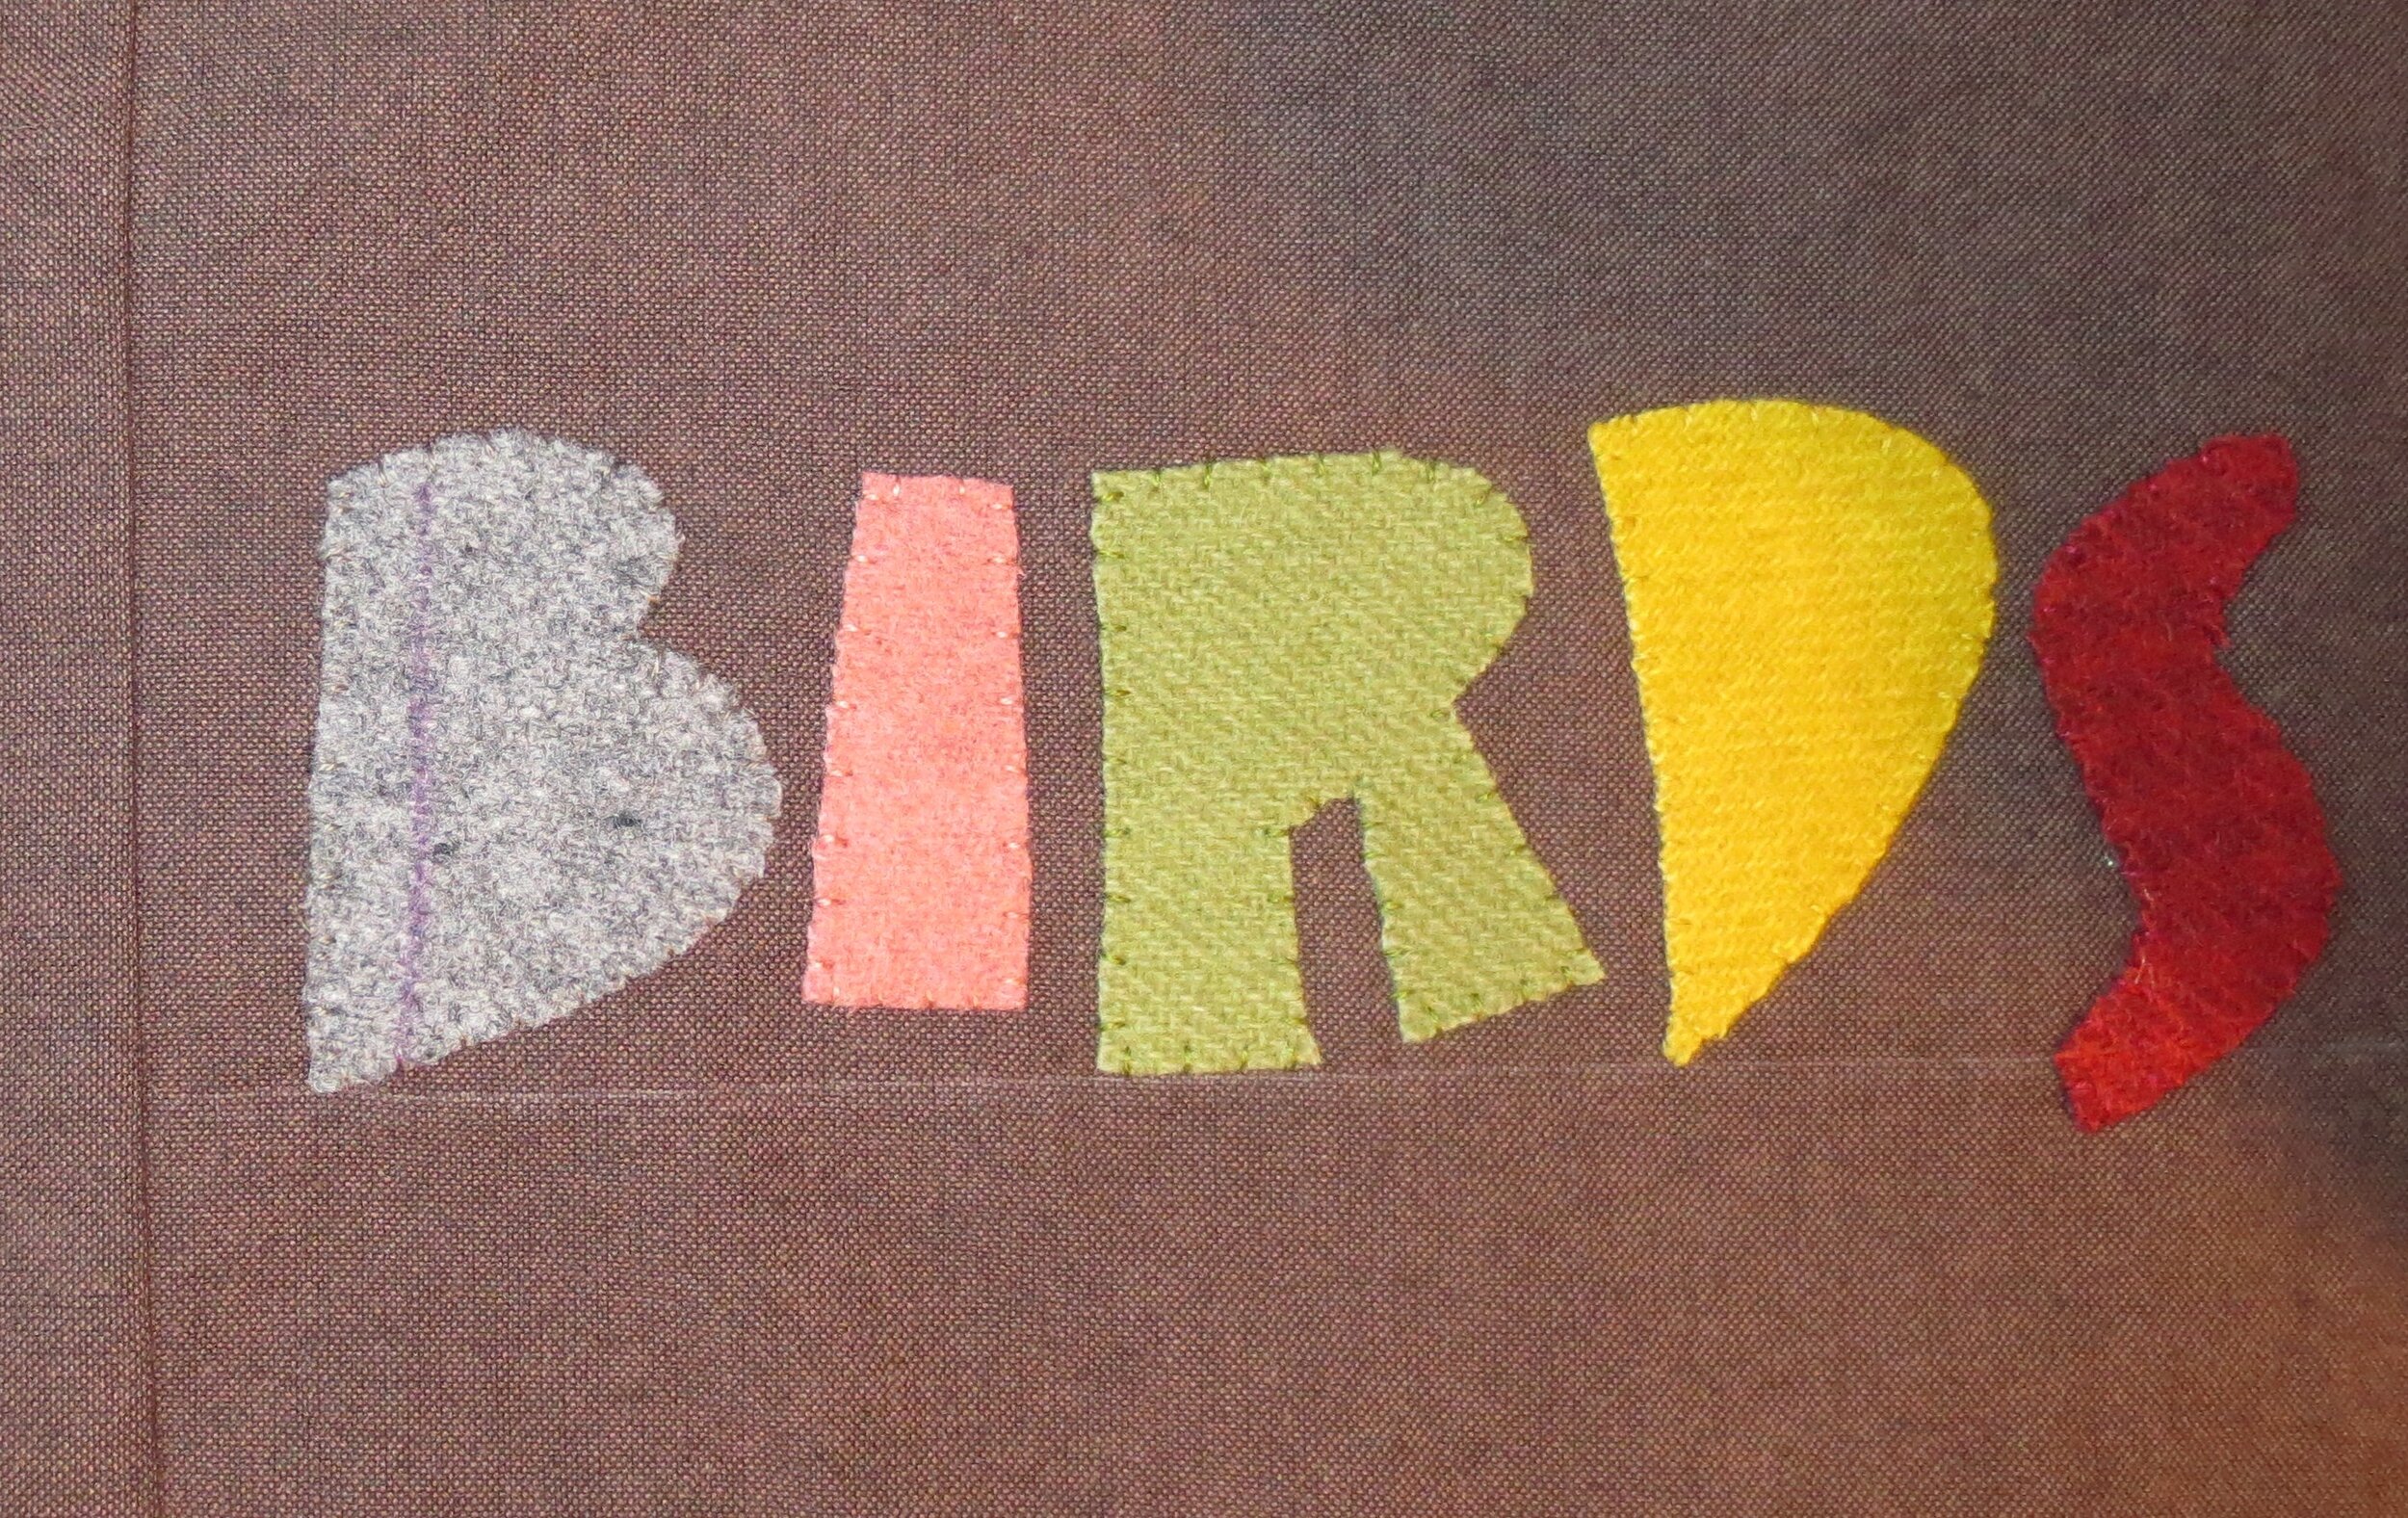
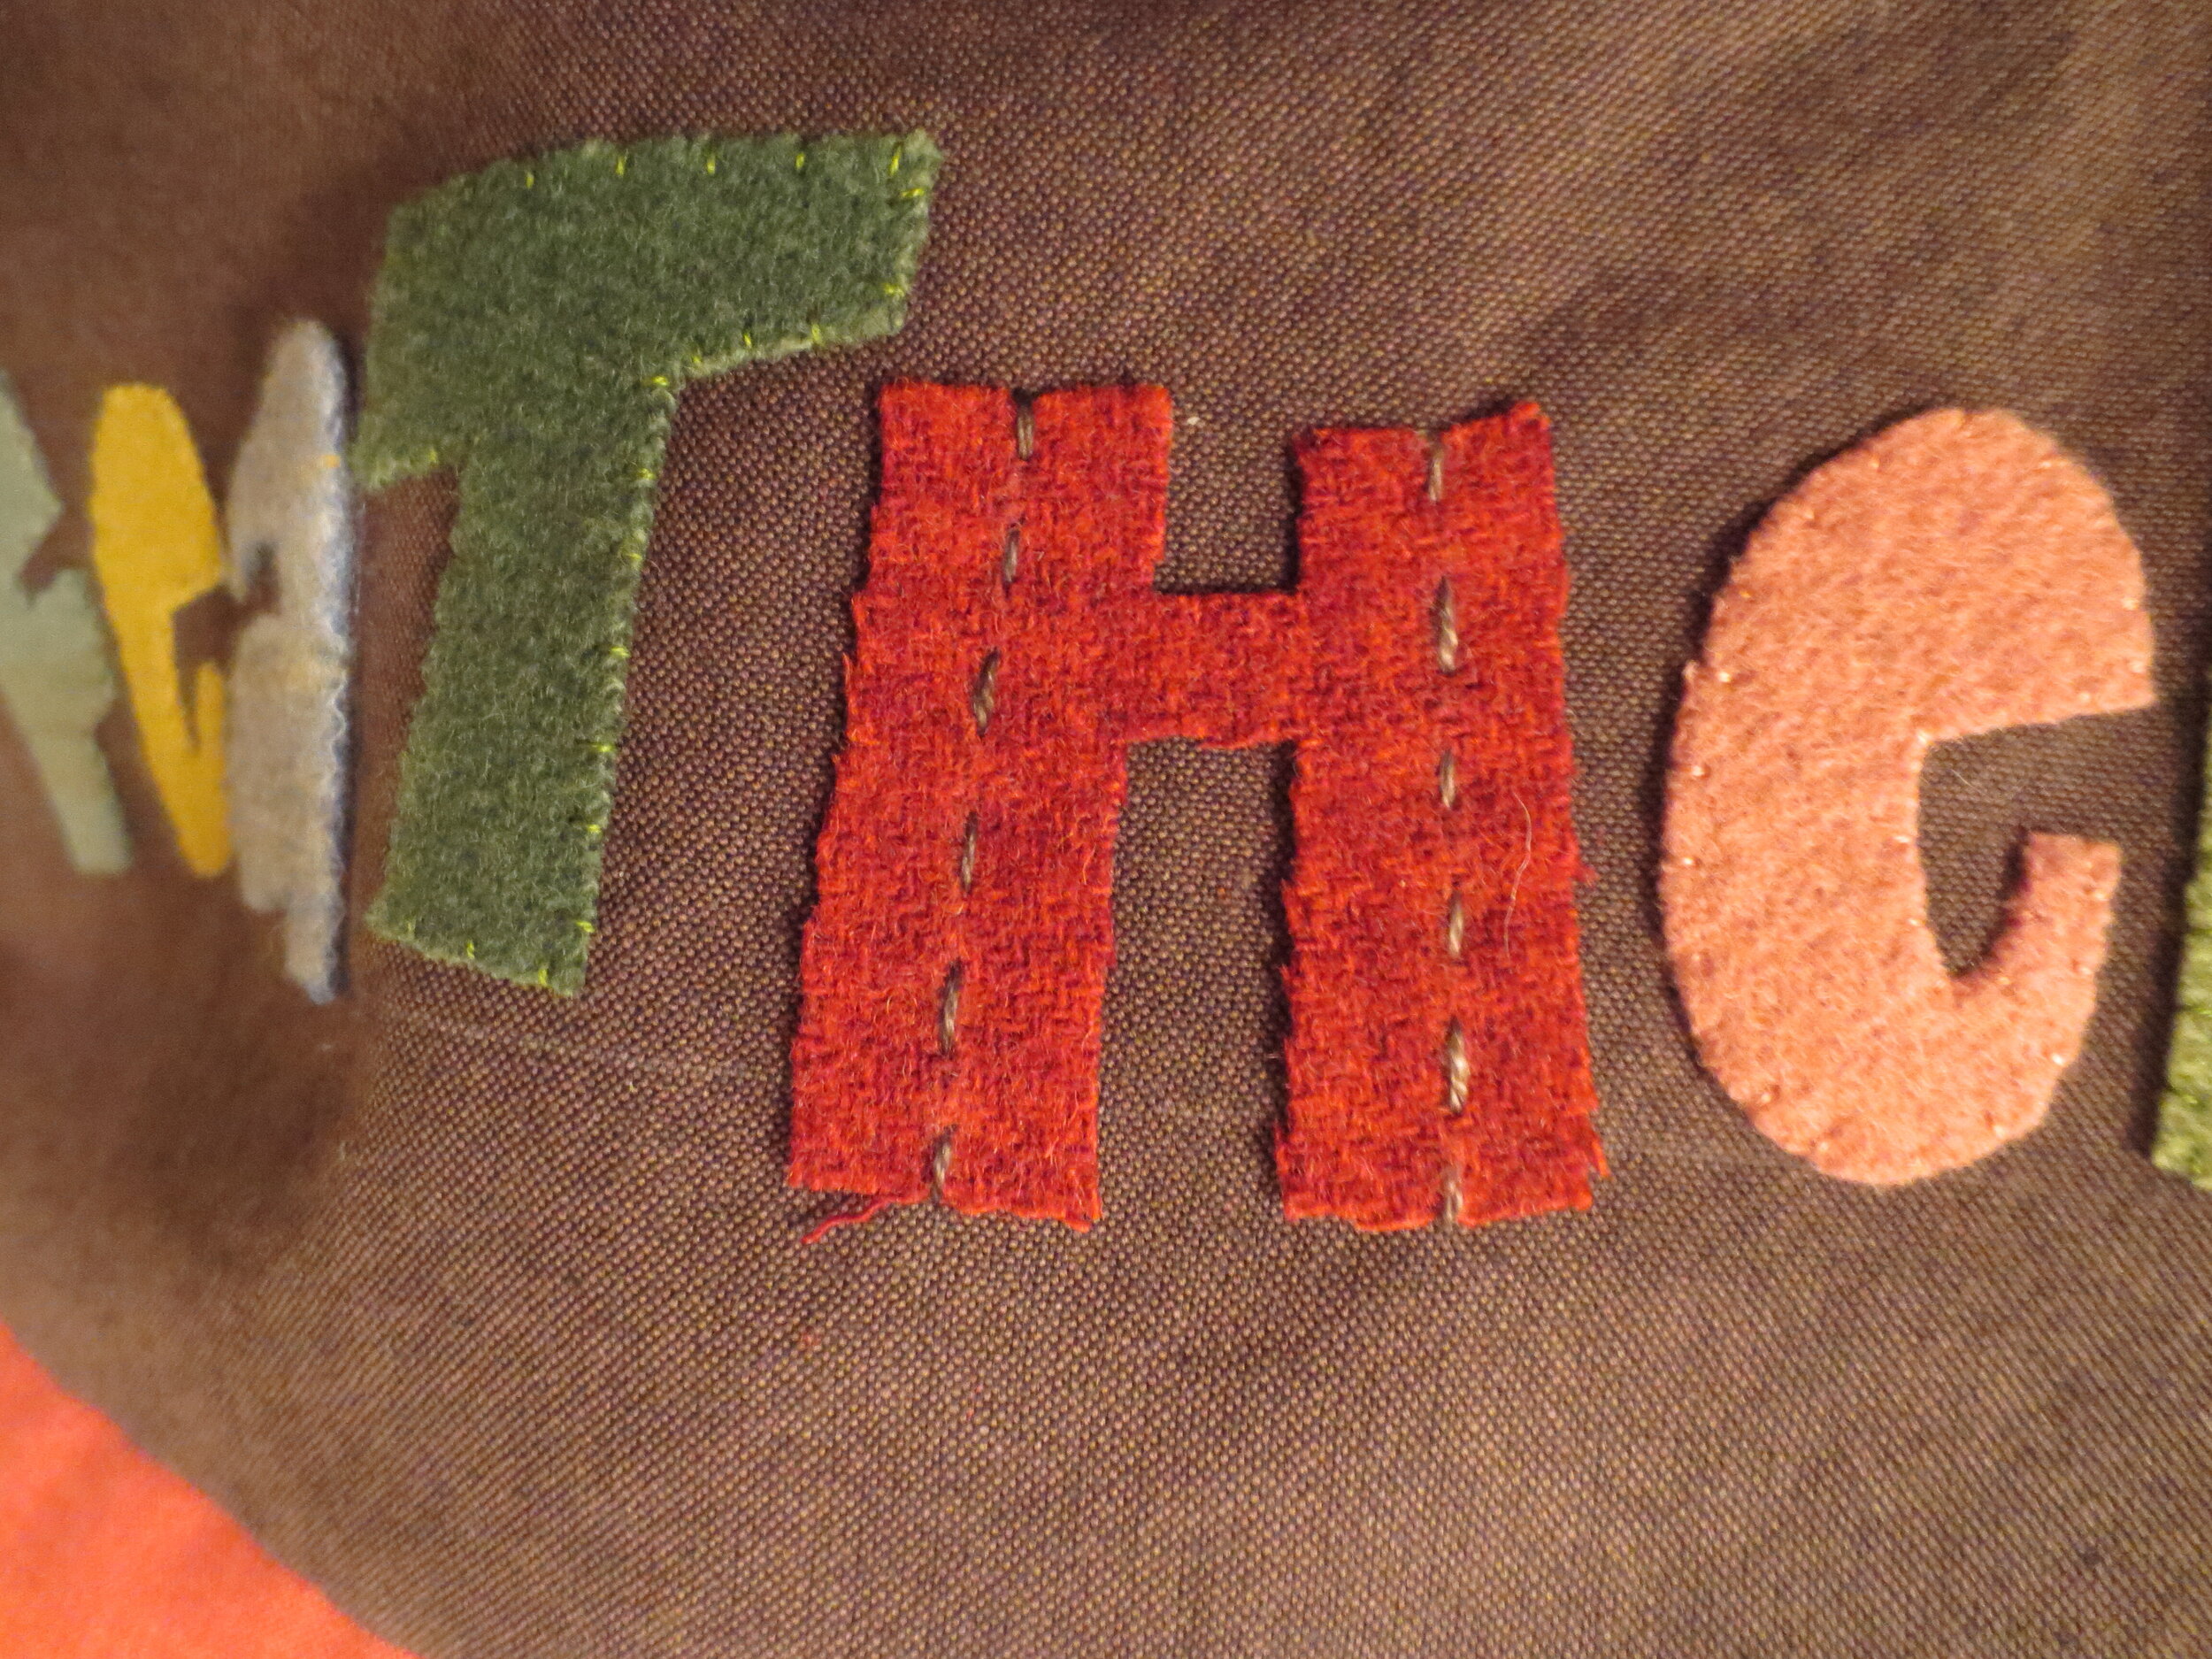
Use 1 strand of the opposite colored thread for the lacing stitch. Bring the needle and thread up between and to the side of the running stitch.
Slide the needle under the first running stitch. ( Try sliding the needle under the running stitch eye first instead of point first. This prevents the point of the needle from catching on the top thread as you slide it under). Pull the thread through.

Slide the needle under the second running stitch and then pull the thread through.
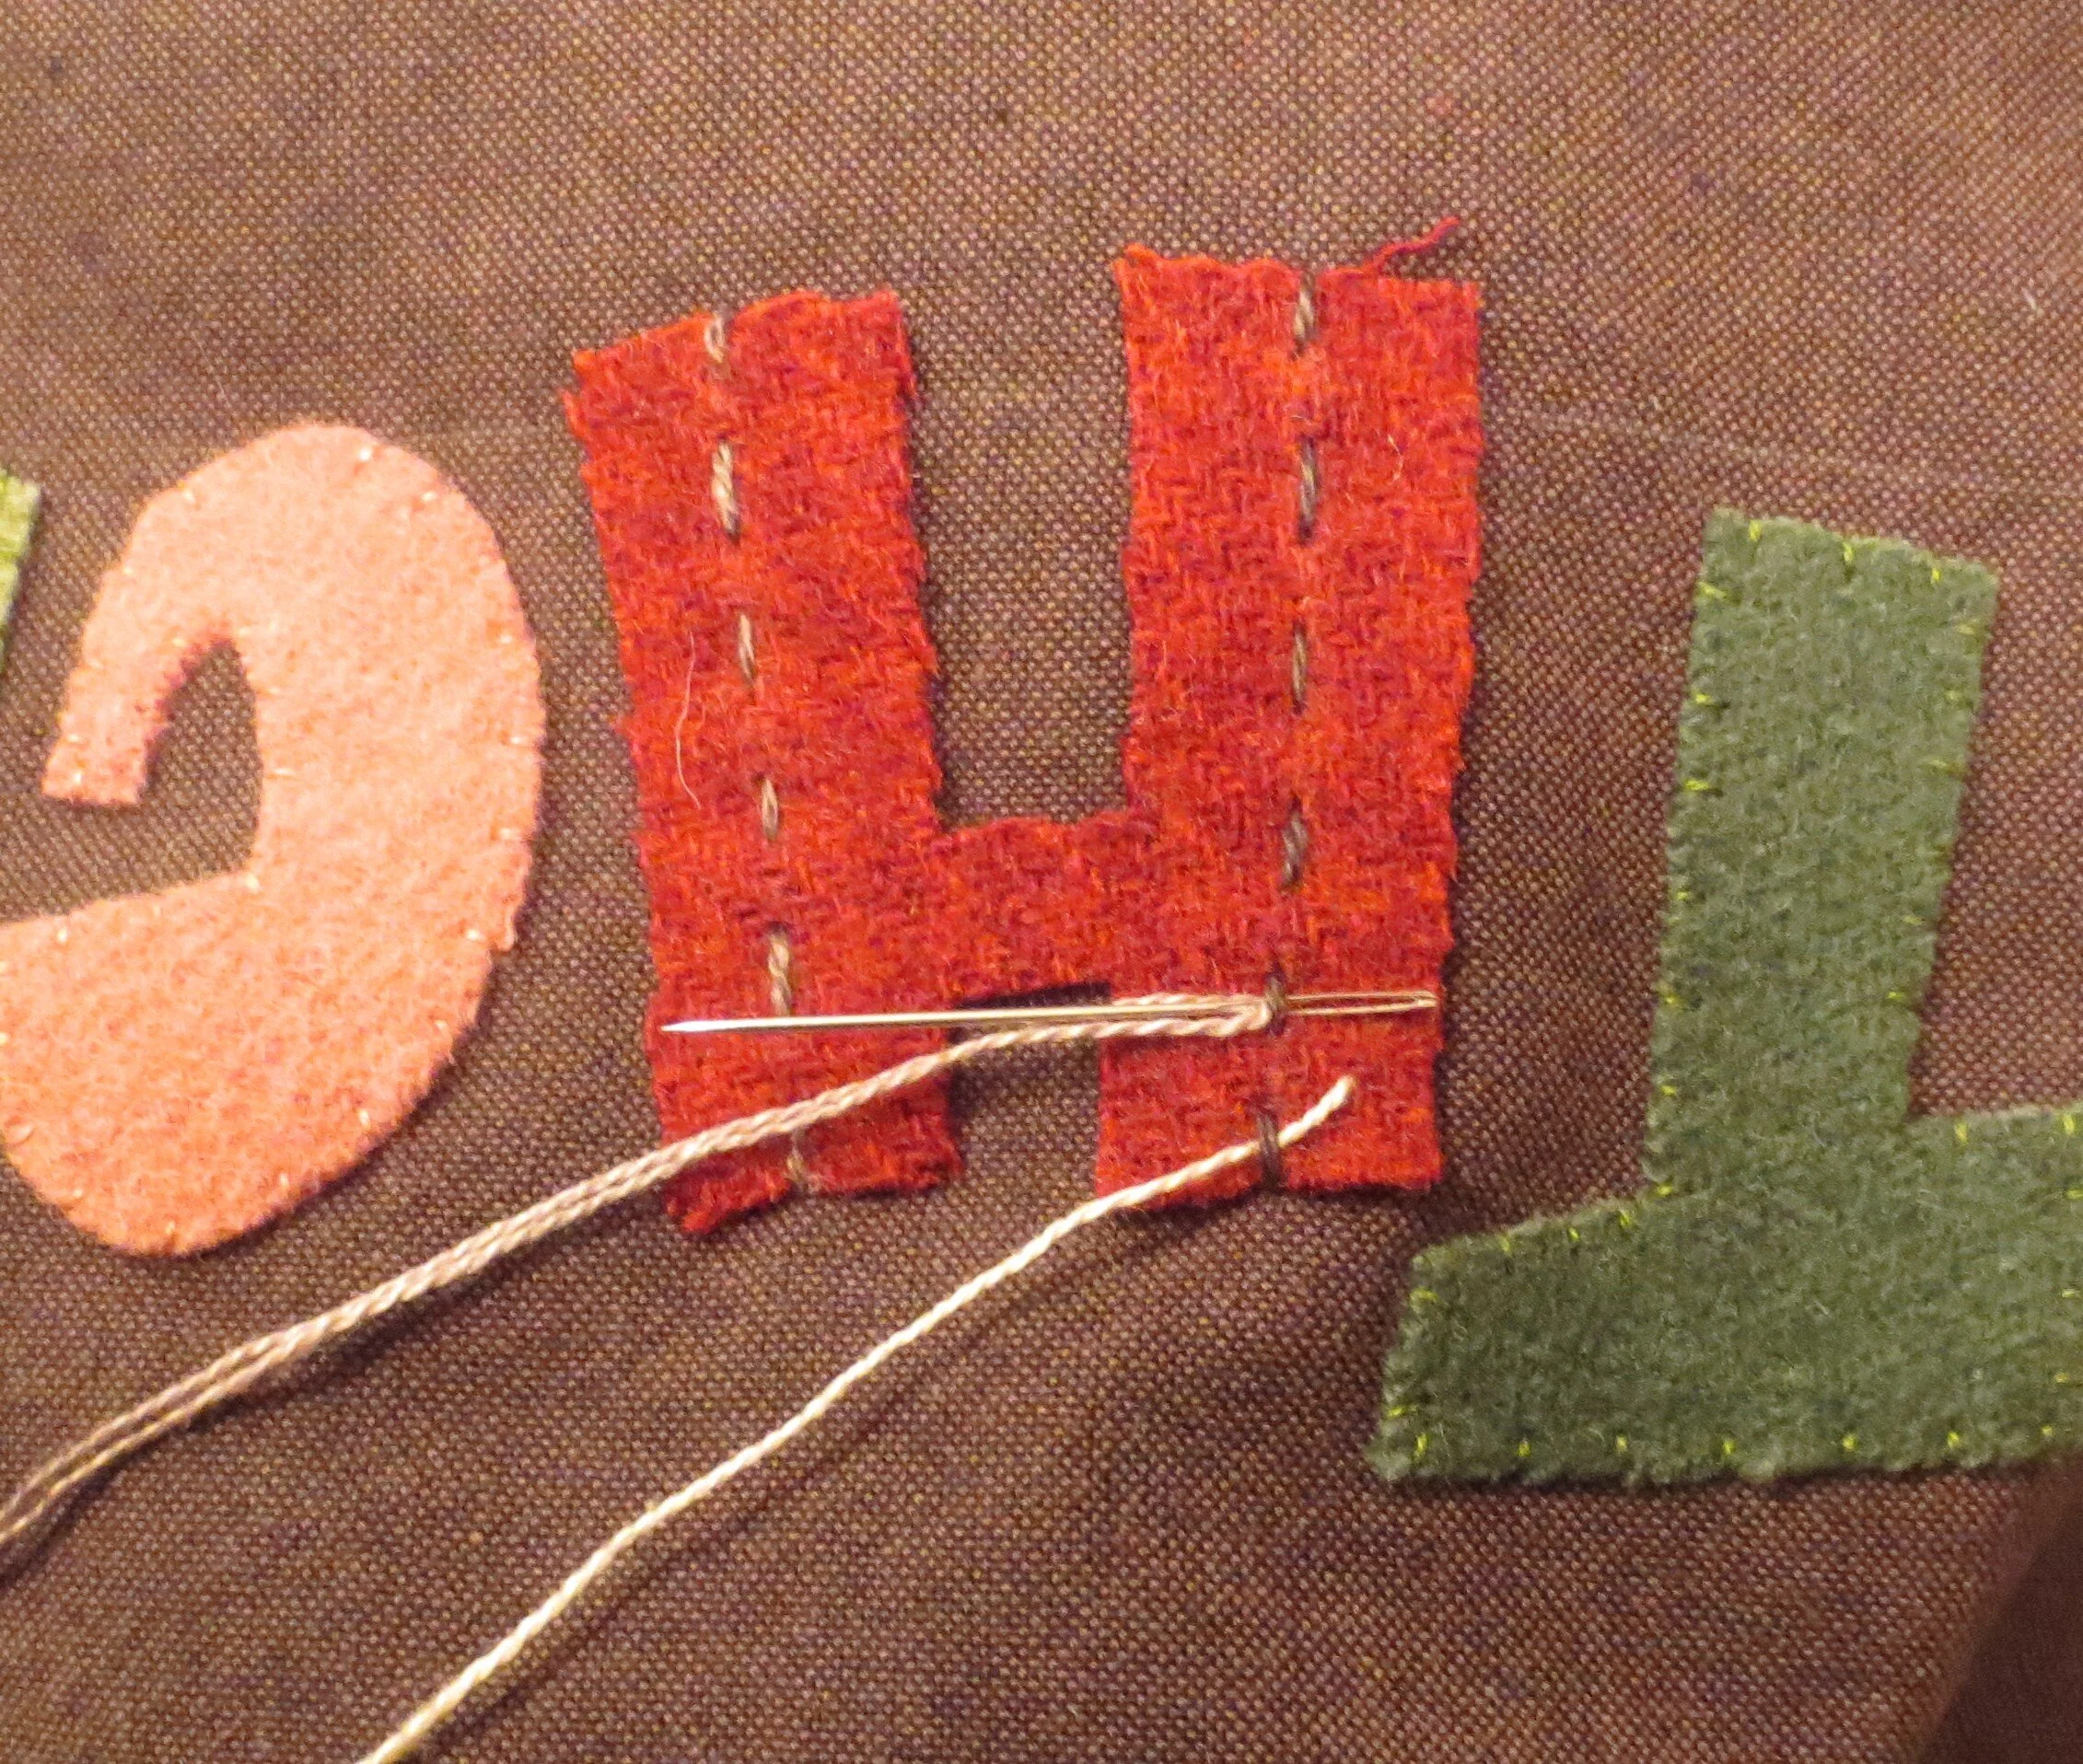
Insert the needle back into the point in which the stitch began and then pull the thread through the back.
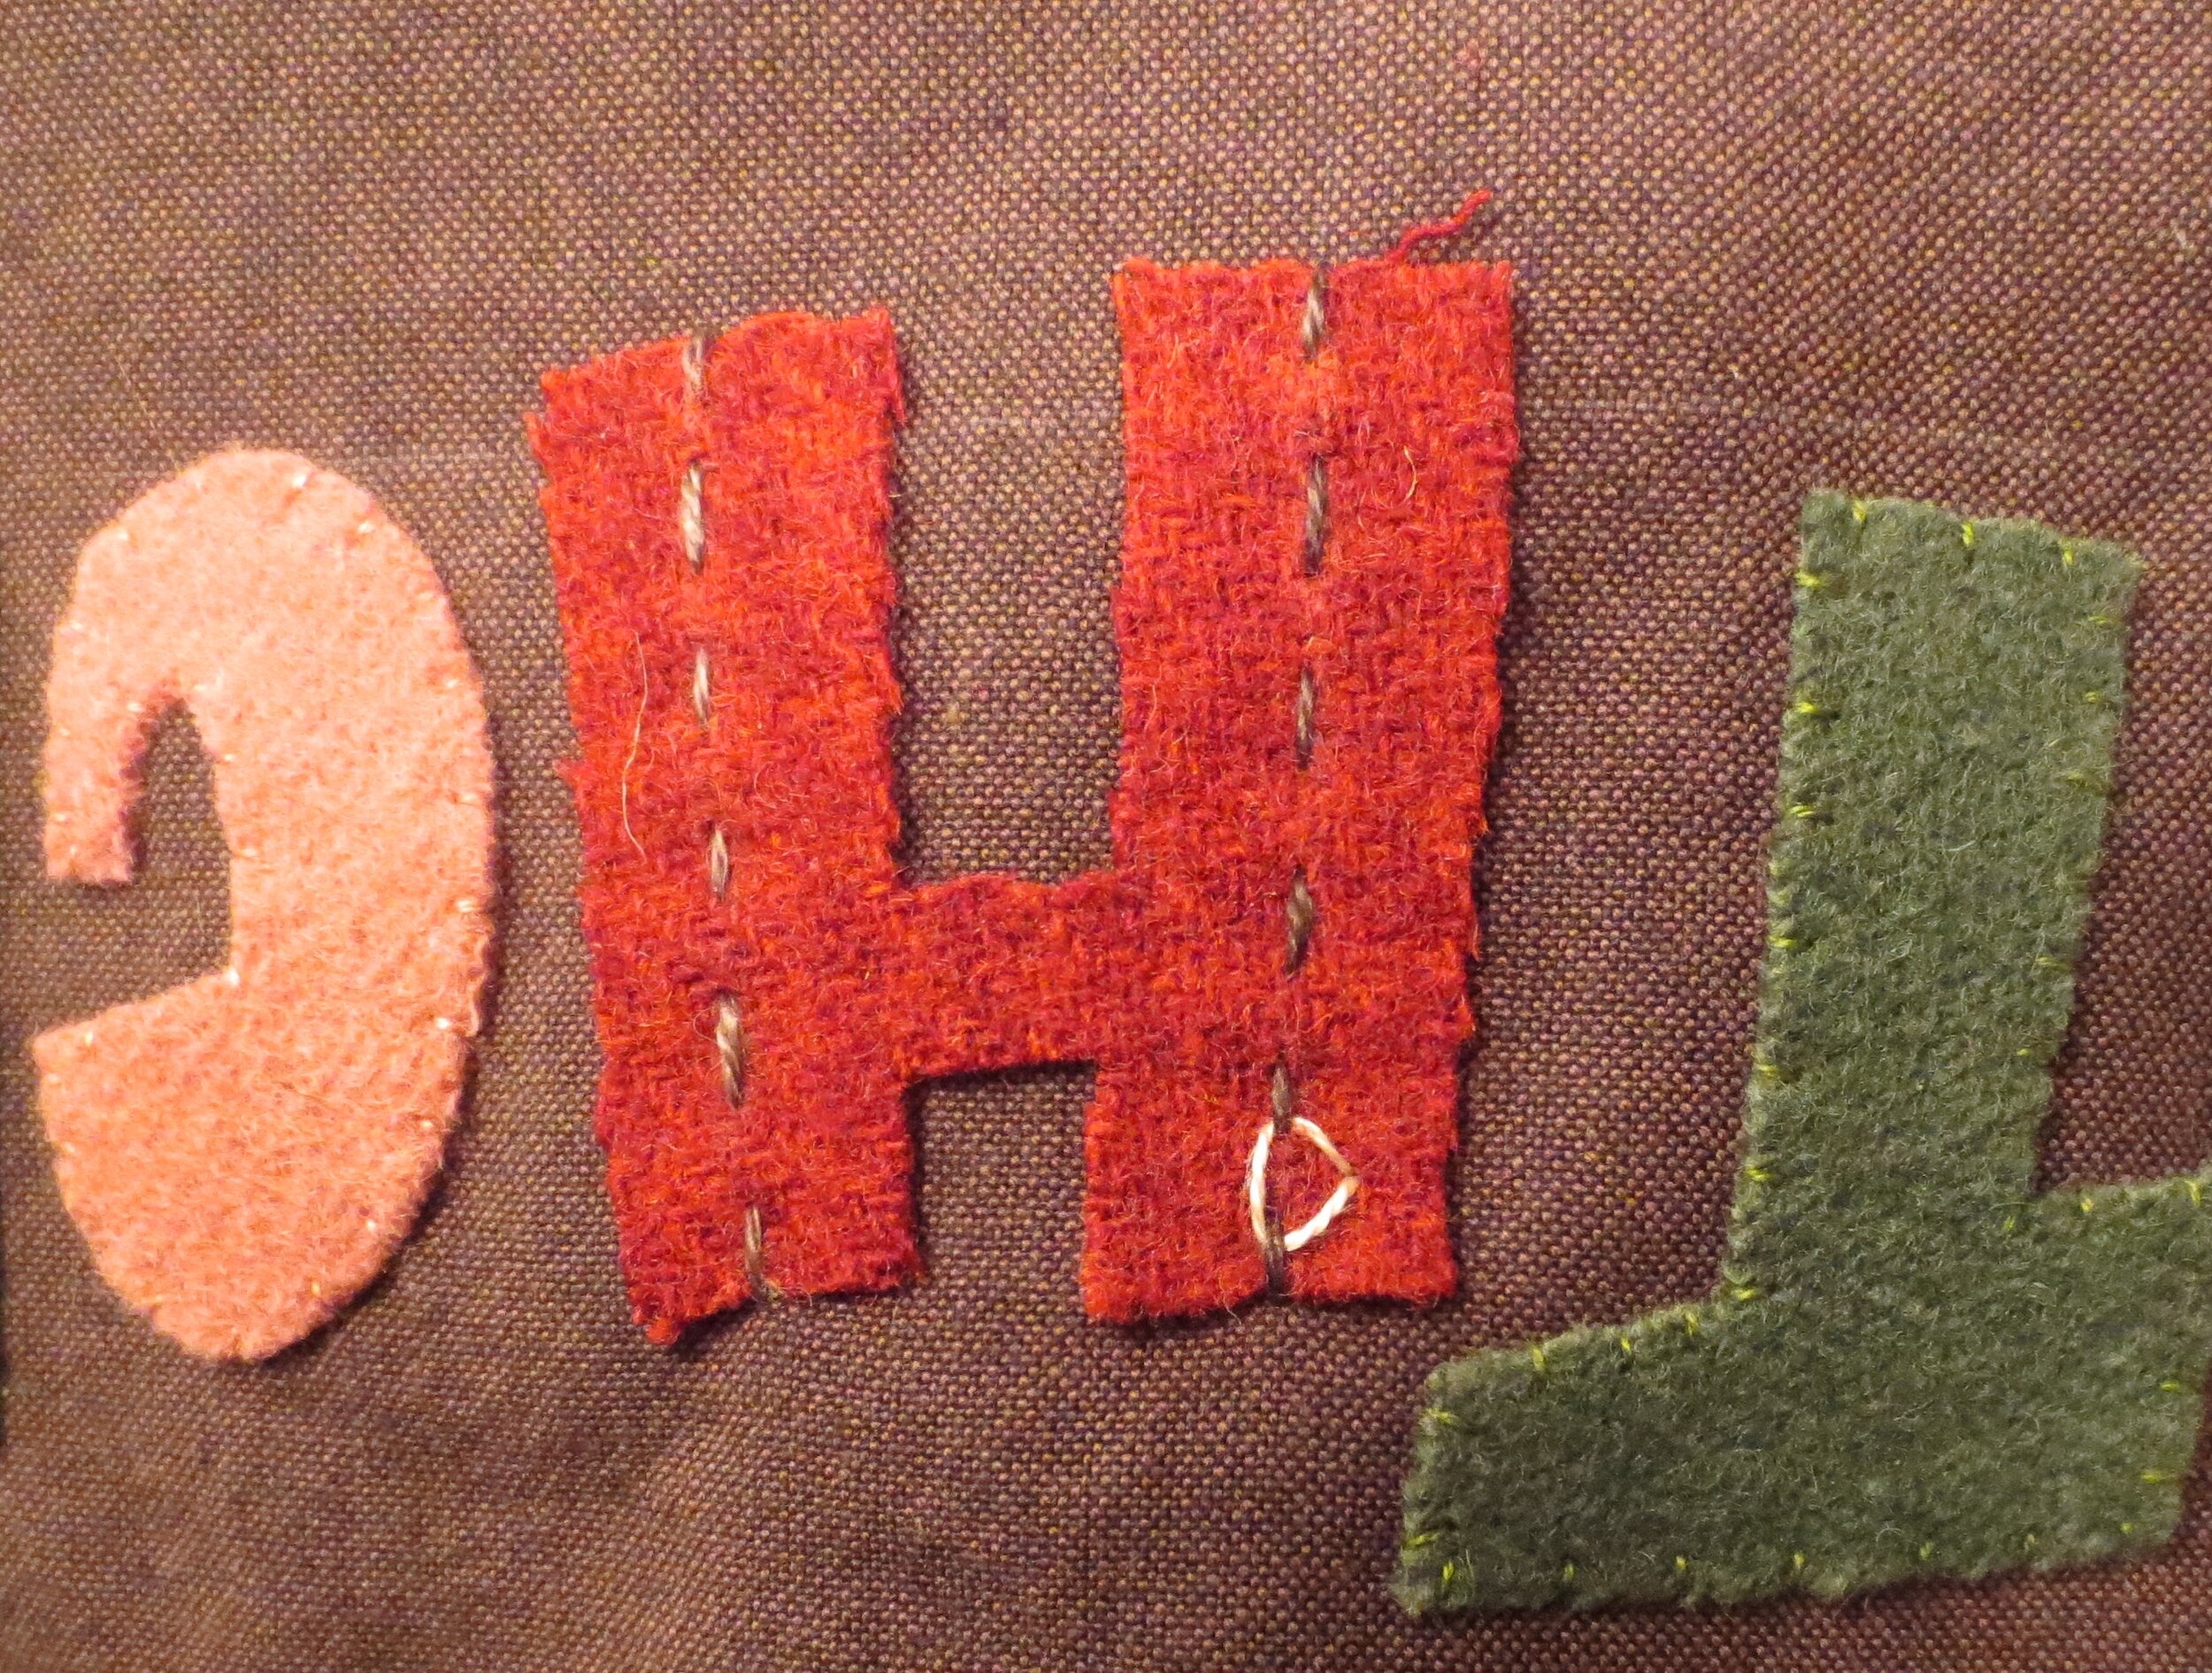
Repeat the lacing stitch through all the running stitches.
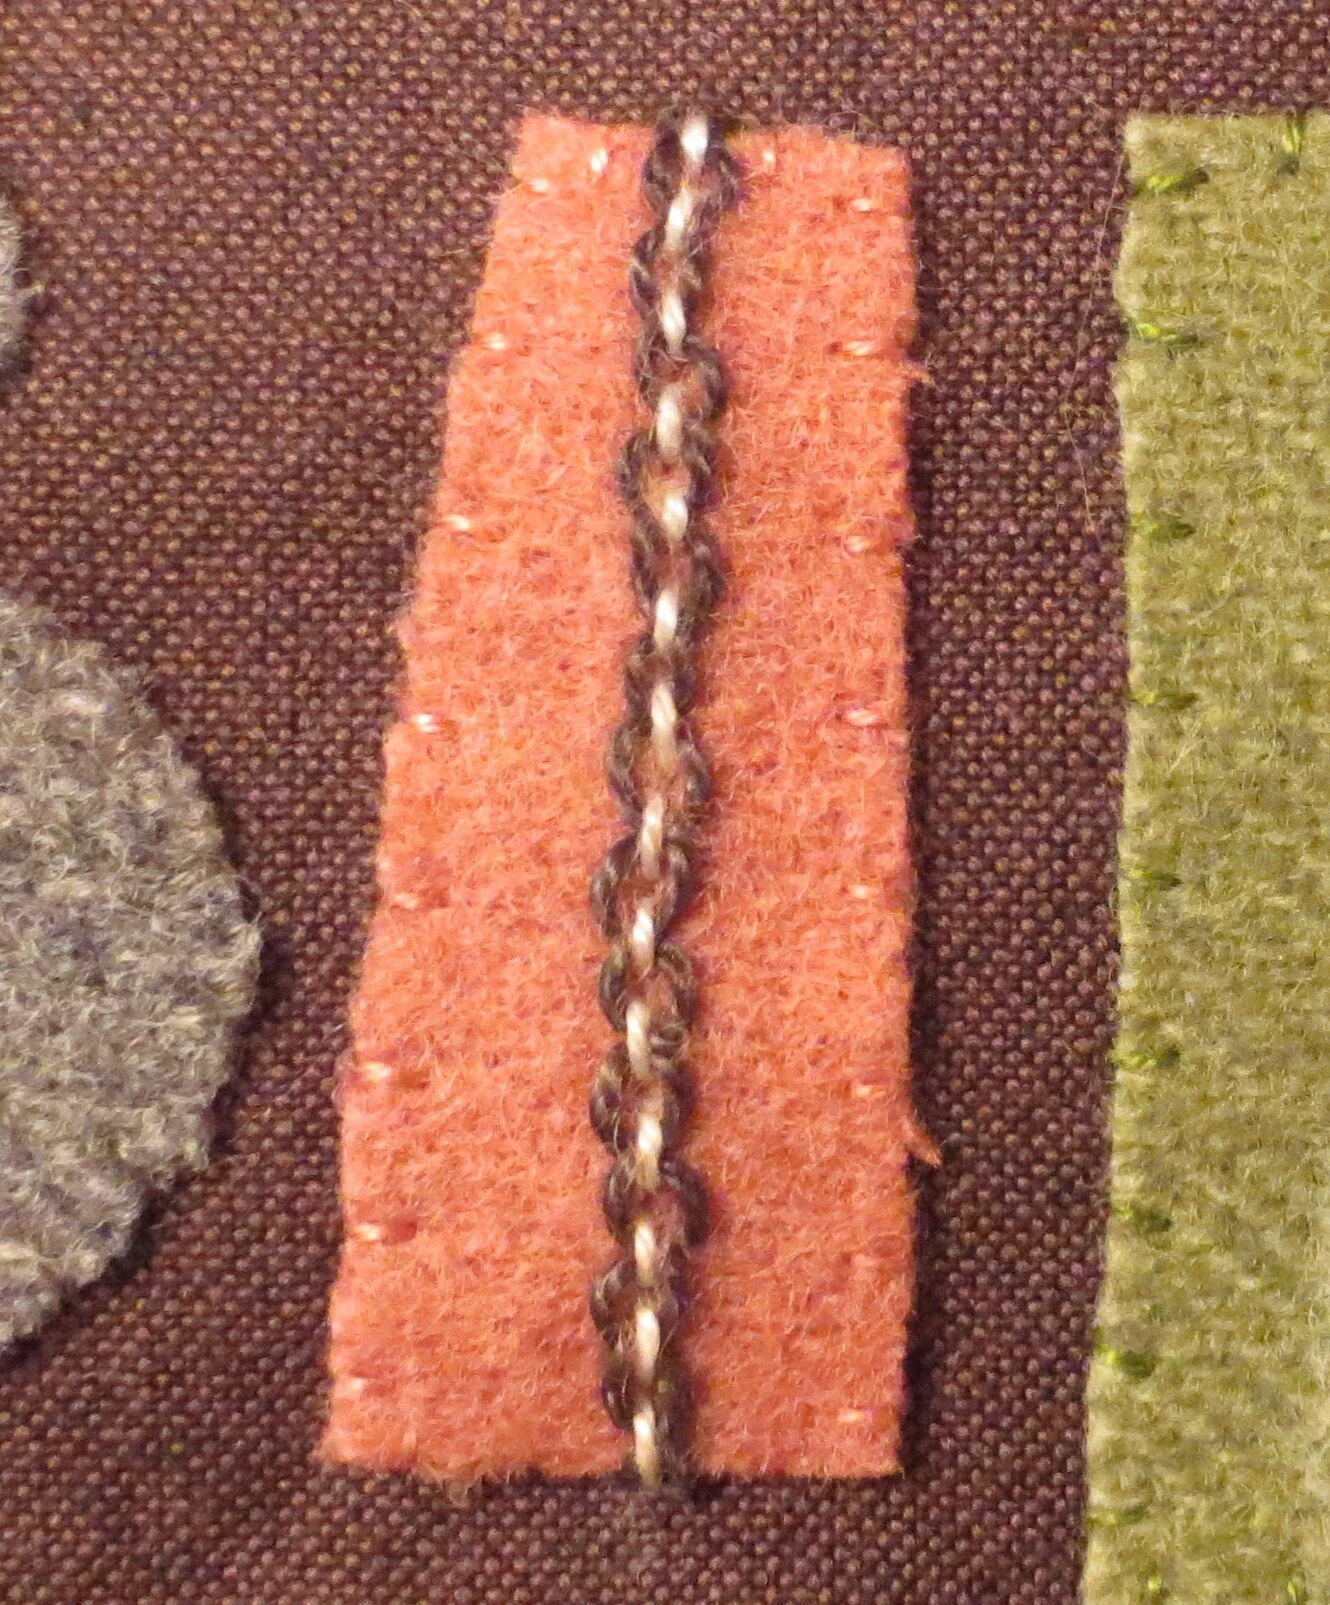
Draw a vertical guide line on the “I” using a chalk or air erasable marker.
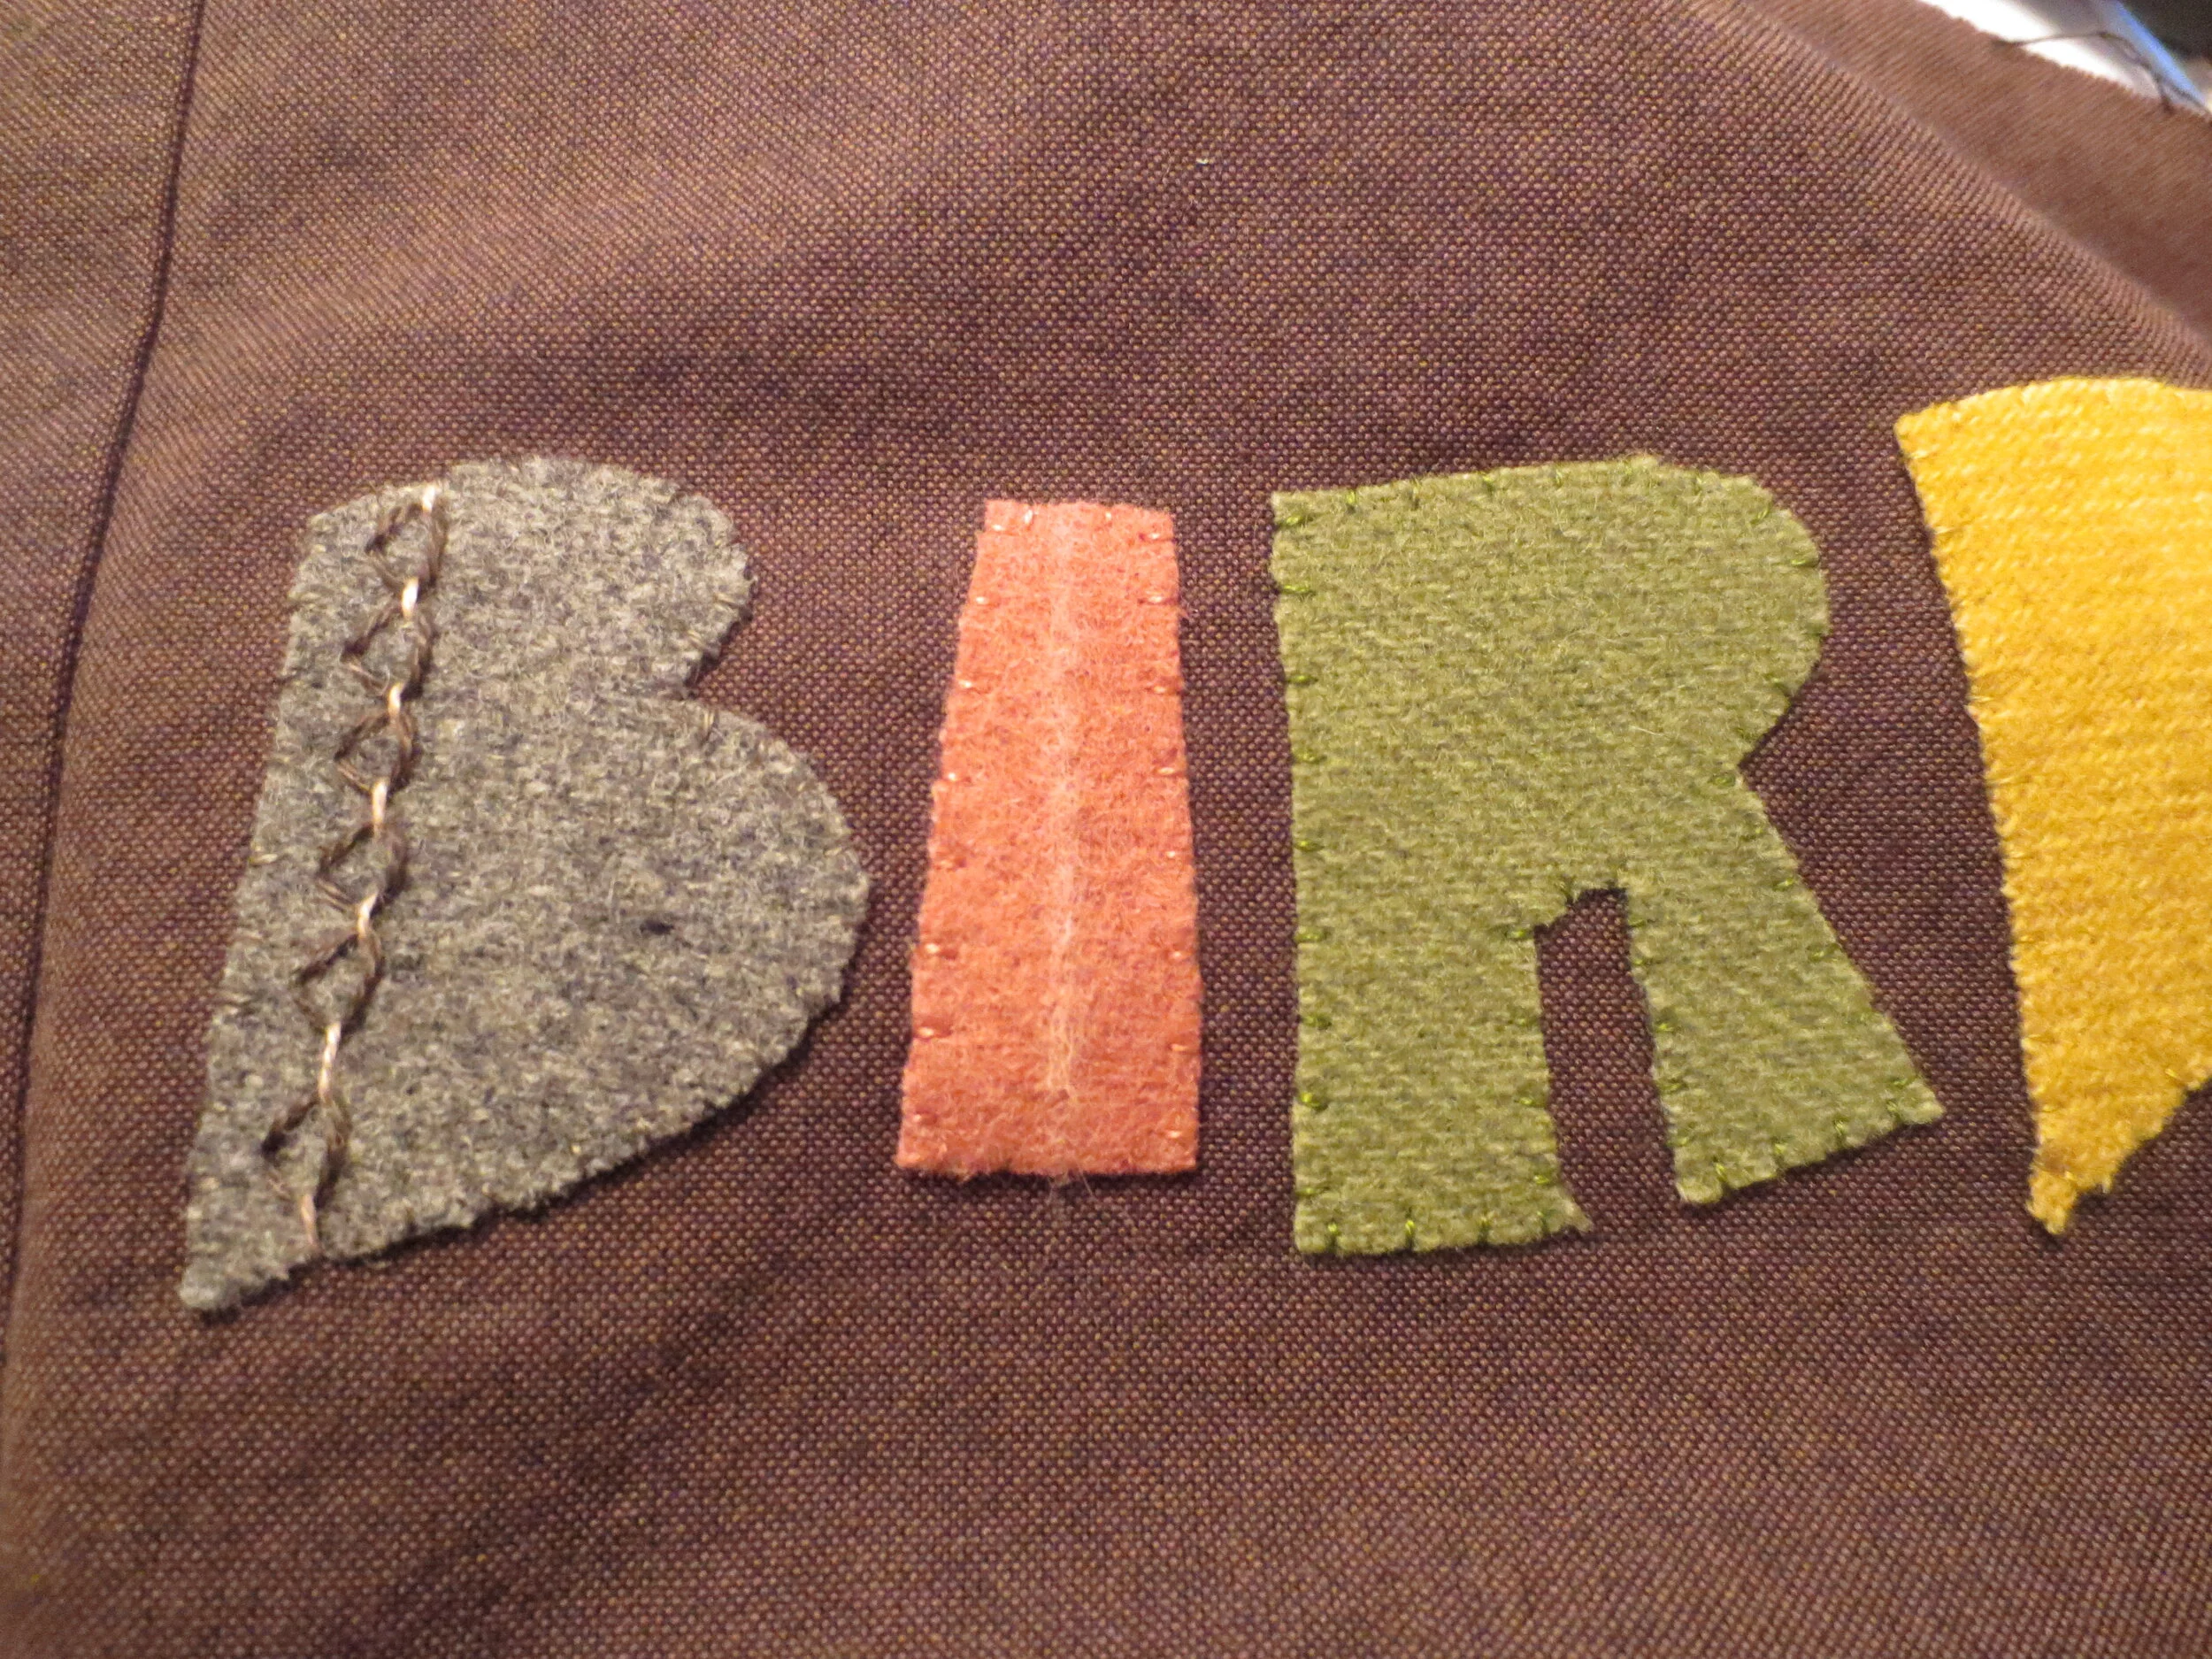
Backstitch over the line with 1 strand of the lighter colored thread.
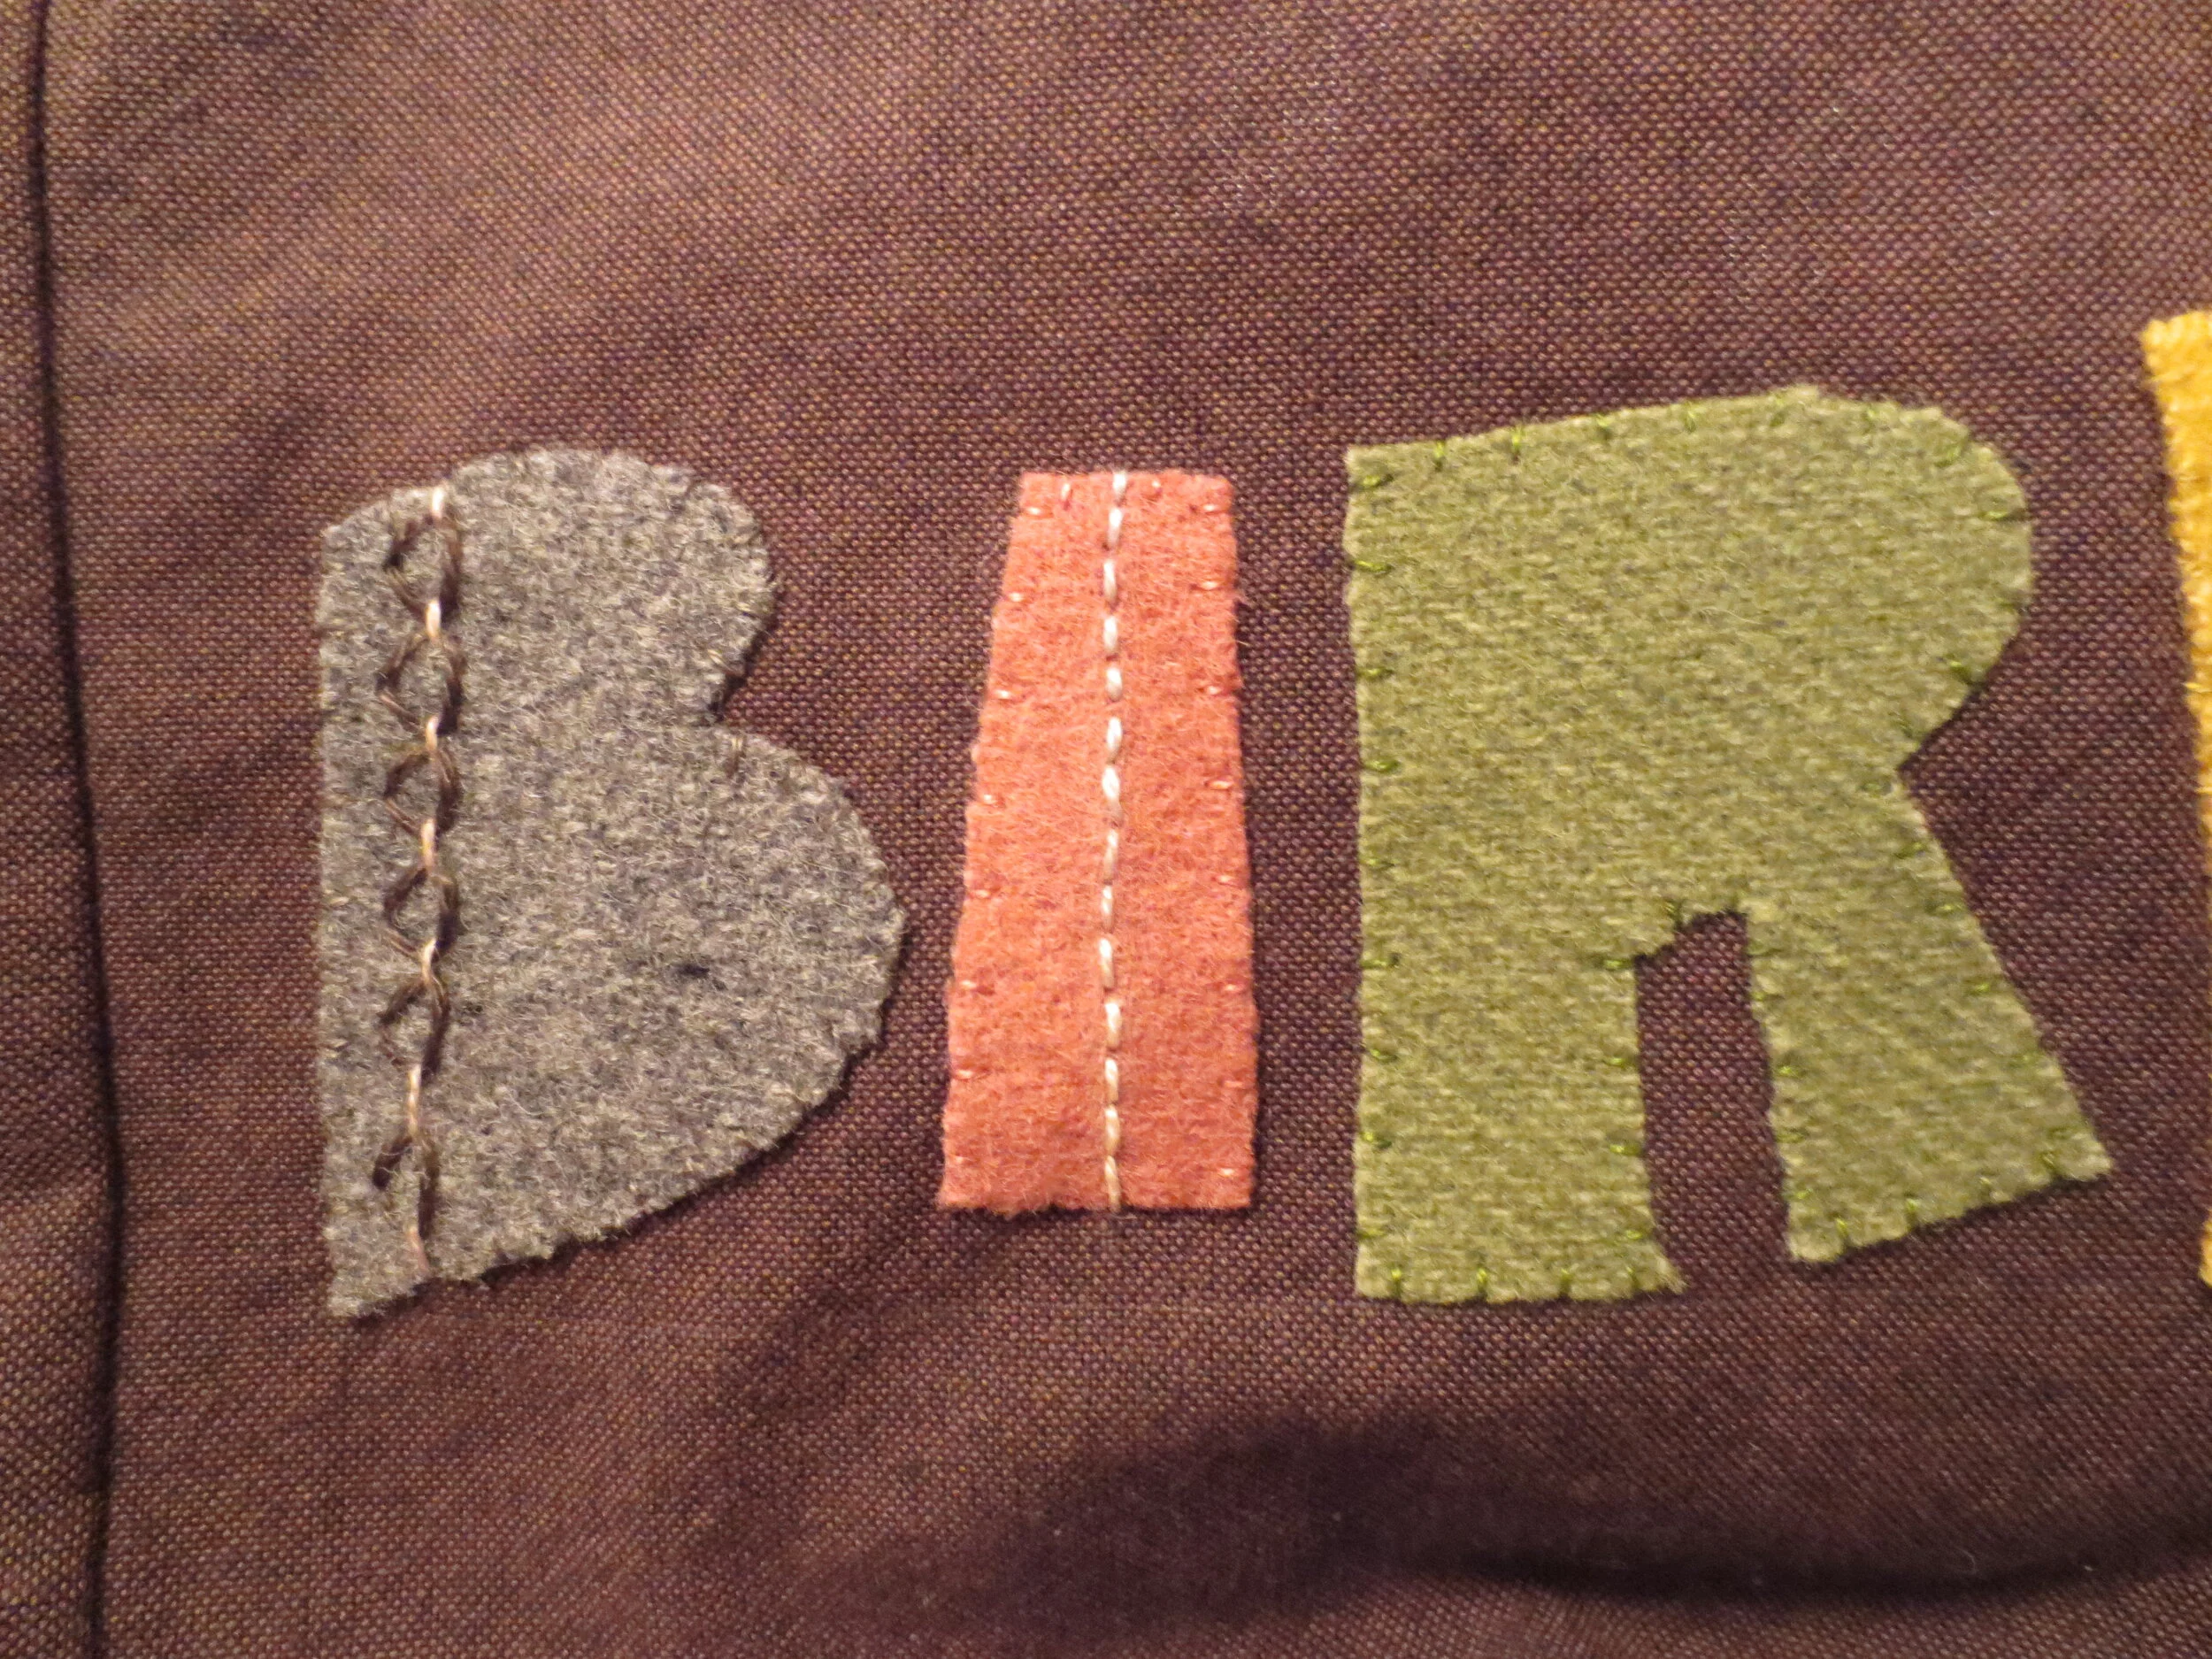
Use 1 strand of the darker colored thread to weave or thread through the back stitch. We did this threaded back stitch on Block #3.
You can leave it as is or you can come back in the opposite direction to make a double threaded backstitch.
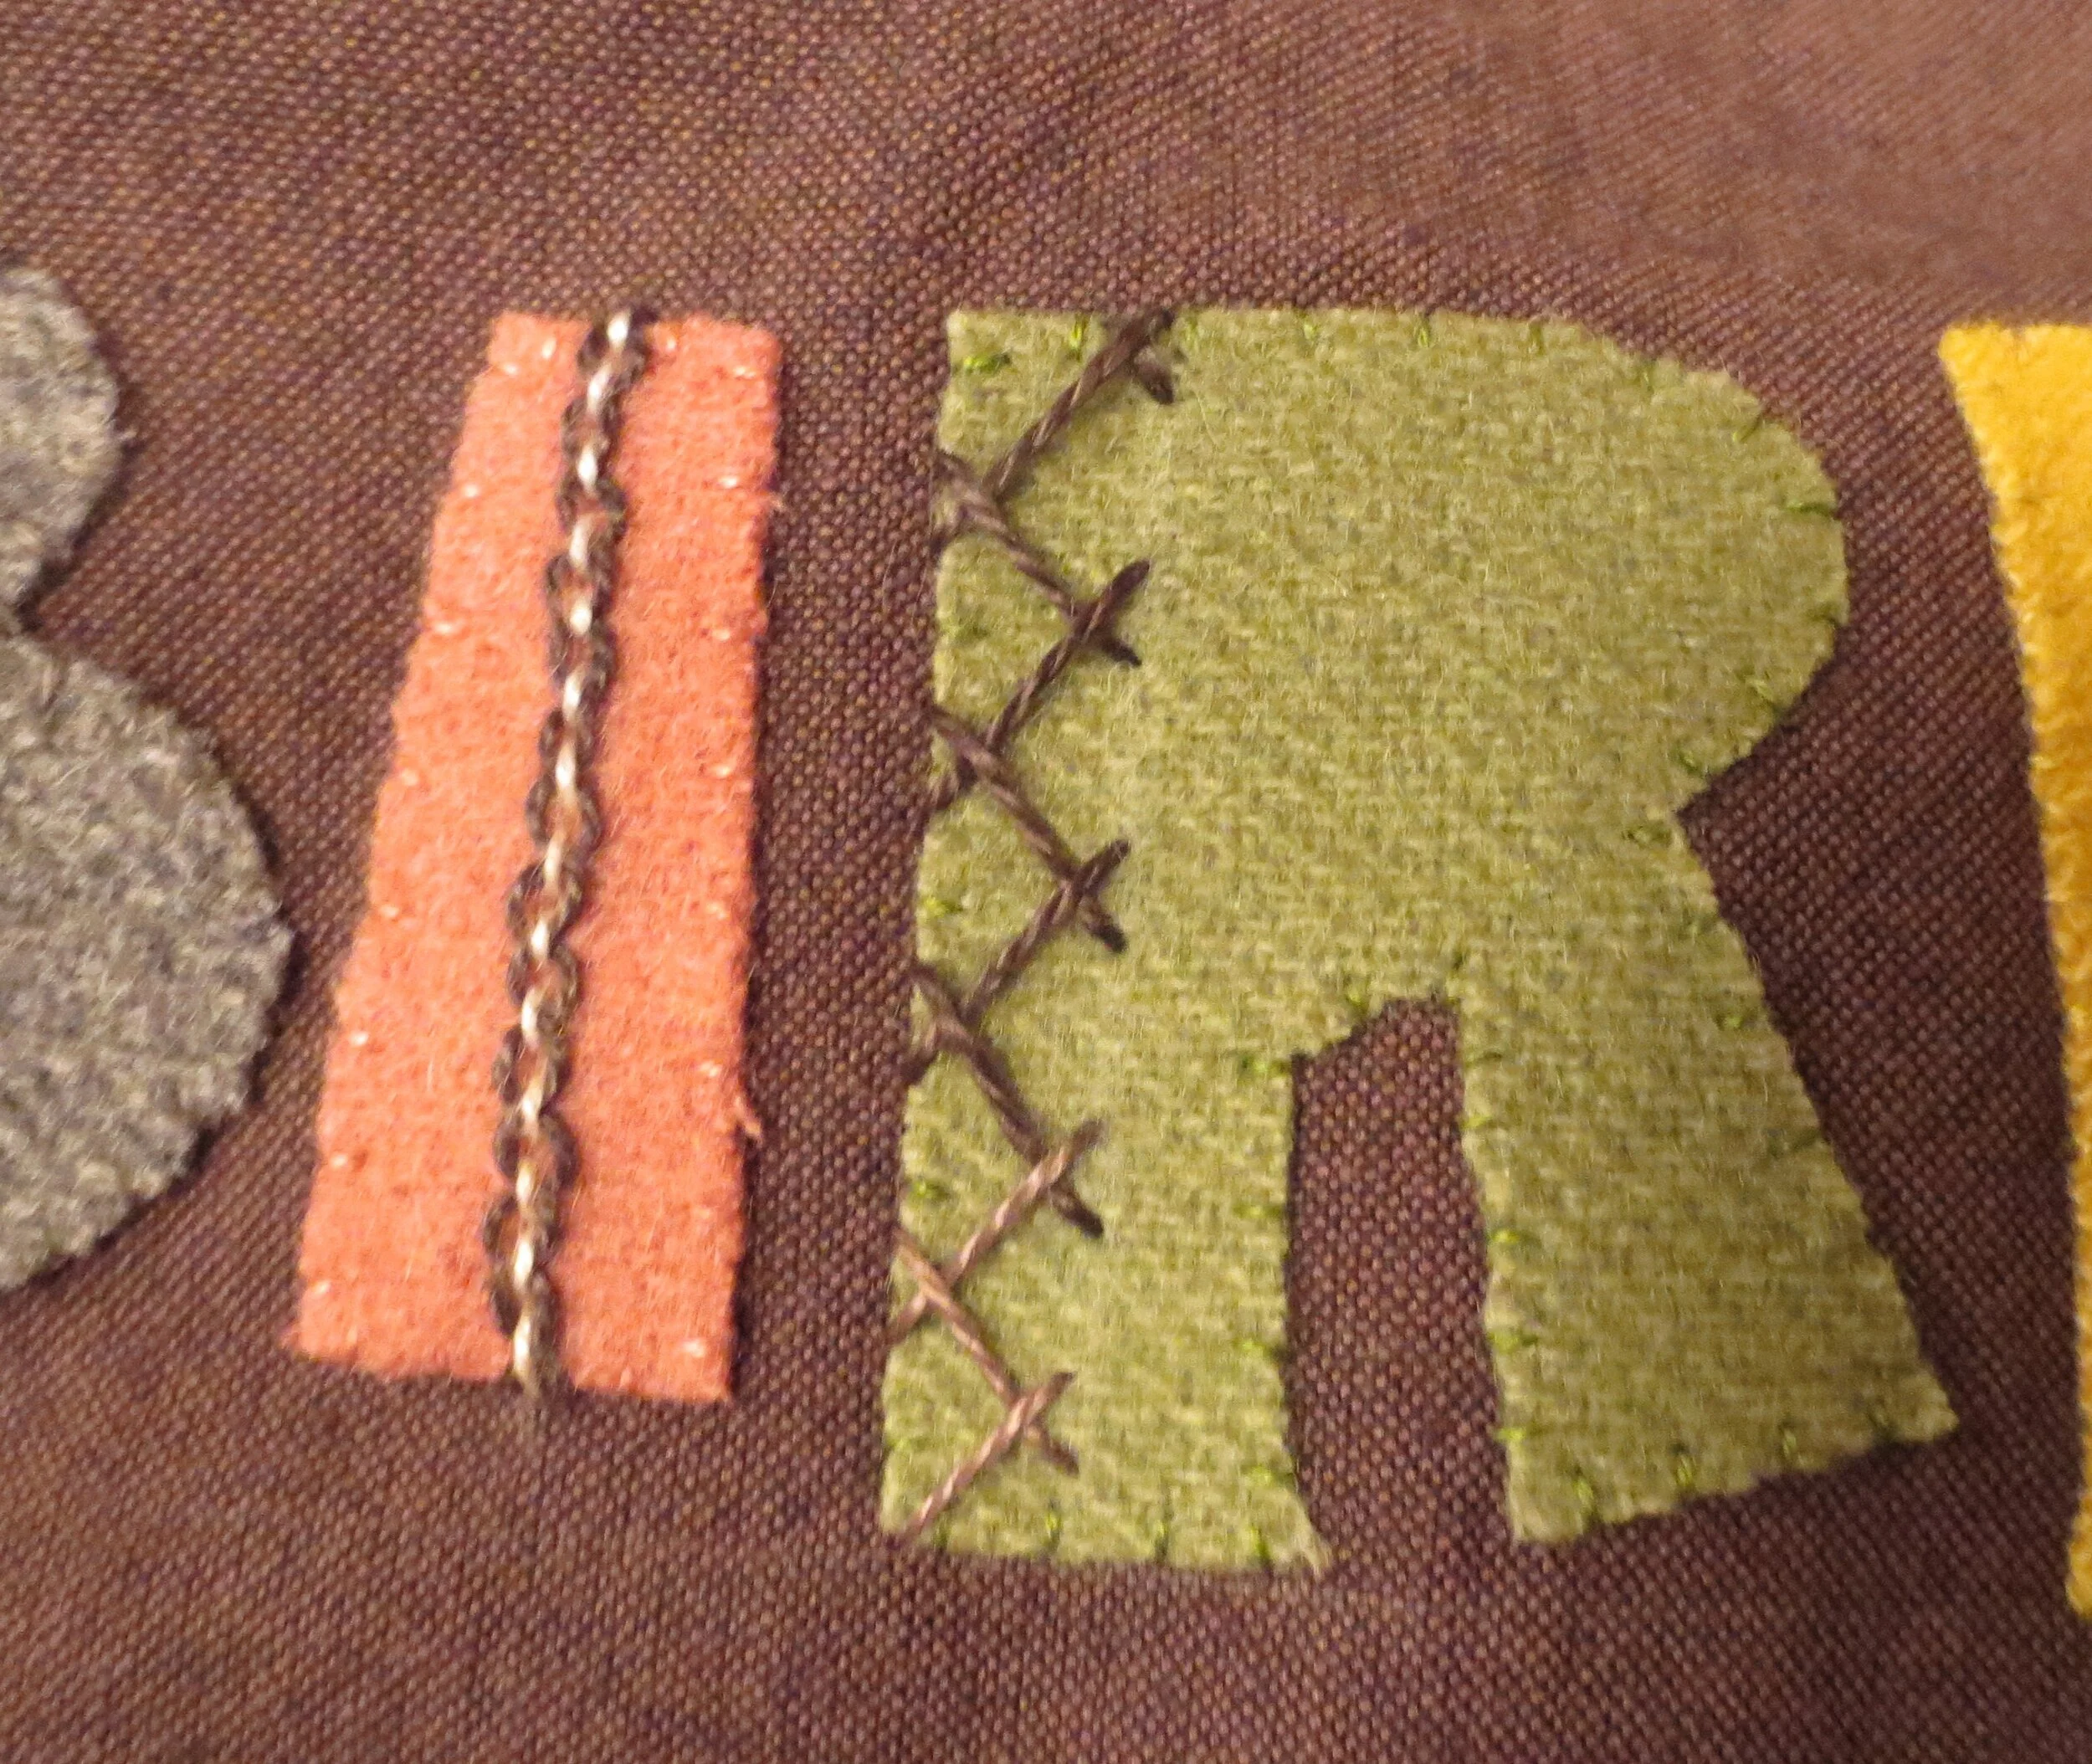
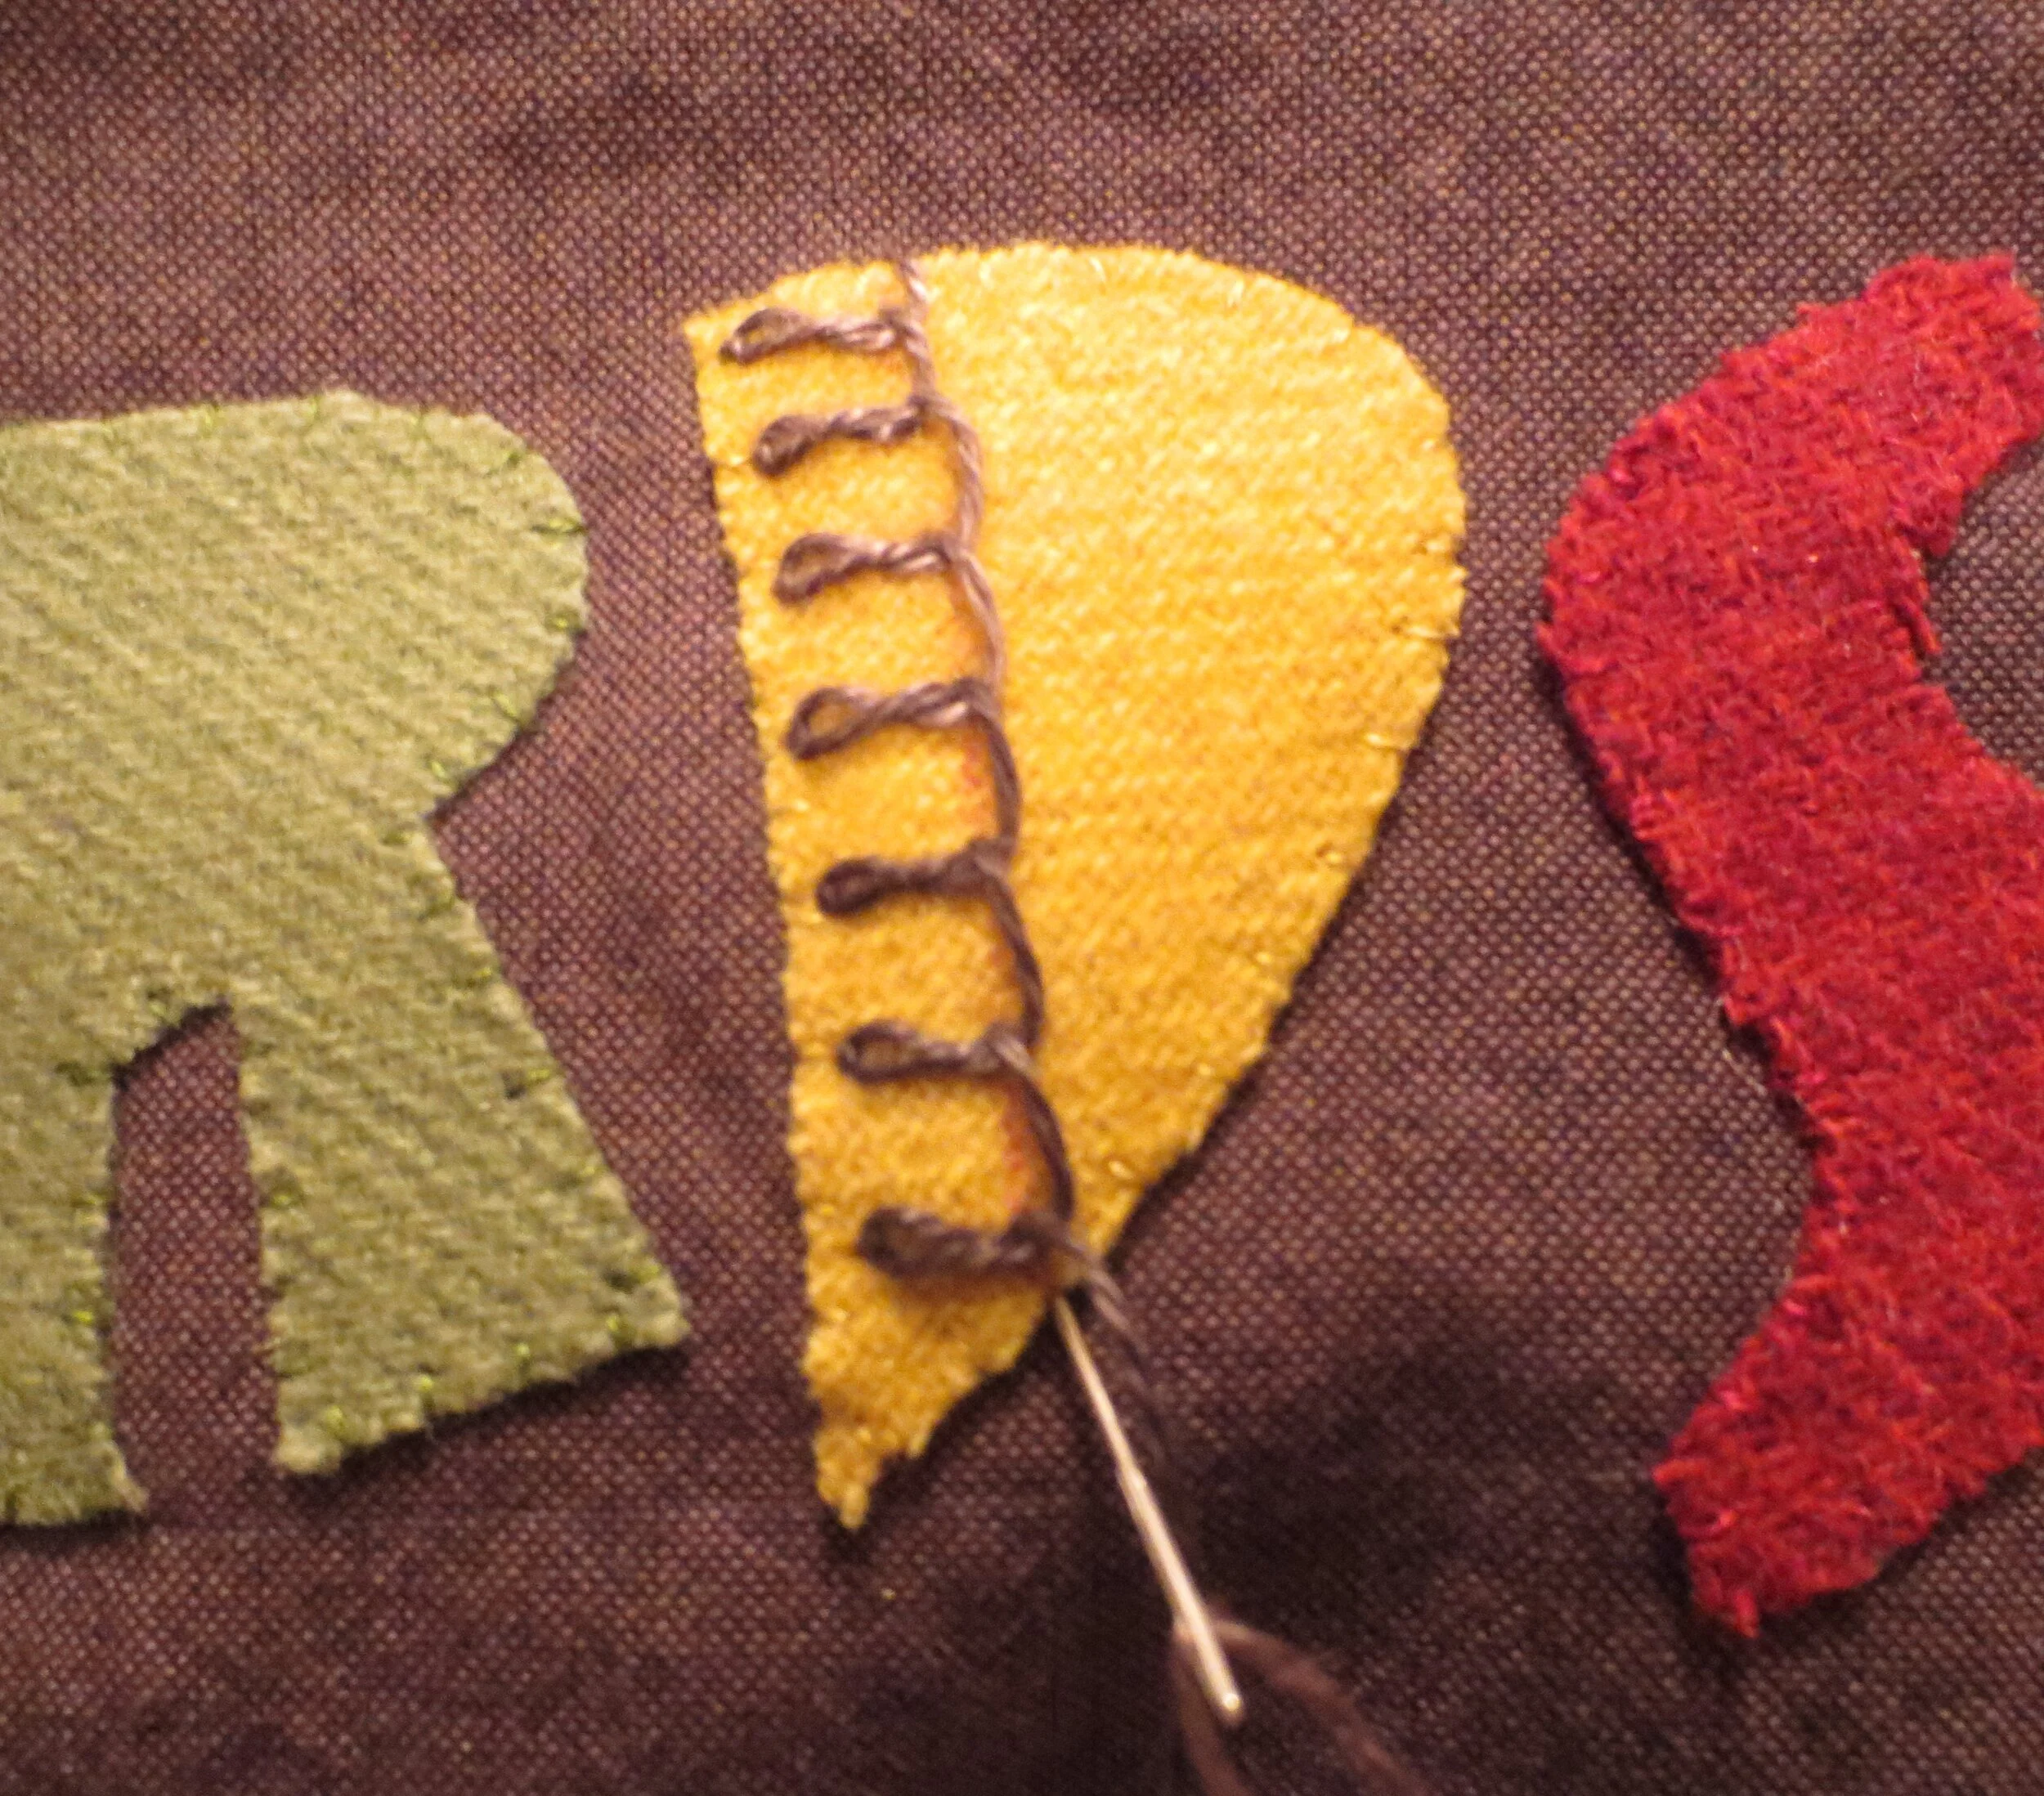
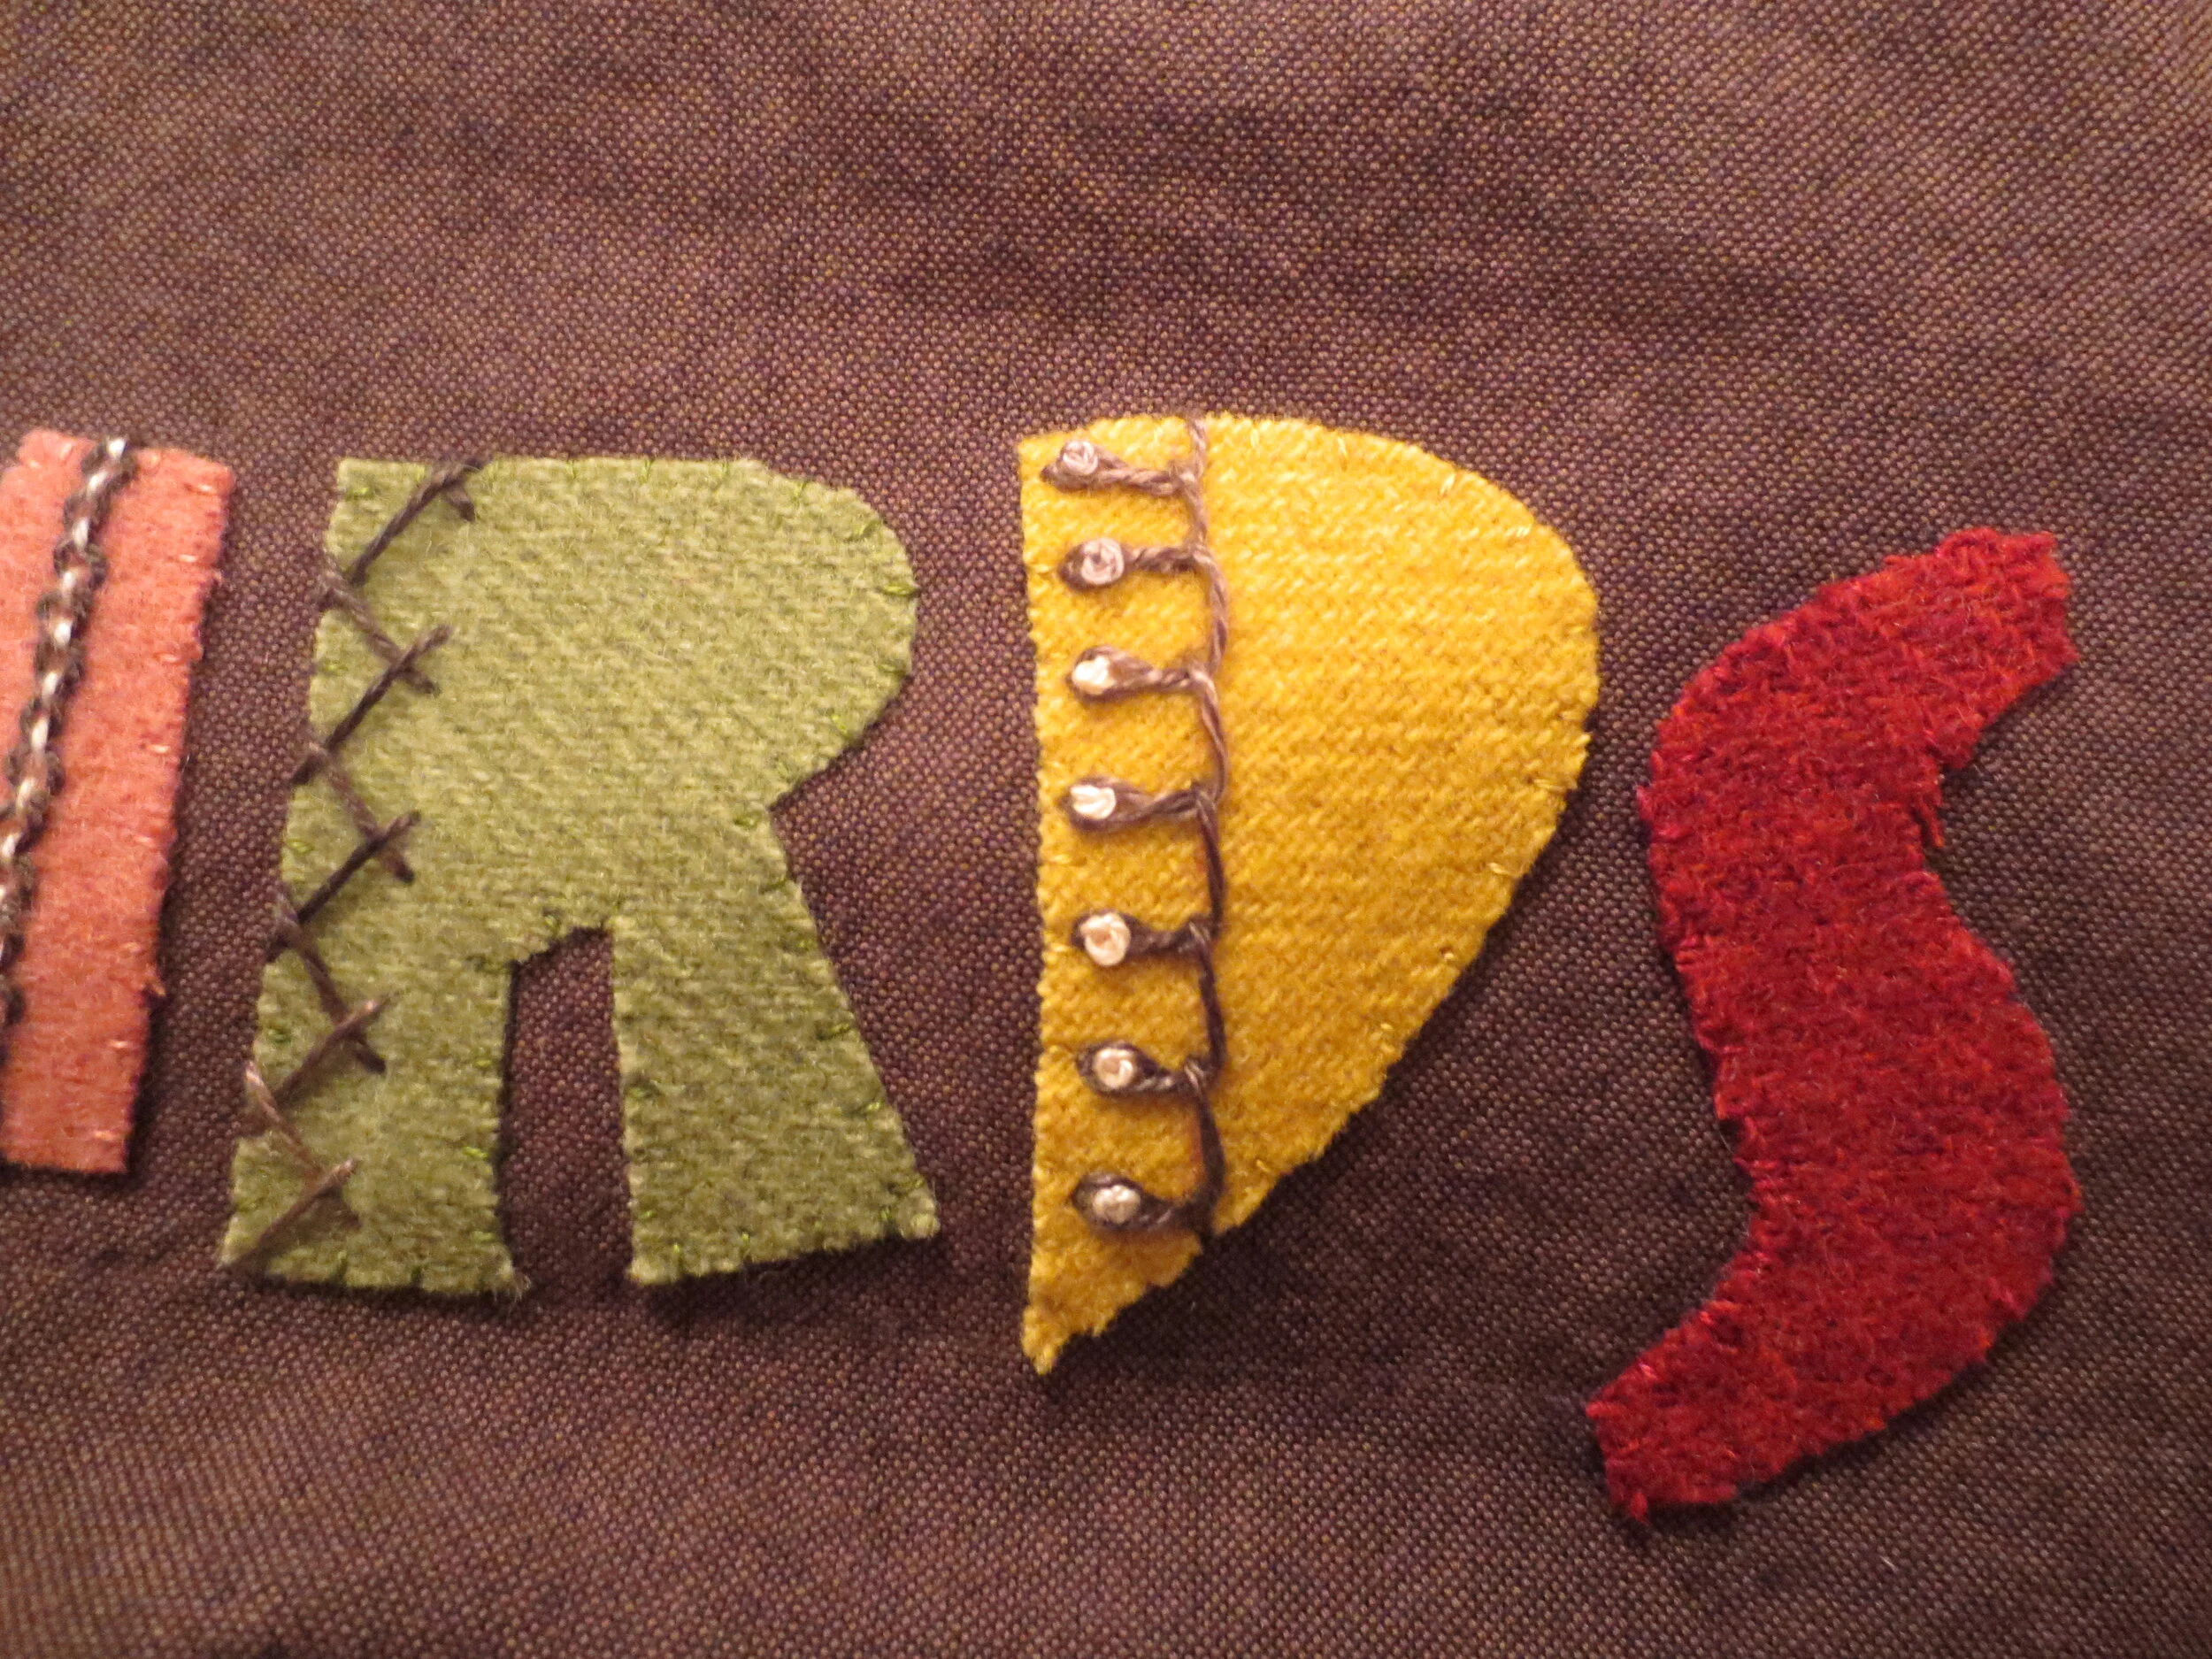
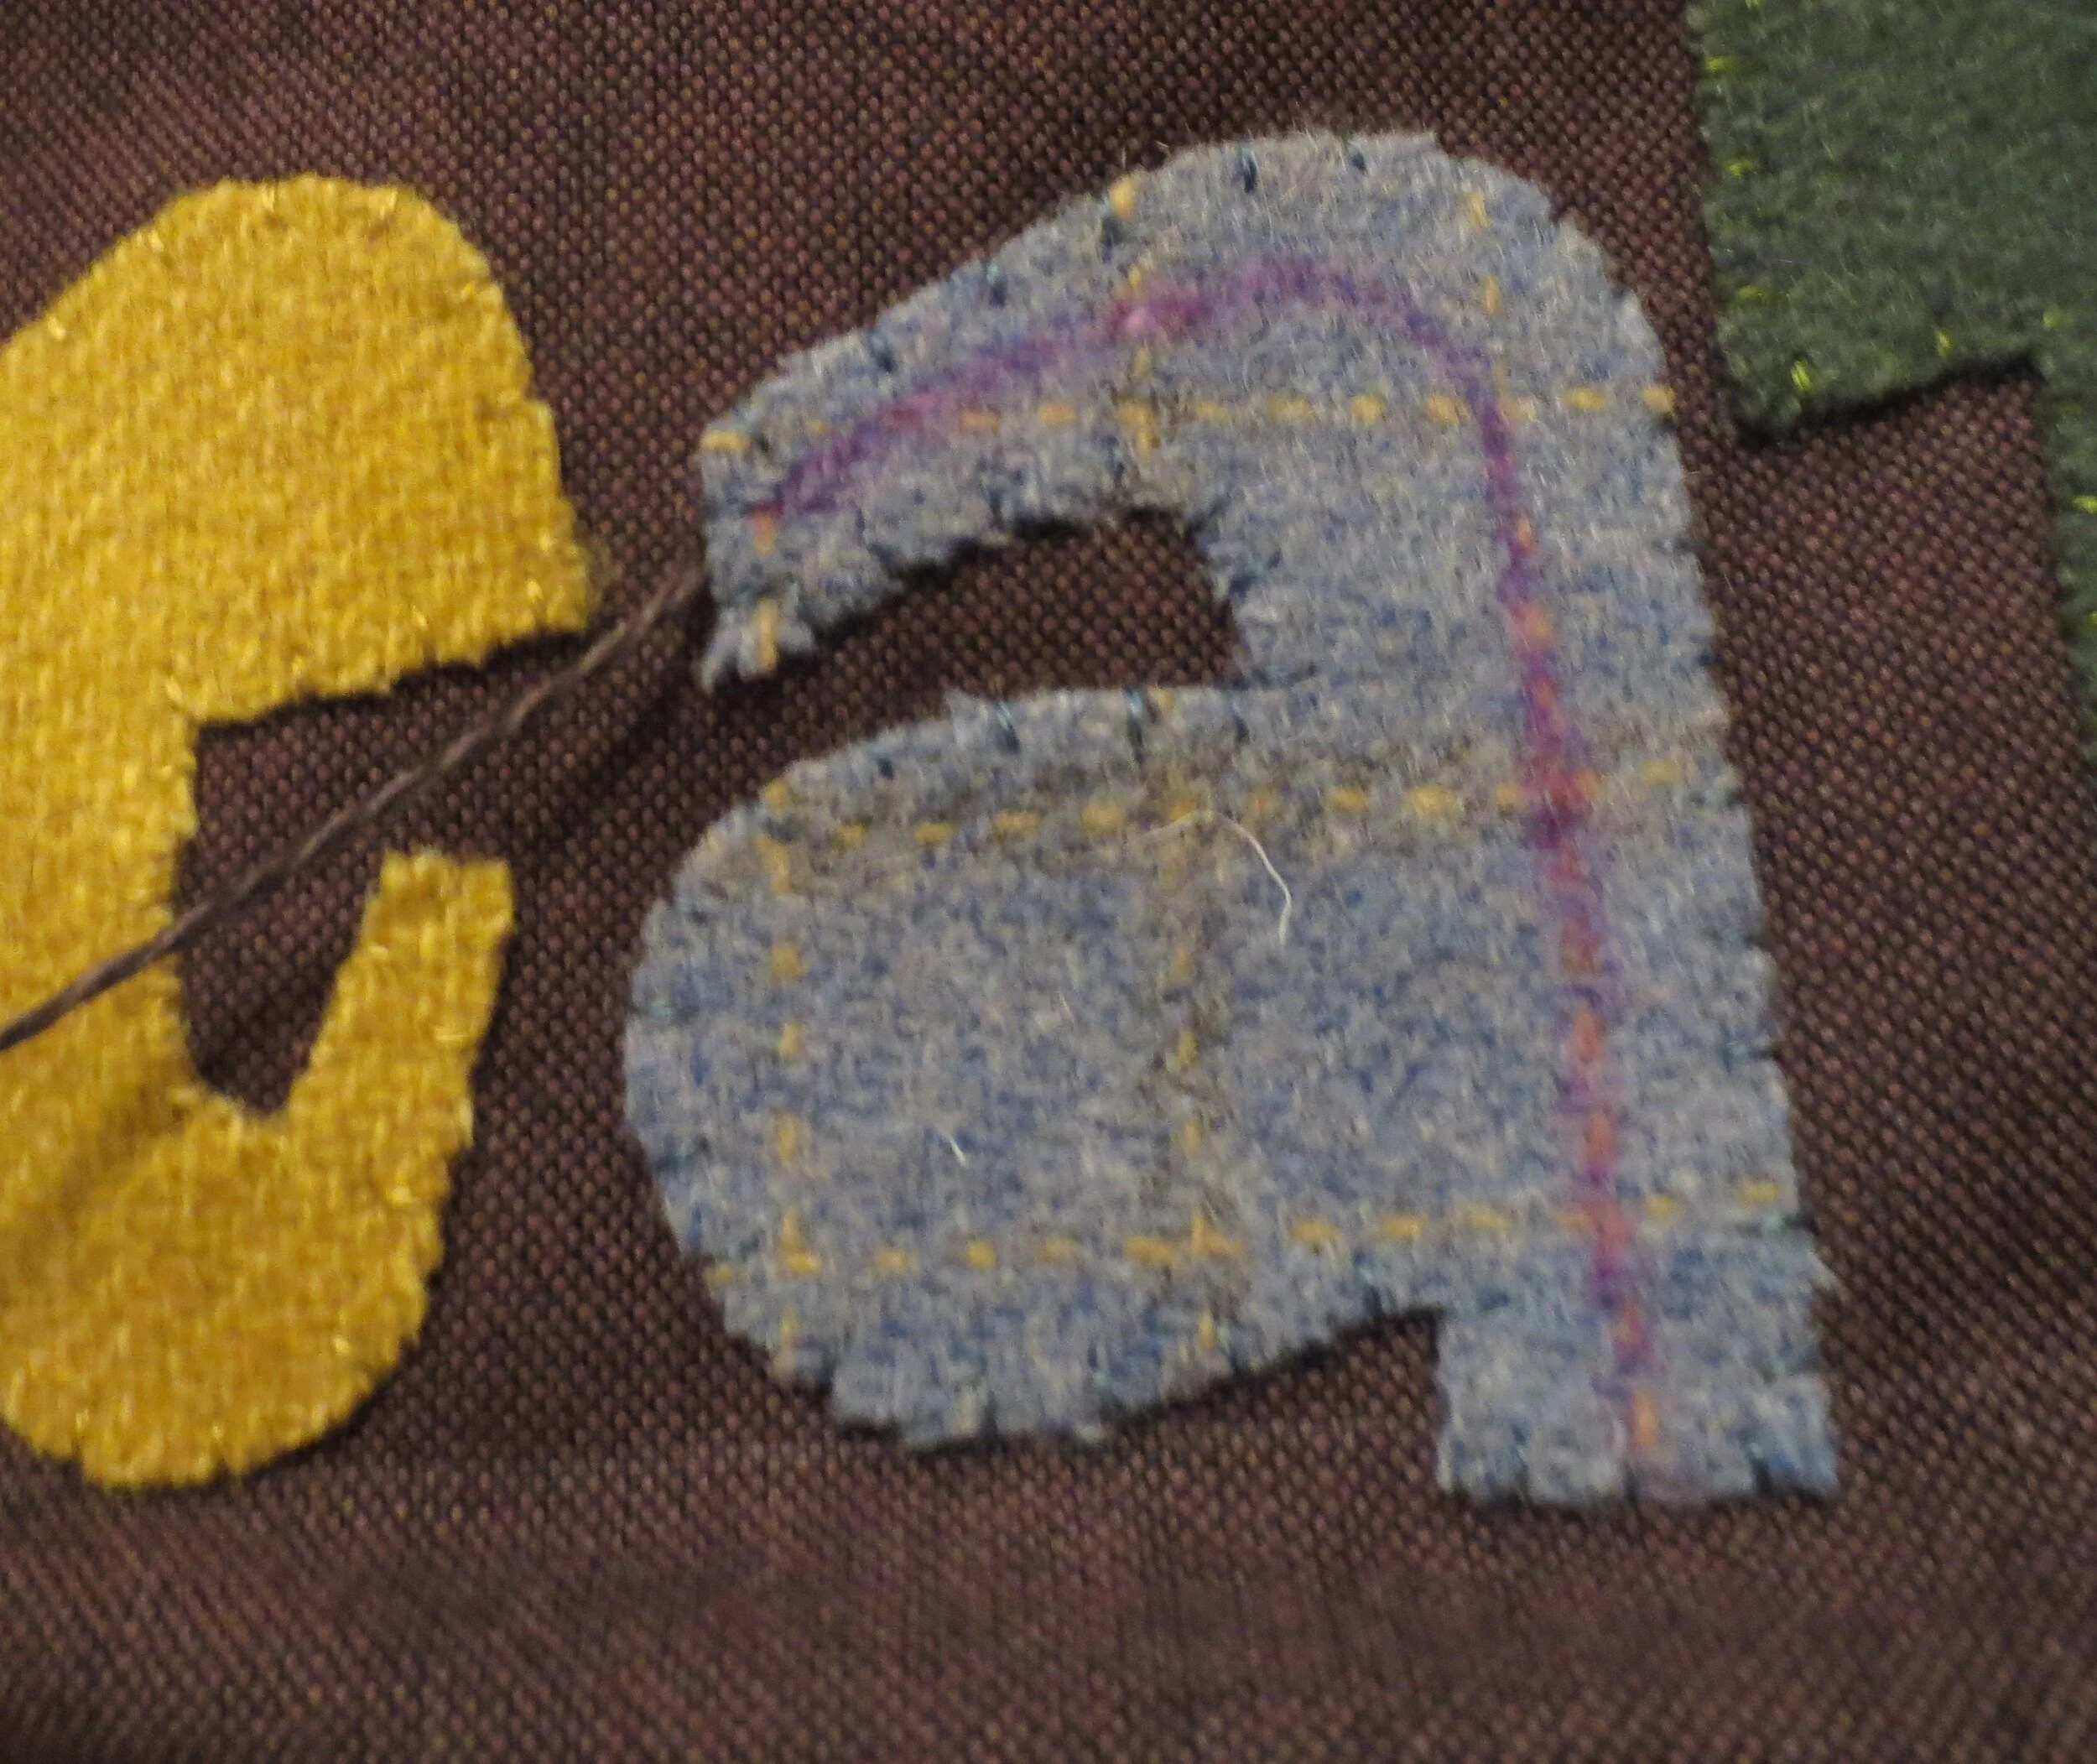
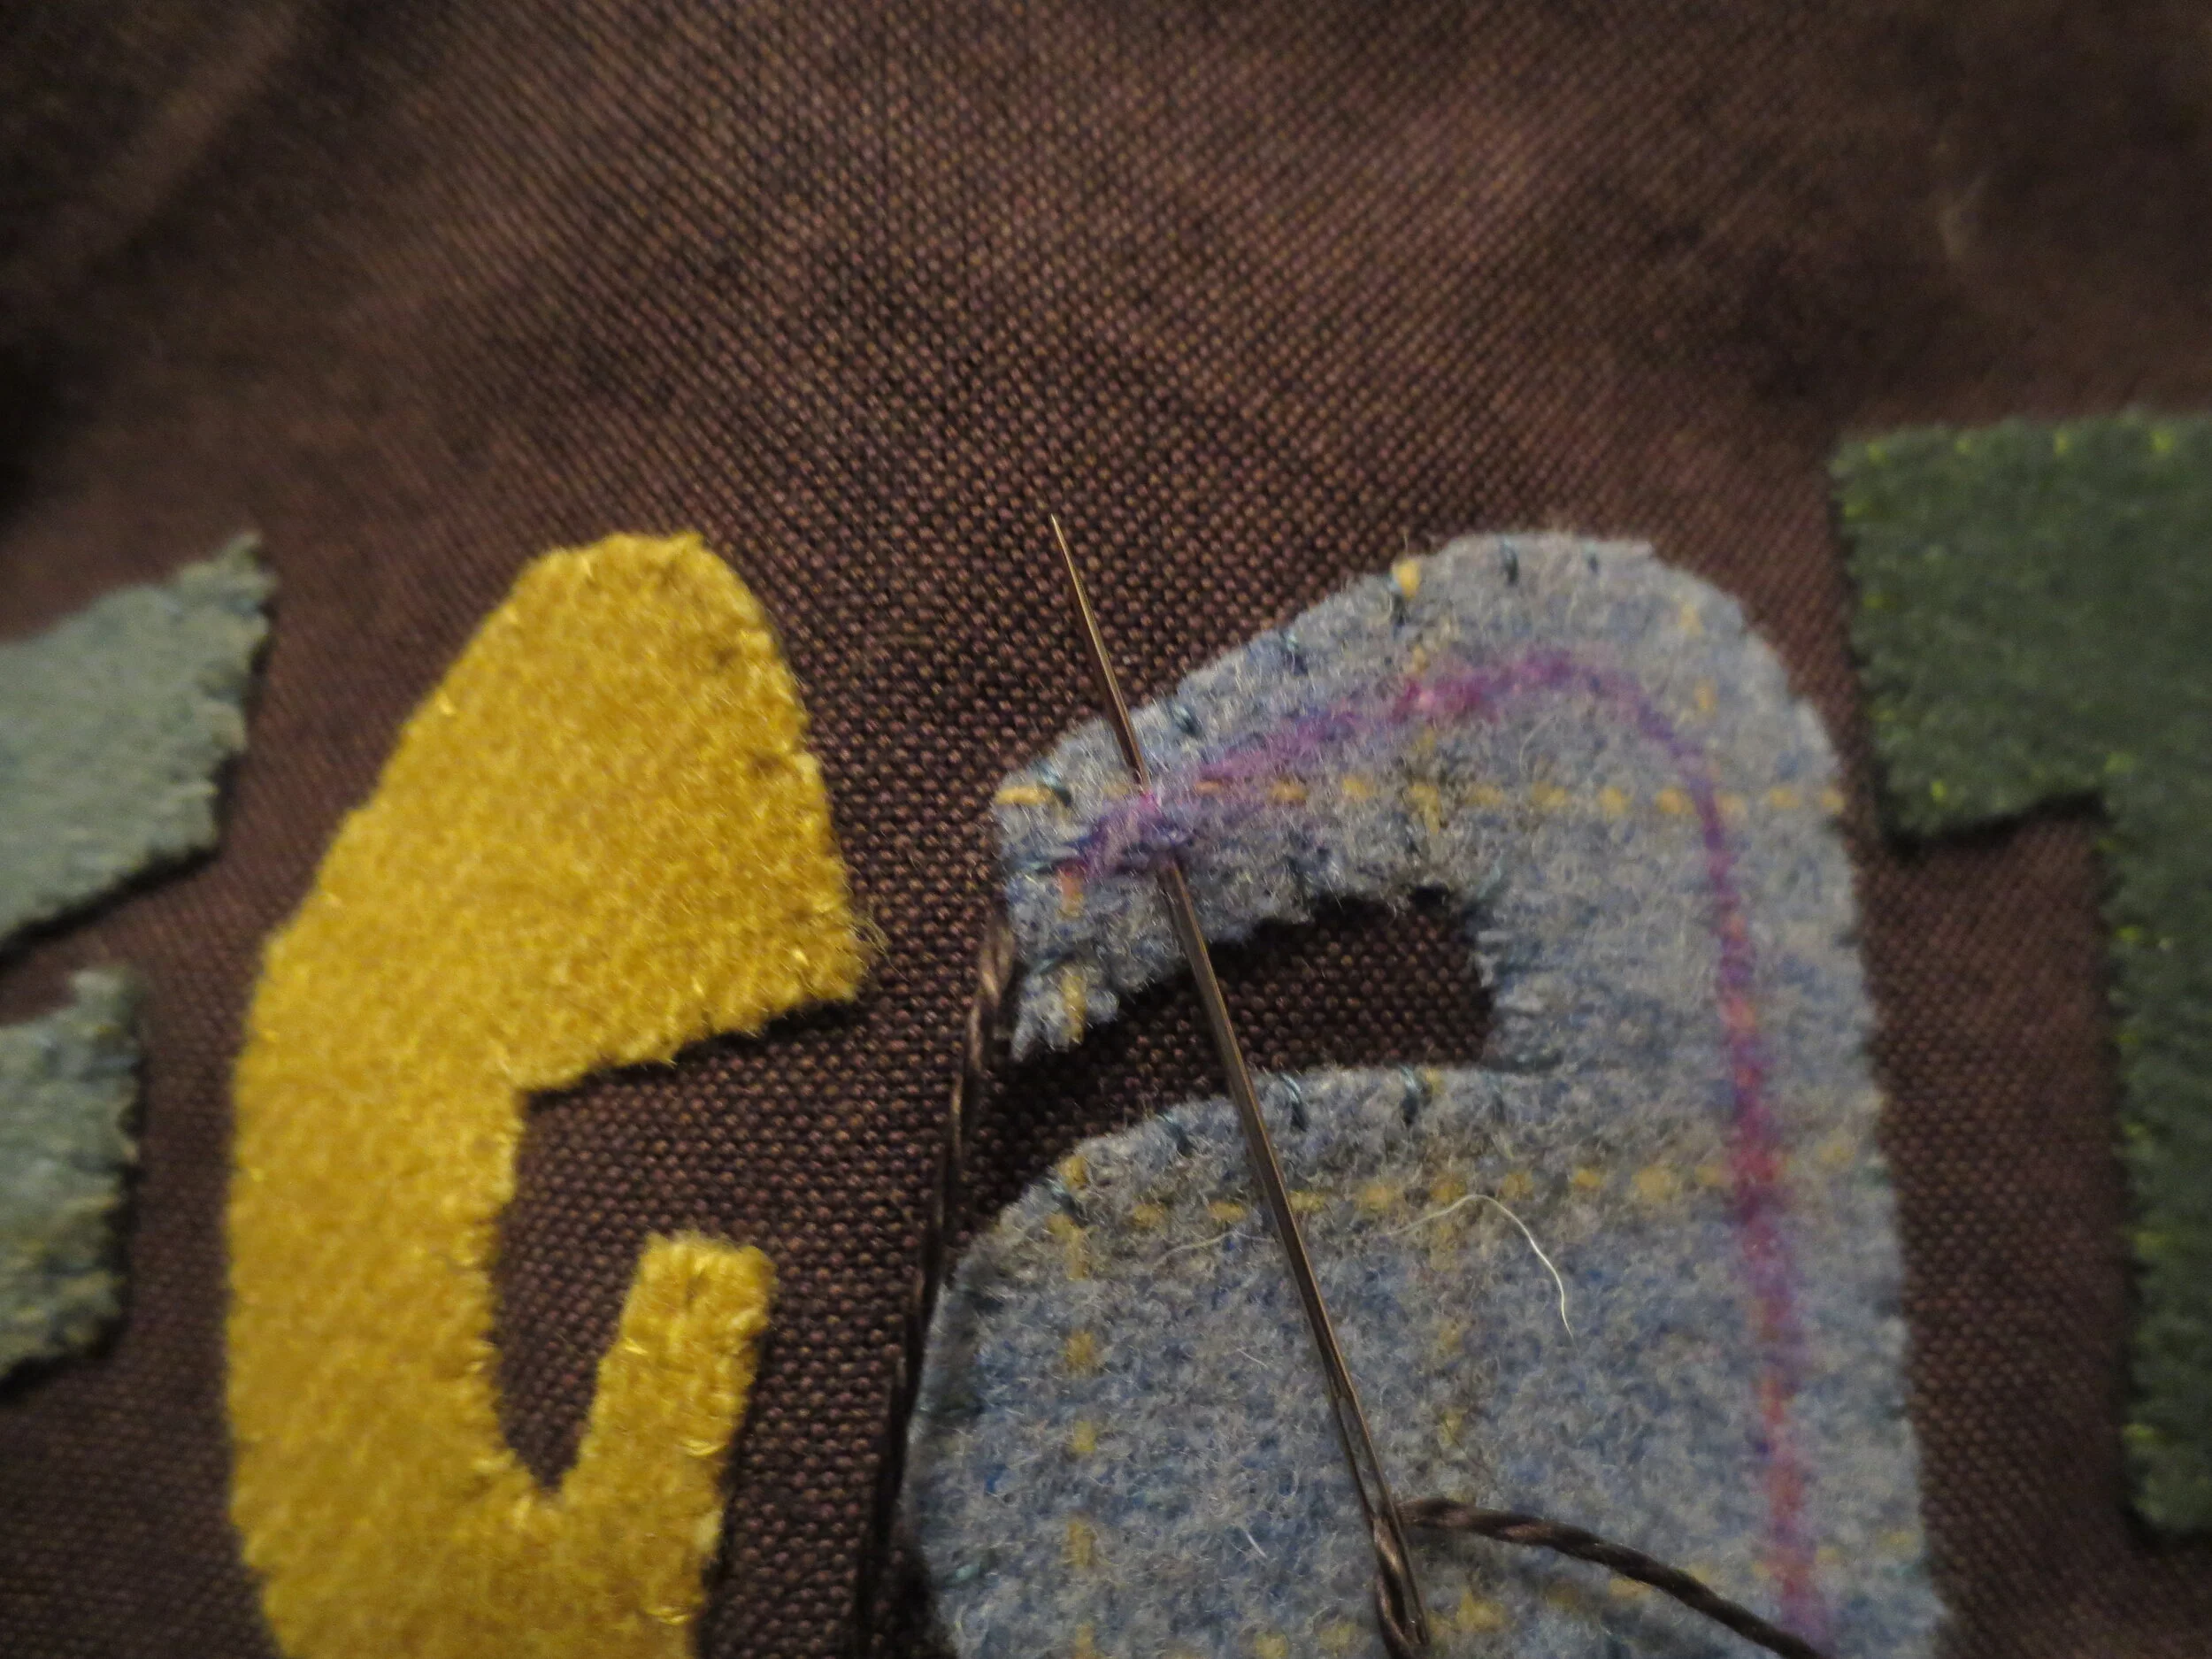
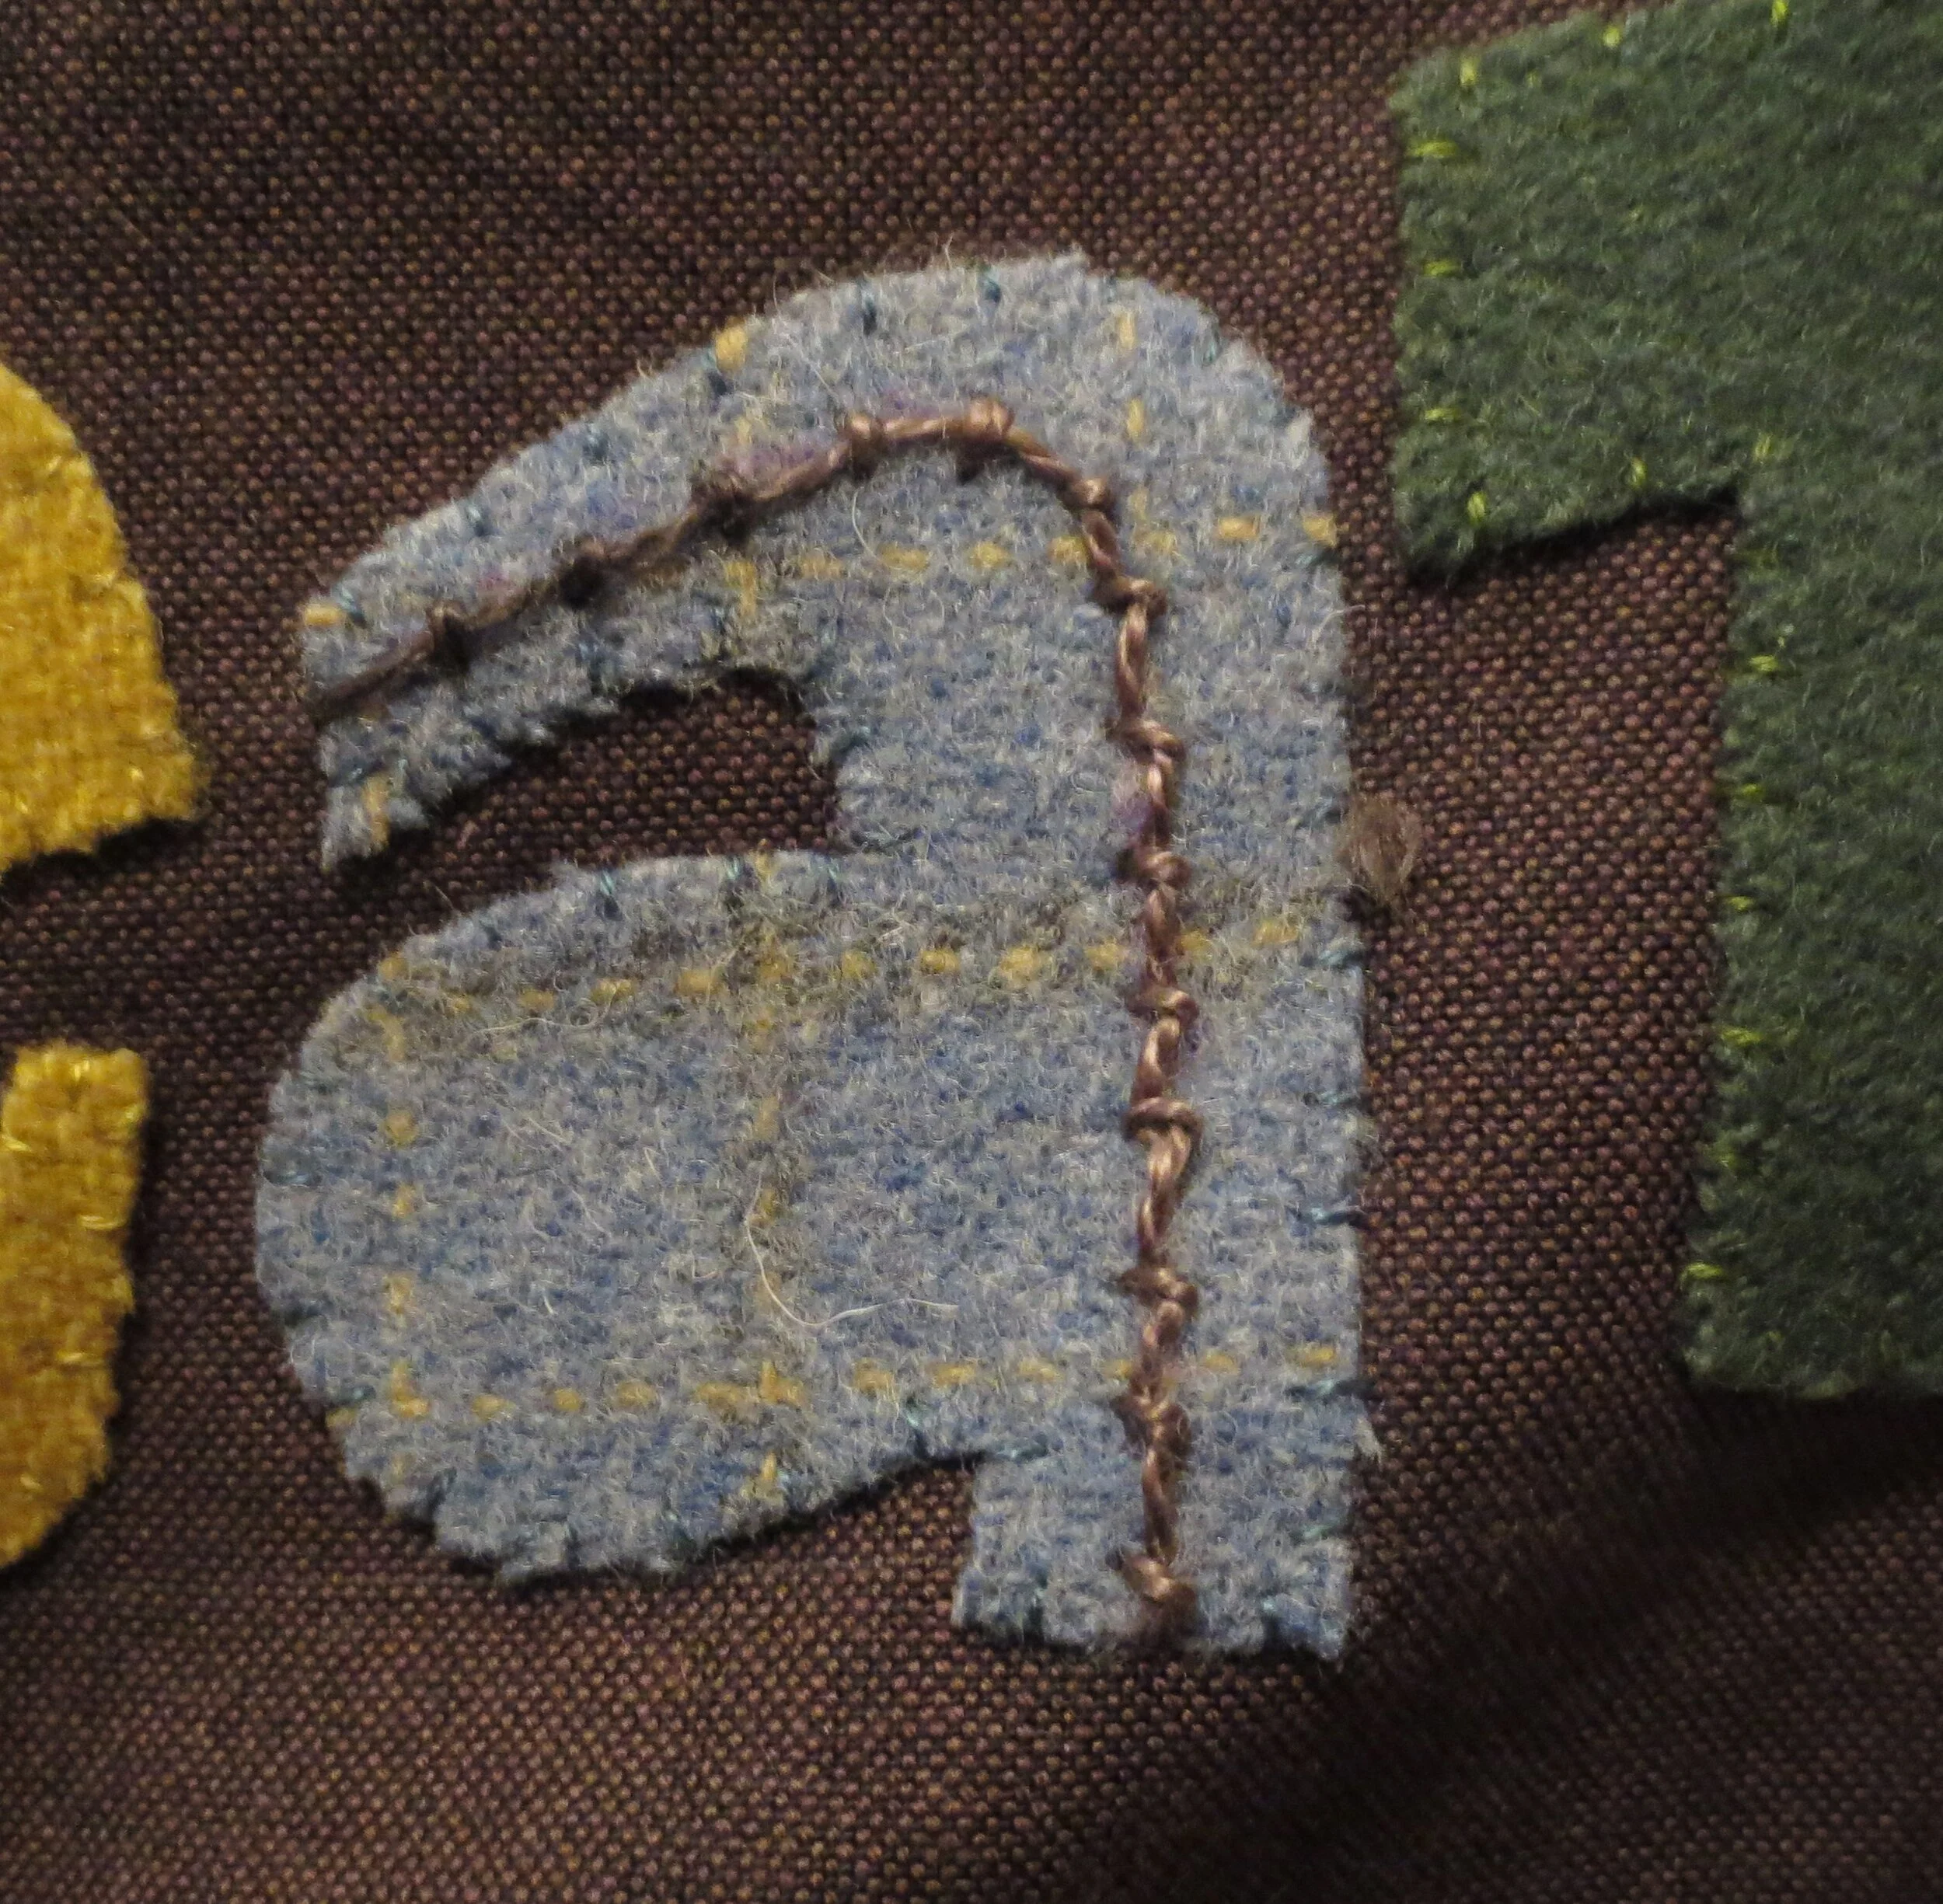
Draw guide lines on the spine of both of the R’s and the “F” in the word OF. We will be making herringbone stitches on these three letters.

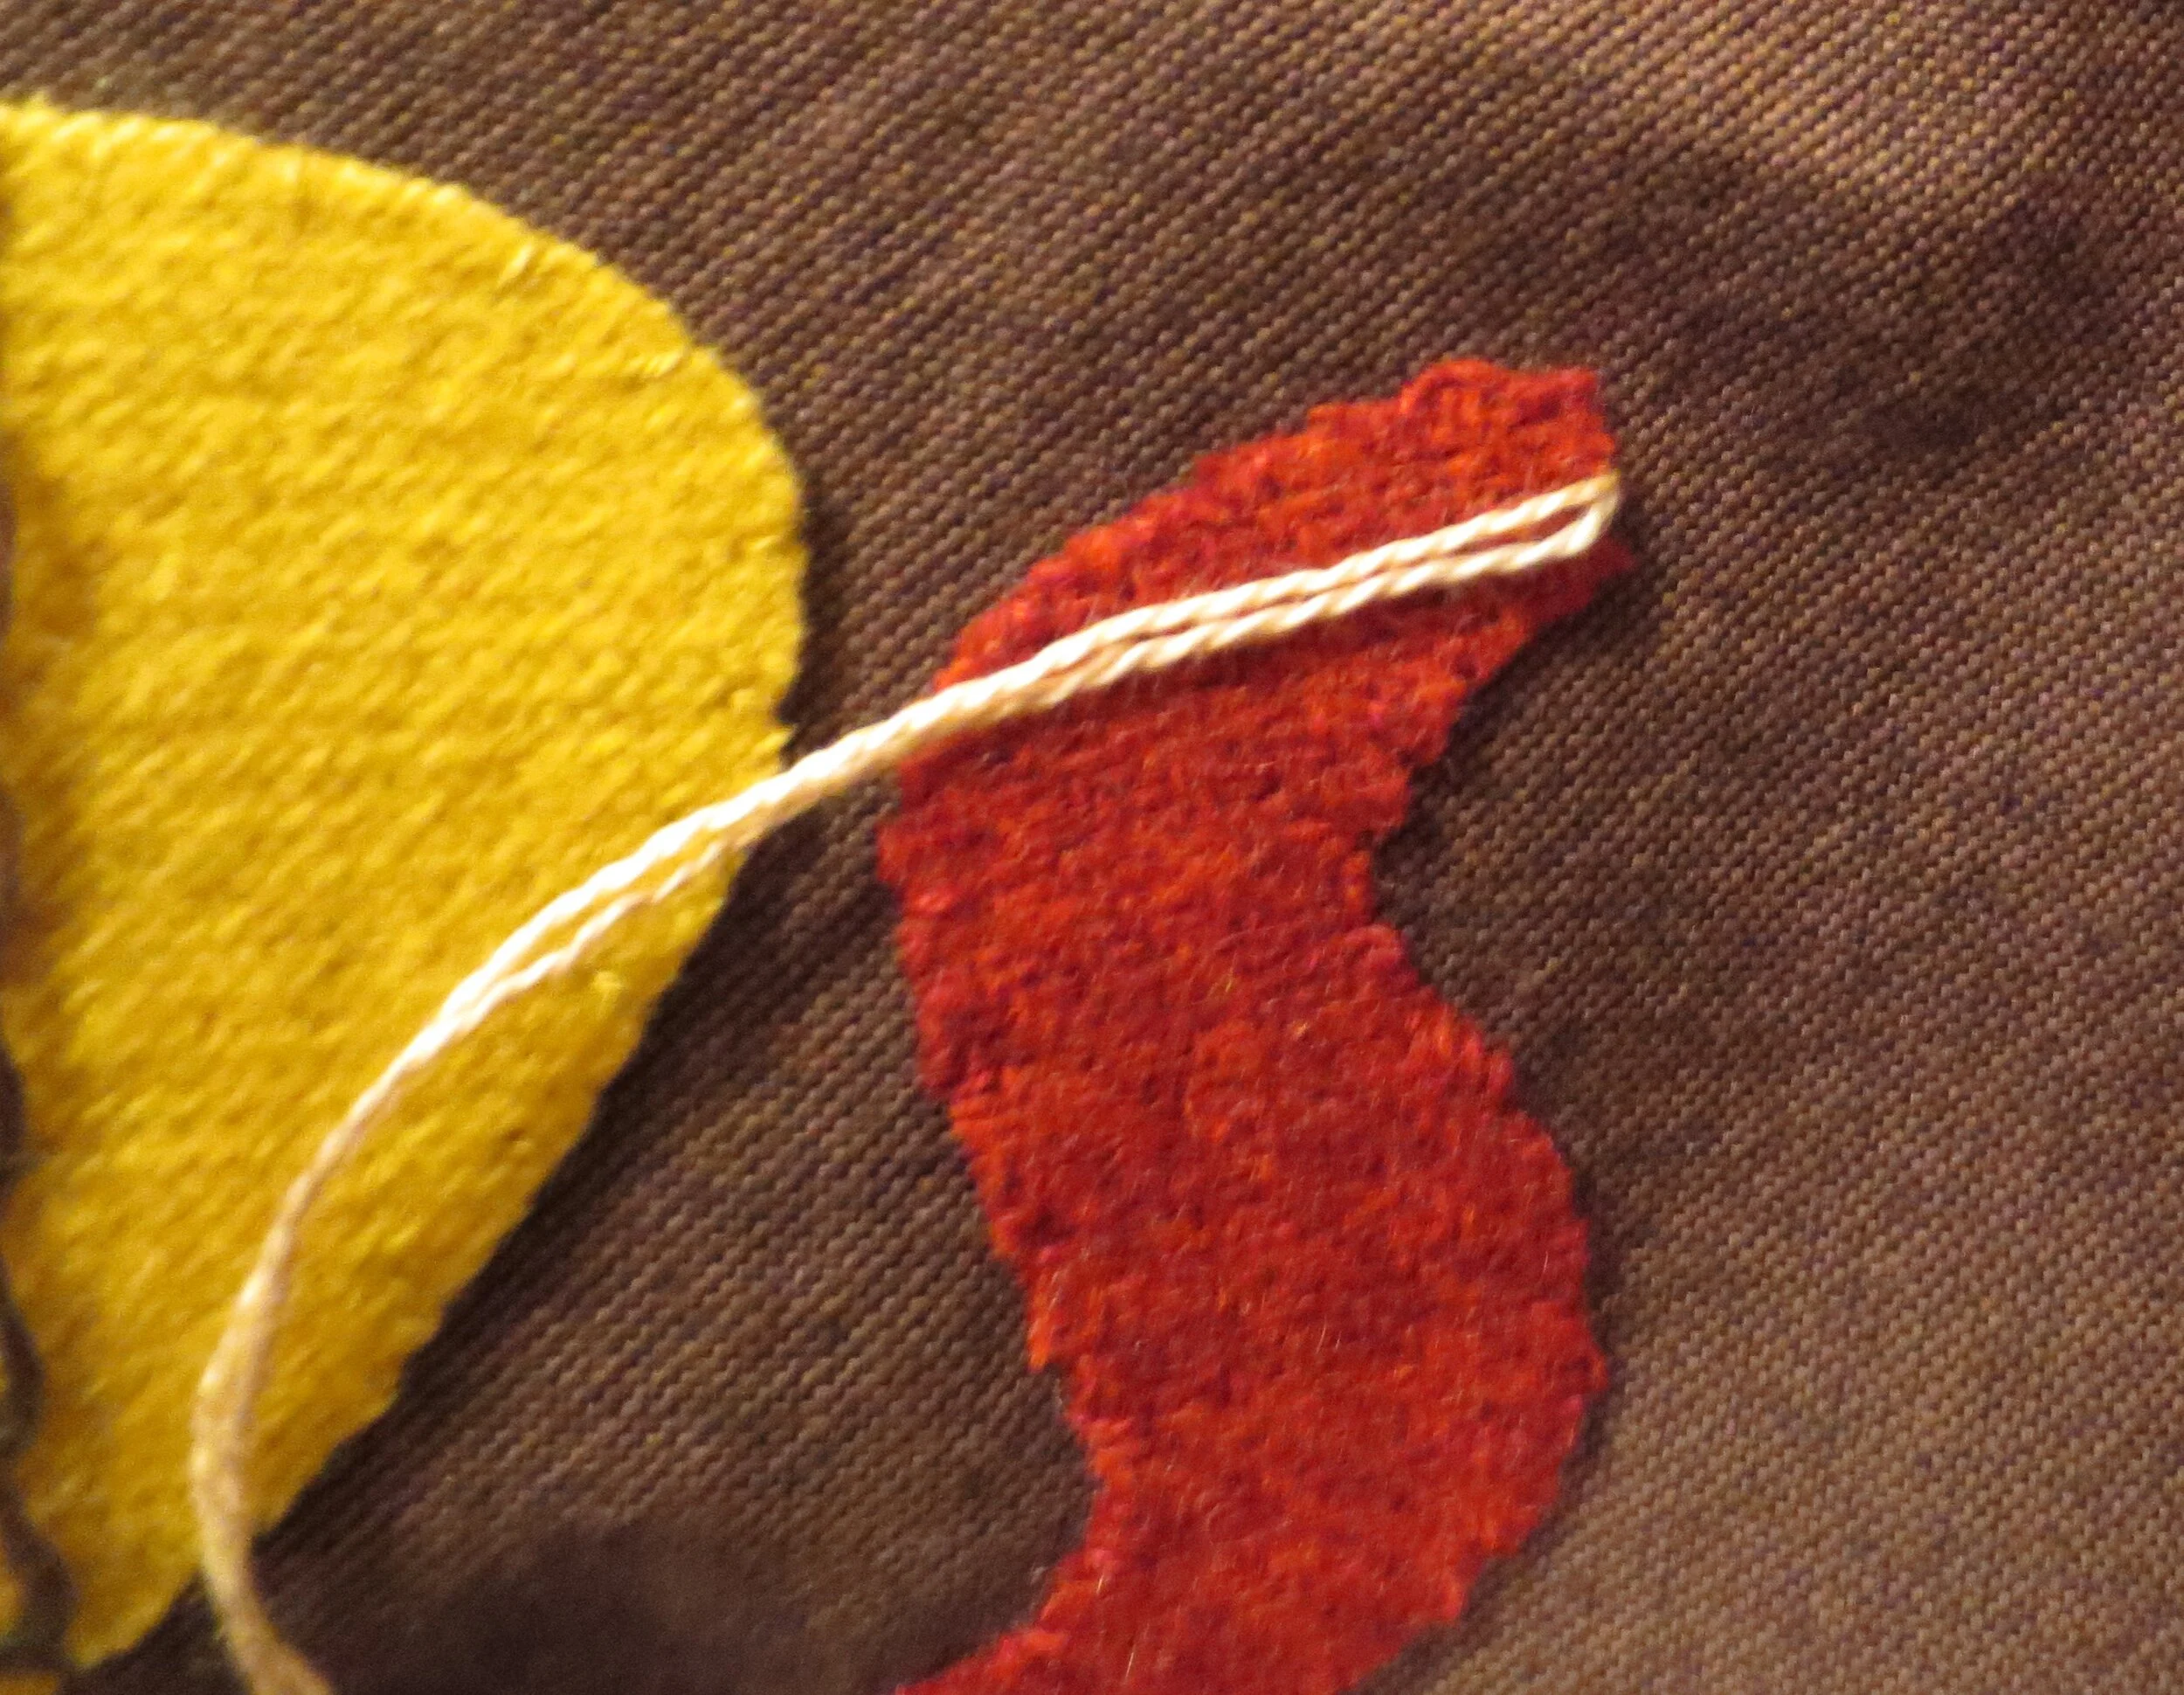
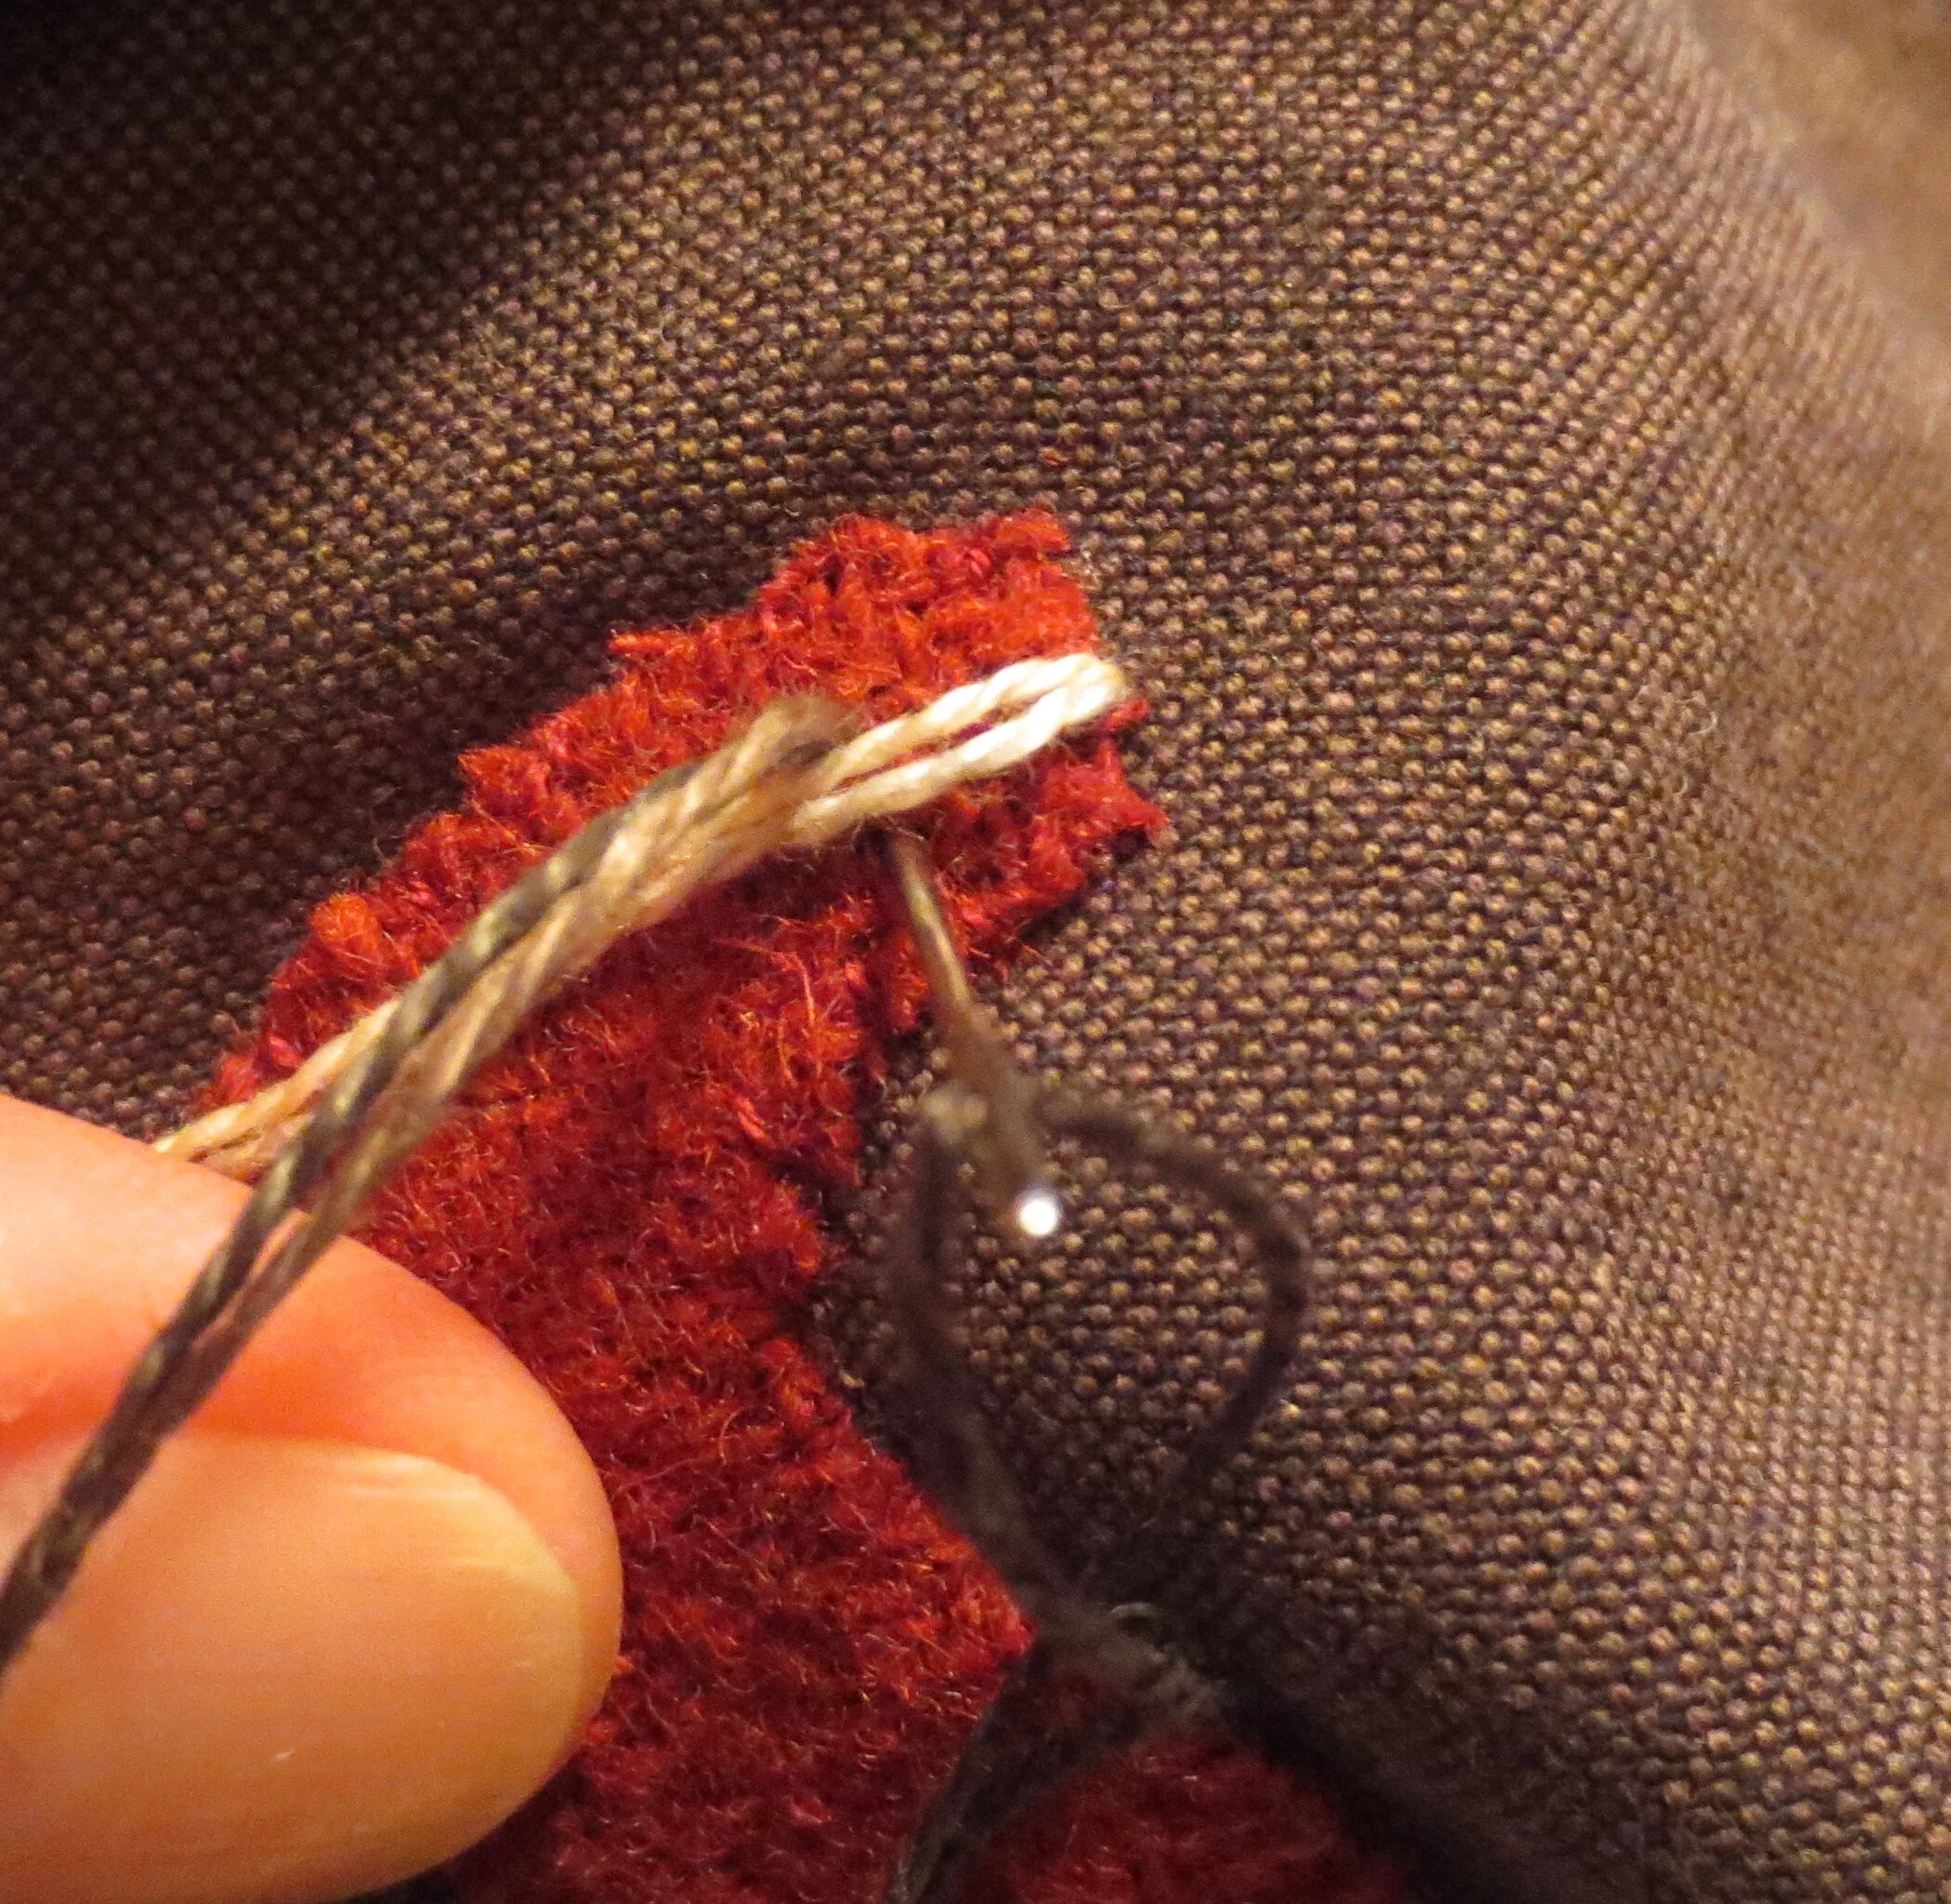
Begin by bringing up your needle on the top edge of the letter as shown below. Use 1 strand of thread that will have the greatest contrast on your wool.
Insert the needle into the guide line approximately 1/4” from the top edge.
Use the photos below to stitch a series of herringbone stitches down the spine.

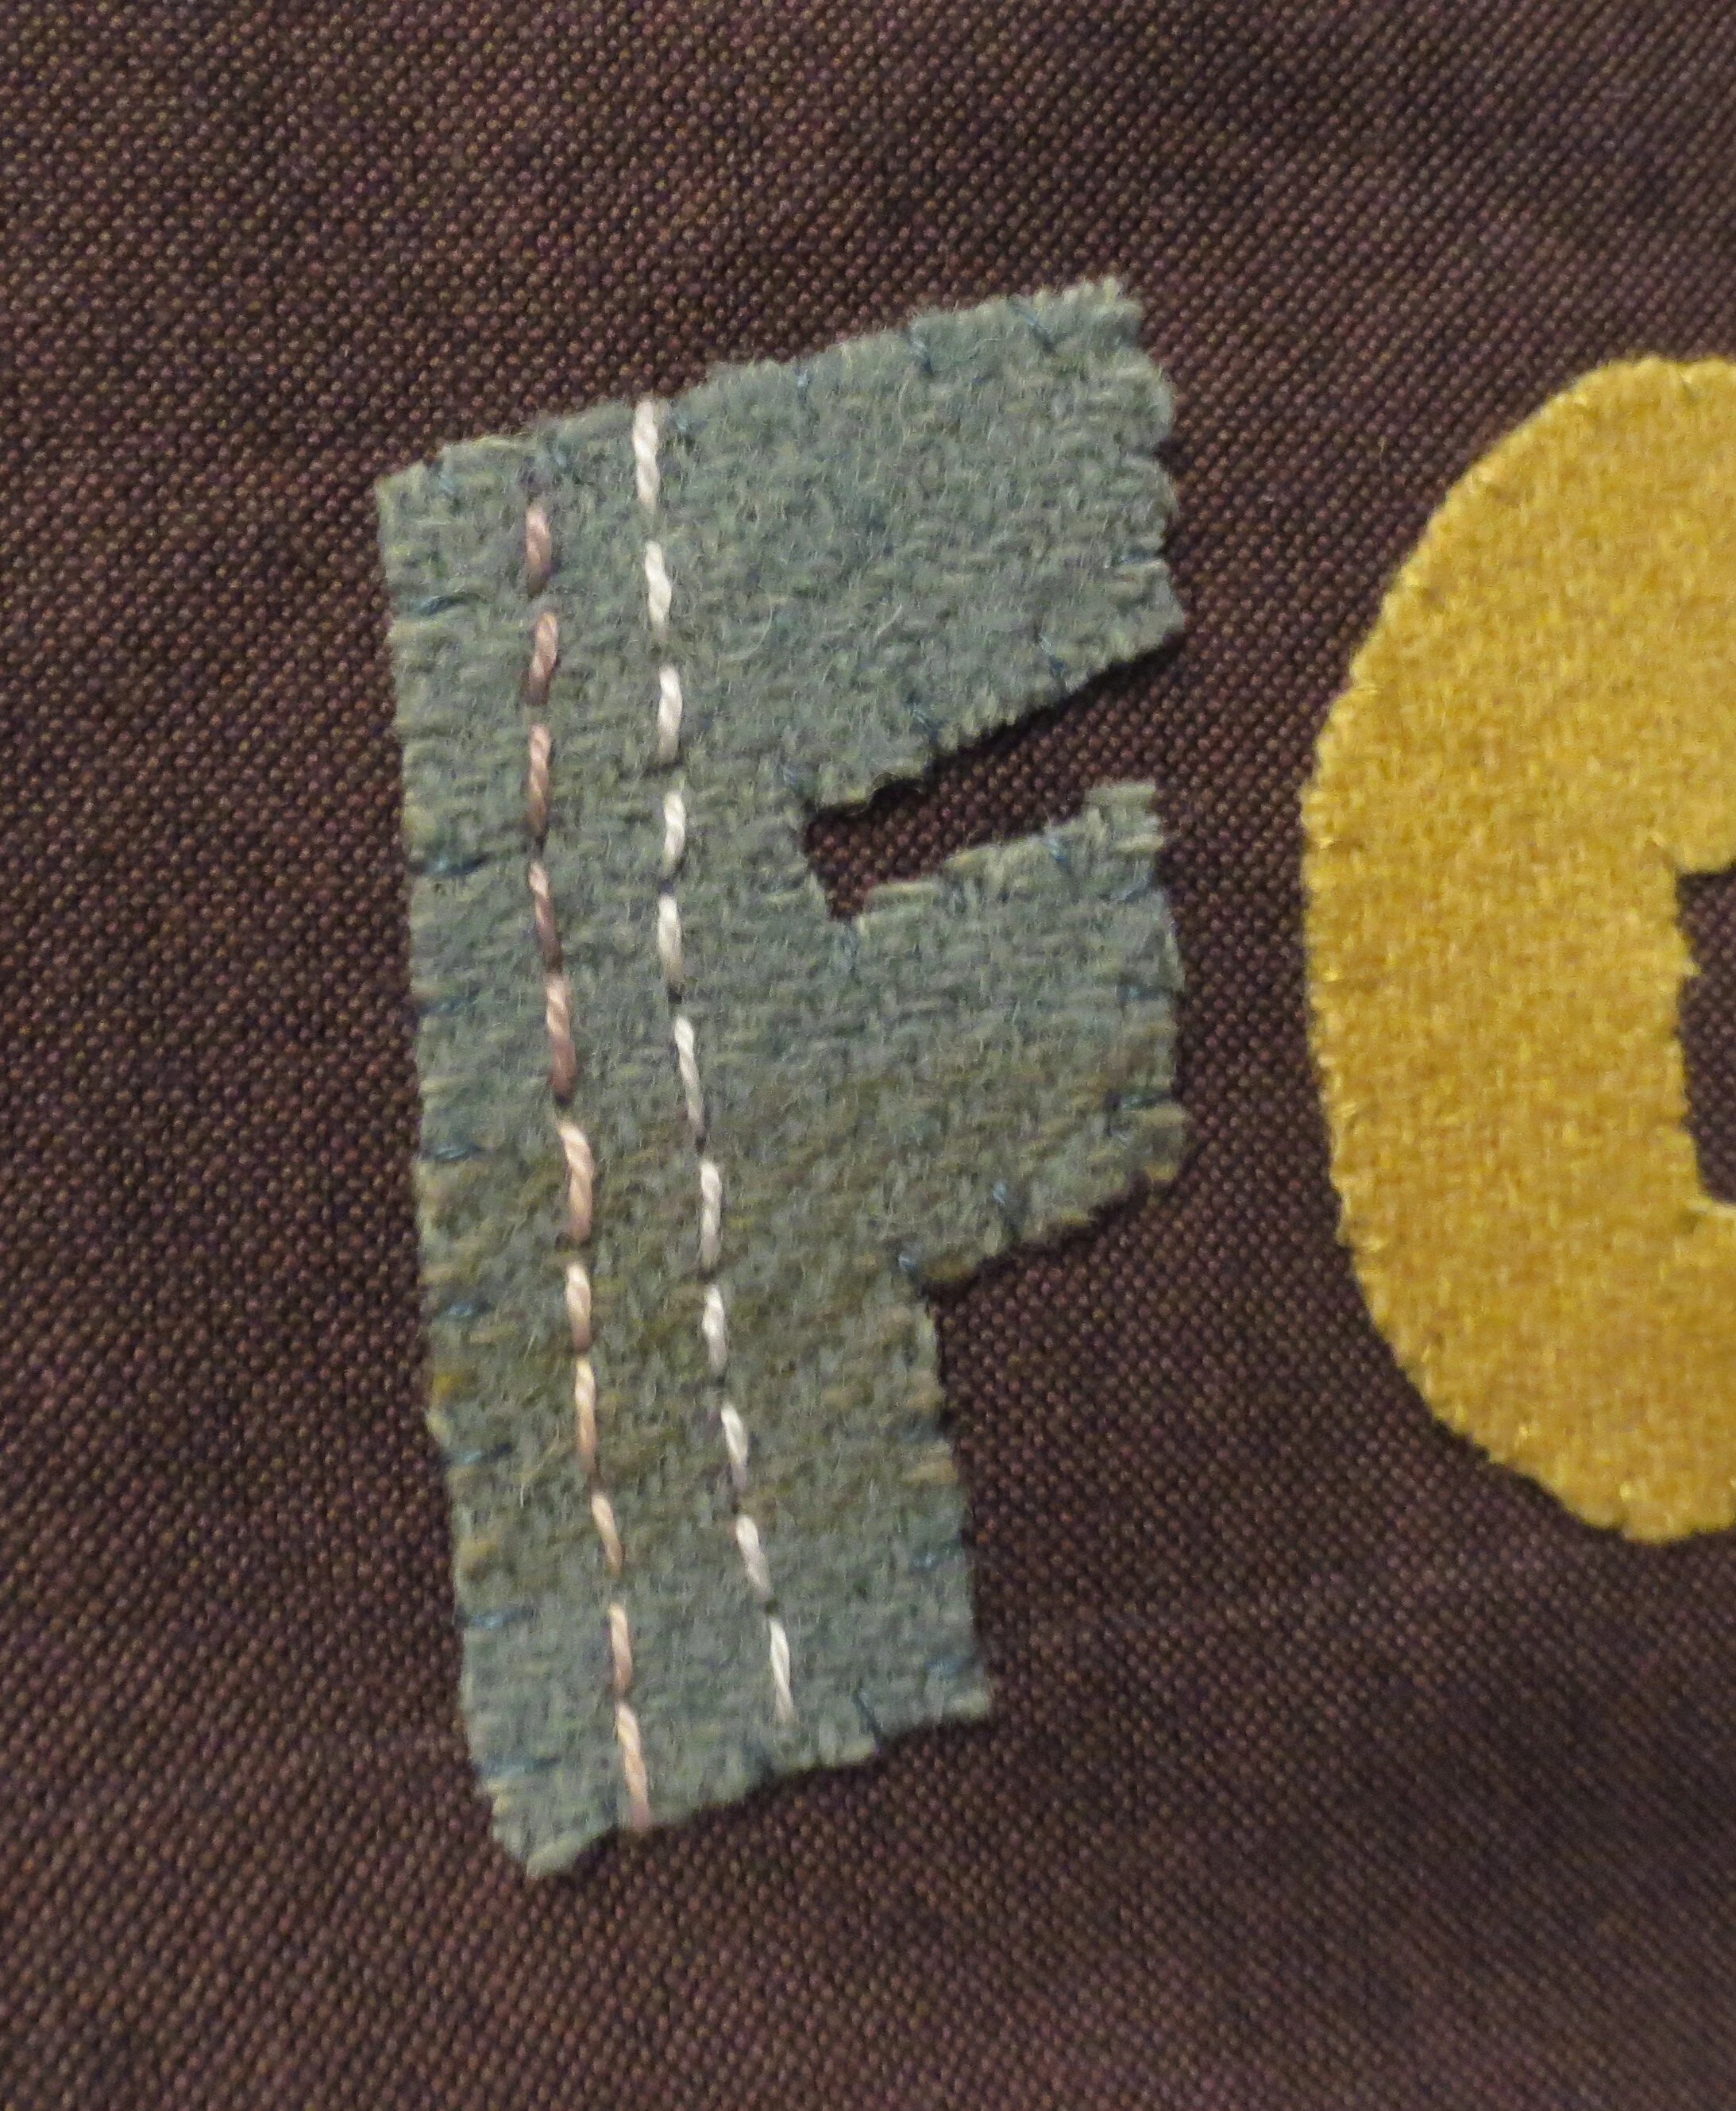
Draw 2 guide lines on the letter F in FEATHER.
Stitch 2 threaded back stitches over the lines.


Draw a guide line on the spine of the “D”.
We will be stitching a series of Basque Stitches along the spine of this letter. Begin by bringing up your needle at the top of the letter at the beginning of the guide line. Insert the needle back in about 1/4” below your beginning point, and then bring it back up about 1/4” from the left edge without pulling the thread through. Sorry for the blurry photo.
Wrap the thread under the base of the needle and over the tip of your needle as shown below.
Pull the thread through.
Now, tack the loop down by inserting the needle in at the end of the loop and bringing the needle back up on the guide line next to the elbow created by the last stitch. Pull the thread through. This completes the first Basque Stitch.
Repeat the stitch down the length of the spine of the letter.
Use 1 strand of the lighter colored thread to make a single French/colonial knot in each of the loops of the Basque Stitches.
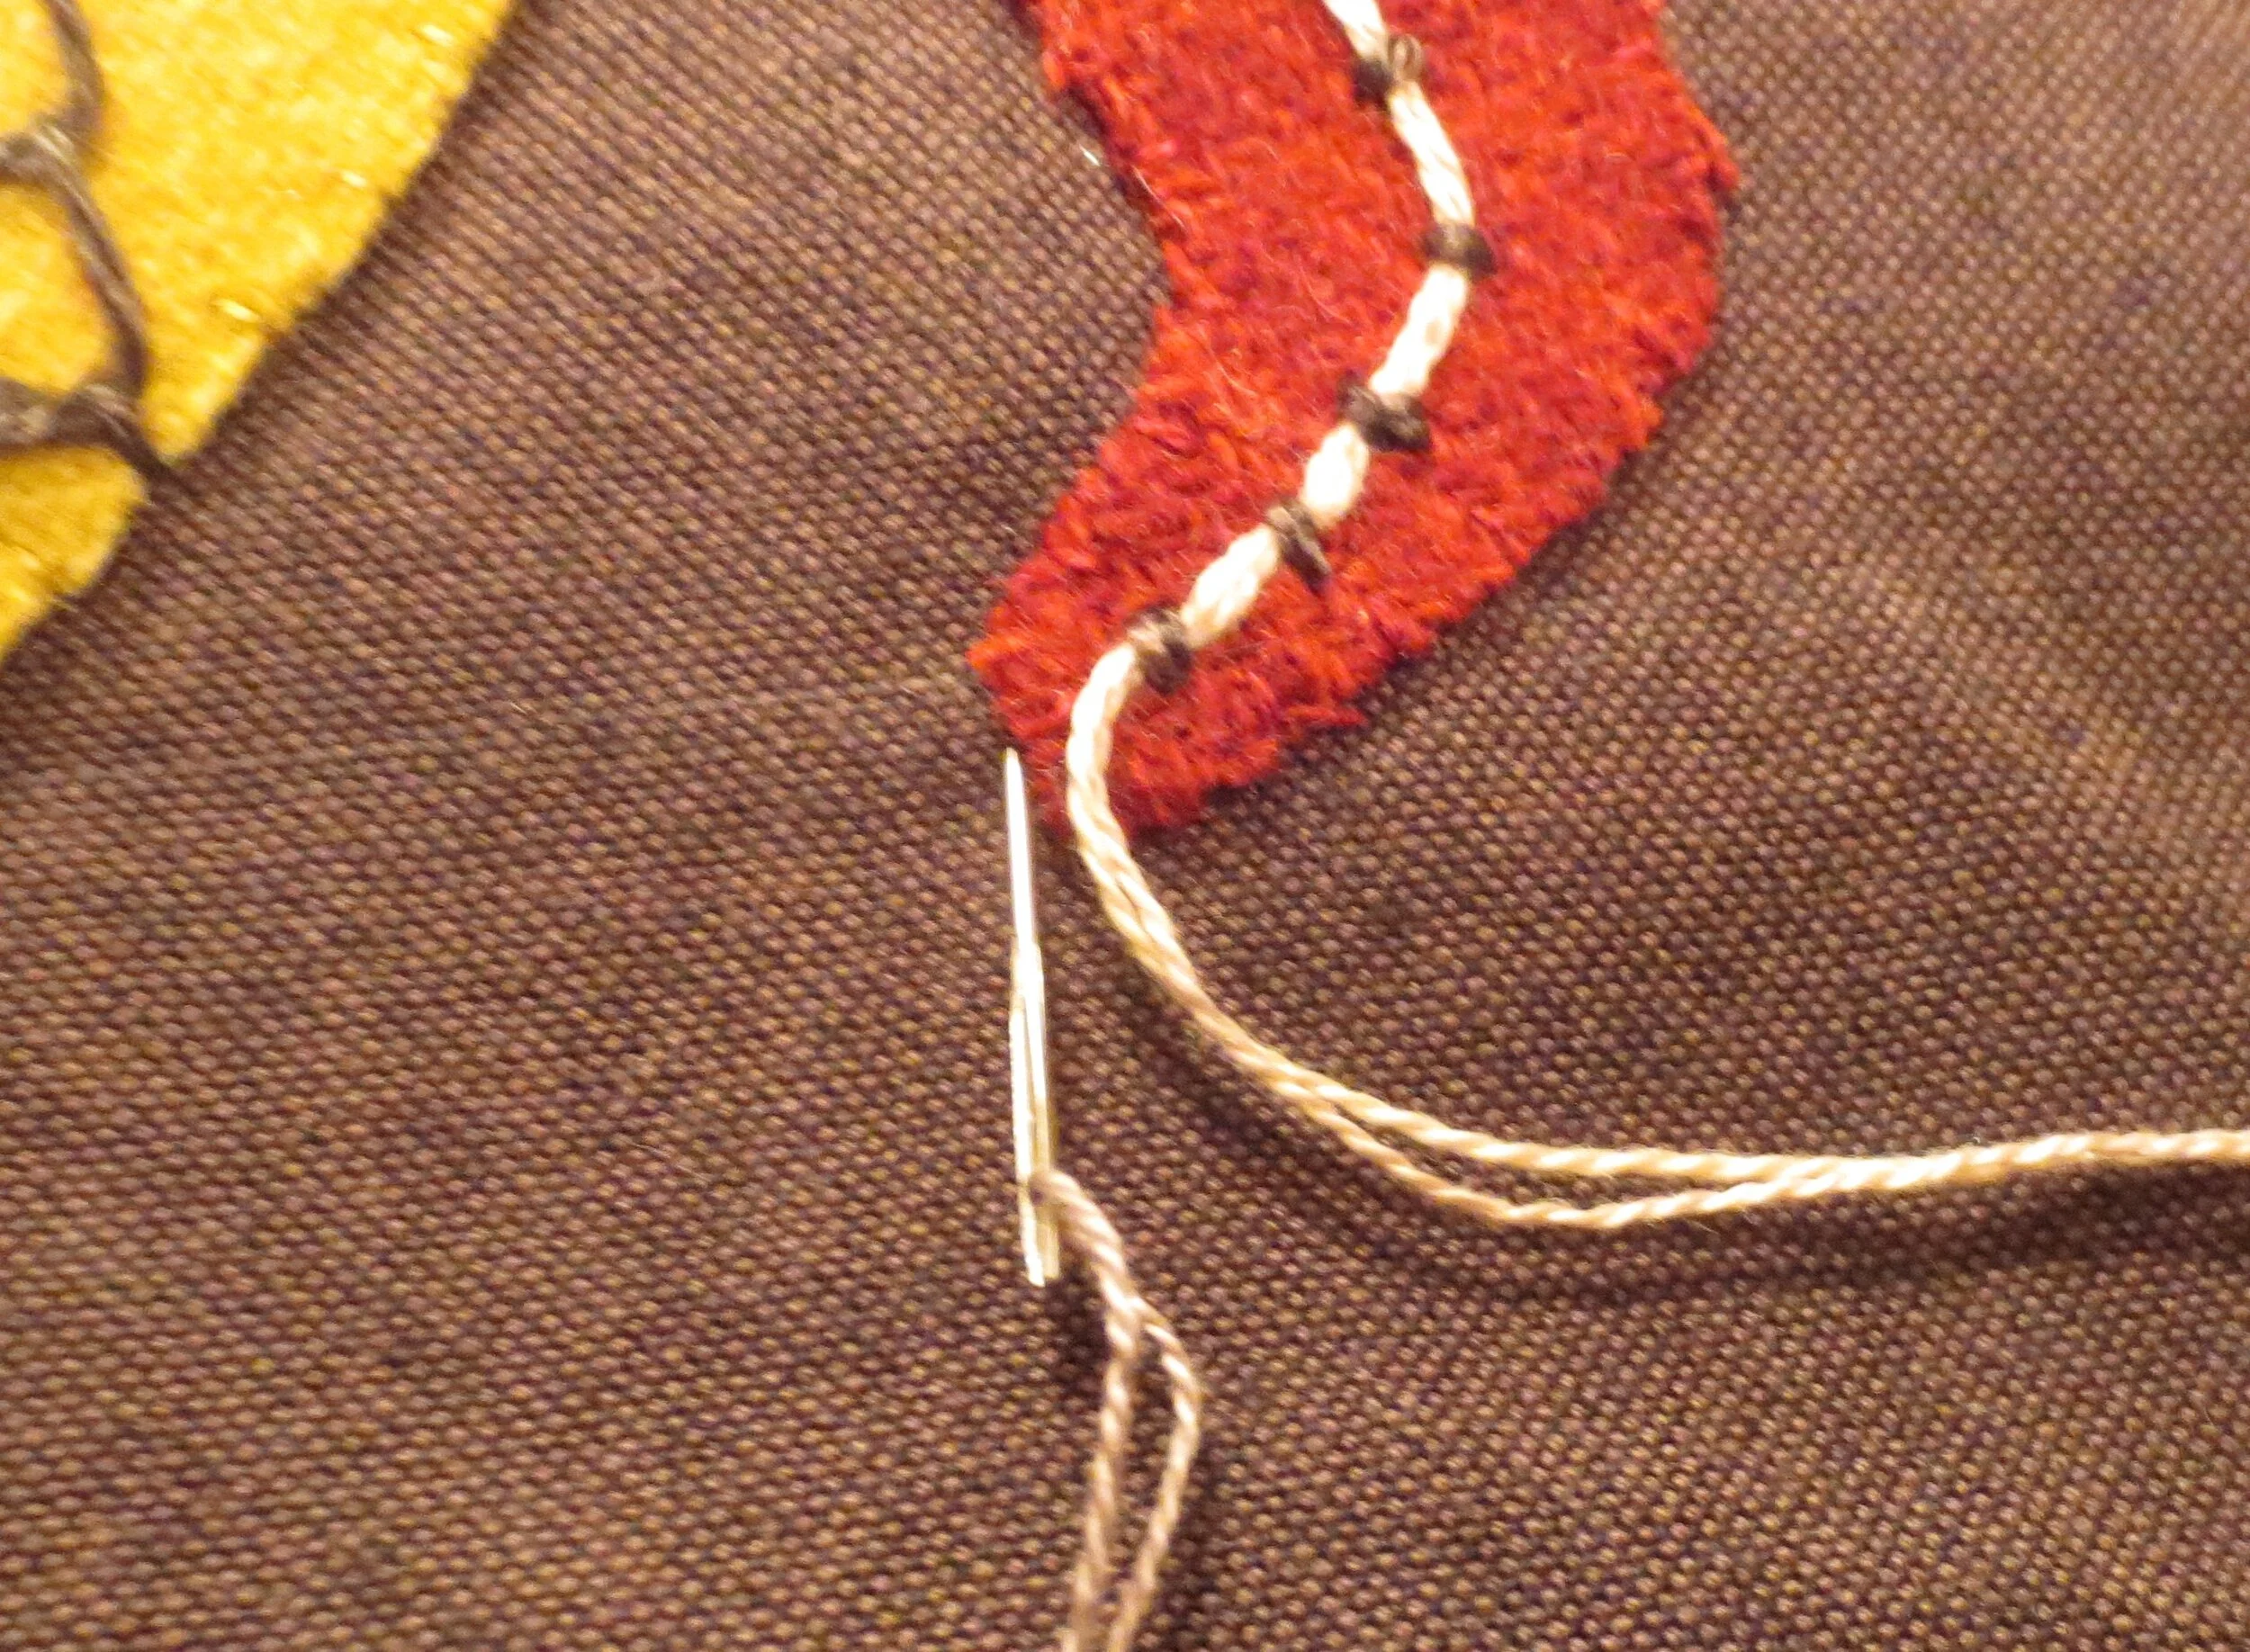
Draw a guide line down the center of the letter S.
Thread one needle with a 2 strands of dark thread and a second needle with 2 strands of light thread.
We will stitch a couching stitch over this line. Begin by bringing the needle with the 2 strands of light thread up at the top of the guide line.
Hold the thread down over the guide line.
Bring the needle up with 2 strands of dark thread up about 1/4” from the top of the letter along the edge of the held thread, and tack the held thread down.

Continue down the length of the letter finishing the stitch by inserting the needle into the base of the letter.
The first word is complete!
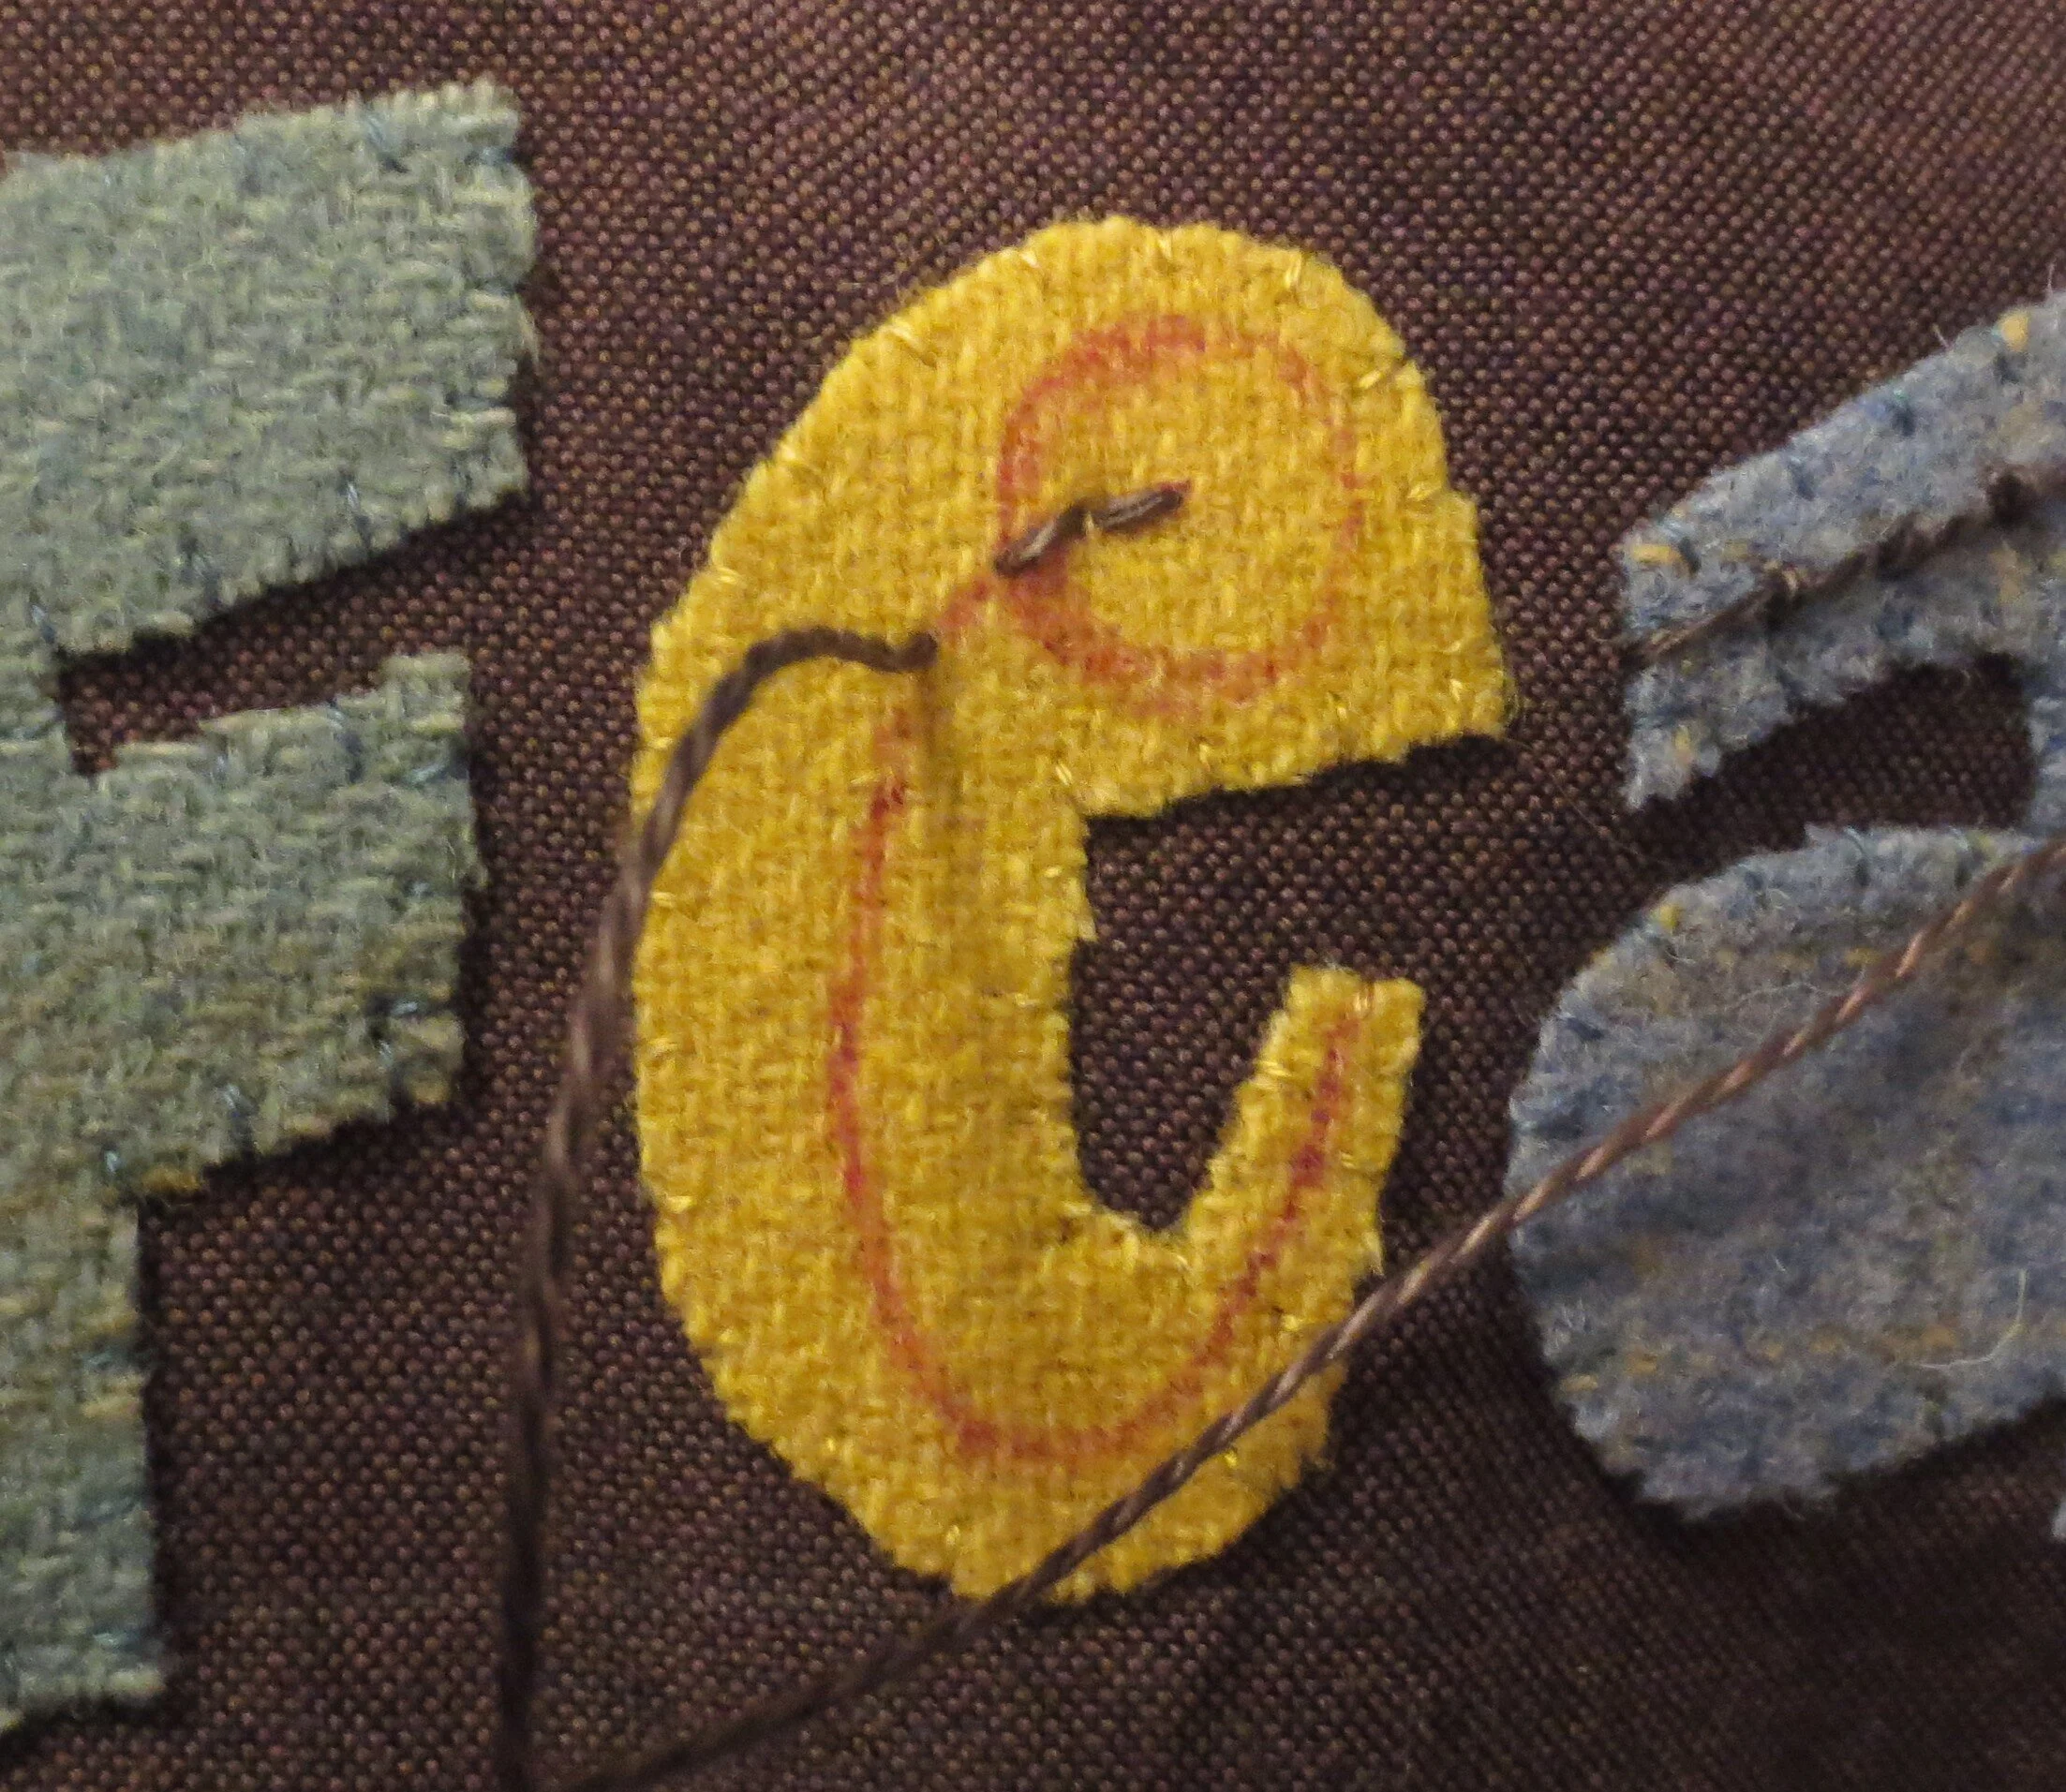
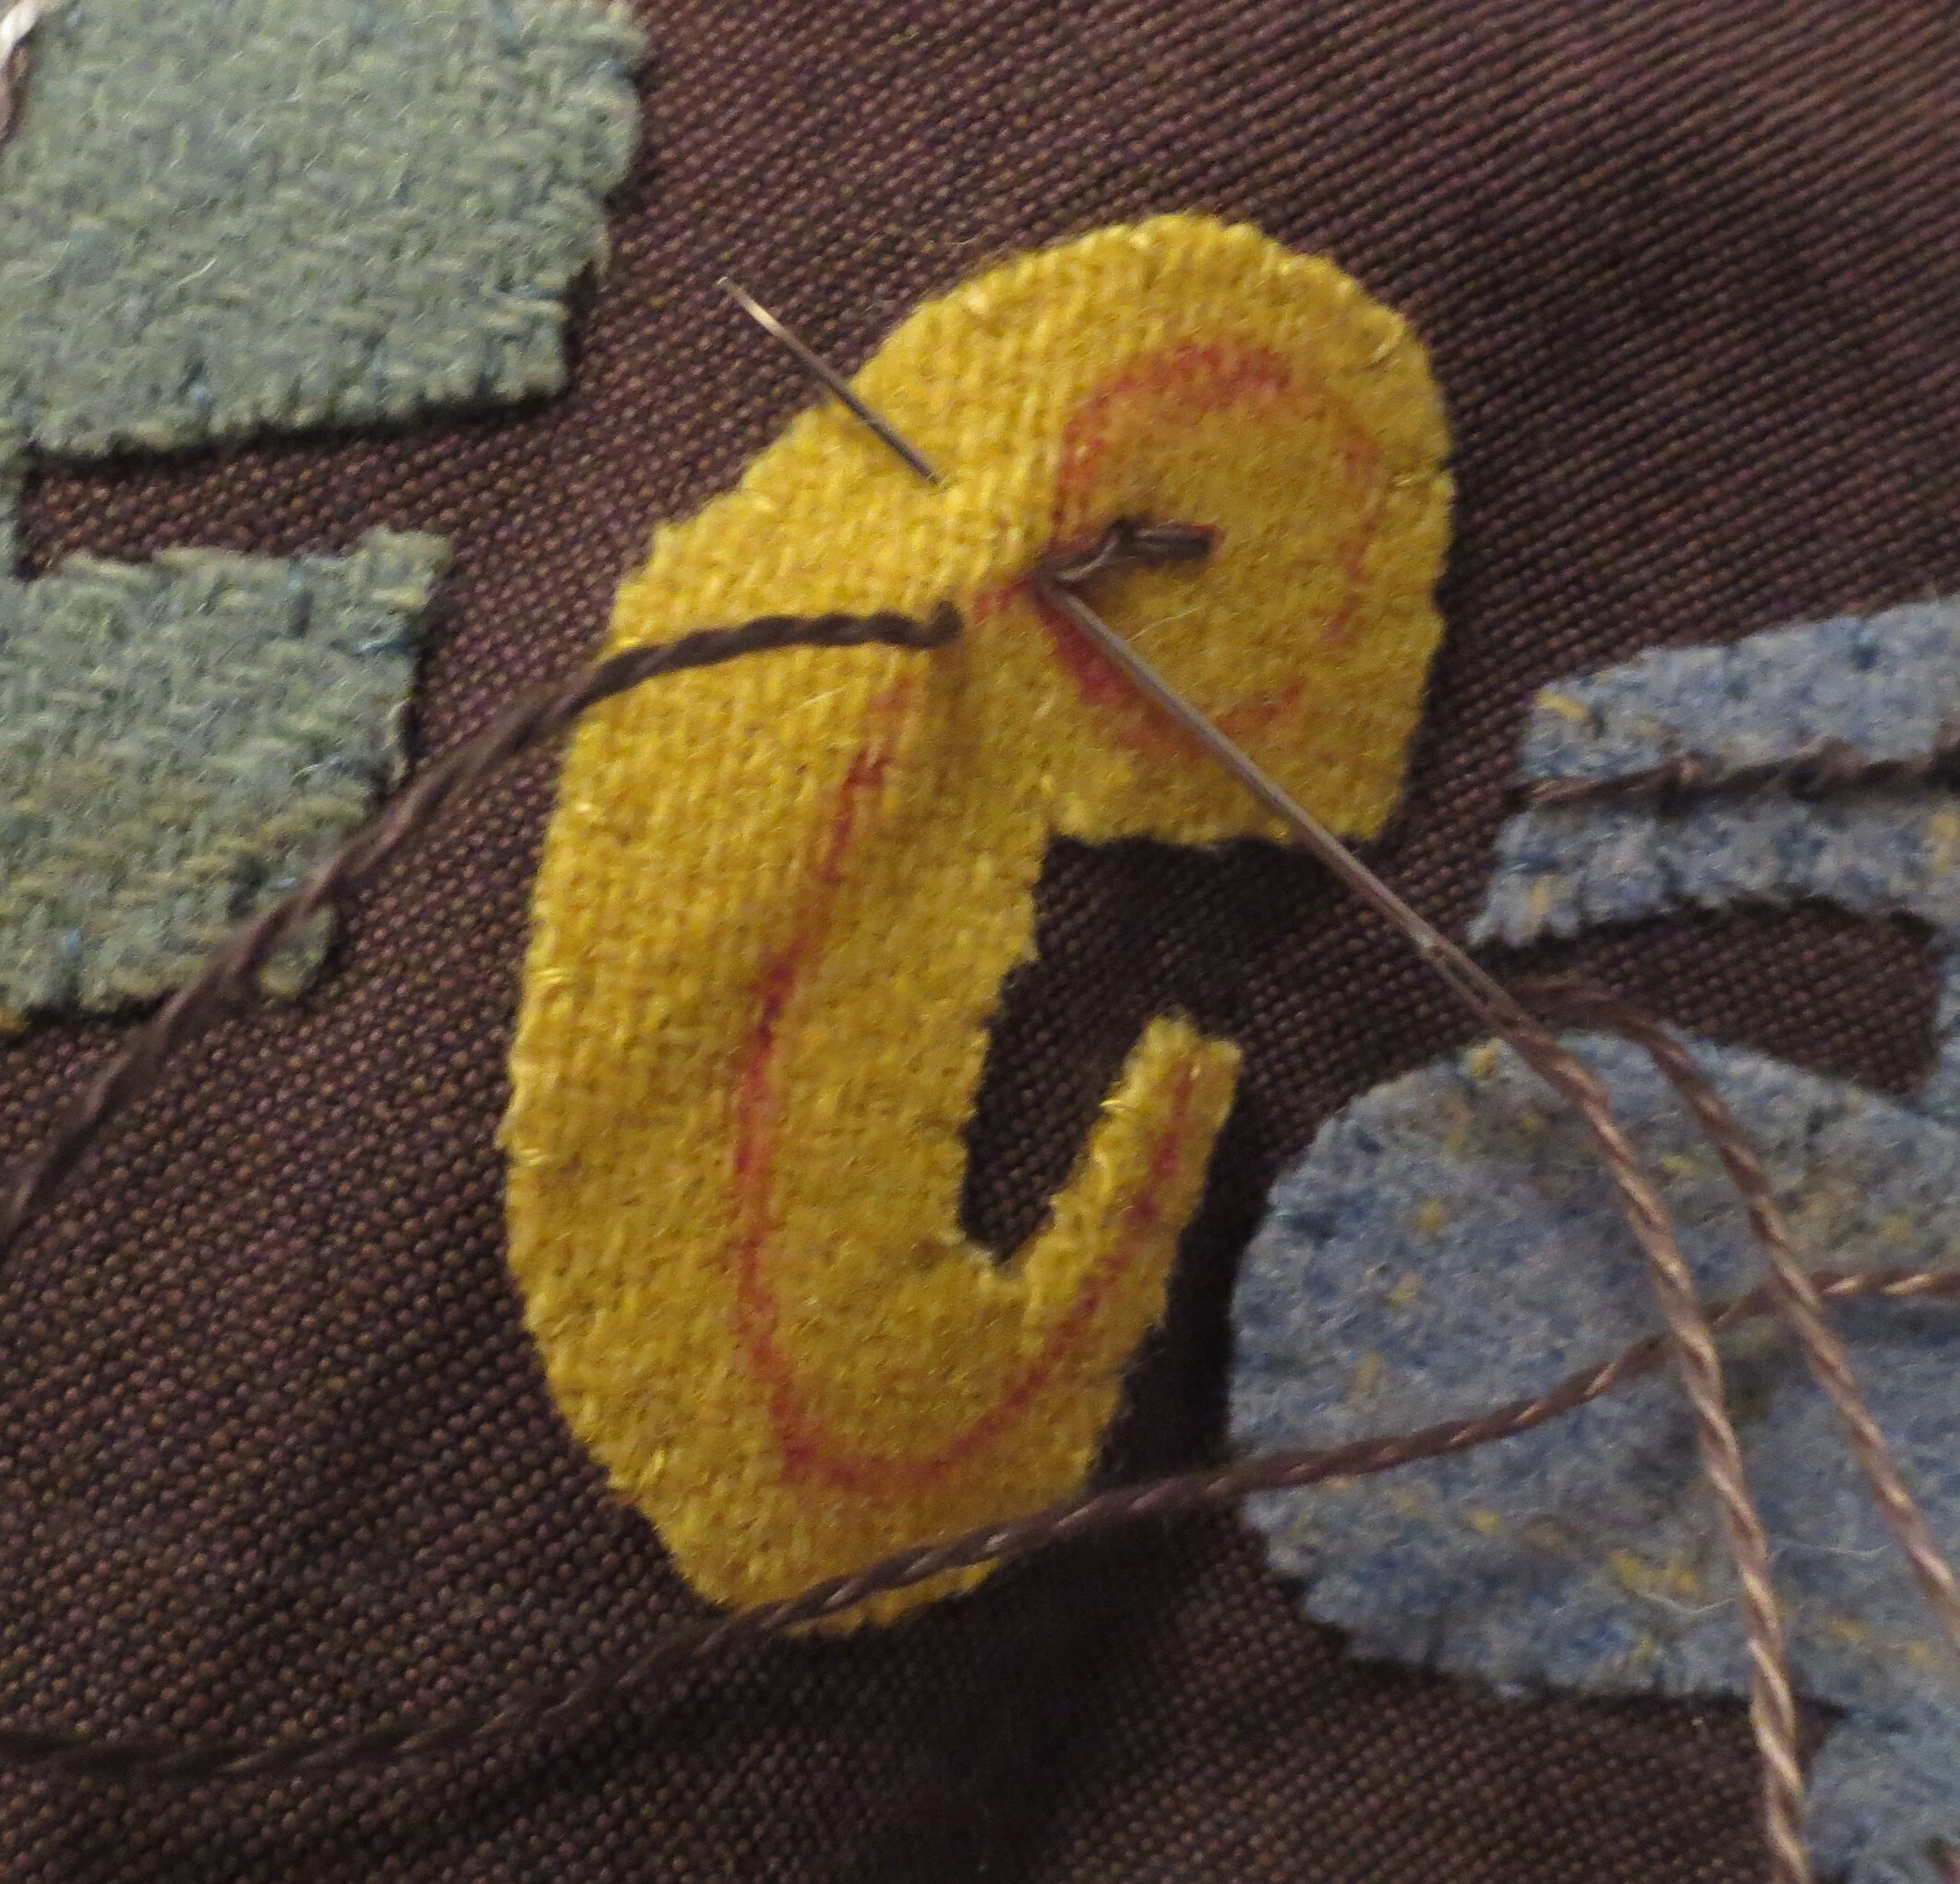
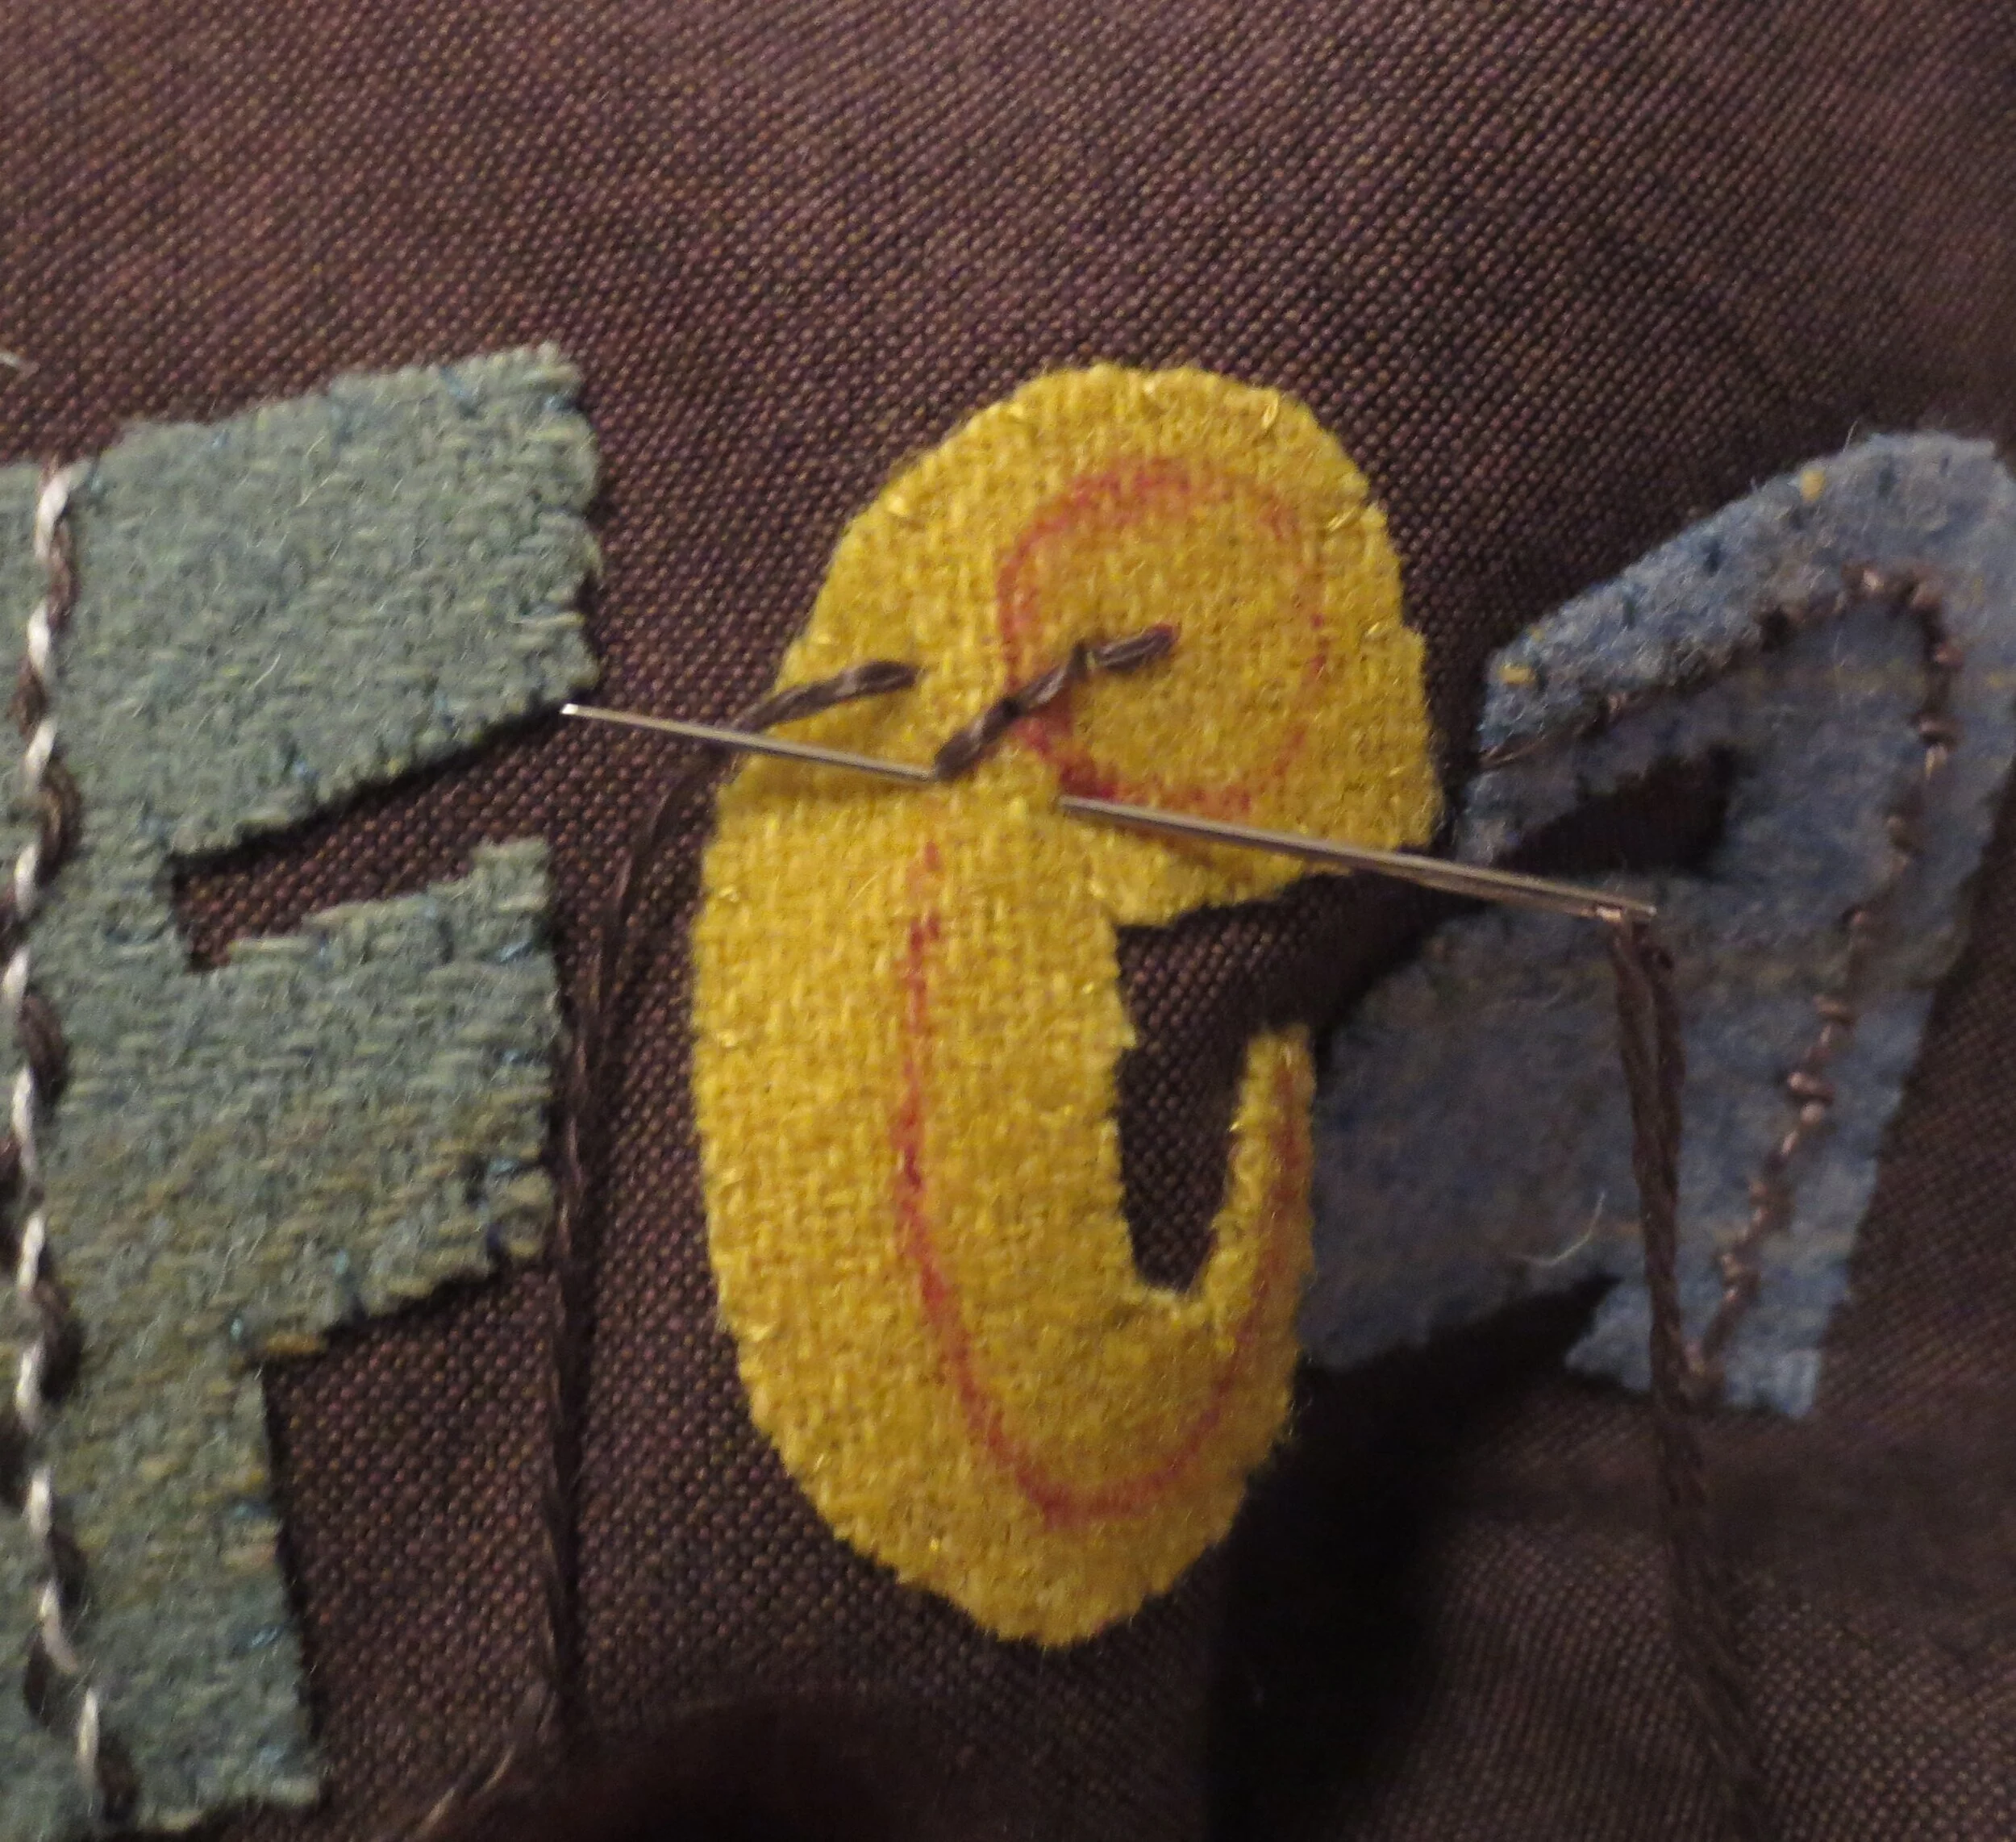
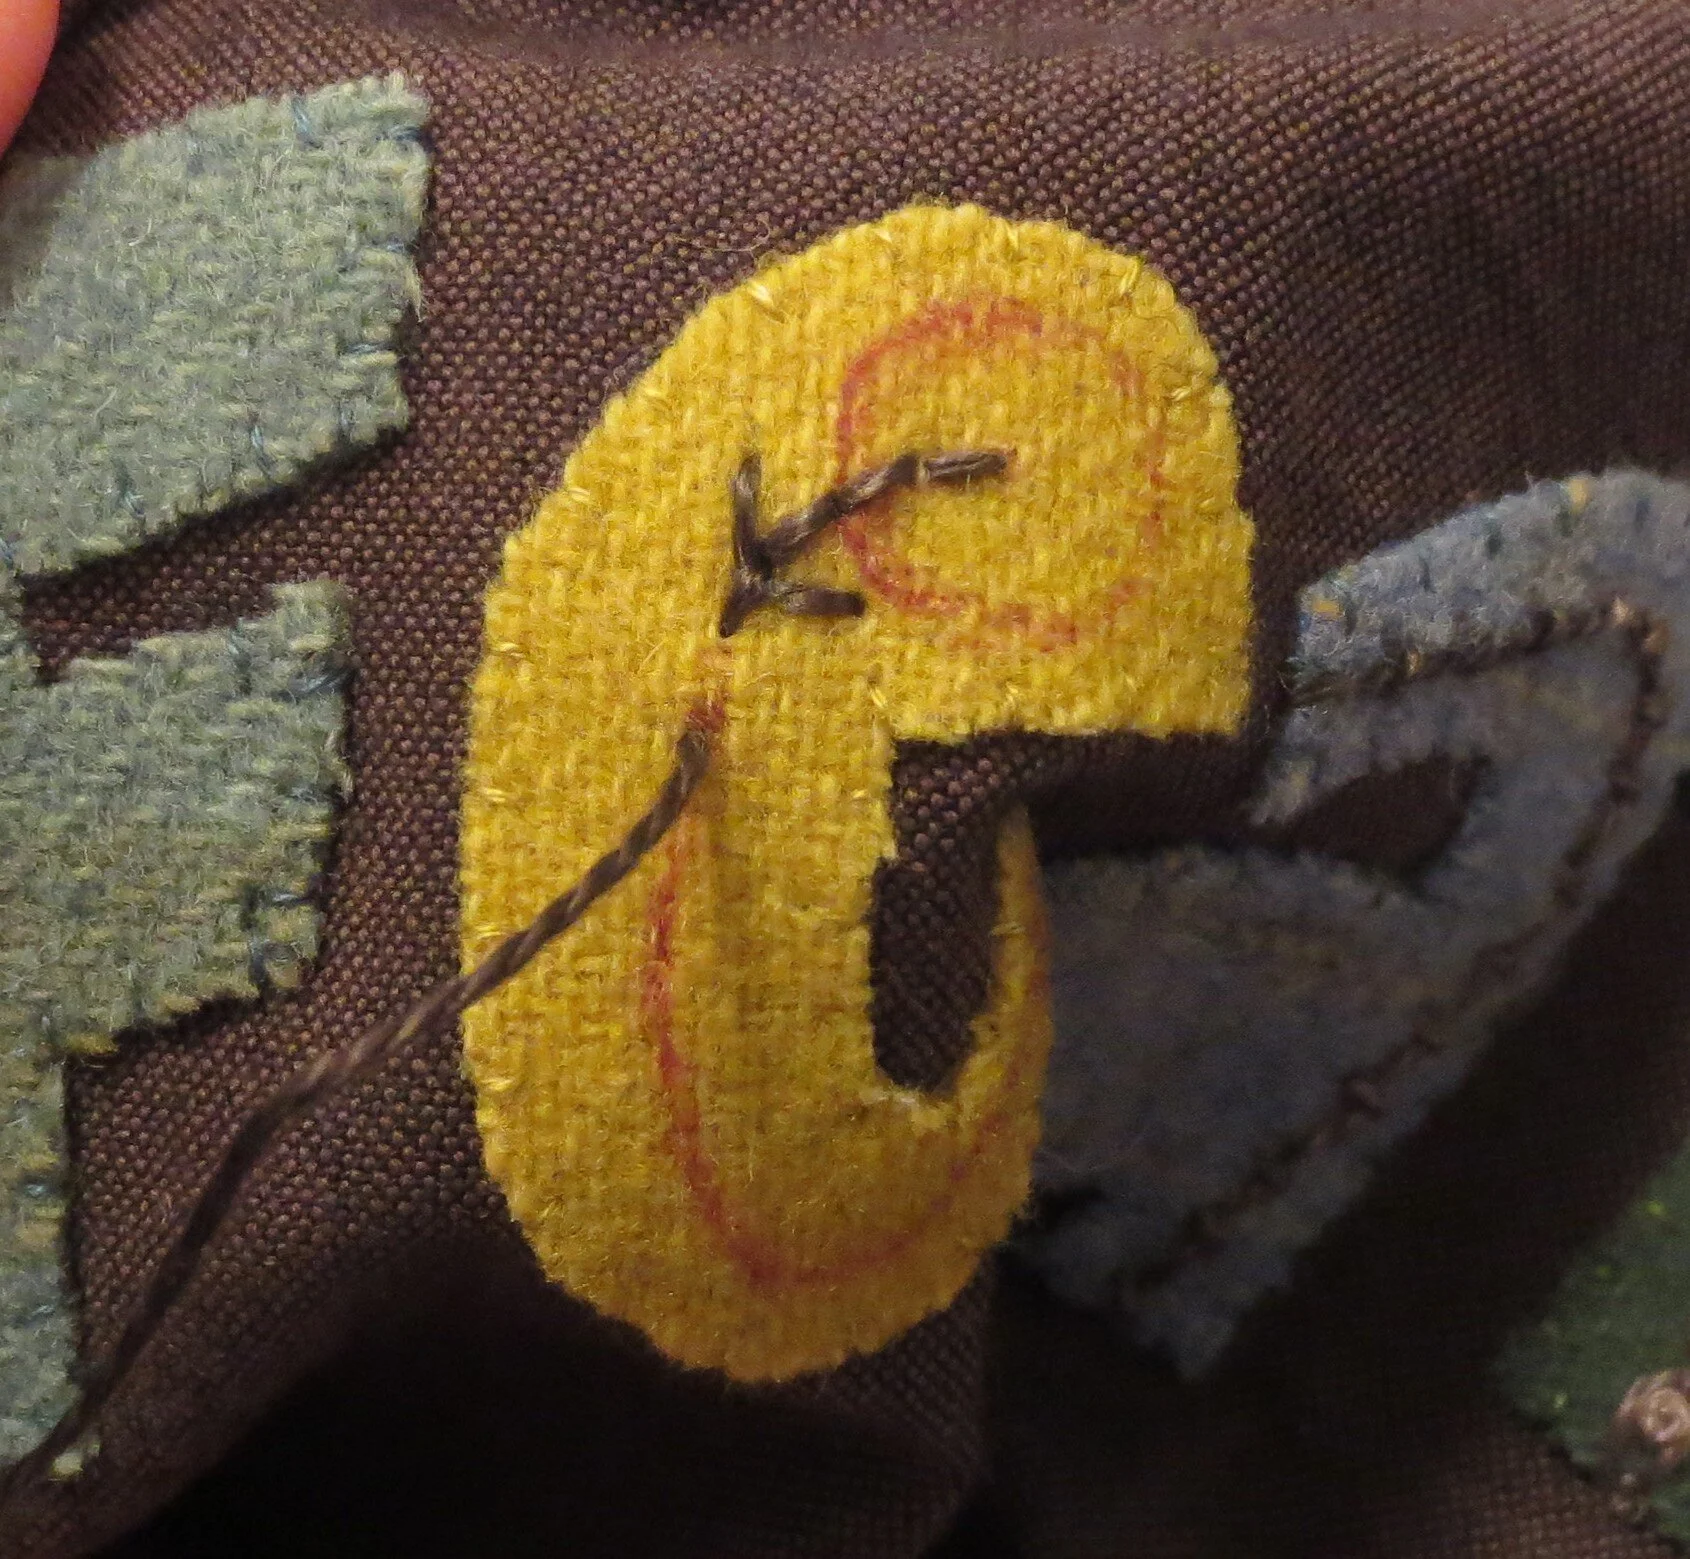
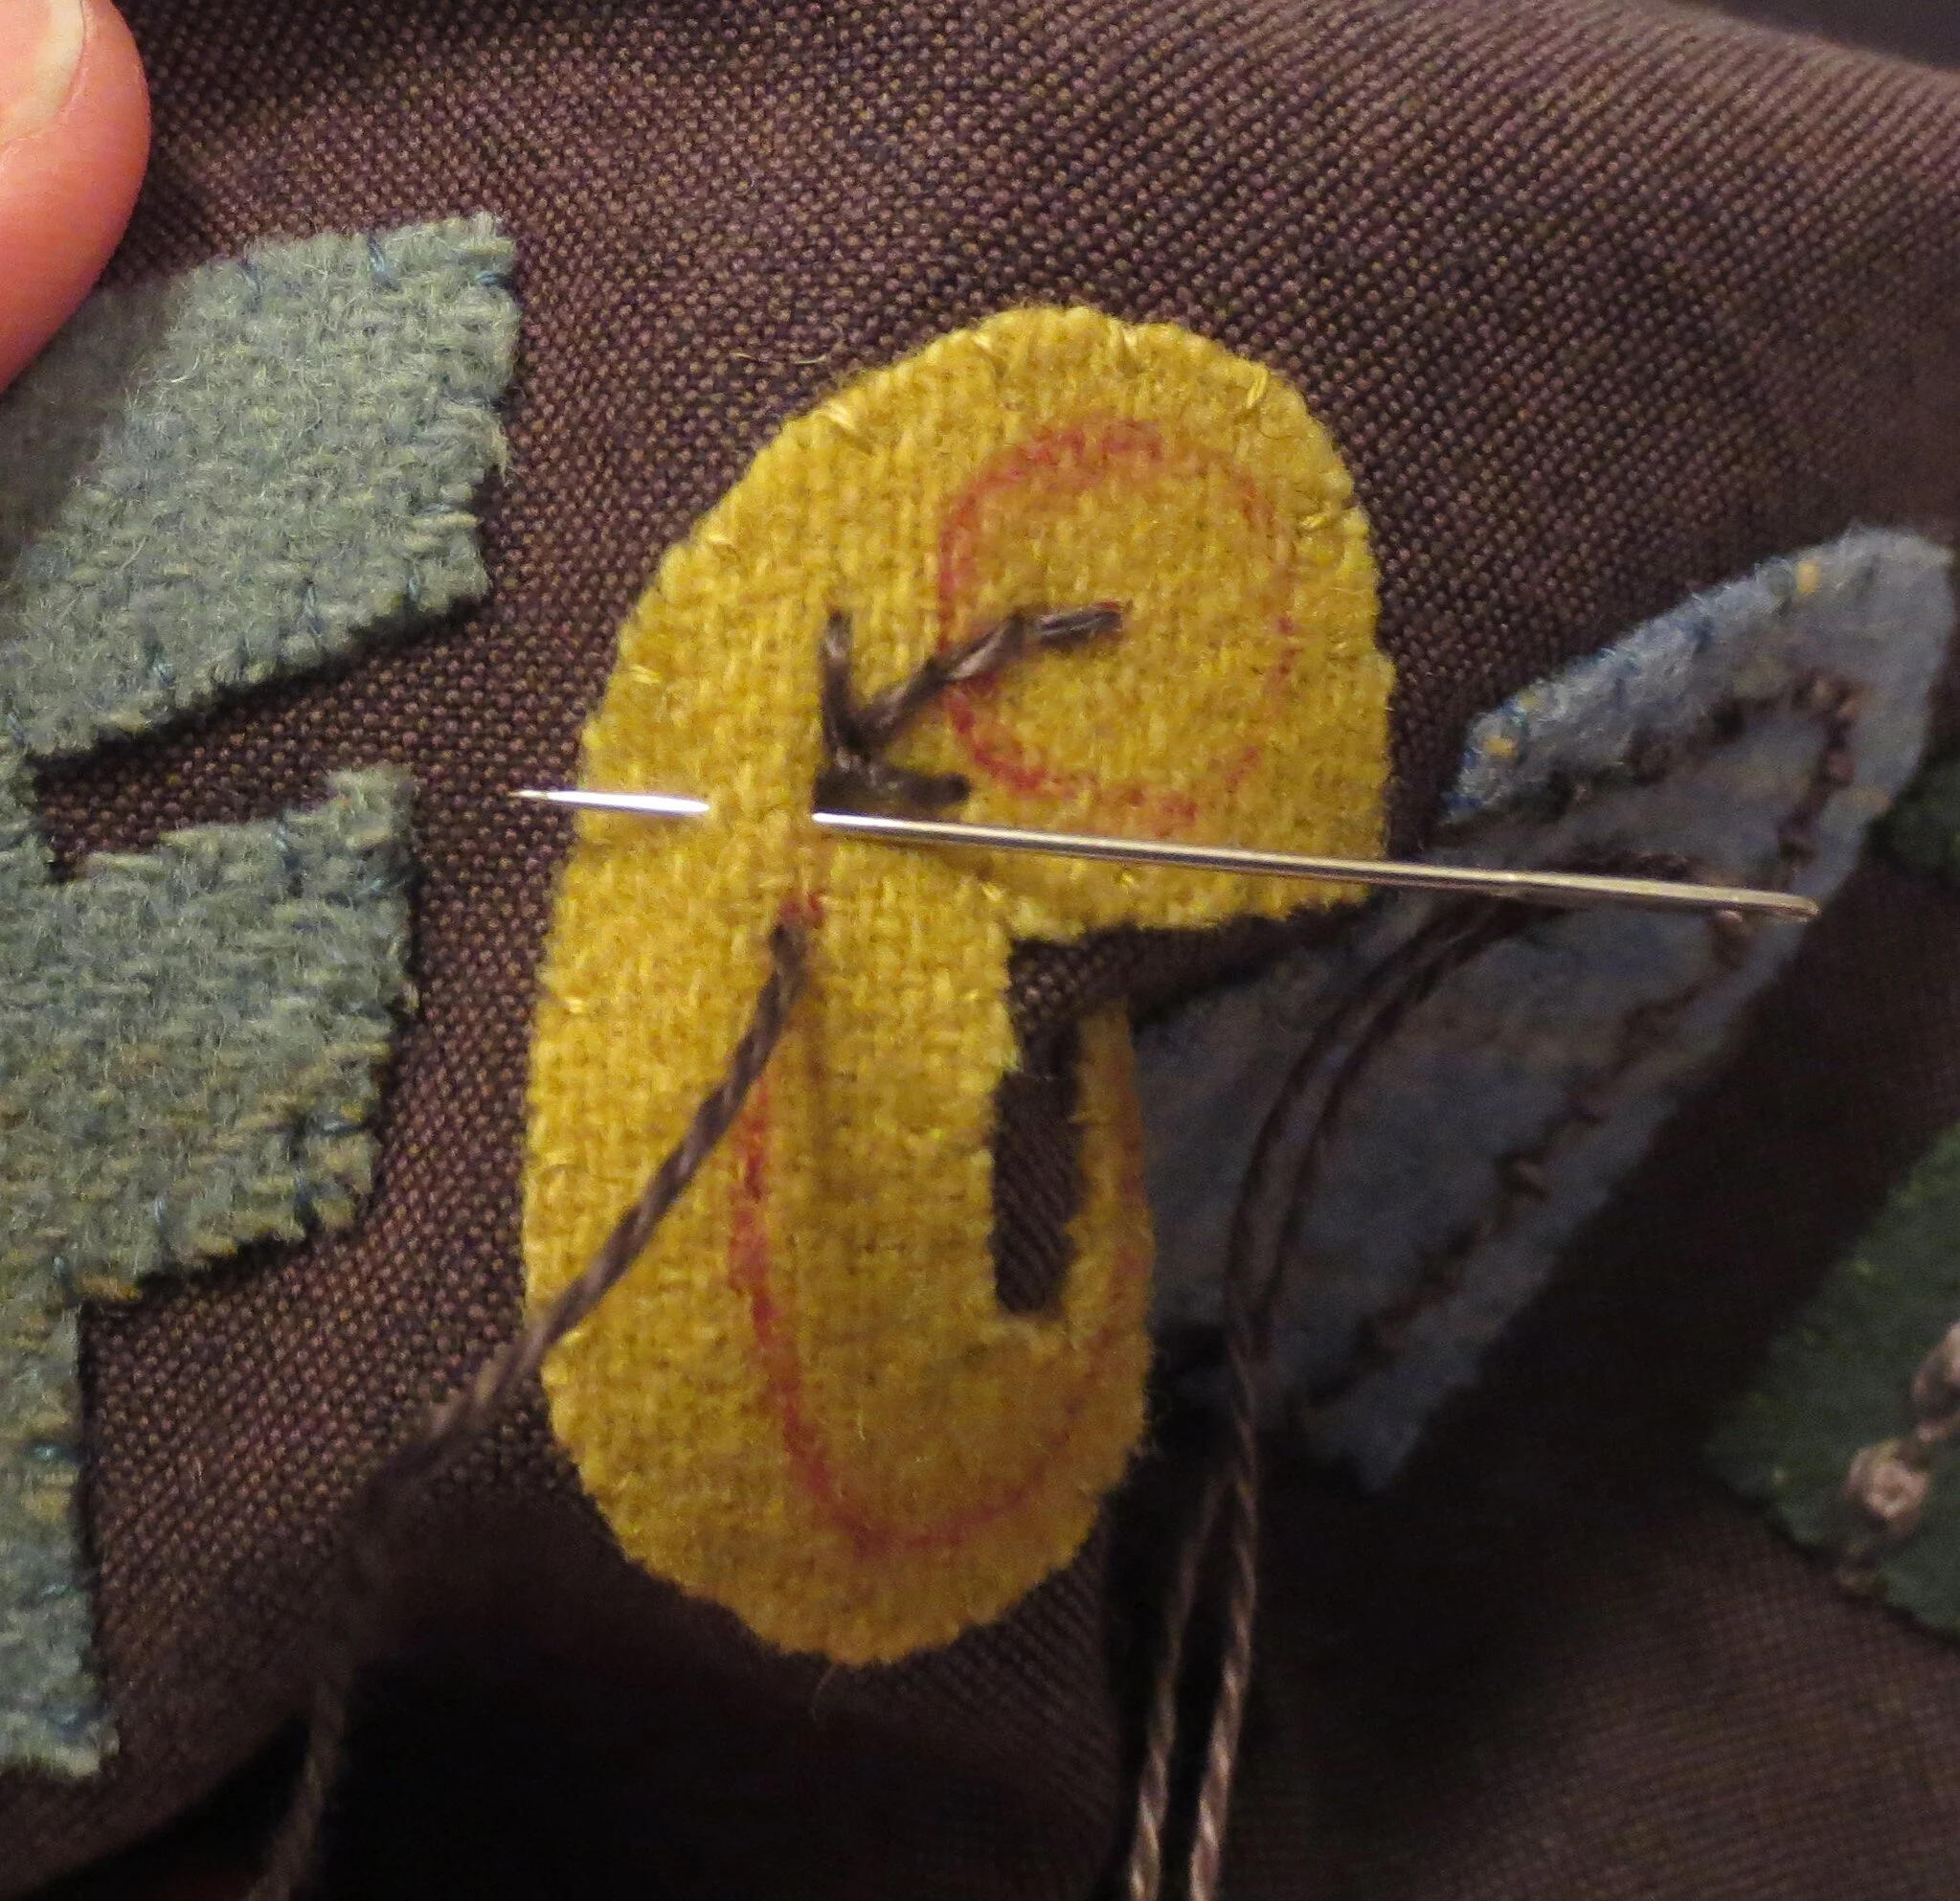
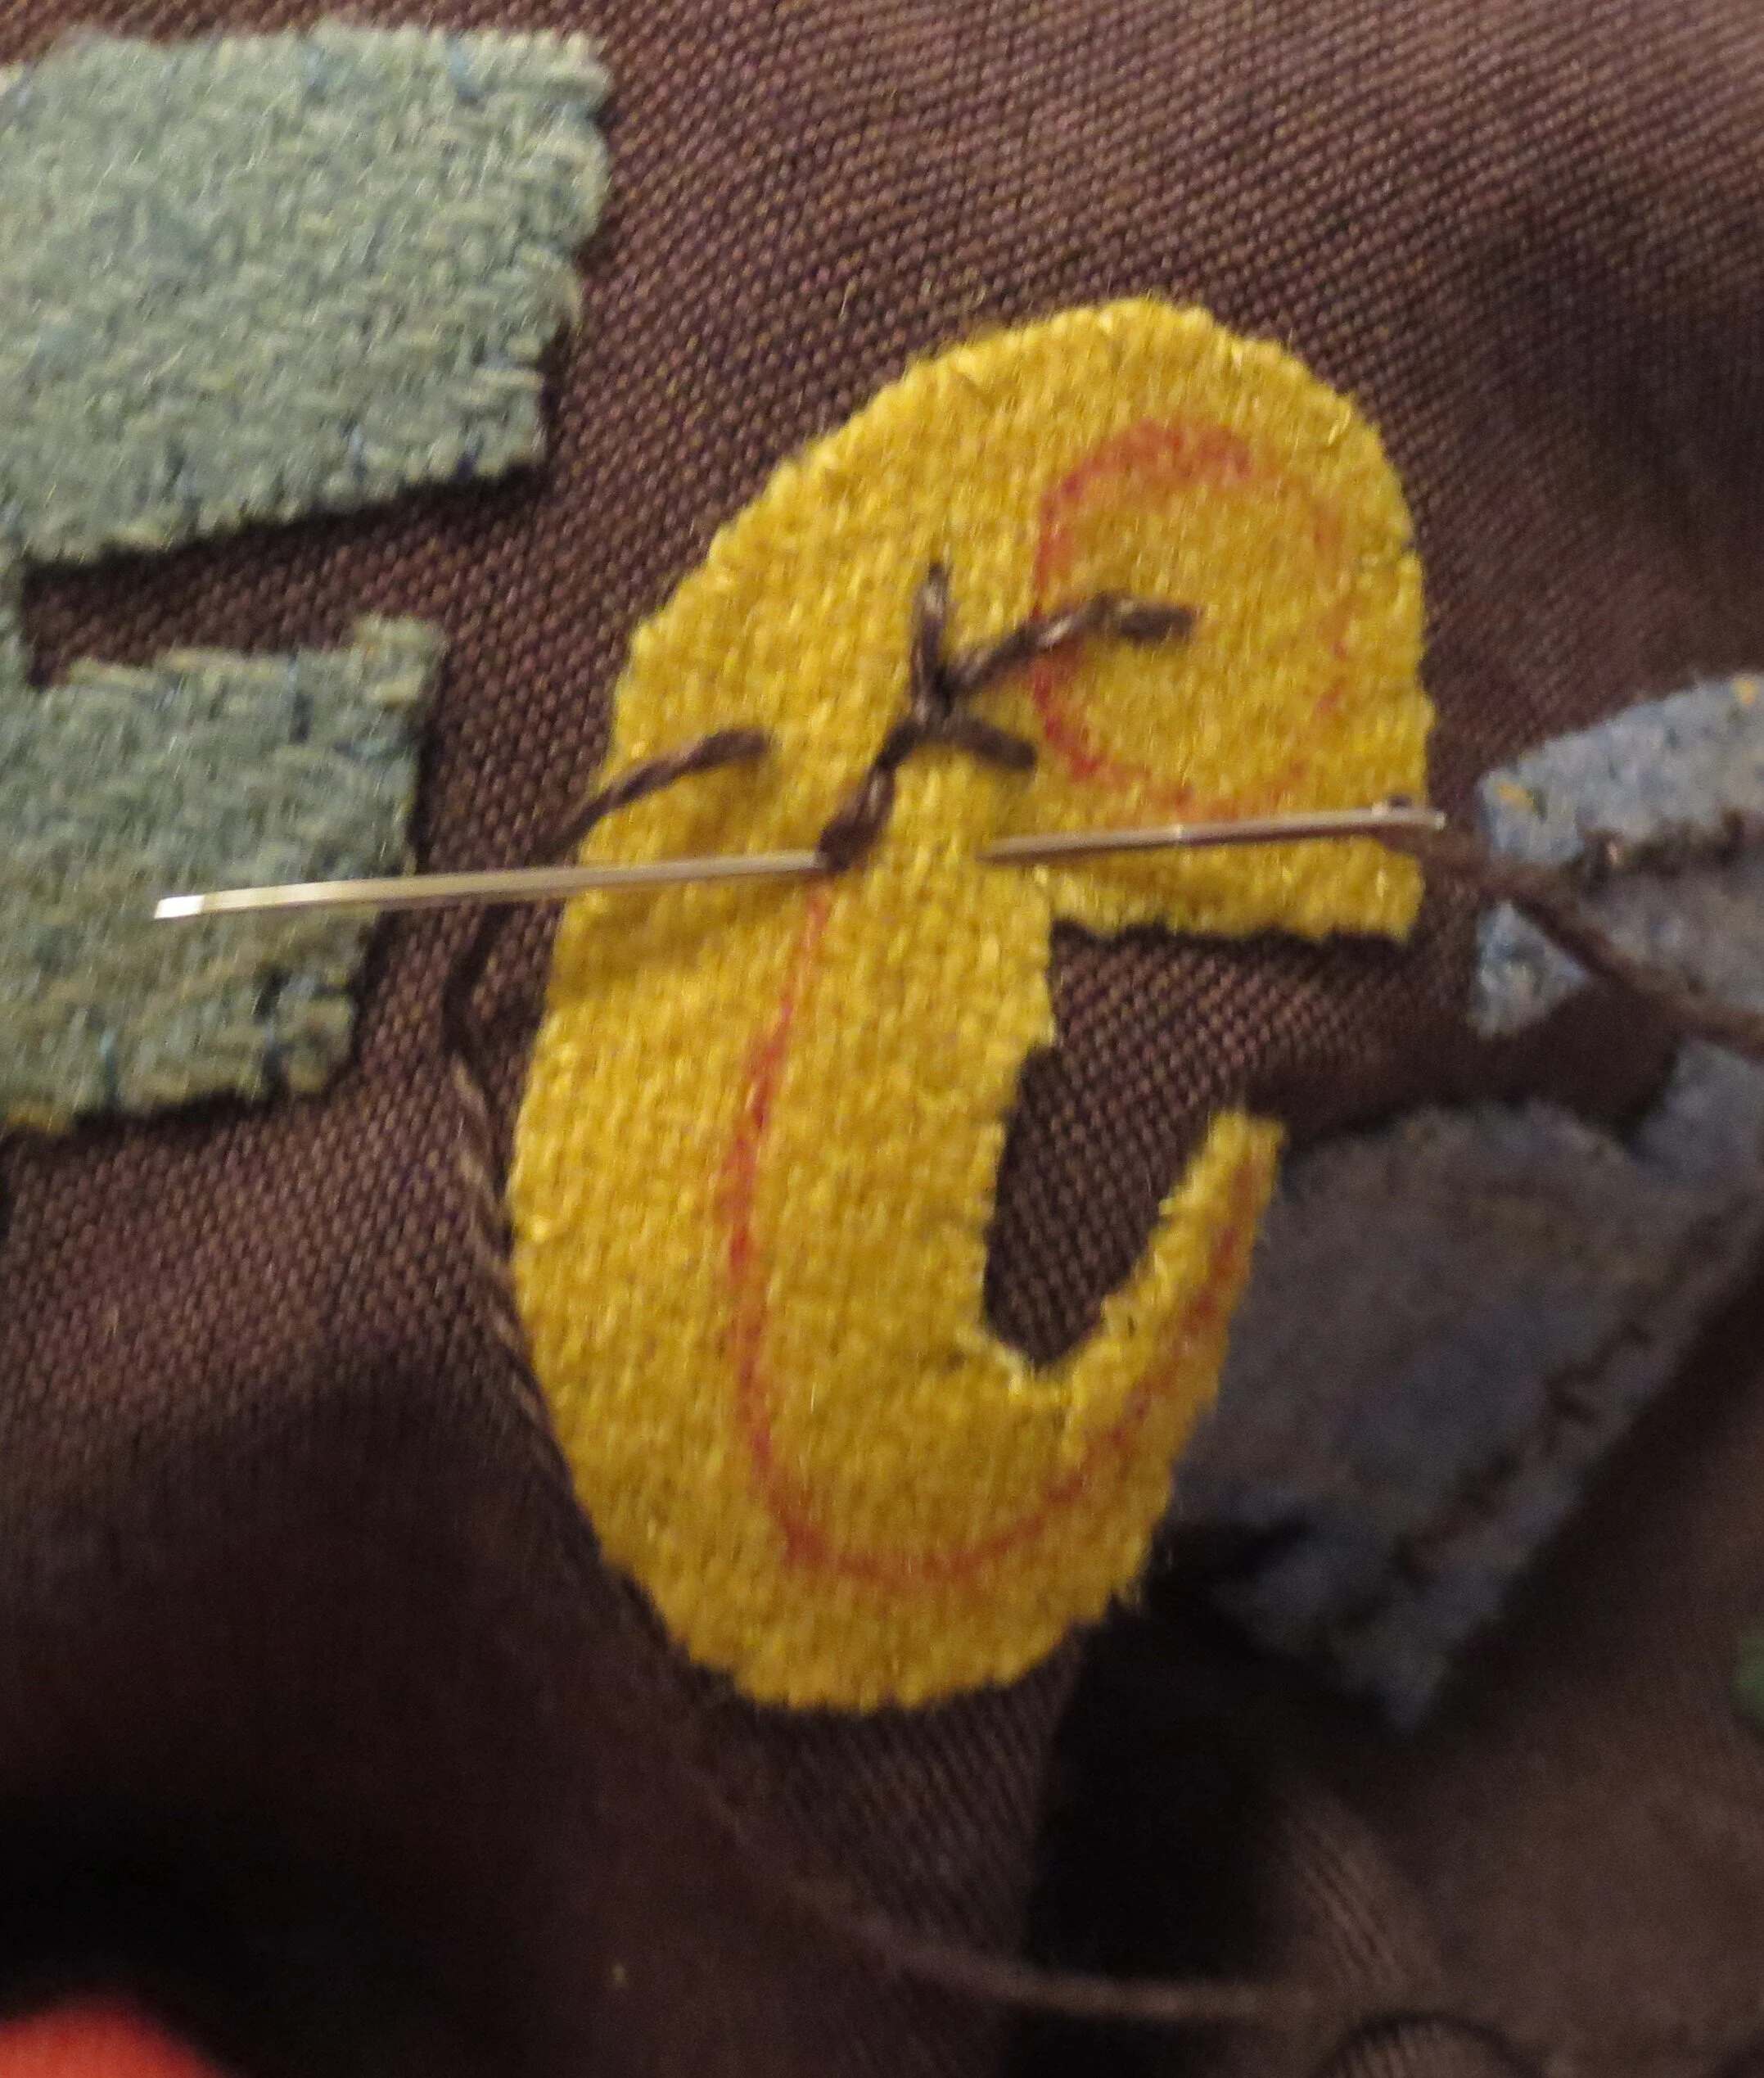
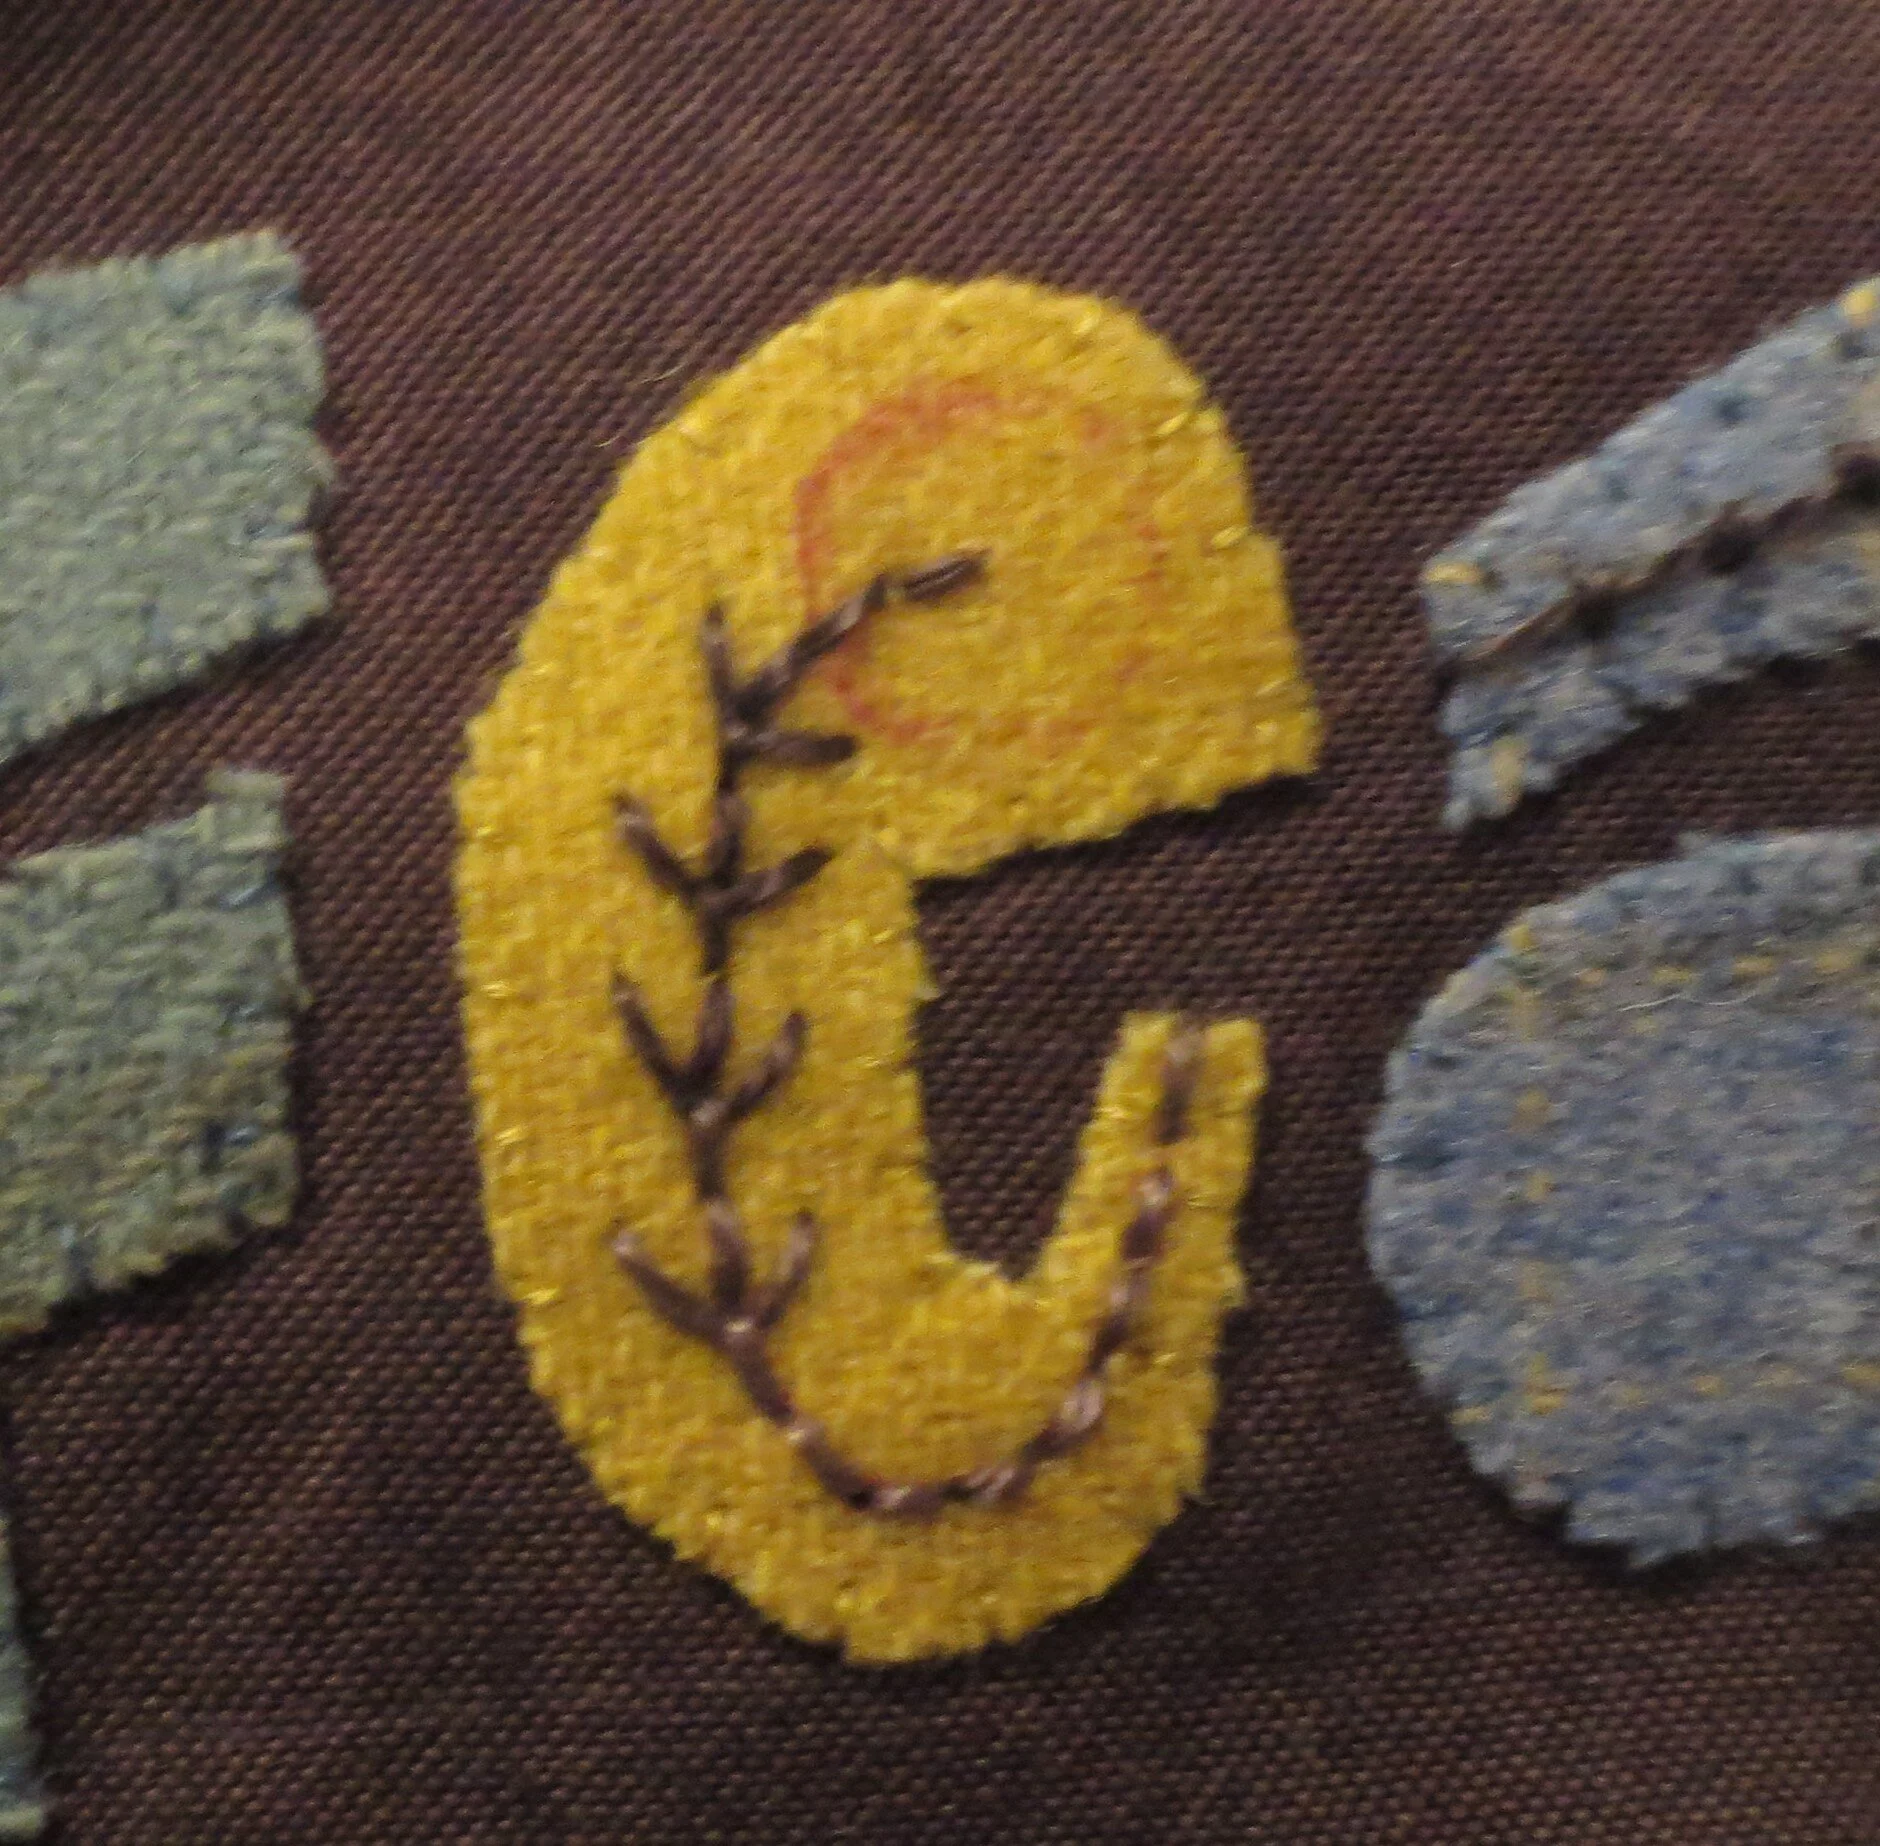
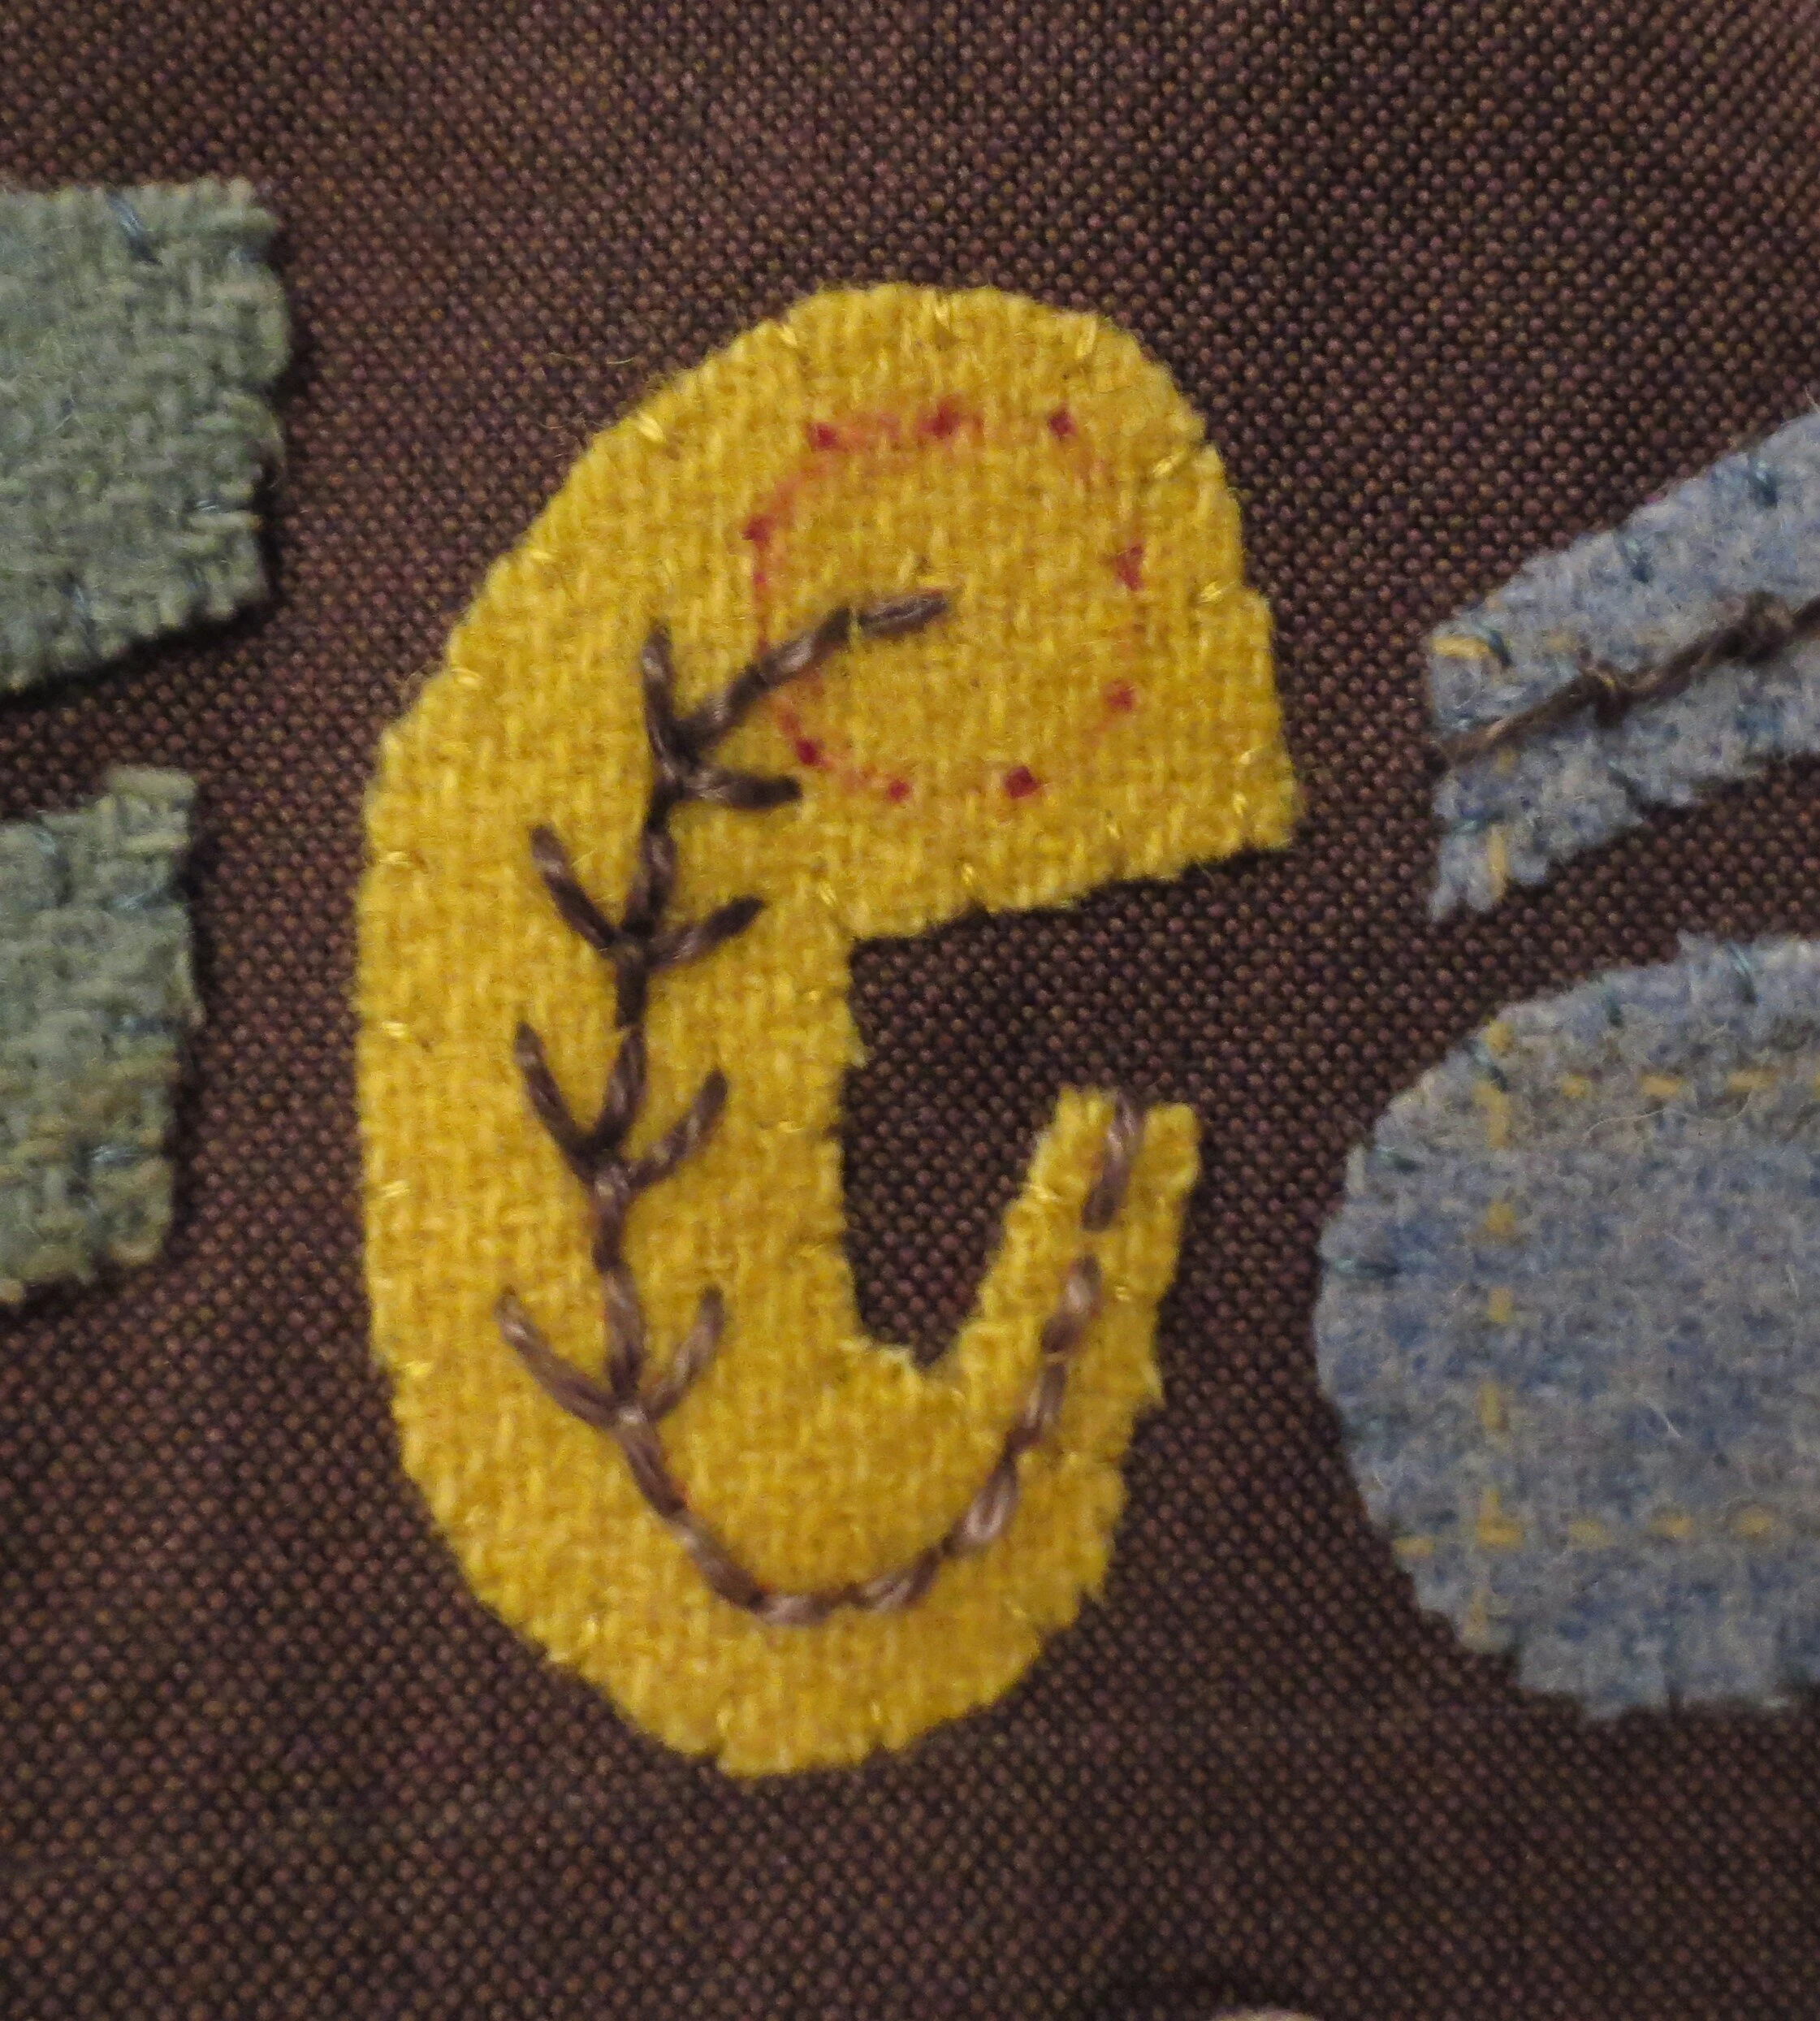
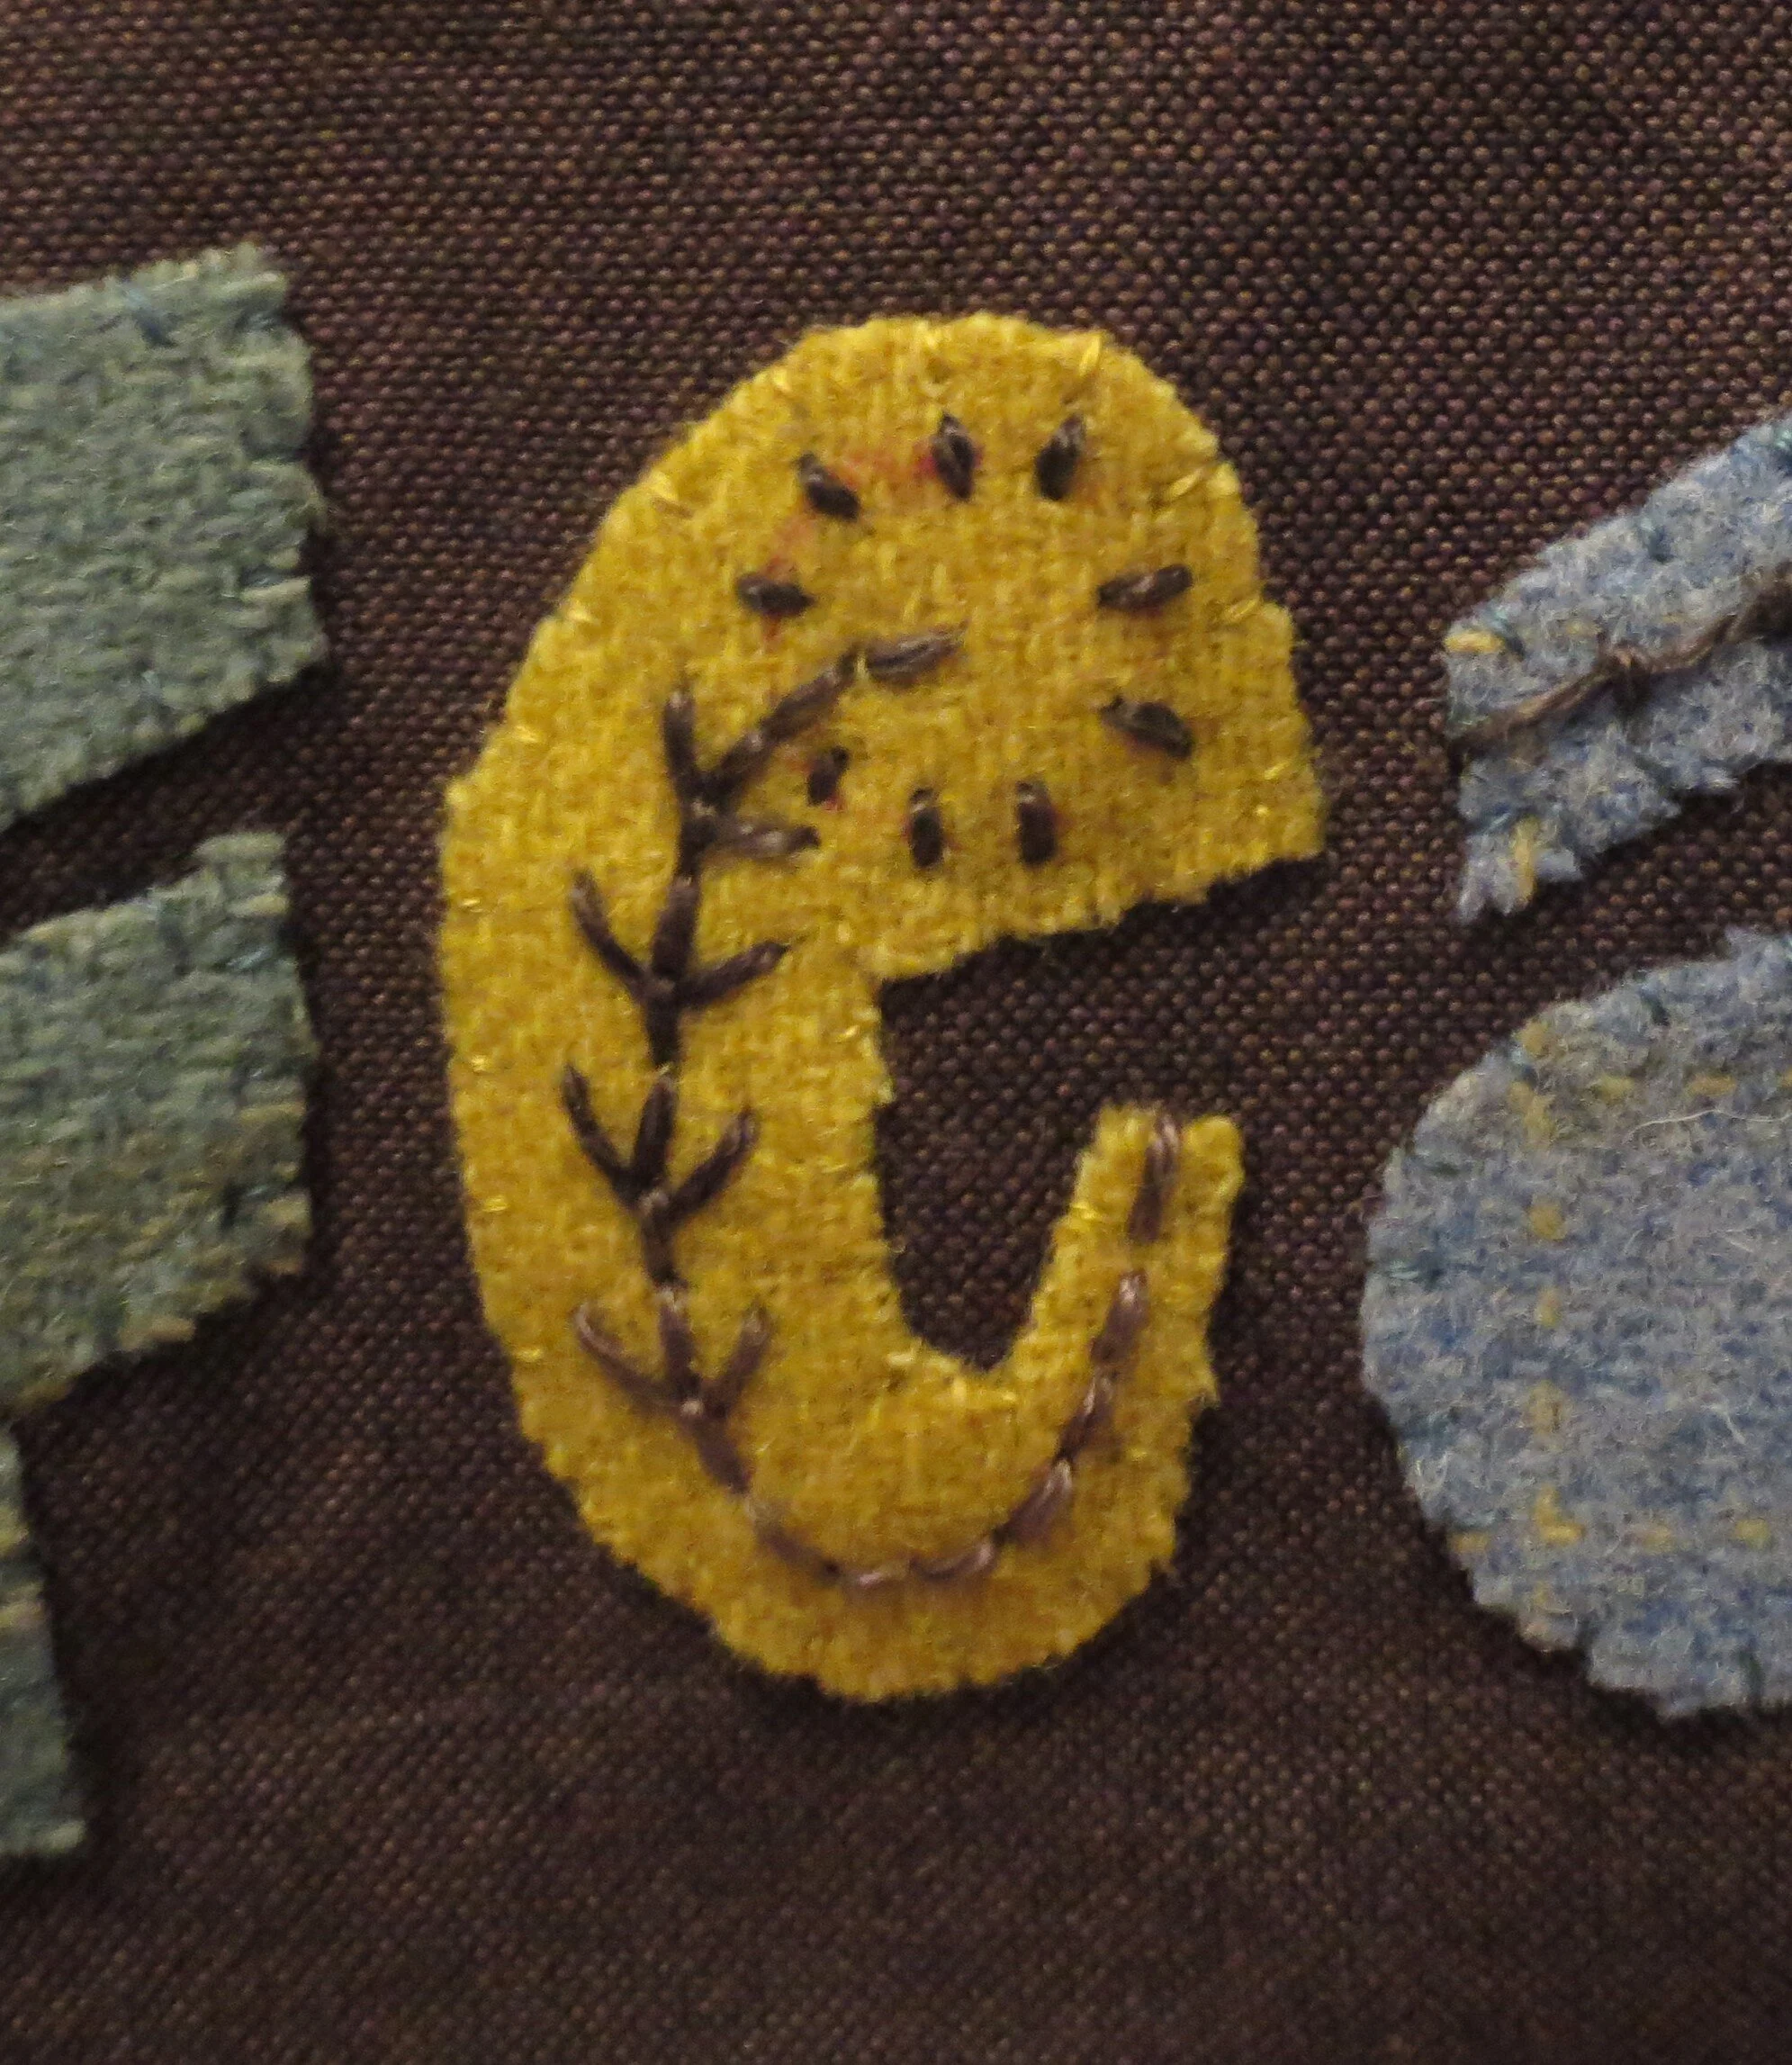
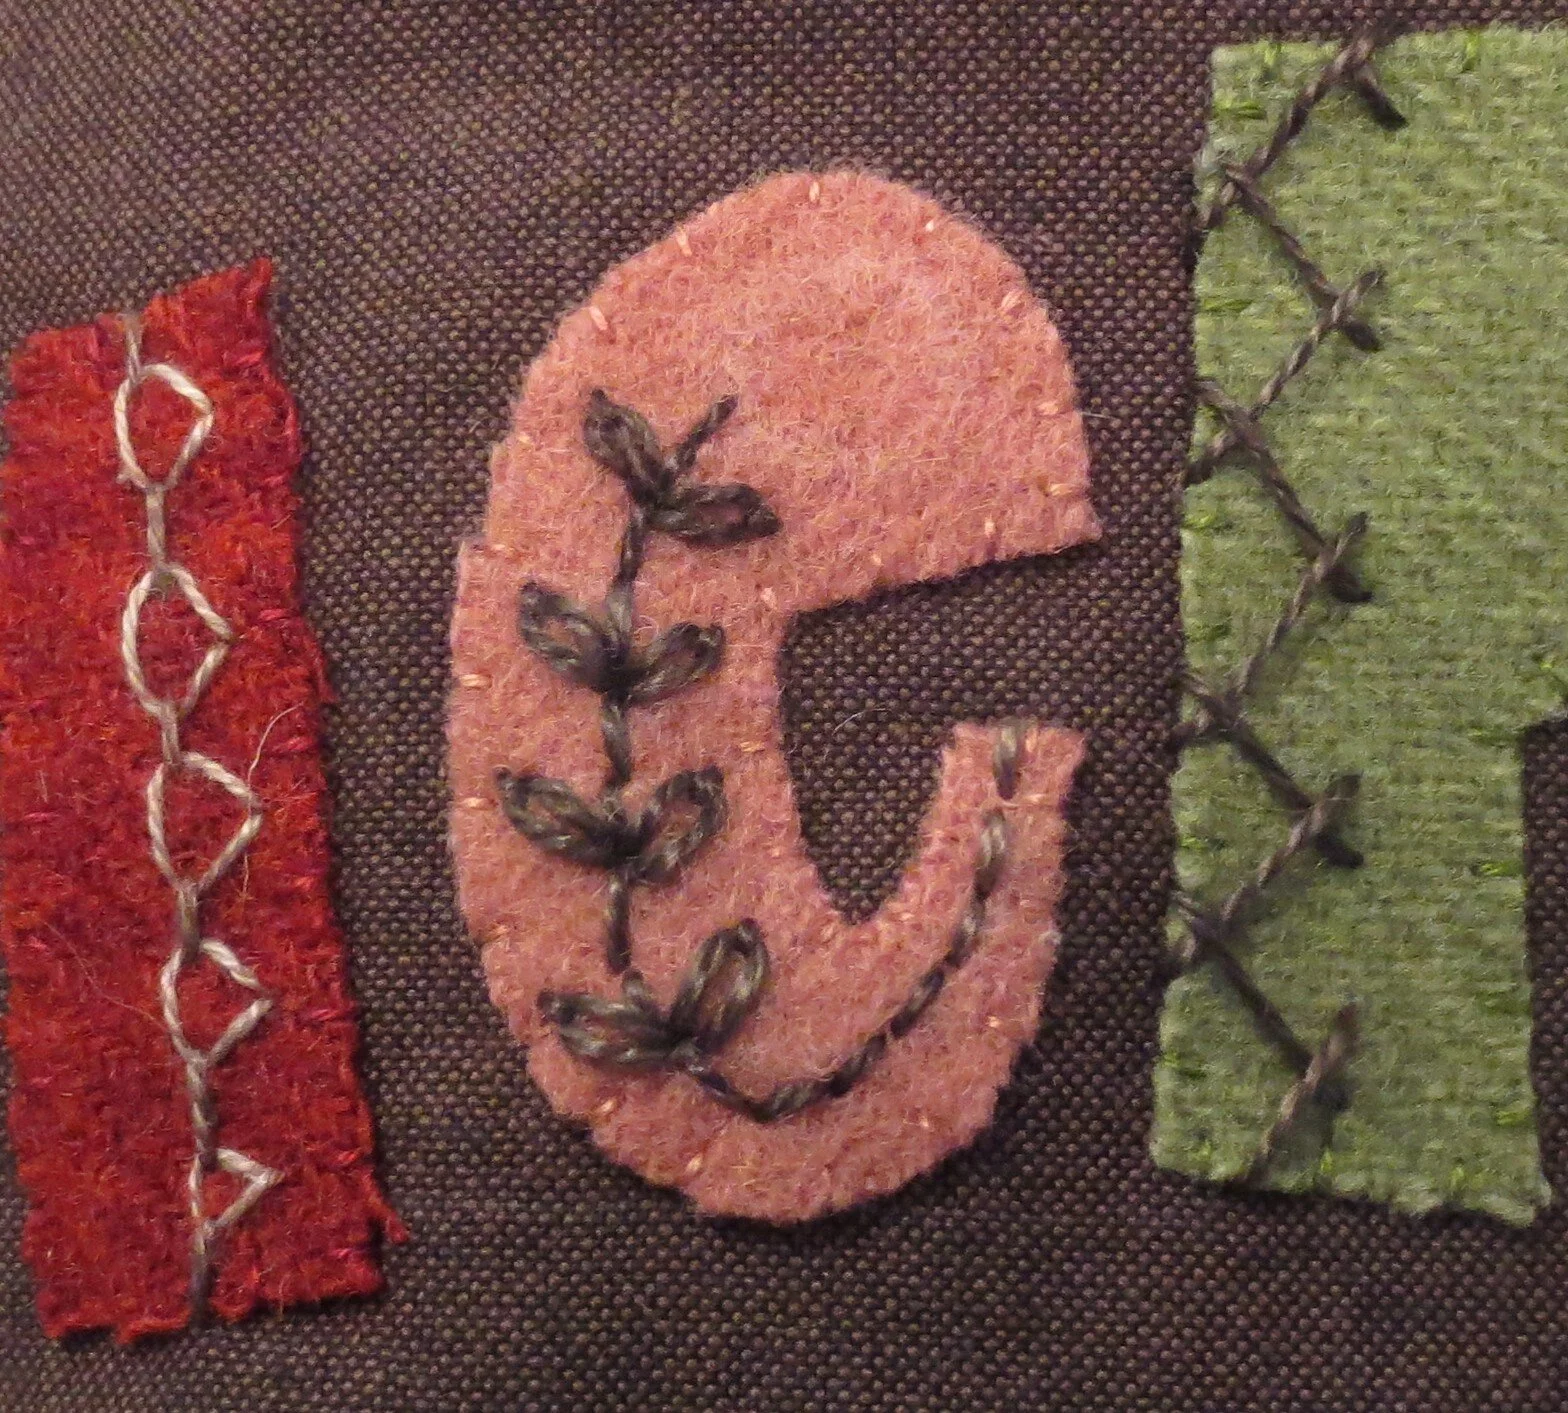
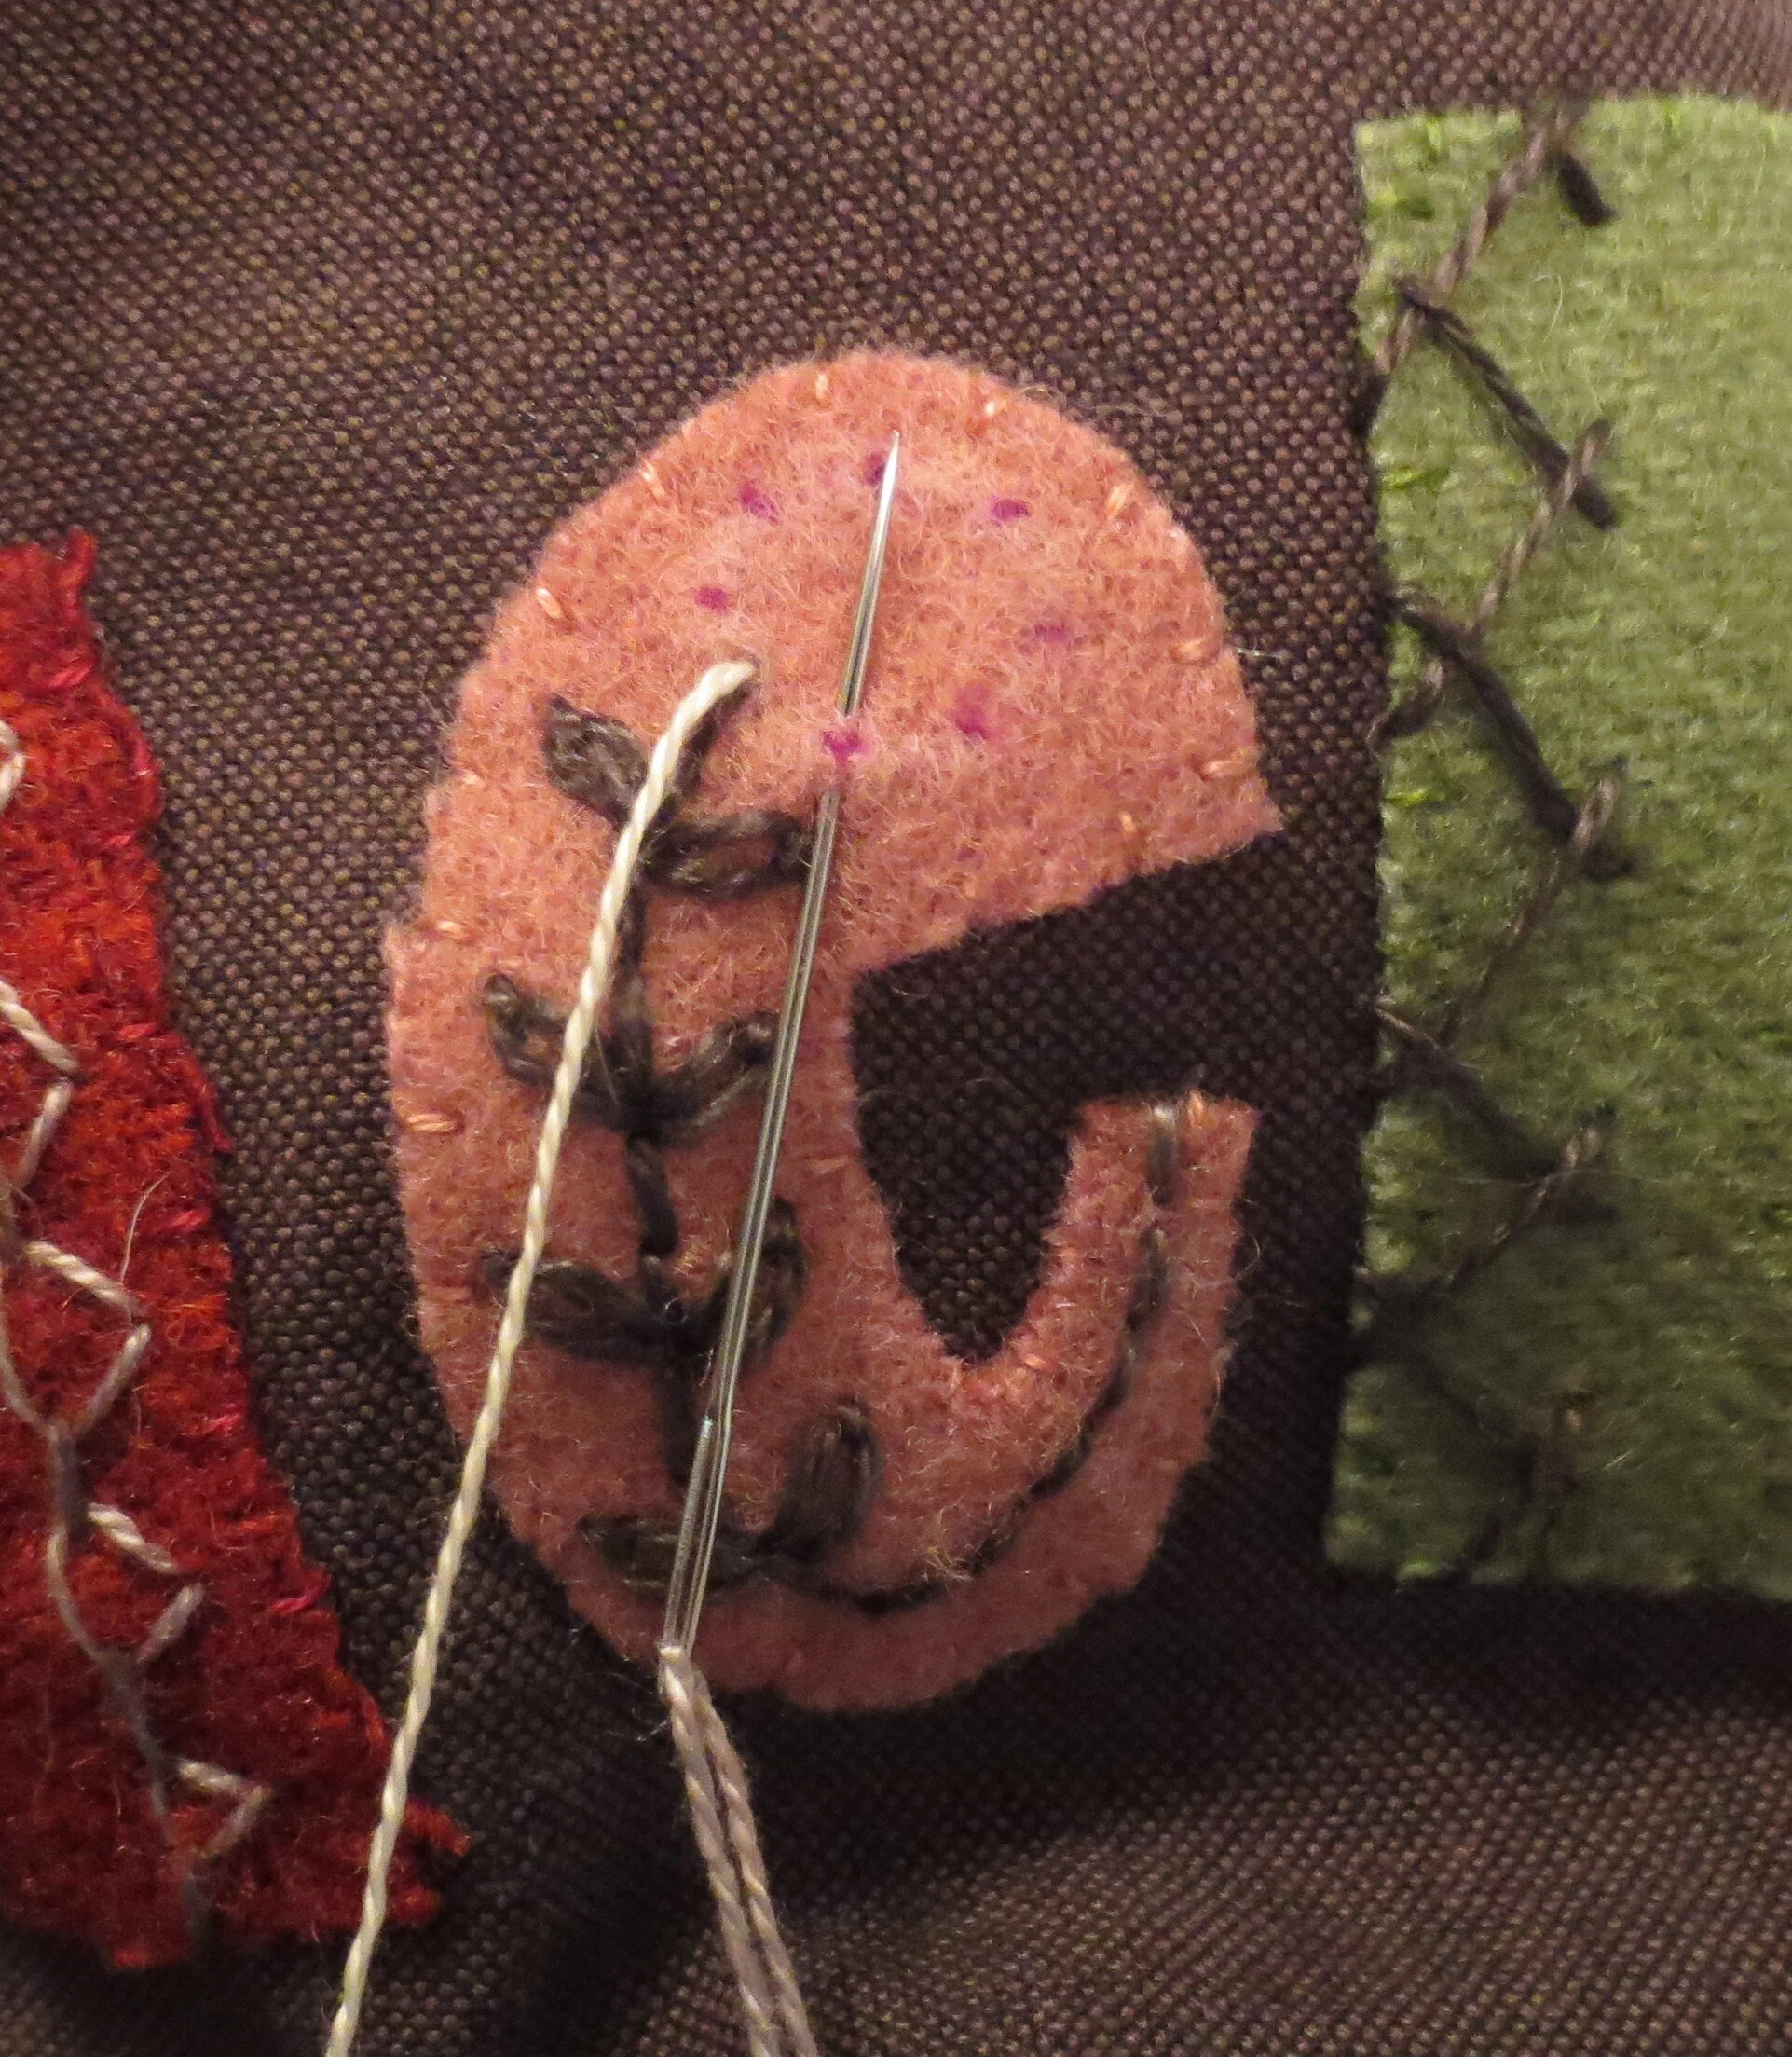
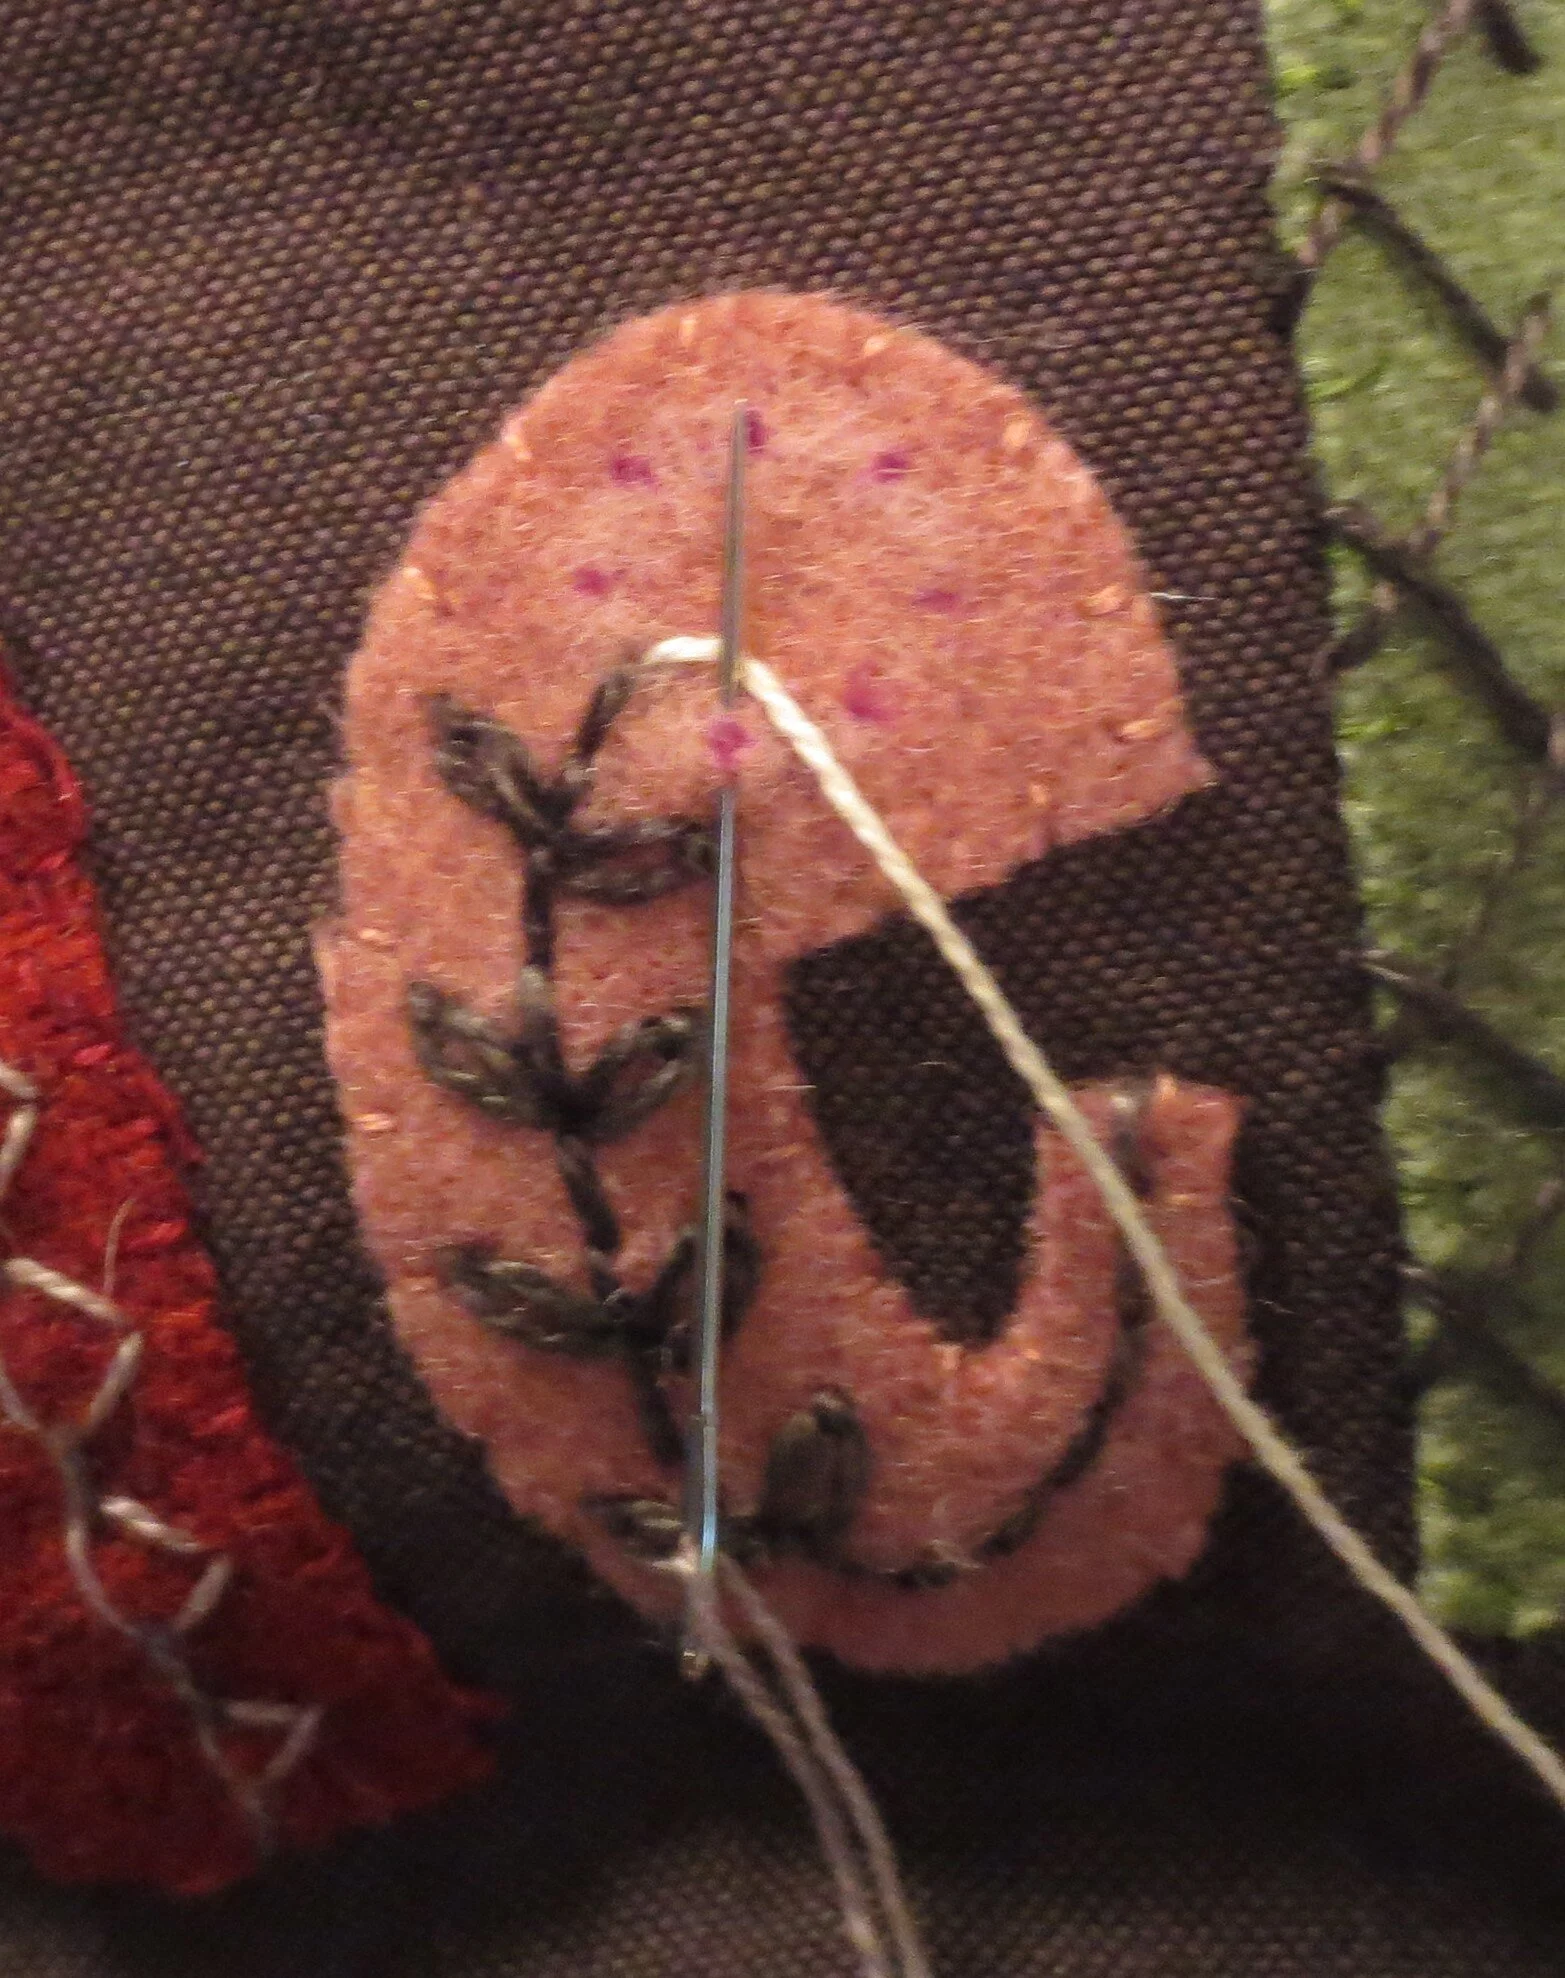
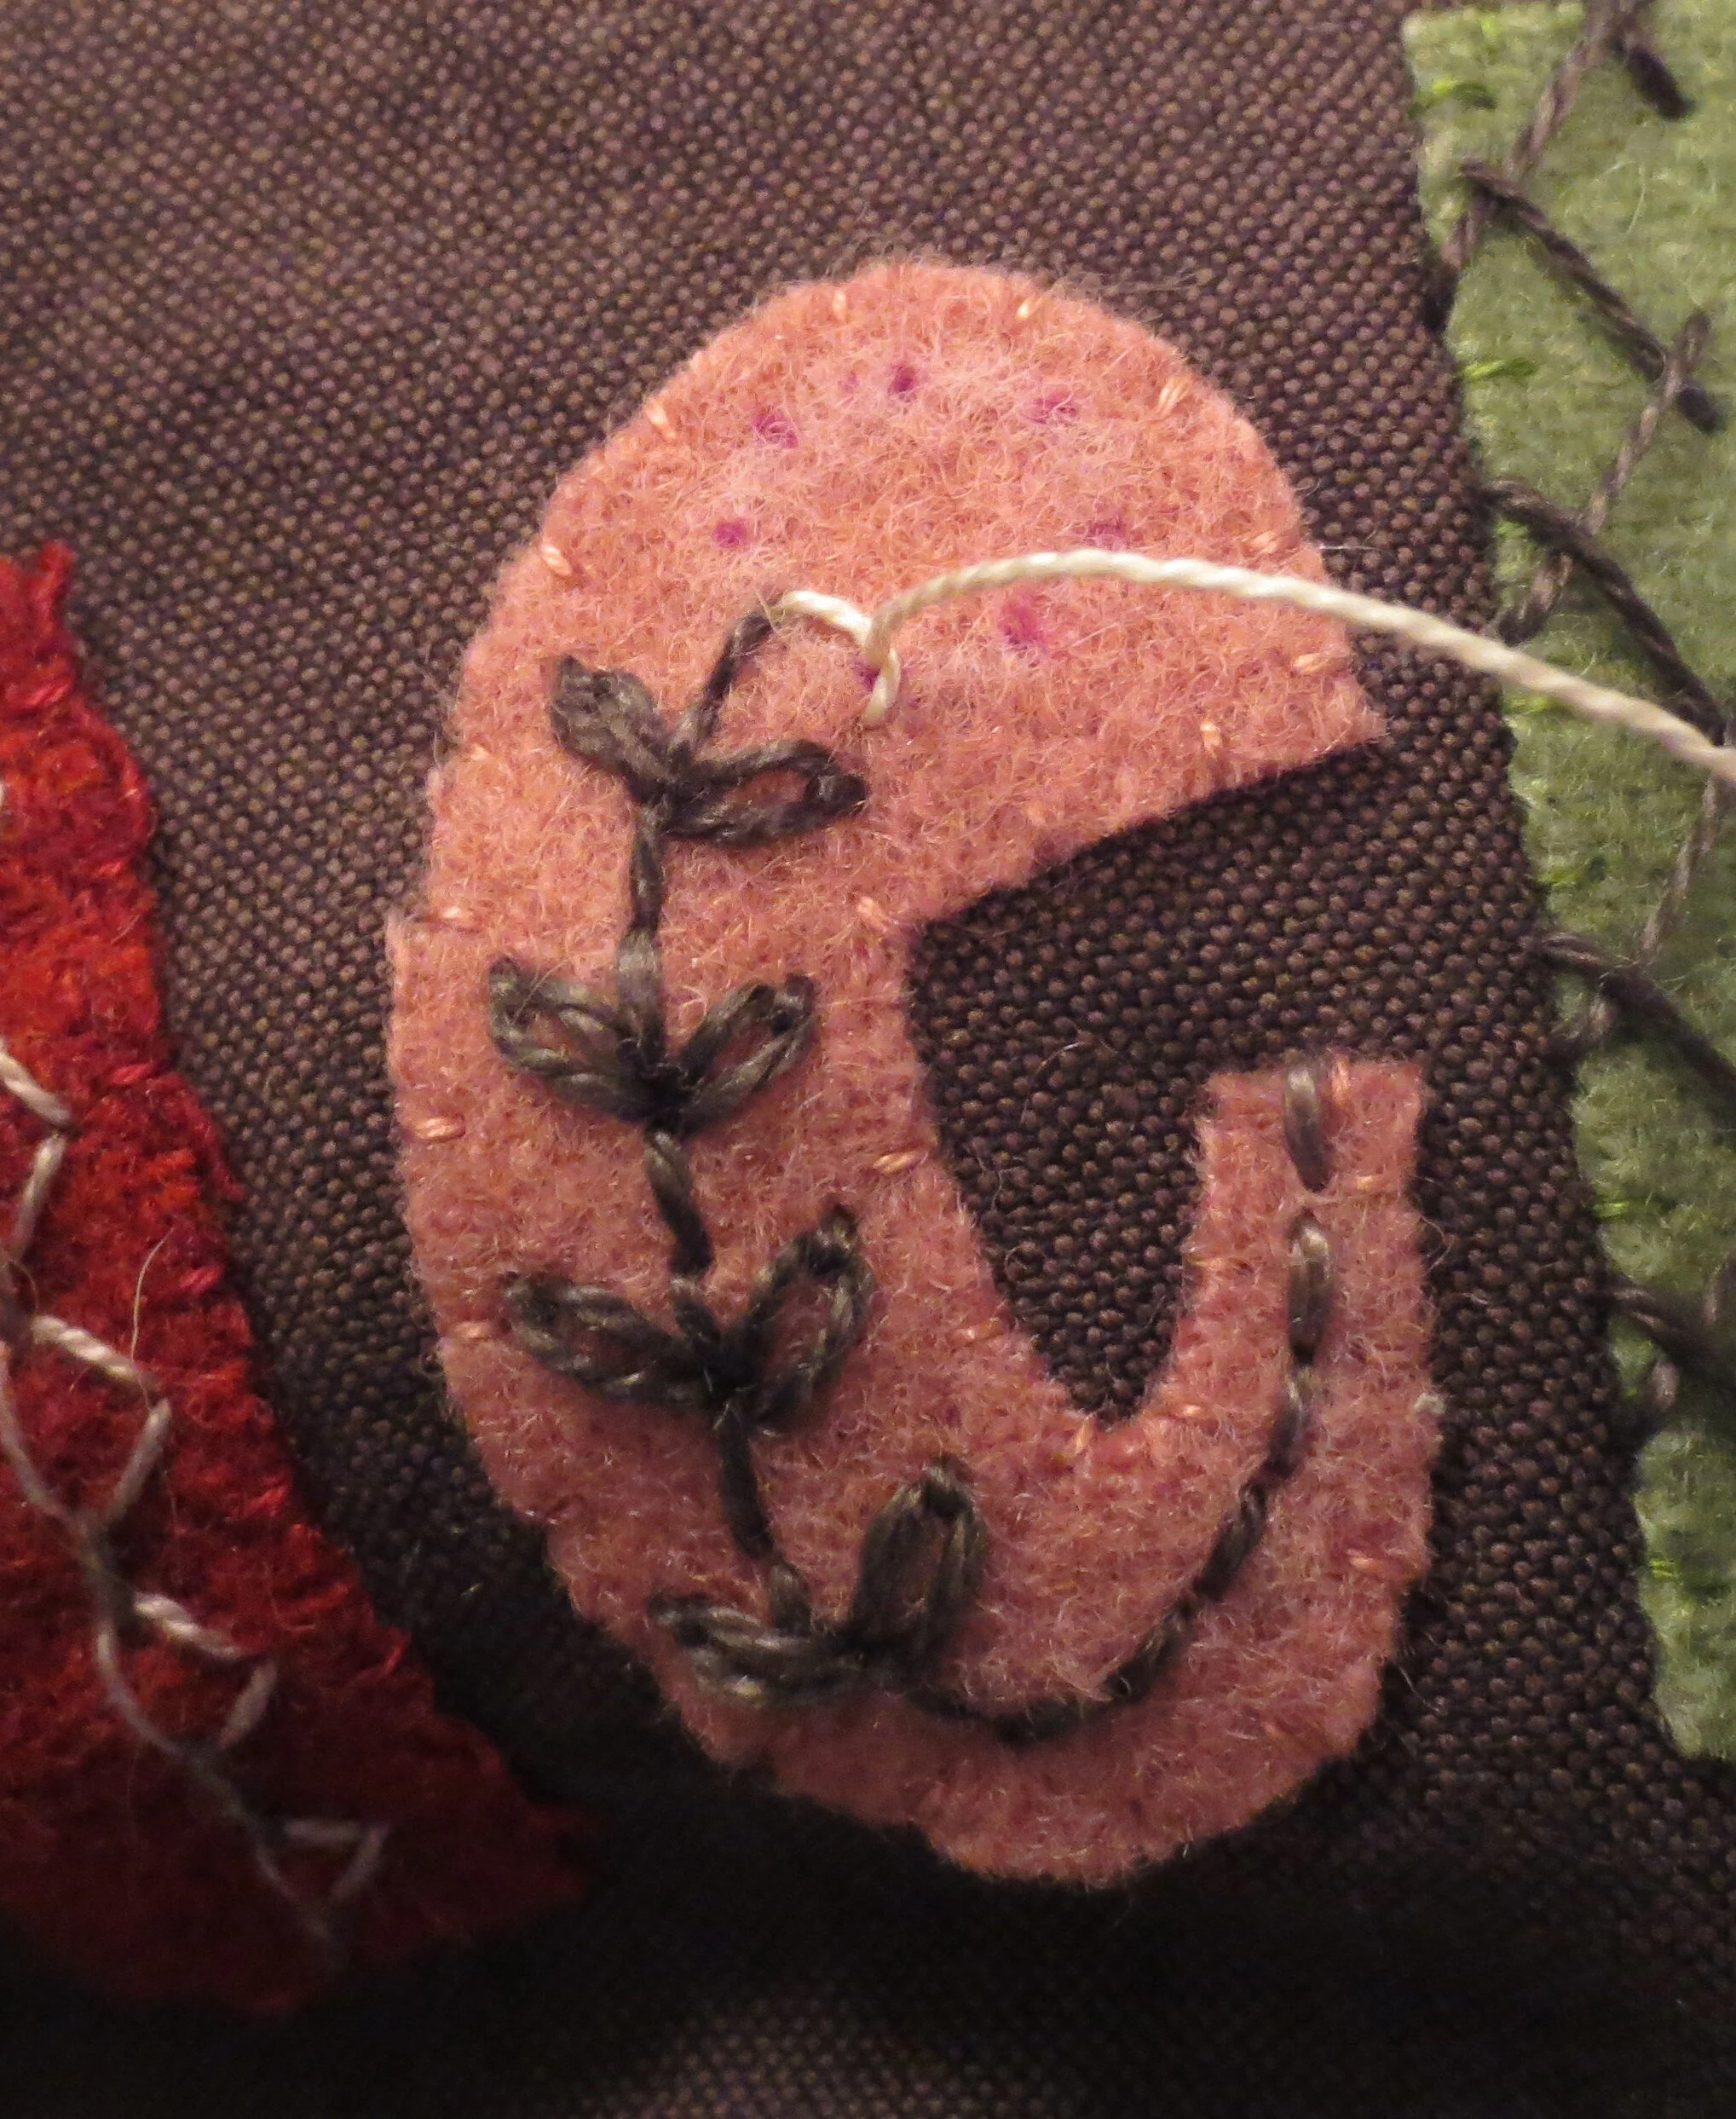
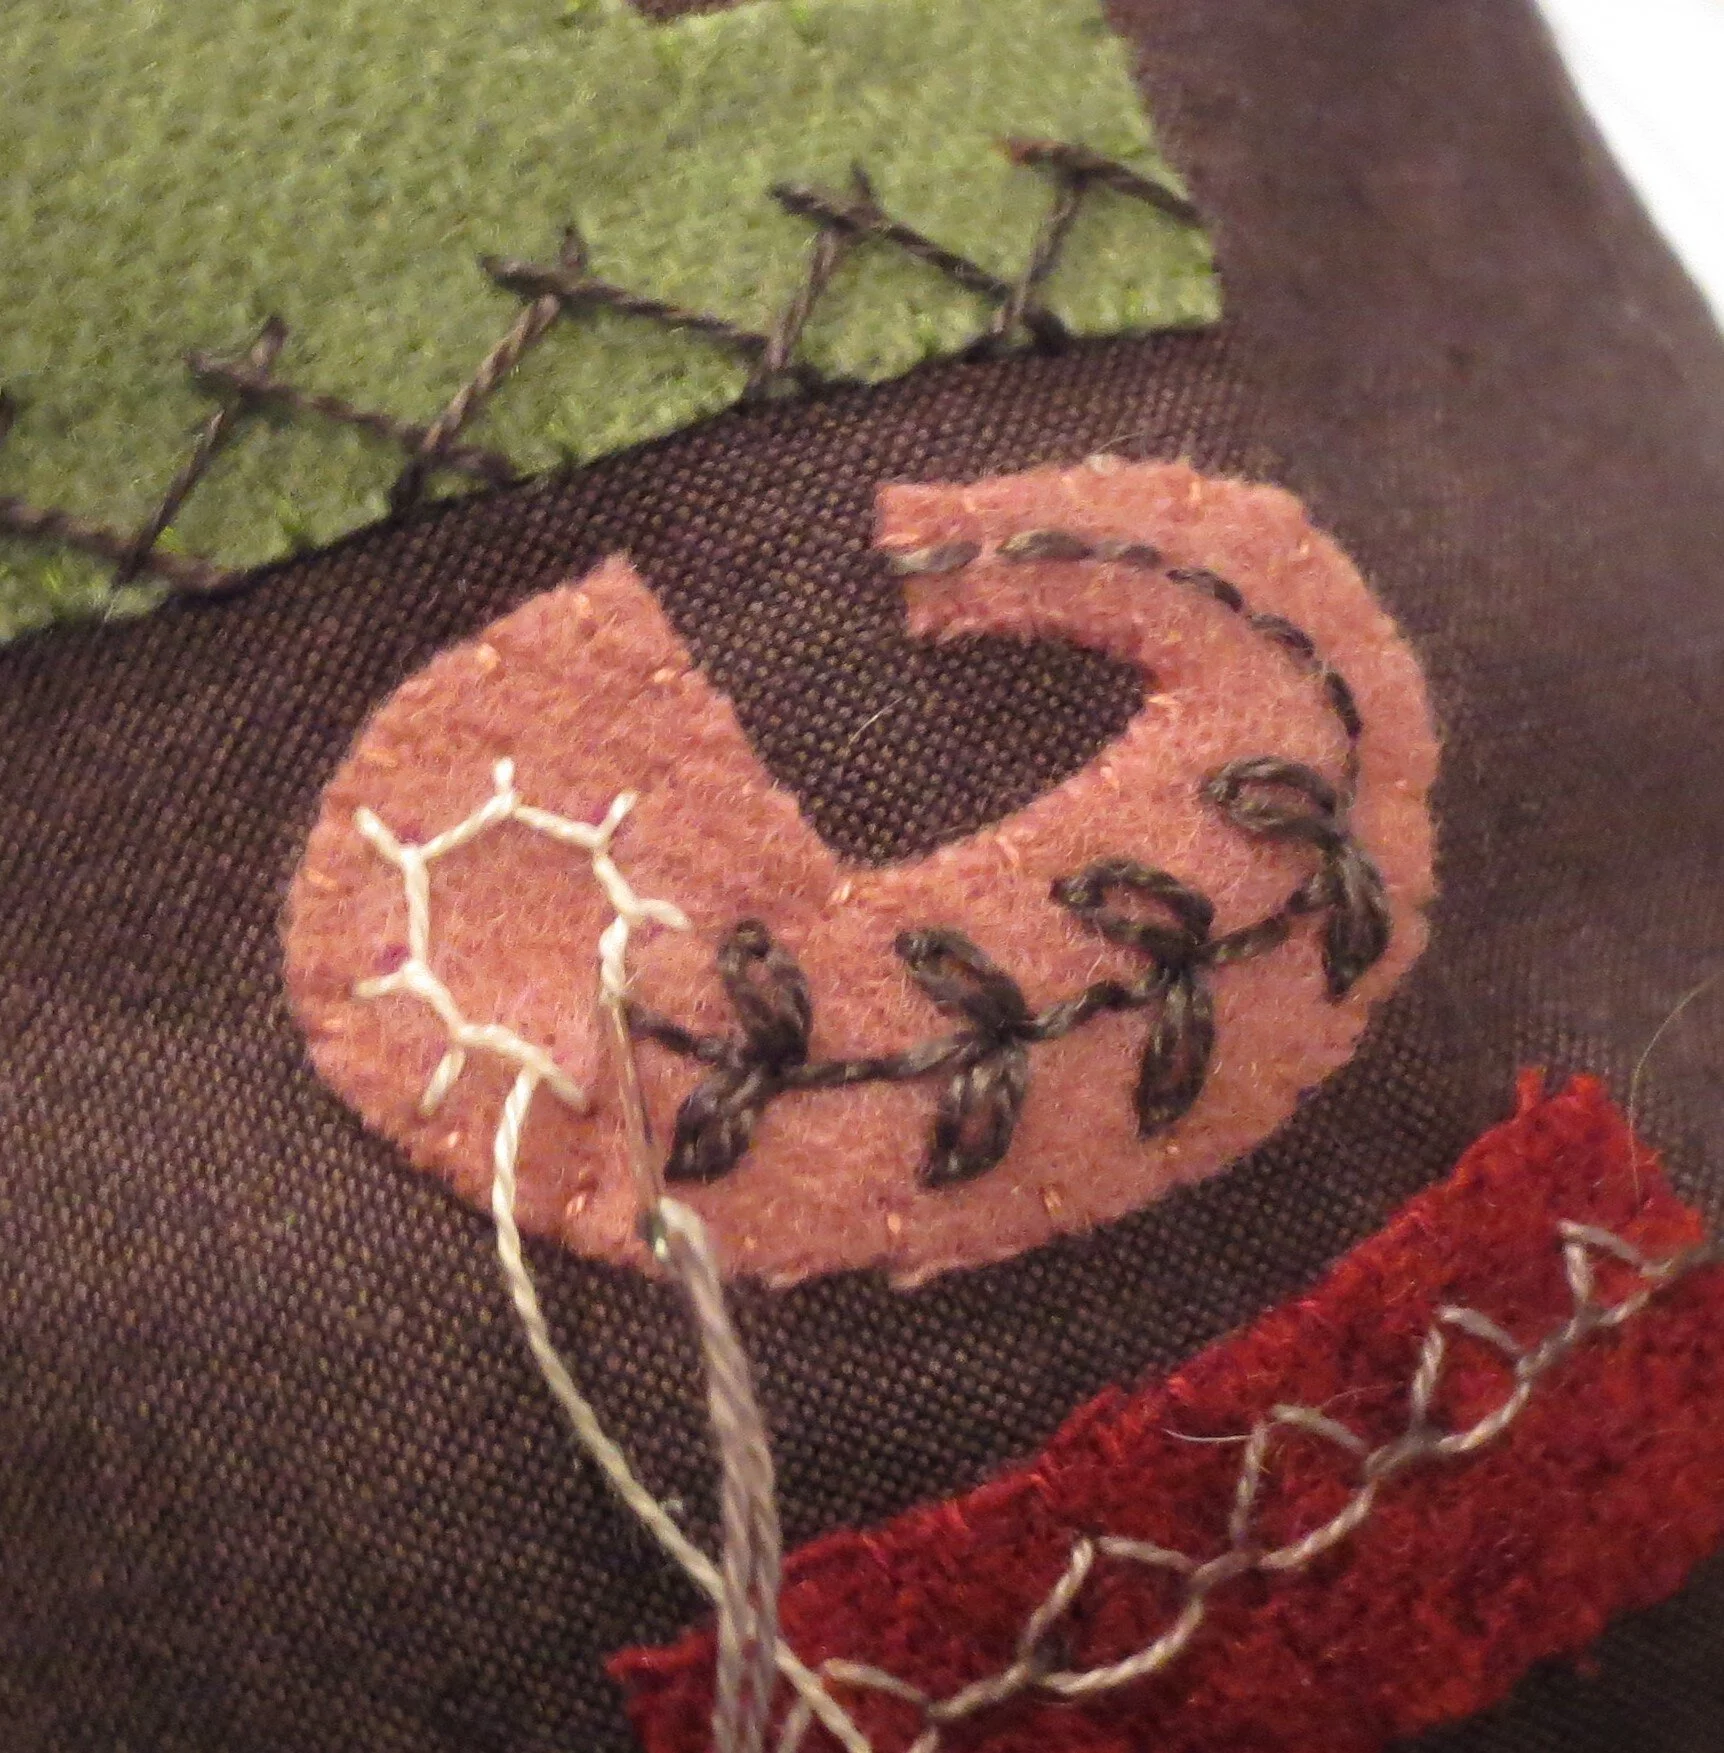
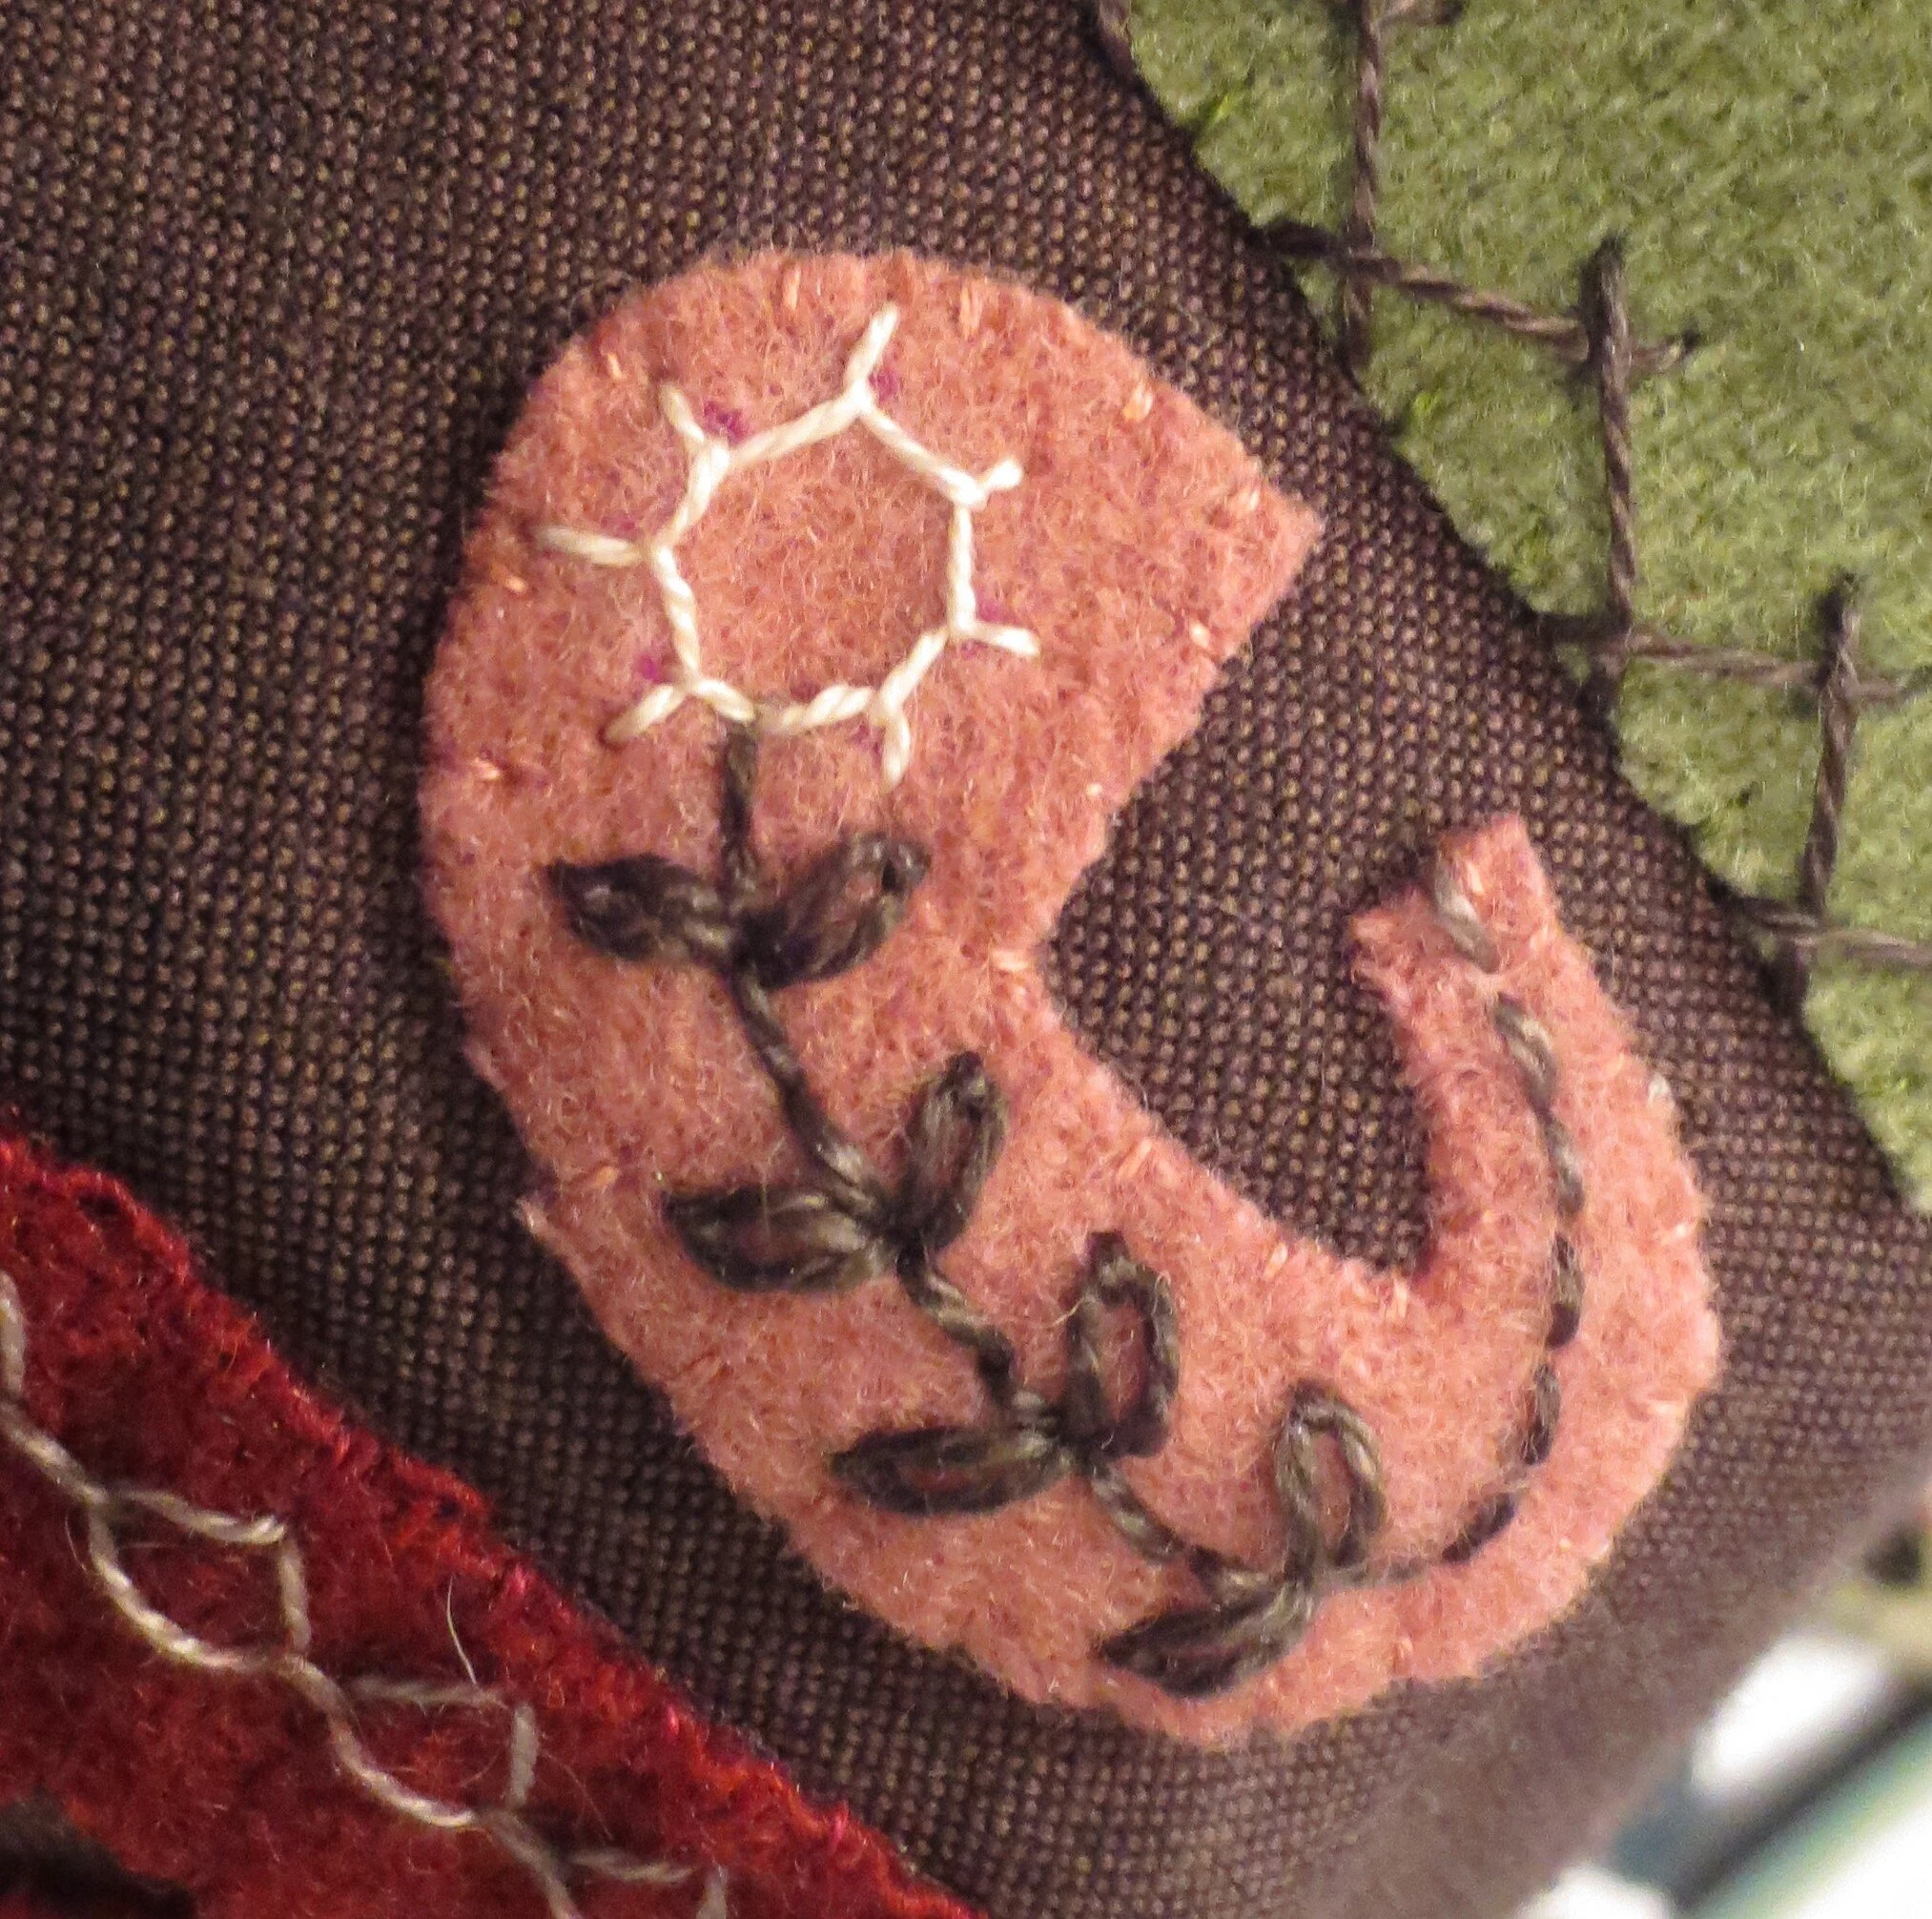
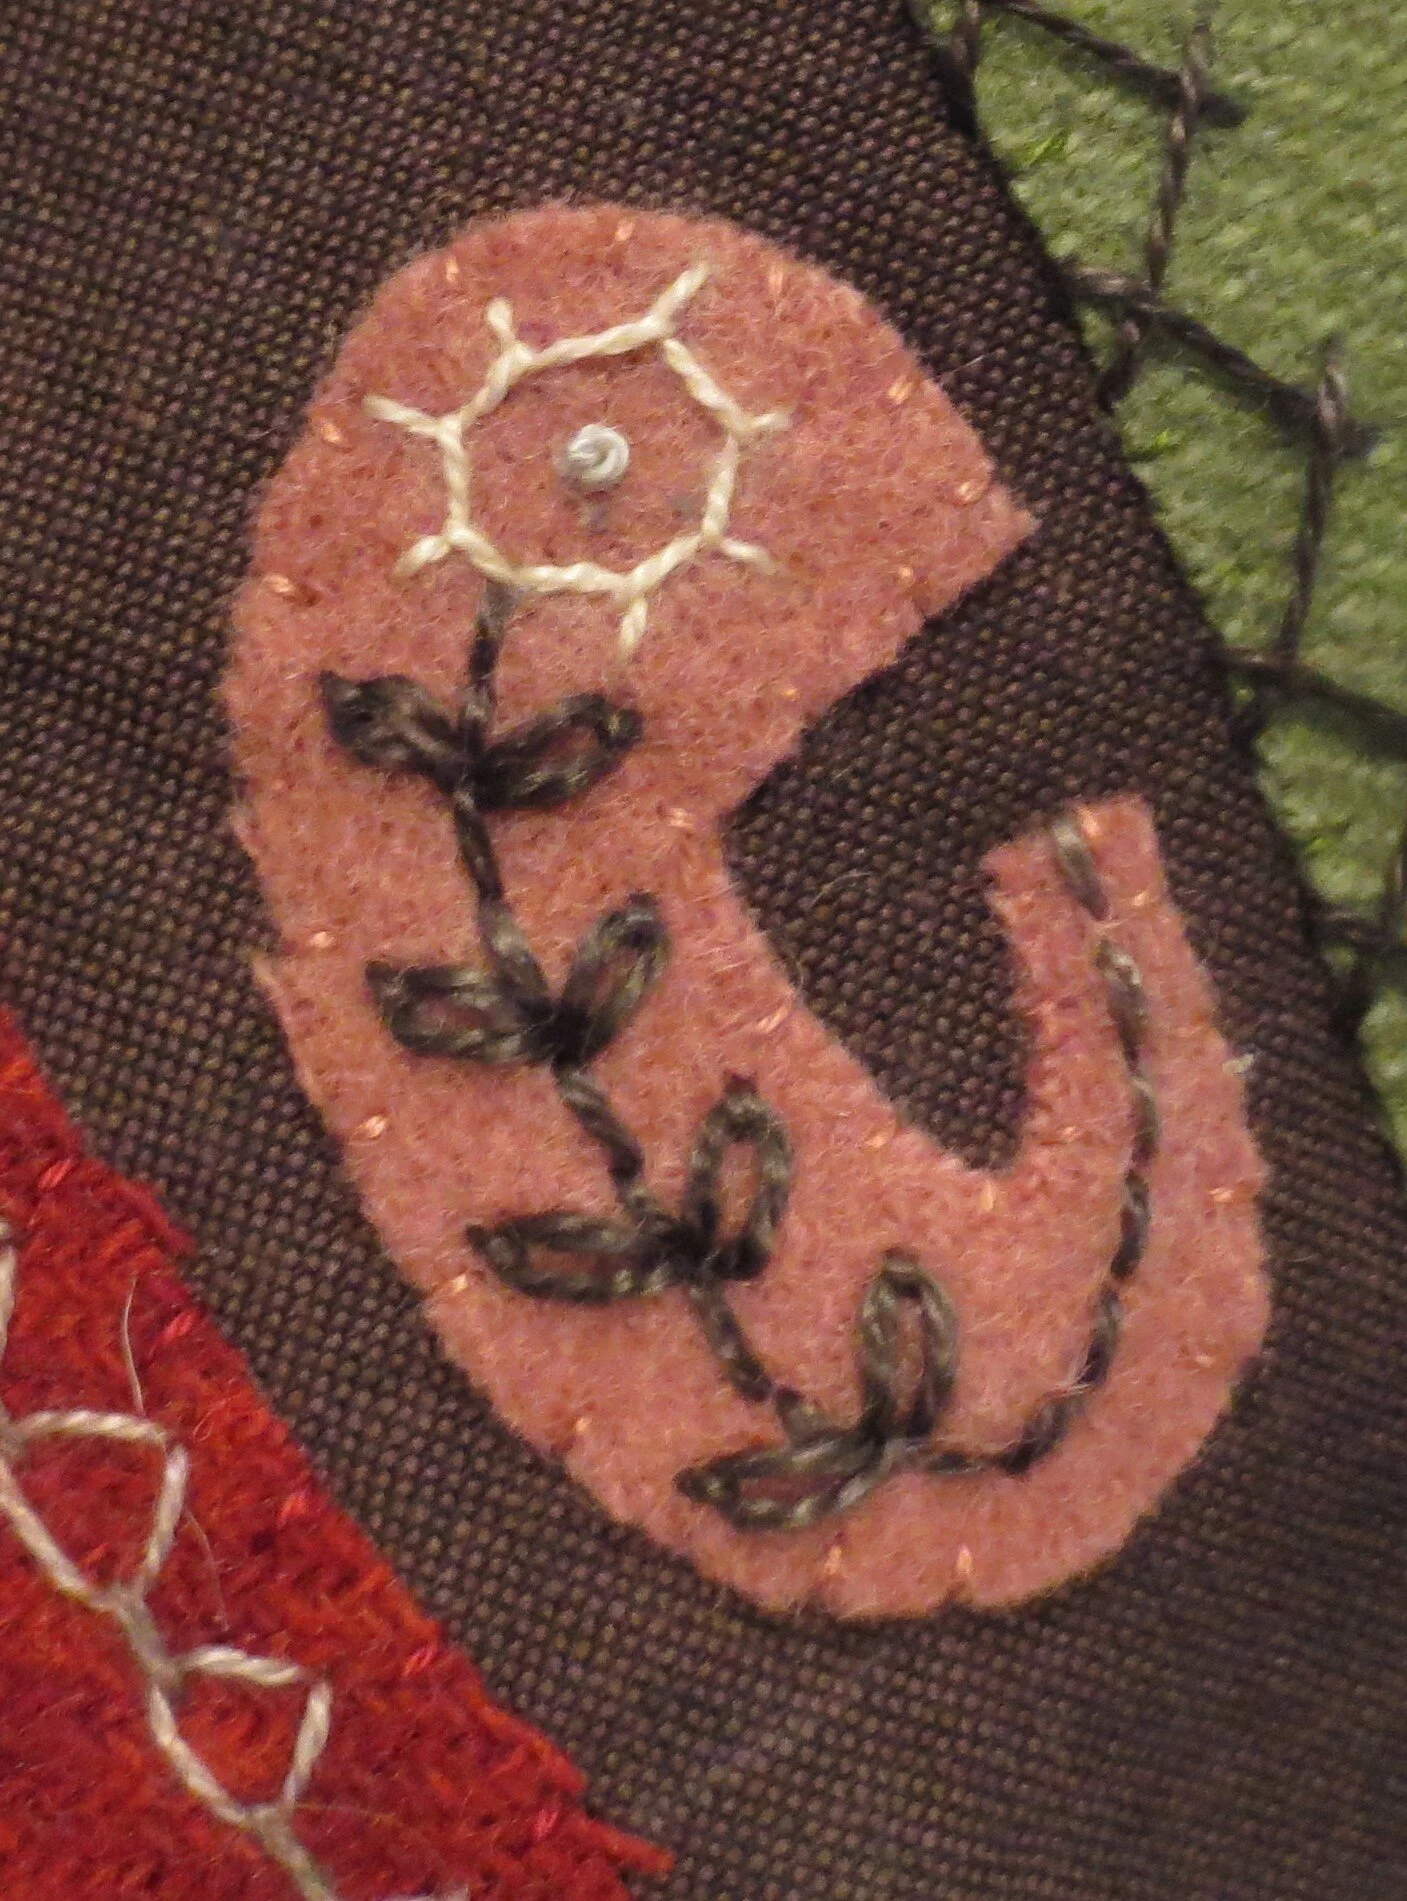
Draw a oval inside the letter O.
Chain Stitch over the drawn line with 1 strand of dark thread.


Use 1 strand of light colored thread to stitch a running stitch through the chain stitch.

Draw a guide line on the letter A.
We will be stitching a Coral Stitch or Snail’s Trail Stitch over the line.
Using 1 strand of thread, bring the needle up at one end of the drawn line.

Insert the needle on one side of the drawn line approximately 3/8” from the beginning and bring it back up on the other side of the line.
Wrap the thread over and around the tip of the needle, pulling the thread taut, but not so much that your fabric puckers.
Hold the wrapped thread in place with the thumb on top and forefinger underneath and then pull the thread upward with the other hand. You are making a knot, so this action is similar to that of stitching a French knot.

Continue stitching over the entire line tacking the last stitch down by inserting the needle at the edge of the bottom of the A and then pulling the thread through to the back.
Repeat the stitch for the remaining letter A.
Draw a guide line on the letter T.
Use 1 strand of thread to stitch a cabled chain stitch over the line. We used this stitch on the rocket in Block #8.
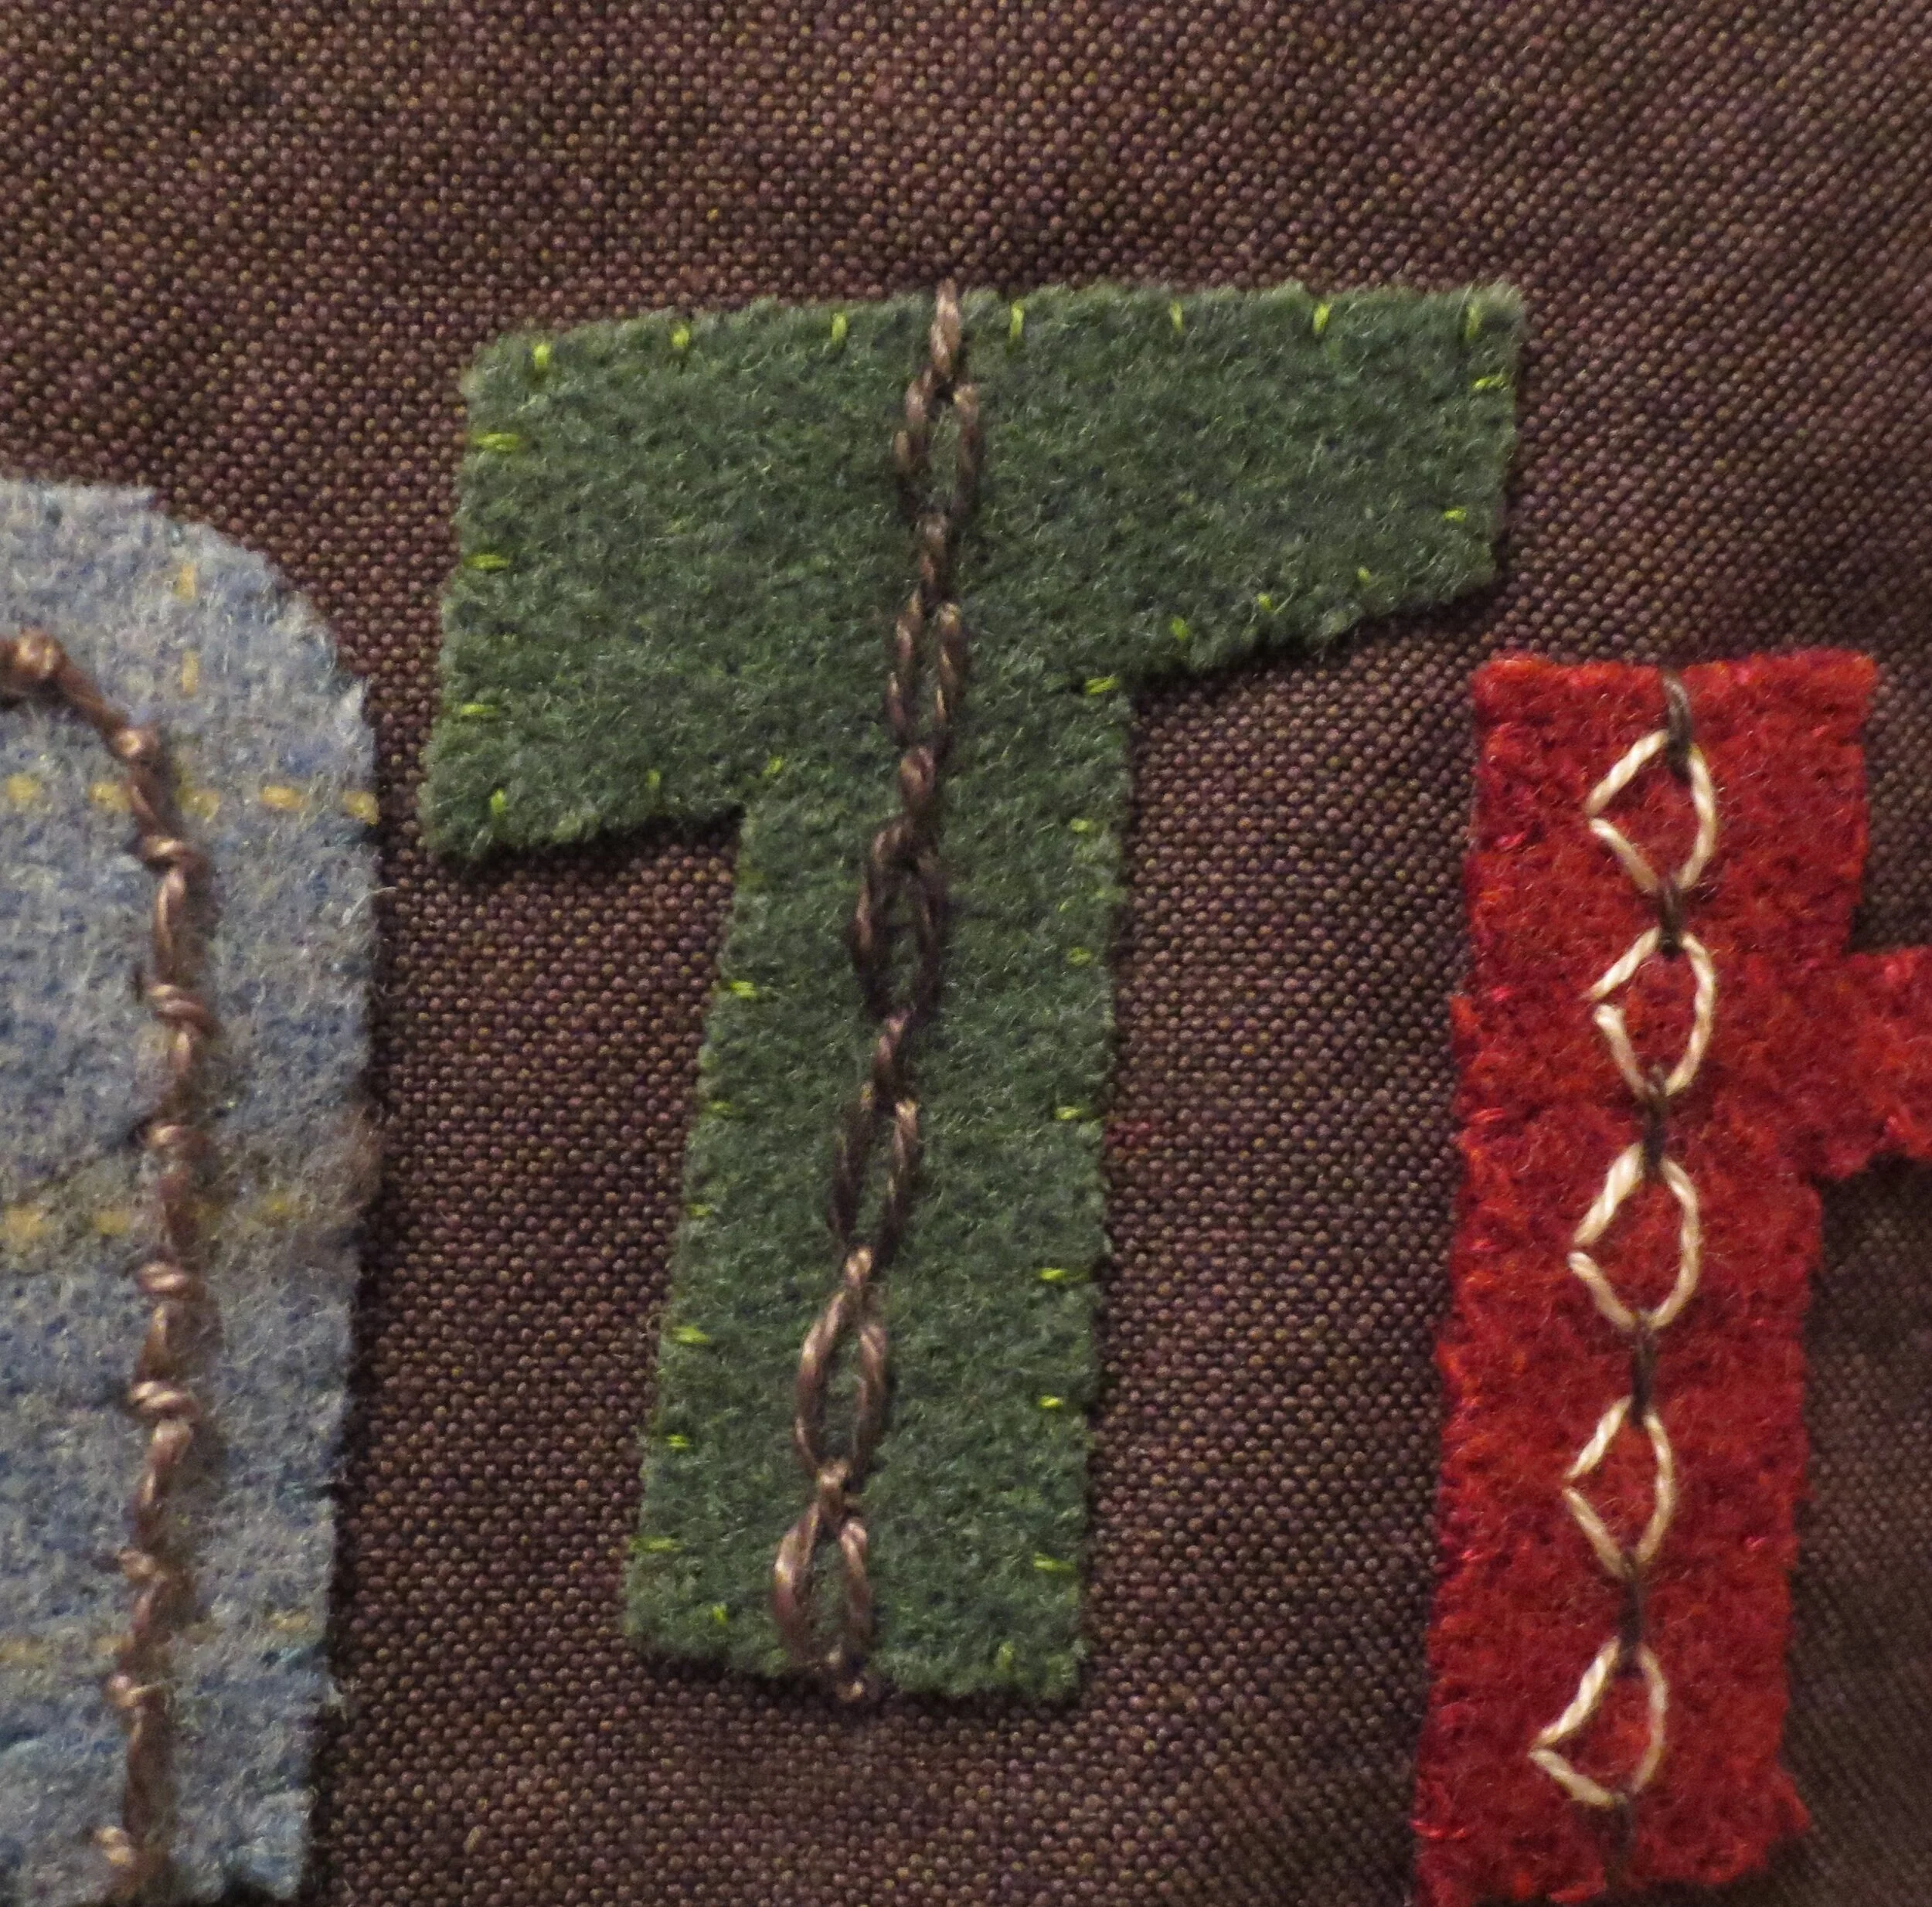
Use 1 strand of light colored thread to stitch a single French knot in the center of each of the links of the cable stitch.

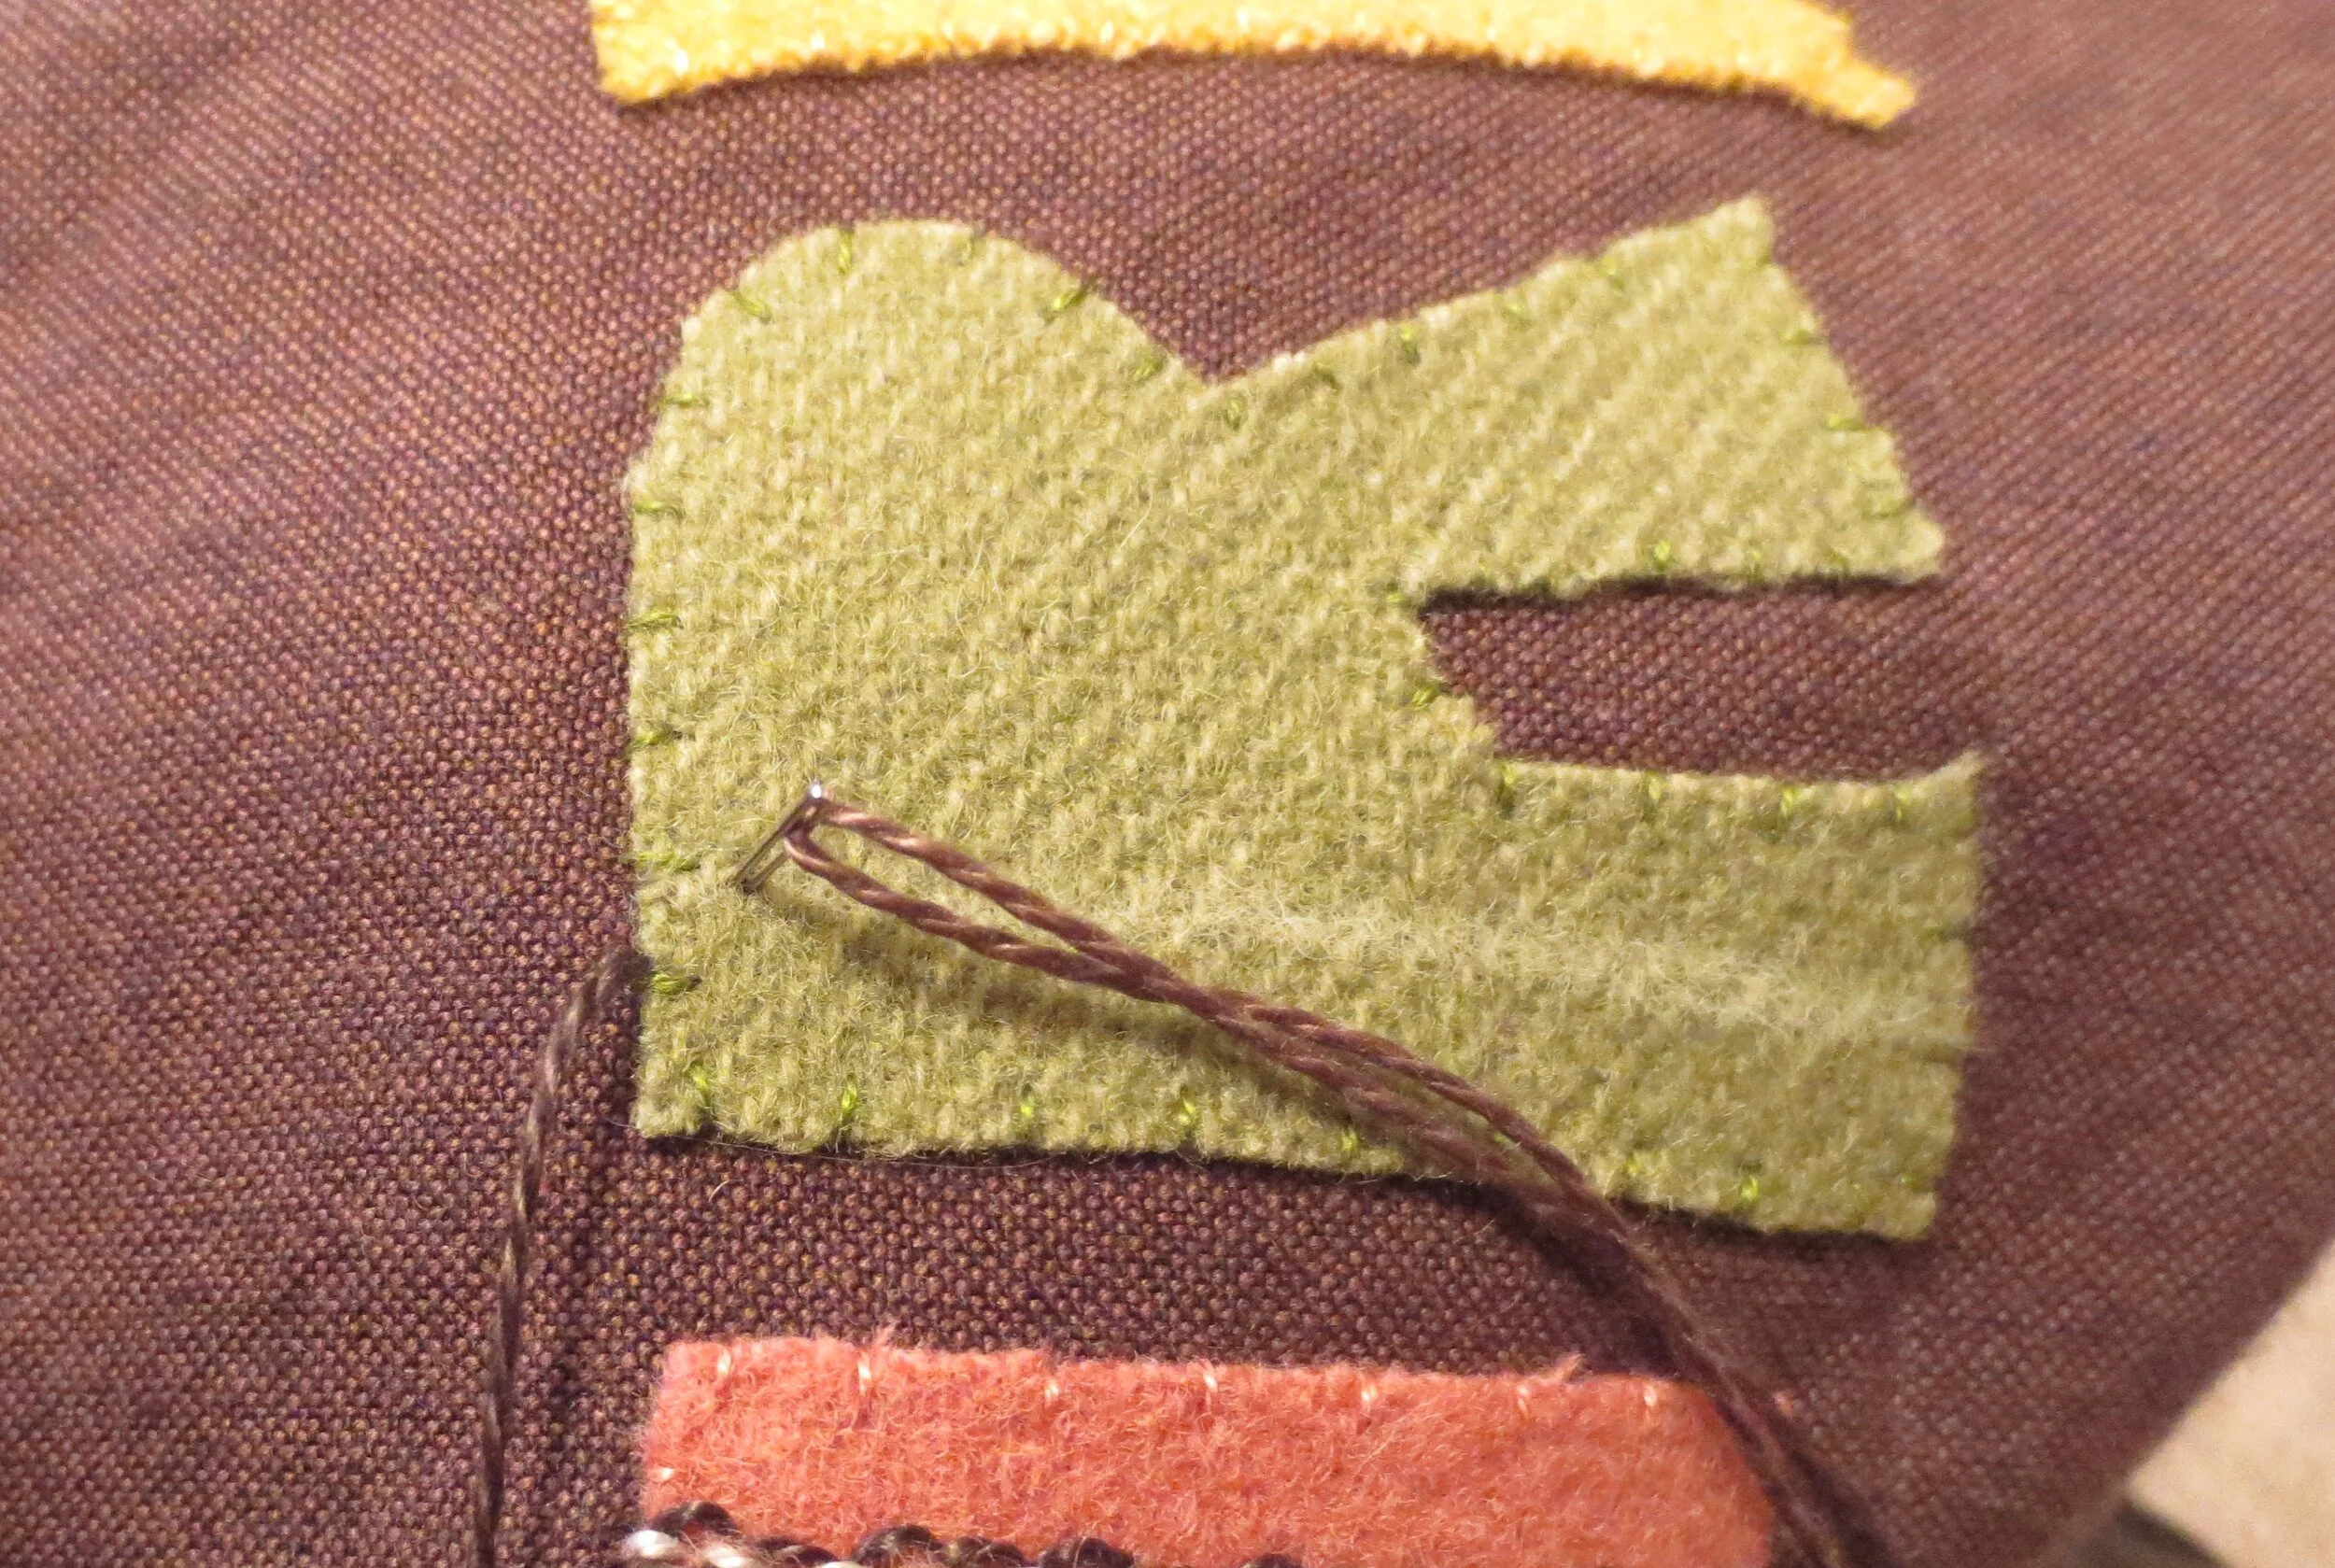
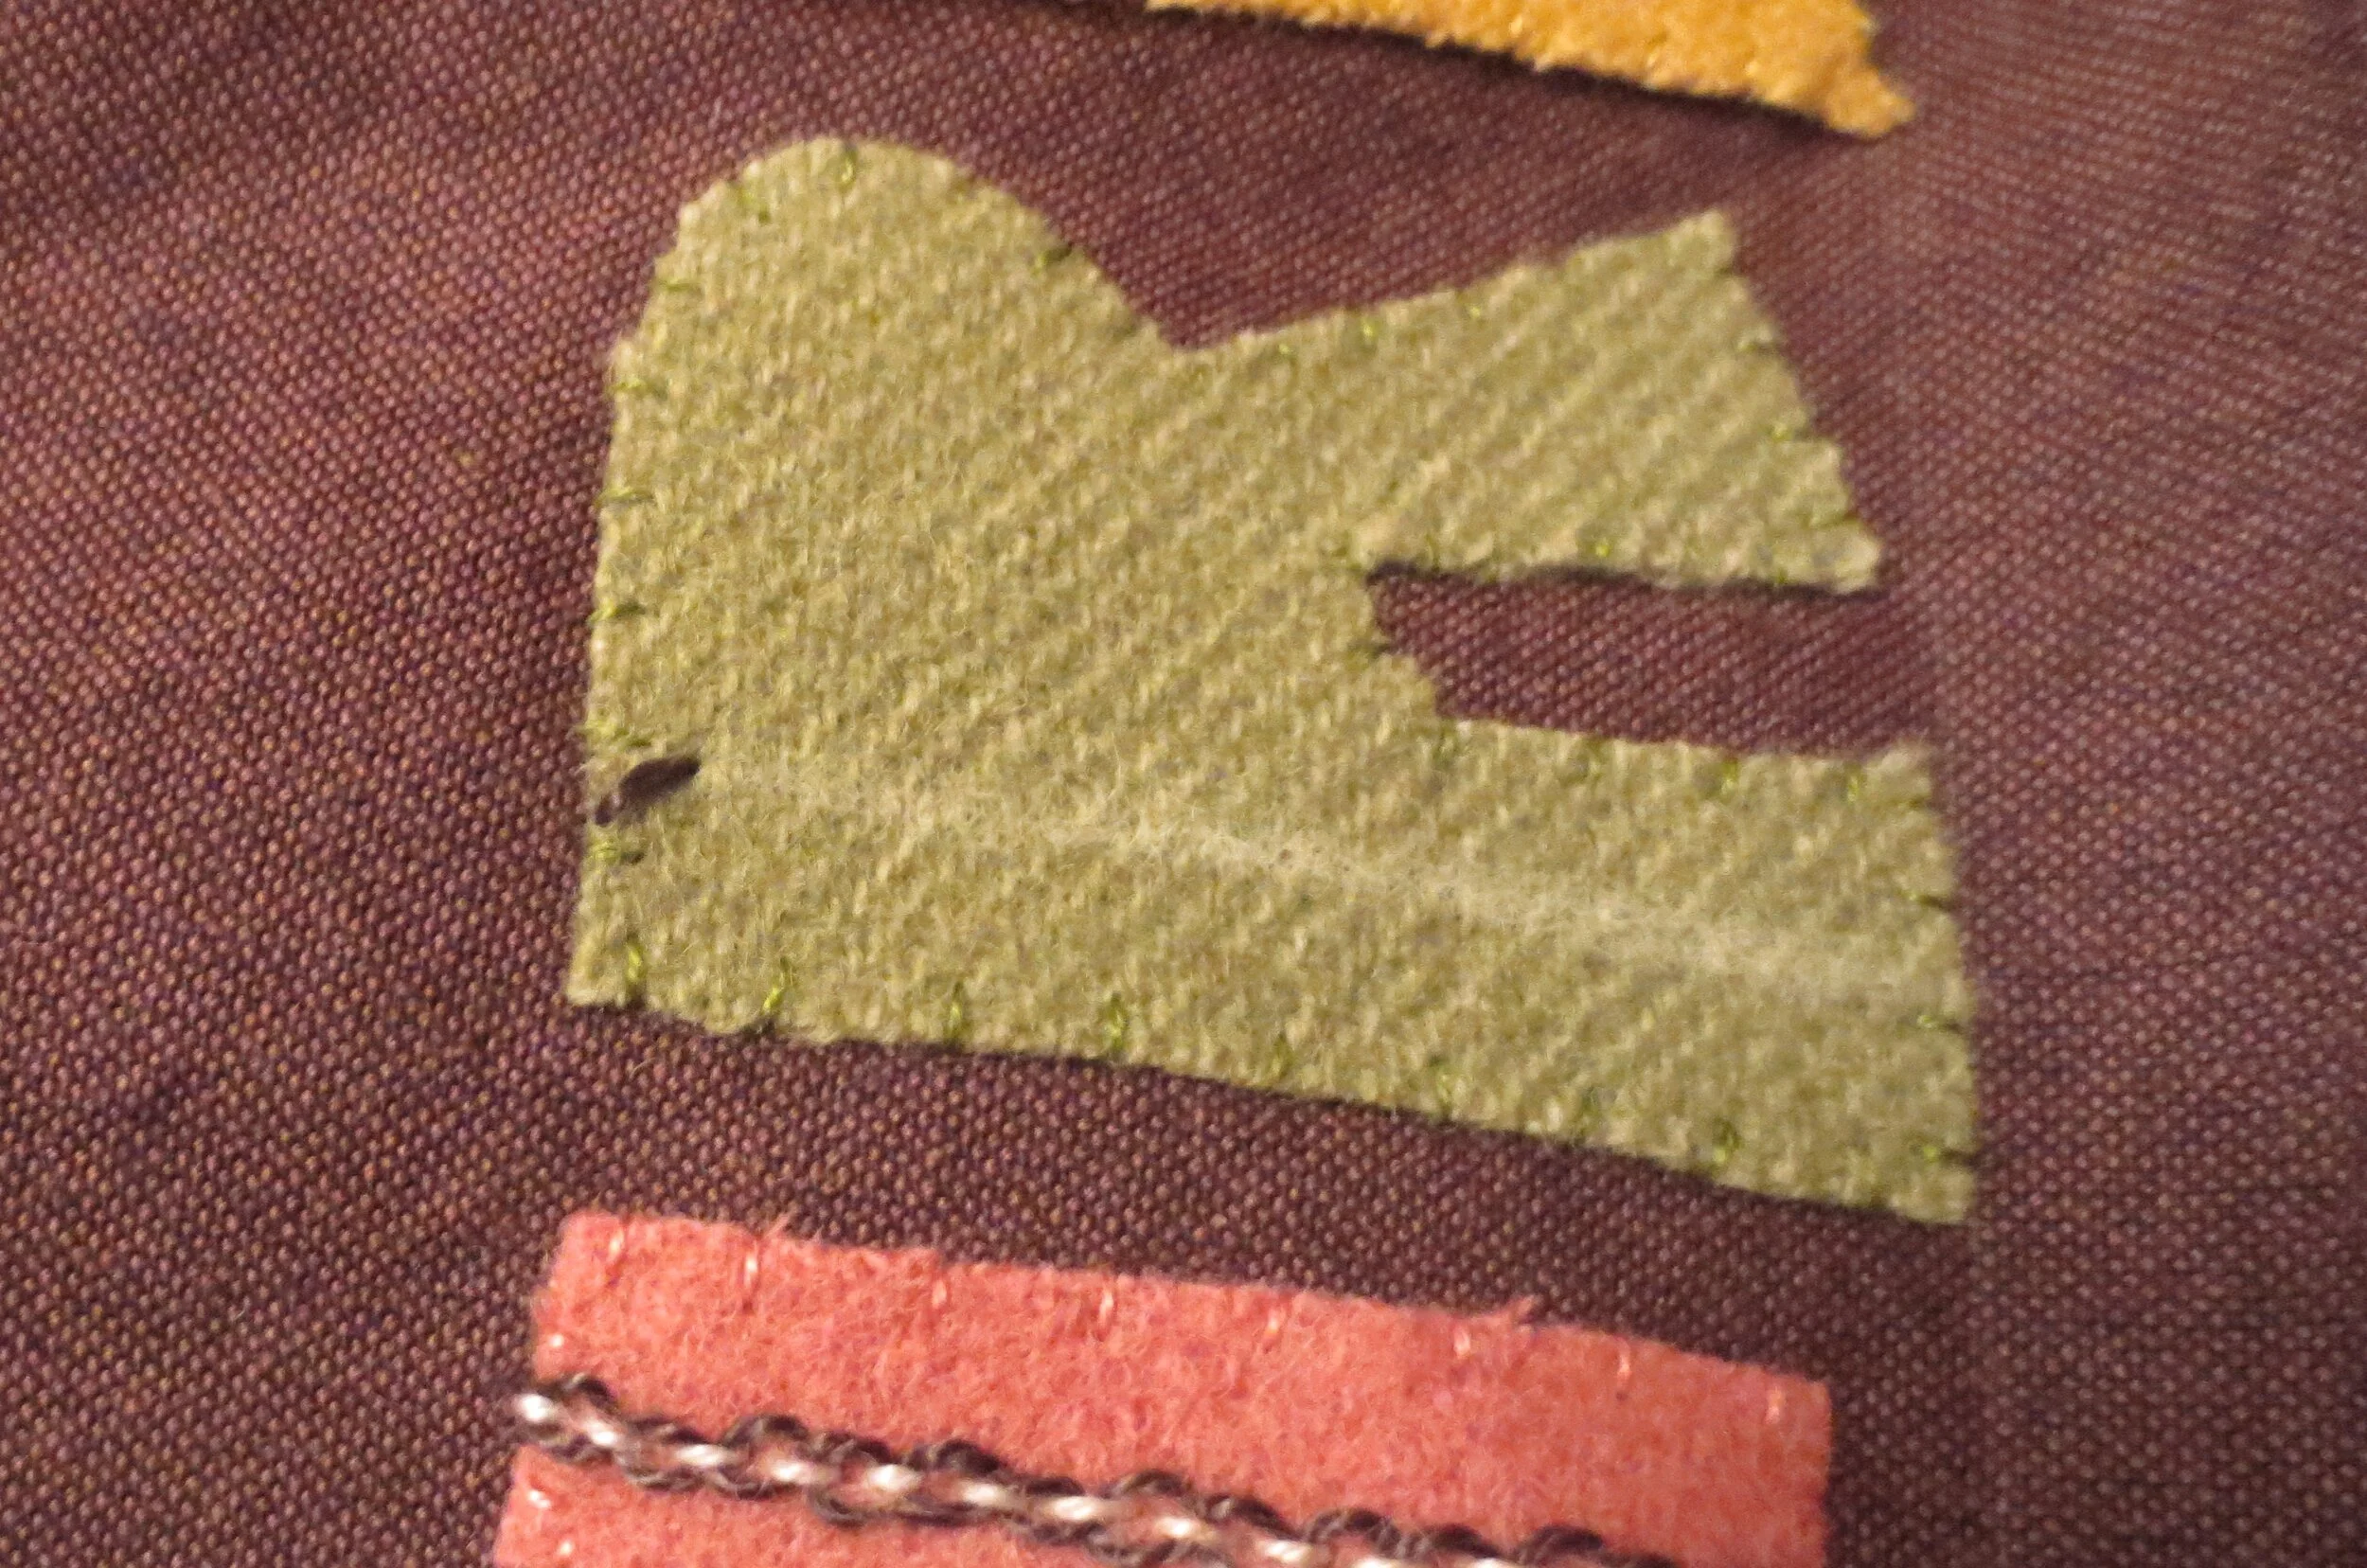
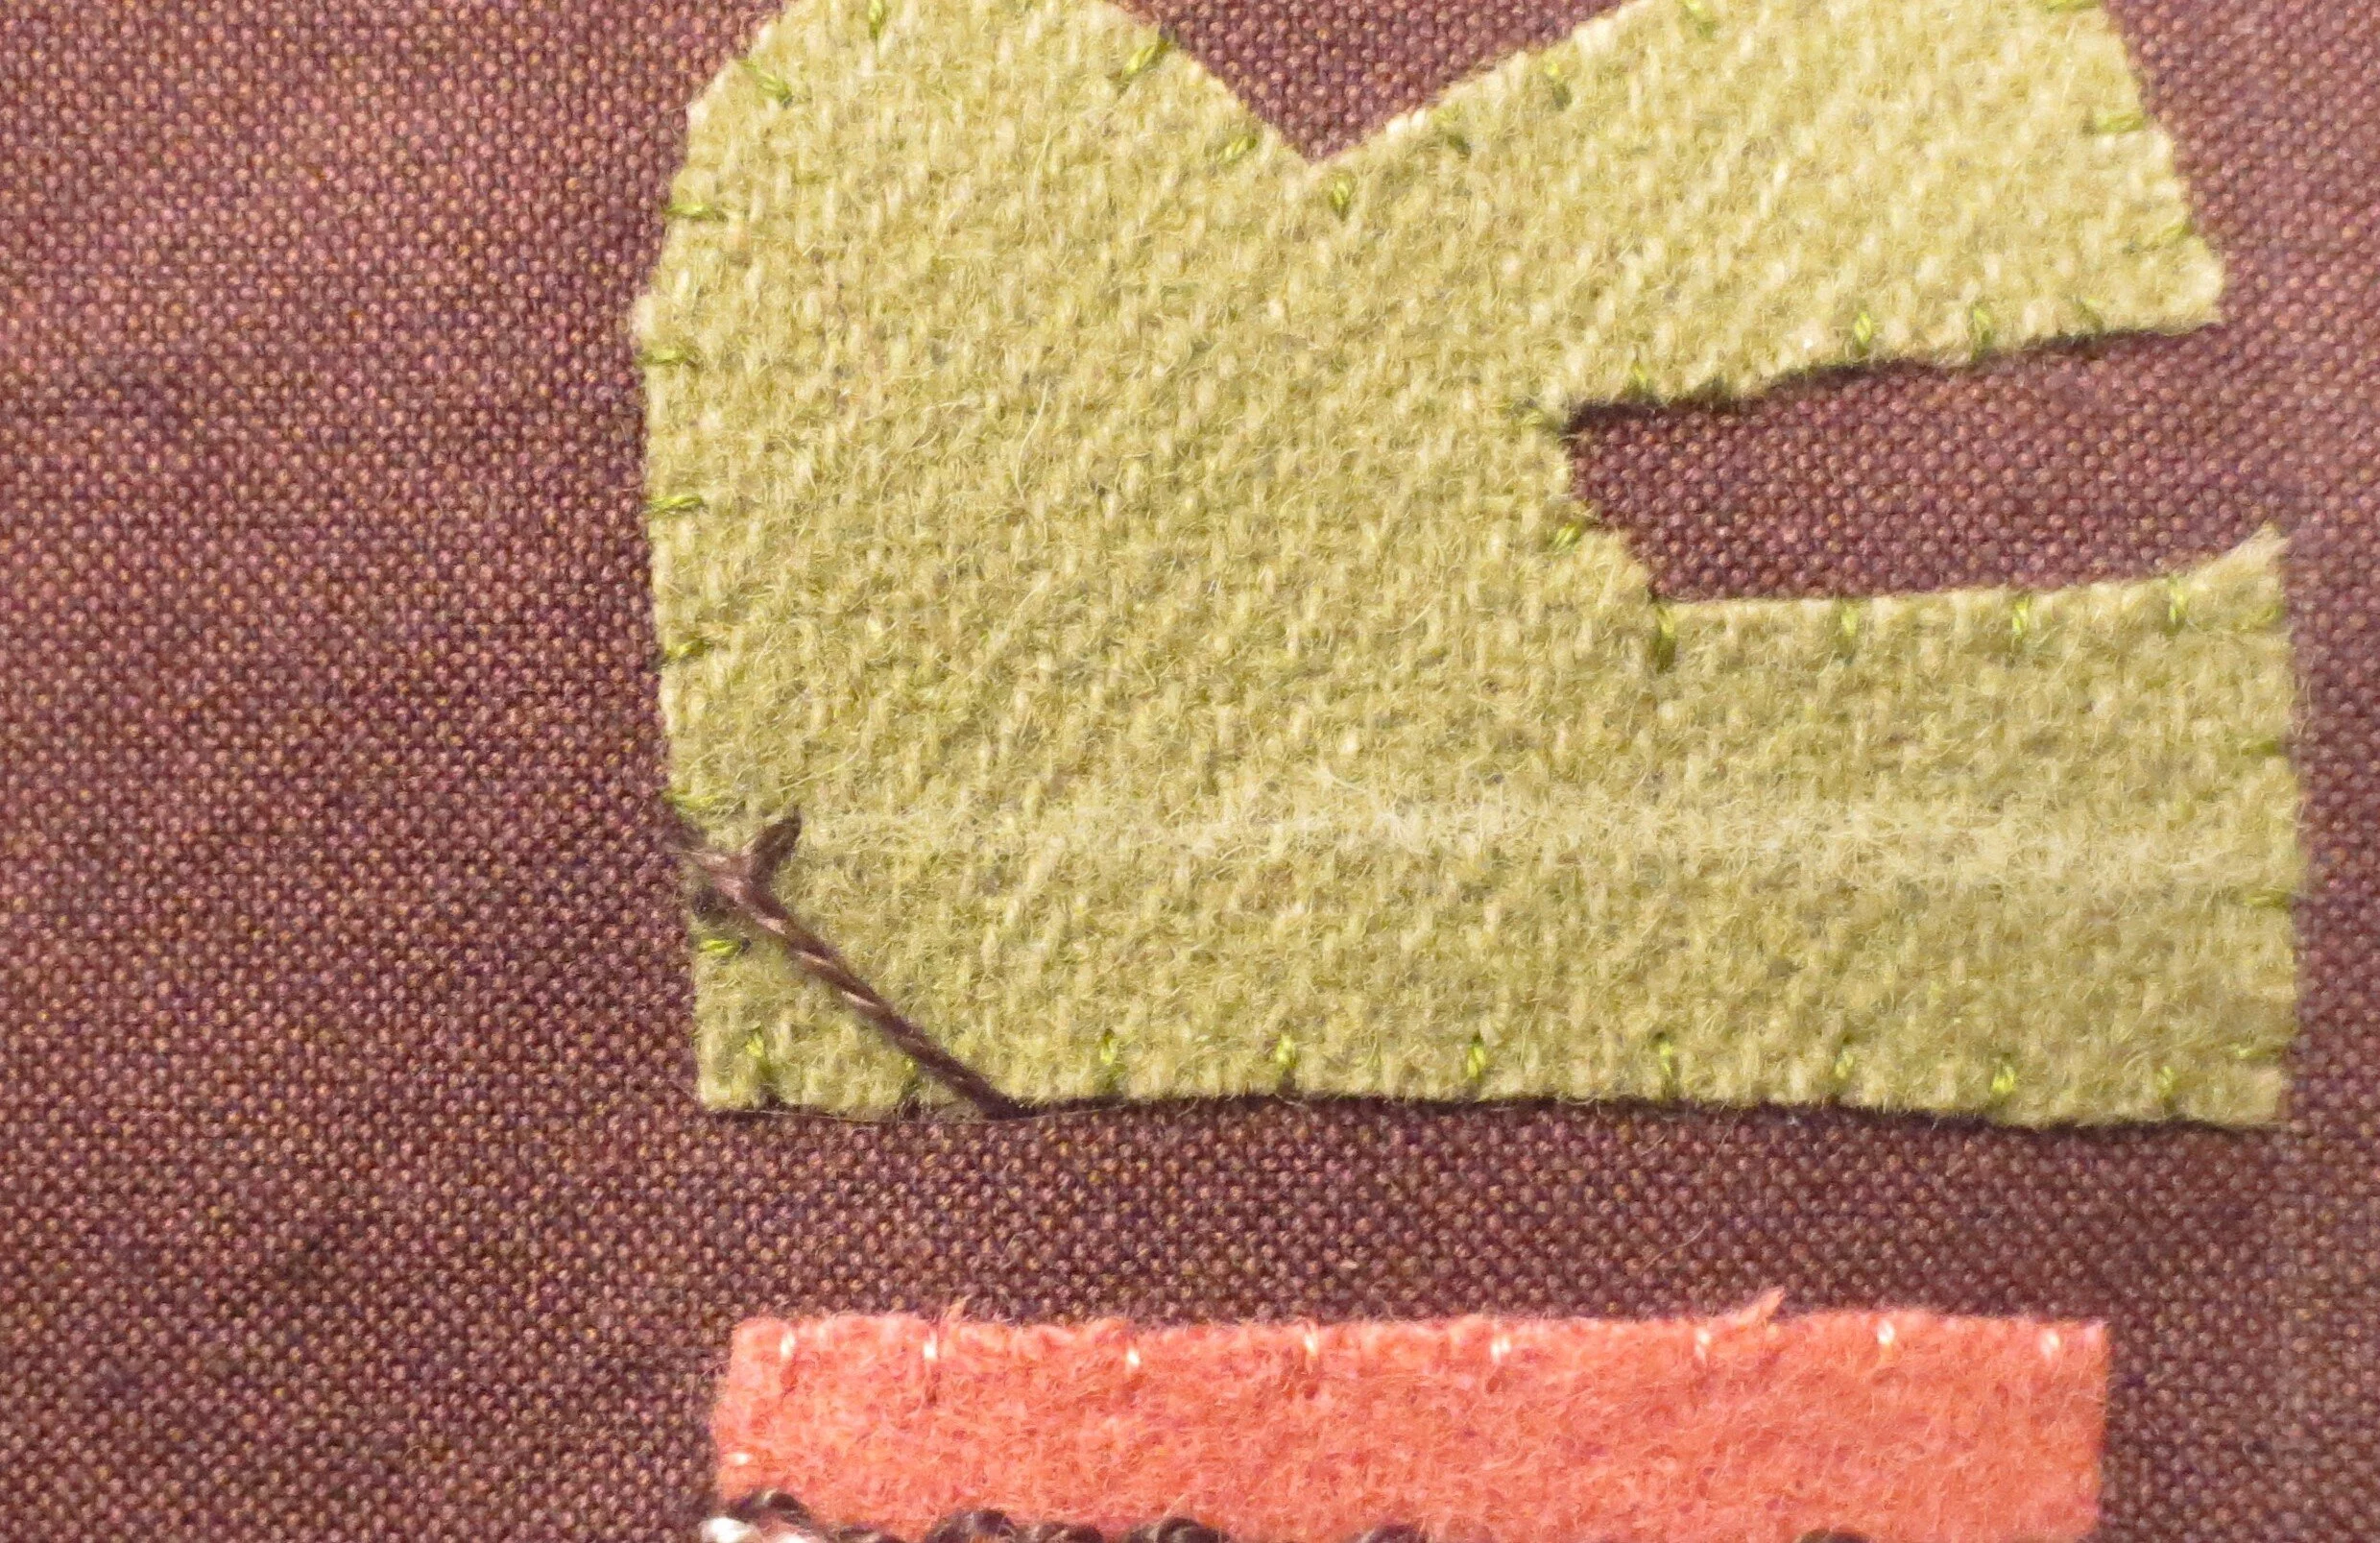
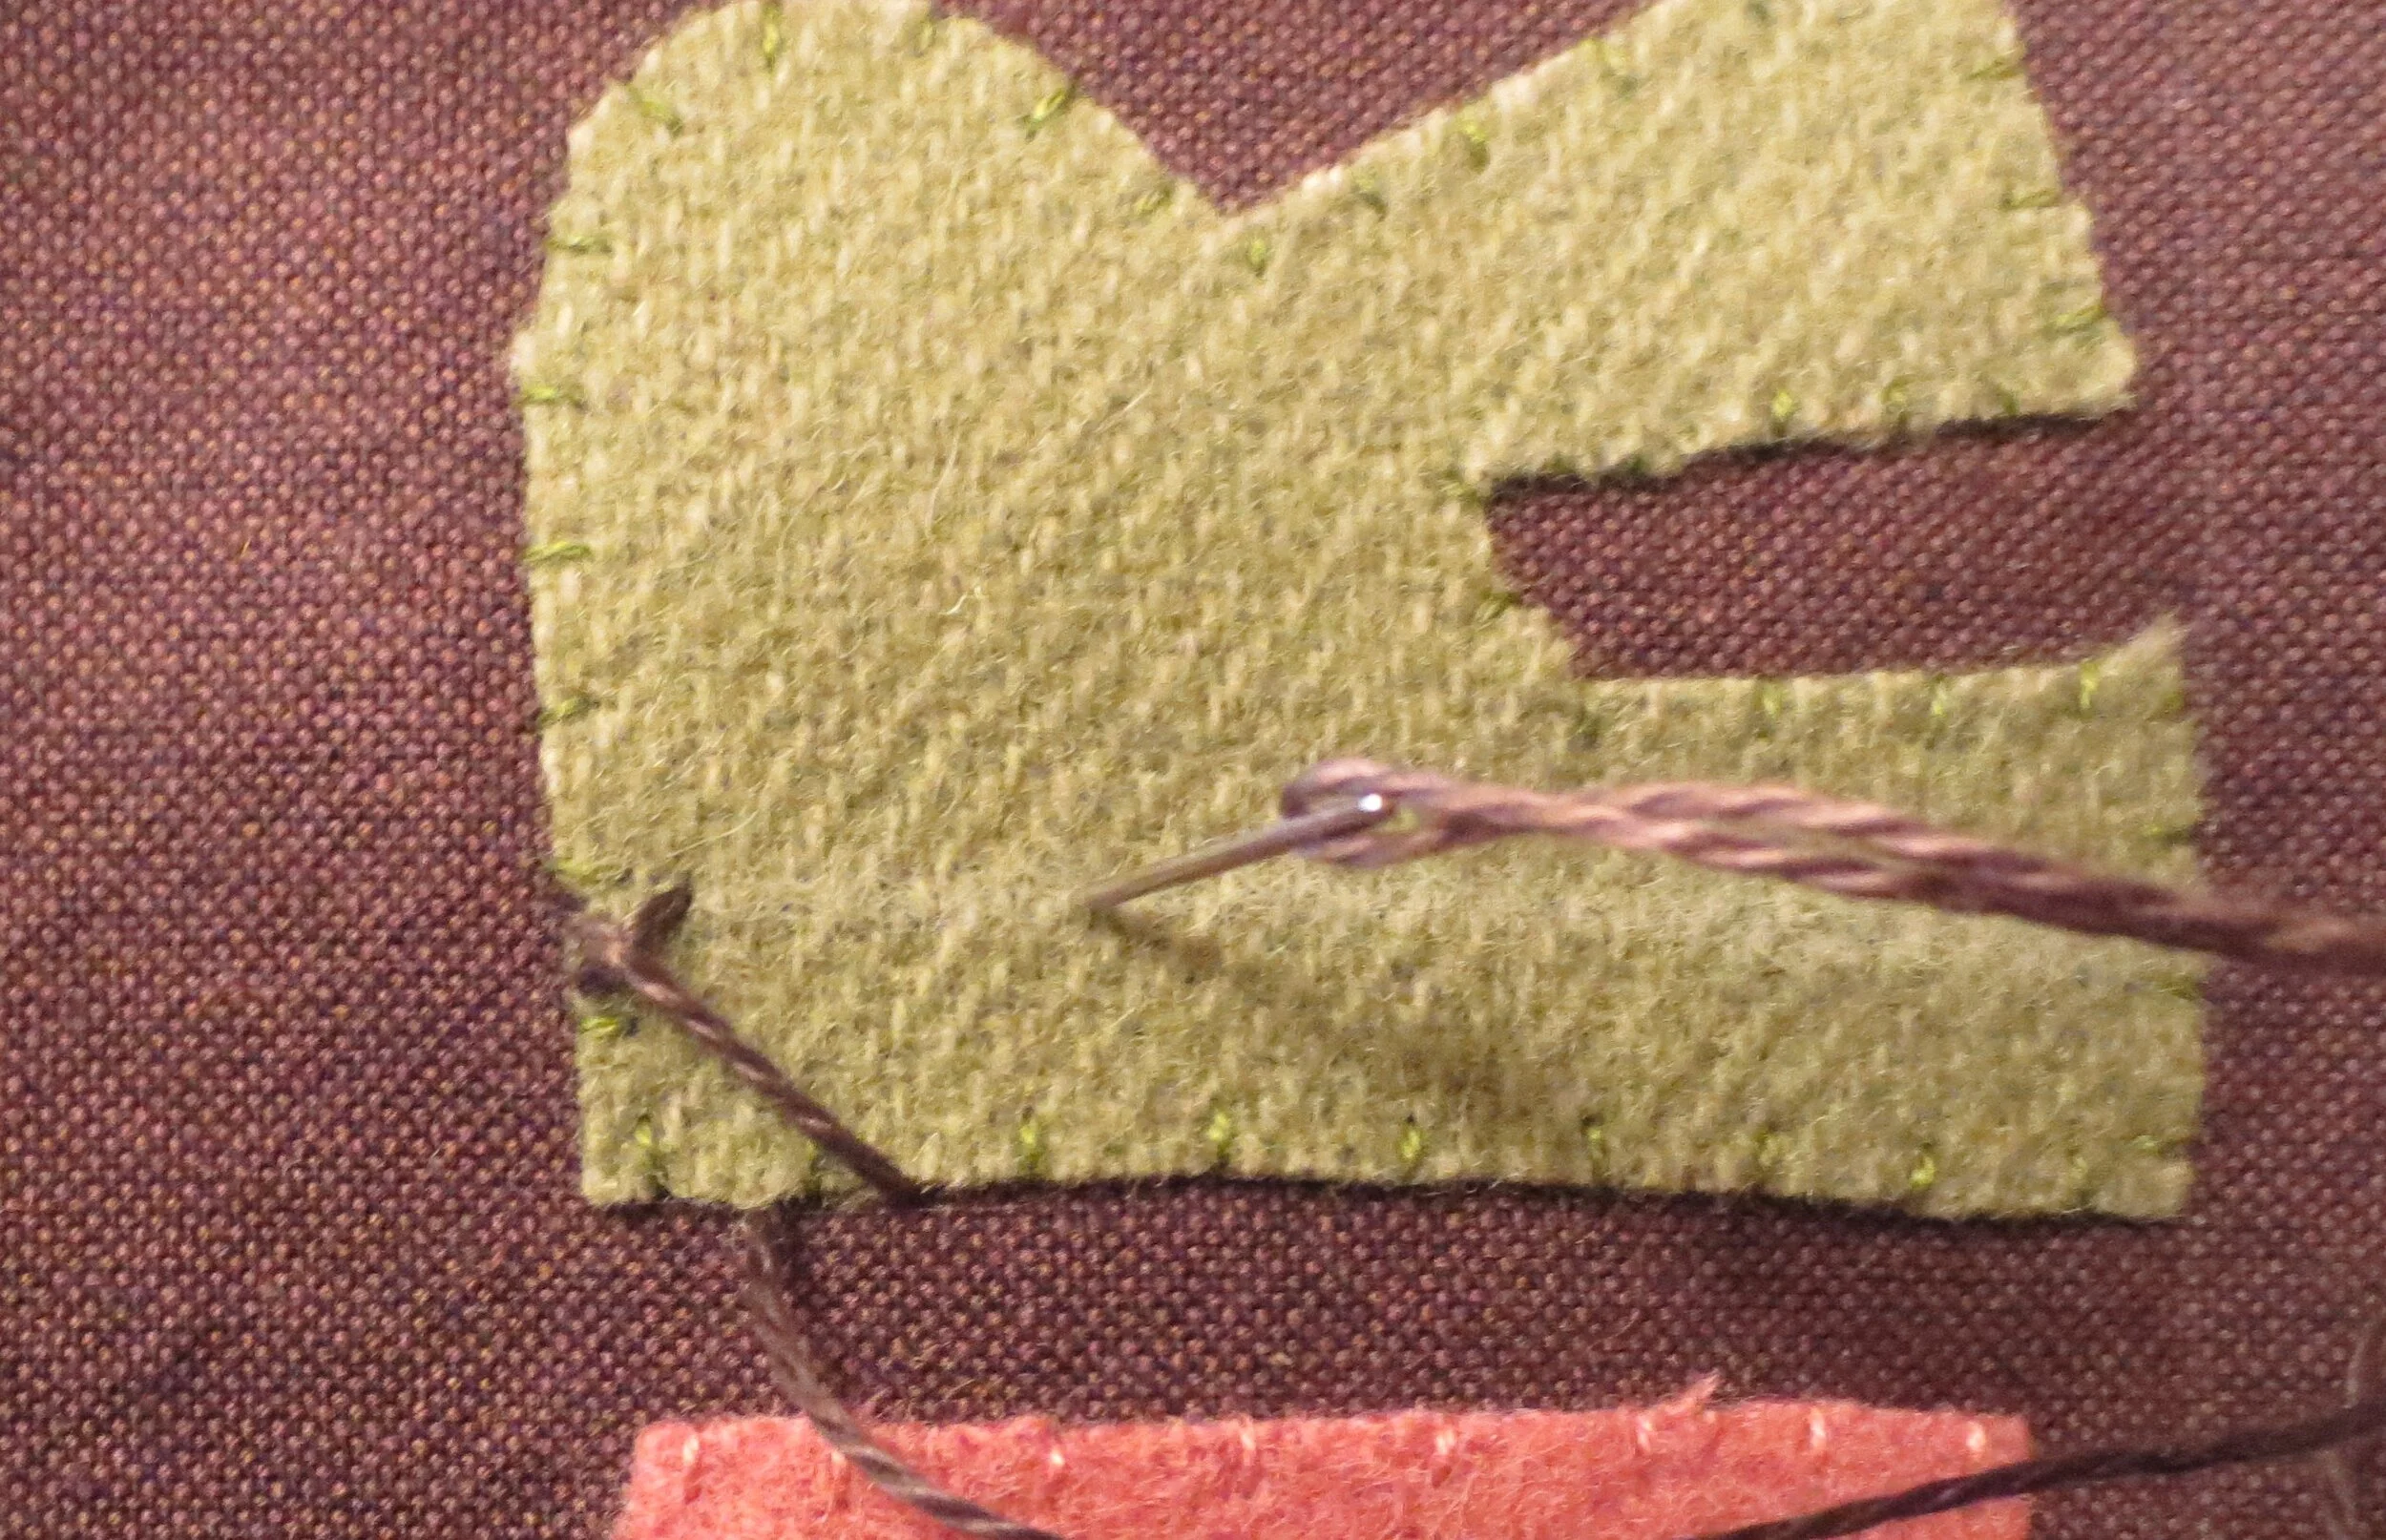
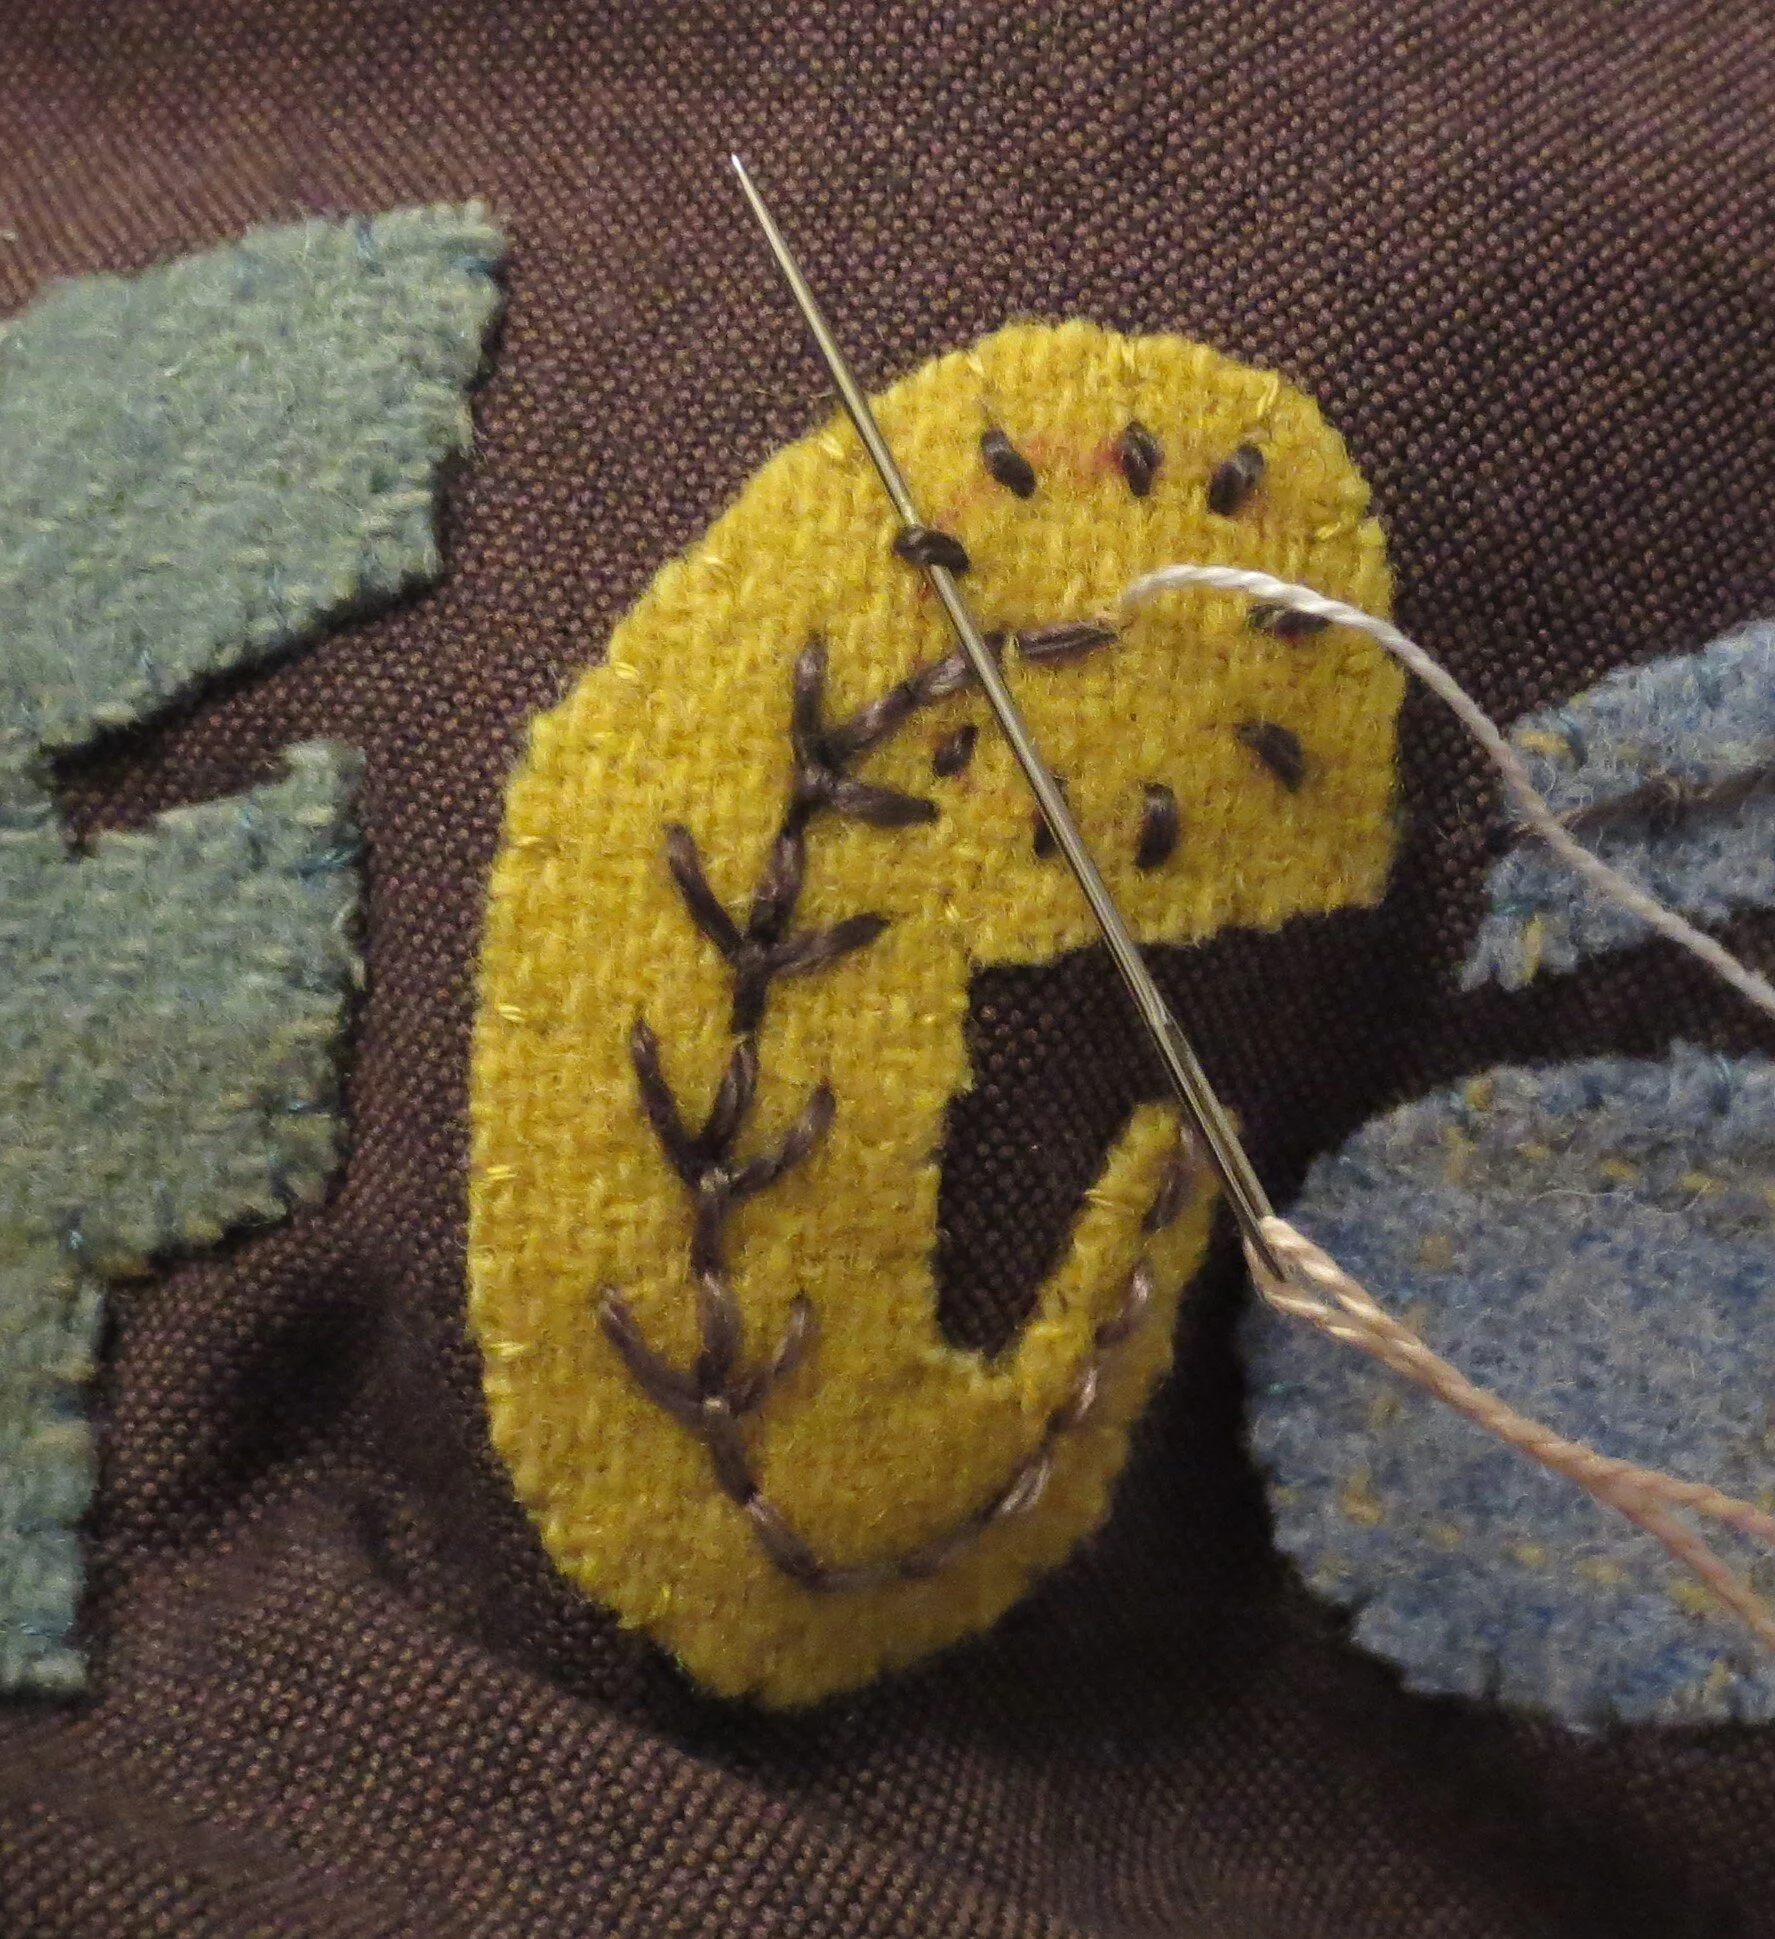
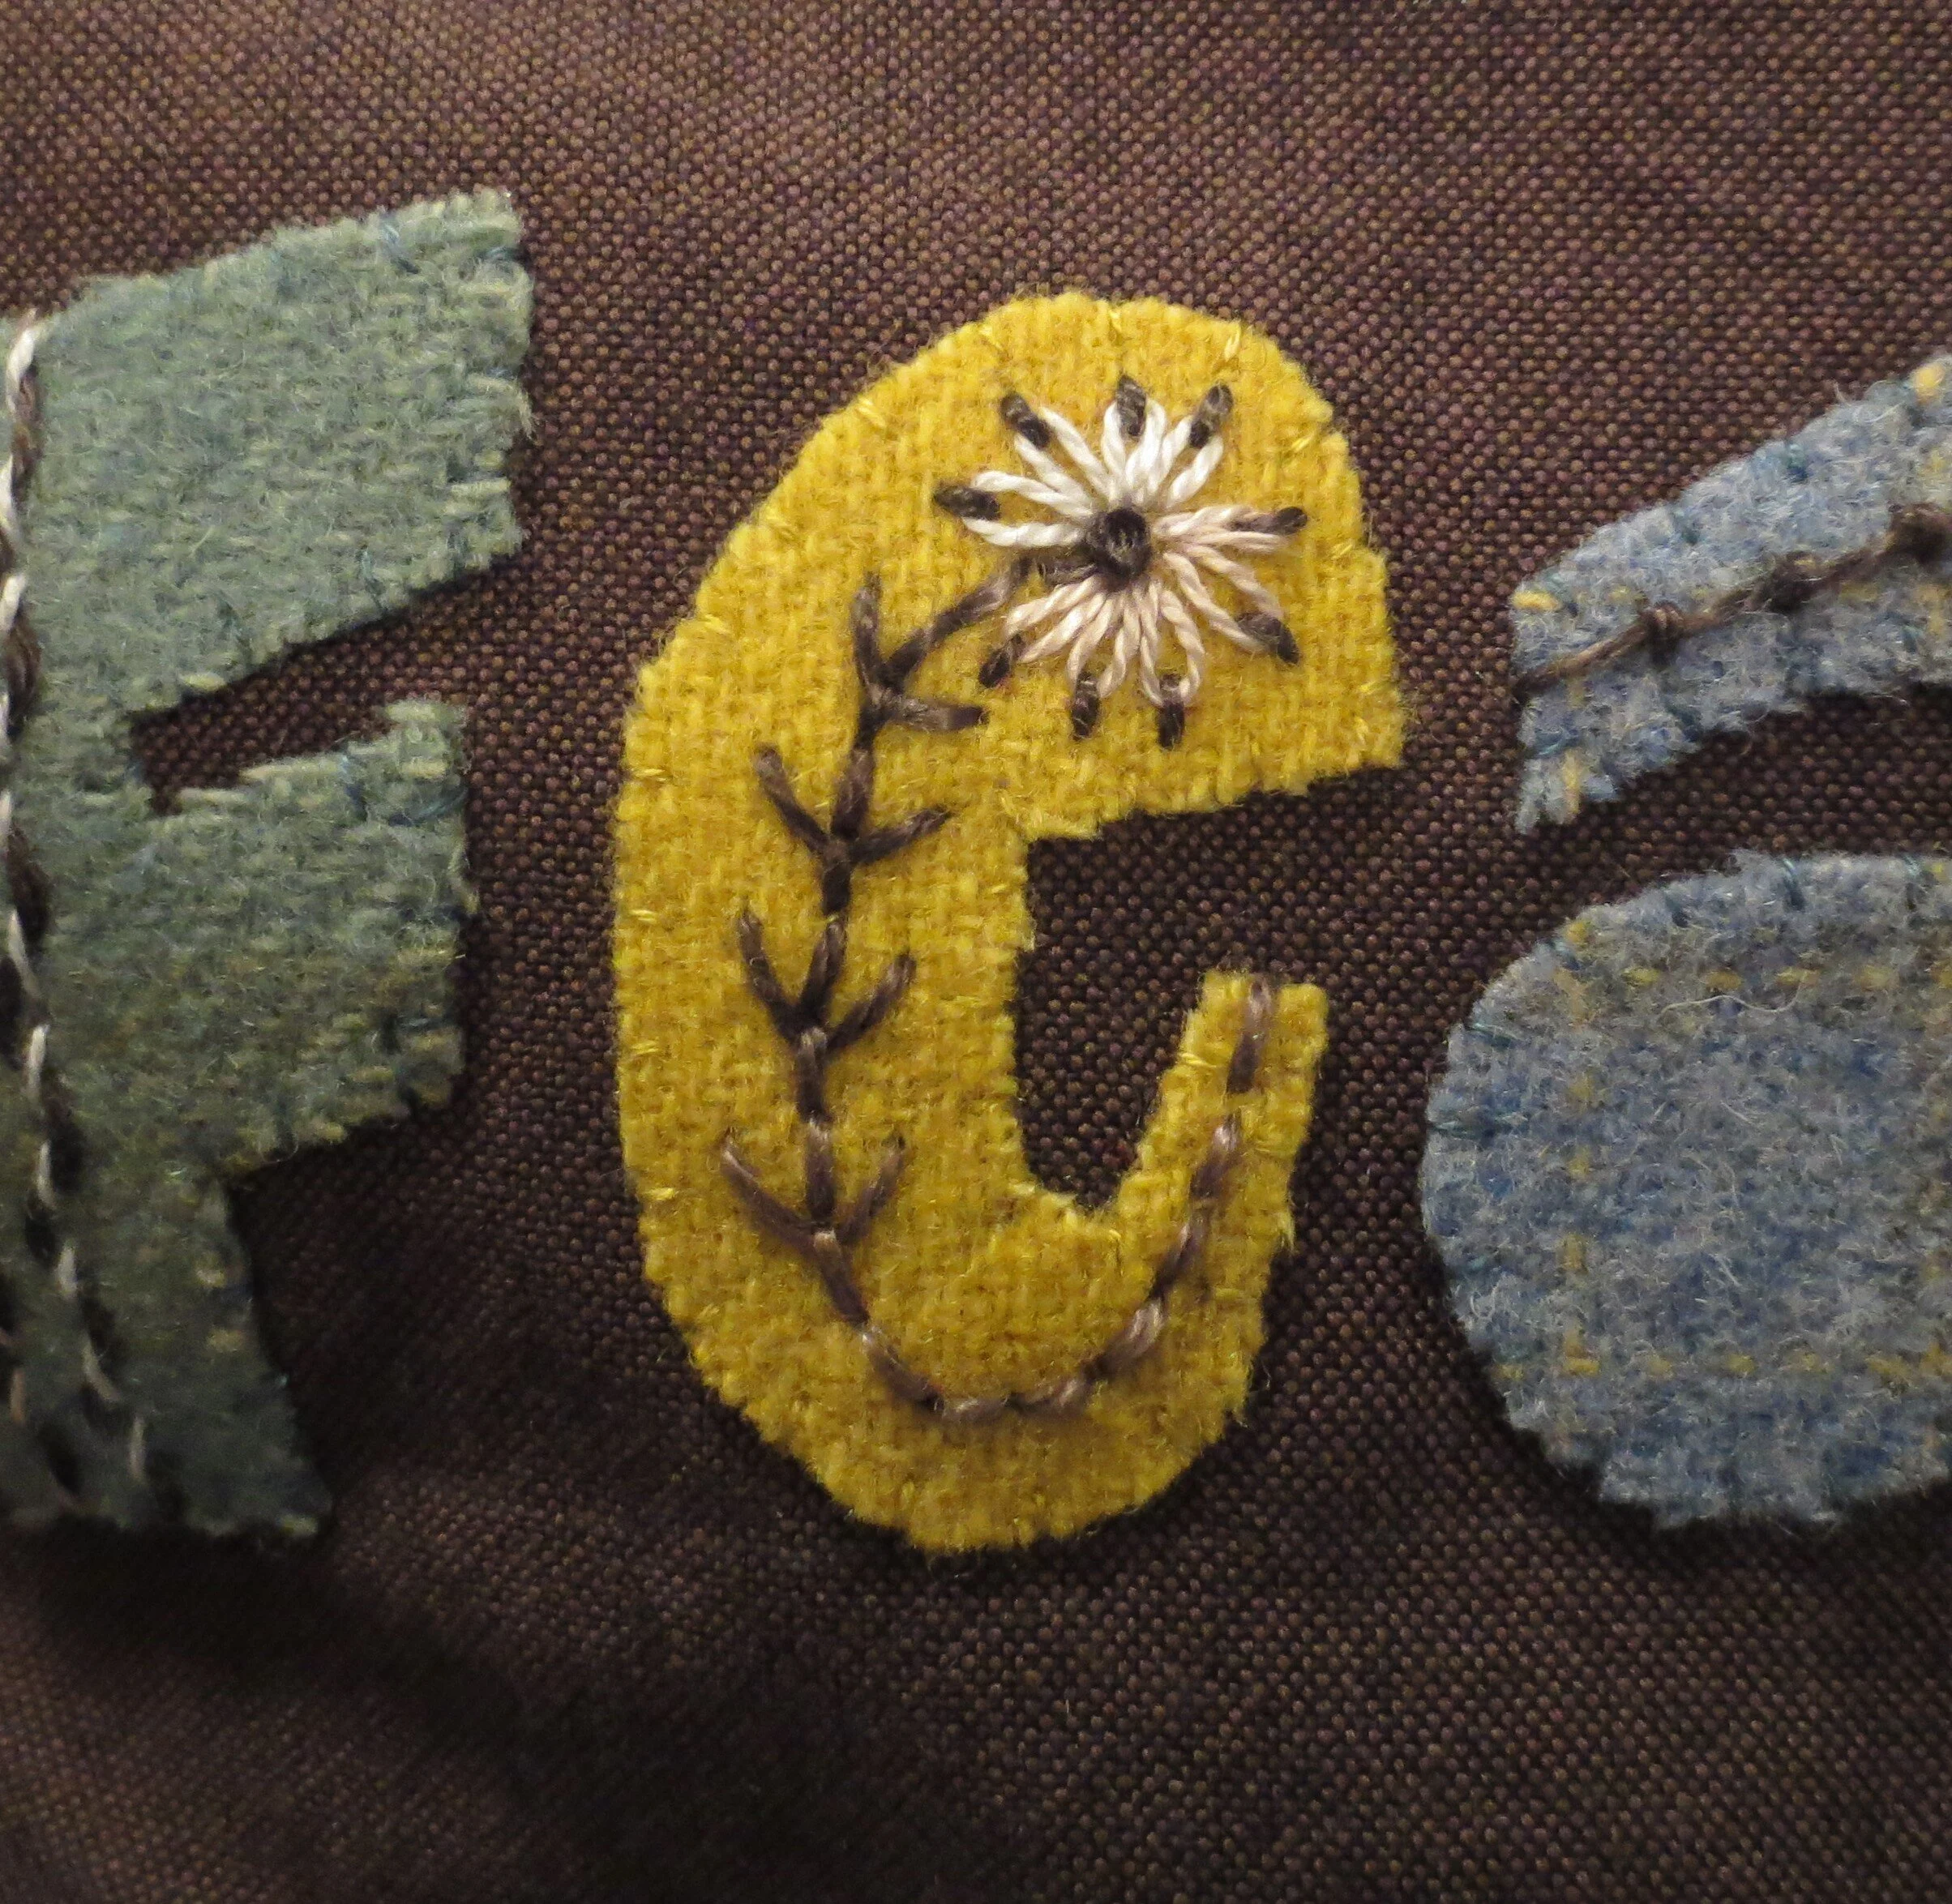
Let’s stitch something fun on the letter E.
Draw a circle with a curved line on the first letter E as shown below.
Begin by stitching 2 back stitches with a single strand of dark thread over the top of the curved line.
Stitch an additional back stitch but bring the needle and thread back up to one side of the drawn line. This will be the beginning of a fern stitch.
Insert the needle back down on the opposite side of the line and then up again at the base of the last back stitch. Pull the thread through making sure the thread lies under the needle.

Continue with 4 more fern stitches followed by a string of back stitches down the length of the drawn line.
Use an air erasable marker to mark 9 evenly spaced dots on the drawn circle.
Stitch short (seed stitch) straight stitches over the dots with 1 strand of dark thread.
Using 1 strand of light colored thread, bring the needle up at the center of the circle and then slide the needle under one of the seed stitches pulling the thread through. insert the needle back down in the center of the circle pulling the thread through to the back.
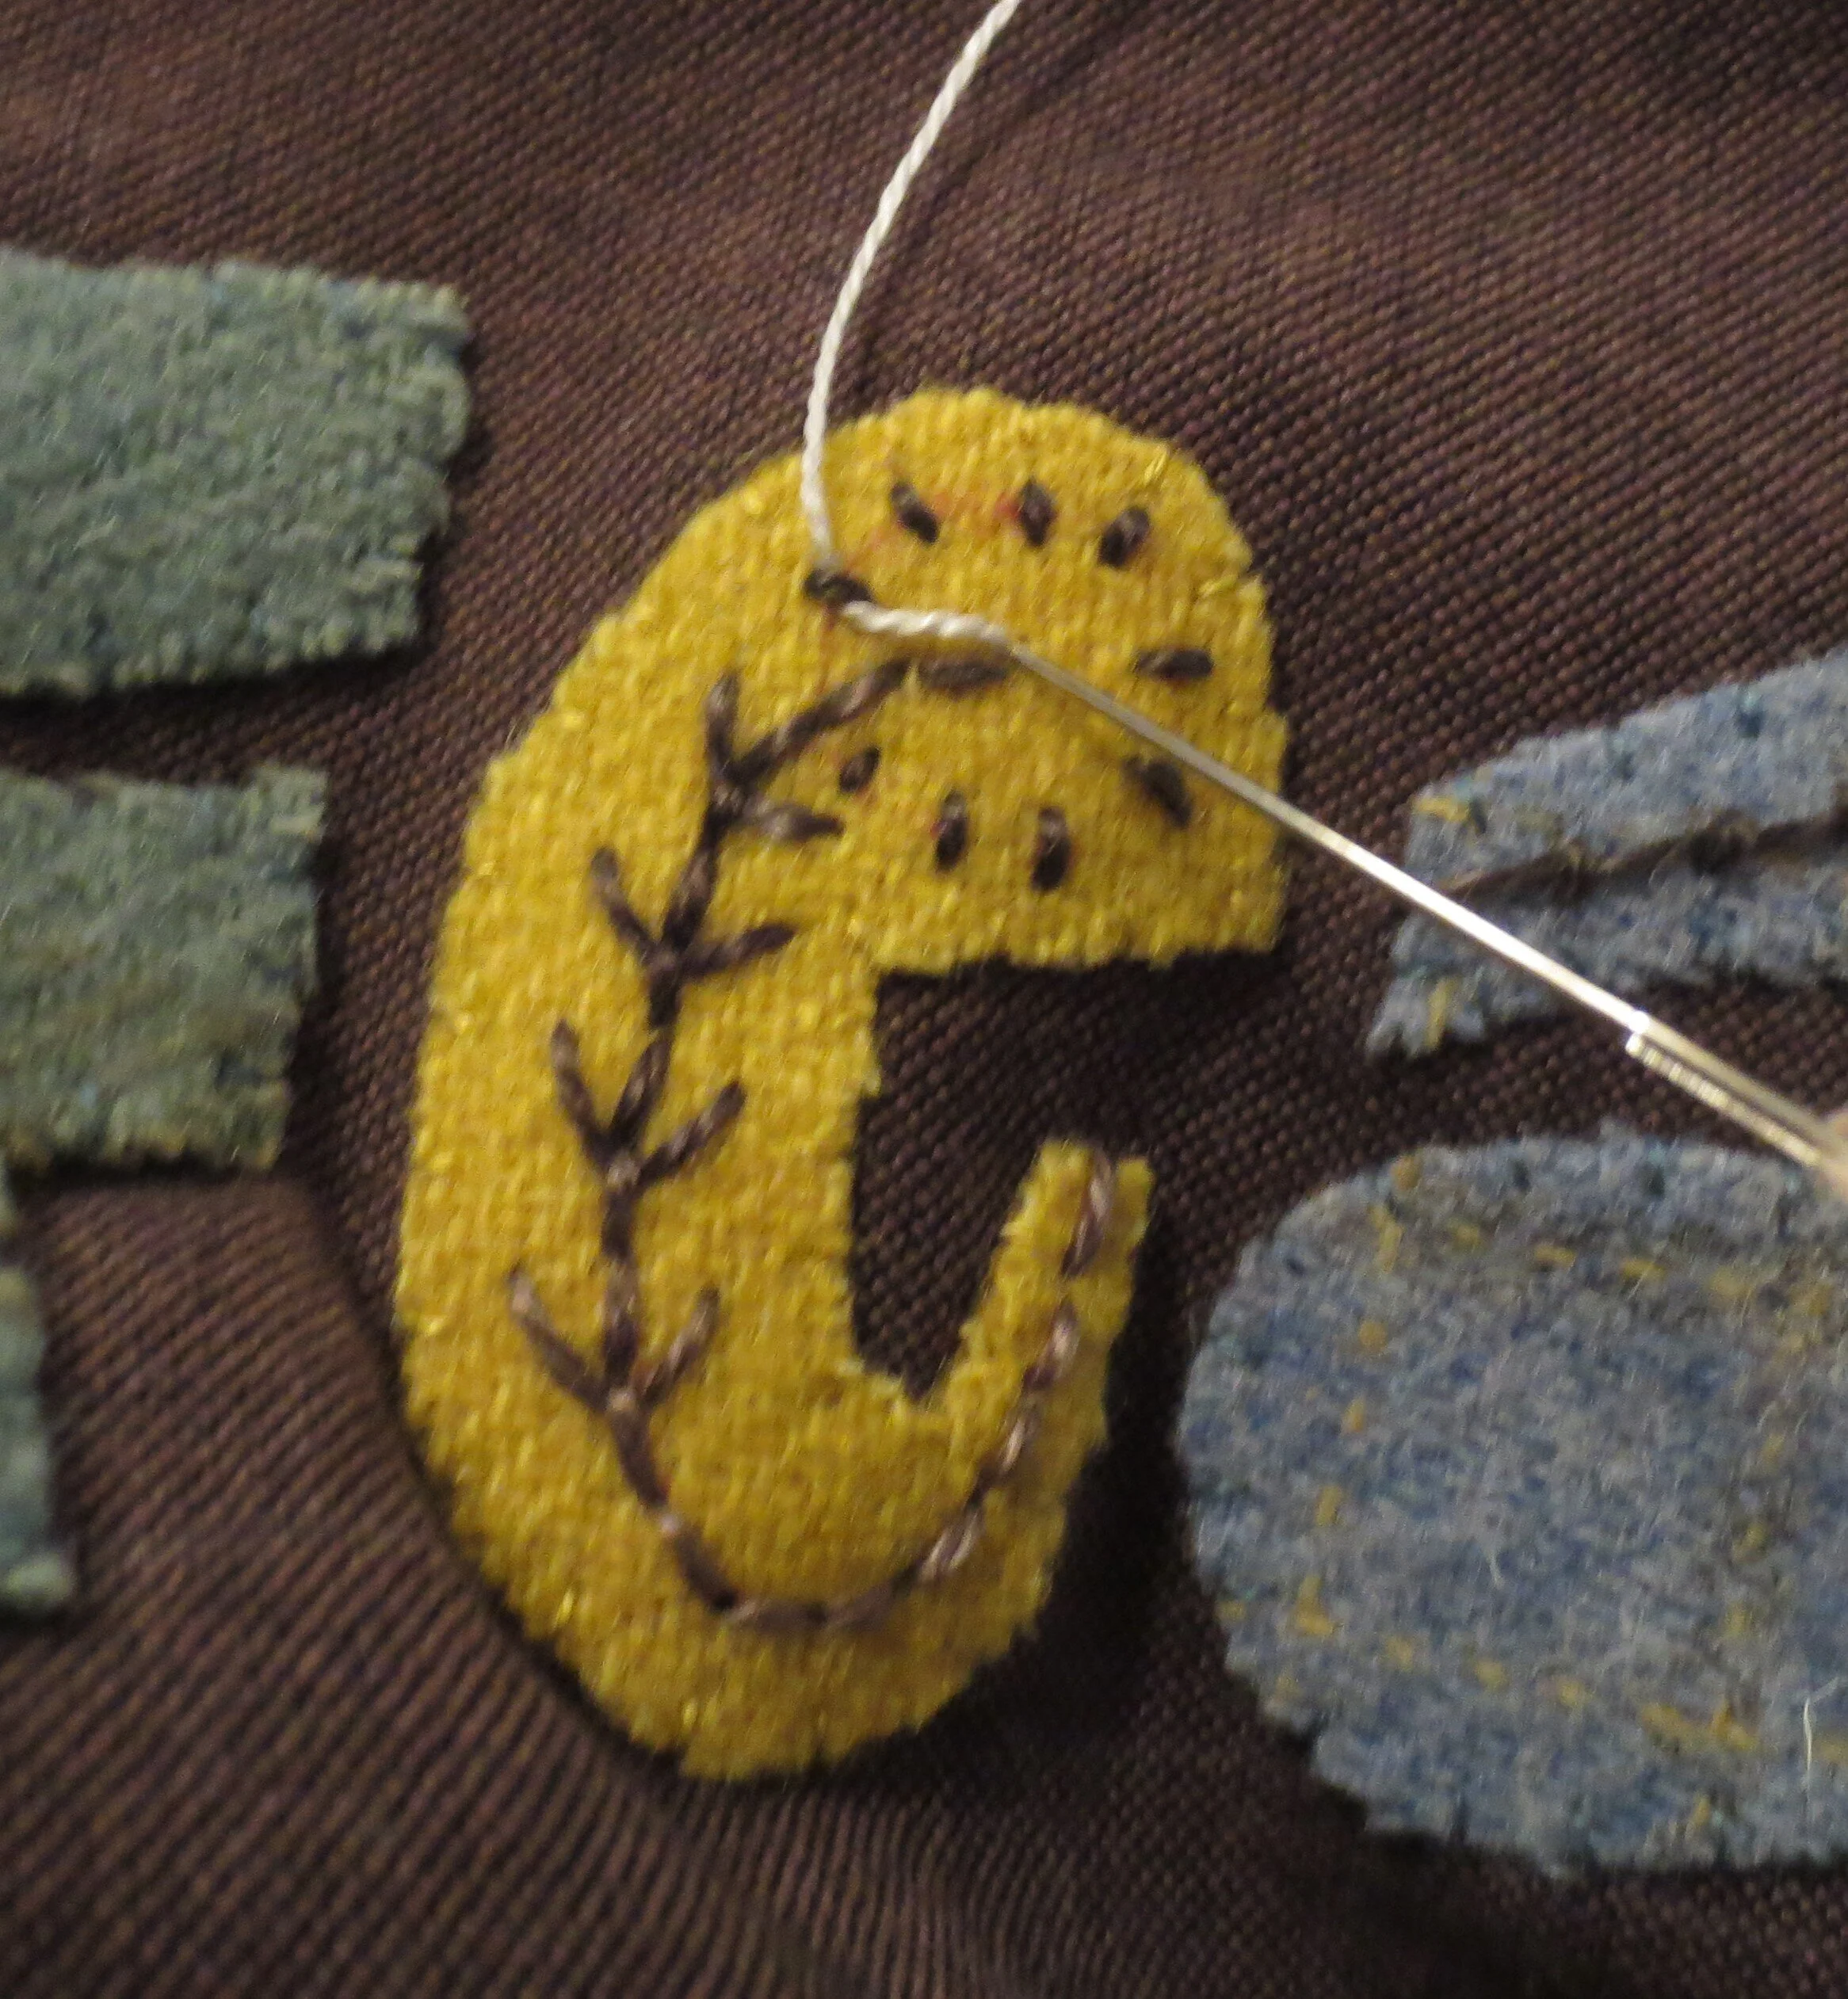
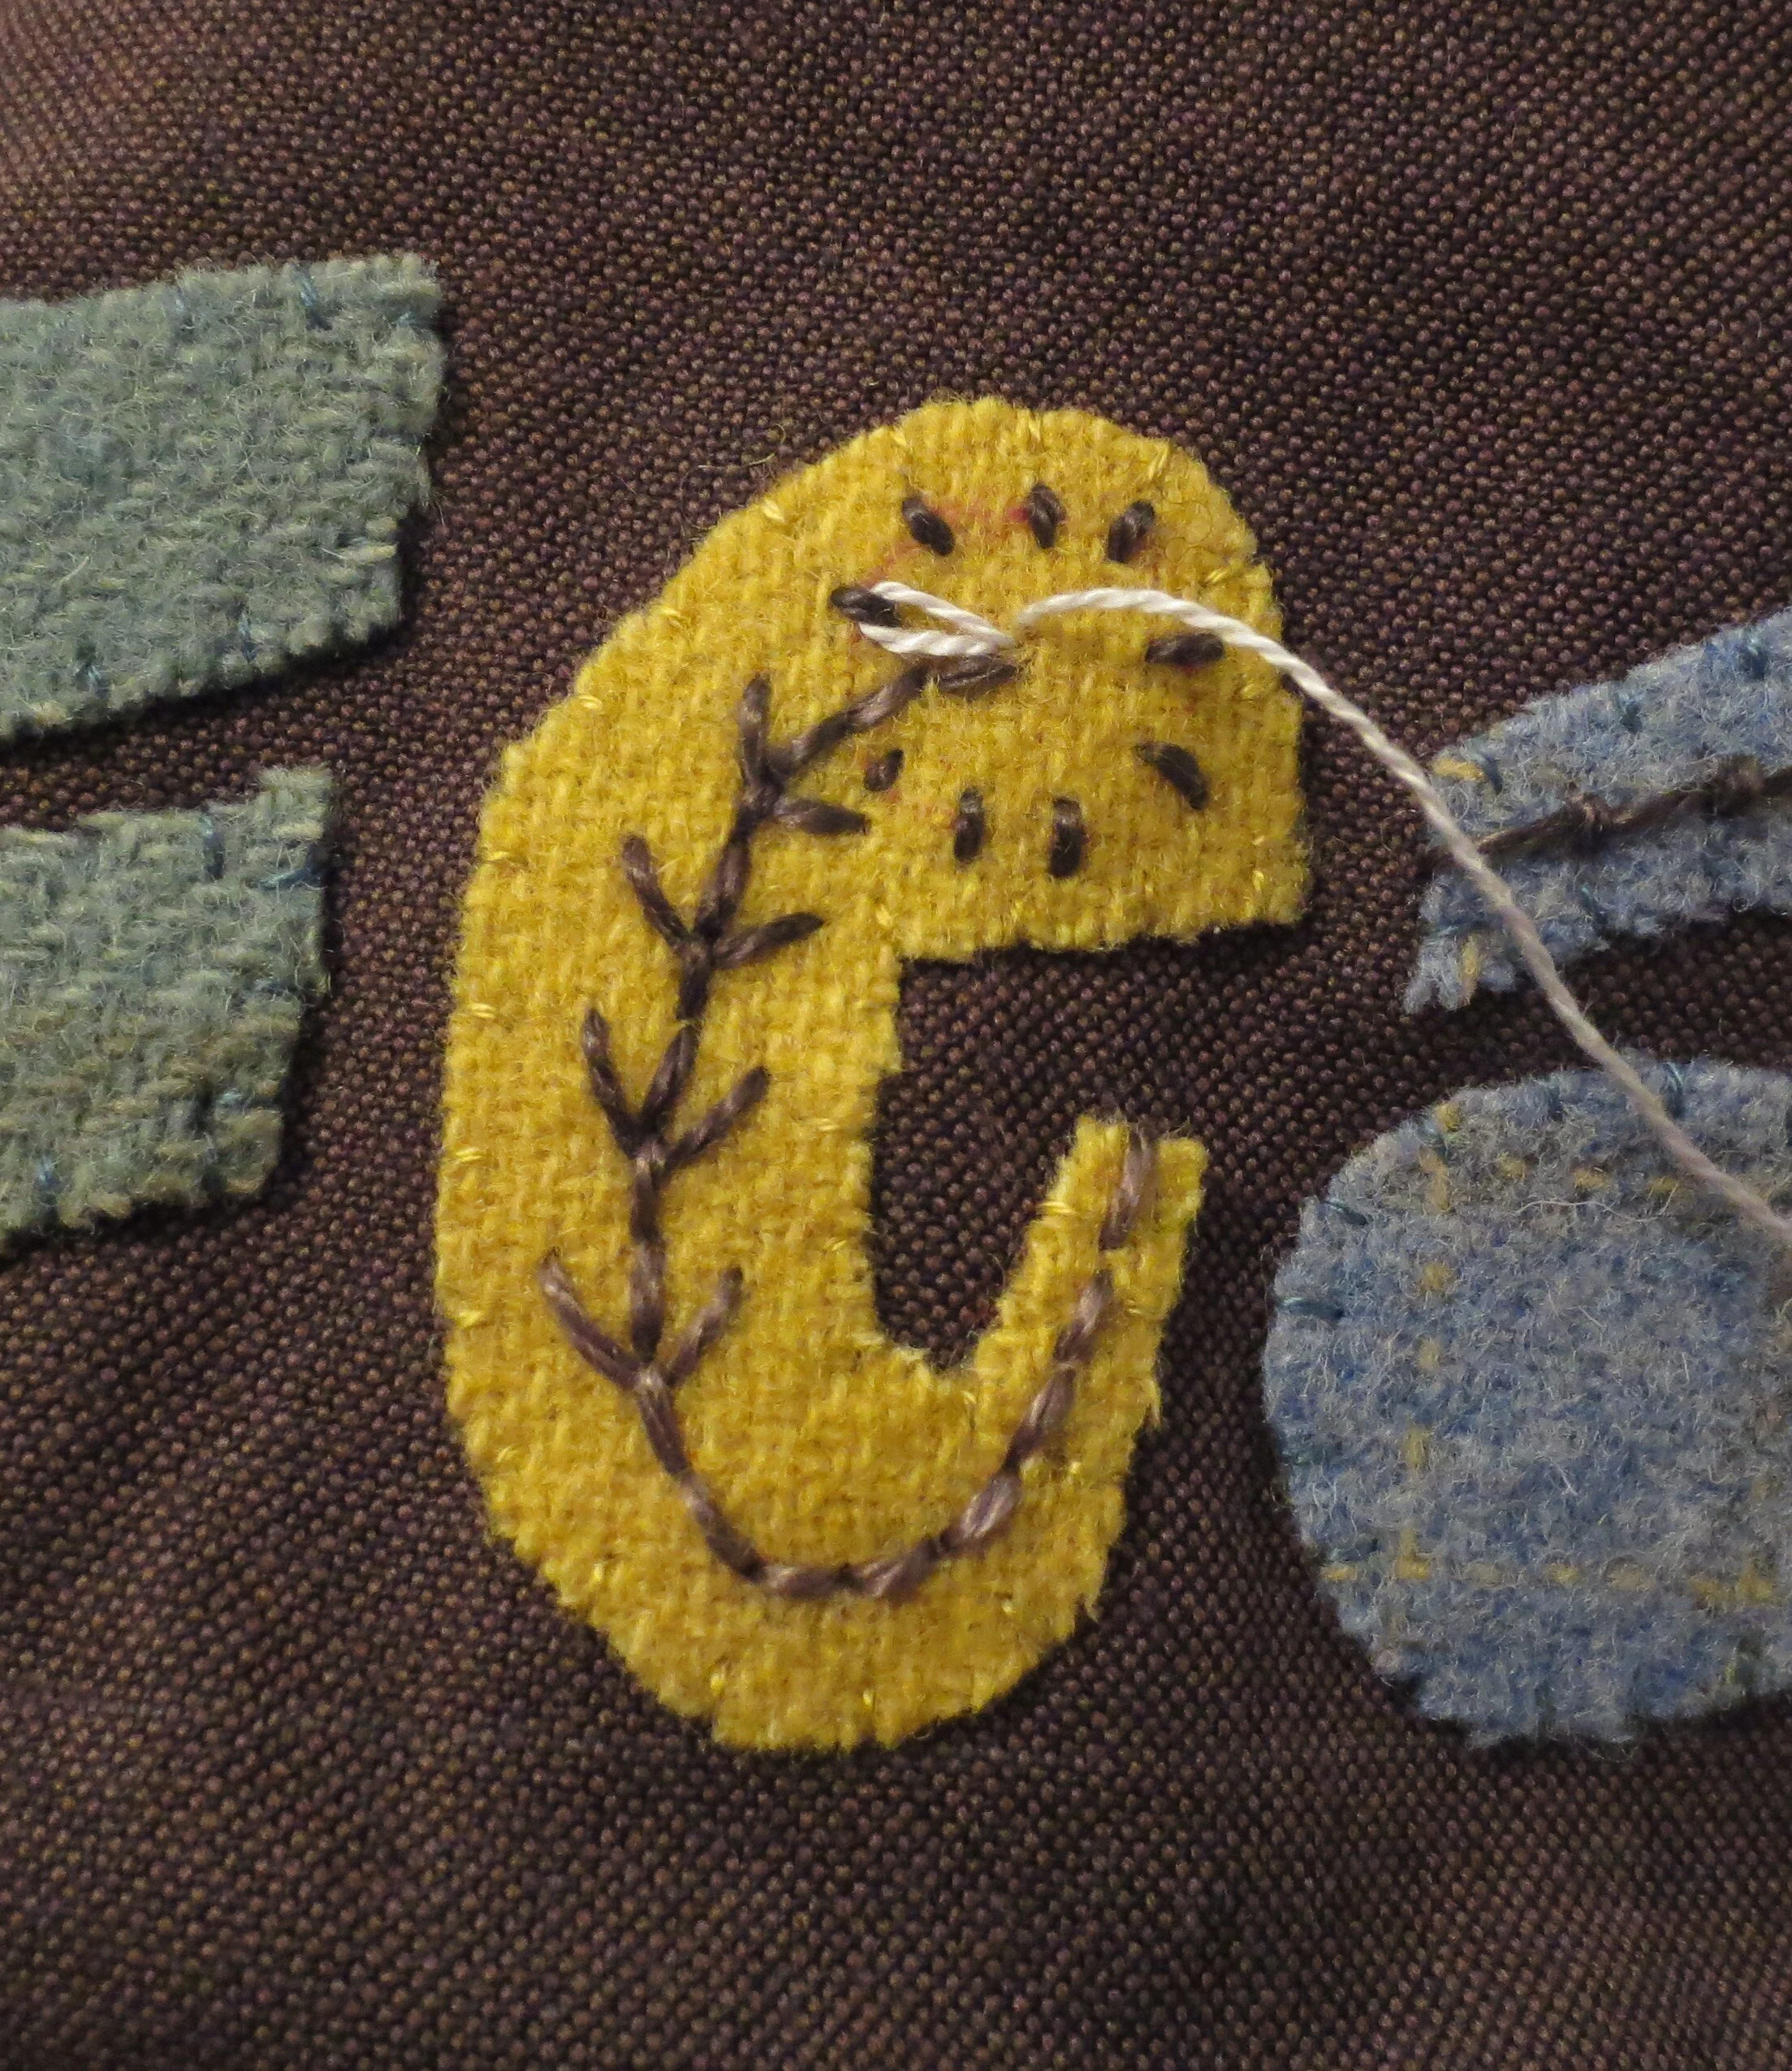
Continue around the circle making little flower petals.
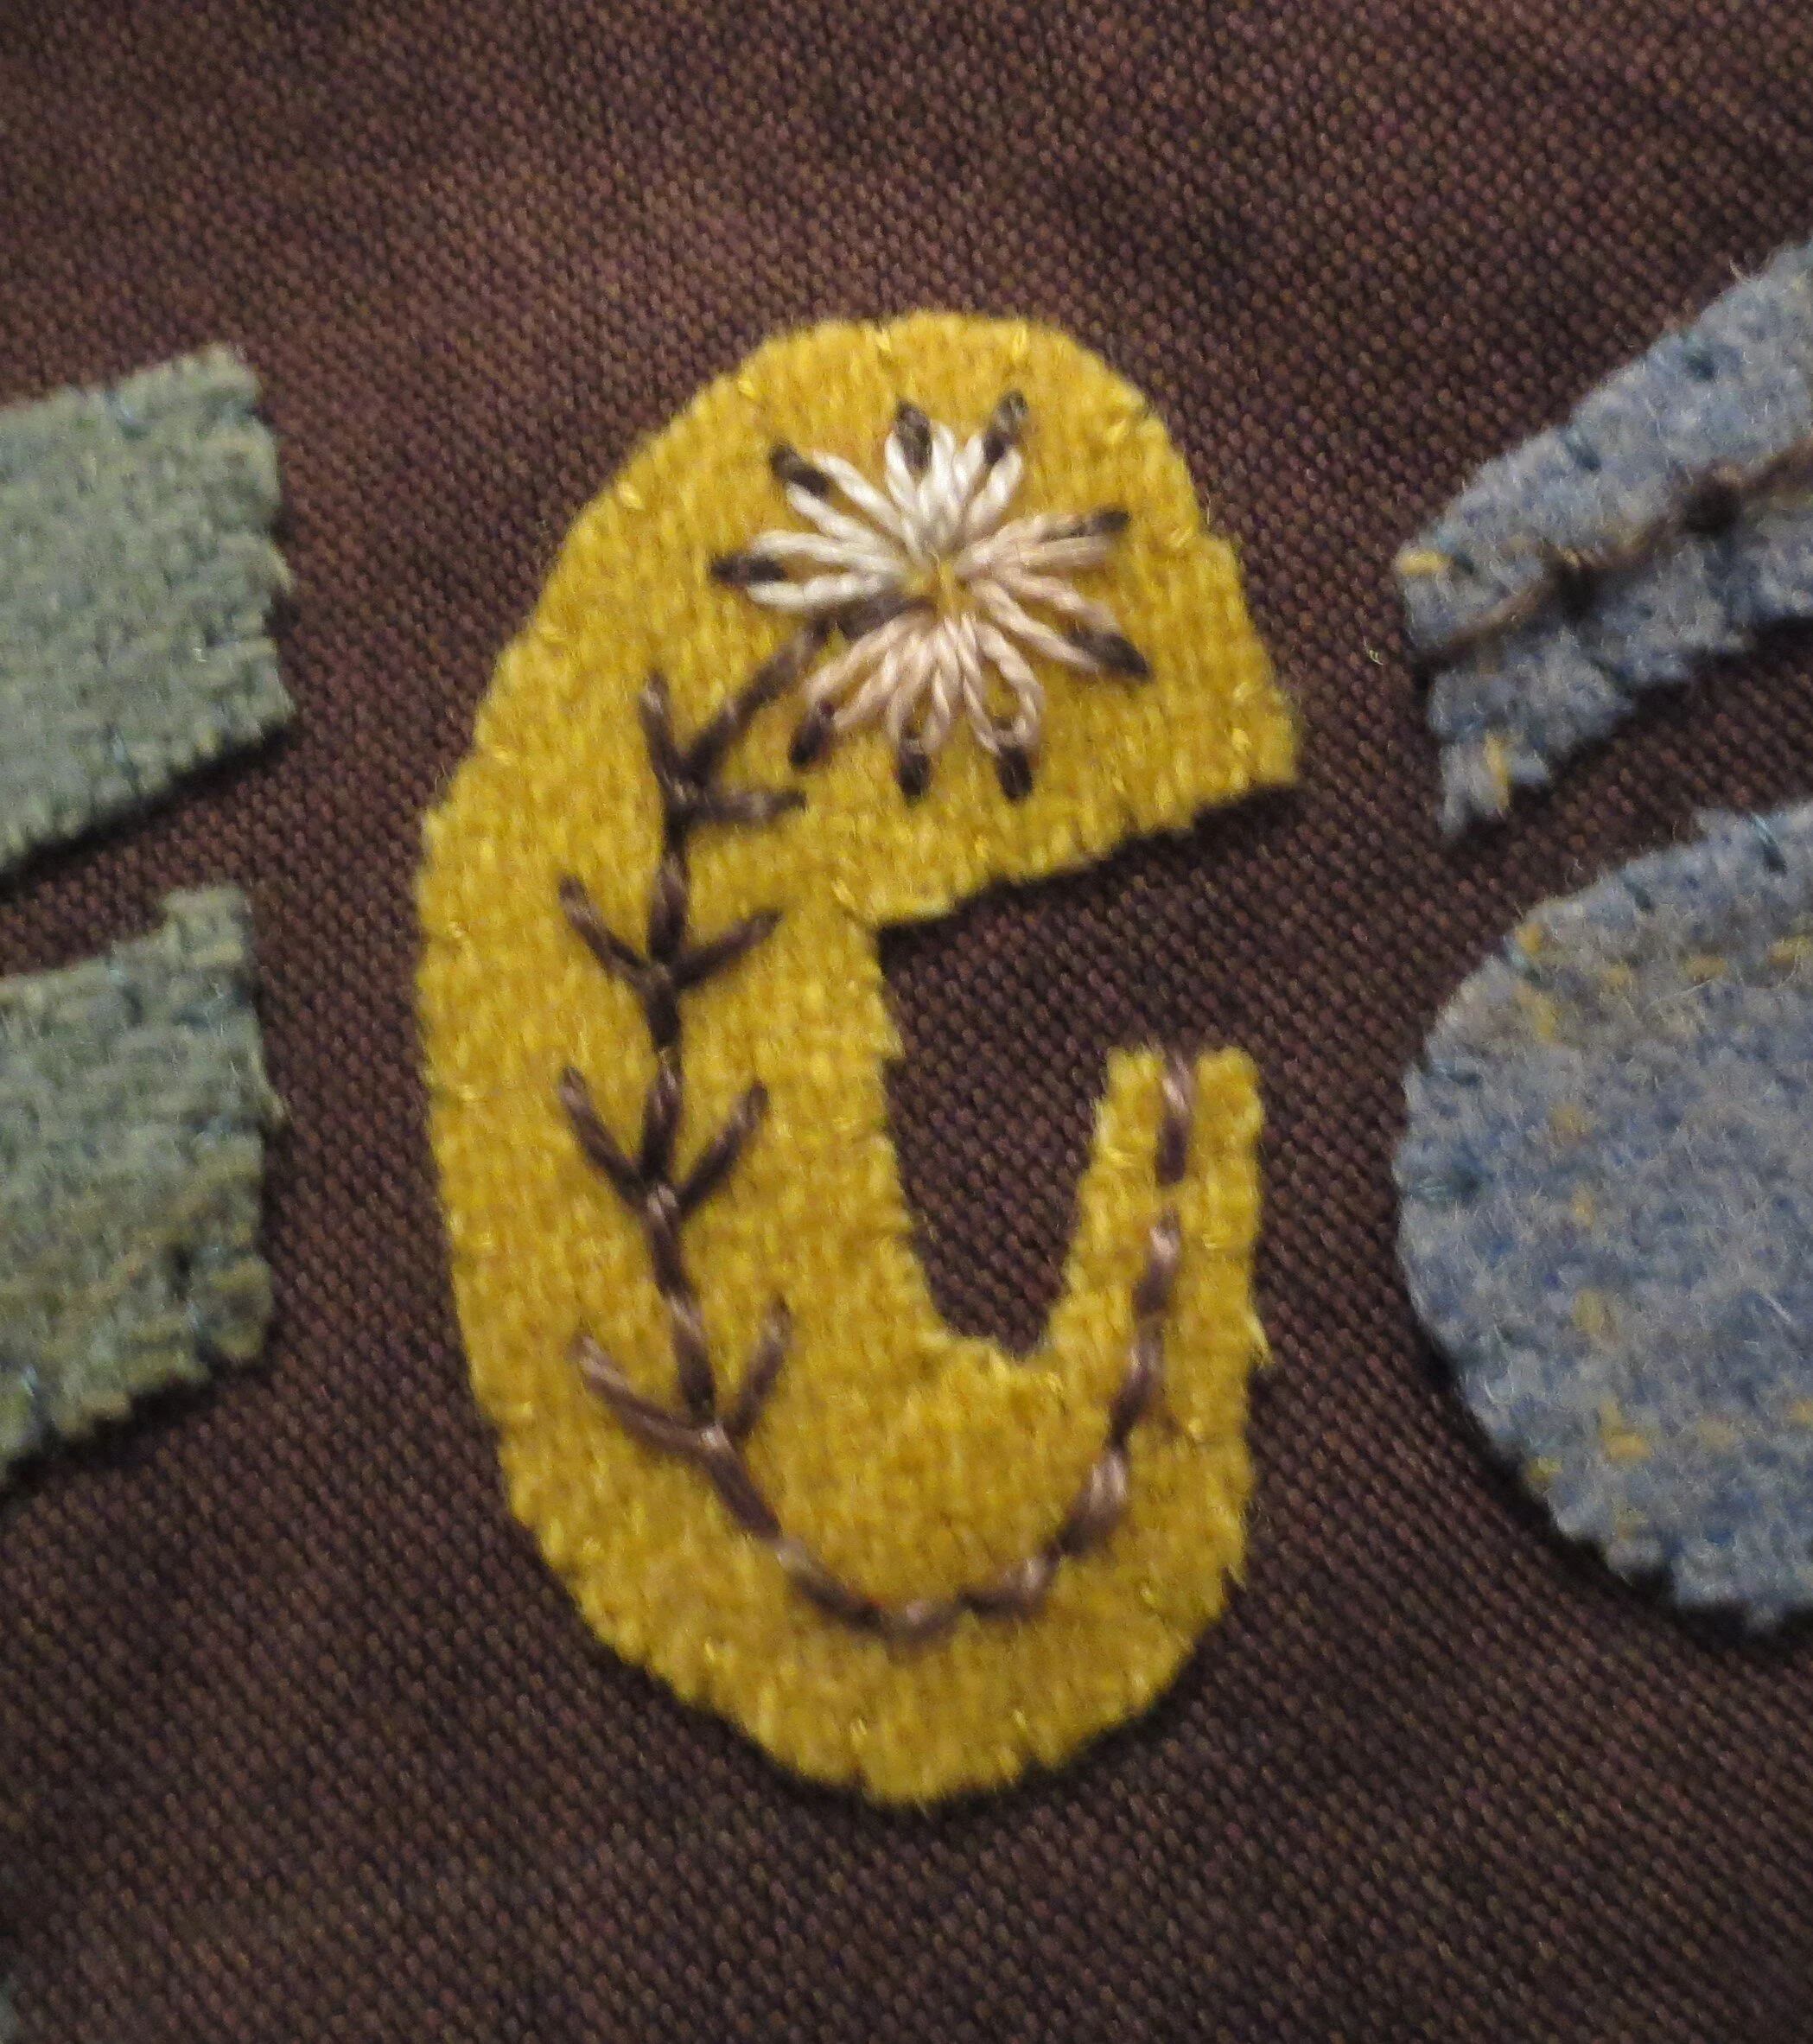
Use 1 strand of the darker colored thread to stitch a single French/colonial knot flower center.
Now let’s work on the remaining letter E.
Draw a circle with a stem like before, but don’t extend the stem into the circle.

Use 1 strand of dark thread to make 2 back stitches at the top of the stem.
Bring the thread back up at the base of the last back stitch and then make a lazy daisy stitch to one side of the stem.

Stitch another lazy daisy opposite the first.
Repeat the same stitch sequence (2 back stitches and 2 lazy daisy stitches) three more times, and then finish the remaining portion of the stem with back stitches.

Use a marking pen or chalk pencil to mark 7 equally spaced dots on the circle.
We will be stitching a buttonhole stitch with the legs facing out instead of in. Begin by bringing the thread up at the top of the stem, and then stitching a series of buttonhole stitches around the circle.

Continue around the circle, turning your work as you stitch, and then finishing by inserting the needle at the top of the stem, and then pulling the thread through the back of the fabric.
Using 1 strand of the same thread, stitch a single French/colonial knot in the center of the buttonhole flower.
The top border is complete!

Now let’s work on the bottom border.
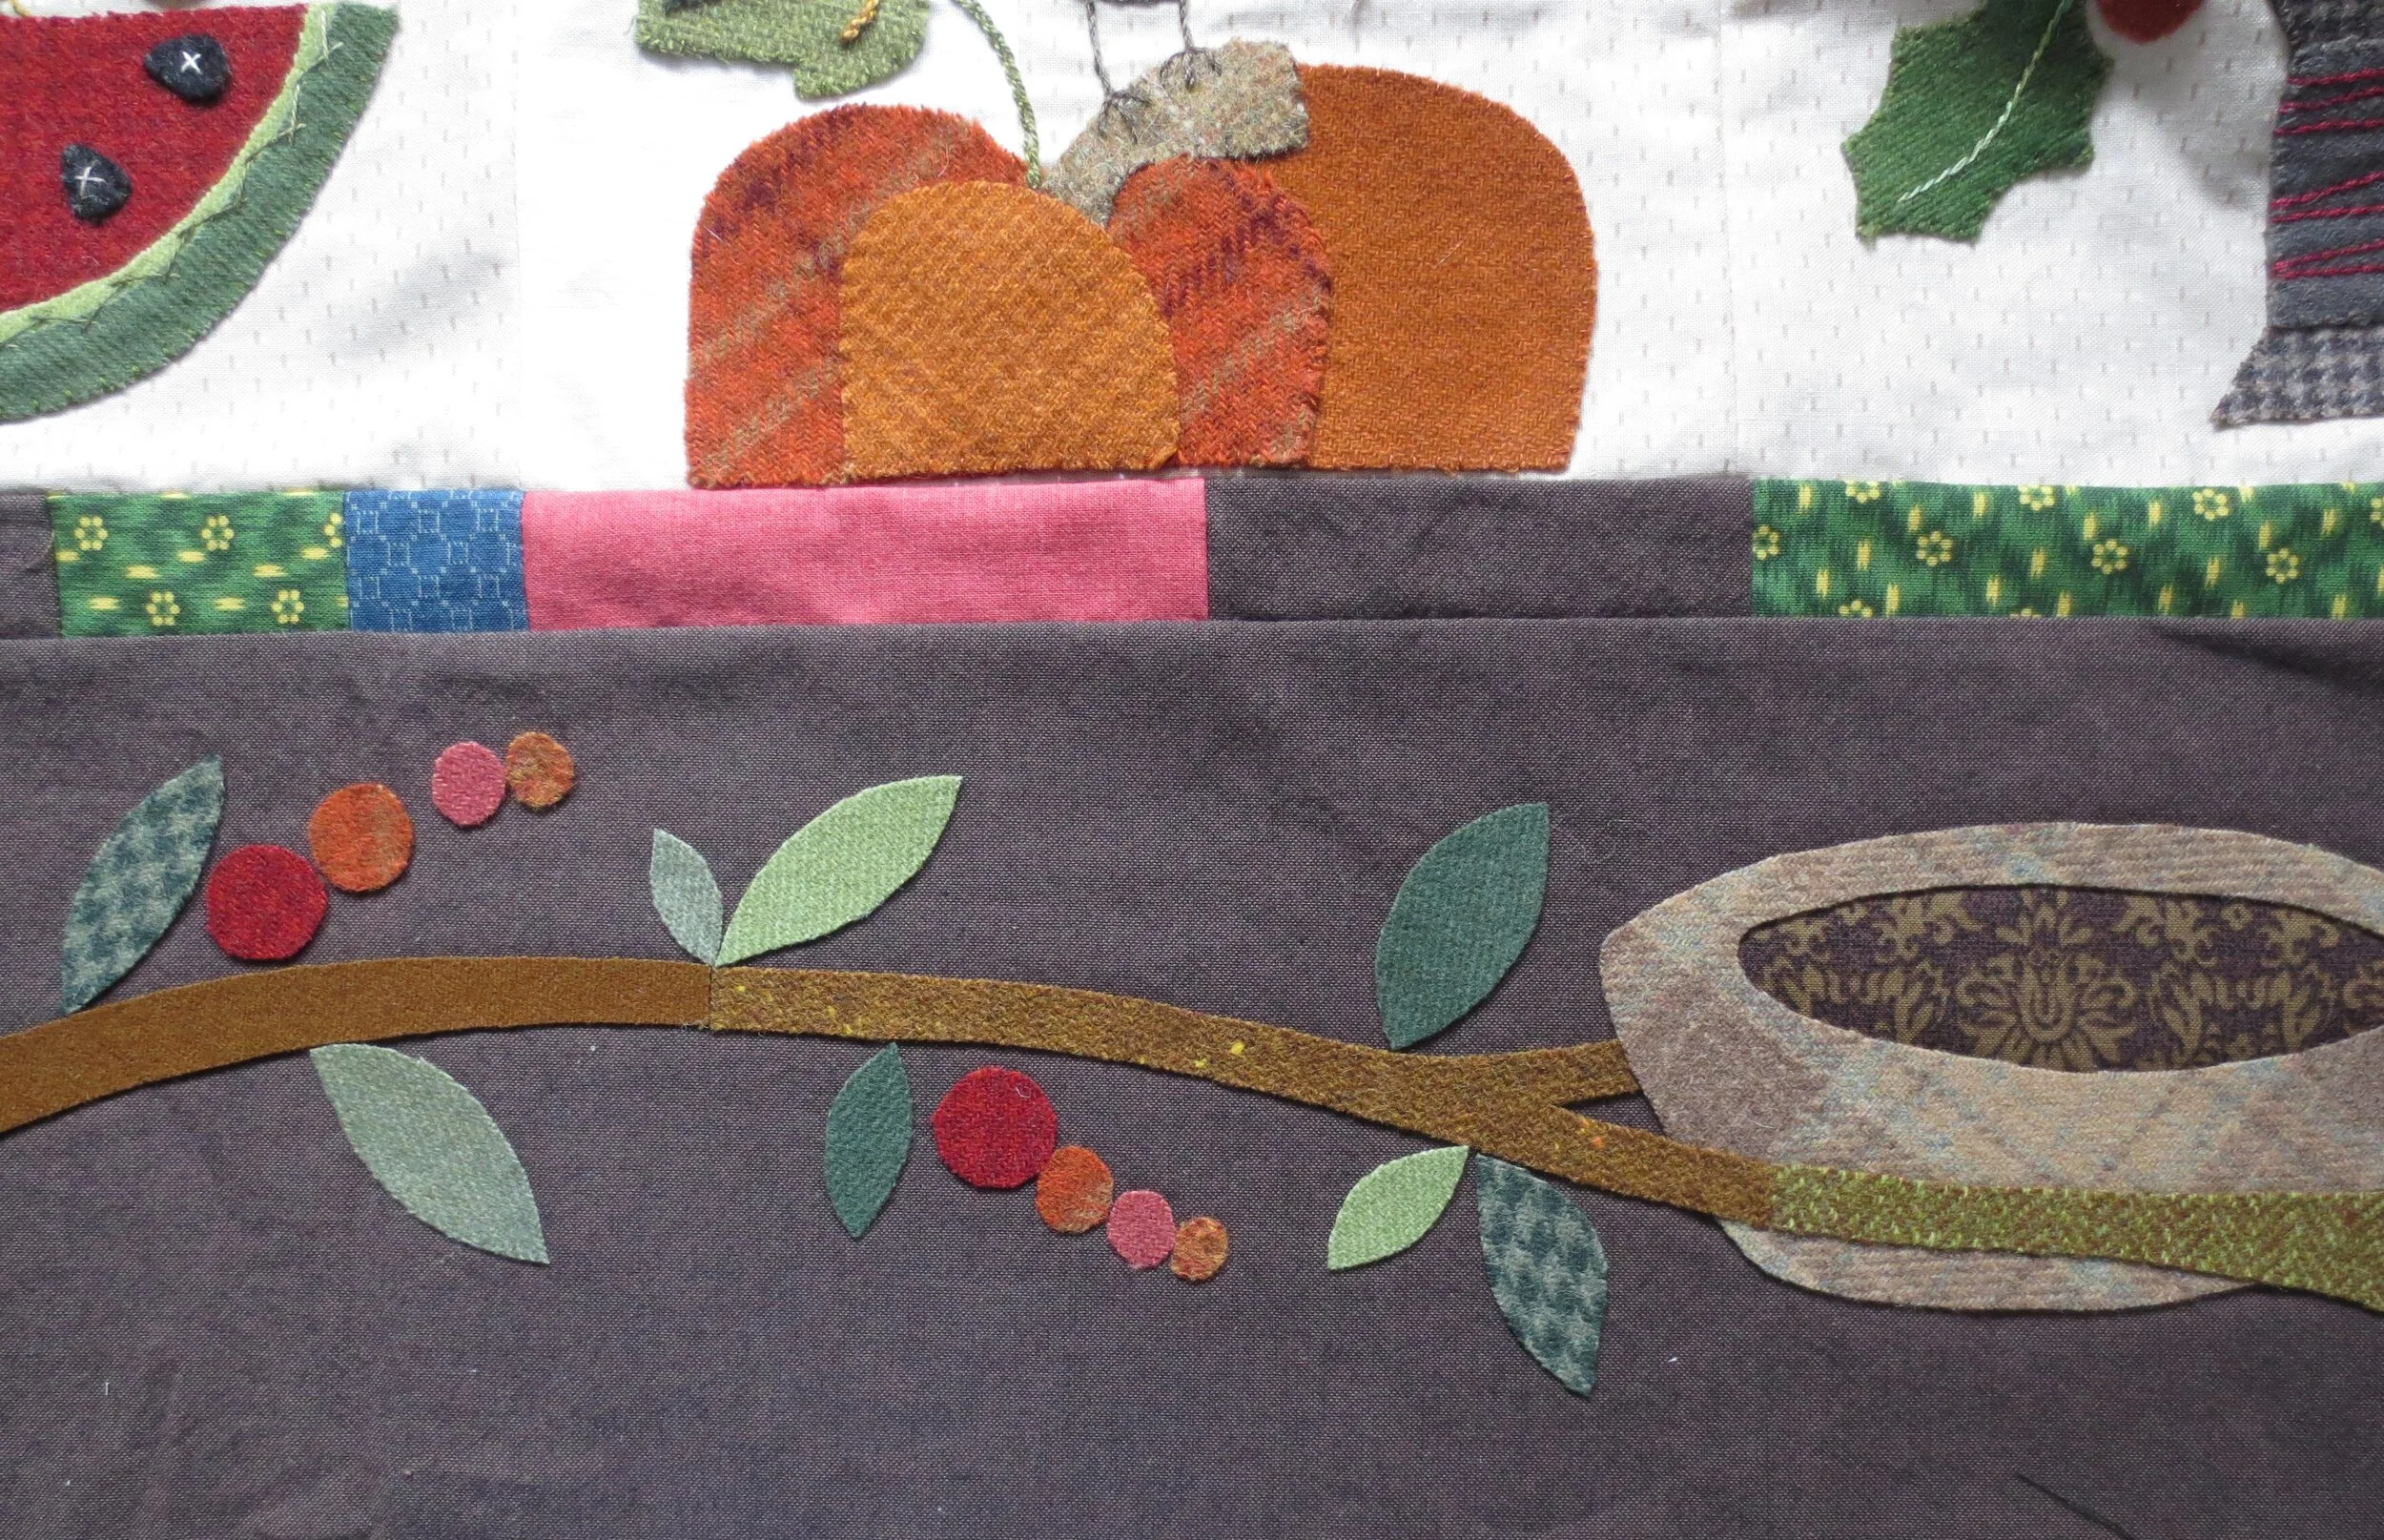
4. Bottom Border
Gather the wool pattern pieces you cut earlier. I forgot to include the berries in the photo below.
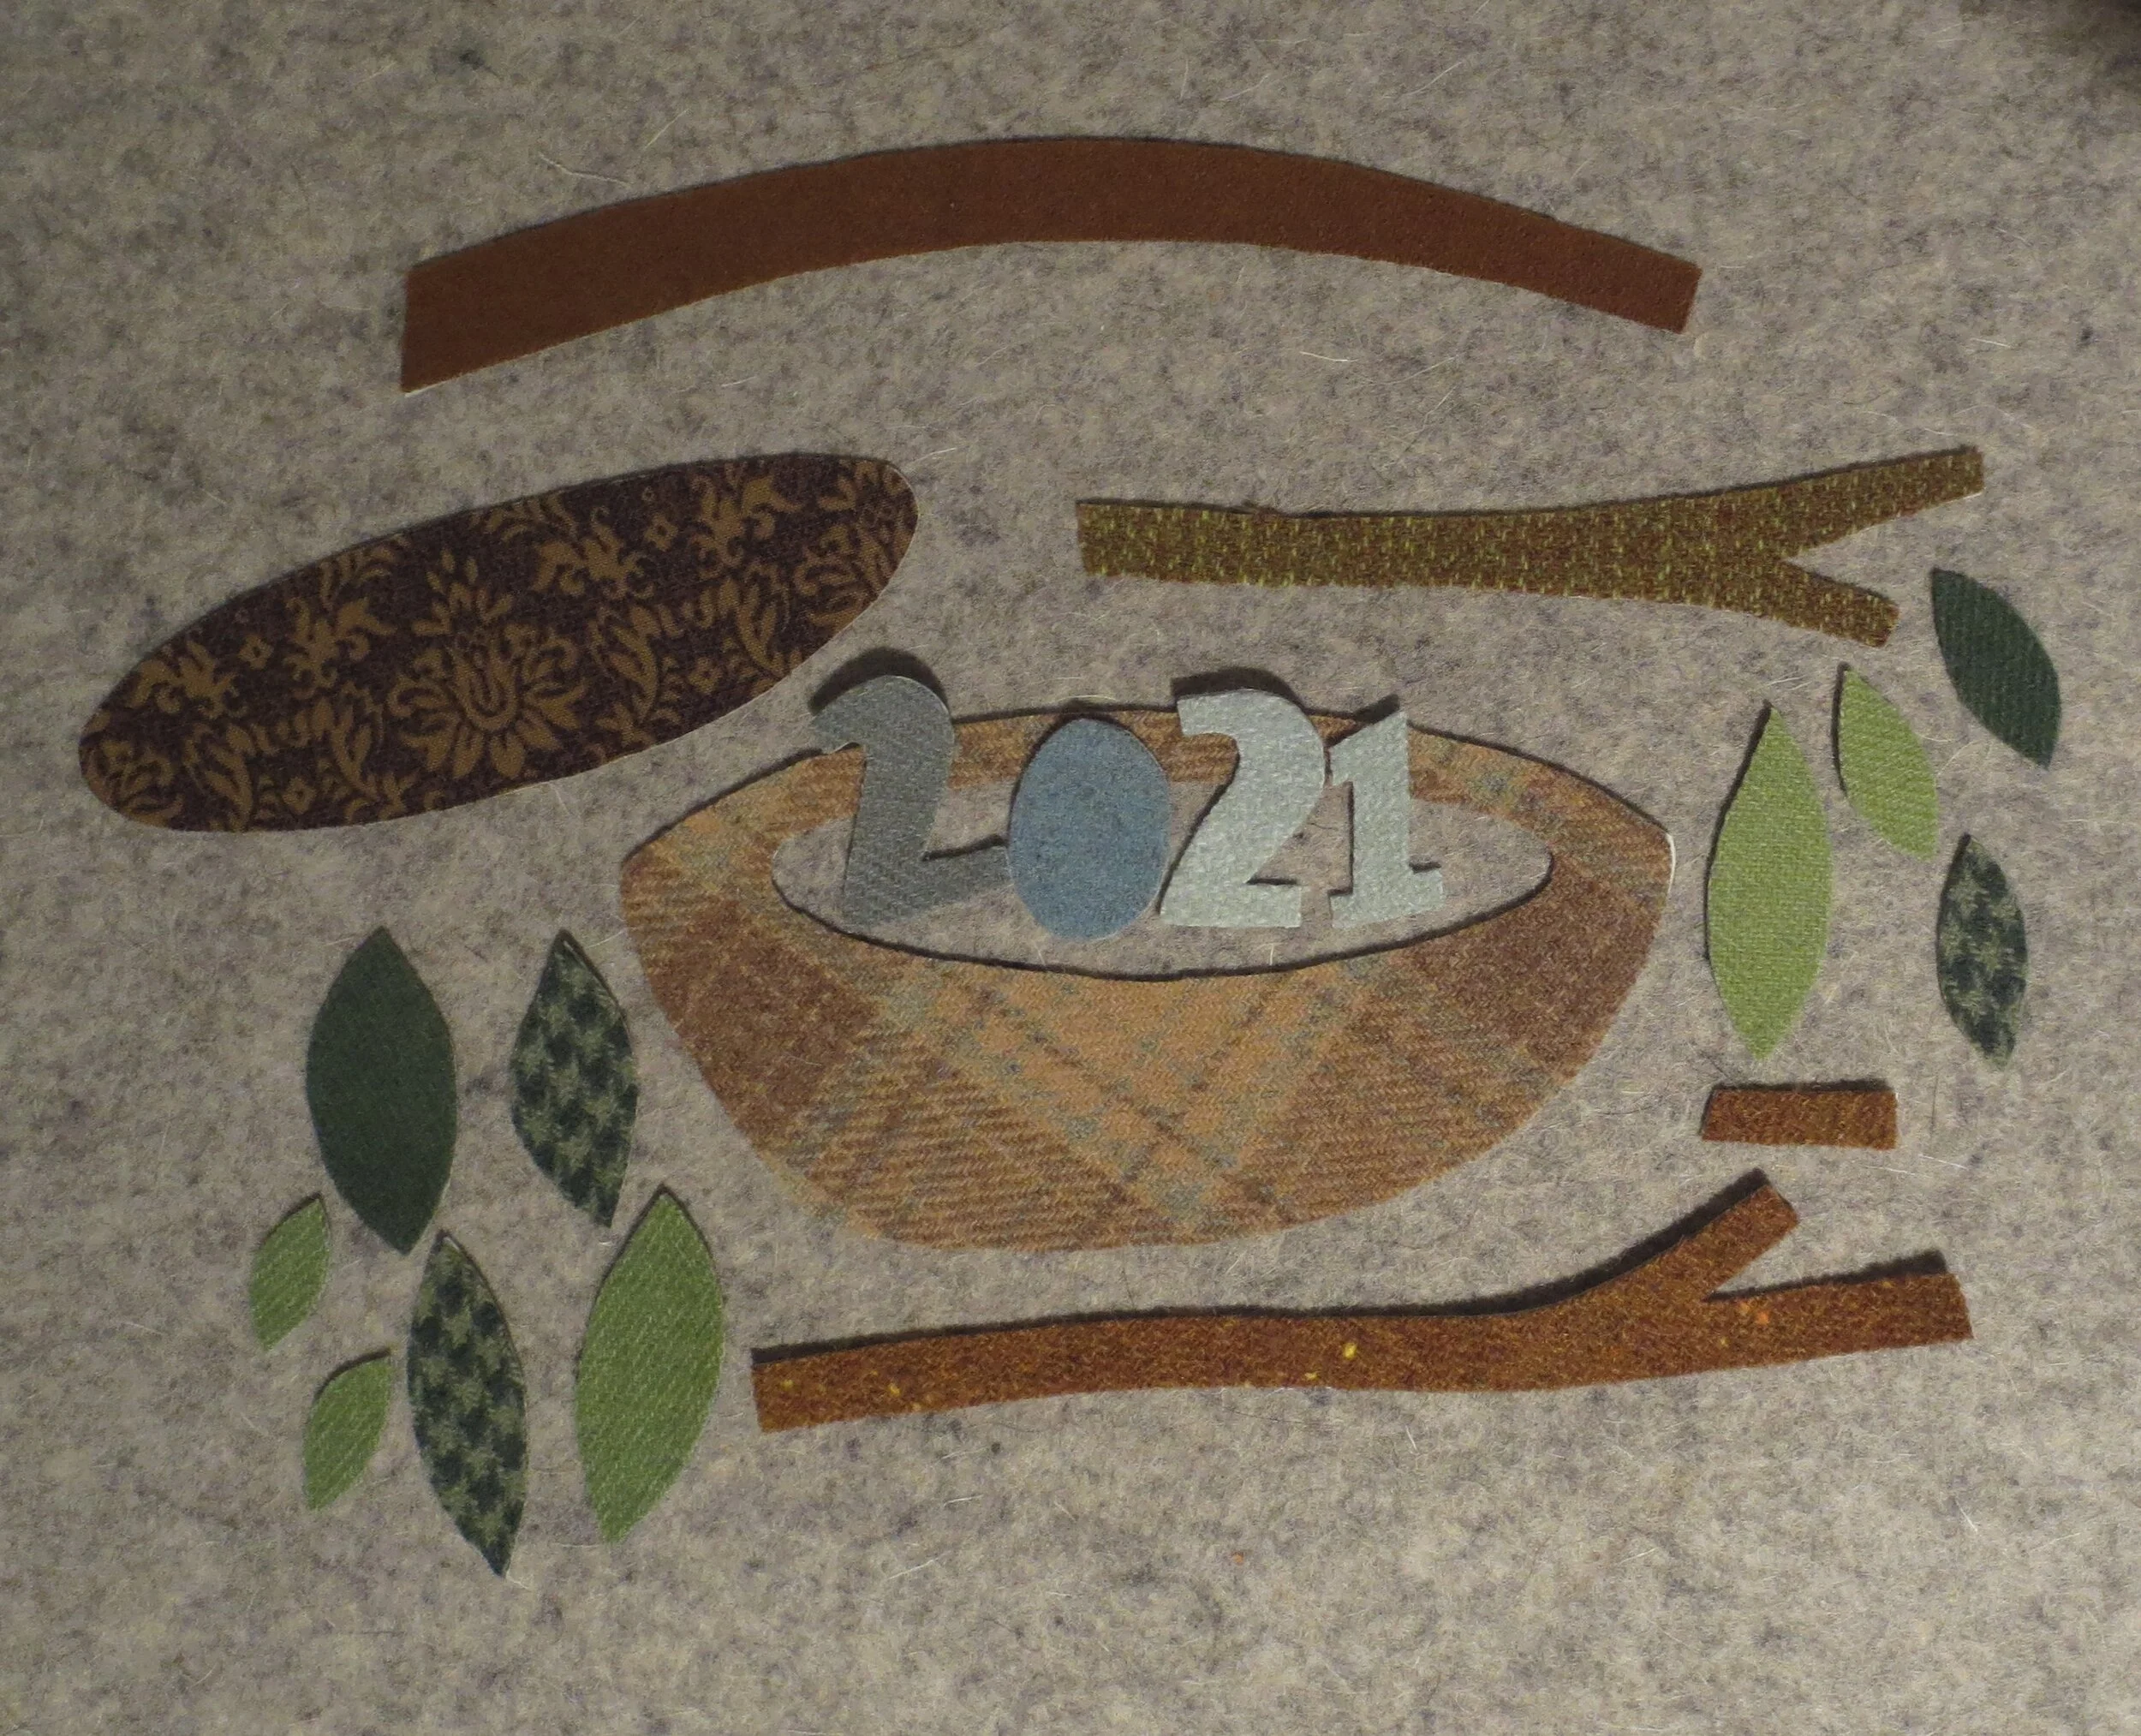
Position all the wool pieces except the date and A1, A2, and E1 on the bottom of the quilt using the layout as a guide.
Fuse in place using steam.
Position the date on the nest using the layout as a guide and then fuse in place with steam.
Position A1, B1, and E1 and then fuse in place using steam.

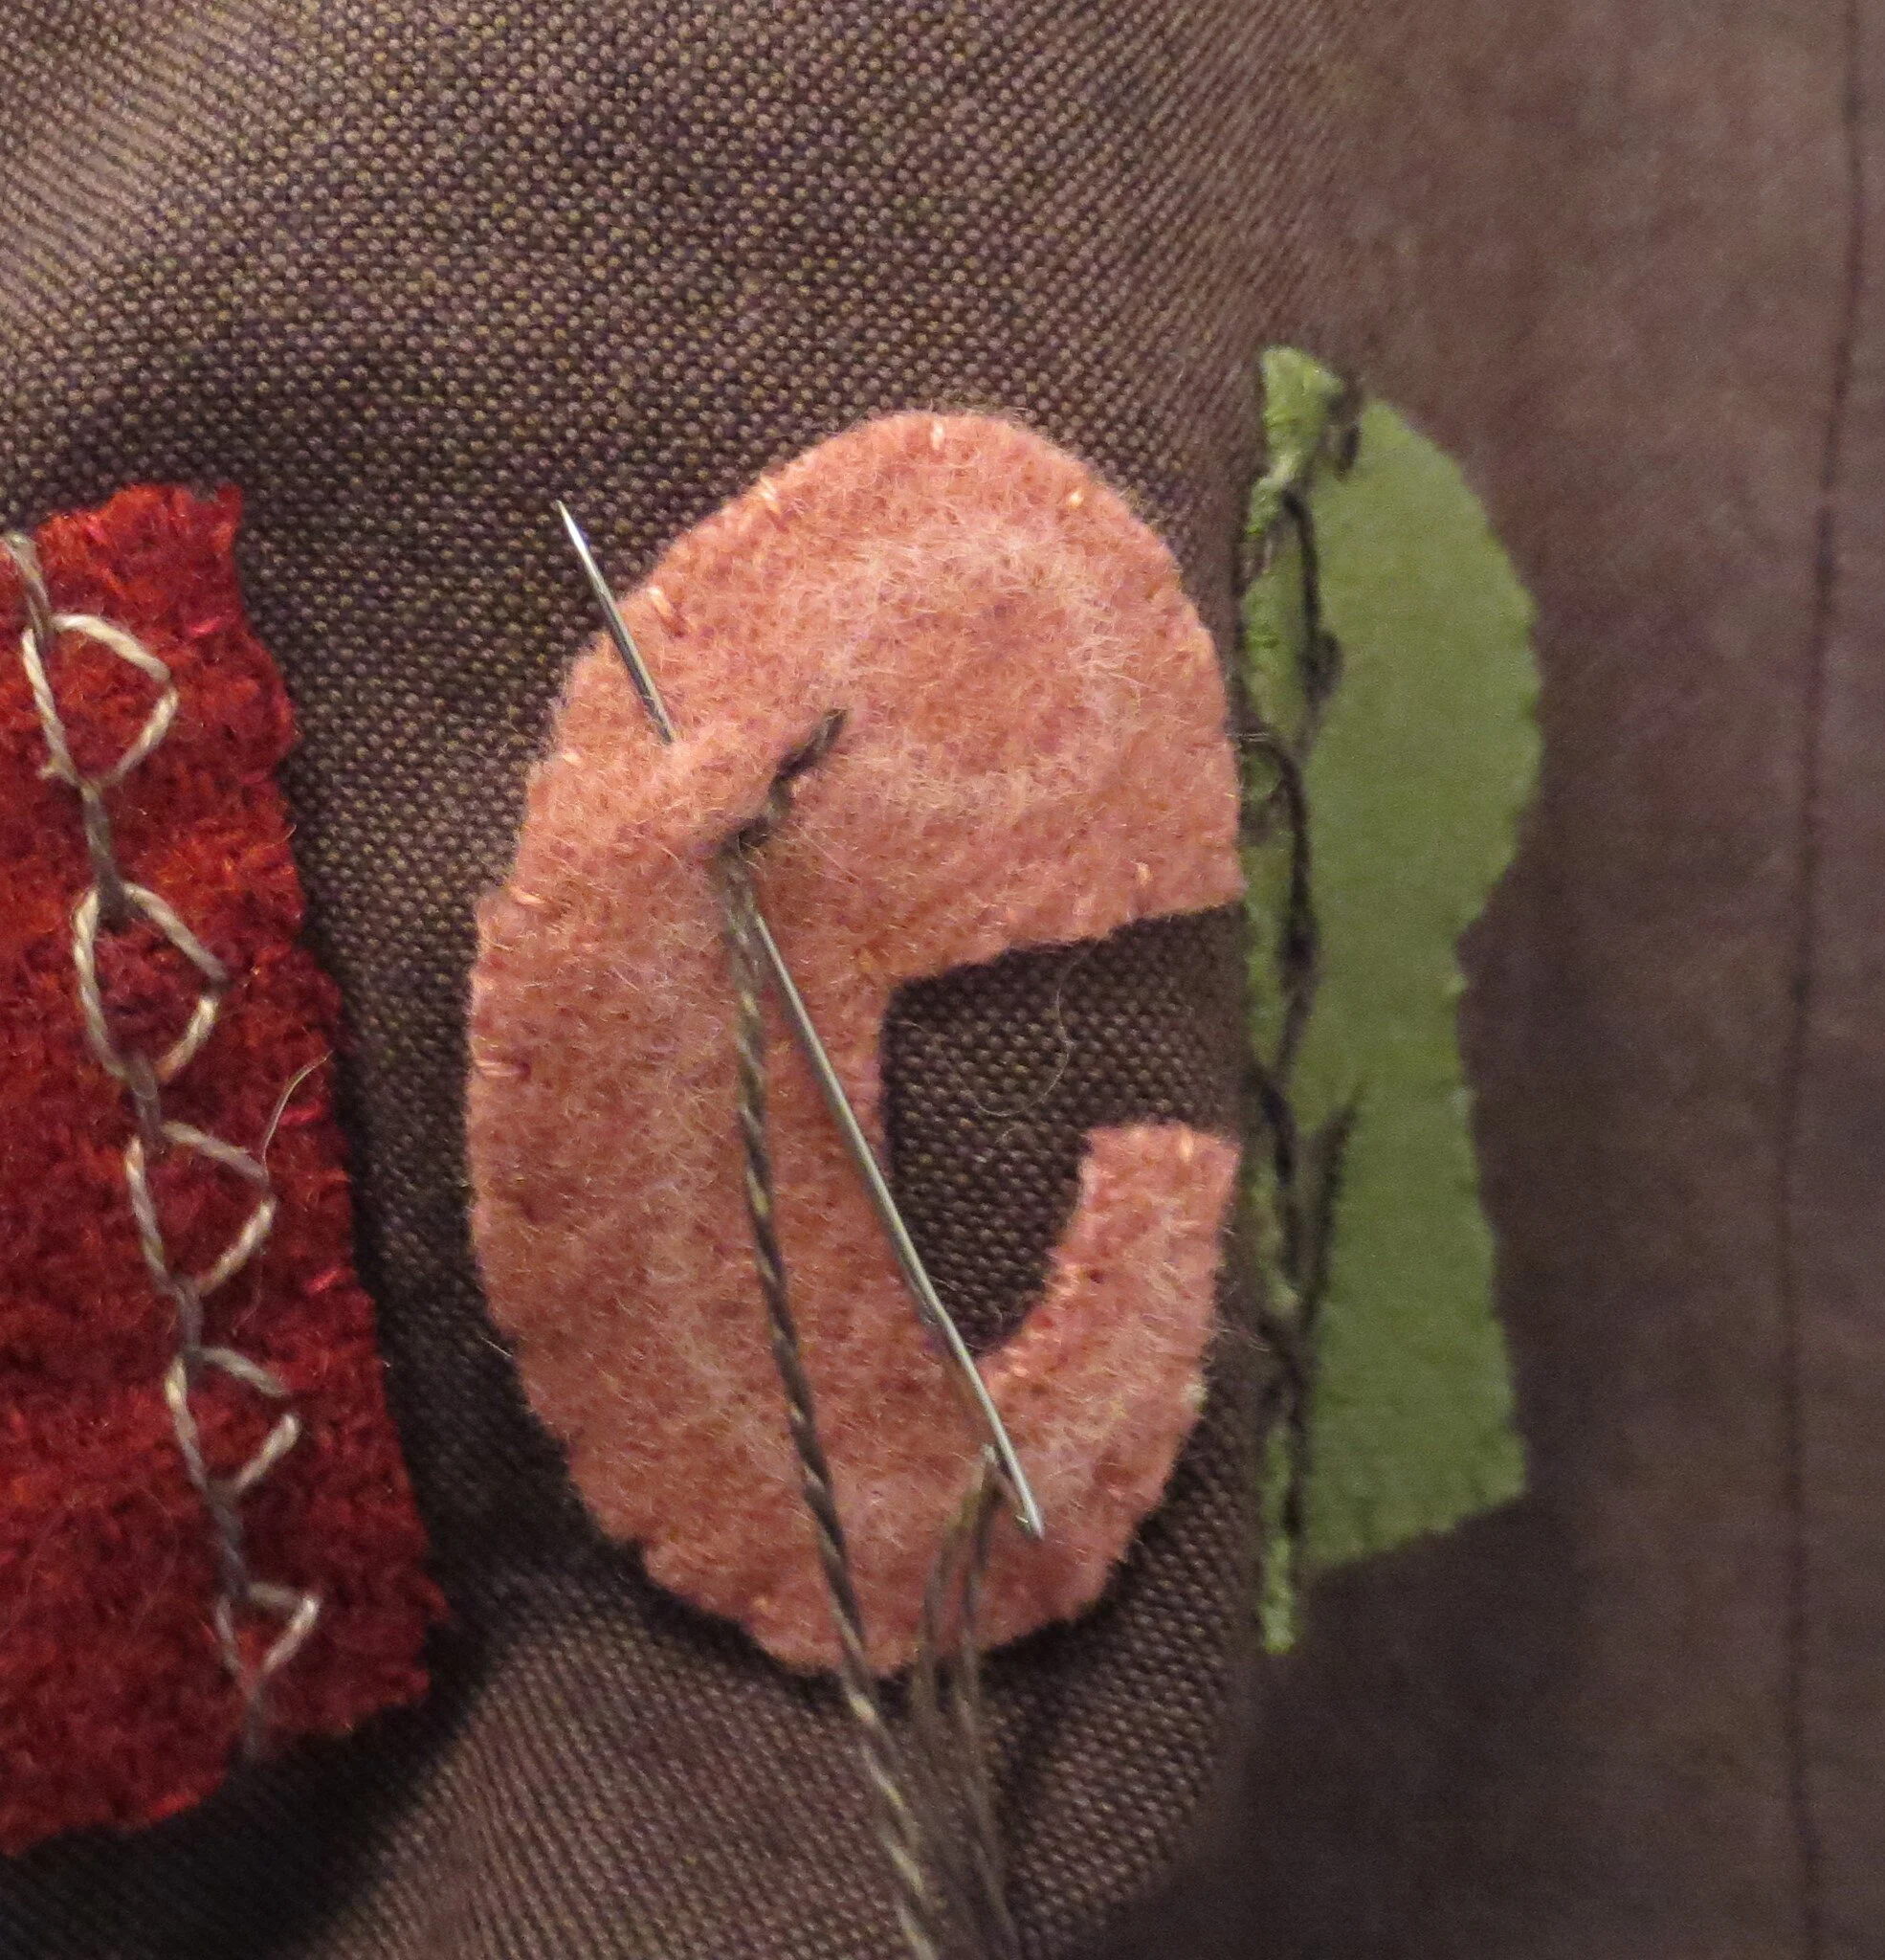
Whip stitch all the wool pieces (smallest pieces first) using 2 strands of floss that match the colors of the wool.
Note: All the following stitches are made with perle cotton, size 8 unless otherwise noted.
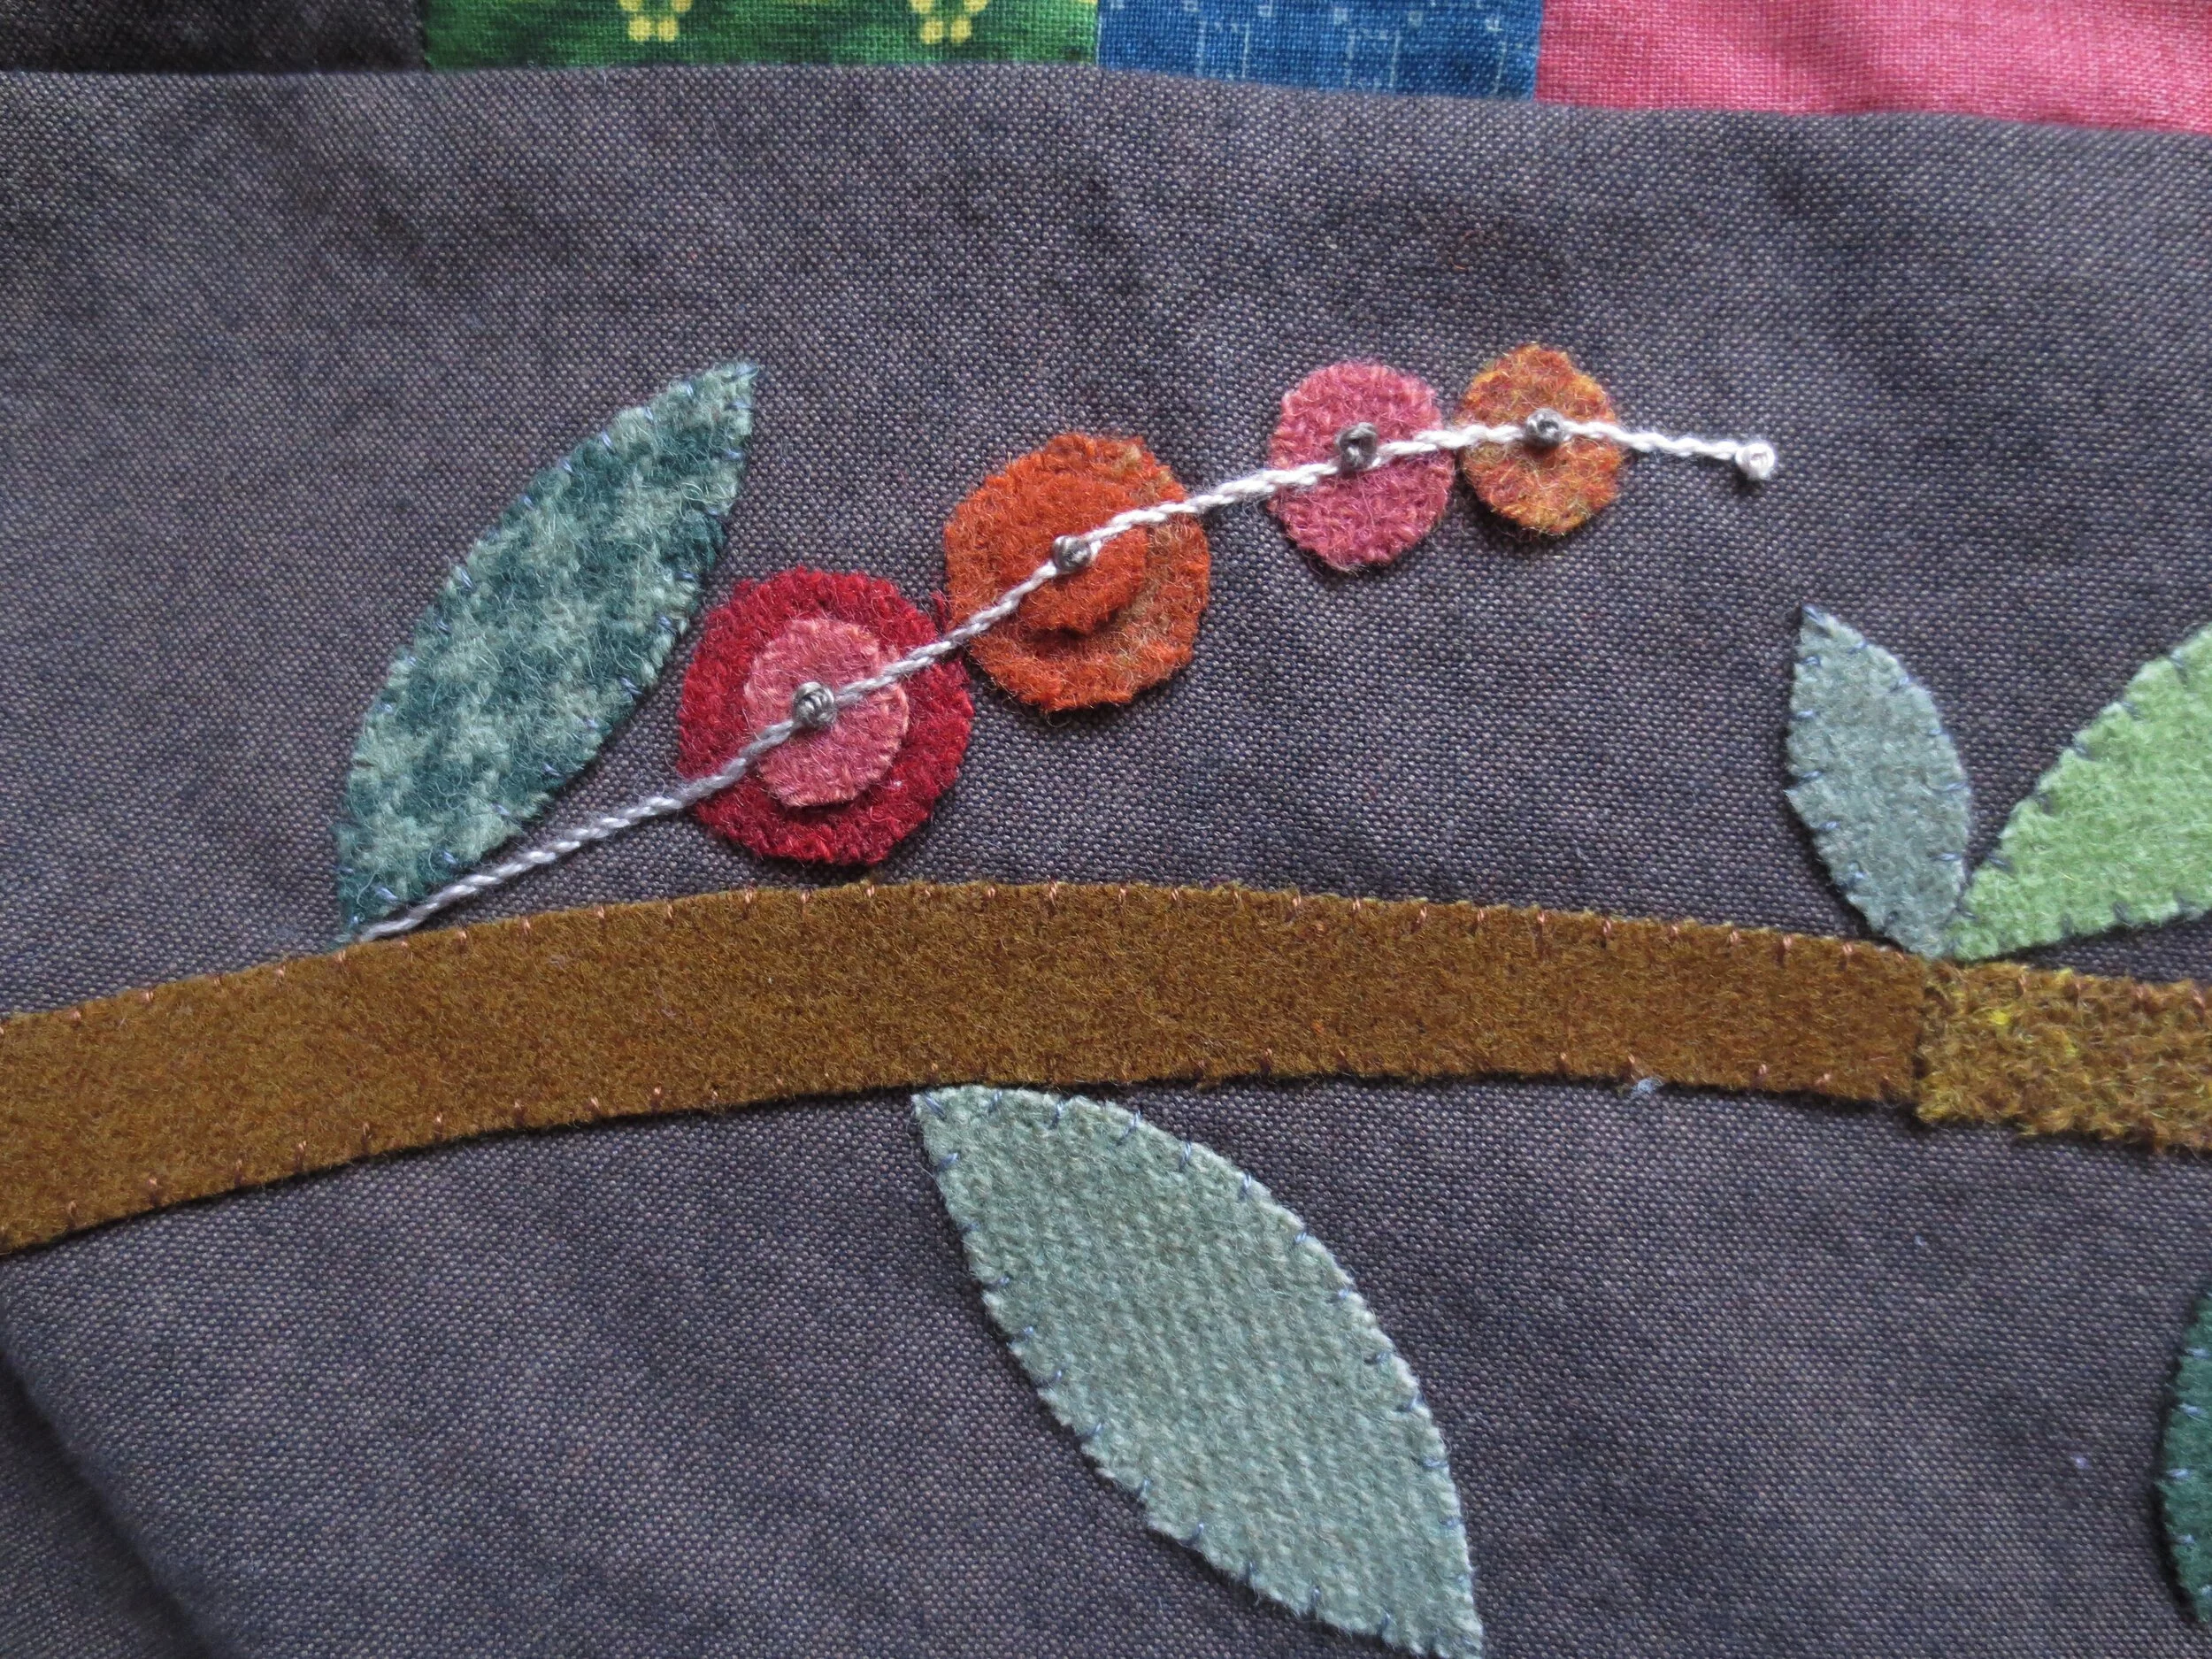
Draw the berry stems using a chalk pencil or fabric marker.
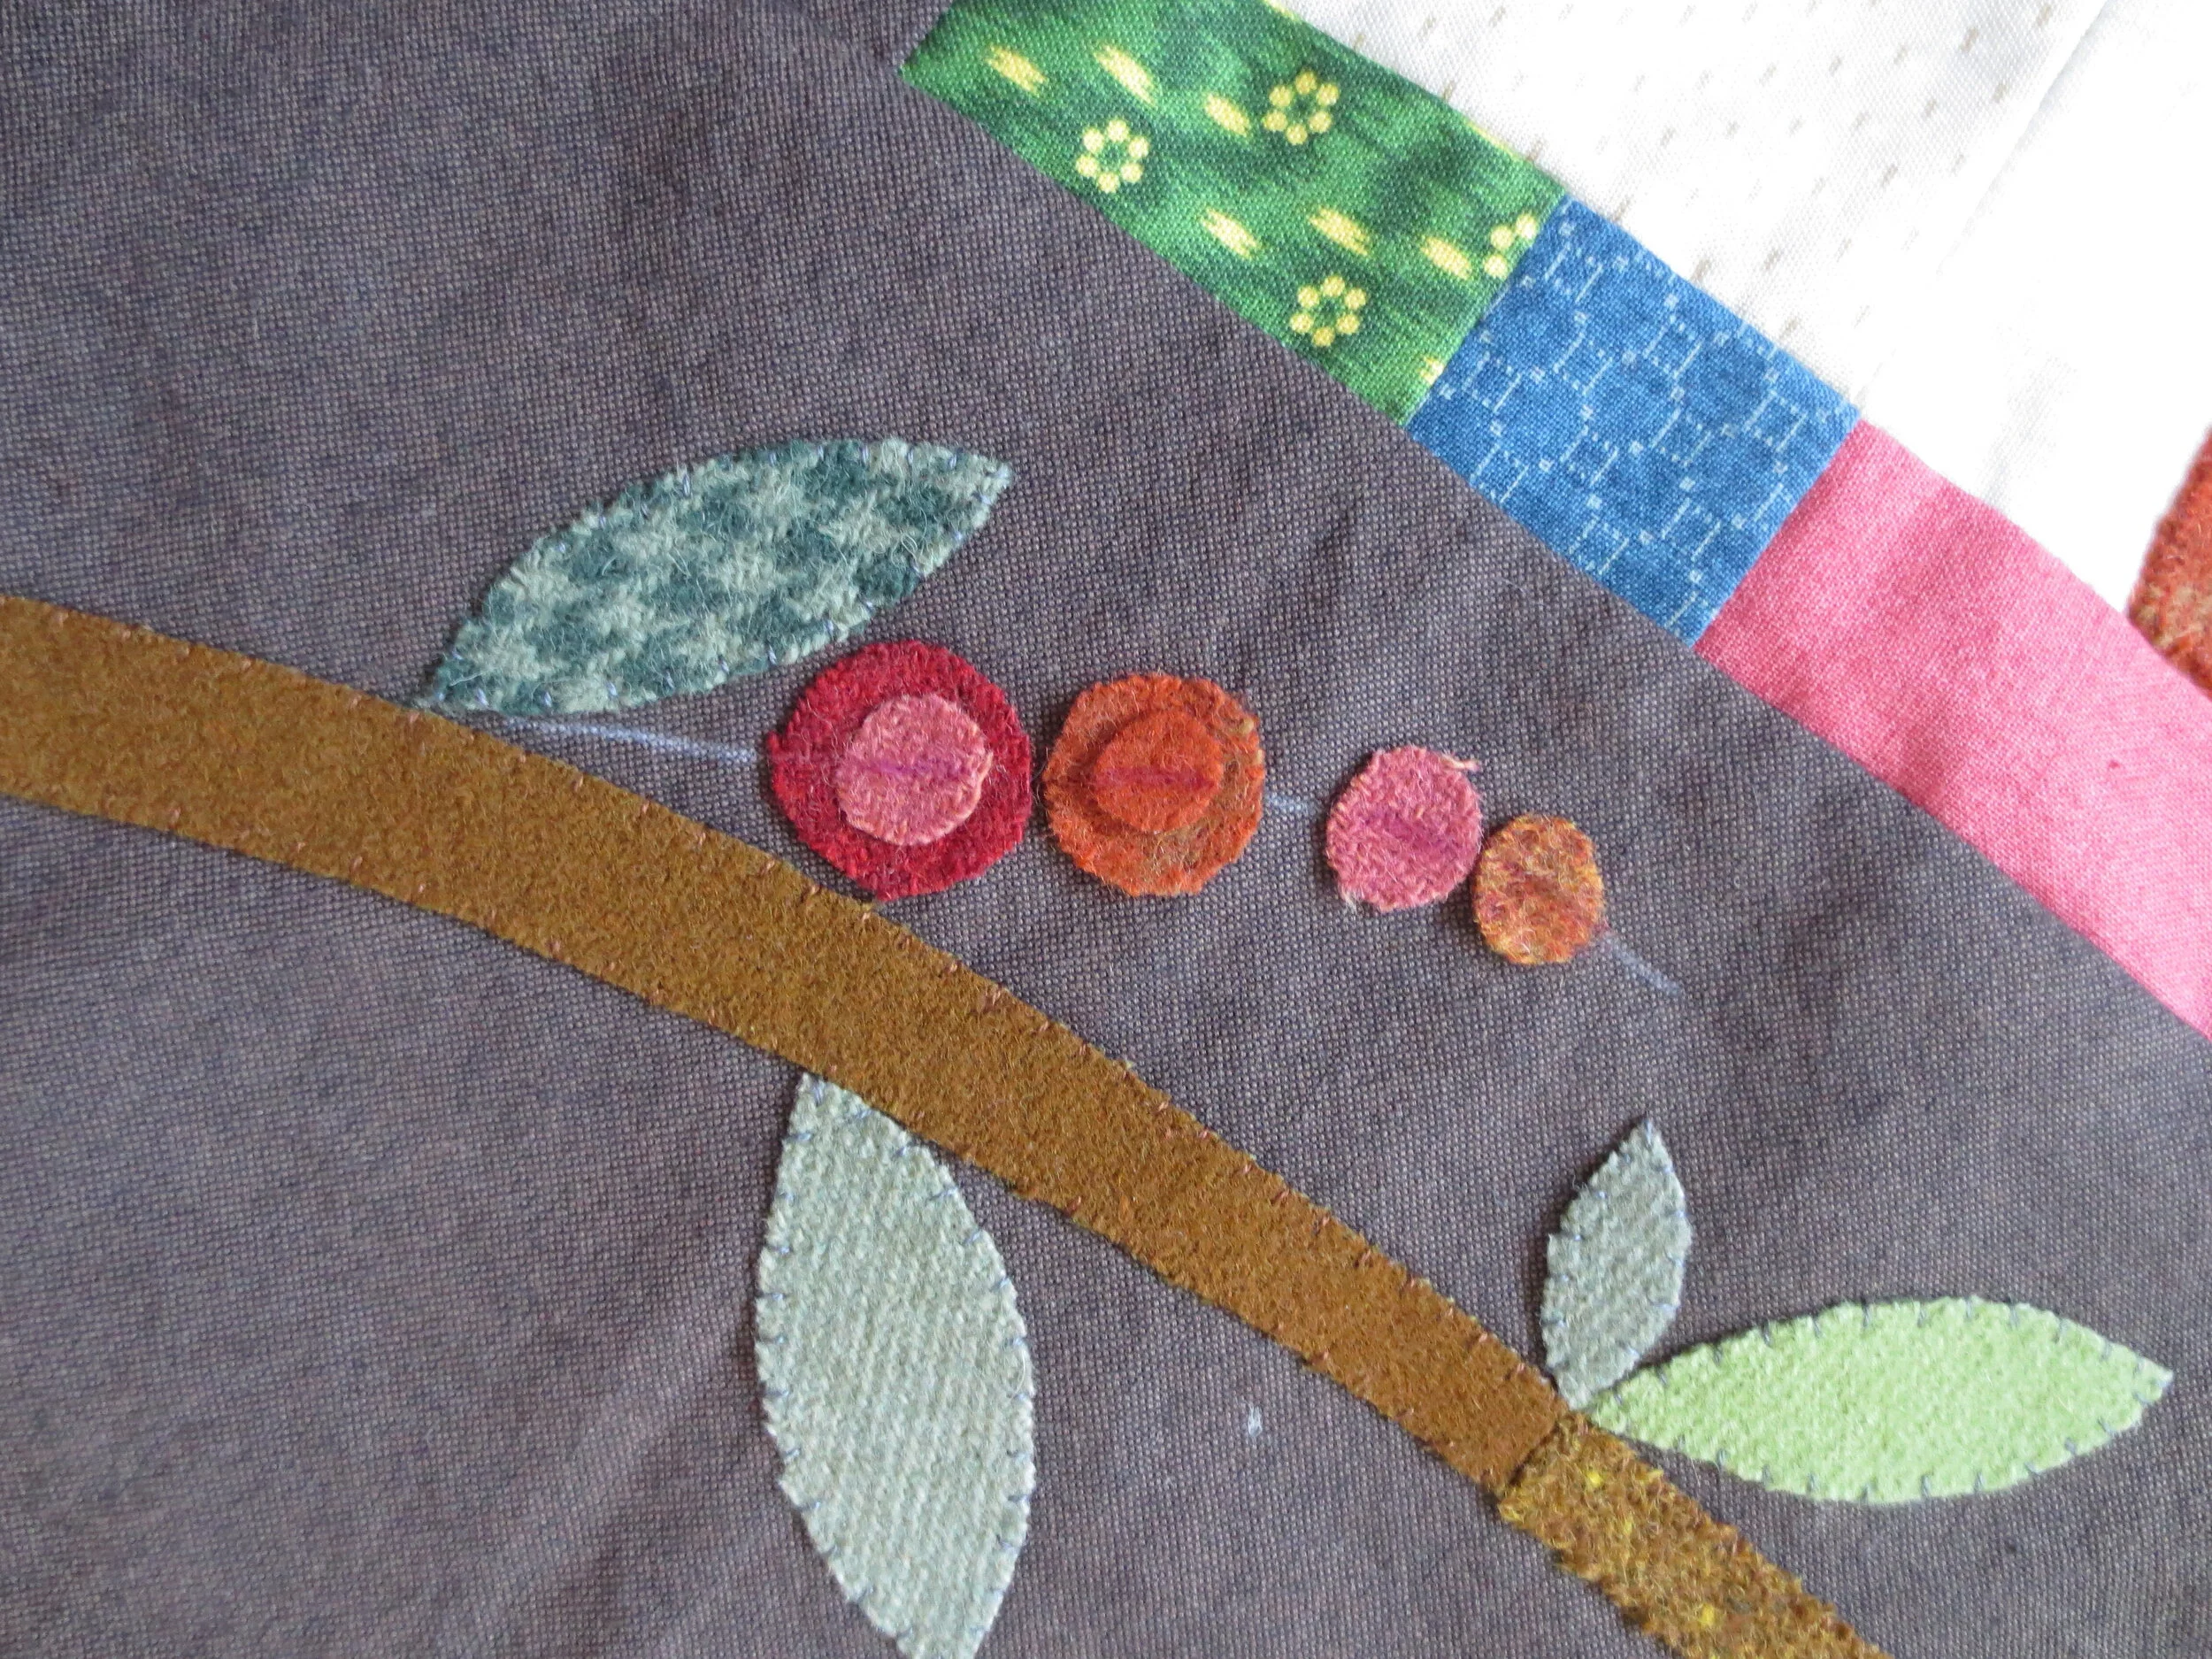
Use 1 strand of thread to stem stitch over the line.
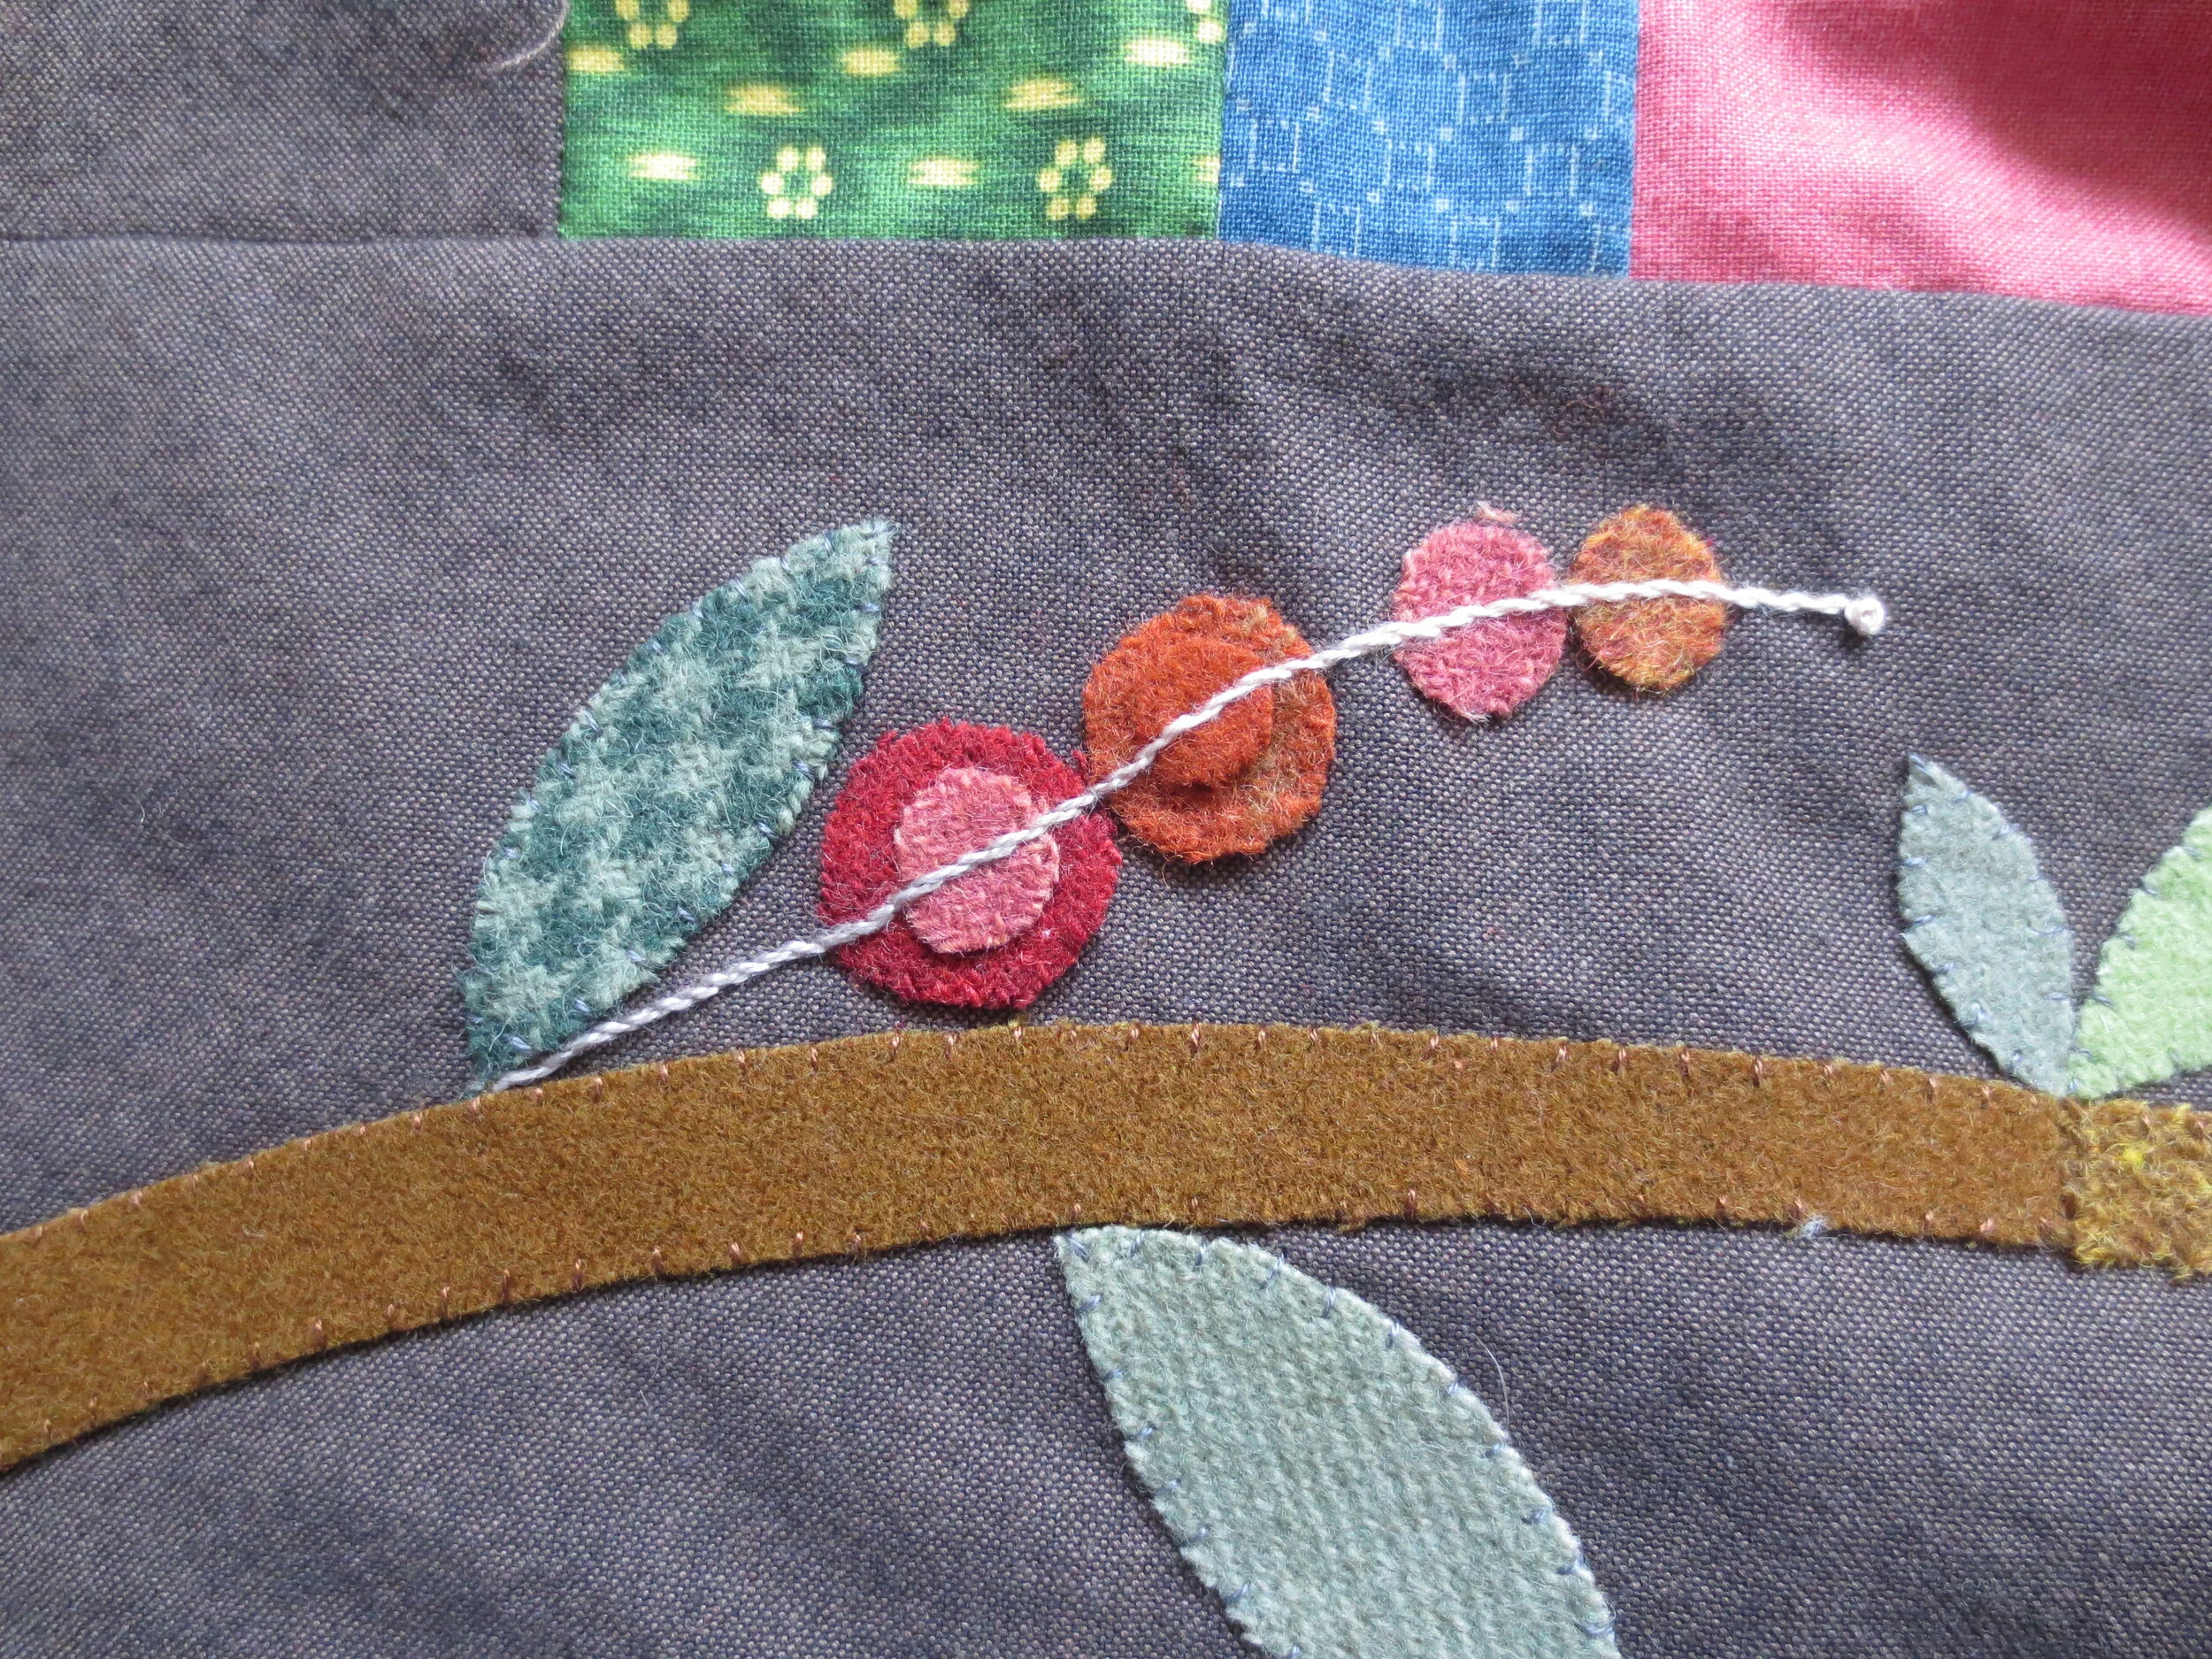
Use 1 strand of opposite colored thread to stitch a single French/colonial knot in the center of each berry.
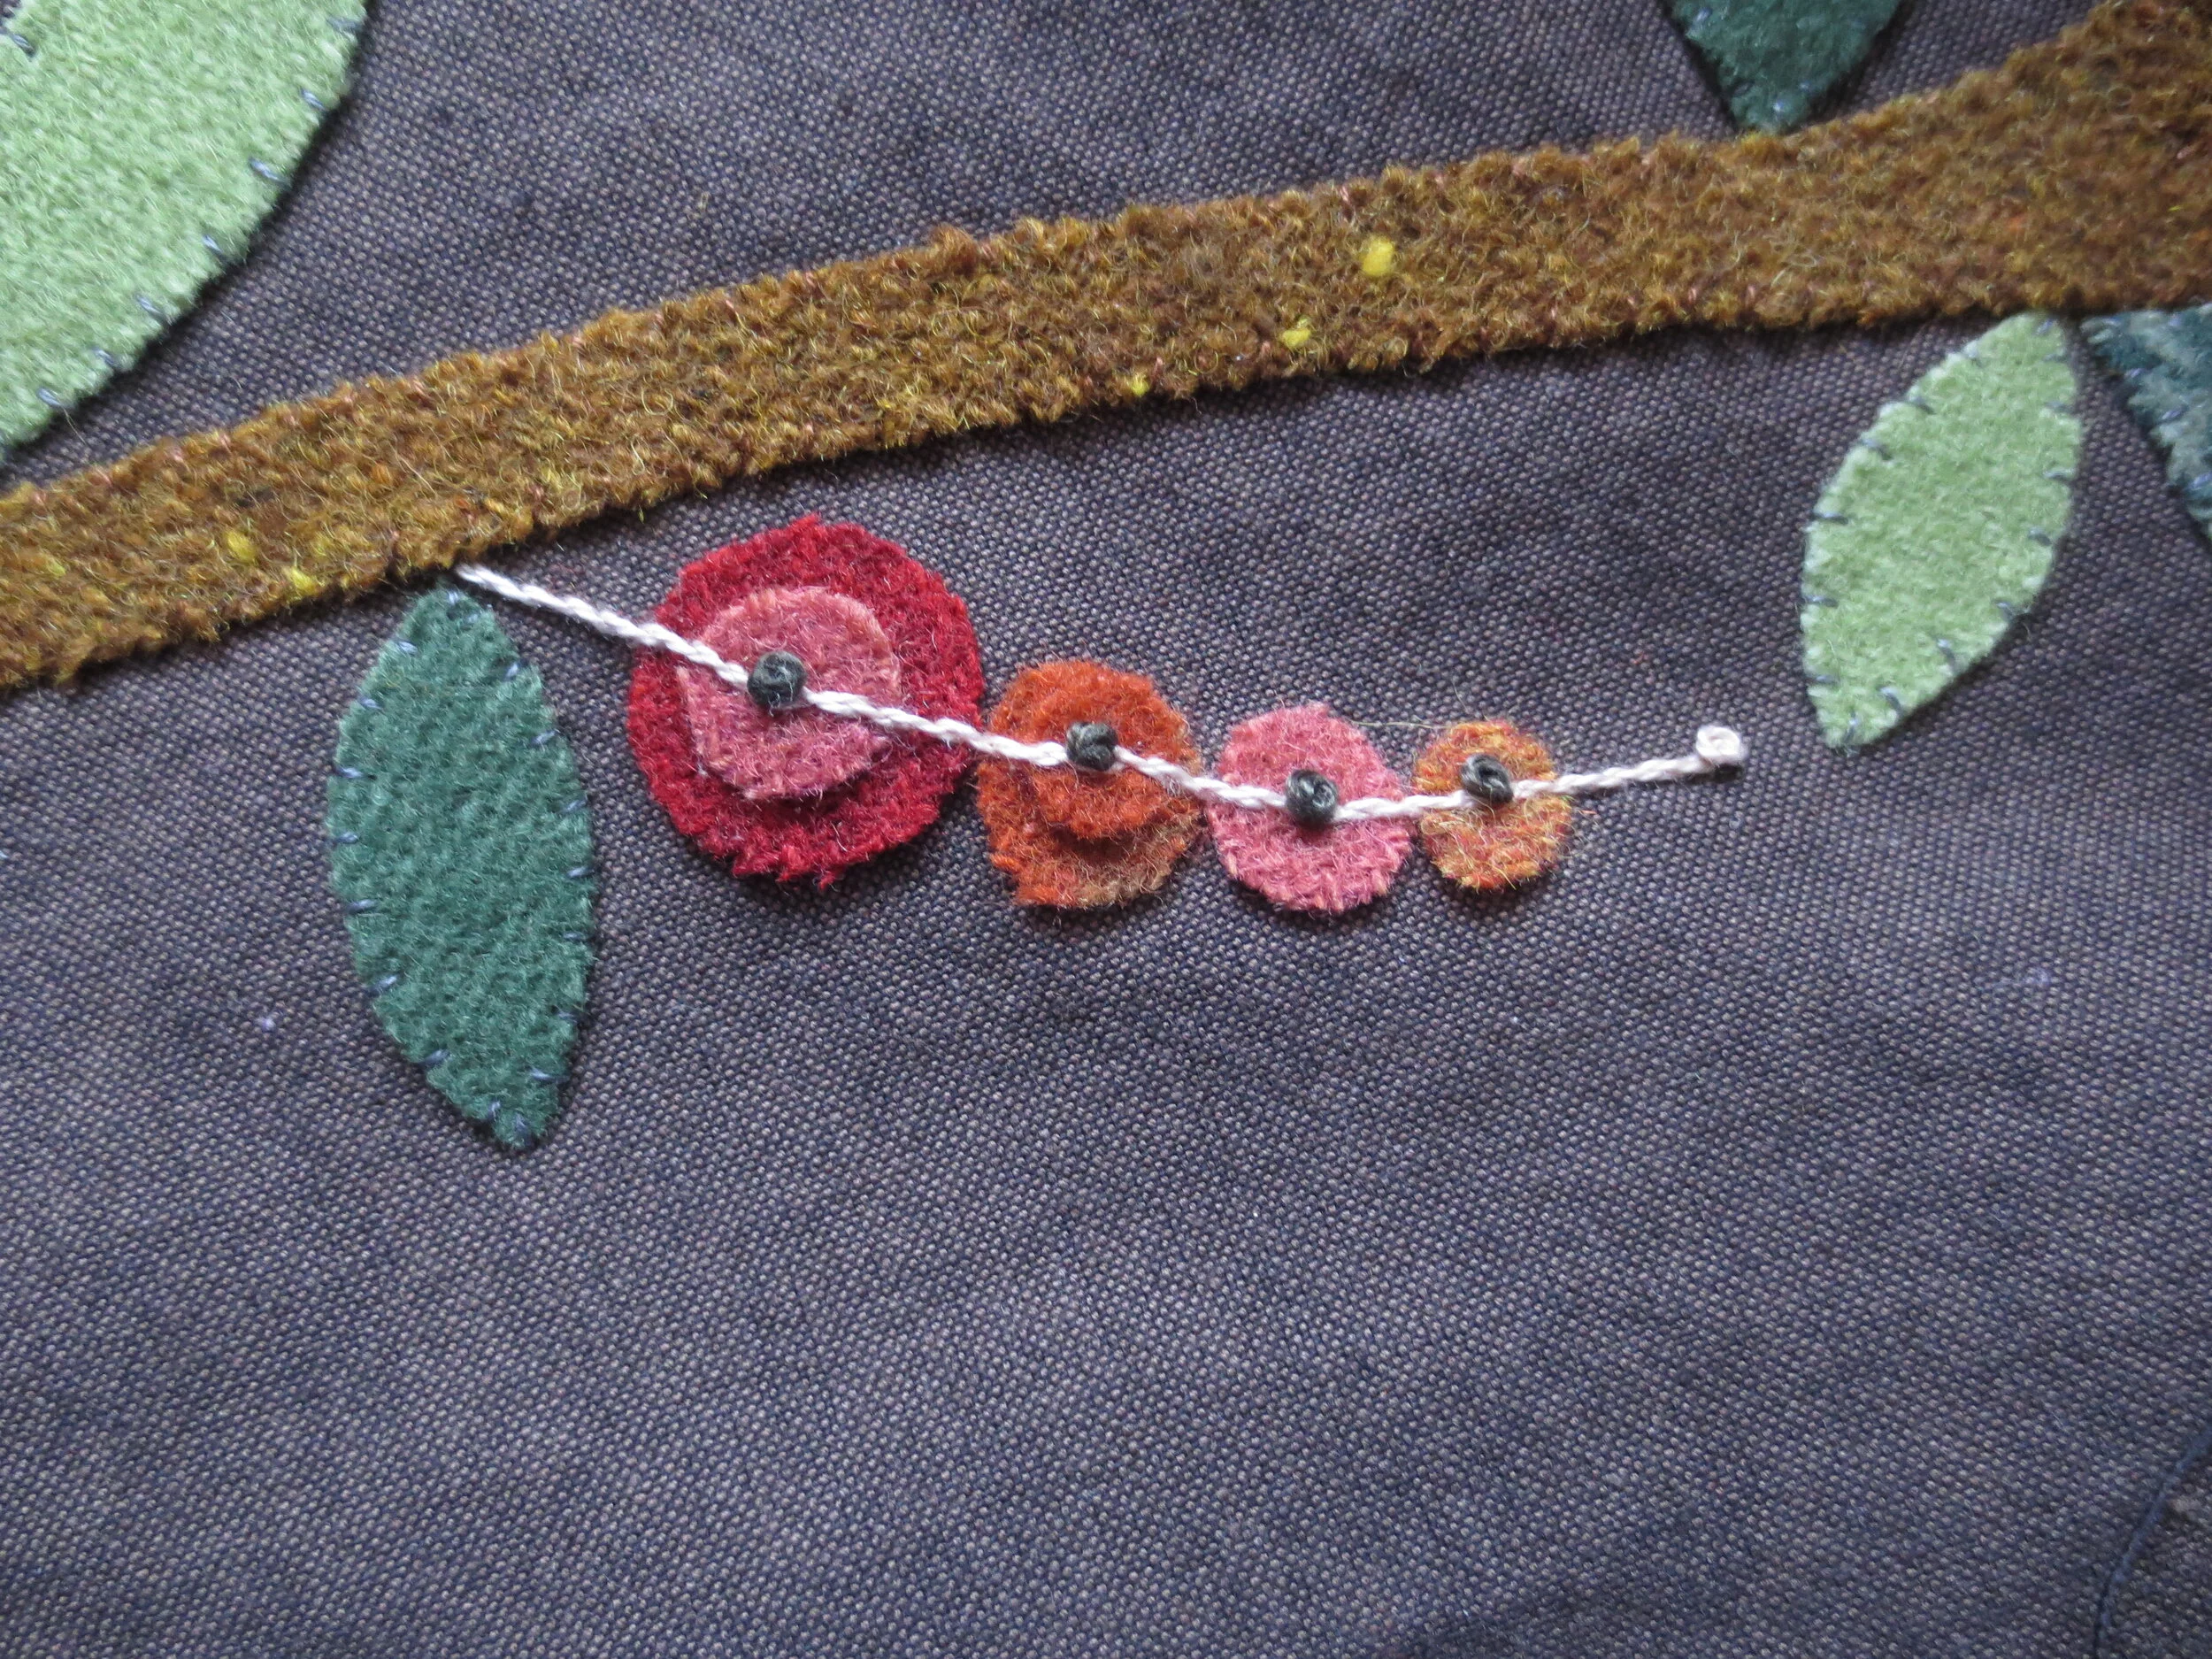
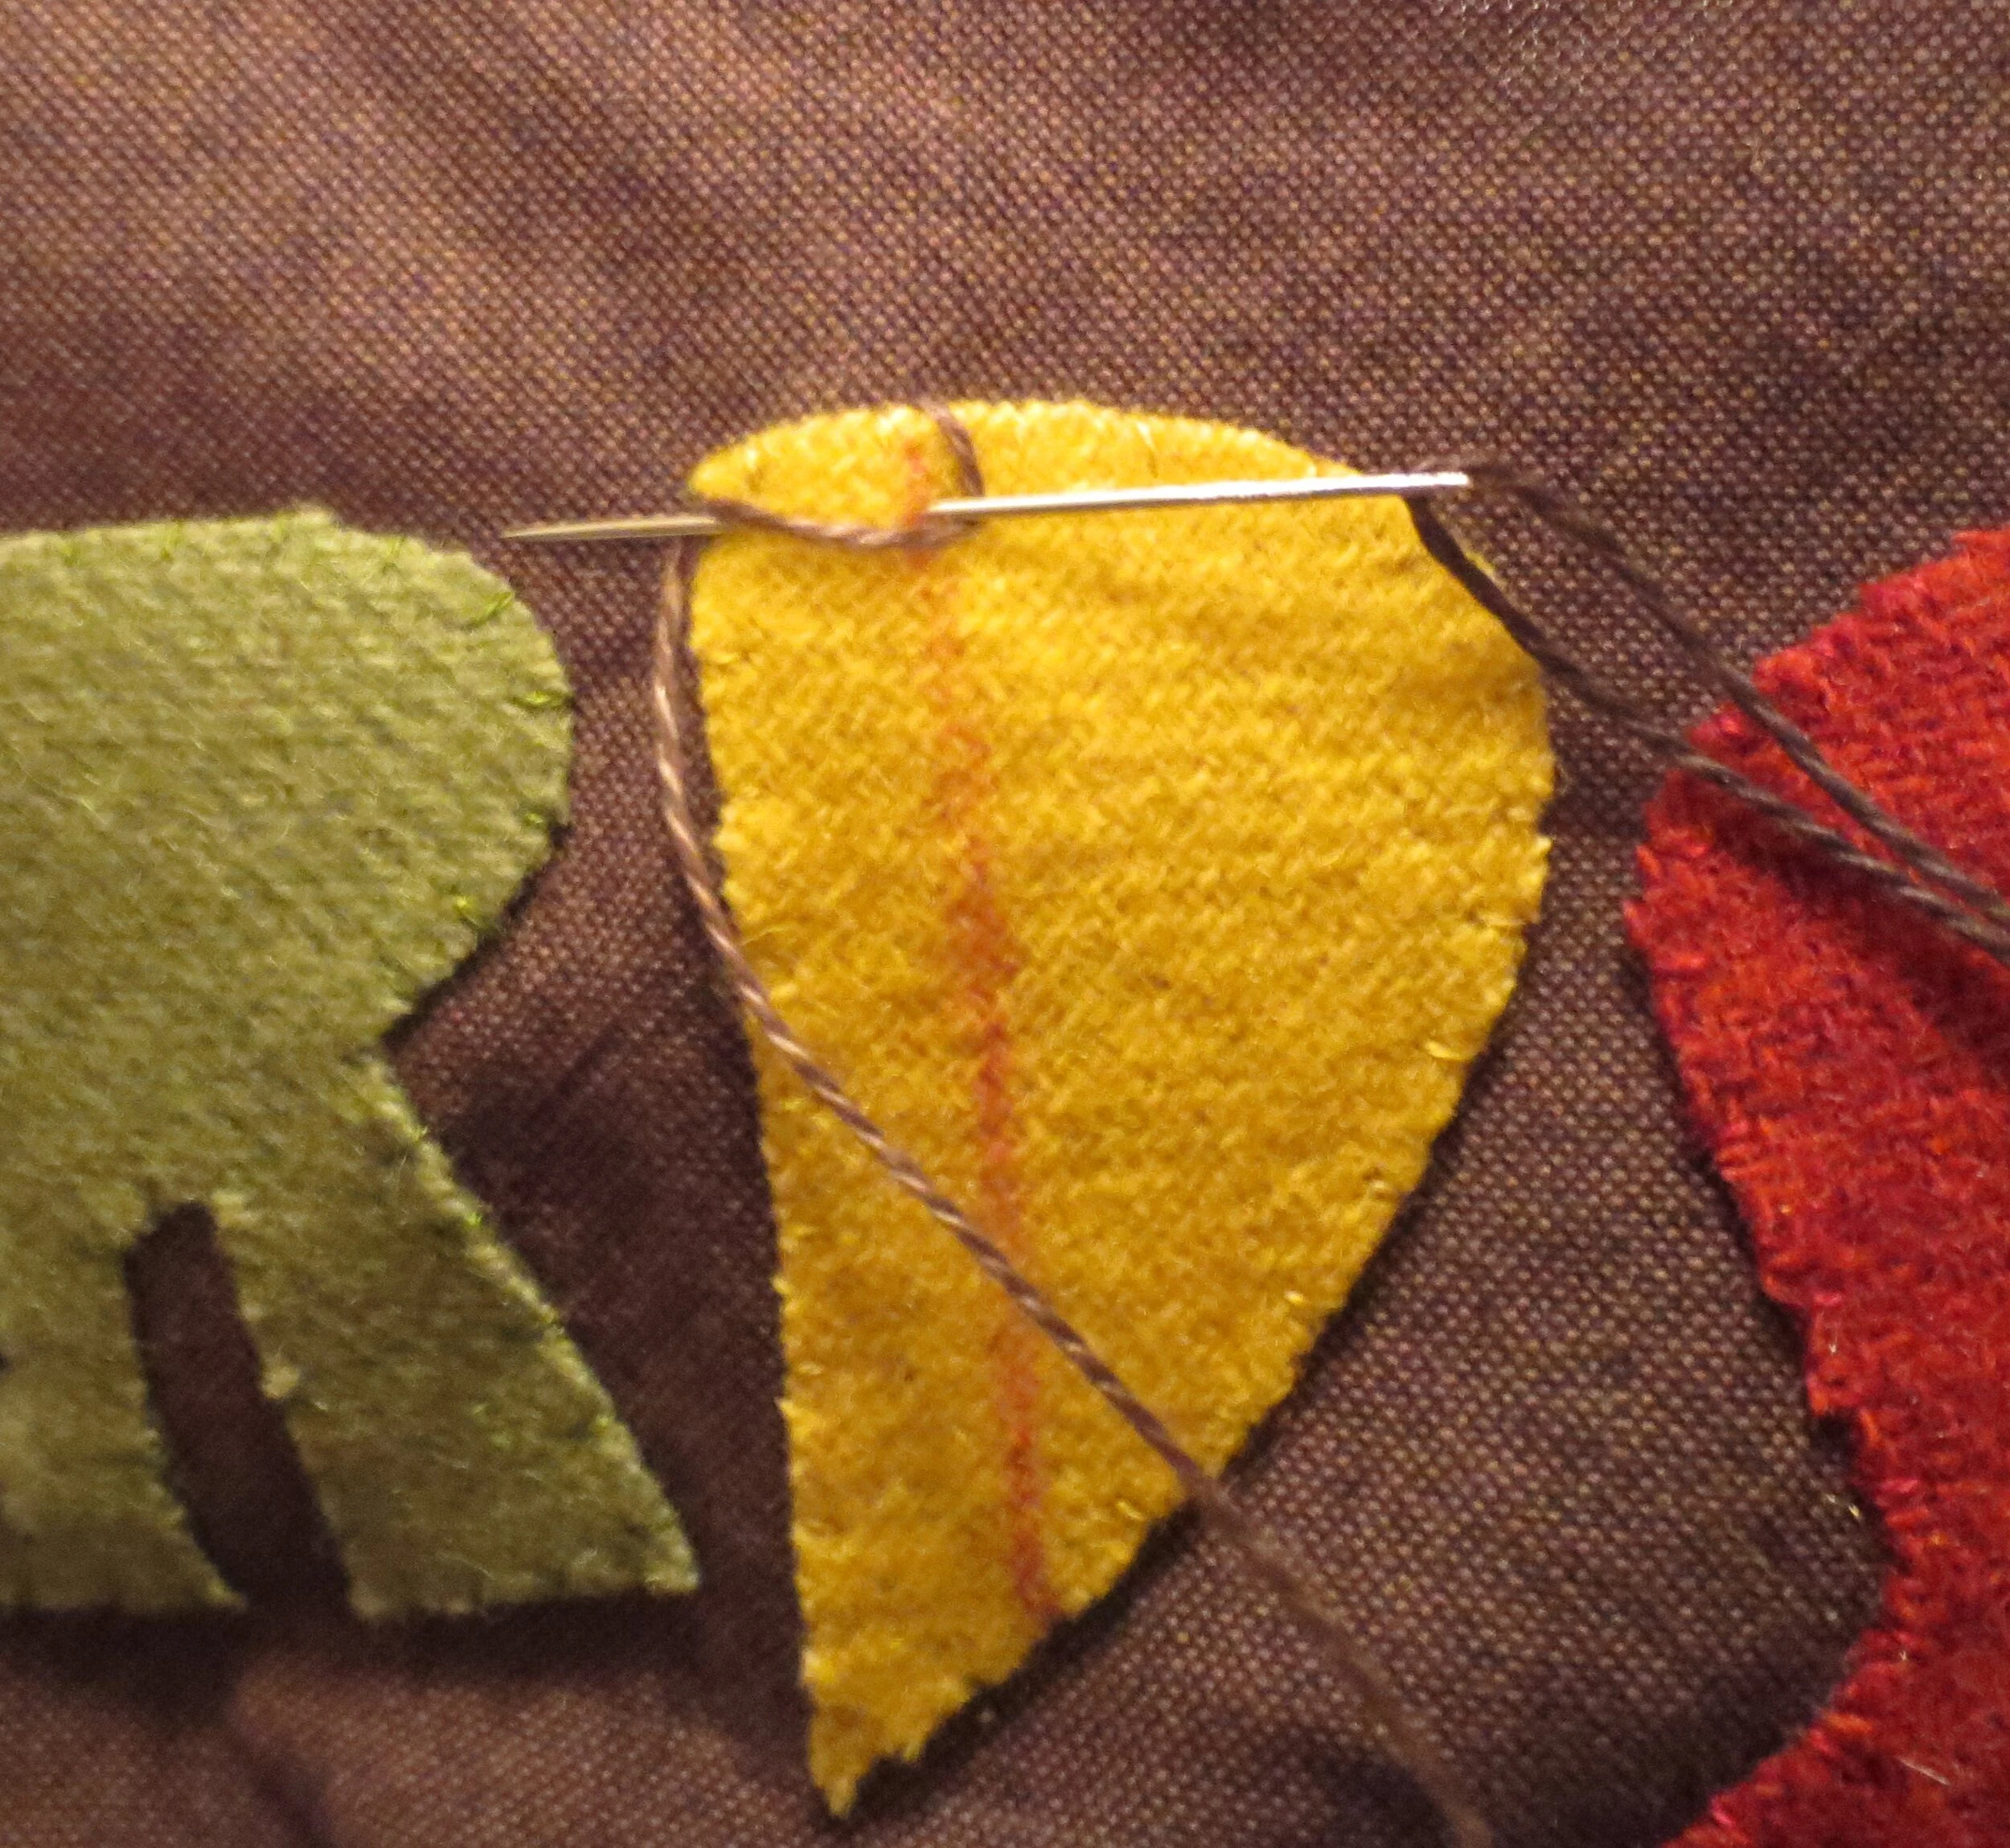
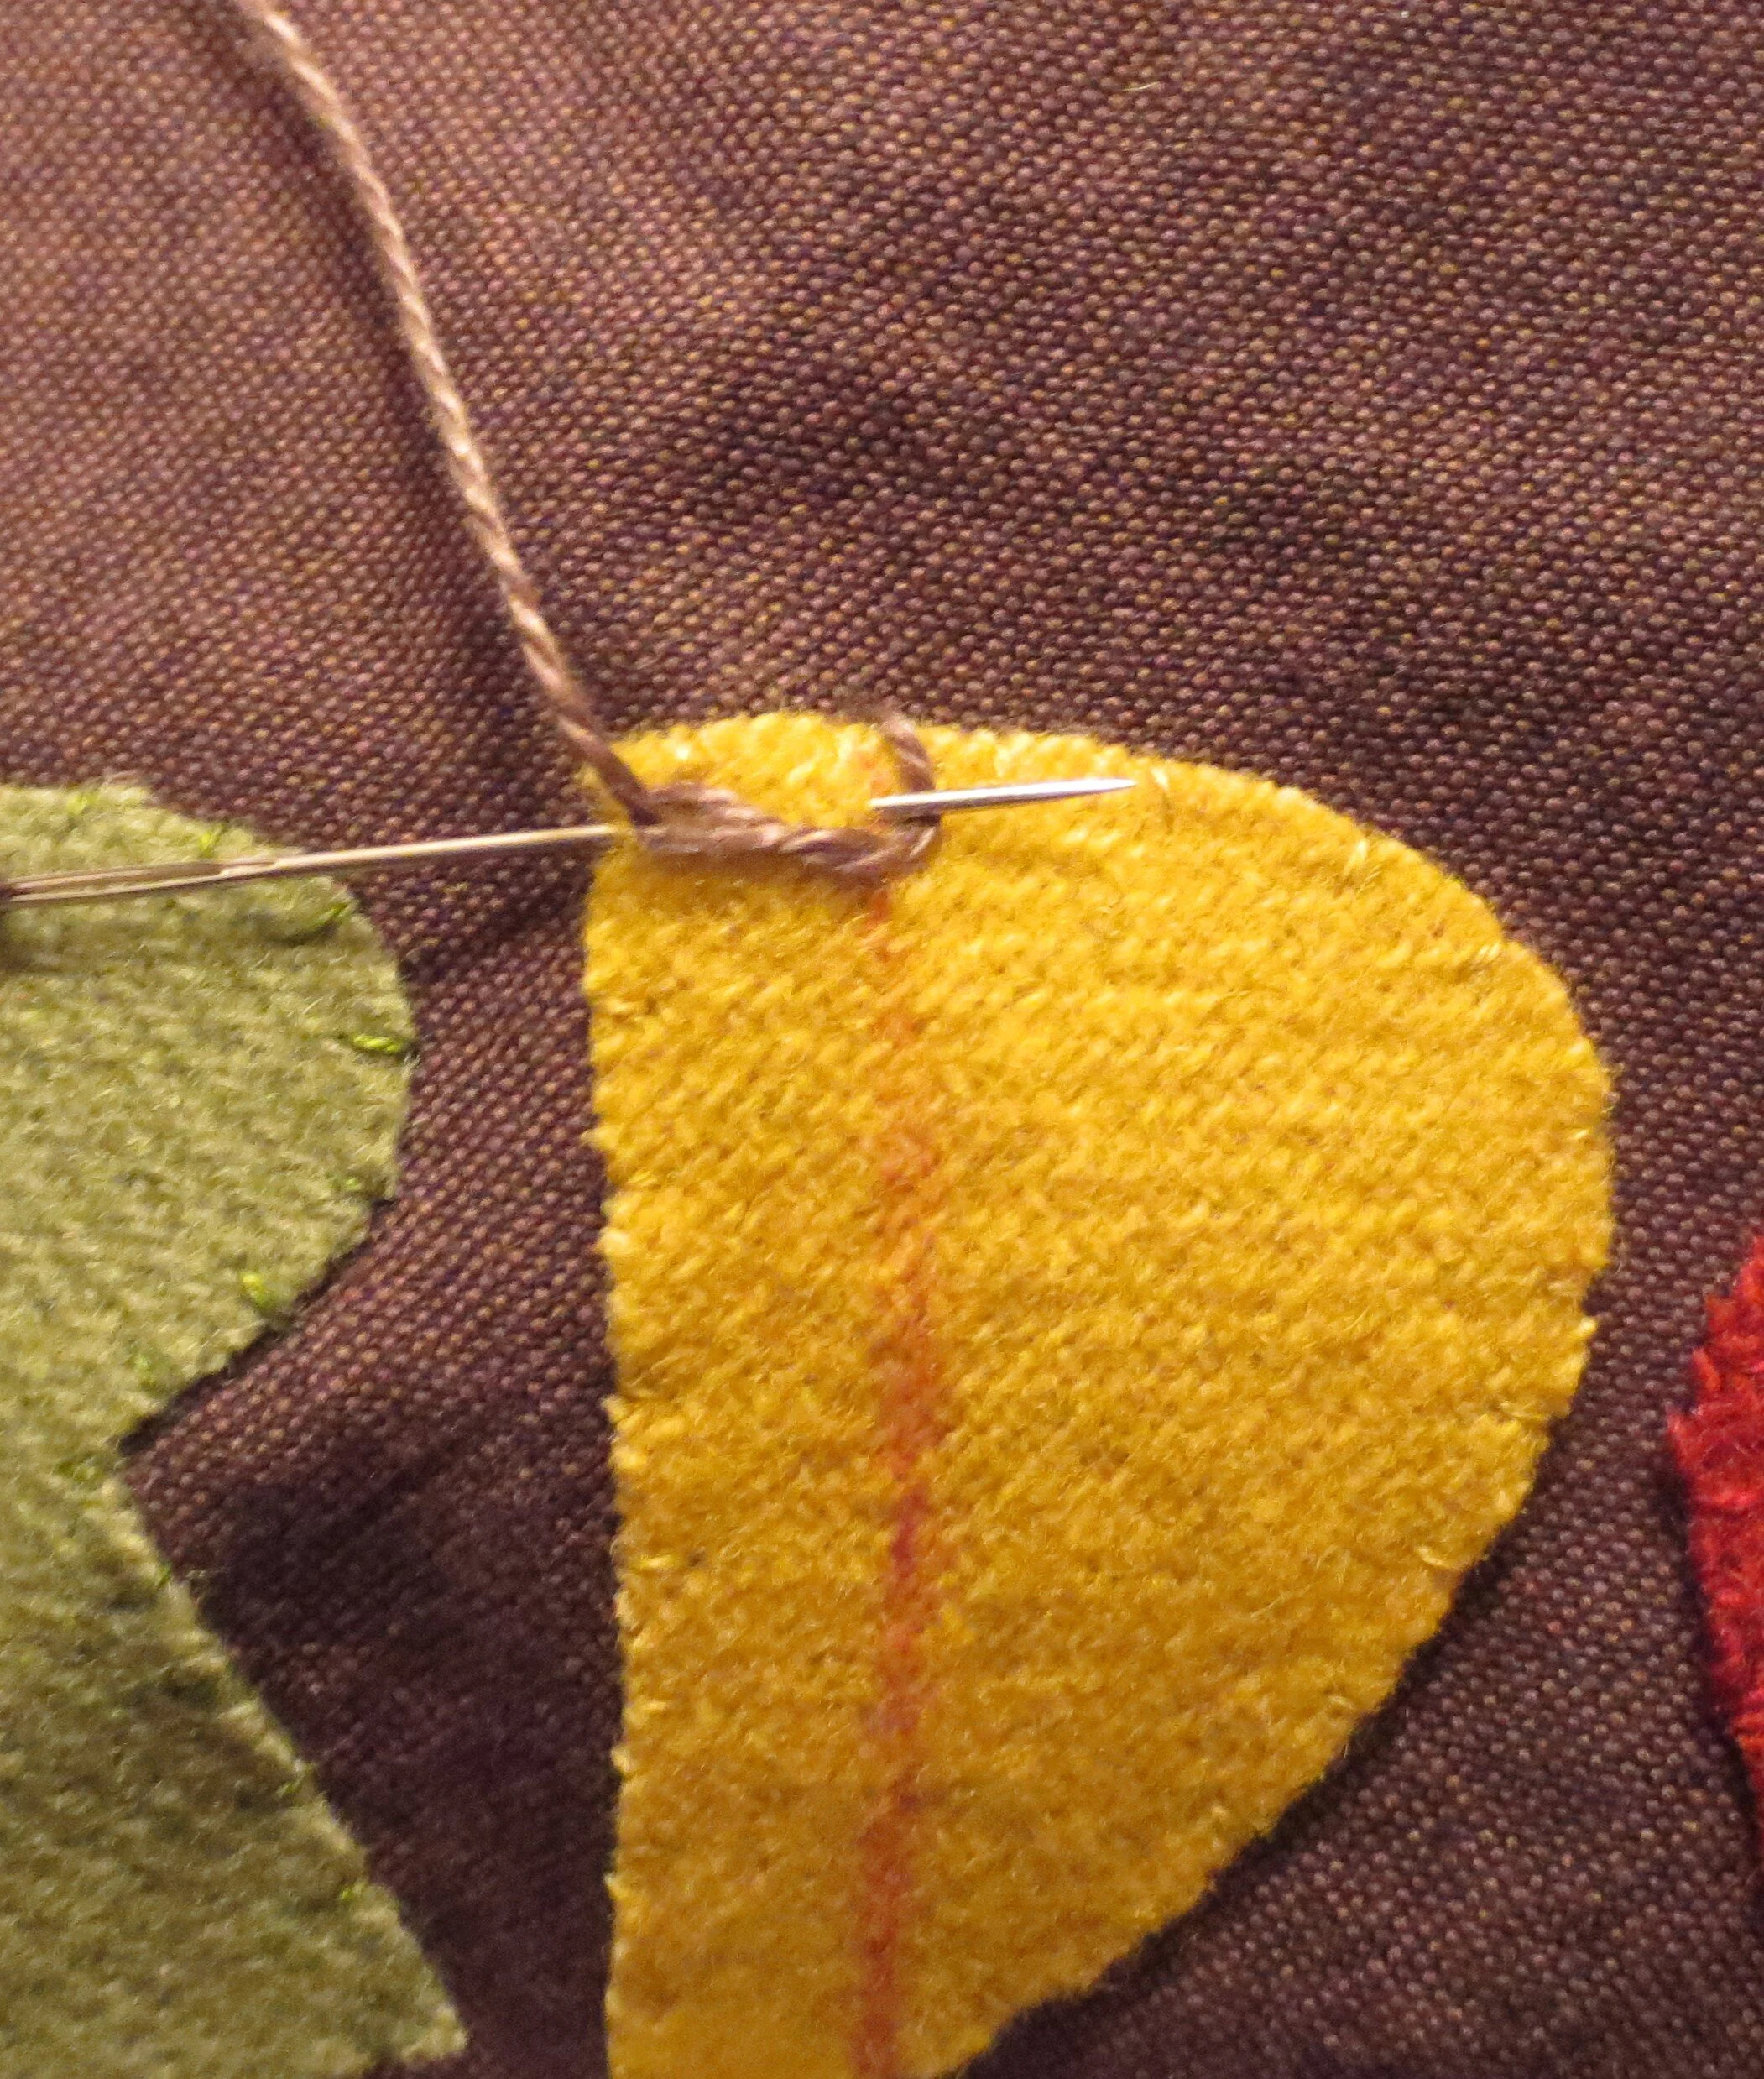
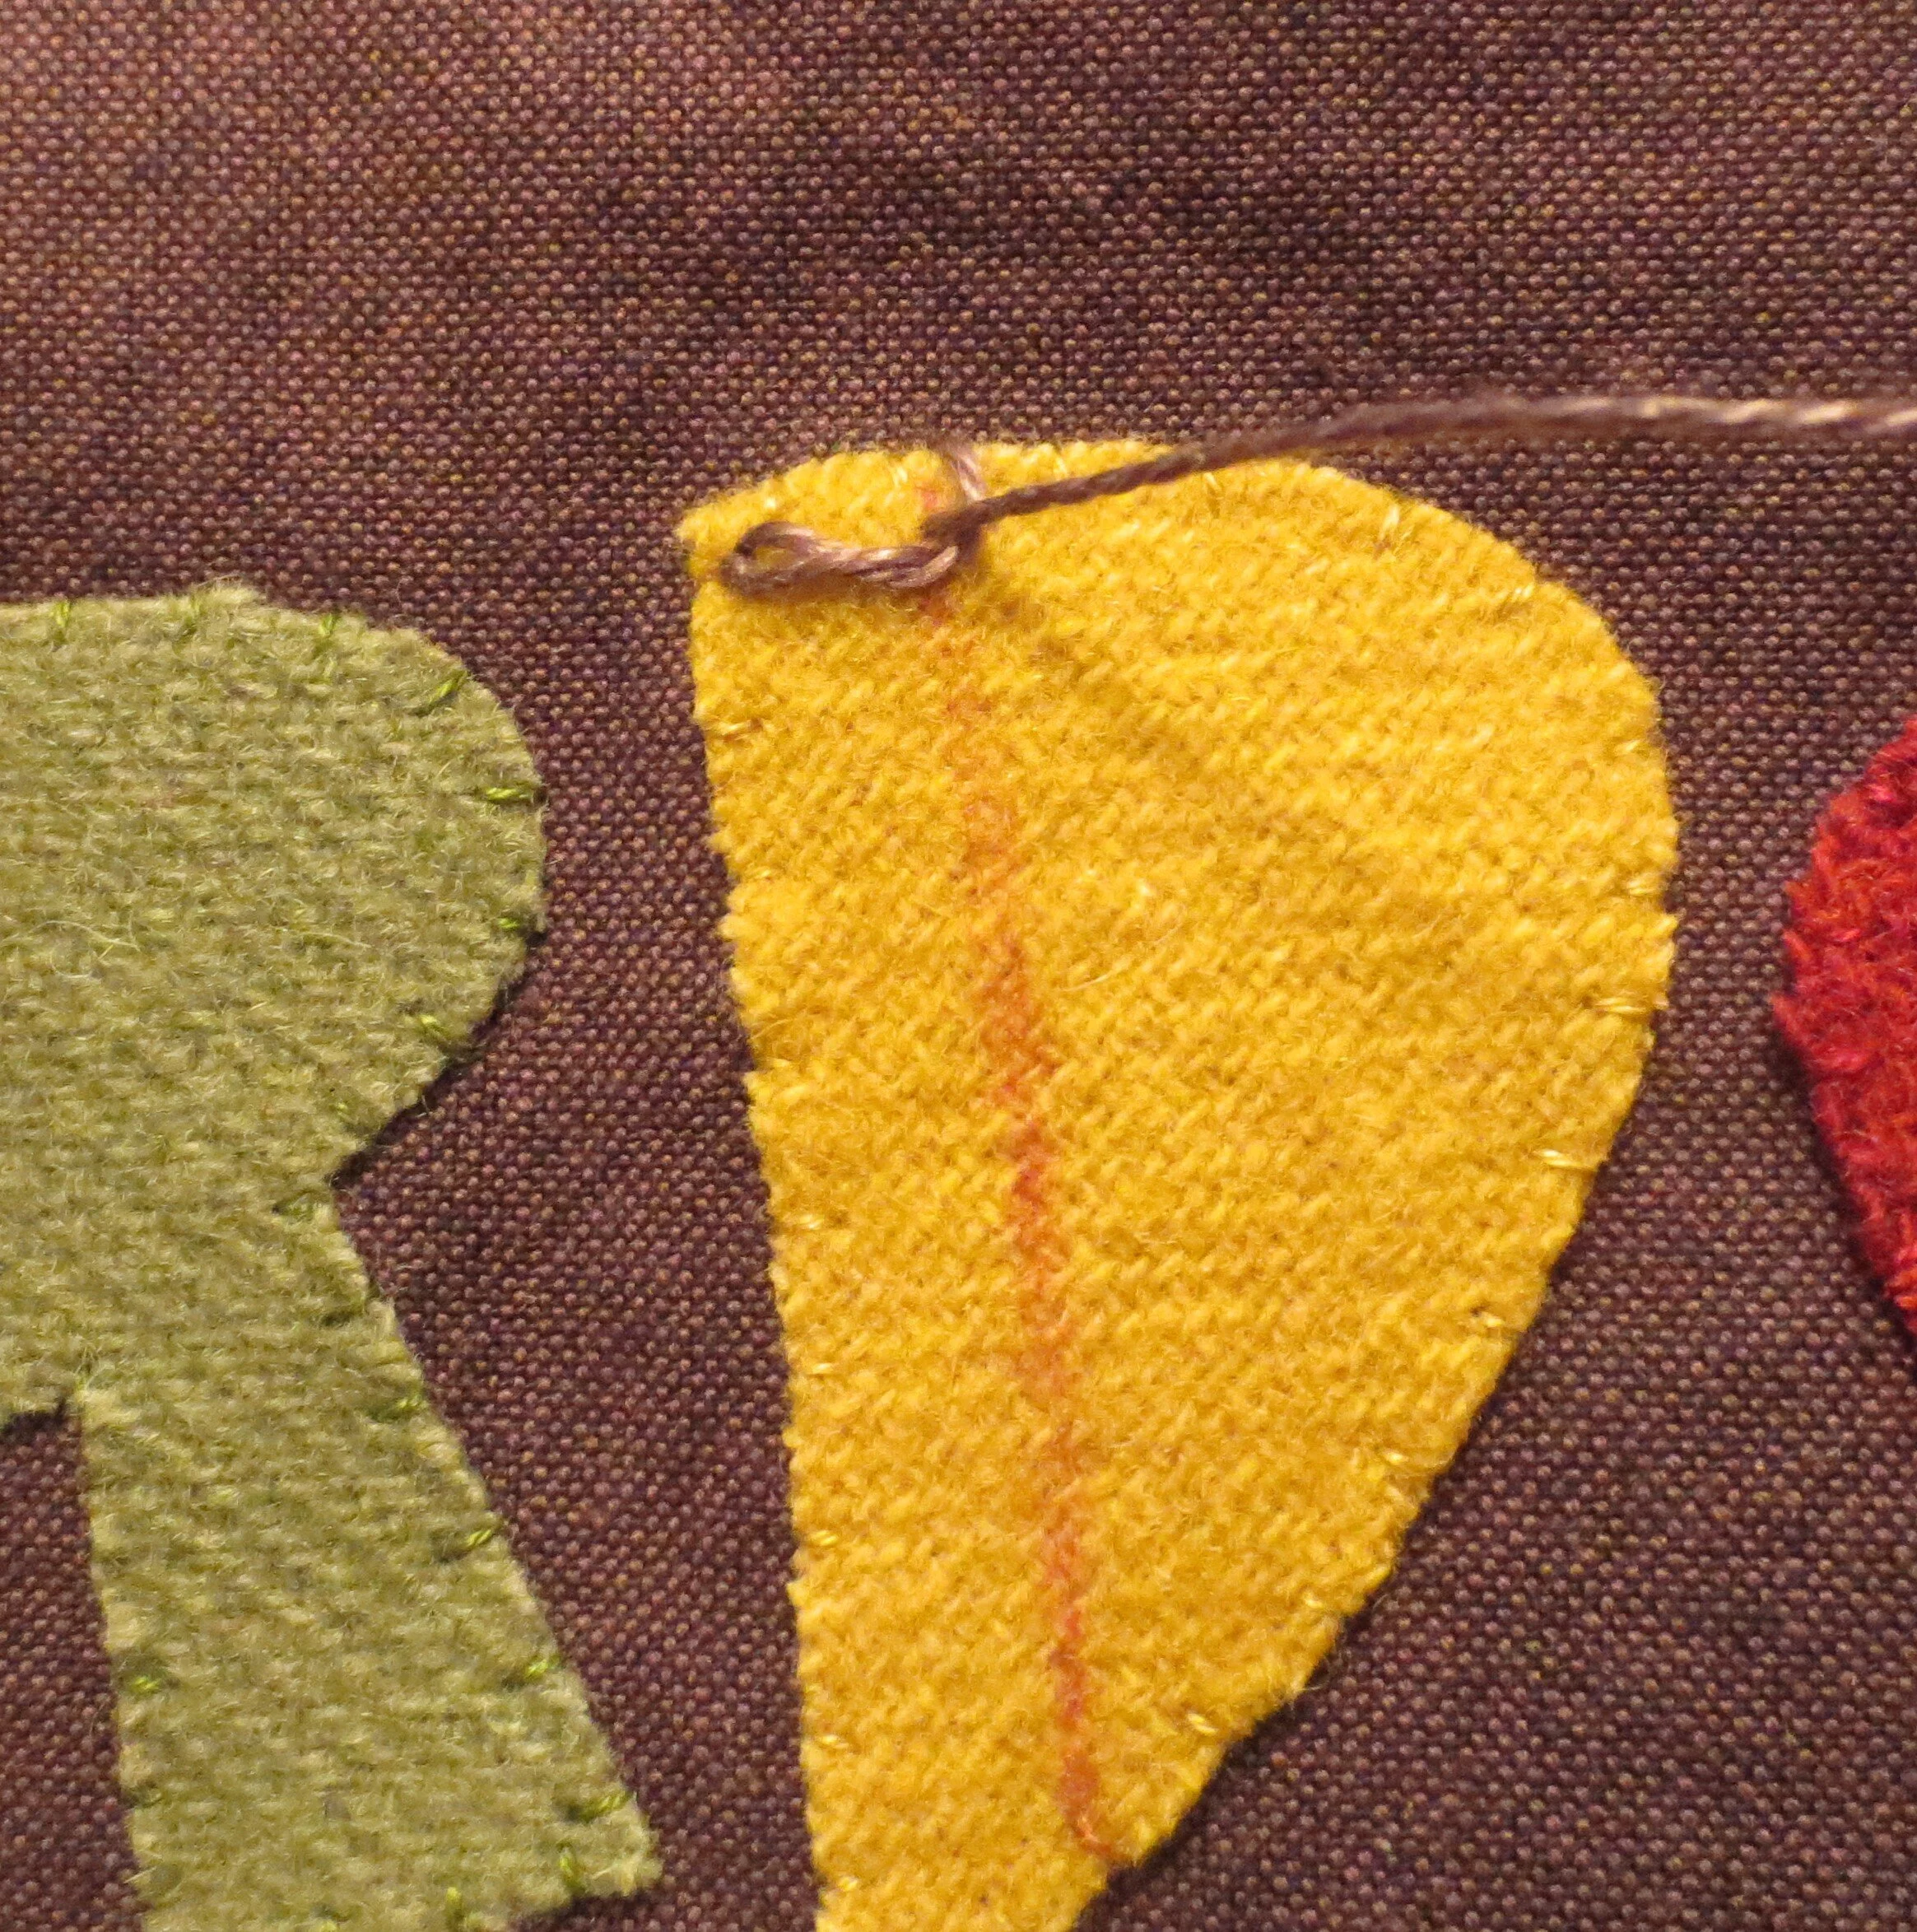
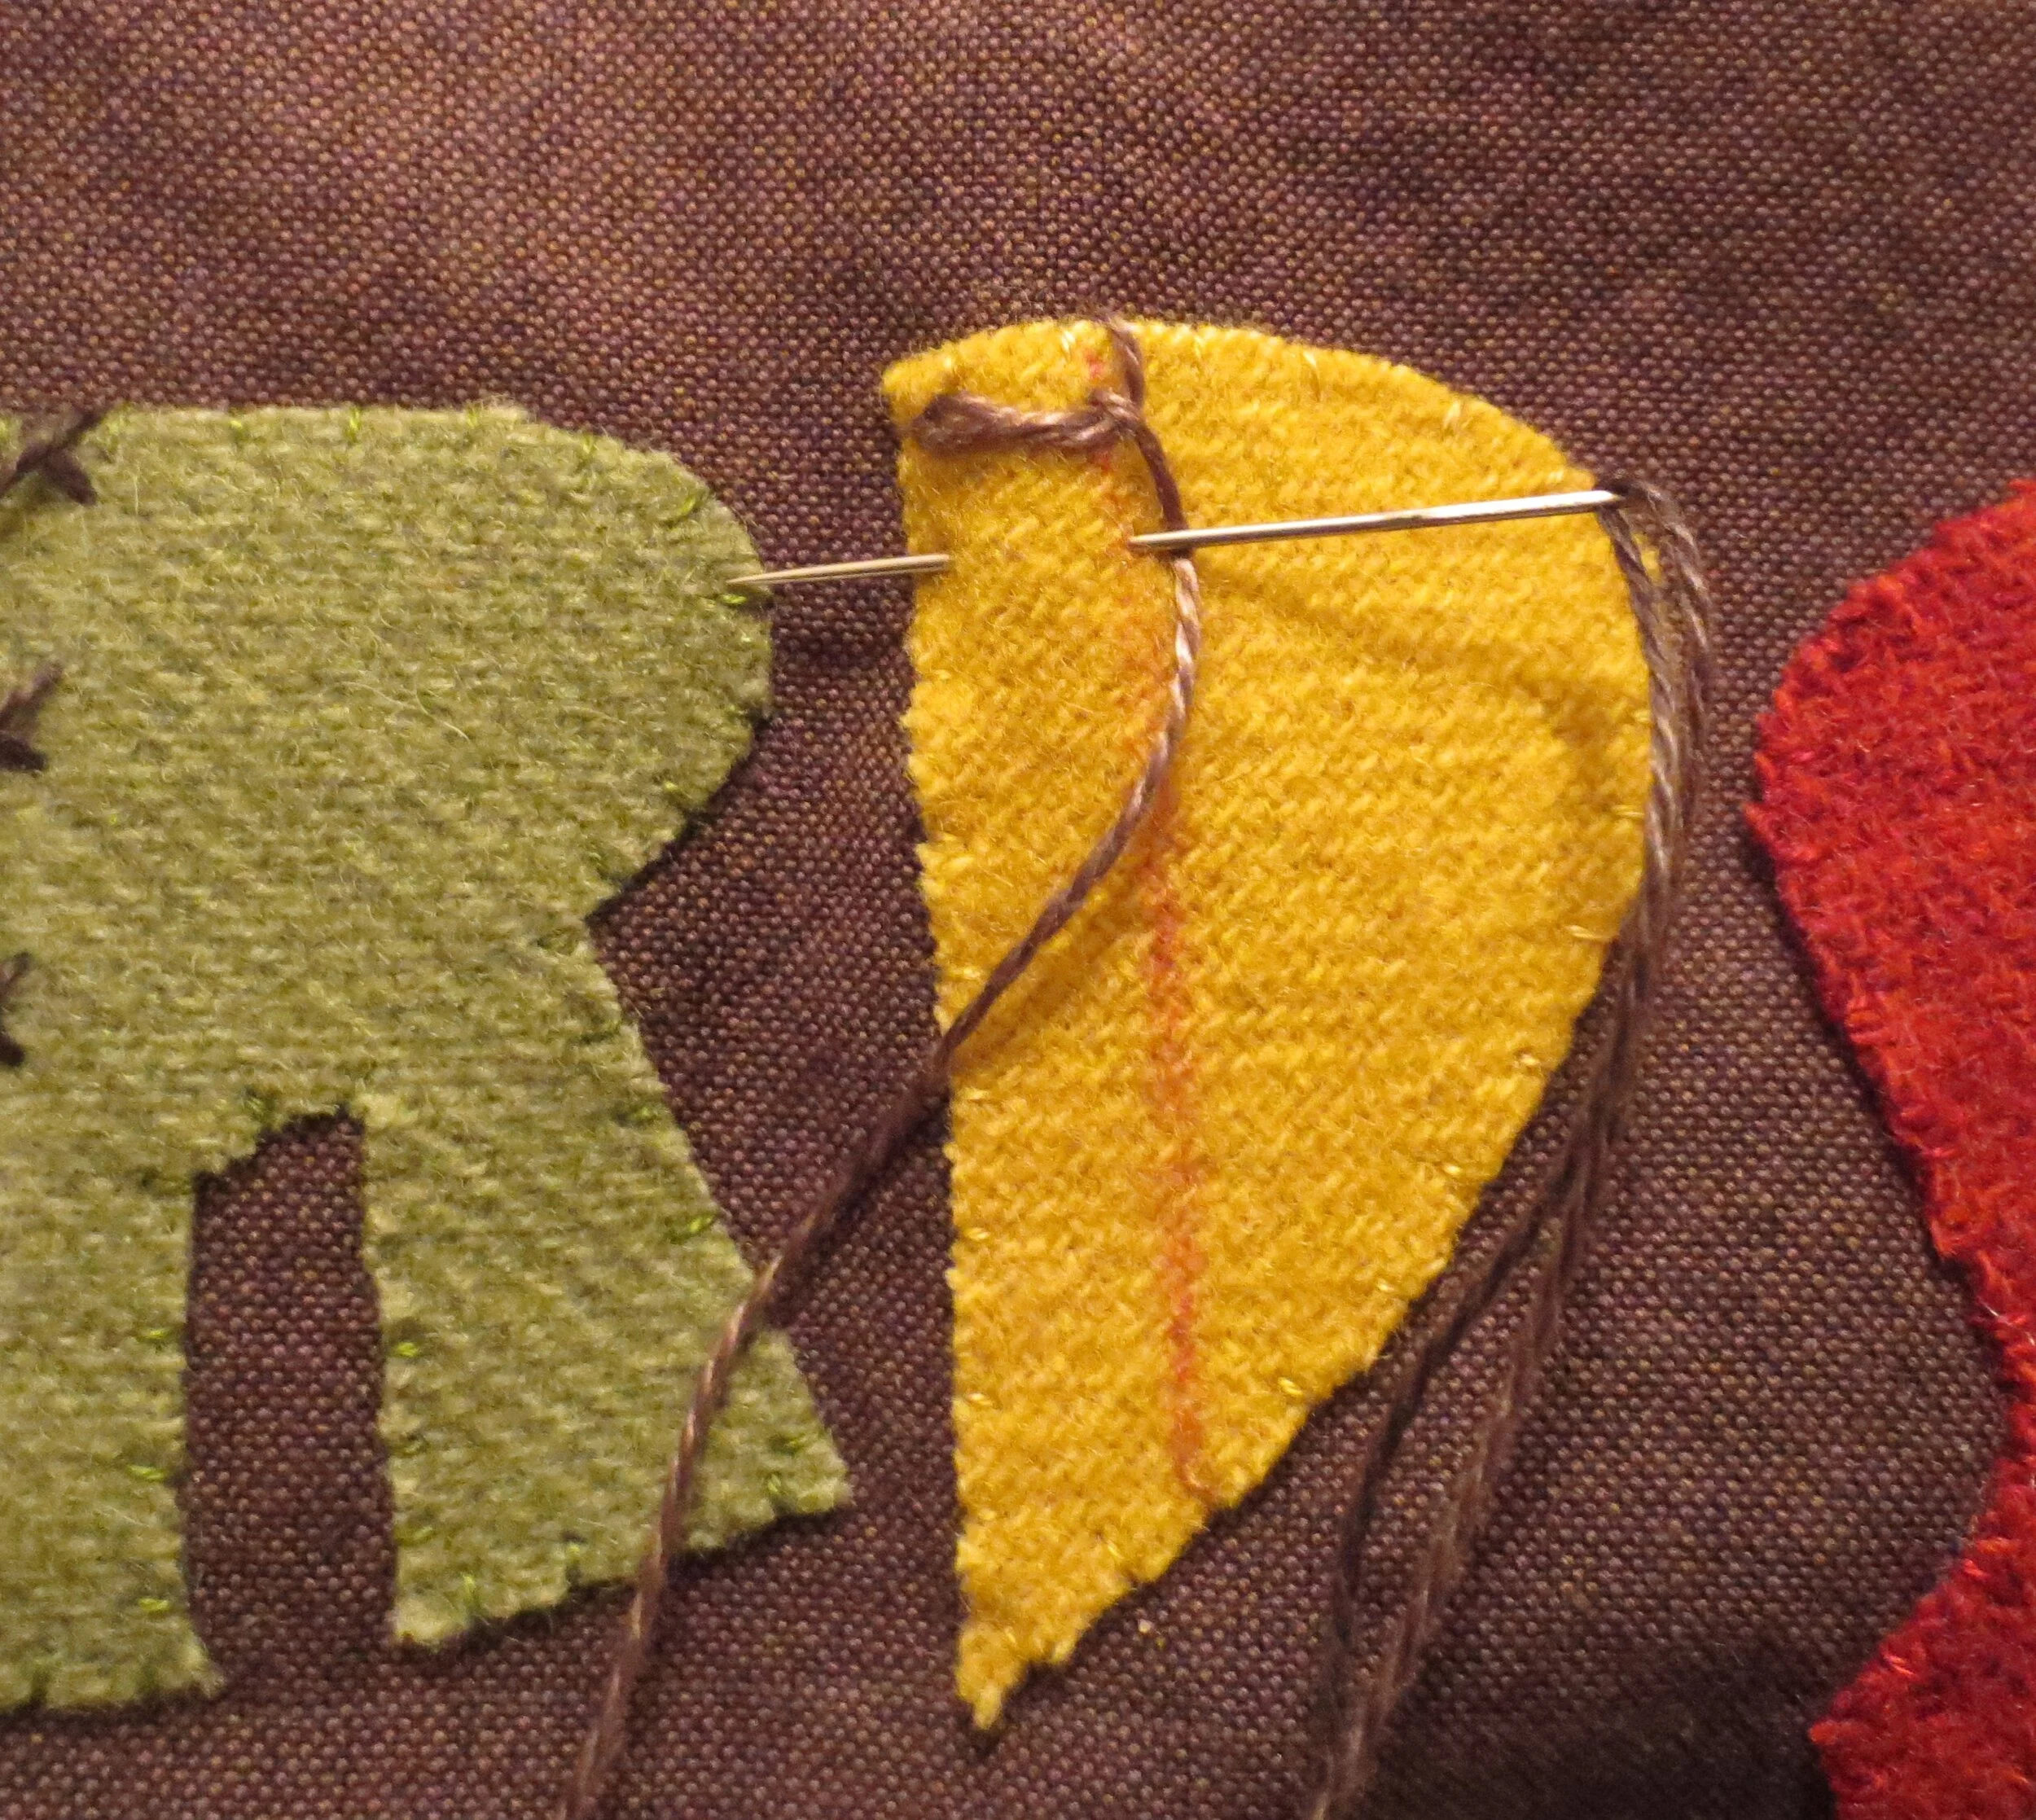
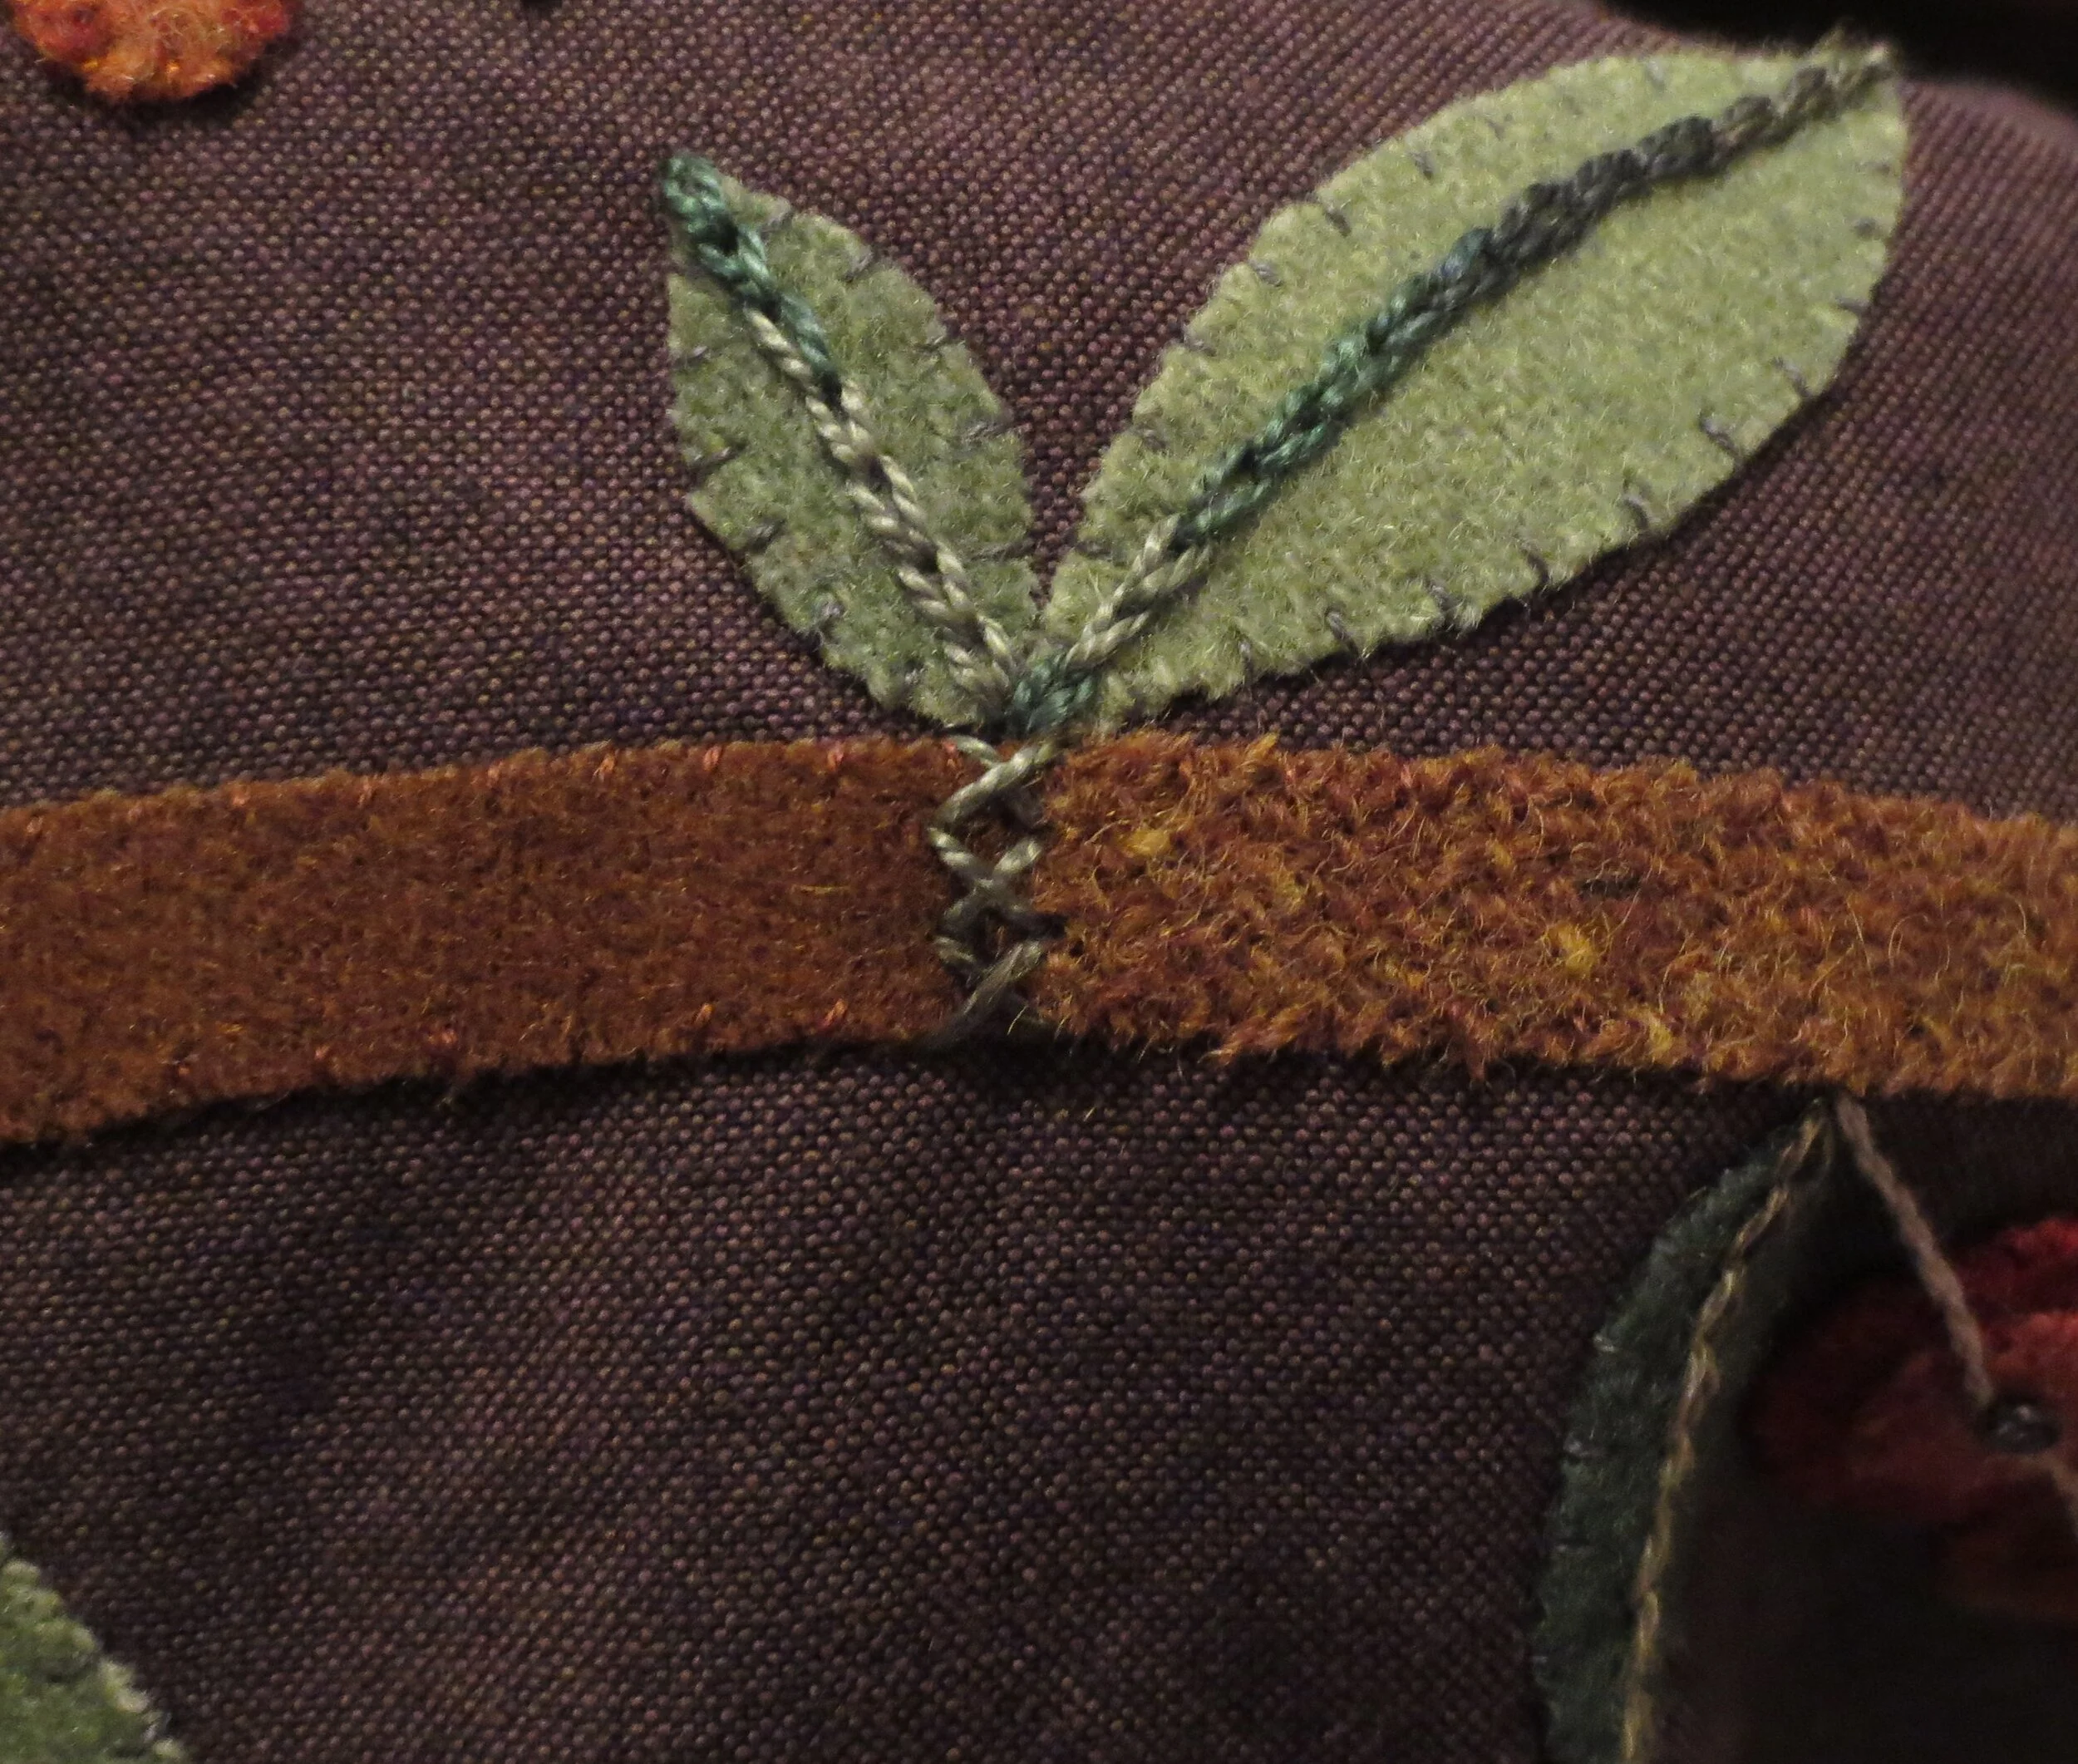
Draw the veins of the leaves.
Chain stitch over the lines with 1 strand of Valdani perle 8, color O526 (this is a variegated green).

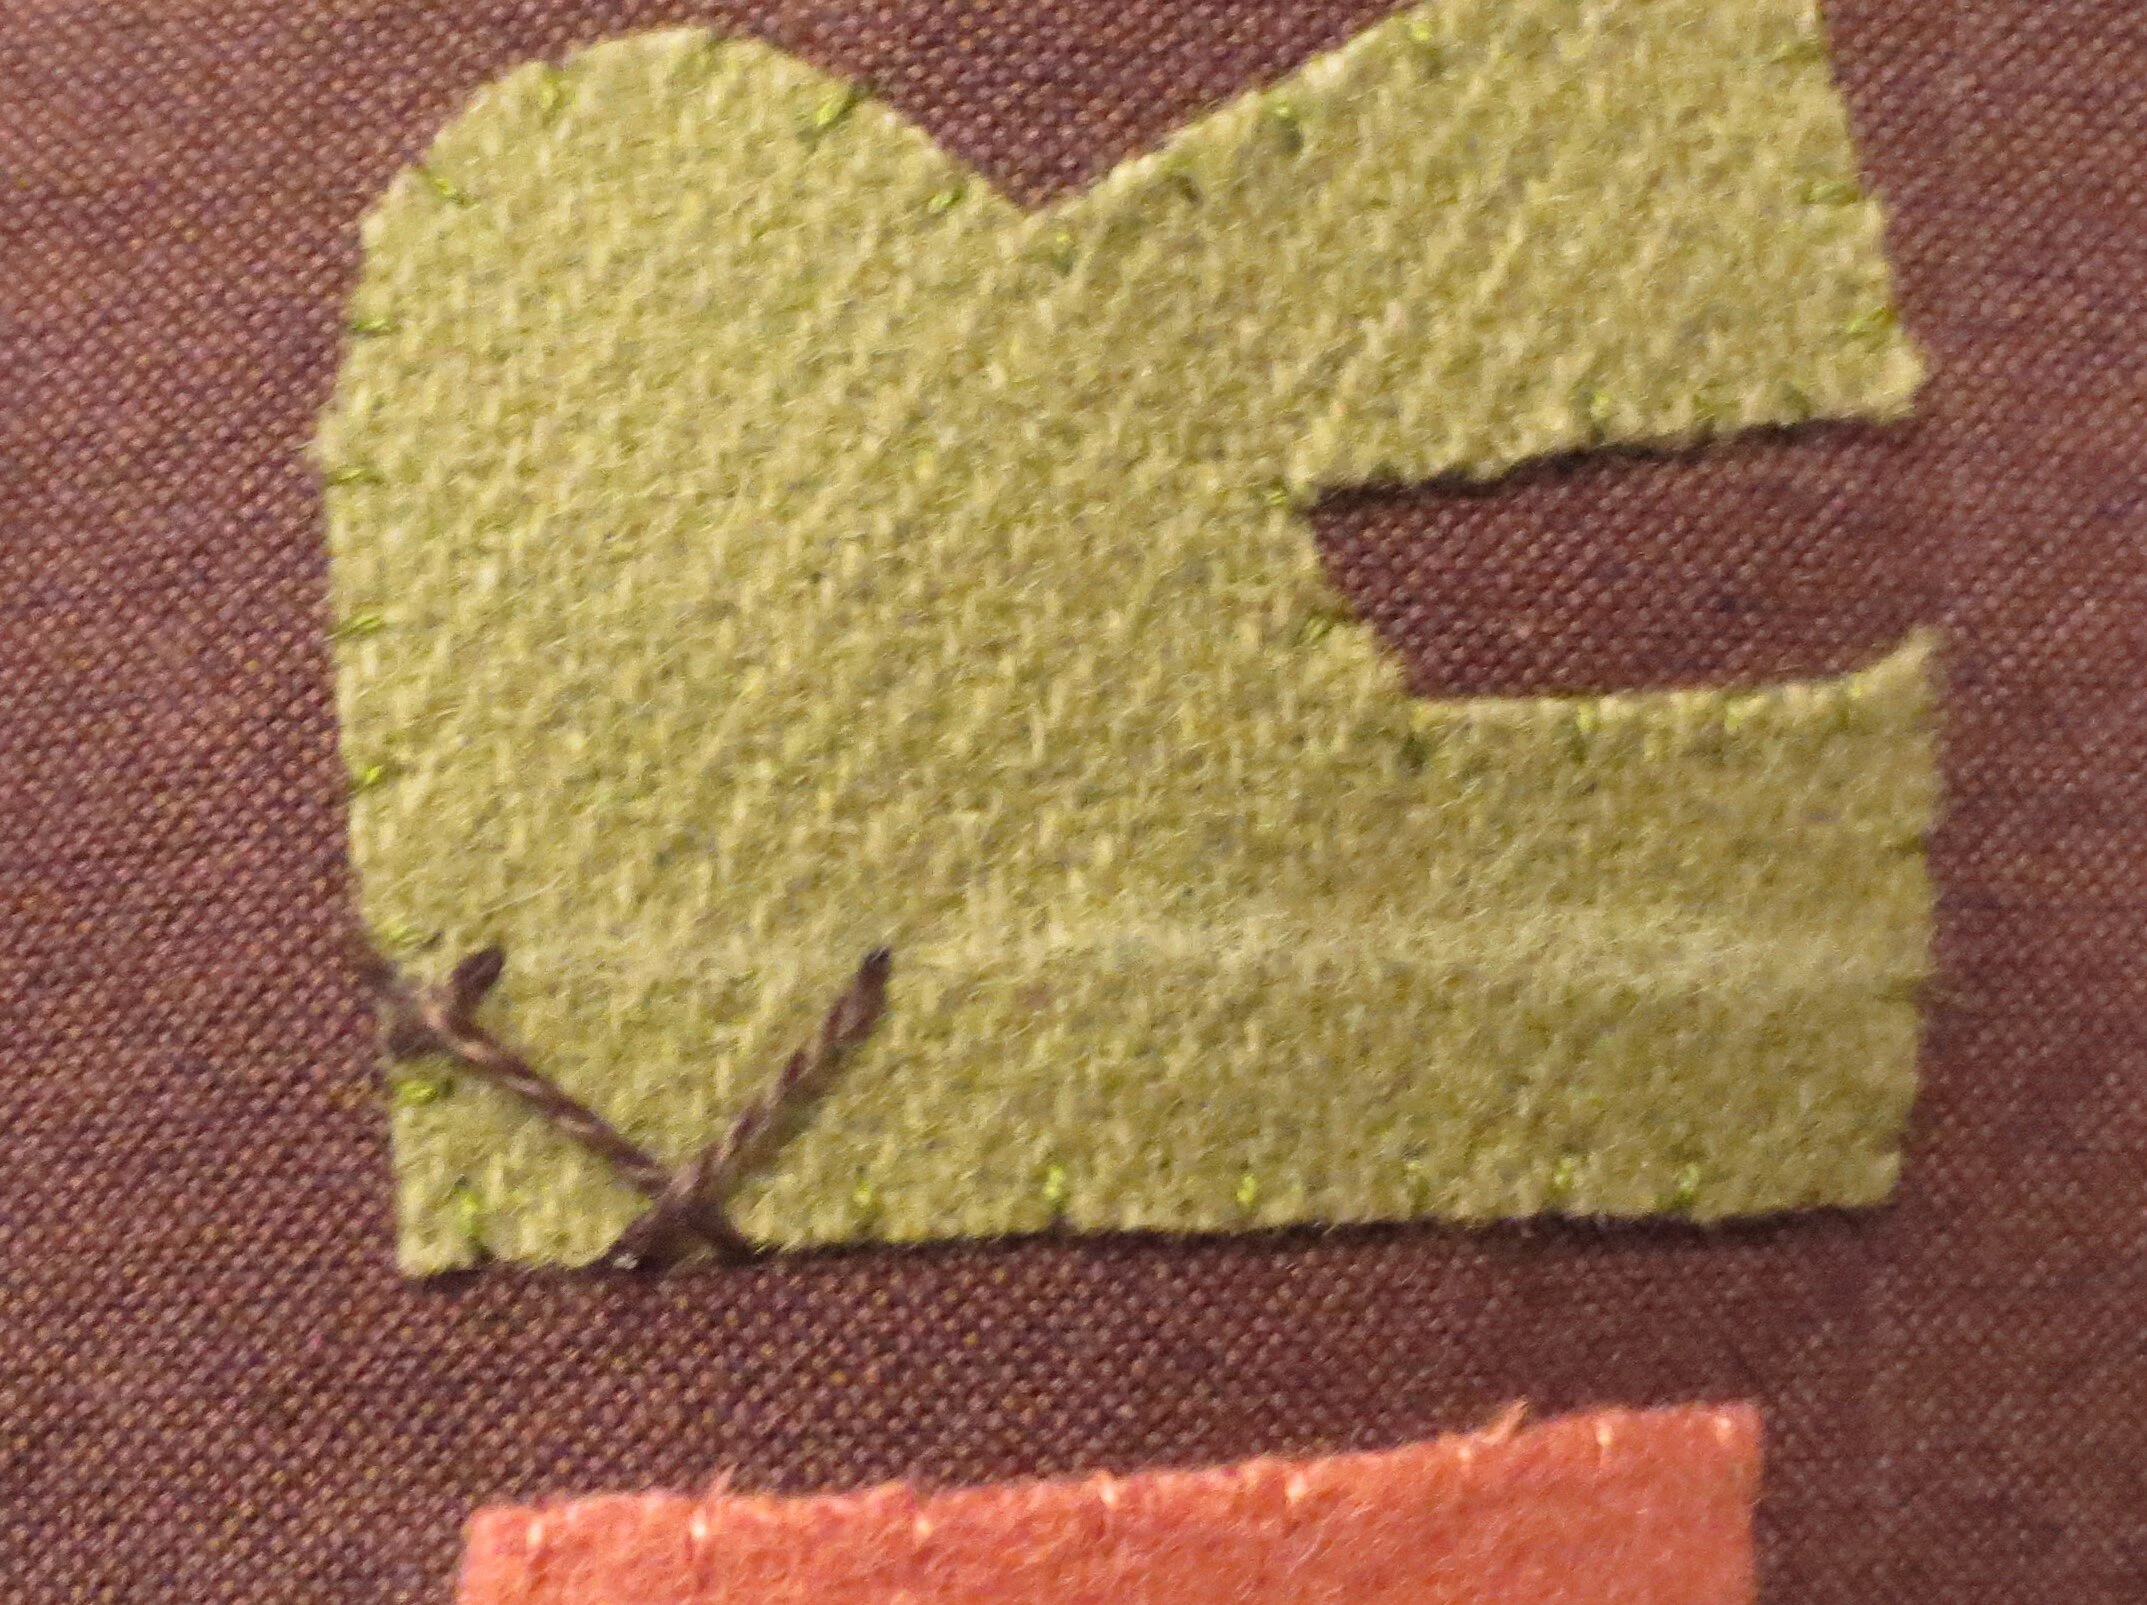
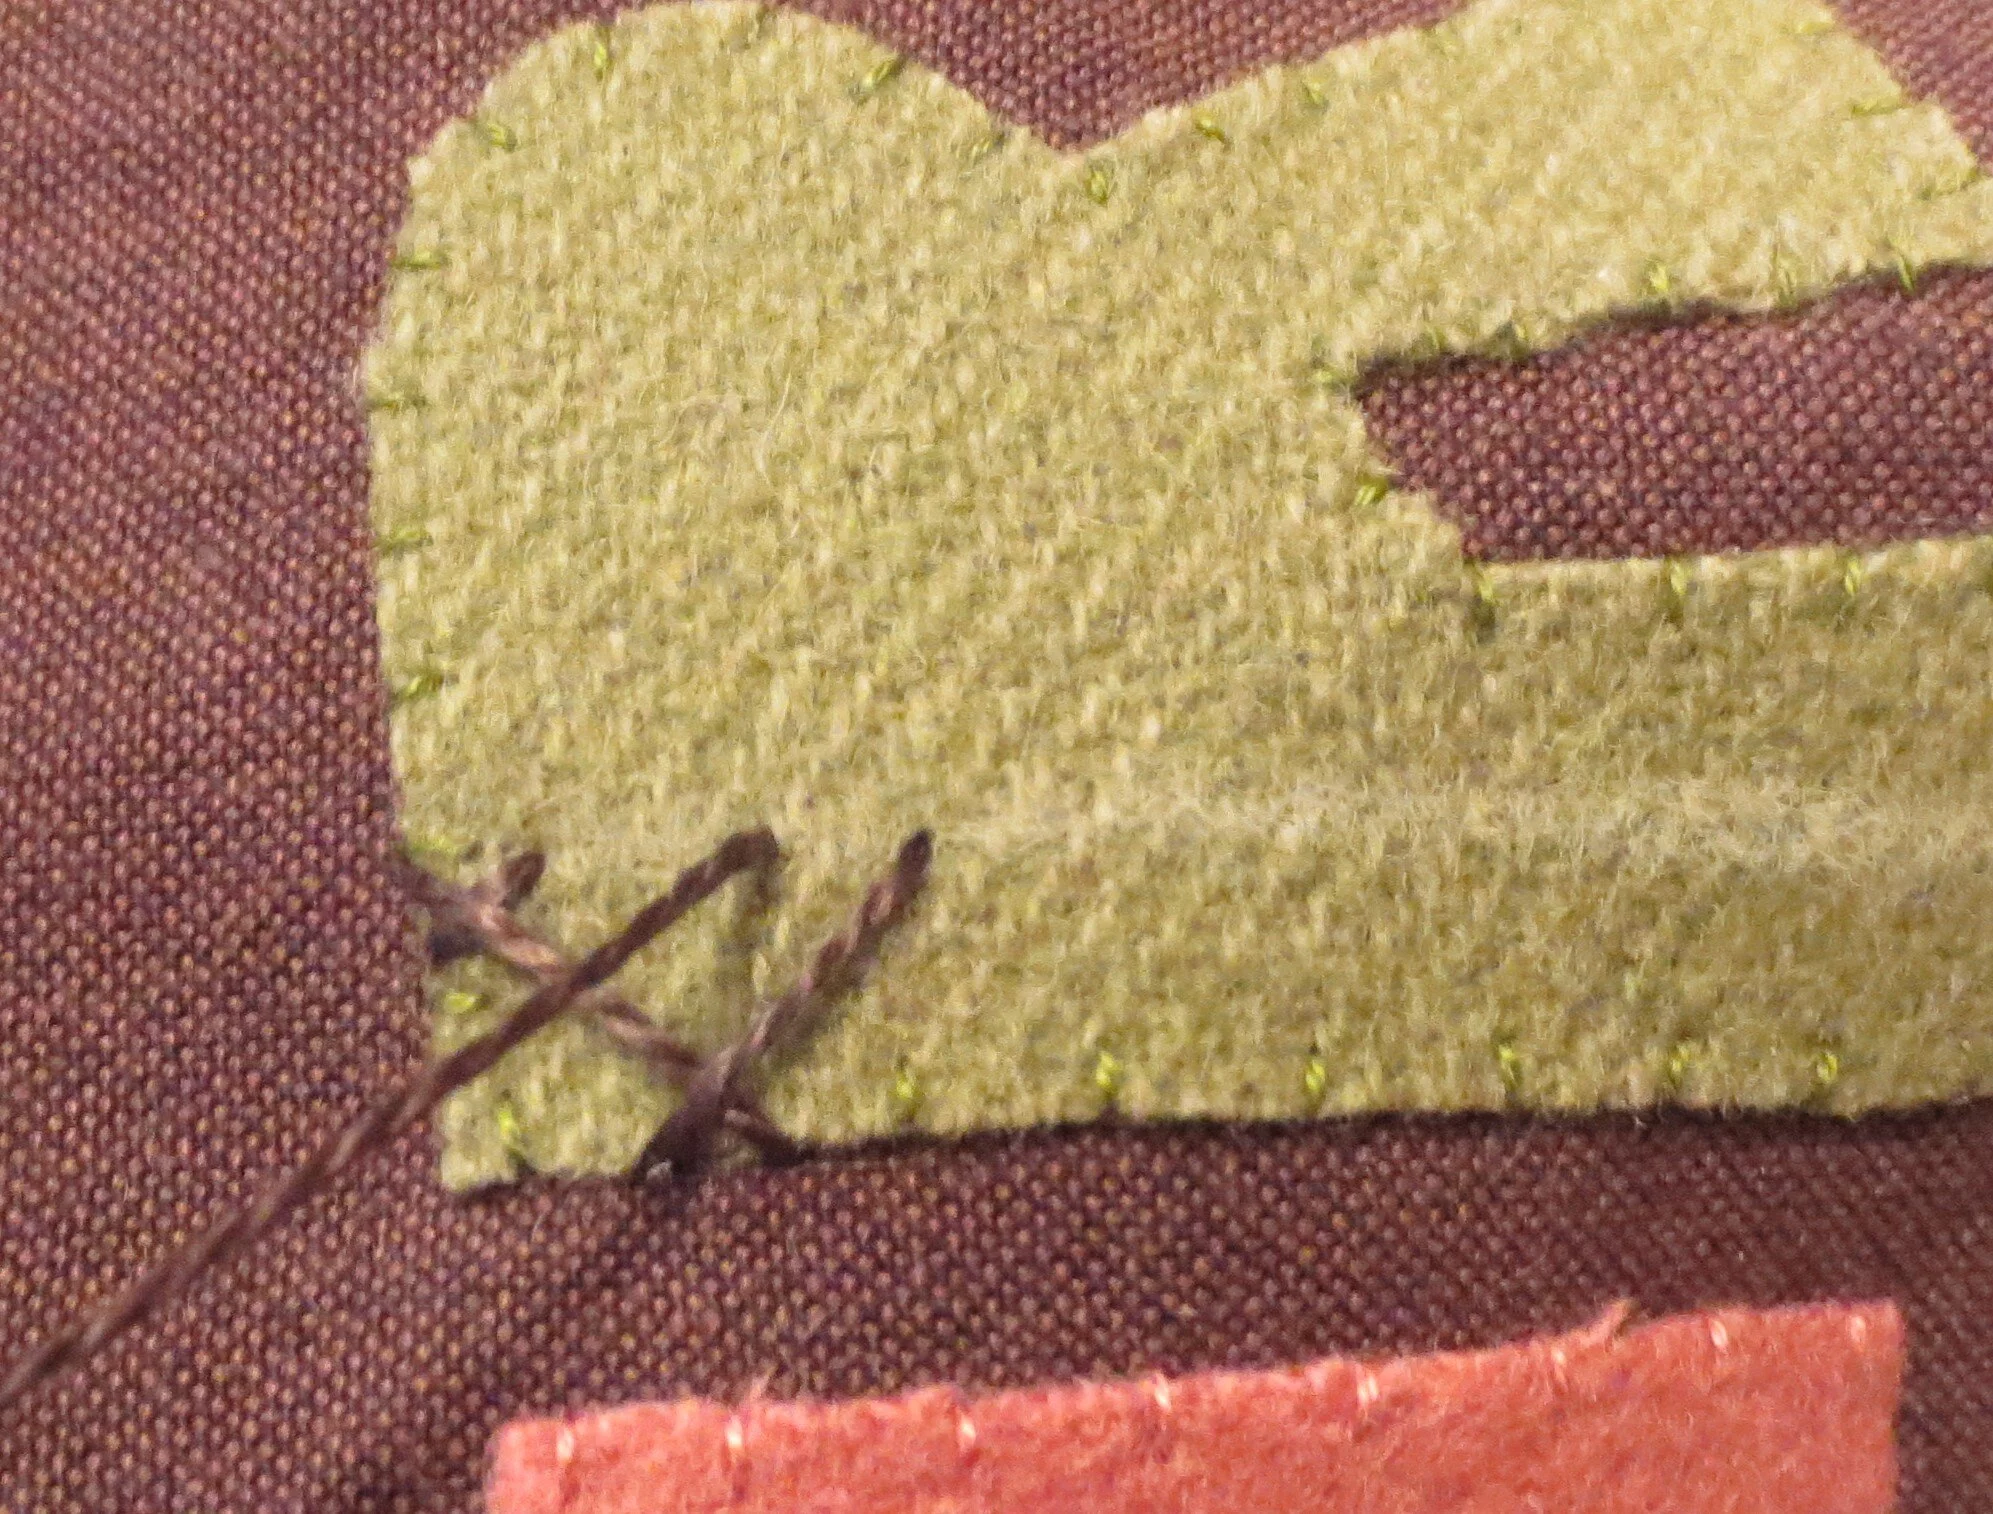
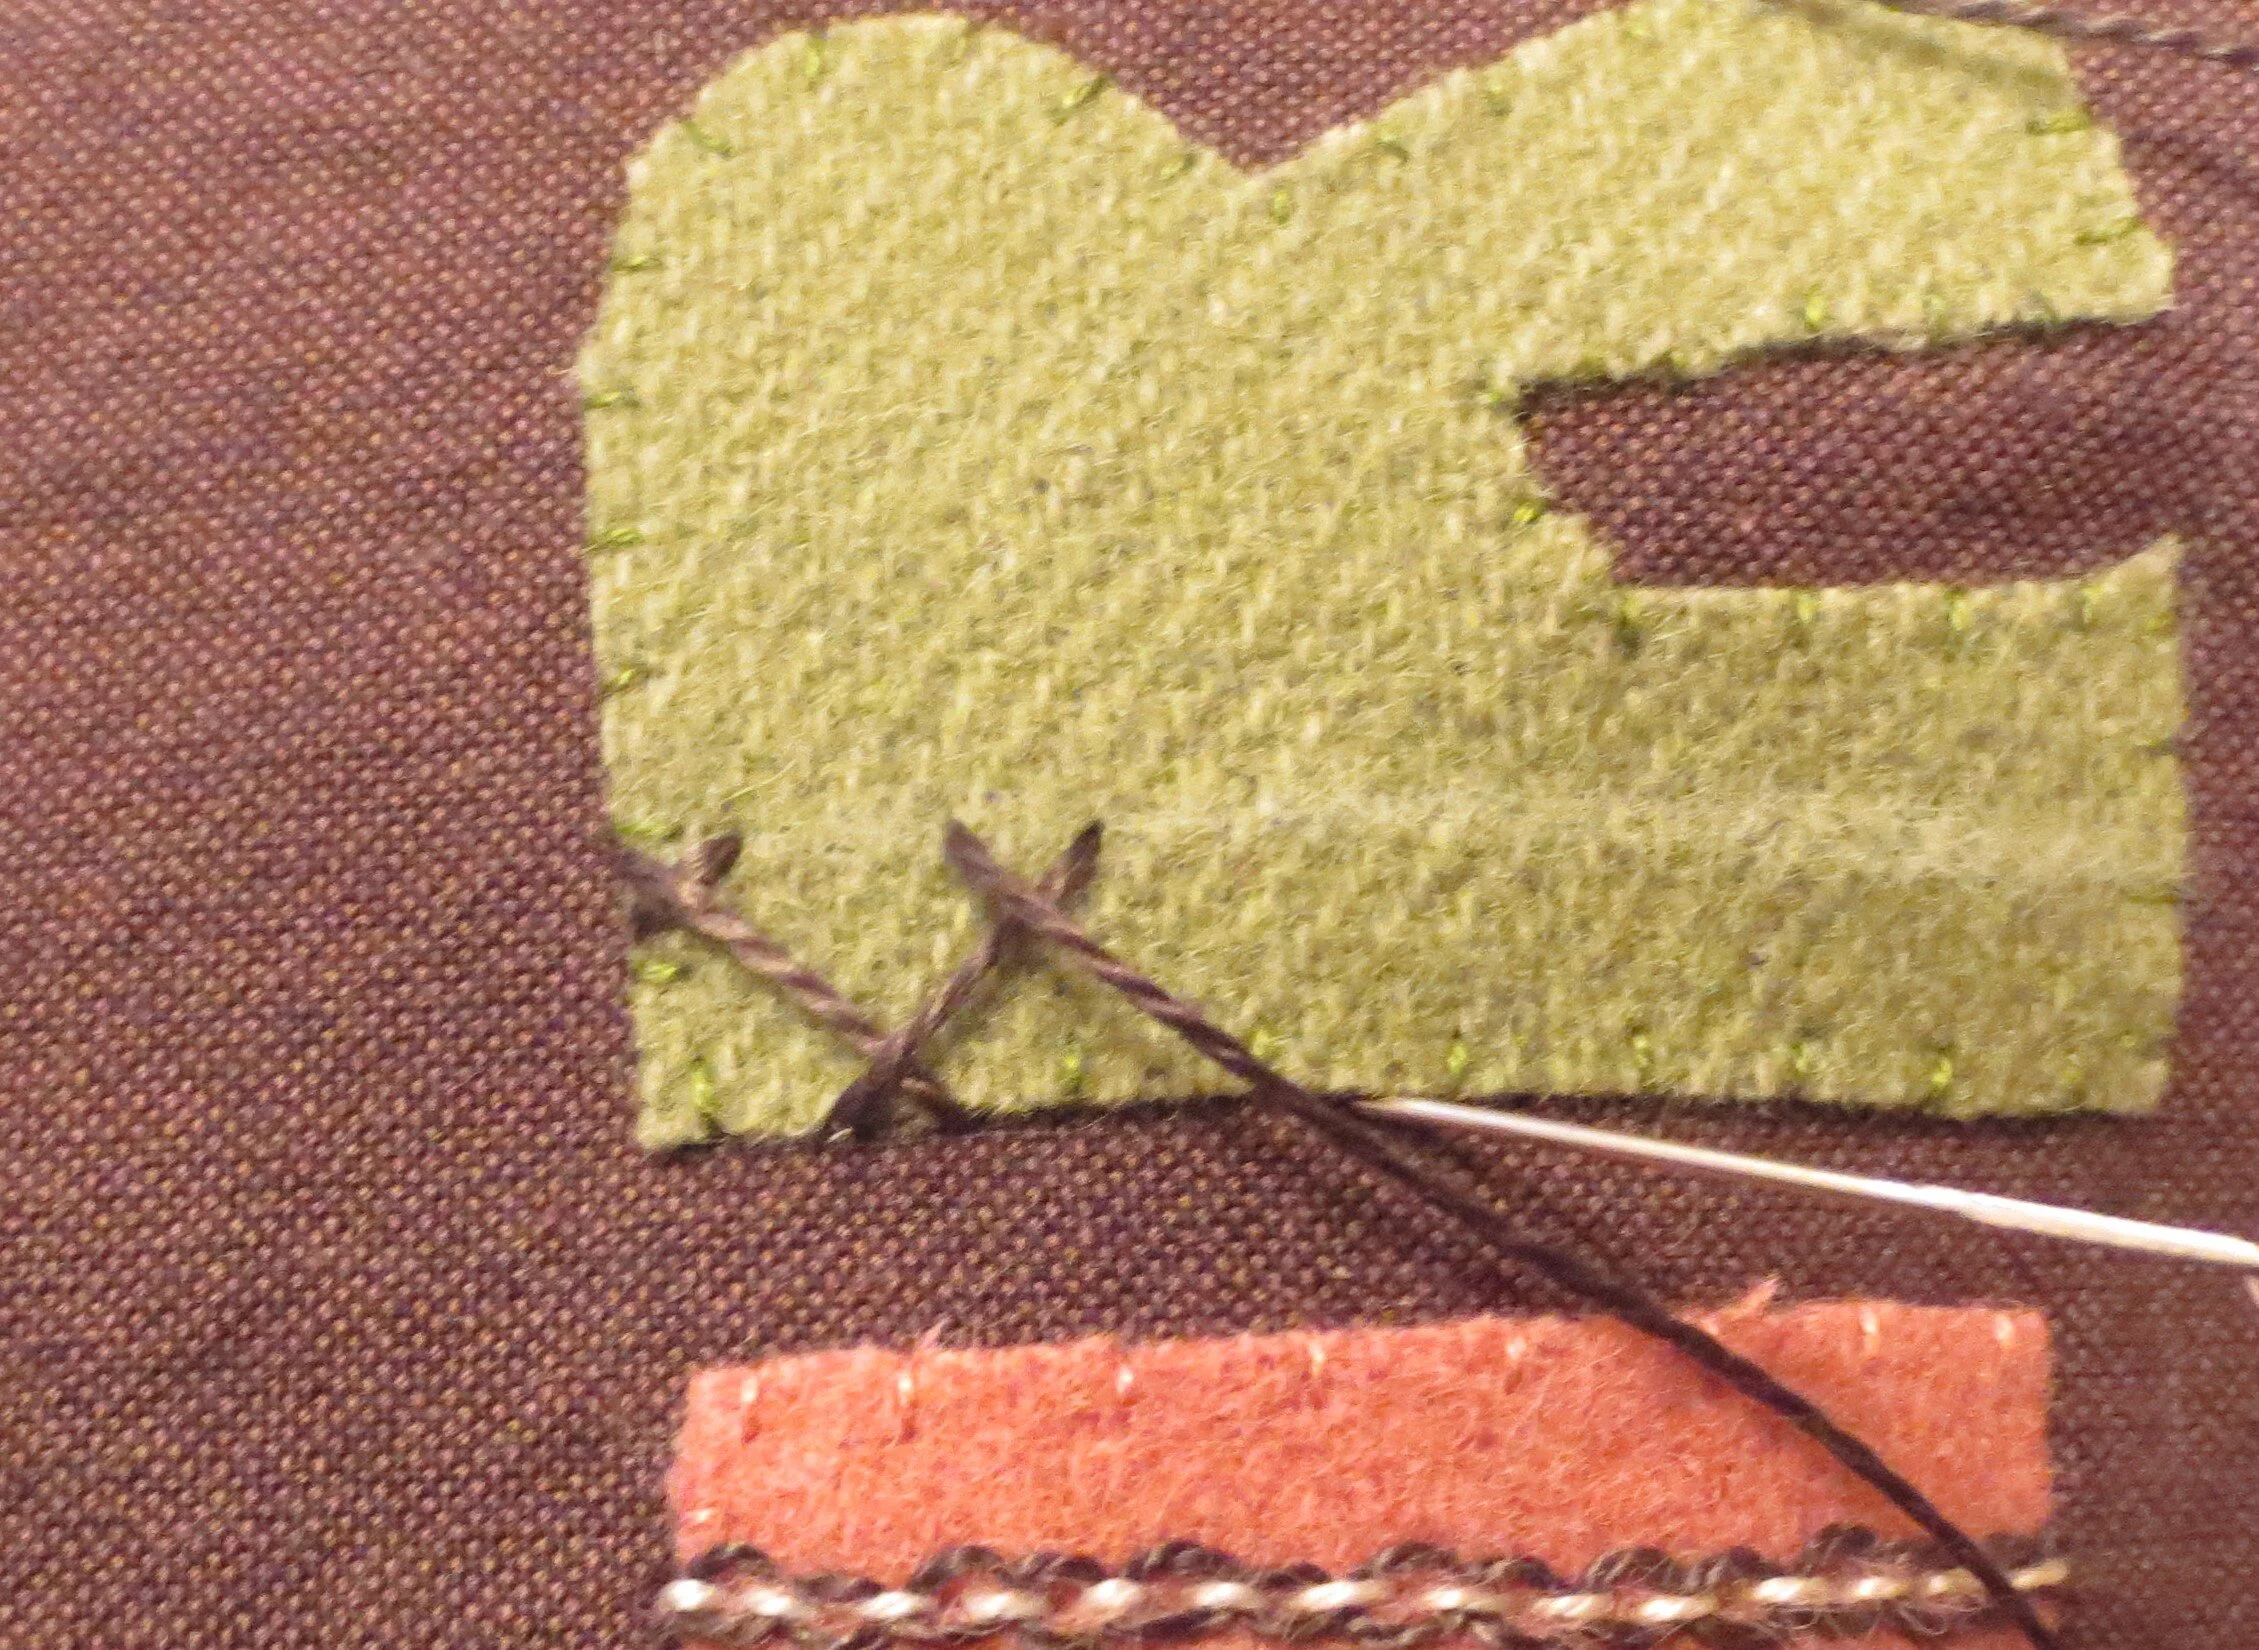
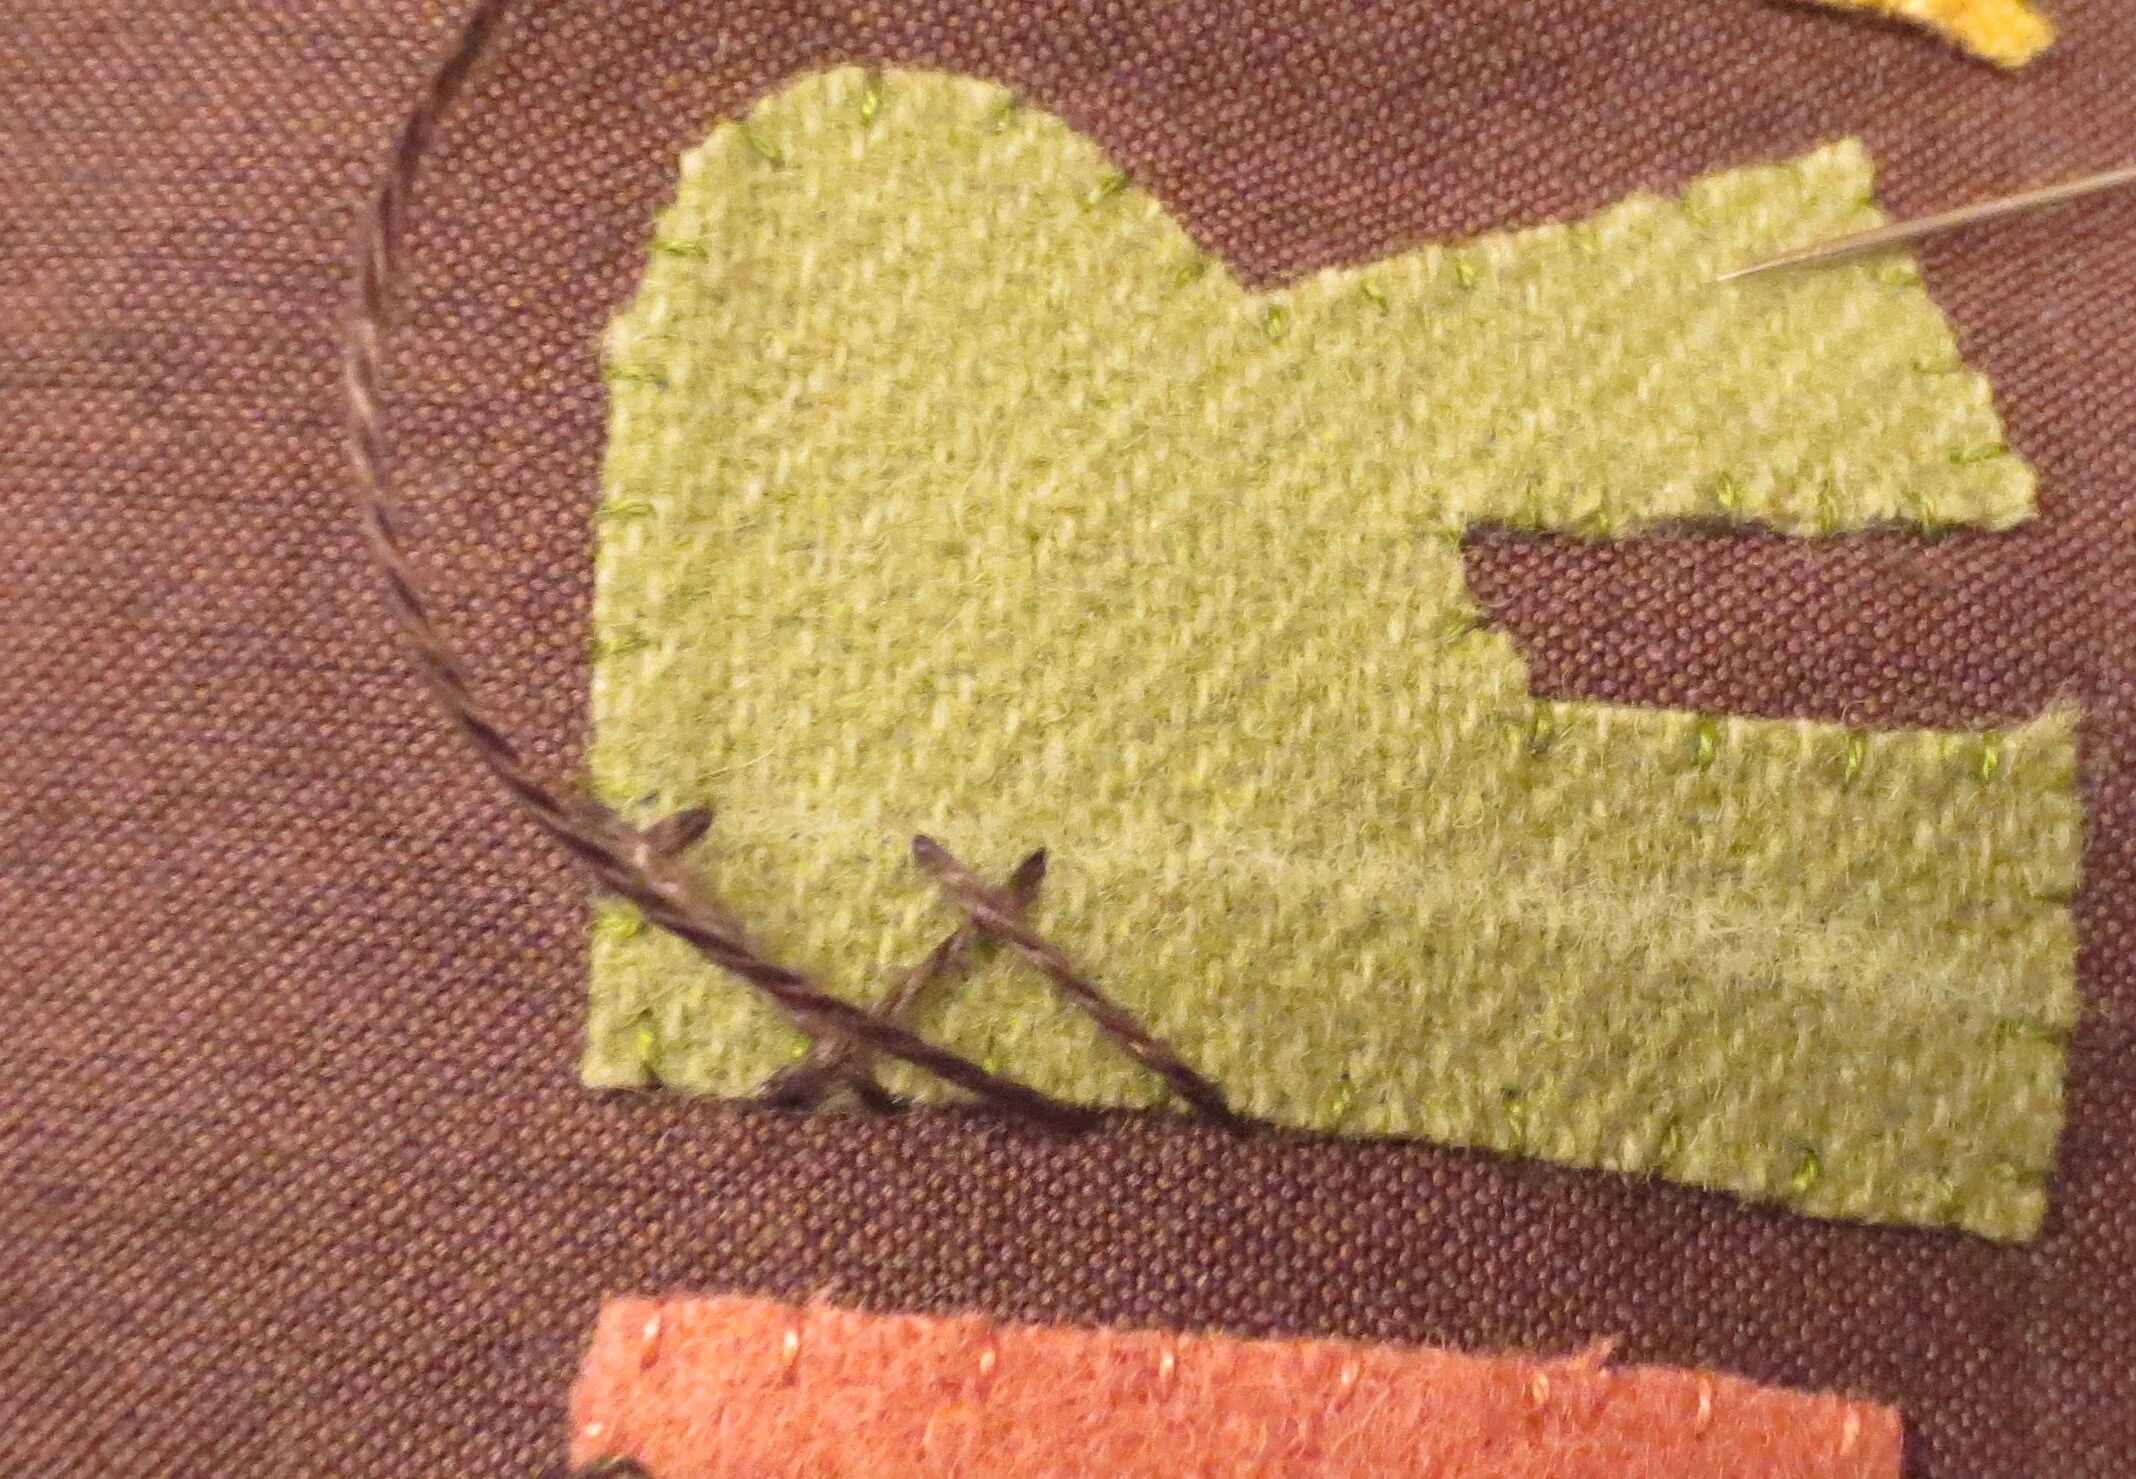
Use 1 strand of dark colored thread to stitch cross stitches over the joints between the branch sections.
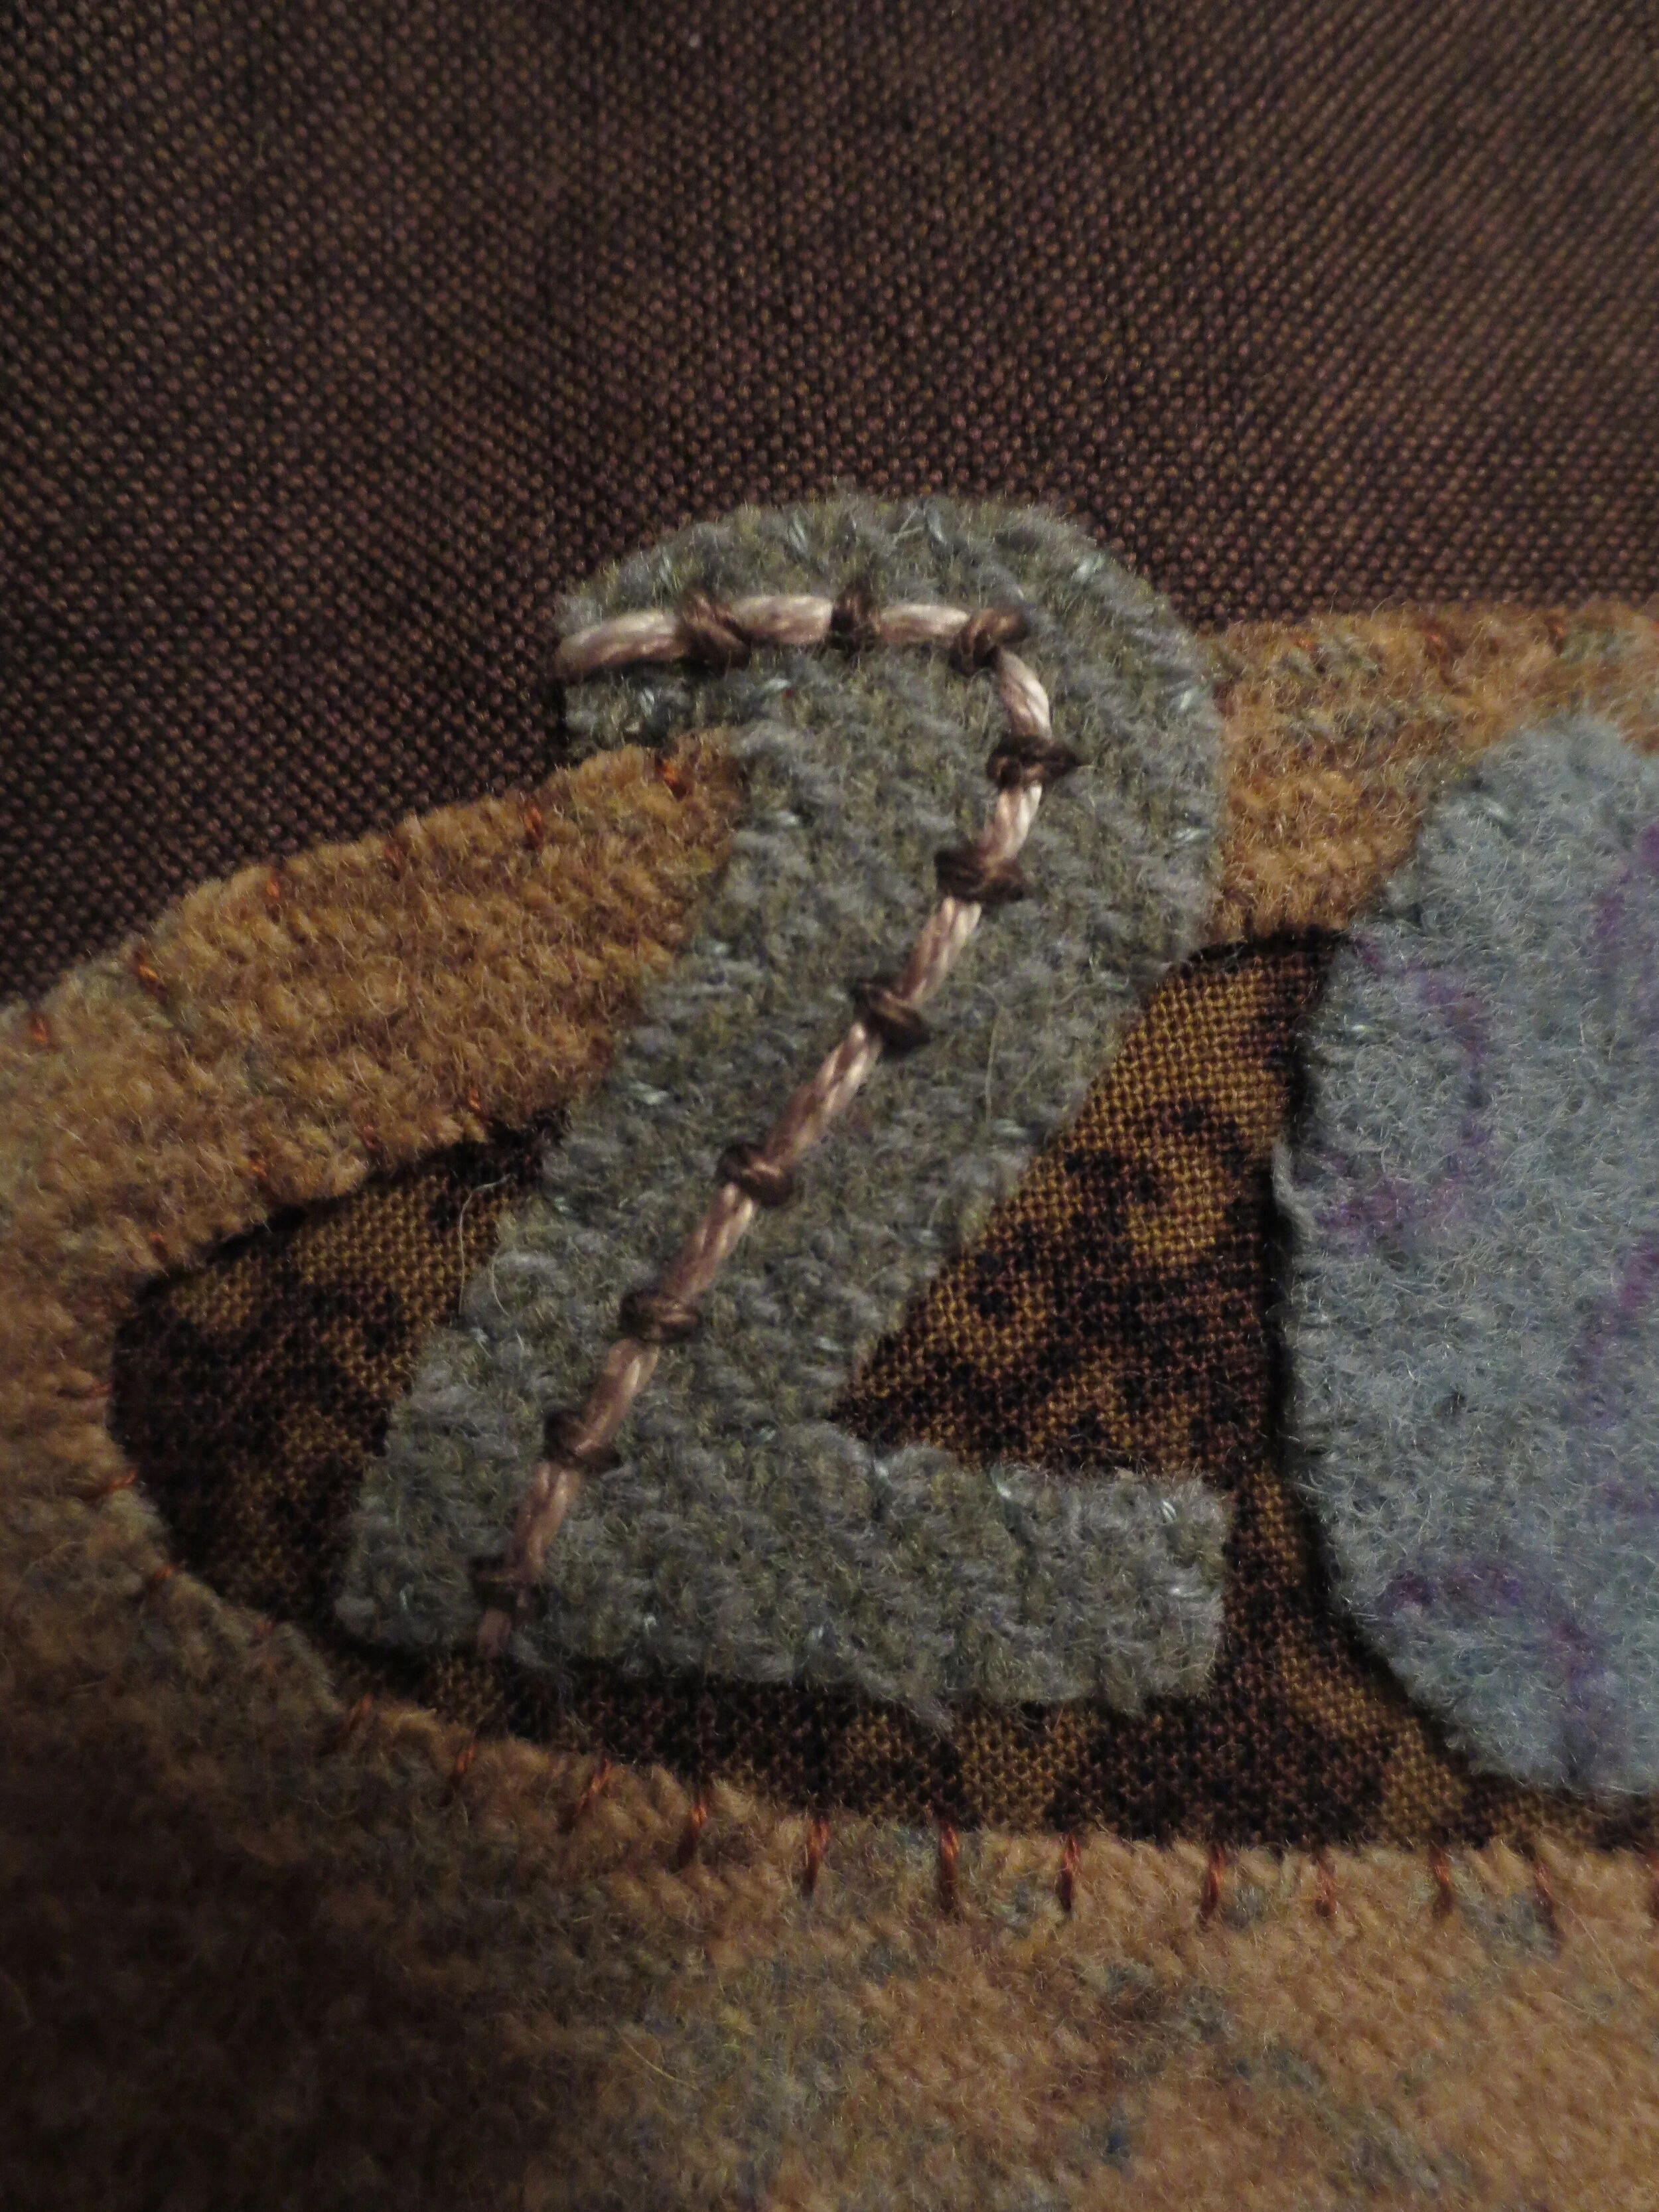
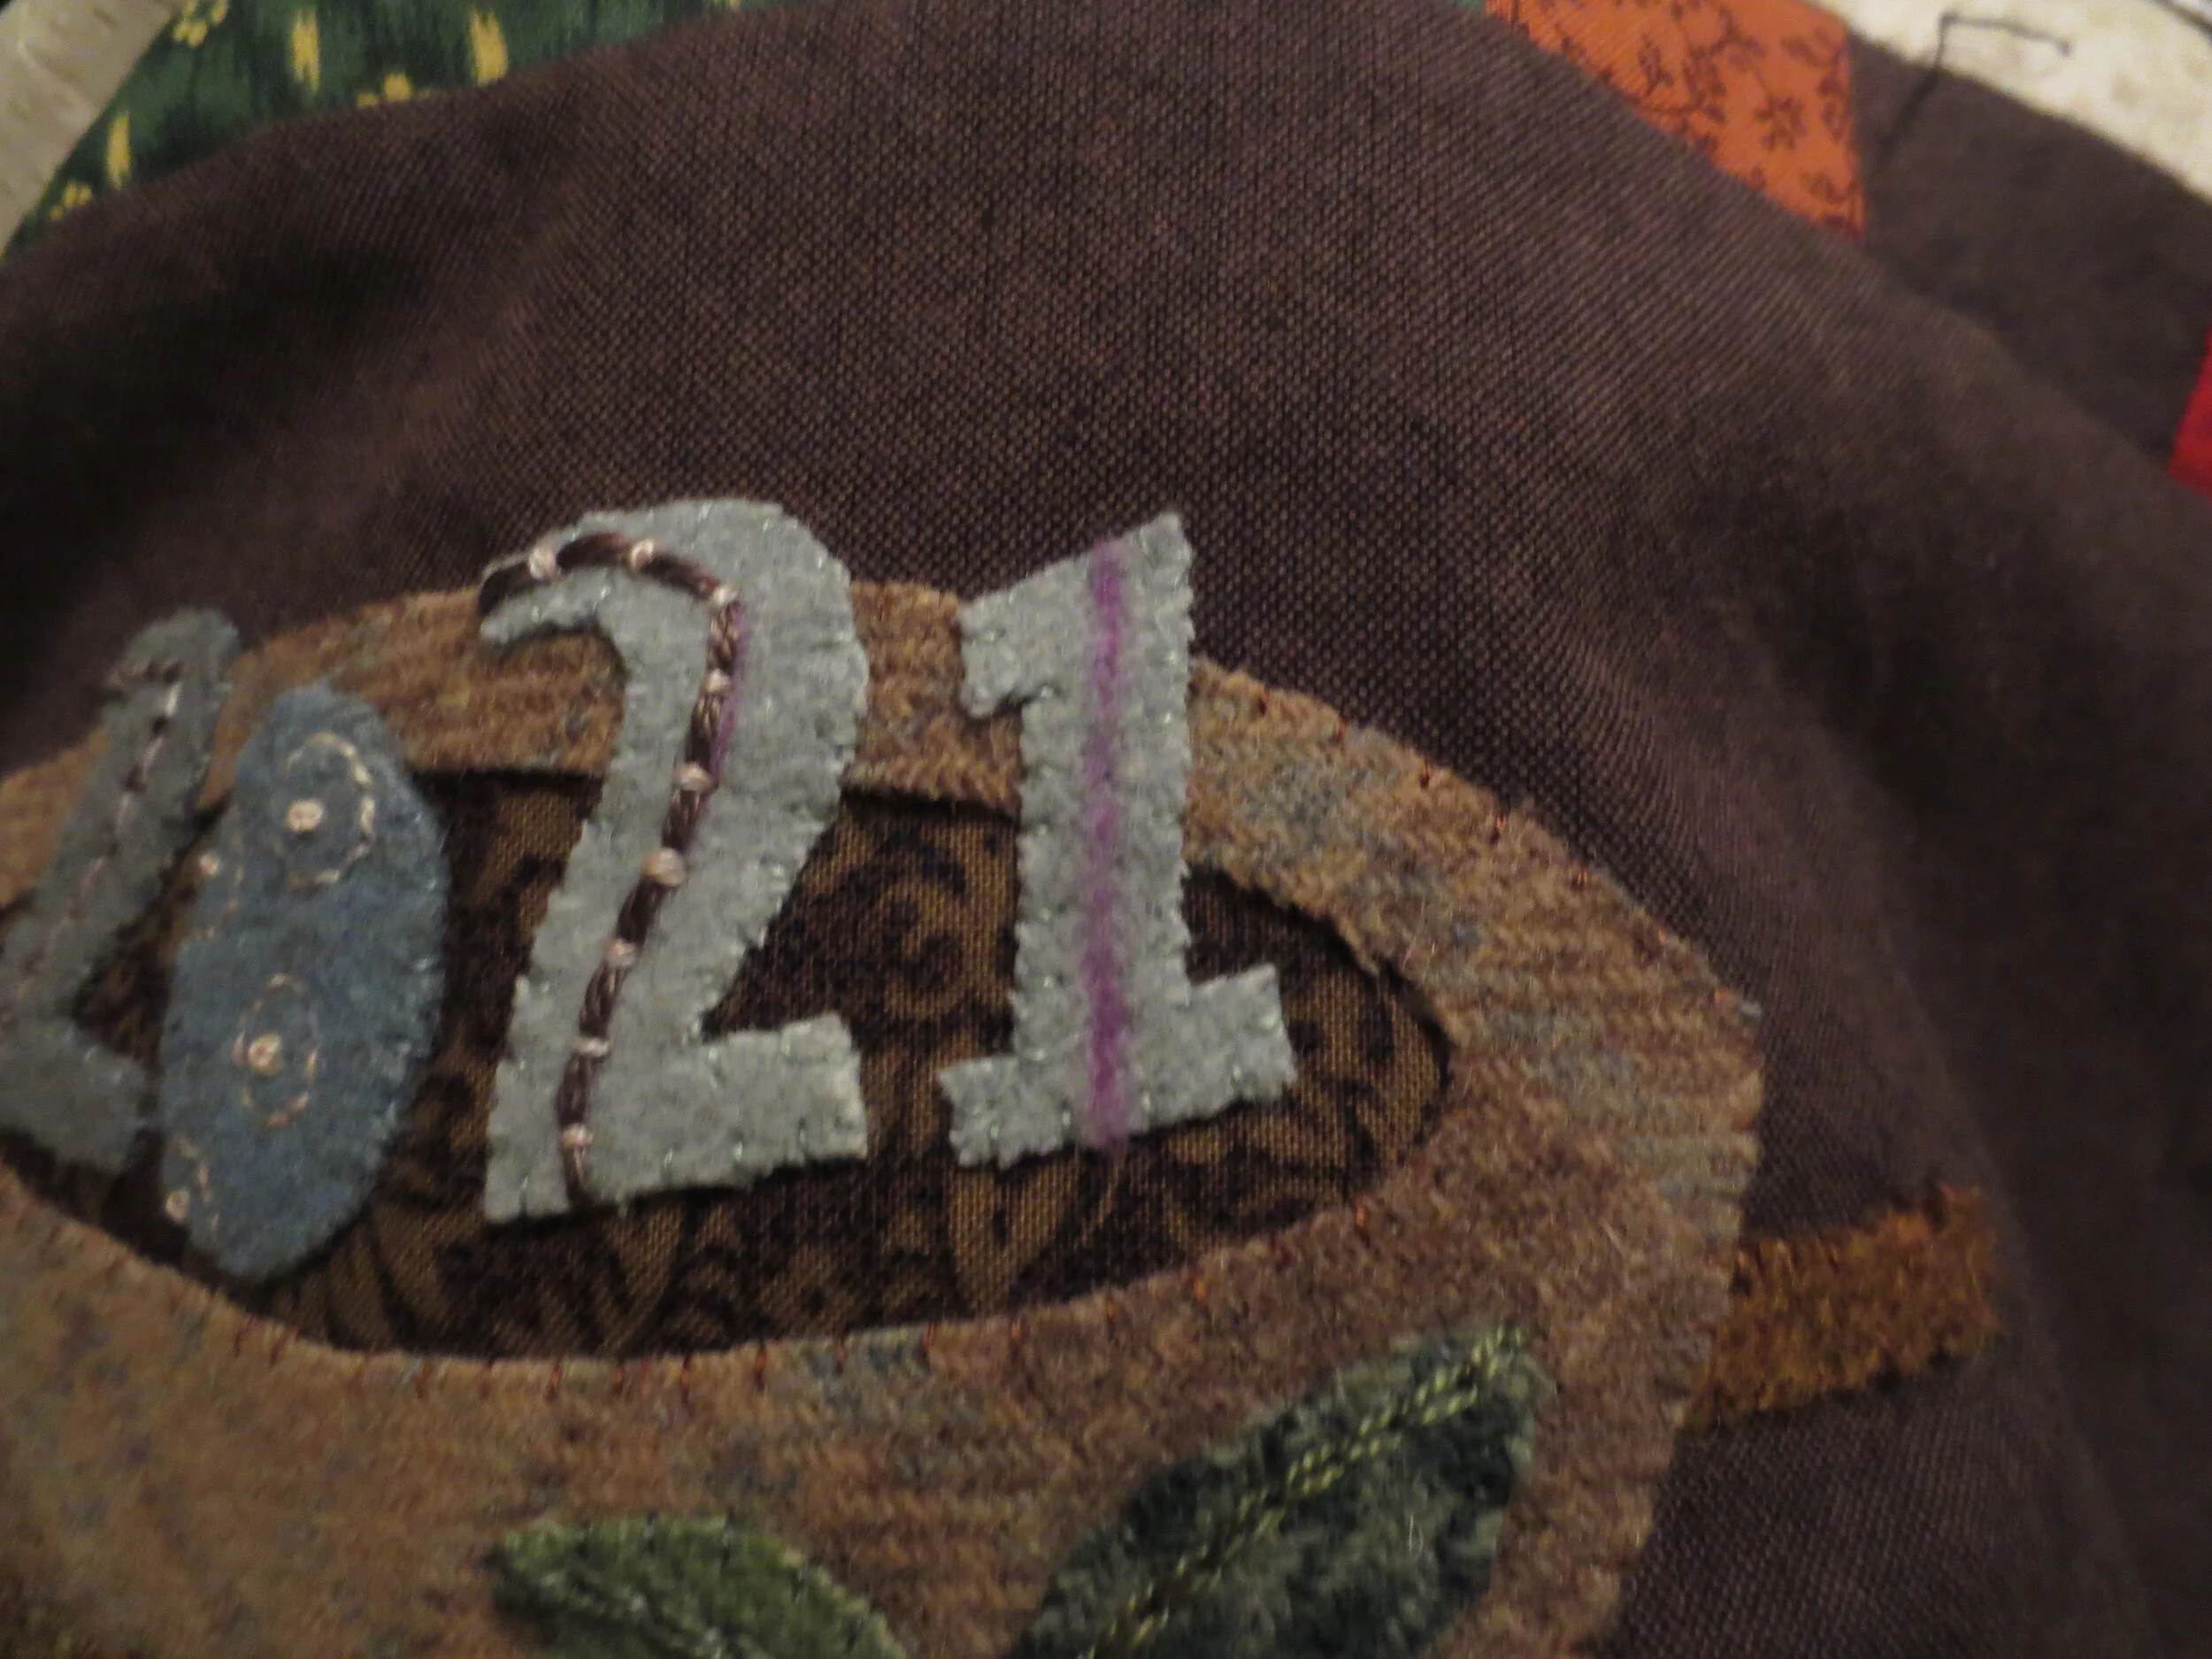
Draw guide lines on both of 2’s.
Stitch a couching stitch on both.
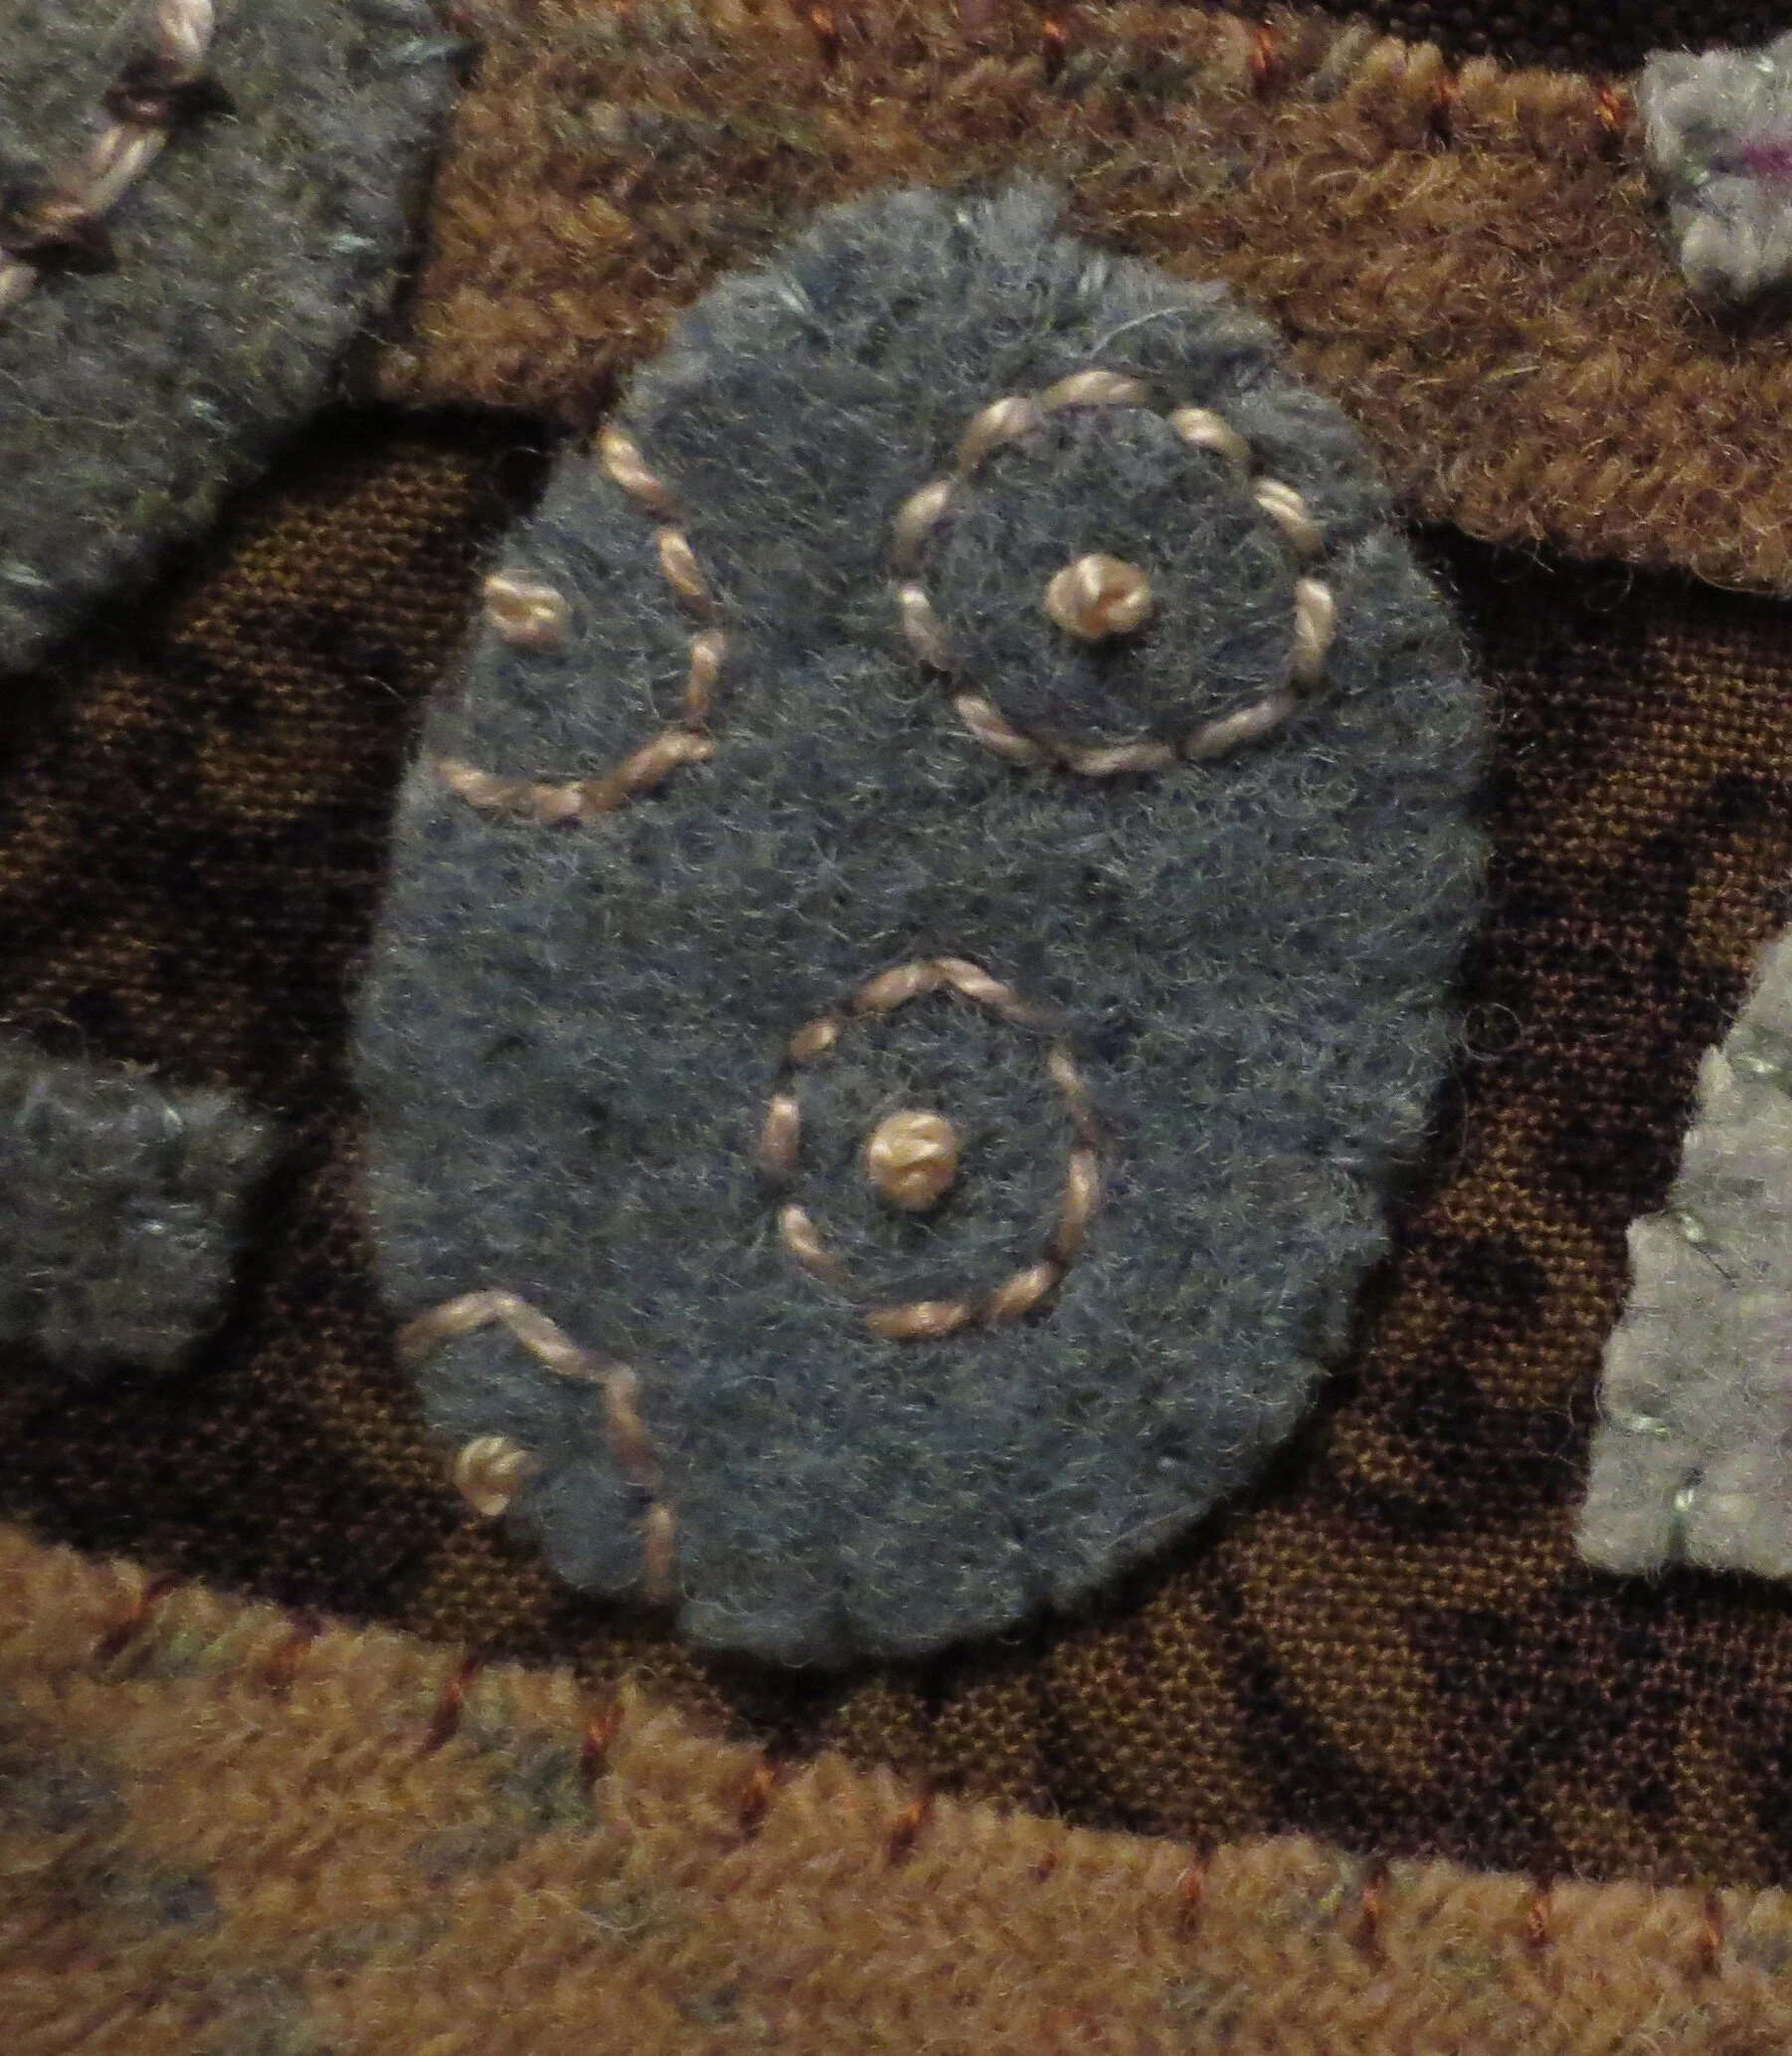
Draw circles and half circles on the zero.
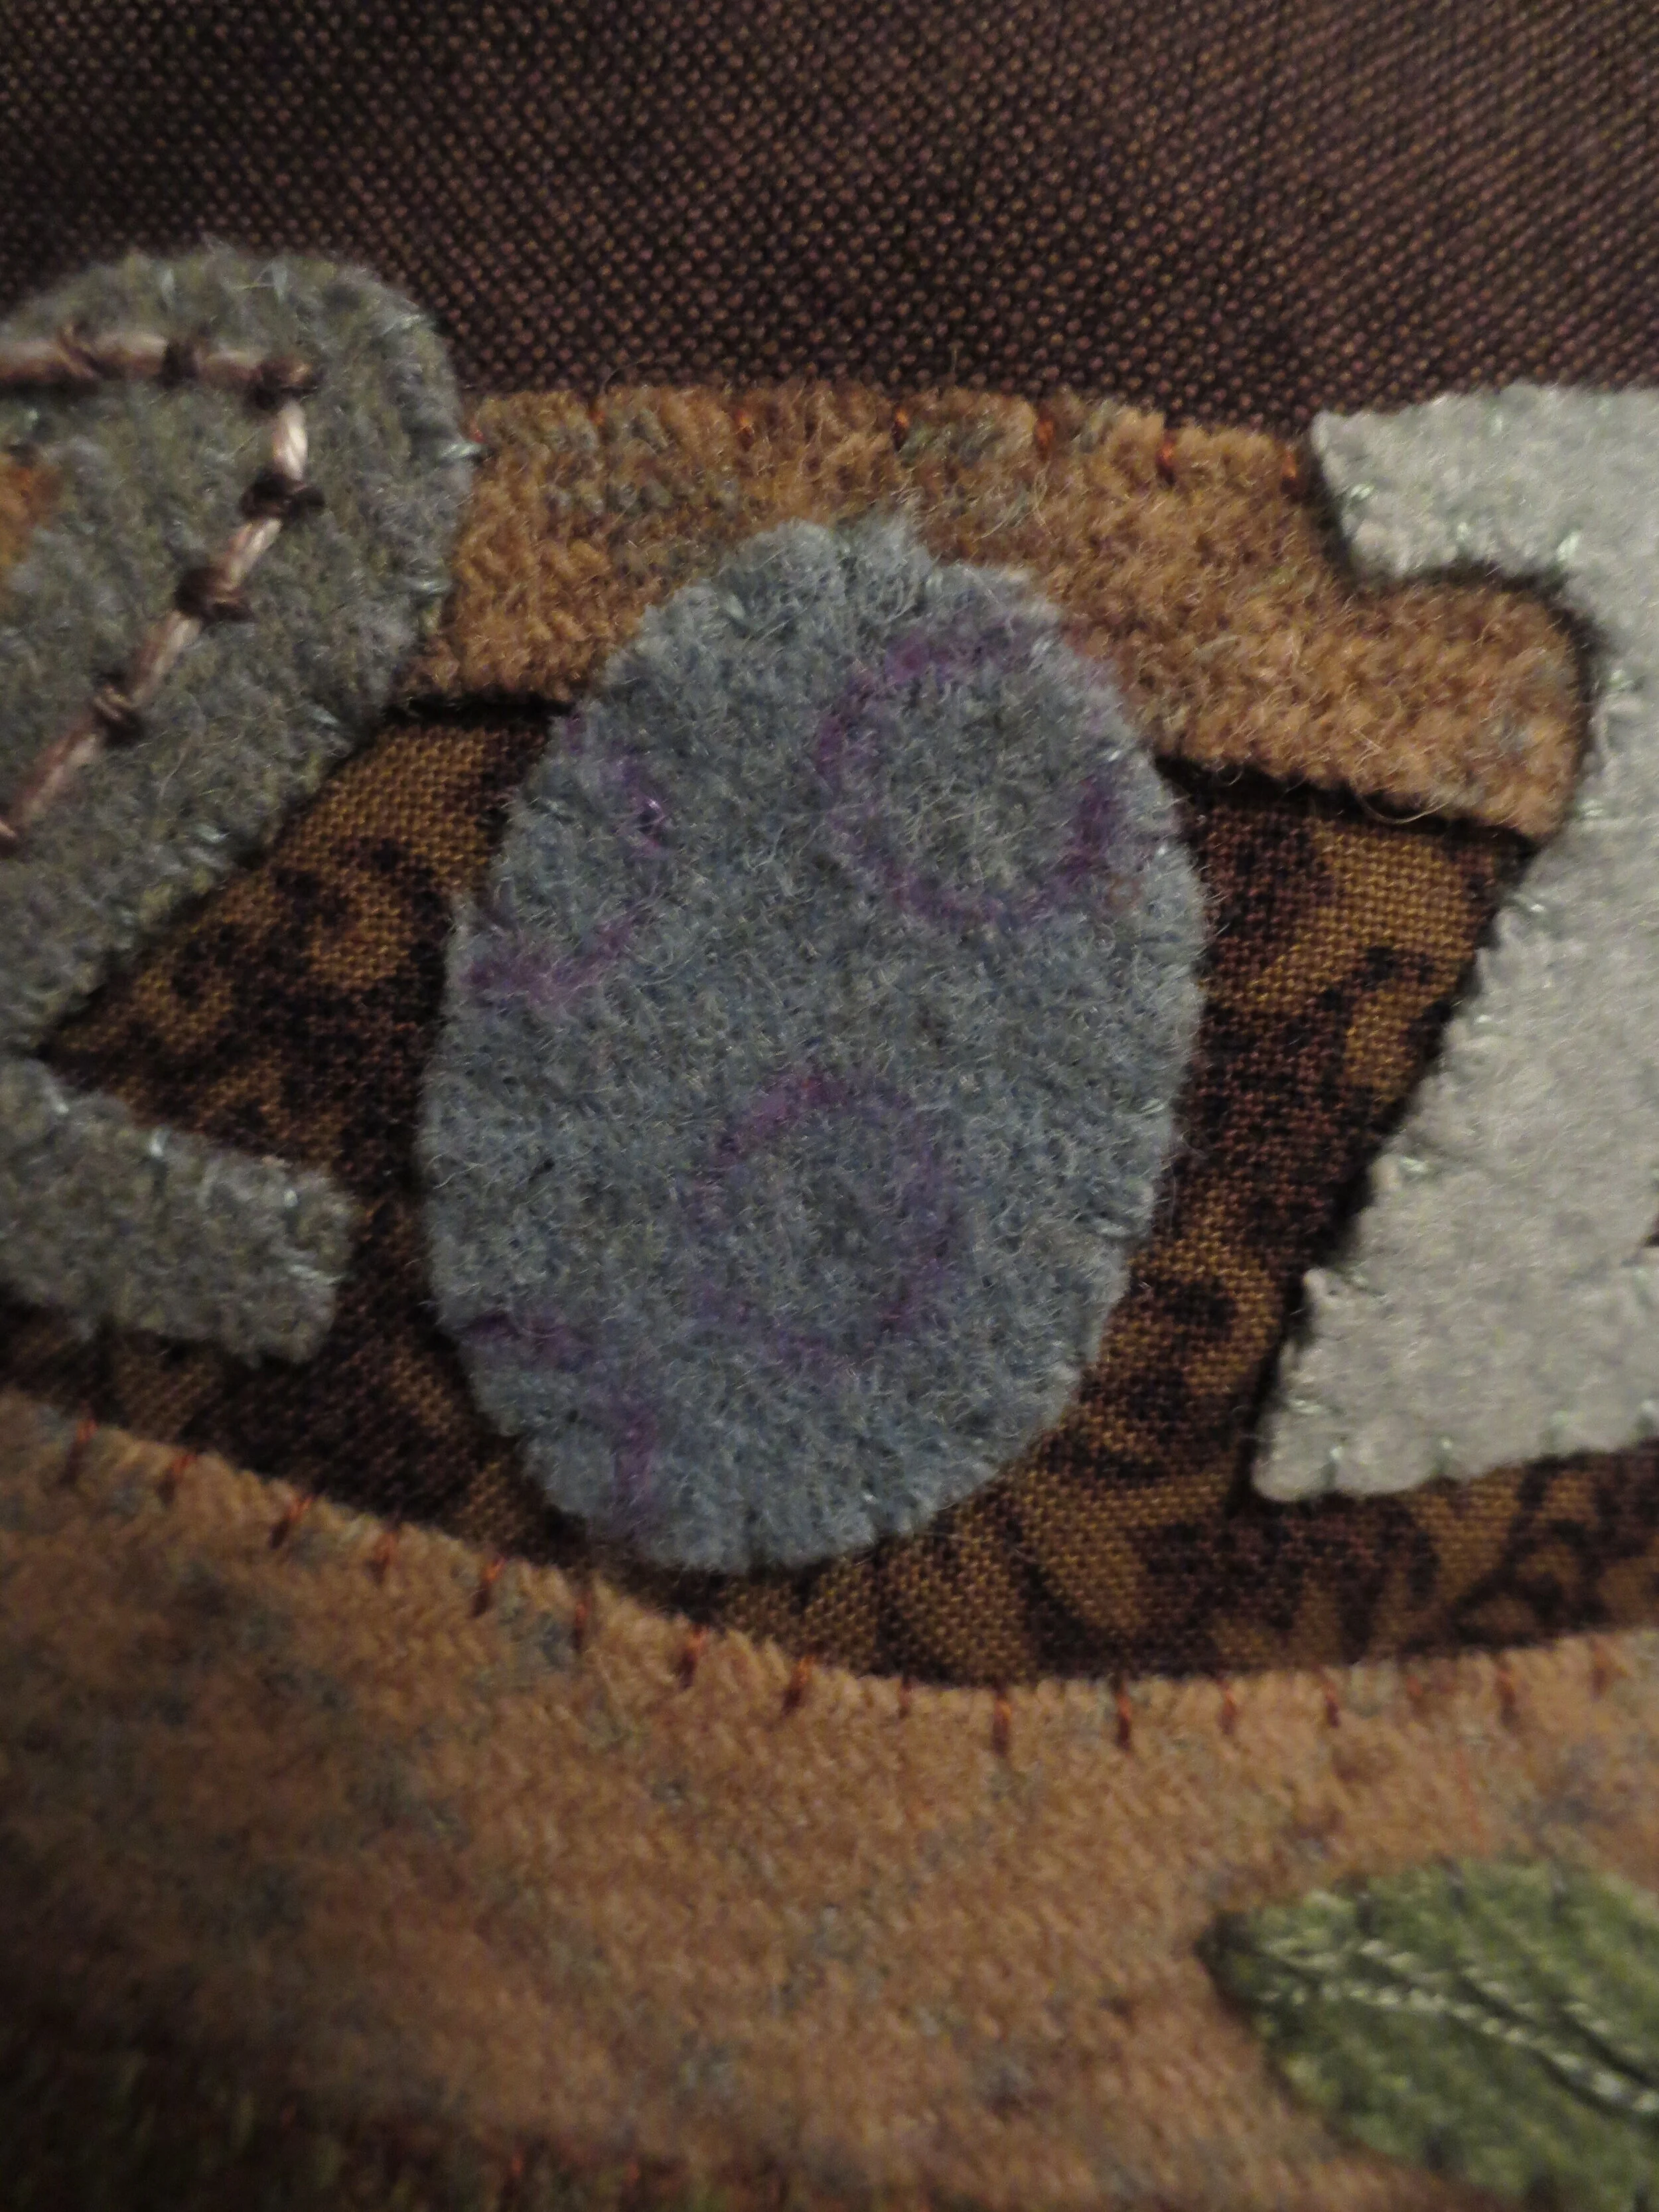
Use 1 strand of thread to backstitch each of the circles.
Use the same thread to stitch a French/colonial knot in the center of each of the circles.
Draw a guide line on the number 1.
Use 1 strand of thread to cable stitch over the line.
Use 1 strand of opposite colored thread to stitch French/knot in each link of the cable.
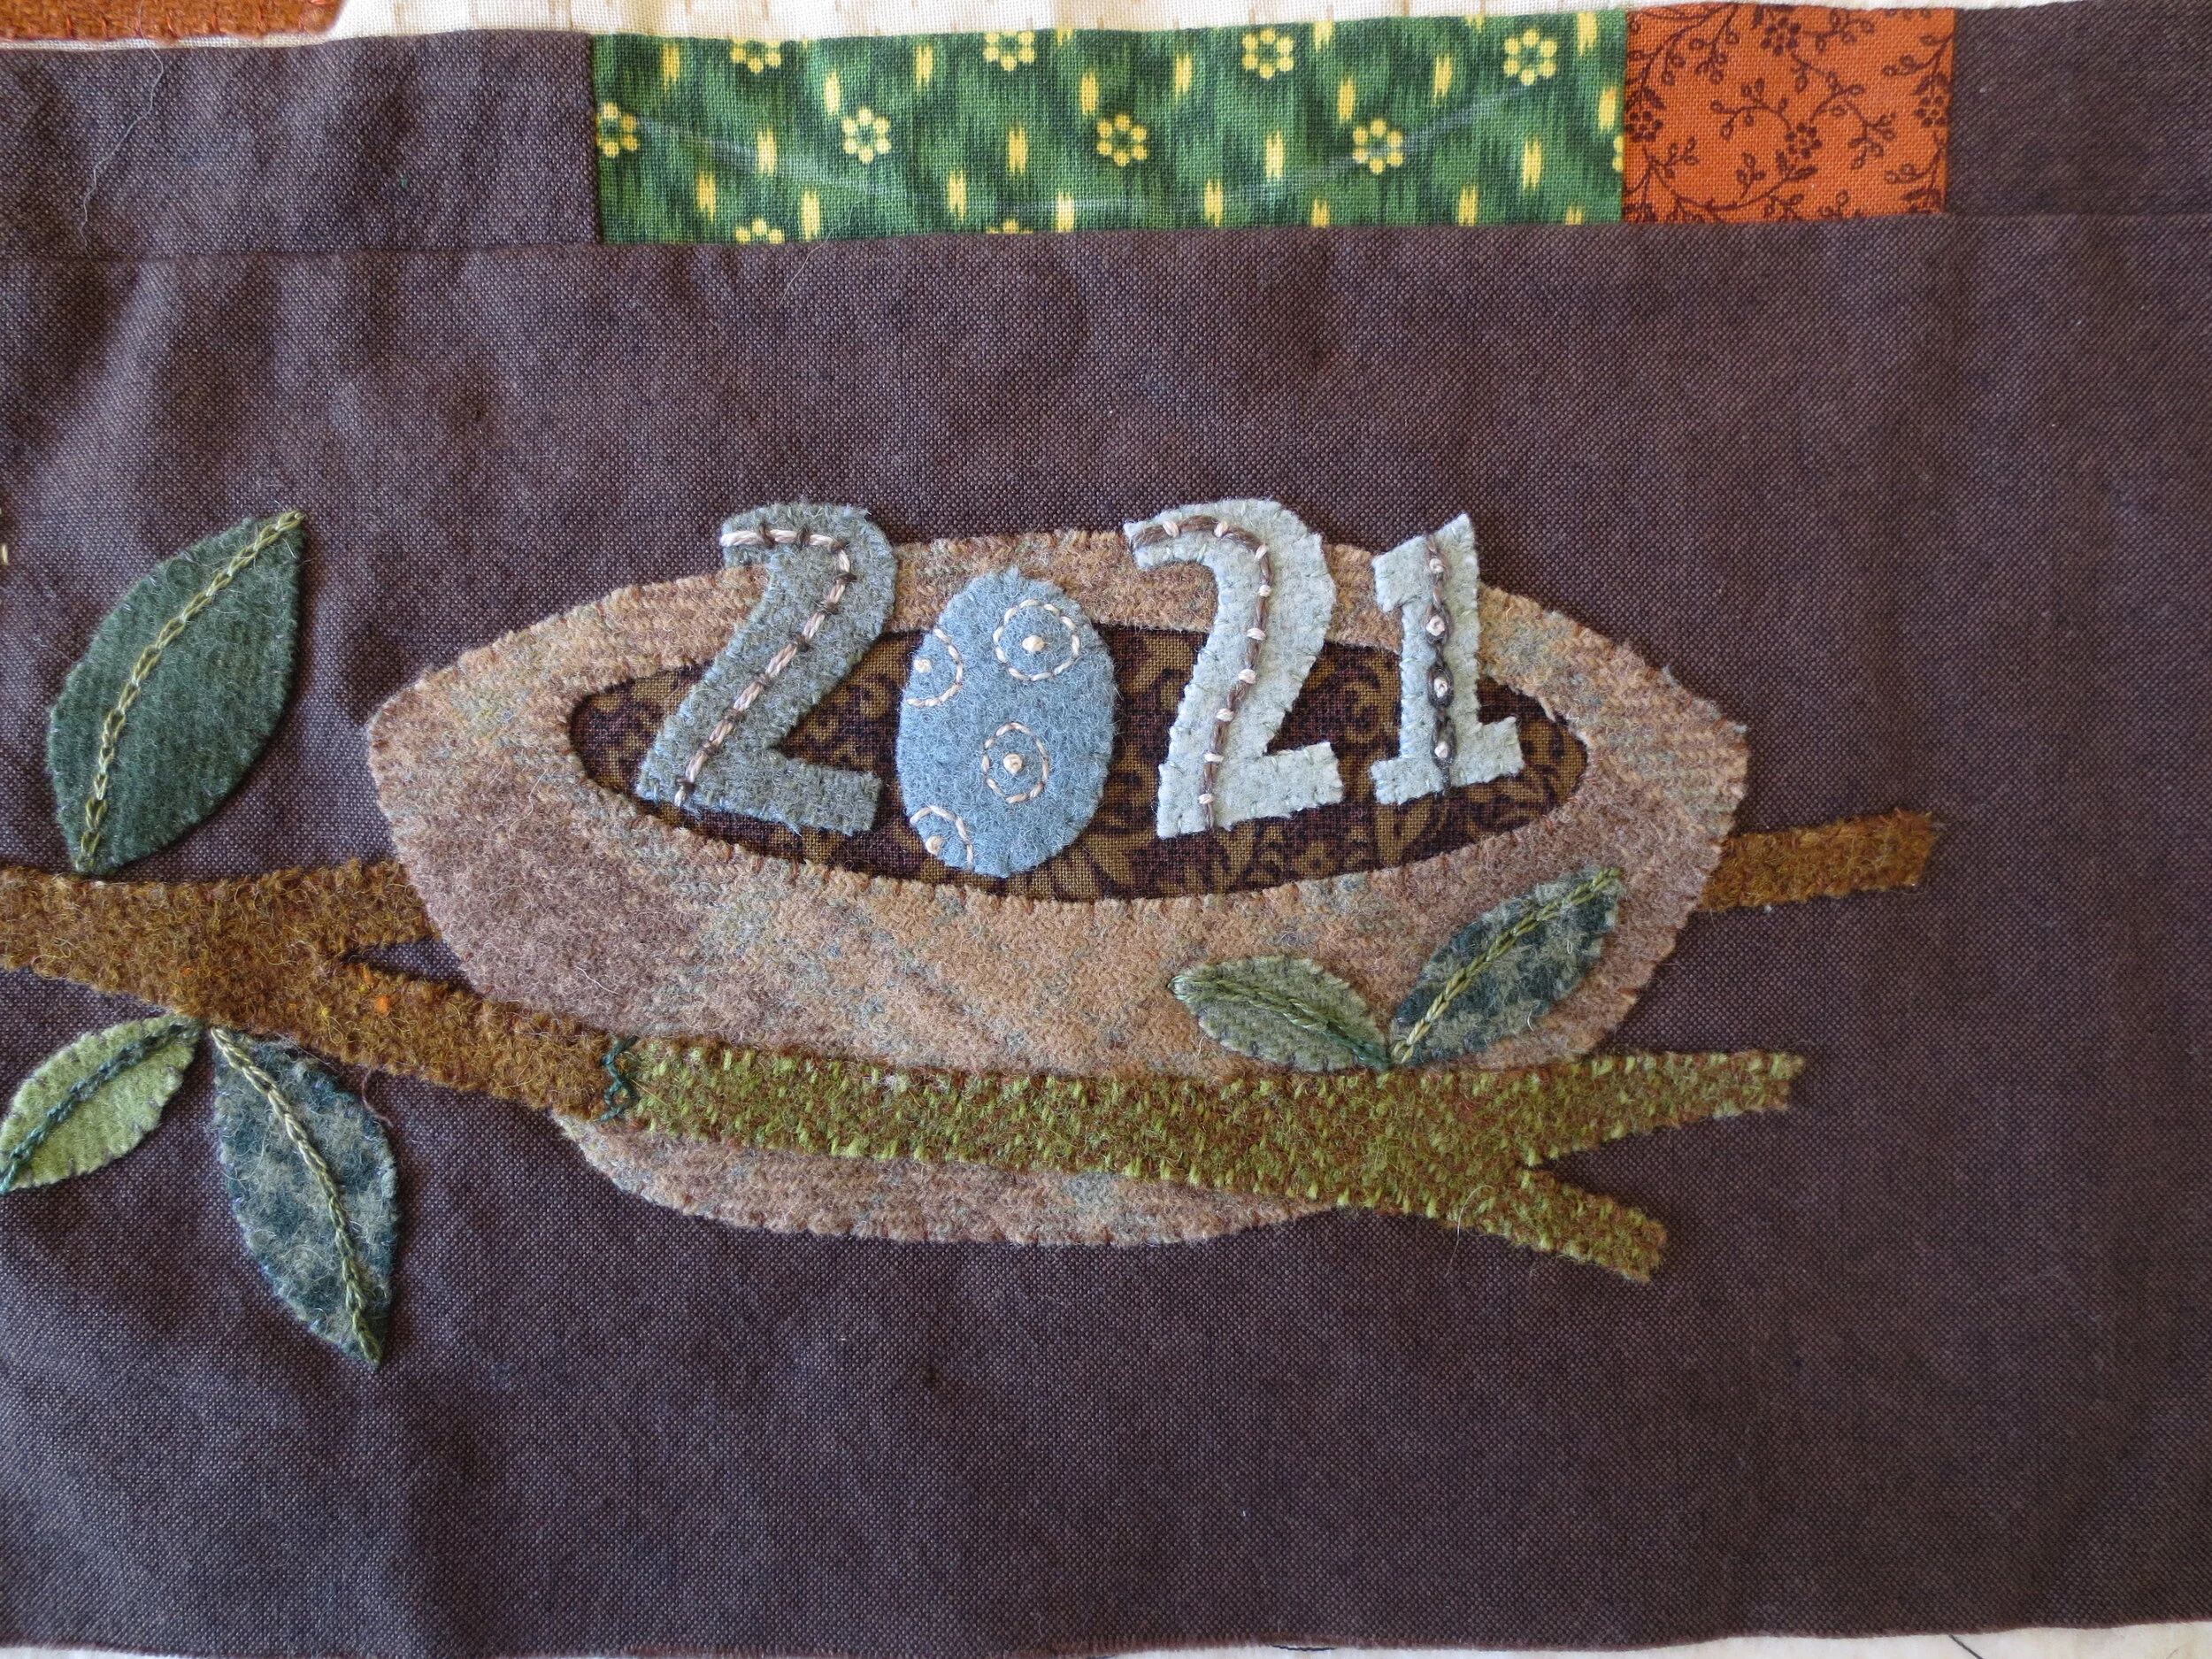
The quilt top is complete!
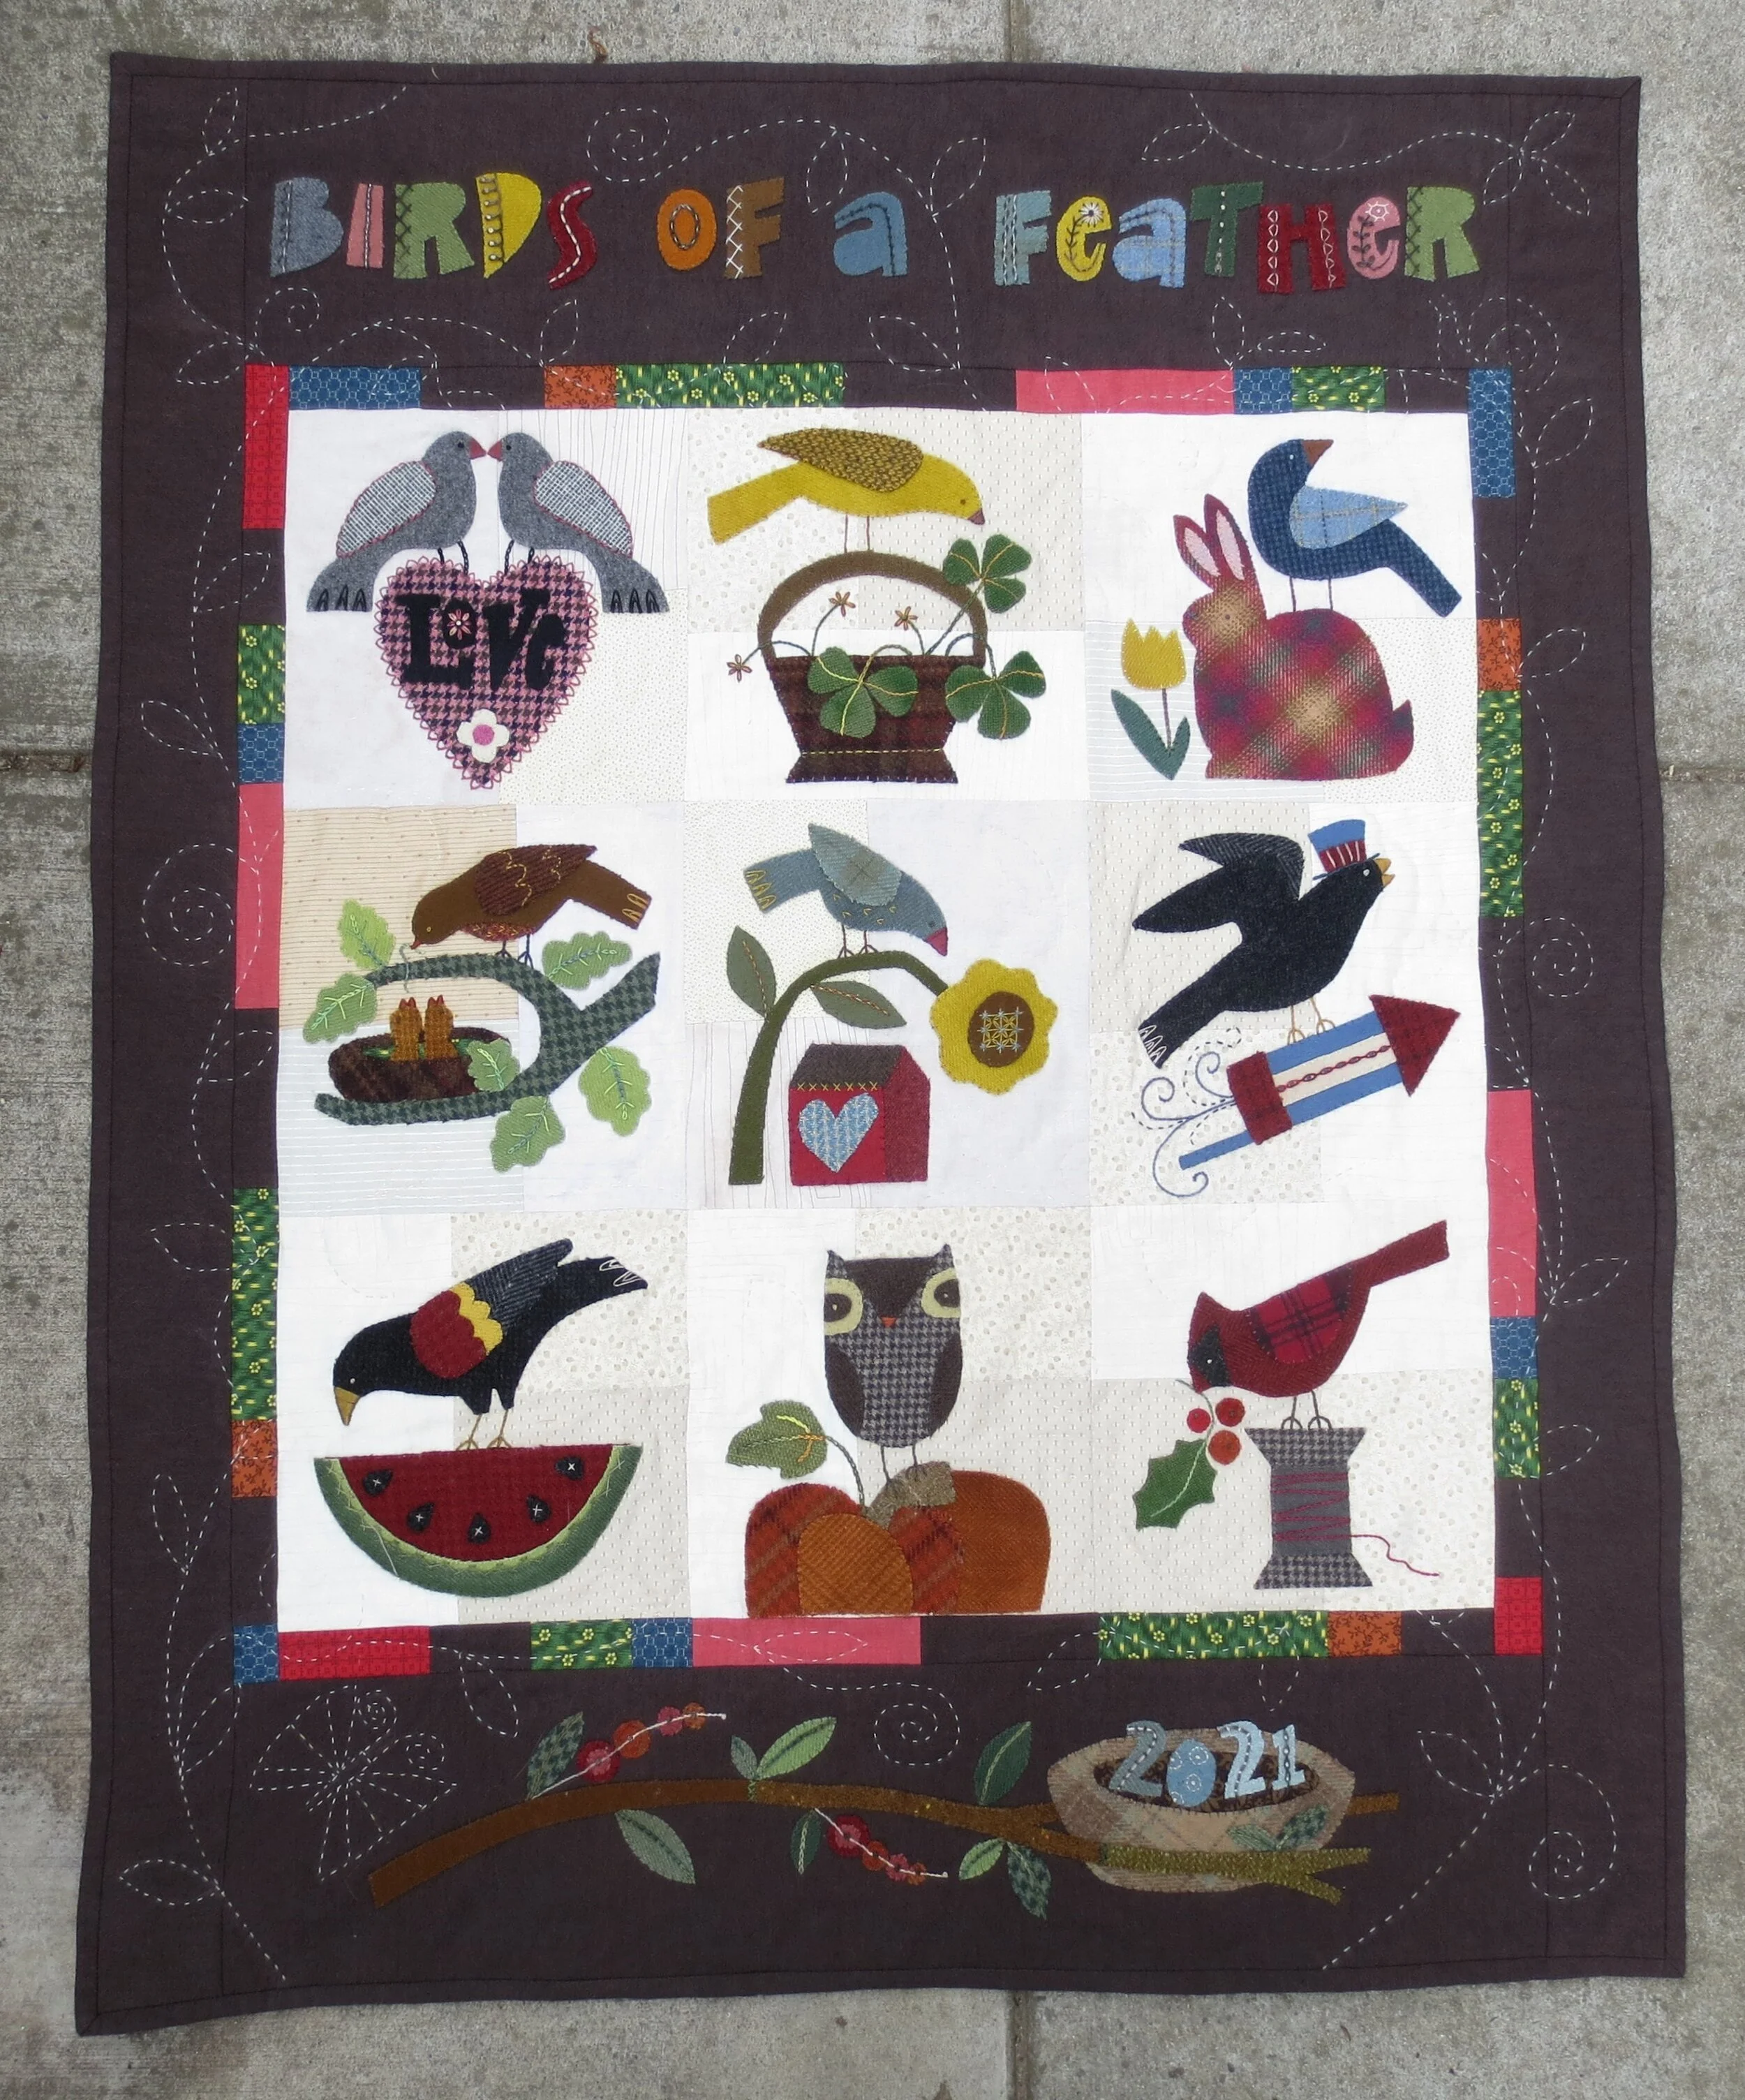
I bound my quilt with the same color as the borders, and I hand quilted it with sulky 12 wt. Blendable, color #4001.
Here is Wooly Gal Brenda’s quilt. Isn’t it fabulous!
‘