
Polar Bear Christmas

Polar Bear Christmas Ornament by Butternut Plaid
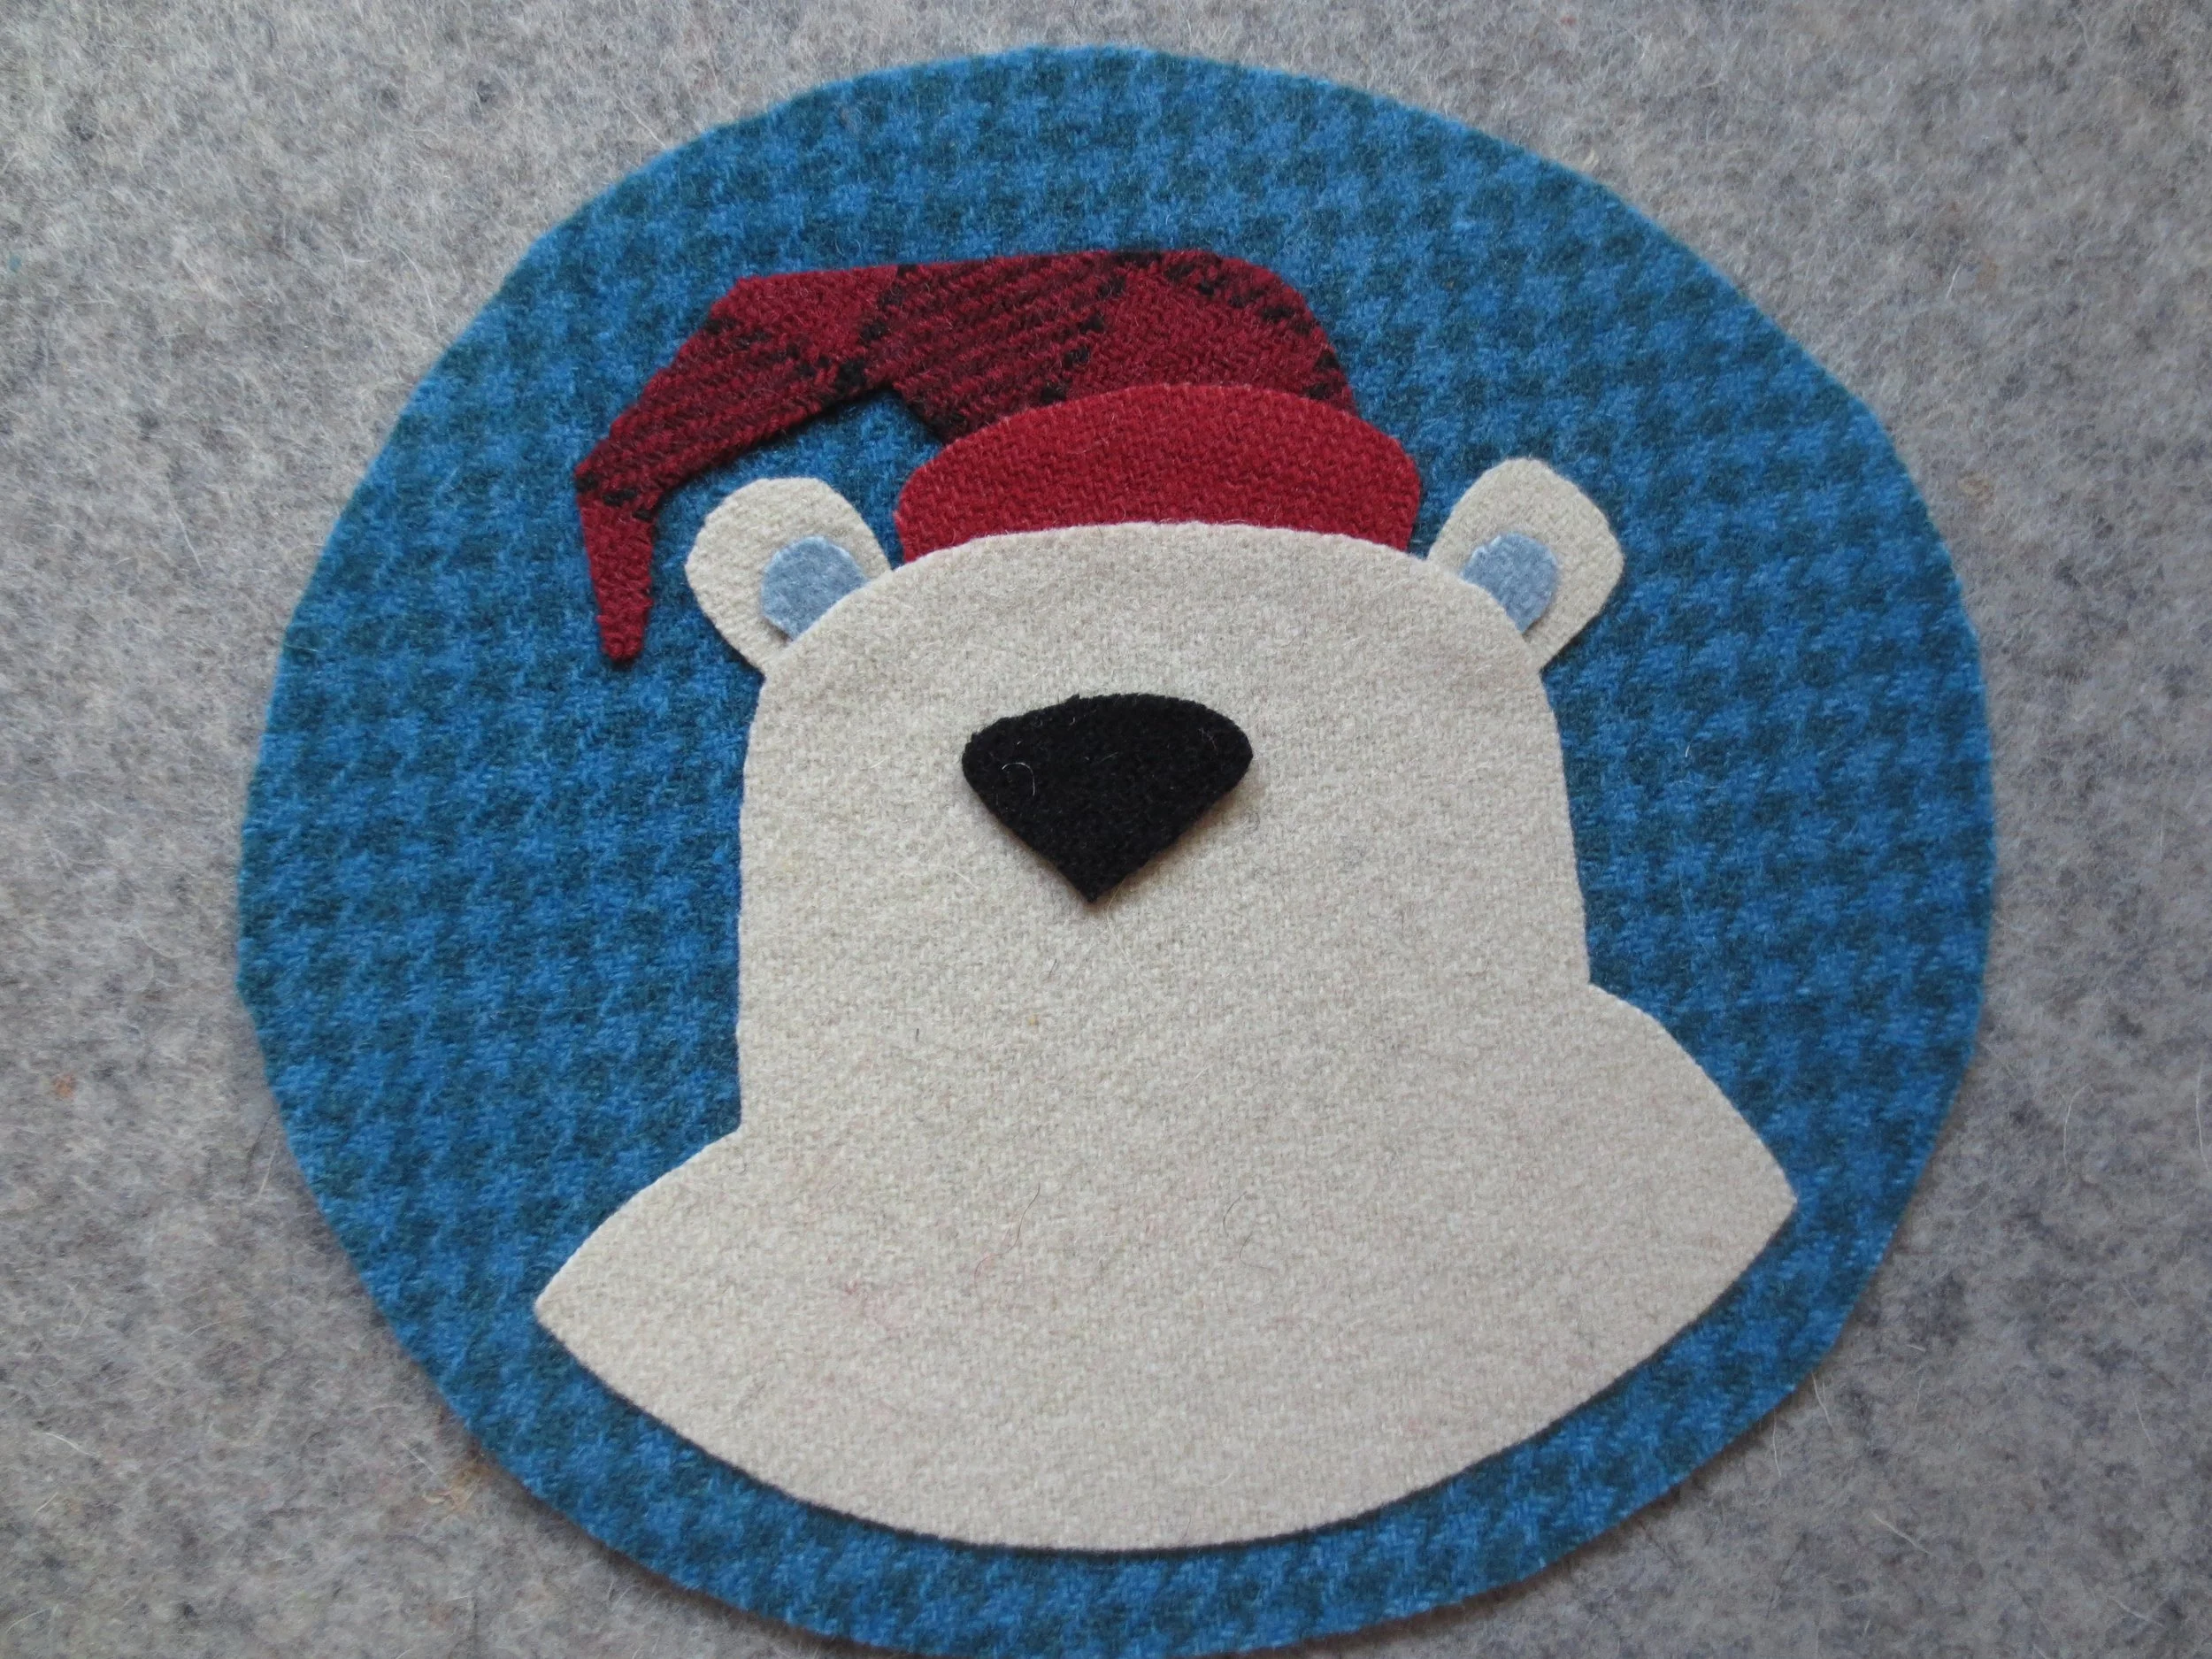
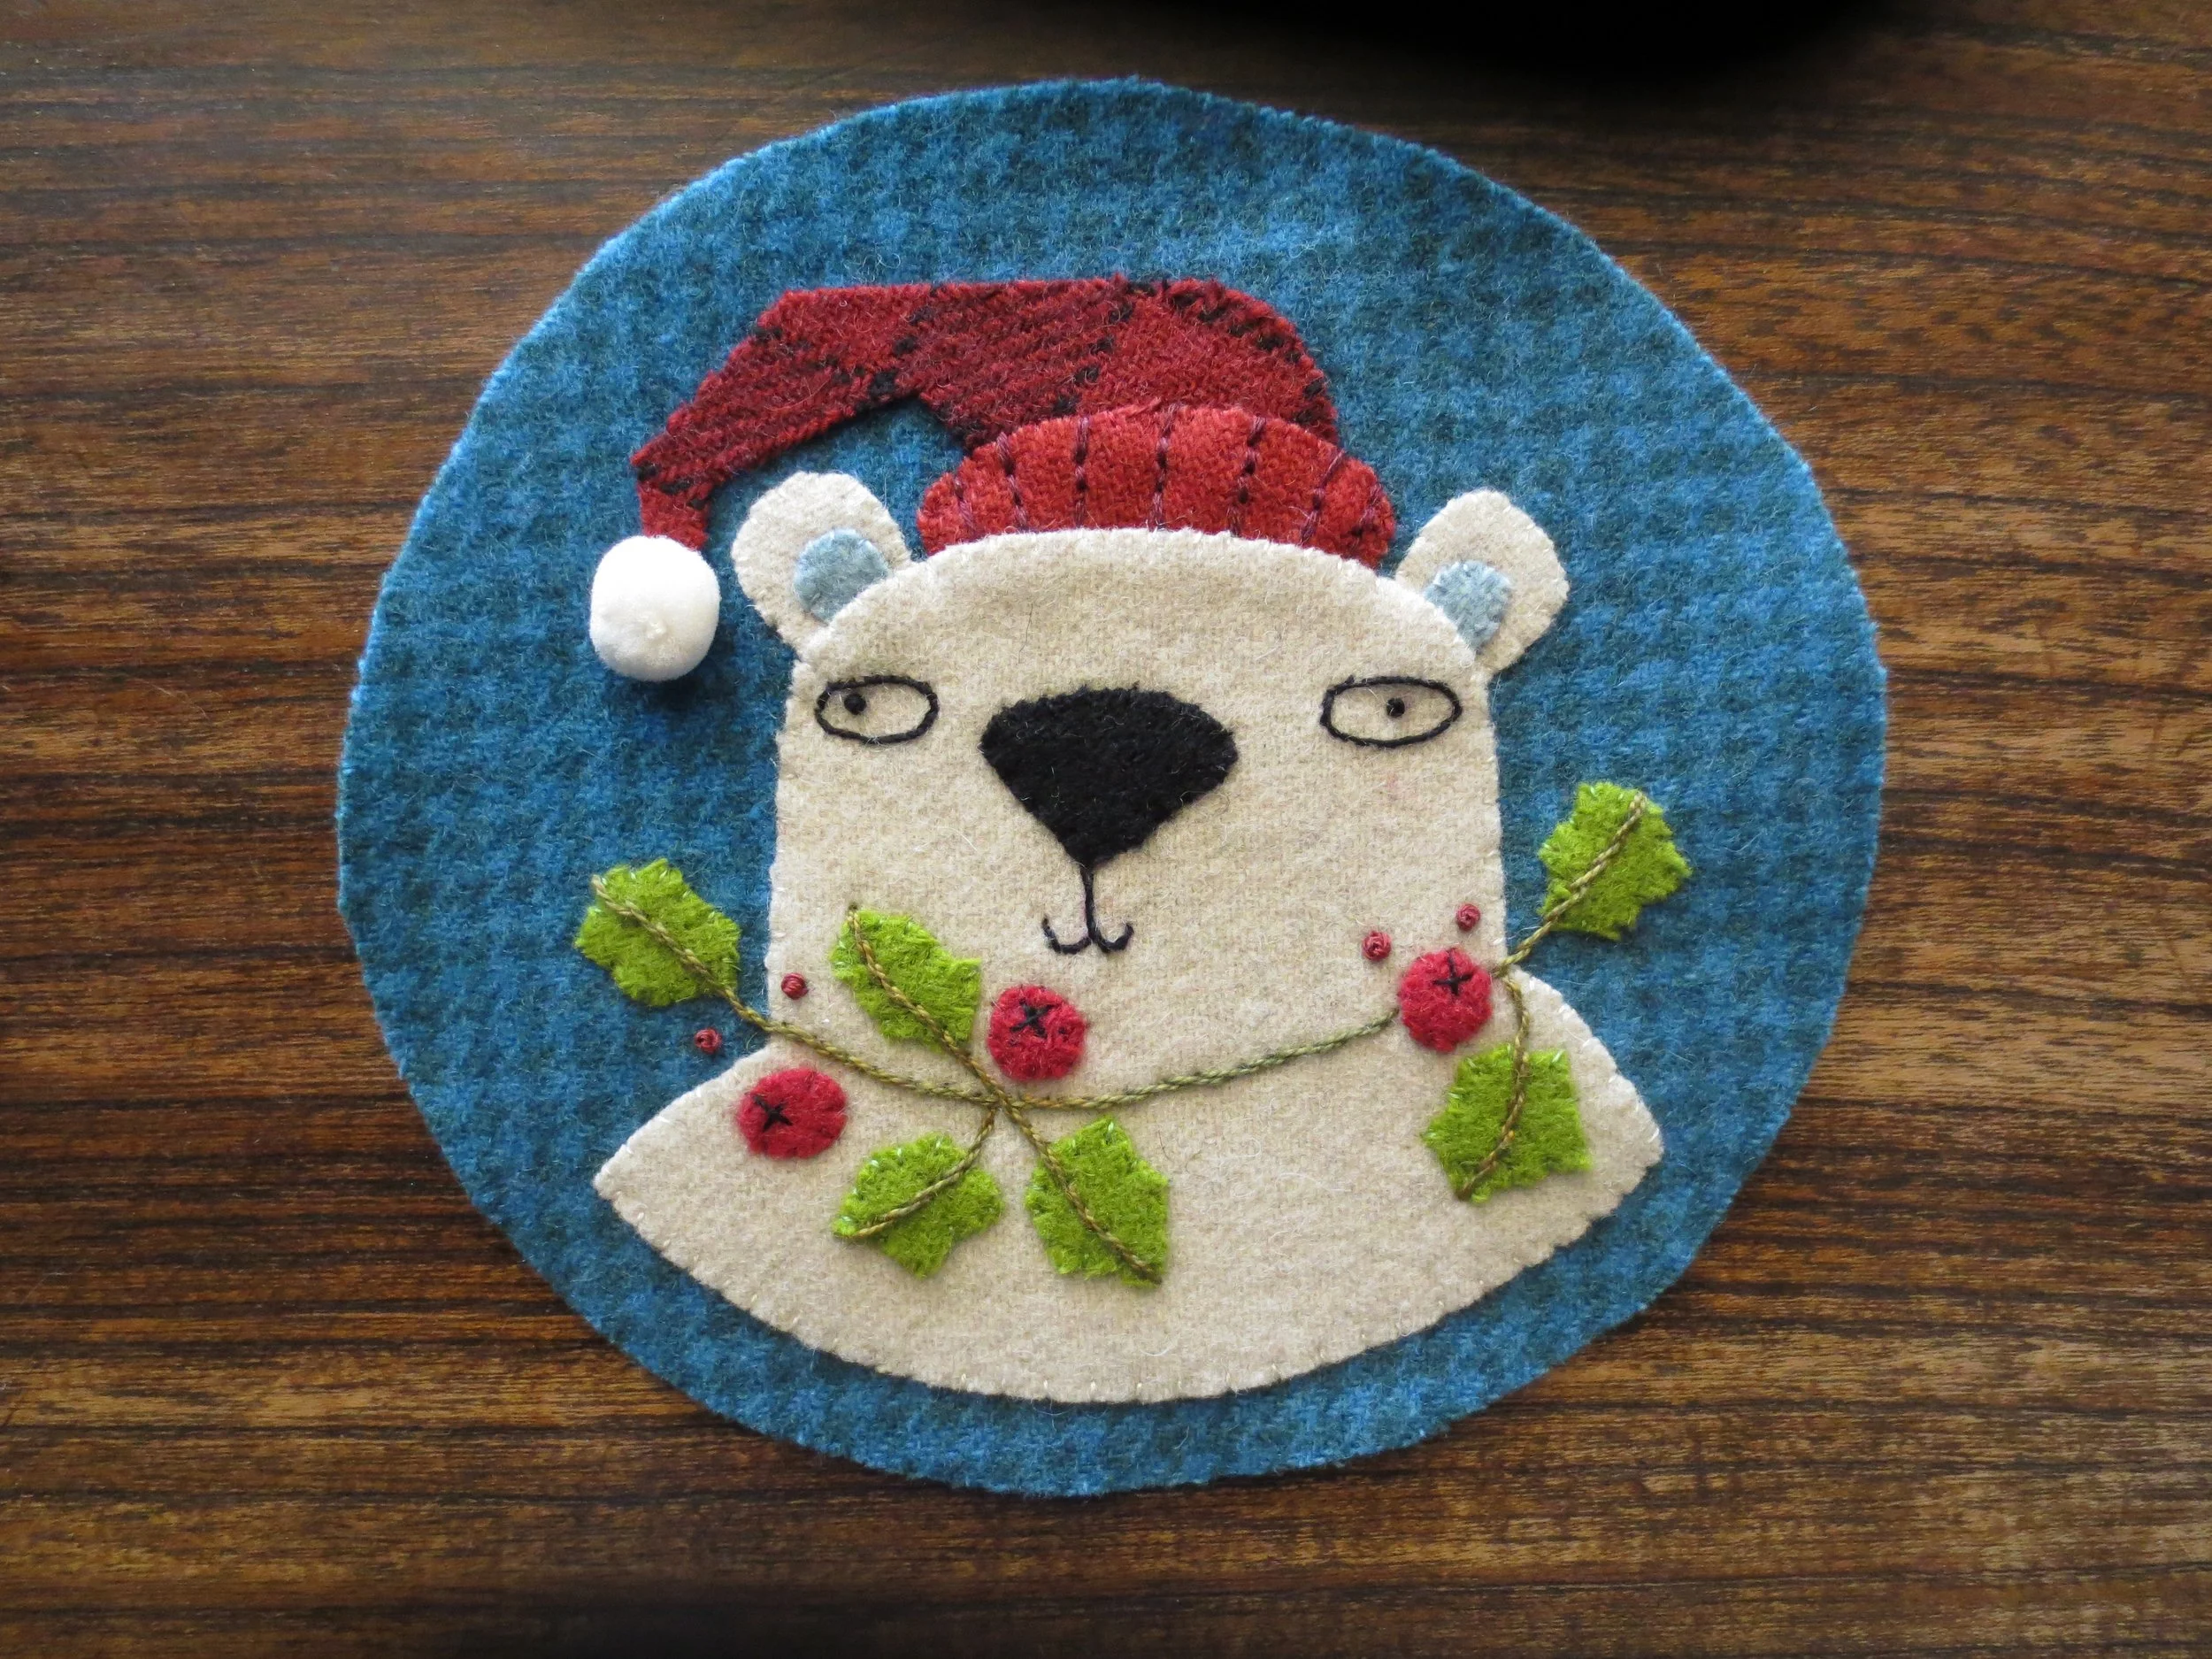
Here’s a companion ornament to the Penguin Christmas. It’s the same size as all the rest of the ornaments except Rudolf, 5” x 5 1/2” when stuffed. He’s made with colors similar to that of the penguin, so if you have wool left over from the penguin ornament you should be good to go.
The instructions to make this ornament are similar to that of the penguin. There are some differences in how the wool pieces are fused, but overall they are very close.
Enjoy! Happy Stitching everyone!
Supplies
Butternut Plaid Stitch Guide if needed
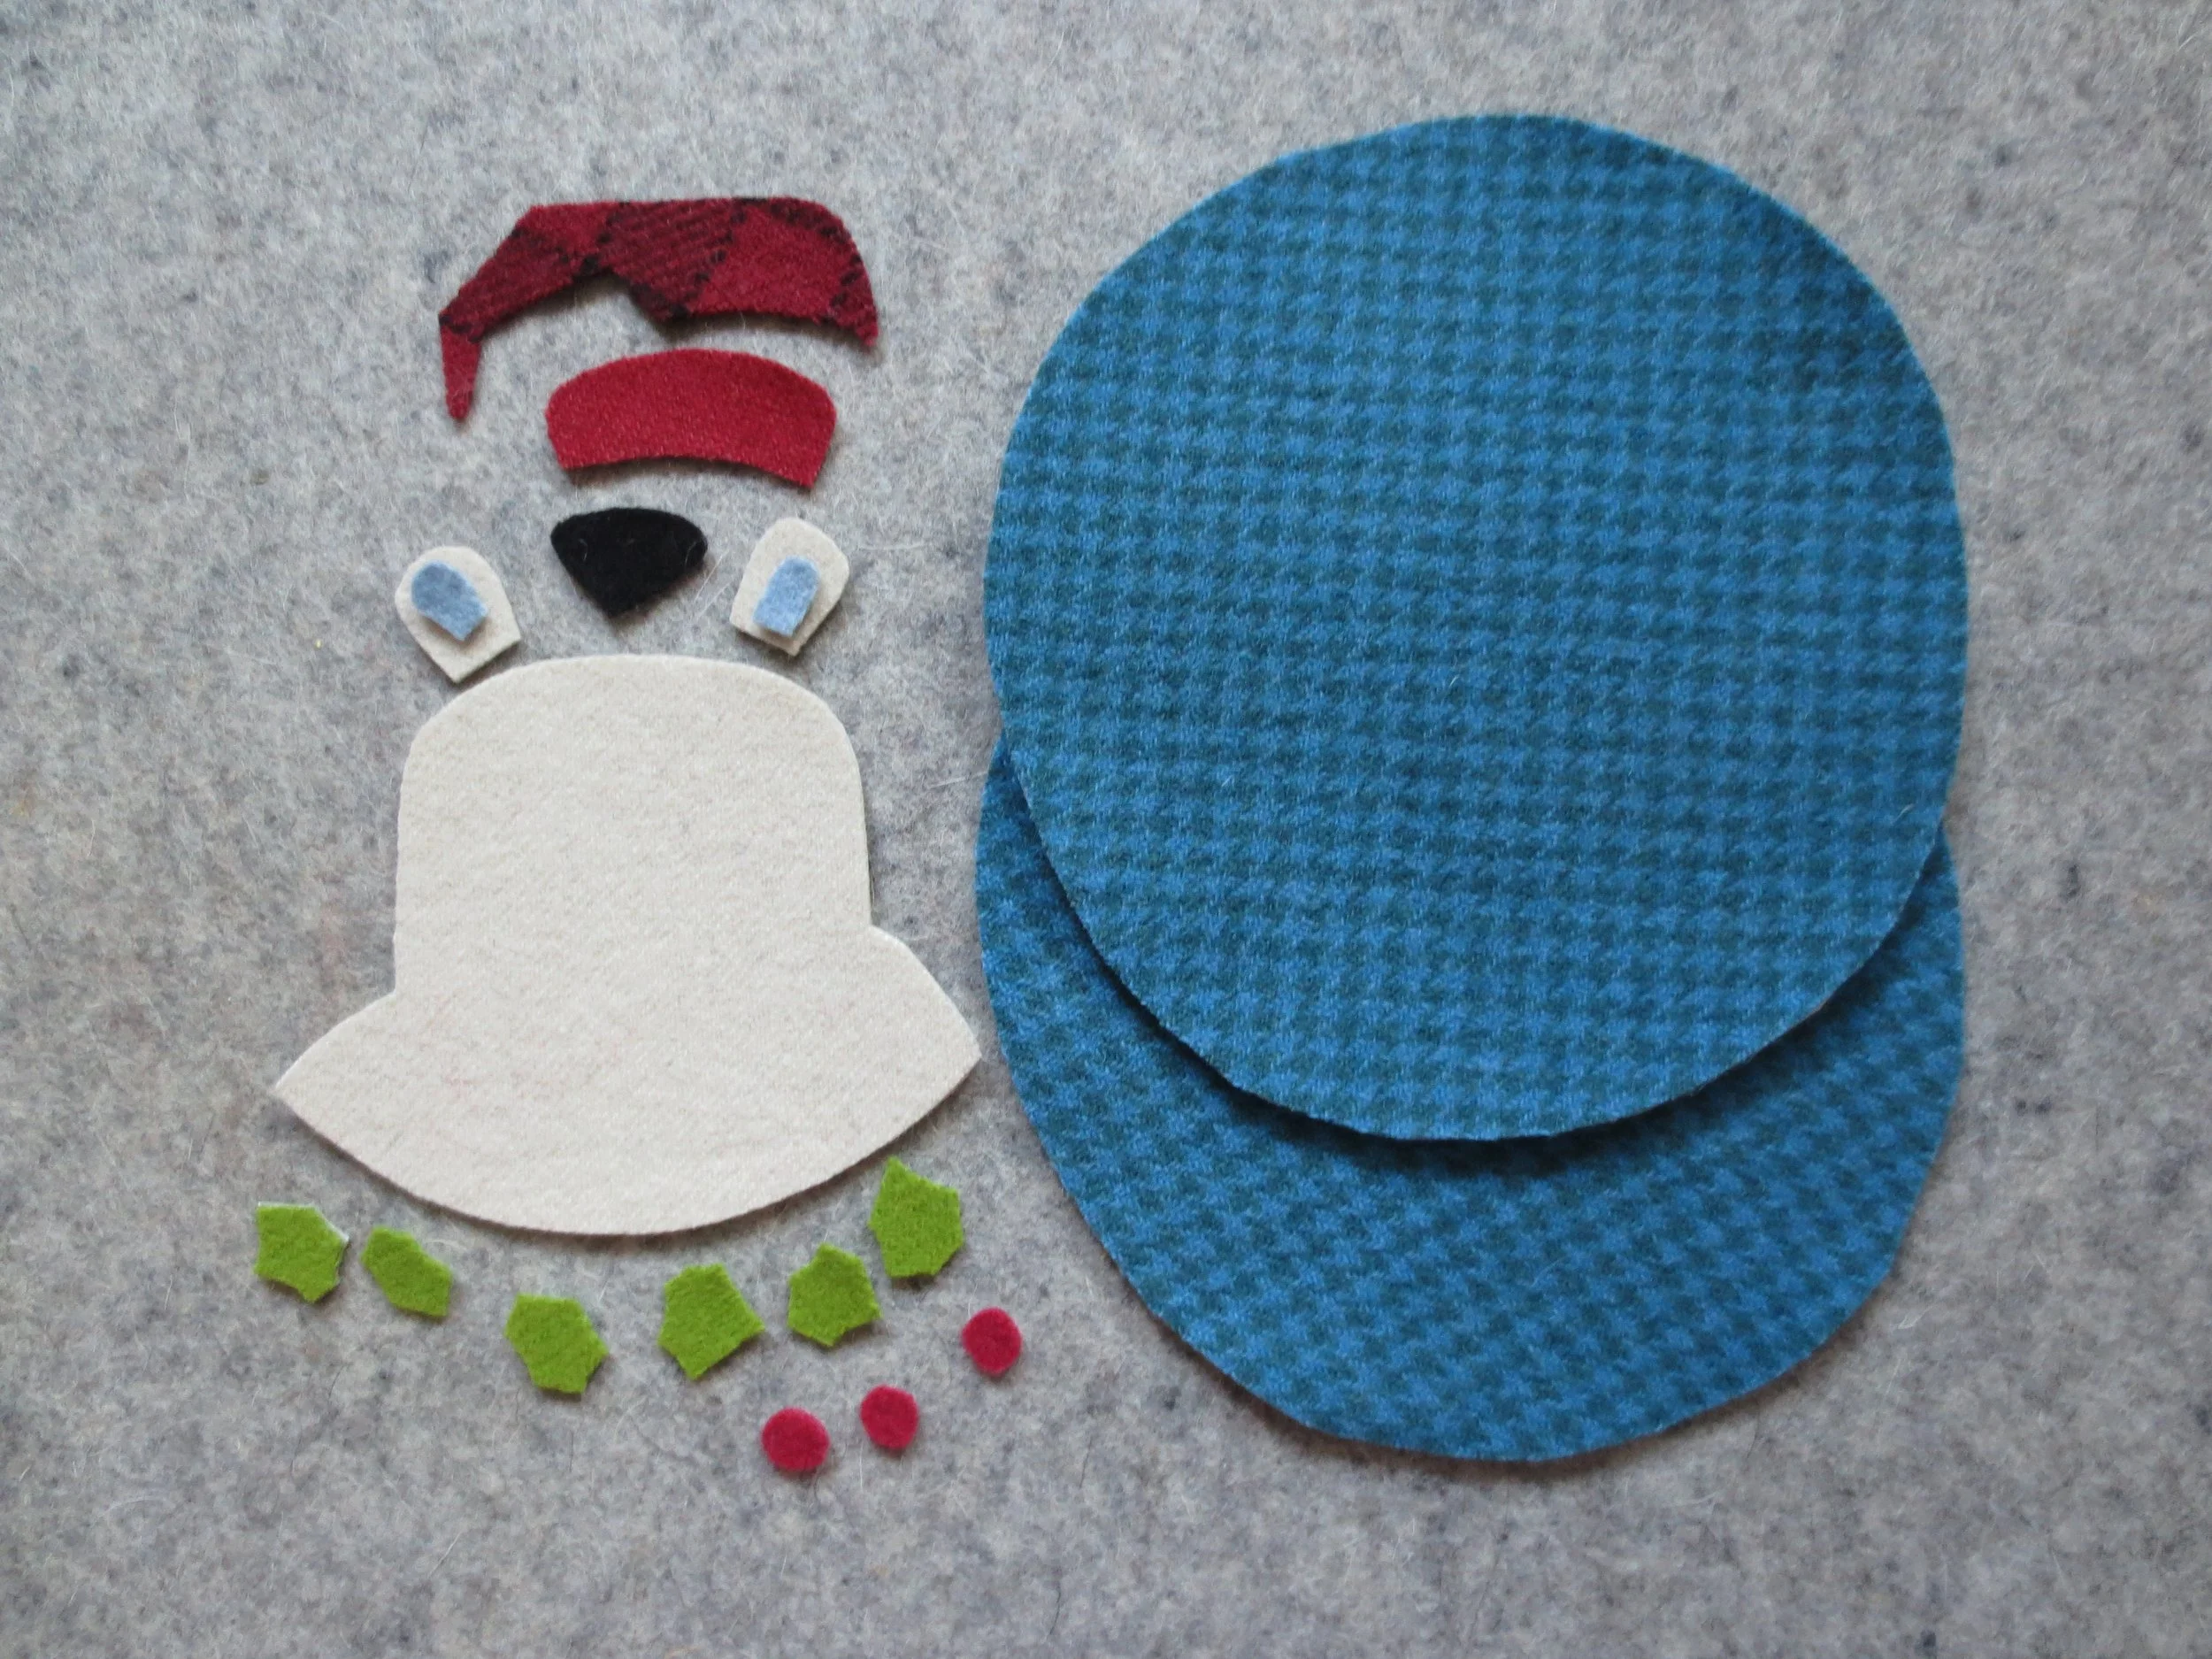
Felted wool or wool felt - suggested colors
Background - 6 1/2” x 14” teal houndstooth
Head/shoulders and ears - 4” x 5”off-white or dirty white
Inner ear - 1 1/2” x 1 1/2” pale blue
Hat band and berries - 1 1/2” x 2 1/2” solid red
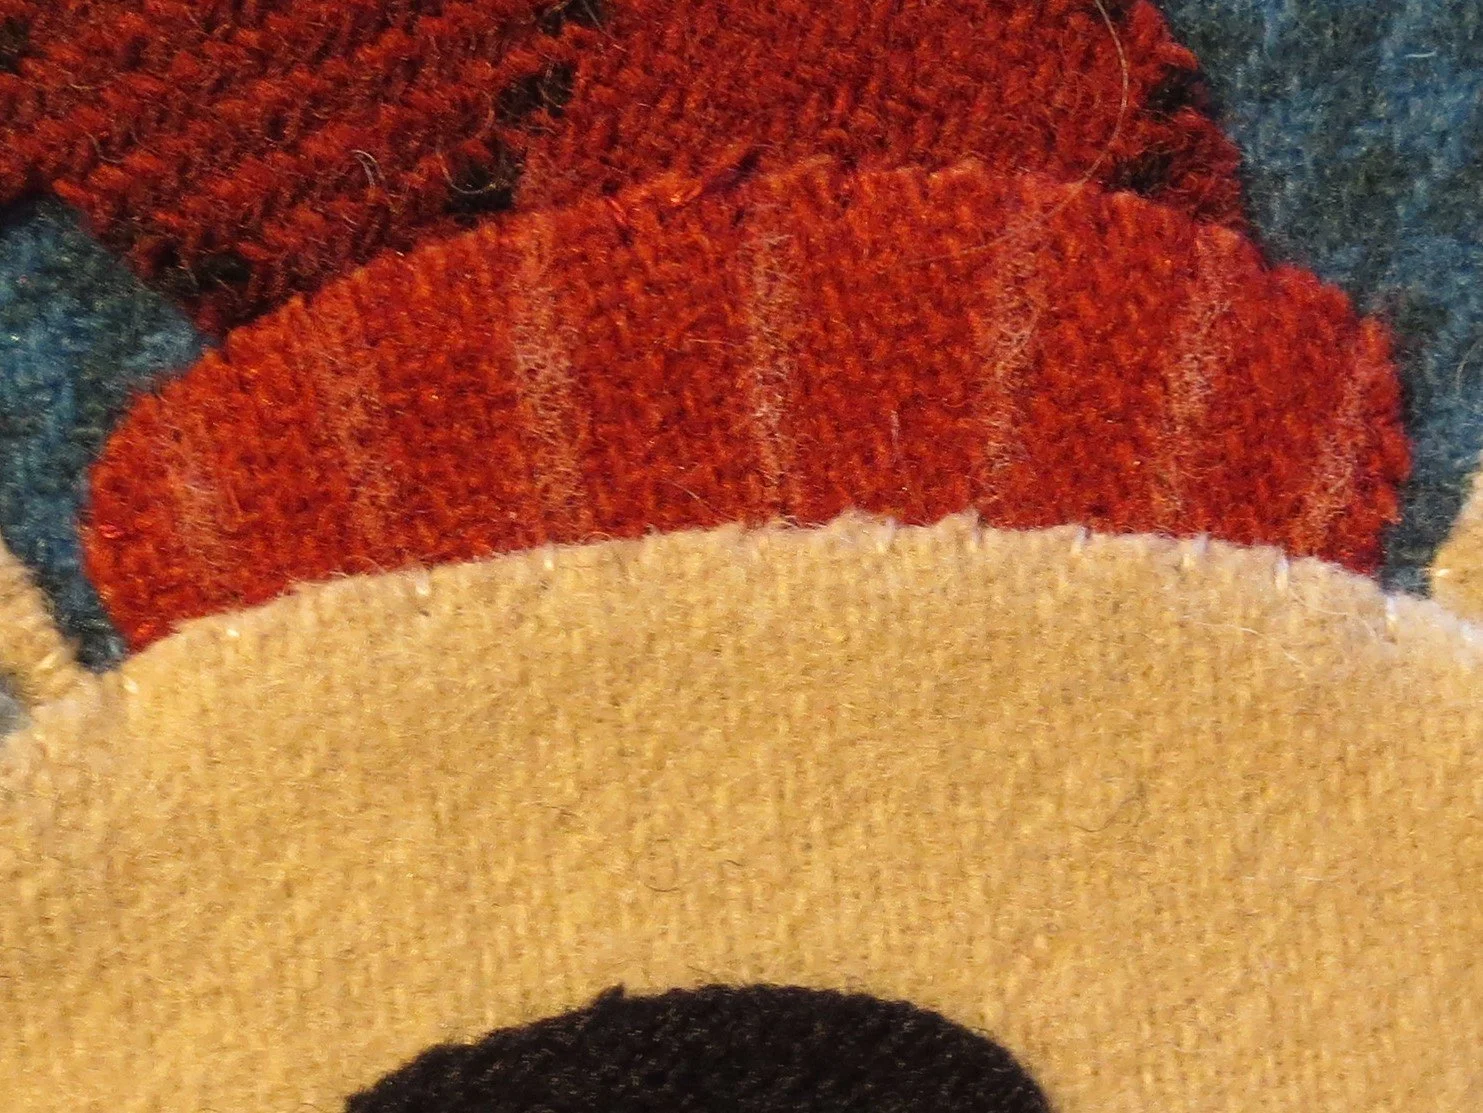
Hat - 2” x 3 1/2” red/black plaid
Nose - 1 1/2” x 1 1/2” black
Holly leaves - 2” x 3”bright green
Thread
6 strand embroidery floss
red to match hat color (this can also be used for the berries)
dark red for ribbing in hat band
green to match holly leaf color
black for eyes and nose
off-white to match body
Perle cotton, size 8
black for blanket stitch border
olive green for holly branch
Miscellaneous
One off-white pom pom 1/2” diameter ( These are not sold separately. They are sold as ball fringe yardage)
Fusible web - feather weight like HeatNBond featherlite
Chenille needles - size 24 and 22
Freezer paper (This can be found in your local grocery store) - Optional (used to make background oval)
Air erasable fabric marking pen like Clover ( I use this for lighter fabrics)
Fine tip chalk pencil like Bohin (i use this for darker fabrics)
Steam iron
Pillow stuffing like Poly-fil
Instructions
Trace and label all patterns (except background) onto fusible web. Images are already reversed for use with fusible webbing.
Cut out pattern pieces leaving a small (1/8”) border around each.
Fuse pattern pieces onto wool according to manufacturer’s instructions.
Cut out wool applique pieces along drawn lines. Set aside until needed.
Make a copy of the pattern page 2, and then cut out the background pattern along the drawn line. Note: A freezer paper pattern can be made instead. Trace the background pattern onto freezer paper, and then cut out the pattern leaving a small (1/8”) border.
If you are using the plain paper pattern use the following method of cutting the background.
Note: You will be cutting 2 pieces of fabric.
Fold the 6 1/2” x 14” background fabric in half.
Pin the pattern to the folded background.
Cut out along outline.
Freezer paper method
Cut the background fabric in half to make two 6 1/2”x 7” pieces.
Iron the freezer paper pattern onto one of the background pieces.
Cut out the pattern along the traced line. Carefully peel away the freezer paper.
Iron the freezer paper pattern onto the remaining background fabric.
Cut out the pattern.
Cut a single pom pom from the ball trim. Clip the attached strings. Set aside until needed.
9. Position the head/shoulder, ears with inner ears, hat and hatband onto the background wool. Do not fuse! We’re going to fuse the wool pieces in stages to insure maximum adhesion.
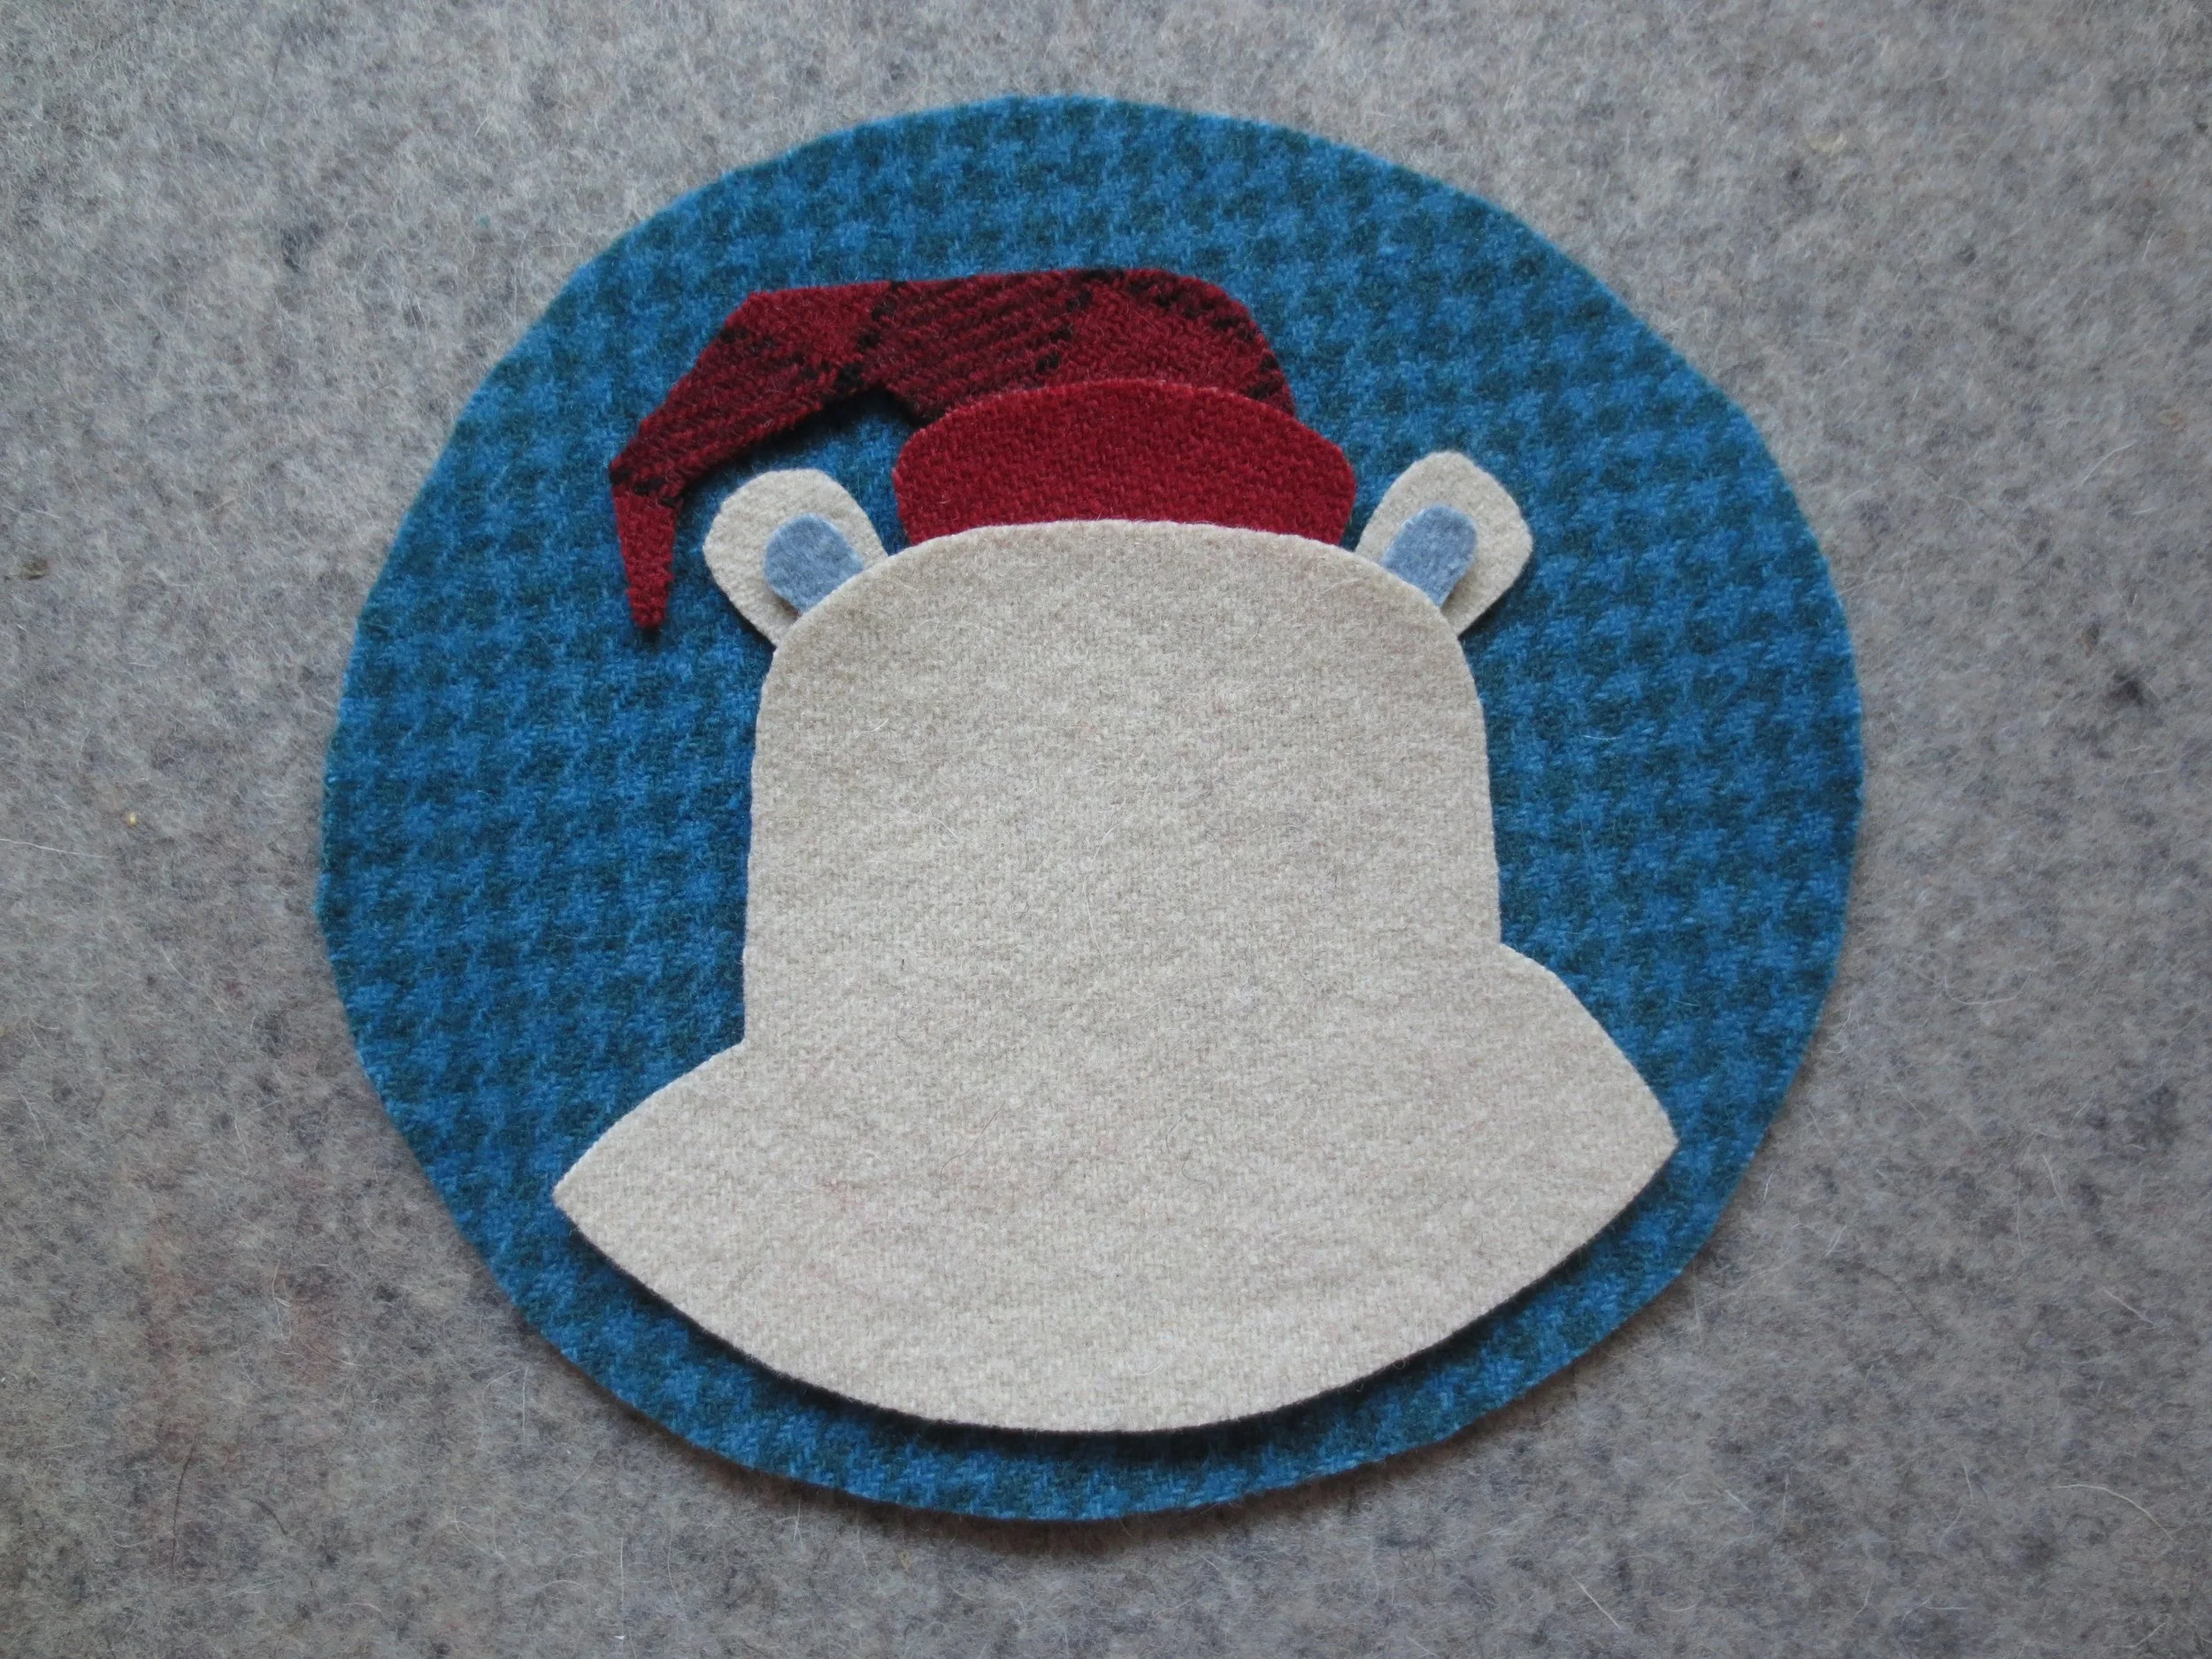
10. Carefully remove the head/shoulders and hatband, and then fuse the hat, inner ears and ears to the background wool.
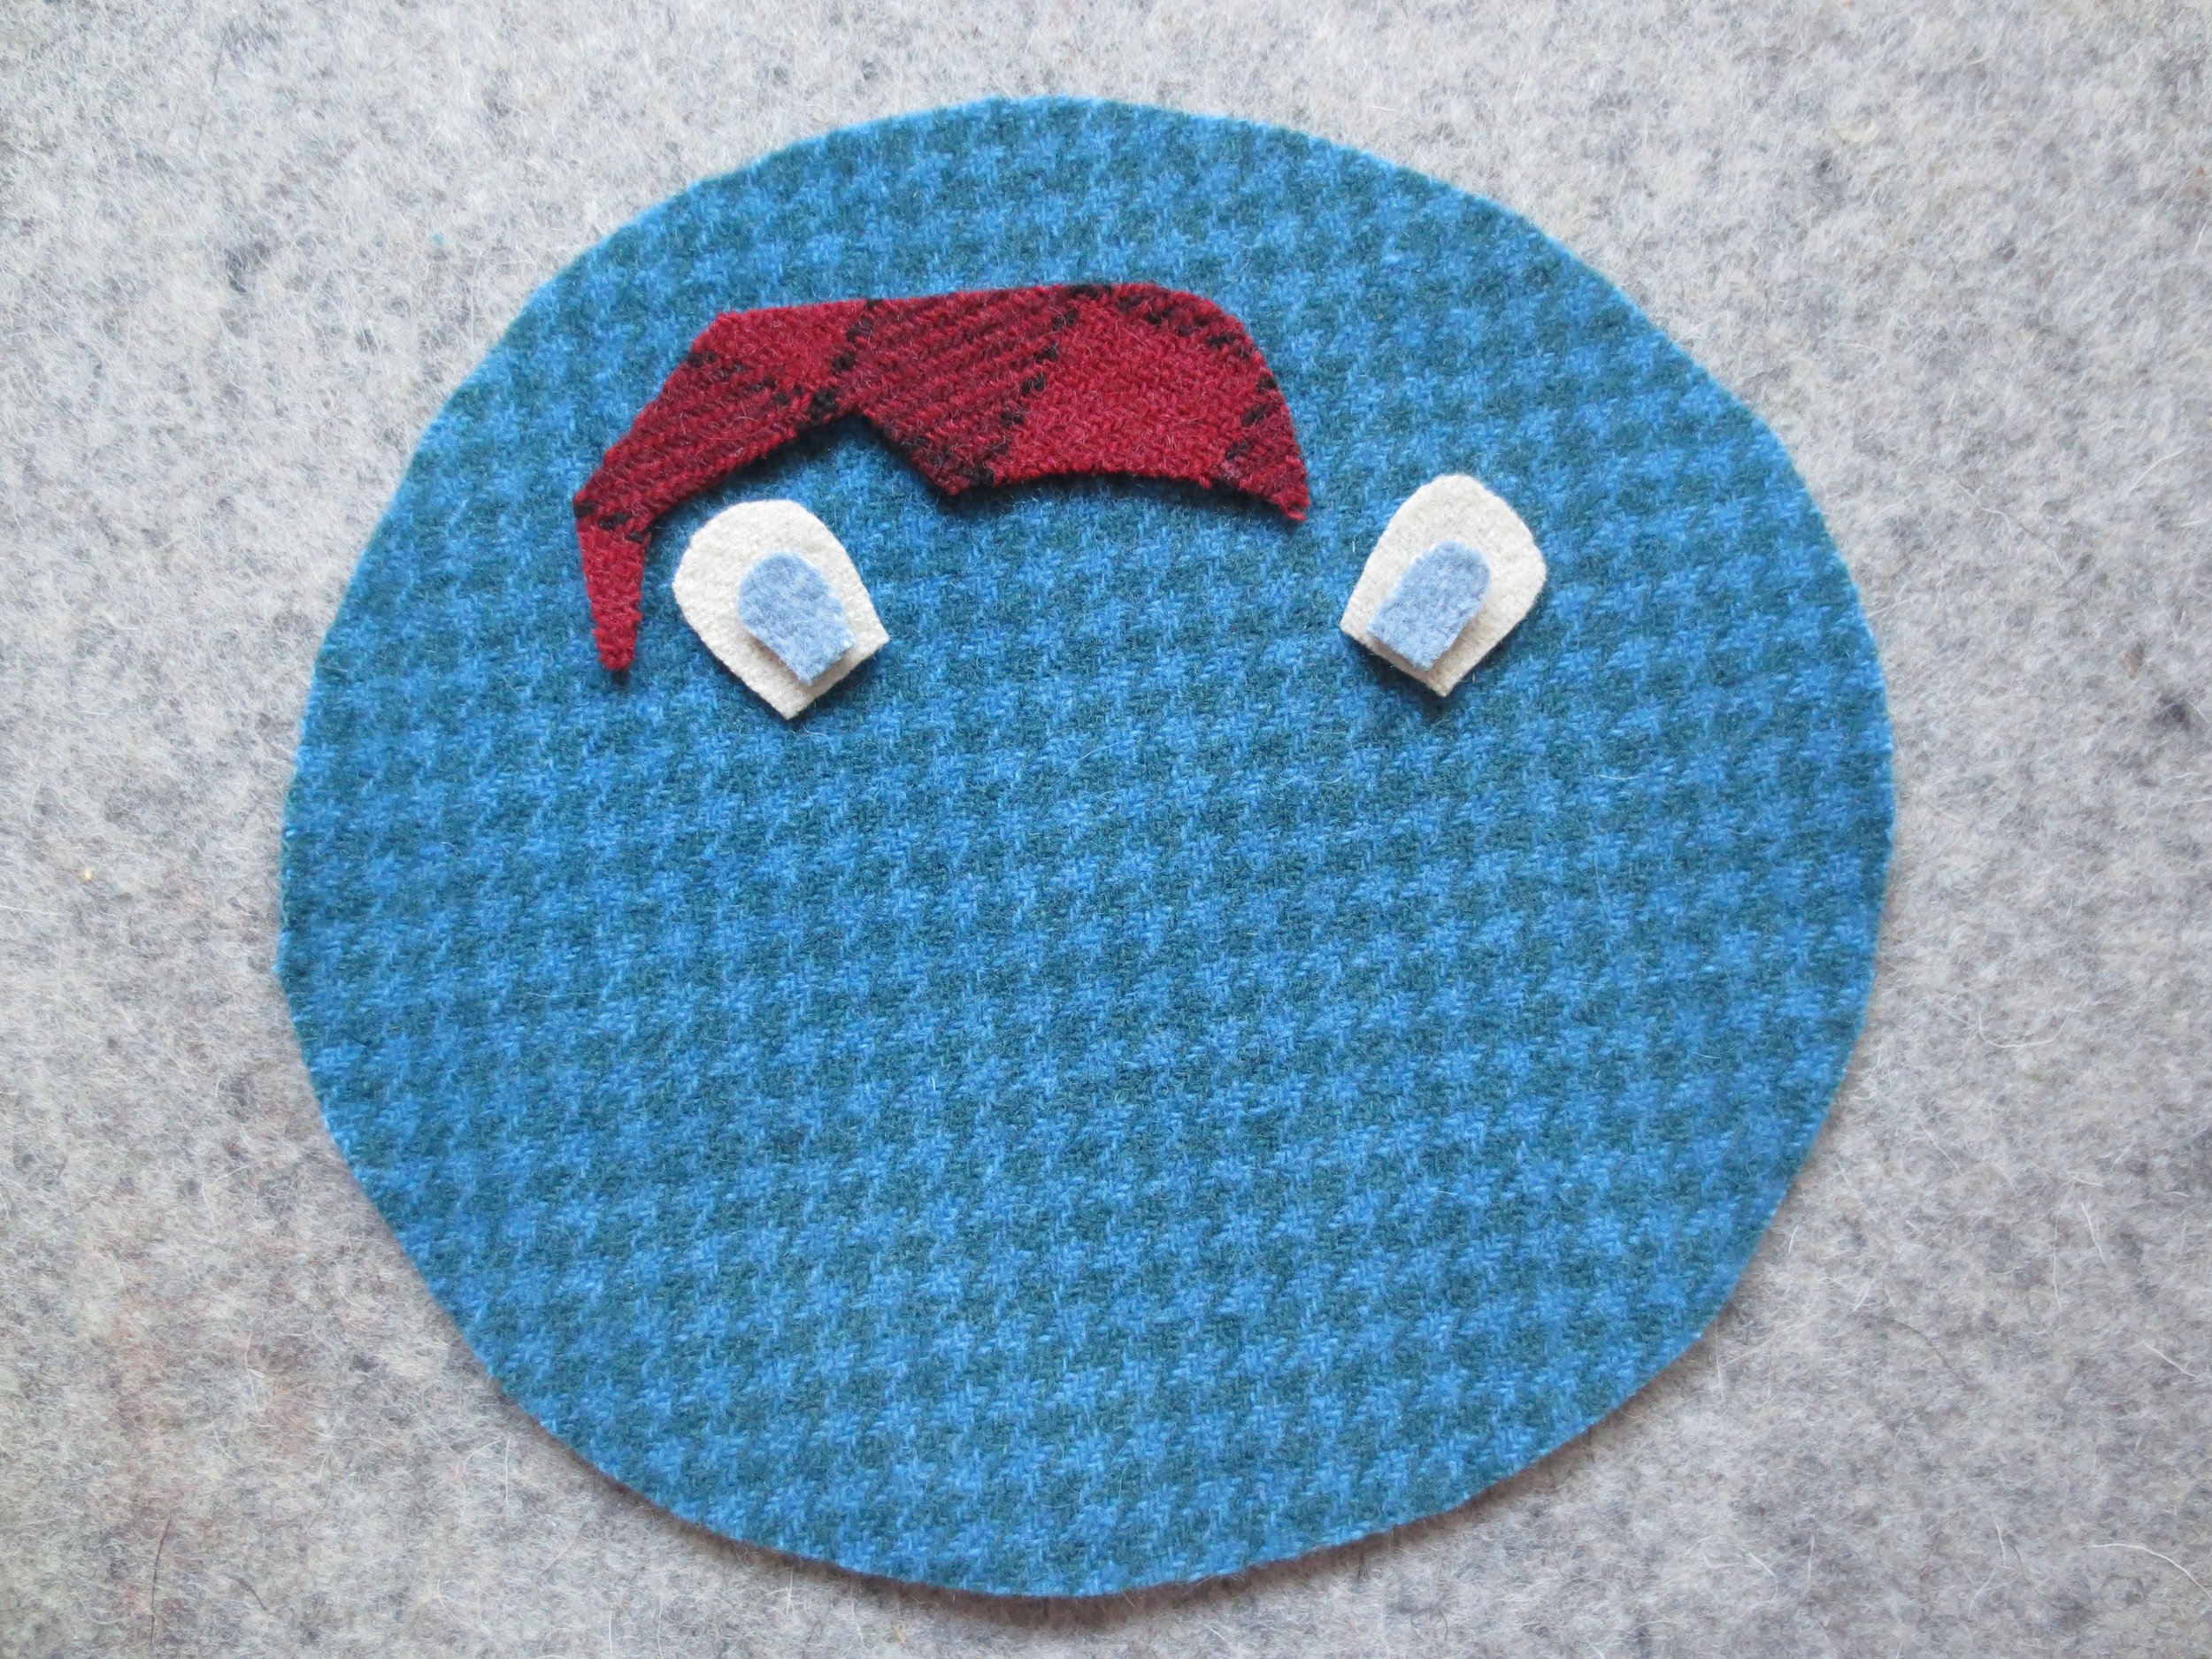
11. Reposition the hatband and then fuse in place.

12. Reposition the head/shoulder and then fuse in place.
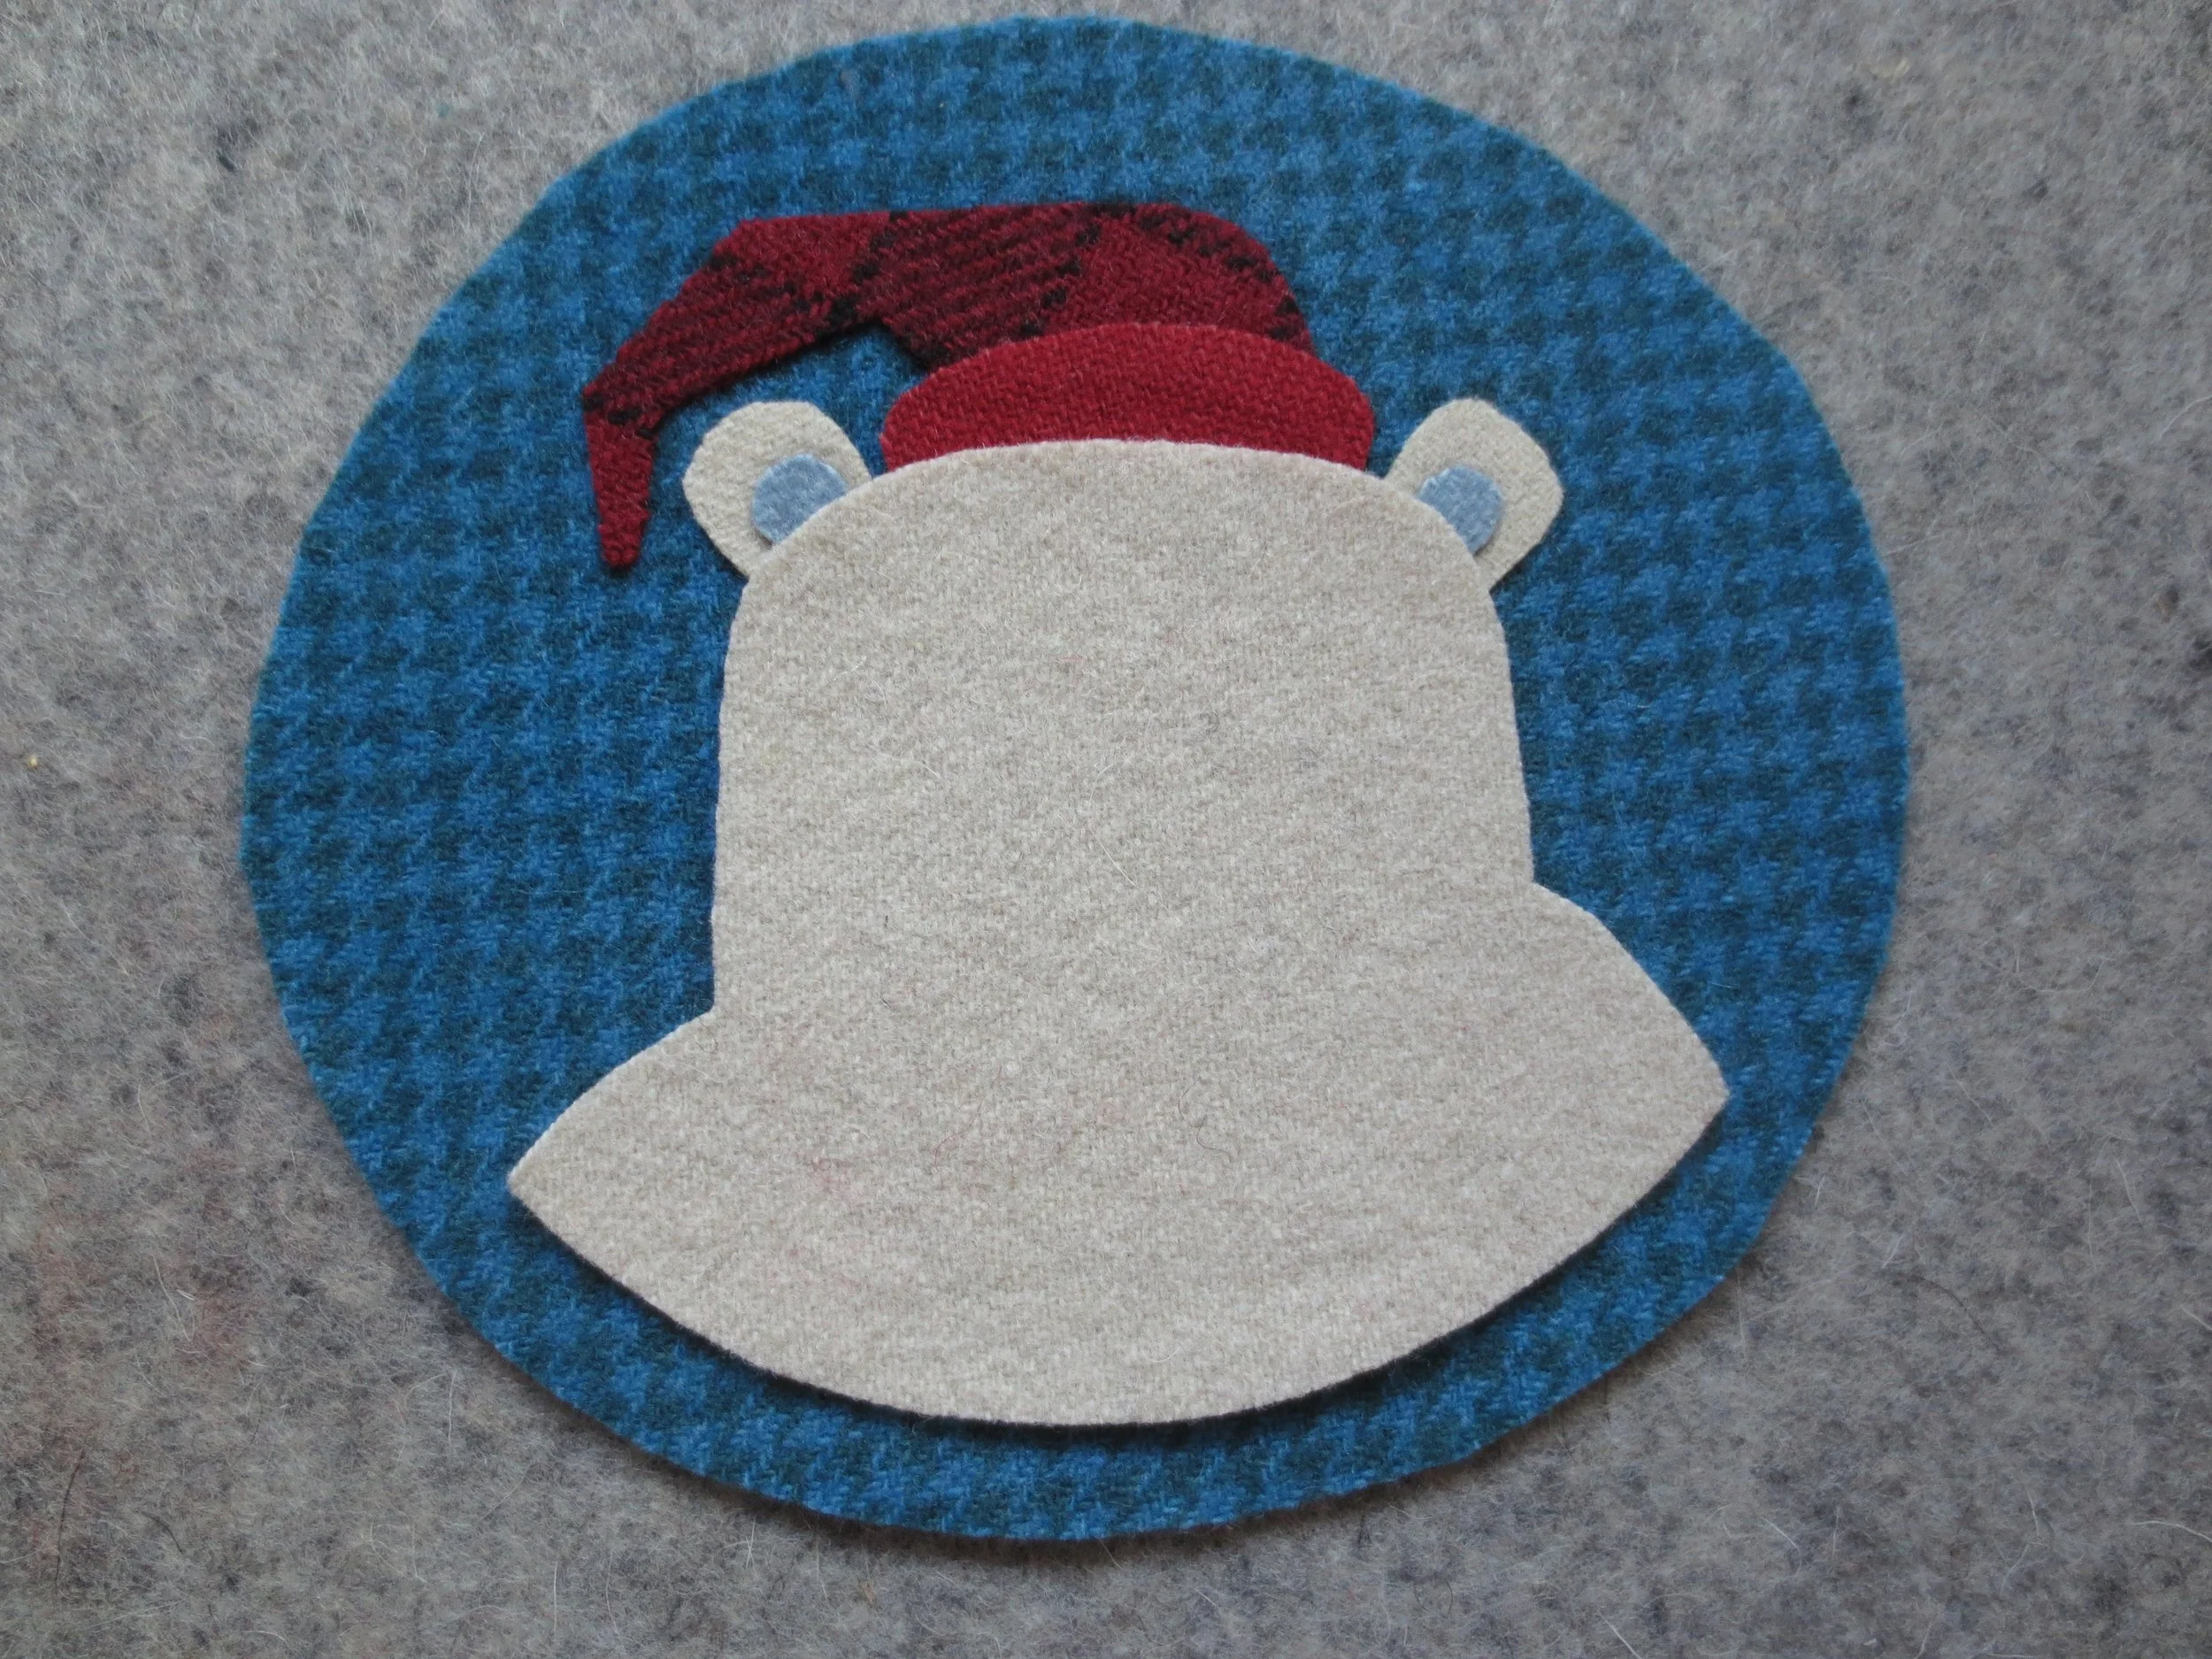
13. Position the nose using the layout as a placement guide, and then fuse in place.
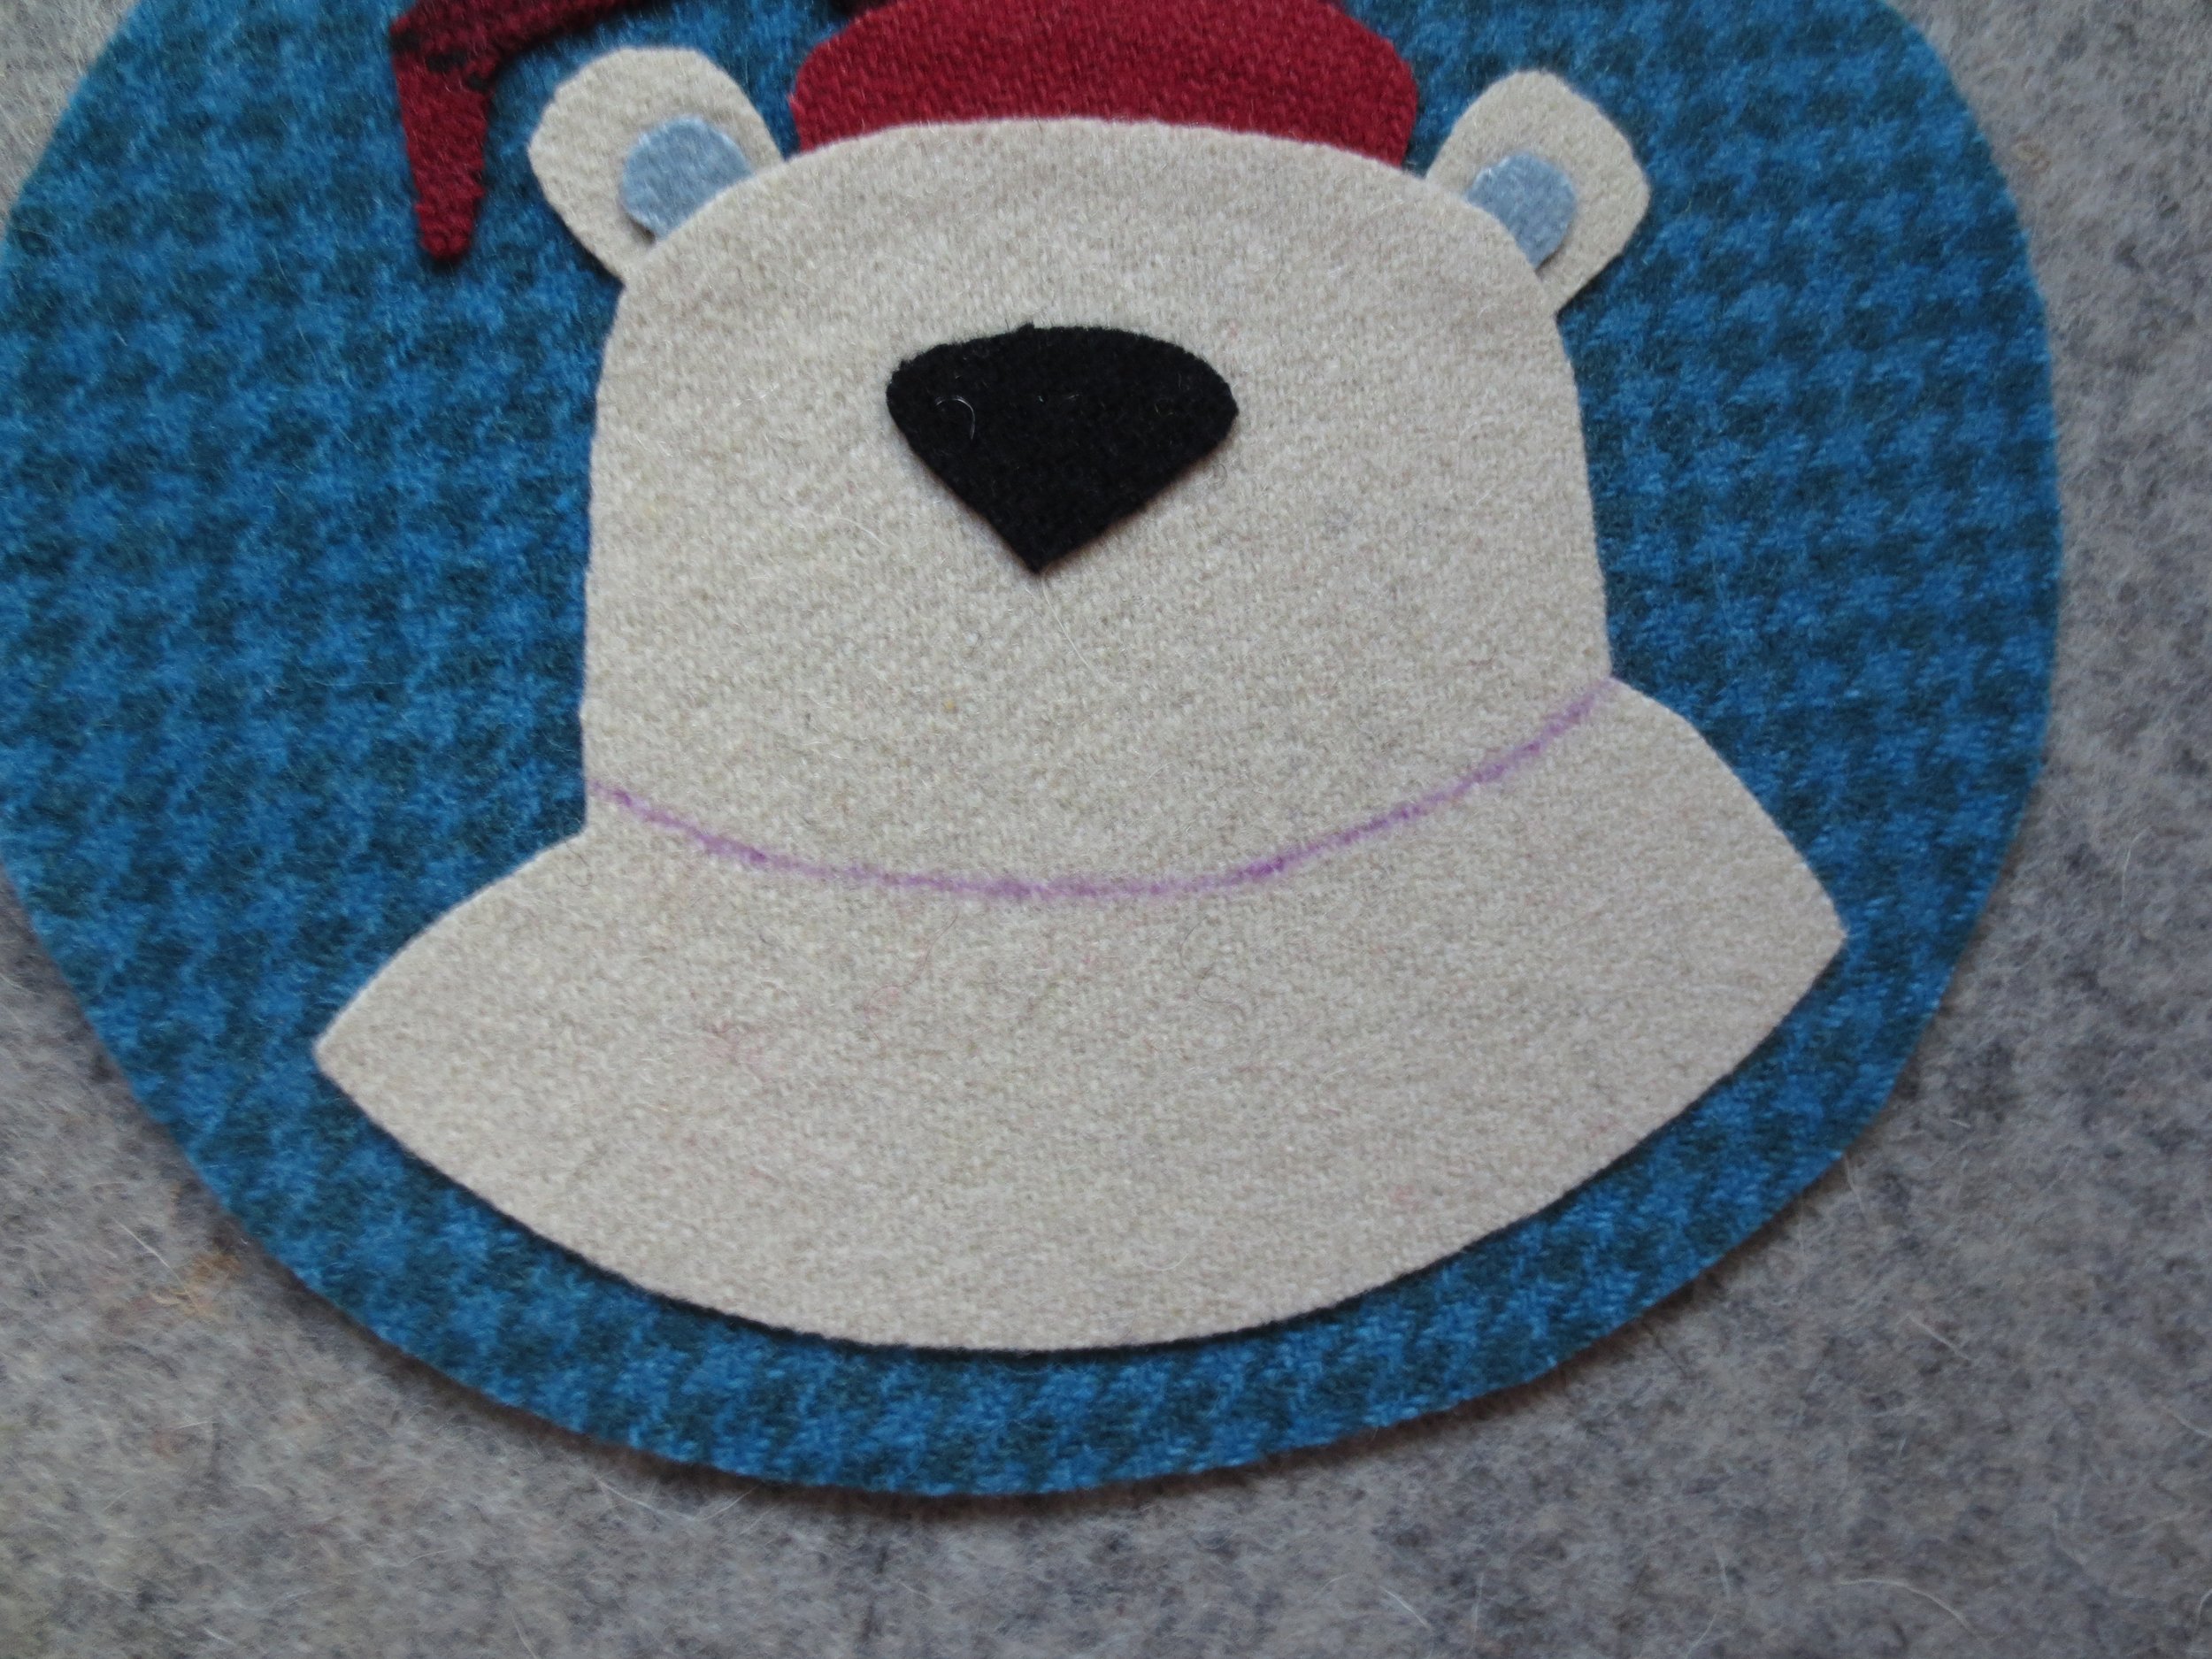
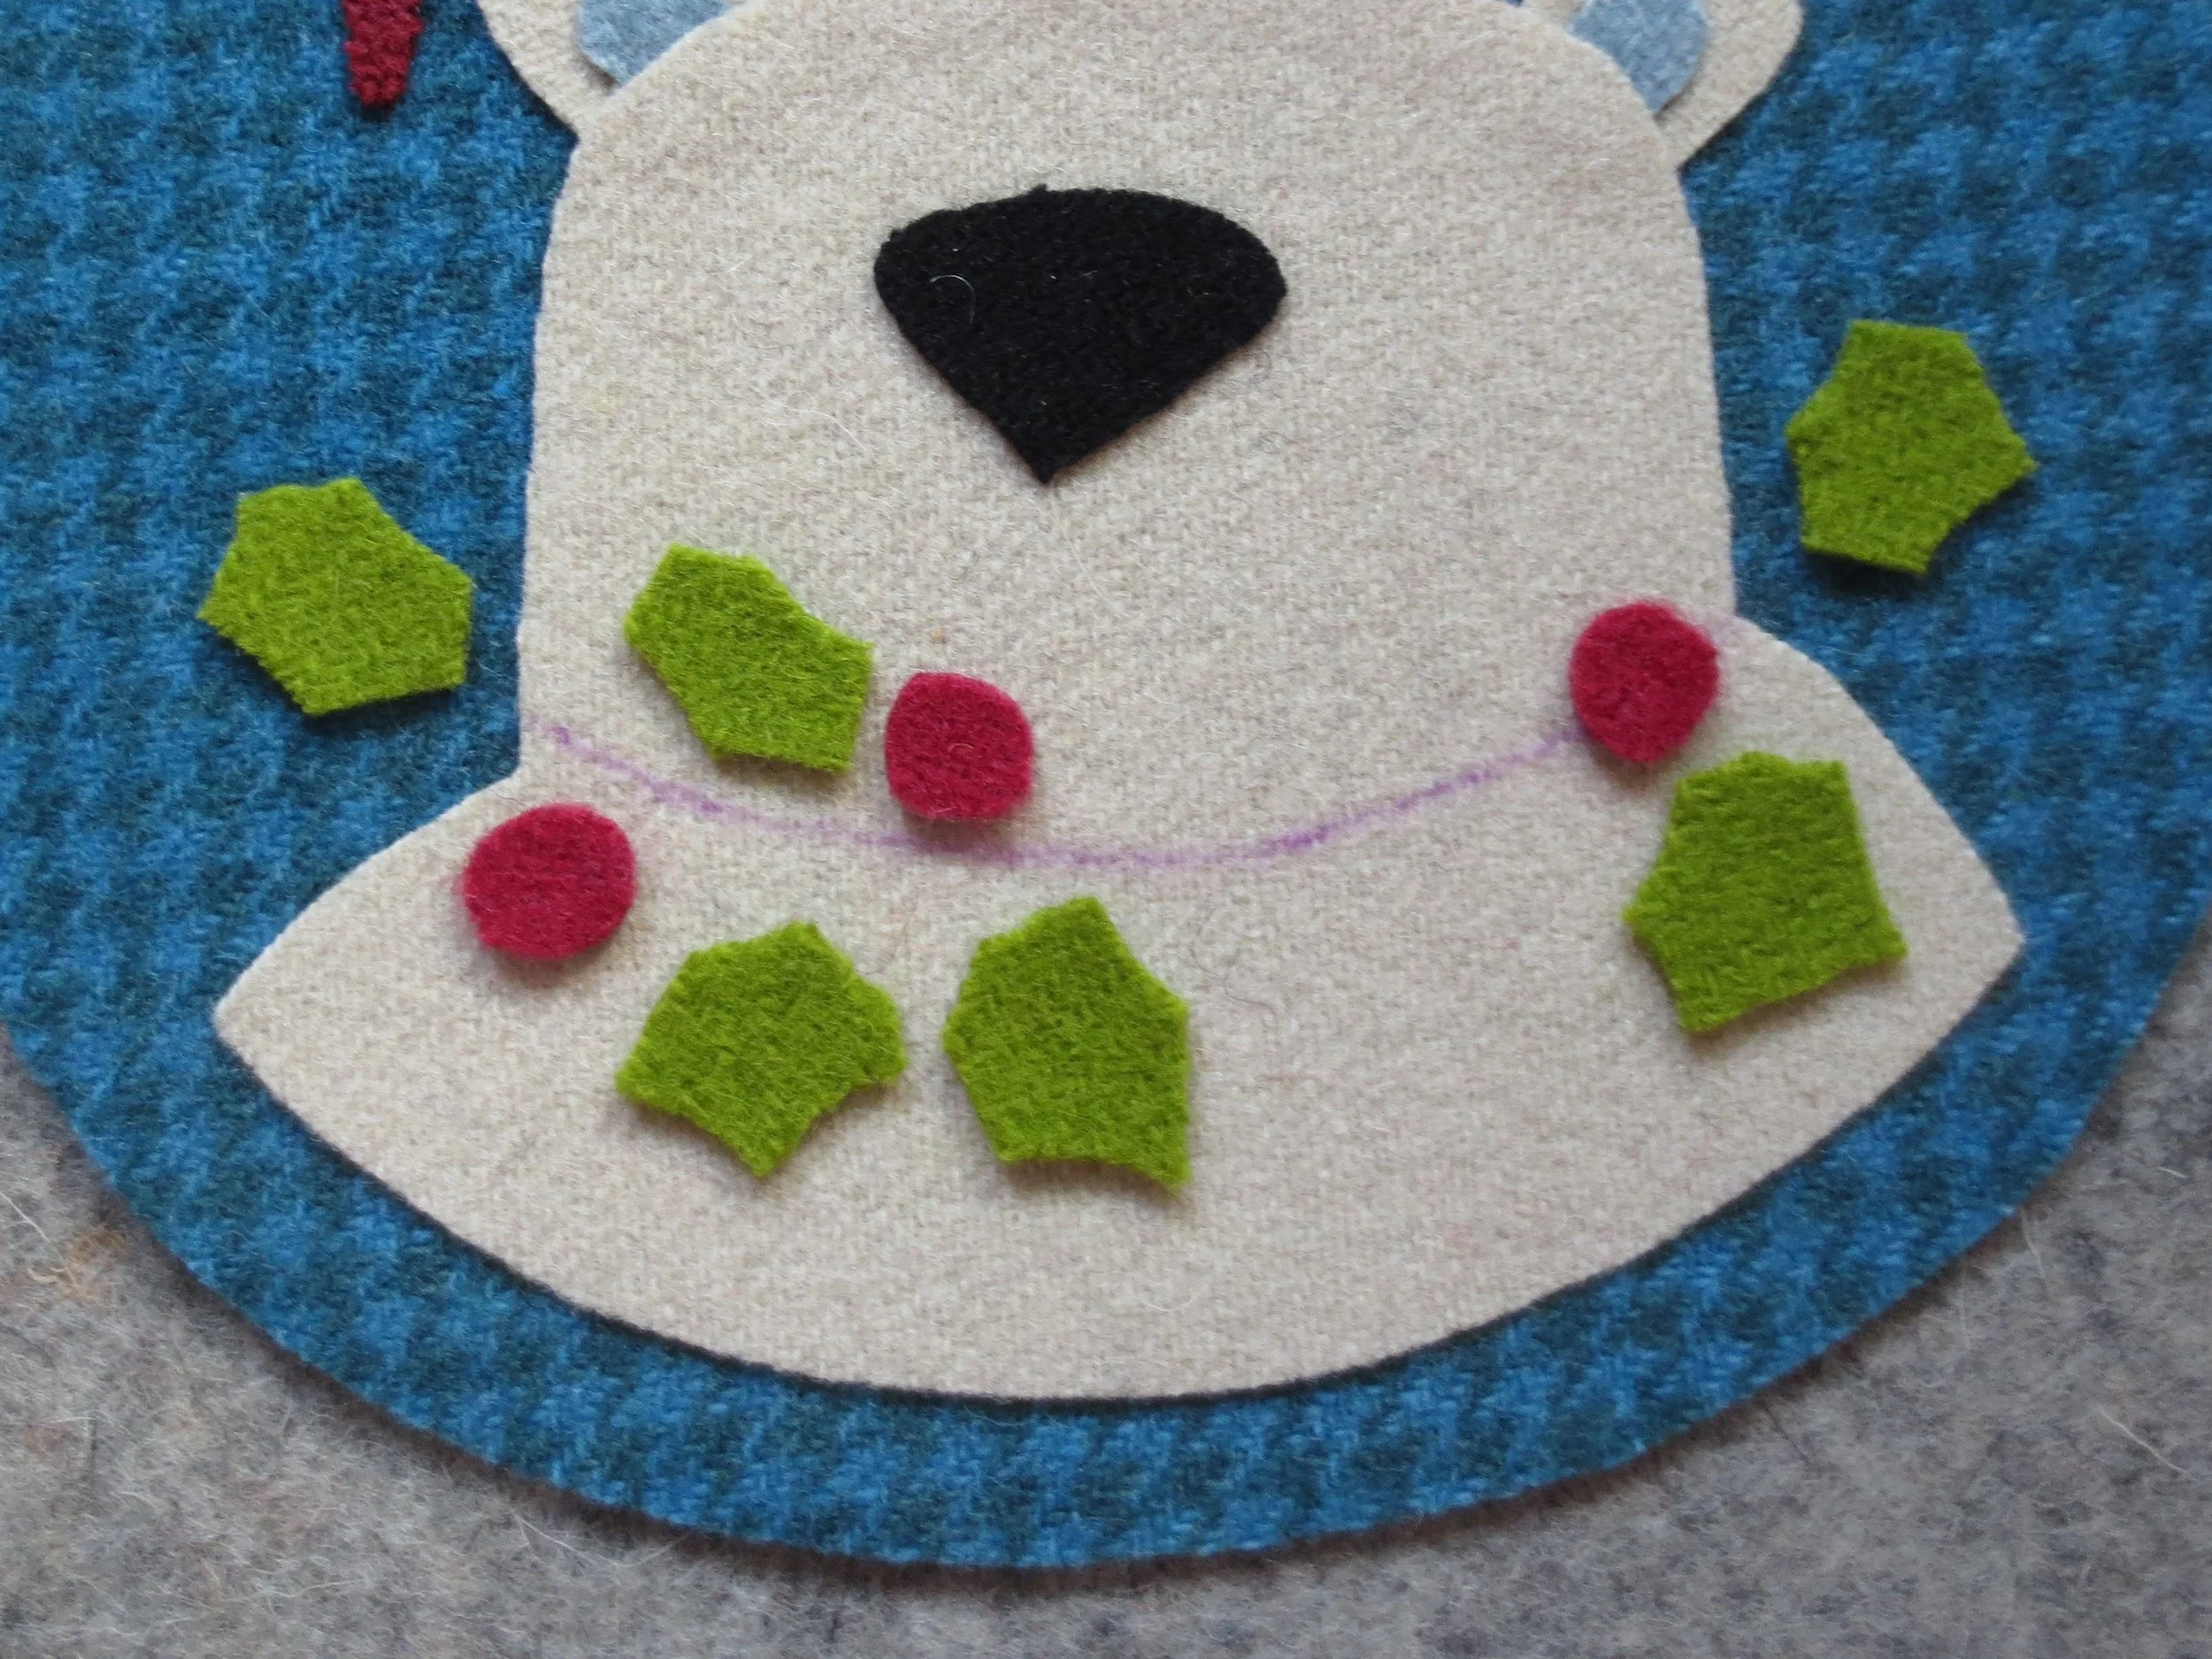
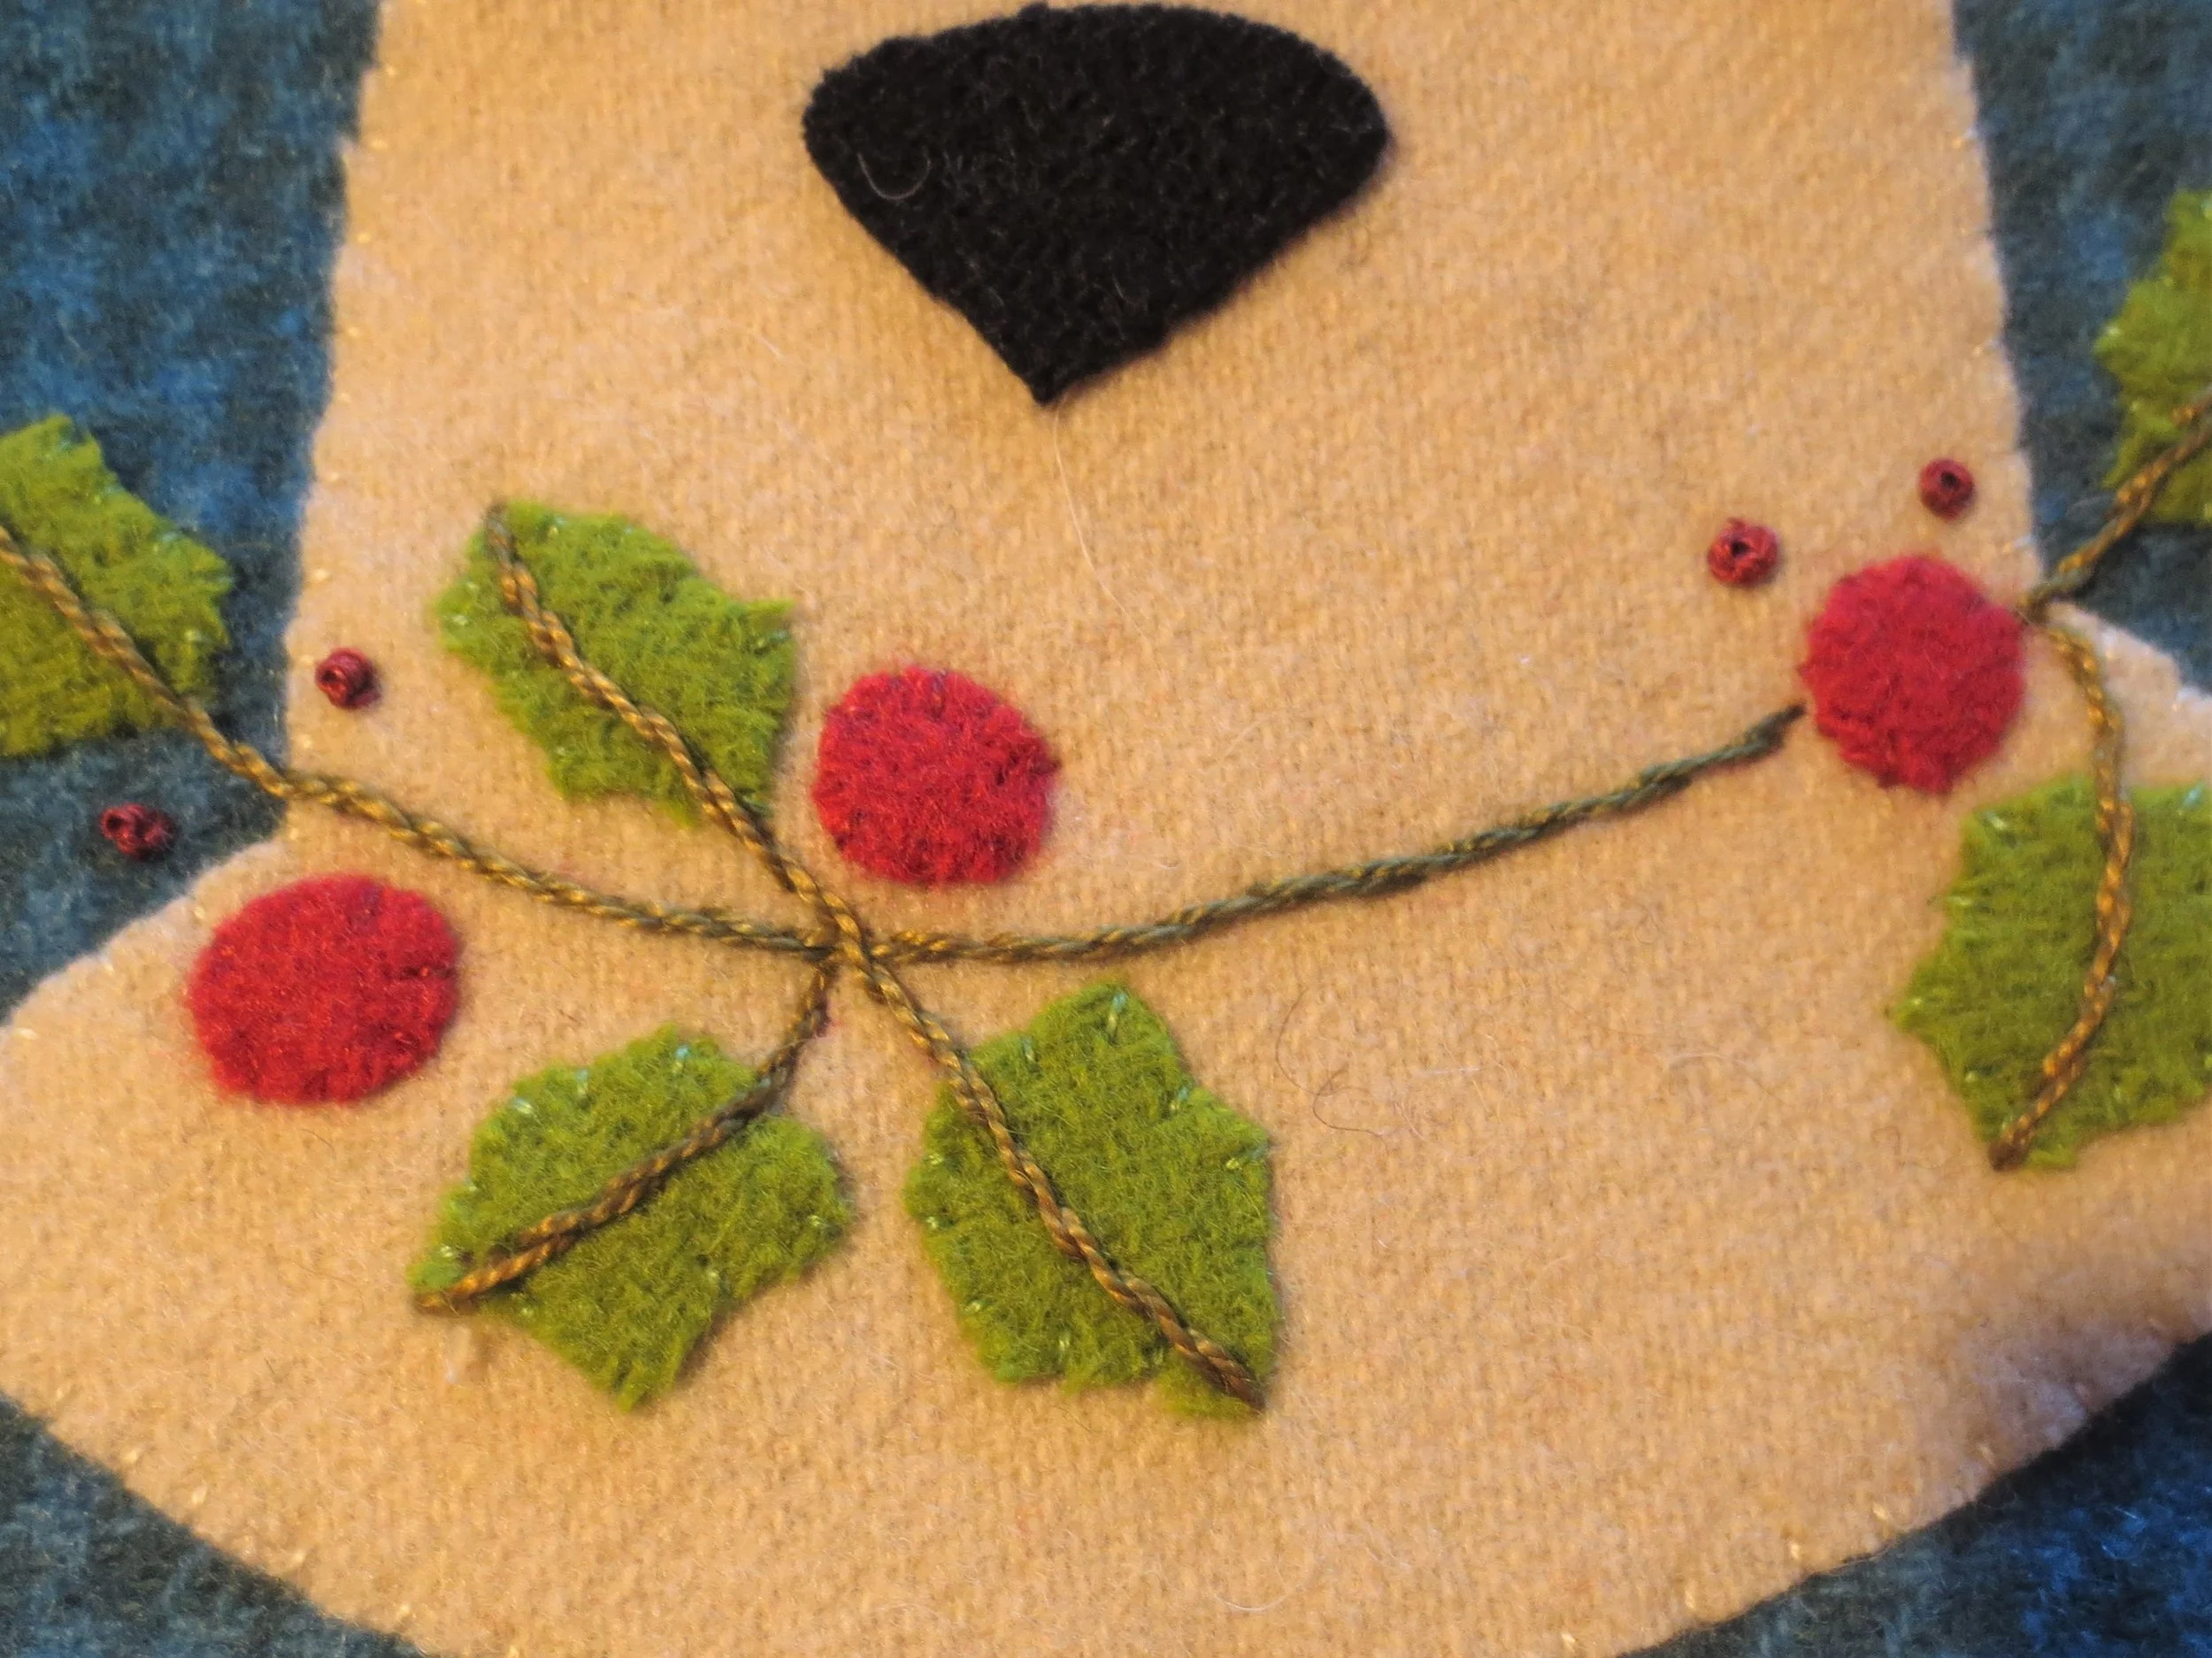
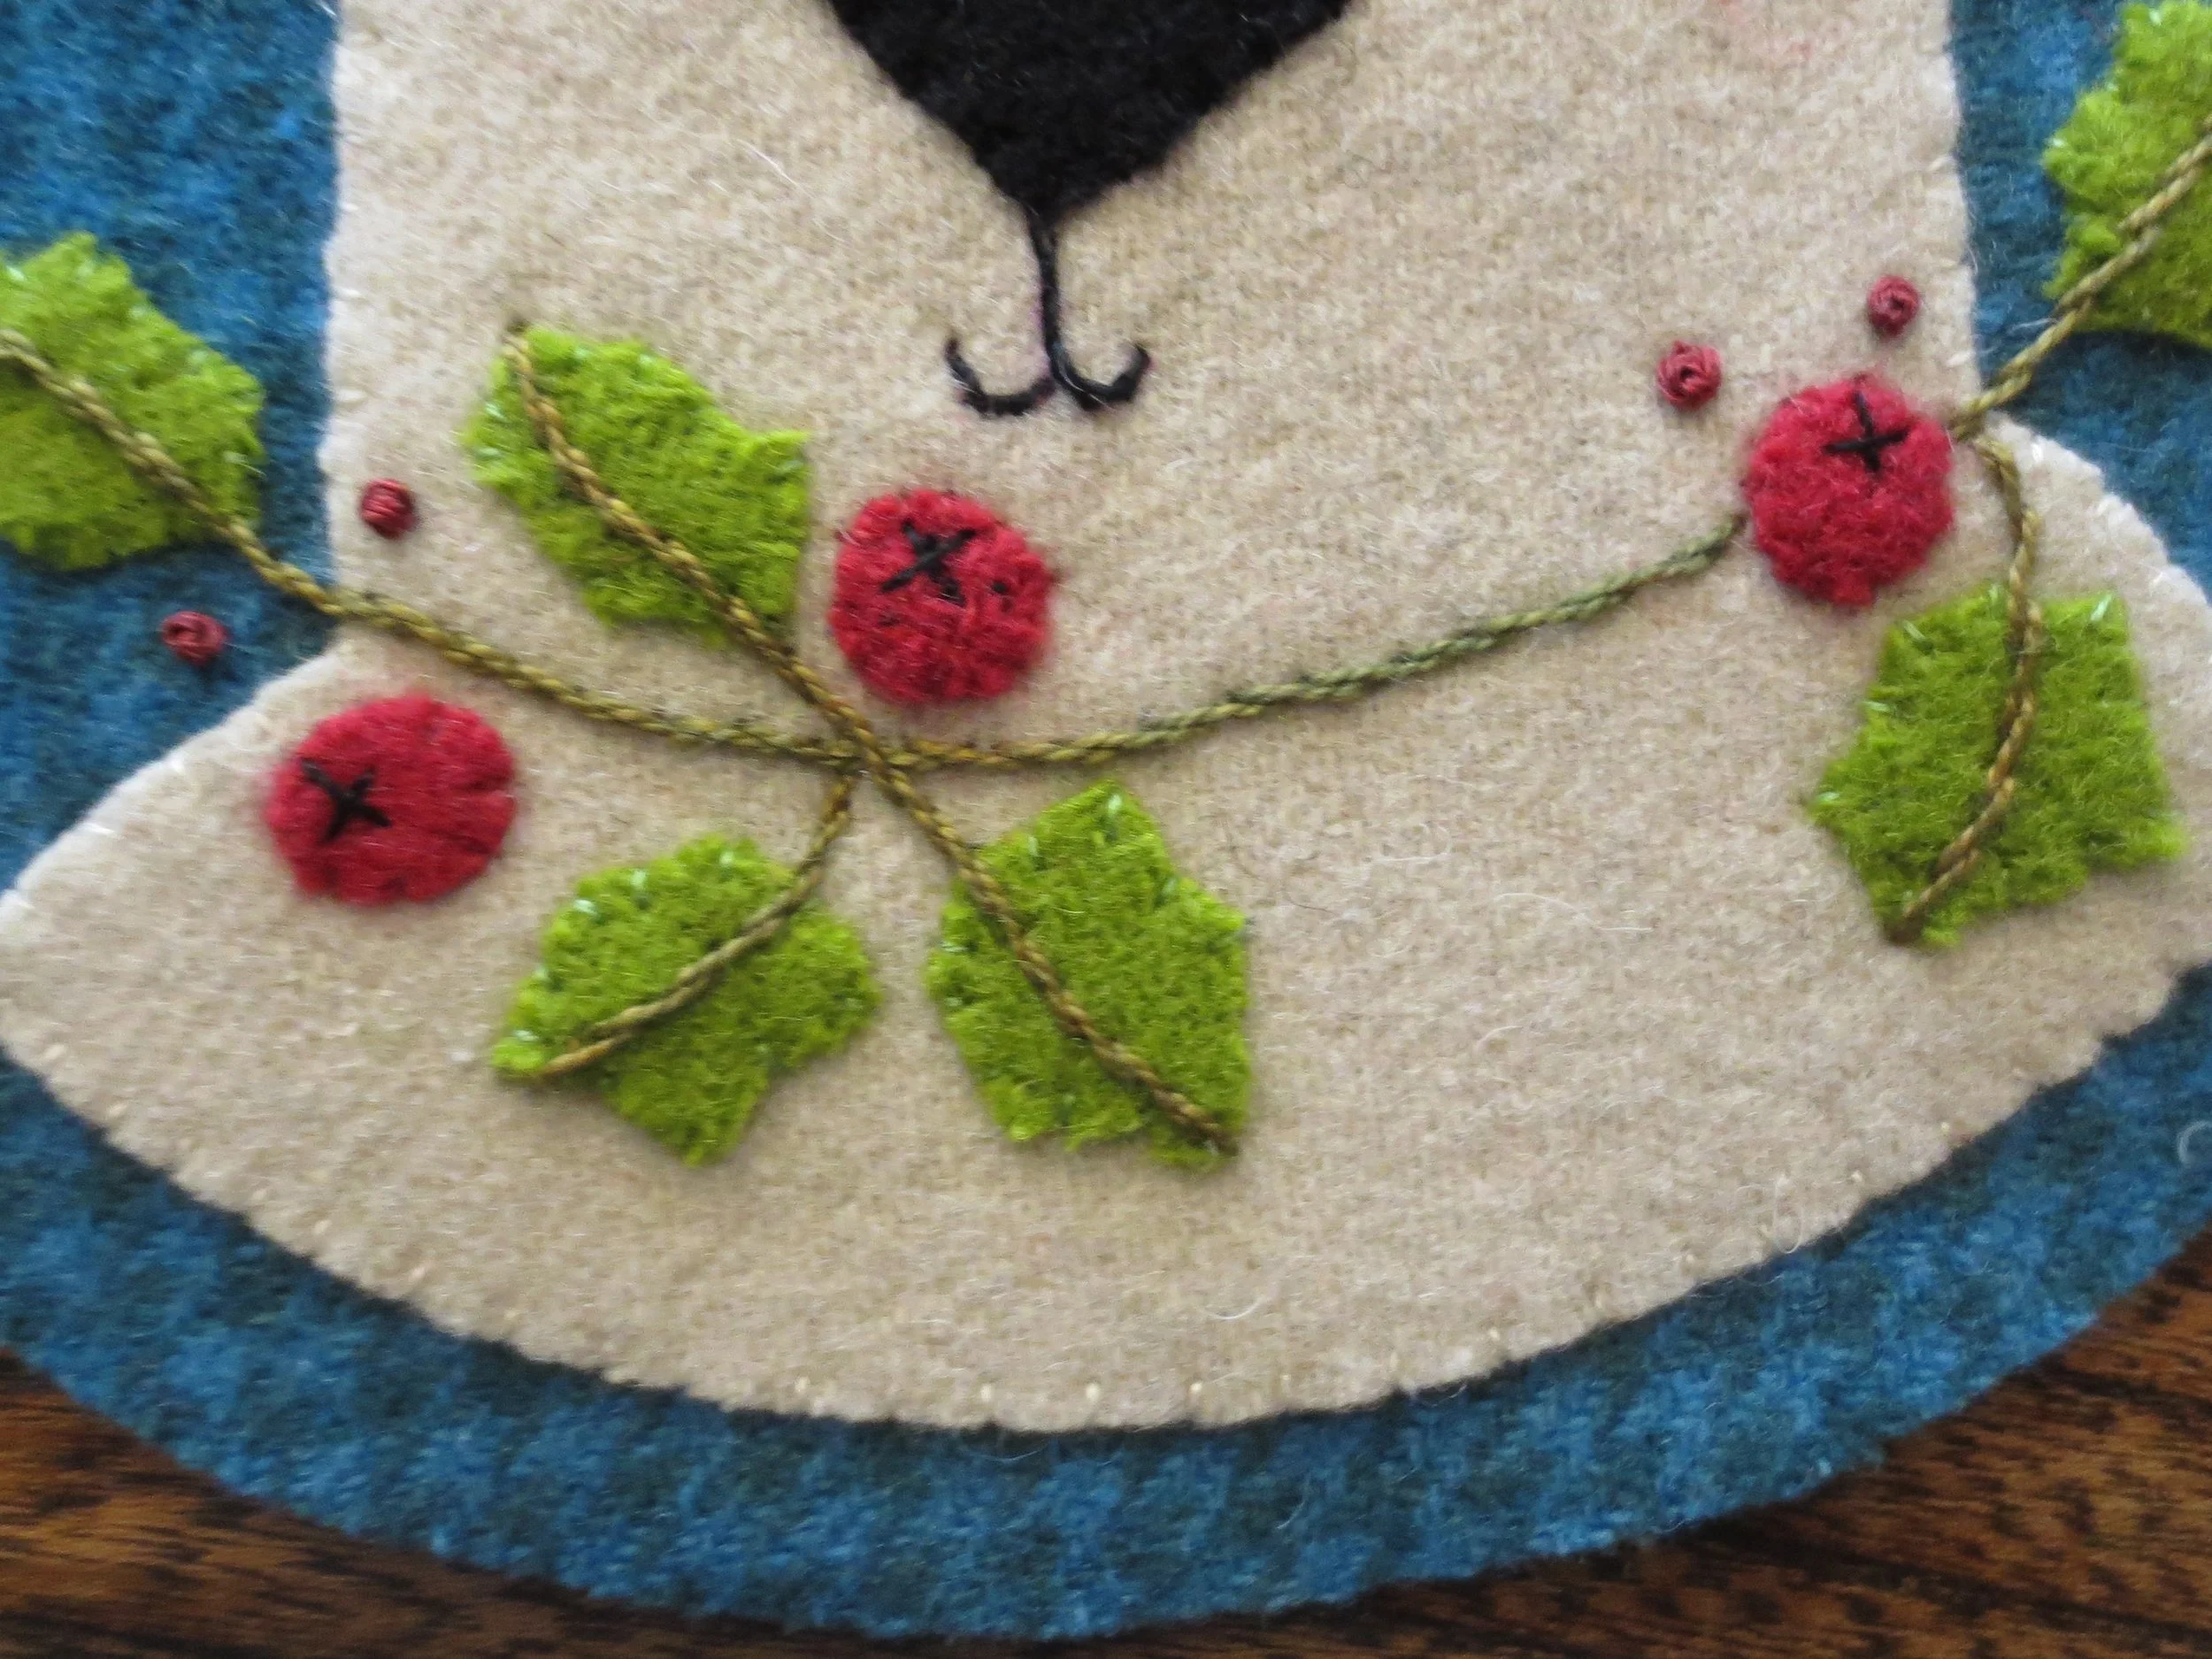
14. Use an air erasable marker or chalk pencil to draw the holly branch using the layout as a placement guide. This will serve as a guide line for stitching as well as a point of reference for the placement of the leaves and berries.
15. Position leaves and berries along the drawn line using the layout as a placement guide. Fuse in place.
16. Whip stitch all the wool piece in place using 1 strand of embroidery floss in colors that match the wool.
17. Now that all the pieces are secured in place, draw the stems and veins of the leaves. Refresh the drawn branch if needed.
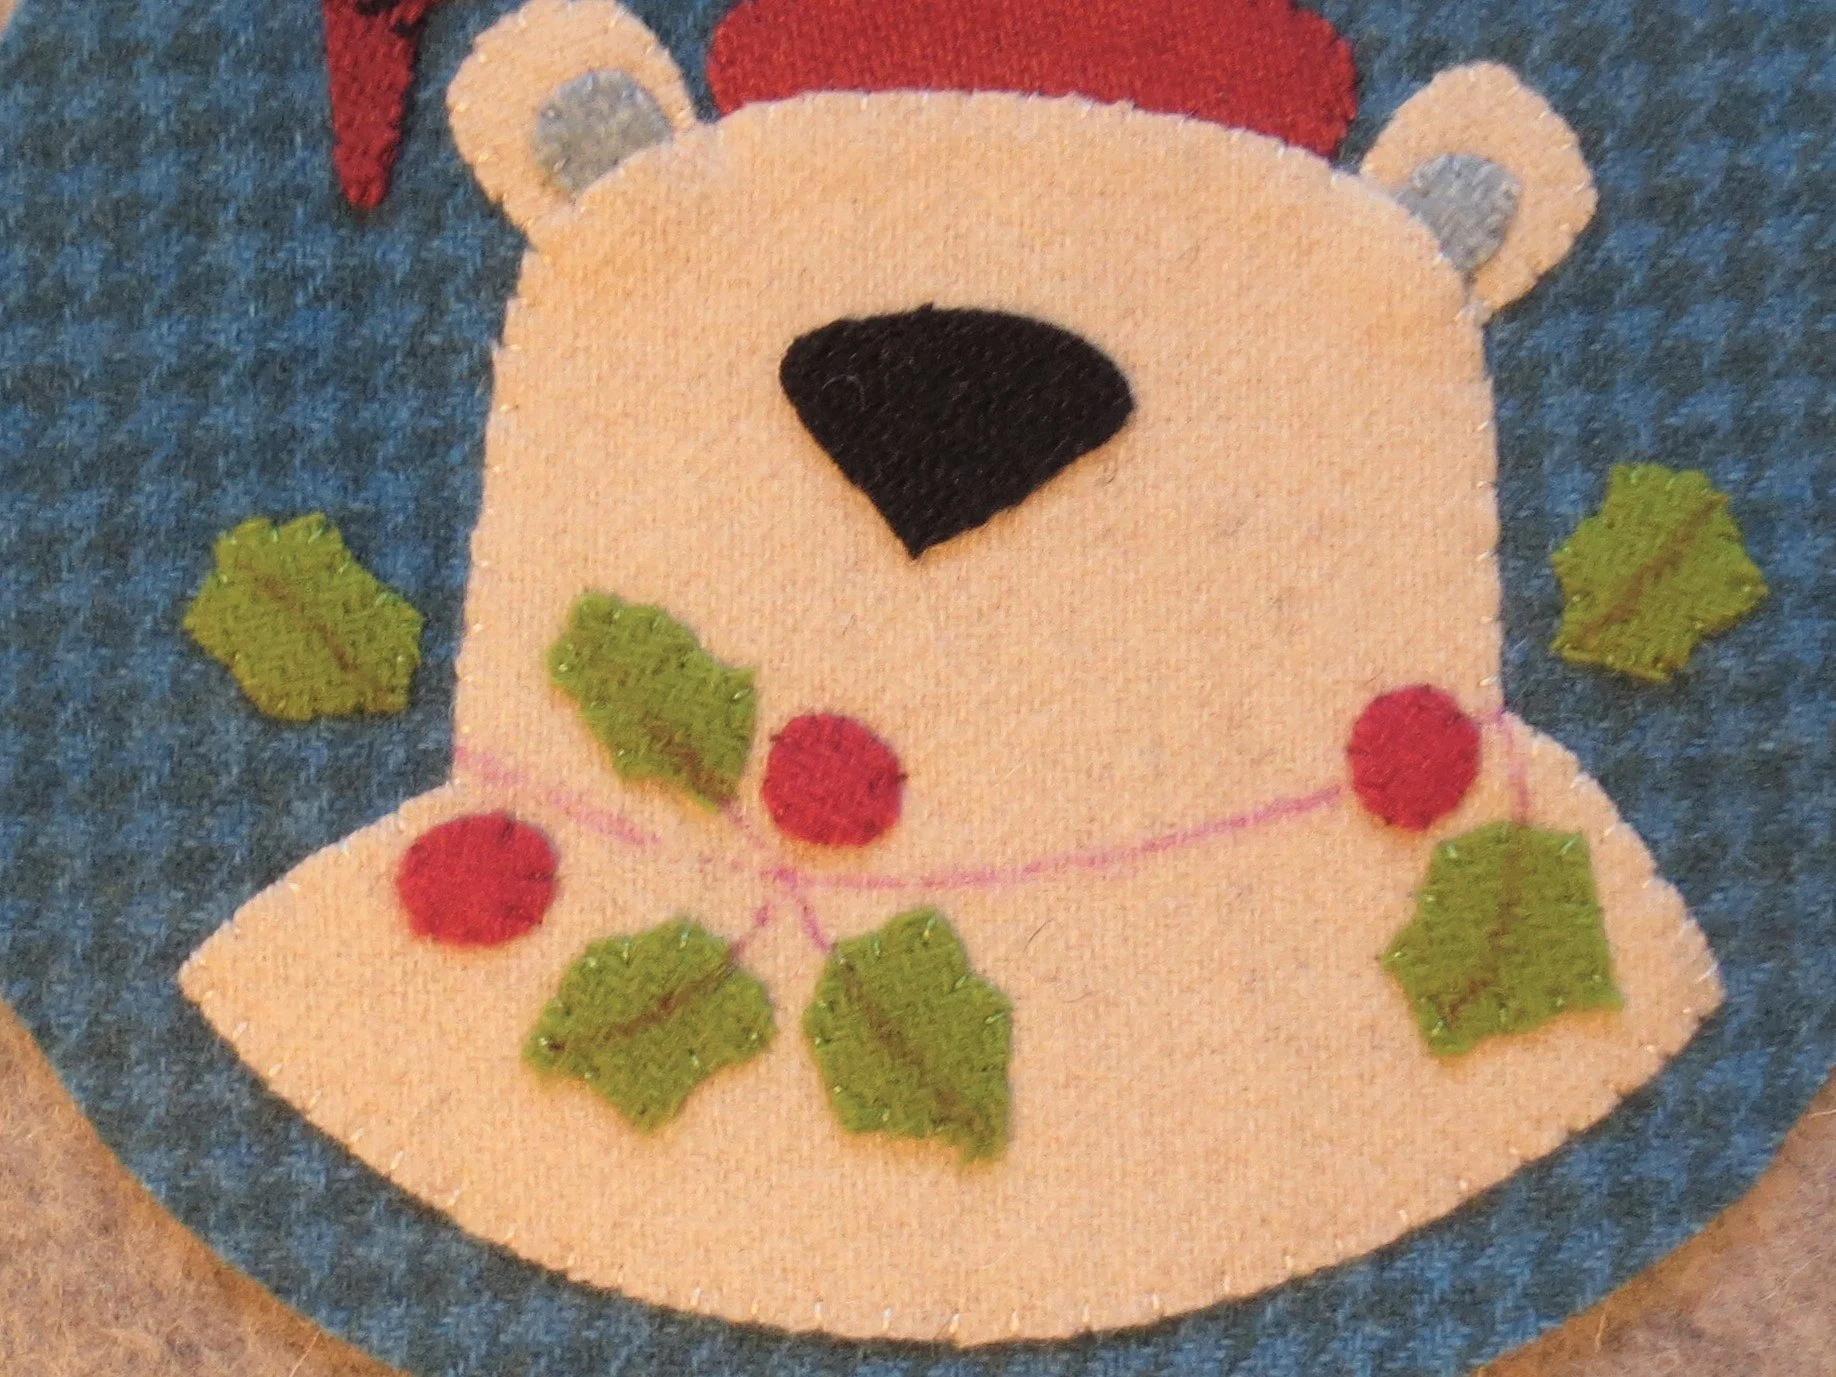
18. Use 1 strand of olive colored perle cotton, size 8 to stem stitch over the drawn lines.

19. Add a few smaller berries along the branch by using 3 strands of red embroidery floss to make French knots. I added an additional berry on the left side for some balance. This is not on the layout.
20. Draw the ribs in the hatband (I used a chalk pencil instead of the erasable marker because it was more visable).
21. Use 3 strands of dark red floss to back stitch over the lines.

22. Use the erasable marker to mark guide lines for the eyes and the mouth.
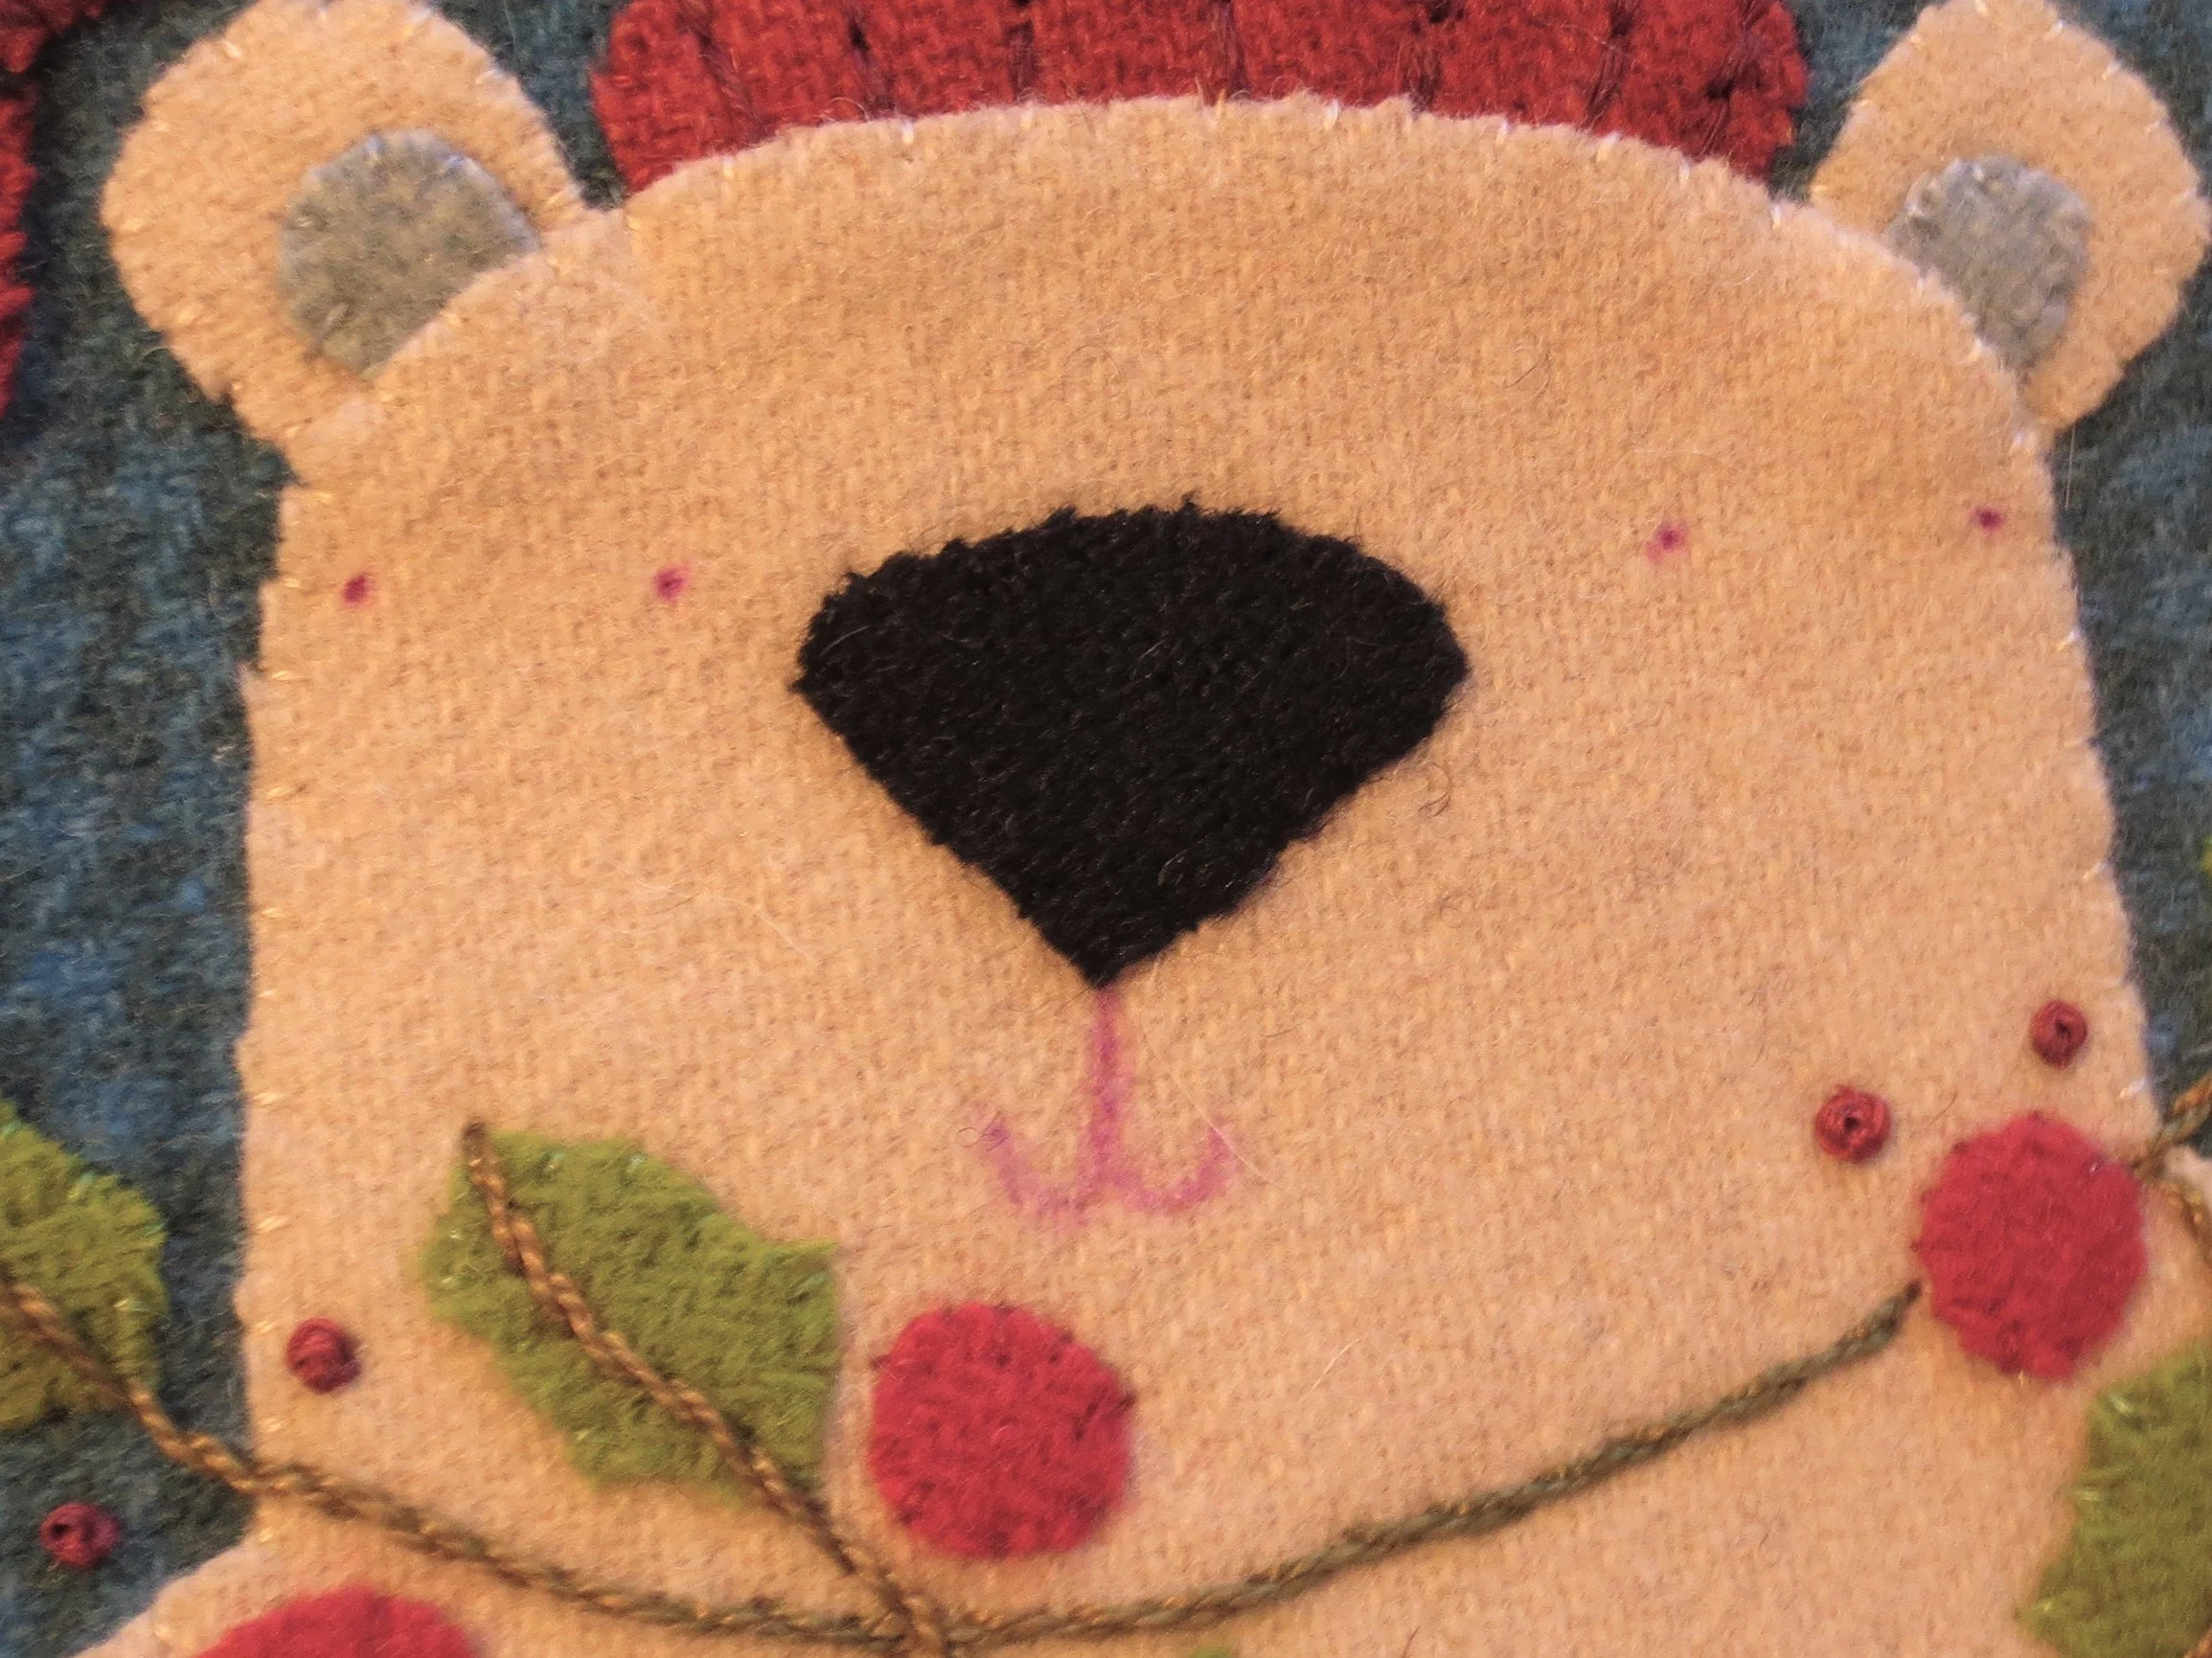
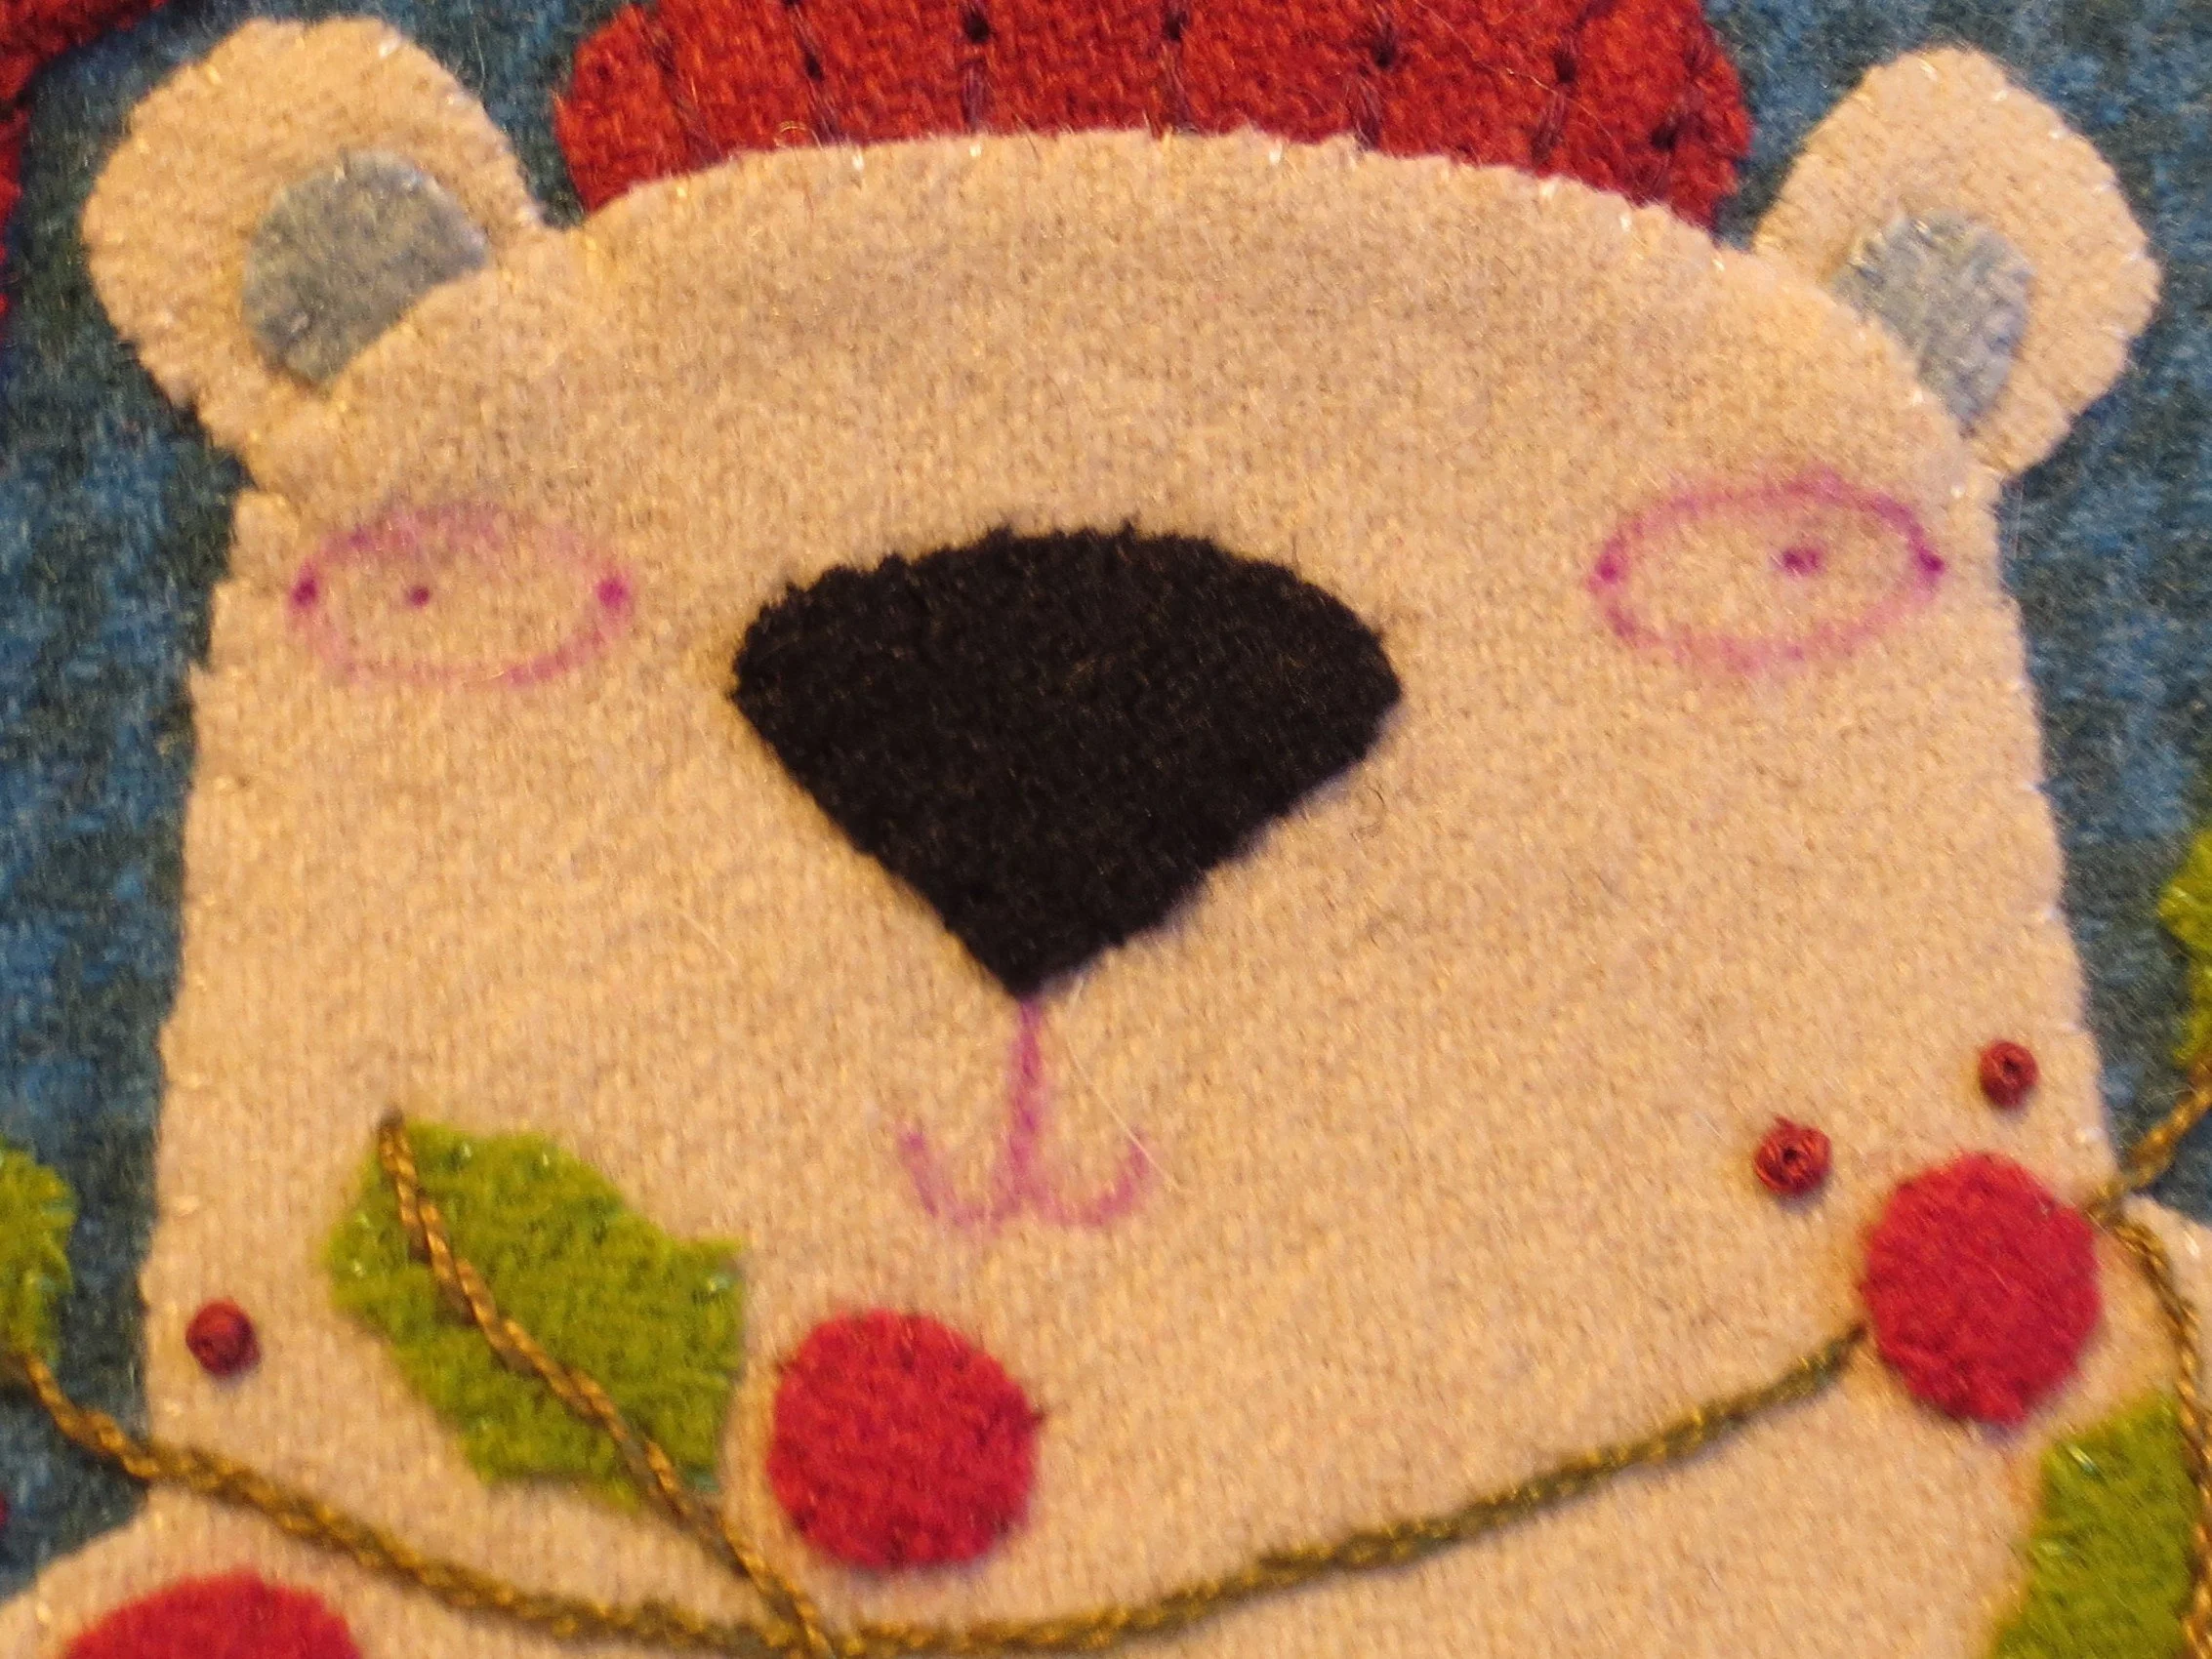
23. Use 2 strands of black floss to back stitch over the drawn lines. Use 3 strands of black floss to make French knot eyes.
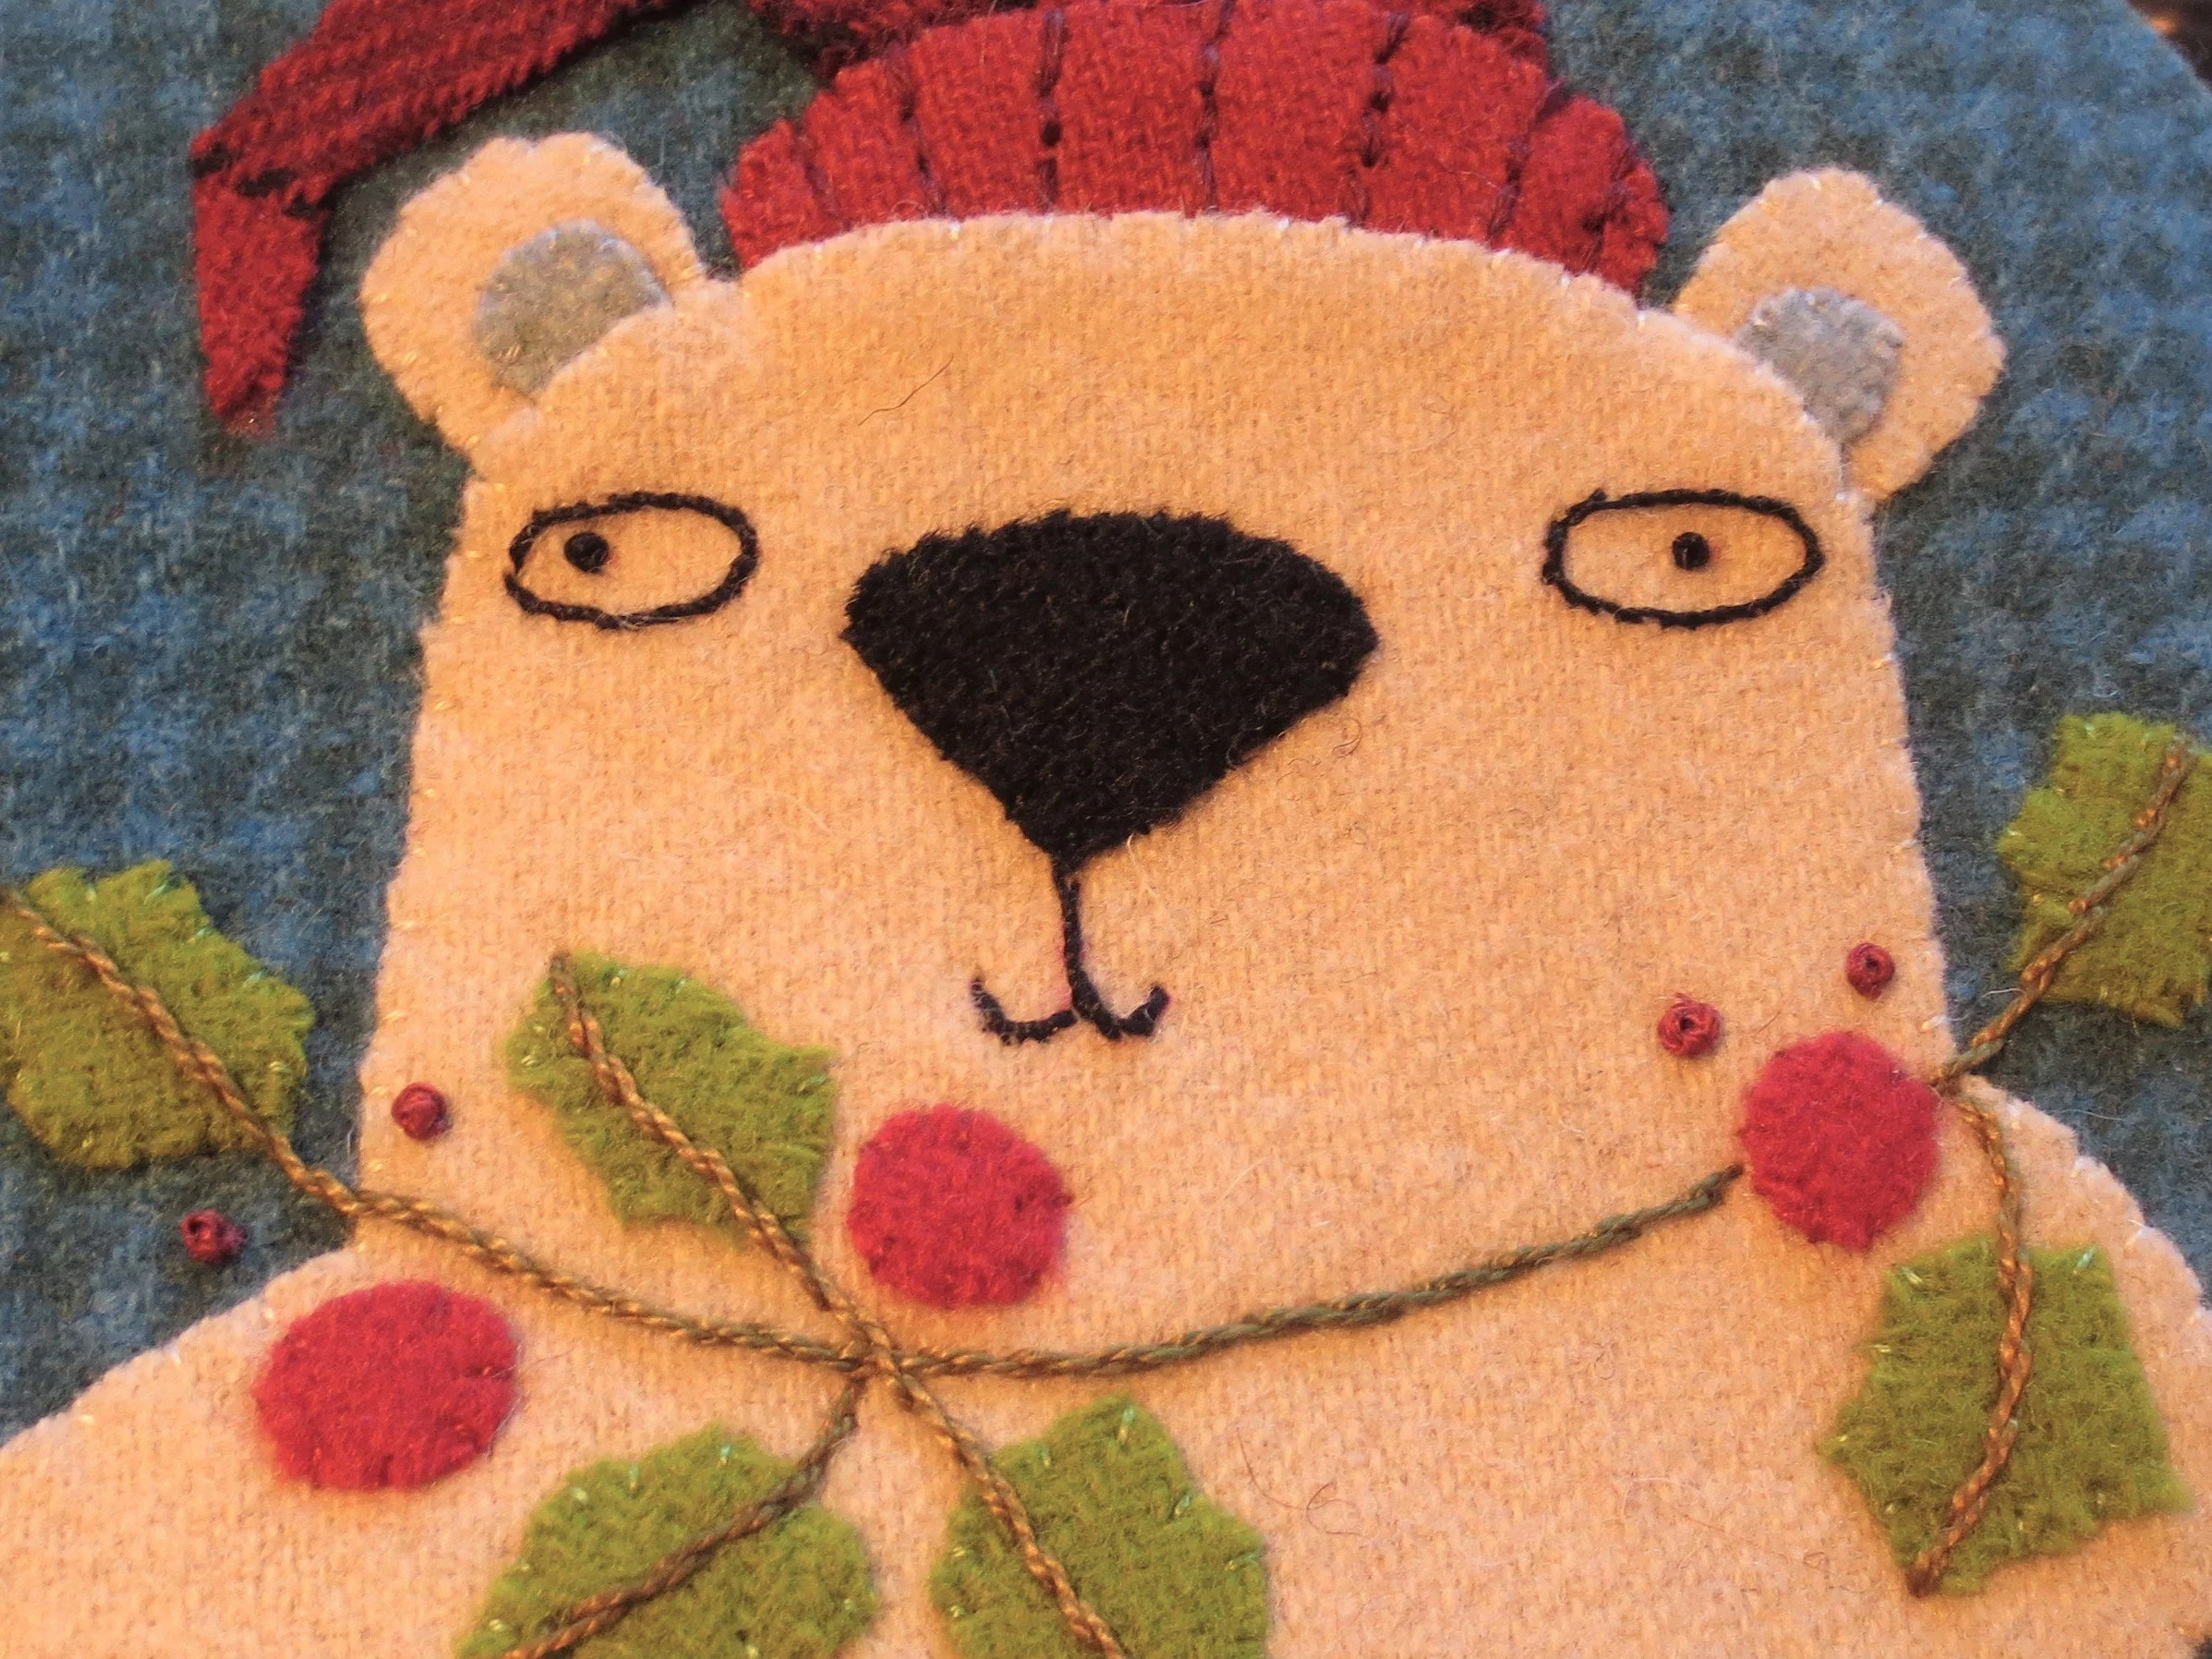
24. Let’s add one last detail. Use 2 strands of black floss to make a single off-center X on each of the large berries.
Yay! The applique part is complete!
Use the ornament construction instructions from Tis The Season to learn how to stuff, stitch, and hang your ornament.