
Gobble Gobble Table Mat
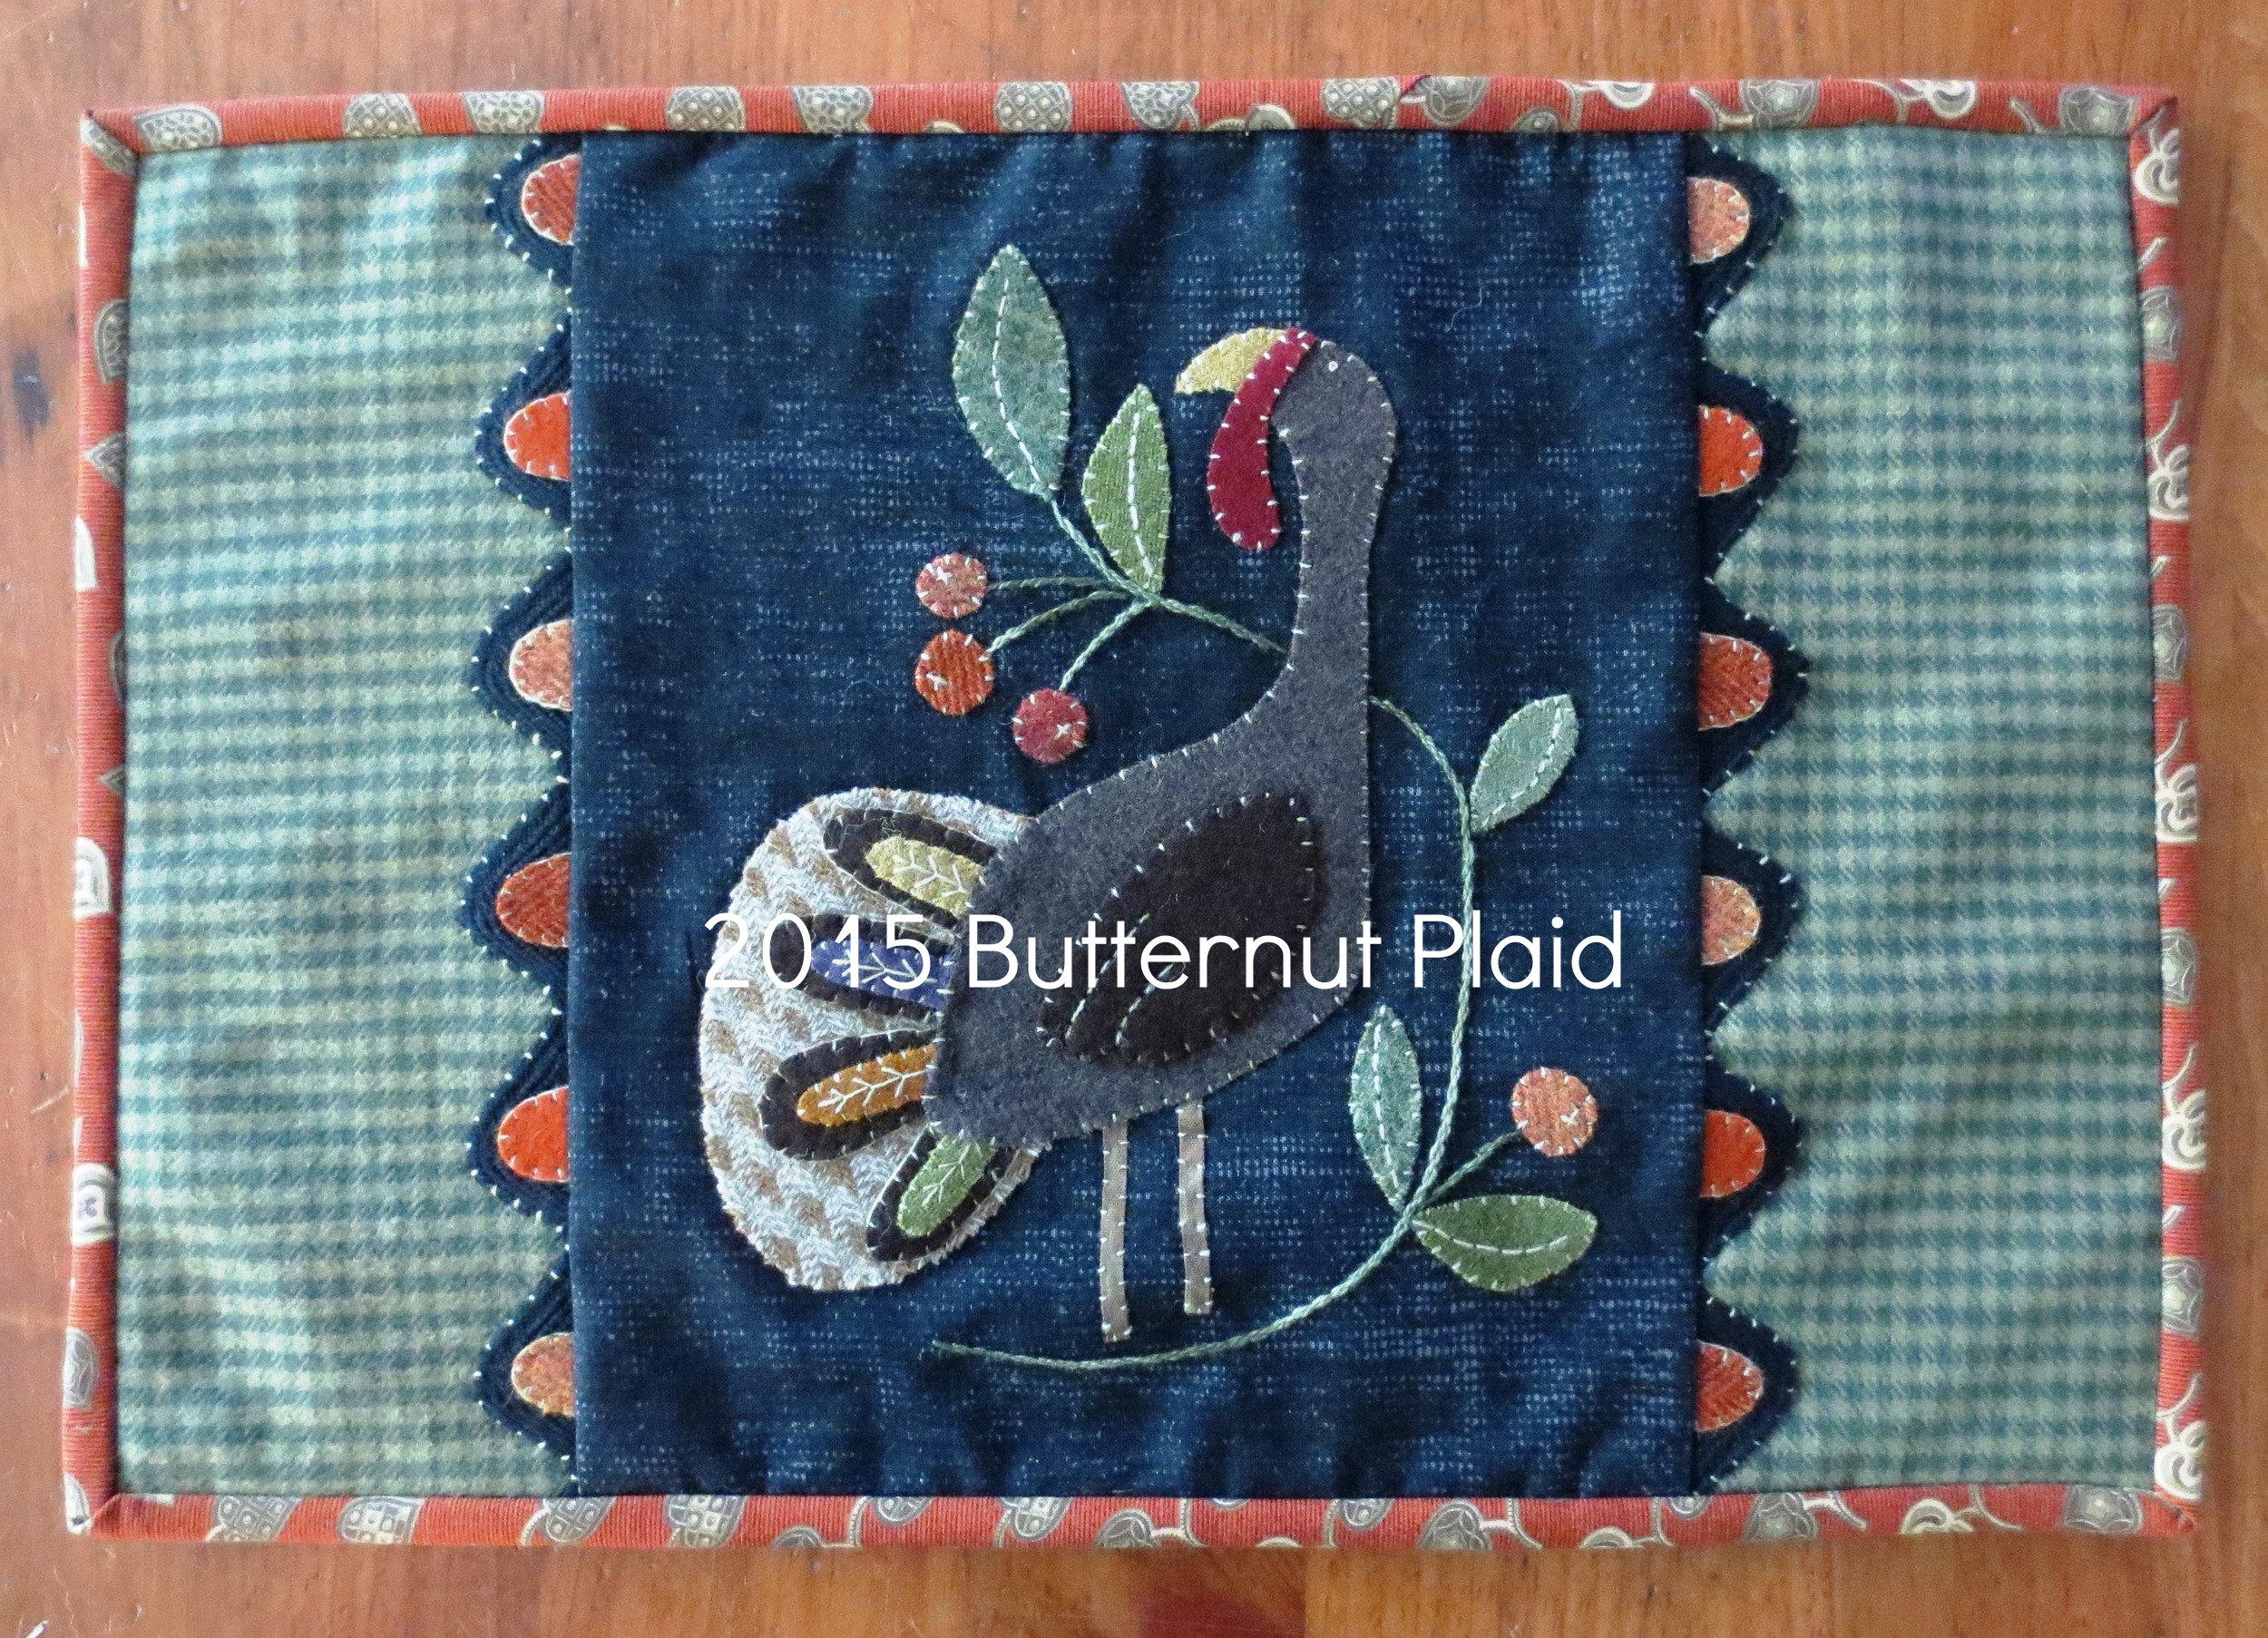
Thanksgiving just gets me all warm and tingly and all kinds of wonderful inside. - Willard Scott
I stitched this almost entirely with hand dyed wool thread from The Merry Hooker Woolens. The 100% wool thread lays beautifully. I highly recommend it. The only other thread is a green perle cotton for the berry branch. I also used 1 3/4" ric rac with orange wool inner tongues for the tongue border.
You will need:
Fabric (based on 44" wide fabric)
Background and backing - 1/2 yard black cotton (Black Faux Burlap Quilter's Candy by Connecting Threads, www.ConnectingThreads.com)
Side borders - One fat quarter green houndstooth flannel
Binding - 1/4 yard (Arnold's Attic by Barbara Brackman for Moda, Pattern #8164 Magnolia 1880-1910, www.modafabrics.com)
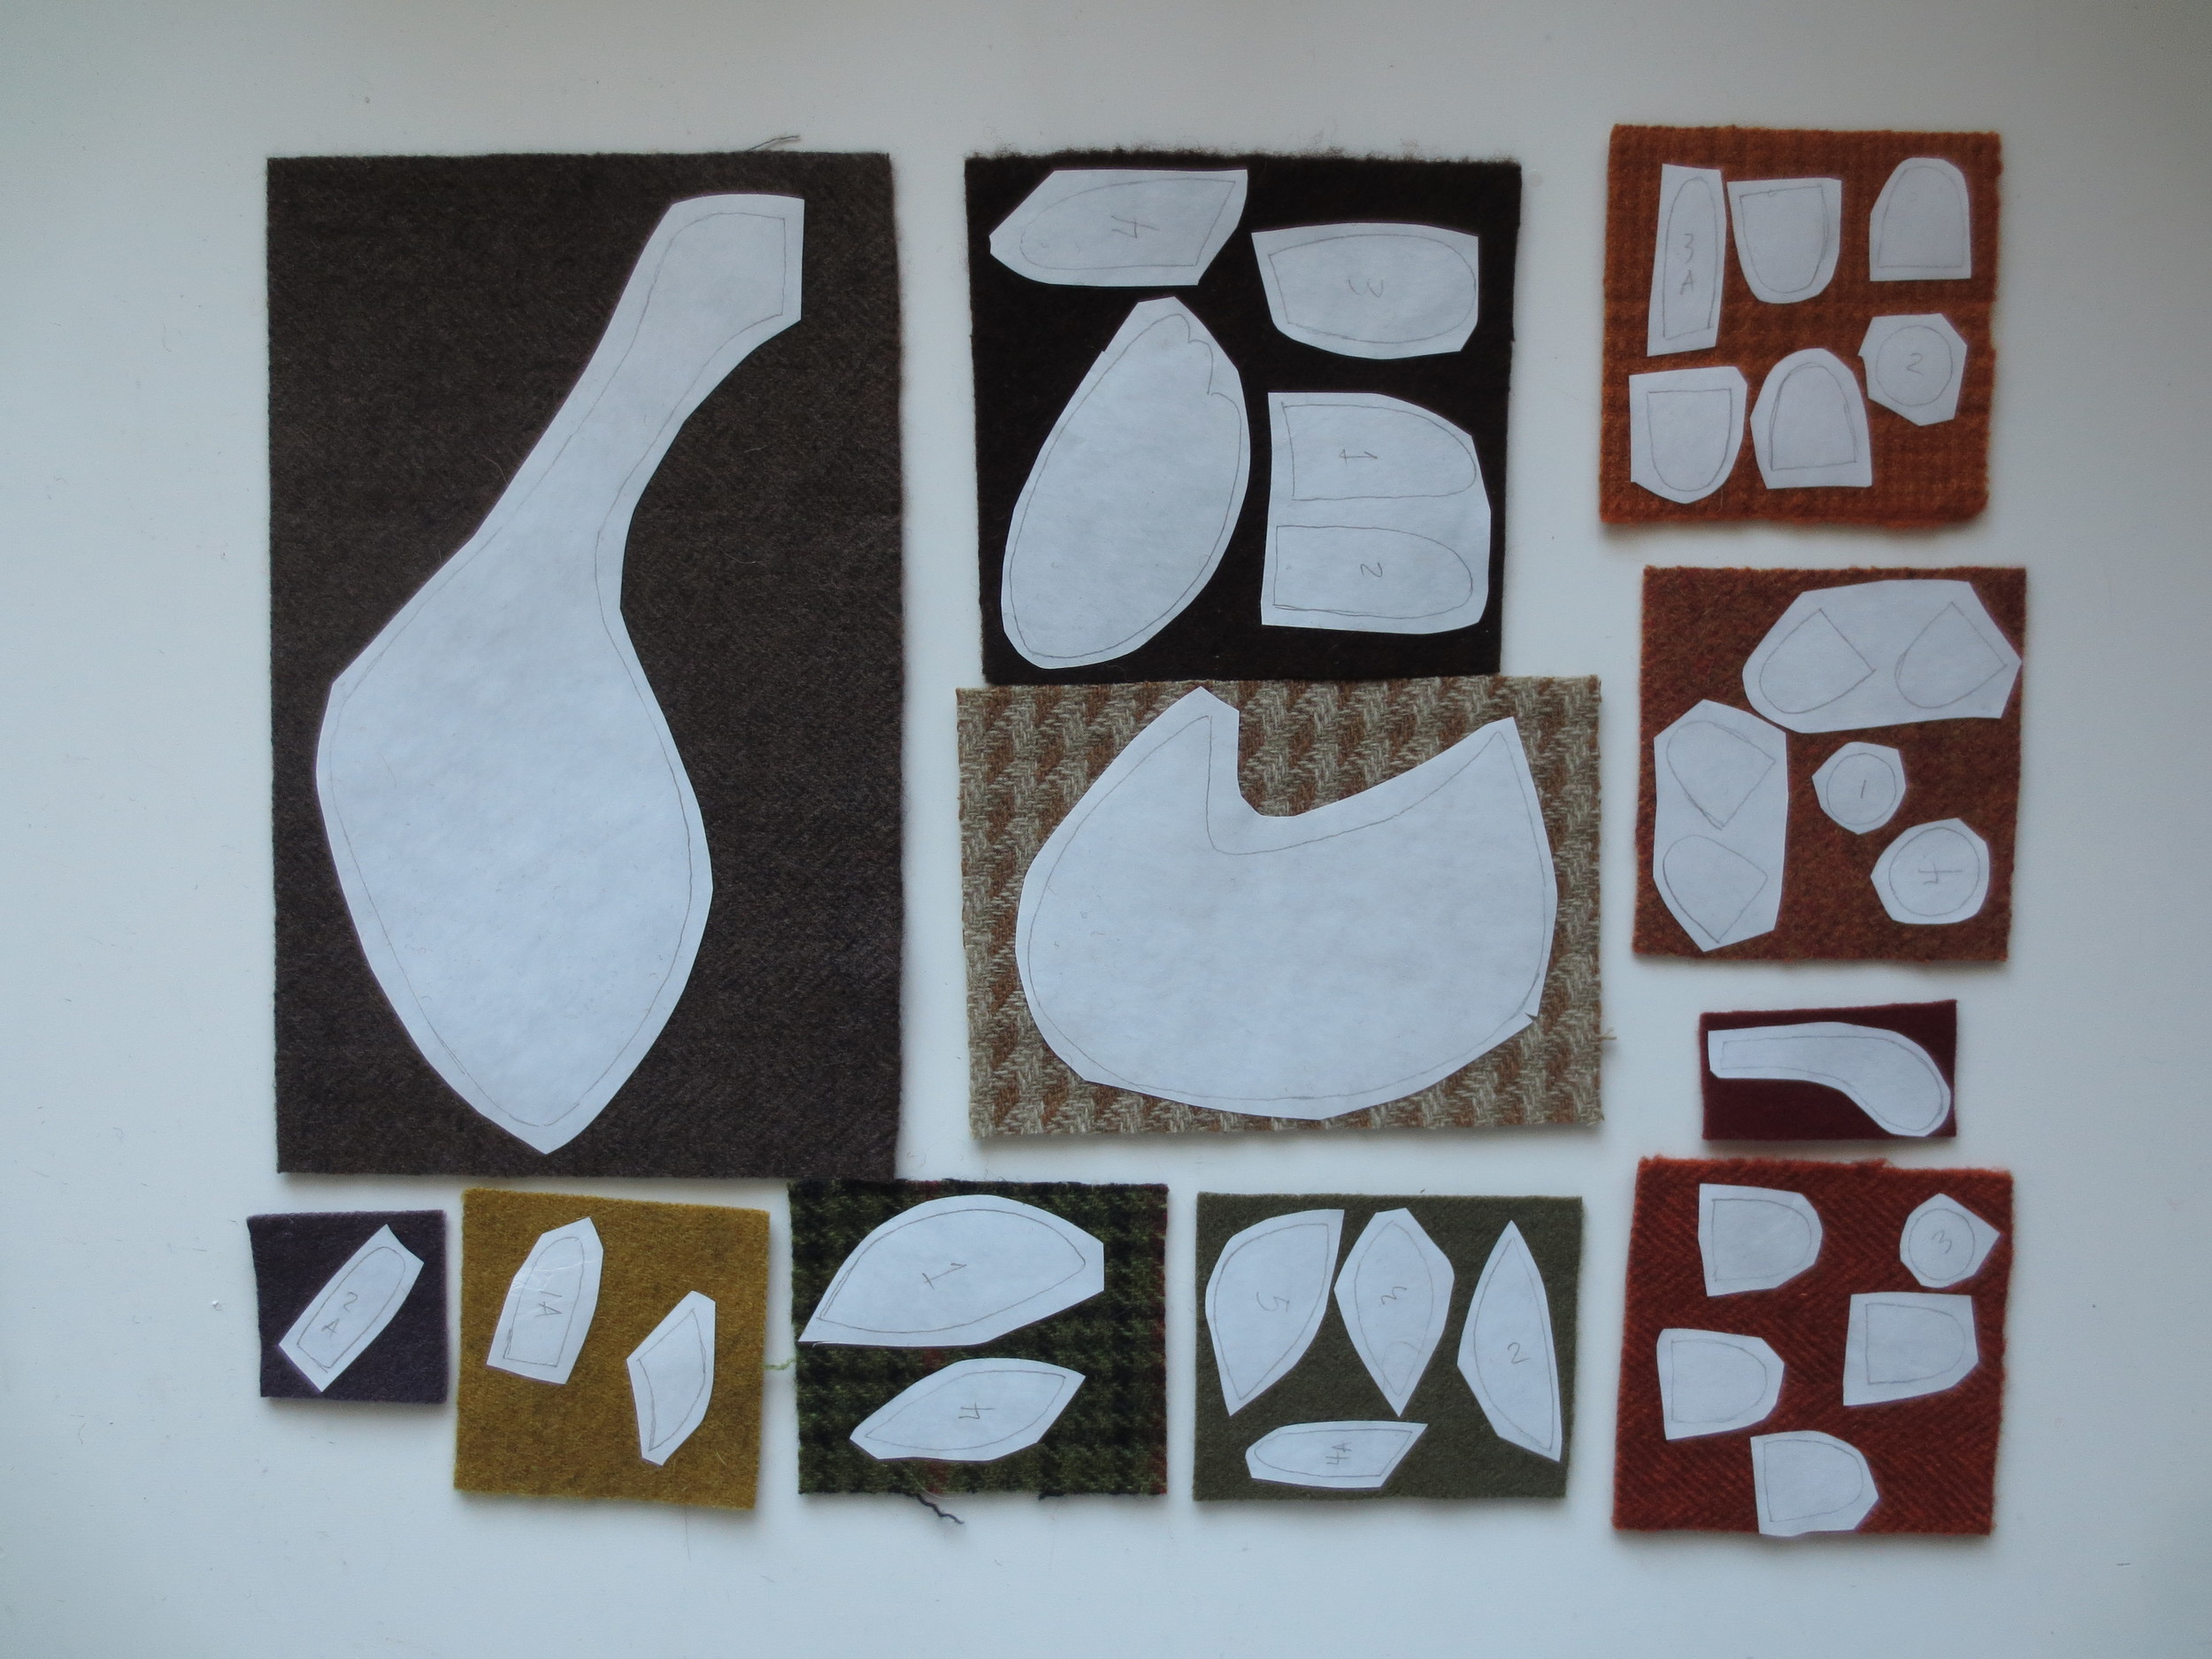
Felted Wool
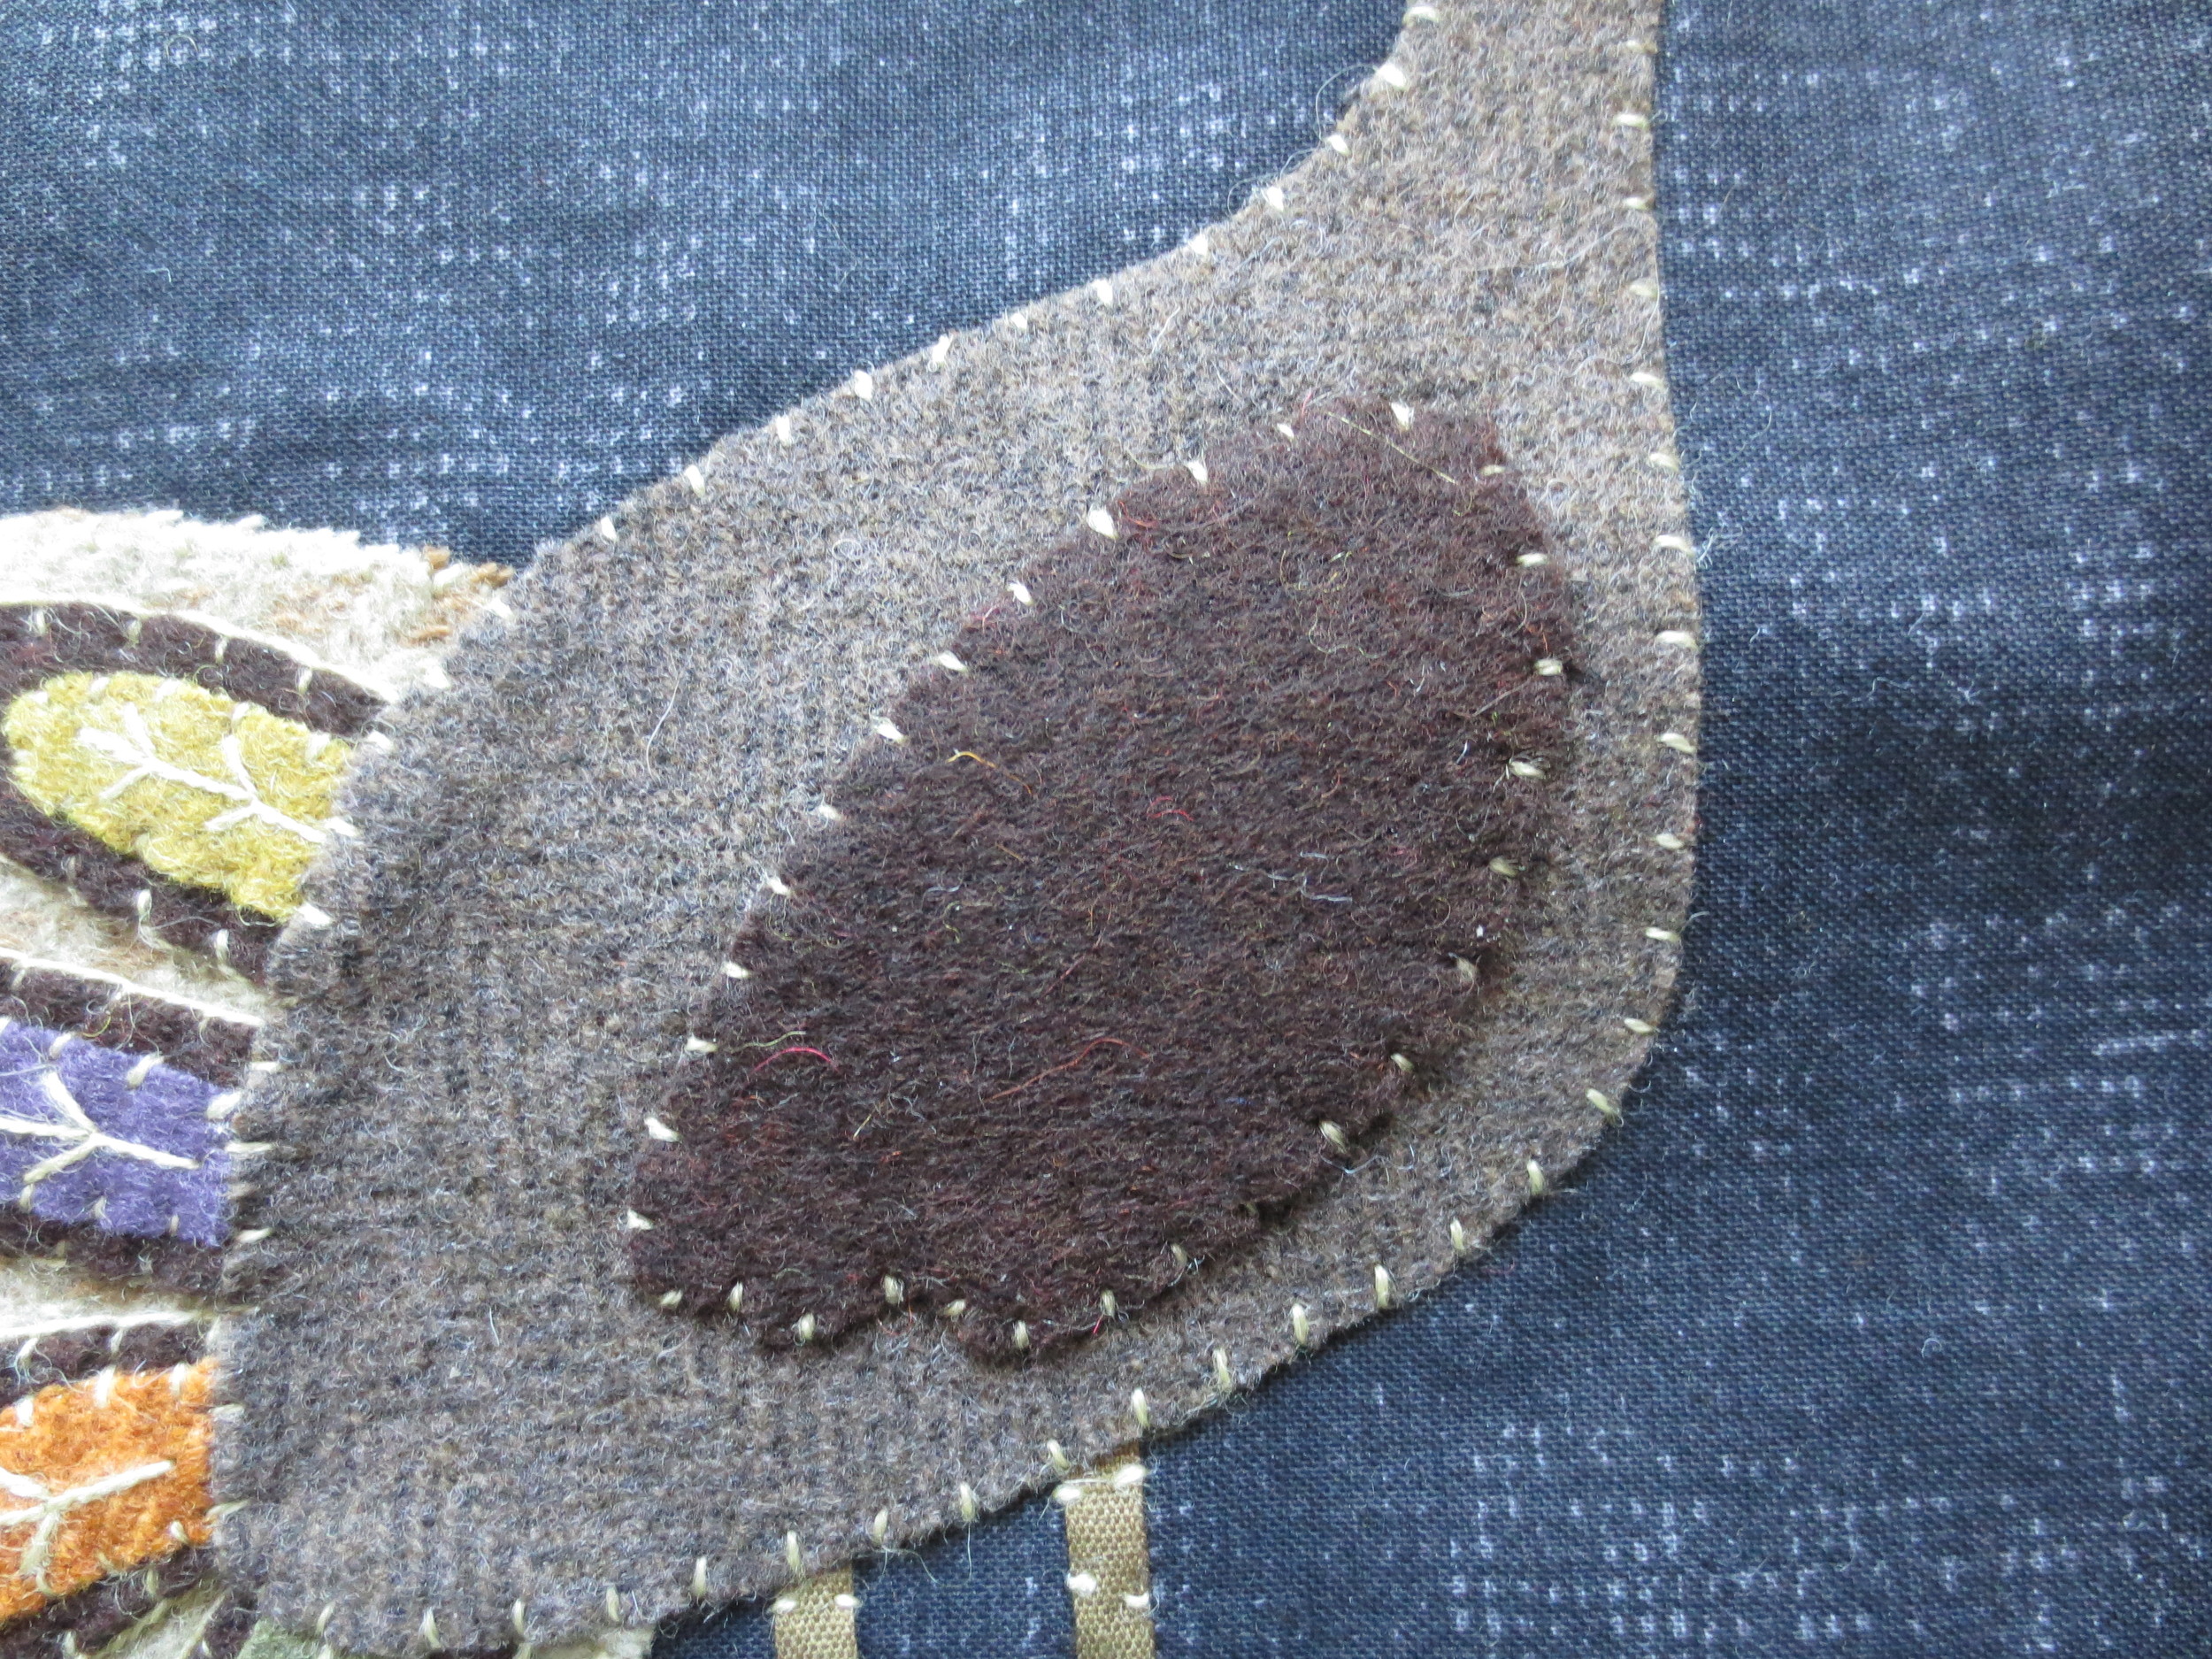
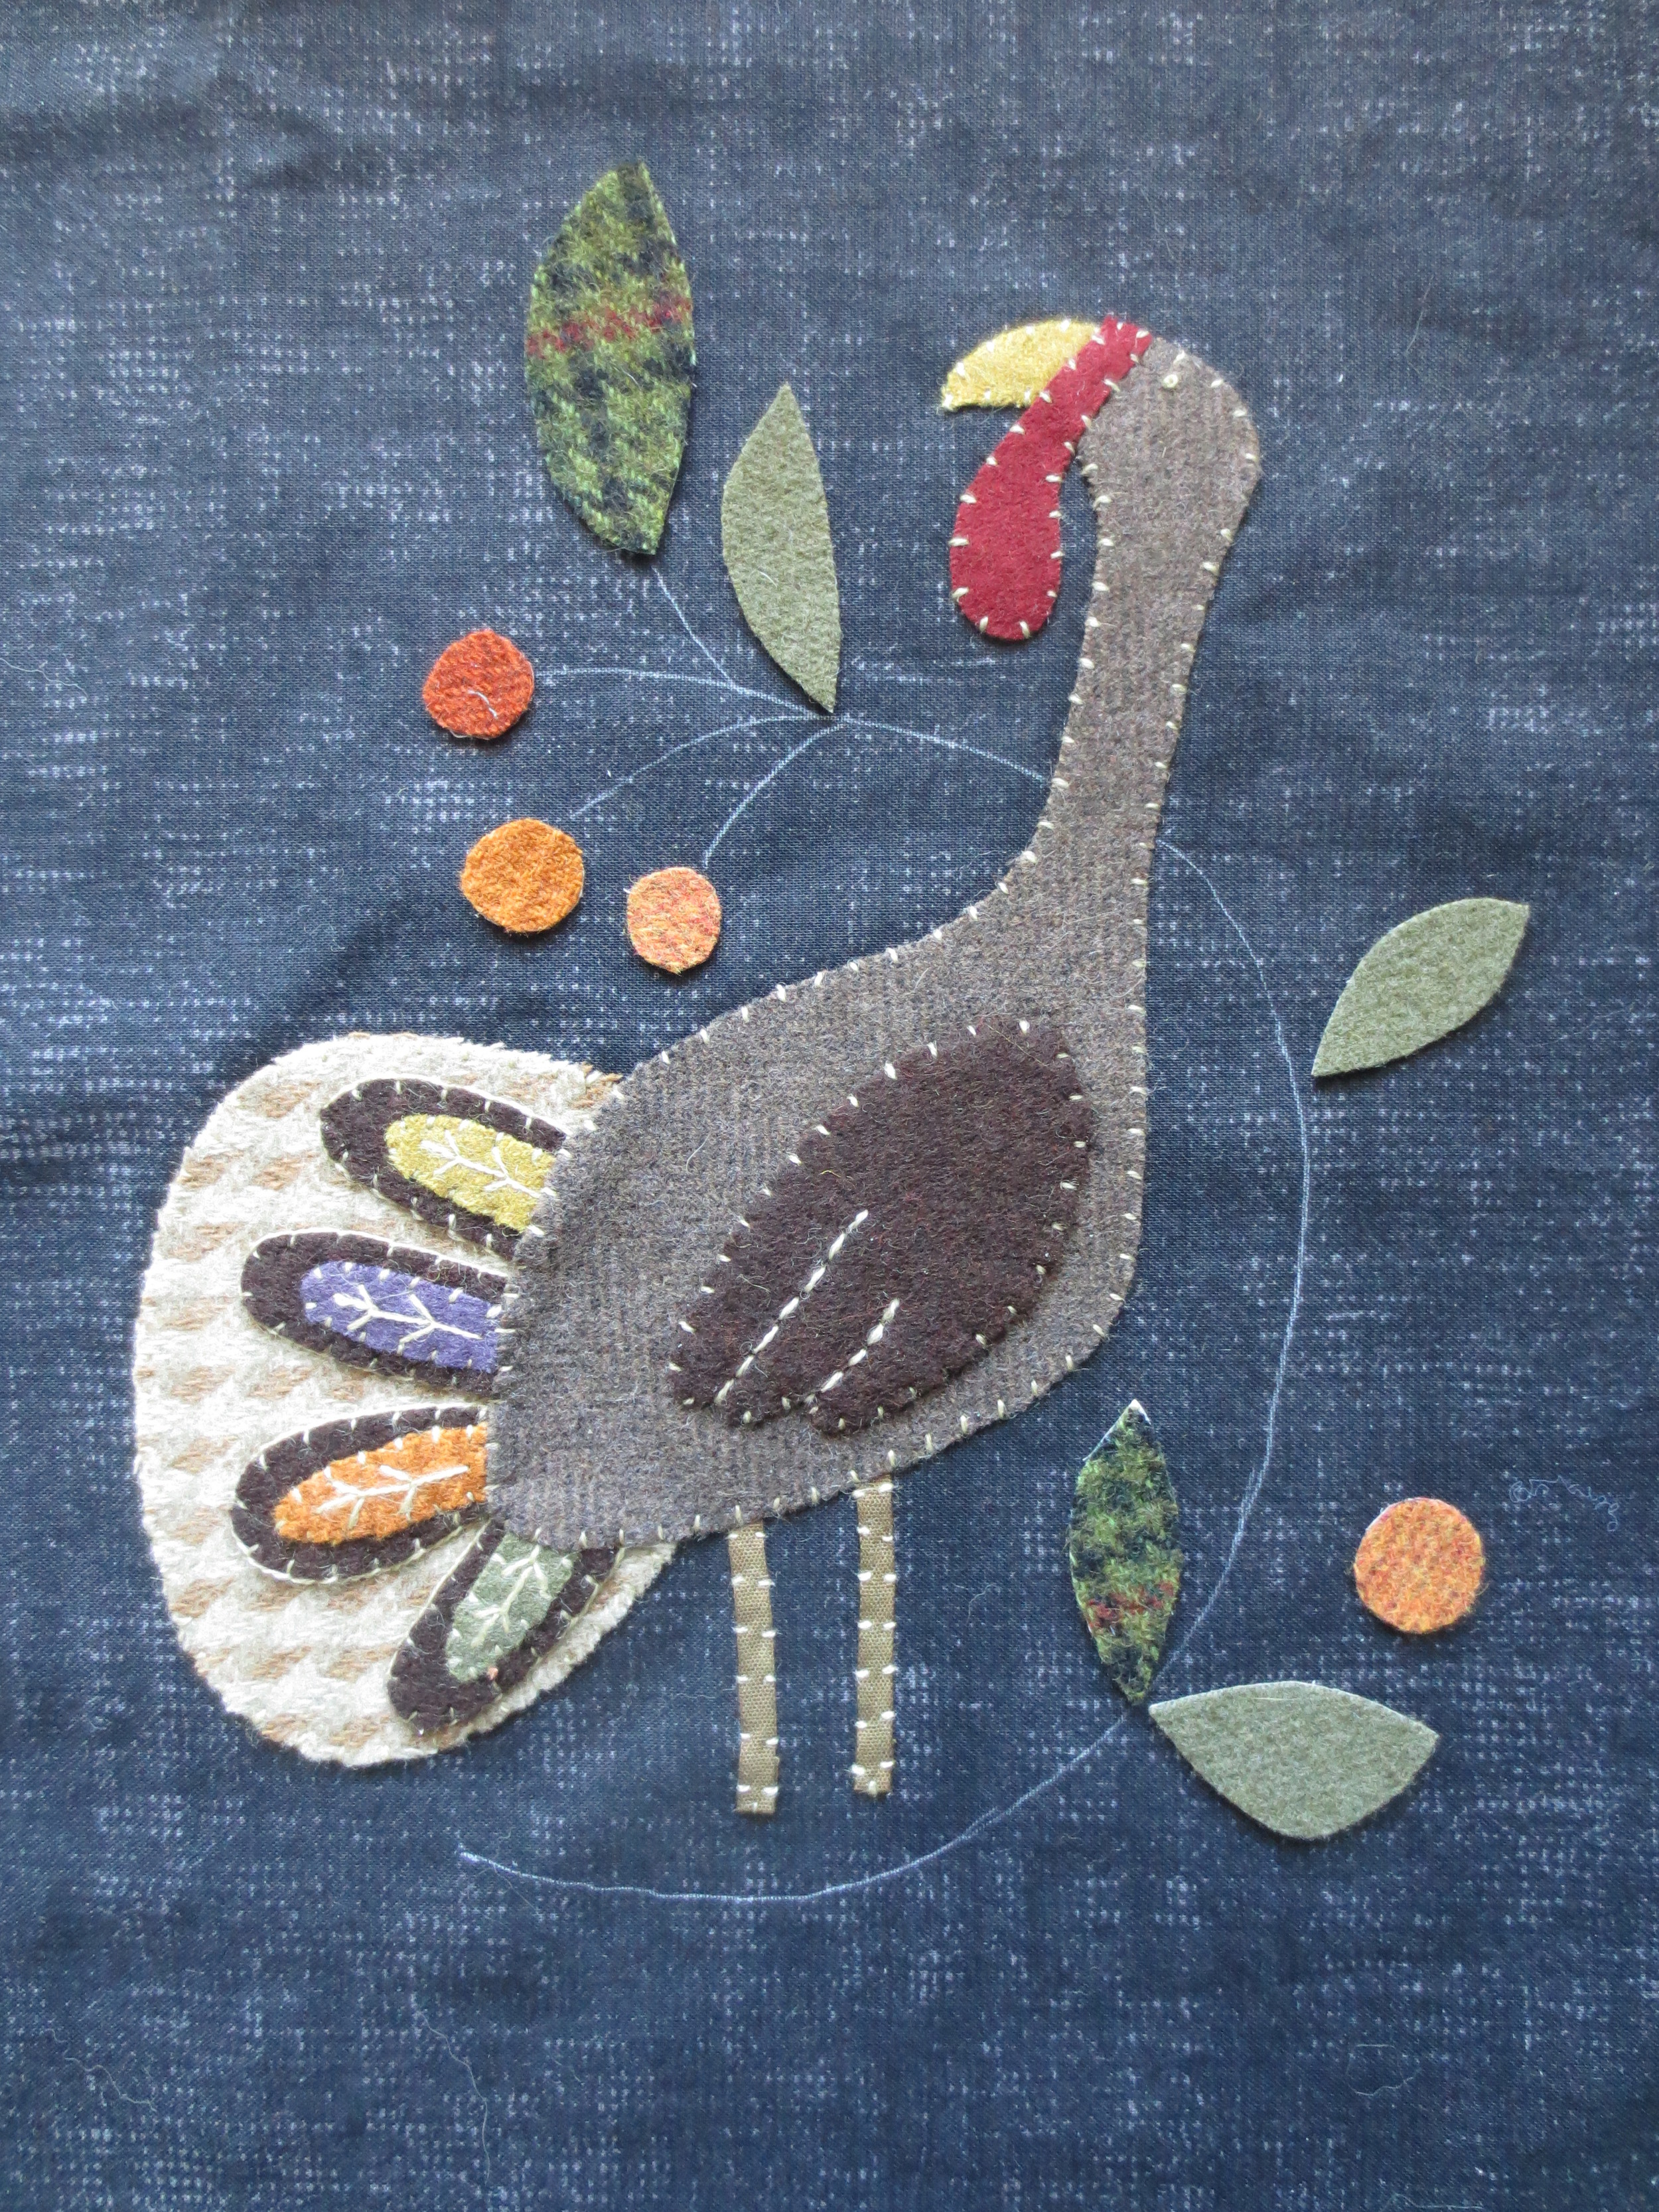
Body - 5" x 8" medium brown herringbone
Wing and tail feathers - 4" square dark brown
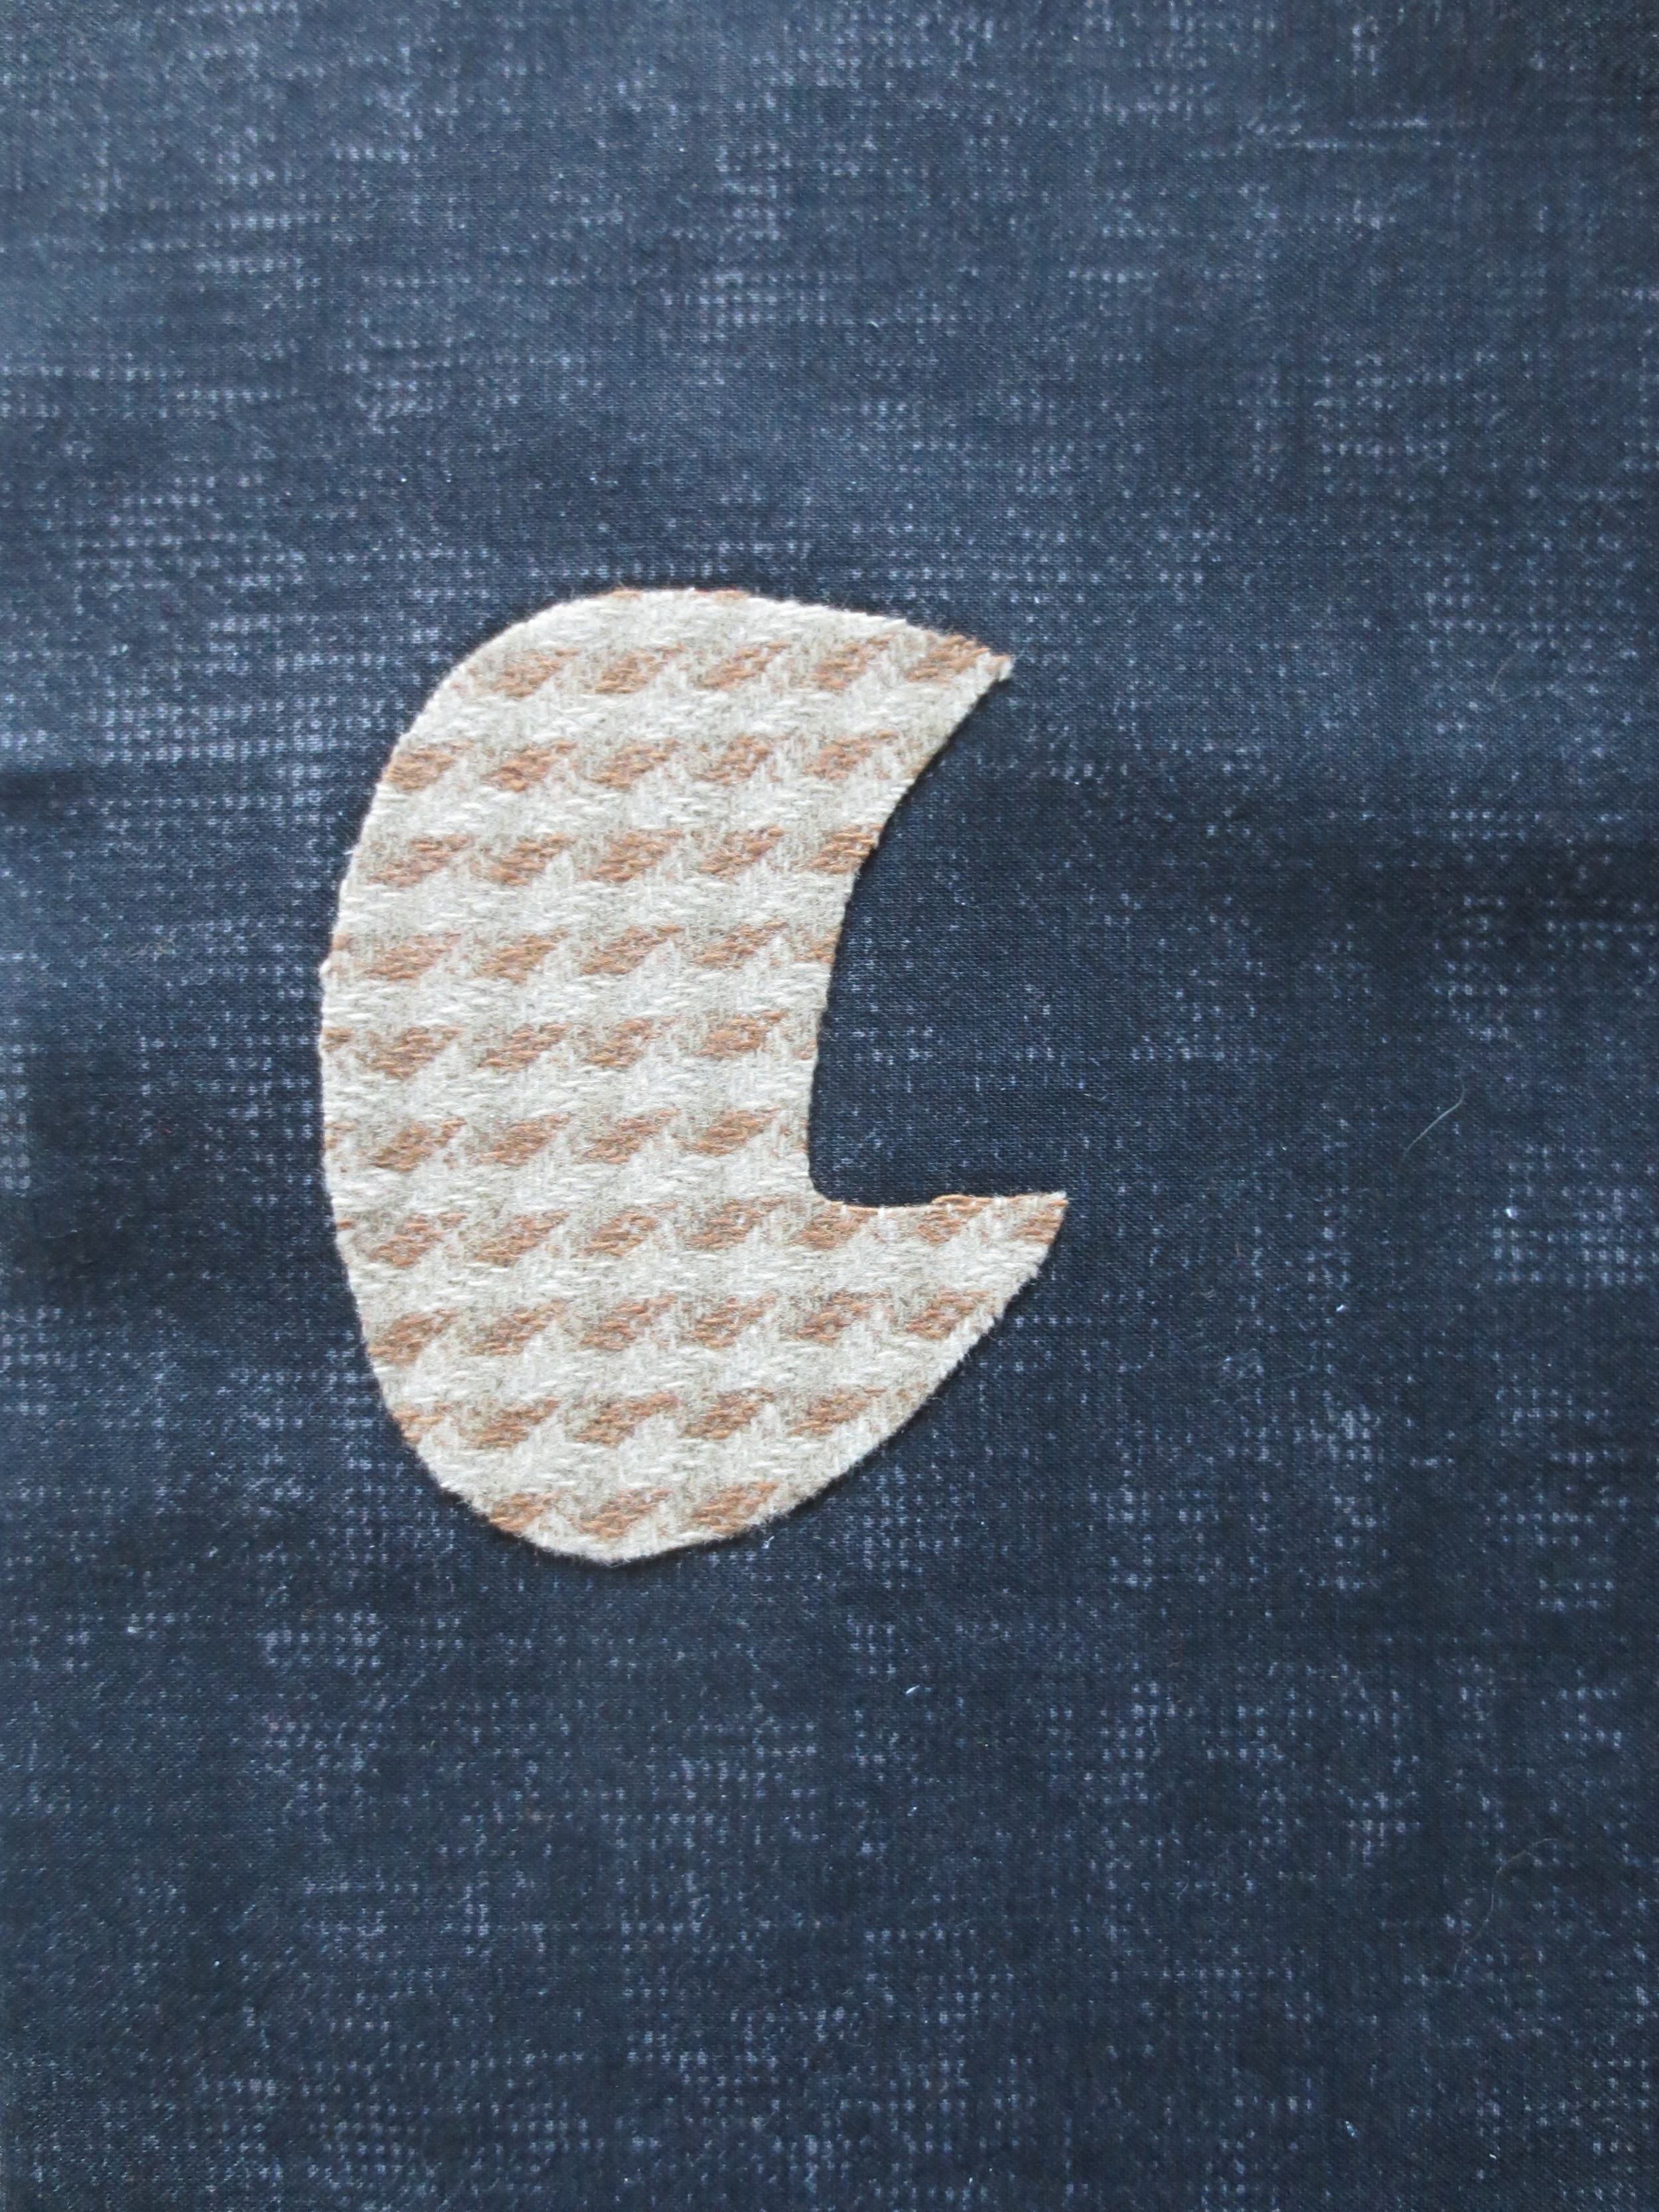
Tail - 3 1/2" x 5" beige plaid
Small tail feather #2 - 1 1/2" square purple
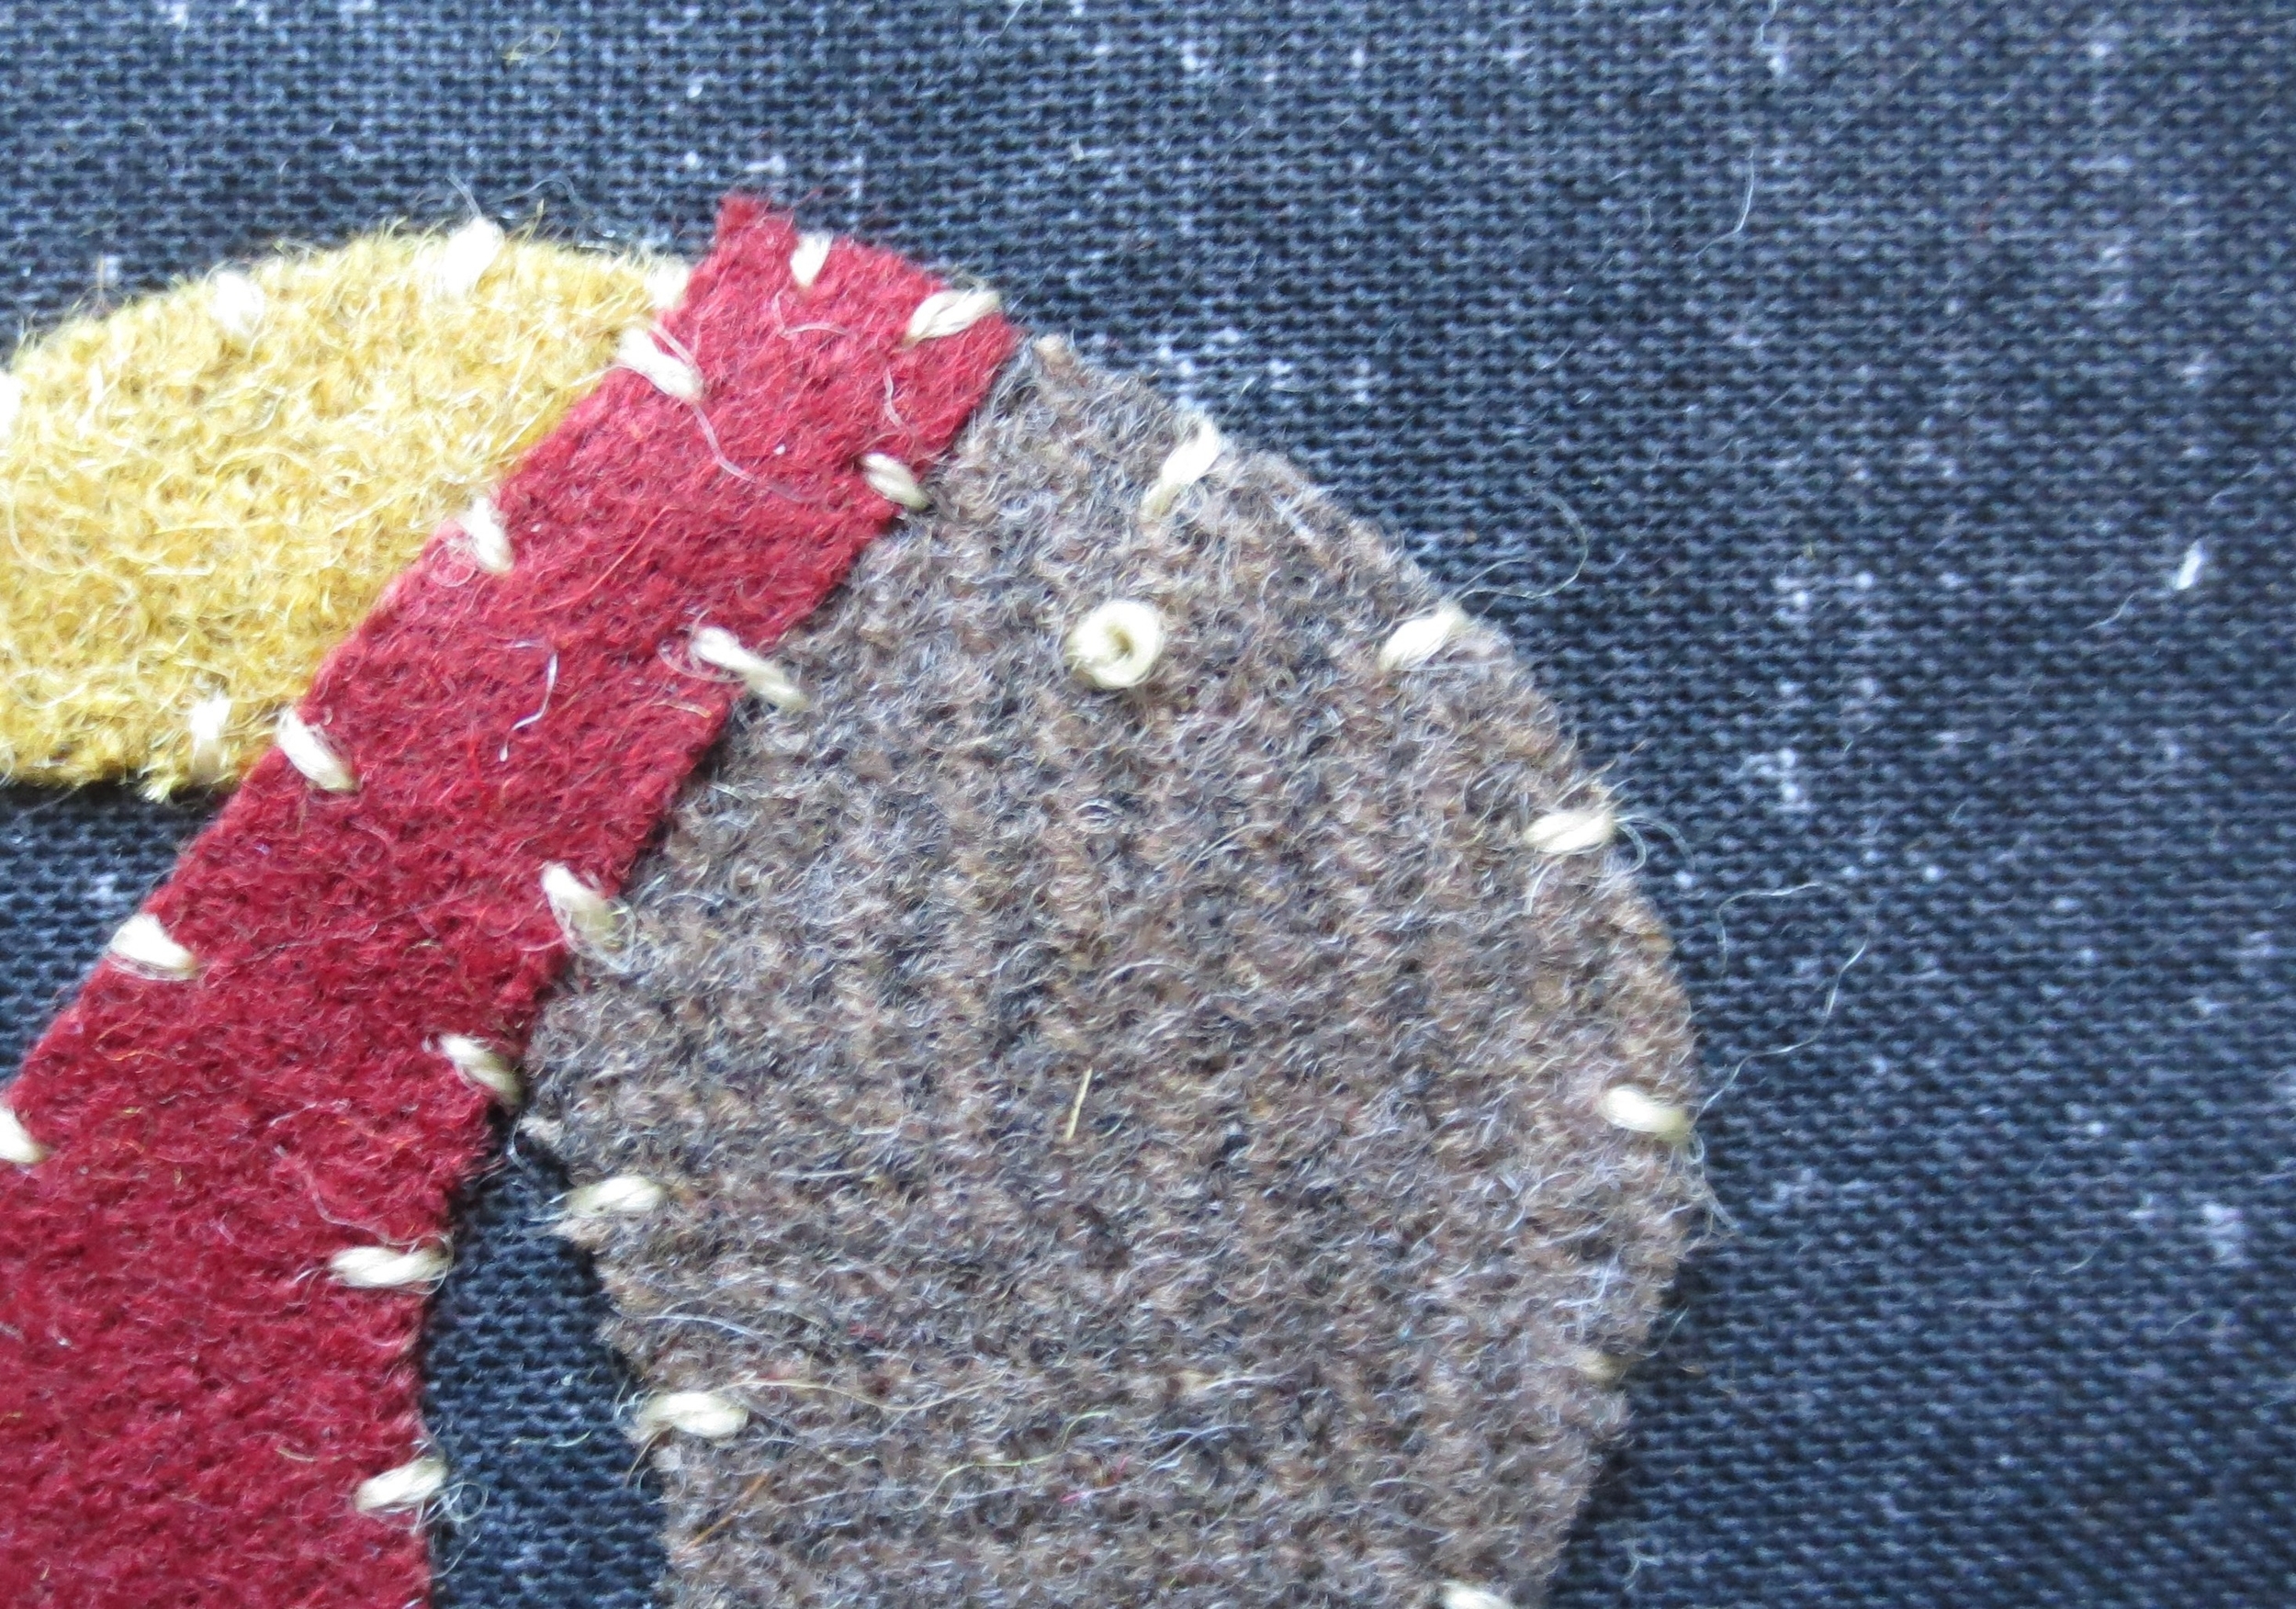
Wattle - 1" x 2 1/2" burgundy
Beak and small tail feather #1 - 2 1/2" square gold
Leaves #1 and #4 - 2 1/2" x 3" green plaid
Leaves #2, #3, and #5, and small tail feather #4 - 2 1/2" x 3" green
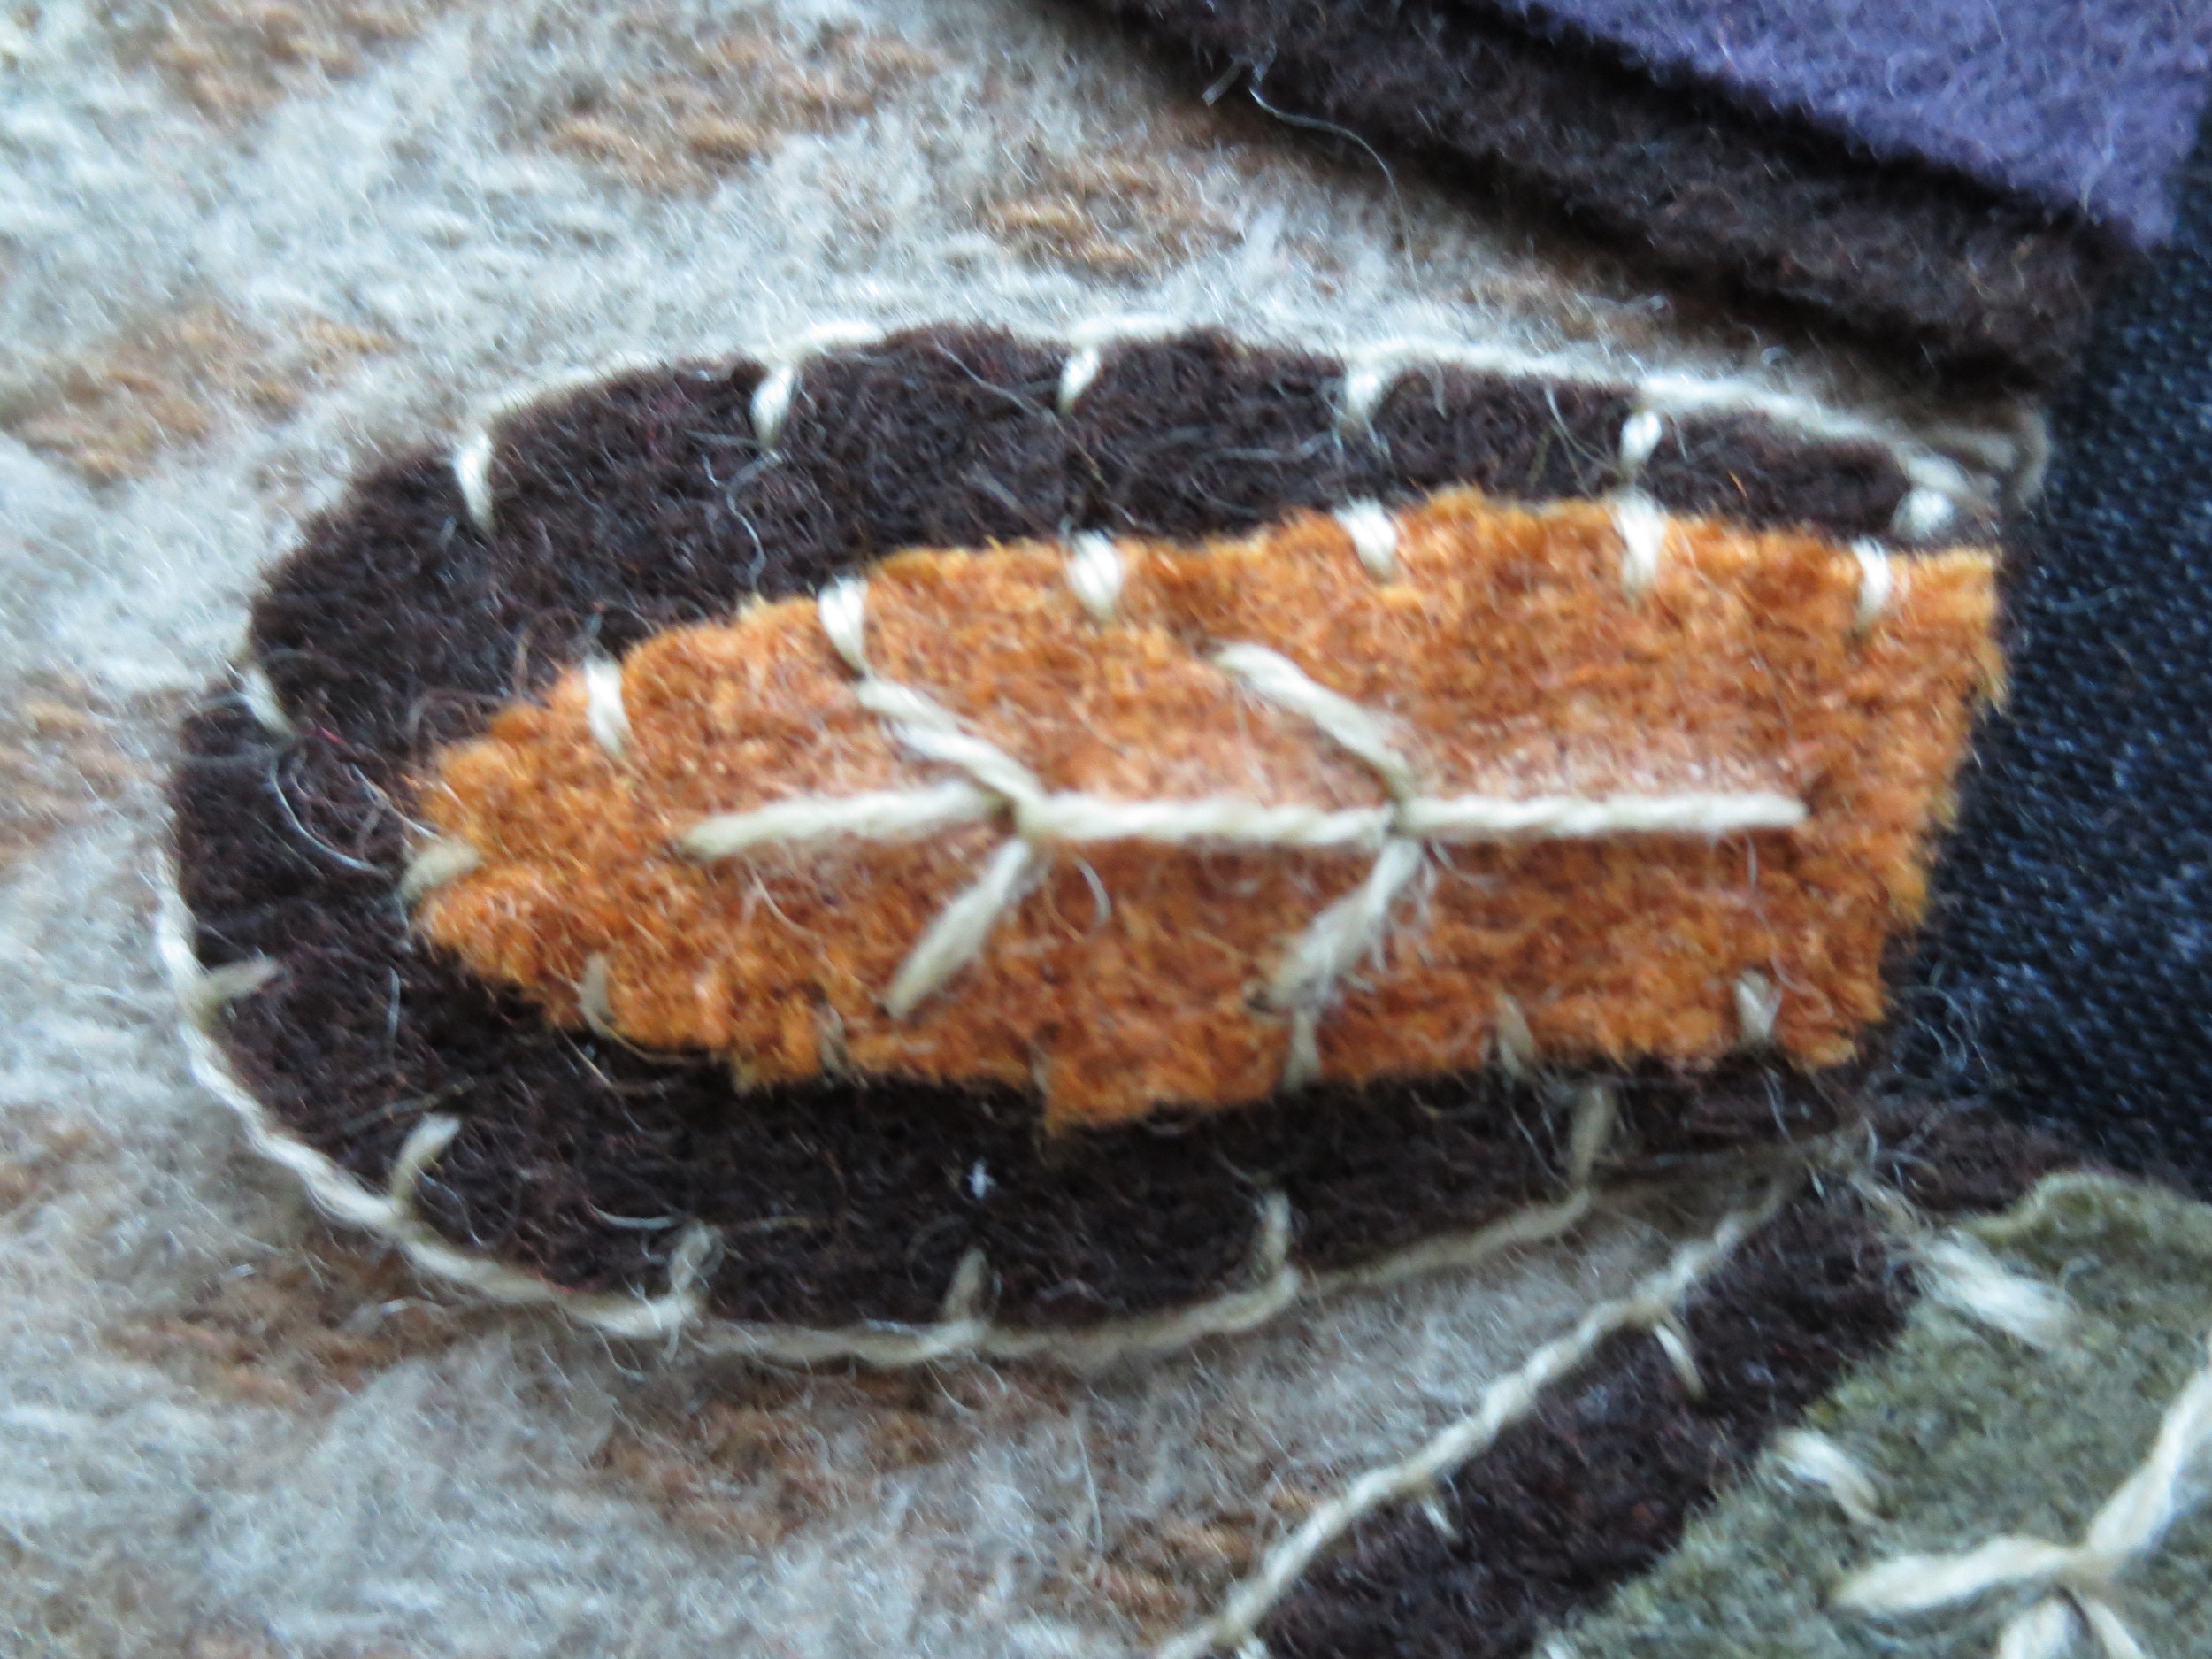
Berries, inner tongue, and small tail feather #3 - 3" squares of three different oranges
Thread
Merry Hooker hand dyed wool thread (http://themerryhookerwoolens.com/) - maple cream (one strand of perle cotton, size 12 or 2 strands of embroidery floss can be used instead)
Valdani (https://www.valdani.com/products) perle cotton, size 8 - color O575 ( 3 strands of embroidery floss can be used instead)
Miscellaneous
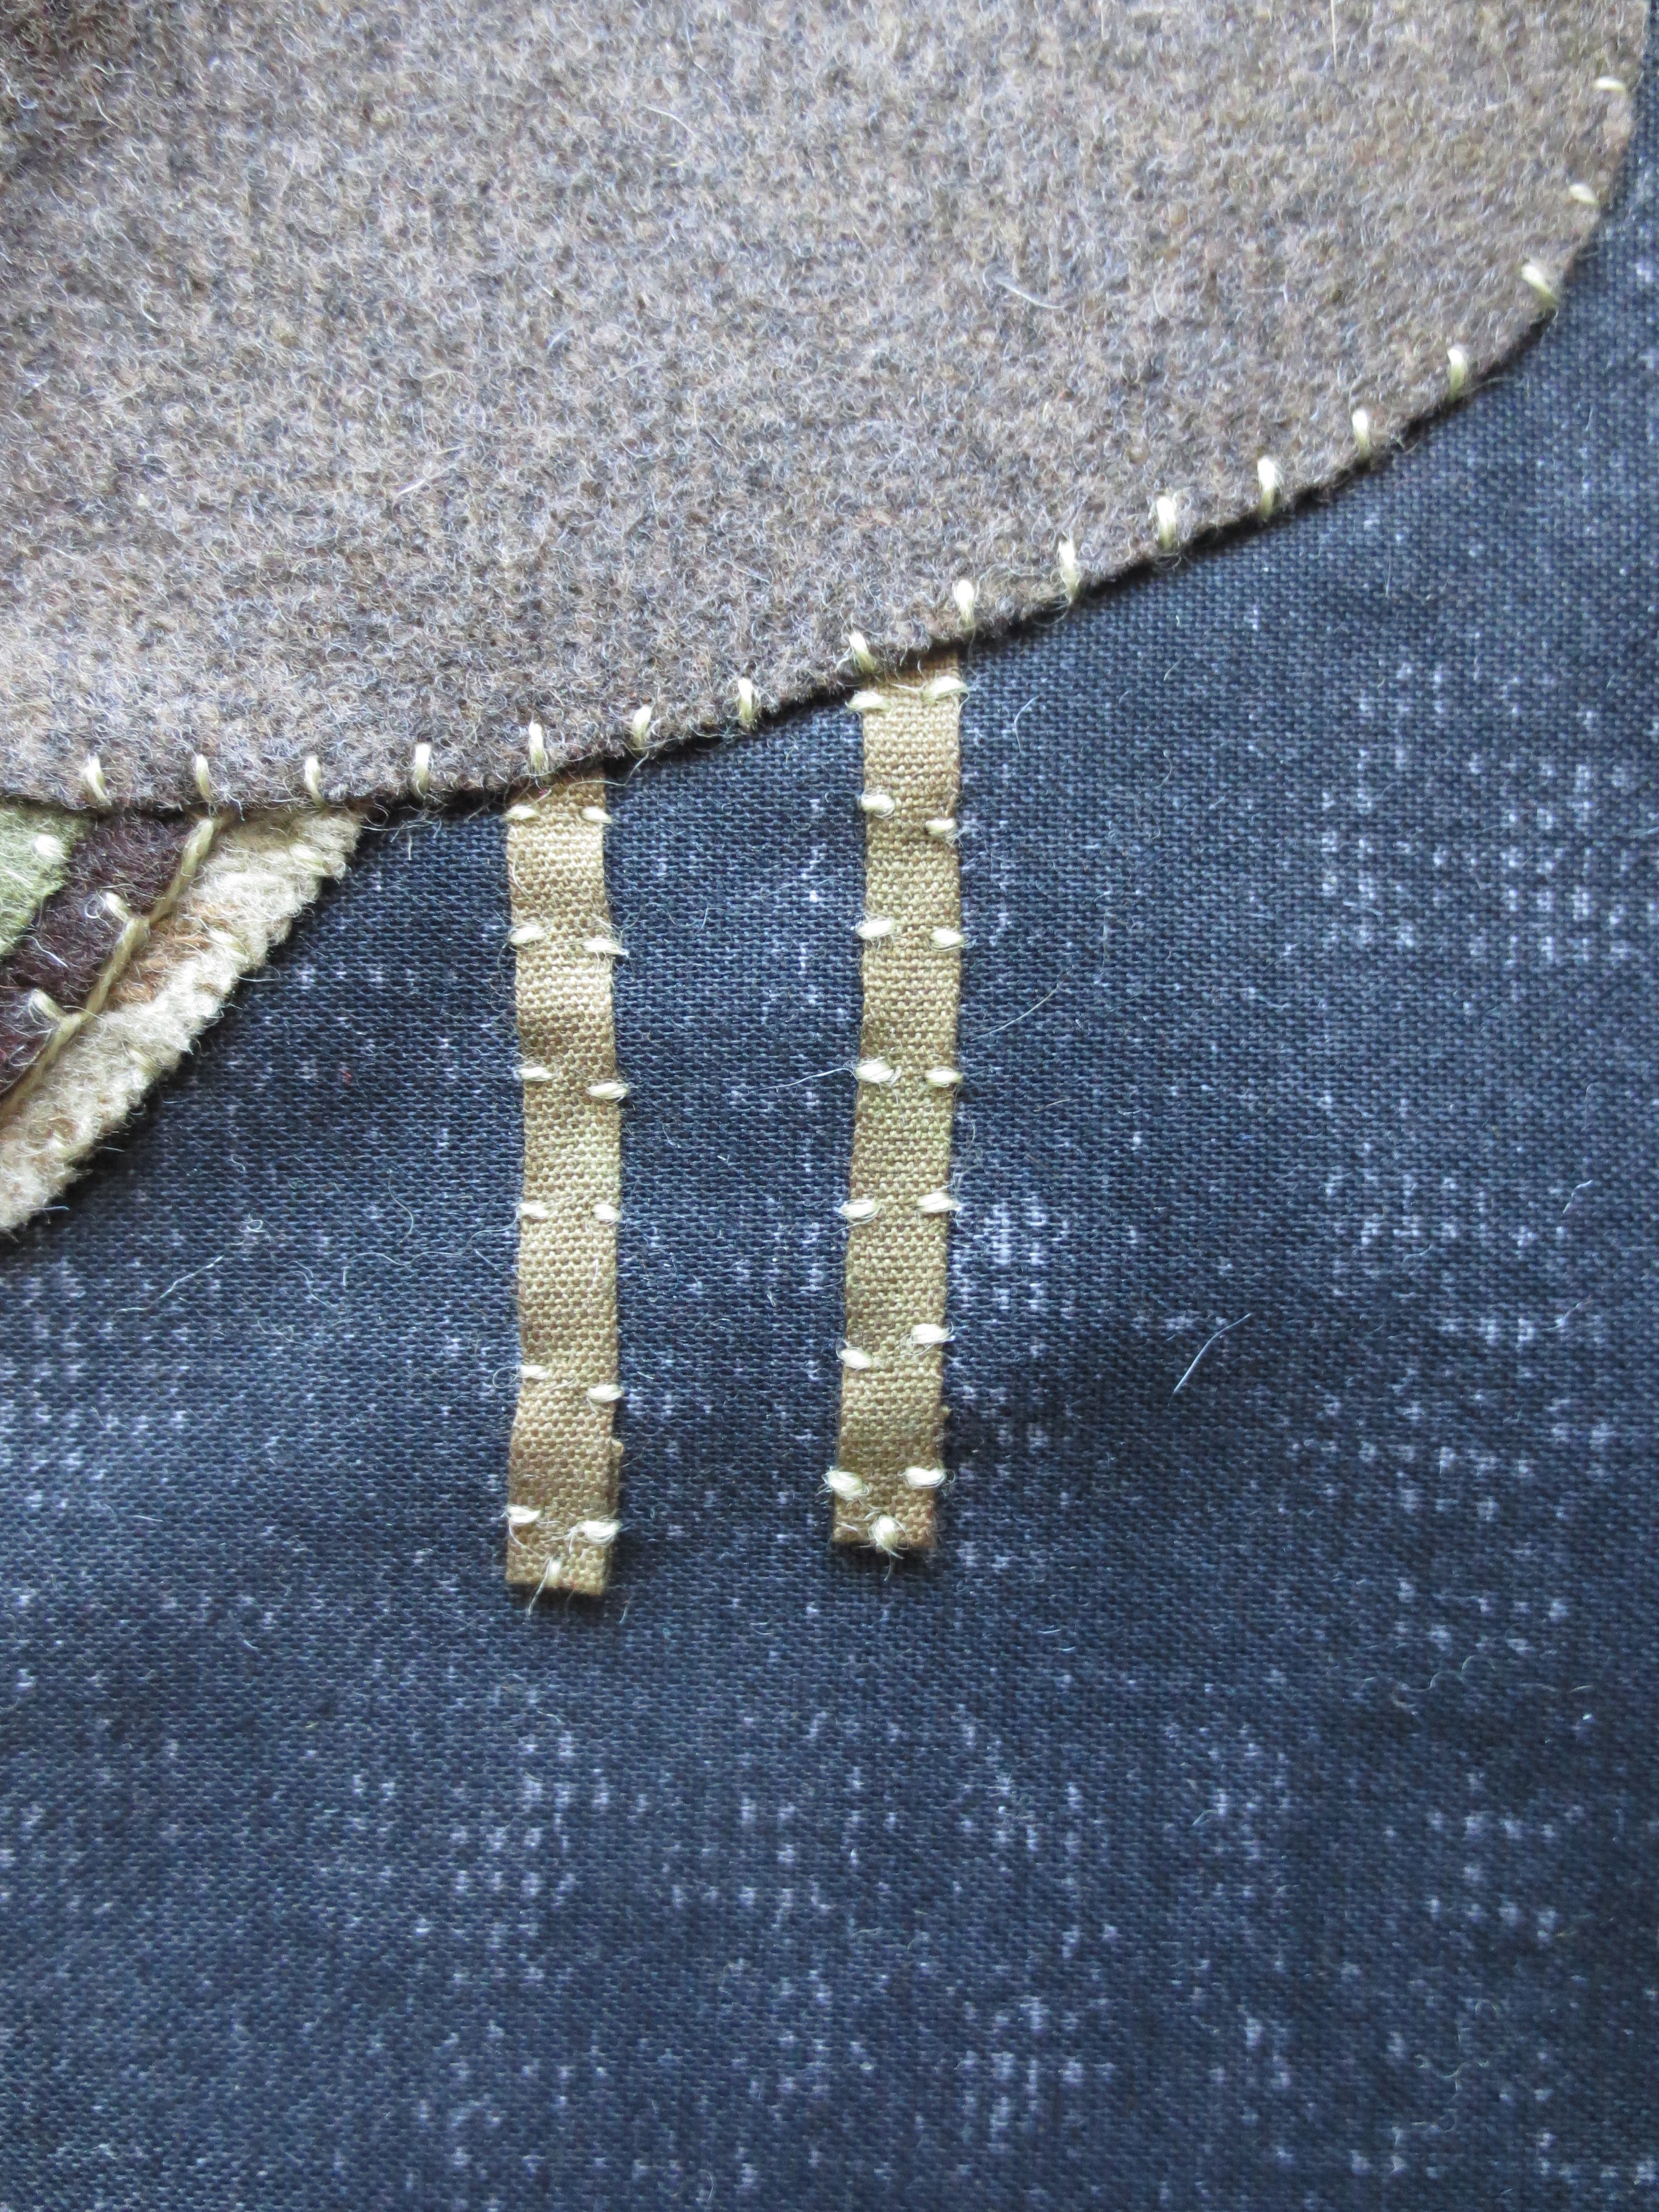
1/4" wide light brown ribbon (http://www.shopangelaliguori.com/products/wood-spool-of-5-yards-cotton-ribbons-2-8-width) - 5" piece Note: I overdyed a piece of natural colored ribbon with coffee to get the light brown color.
1 1/2" wide black cotton ric rac (http://www.sewbizfabrics.com/CottonRR9.shtml) - 1 yard
14" x 18" piece of thin quilt batting ( I used Hobbs Heirloom 80/20 Black cotton batting)
Featherweight fusible web
Chenille needle - size 24
Chalk pencil
Sewing machine with thread to match fabric
Instructions
Download Gobble Gobble Layout, Gobble Gobble Pattern, and Butternut Plaid Stitch Guide if needed.
Cut
Background fabric - 11" x 14"
Backing - 14" x 18 1/2"
Side borders - Two 4 1/2" x 12 1/2" pieces (set aside)
Binding - Two 2 1/2" x 44" strips
Ribbon legs - two 2 1/2" pieces (set aside)
Batting - 14" x 18 1/2"
Set aside everything but the background fabric.
3. Applique
Trace pattern pieces onto fusible web (pattern is already reversed). Cut out and fuse to desired wool.
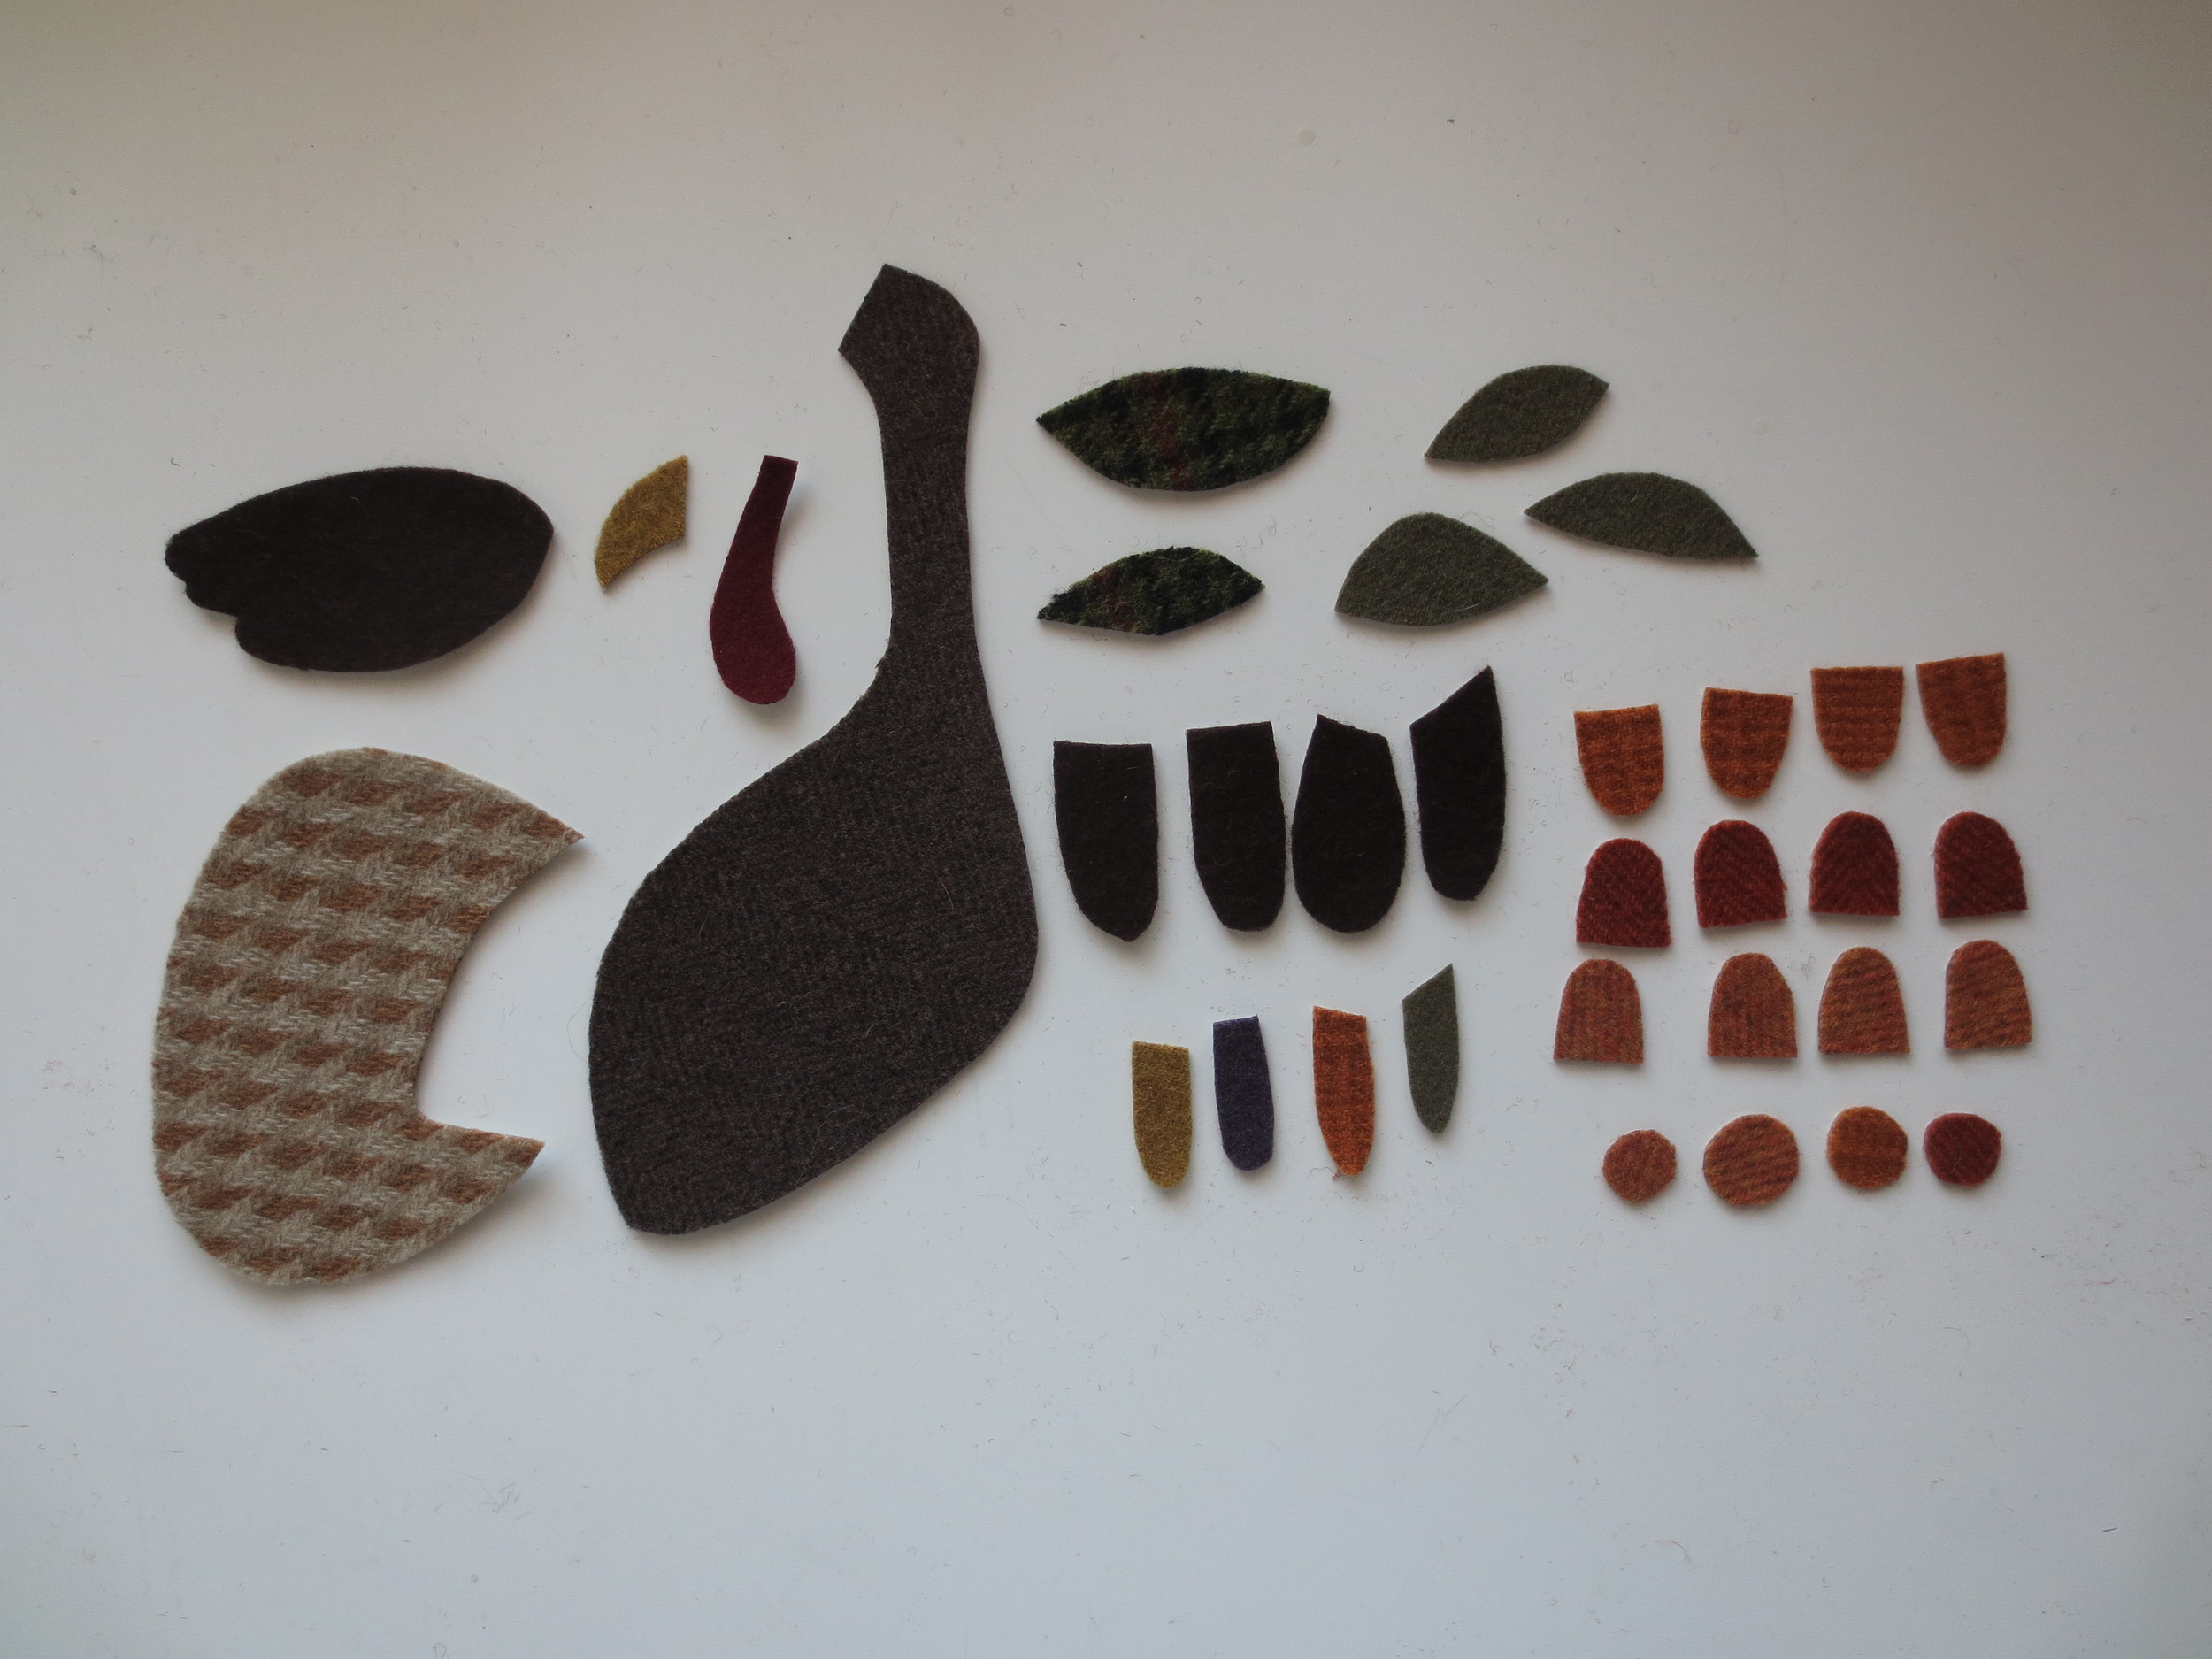
Cut out wool and position on background fabric using the layout for guidance. Note: The background fabric will be trimmed to 9 1/2" x 12 1/2", so position pieces with that in mind.

Begin with the tail first because the body overlaps it. Remove the rest of the wool and fuse the tail in place using steam. Place the large and small tail feathers on top of the tail and fuse in place using steam.
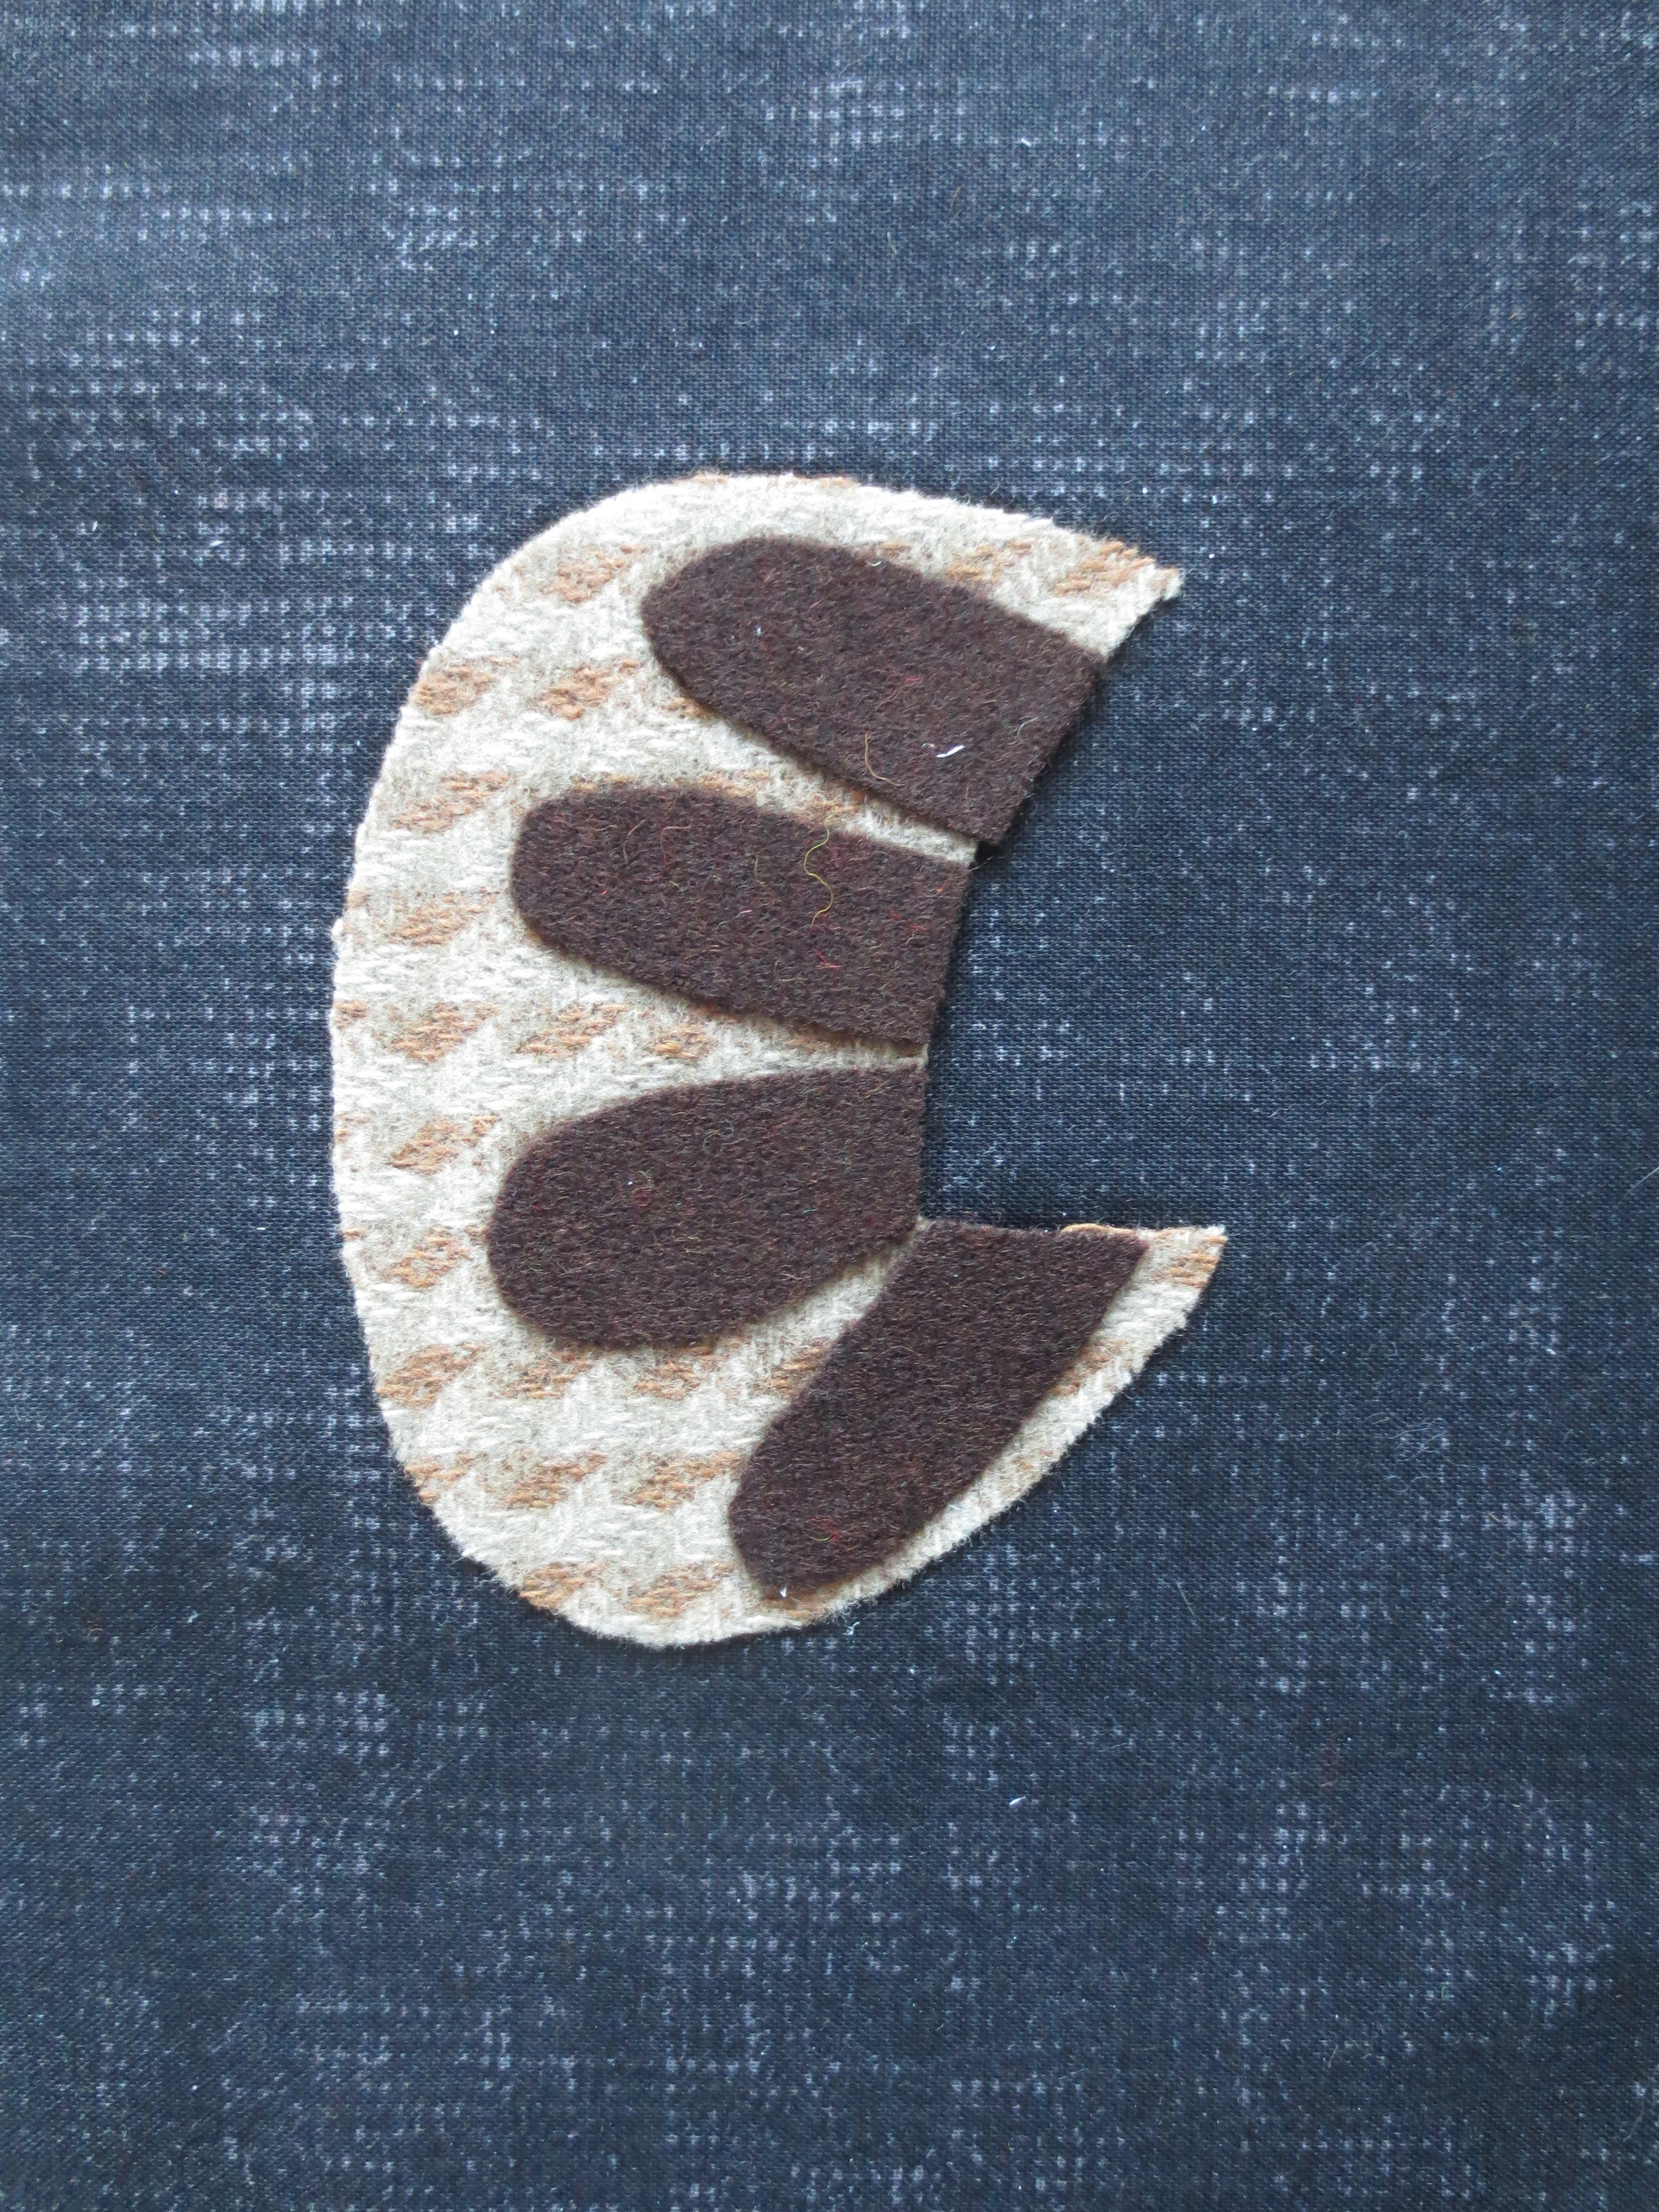
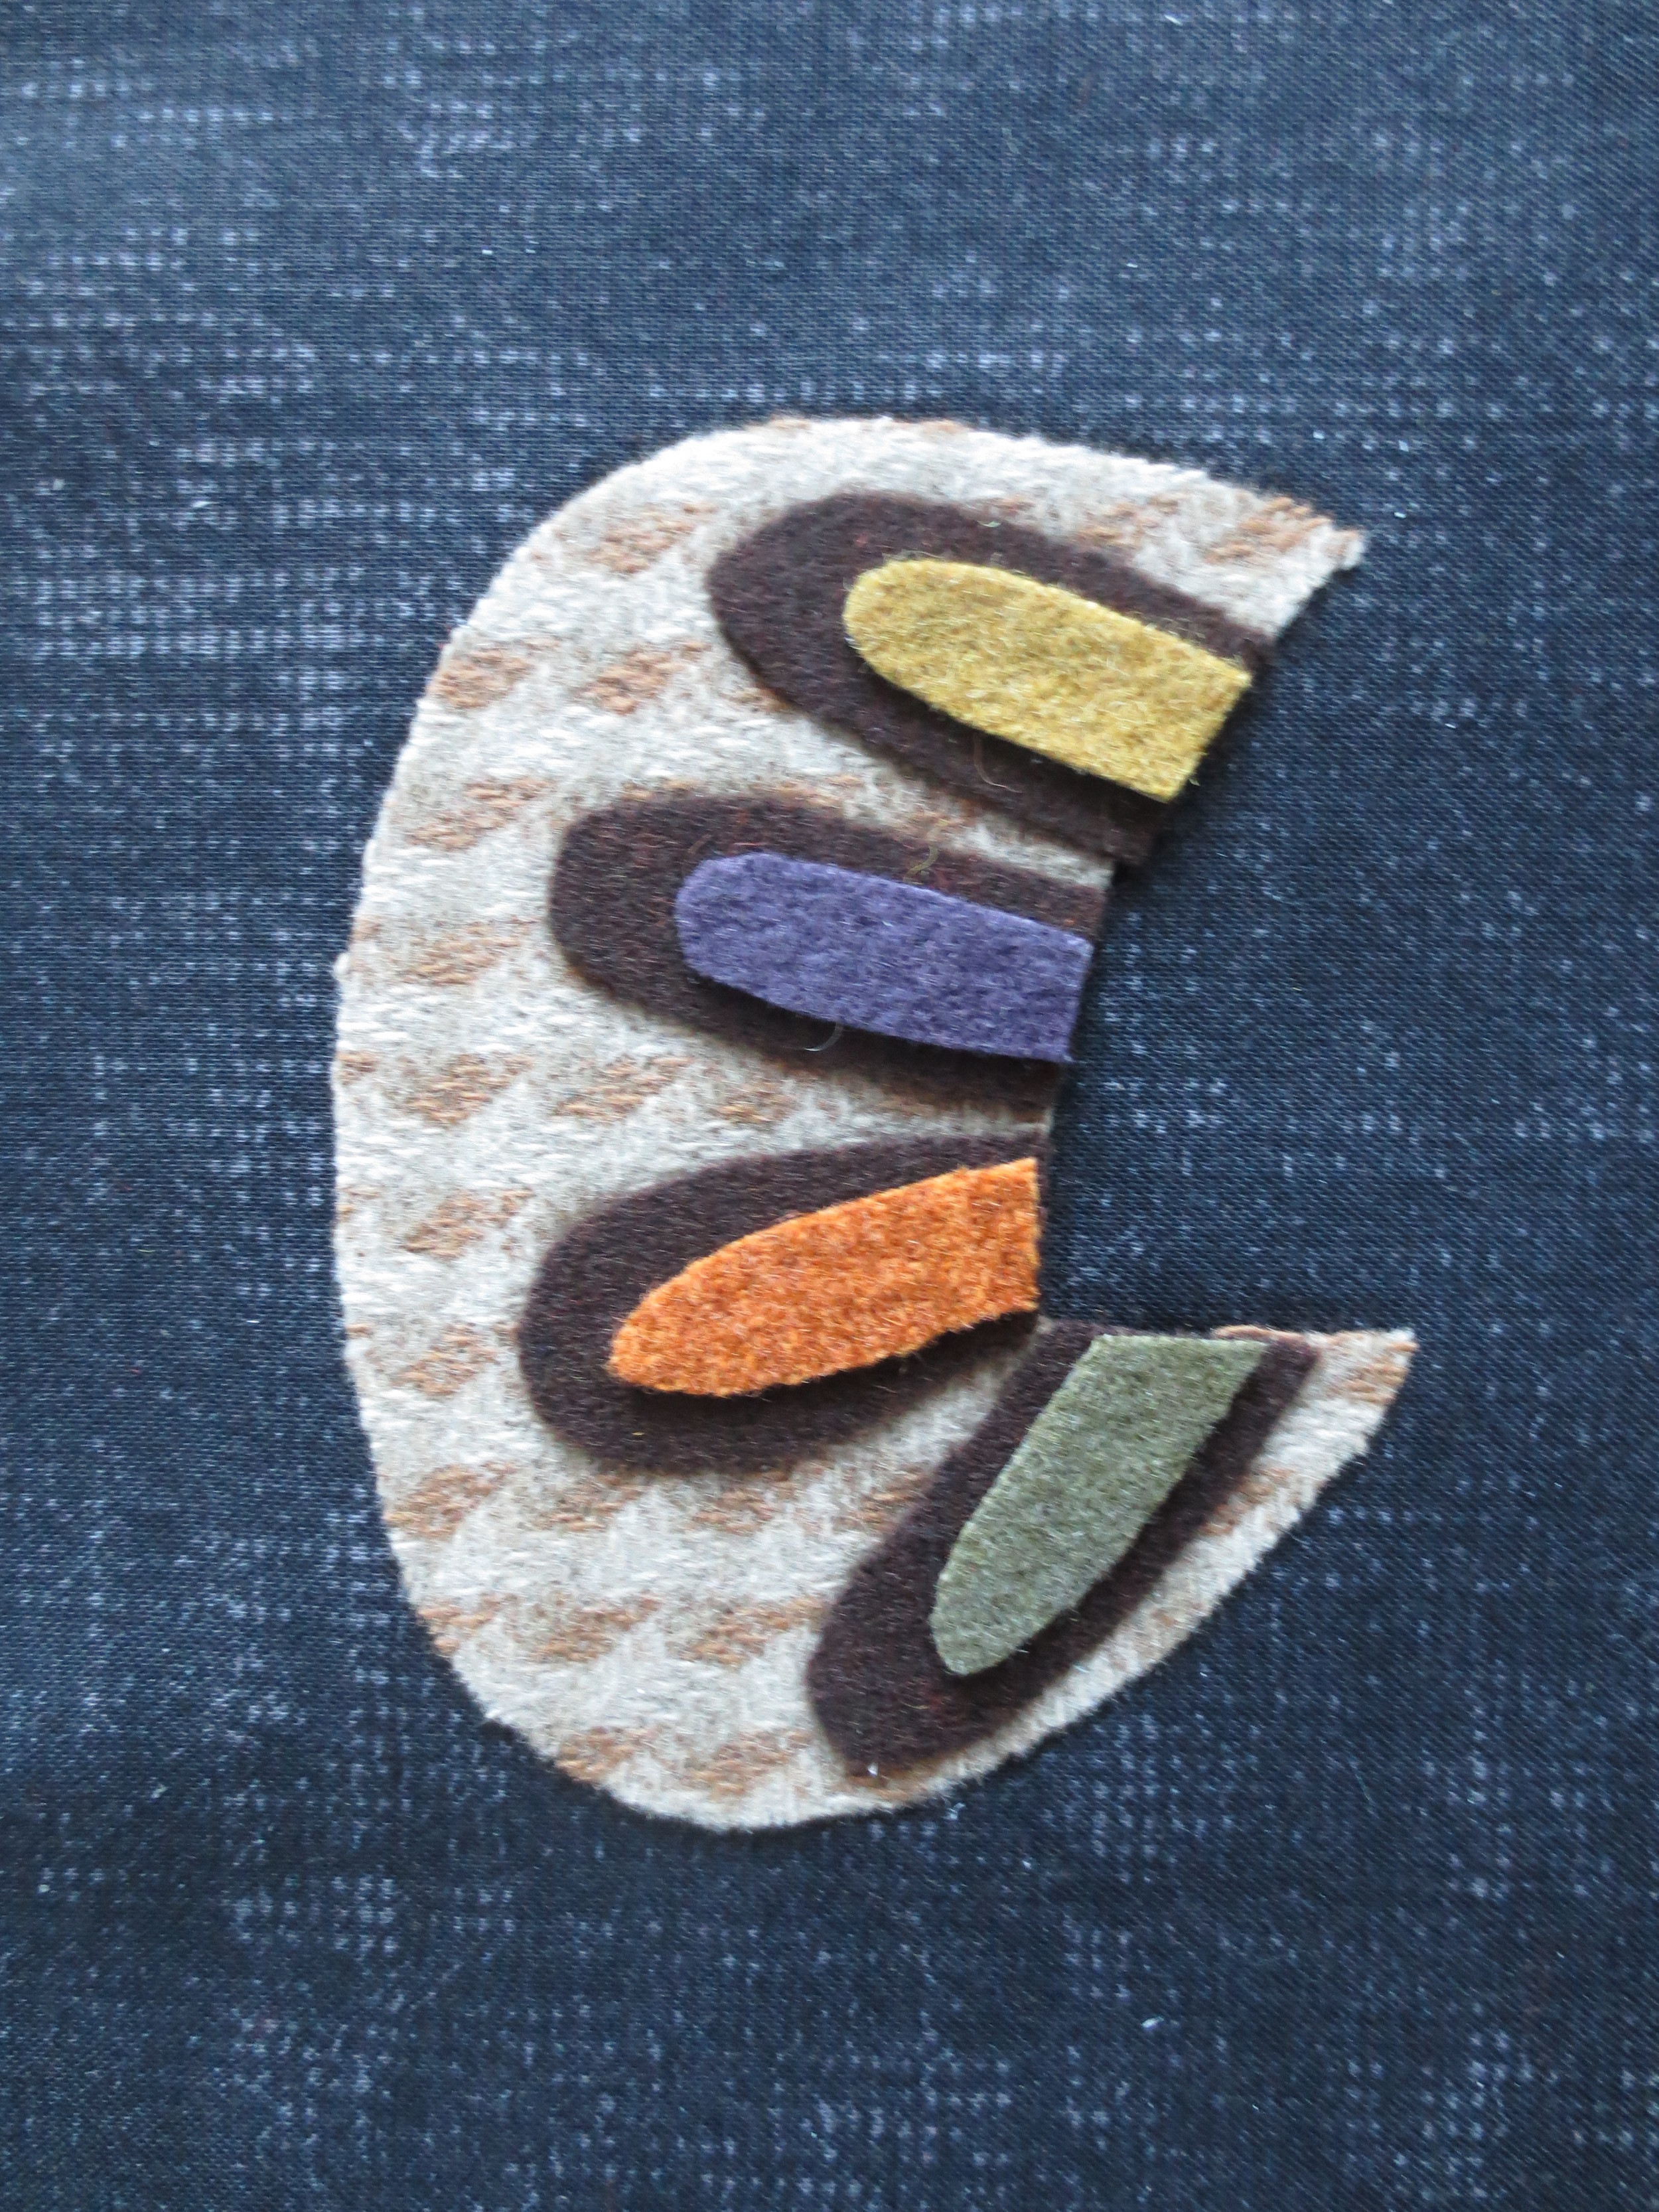
Whip stitch tail and small feathers using one strand of maple cream wool thread.
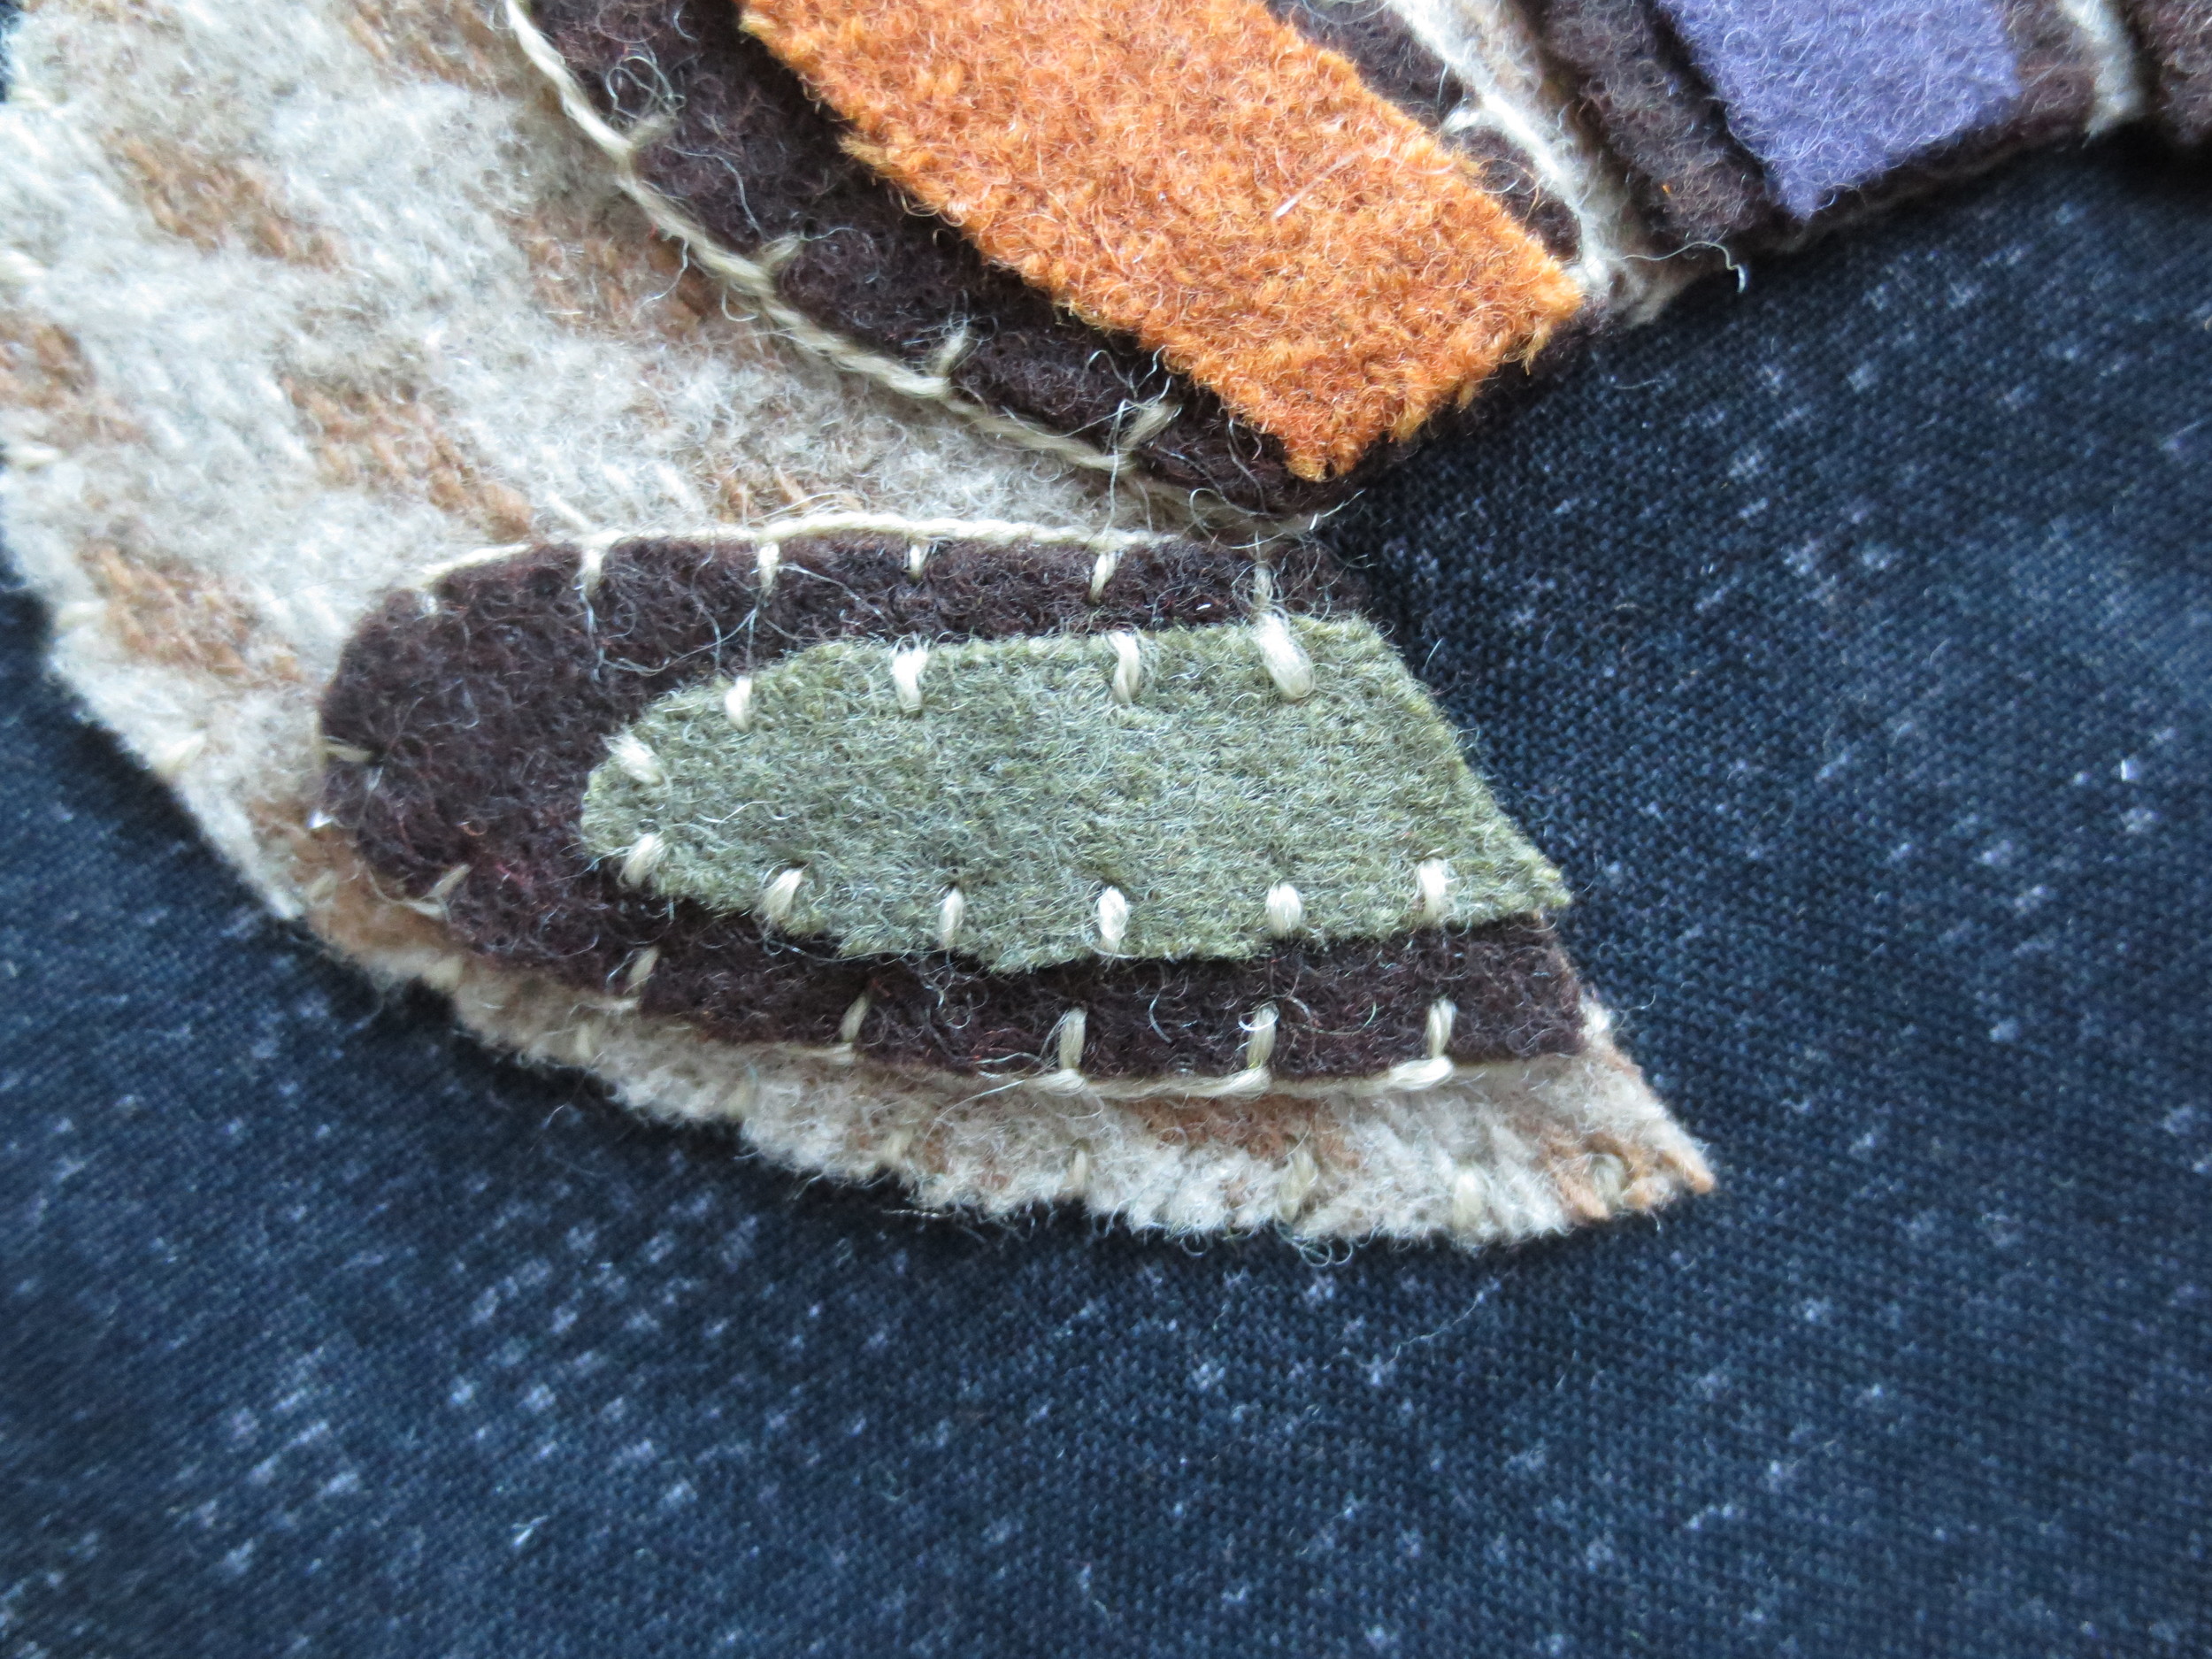
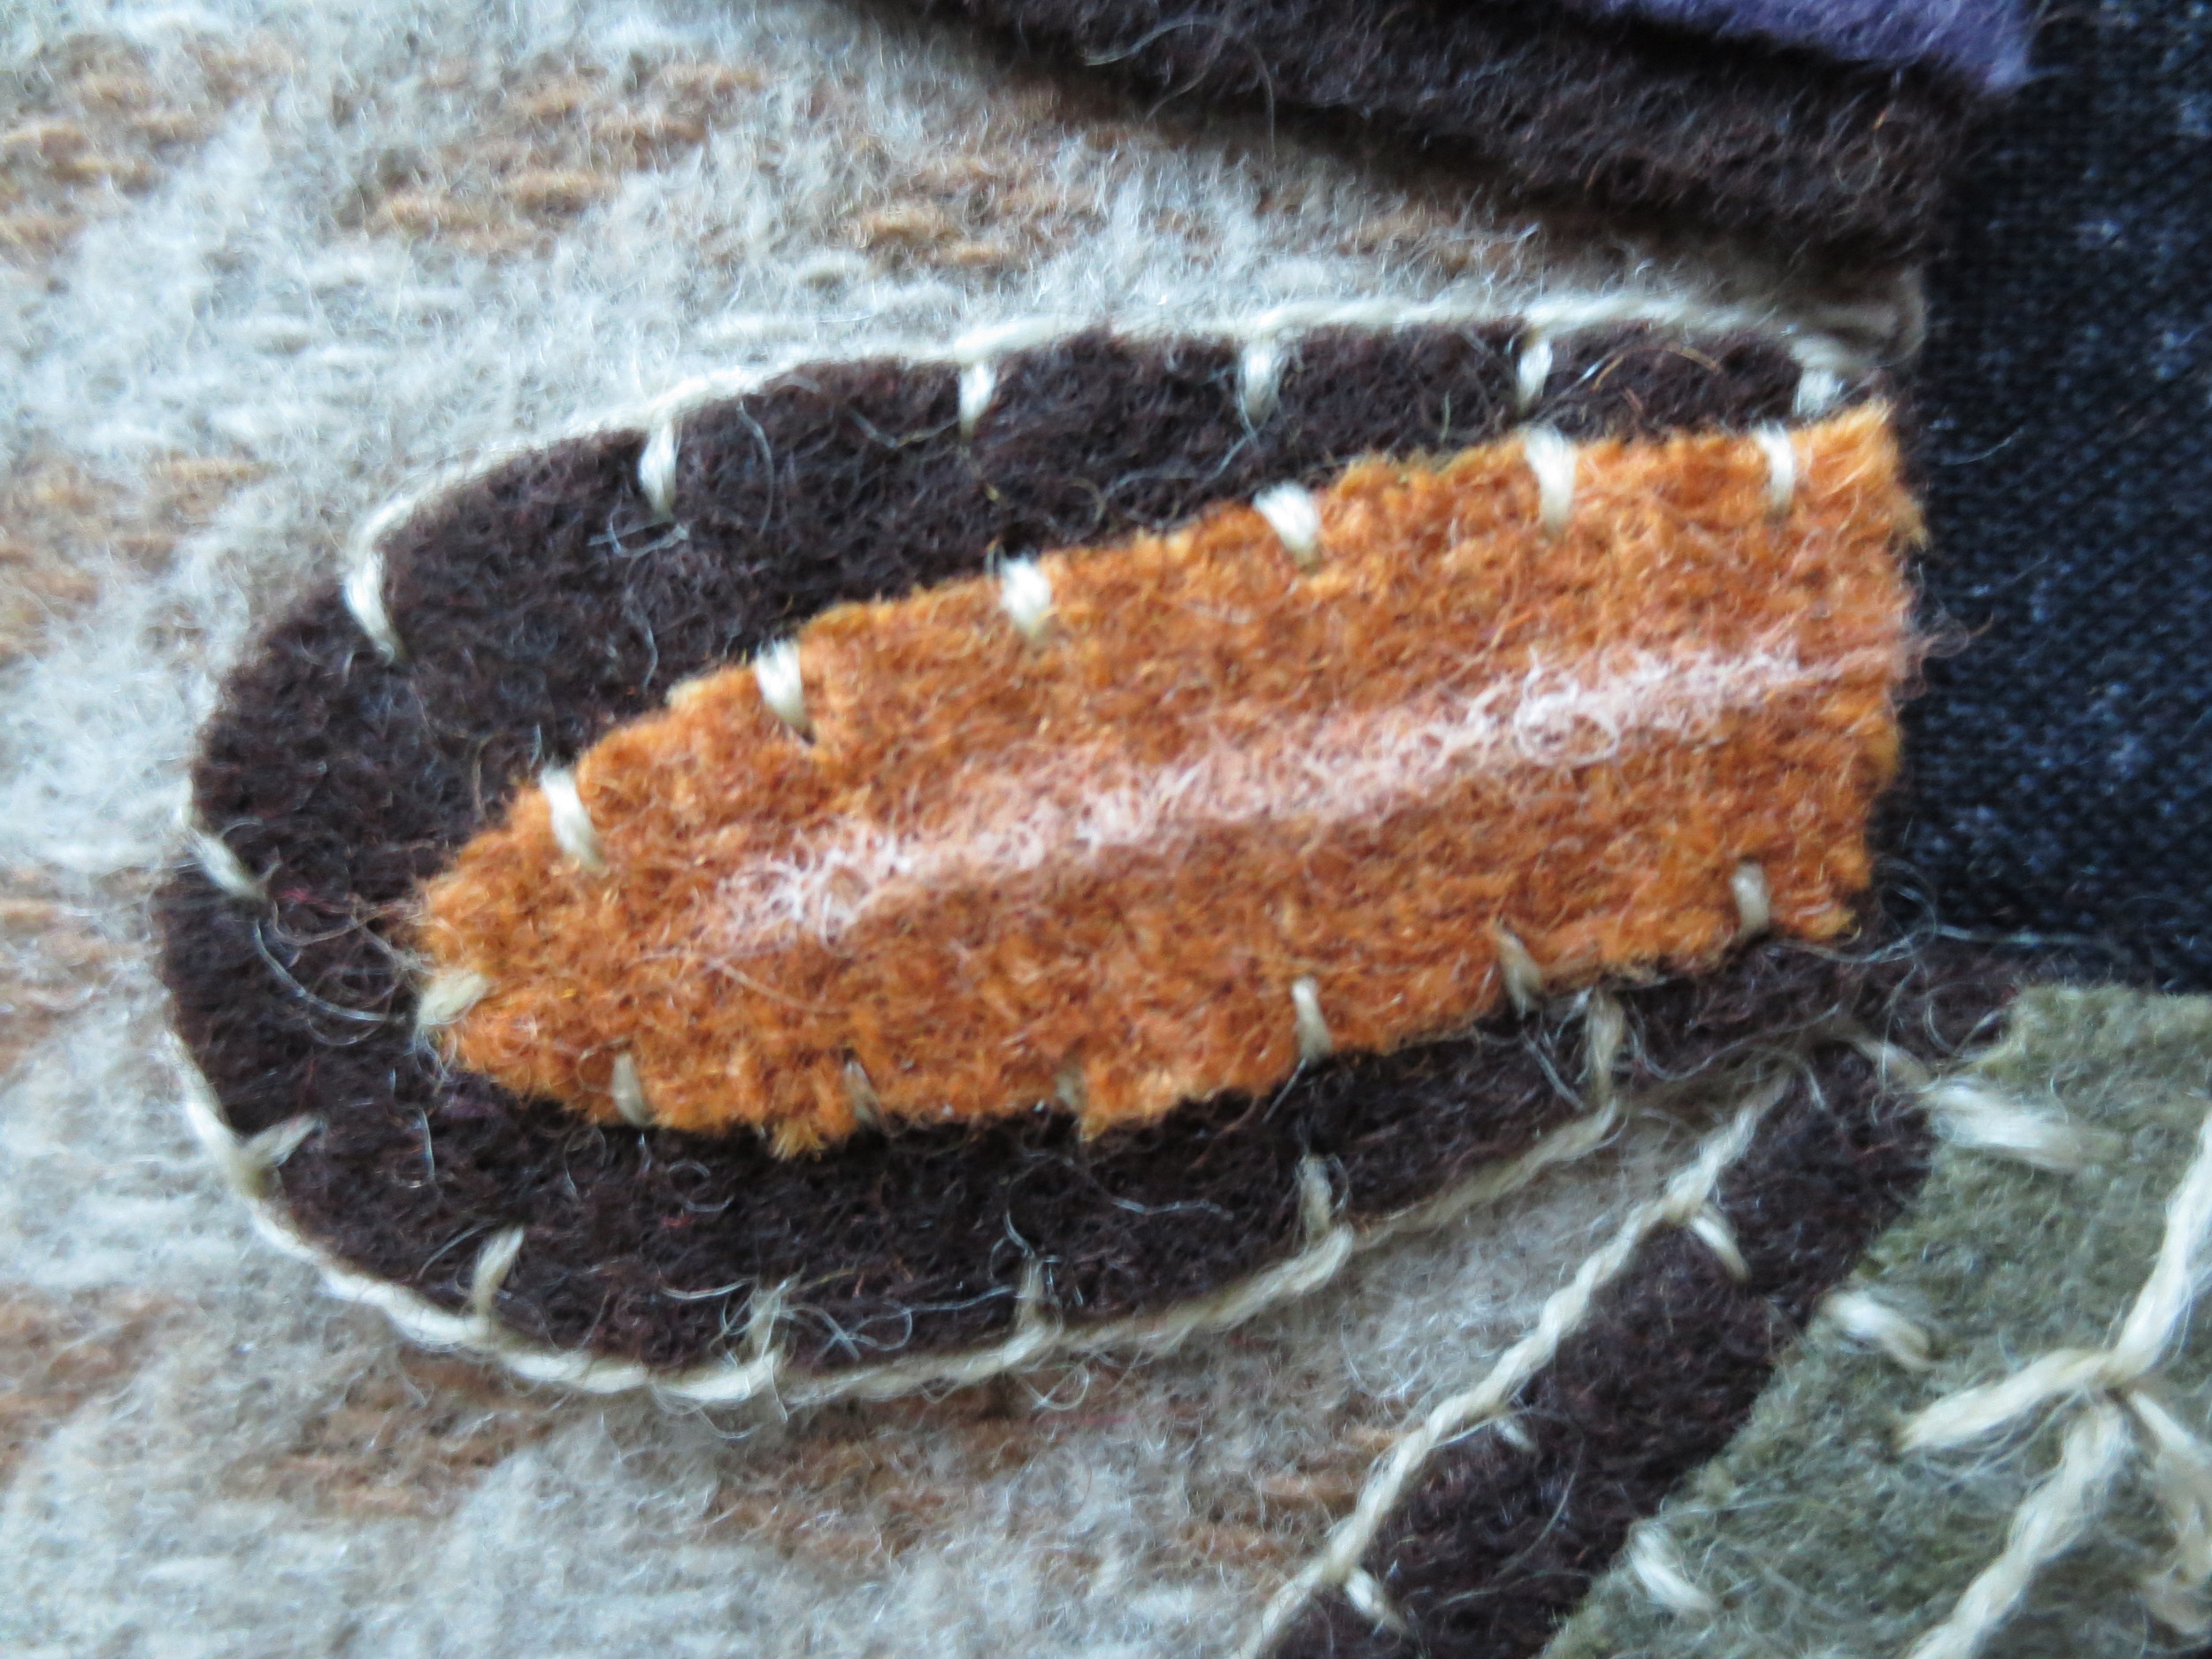
Blanket stitch the large feathers using the same thread.
Draw a guide line down the center of each small feather with a chalk pencil.
Stitch a closed fly stitch over the guide line using the same thread.
Replace the turkey body,beak, wattle, and ribbon legs. Pin the legs in place, folding the bottom ends under 1/4".
Fuse the wool in place.
Whip stitch all the pieces with one strand of the maple cream thread.
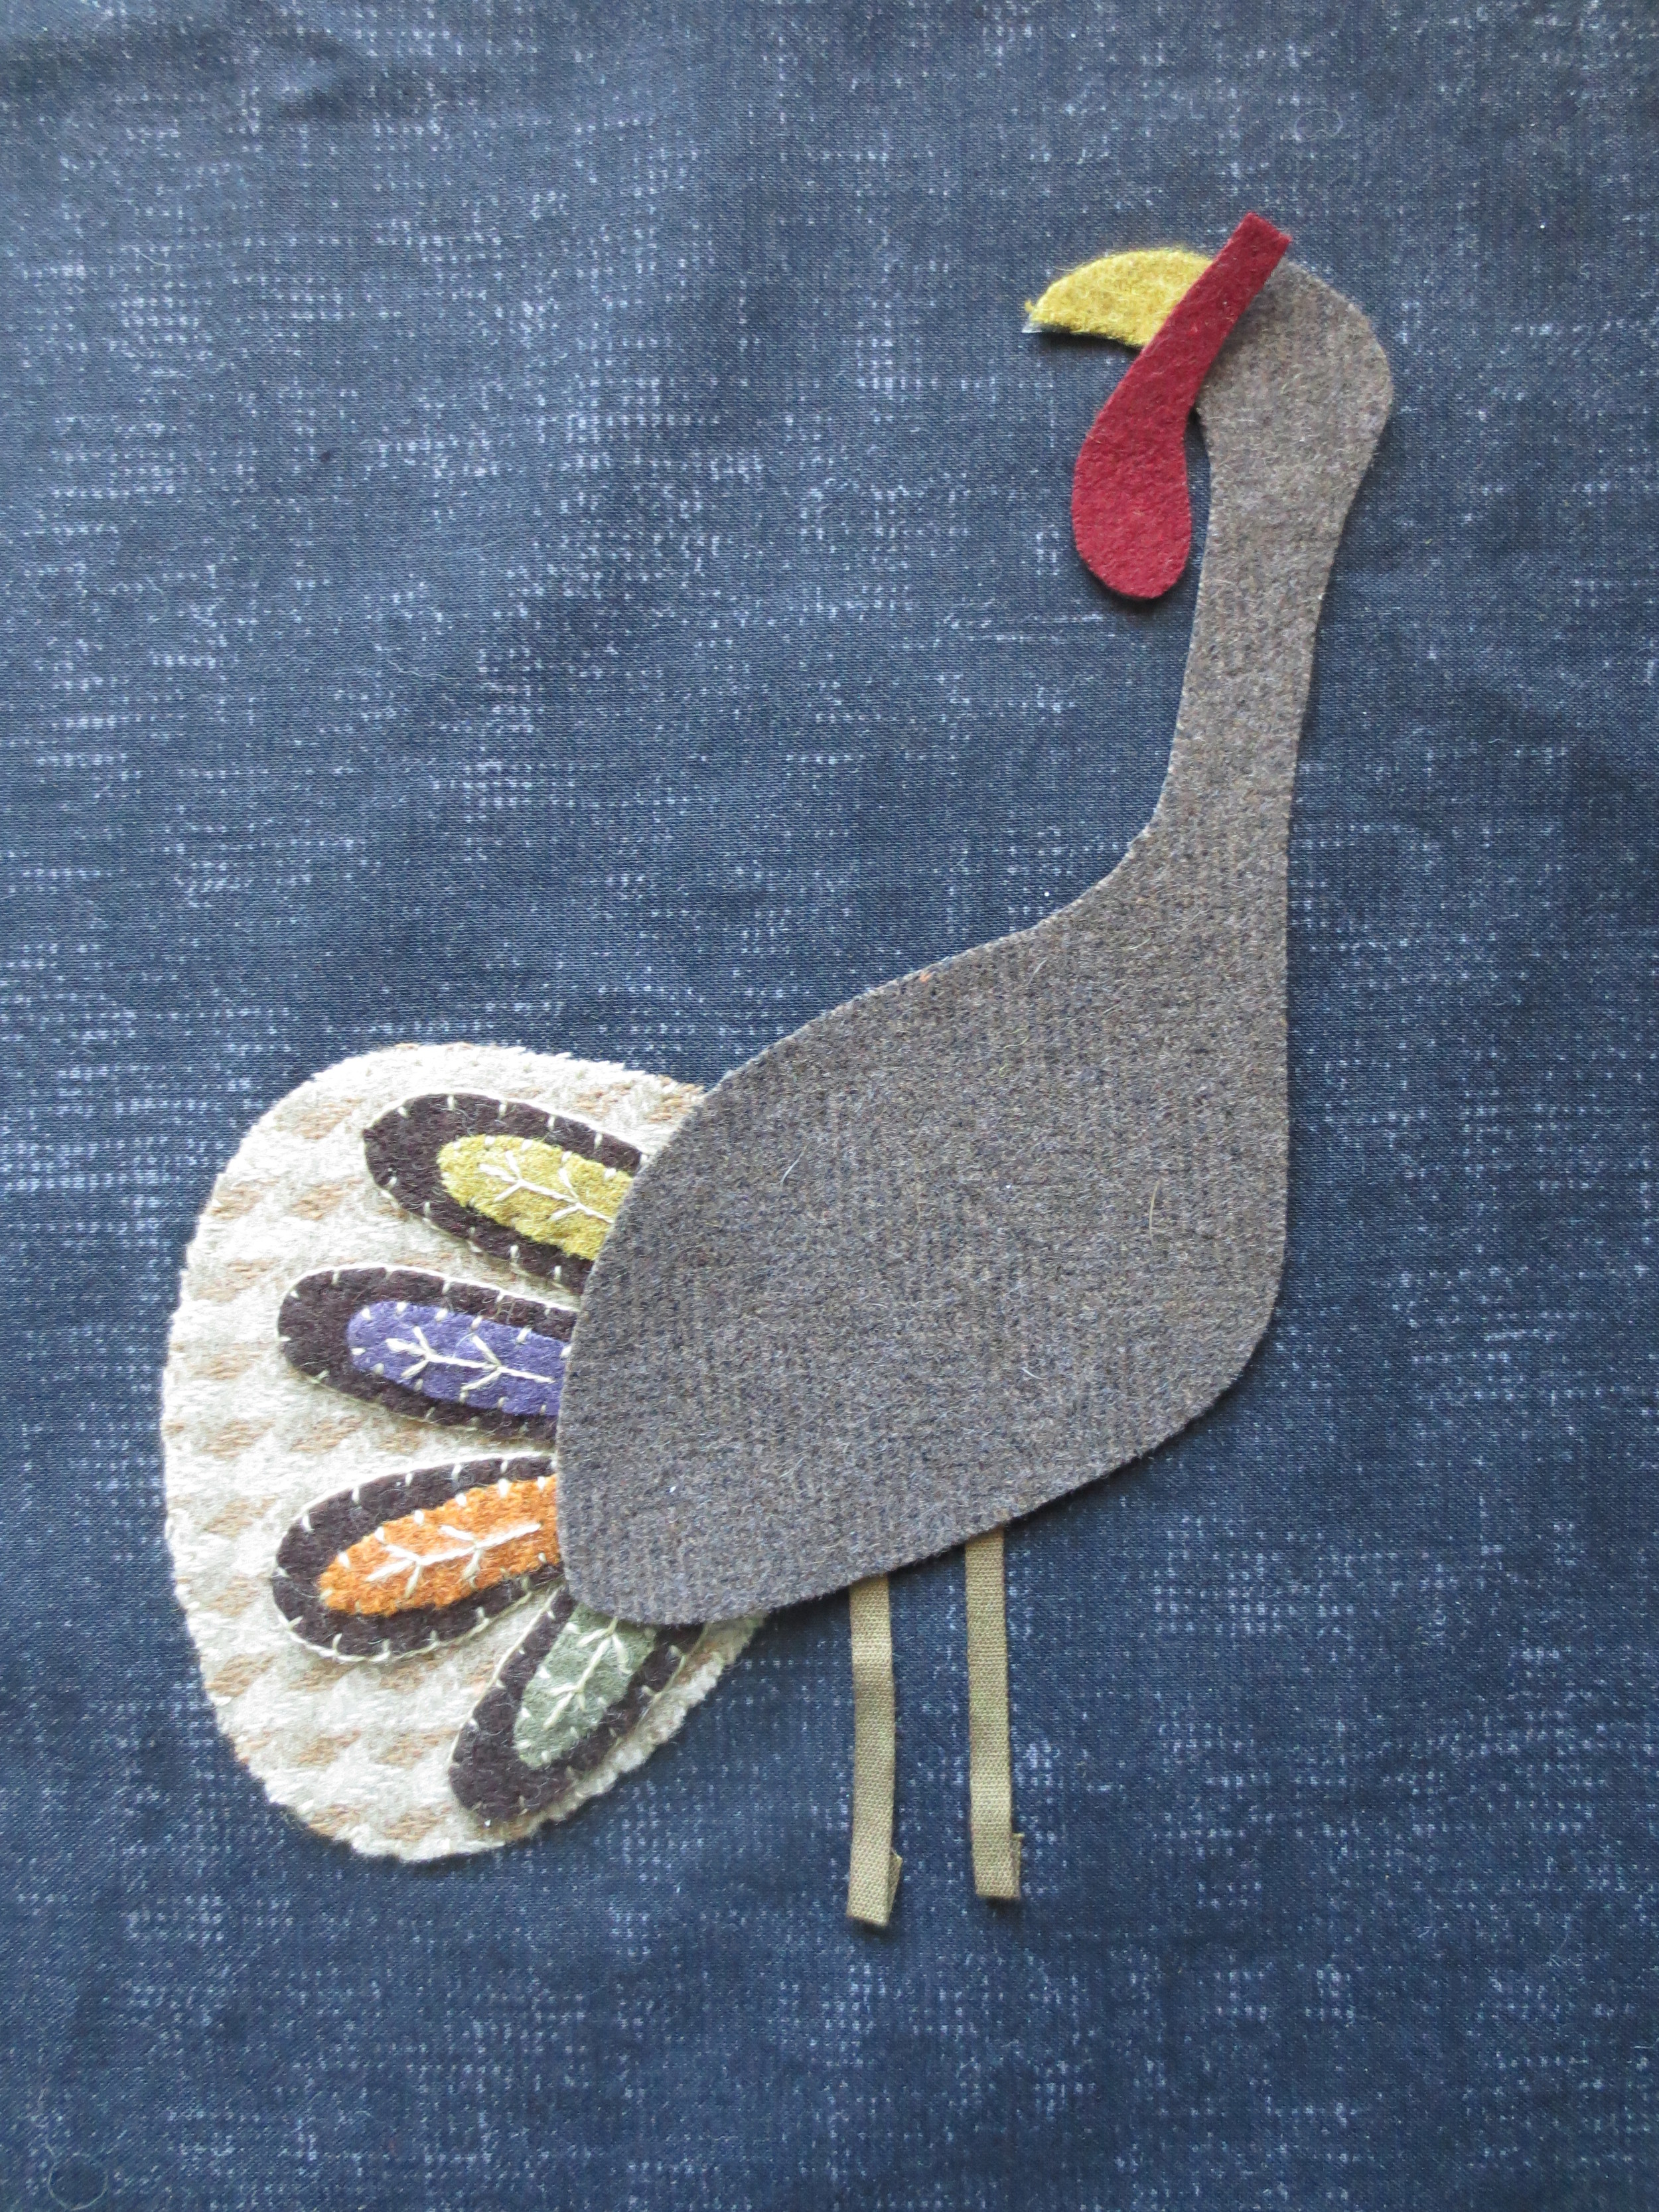

Position wing on body and fuse in place.
Whip stitch wing with the maple cream thread.
Use a chalk pencil to draw two parallel lines on the wing (using the layout for placement), then backstitch over the lines with the same thread.

Stitch a single French knot for the eye.
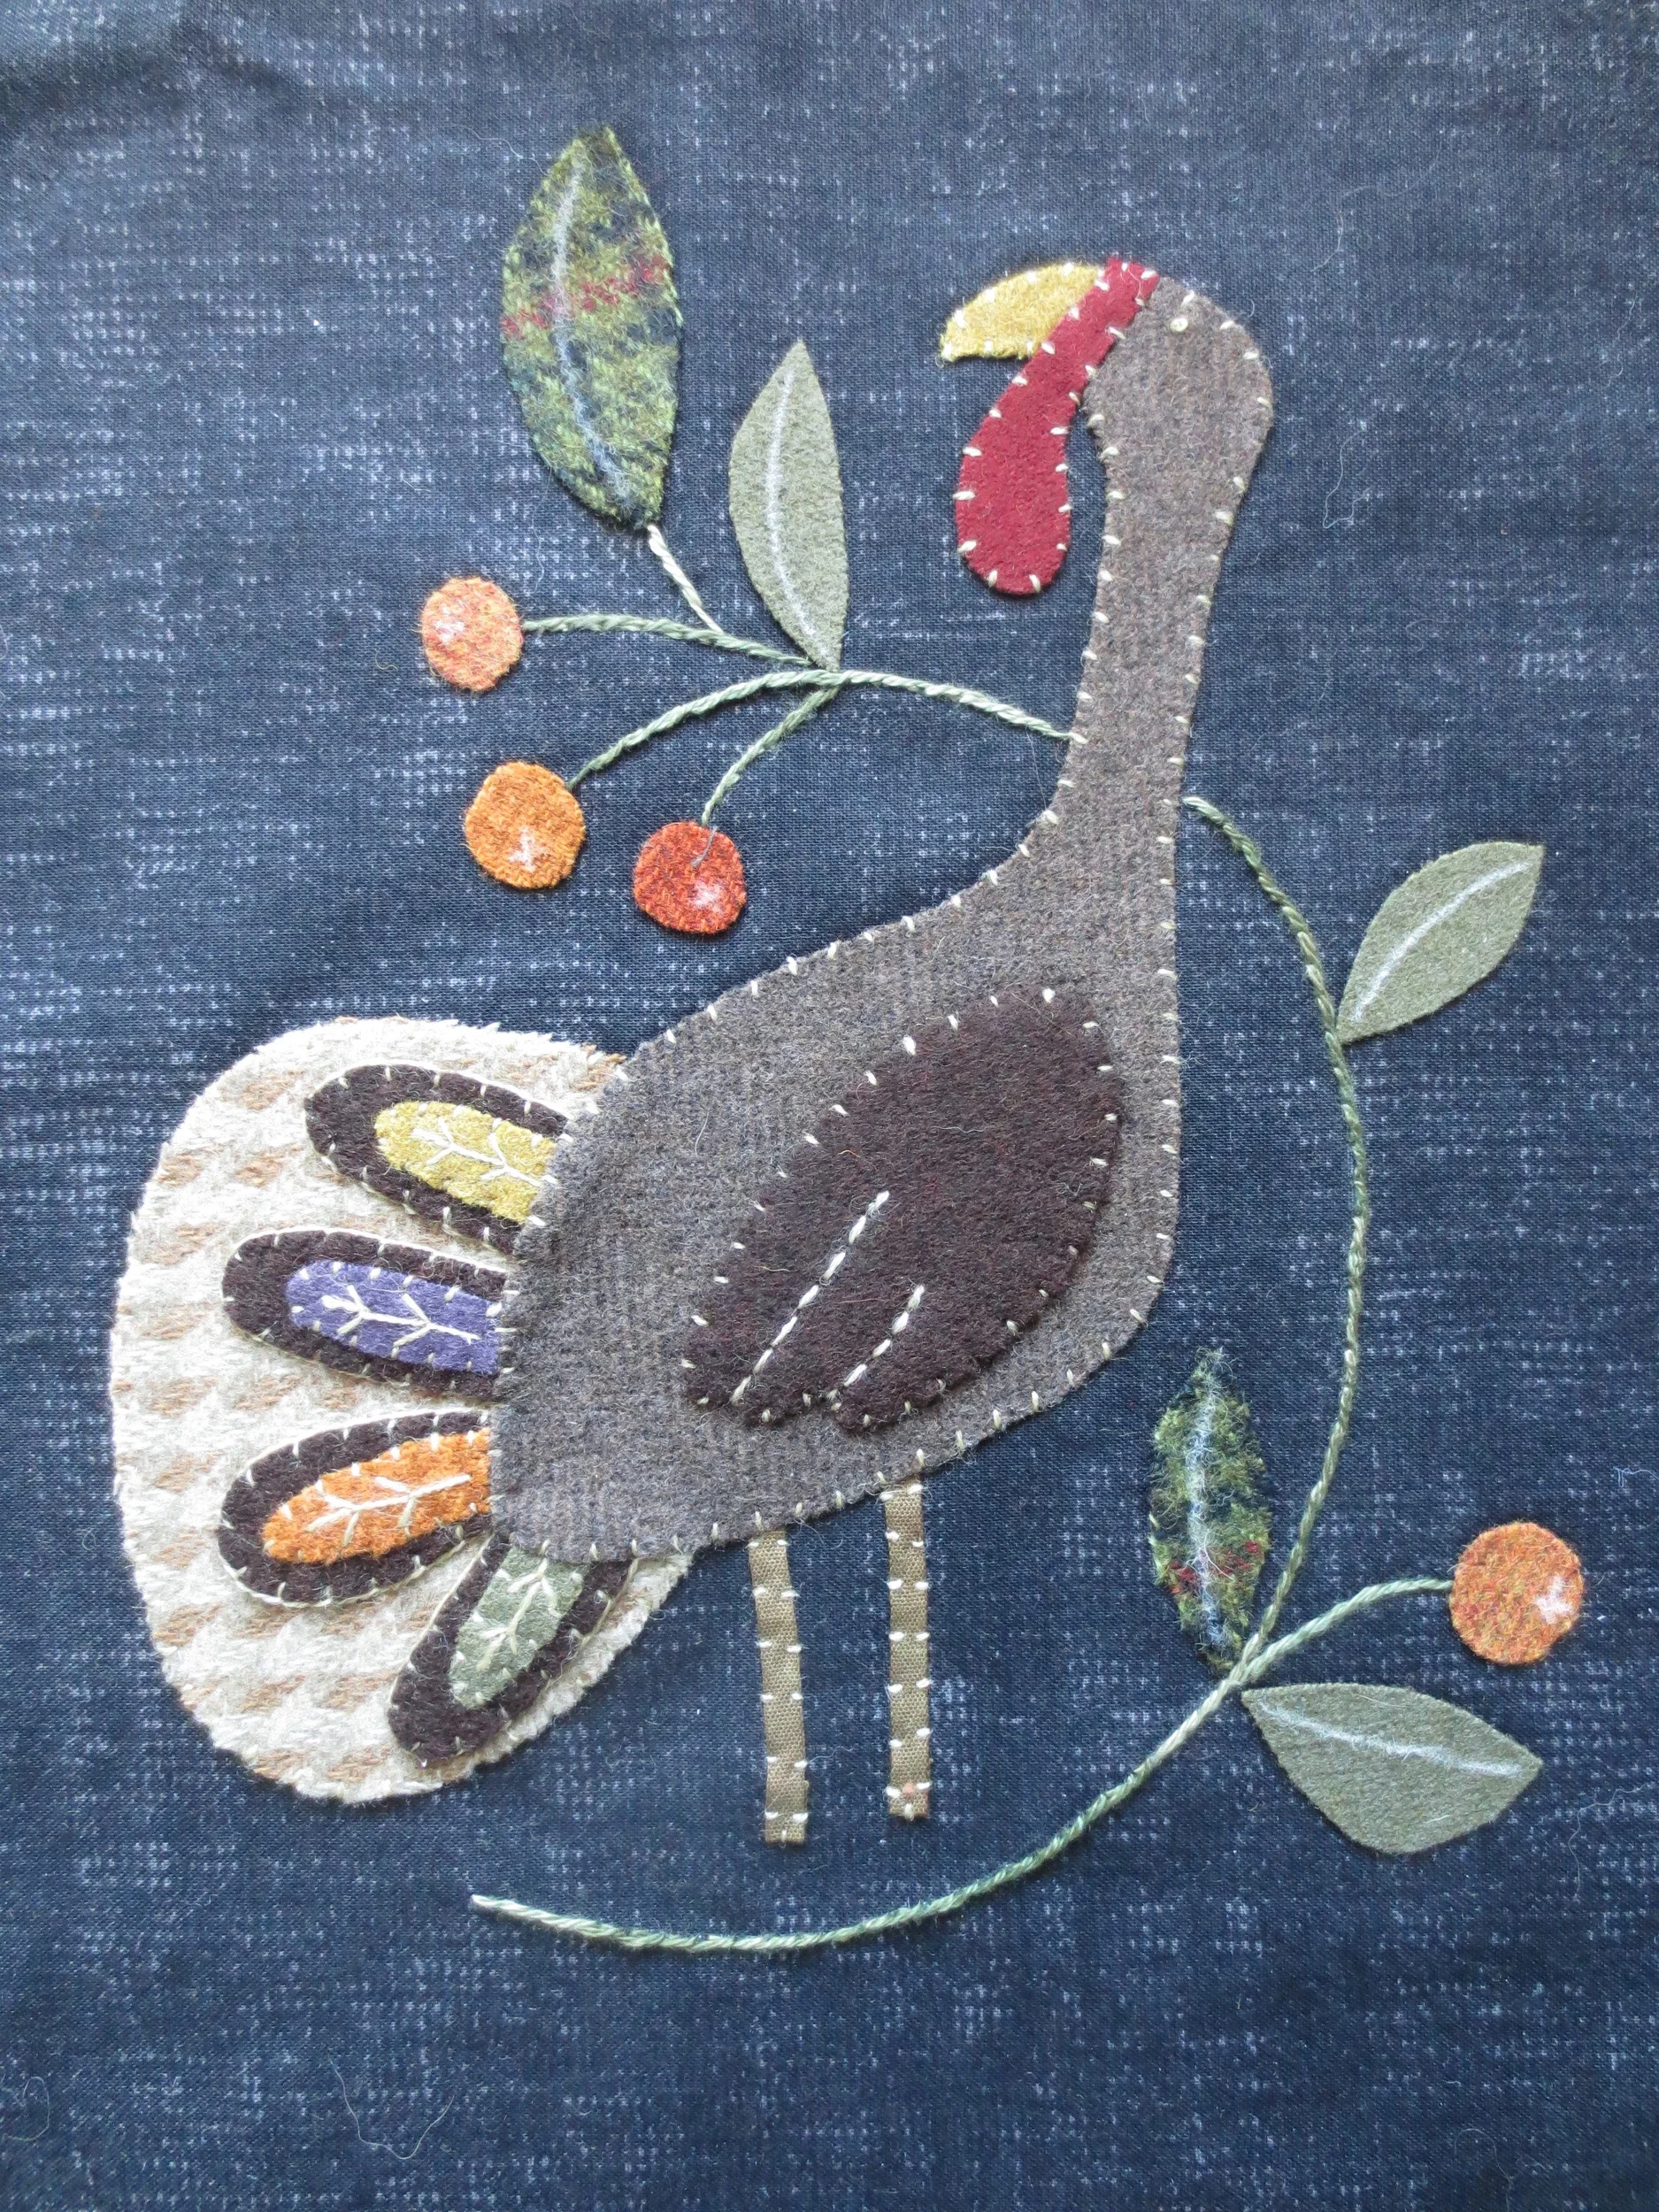
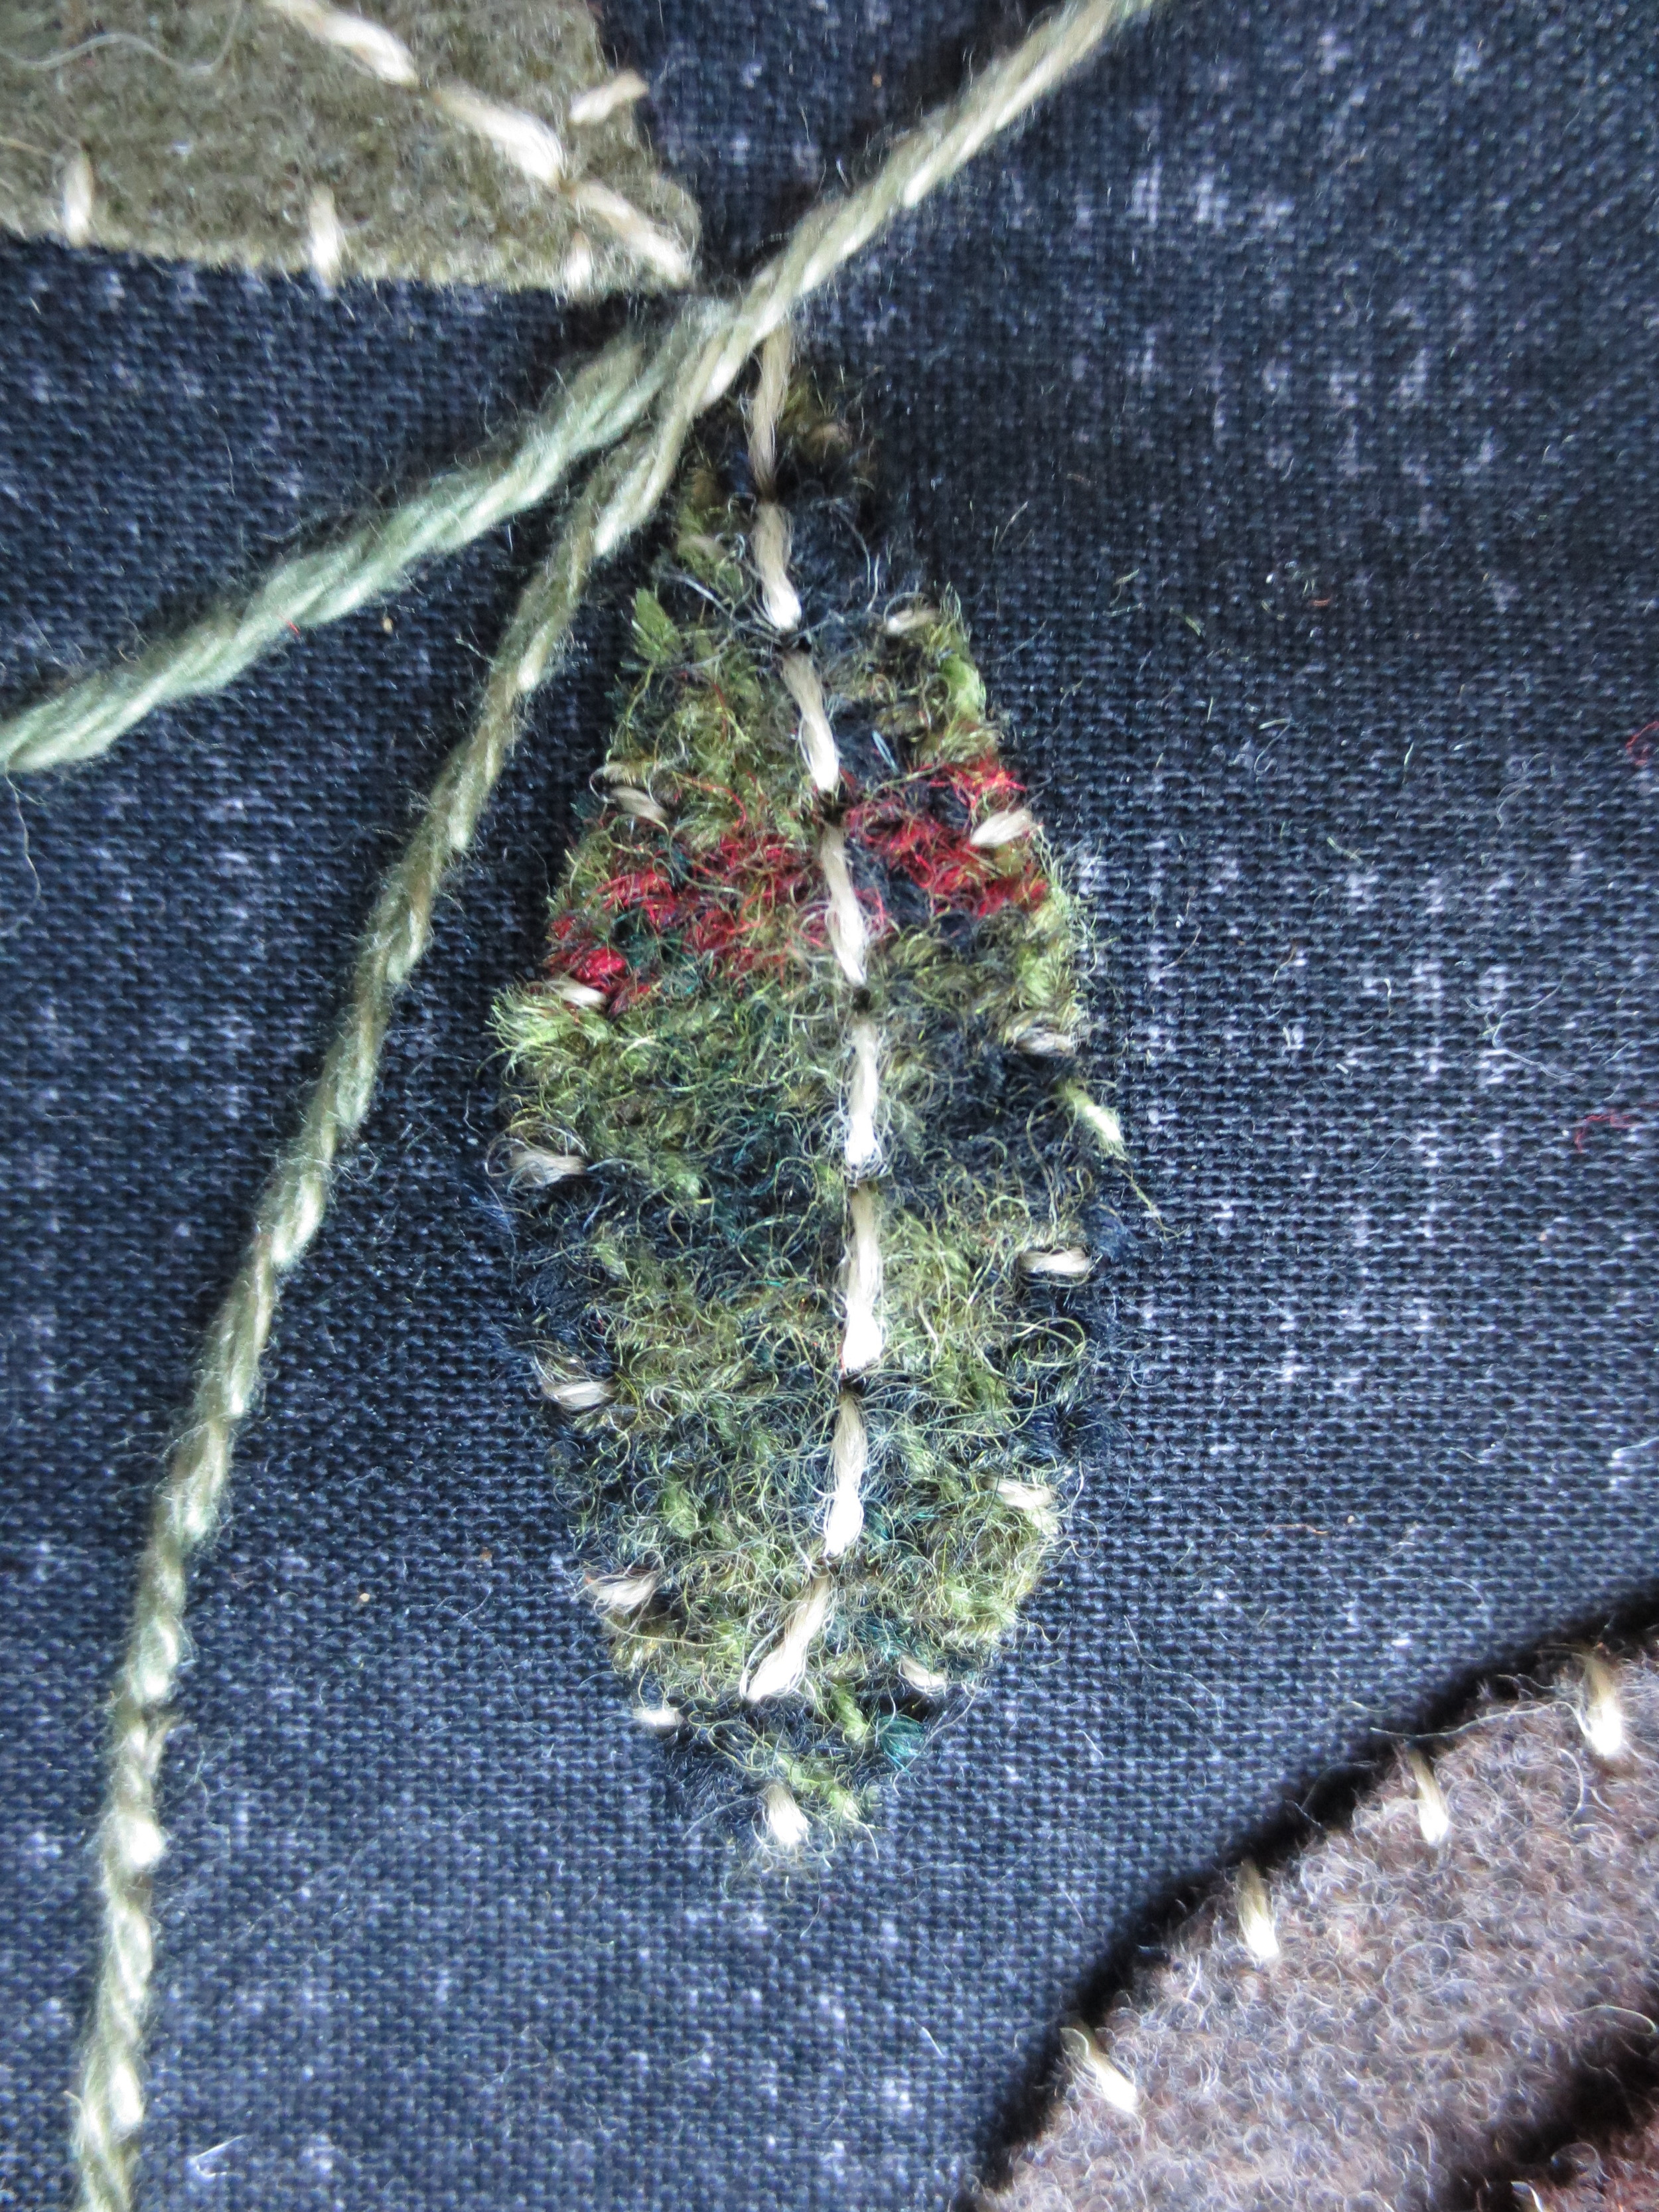
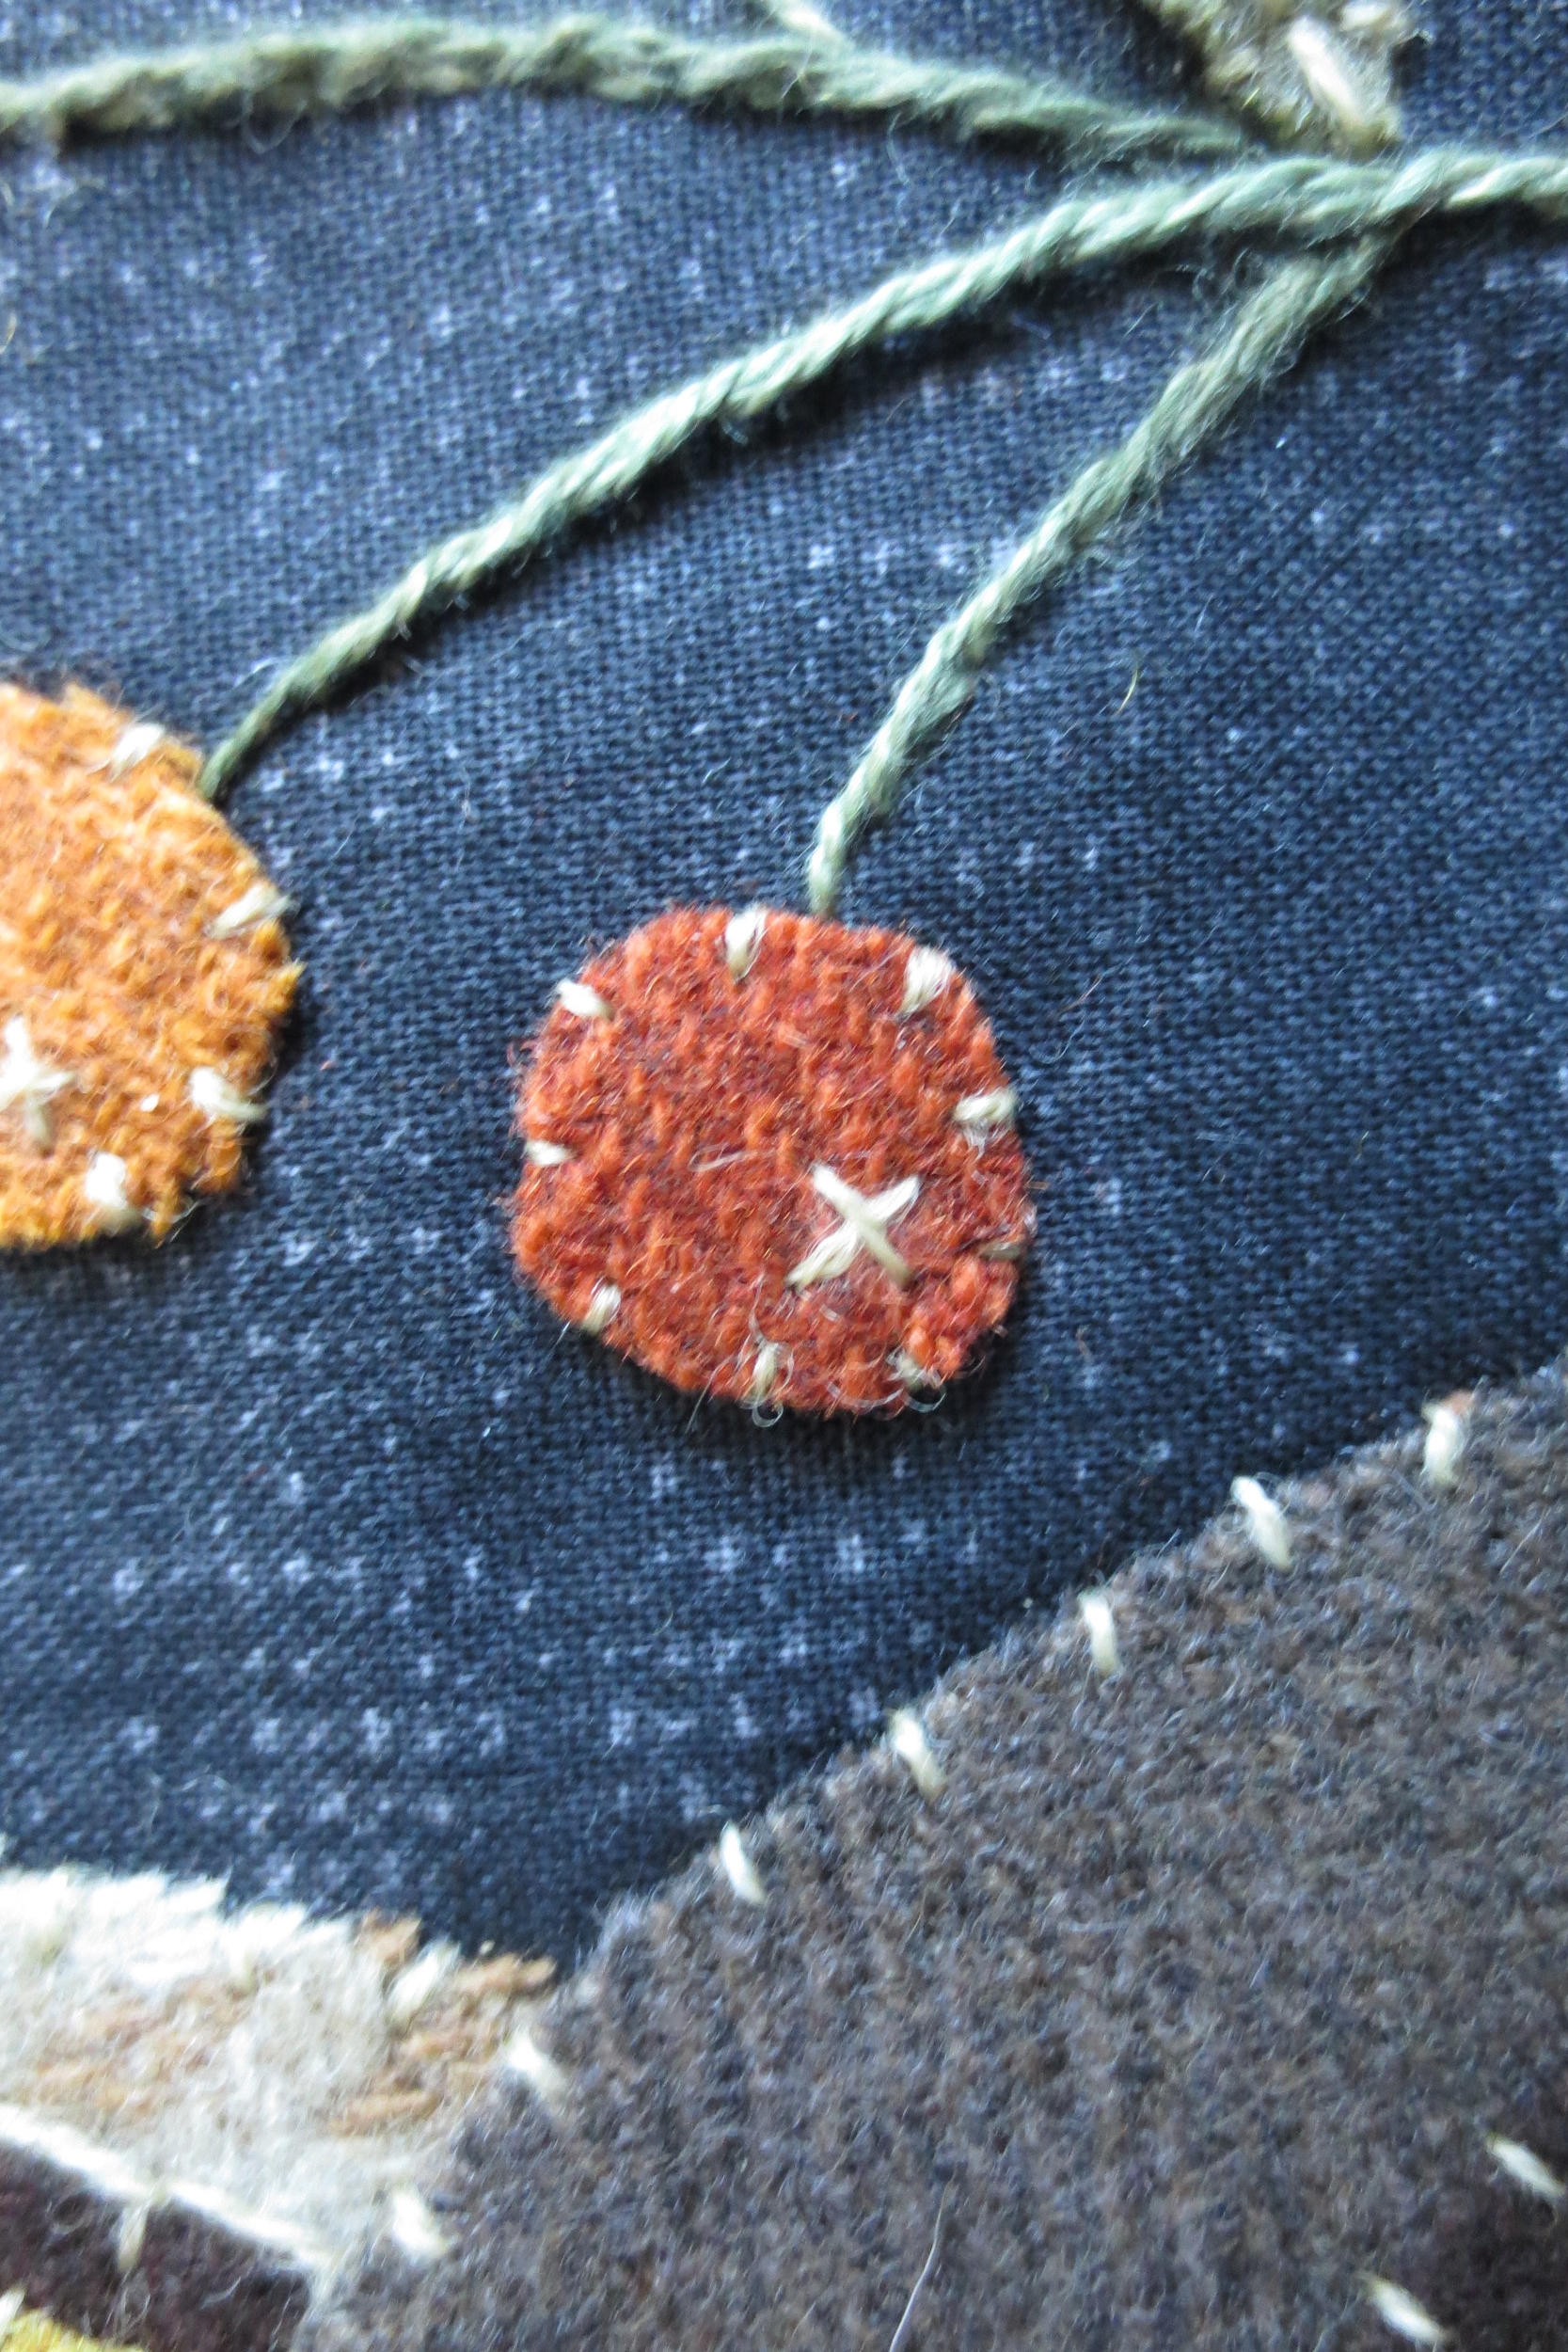
Use a chalk pencil to draw the berry branch and stems. Repositioning the leaves and berries will help with the placement of the branch
Use perle cotton, size 8, color #0575 to stem stitch over the chalk lines.
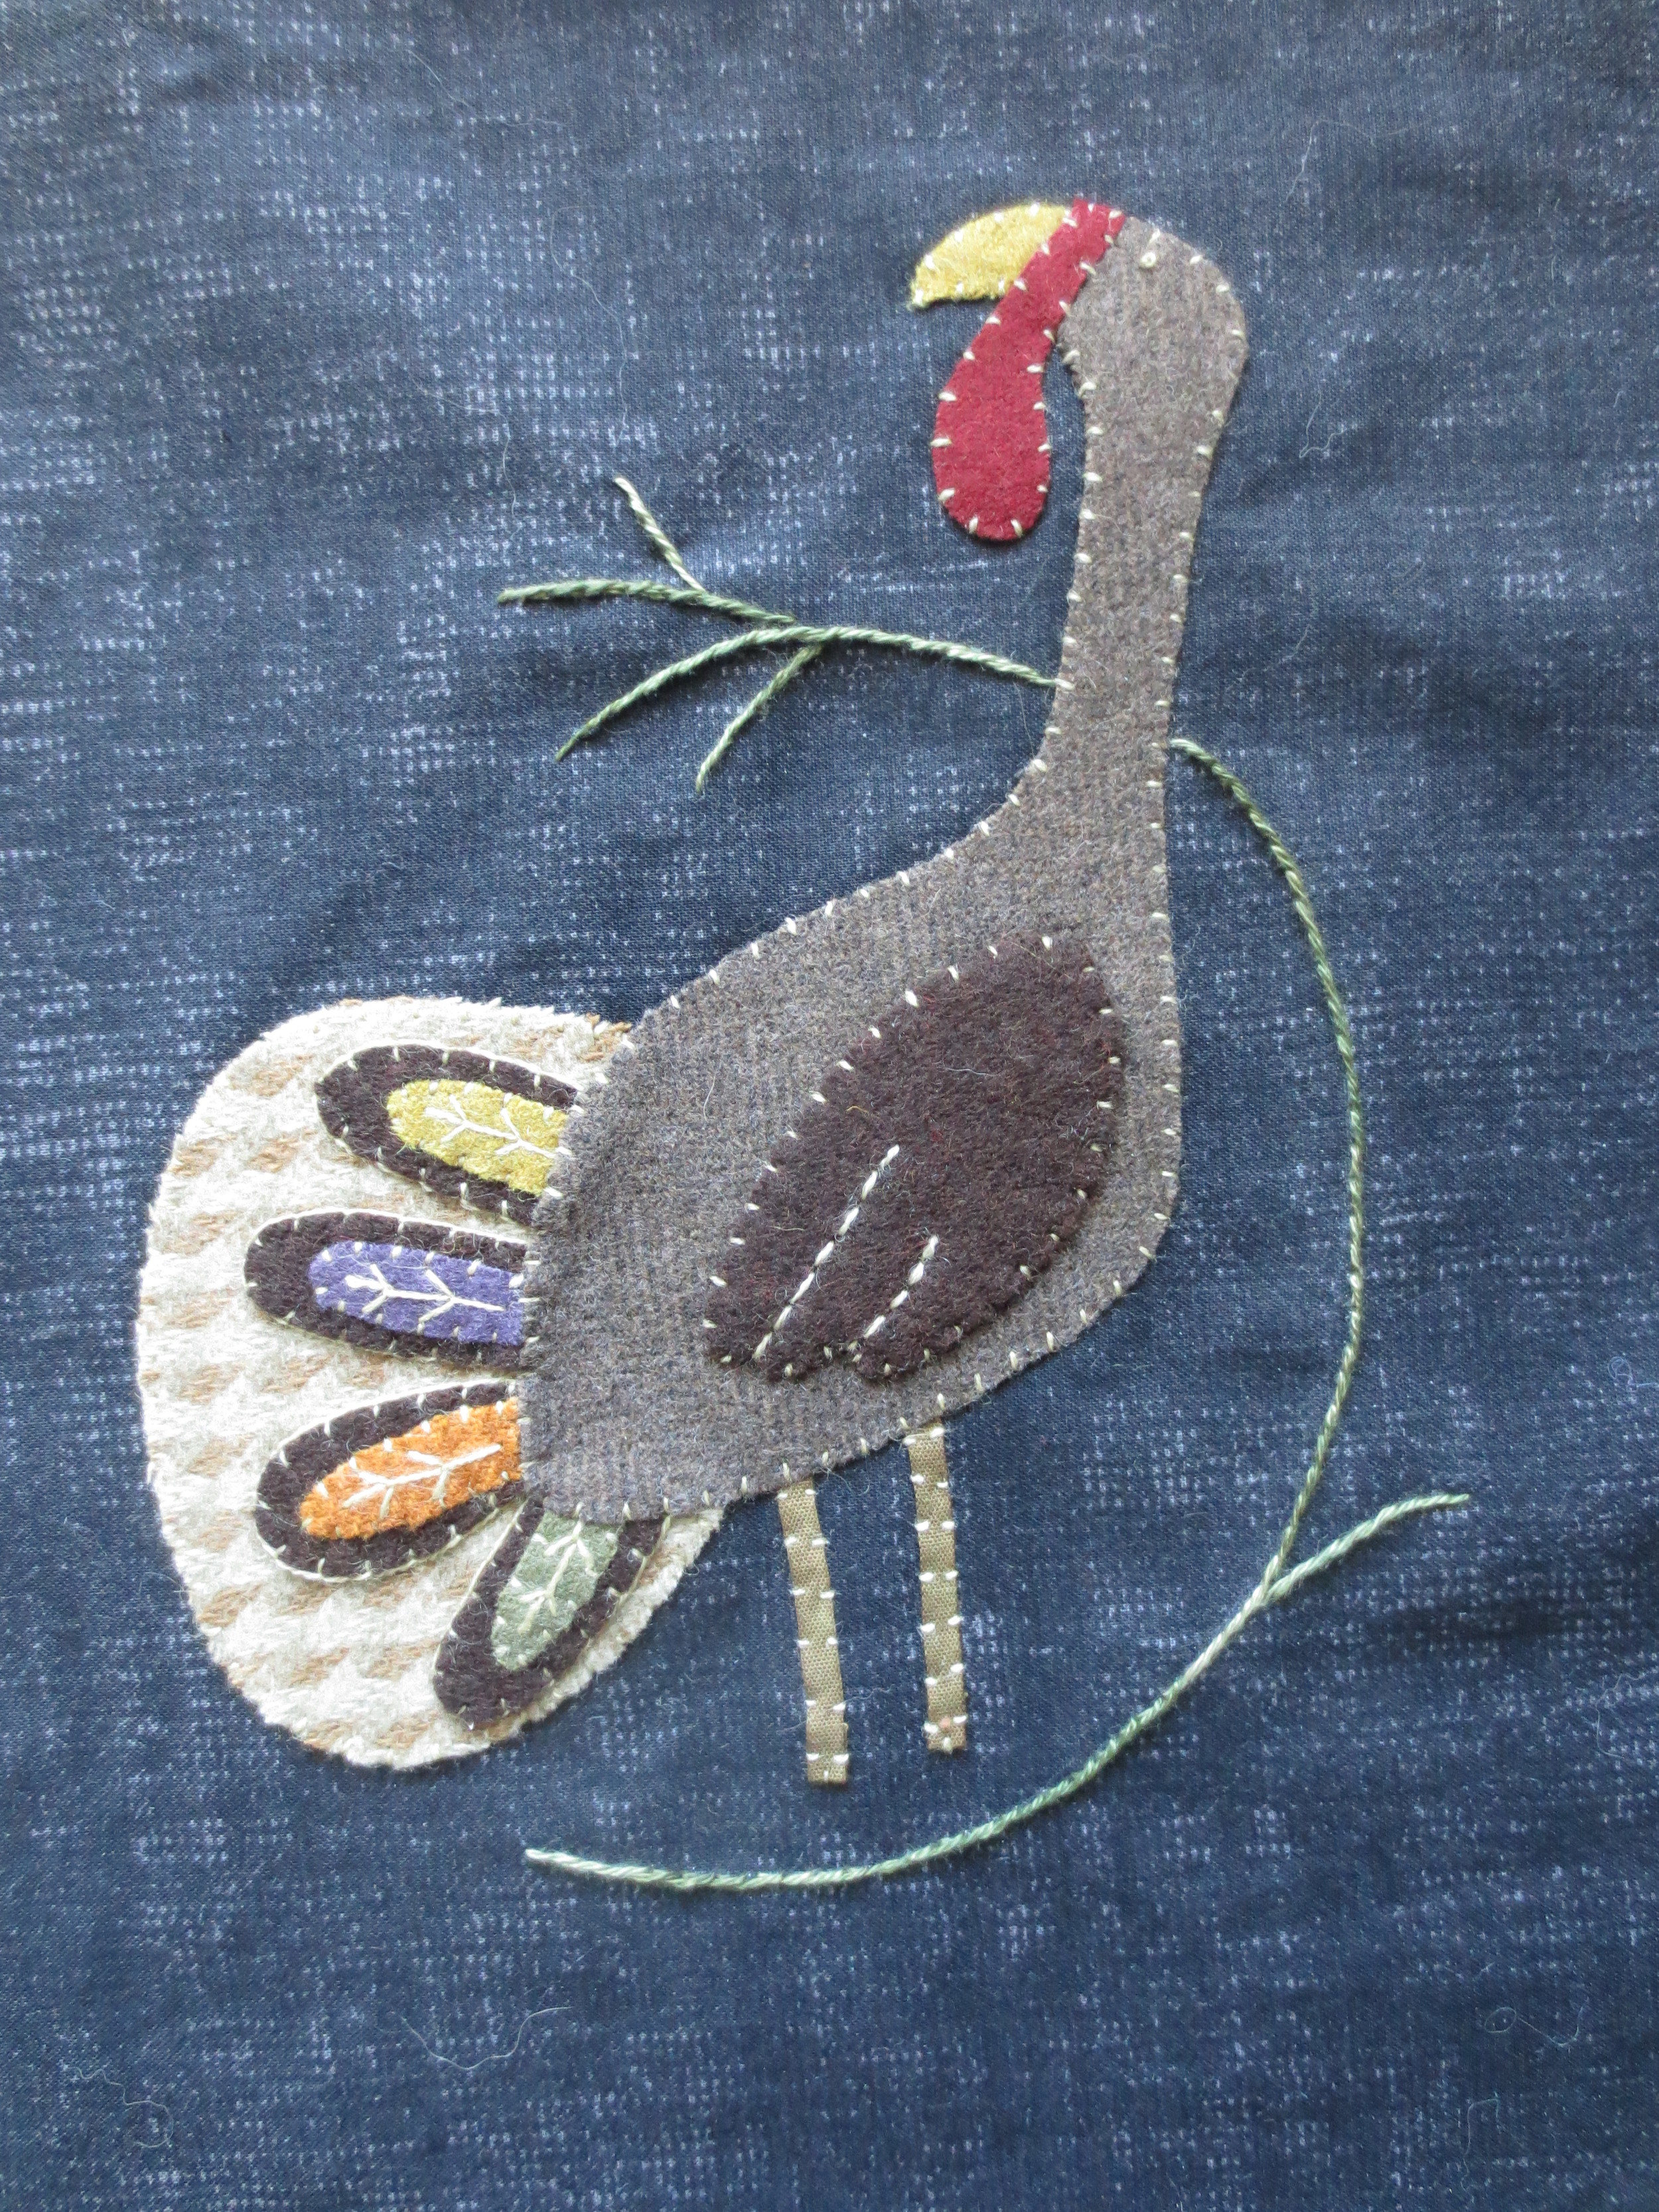
Replace the leaves and berries and fuse in place.
Use a chalk pencil to draw veins of leaves and X's on berries.
Use maple cream thread to back stitch veins, cross stitch X's, and whip stitch berries and leaves.
4. Ric Rac Border
Cut ric rac into two 18" pieces.
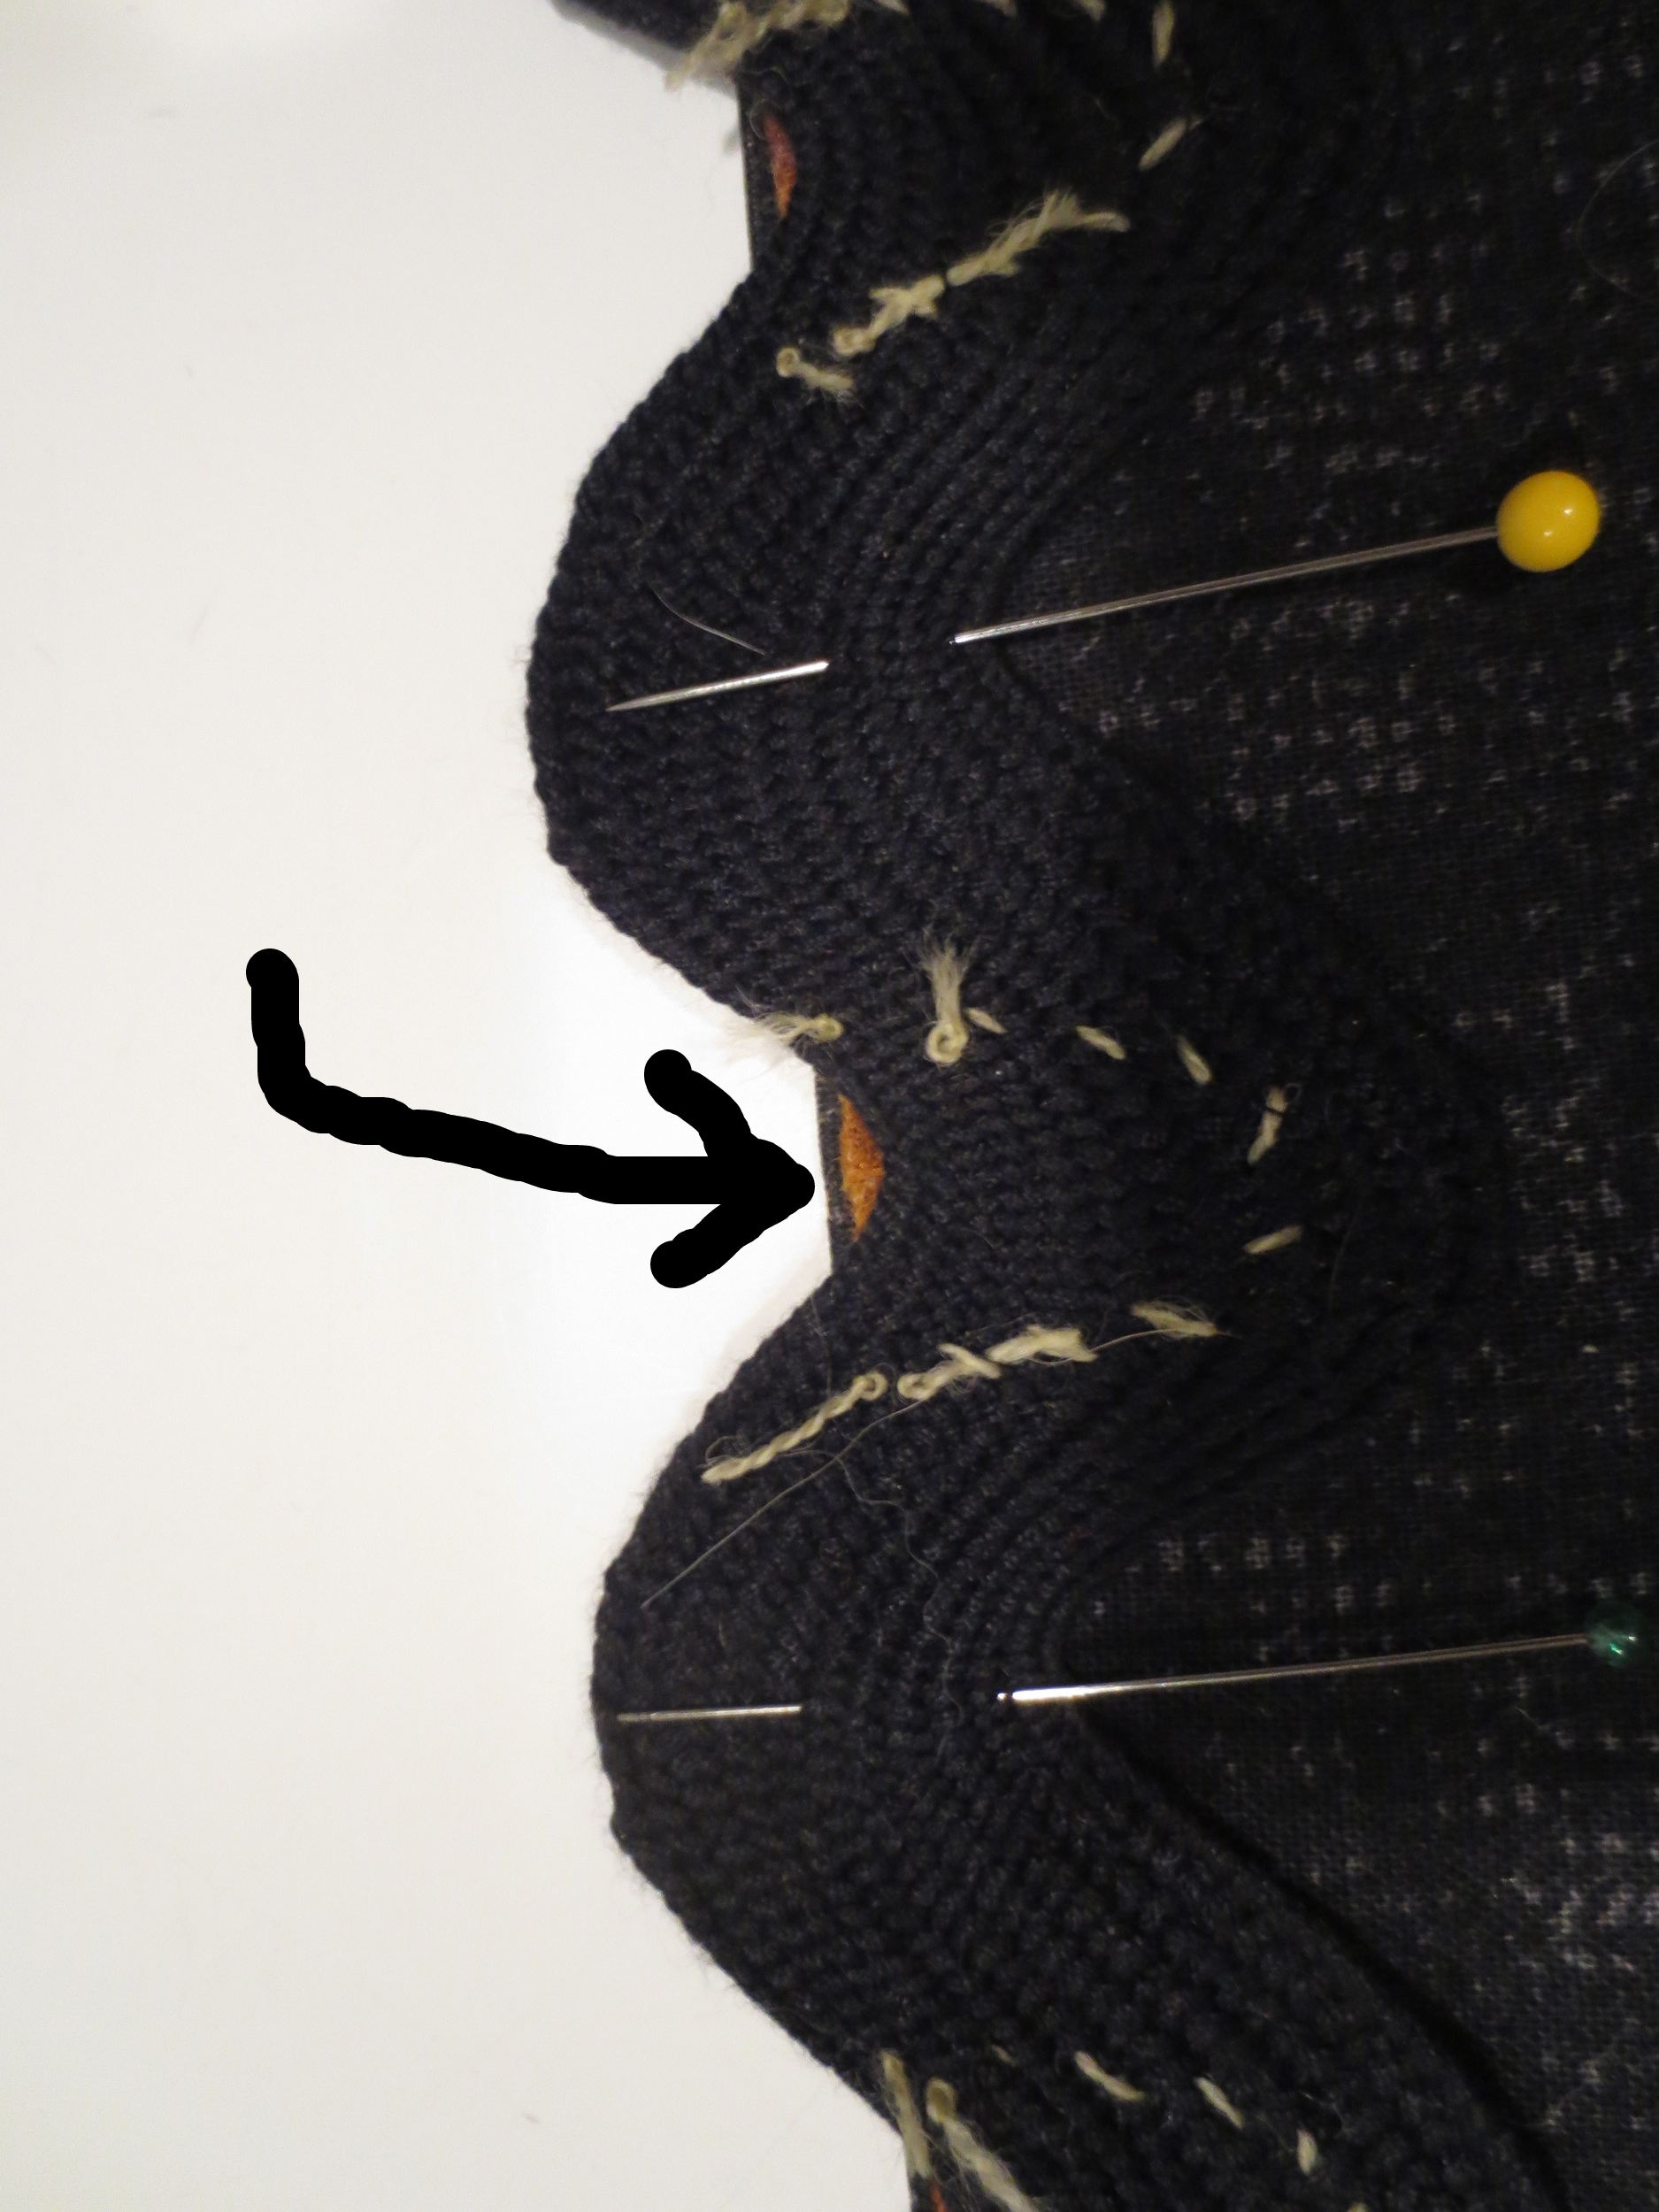
Position wool tongues on ric rac, alternating the differently shades of oranges.
Fuse with steam.
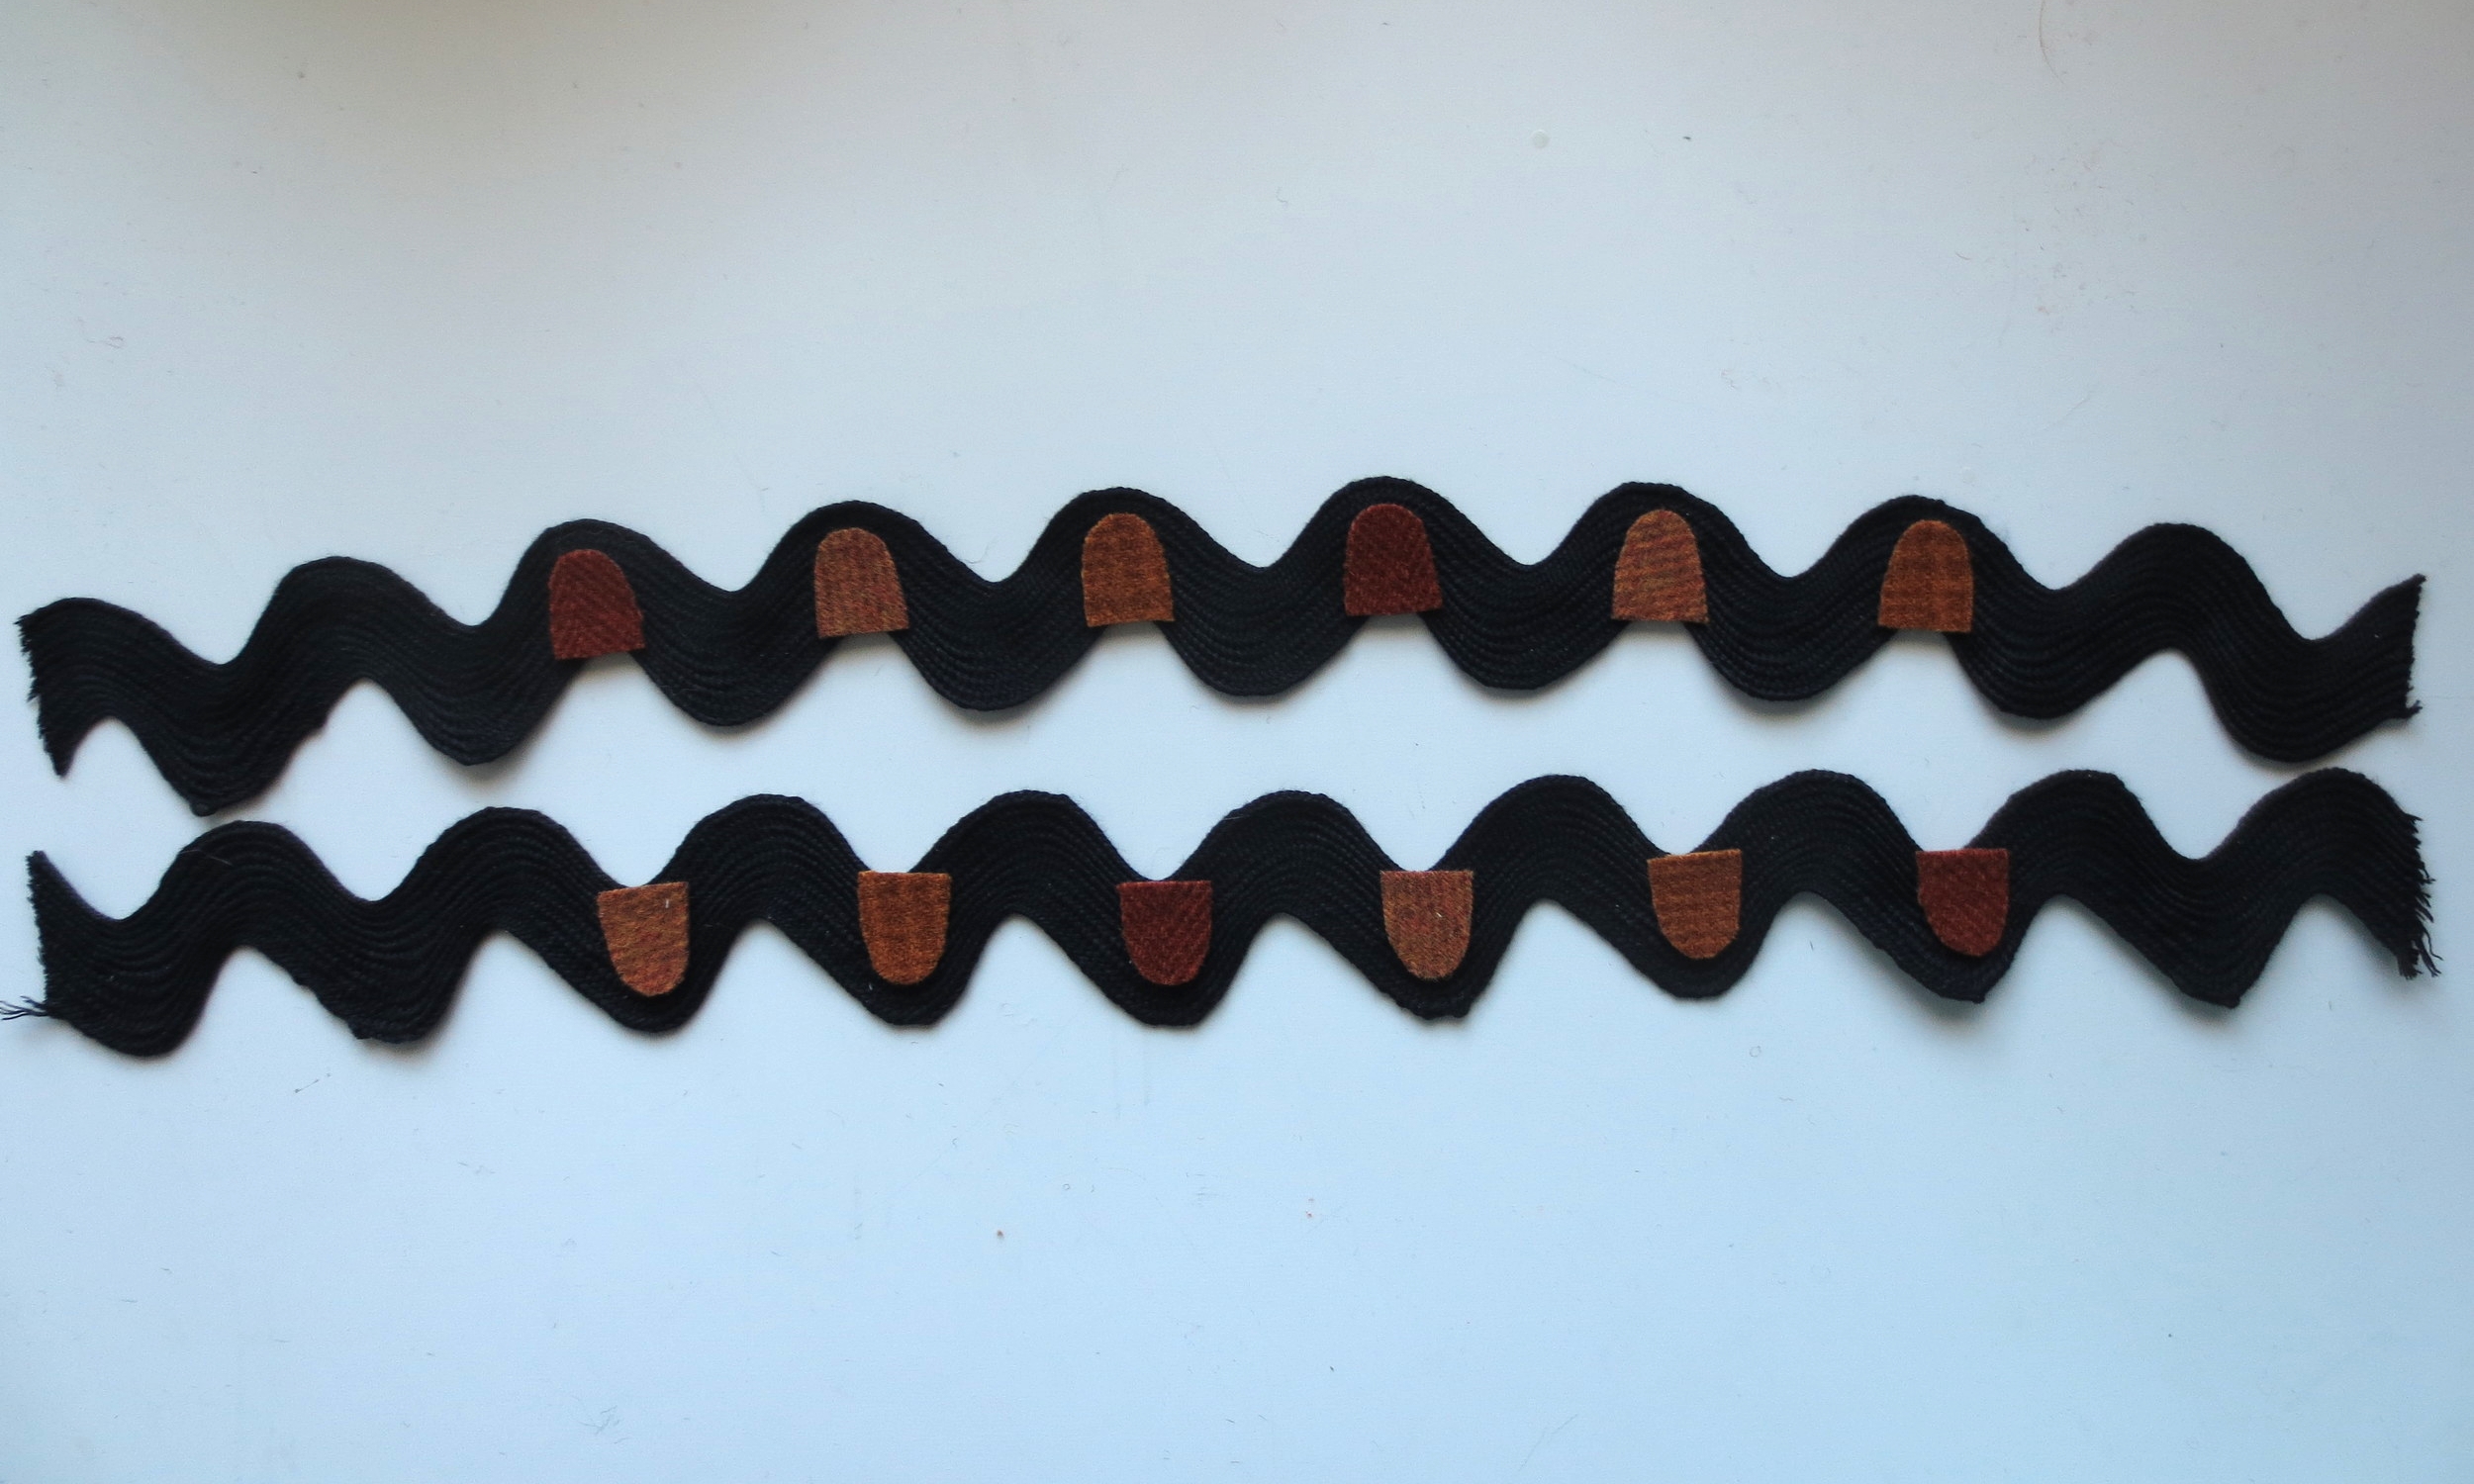
Blanket stitch the tongues with one strand of maple cream thread.
5. Assembly
Trim the appliqued background to 9 1/2" x 12 1/2".
Lay the appliqued background on your work table, right side up.
Lay ric rac on right and left sides of background, wrong side up, lining up the edge of tongue with the background.
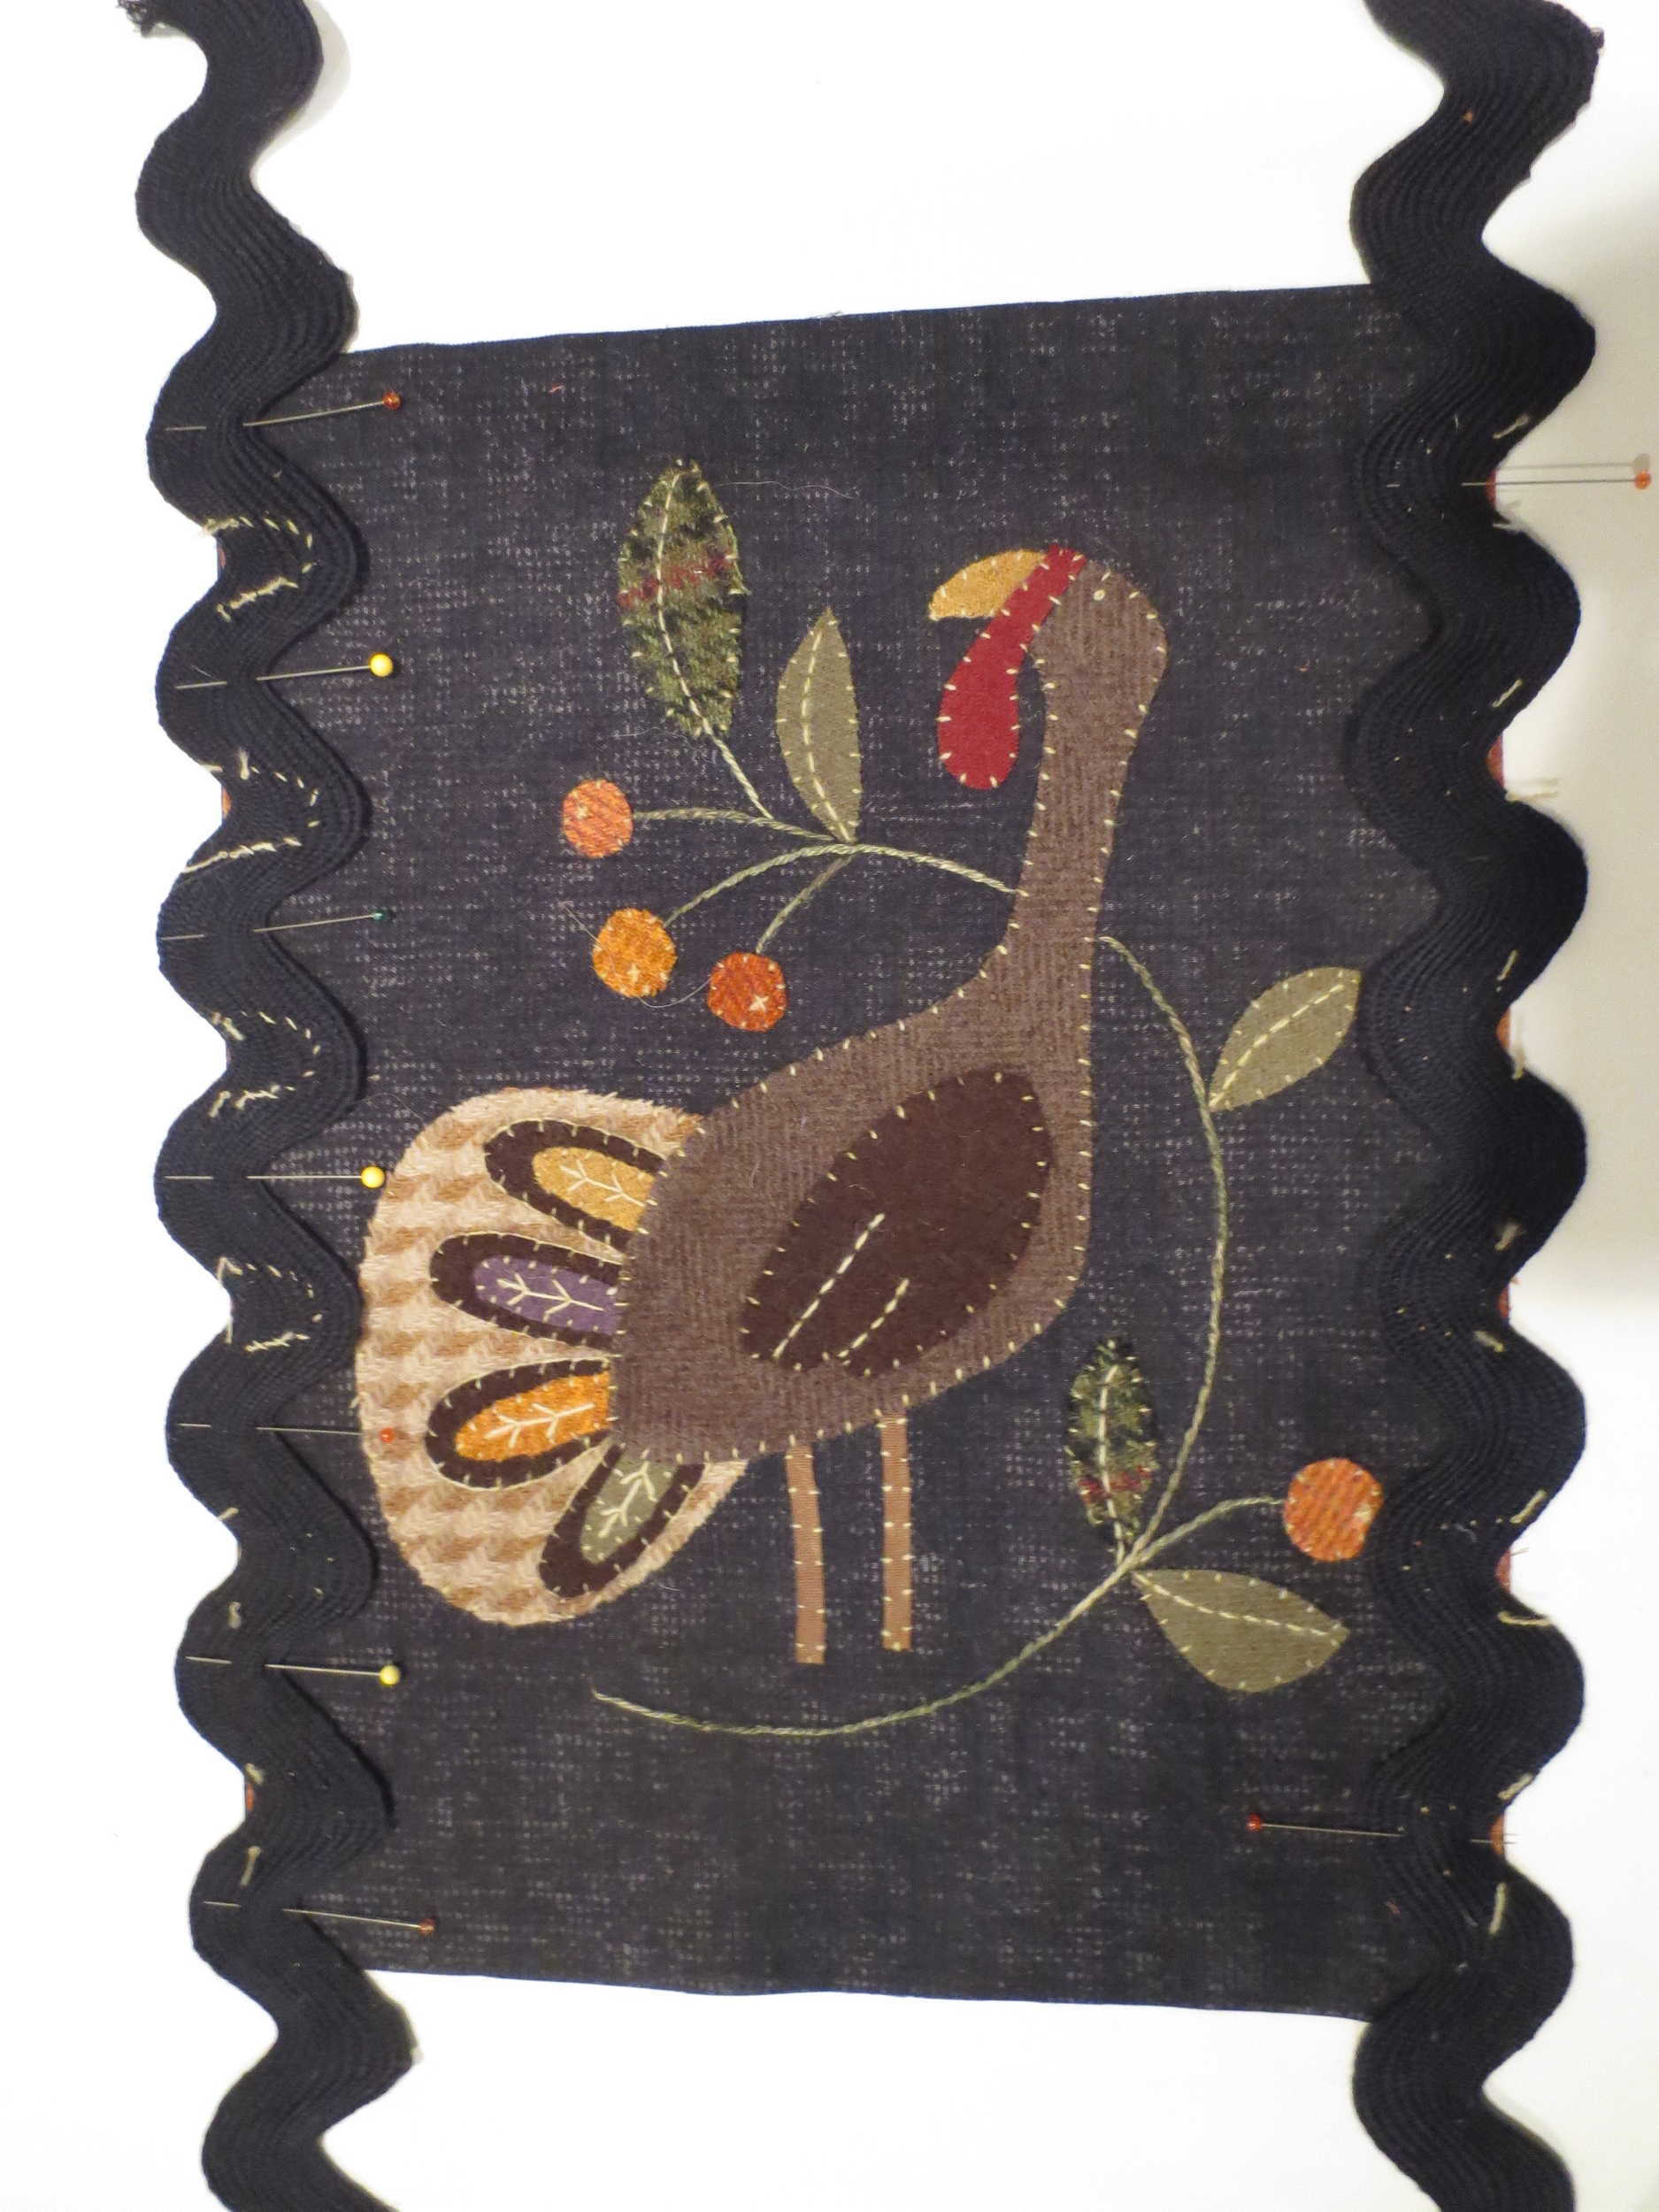
Lay side panels, right side down, on top of the ric rac, lining up edges with background edges. Pin in place. Make sure you position the tongues so that they line up on both sides . I positioned the first one about 1 1/2" from the edge.
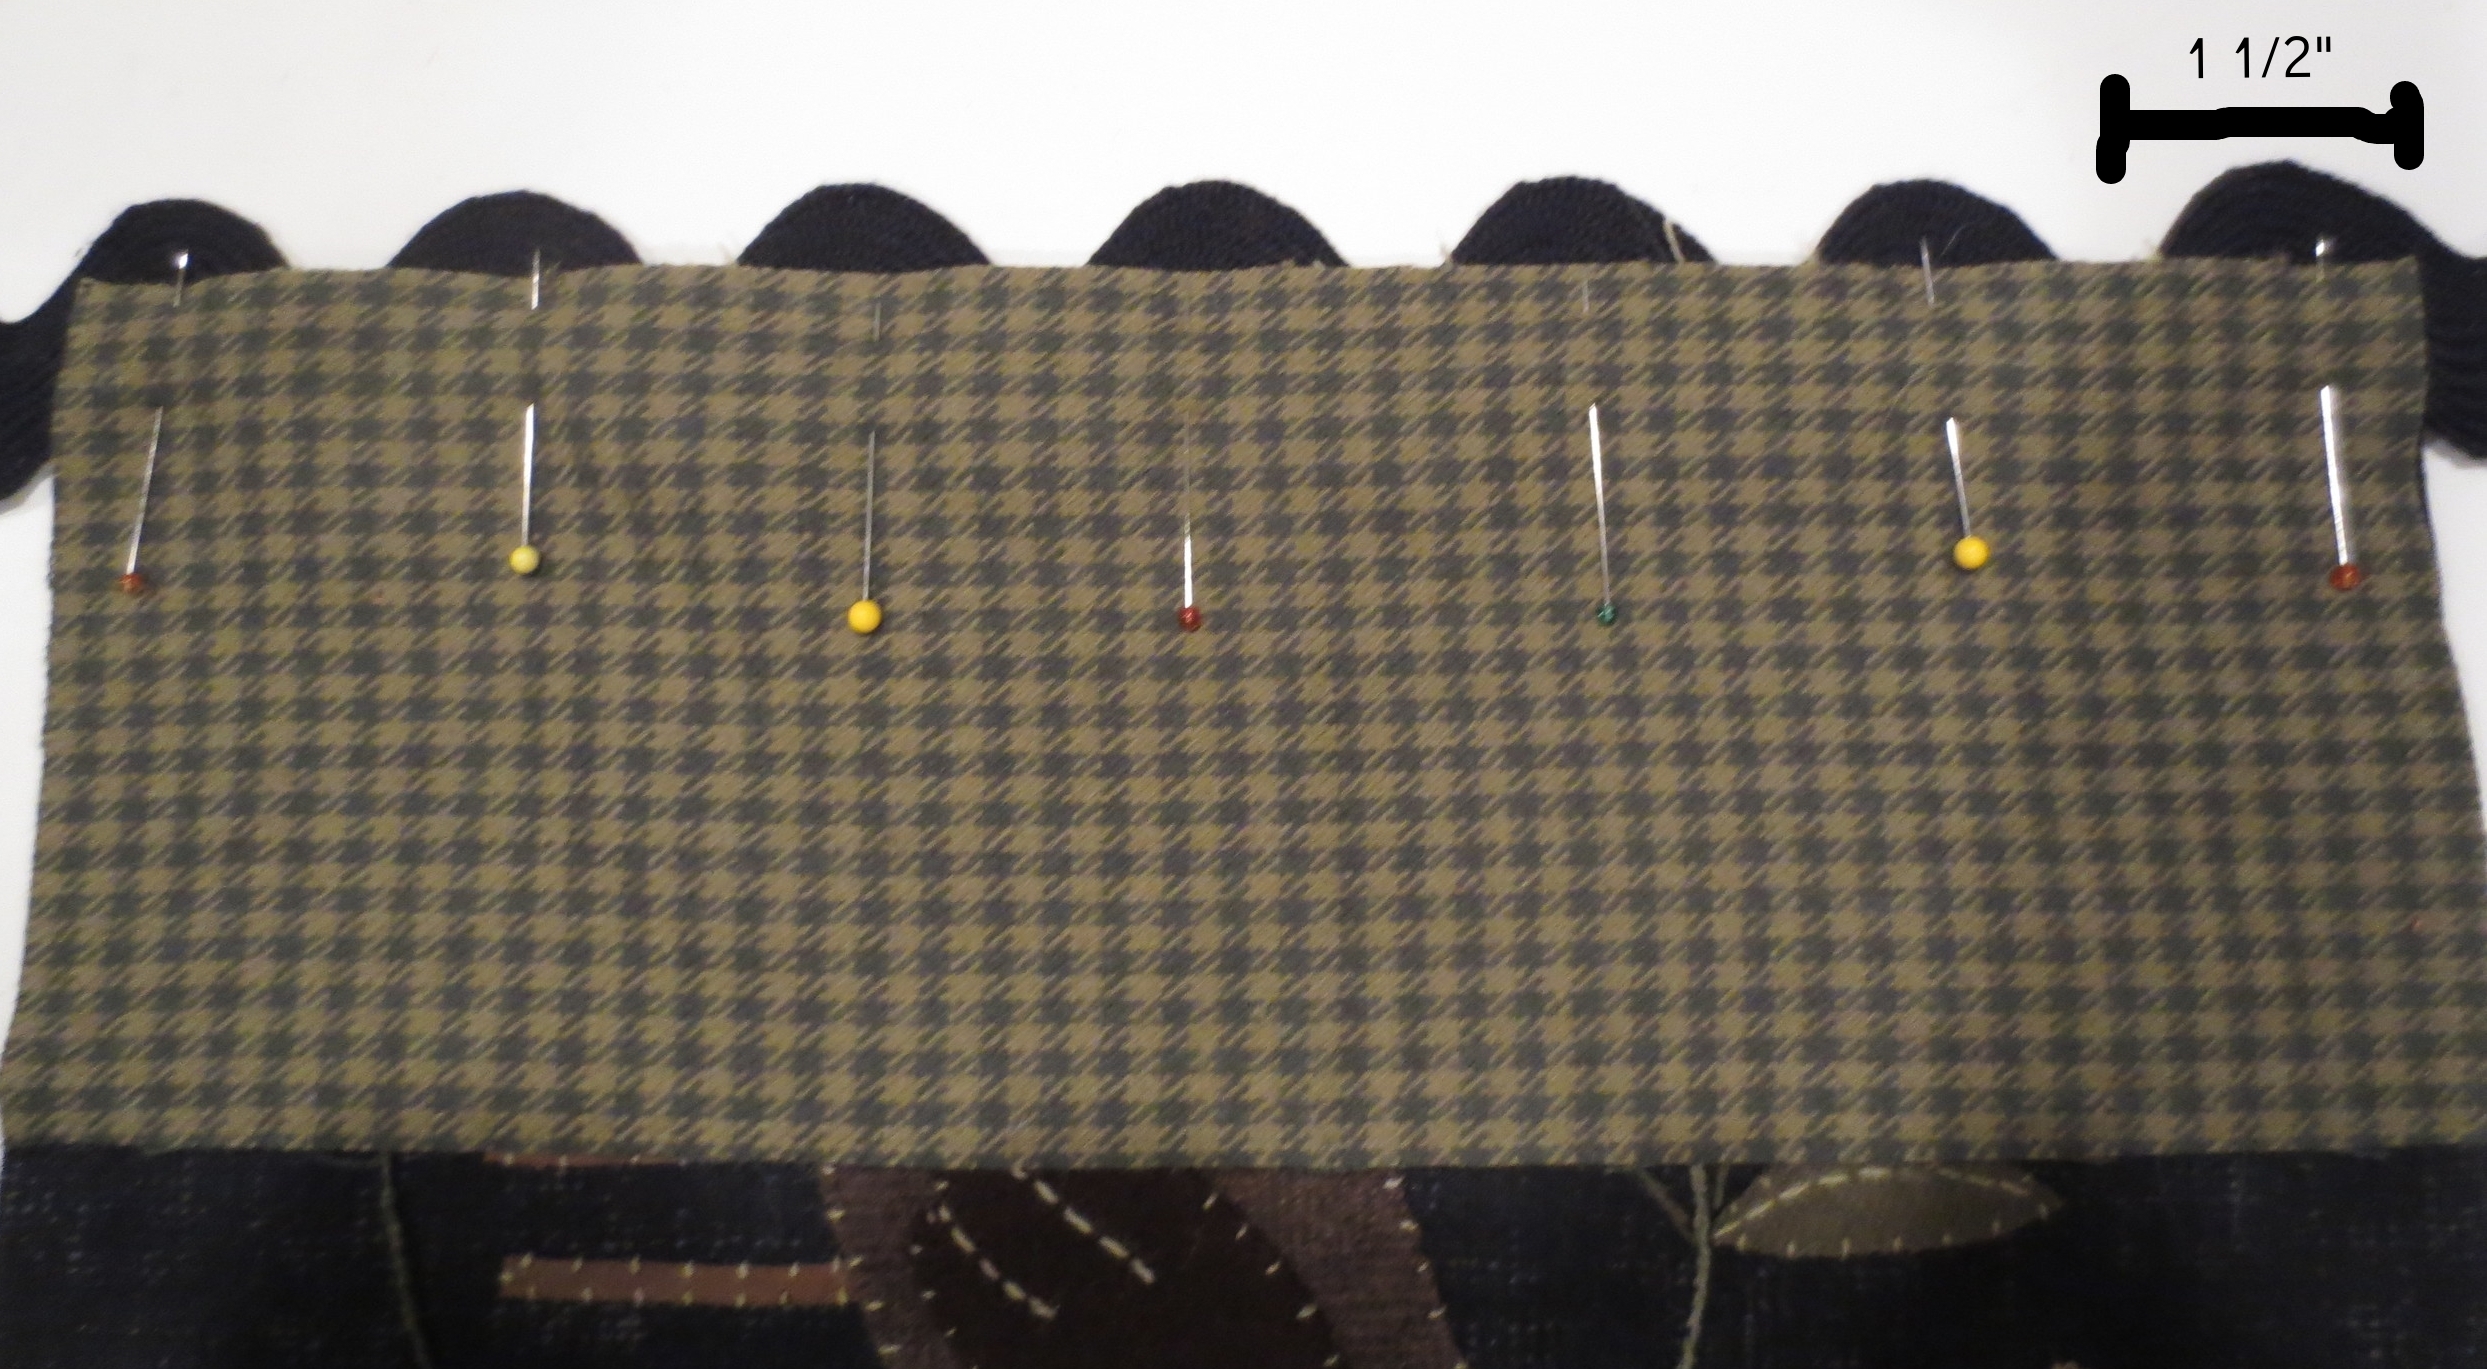
Sew the side panel, ric rac, and background together with a 1/4" seam.

Press seam toward background.
Trim excess ric rac and square up mat.
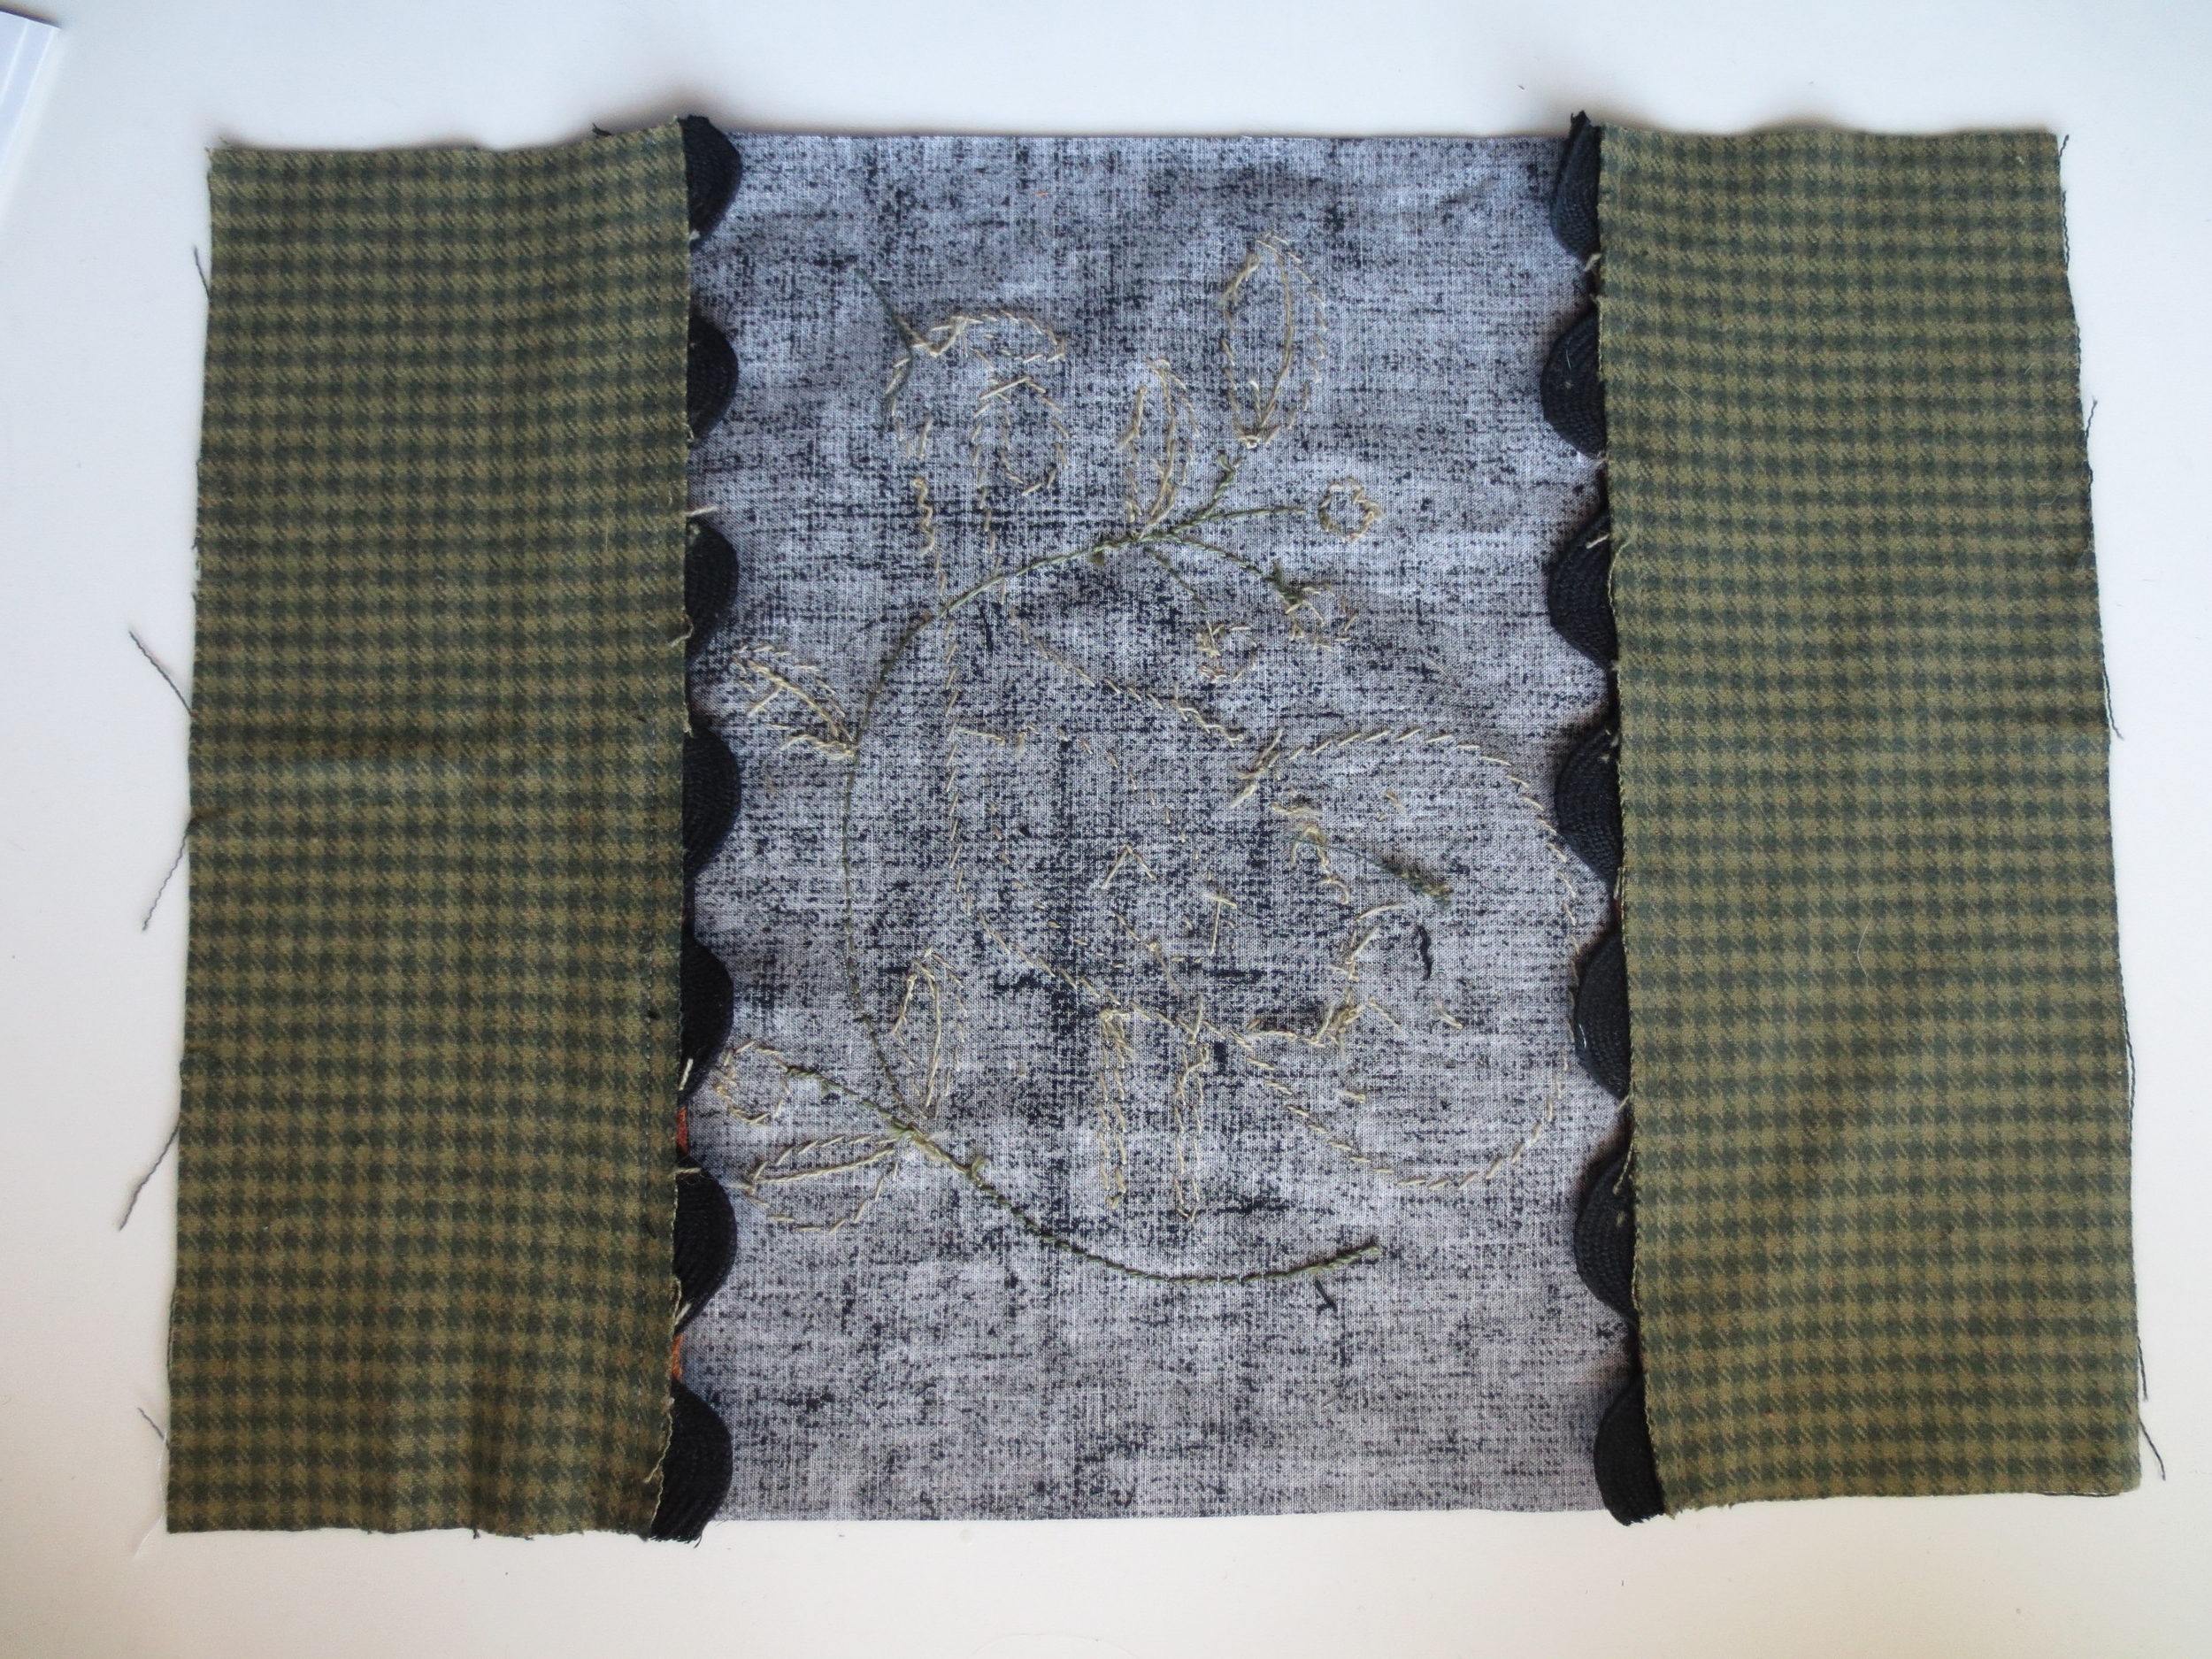
Whip stitch ric rac to side panels with maple cream thread.

Layer backing (wrong side up), batting, and front (right side up). I used 505 SPRAY AND FIX, a temporary fabric adhesive, between the layers instead of pinning. Pin layers if you don't have fabric adhesive.

Stitch in the ditch created by the seam between the ric rac and background to secure the layers together.
Prepare your binding and attach to your mat. There is a great youtube video that shows how to square up your project, cut your binding, and sew it to your project https://www.youtube.com/watch?v=K4sv0PpelZ4.
Enjoy!